DASHBOARD (NEW BOOKING ,CLIENTS,SERVICES,STAFF,SCHEDULE)
Manage Appointments And Services In Leo-Booking Dashboard
This tutorial guides you through managing schedule (booking, clients ) and services using the Leo-Booking dashboard.
Go to leo-booking.com
1. Introduction
You will learn how to navigate the interface, add bookings, and update service details effectively.
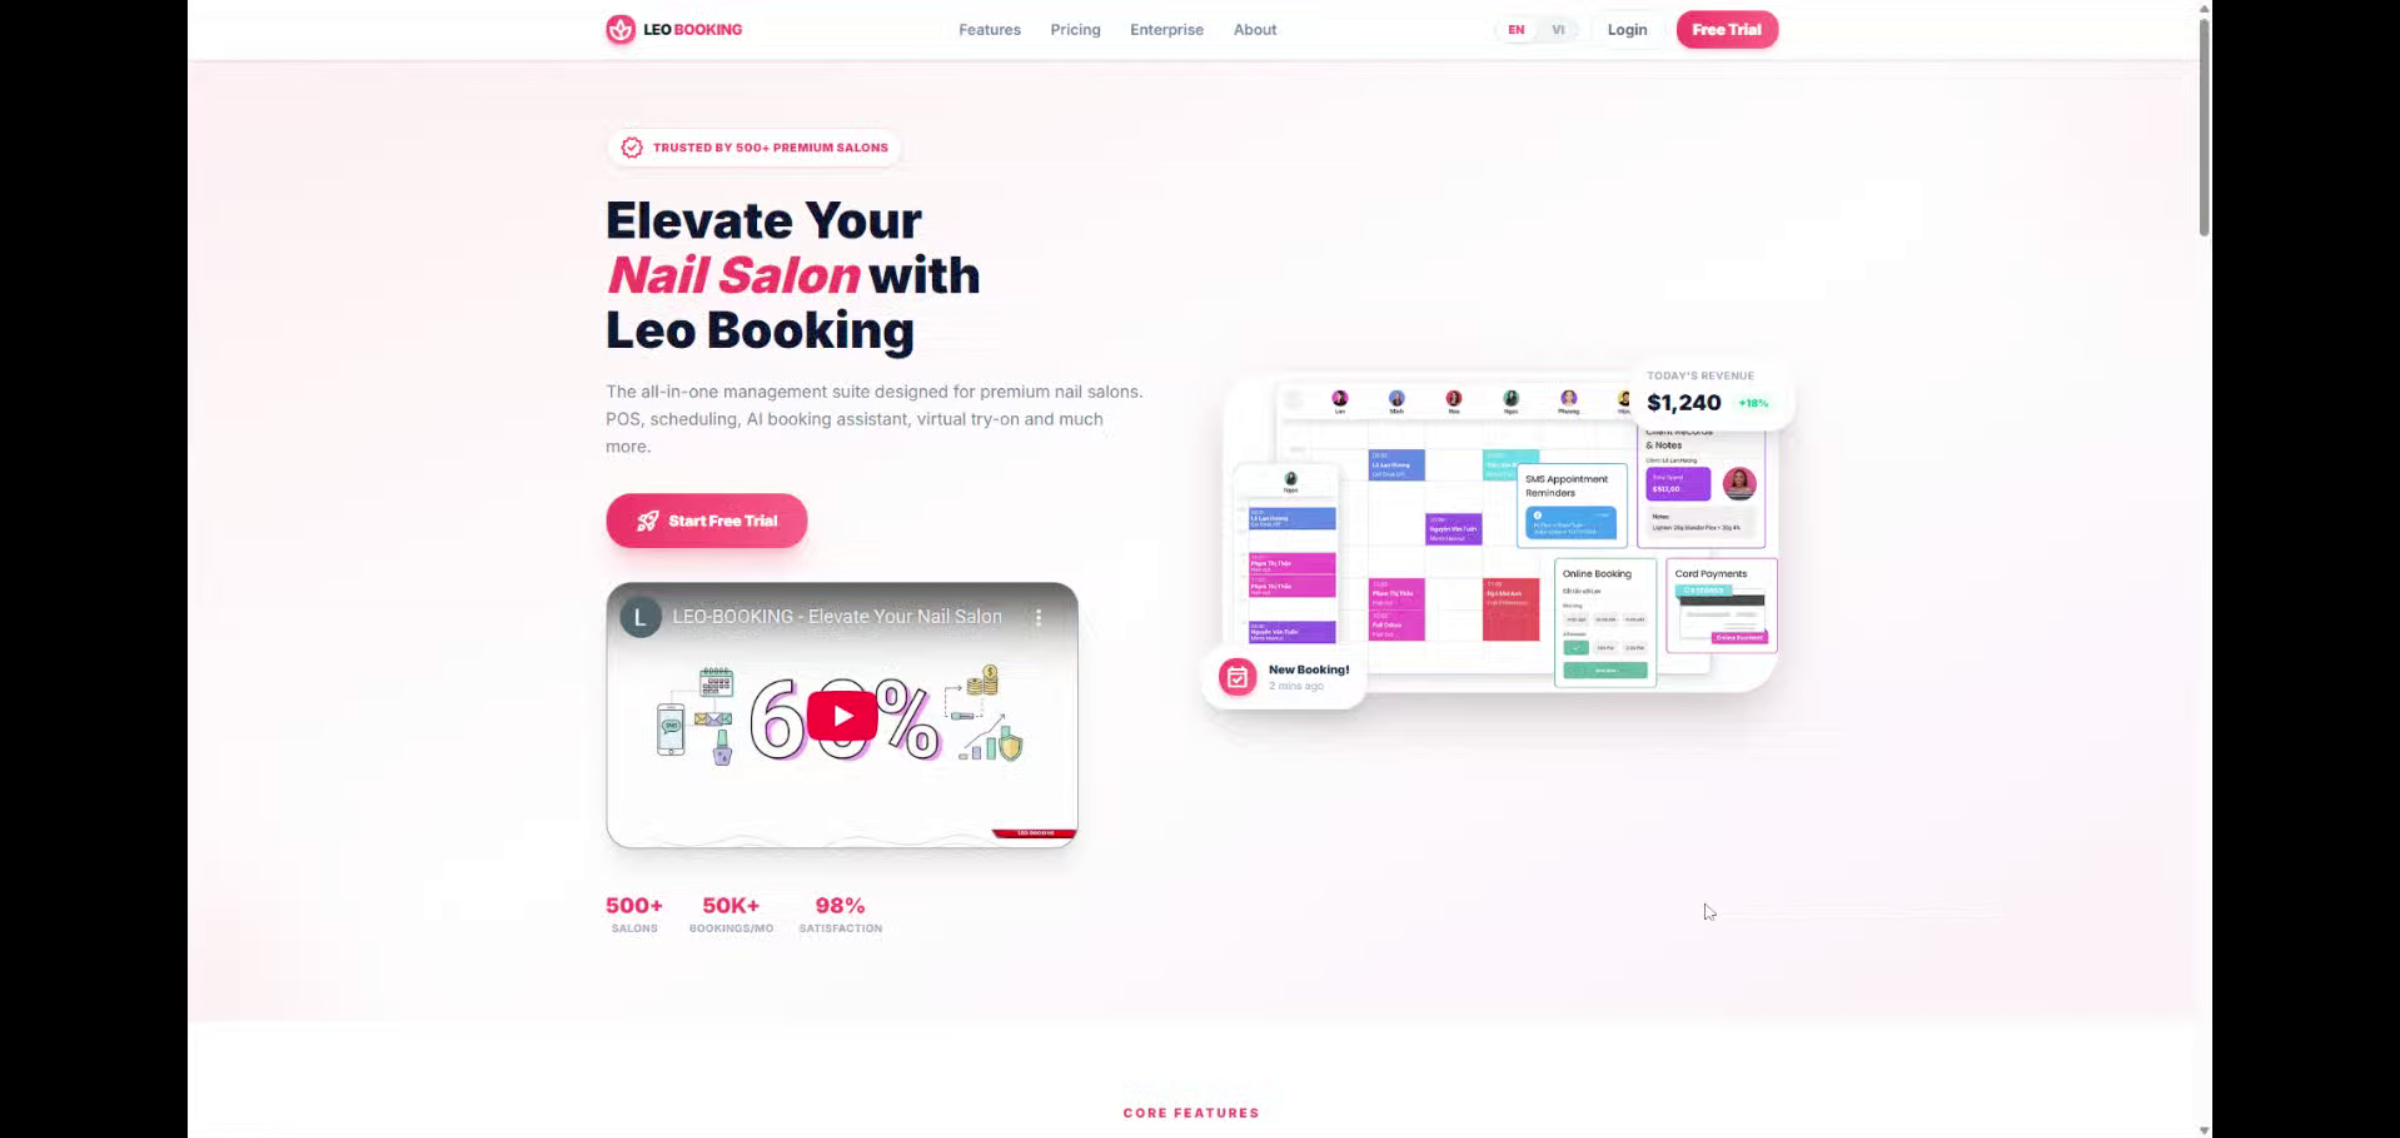
2. Access Login Page
Click the Login button to begin accessing your account. And You can choose either English or Vietnamese

3. Sign Into Account
Enter your password in the designated field and Sign In Now button to proceed to your dashboard.

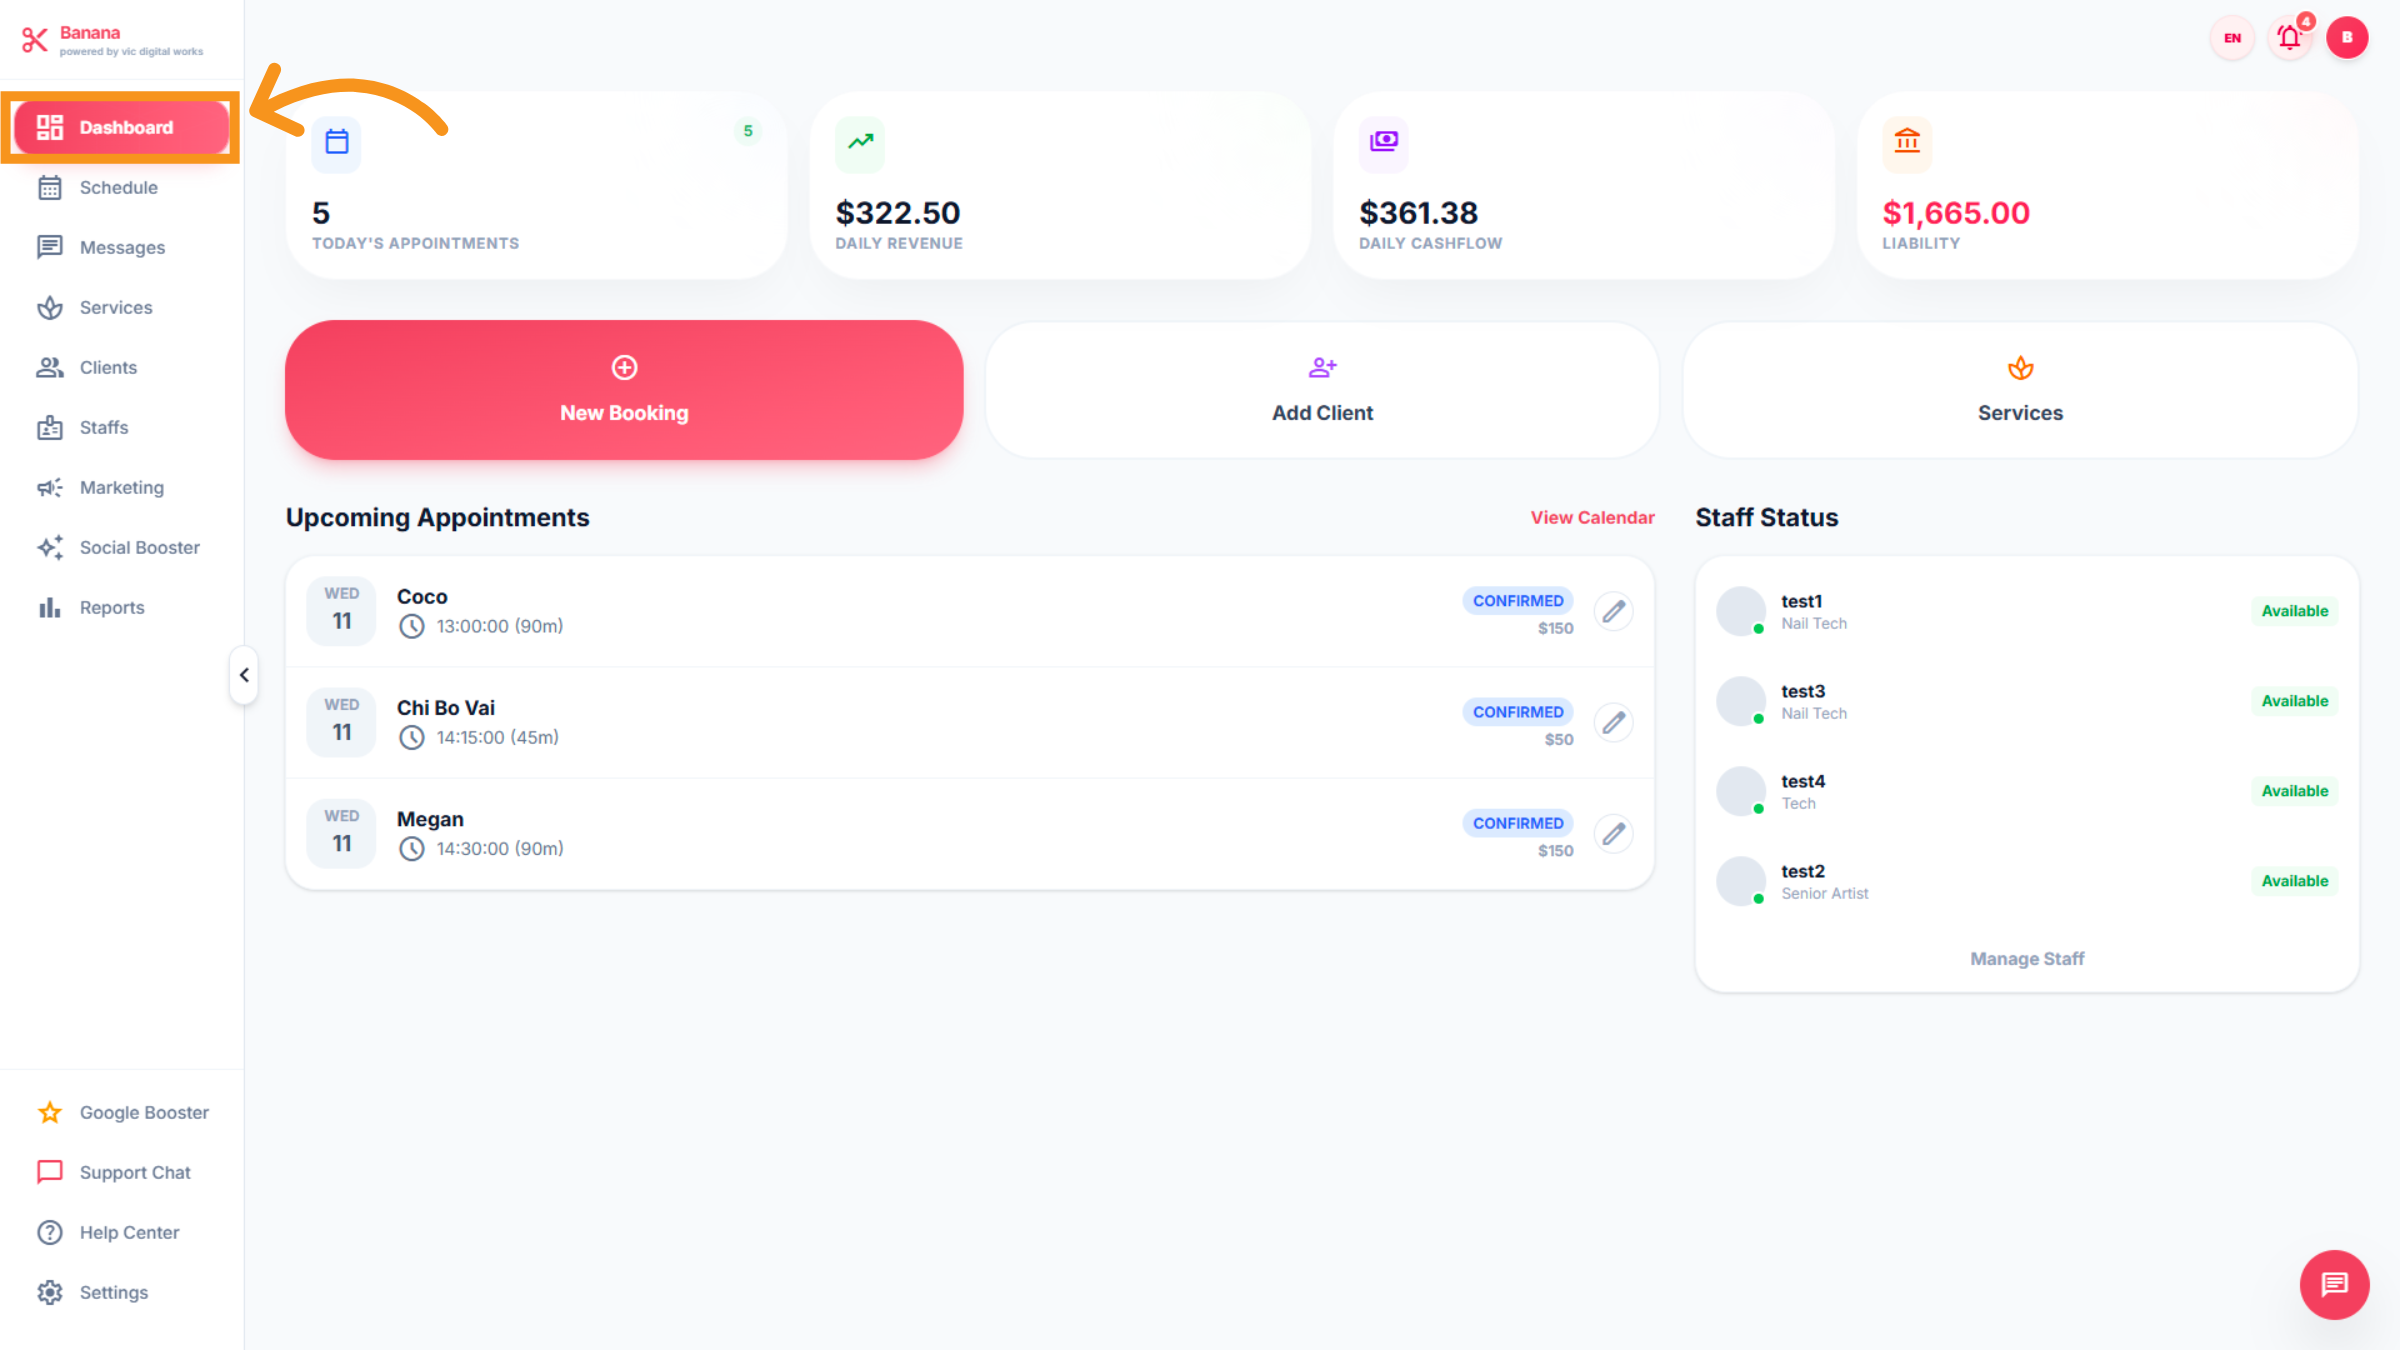
4. Open Dashboard
After logging in, you will see the main Dashboard screen, which includes: the number of appointments, daily revenue, daily cash flow, liabilities, customer booking status and support quick search bars for New Booking, Add Client, and Services.
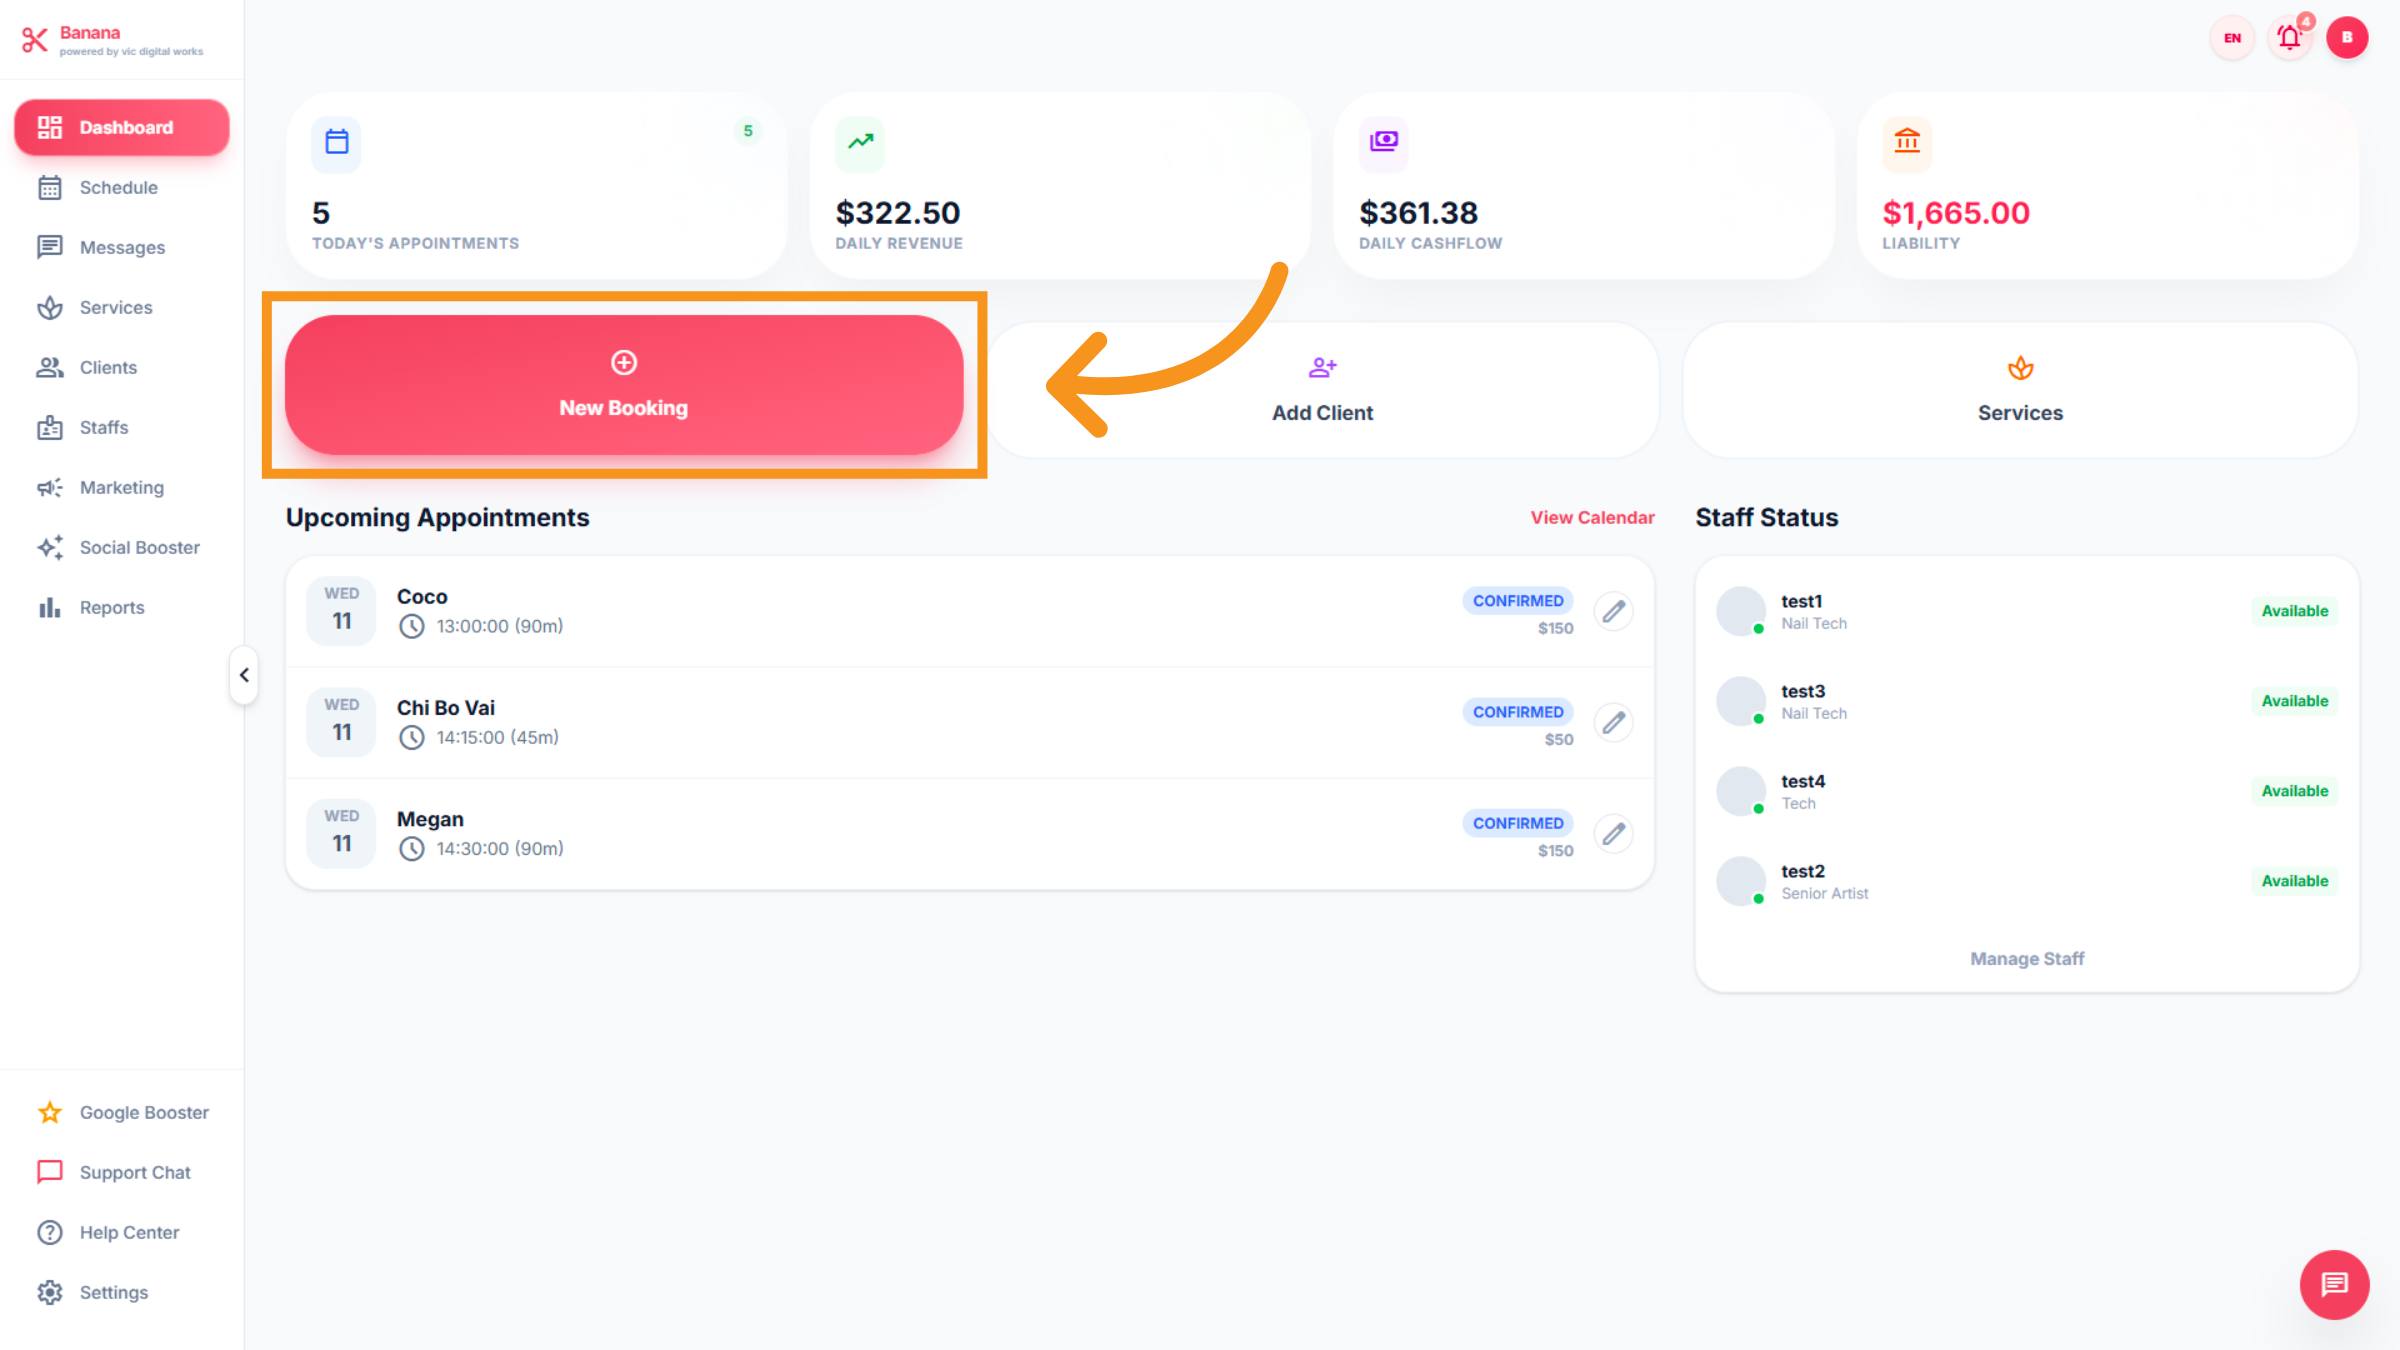
5. Start New Booking
Click New Booking button to initiate a new appointment booking.
6. Booking Details
In this section, the booking information will be displayed. Includes : Day-Time, Booking status, Payment status, add service/add on, Appointment notes...
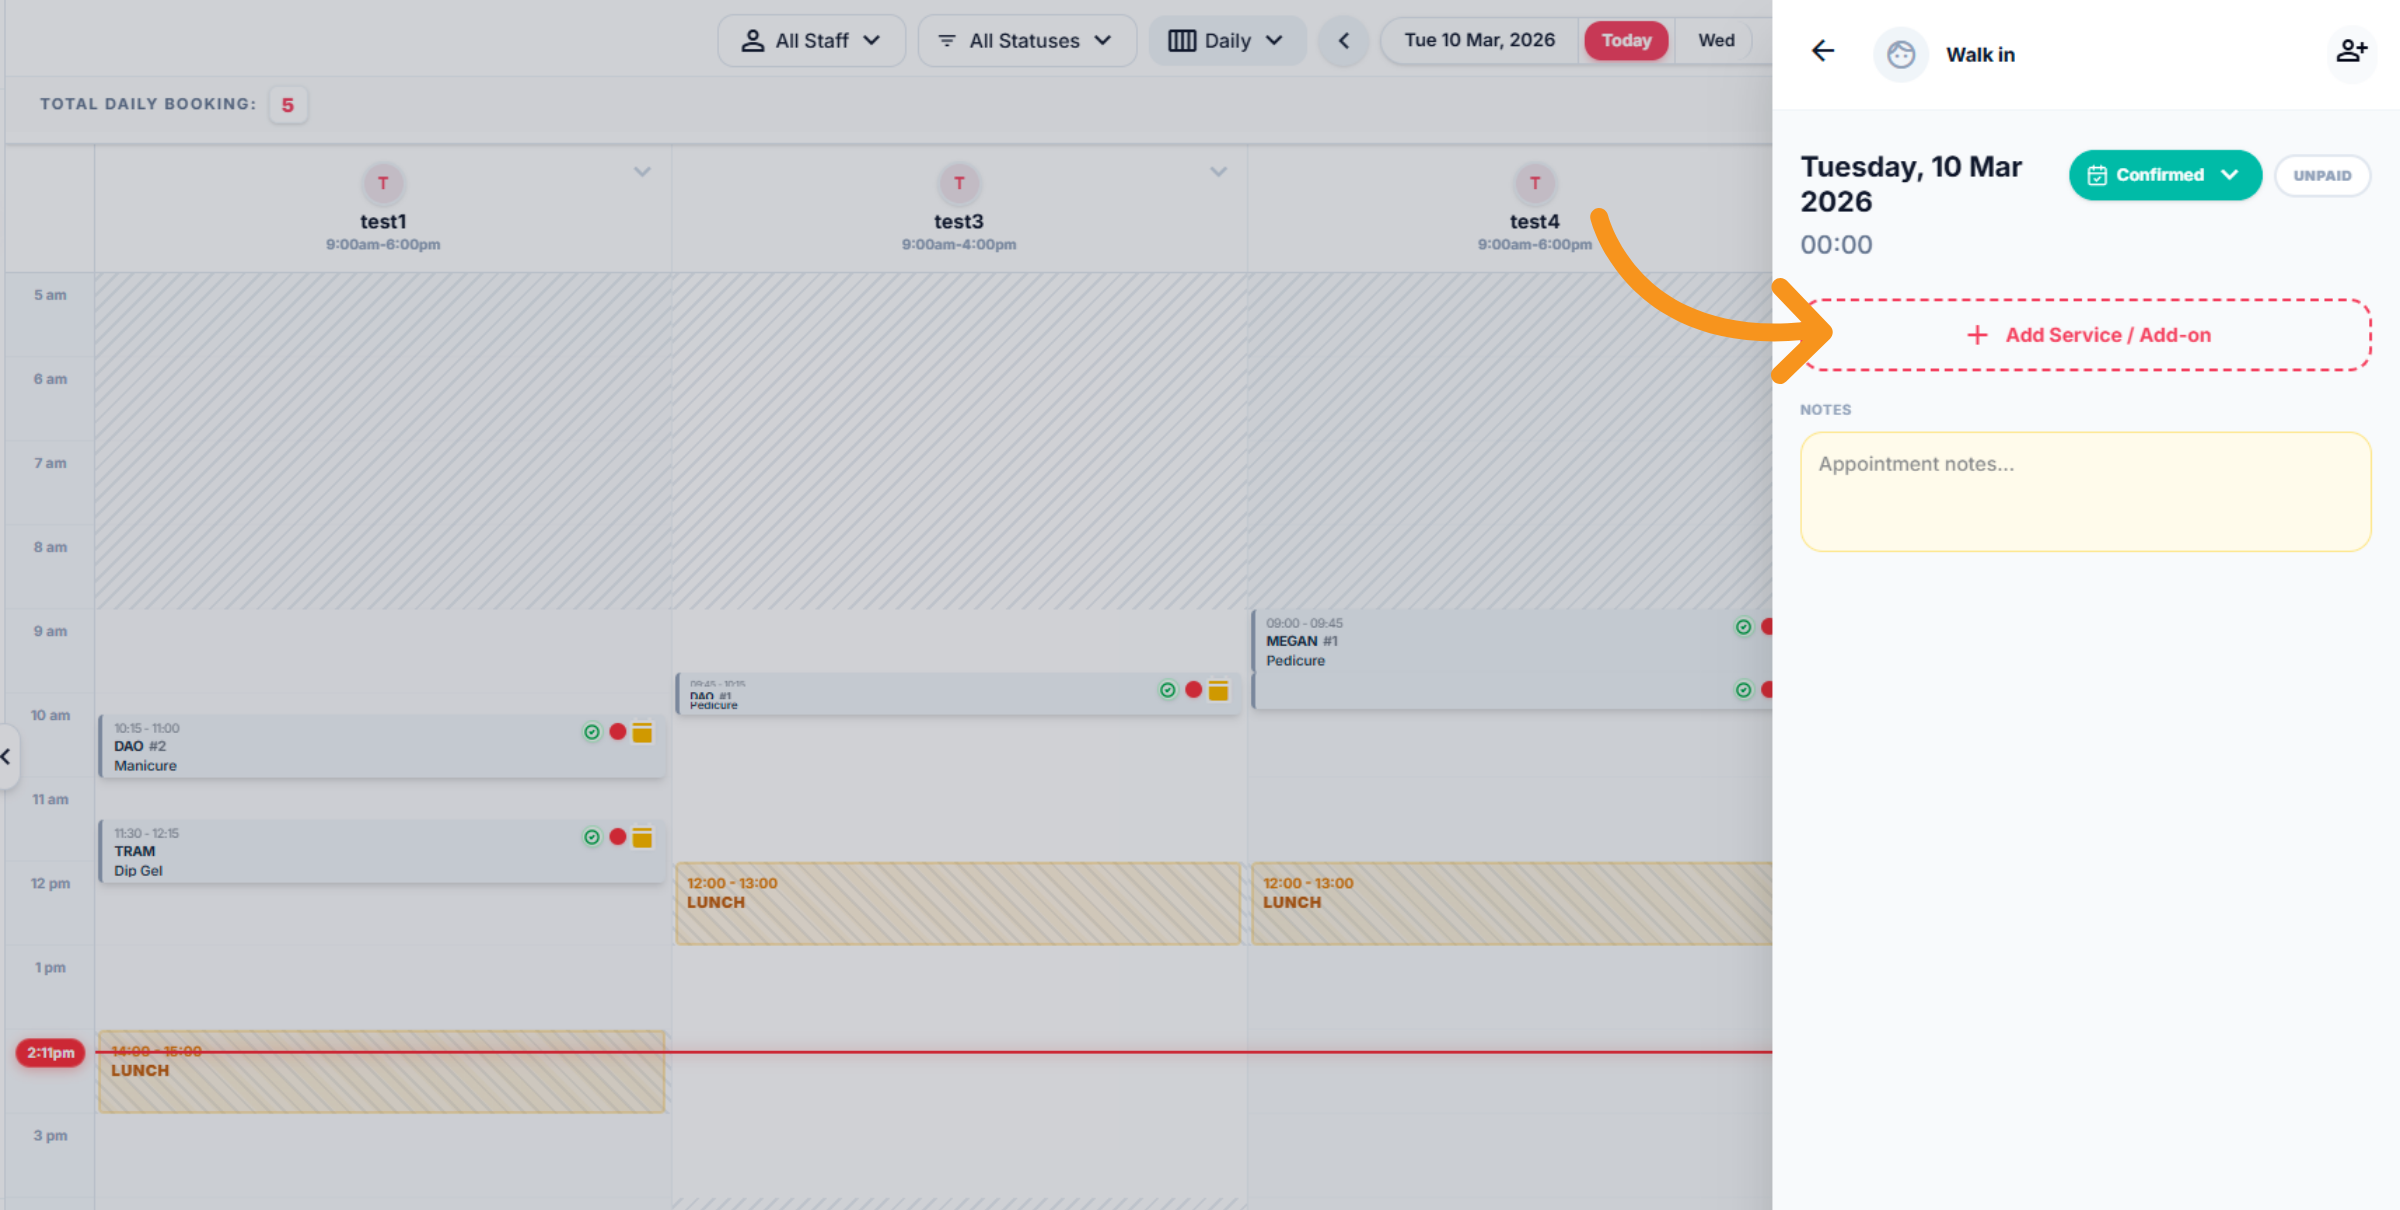
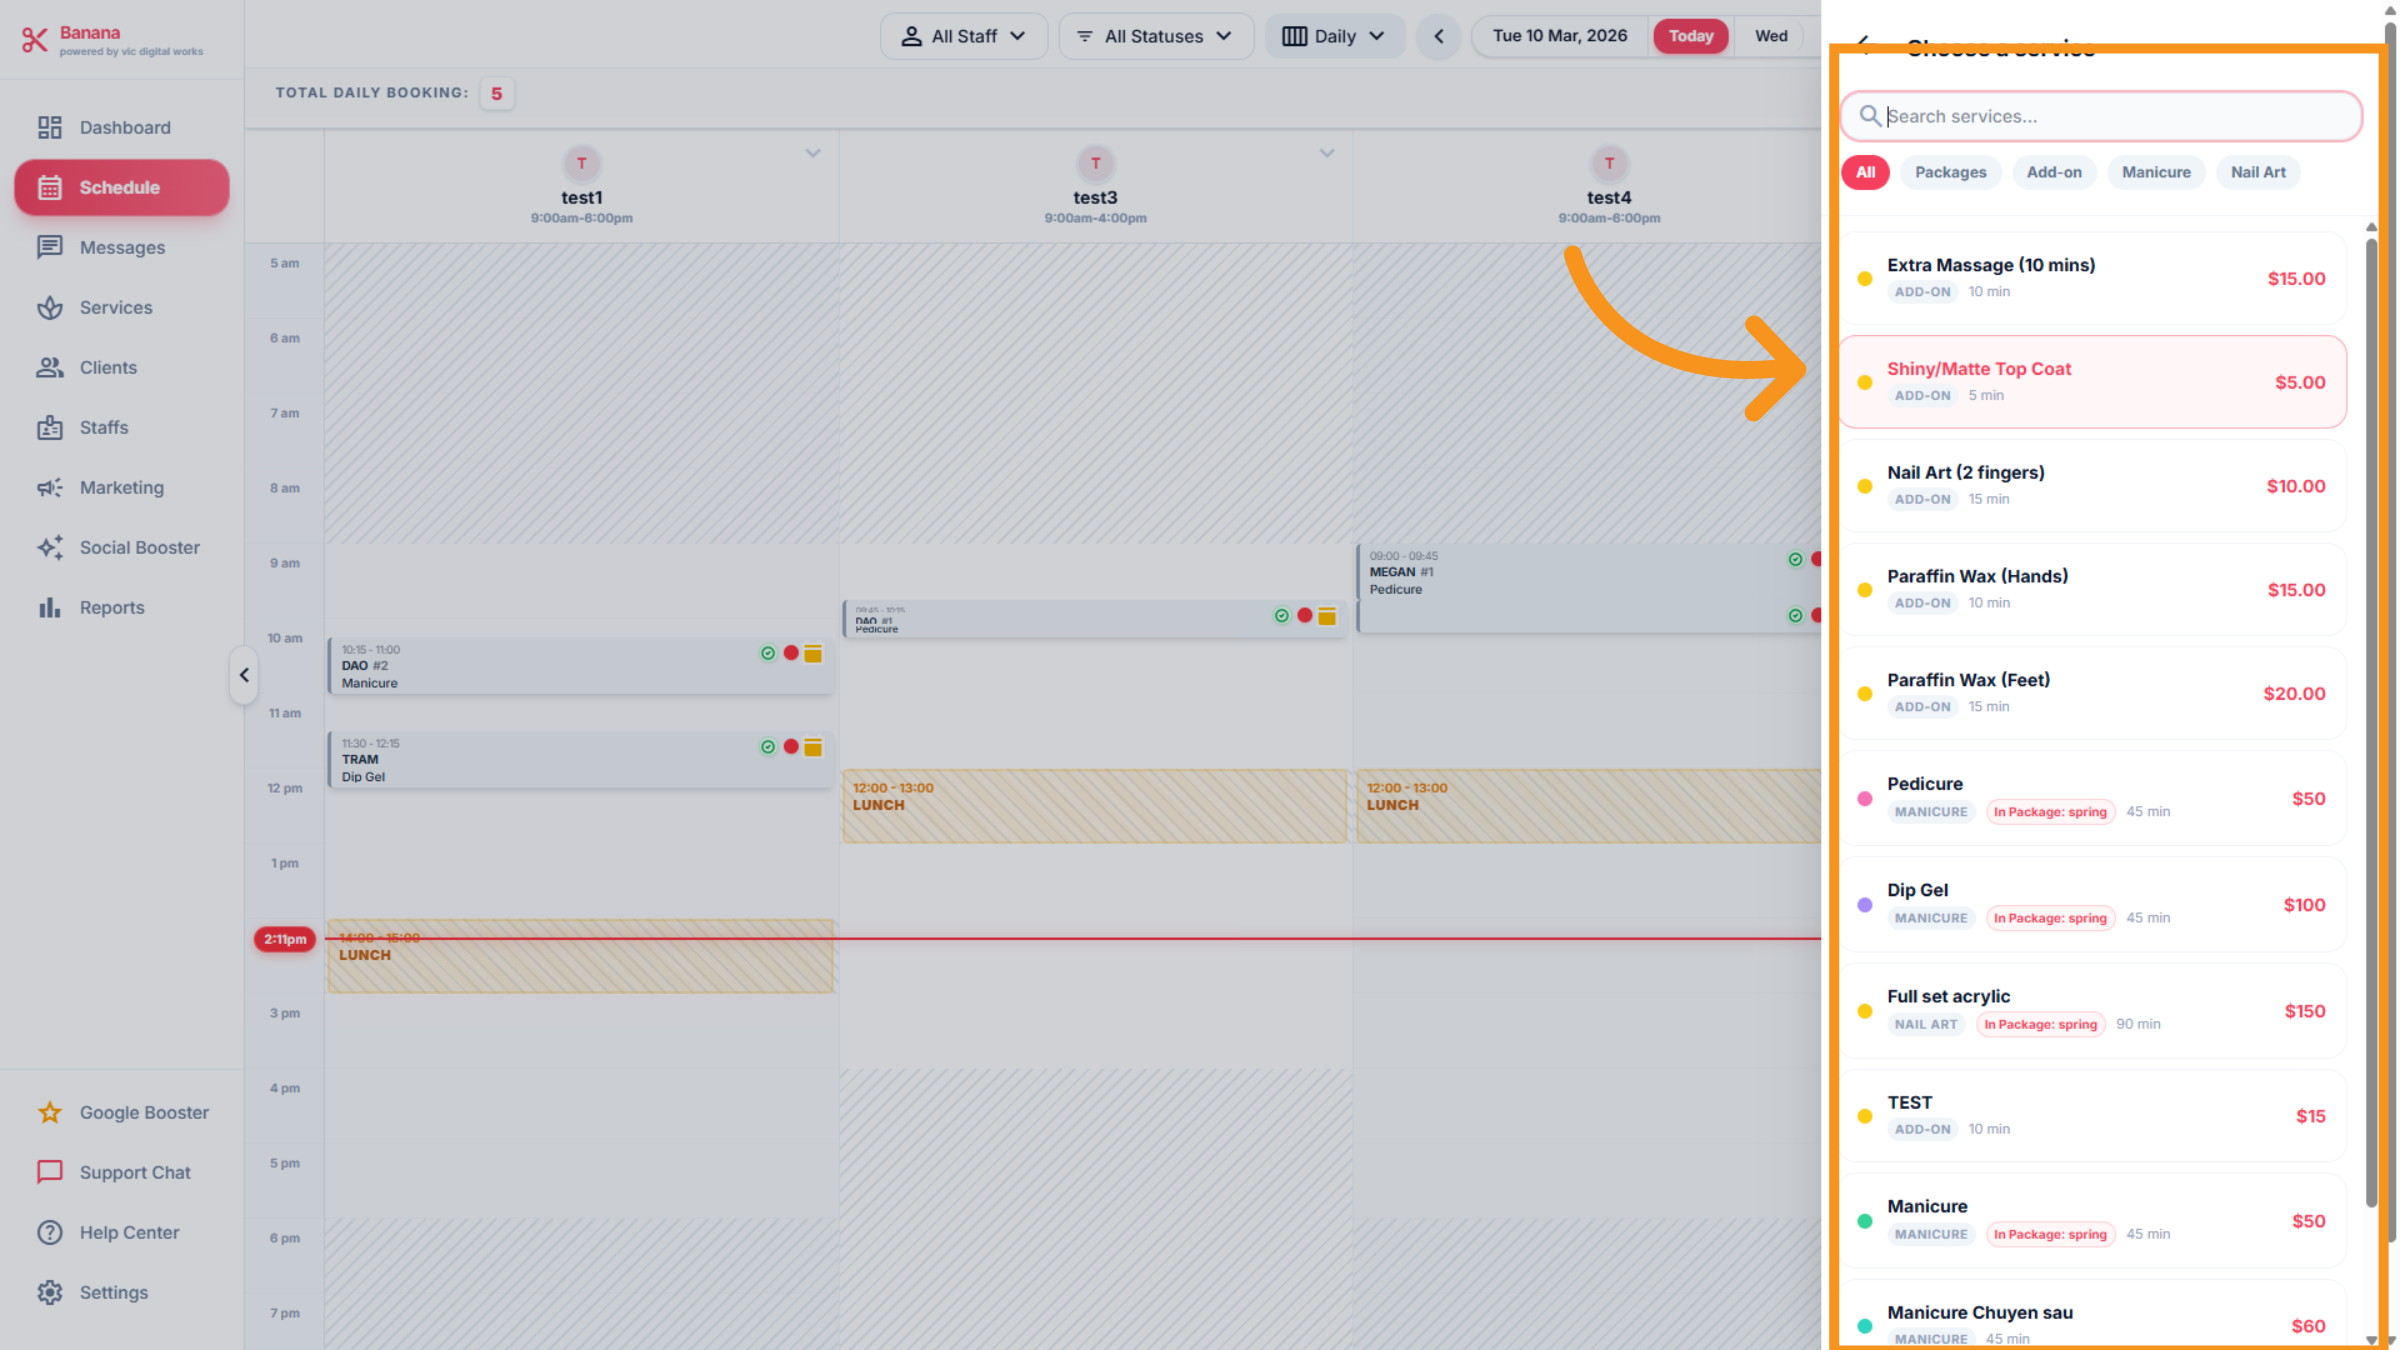
7. Select Service
When you click "Add Service/Add On," the list of services will appear . You can choose any service customer request.
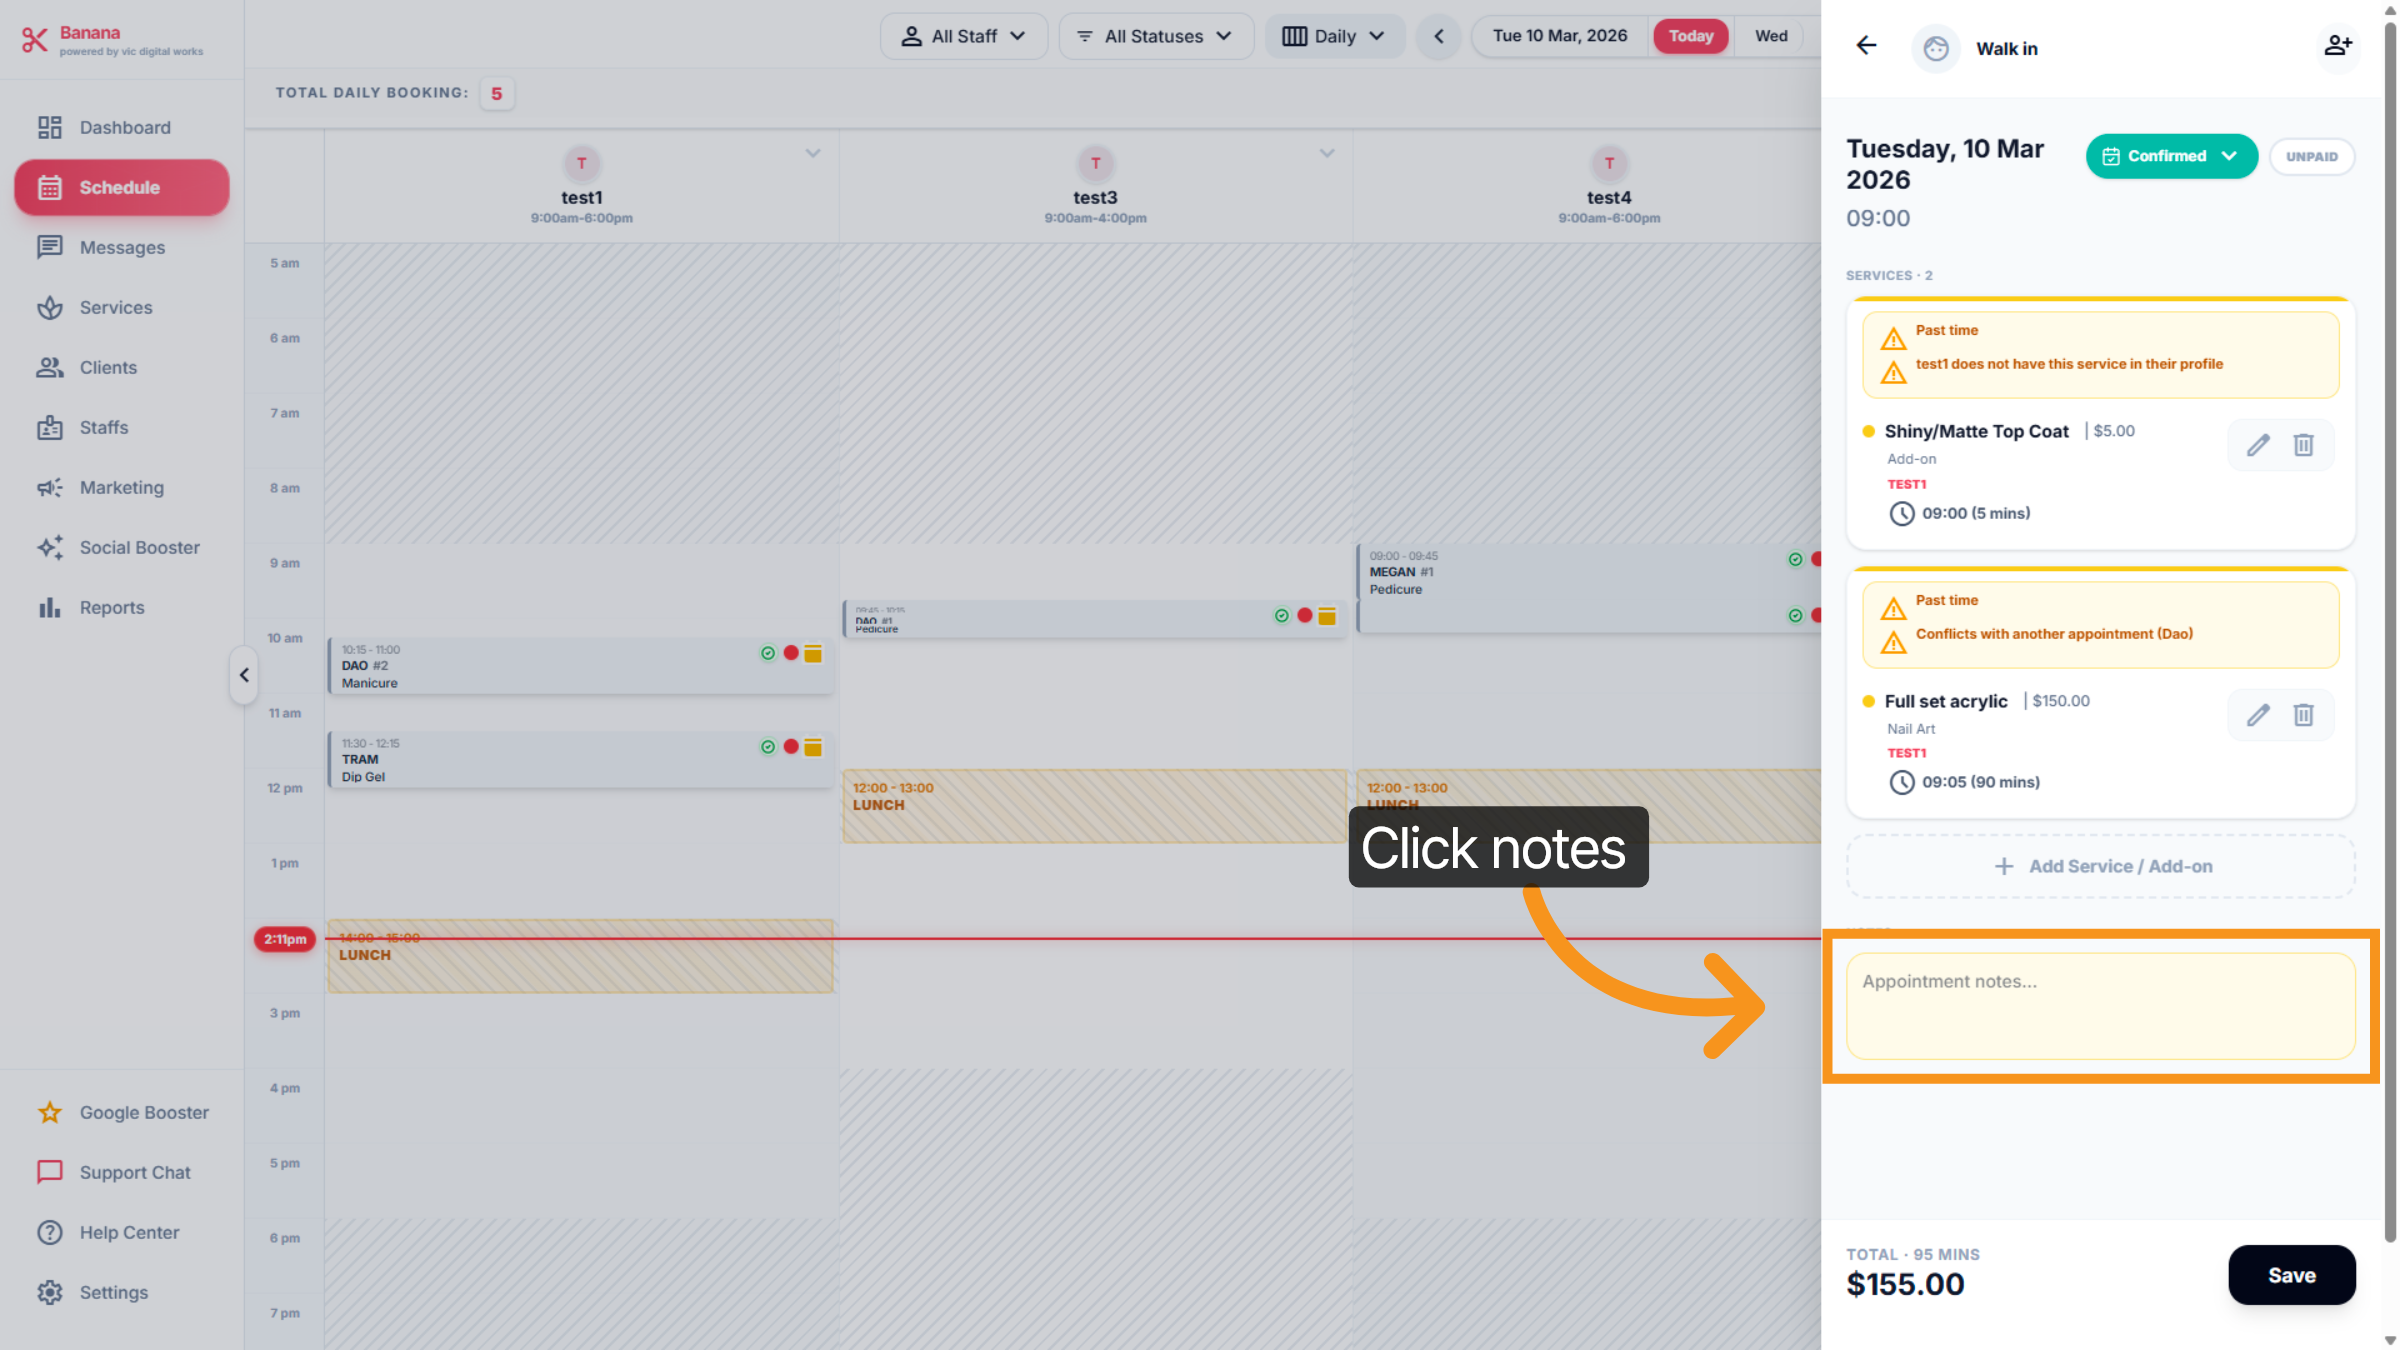
8. Add Appointment Notes
You can add "Appointment notes"... to add specific details or instructions
9. Access Edit Mode
This section allow you "edit" to modify the details of the selected add-on service, price , time...
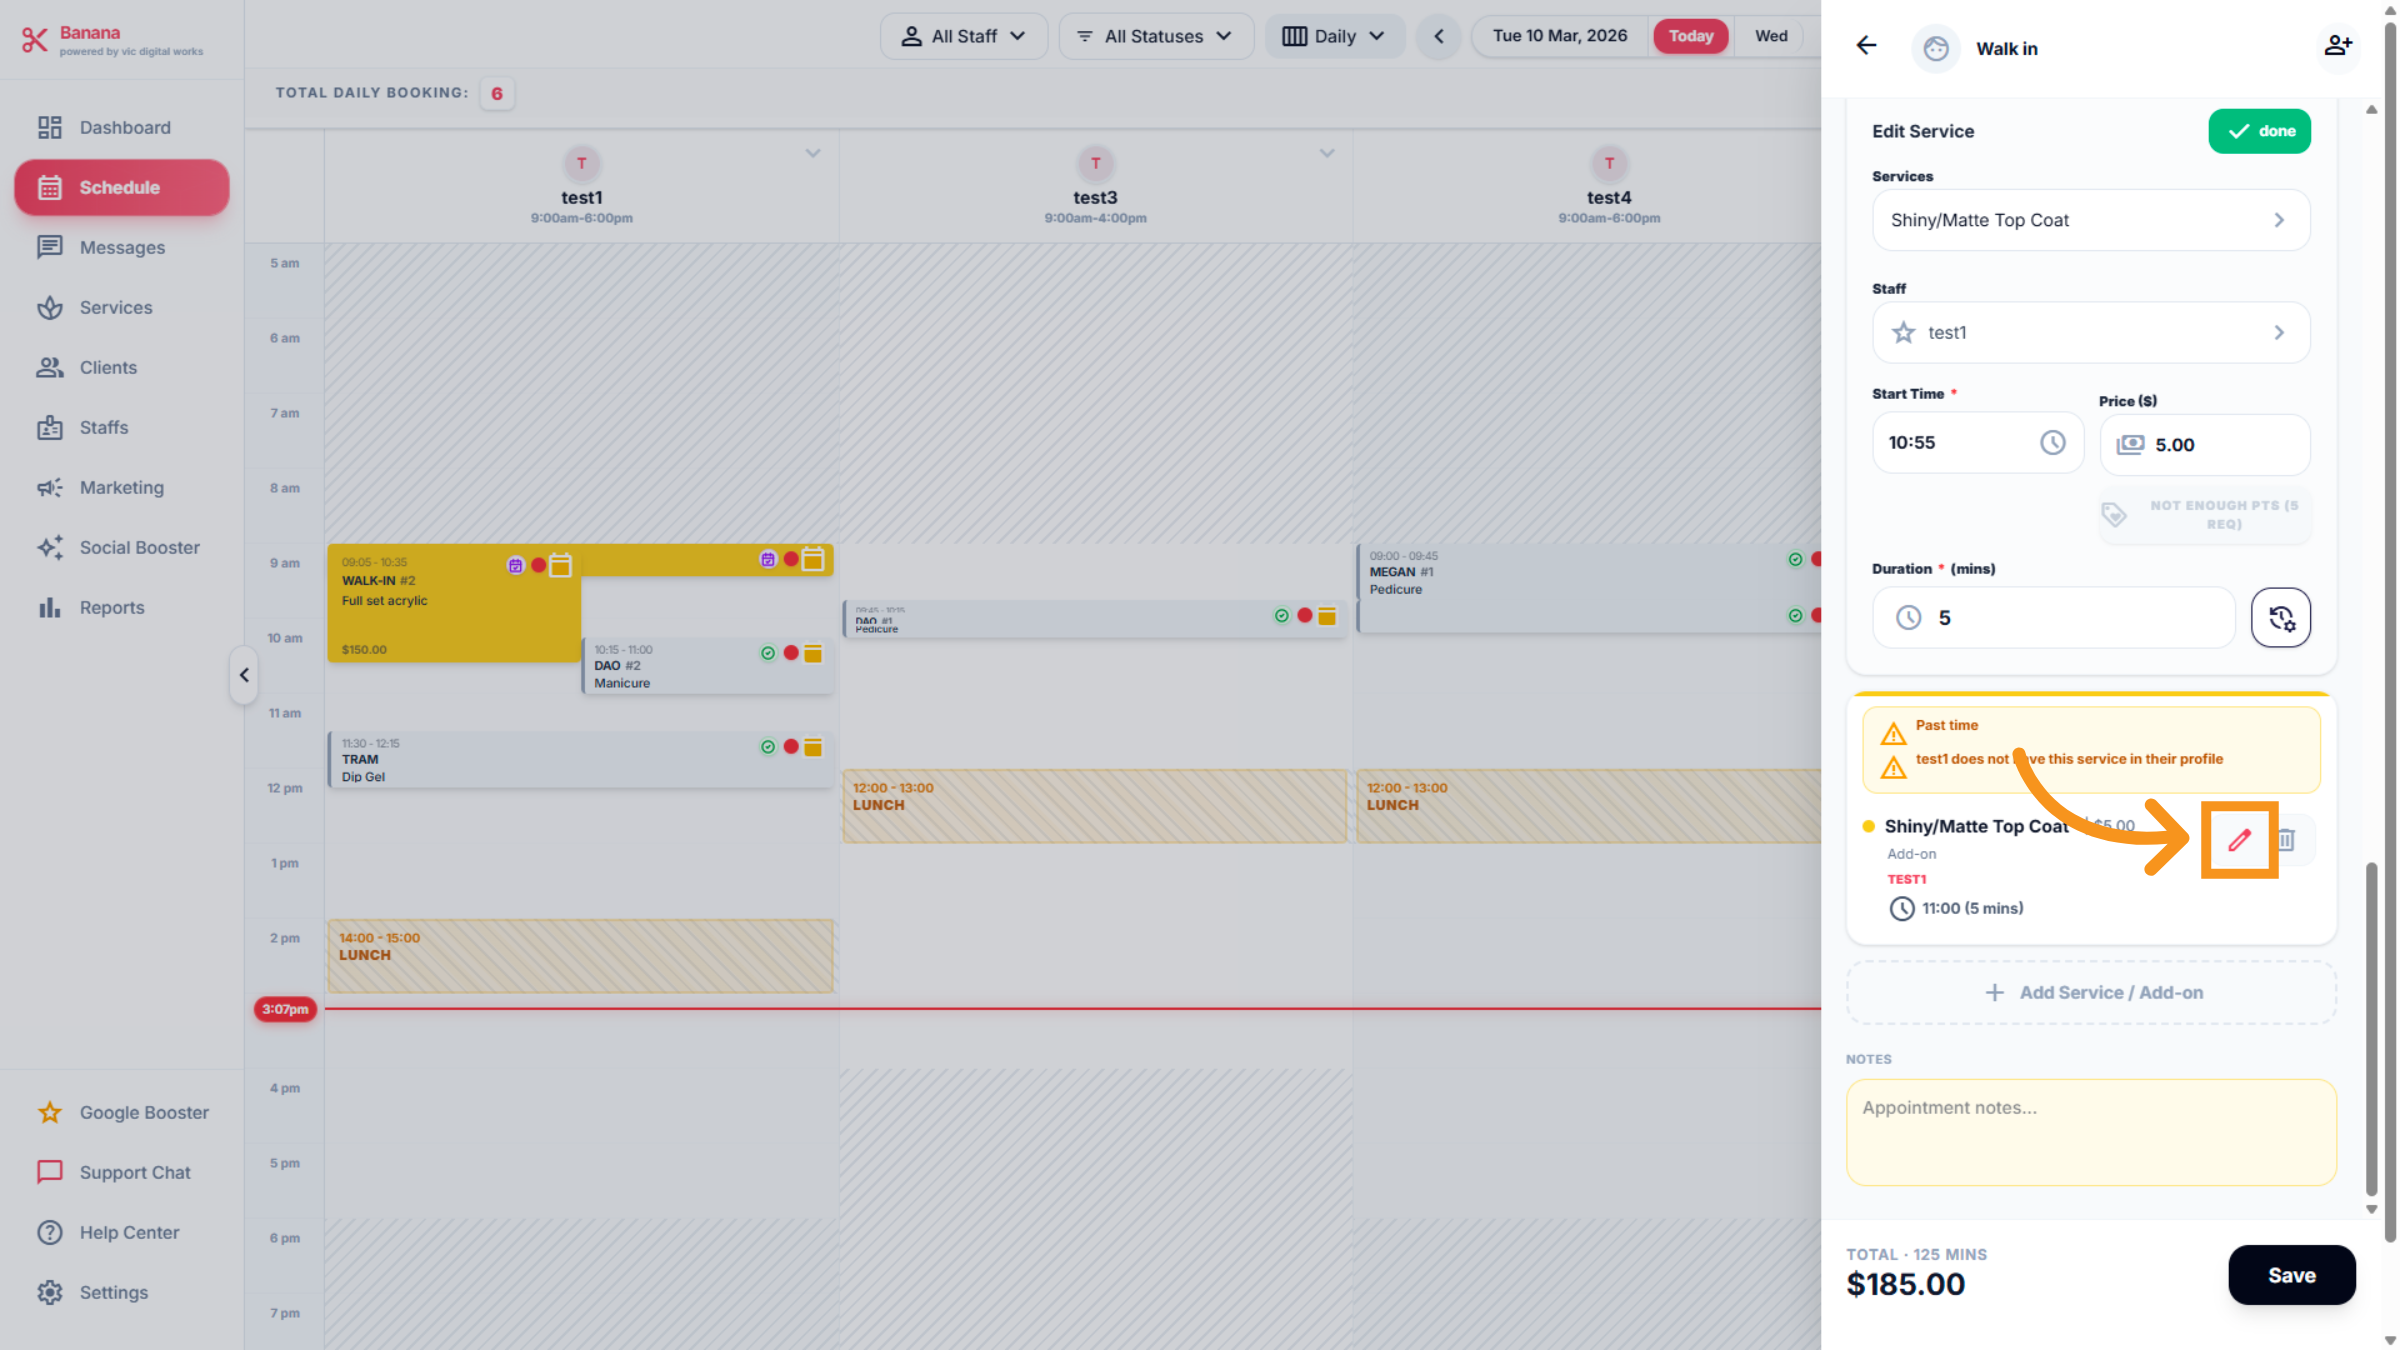
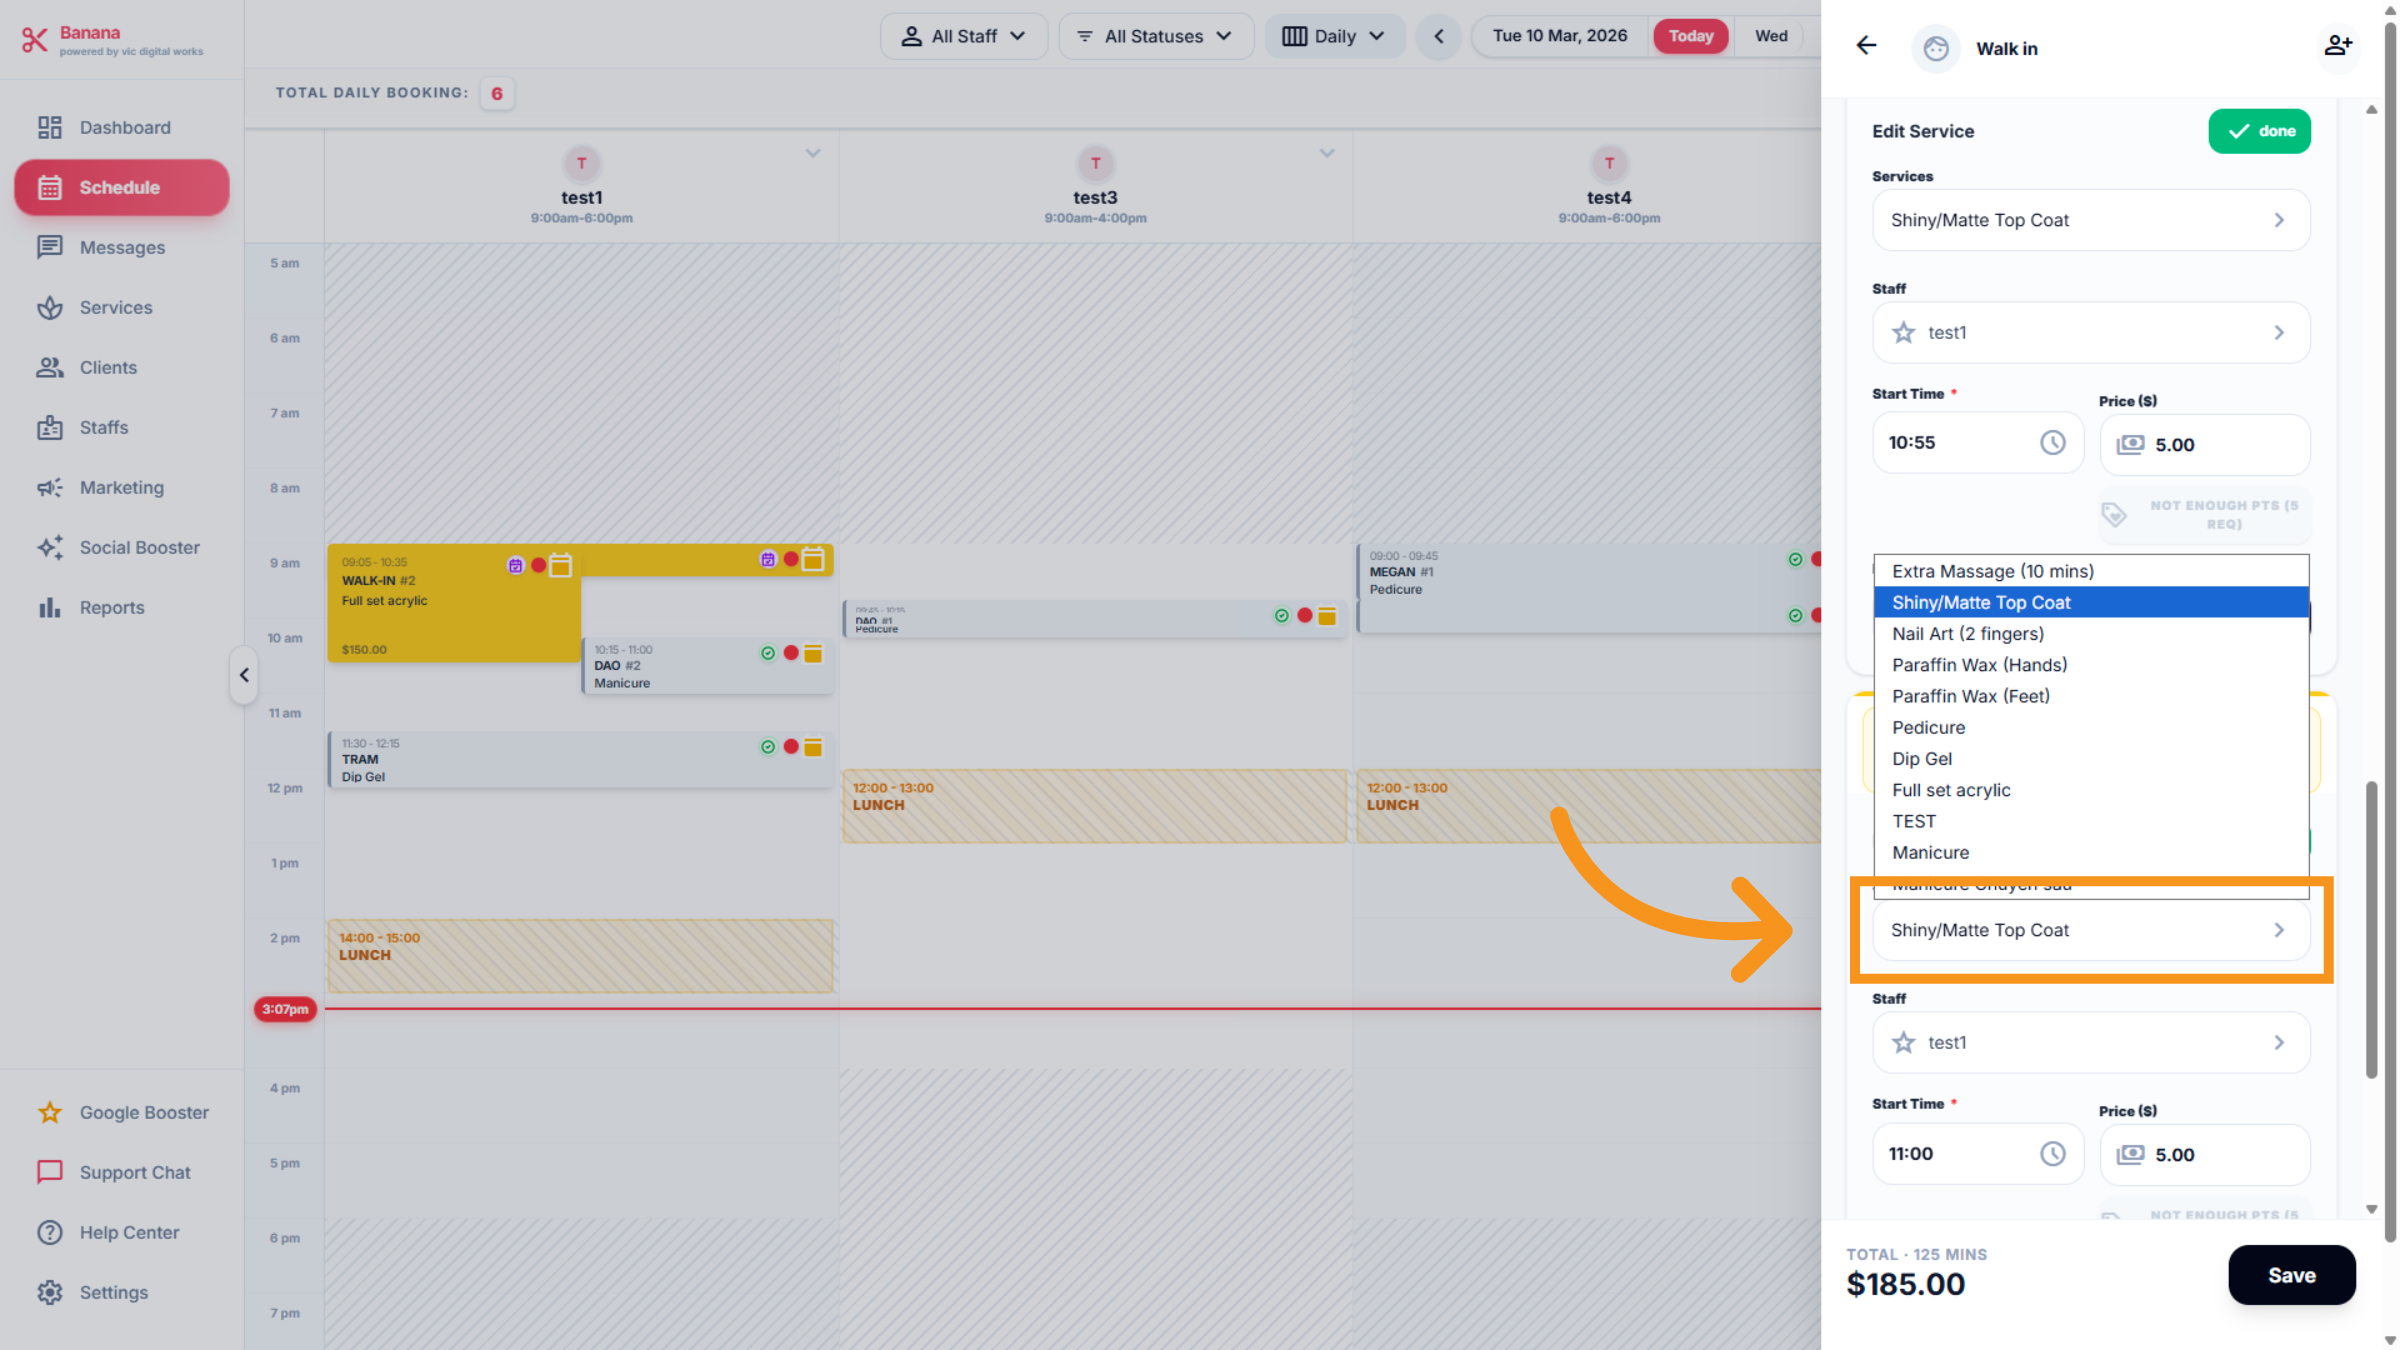
10. Edit Mode options
Click the list of available add-on services ... and select the desired options.
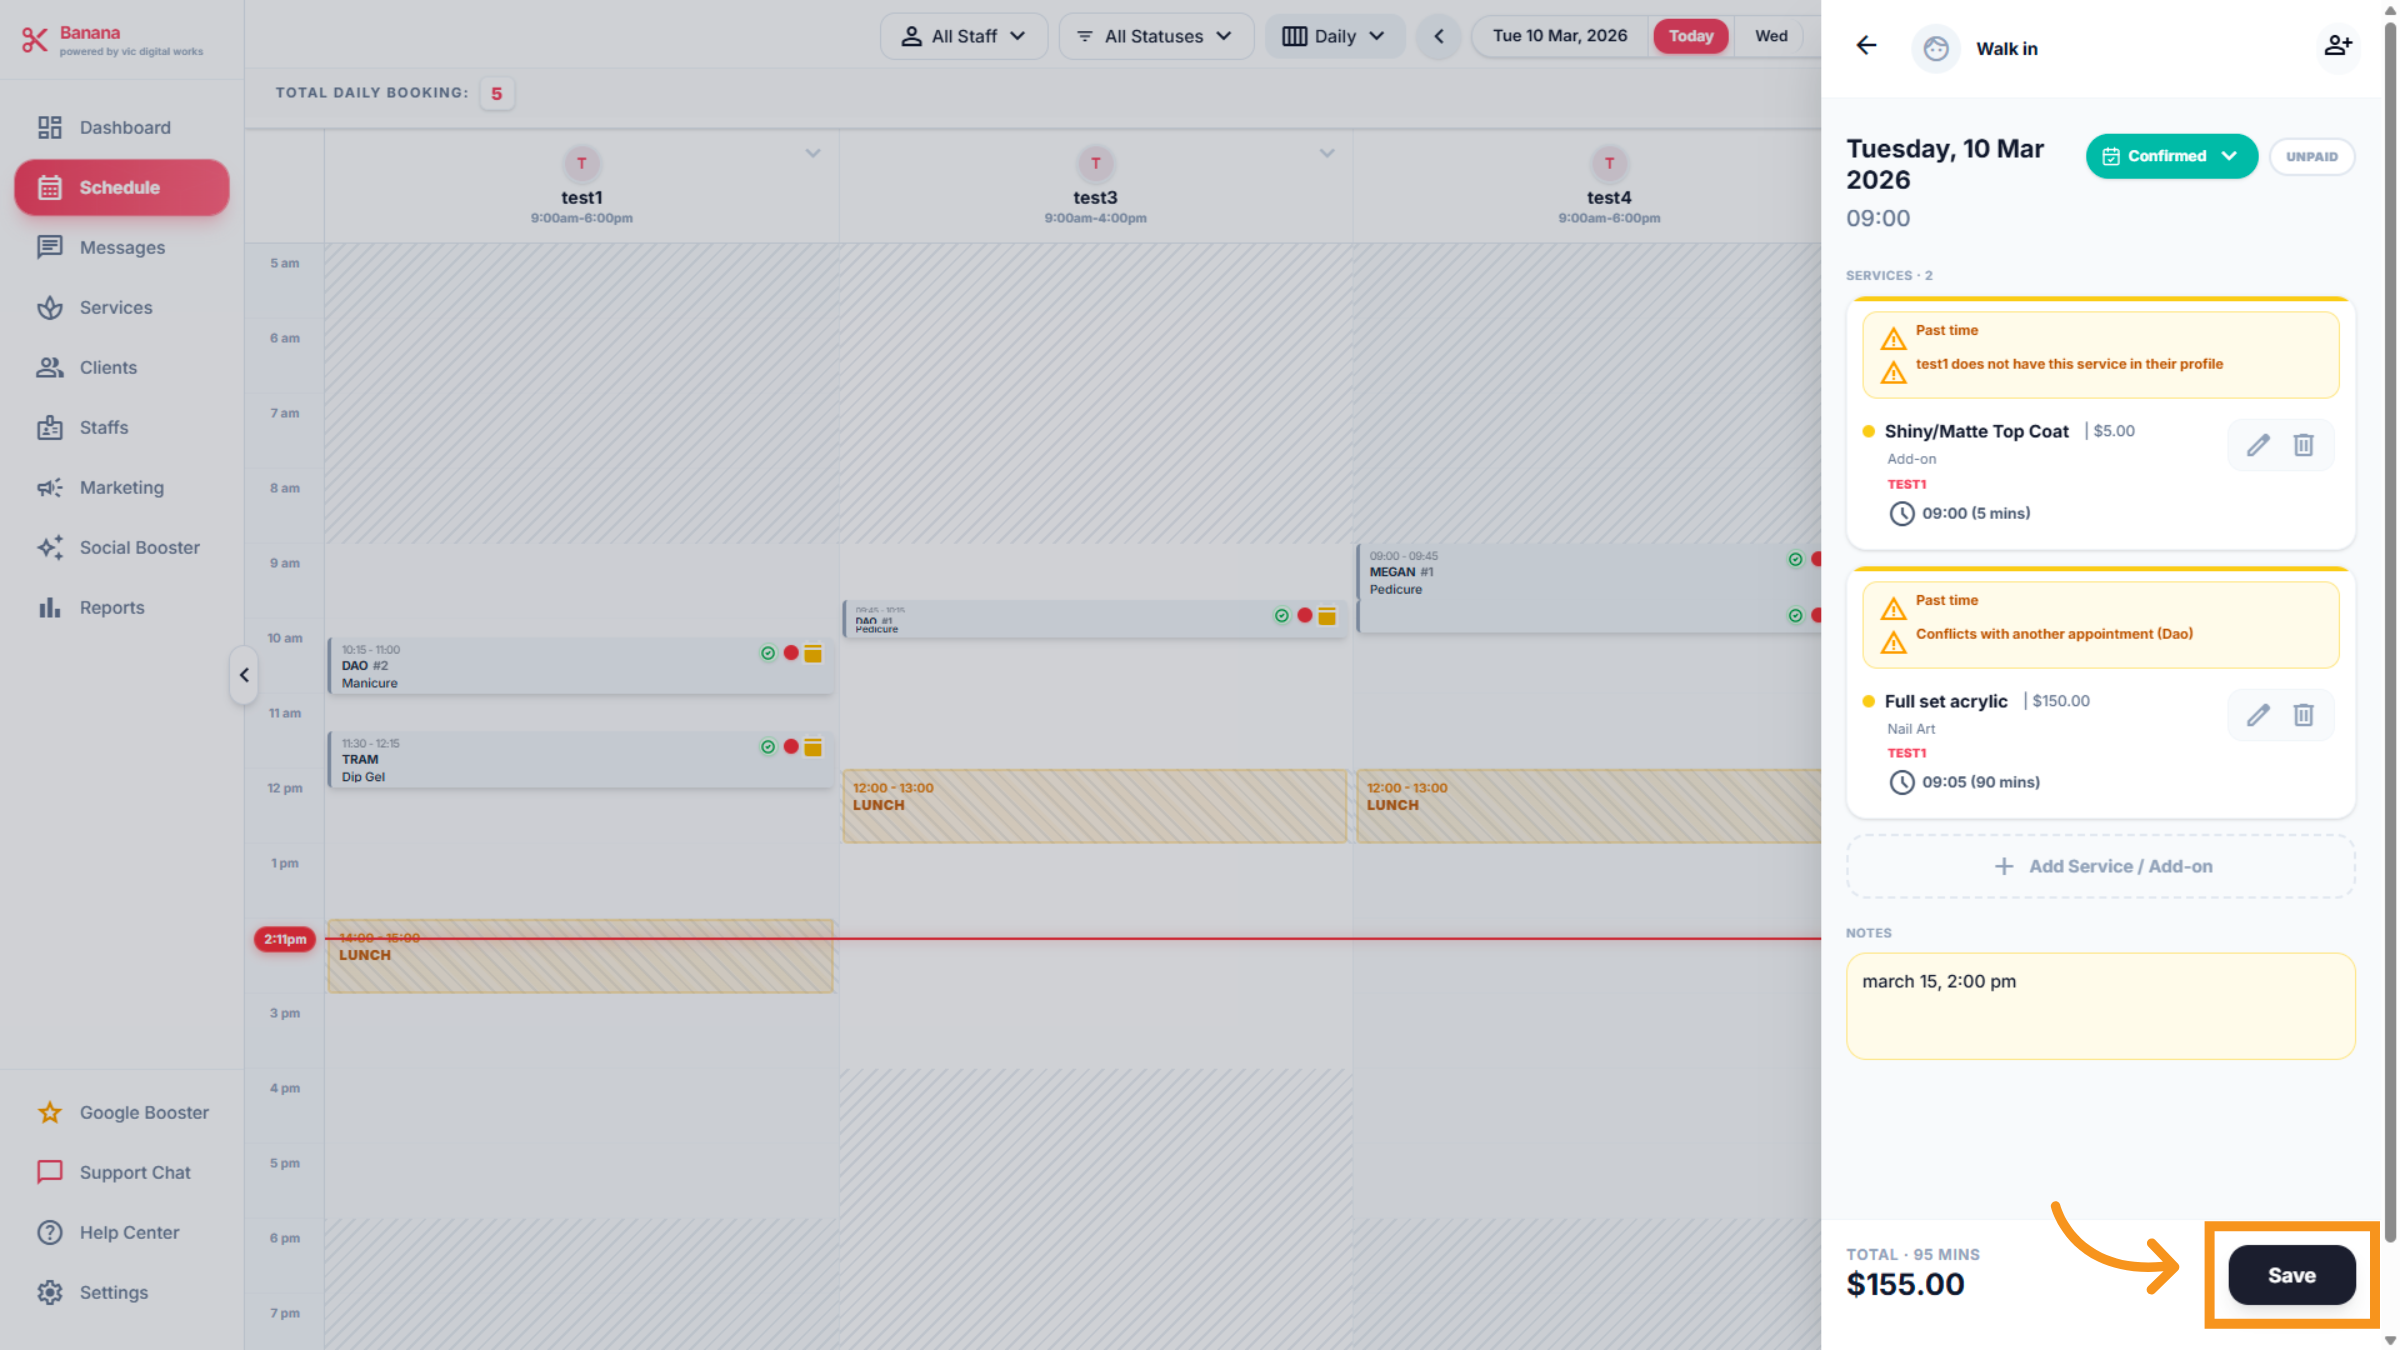
11. Save Booking
After finishing the booking, click the Save button to confirm and store the new booking information.
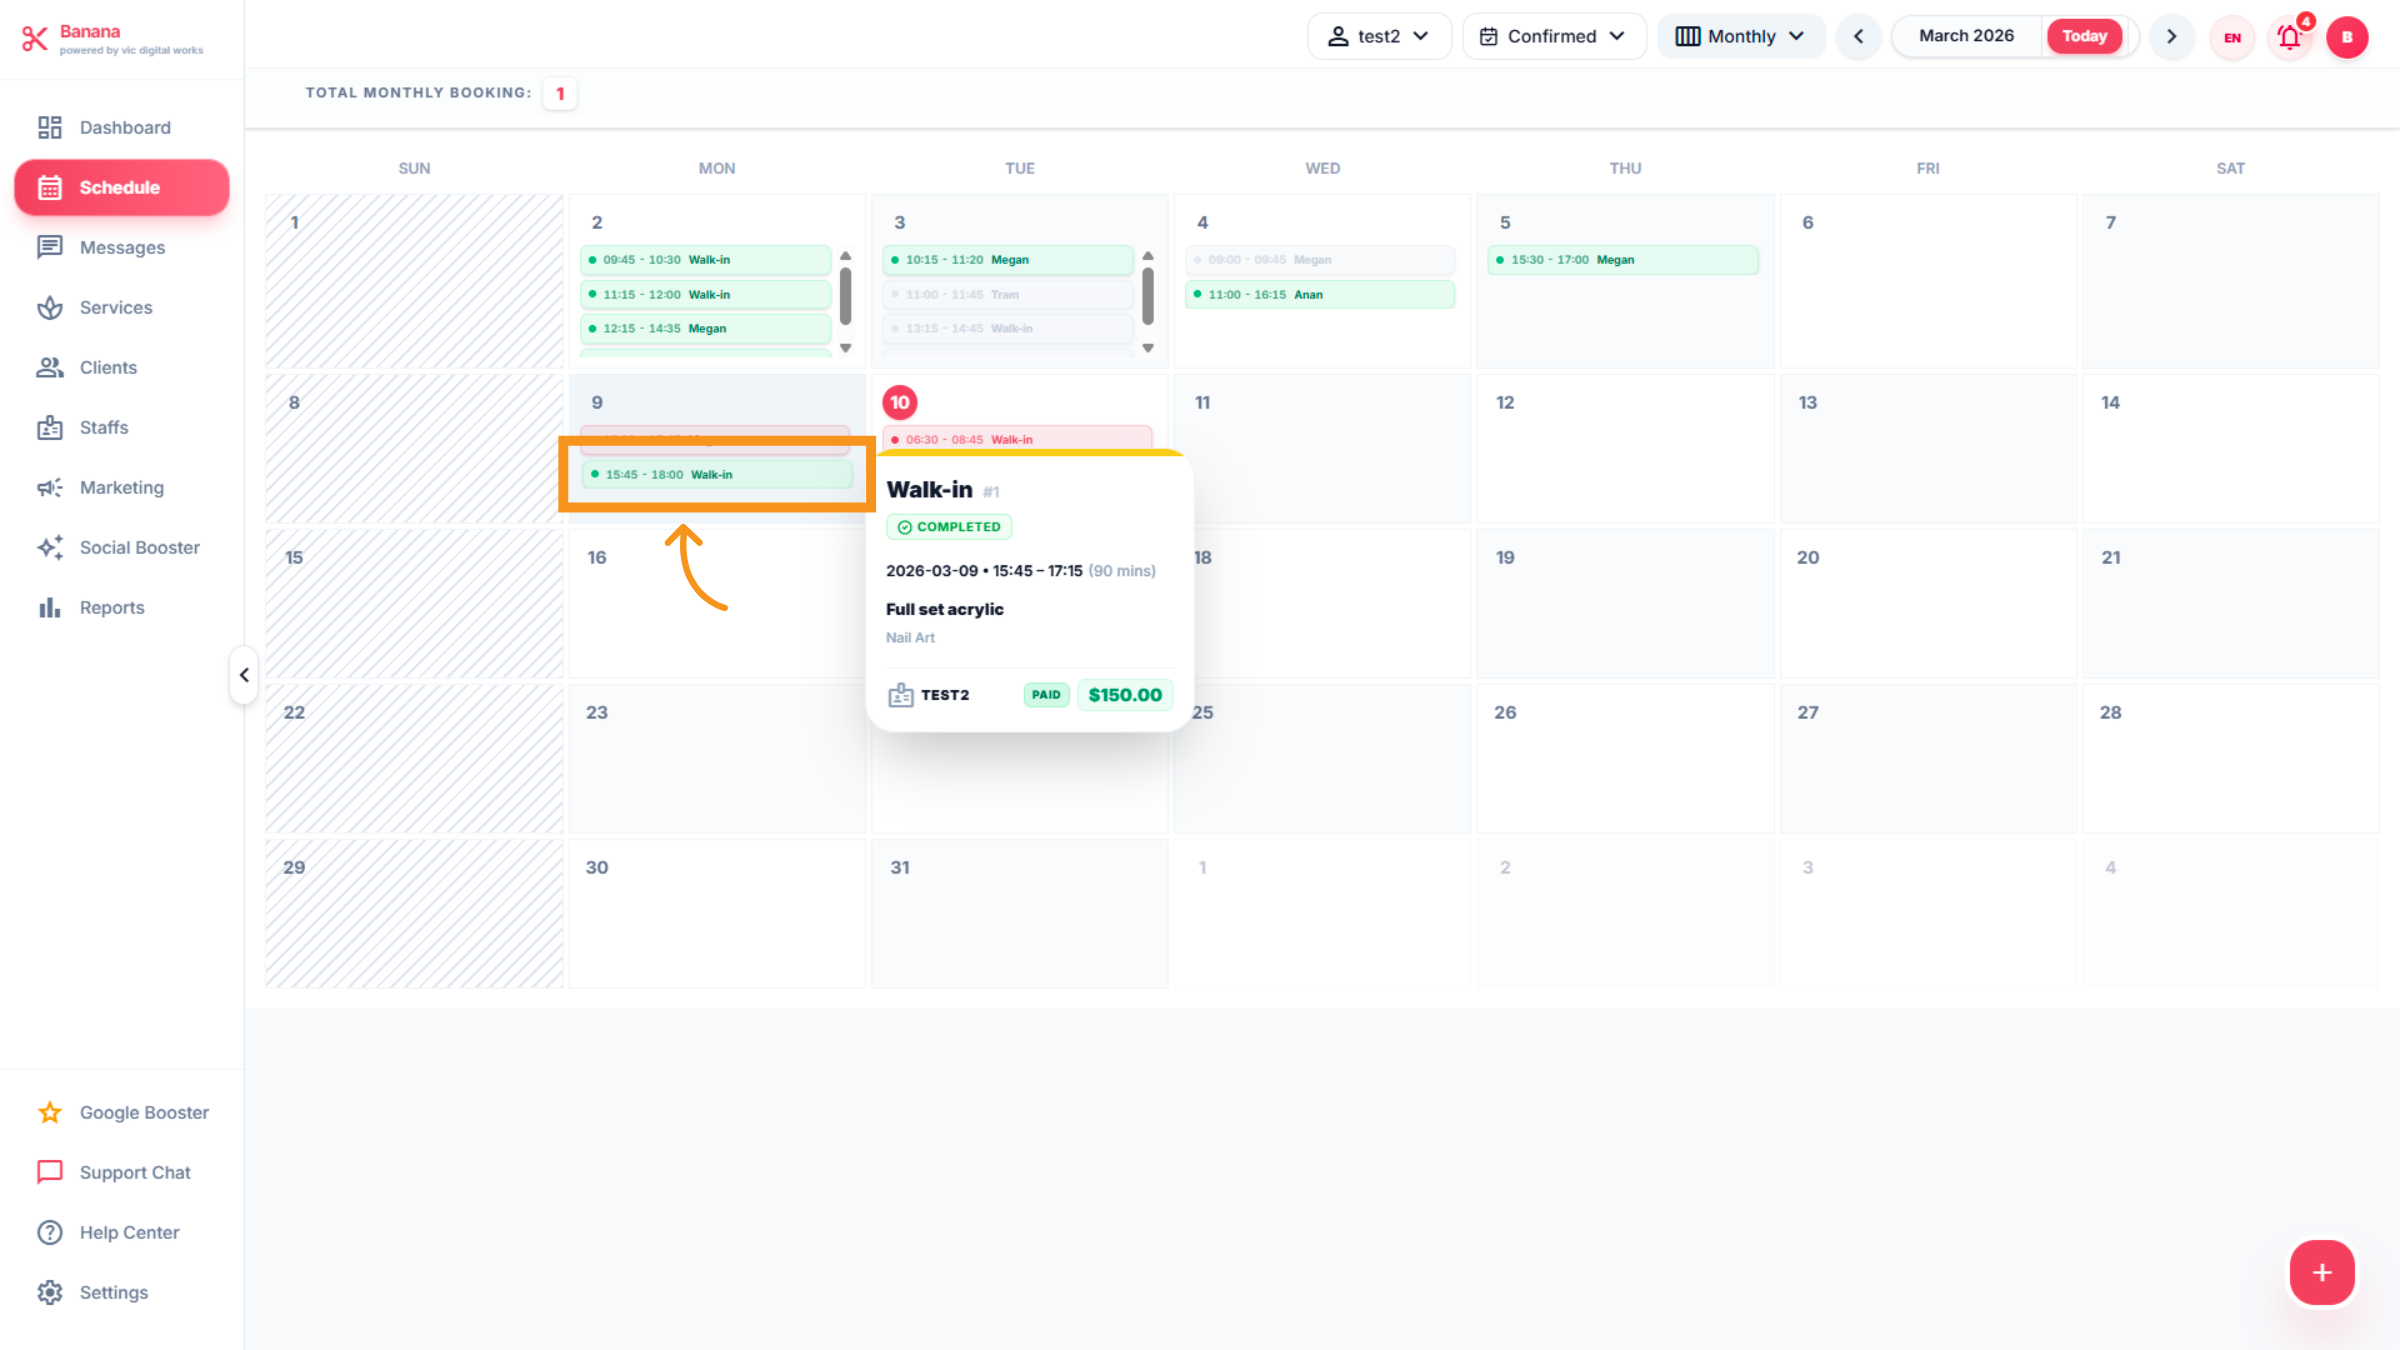
12. View Completed Appointments
Click Completed to filter and view appointments marked as completed.
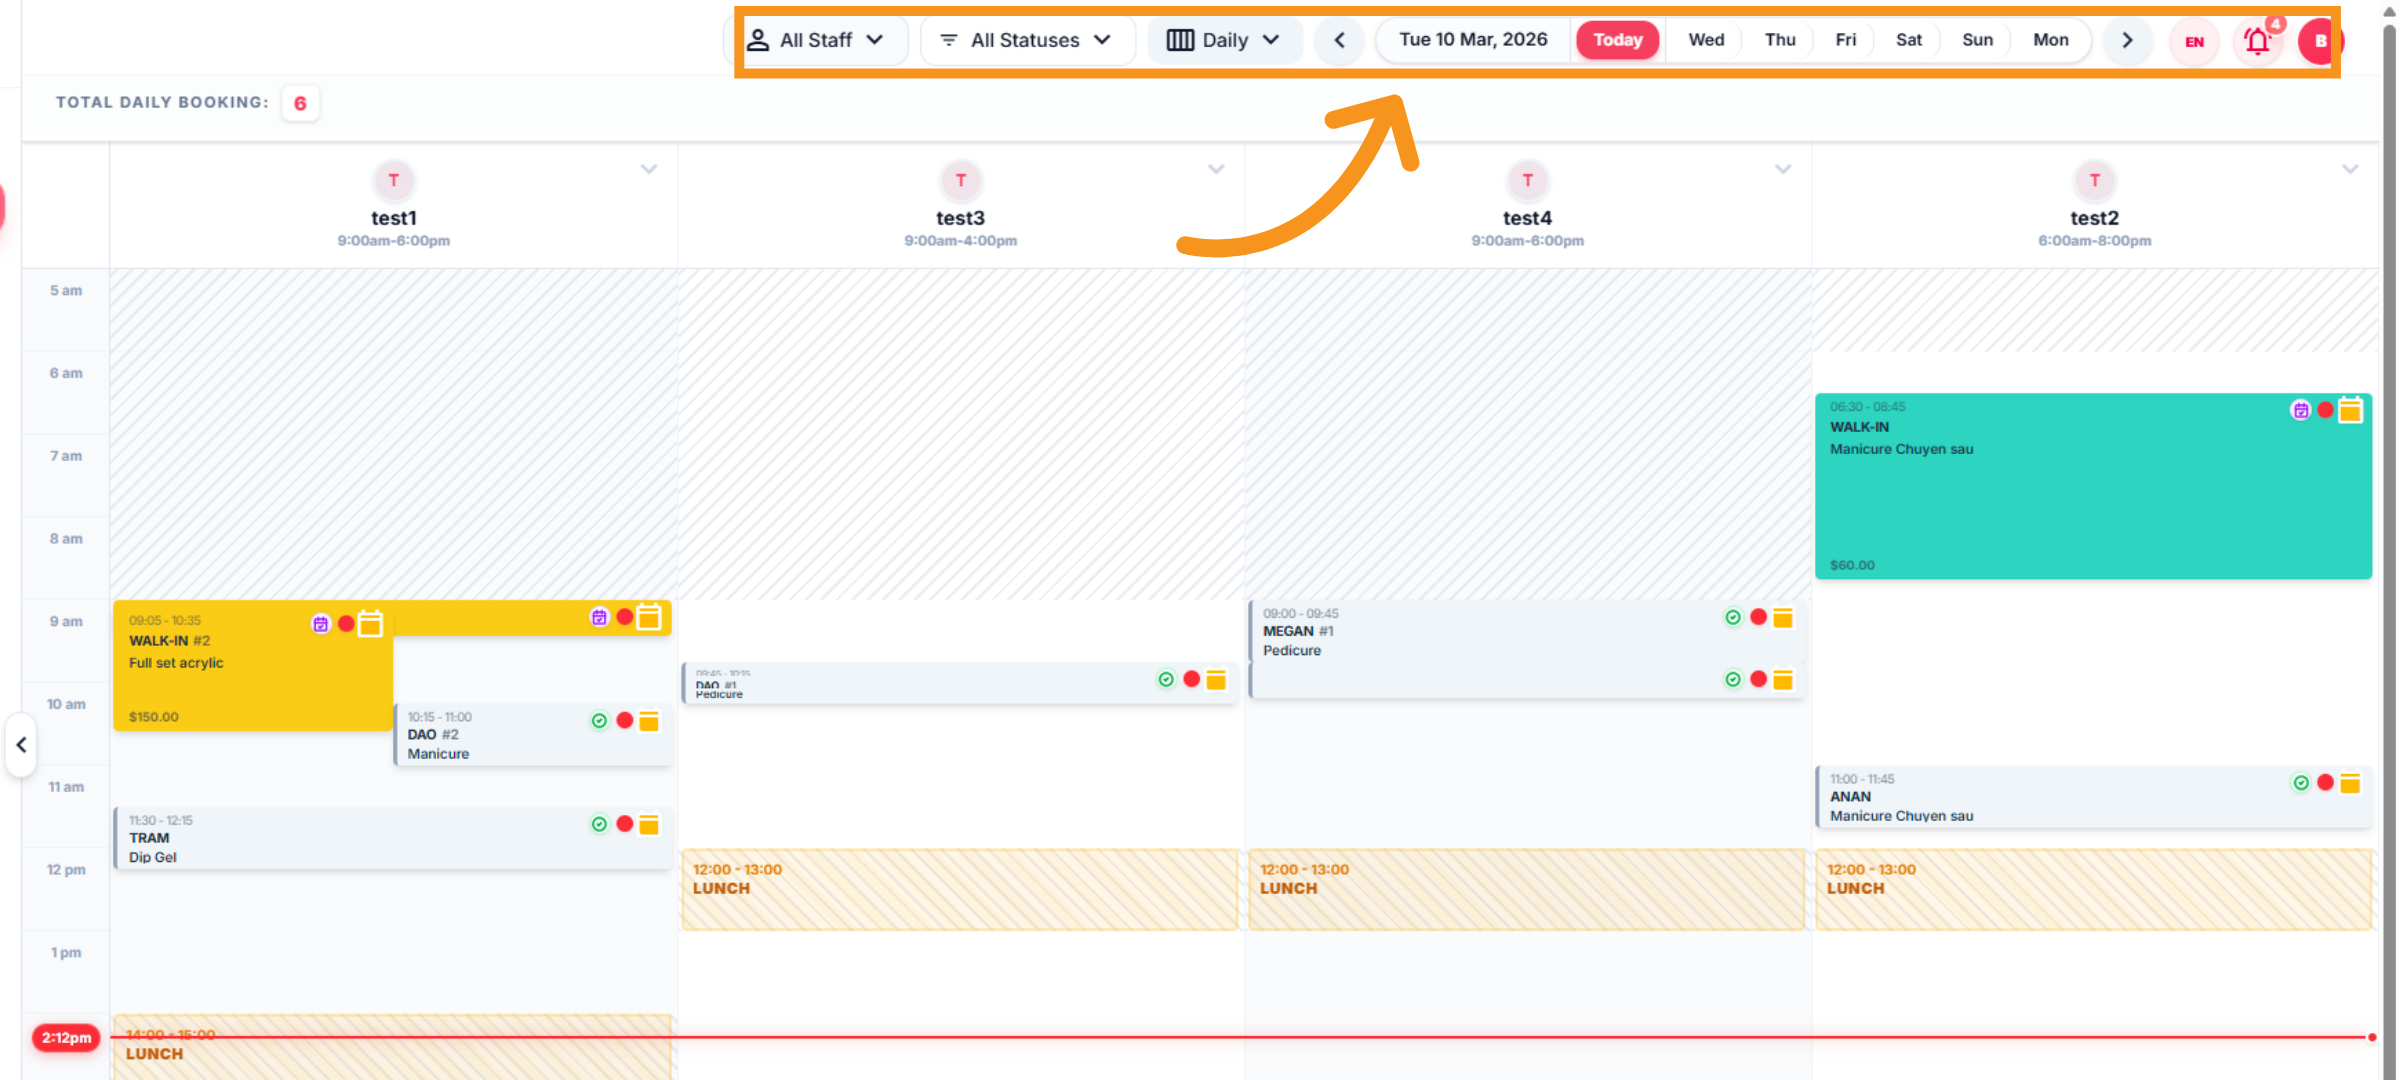
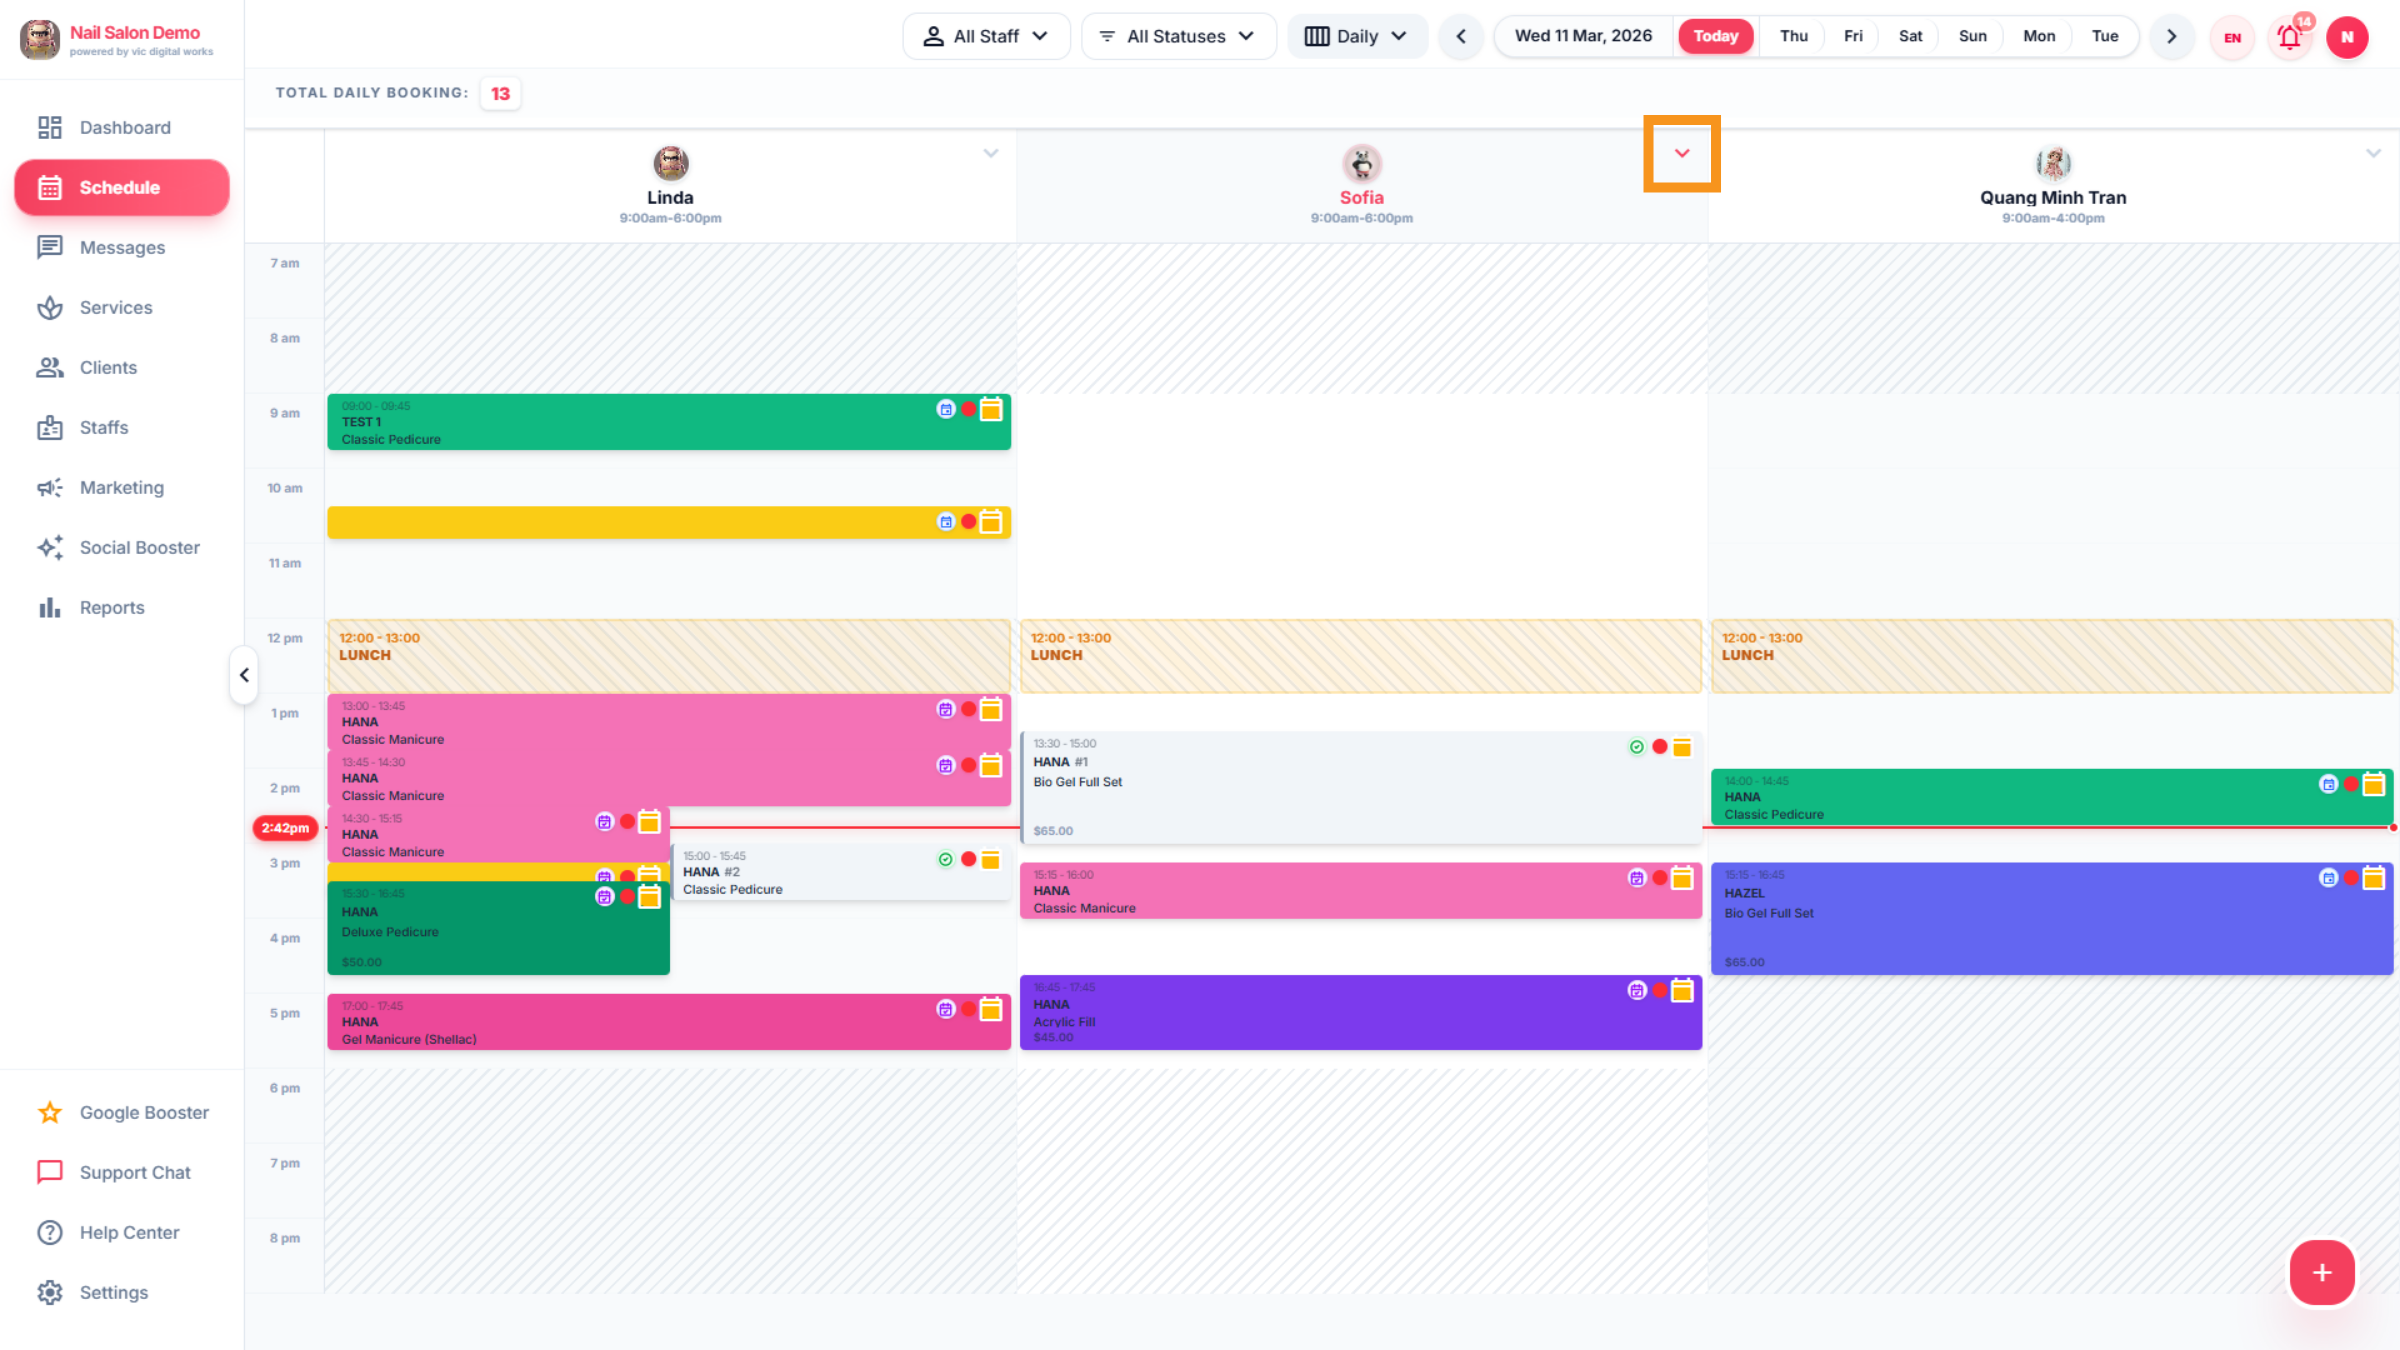
13. Booking arrangement
You can view the interface for scheduling technicians, includes Name- Statuses-Time
14. Technician tracking schedule
Smart scheduling lets you assign services based on each technician’s expertise to meet customer expectations. Furthermore ,You can assign any colors you like to each service offered by the salon.
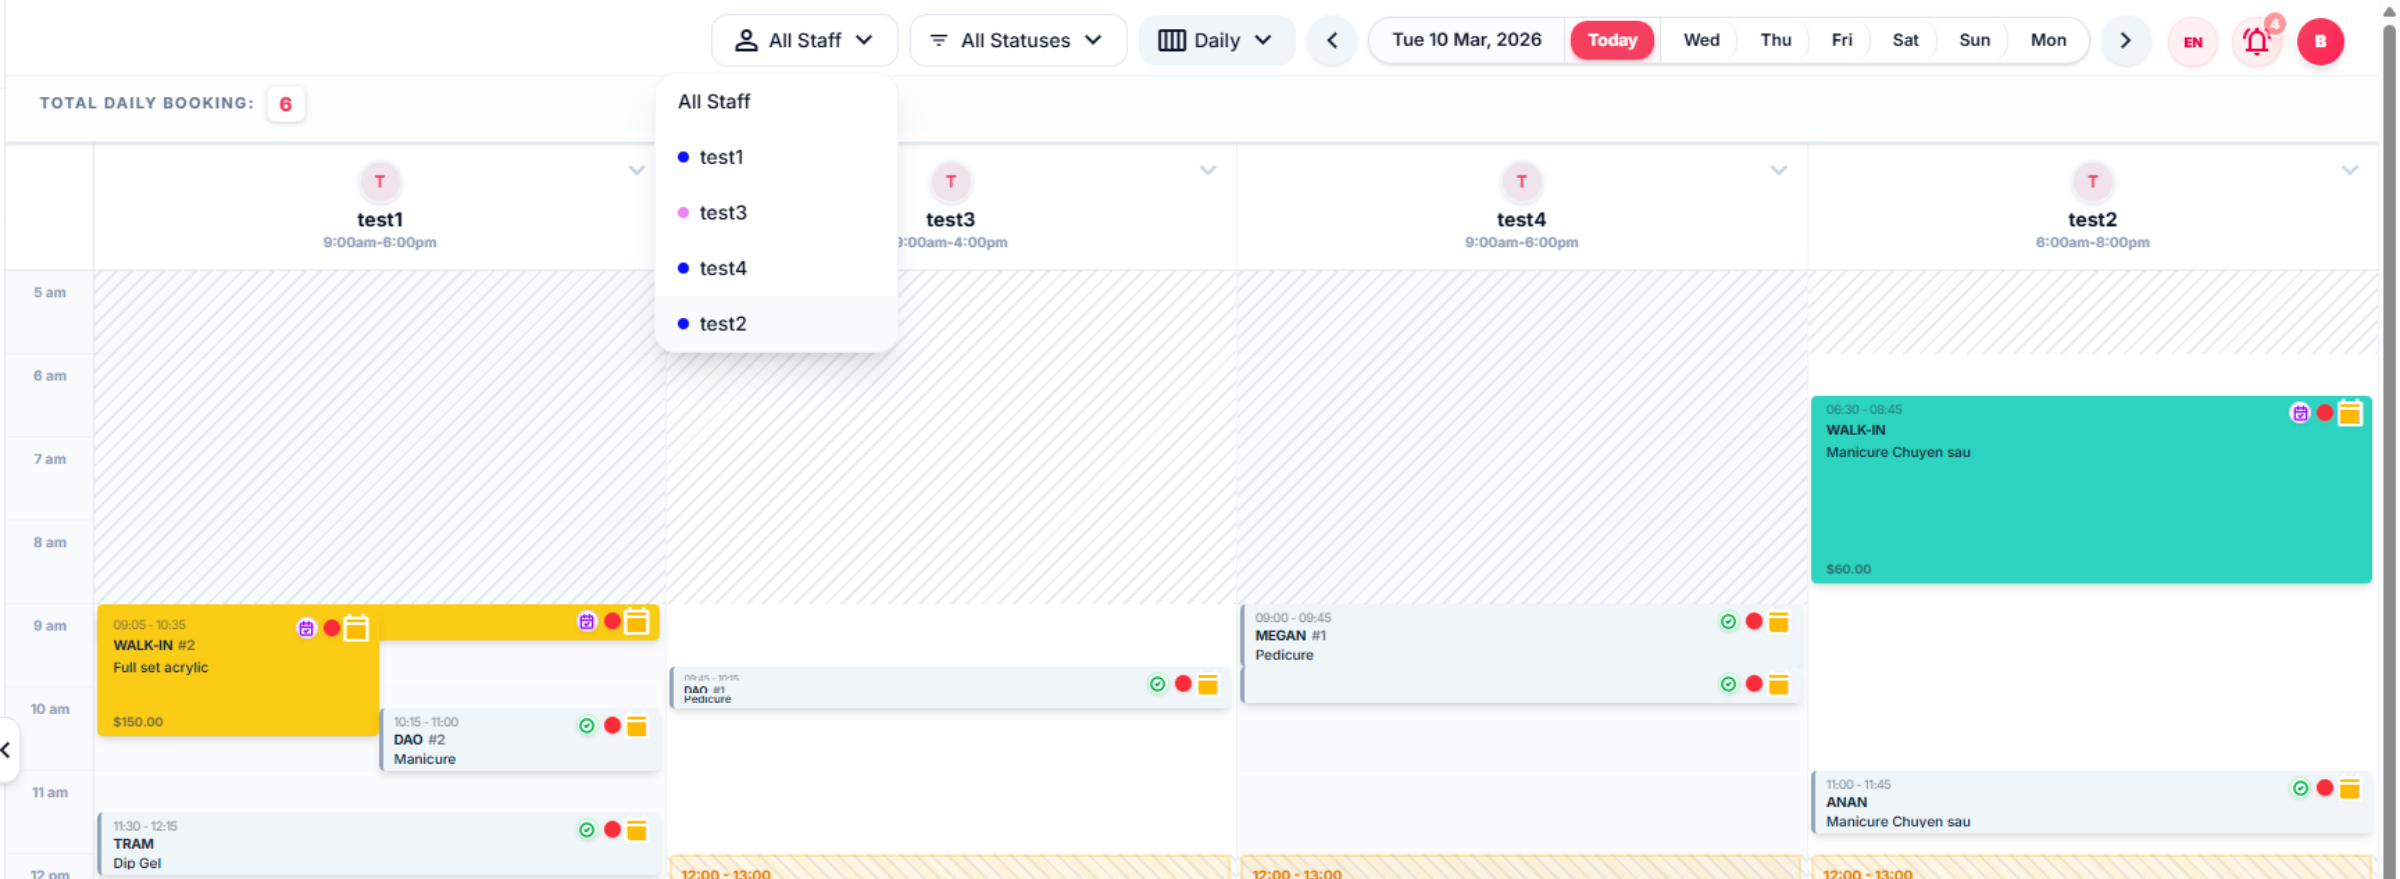
15. Technician status
You can filter and check the status of each technician.
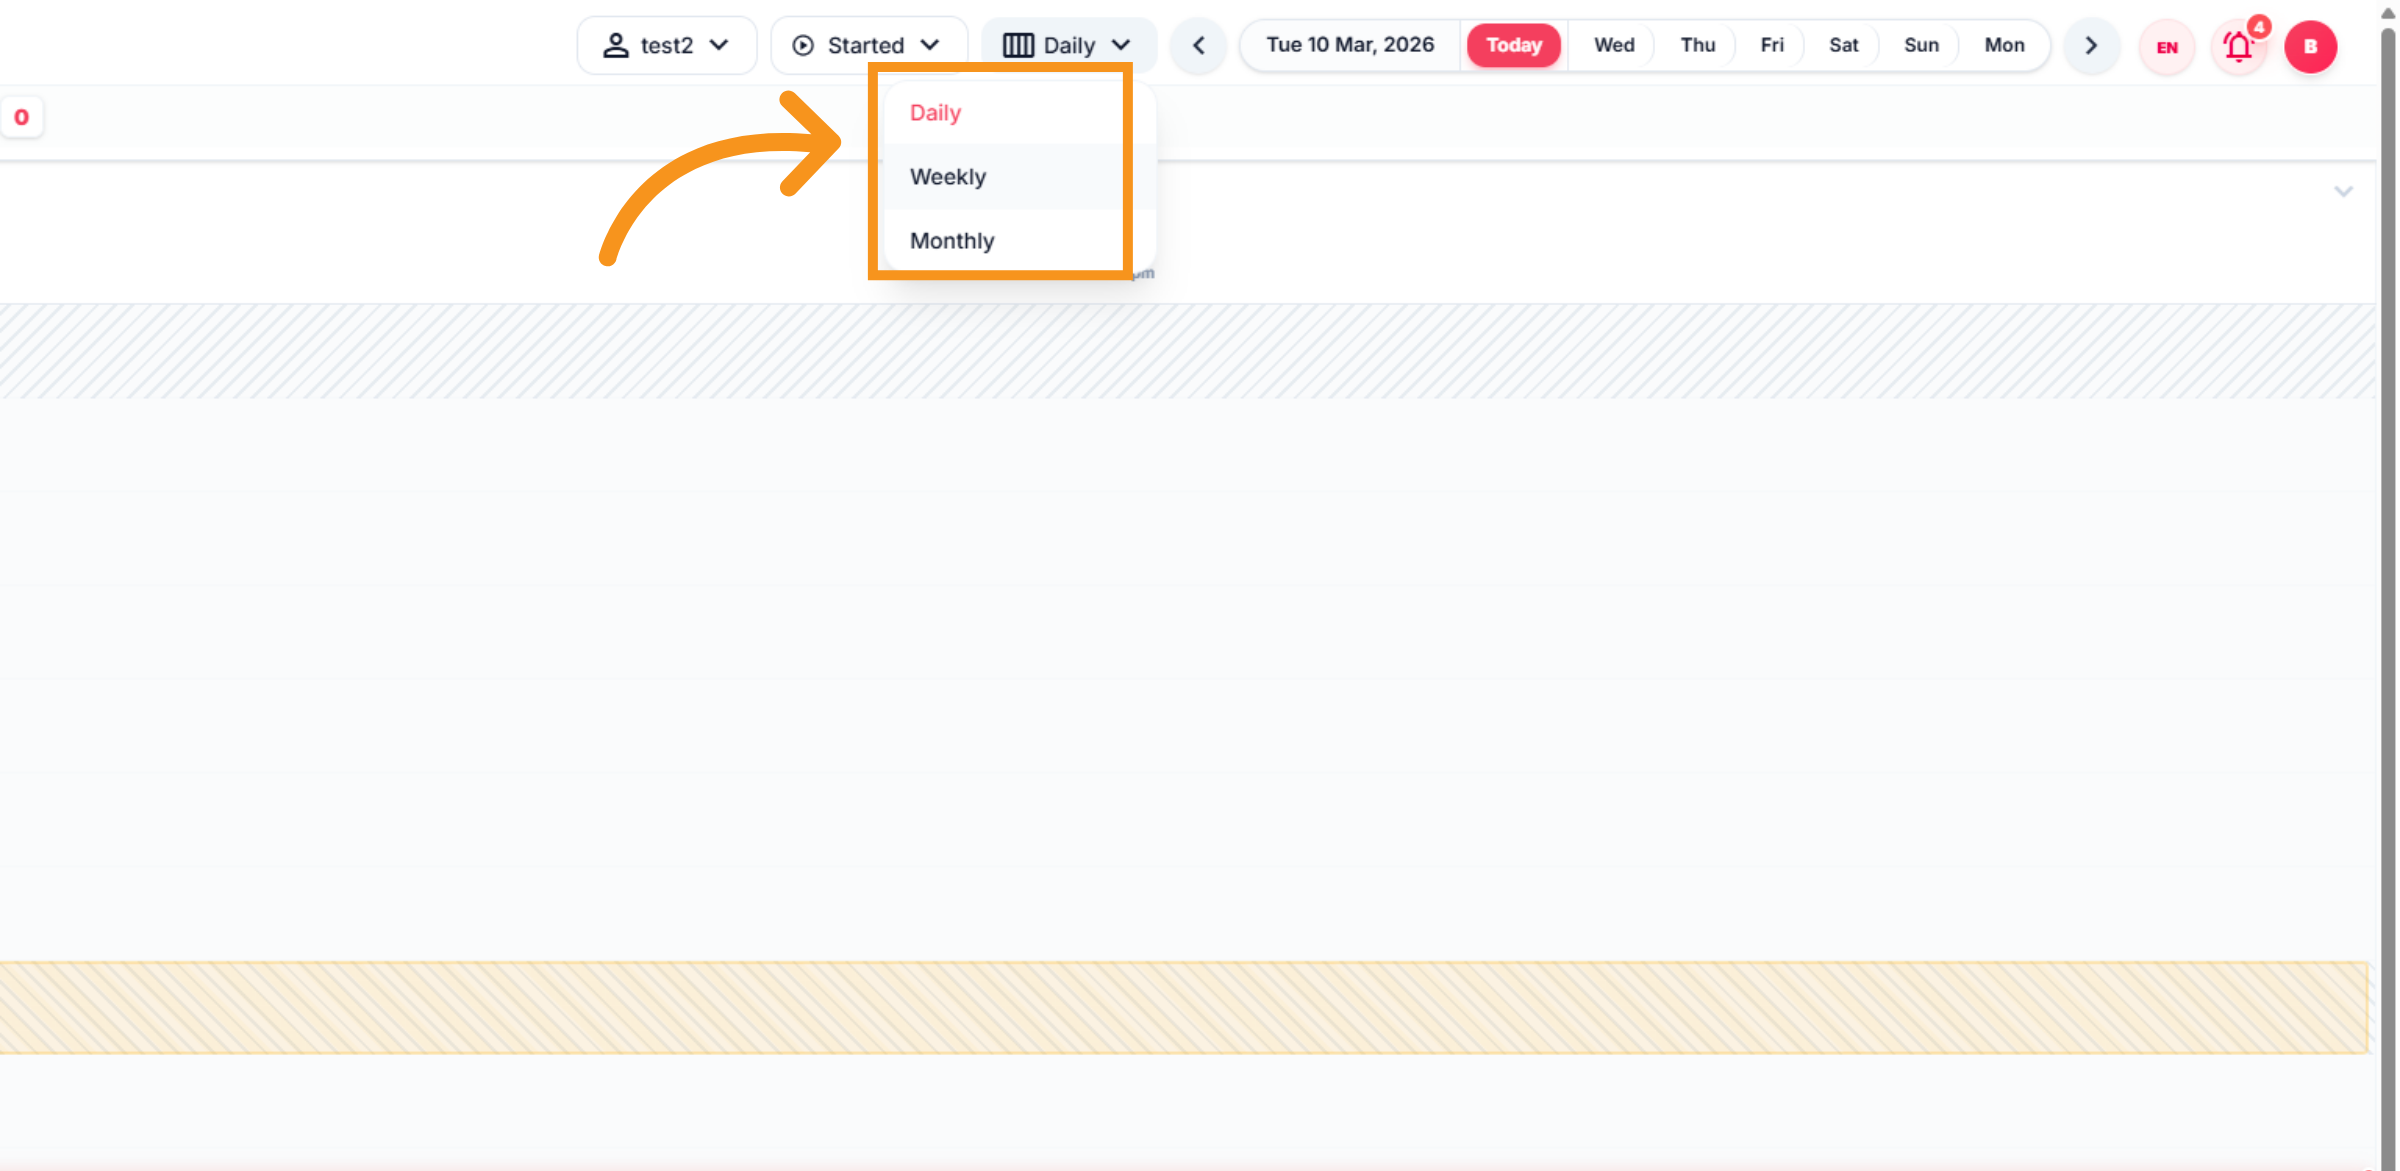
16. Select view by time
Select view by Daily, Weekly, Monthly
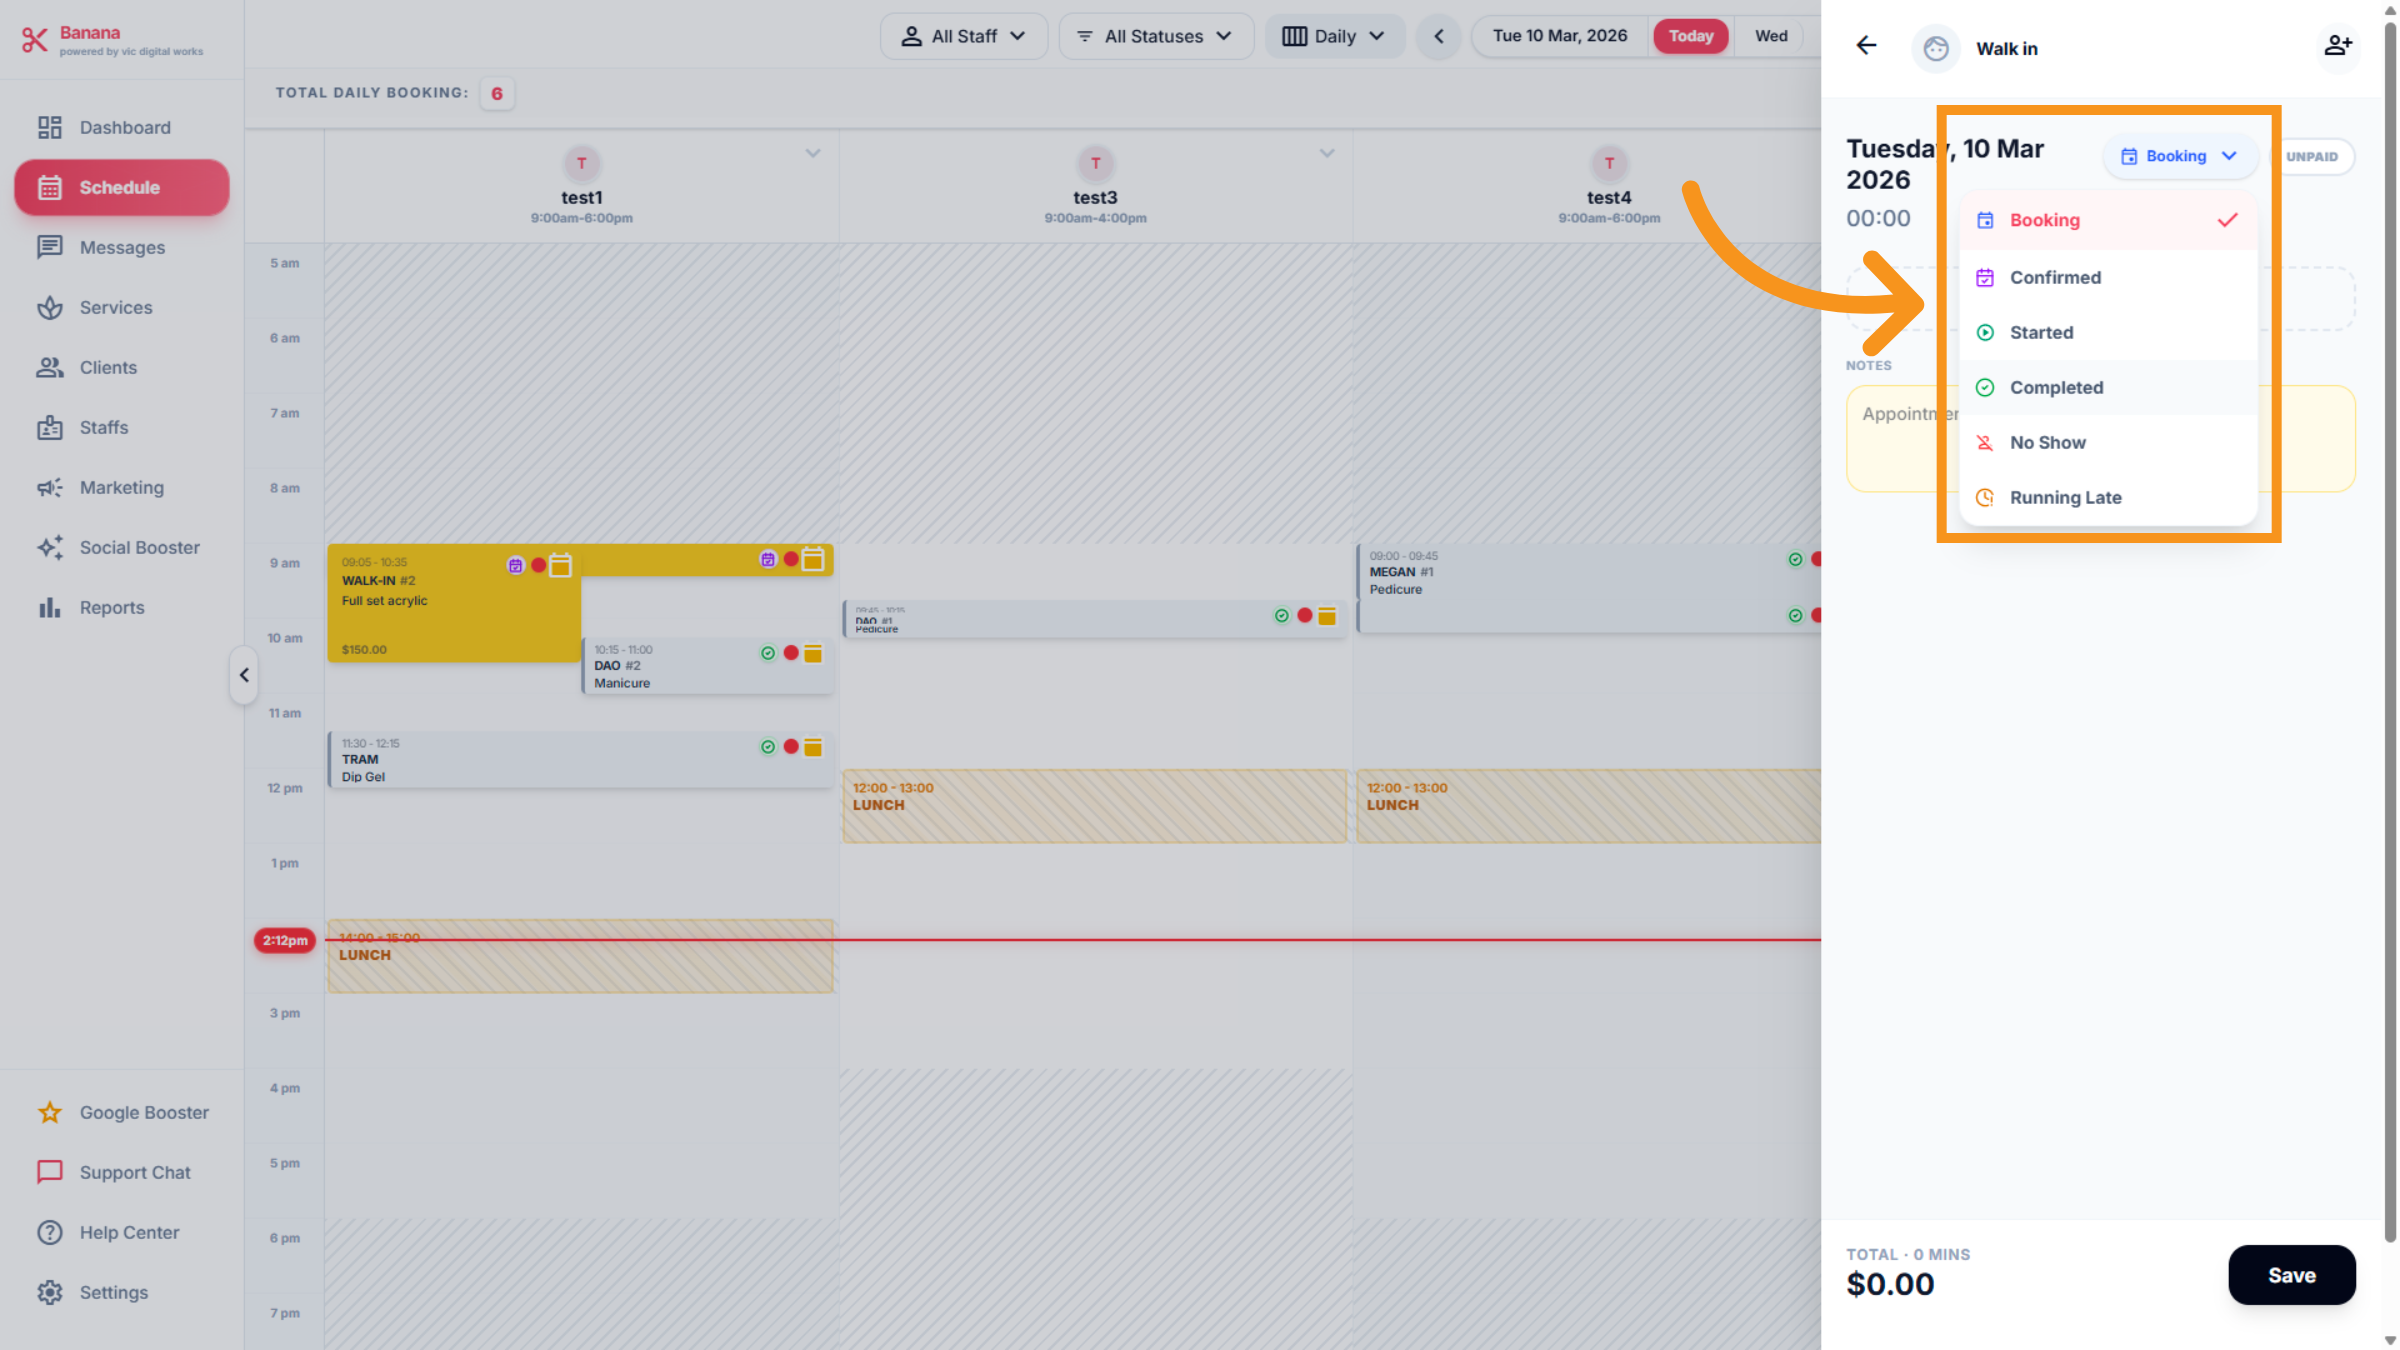
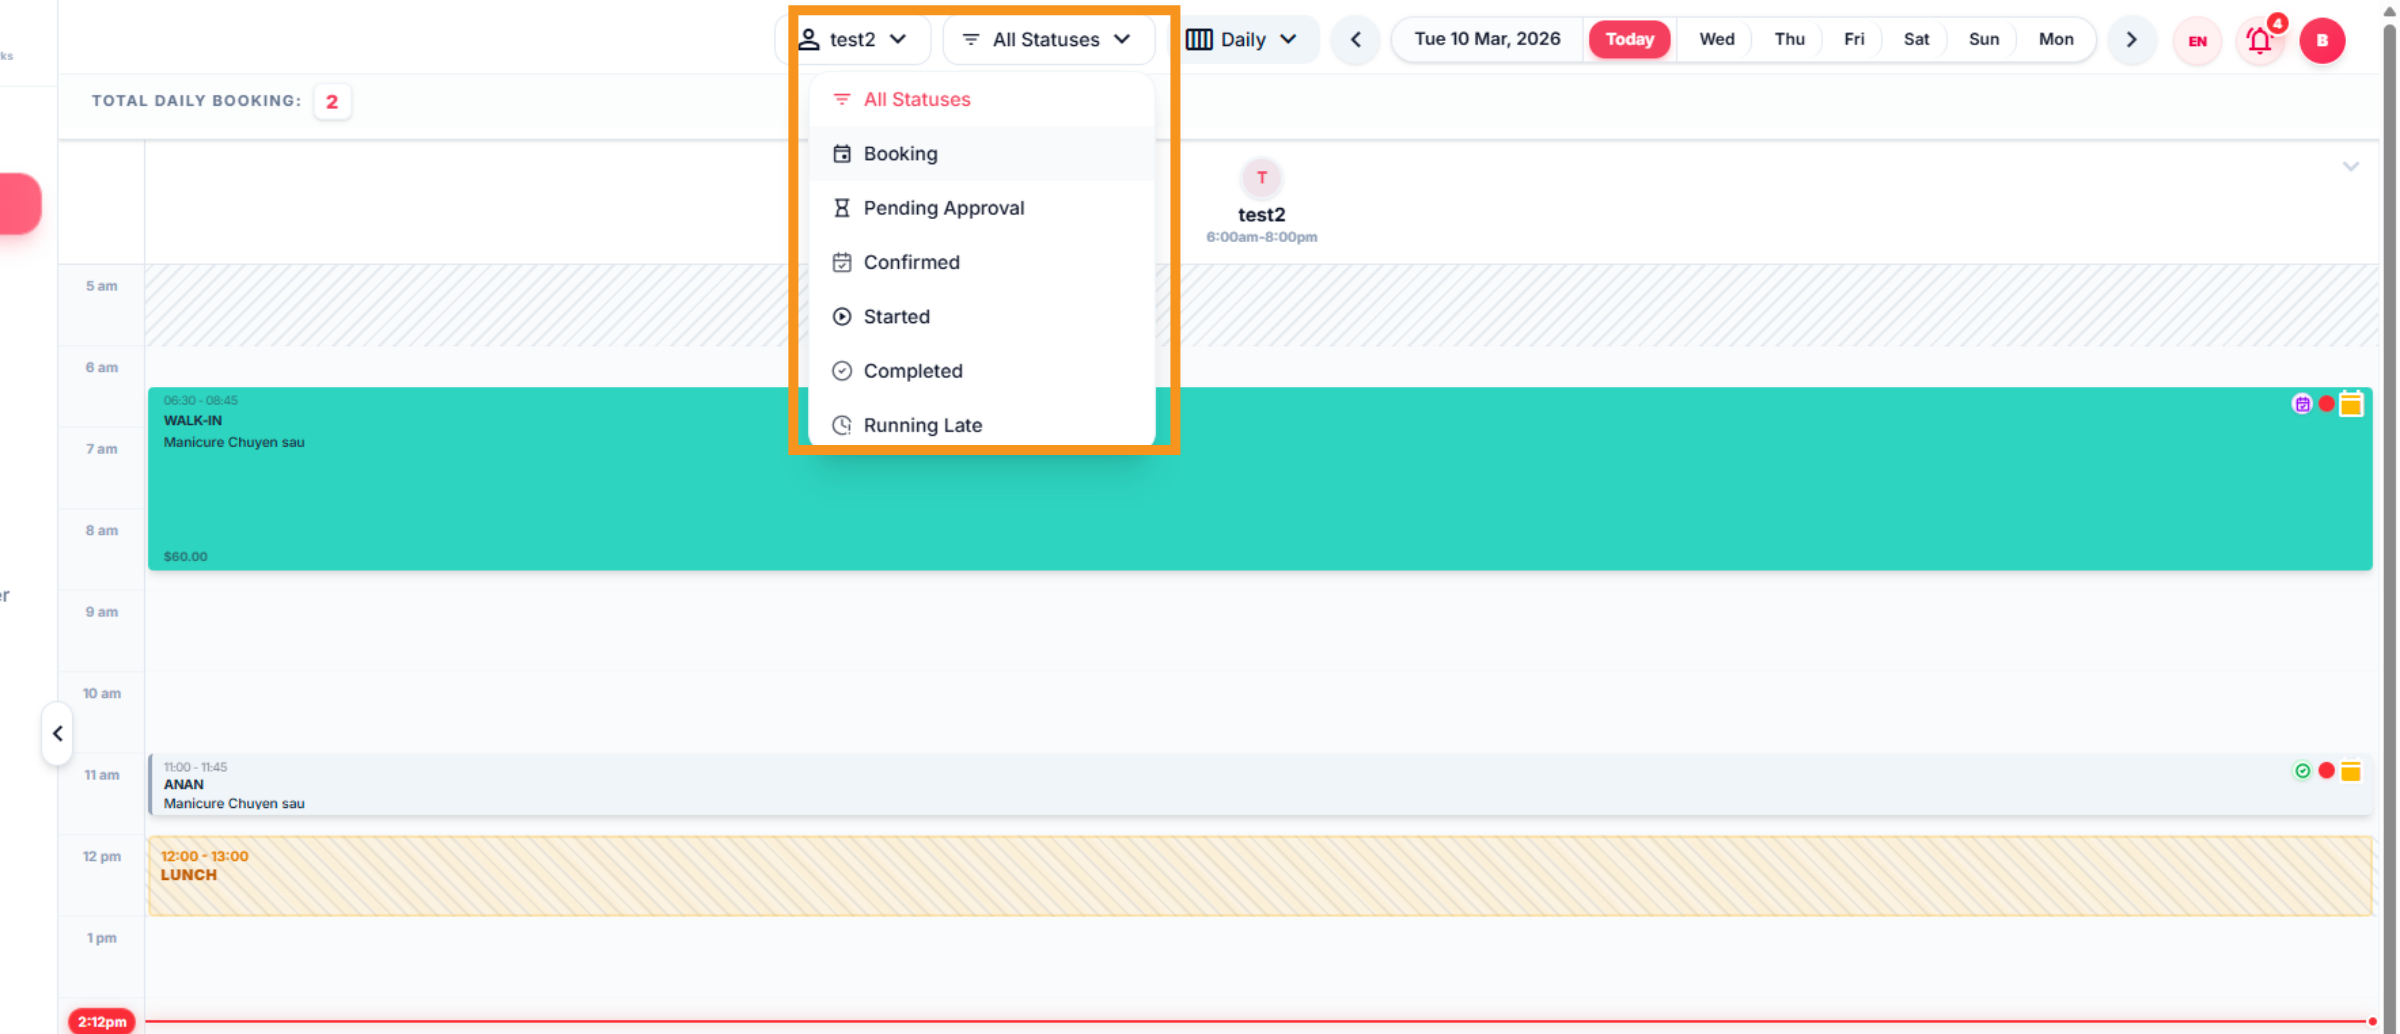
17. Open Status Filters
You can "click" to change the text to red to mark the technician's status. The colors displayed on the sides indicate the associated services.
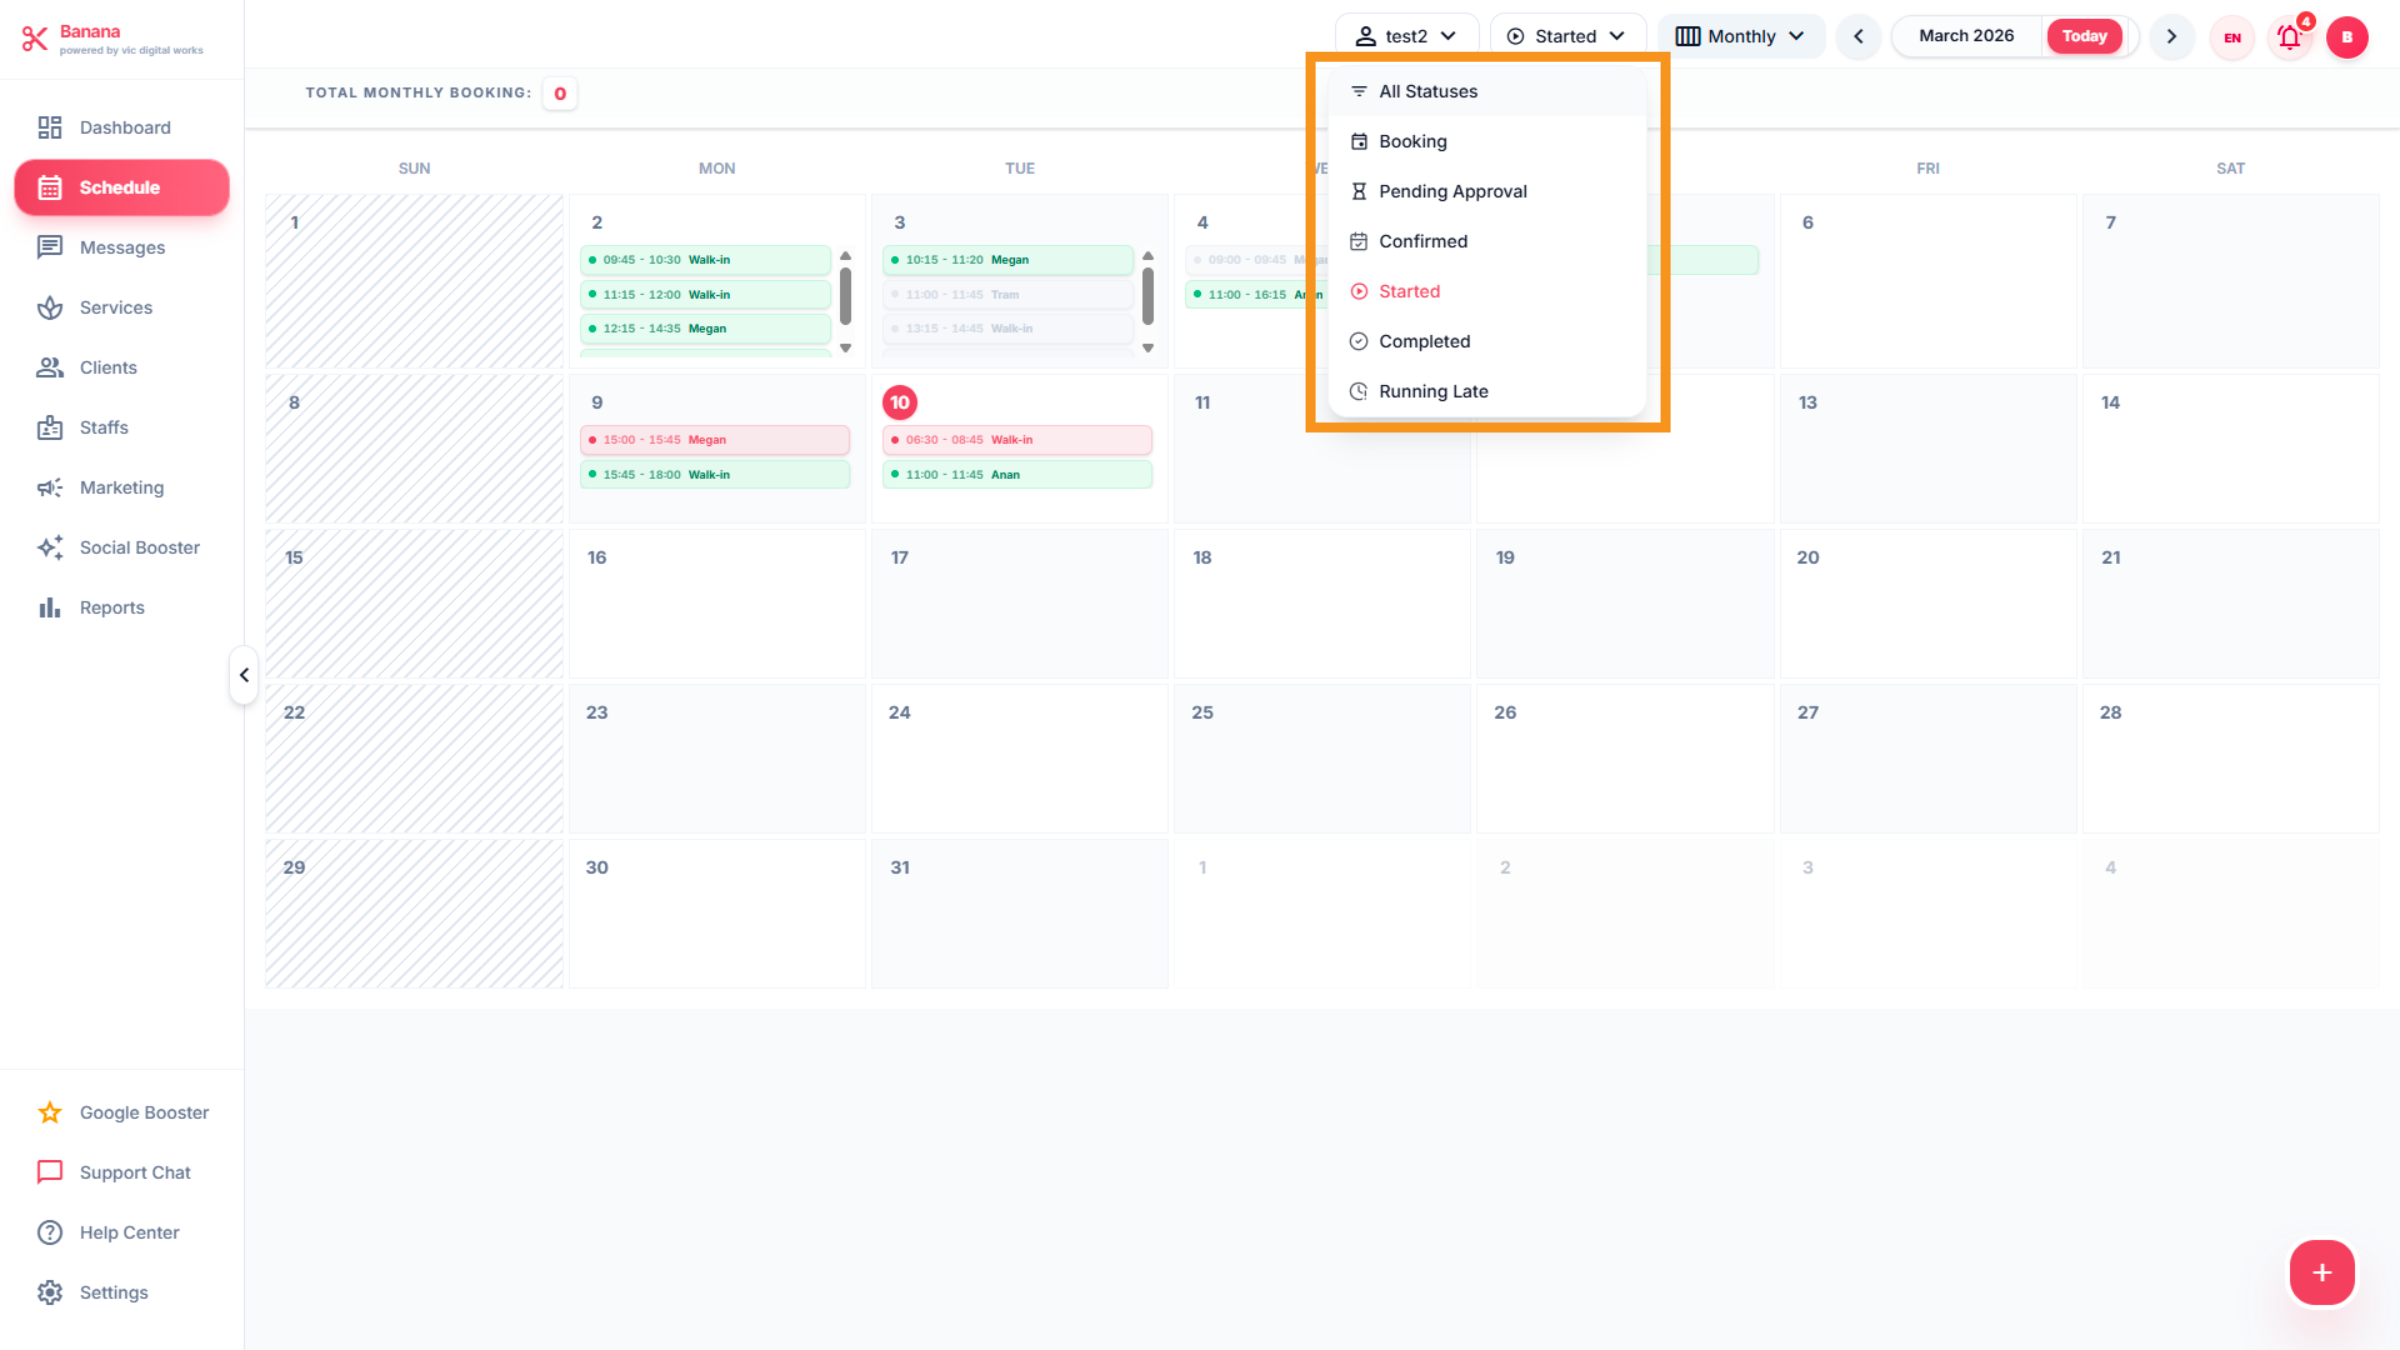
18. Check Appointment status
You can check the status of any bar by clicking.
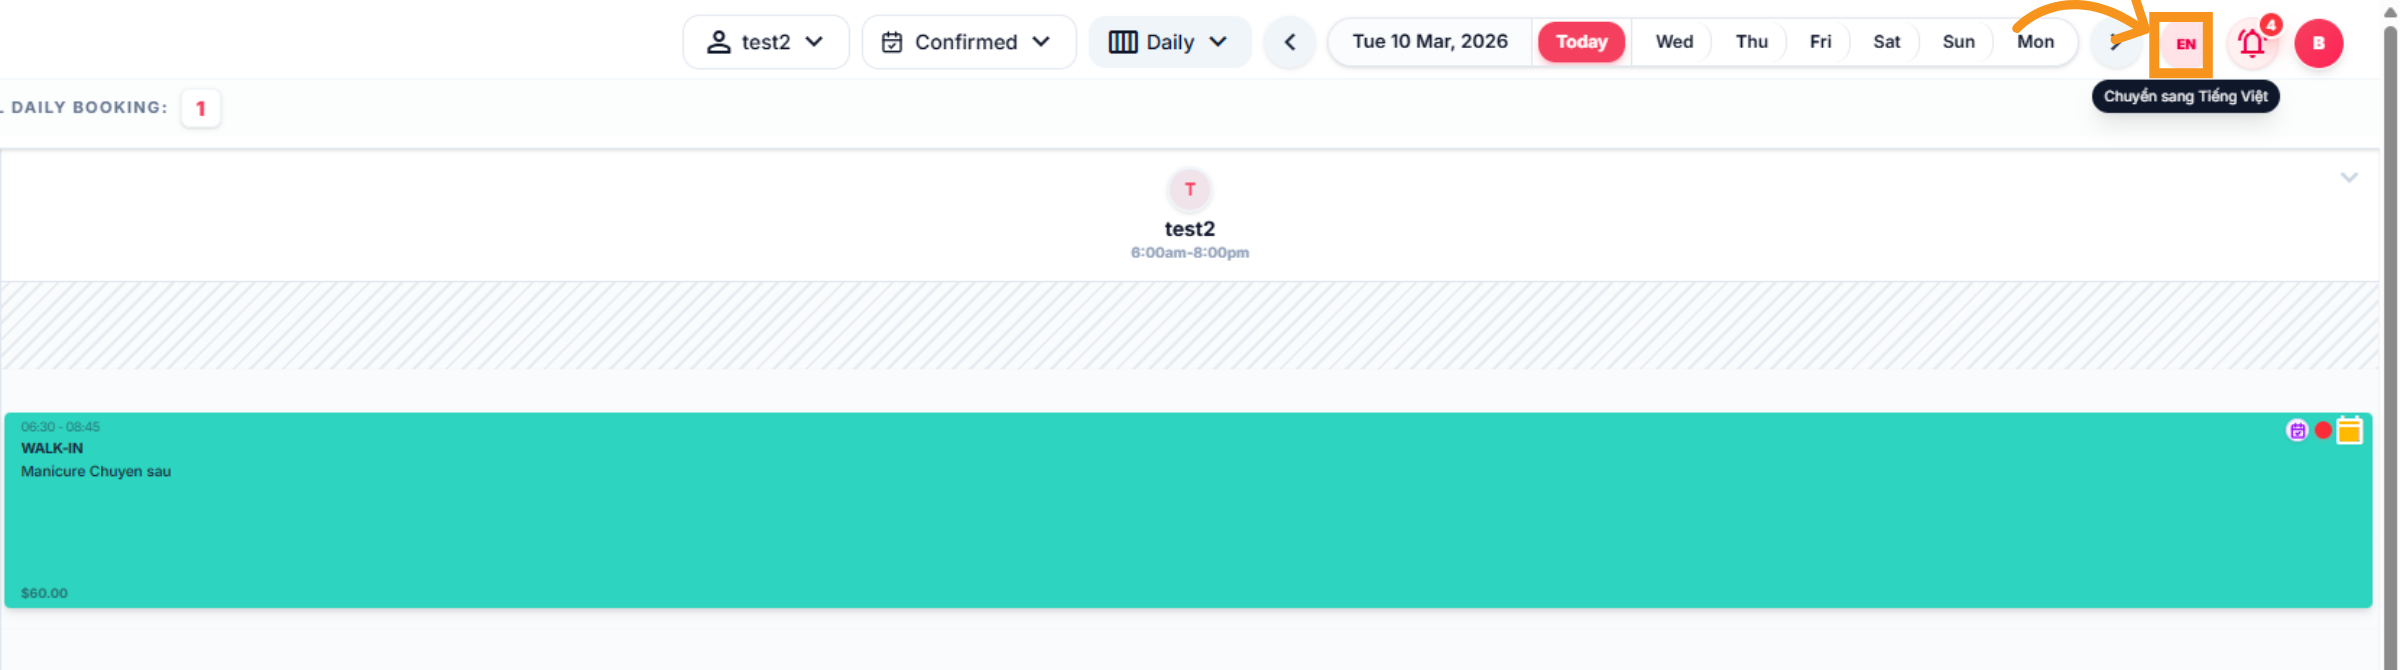
19. Change Language to English or Vietnamese
Click EN-VI to switch the interface language to English - Vietnamese
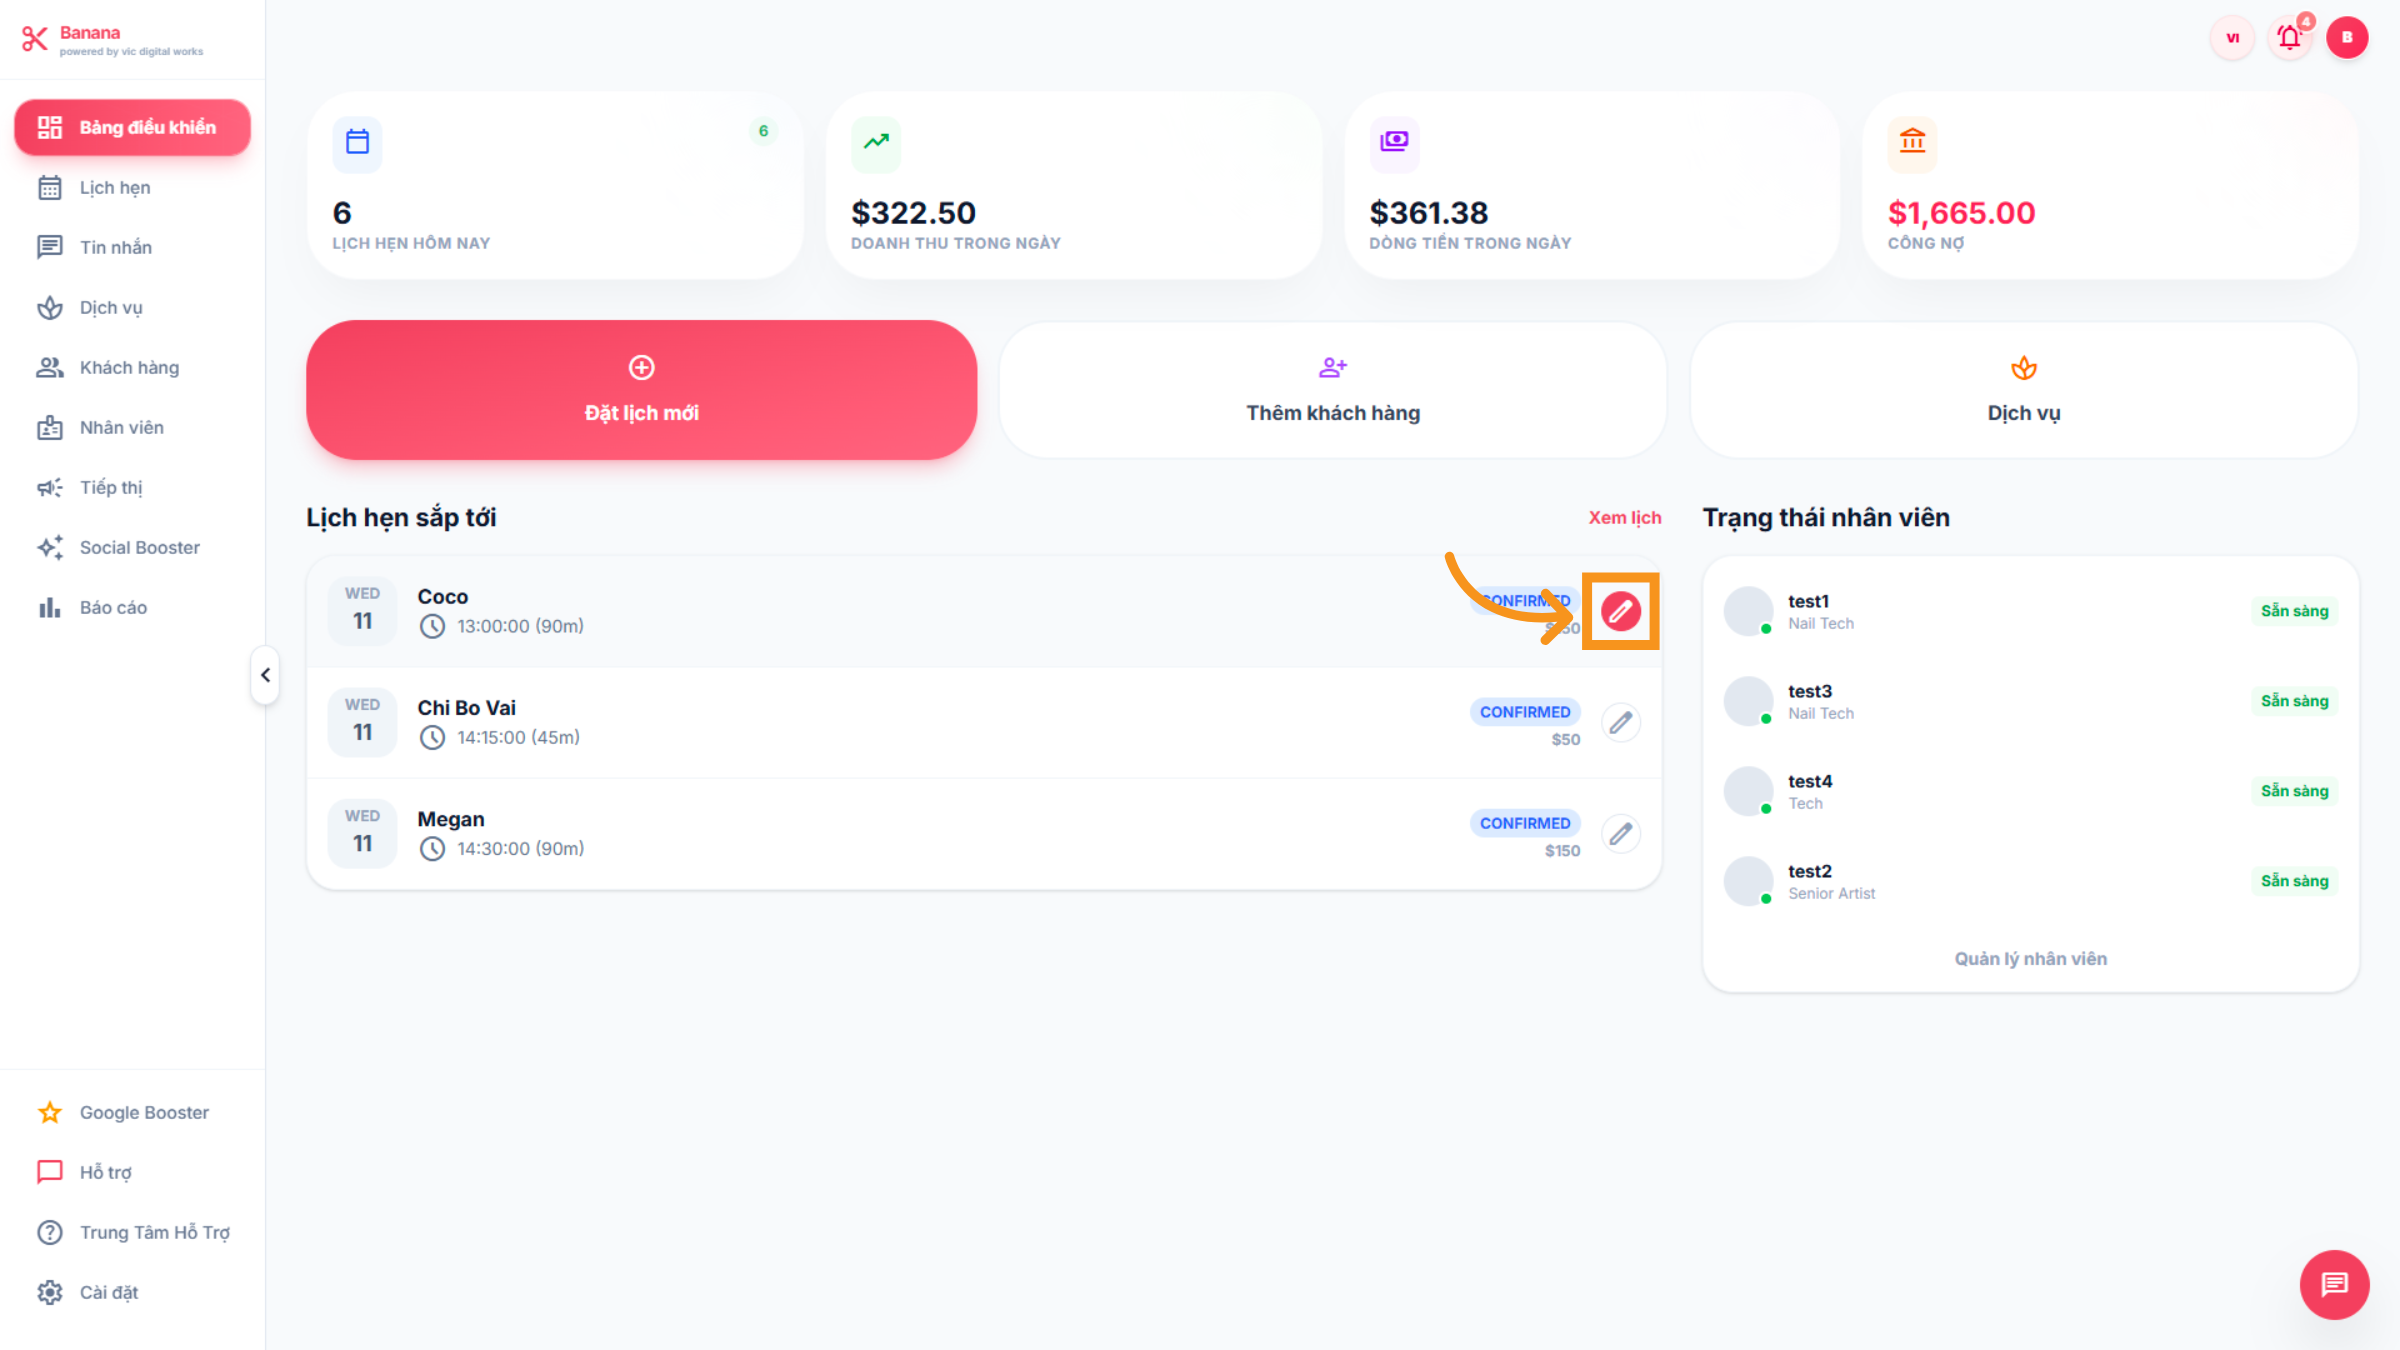
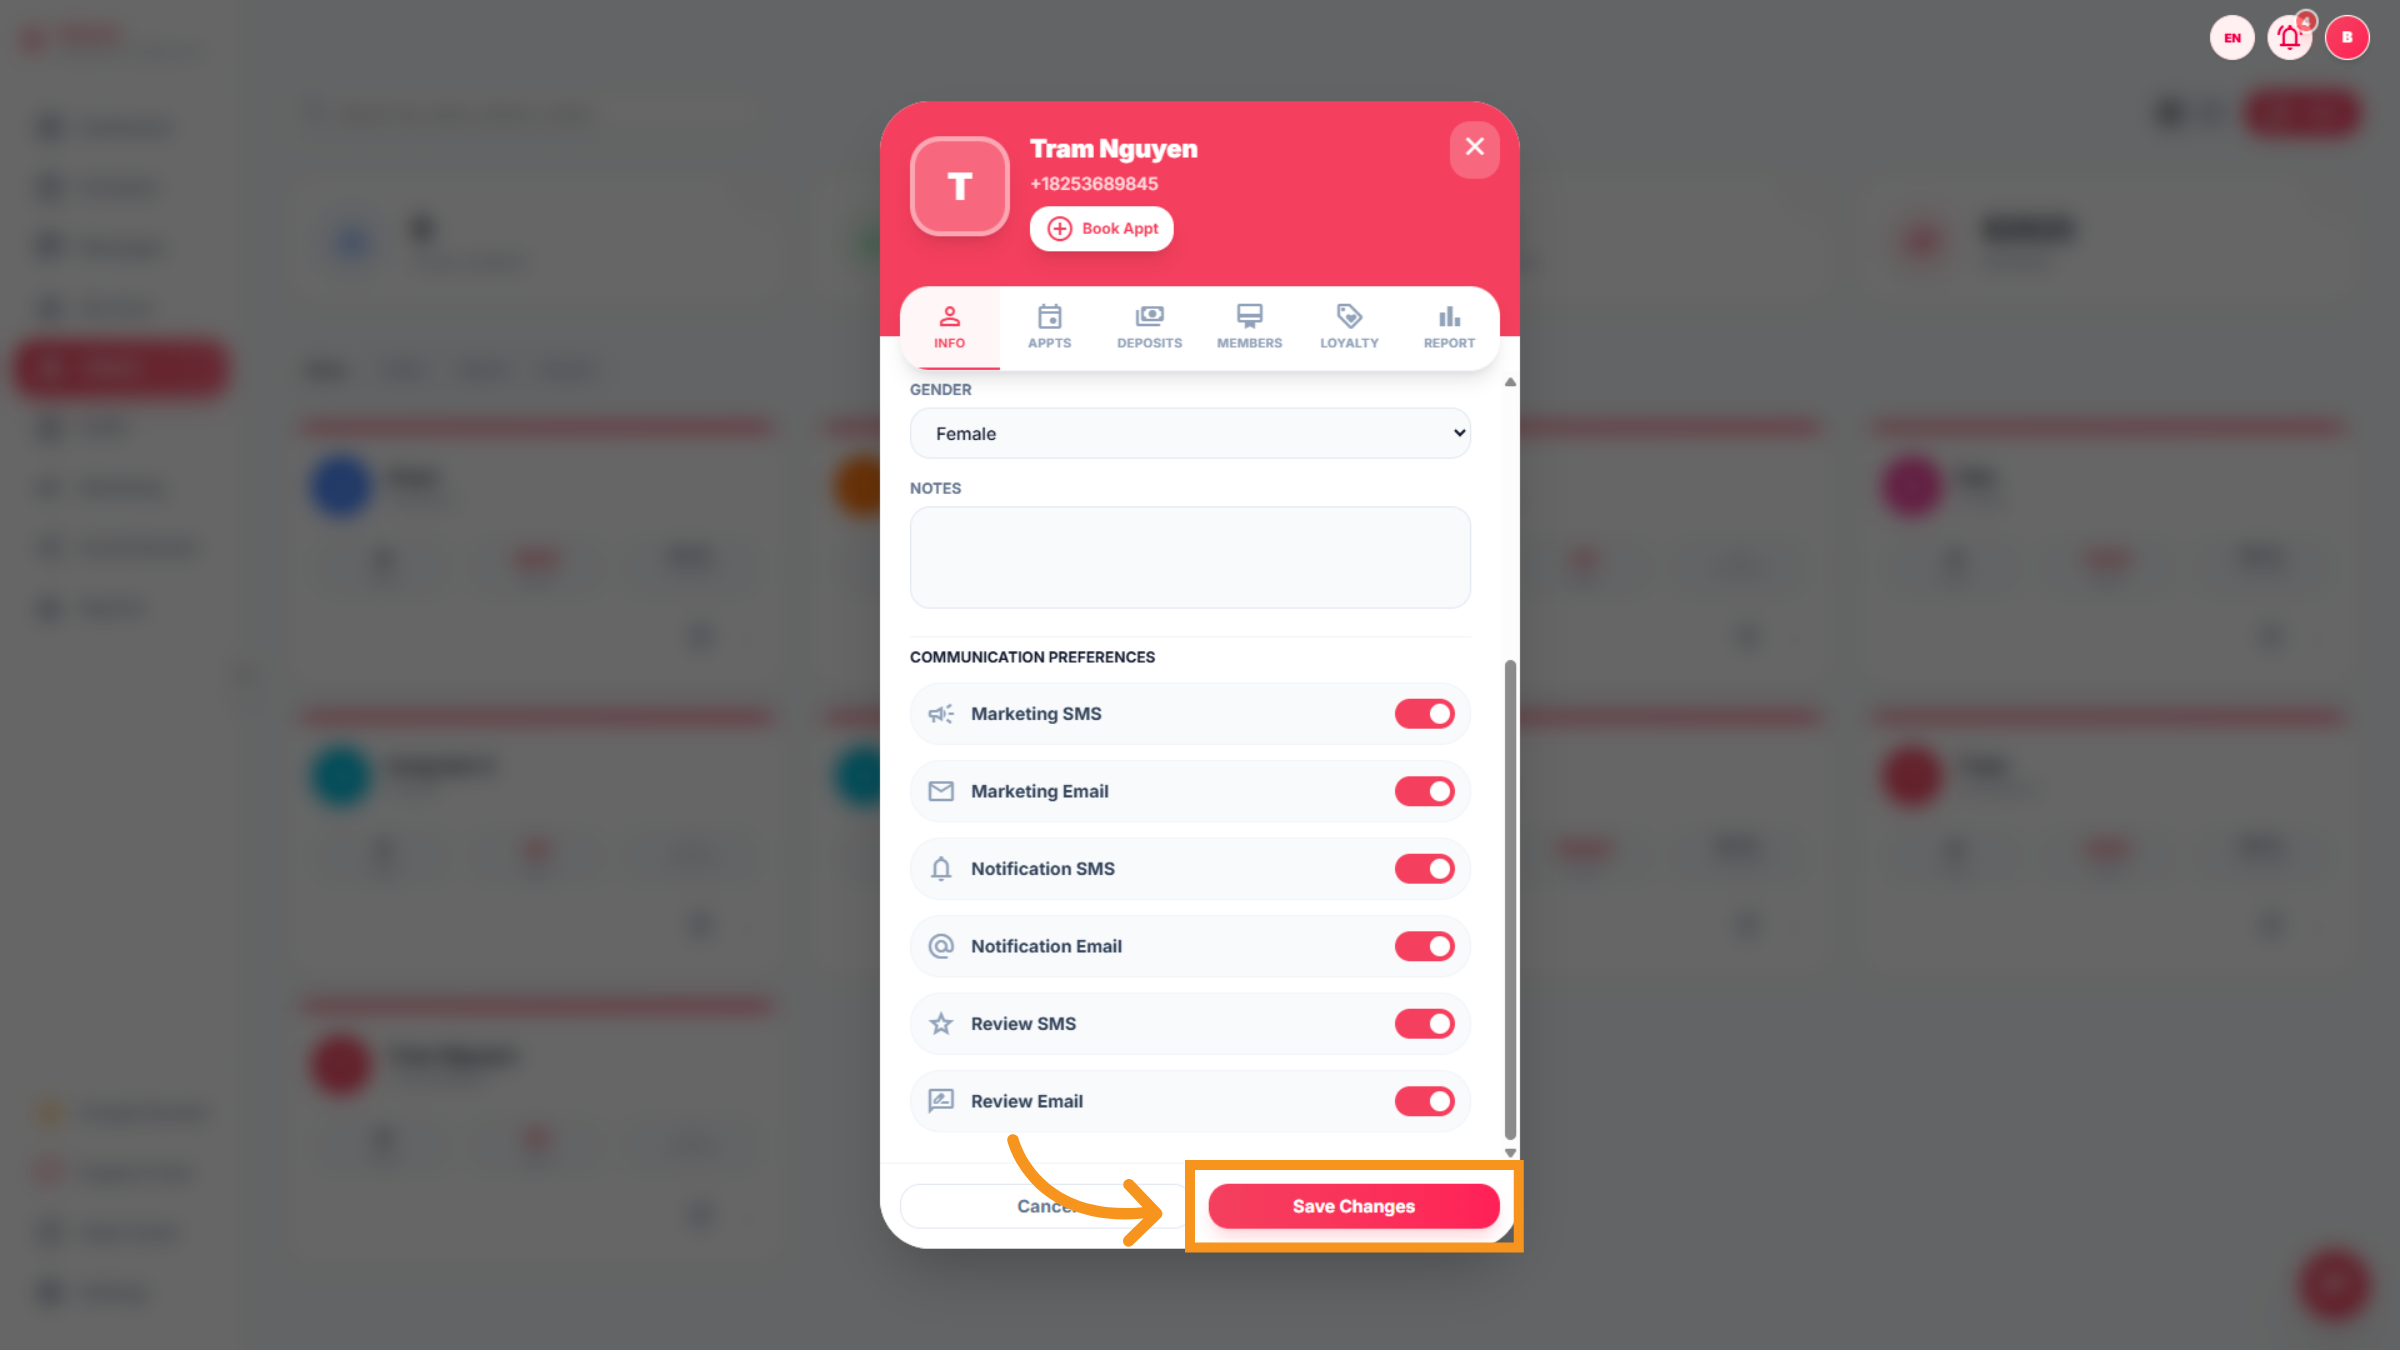
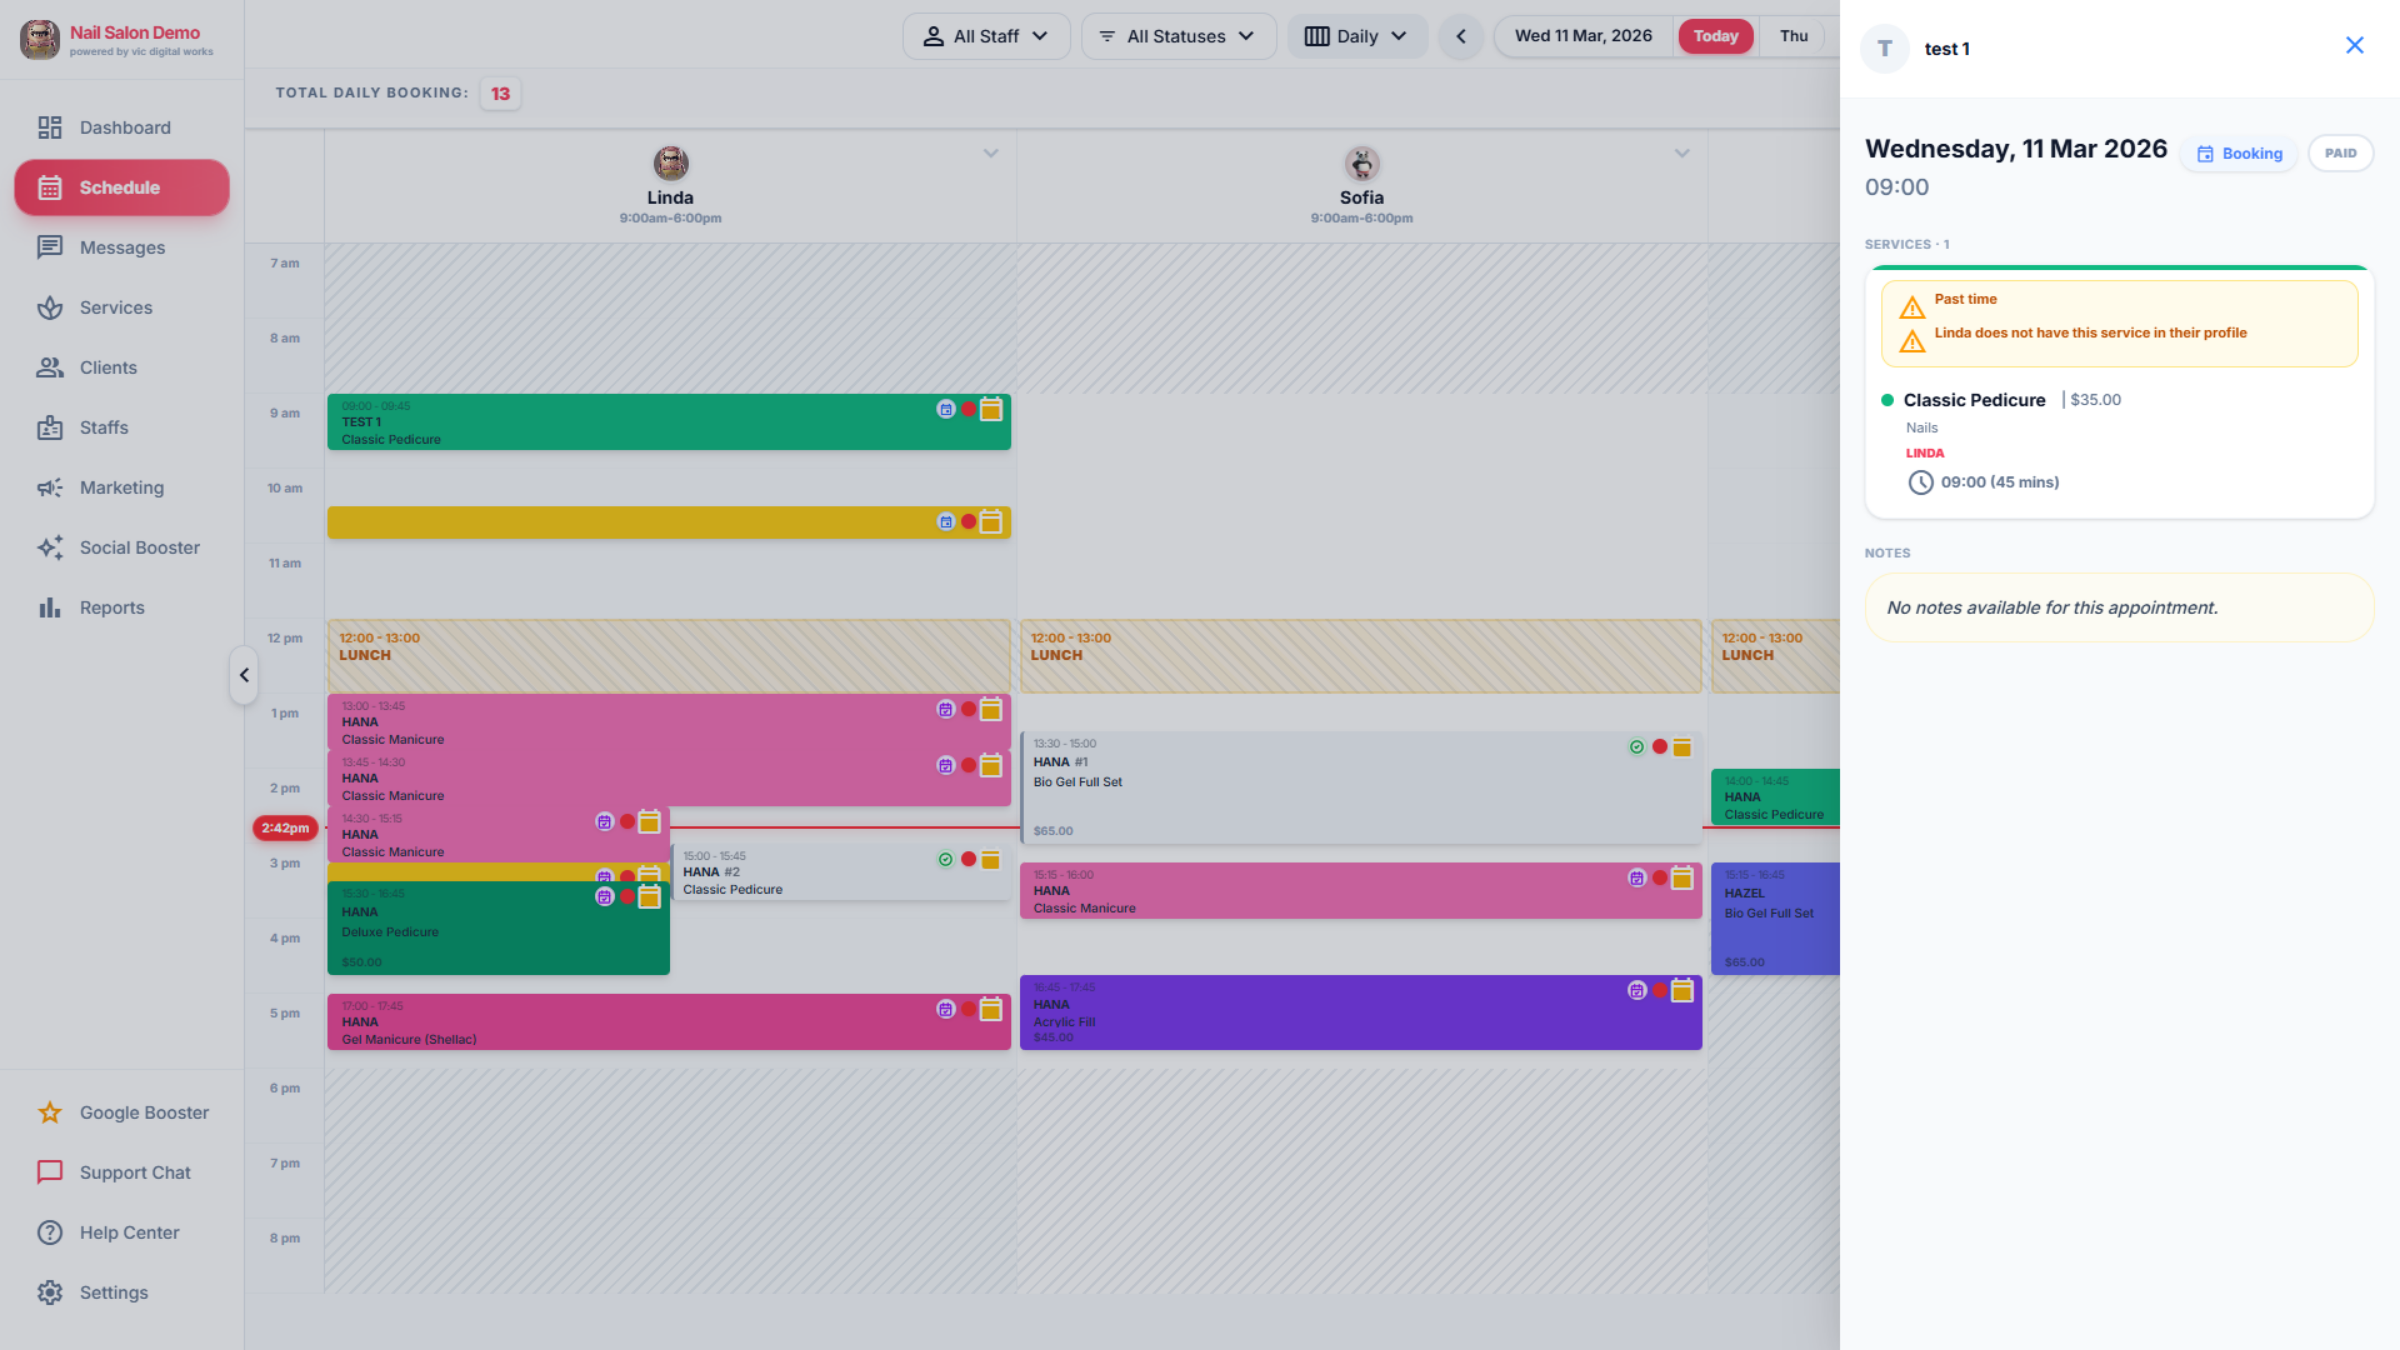
20. Edit Appointment Details
You can edit to modify the selected appointment information here.
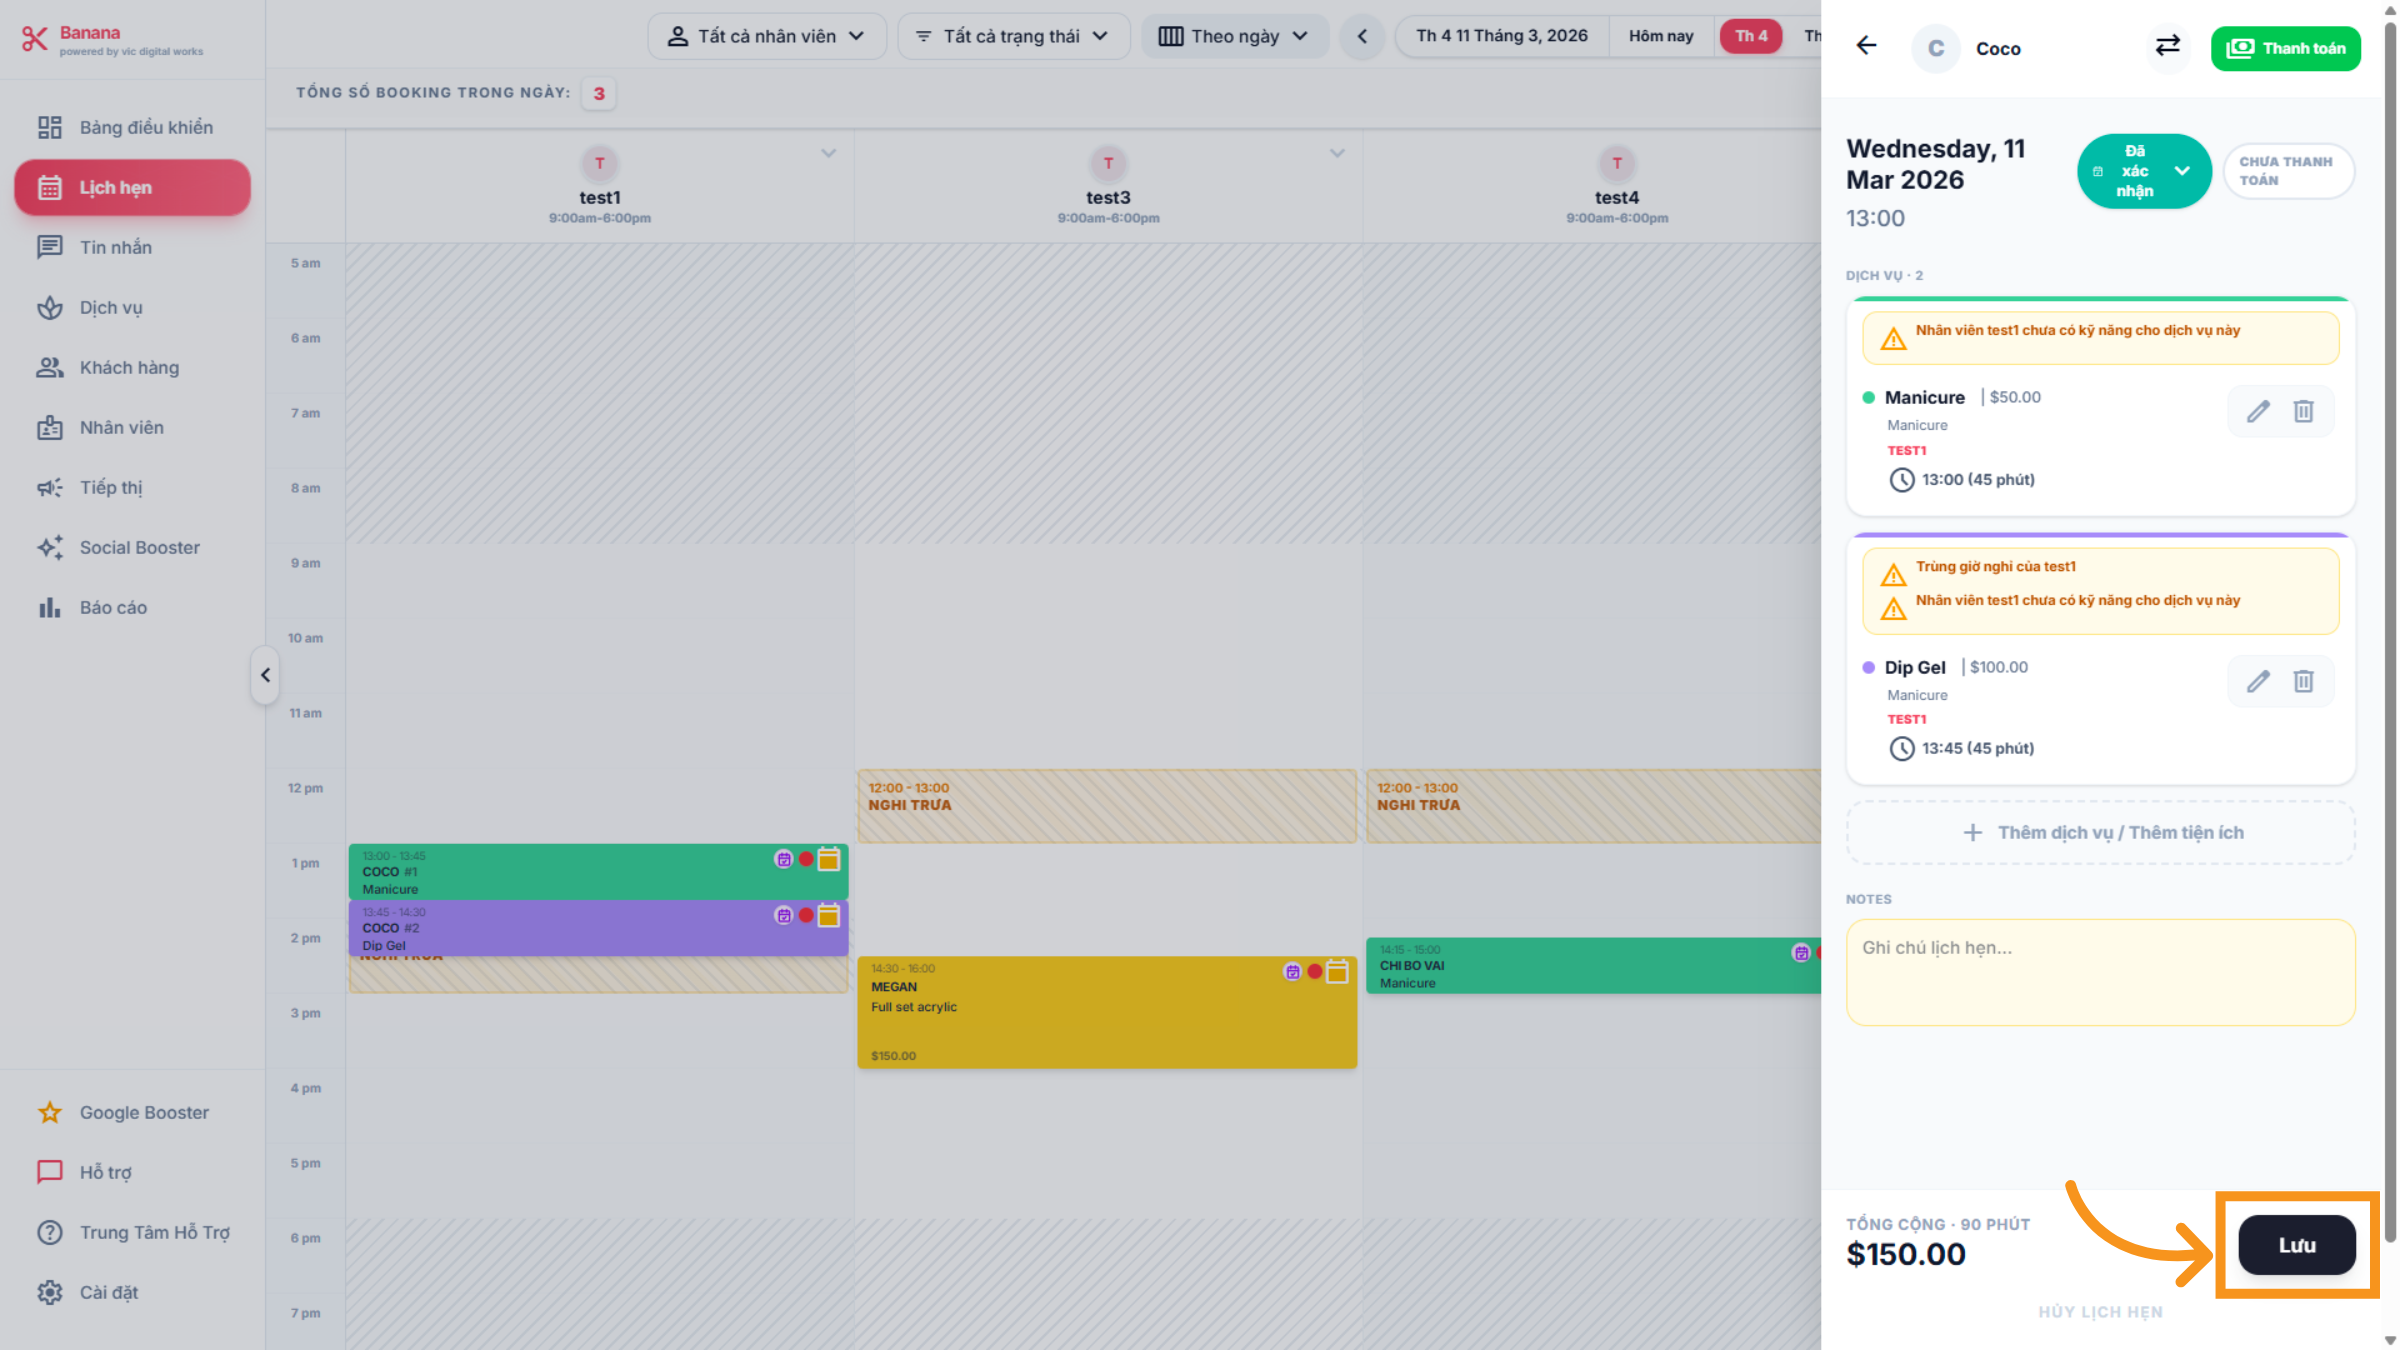
21. Save Changes
Click "save"to save the changes made to the appointment.
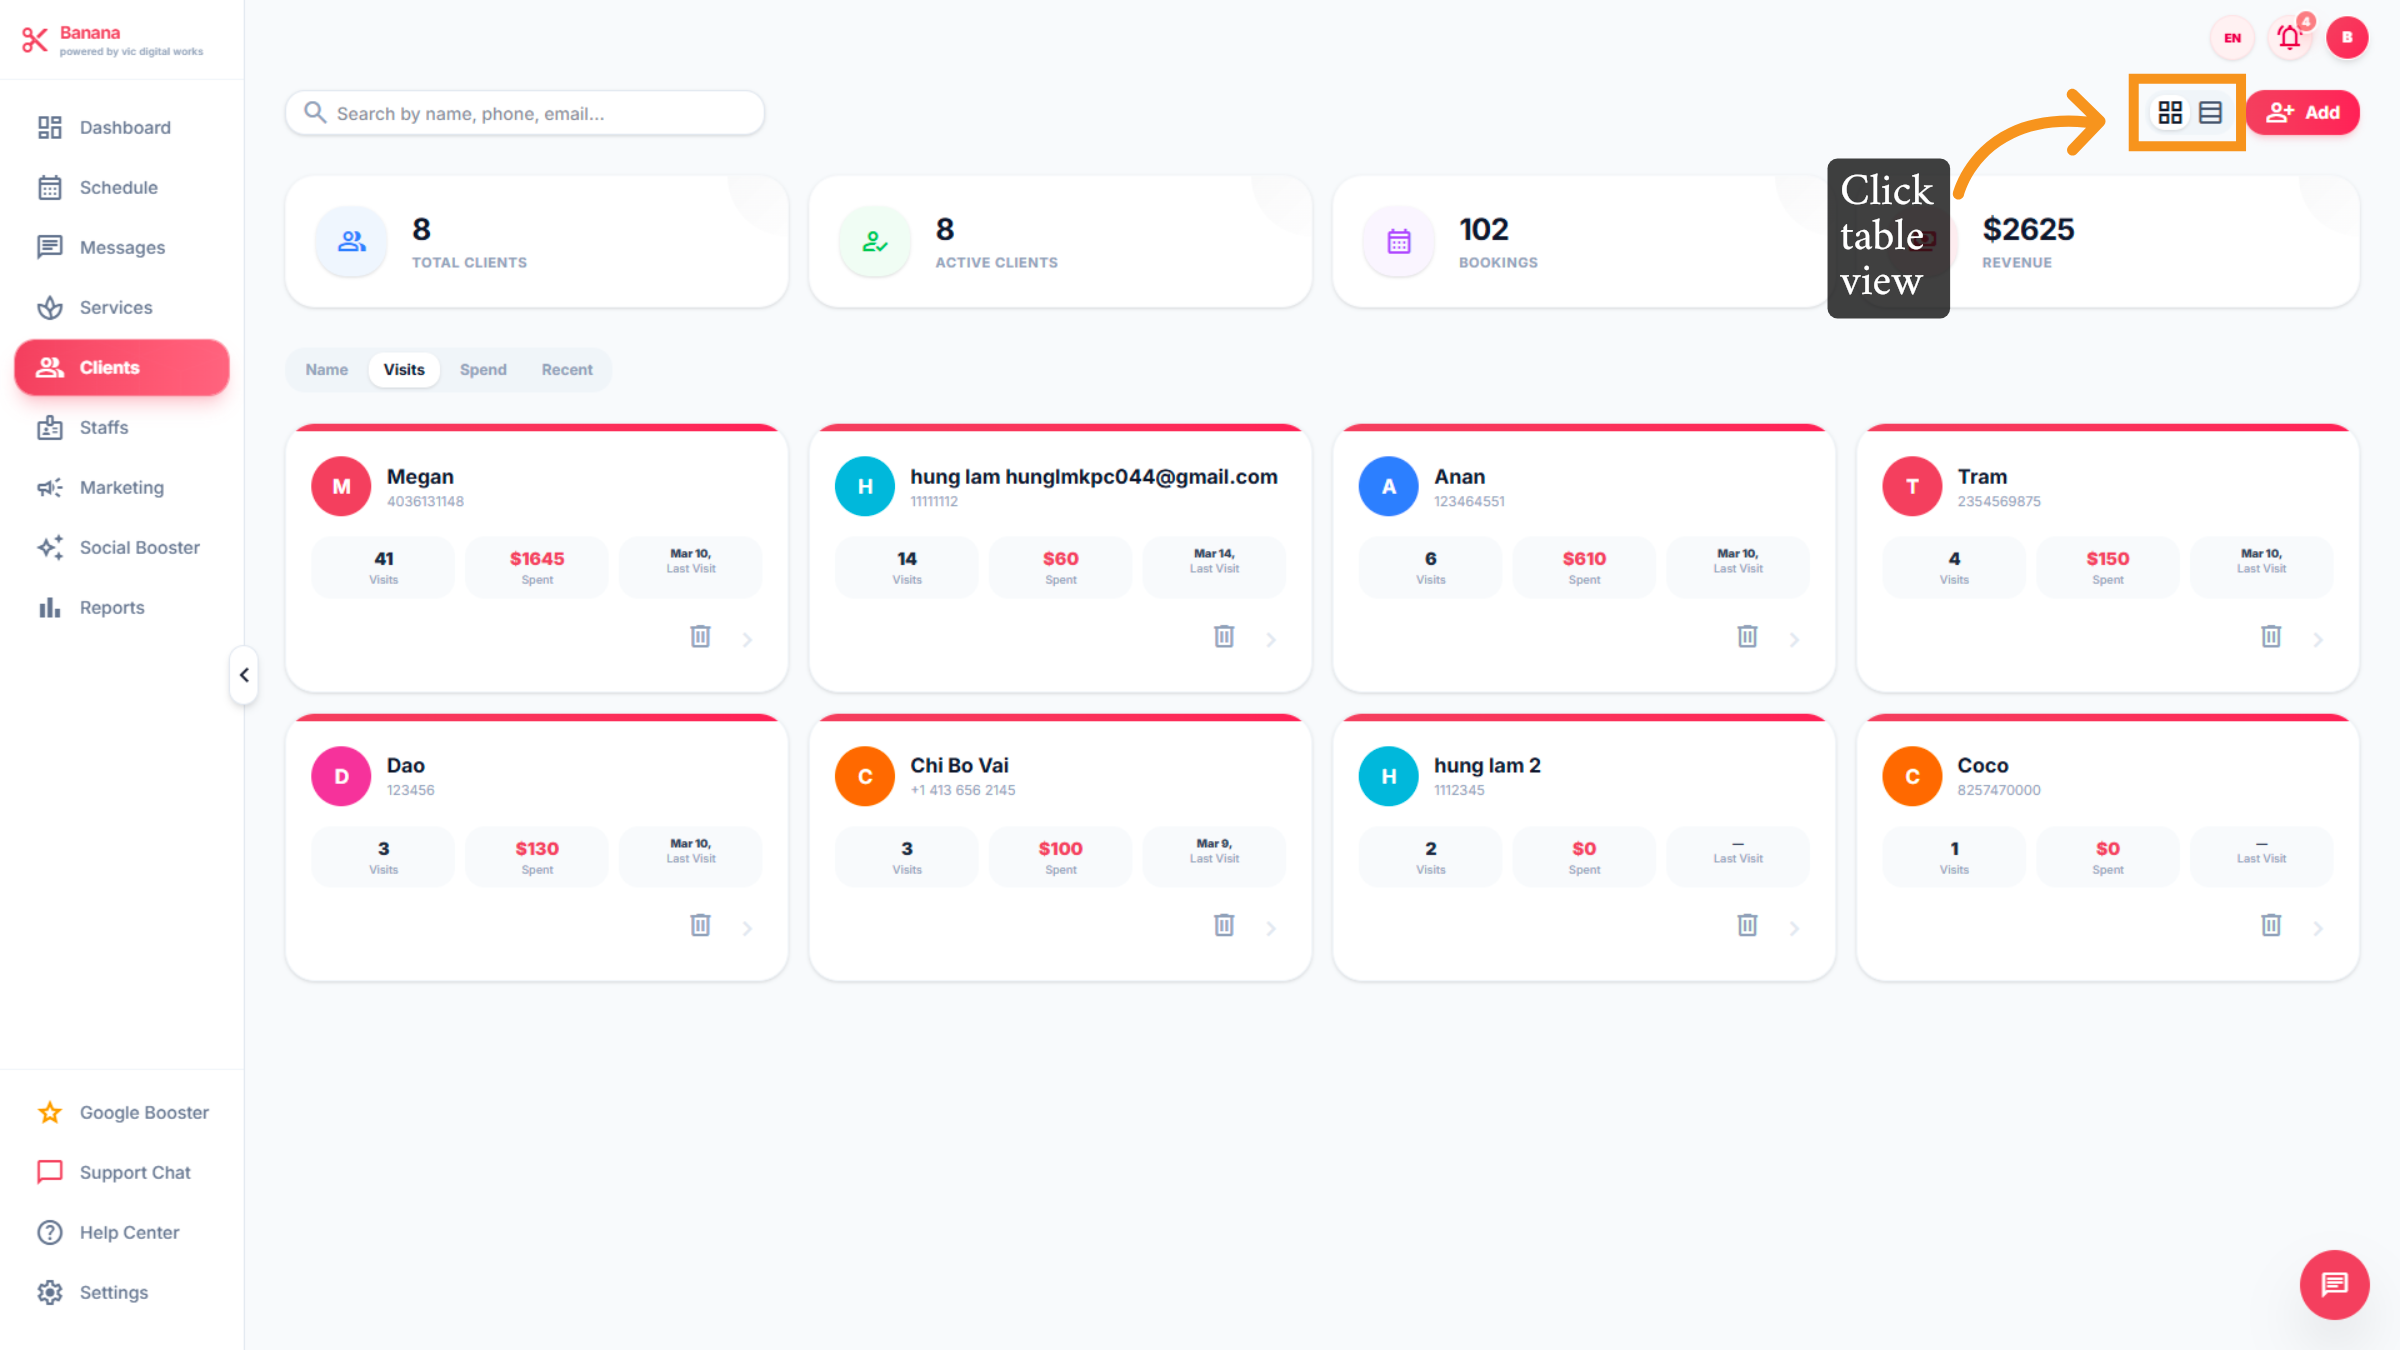
22. CLIENTS
Click "Clients" to add a new customer or manage existing customer information in the system.

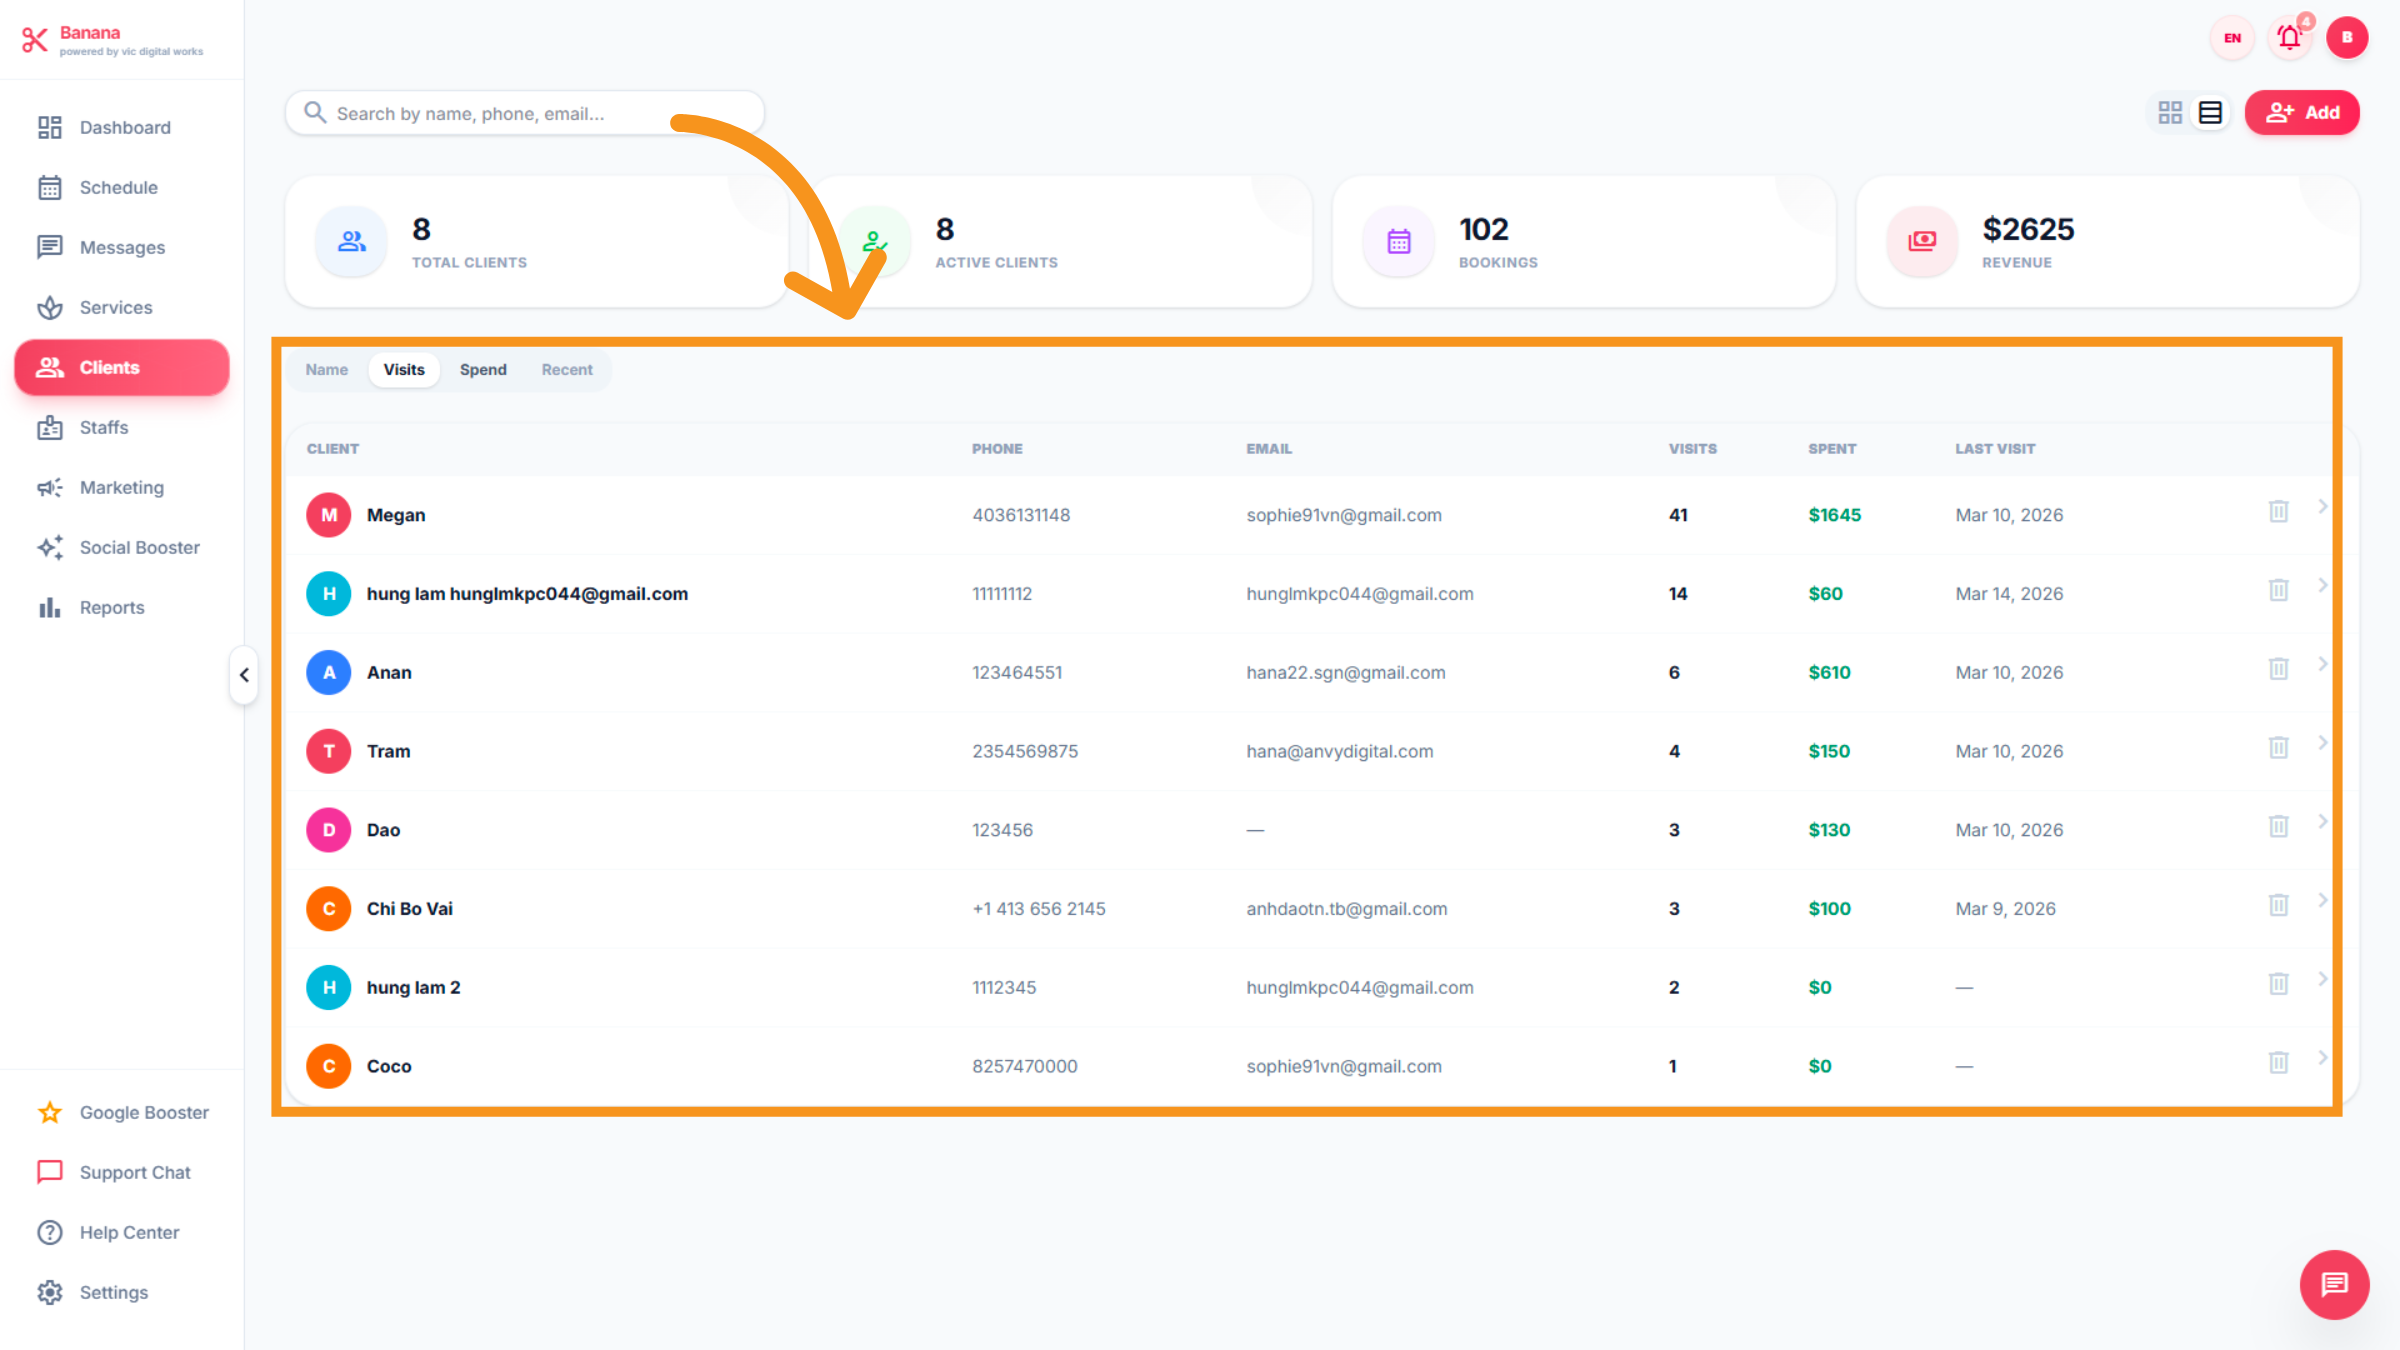
23. Switch to Table View
Clinents interface includes: Total Clients,Active Clients,Bookings,Revenue and Manage customer information based on Name, Visits, Spend, and Recent. Click the table rows icon to change the display to a table view for detailed information.
24. New clientsclinents information
Click the all sections to analyze client data and trends.
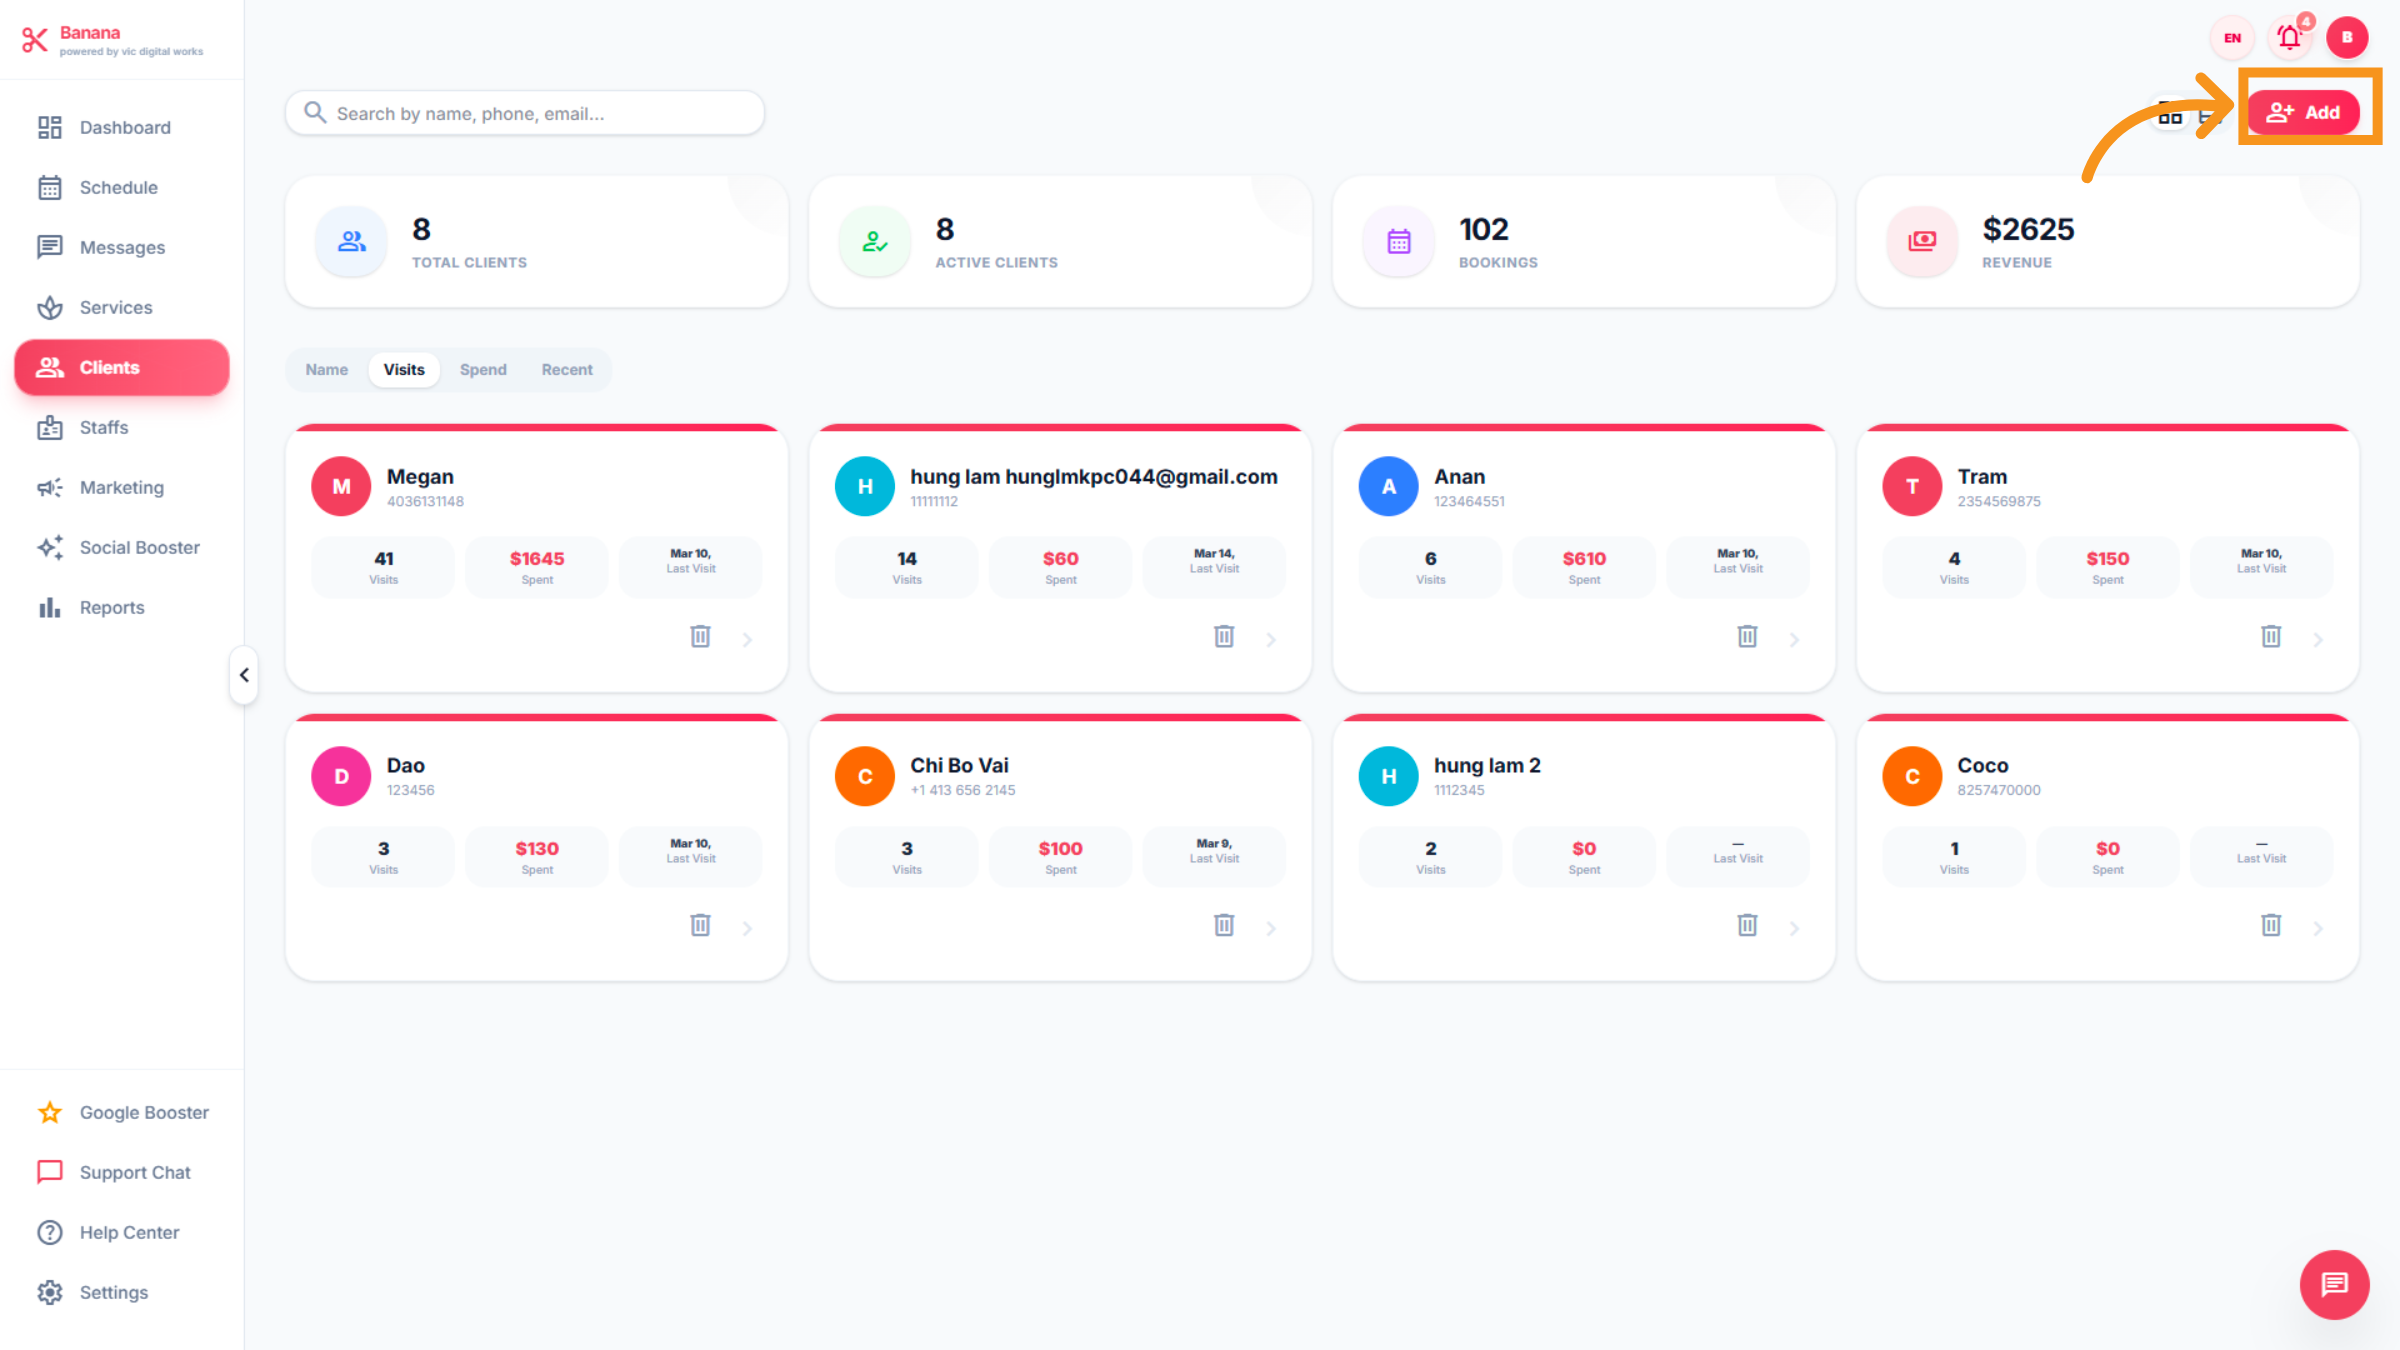
25. Access "ADD..."
Access "Add" to input information for new customers.
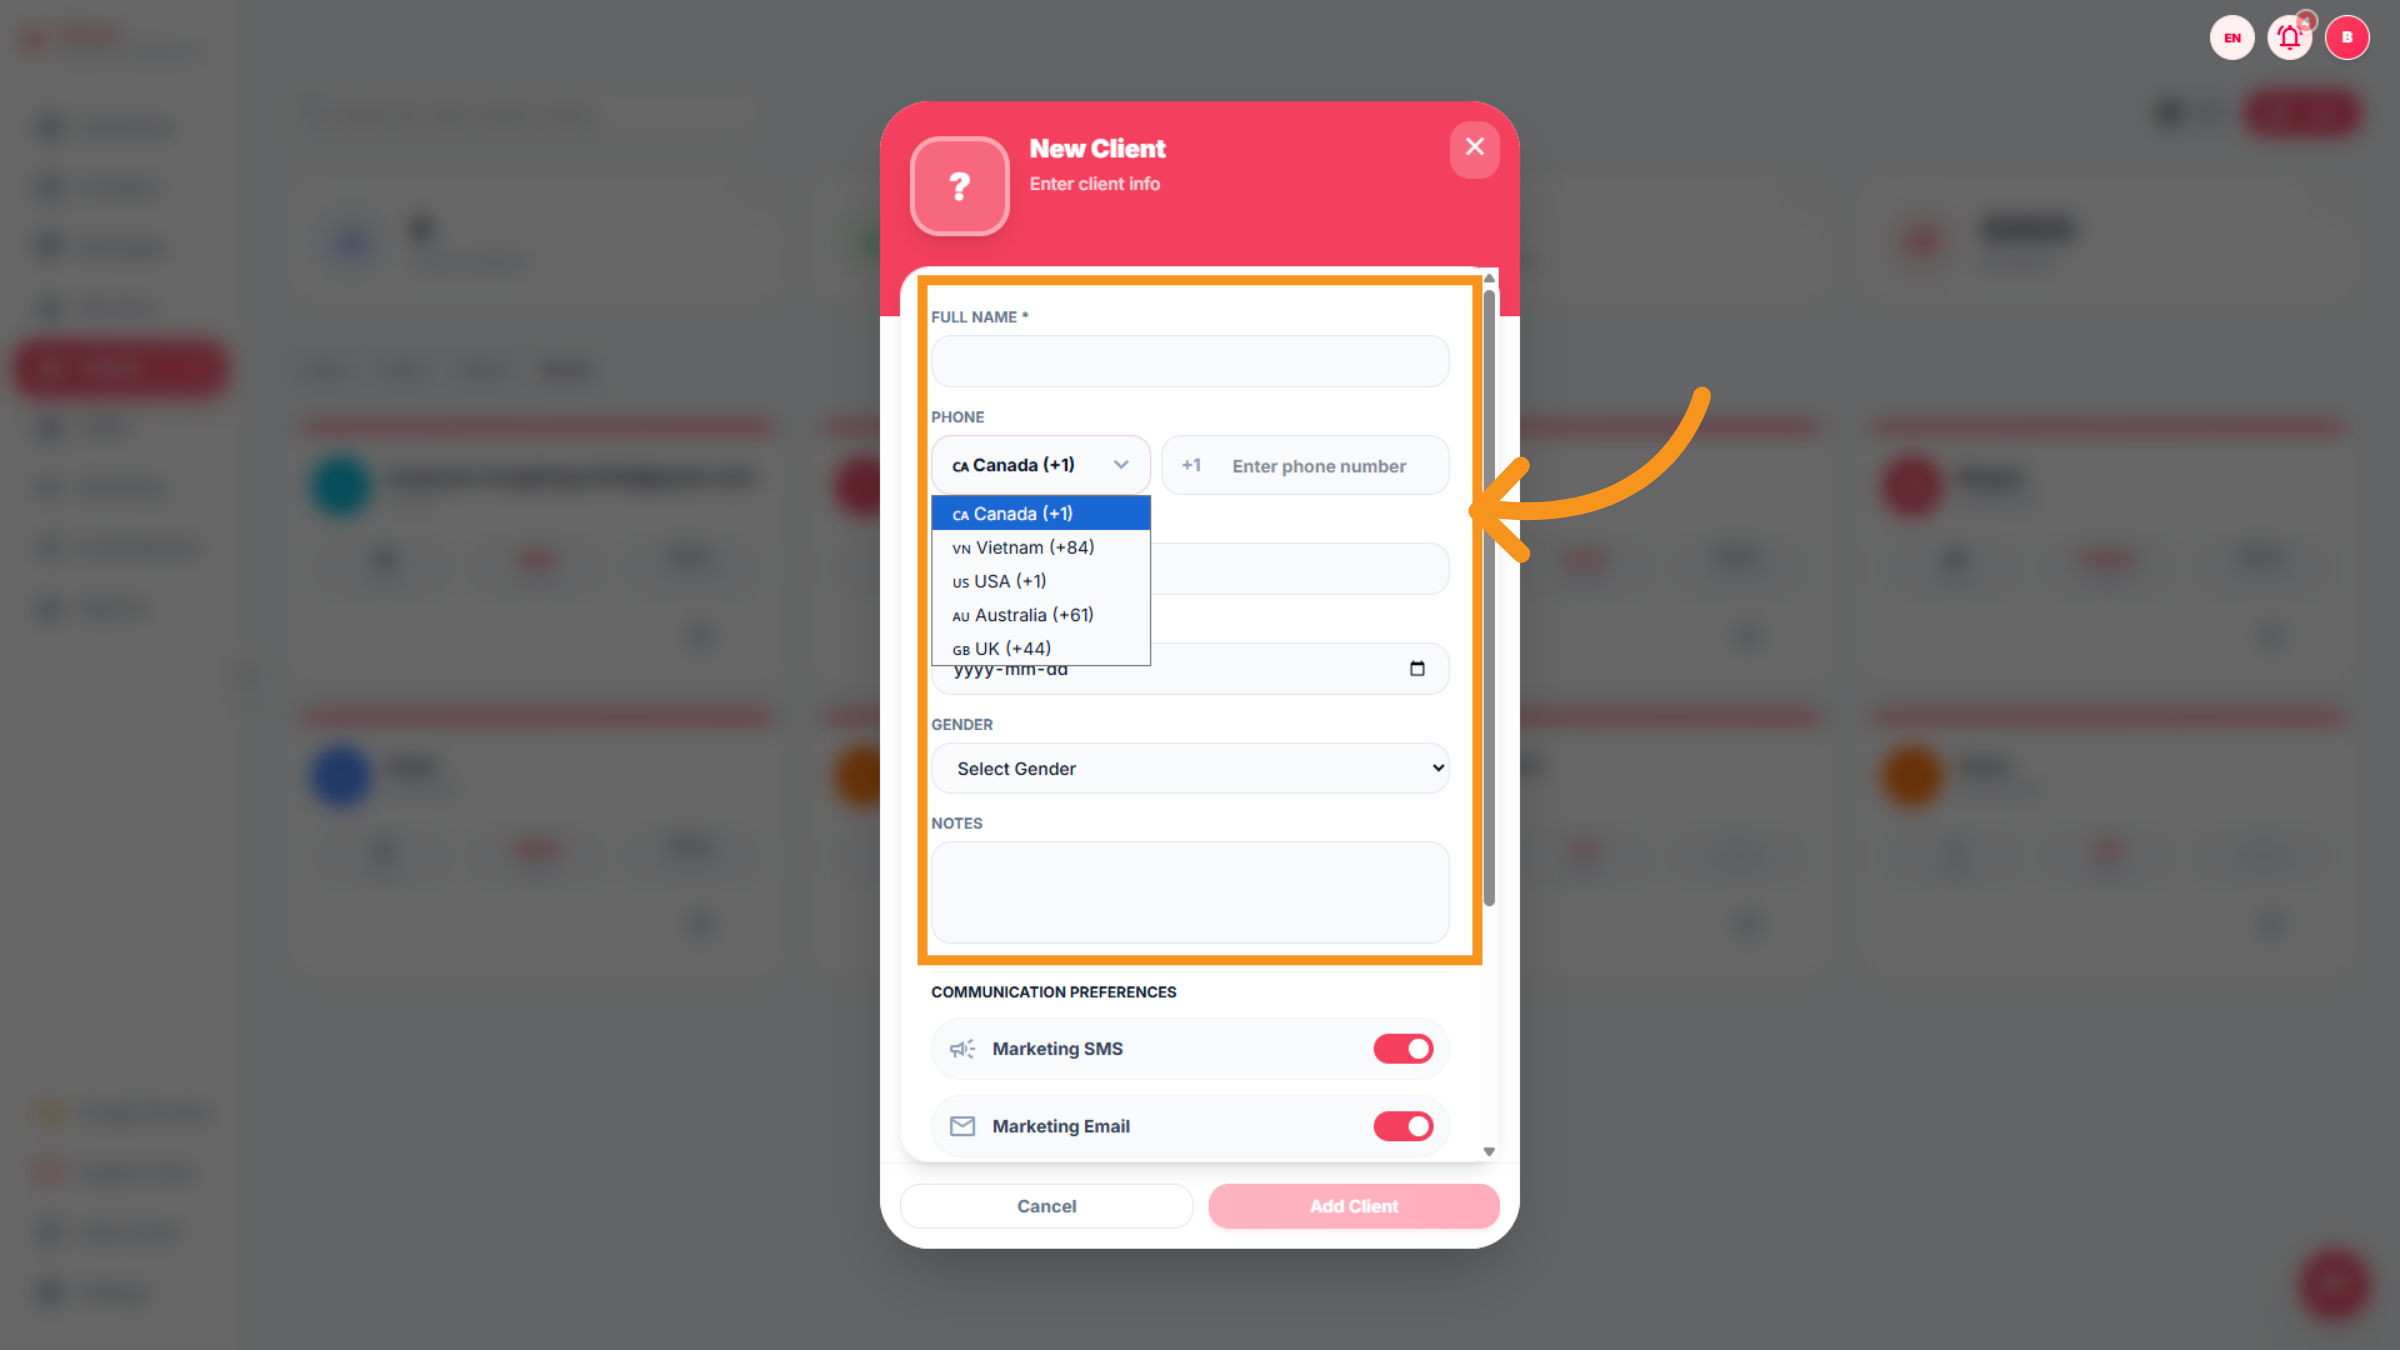
26. New clinentclient input...
Dropdown to fill client information.
27. Access the servicessevices Bar
Access theAccessthe bar chart icon to generate and view client services.

28. Save Client Changes
Click Save Changes to apply any updates made to the client profile.
29. SERVICES
You will learn how to manage and customize offerings to optimize your salon's service catalog effectively.
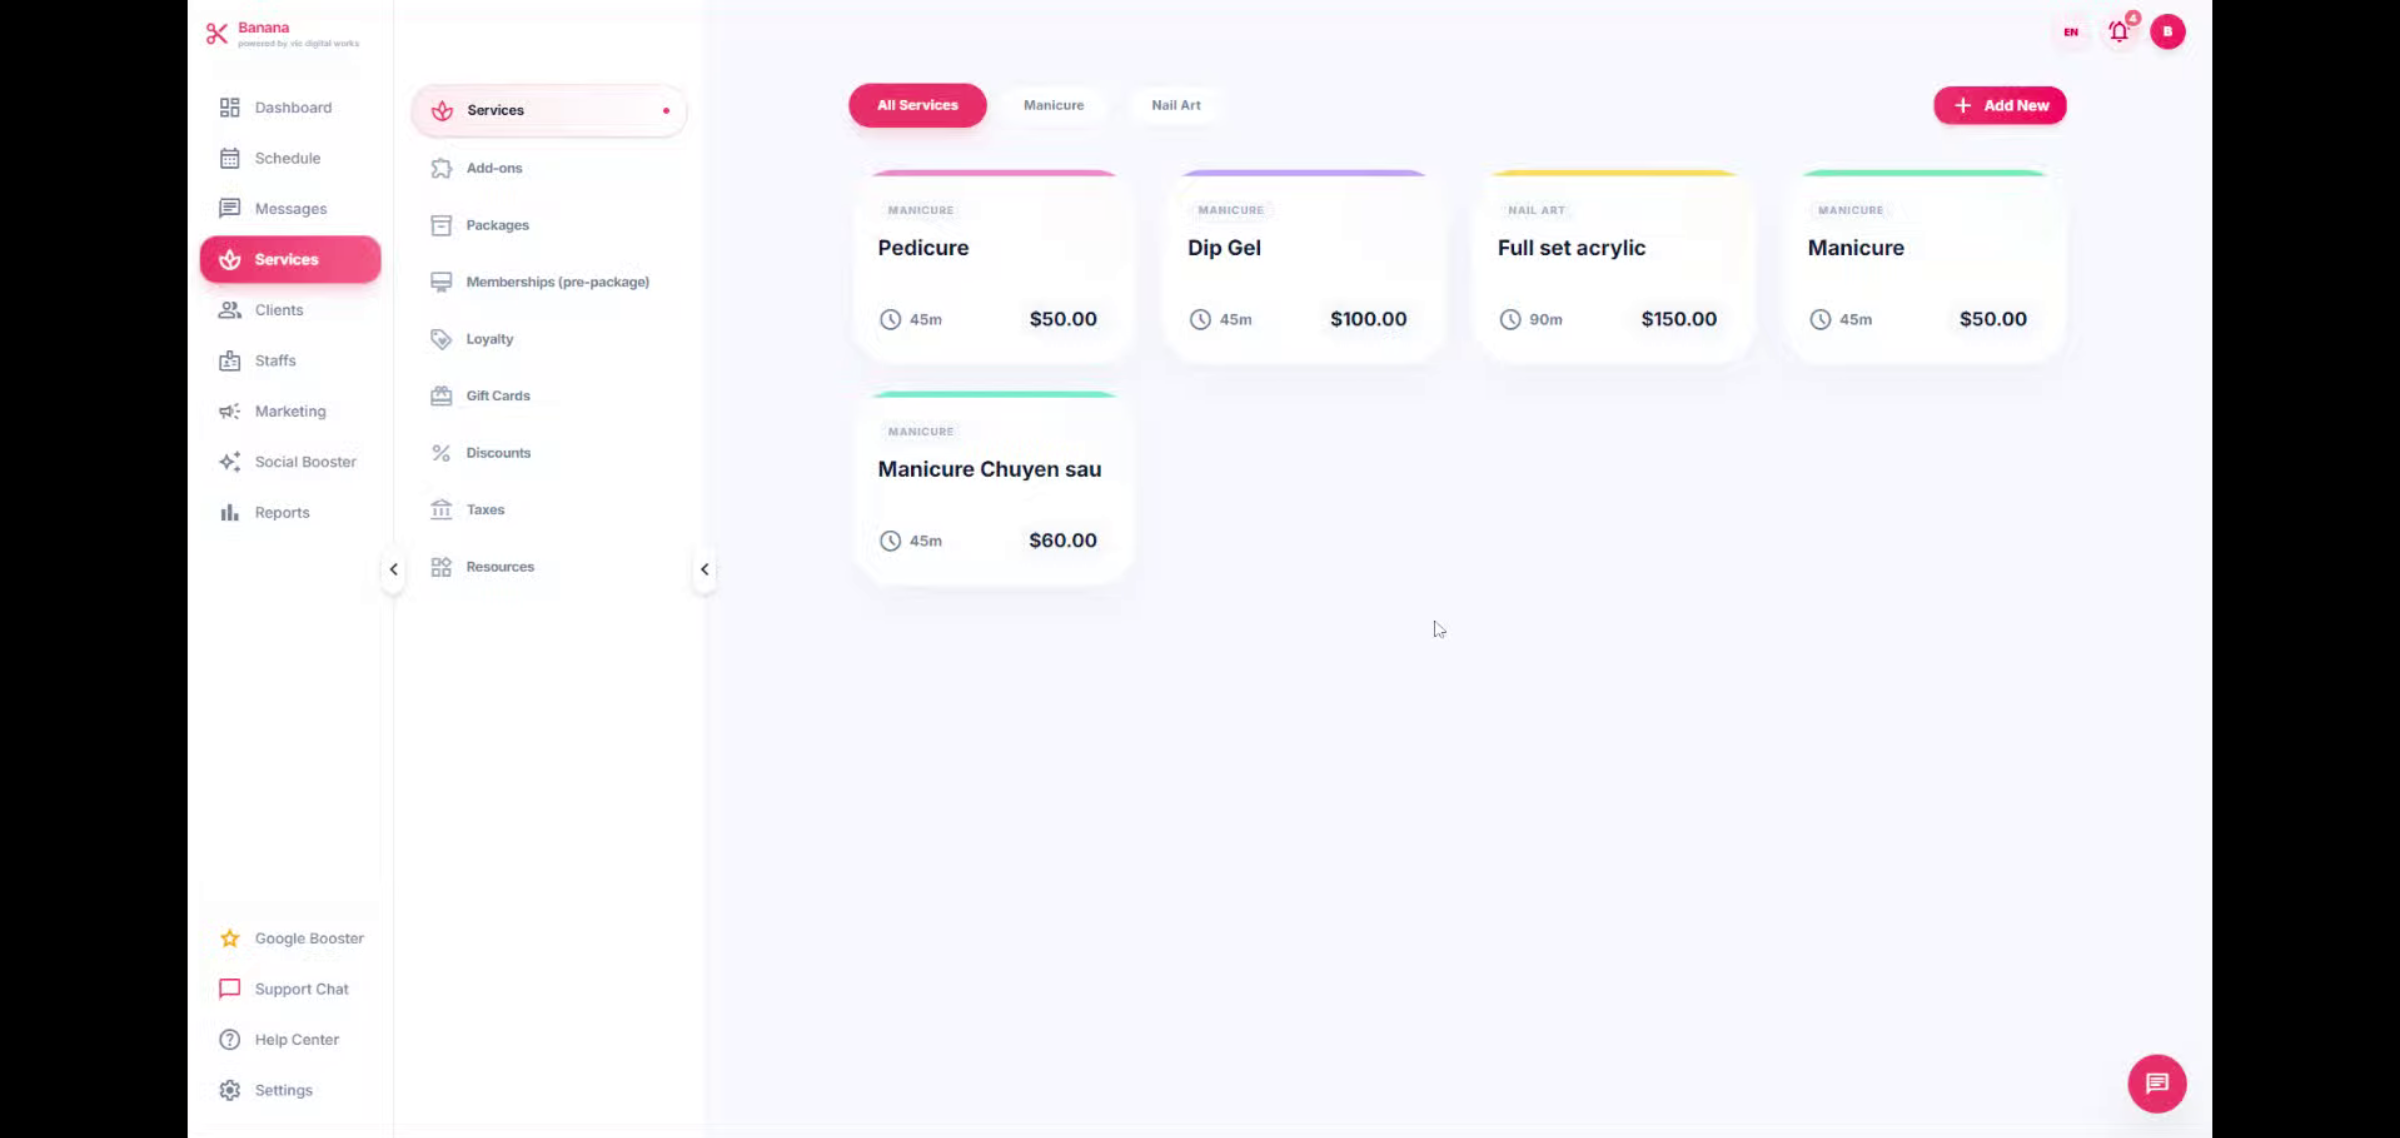
30. SERVICES CATEGORY
This section shows all services offered by the shop. You can also add additional services or promotions here , includes: Add-Ons Packages Membership(pre-package) Loyalty Gift cards Discounts Taxes Resources
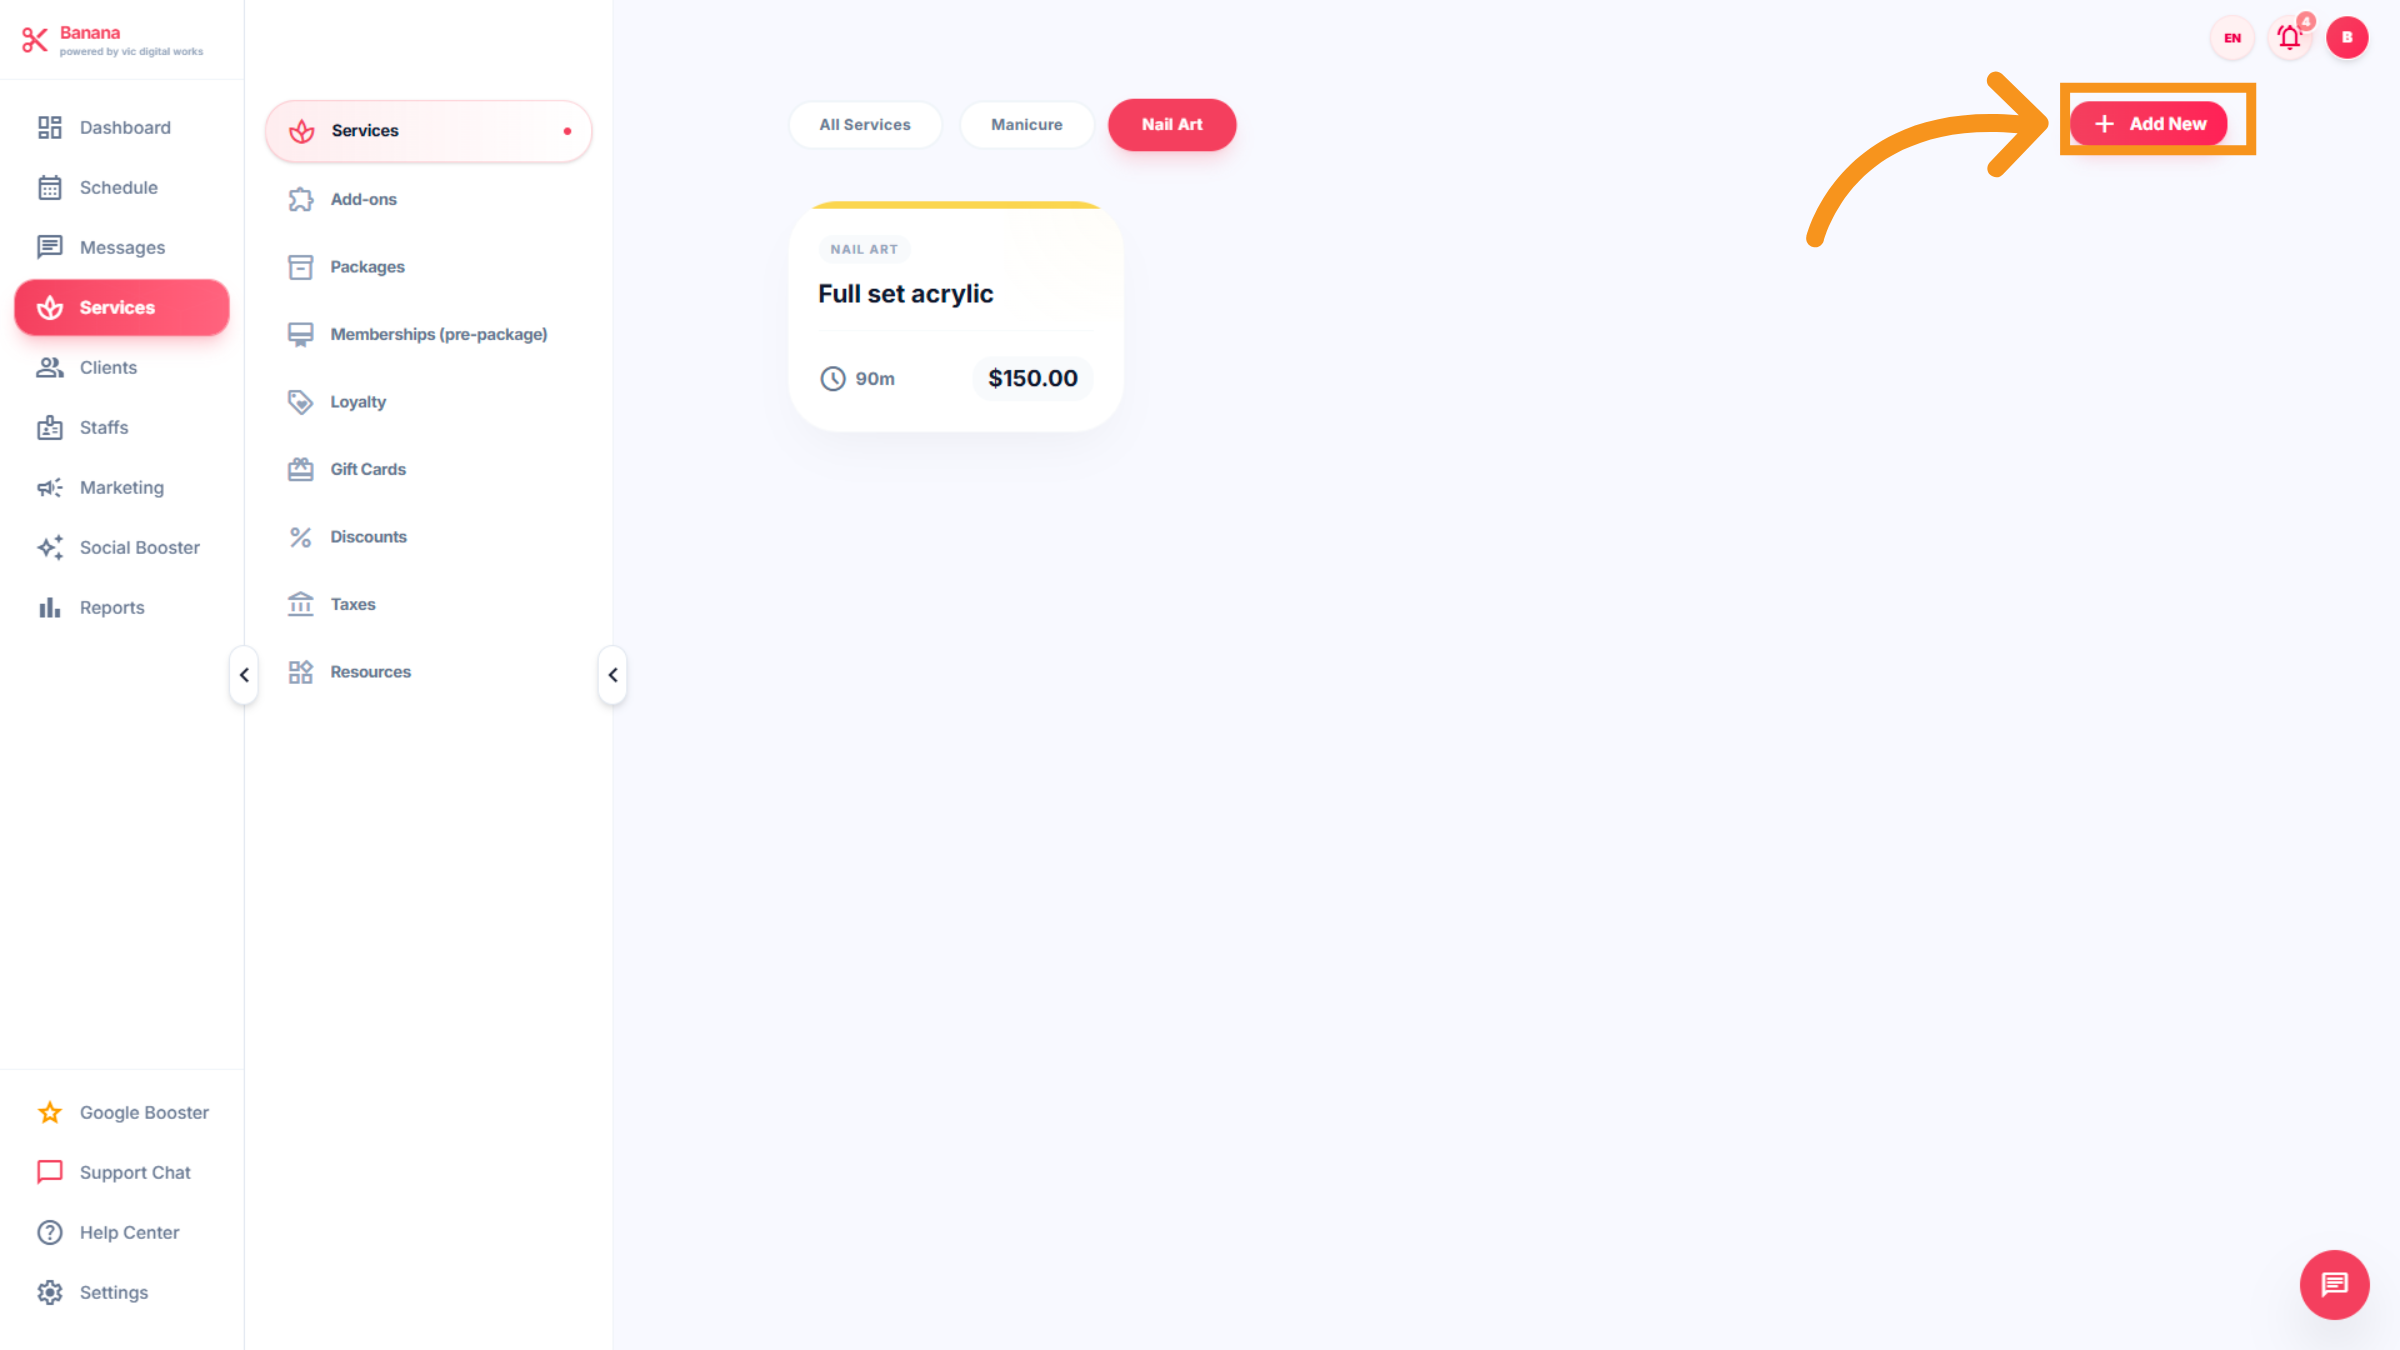
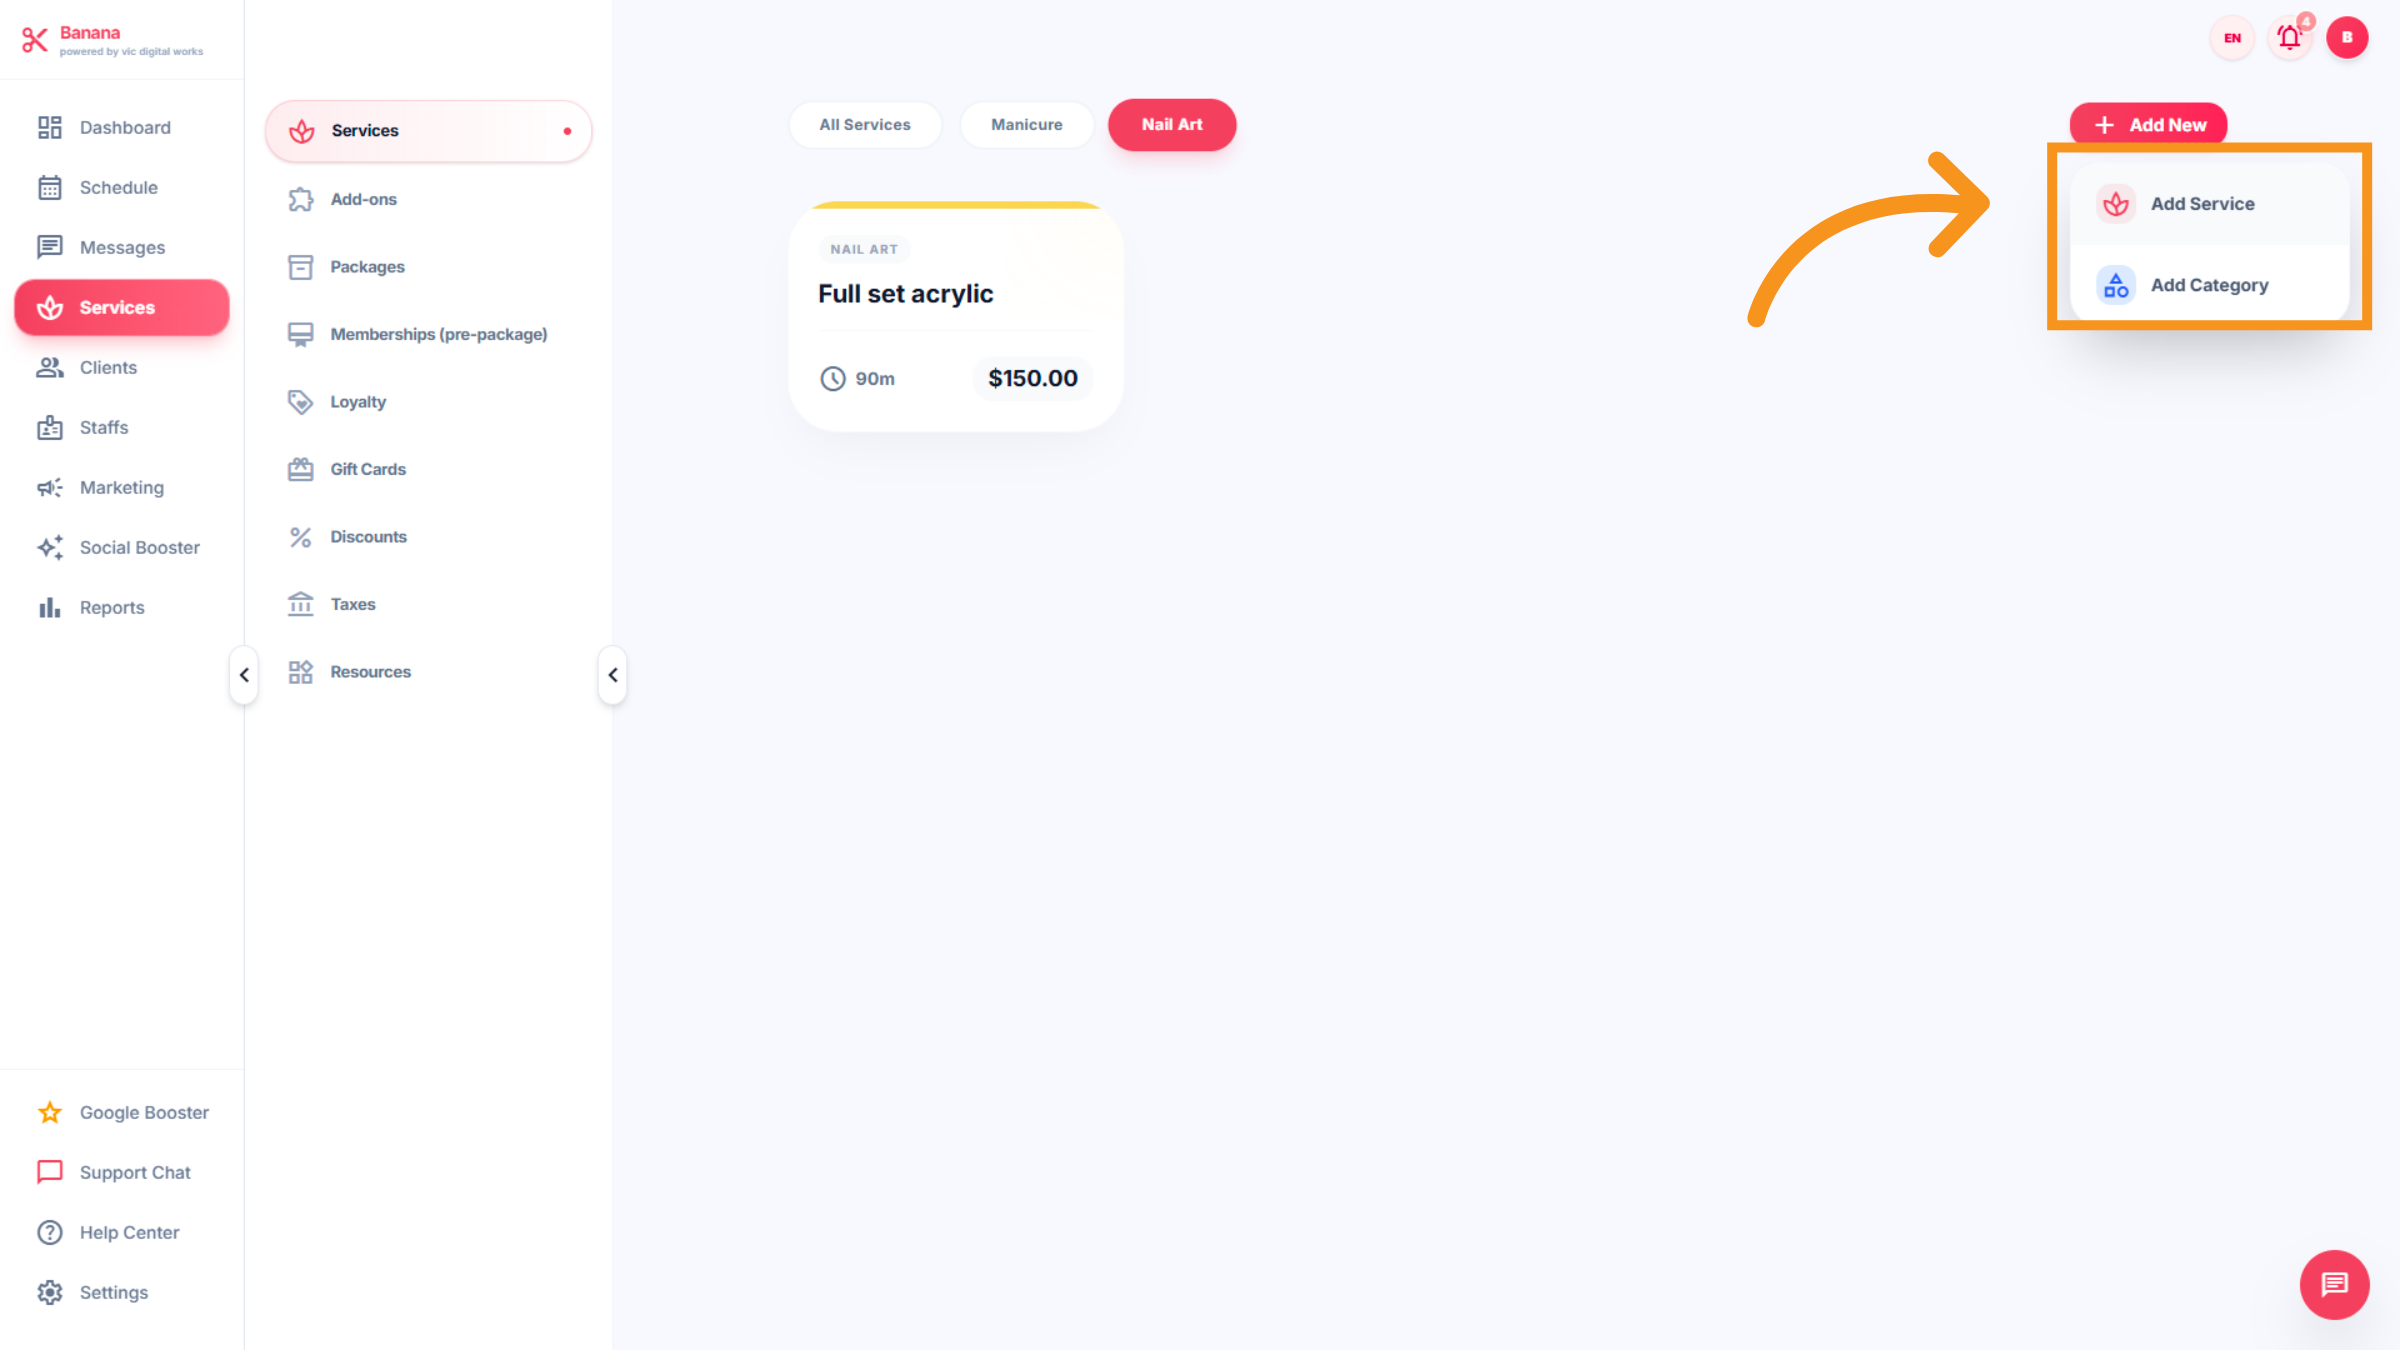
31. Initiate New Service Addition
Click "Add New" to start creating a new service entry.
32. Open Add Service Form
After click "Add new" it dropdown the form for add services or Add category. Add service : detail the informtion of service. Add category : Which group is the service assigned to by default.
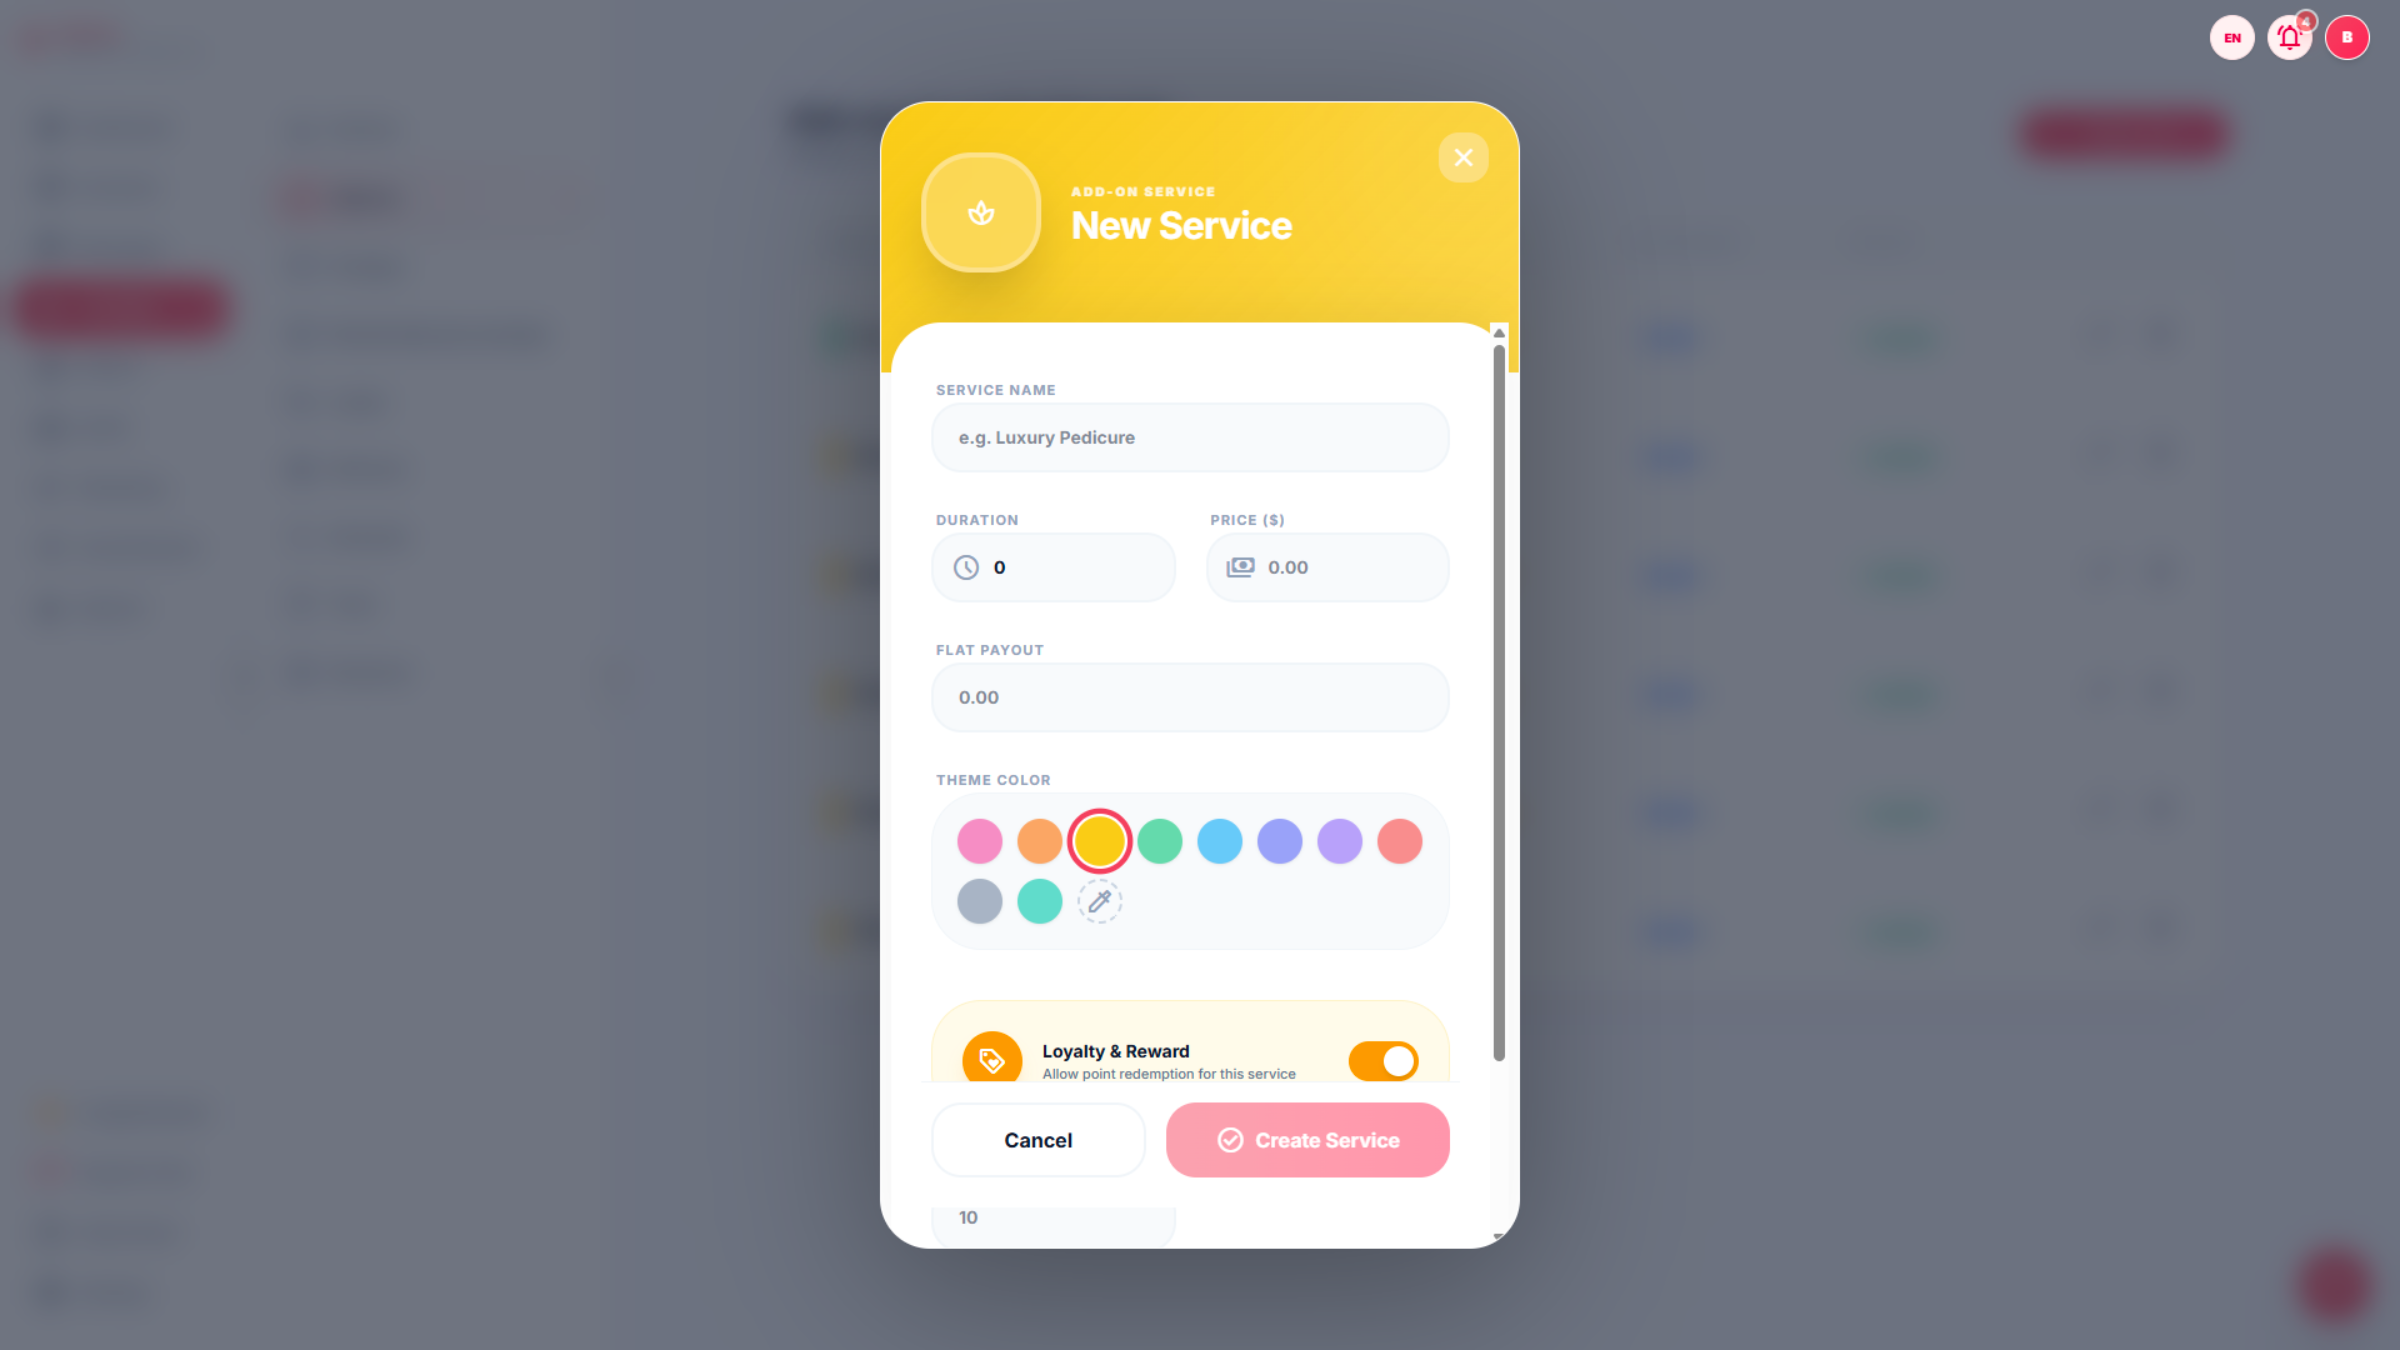
33. Activate Add Service Field
This section allows you to add service information, including: Service Name, Duration, Prices, Category, and Theme Color.
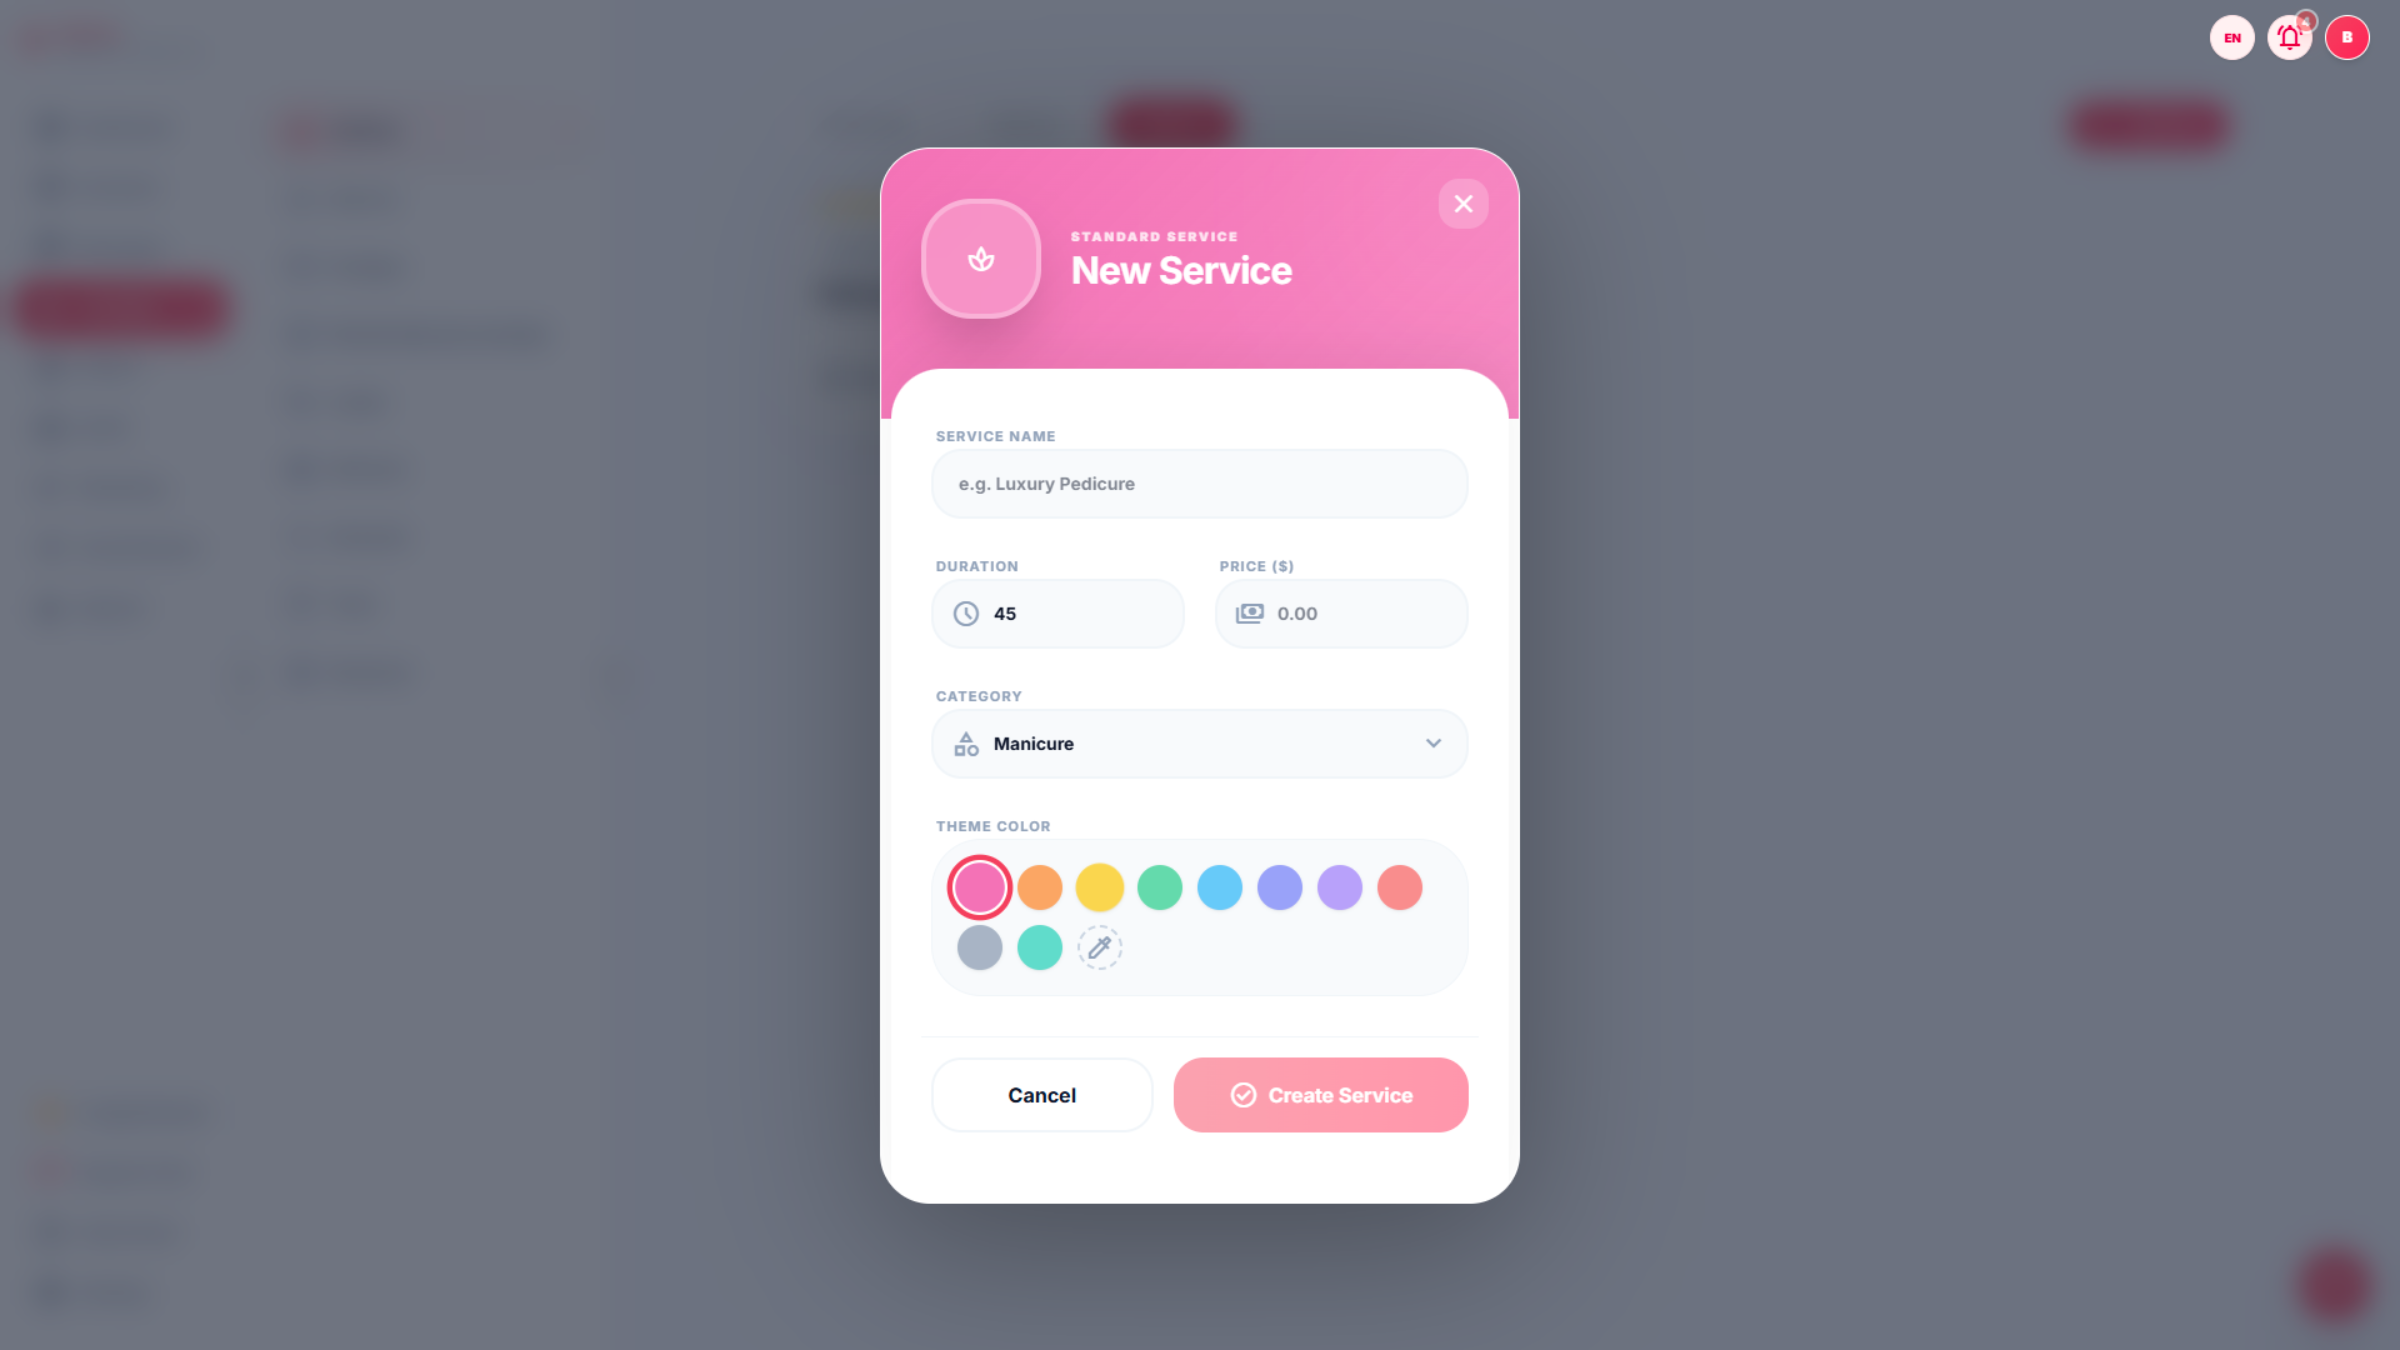
34. Select Example Service Name
Once the information is filled in, select ‘Cancel’ or ‘Create Service’ to complete the process.

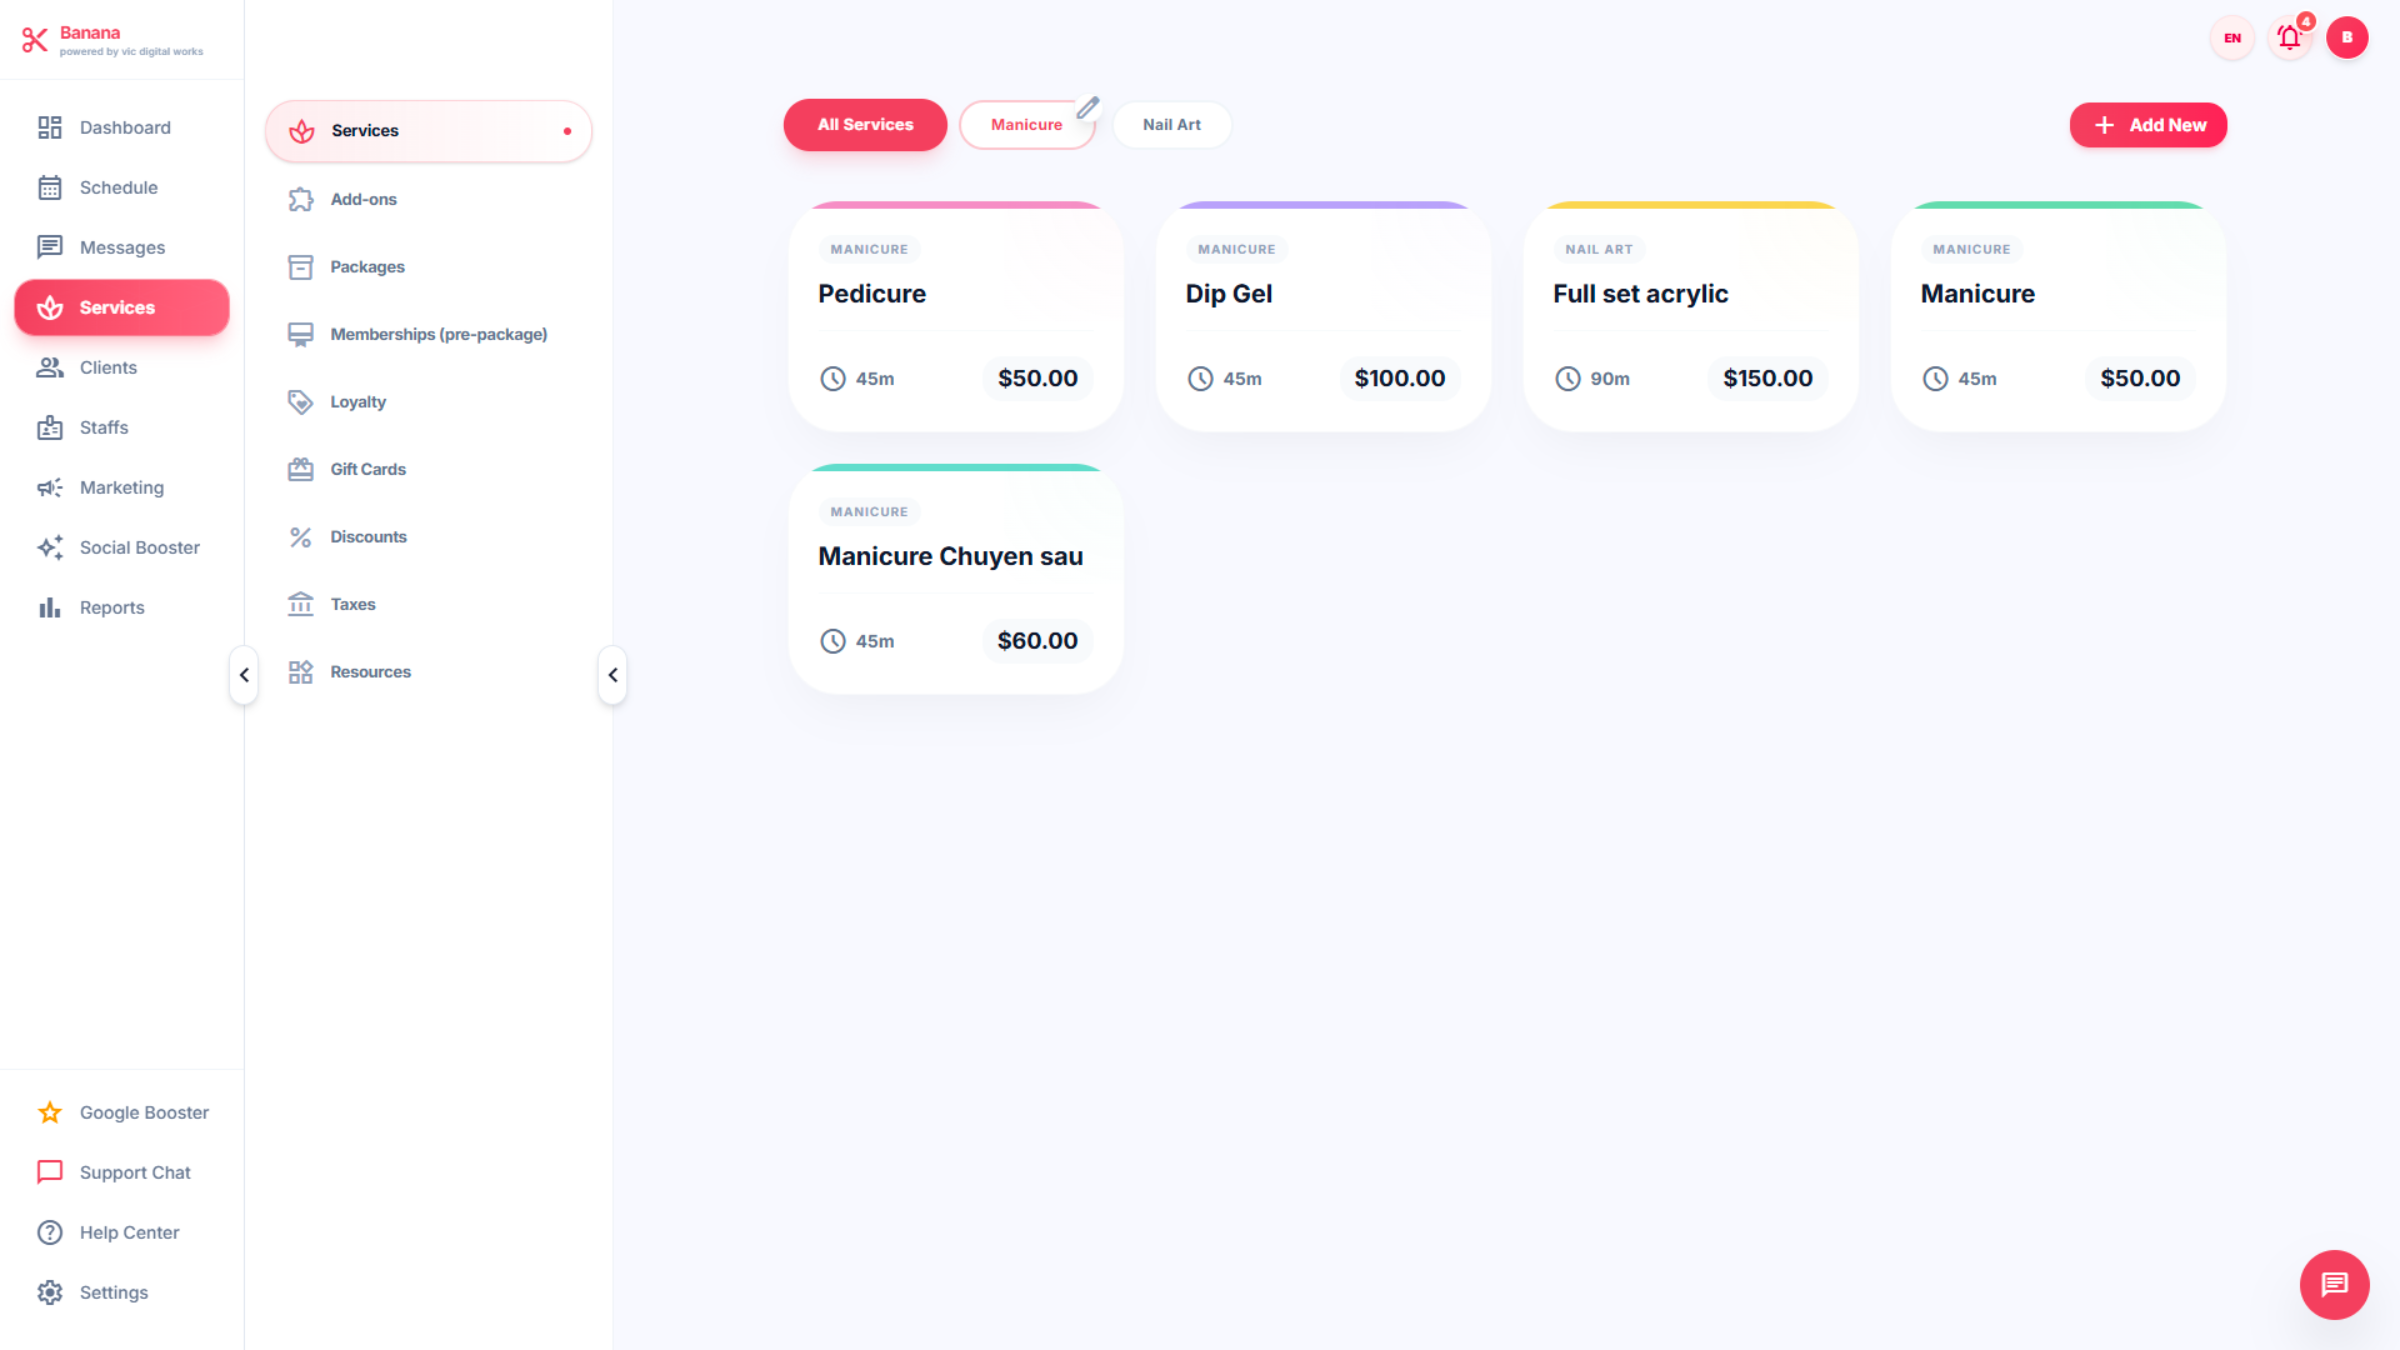
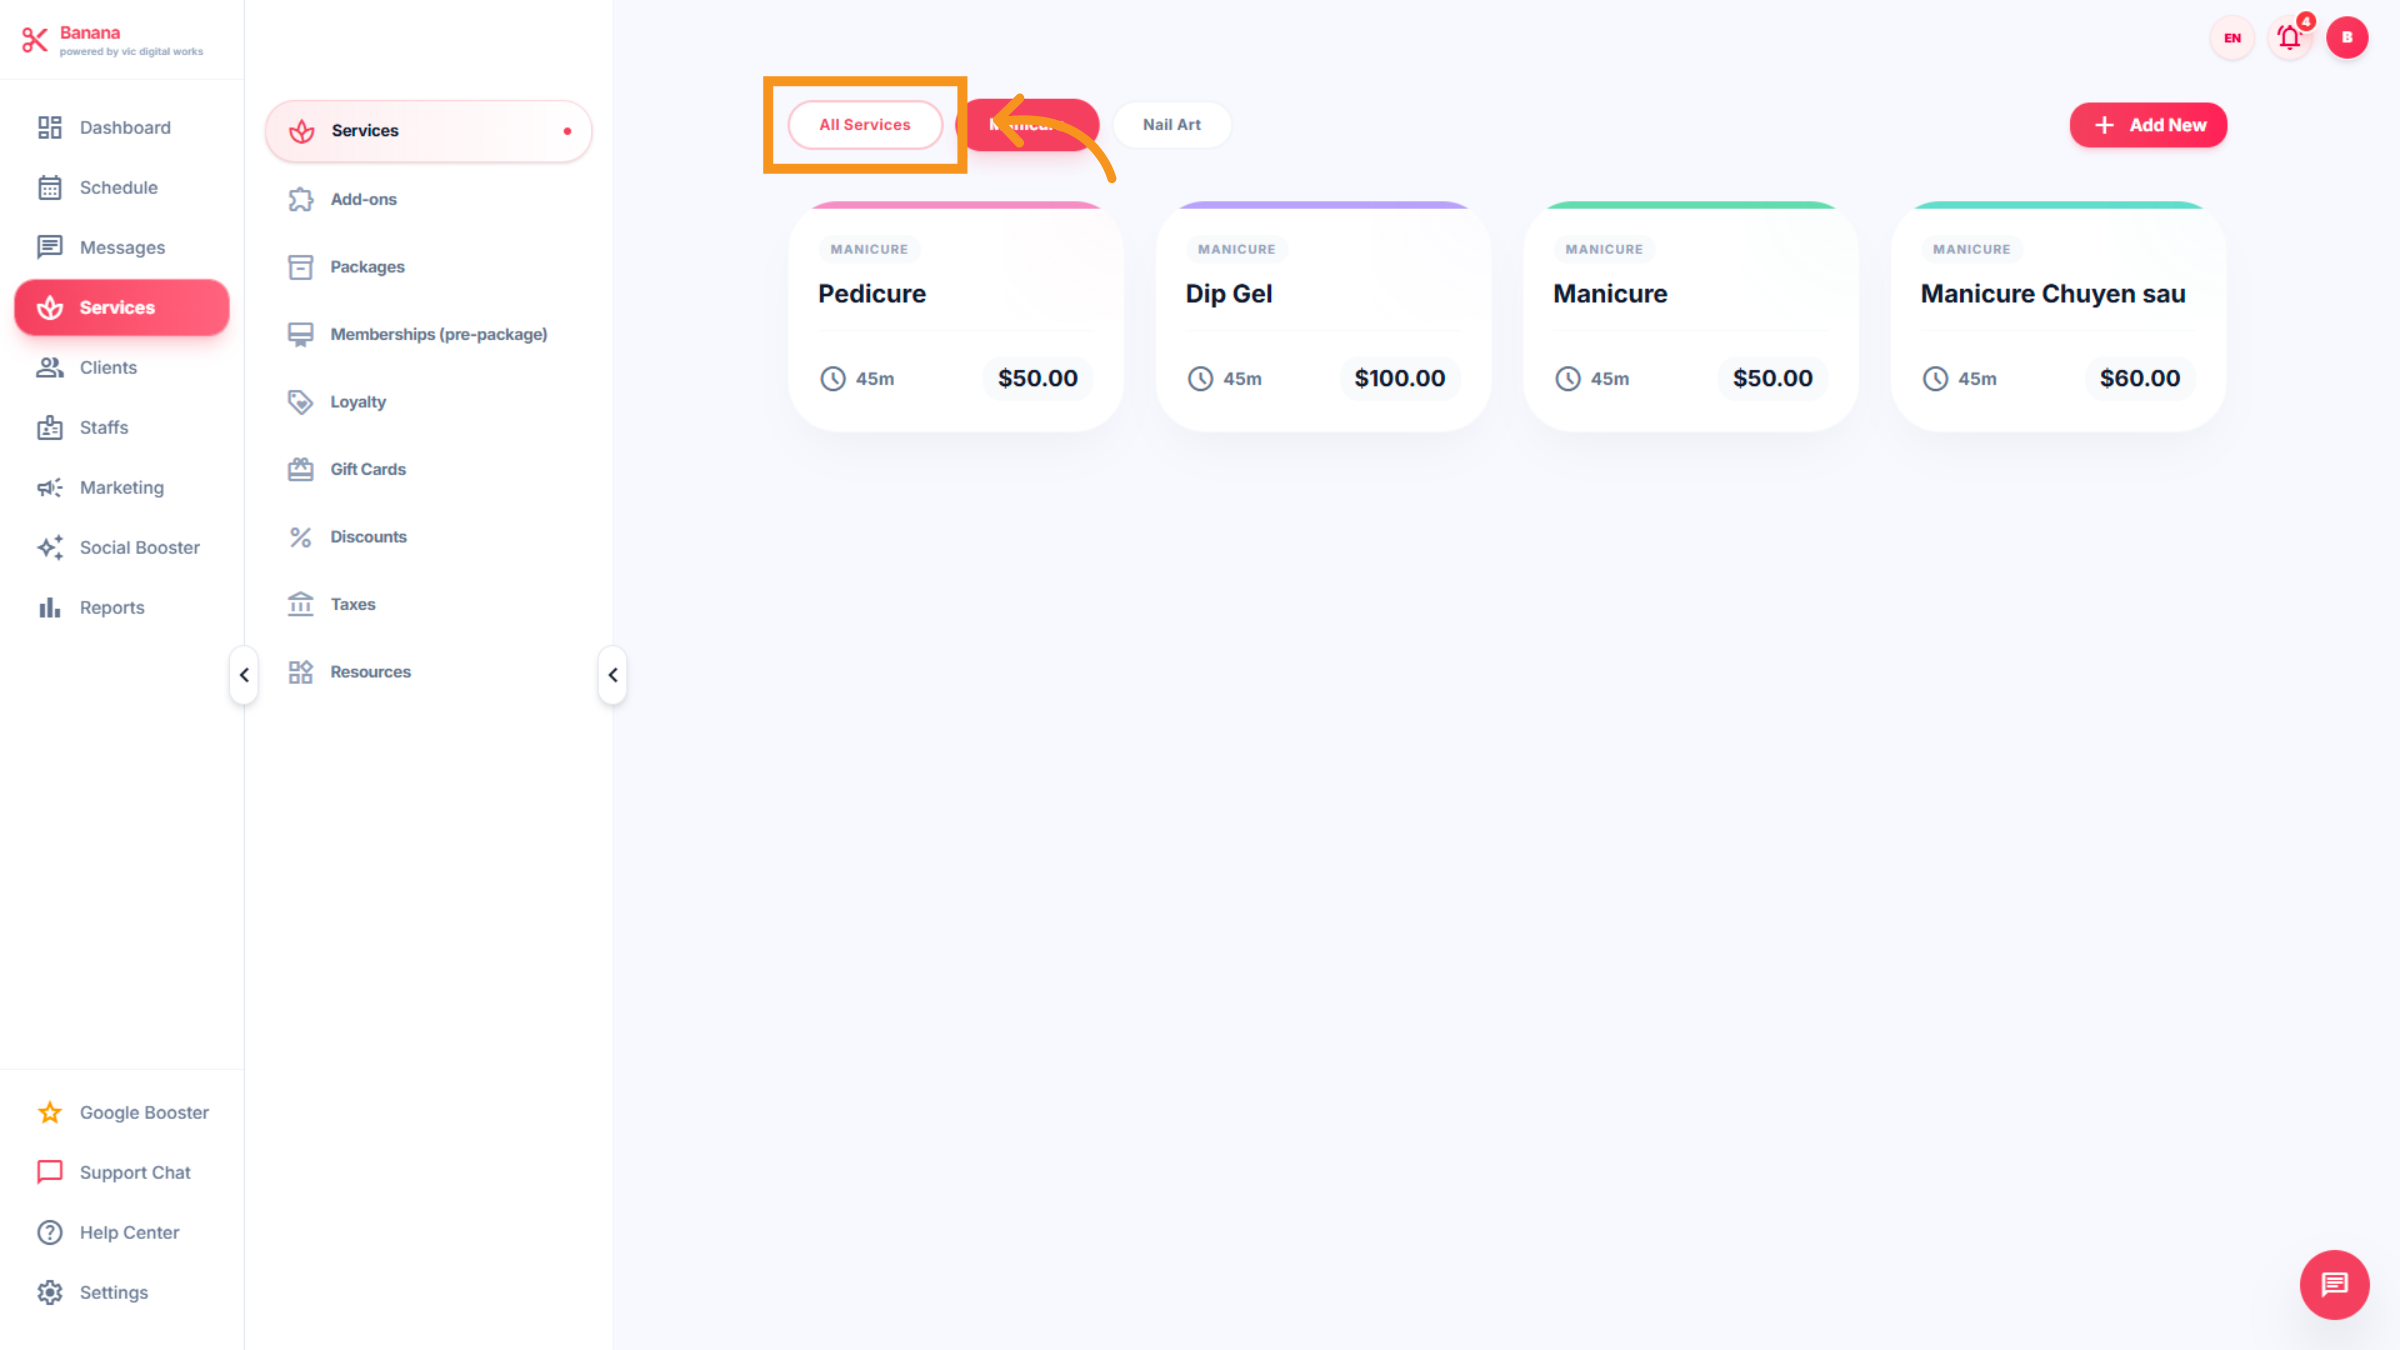
35. View All Services
Click All Services to display the complete list of salon services.
36. Add - on interface
Add on are additional services offered alongside the main services. Includes price and redeemed points according to the shop owner's policies and employee commission structure, and can be adjusted at any time to attract customers and motivate technician to perform better.
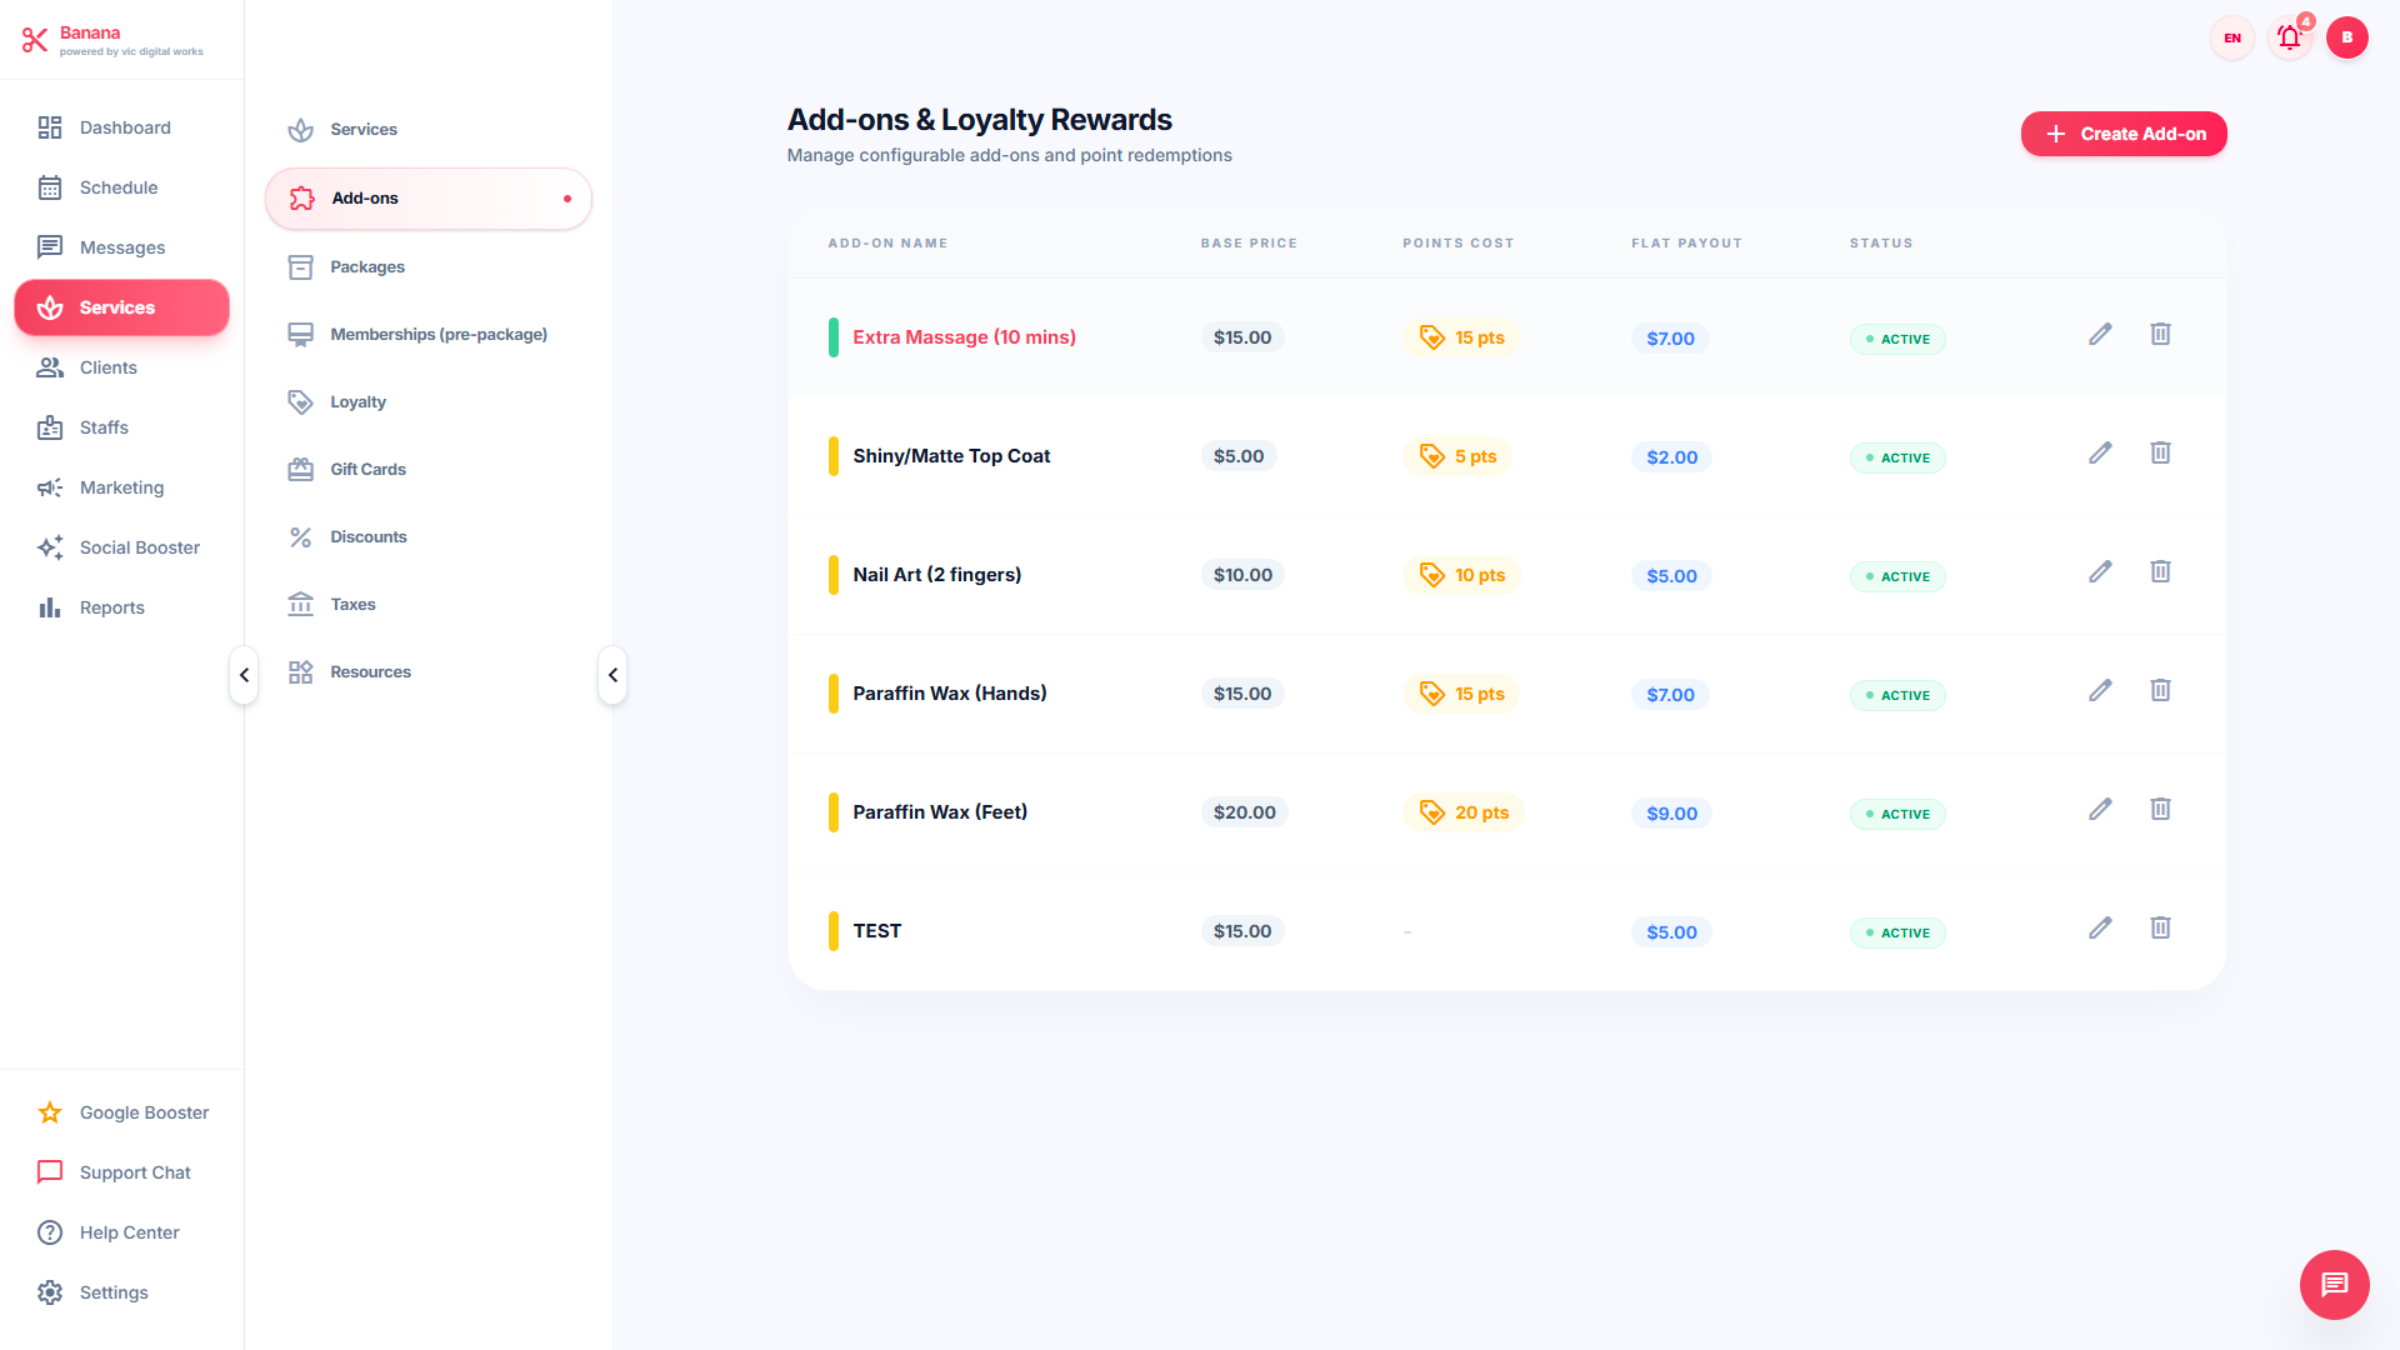
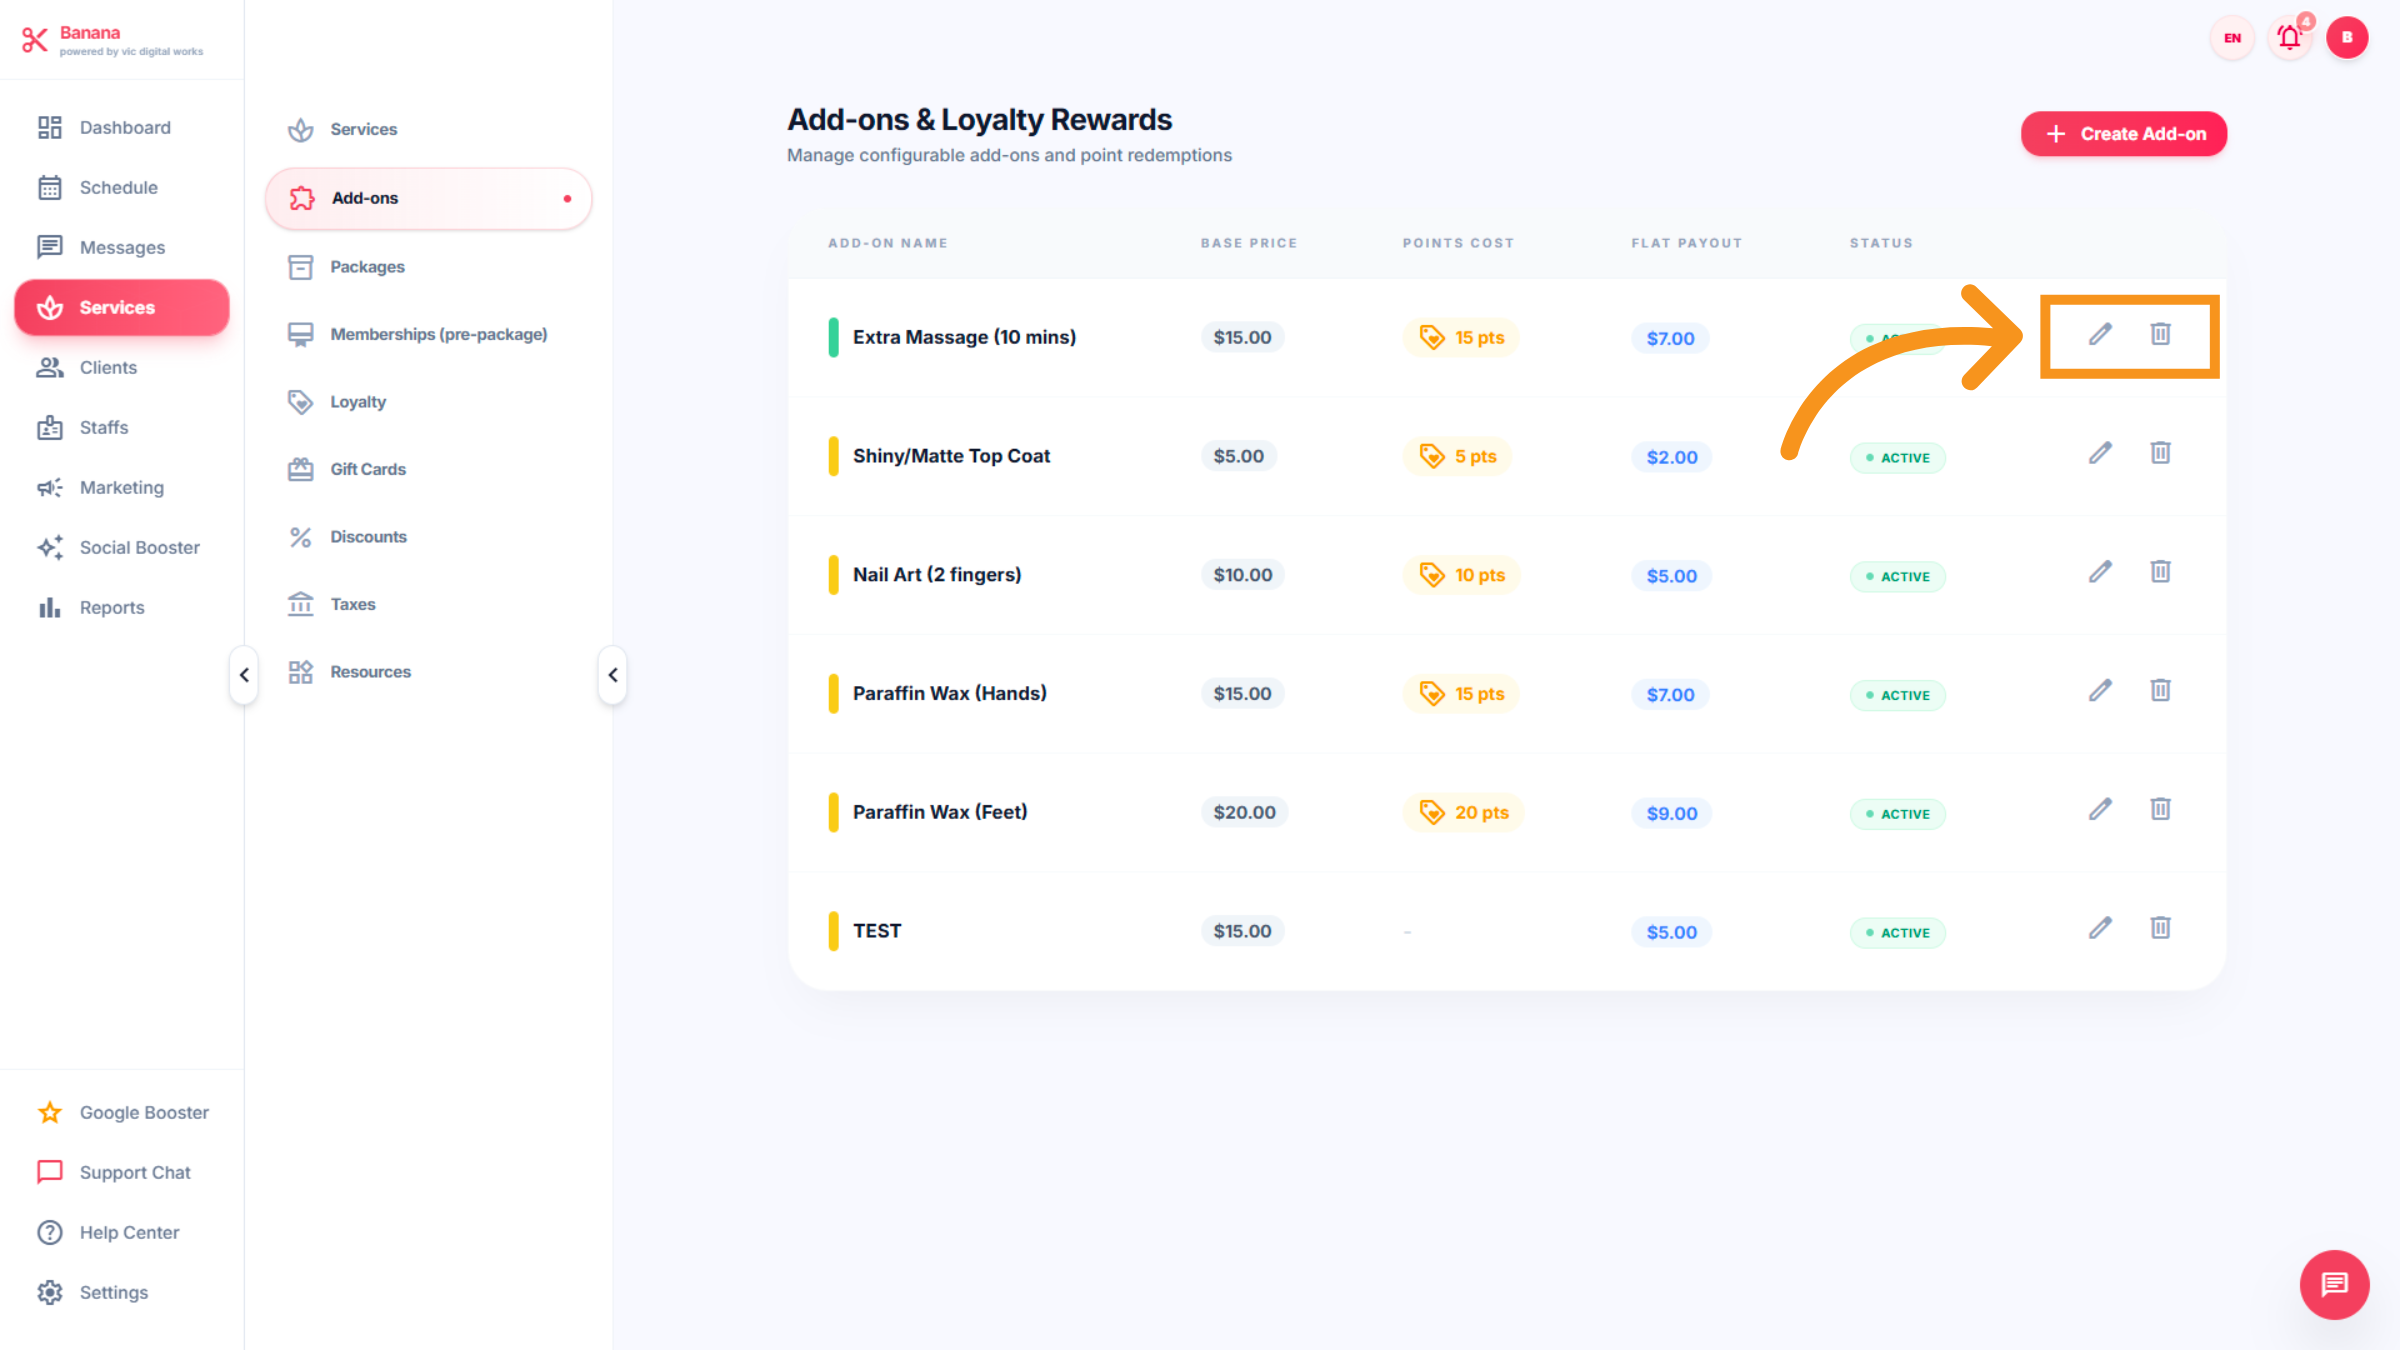
37. Edit Add-on Service
The interface of Add-on includes: -Add-on names: Name of service - Base Price: Price of service -Points Cost: redeemed points - Flat Payout: Technician commission -Status: notice service active.

38. Add-On Edit
* The highlight is EDIT; "click" can be adjusted at any time.
39. Add-on Creation
"Add-on new" same "Add new service" process. This section allows you to add-on service information, including: Service Name, Duration, Prices, Category, and Theme Color.
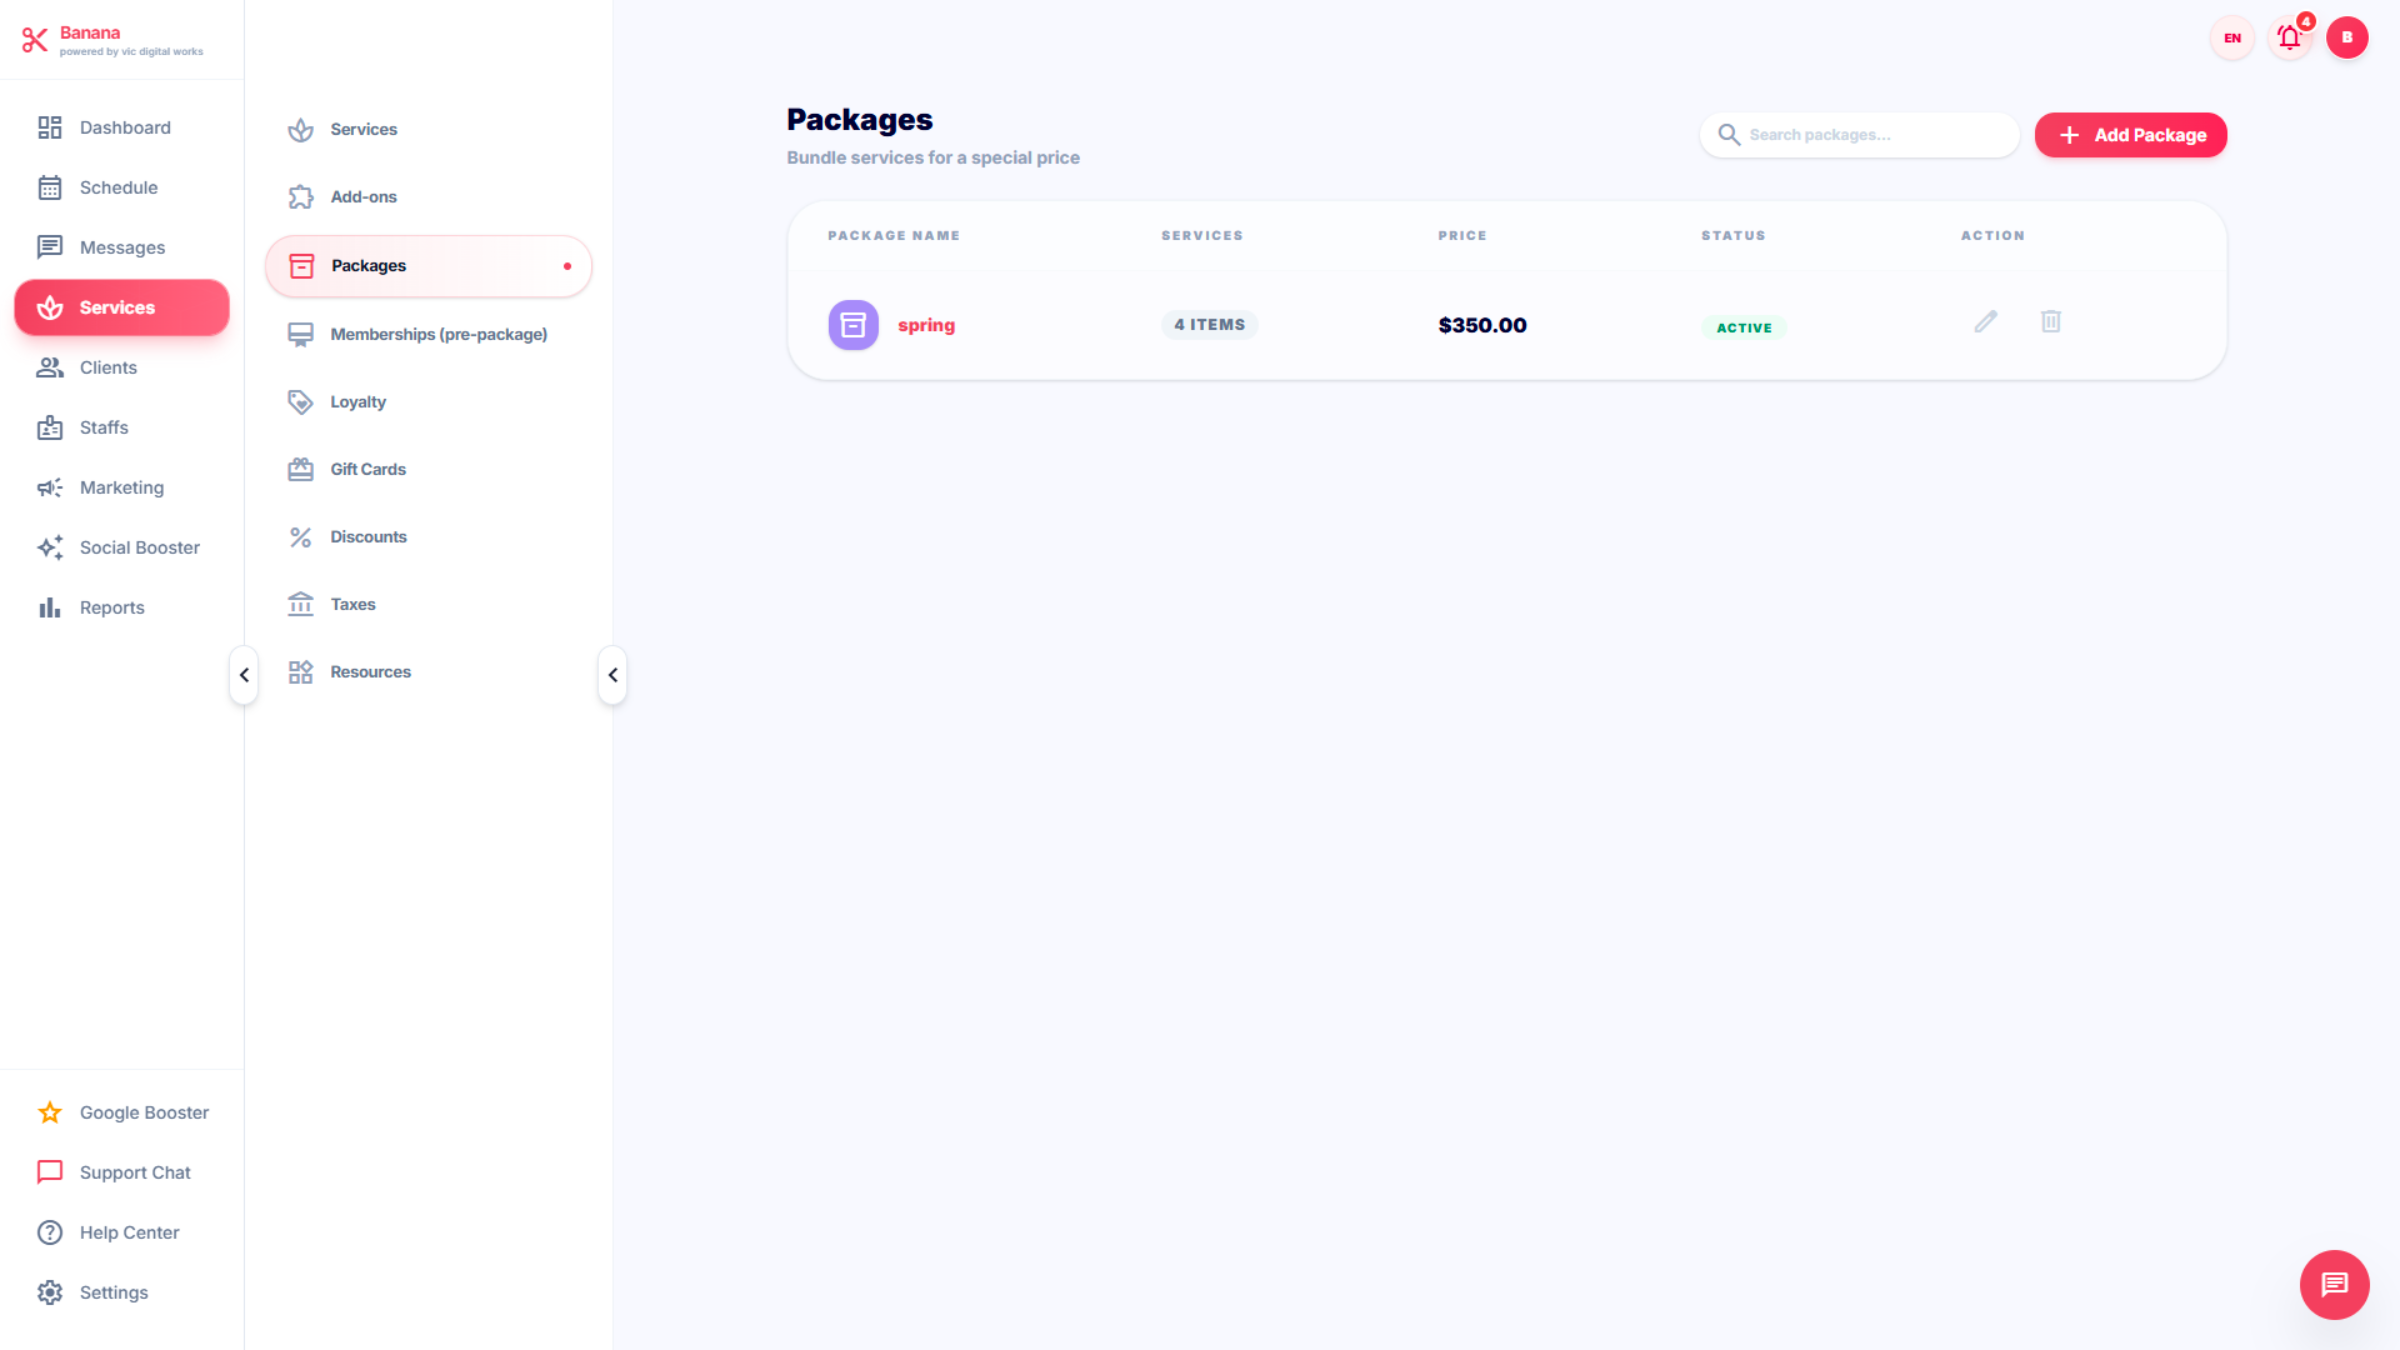
40. PAKAGES
Click Packages to manage bundled service offerings and deals. This section includes : -Add Packages: - Service packages -Price -Status: -Action(edit)
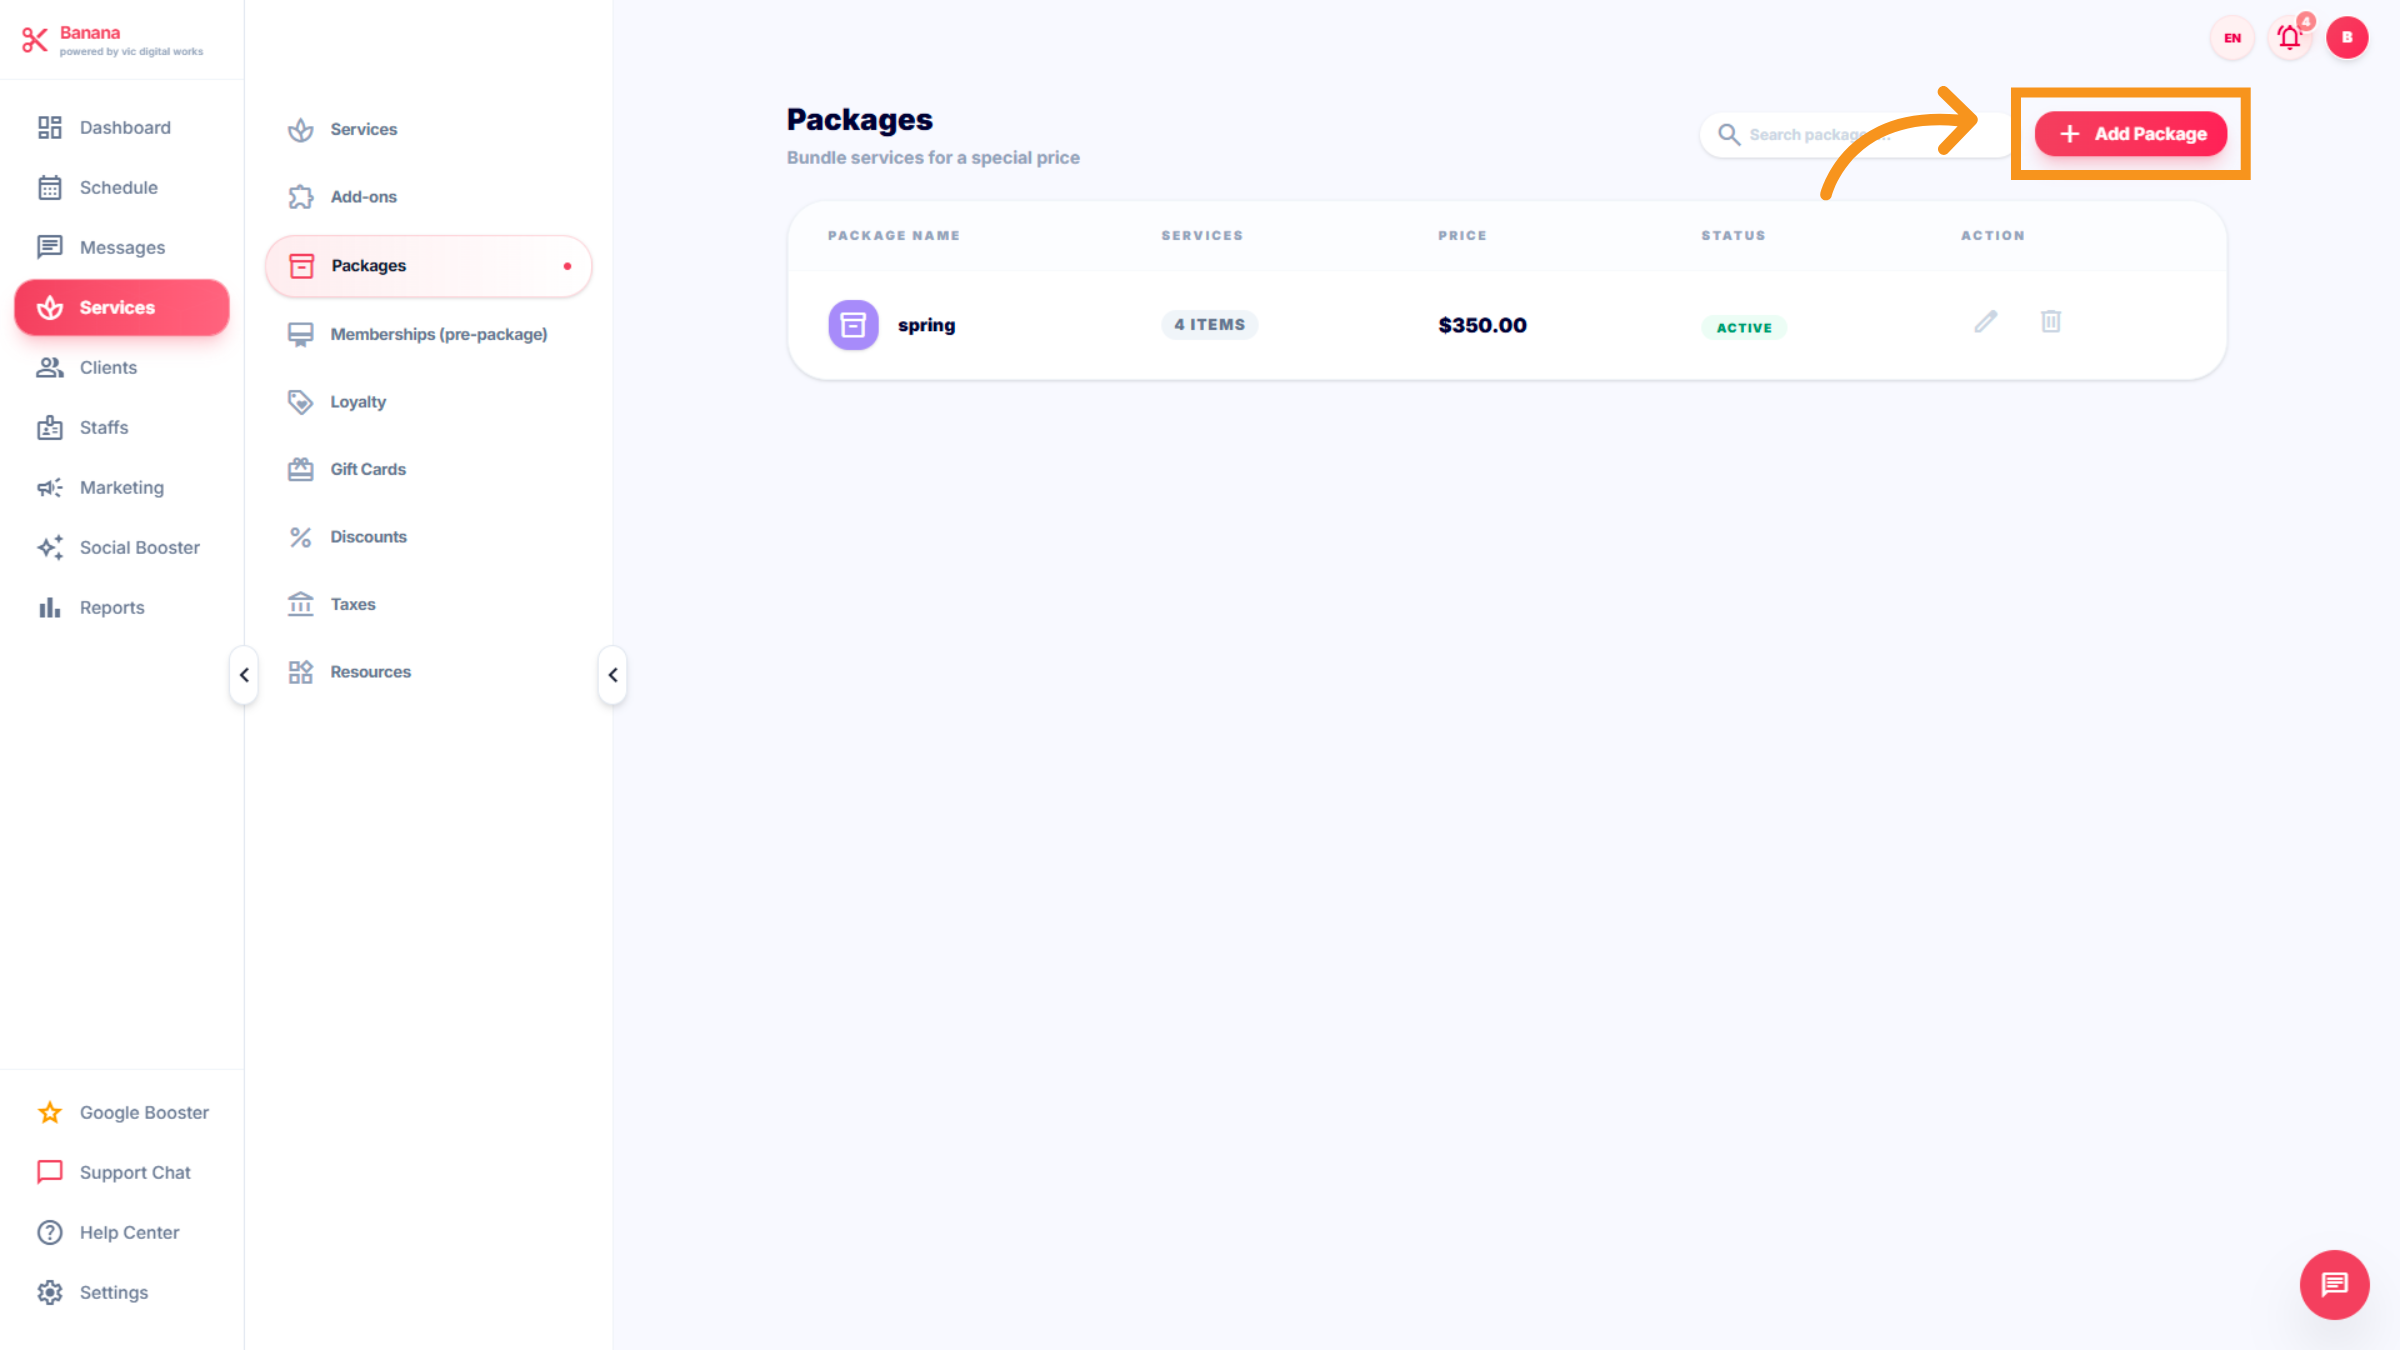
41. Access Add New Package
Click Add Package to create a new service package.
42. Interface of Package
This section includes : Packages name,Services, Decription, Package setting (package price,status,color theme).
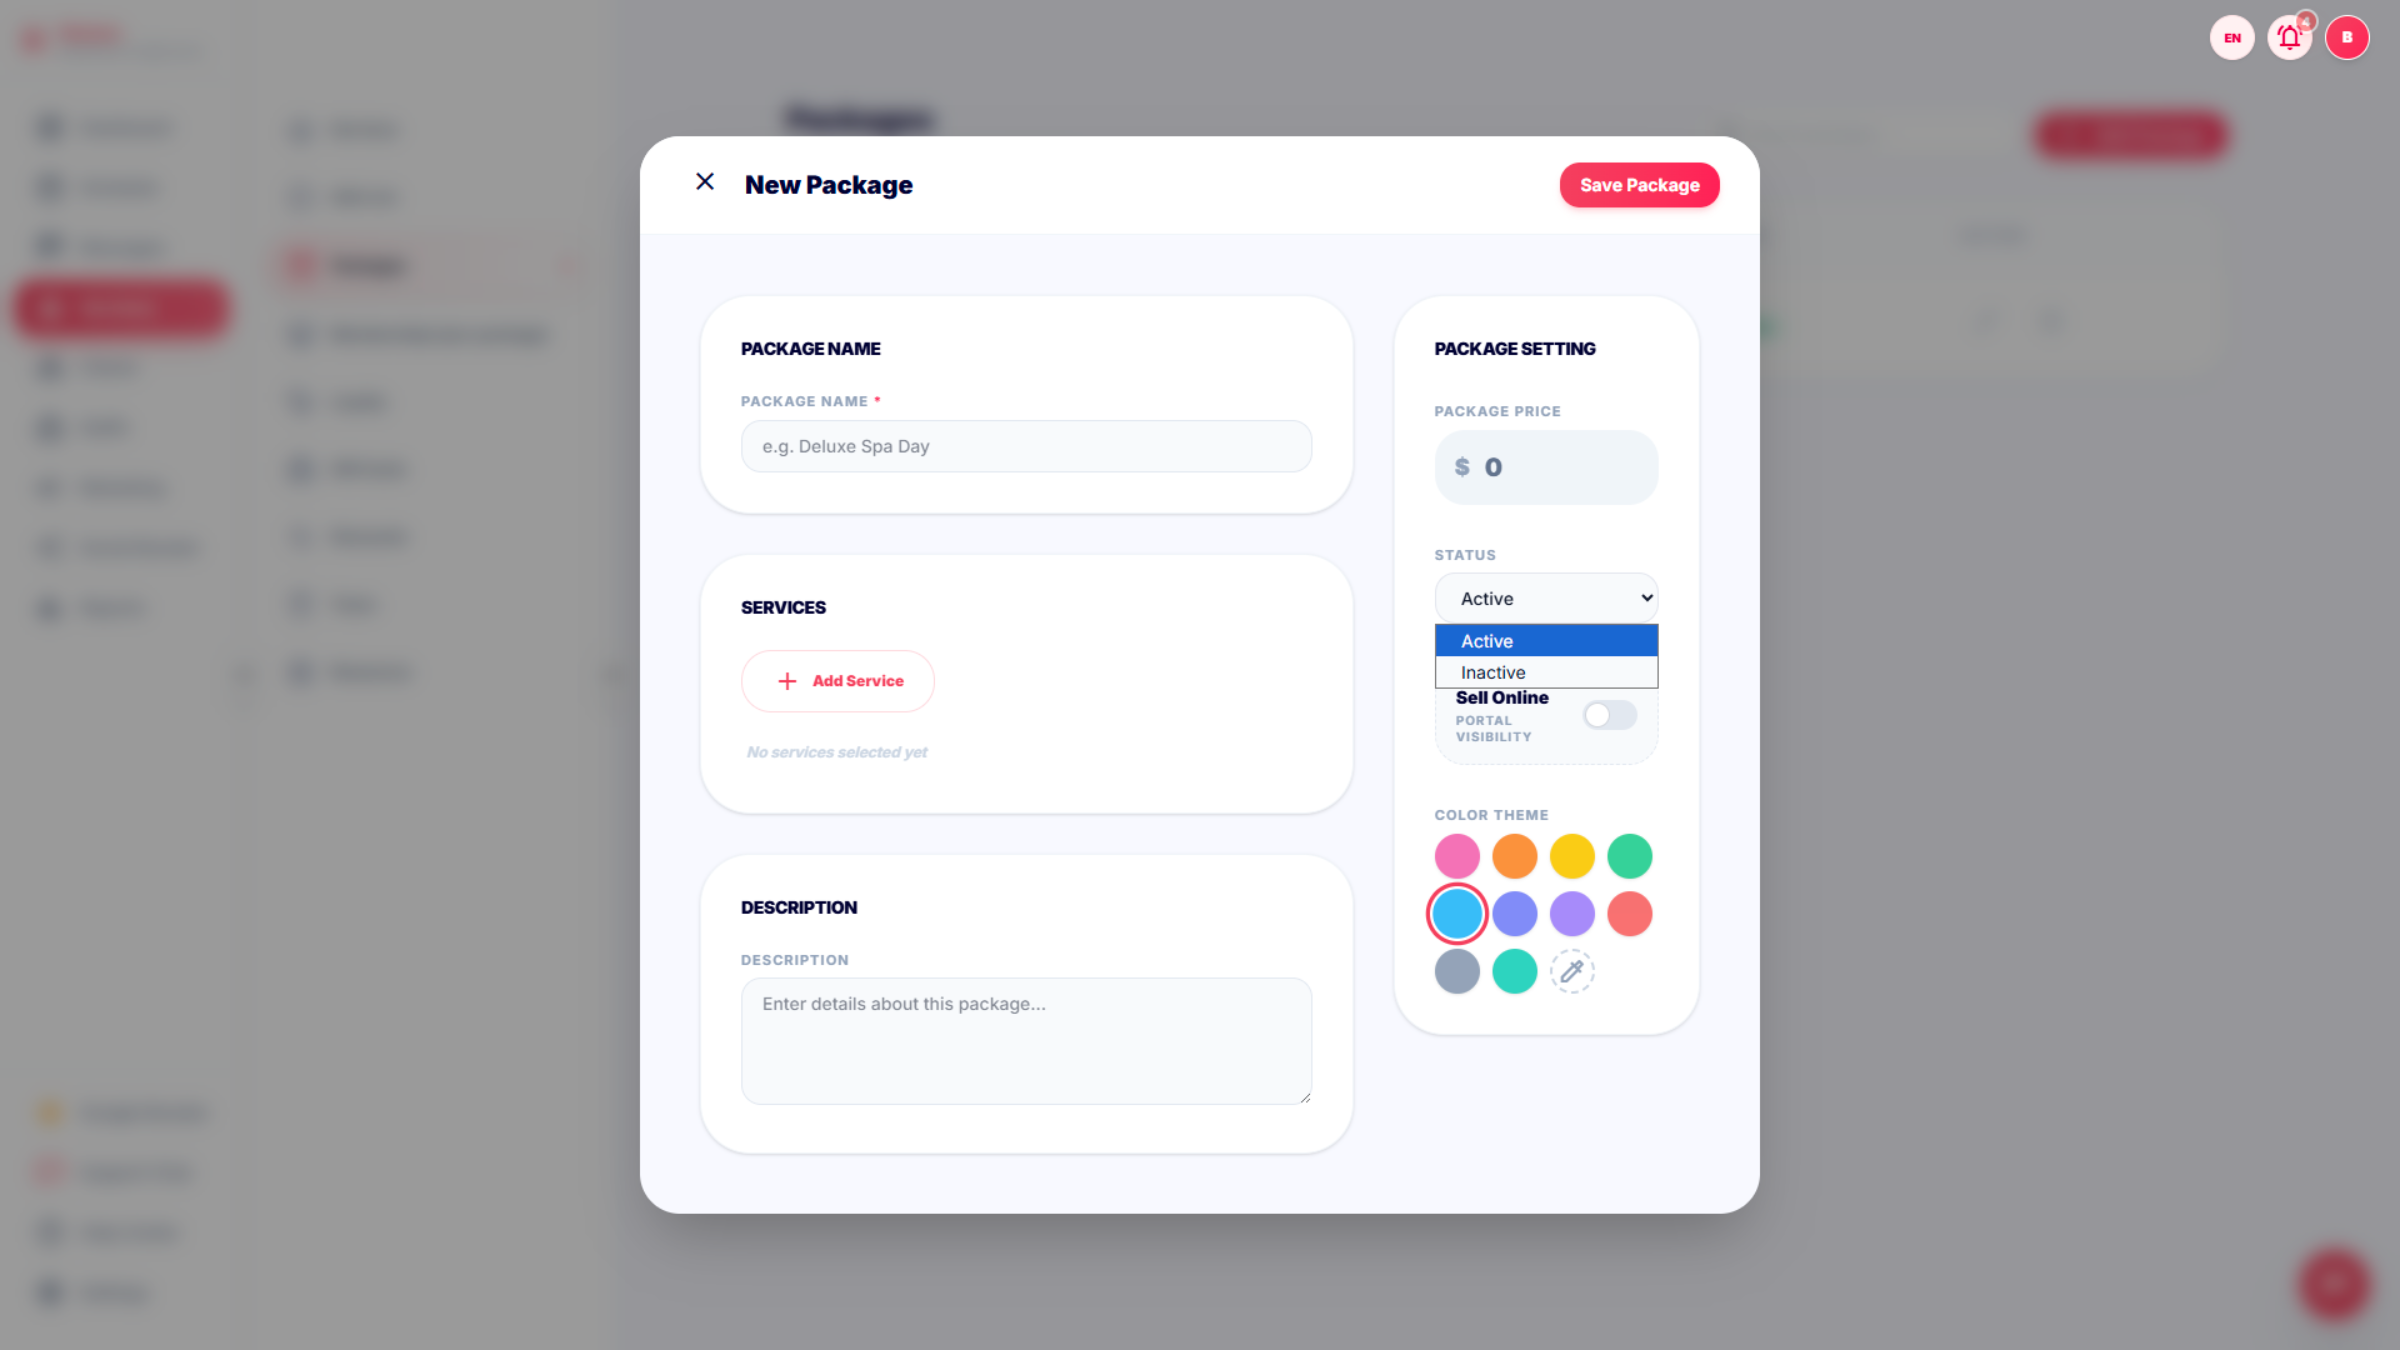
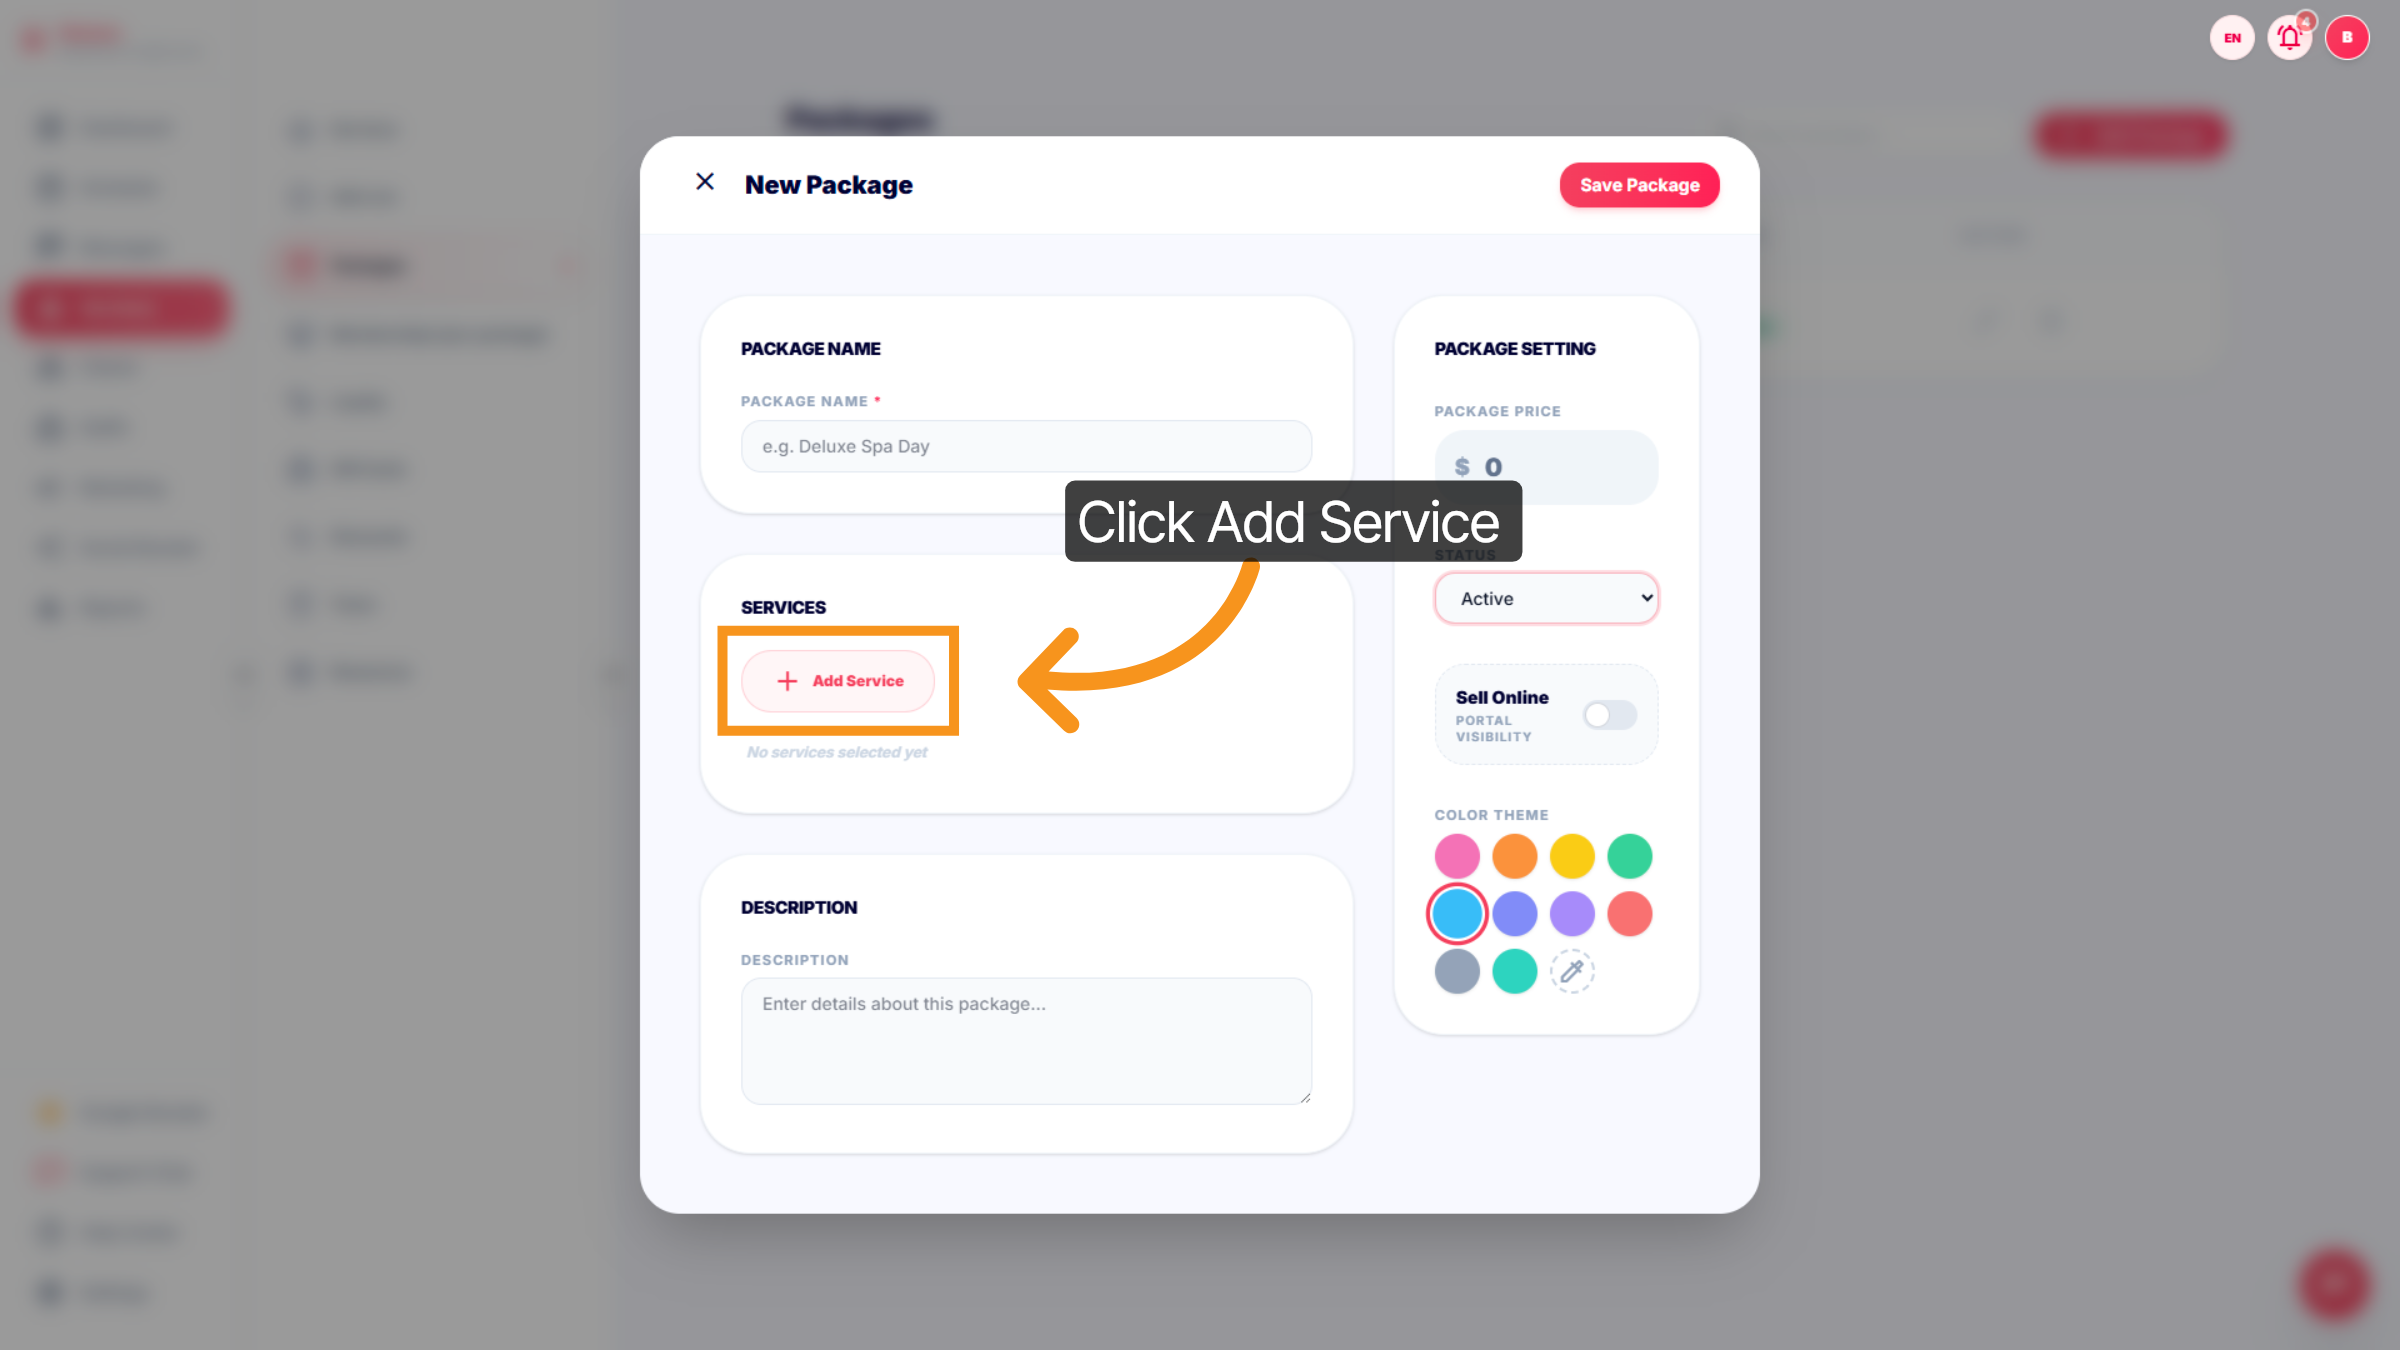
43. Create new Package
Create a name for package and Click "Add Service" to include a new service in the package.
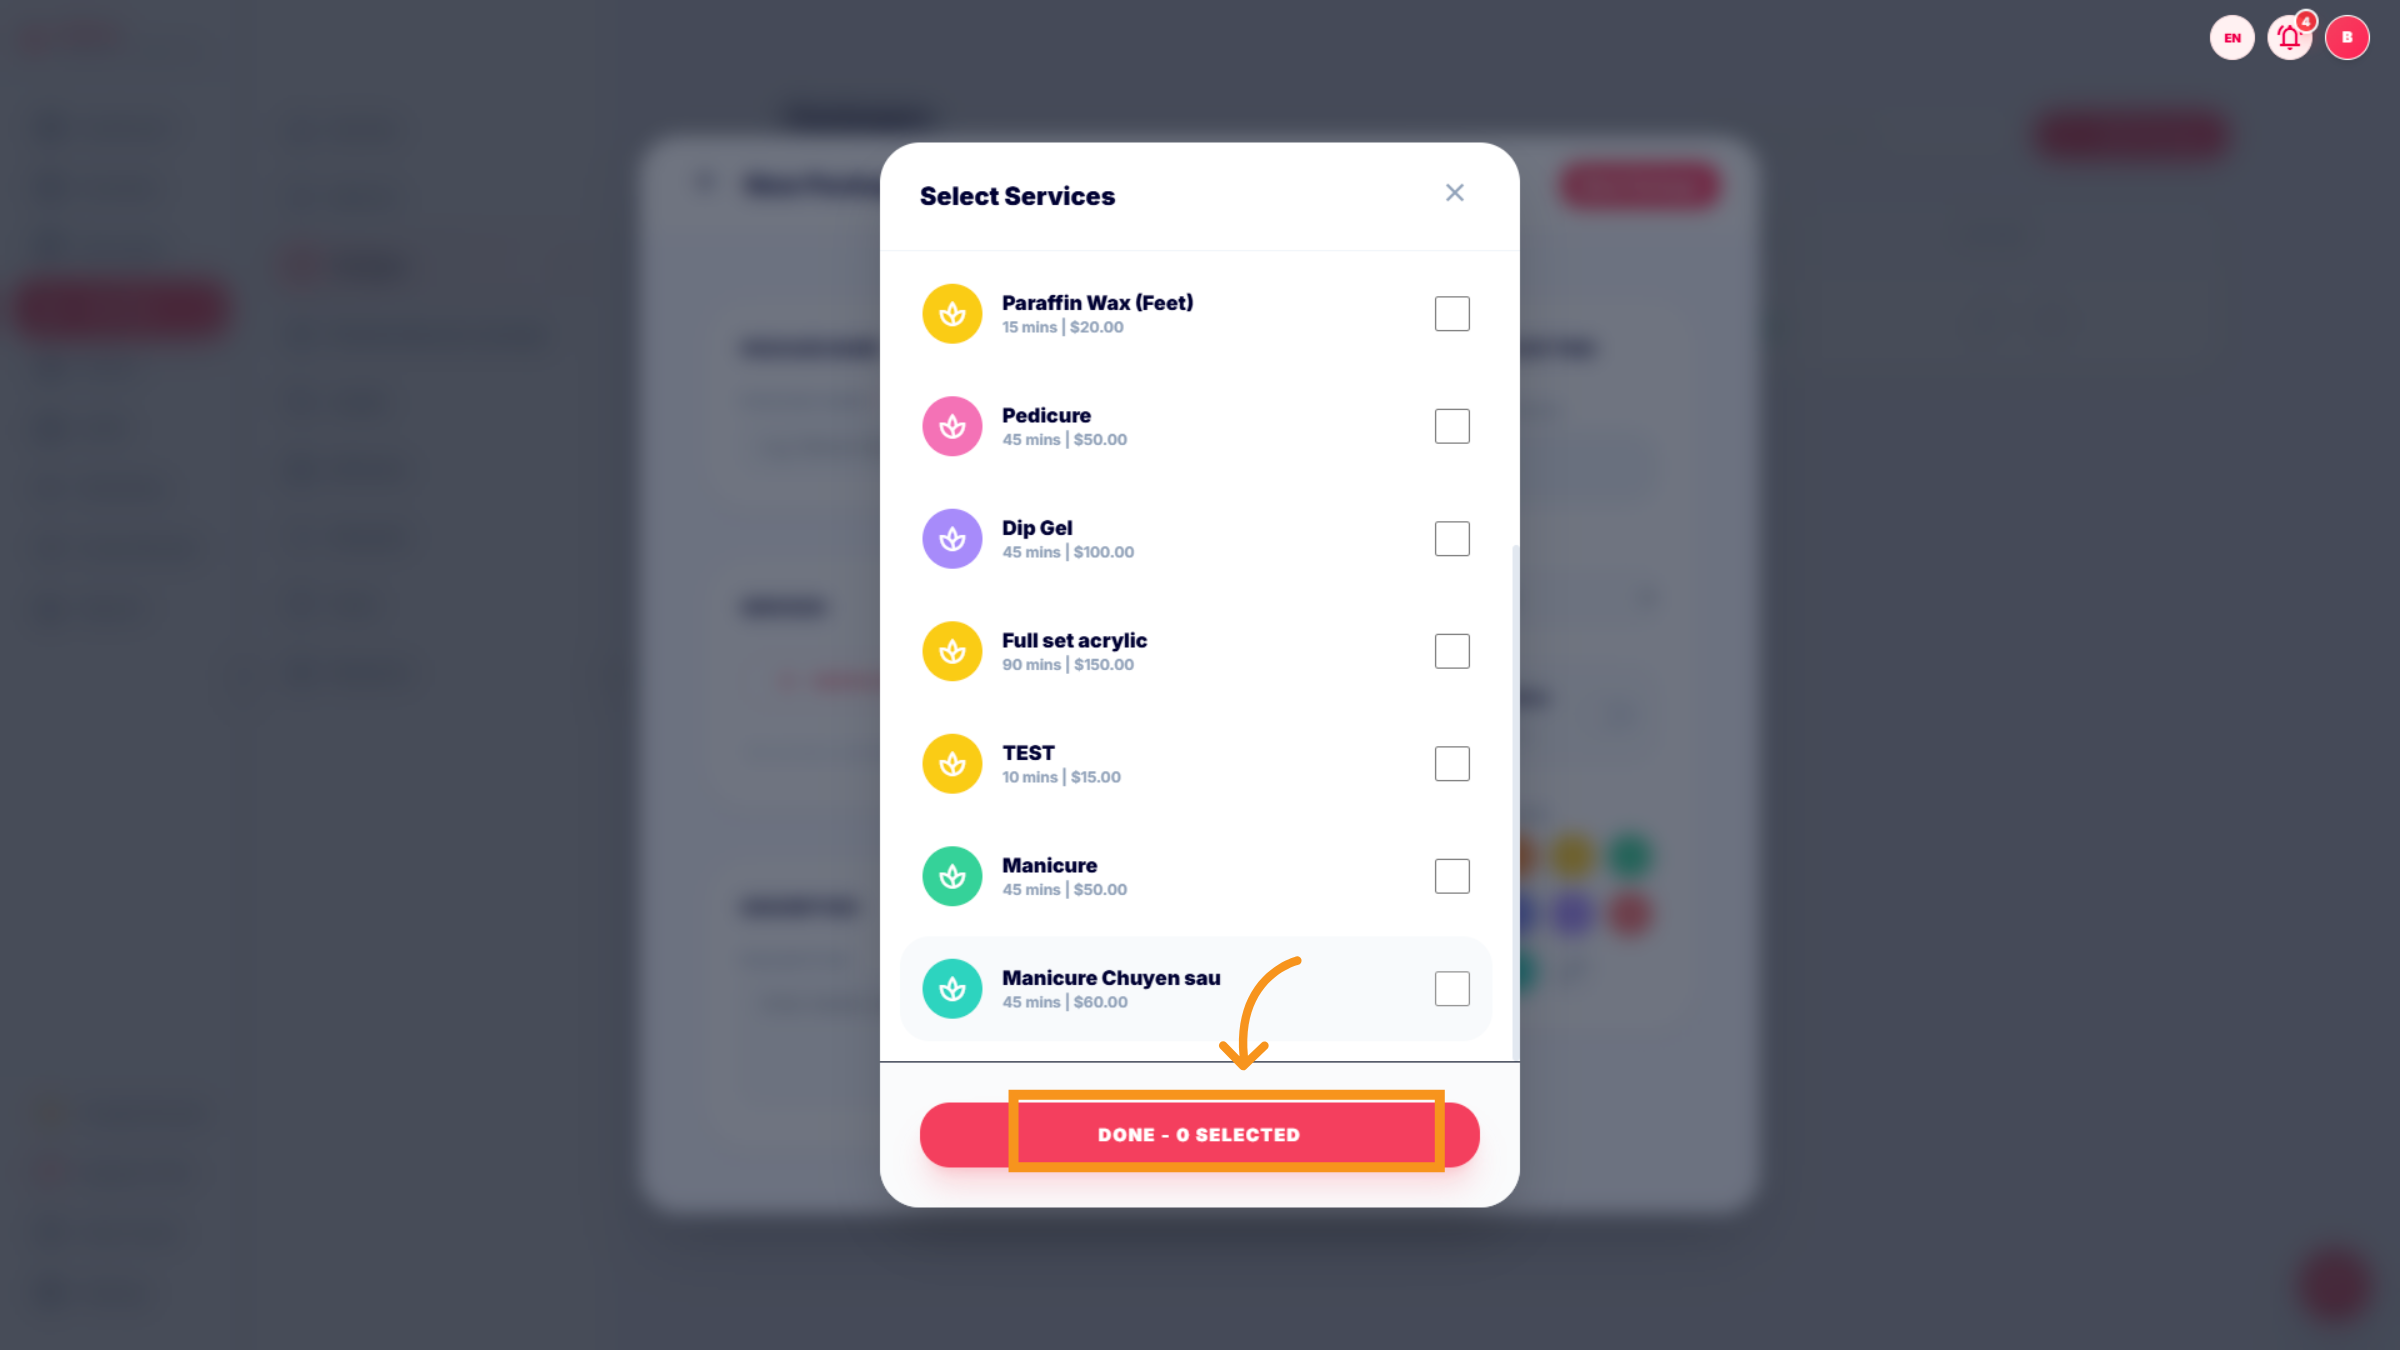
44. Select Service for package
Click on services to select the package, then click "done" to complete the process.
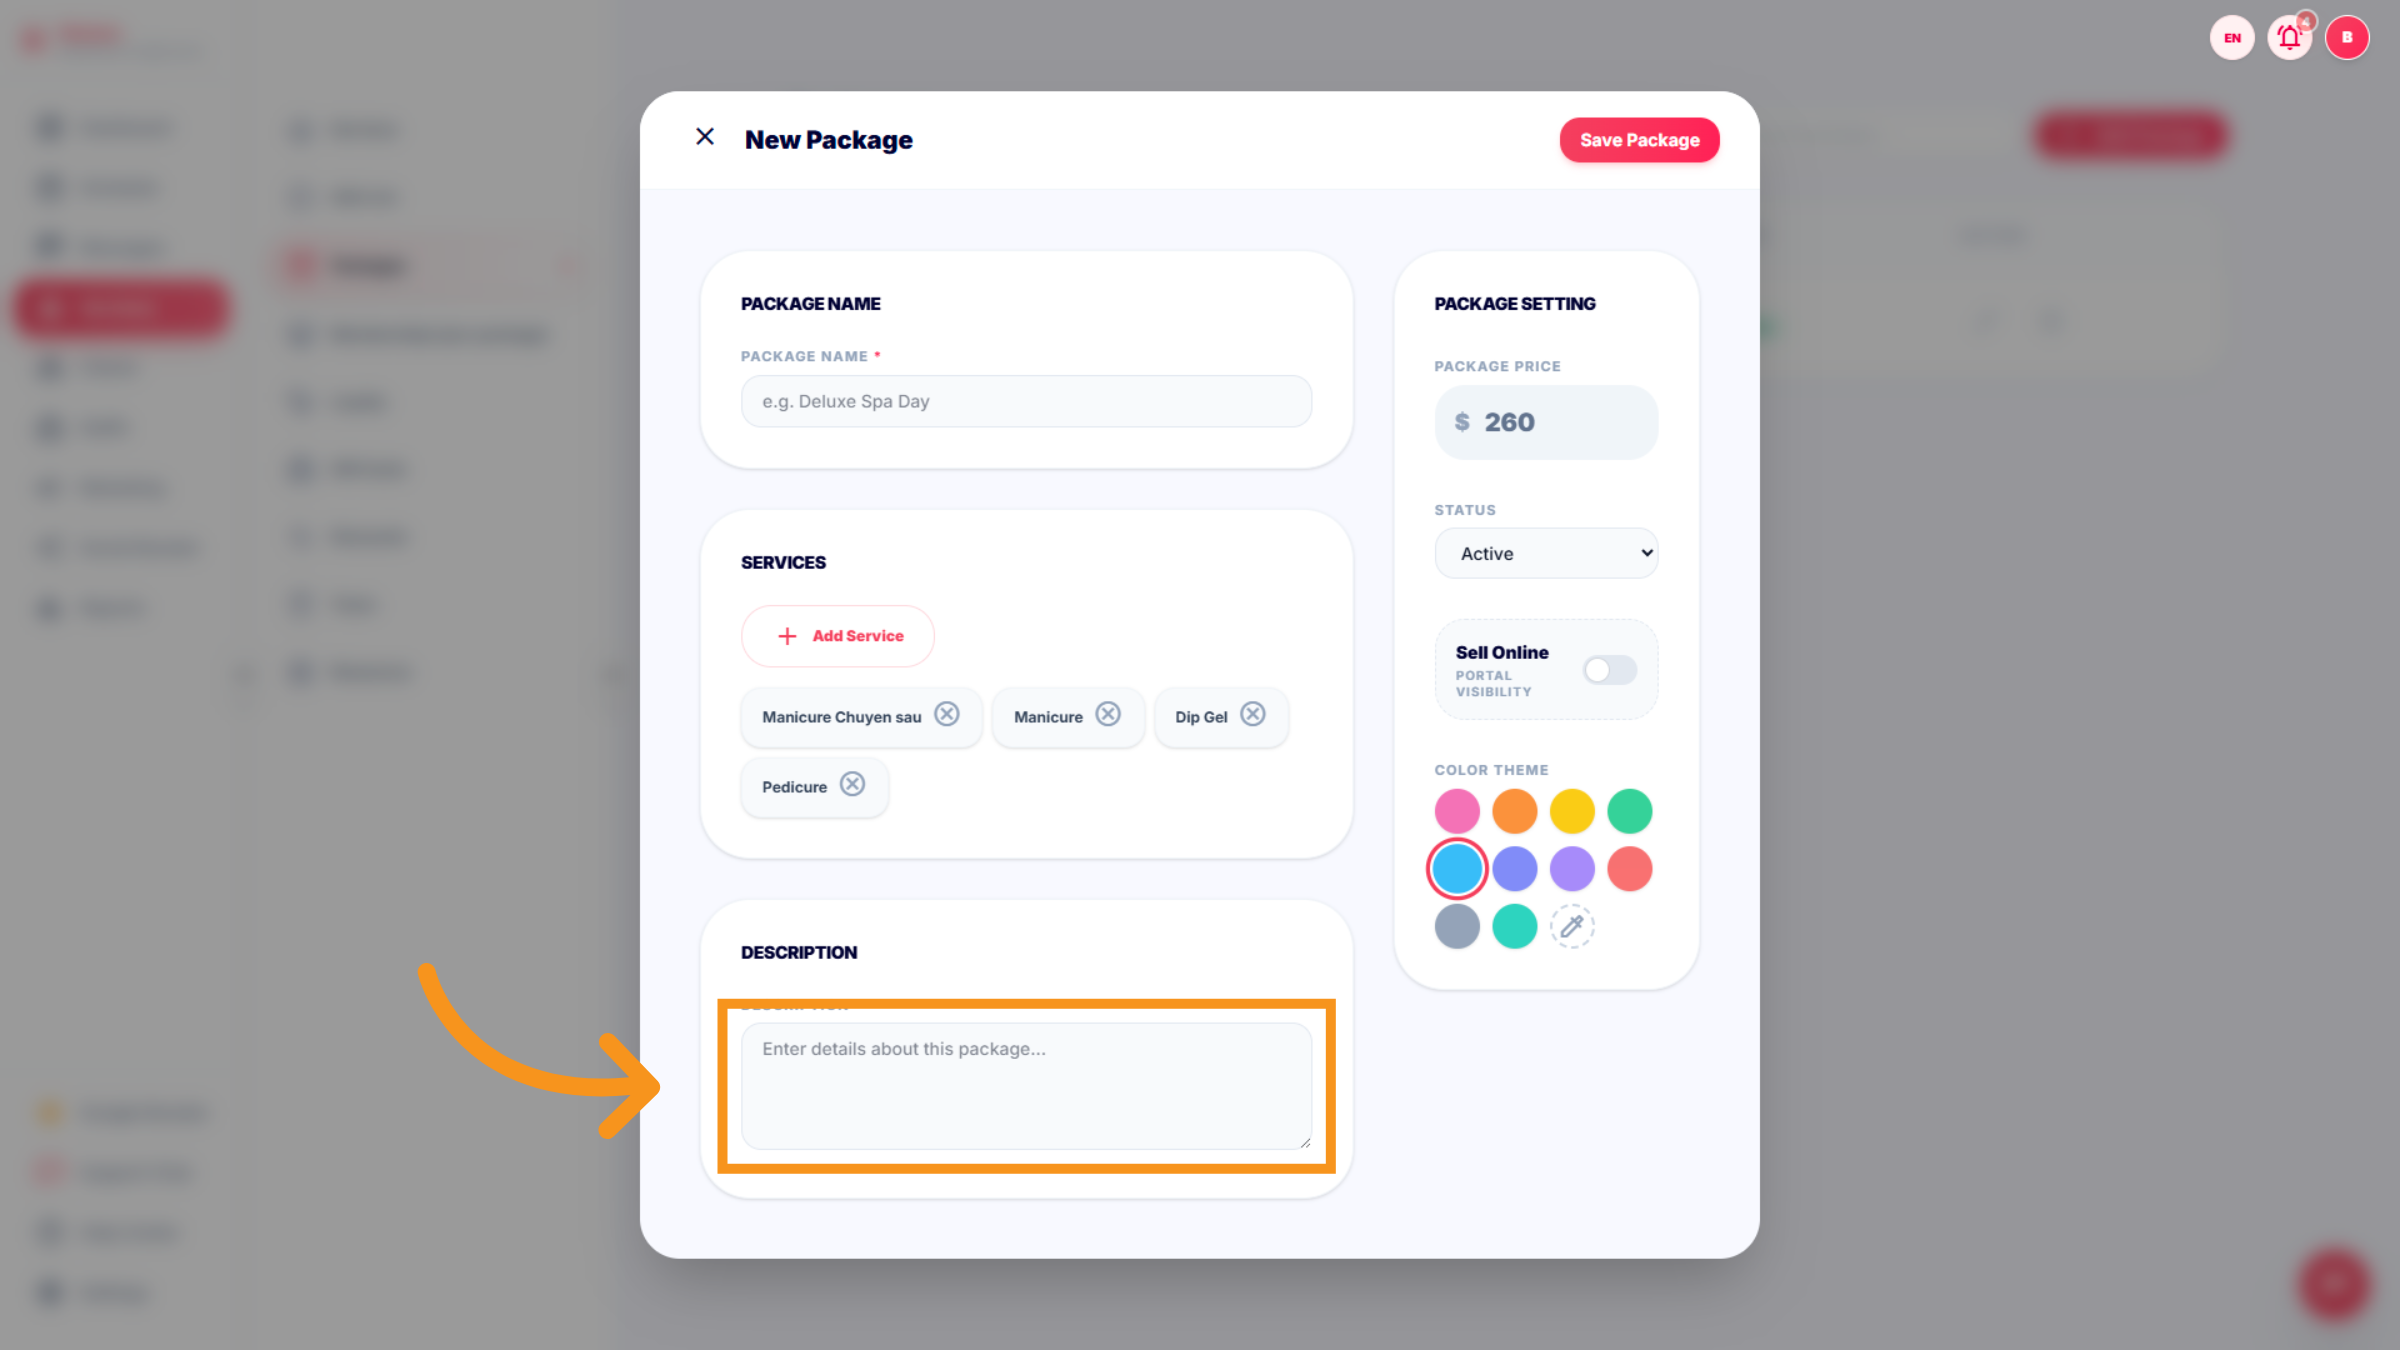
45. DecriptionDescription
Click Enter details about this package... to add descriptive information. for the packages.
46. Access Memberships Section
Click on Memberships (pre-package) to manage your membership options. This section includes a combination of services.
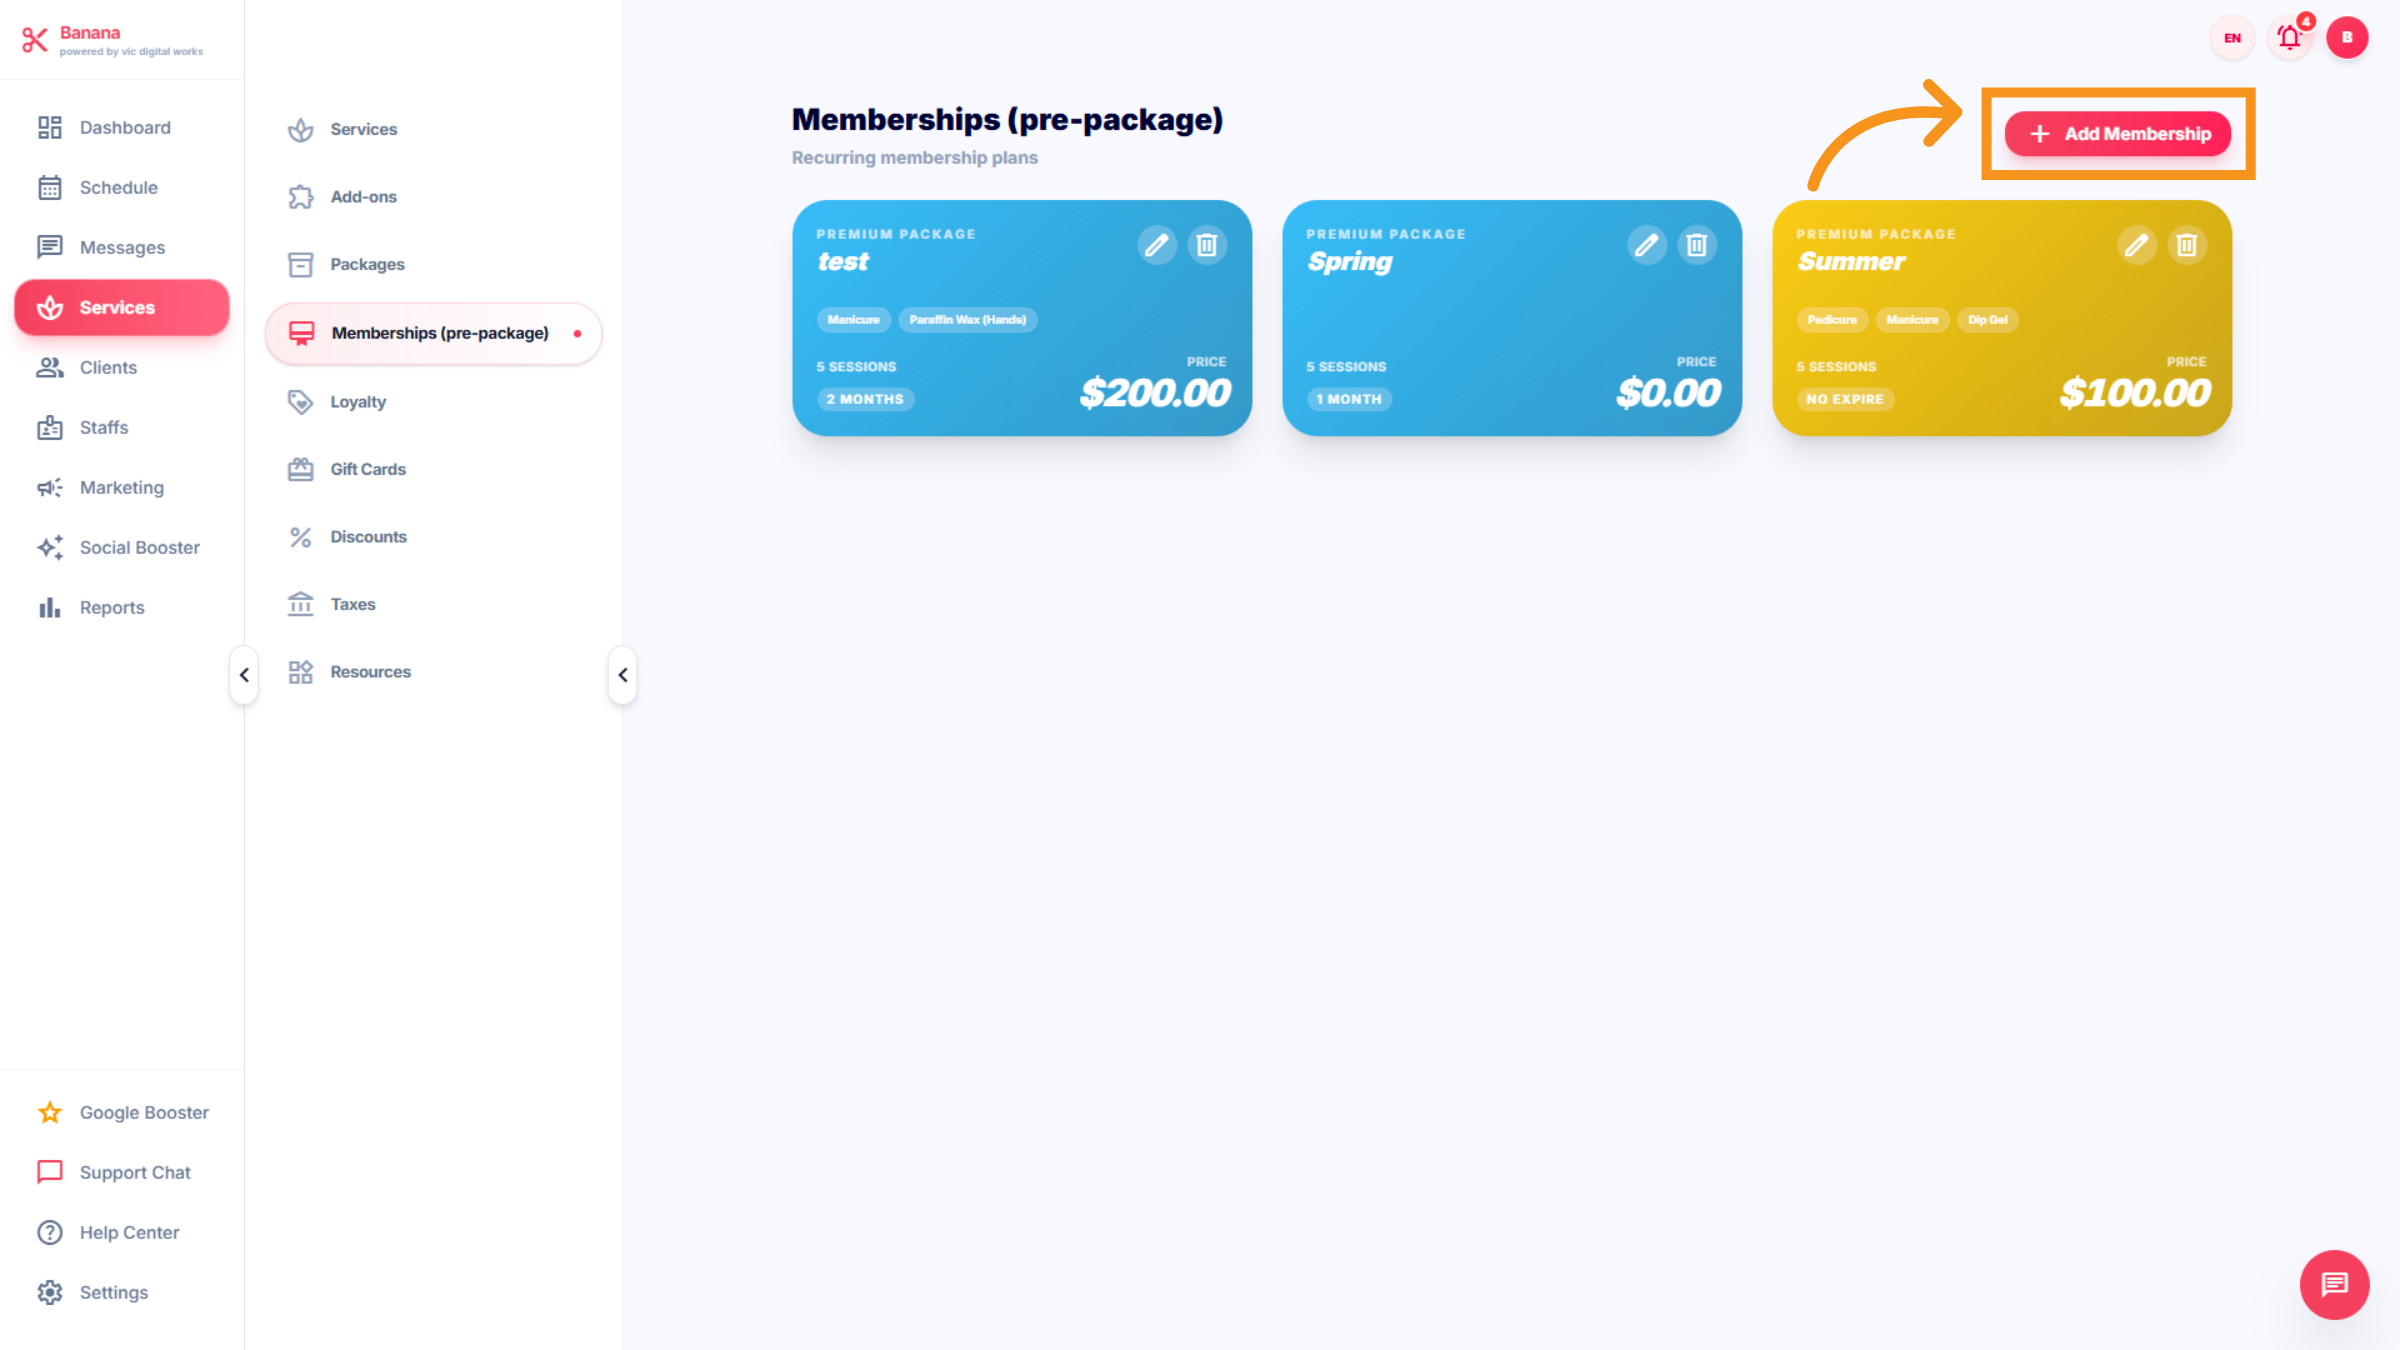
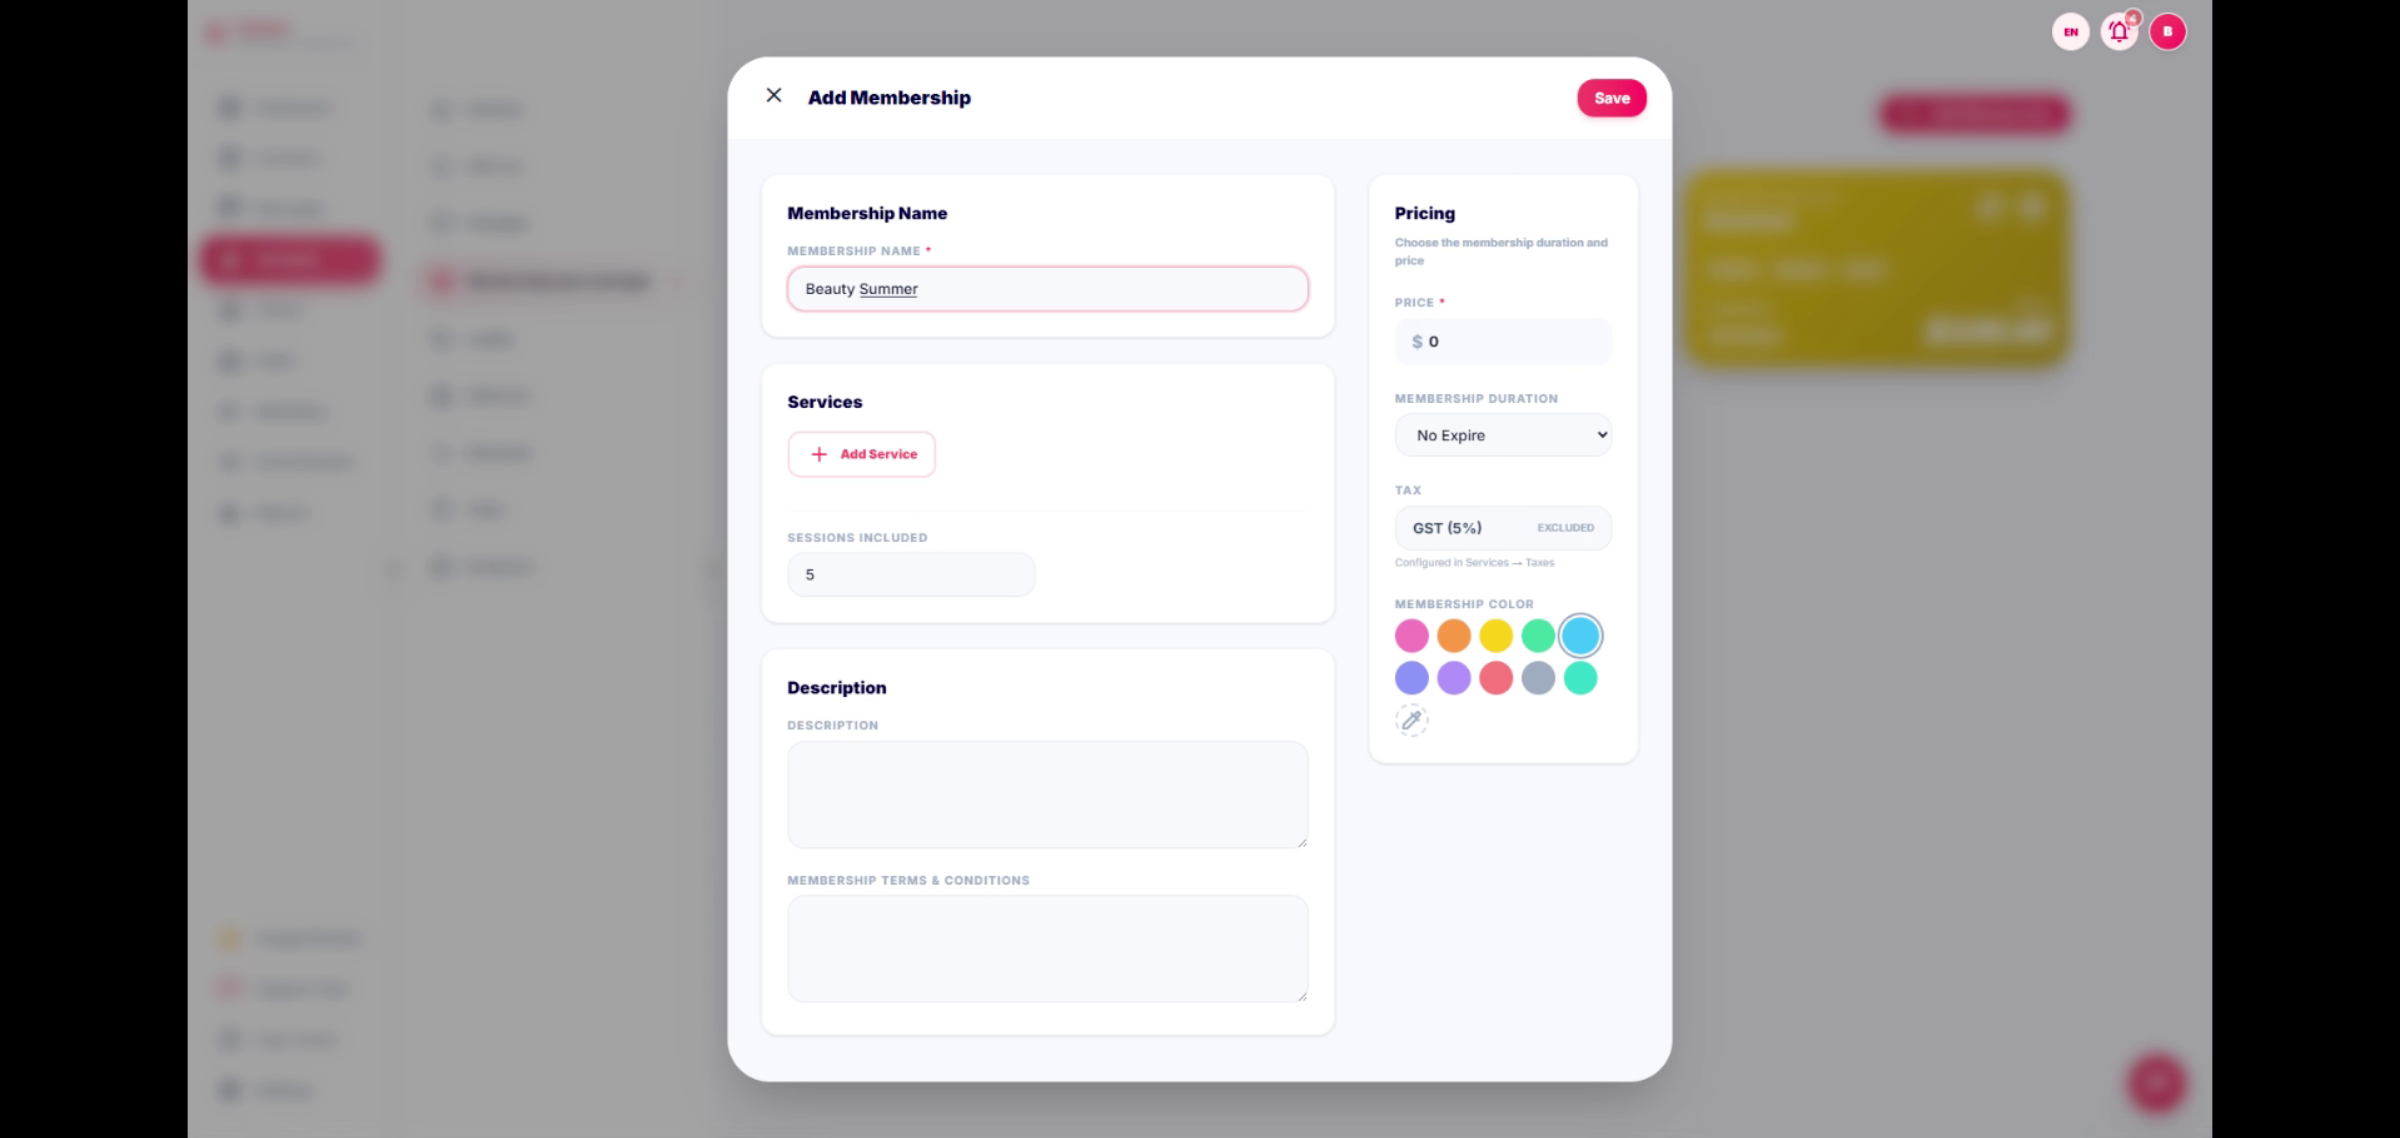
47. Enter Add new Membership
Create the membership name, which should include the following details: Services, Description, Pricing (price, Member duration, Tax, and color theme). Especially, this section contains Membership terms and cconditions.
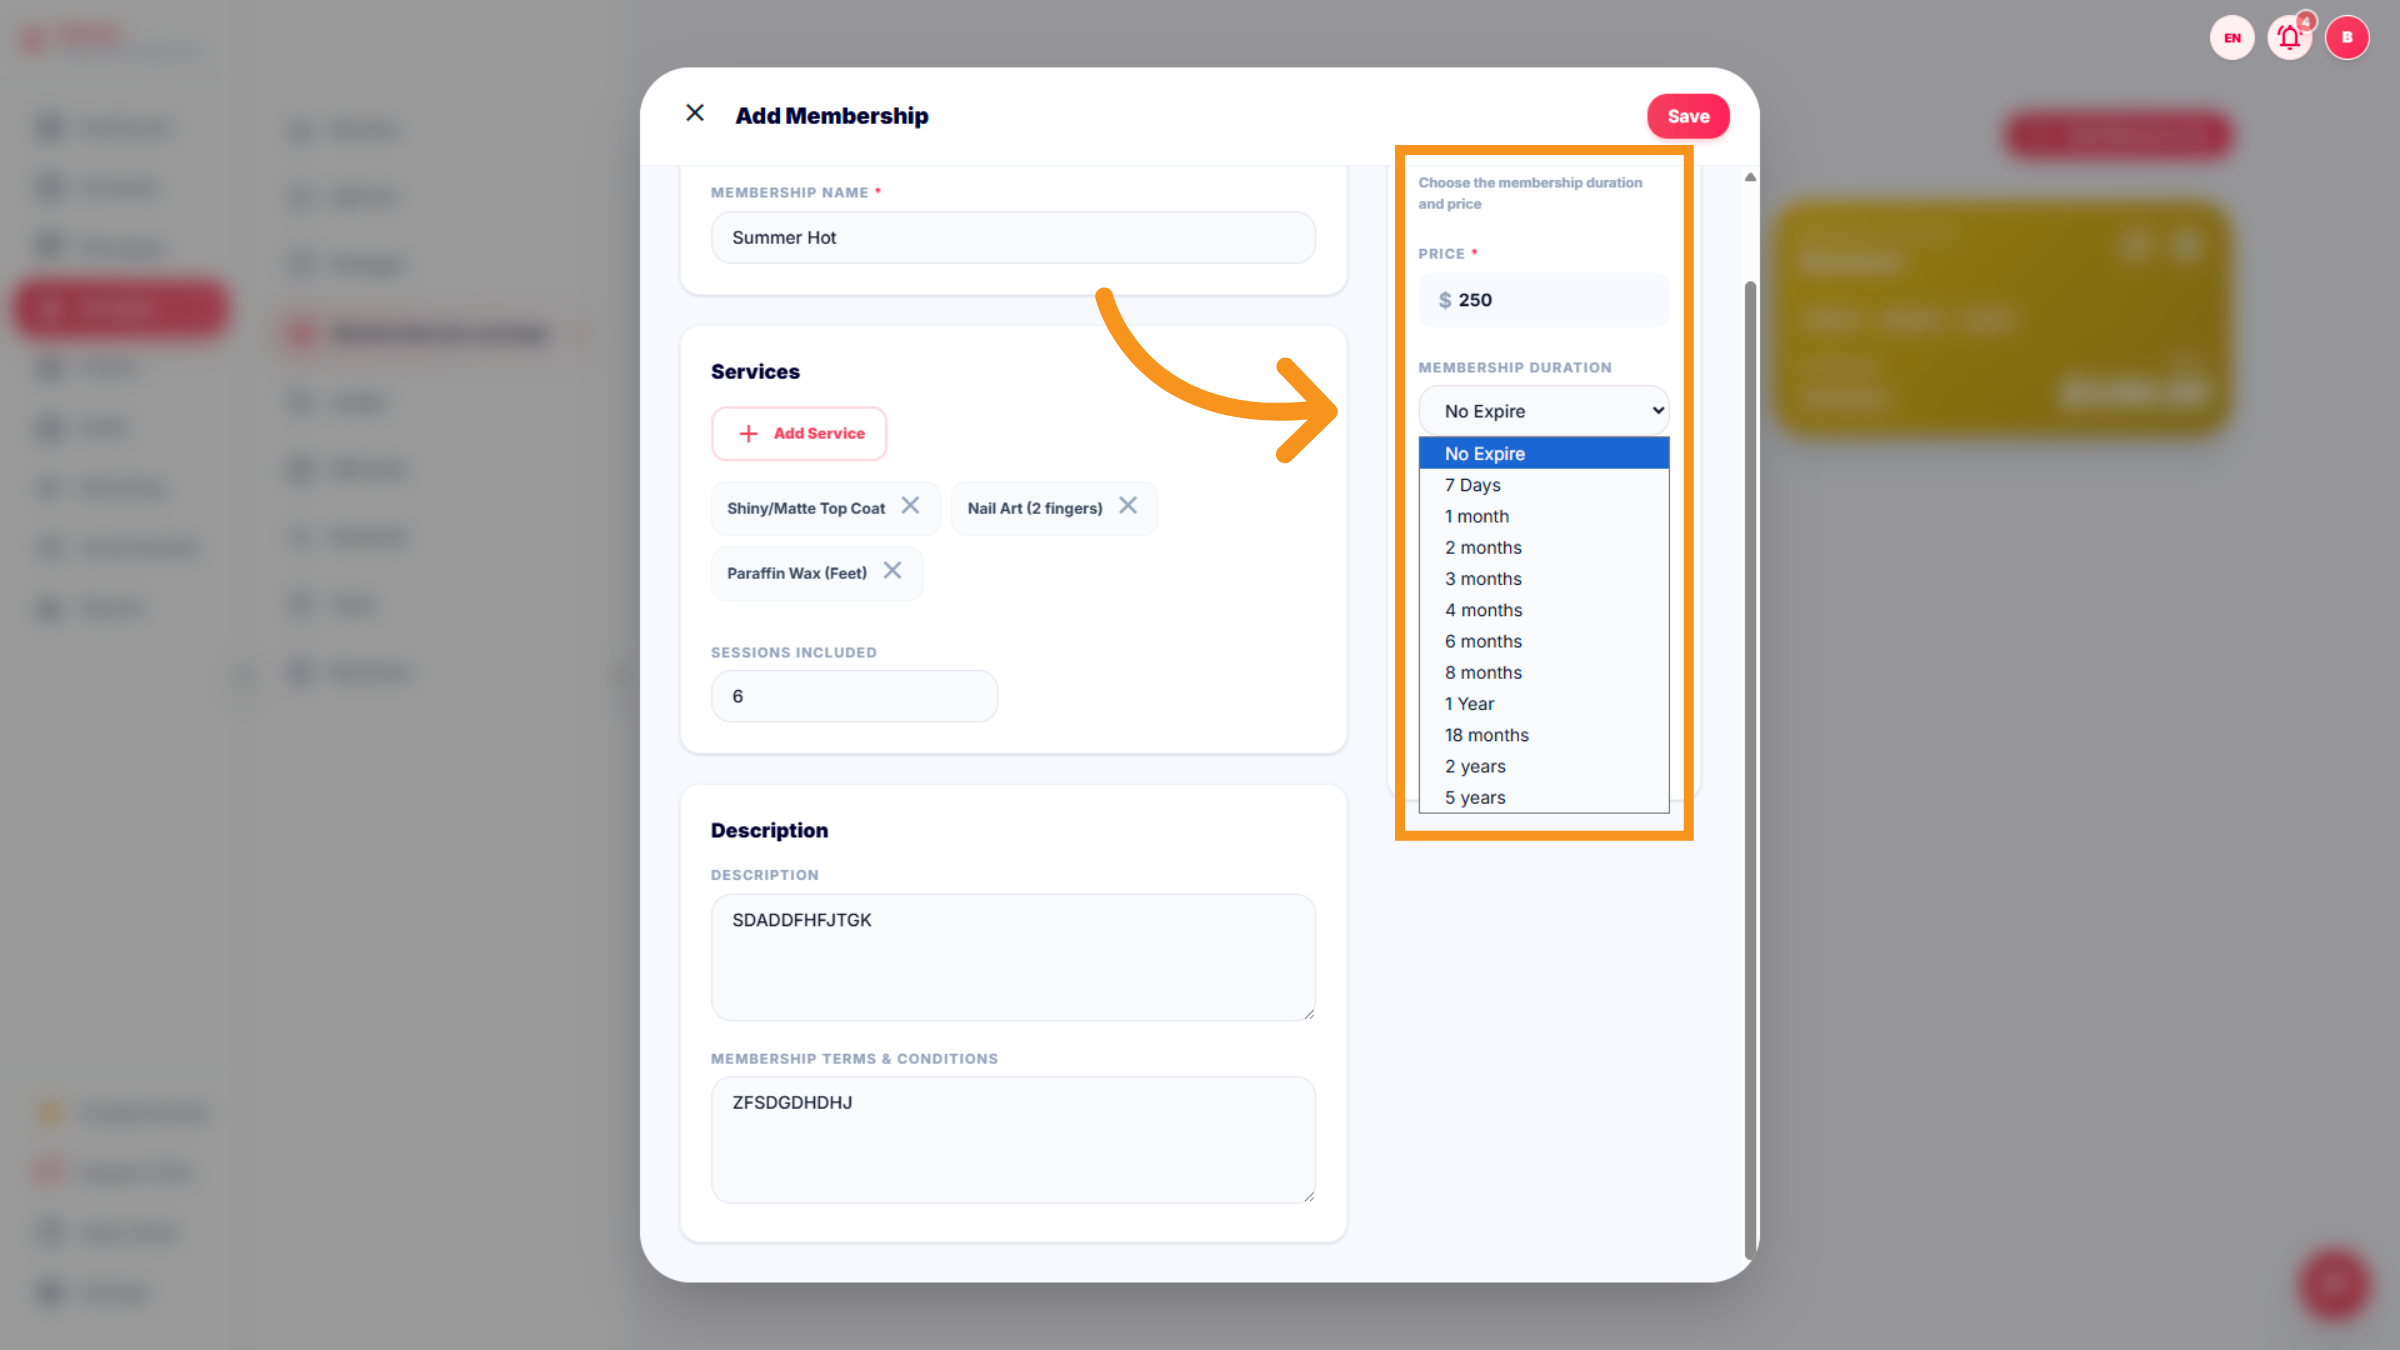
48. Select Price and Expiry Options
You can add Price and membership duration (expiry) and click "SAVE" to complete the process
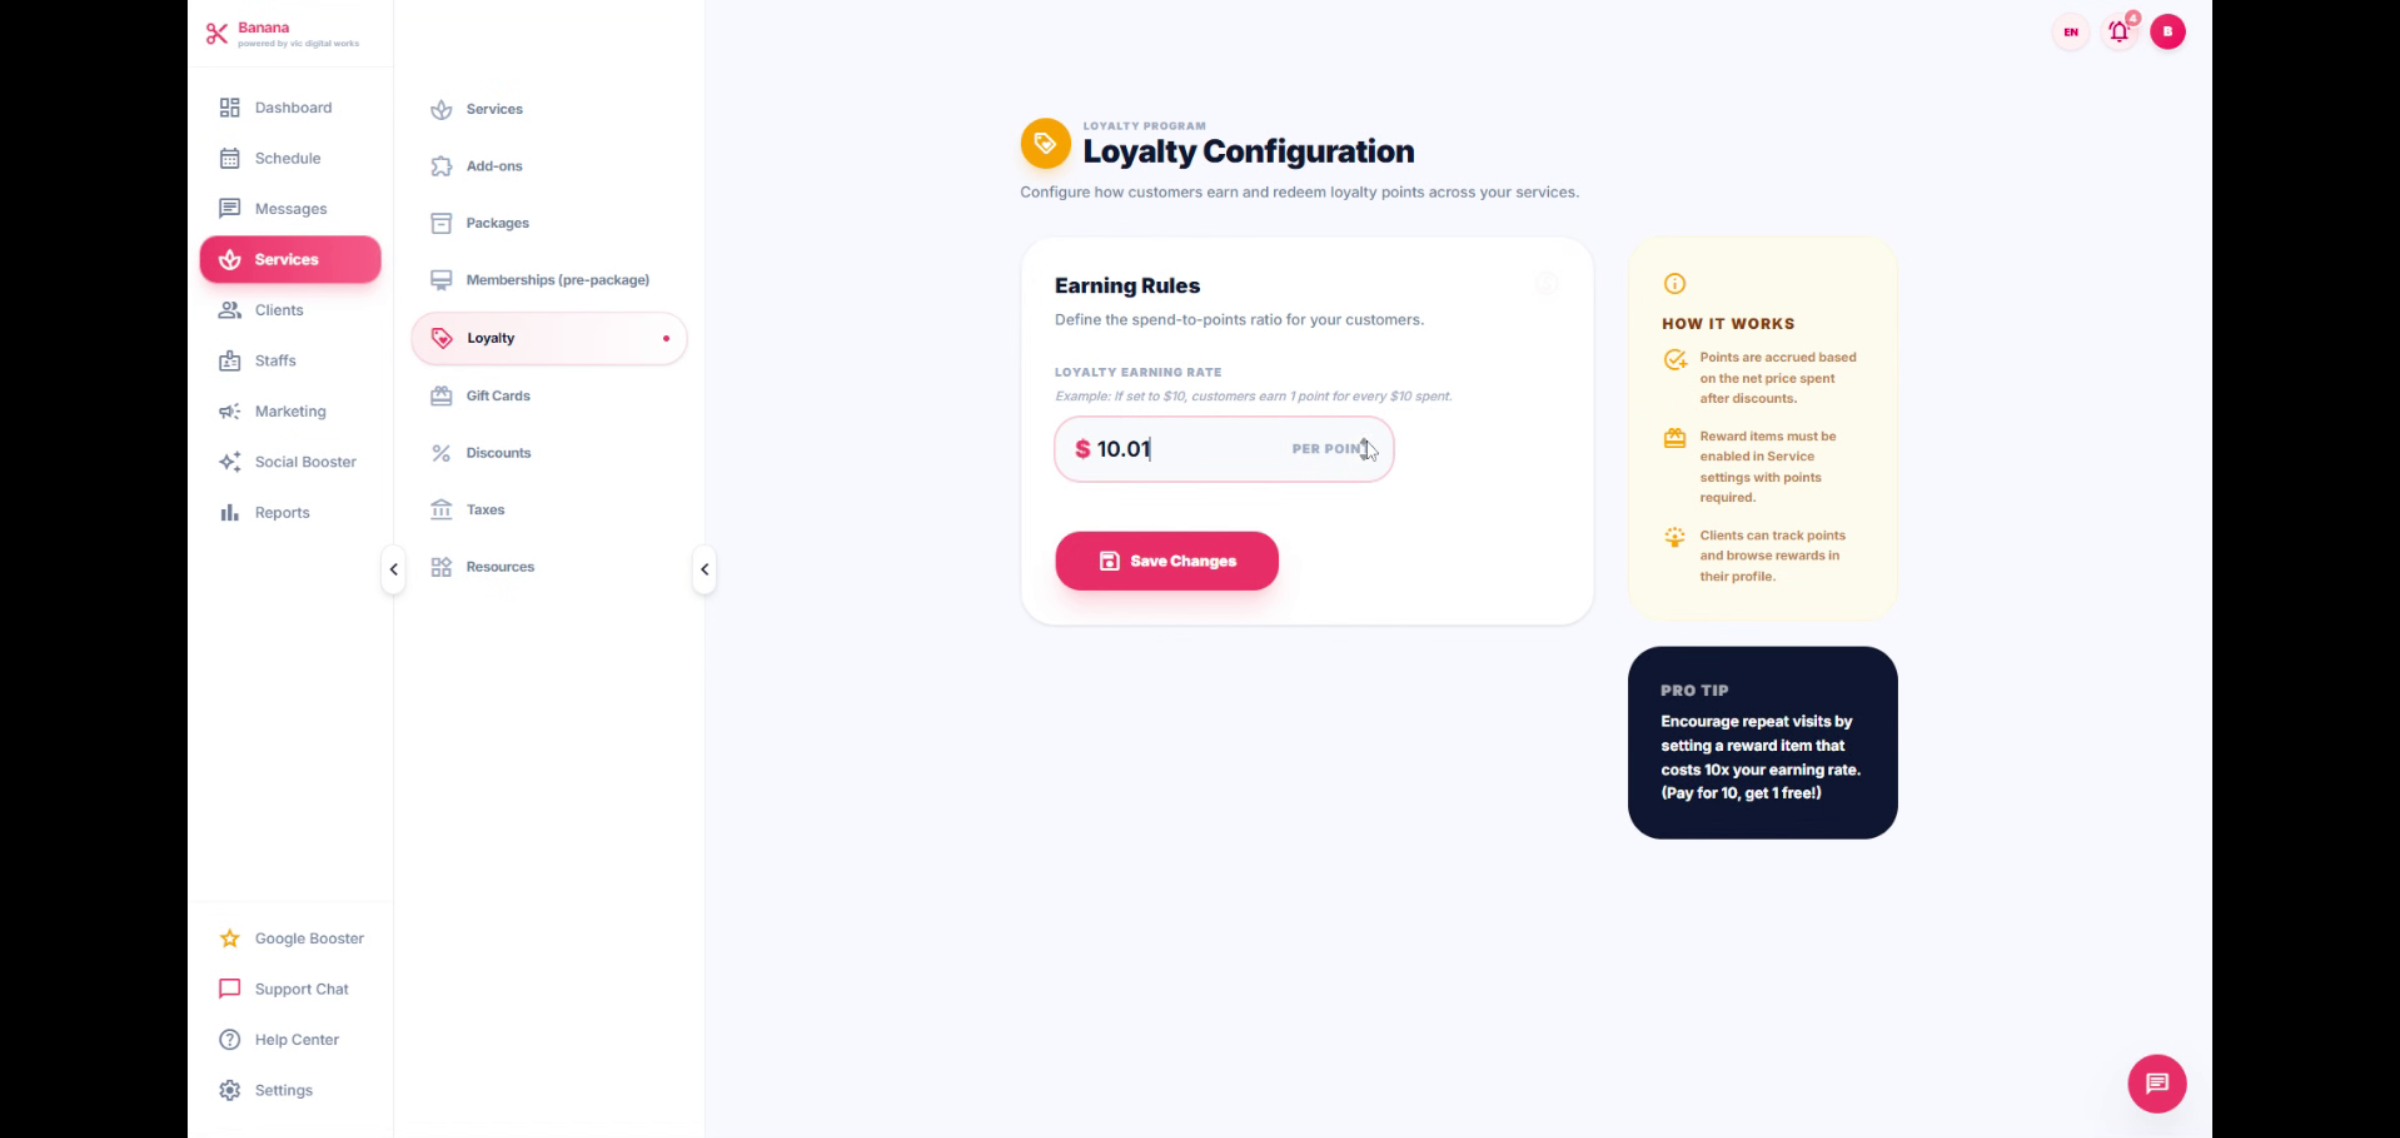
49. Loyalty
Click Loyalty to manage loyalty program settings and rewards. Includes : Earning Rules, How it works, Pro tip
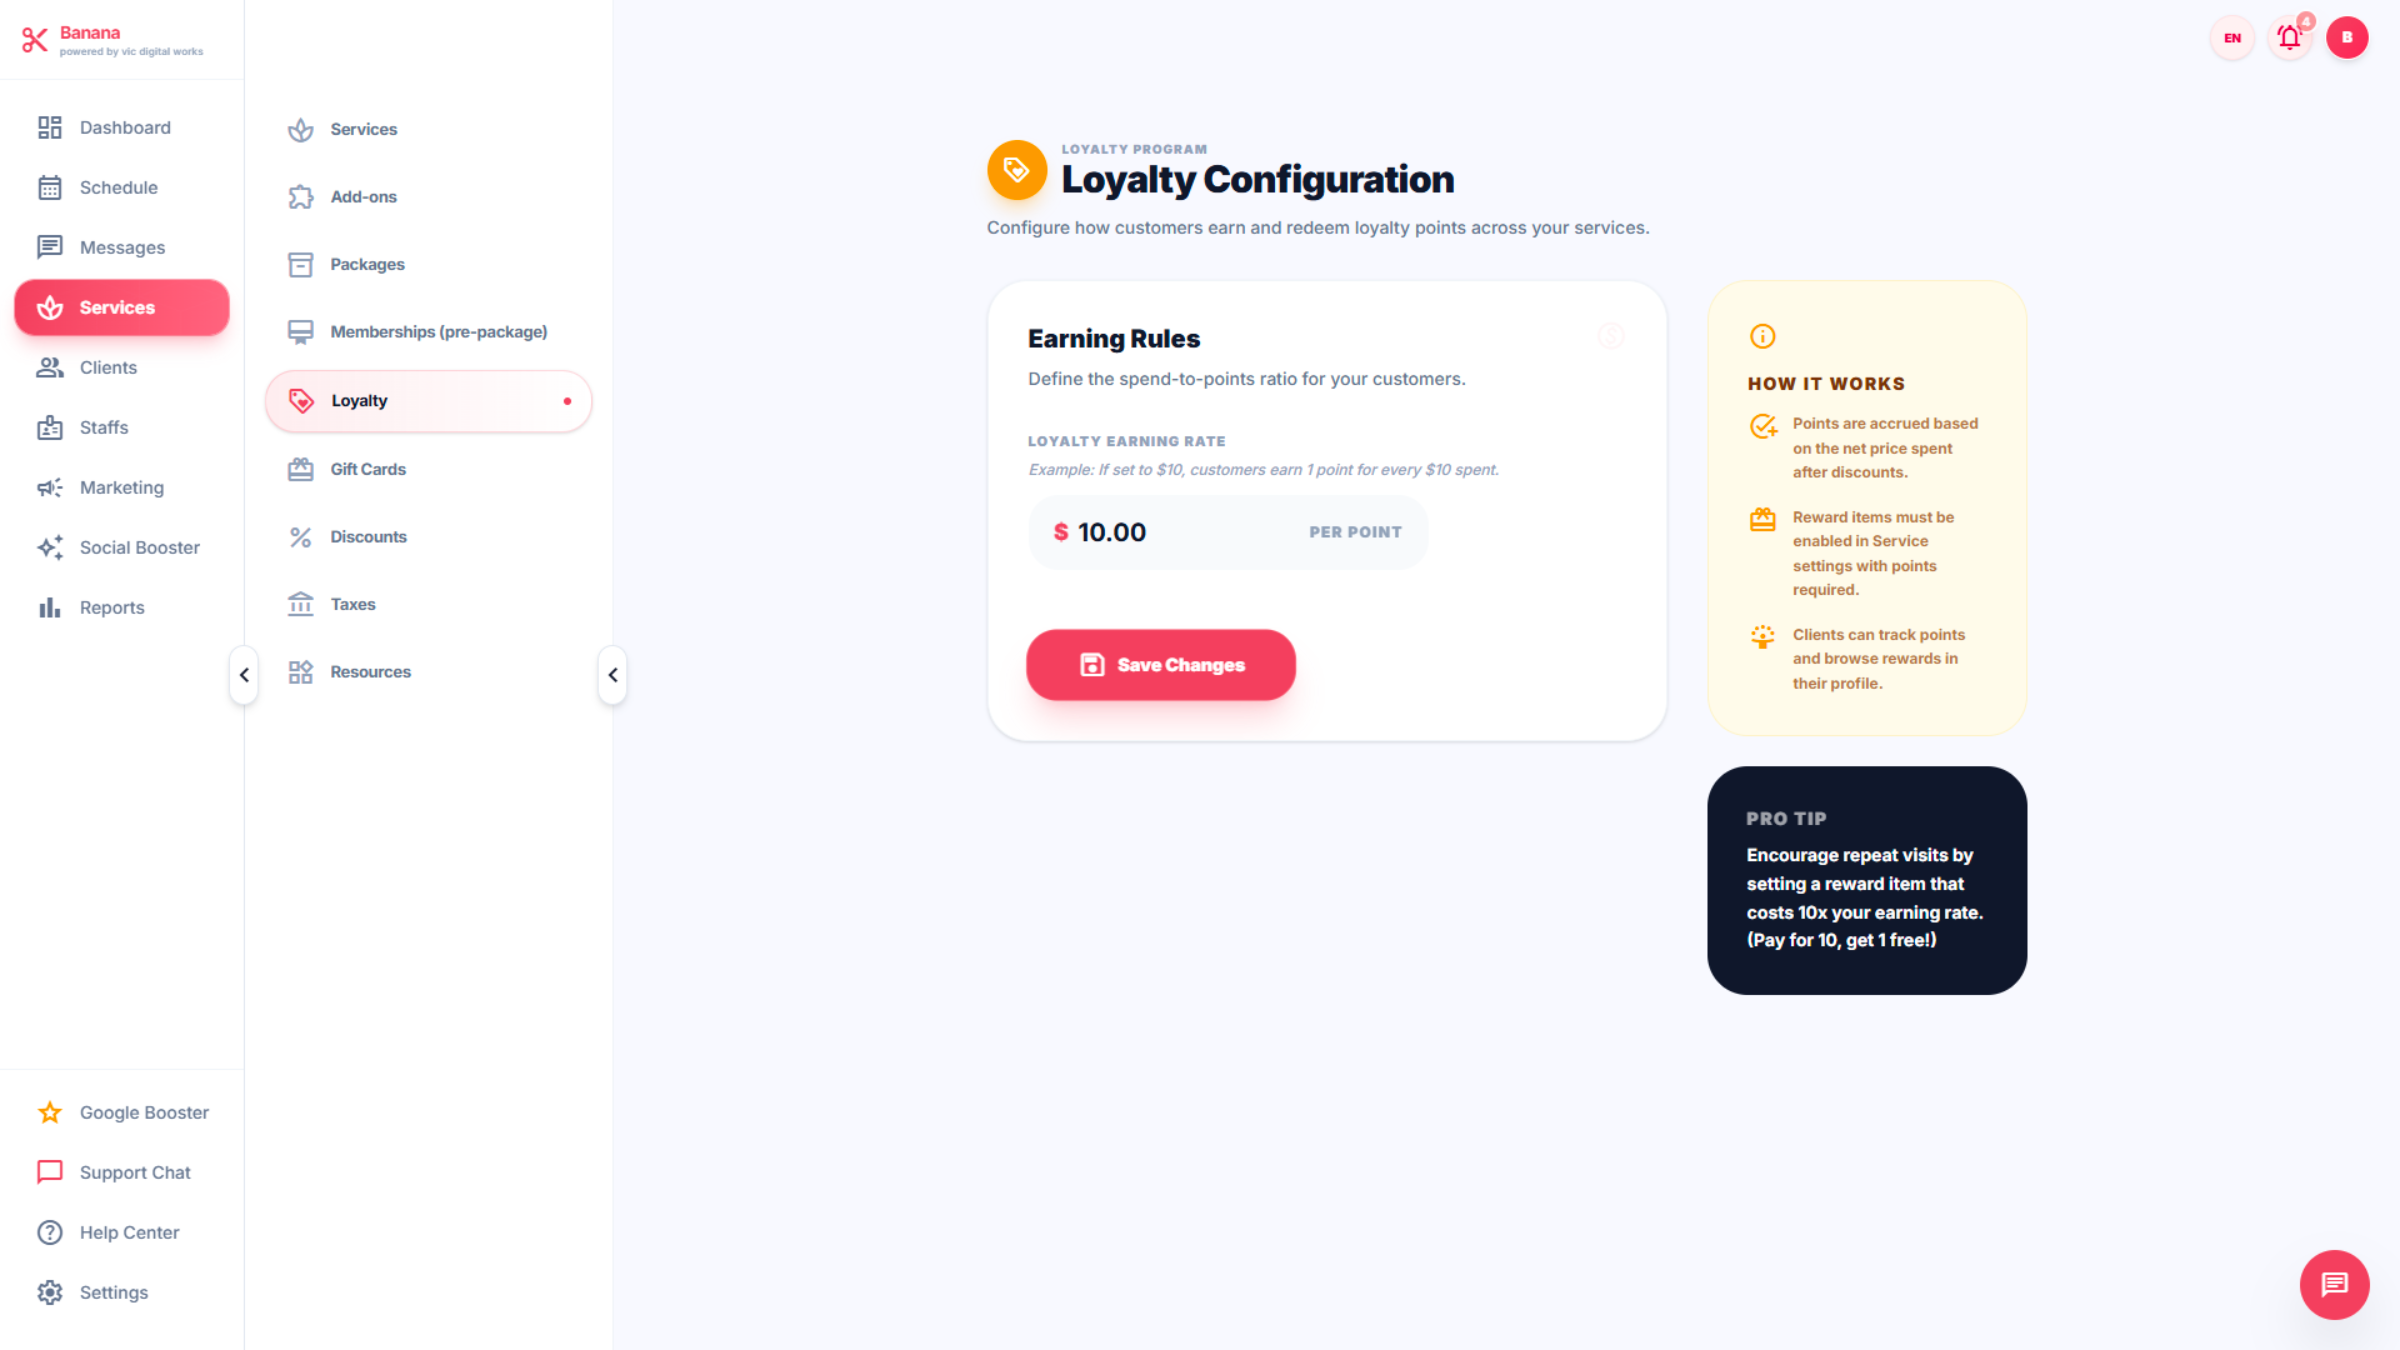
50. Enter Price Value
You can set any price within Earning Rules.
51. Gift Cards
Gift cards enable customers to prepay for services or products. The card value can be redeemed at the salon in accordance with the salon owner's policies. Gift Cards includes : Setting Issued card Sell Gift card Gift cards values Term & conditions: Online Sales (optional) Promotion:(optional)
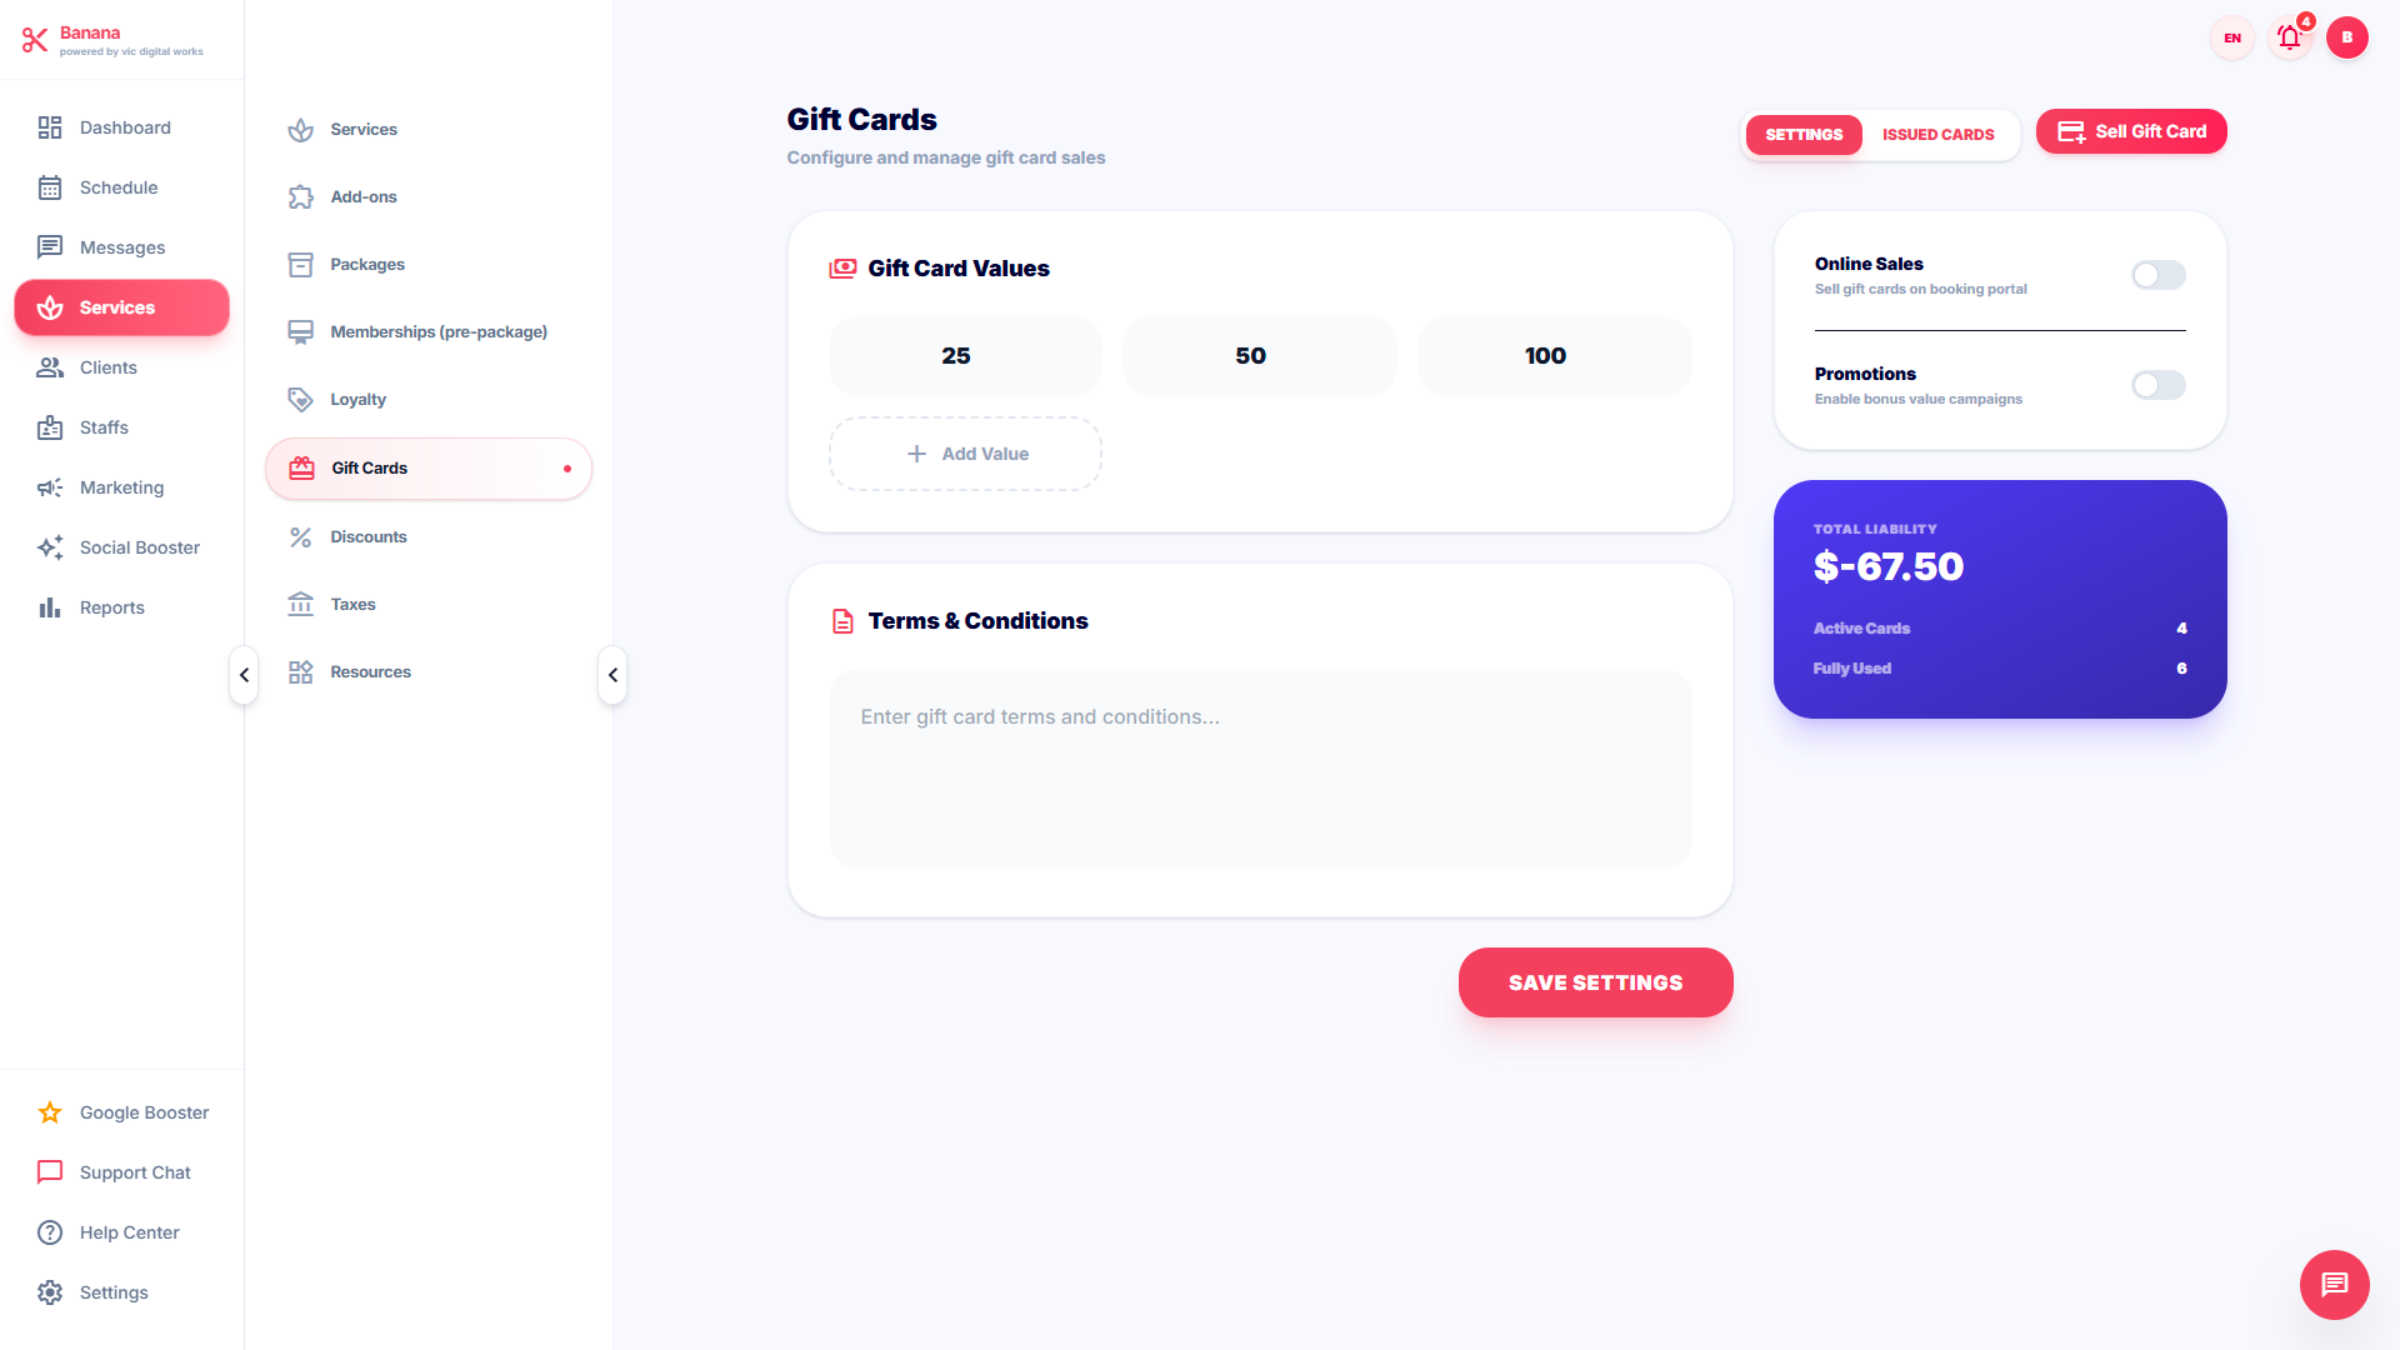
52. Access Gift Card Settings
Click SETTINGS to configure gift card options and preferences.includes : CODE,CLIENT, ORIGINAL VALUE, BALANCE,STATUS,EXPIRY

53. Add Gift Card Value
Click "Add Value" to add a new value to a gift card.
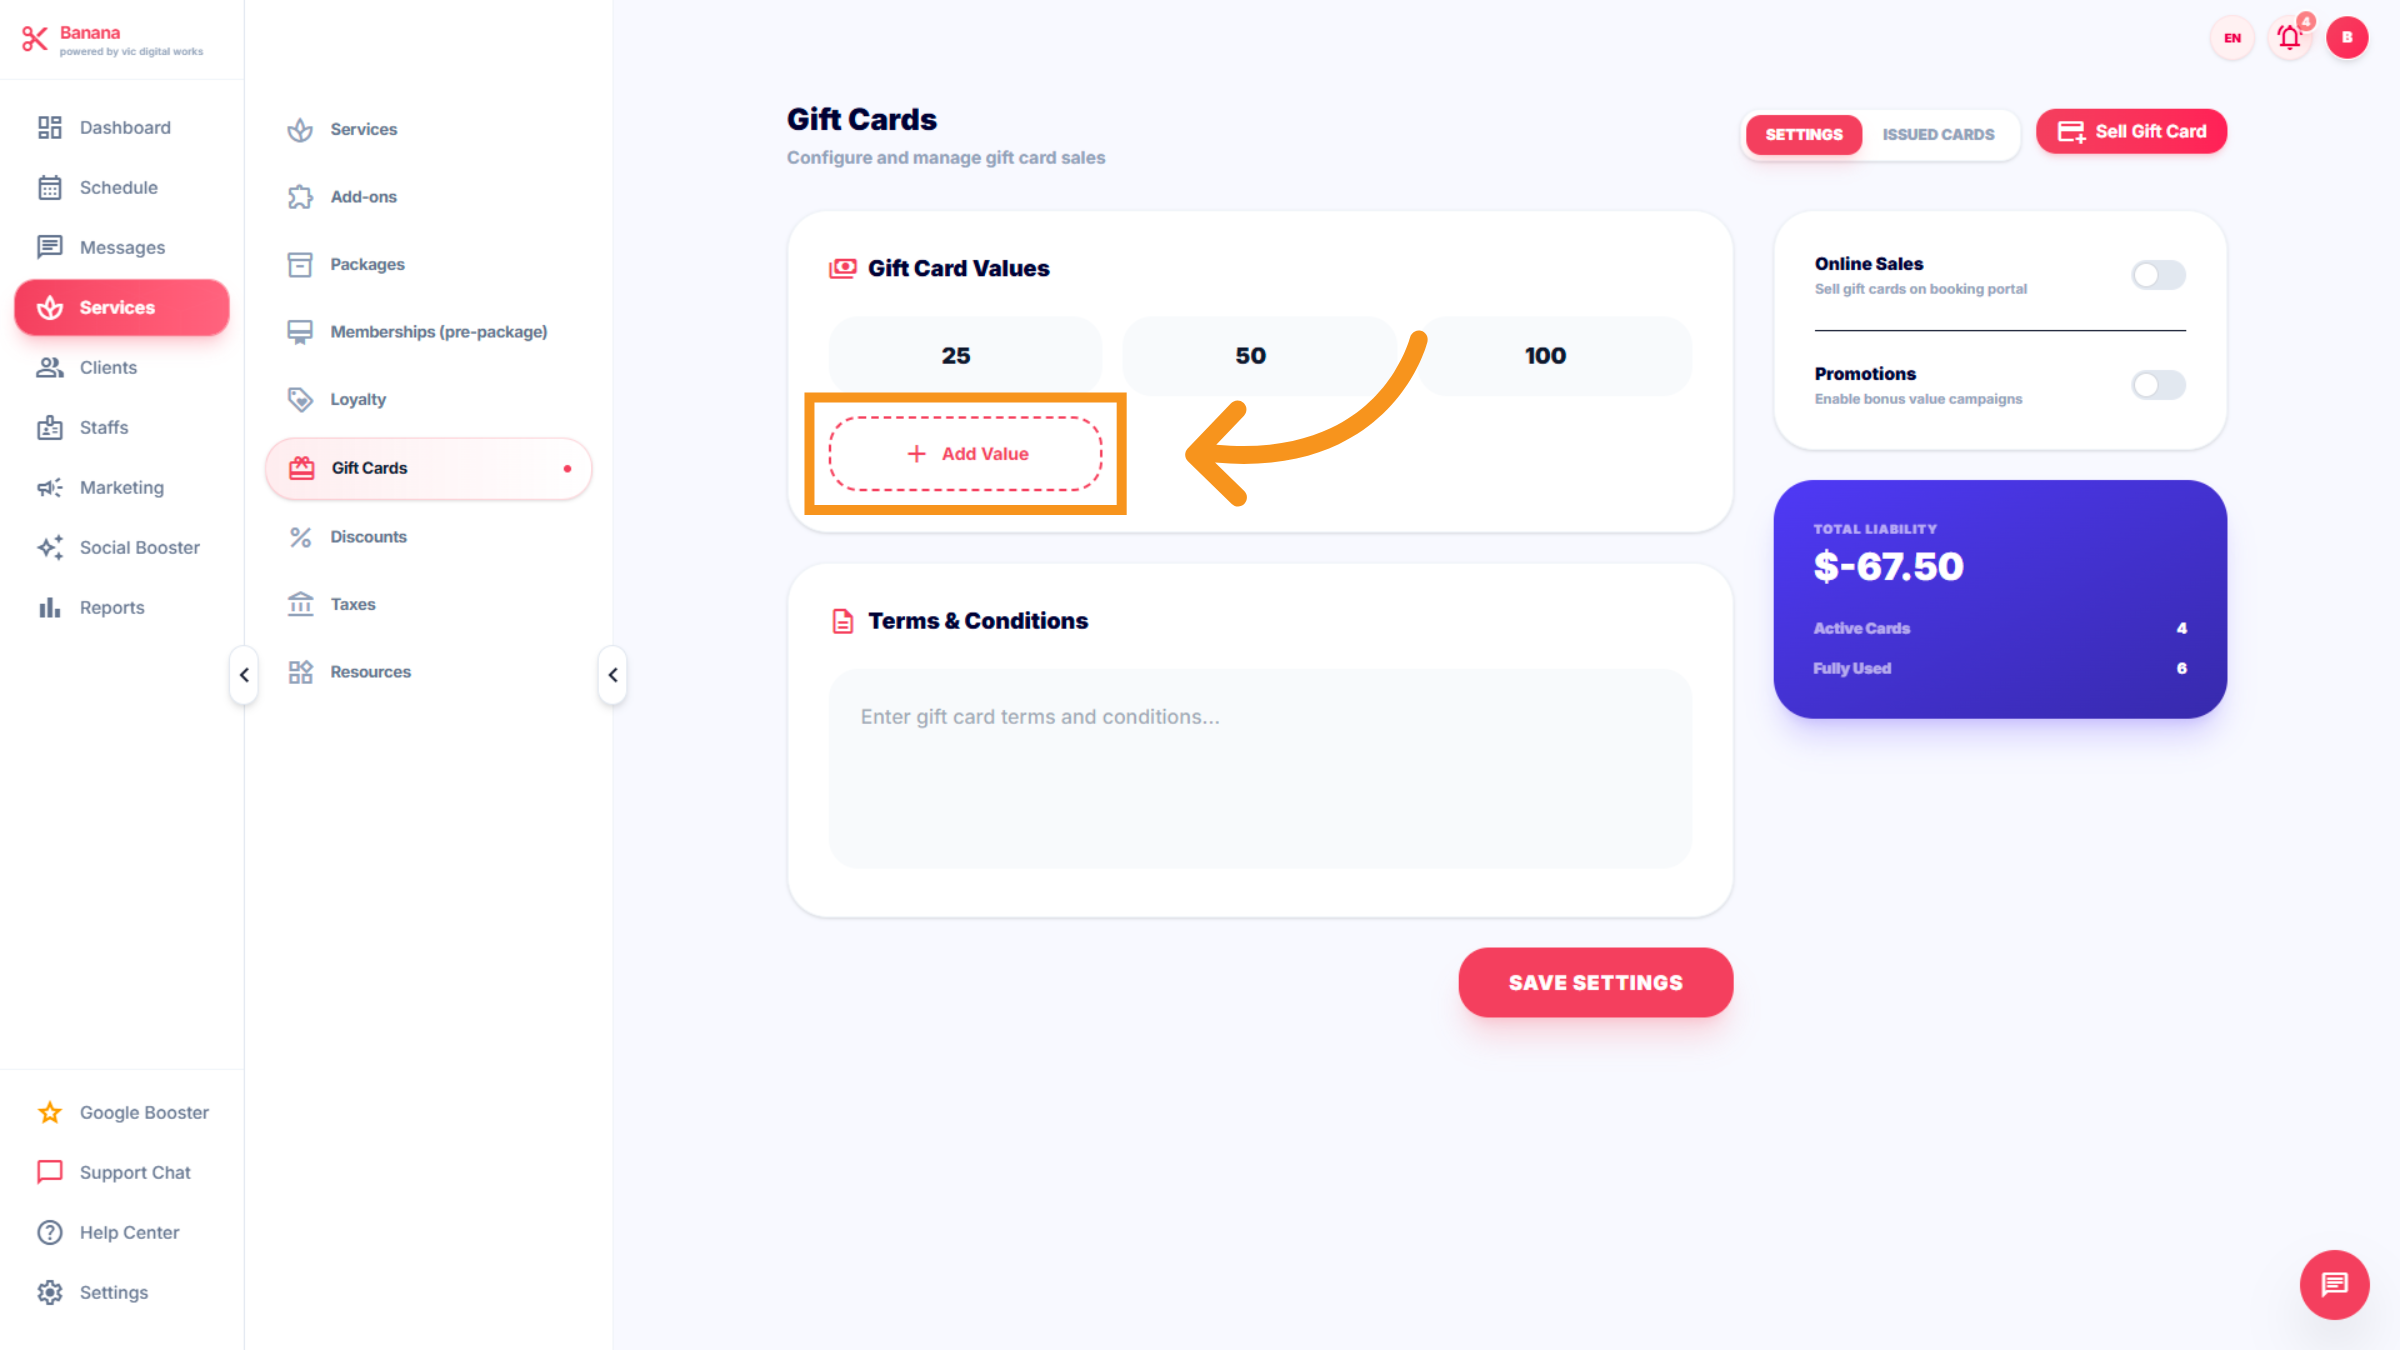
54. Select Gift Card Amount
Or increase value for a gift card .

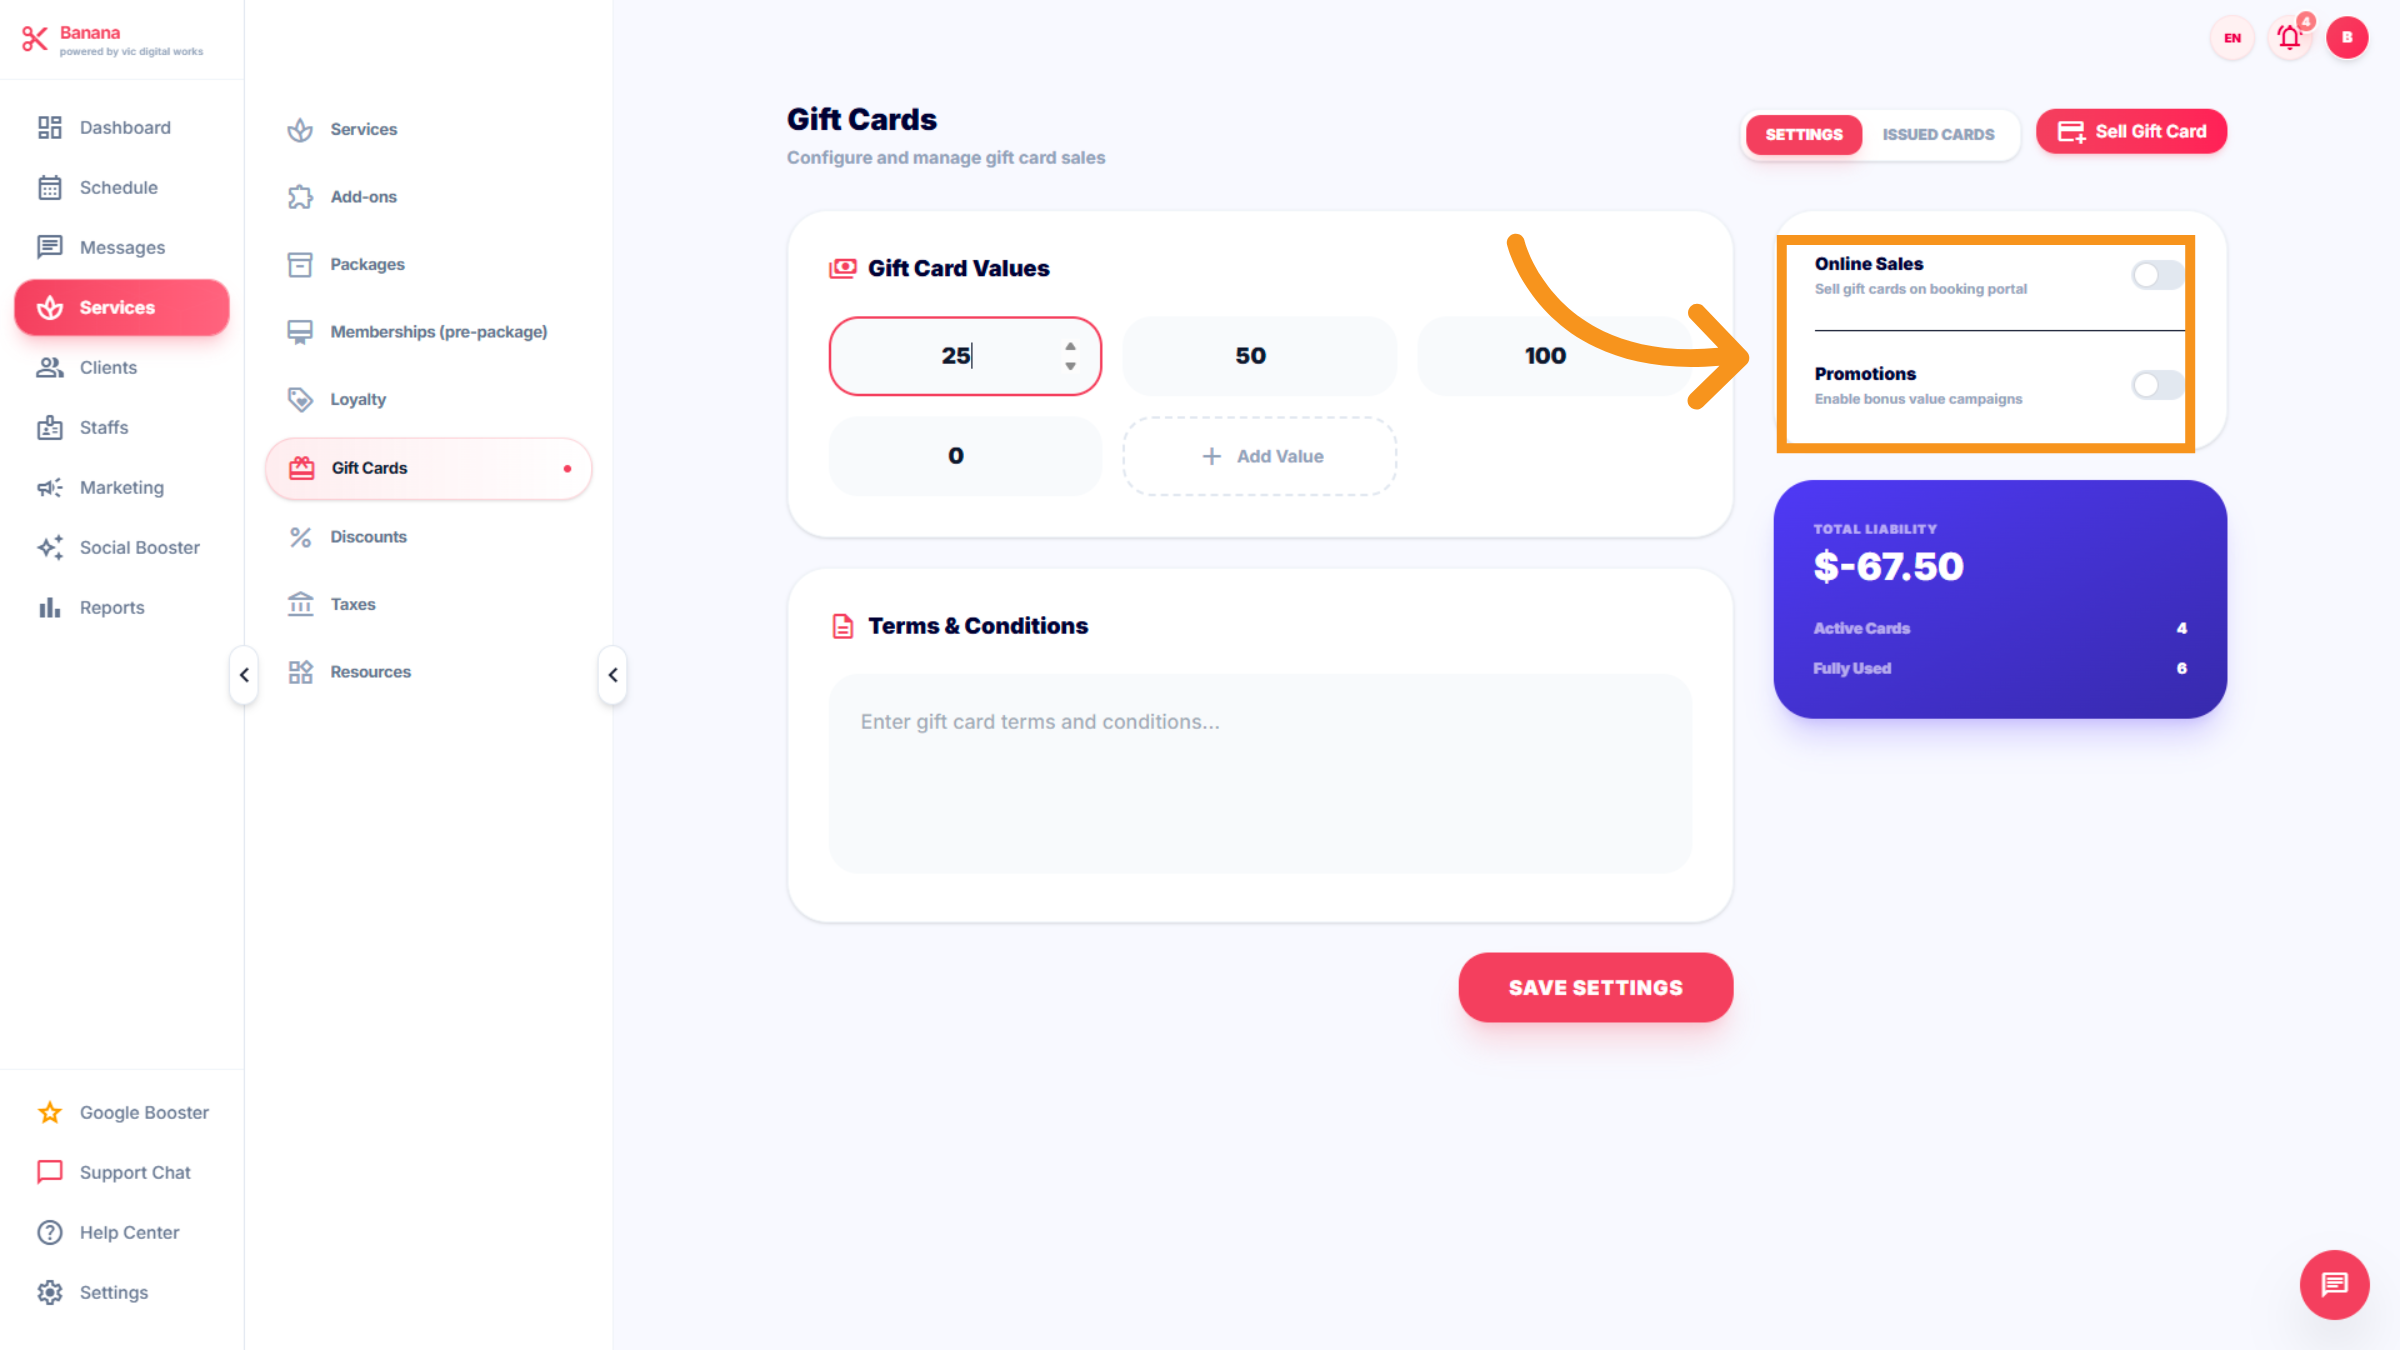
55. Access Additional Options
This section is optional. You can "click" one when you wish to promote.
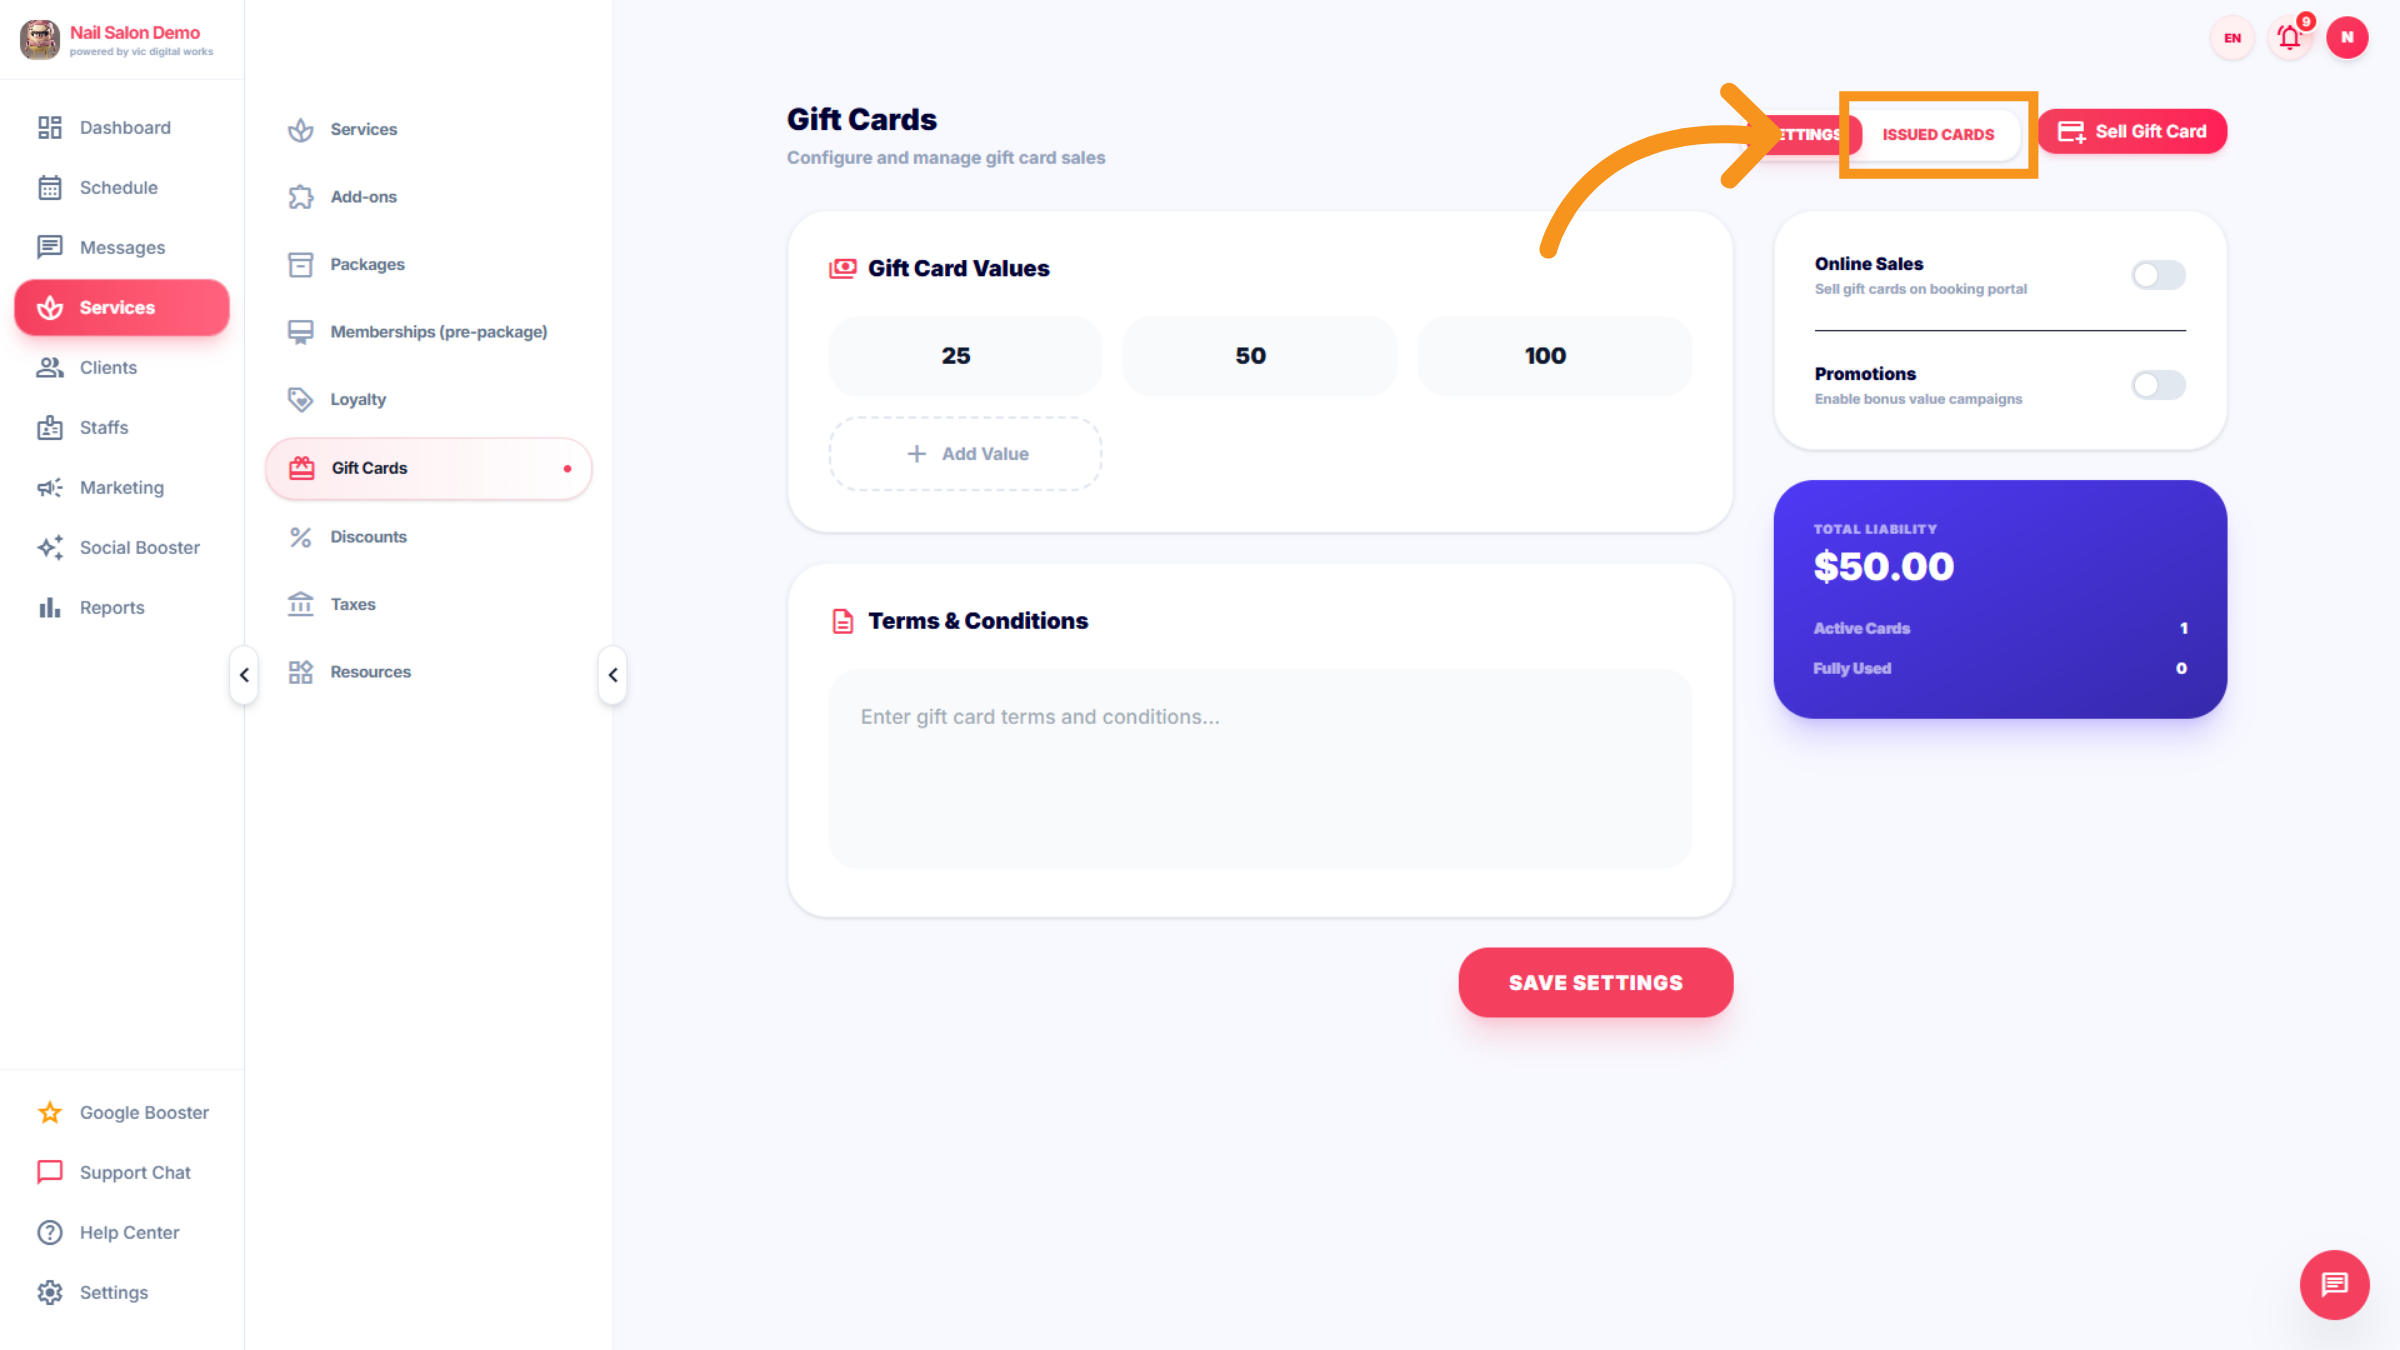
56. Access Issued Cards Section
Click "ISSUED CARDS" to open the section where all issued cards are managed within the Salon
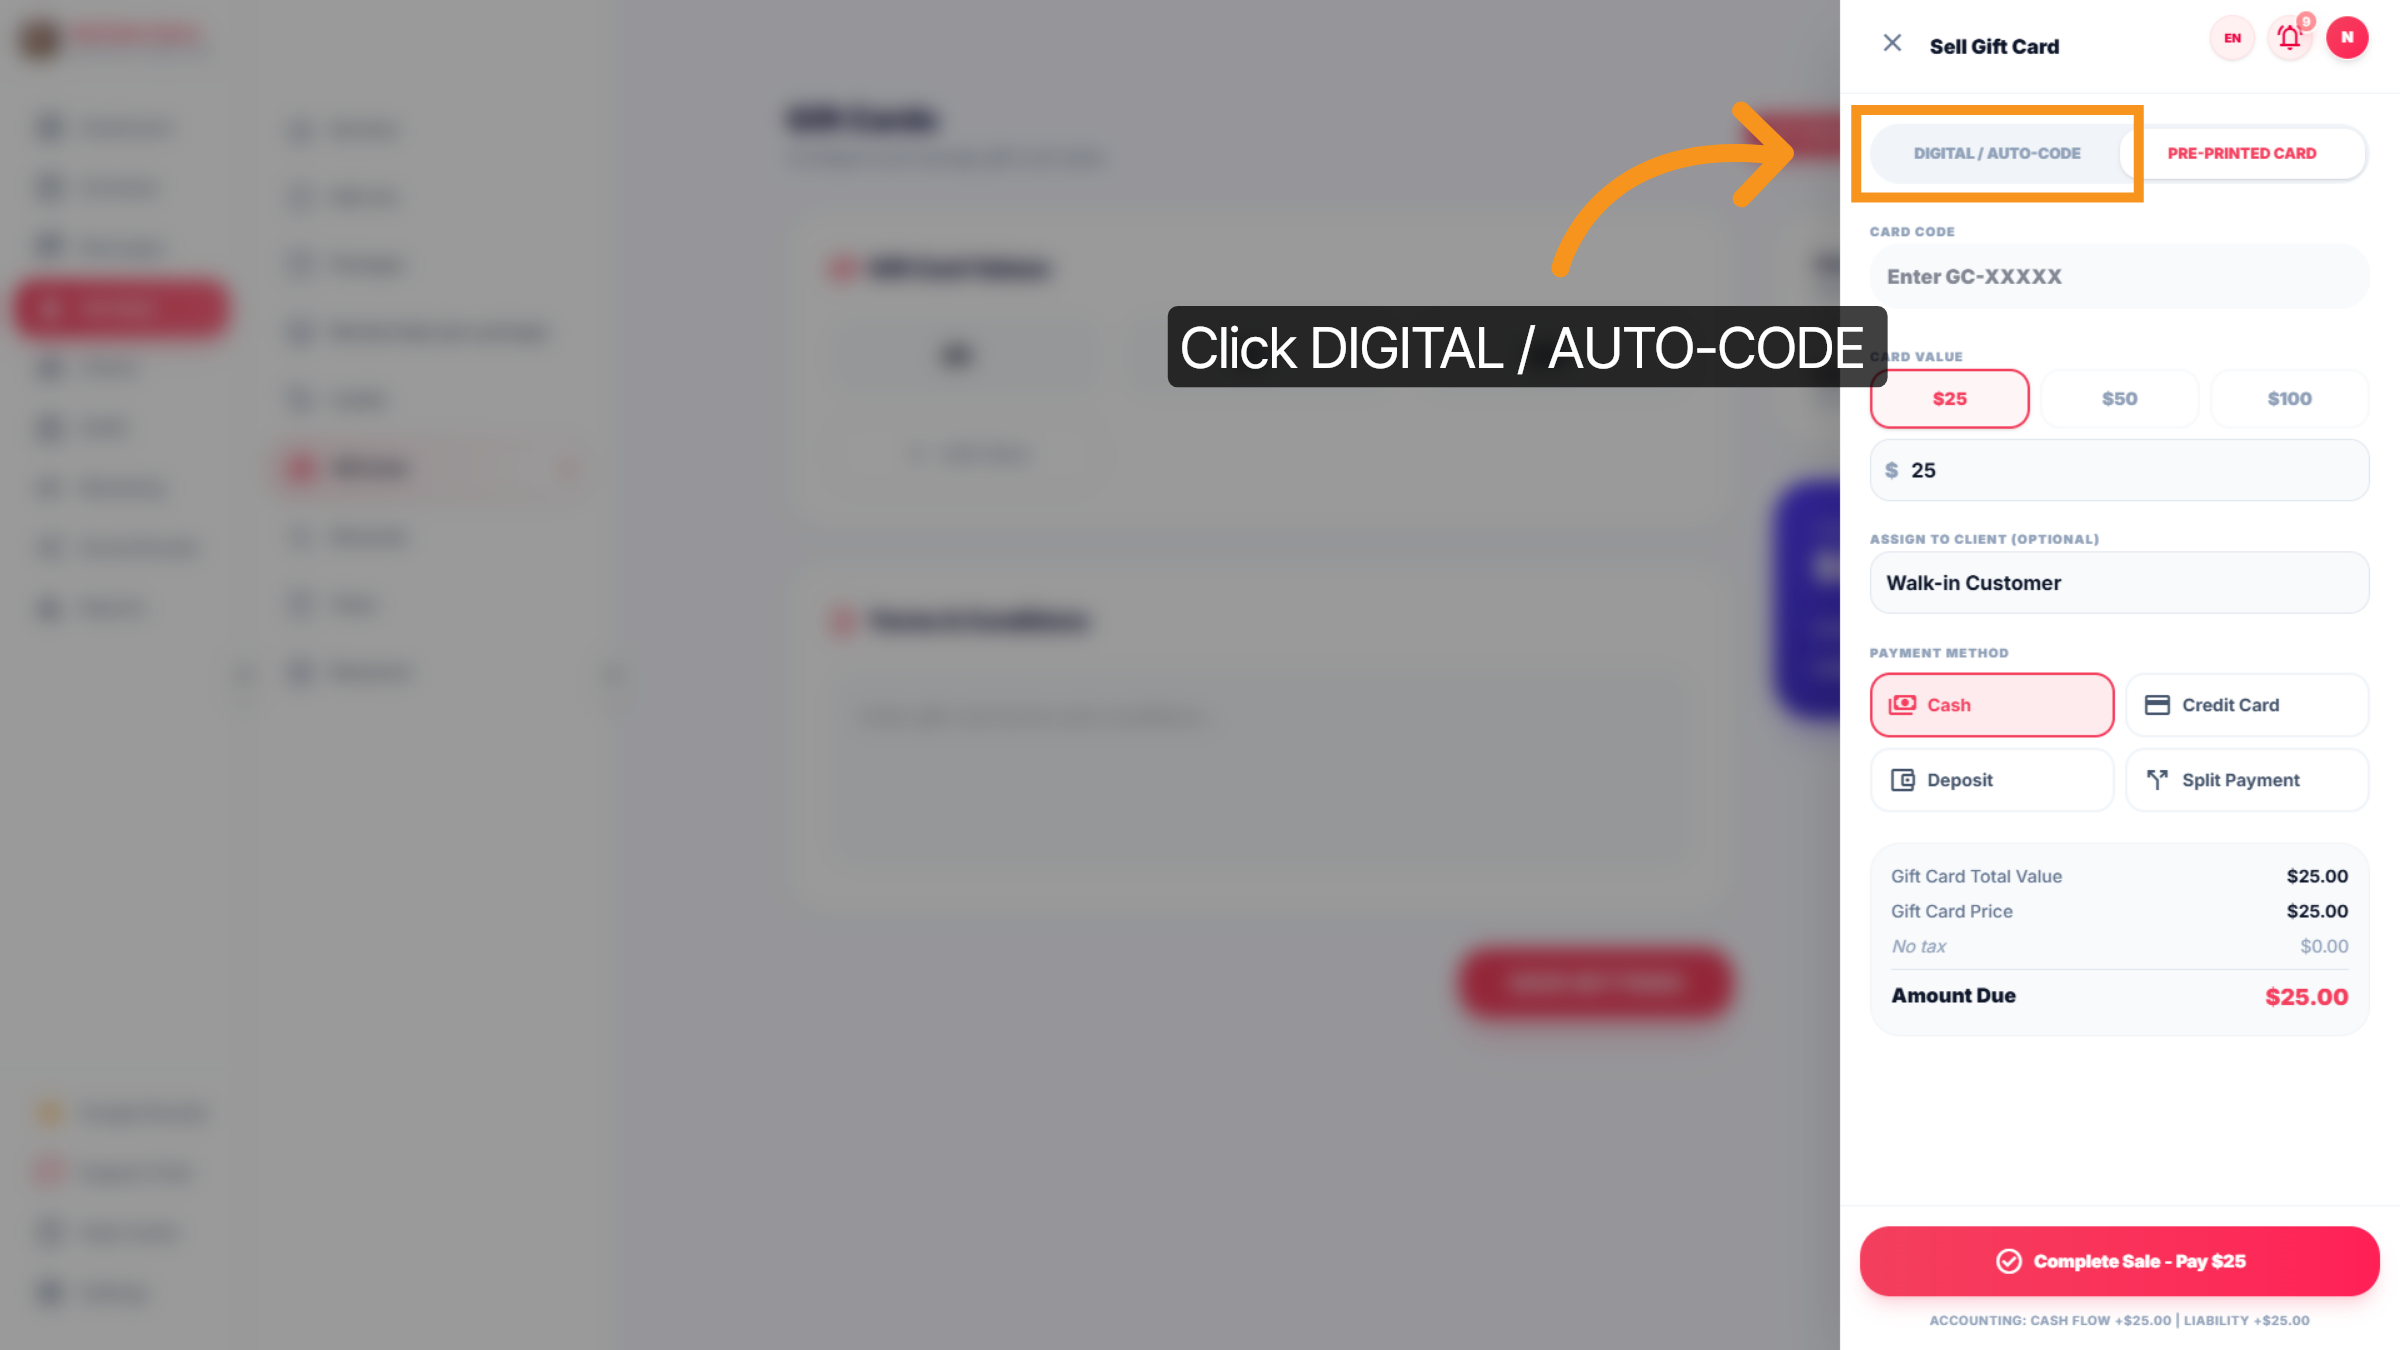
57. Sell Gift Summary
Sell Gift Card /Pre-printed card summary includes : Card values, Assign to Client(optional), Payment method (Cash,Credit card,Deposit,split payment)

58. Sell Gift card/ Digital Auto-Code Card
Click "DIGITAL / AUTO-CODE" fill Card code and check Card values, Assign to Client(optional), Payment method (Cash,Credit card,Deposit,split payment).
59. Split Payment Option
Click "splitSplit Payment" to enable split payment for the transaction.
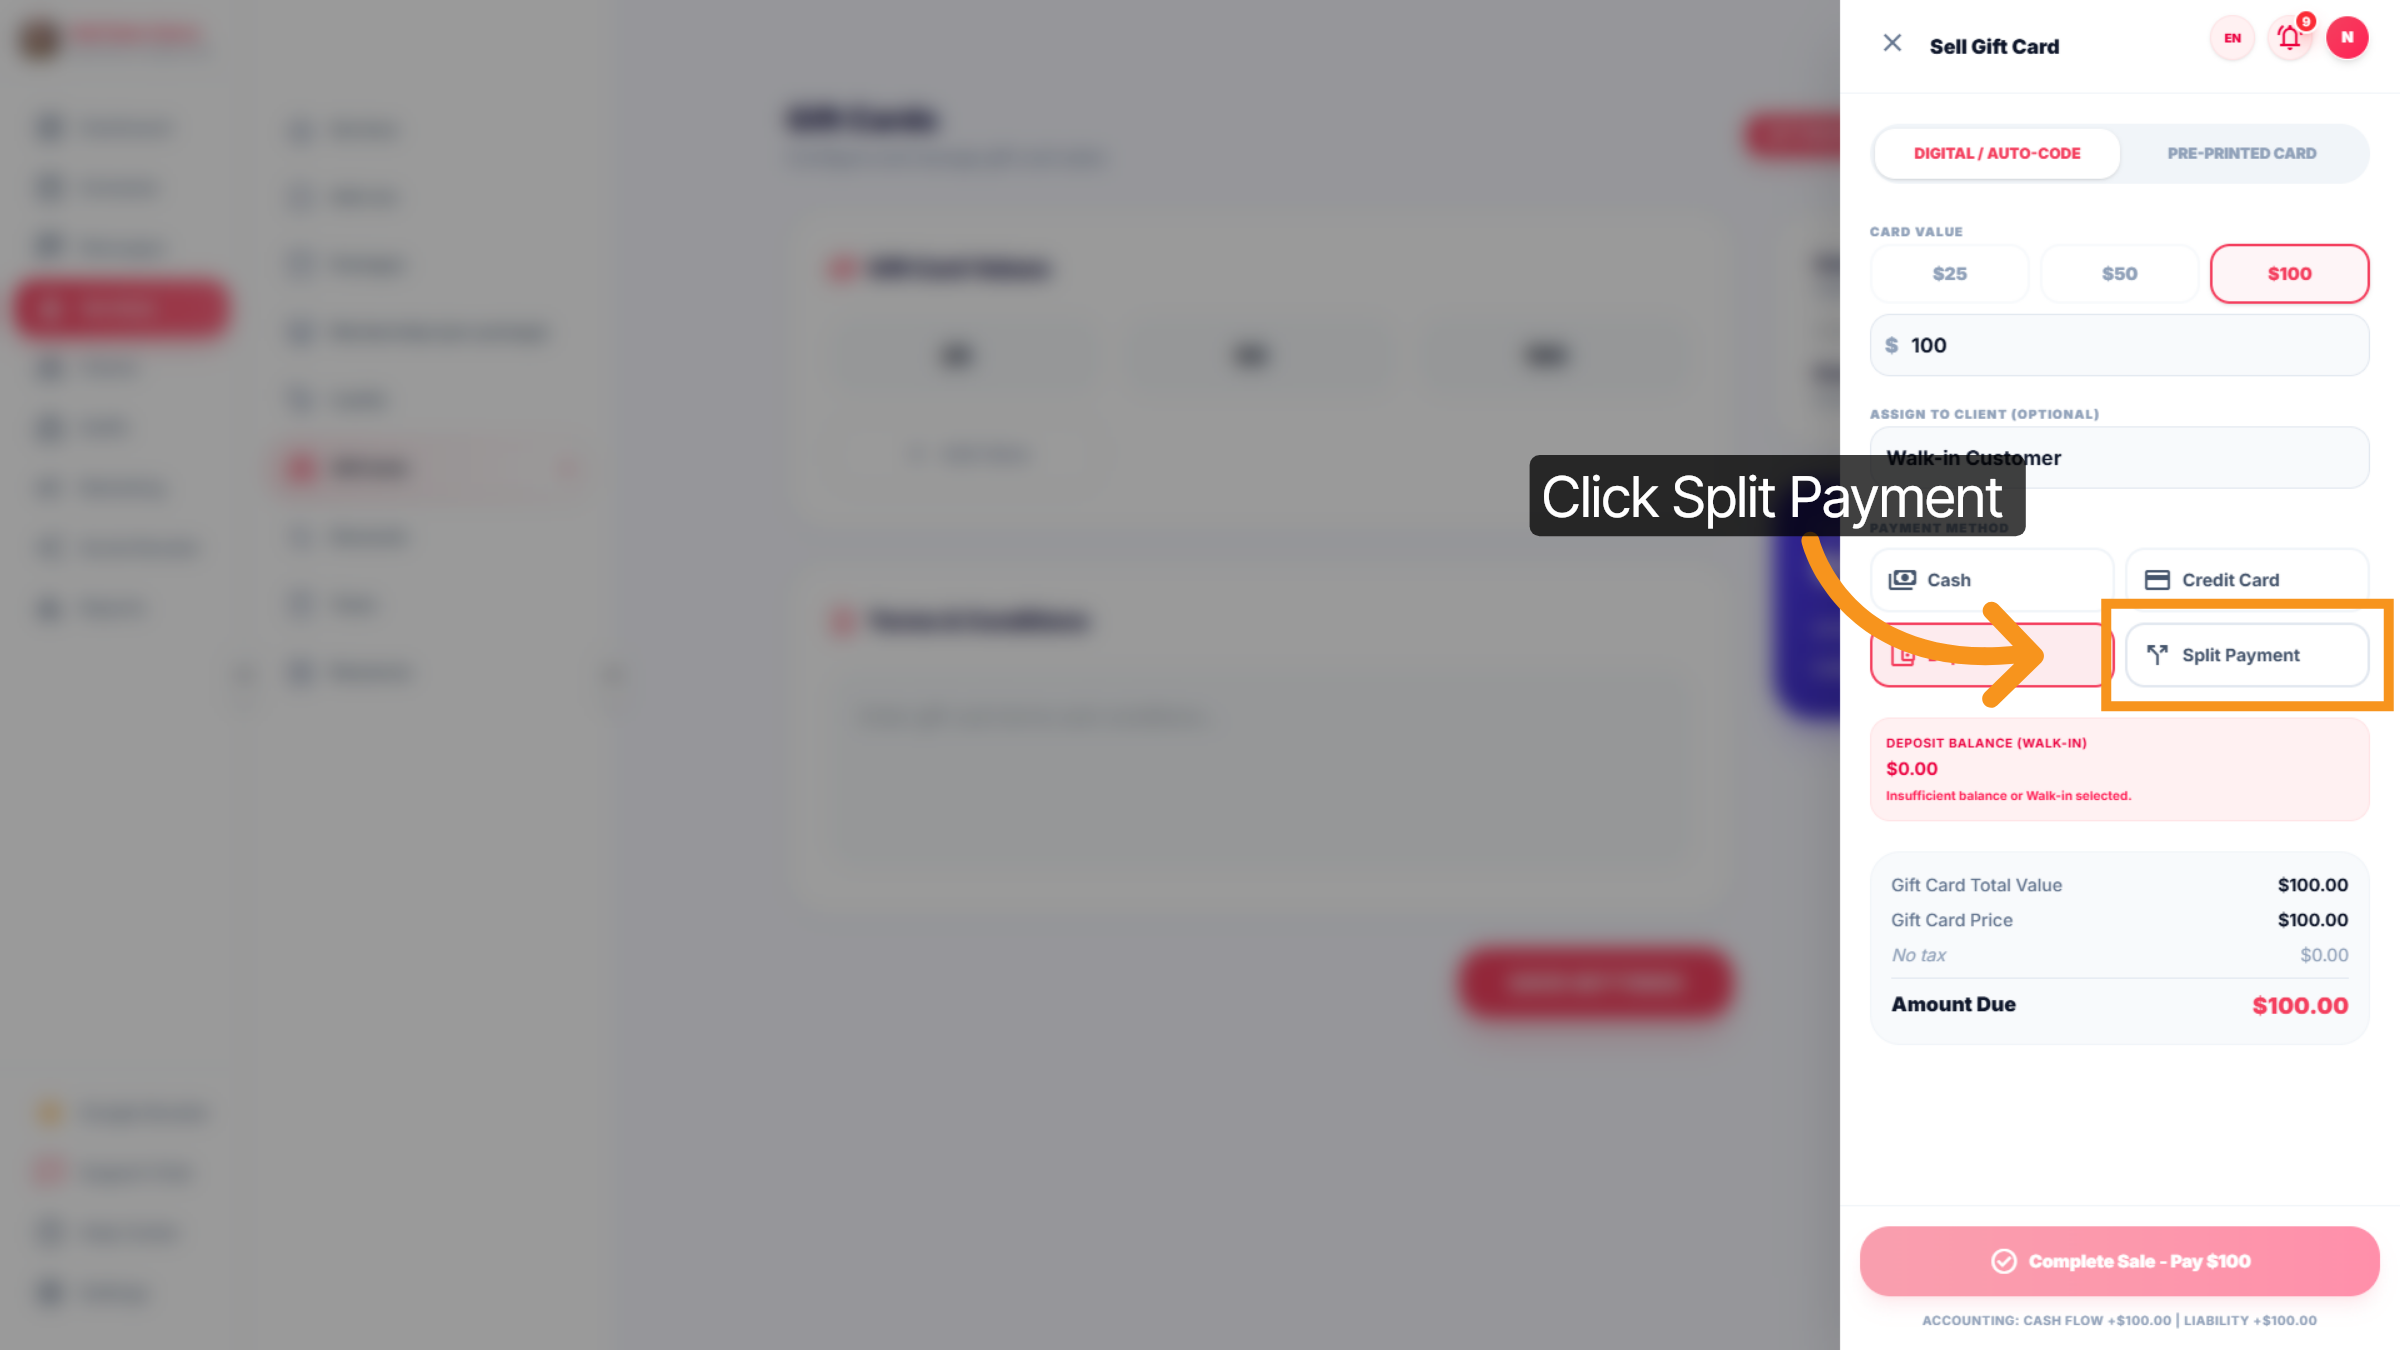
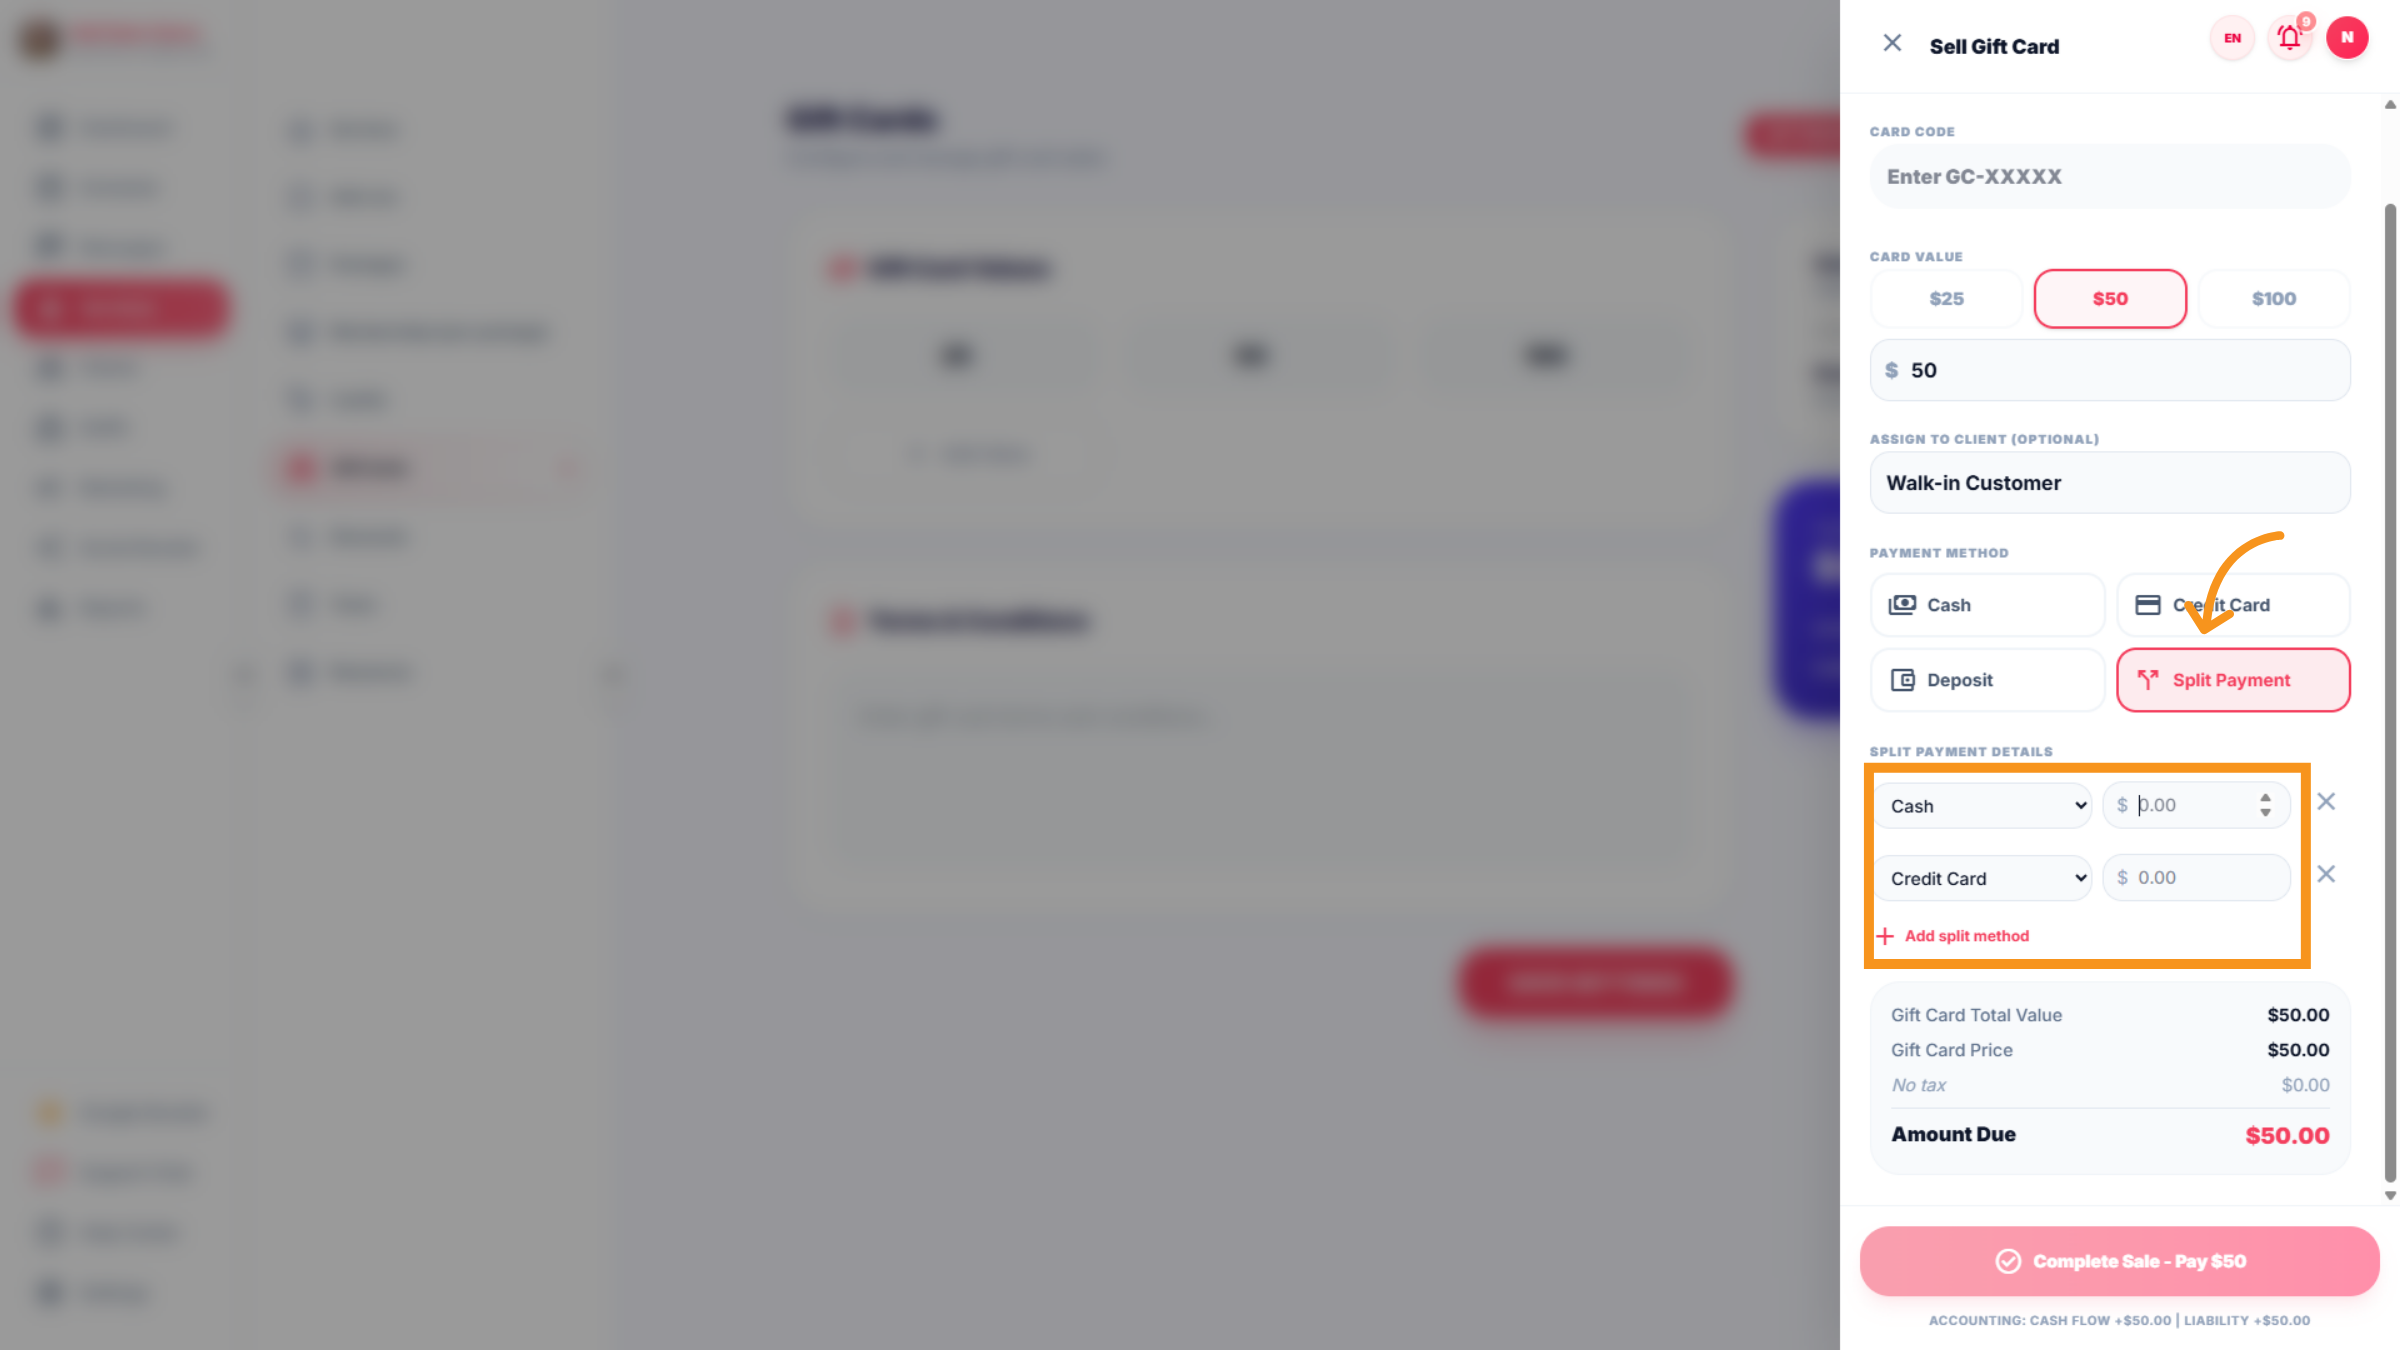
60. Select "Split payment"
"Split Payment": Enable split payment to let customers pay with multiple methods in one transaction.
61. TAX
This section lets salon owners configure taxes for services and products.
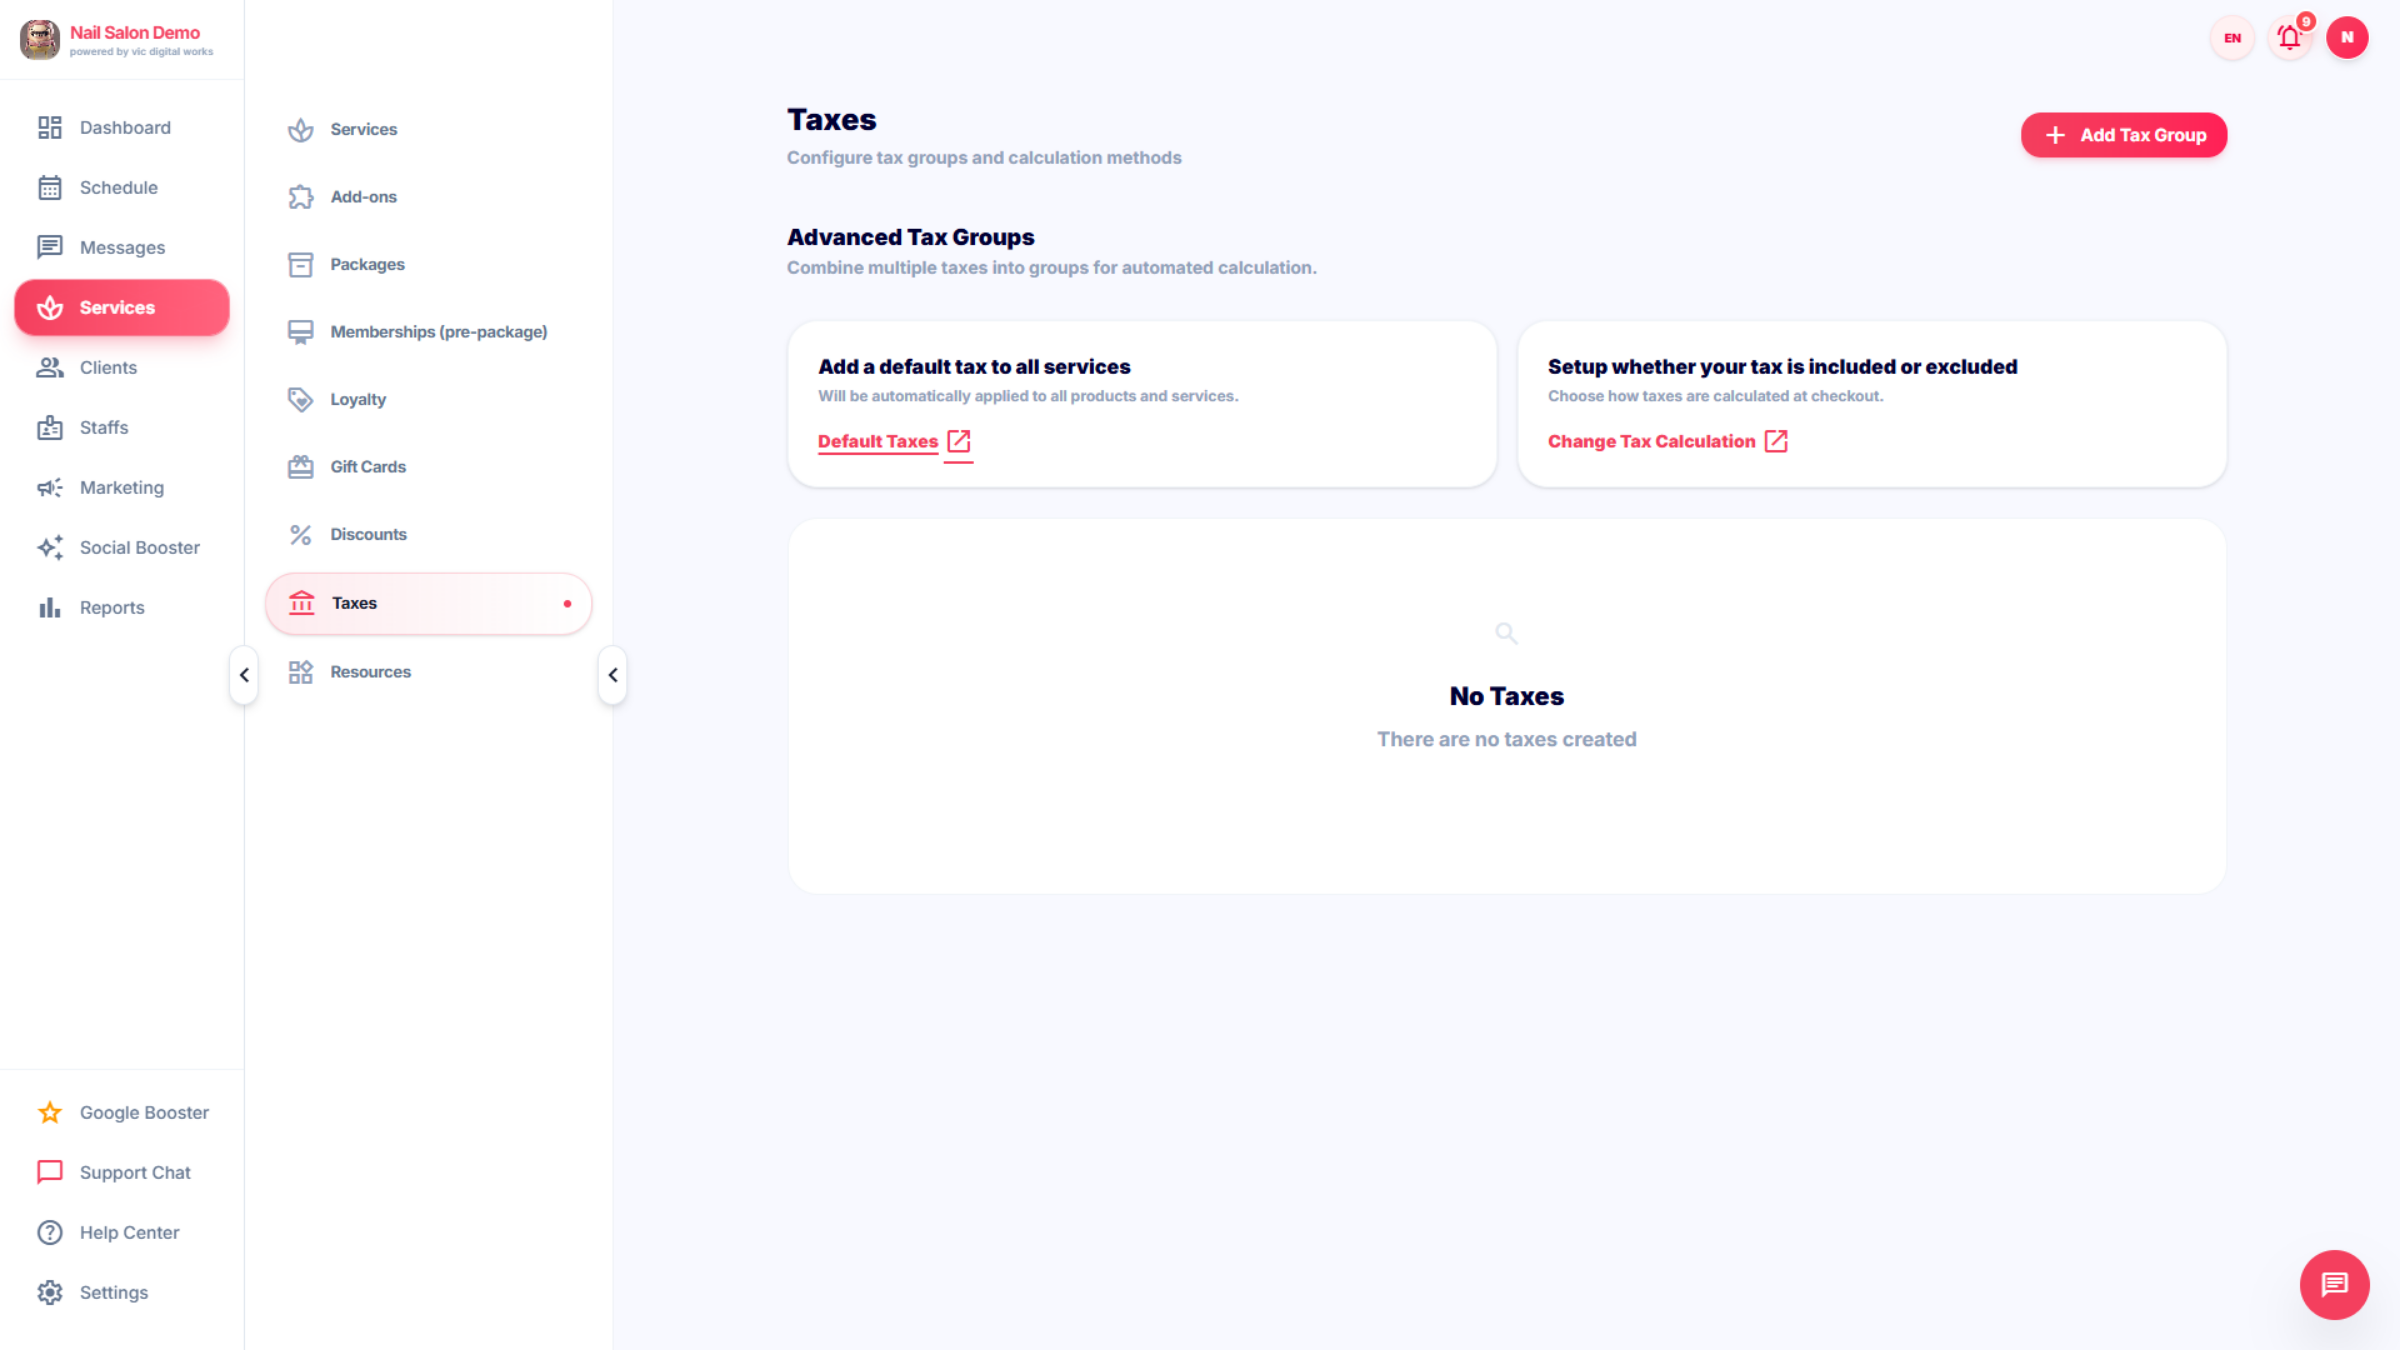
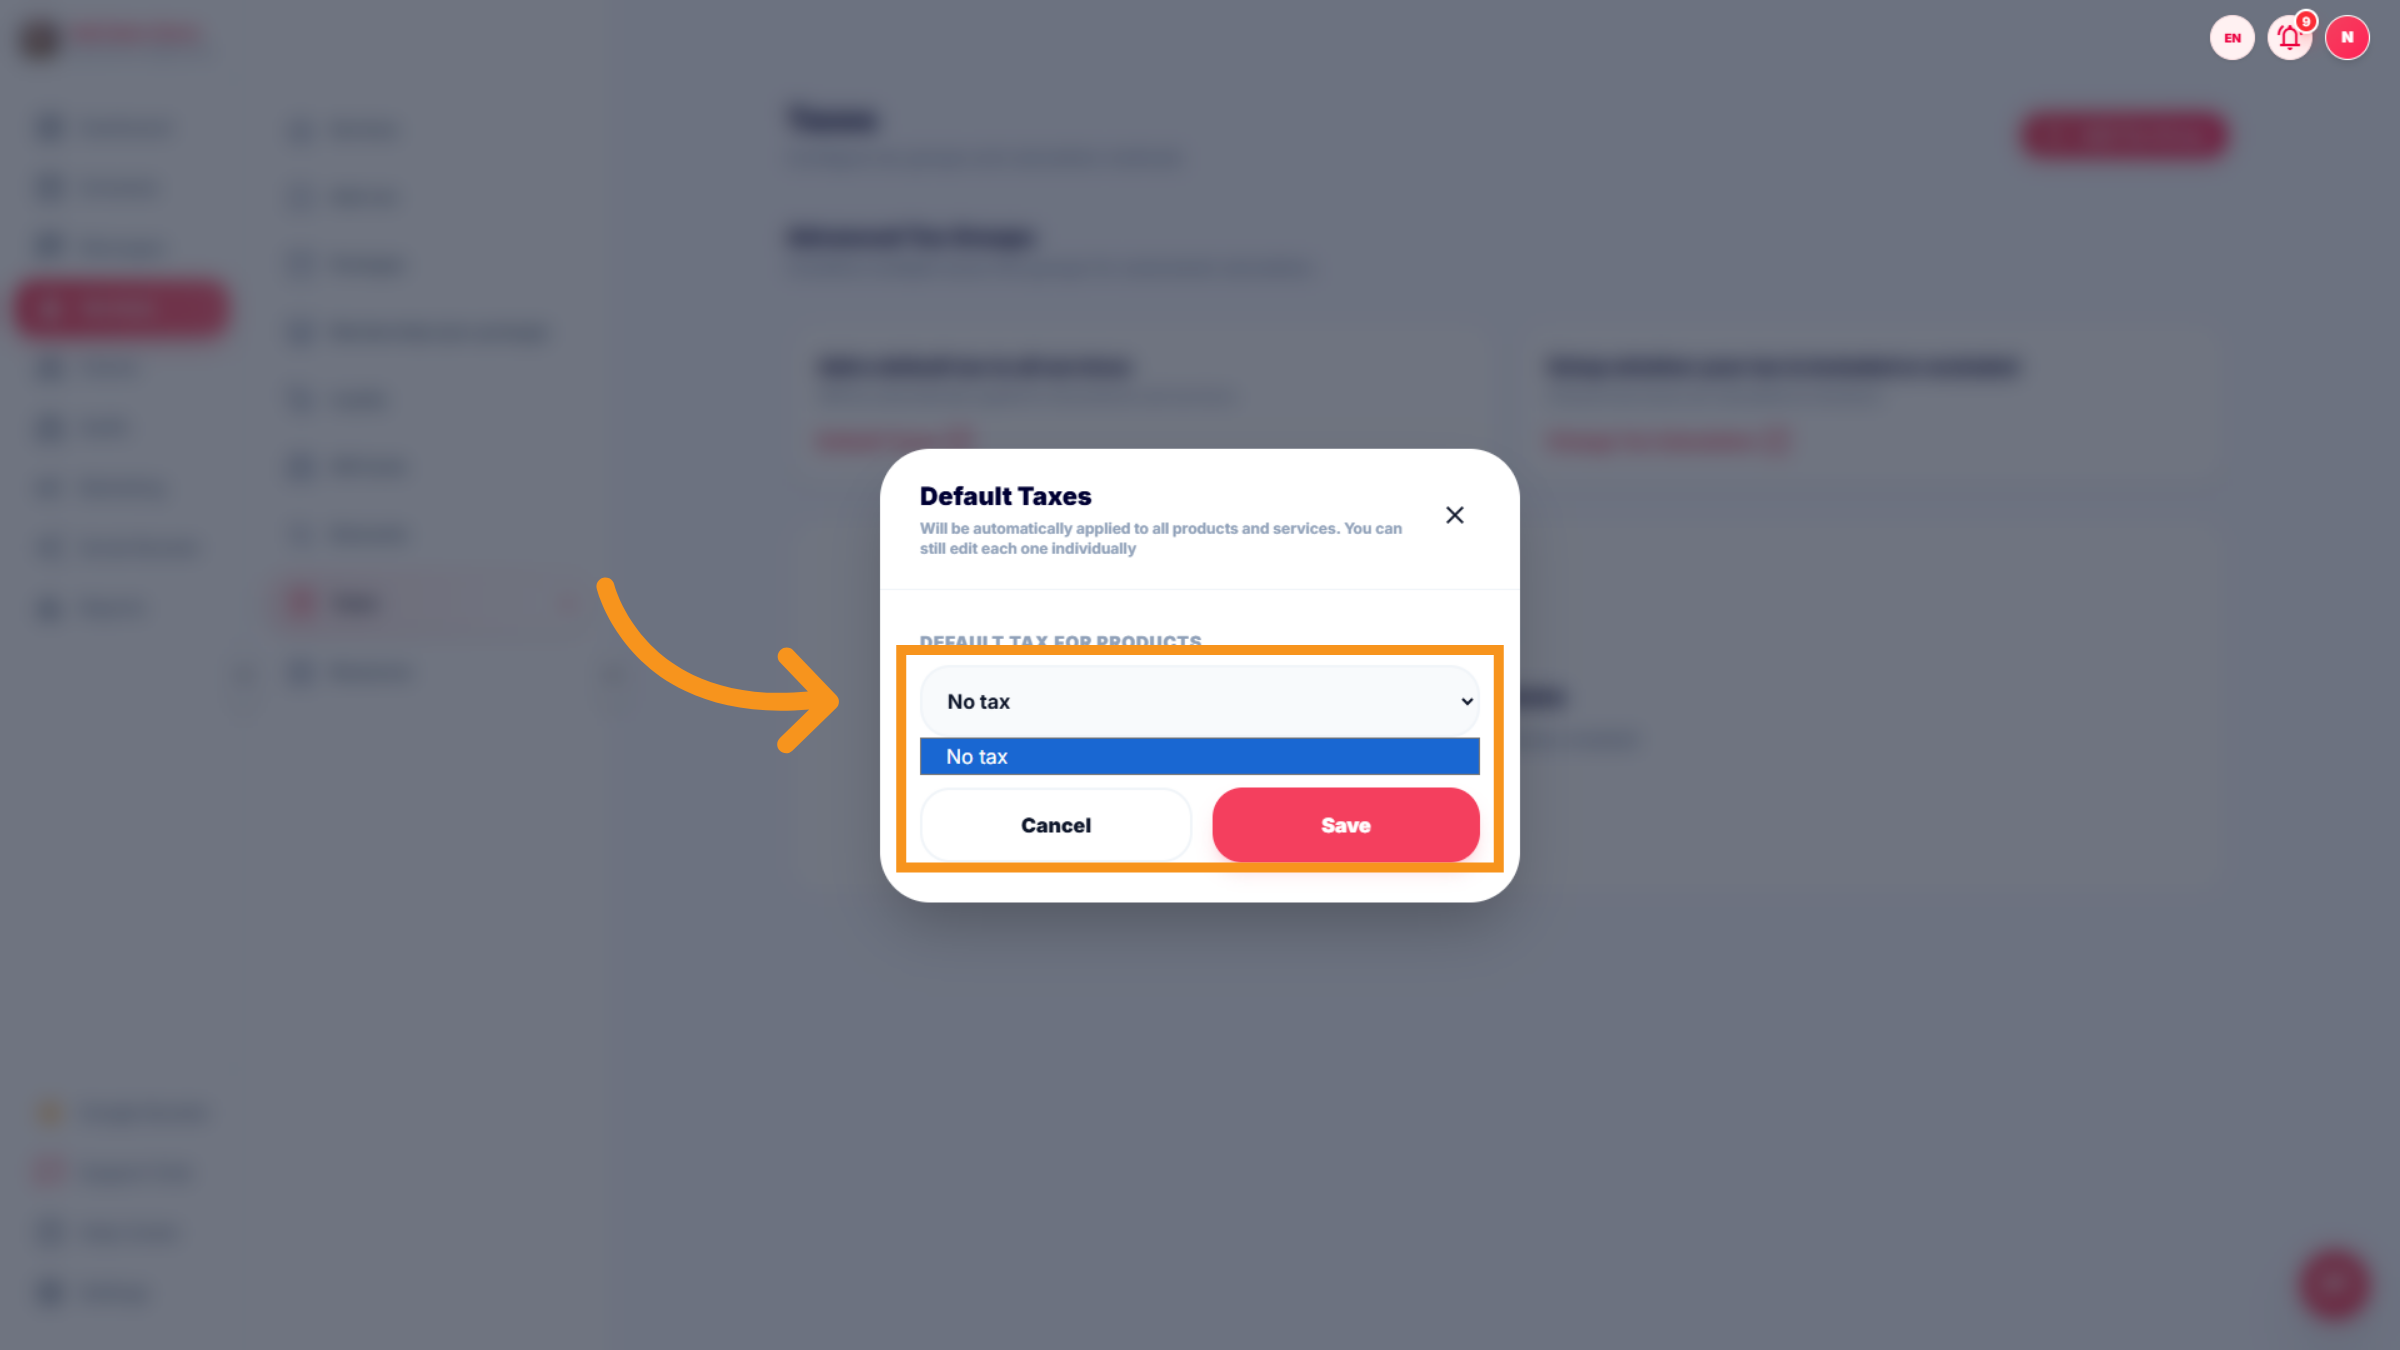
62. Select No Tax Option
Click "No tax" to apply no tax to the current configuration. All salon services are priced before tax
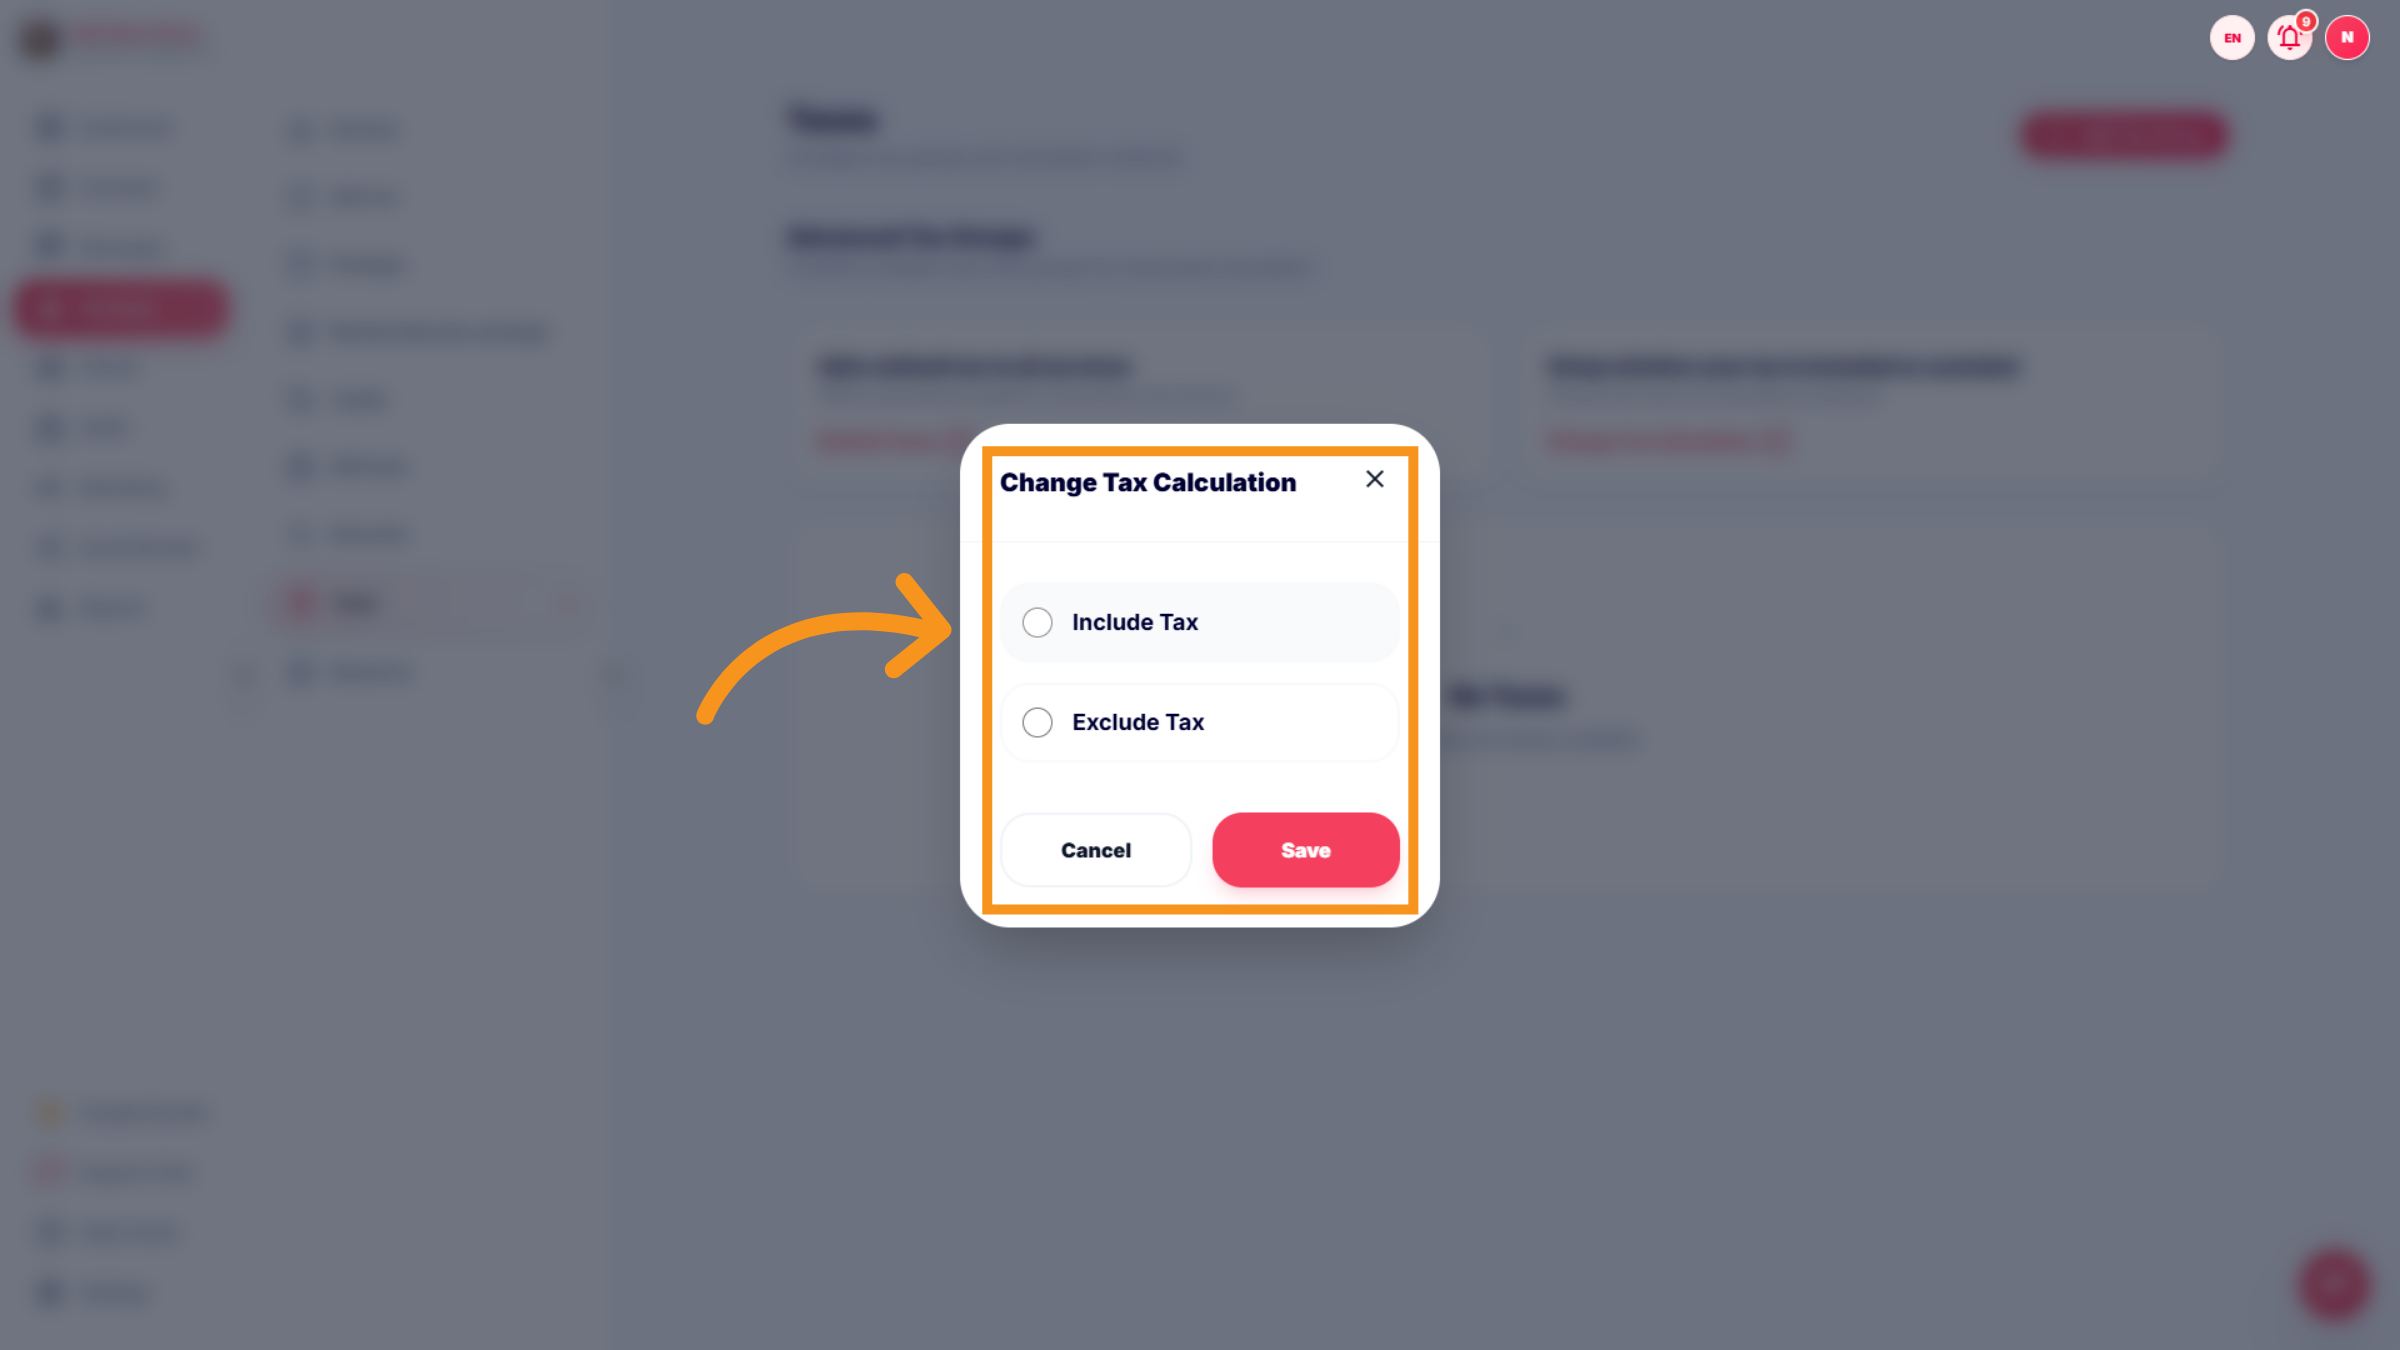
63. Include Tax in Calculation
Select a default "Include/Exclude" for each service
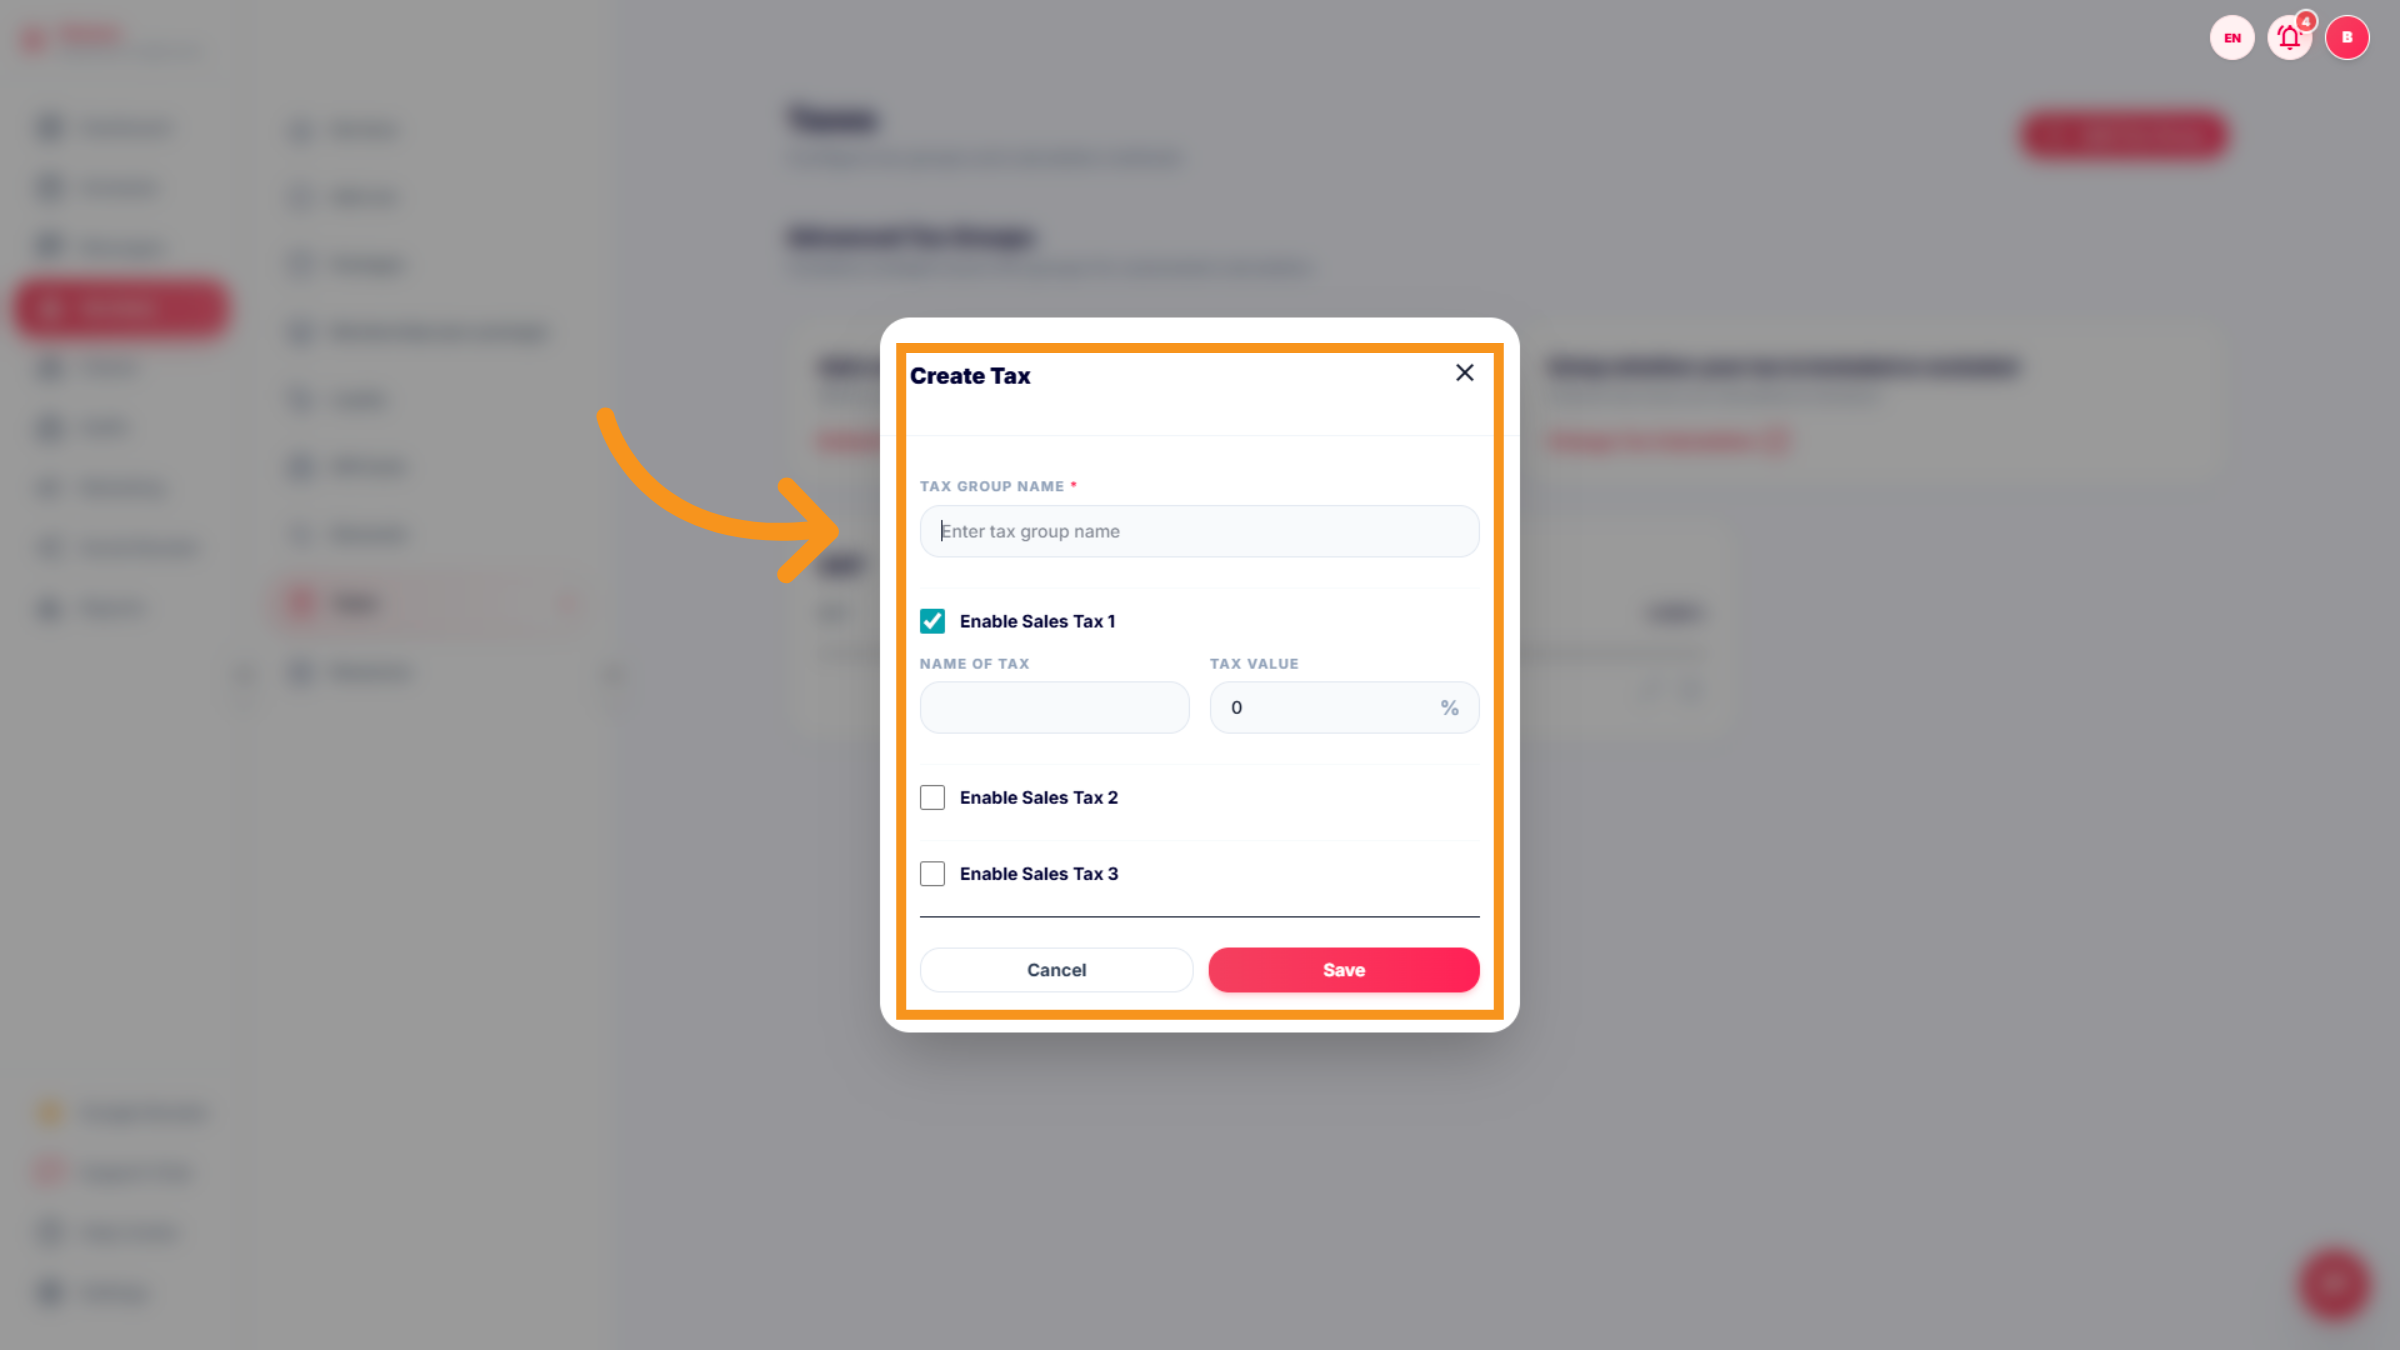
64. Add New Tax Group
Click "add Add Tax Group" to create a new group for tax categorization.
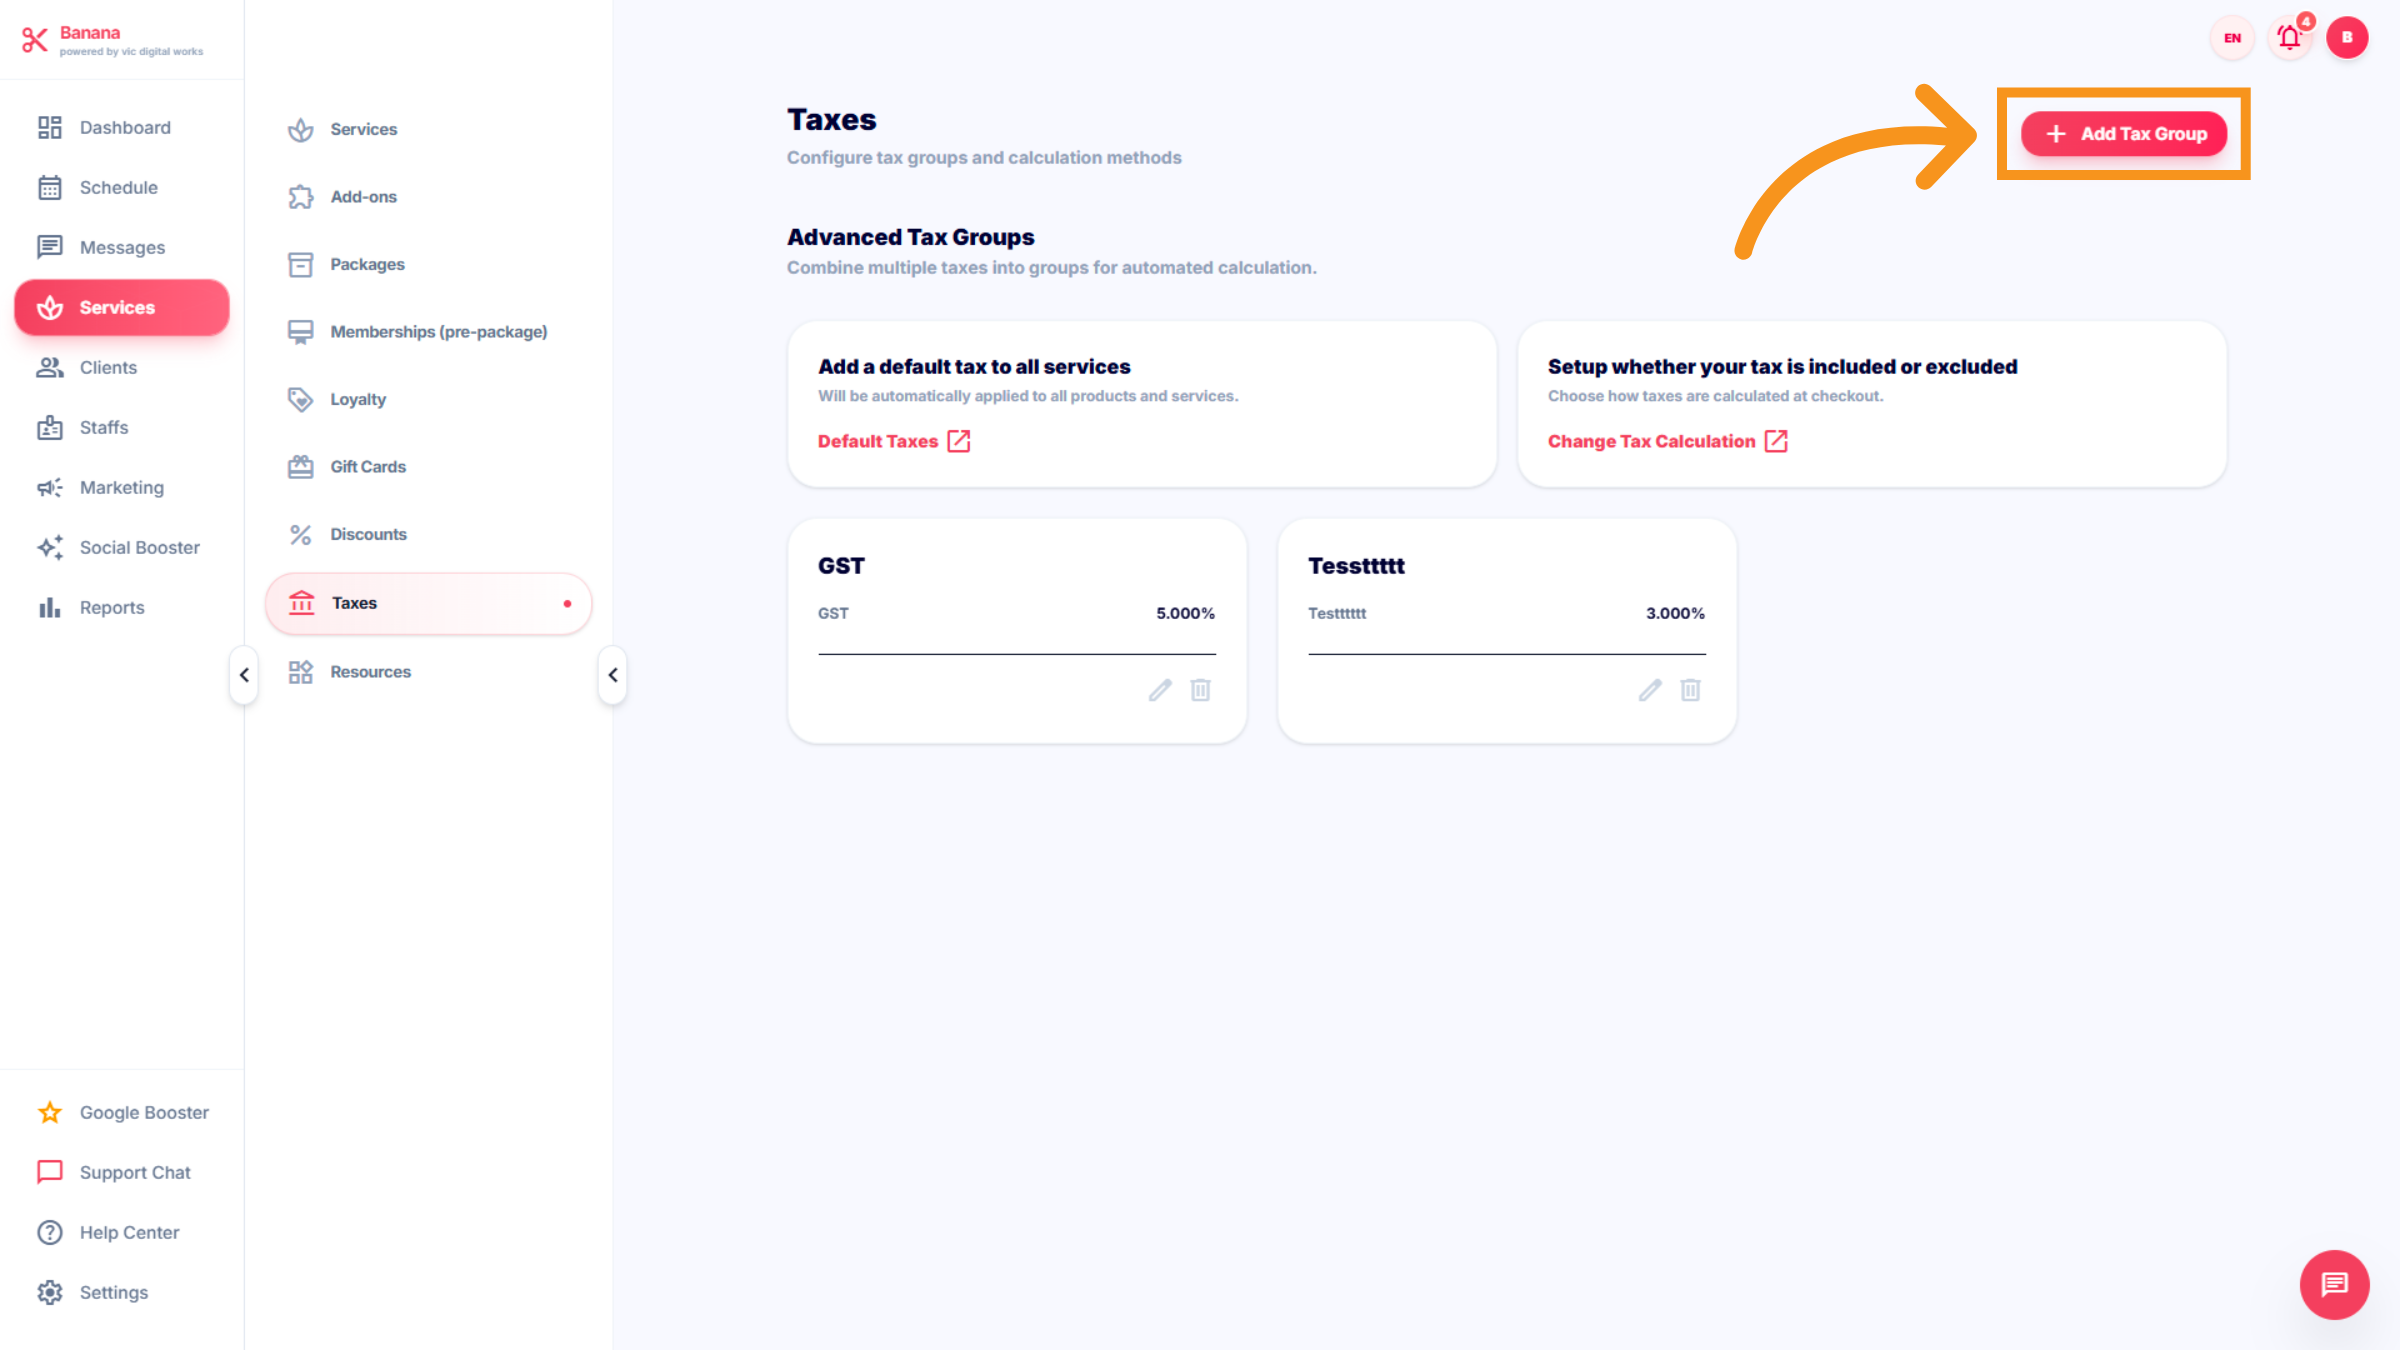
65. Enter Tax Group info
This section " Tax groups "let you to set appropriate tax rates according to provincial regulations.
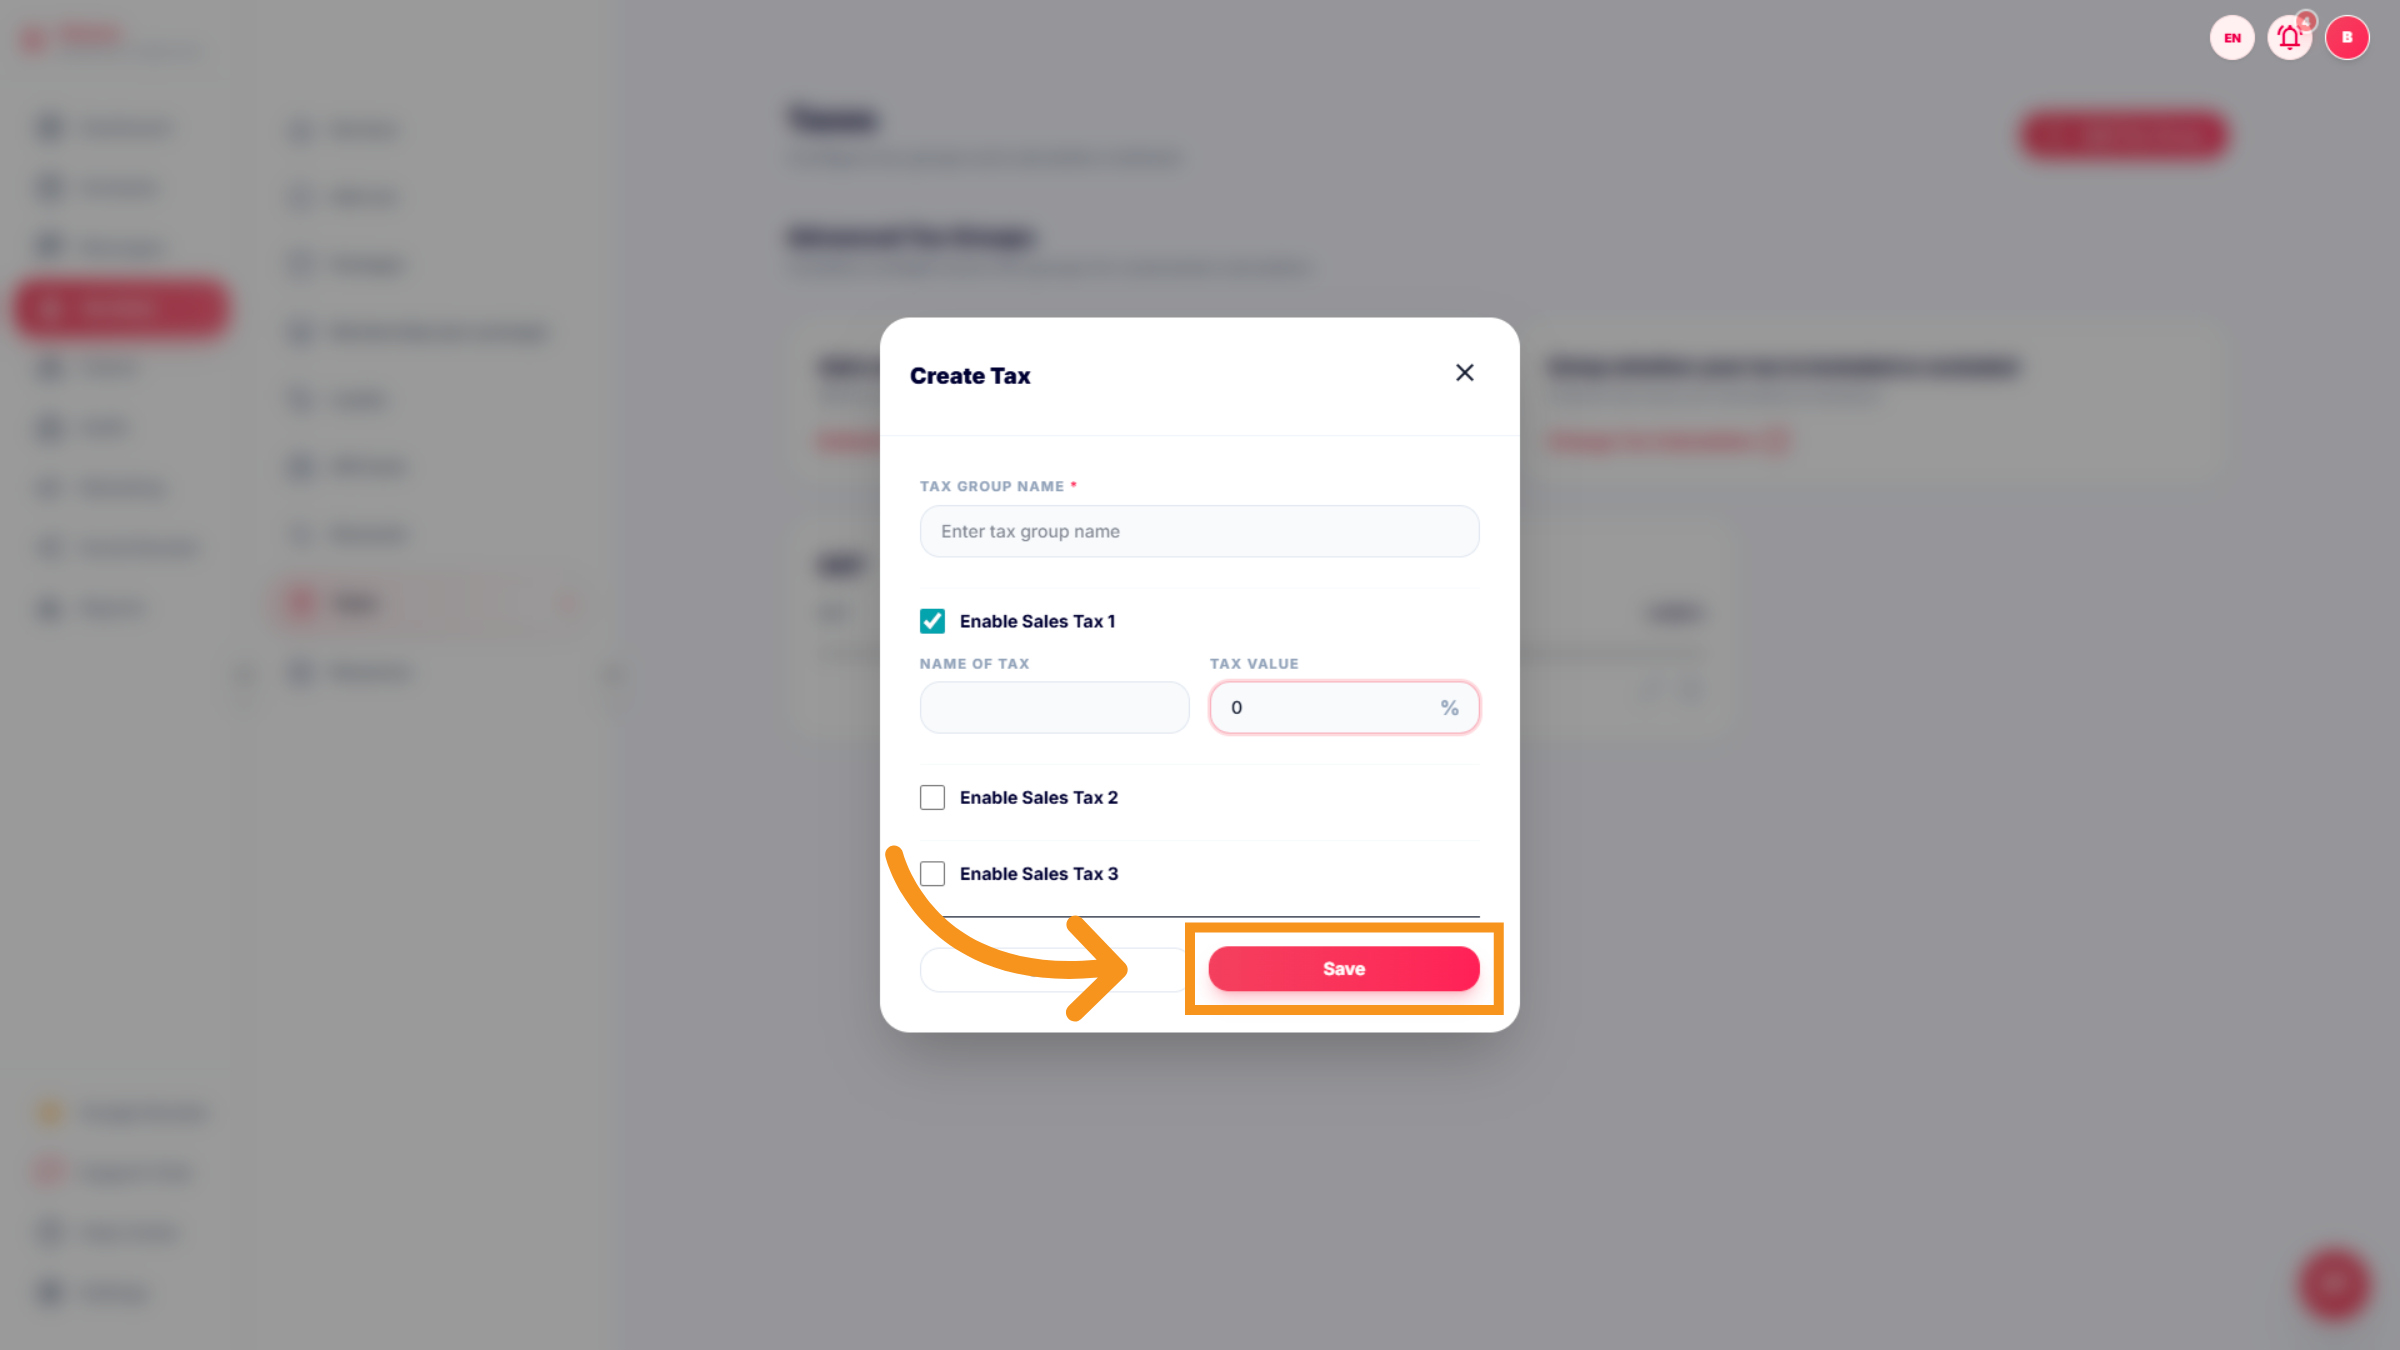
66. Save Tax Group
Click "Save" to finalize and store the new tax group settings.
67. SCHEDULE
The Schedule feature is a management and tracking tool that allows you to assign shifts, including pay and commissions, for technicians.
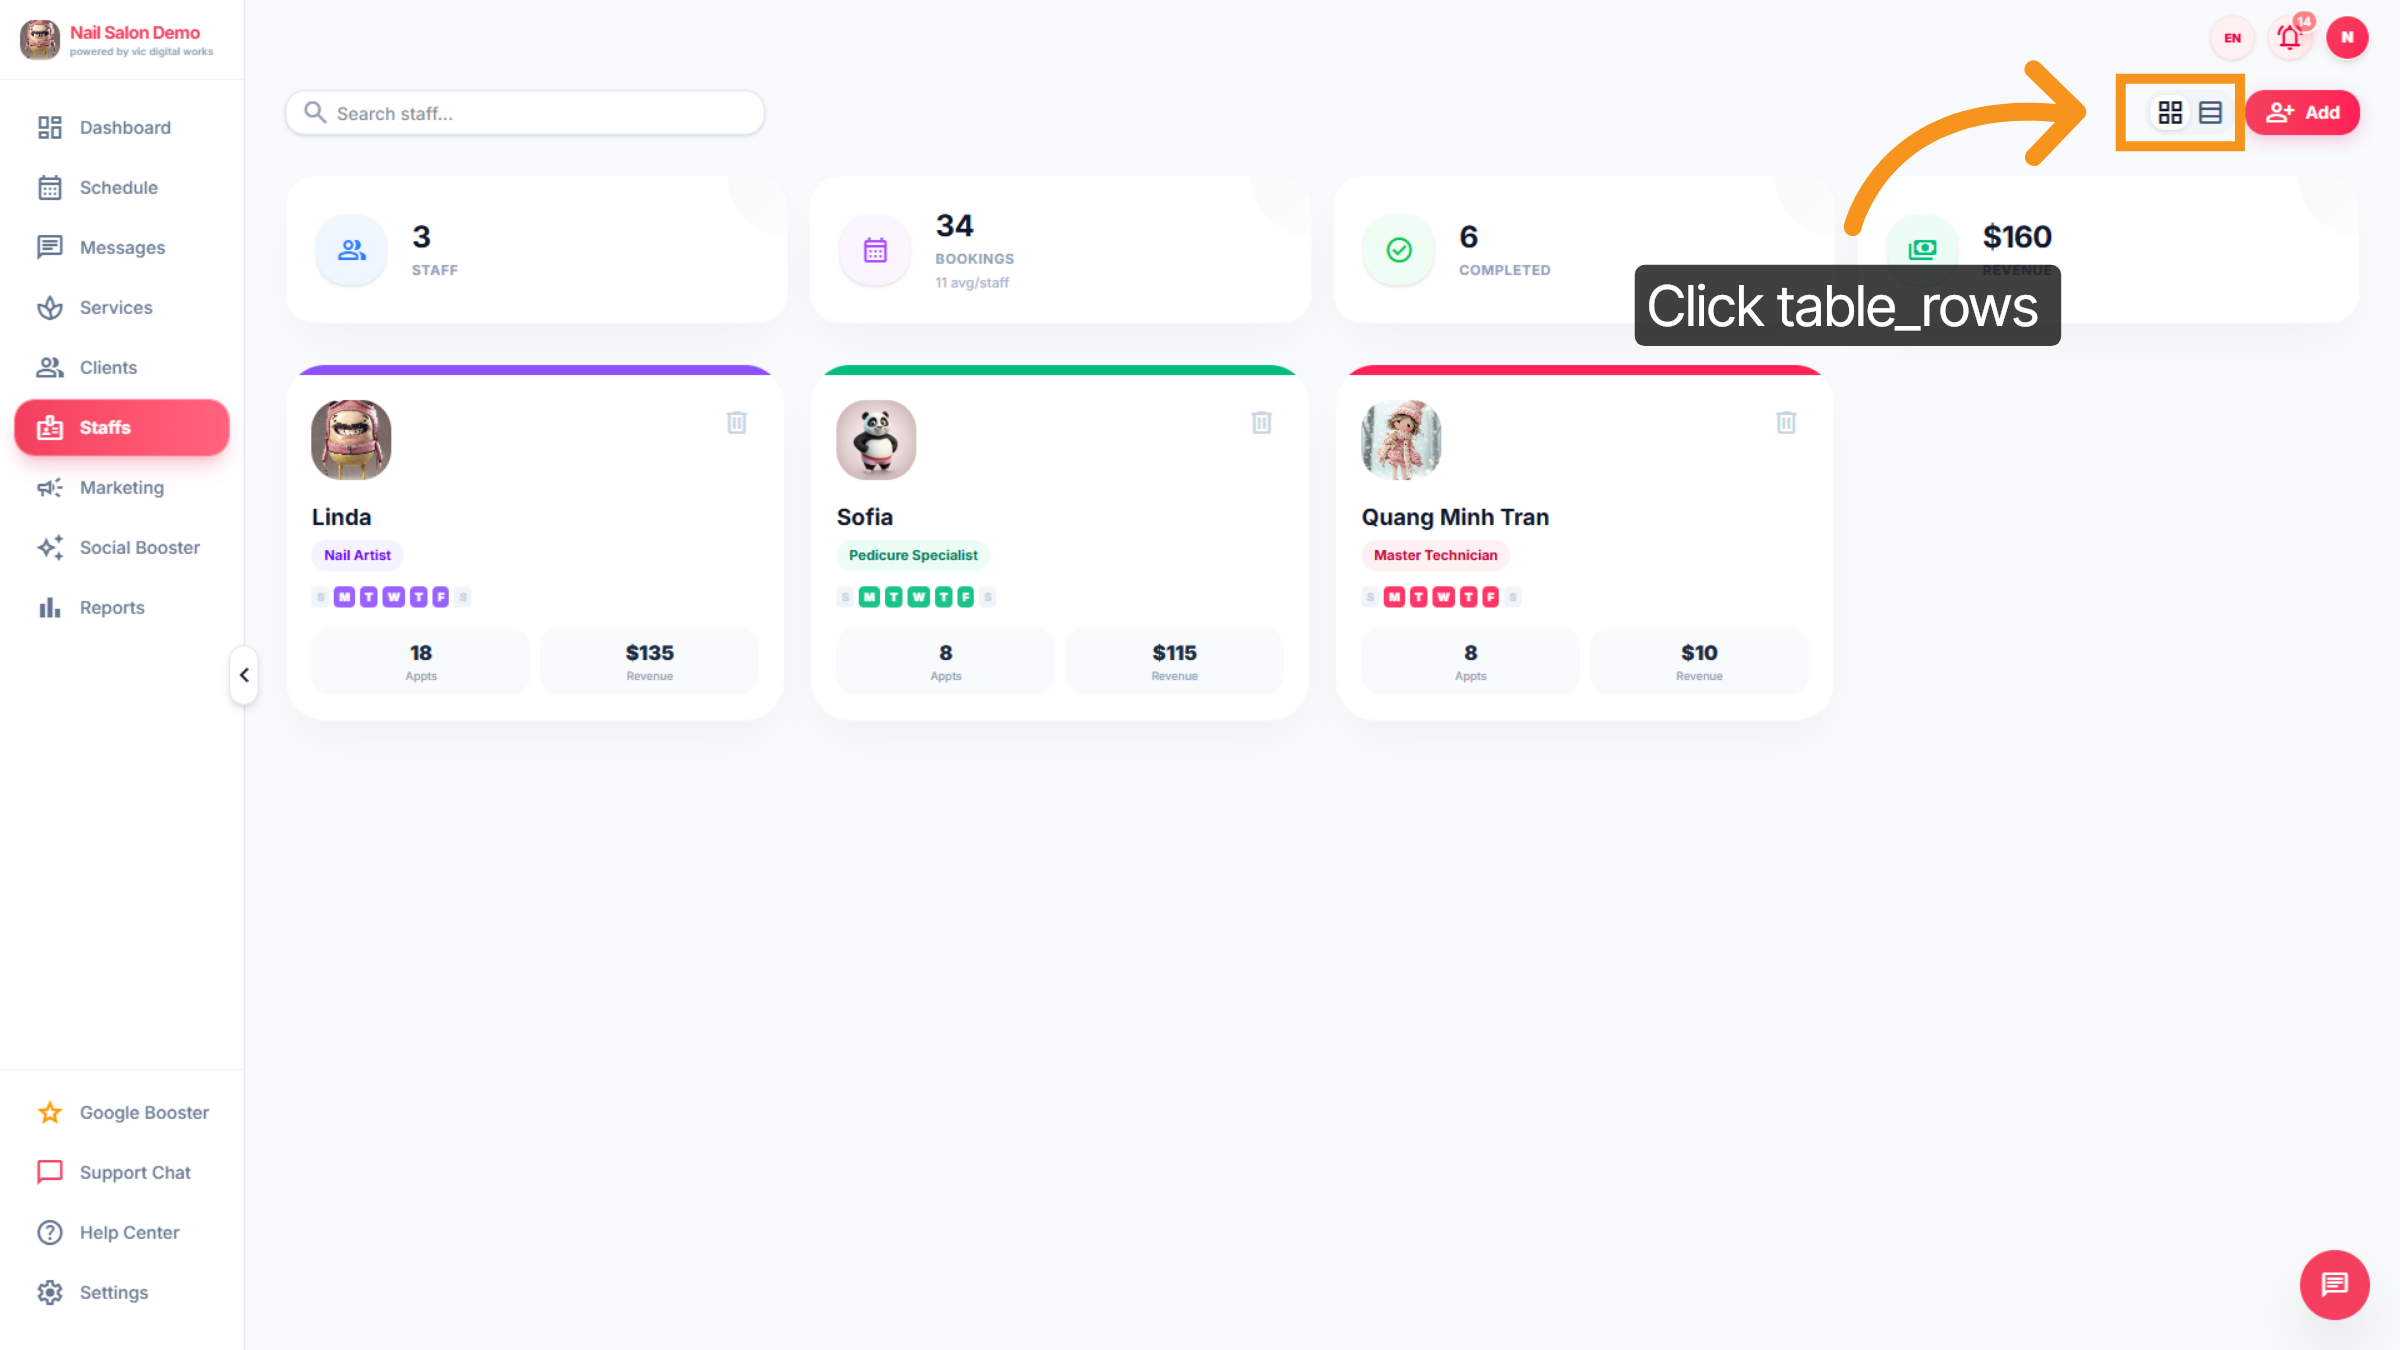
68. STAFF
Each color in the calendar represents a different service. Small icons represent status.
69. Open Table View
Click "table_rows" to switch to a detailed table view of staff or scheduling data.
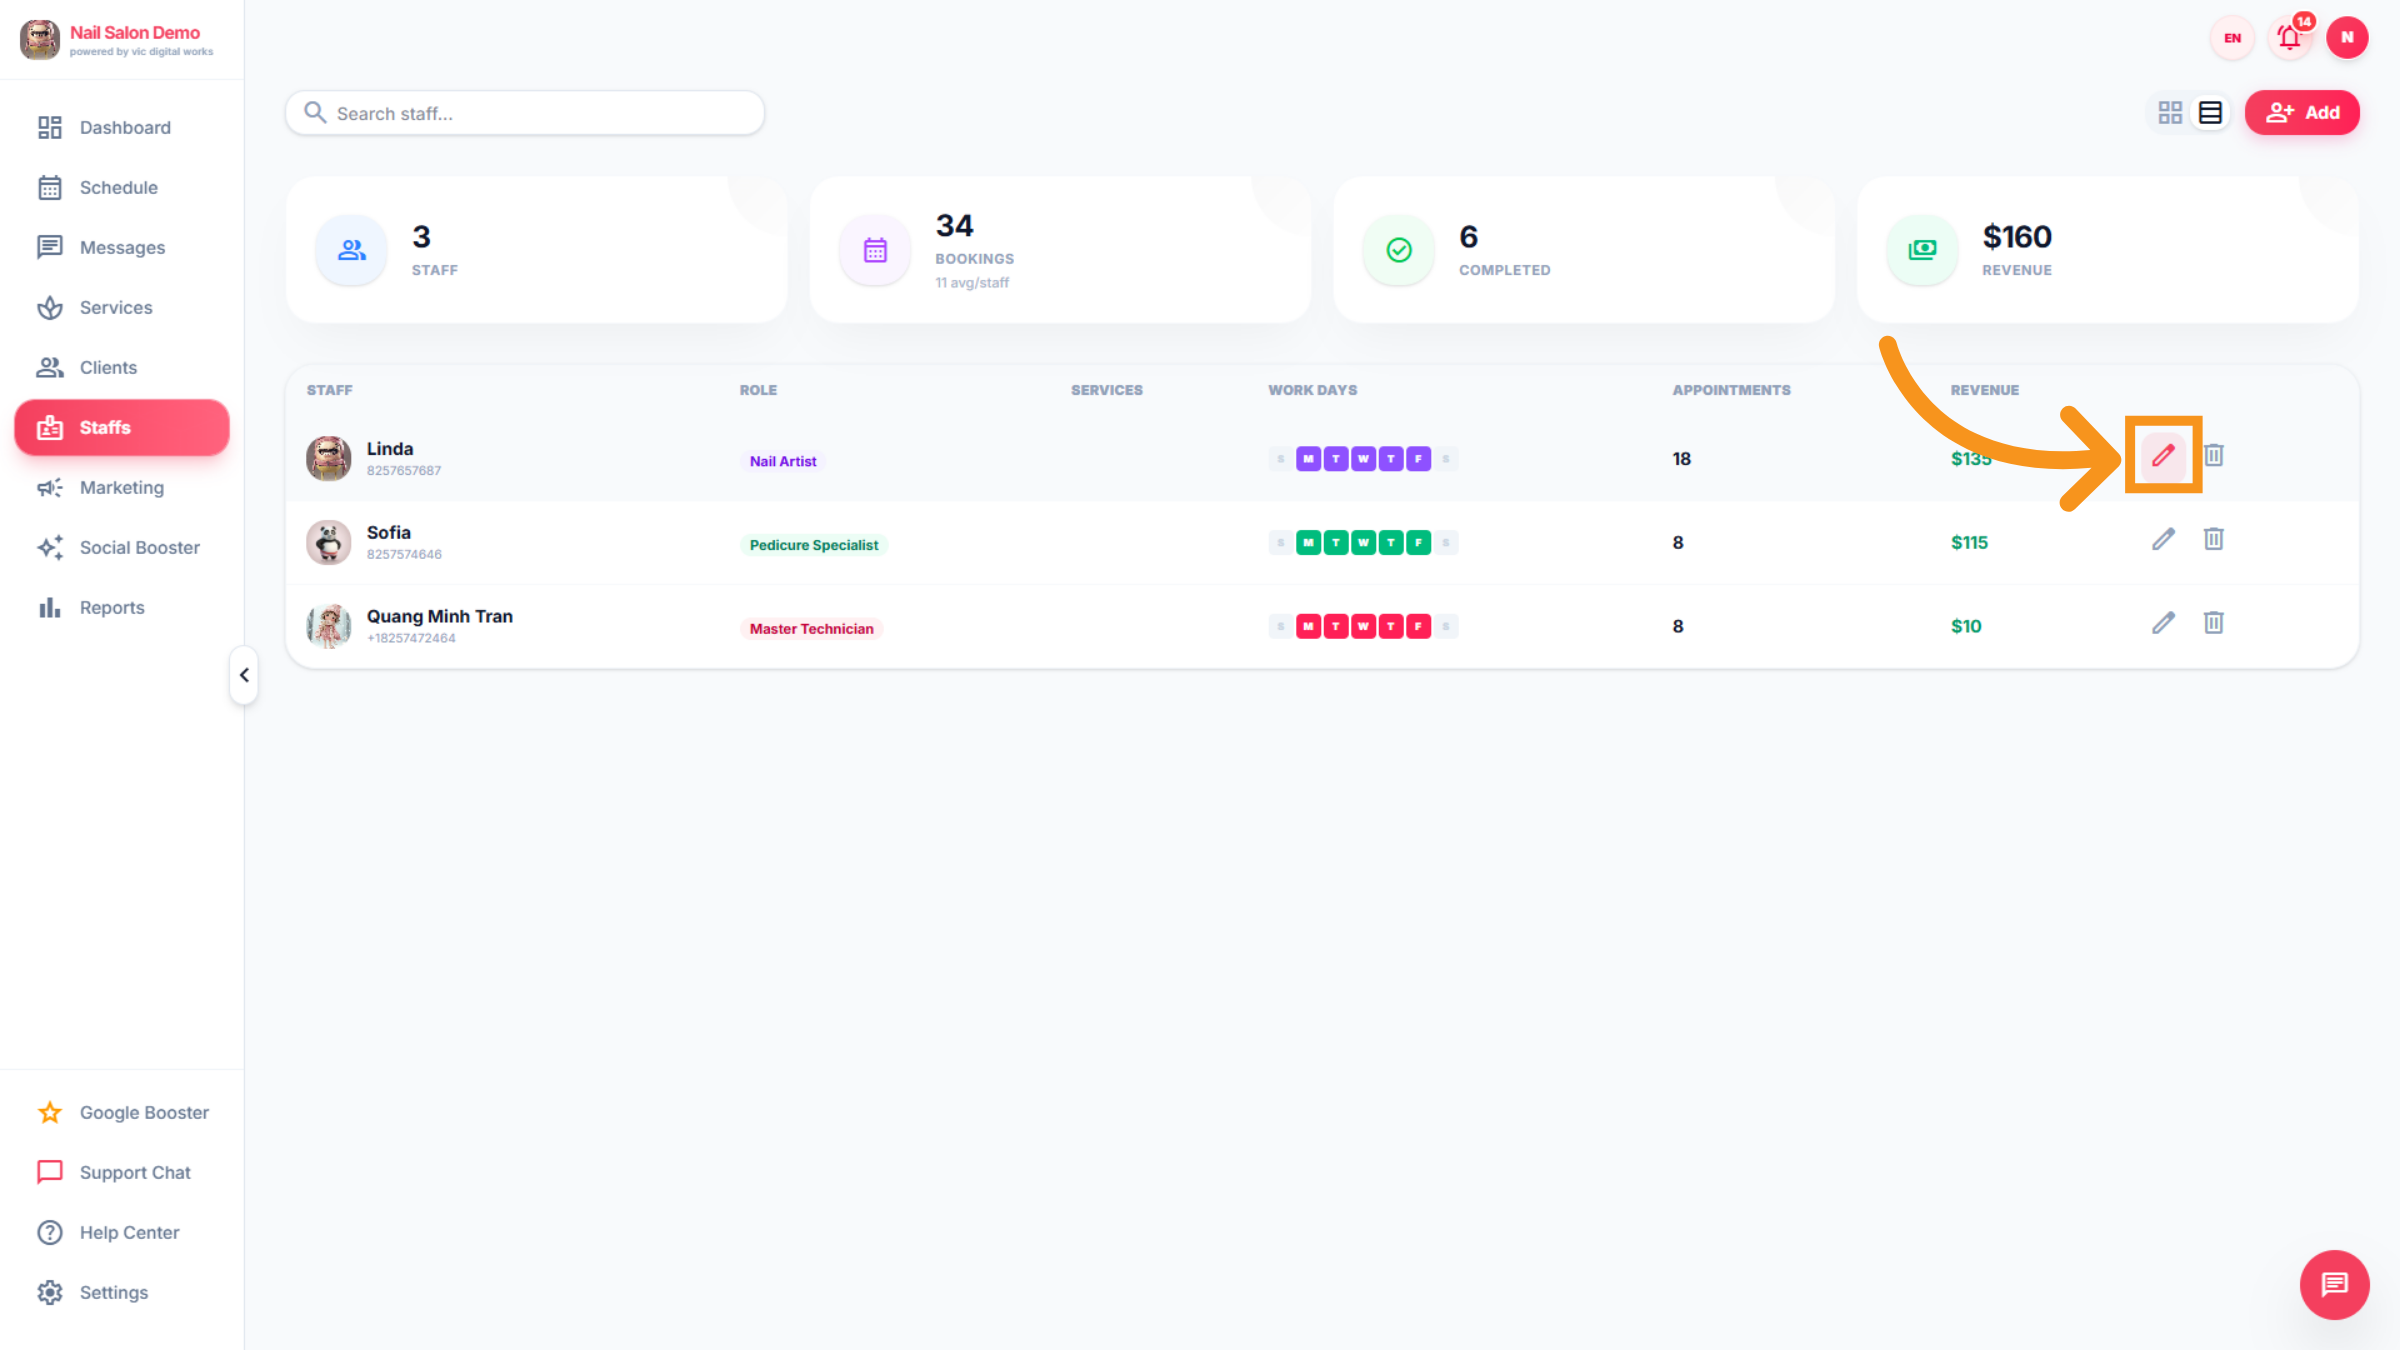
70. Edit Staff Details
The "pen icon" represents the "edit" function. You can modify staff member information or scheduling preferences.
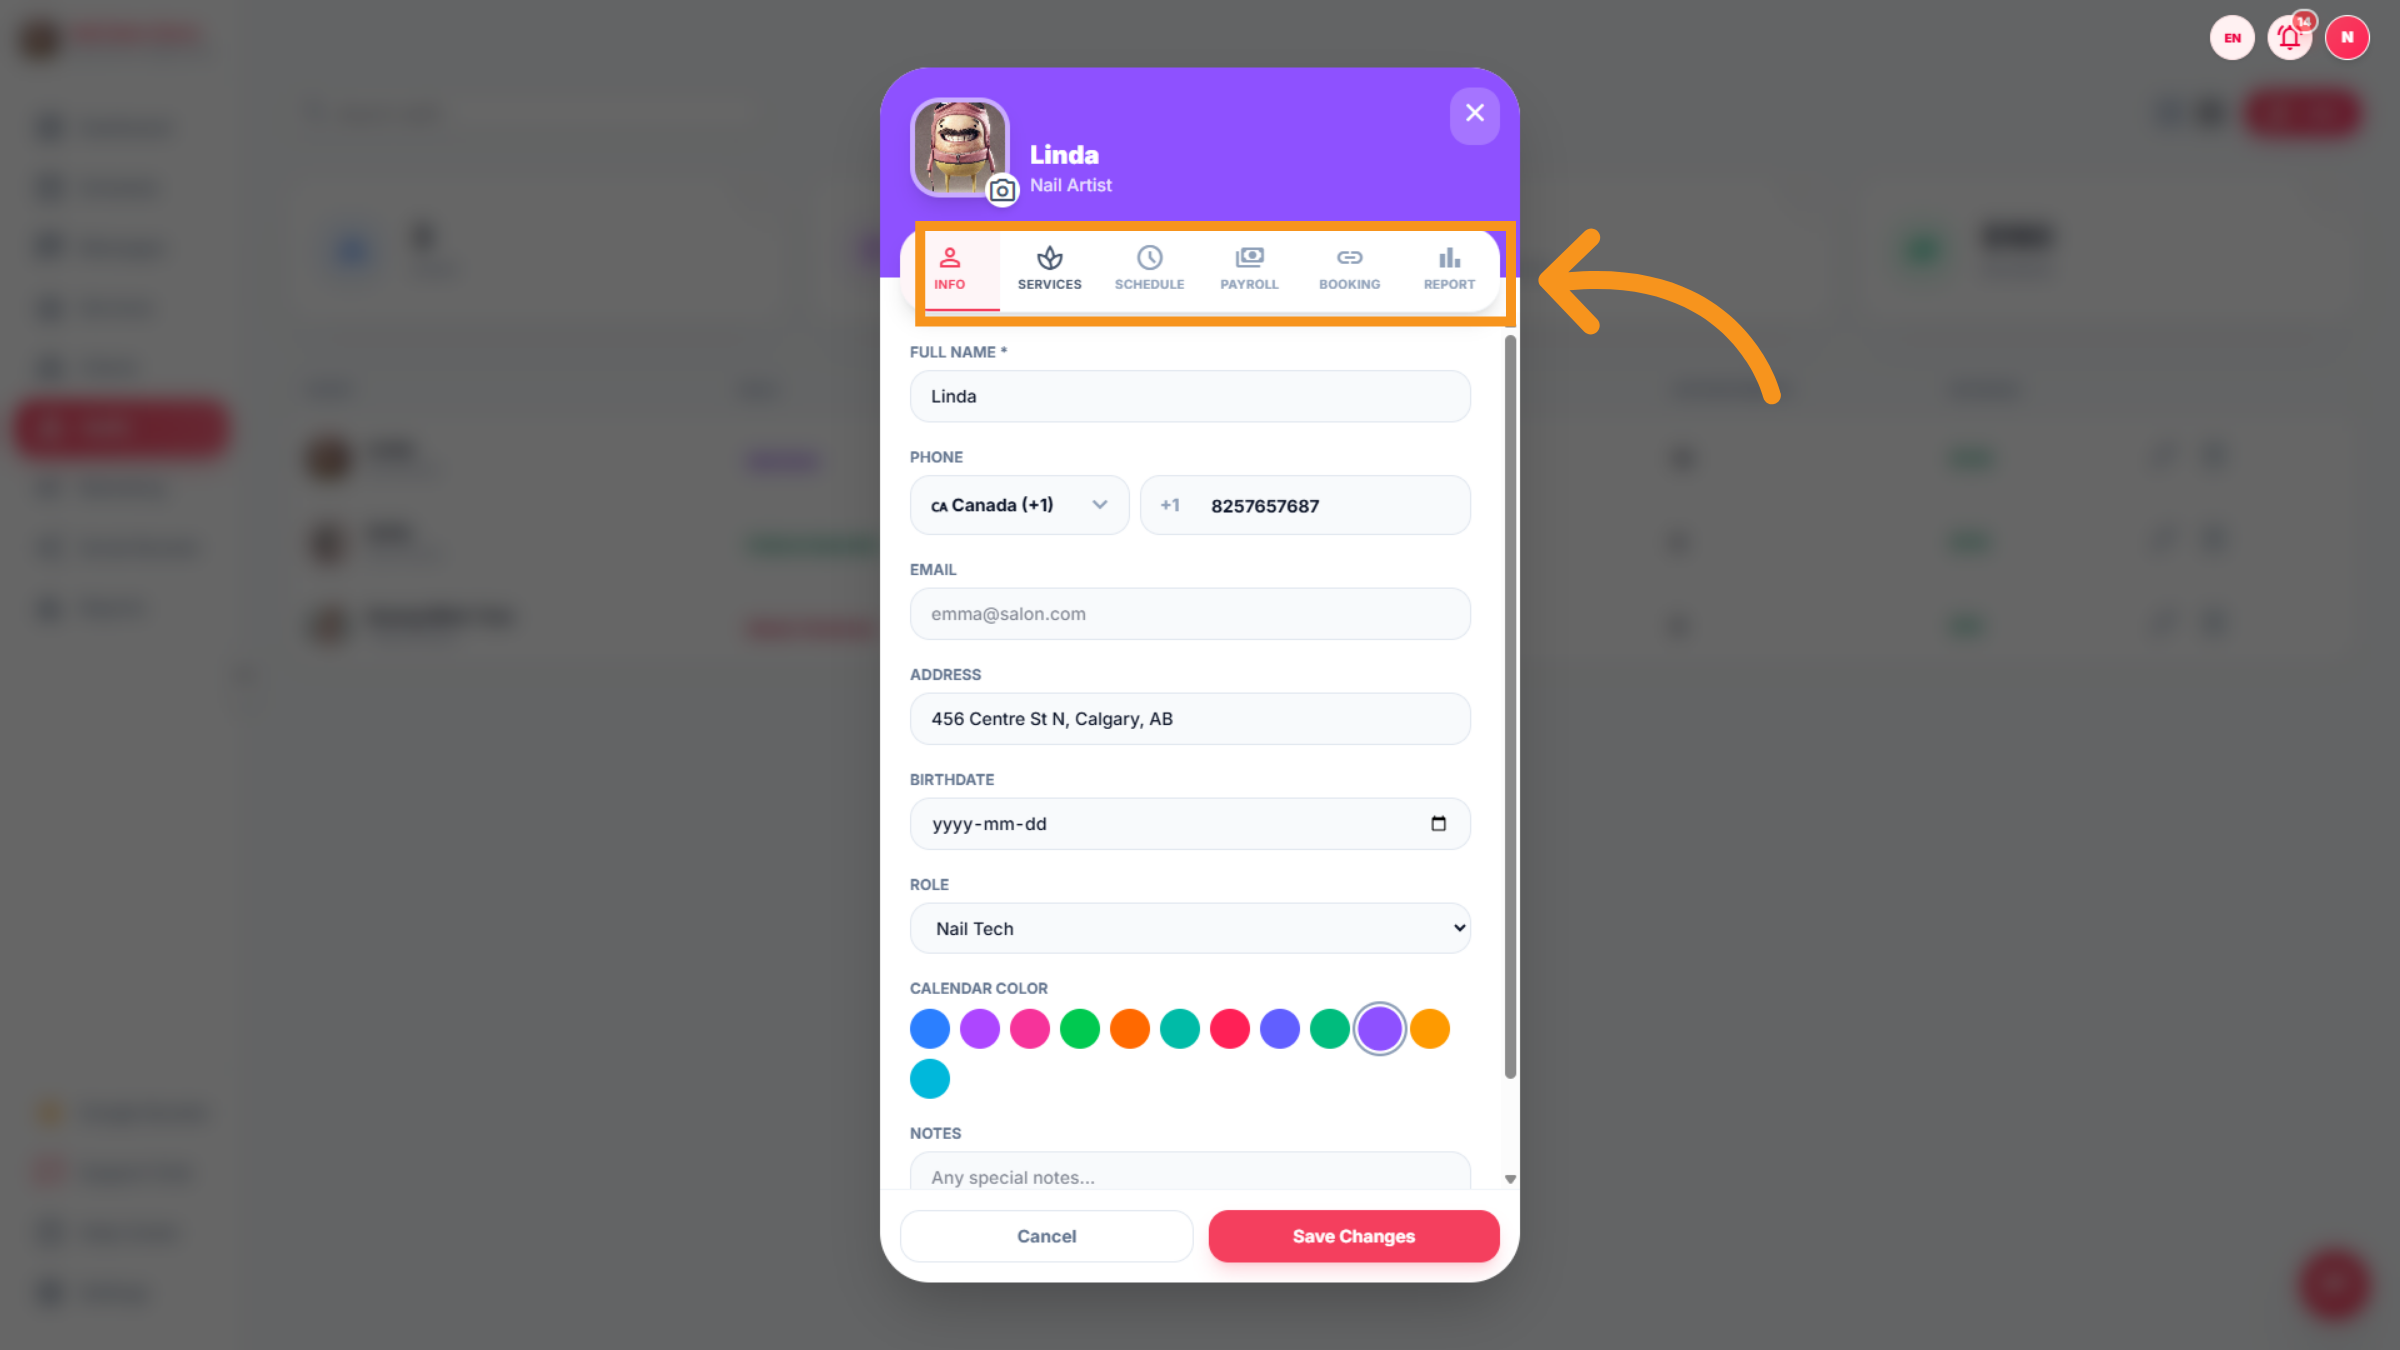
71. Check Staff info
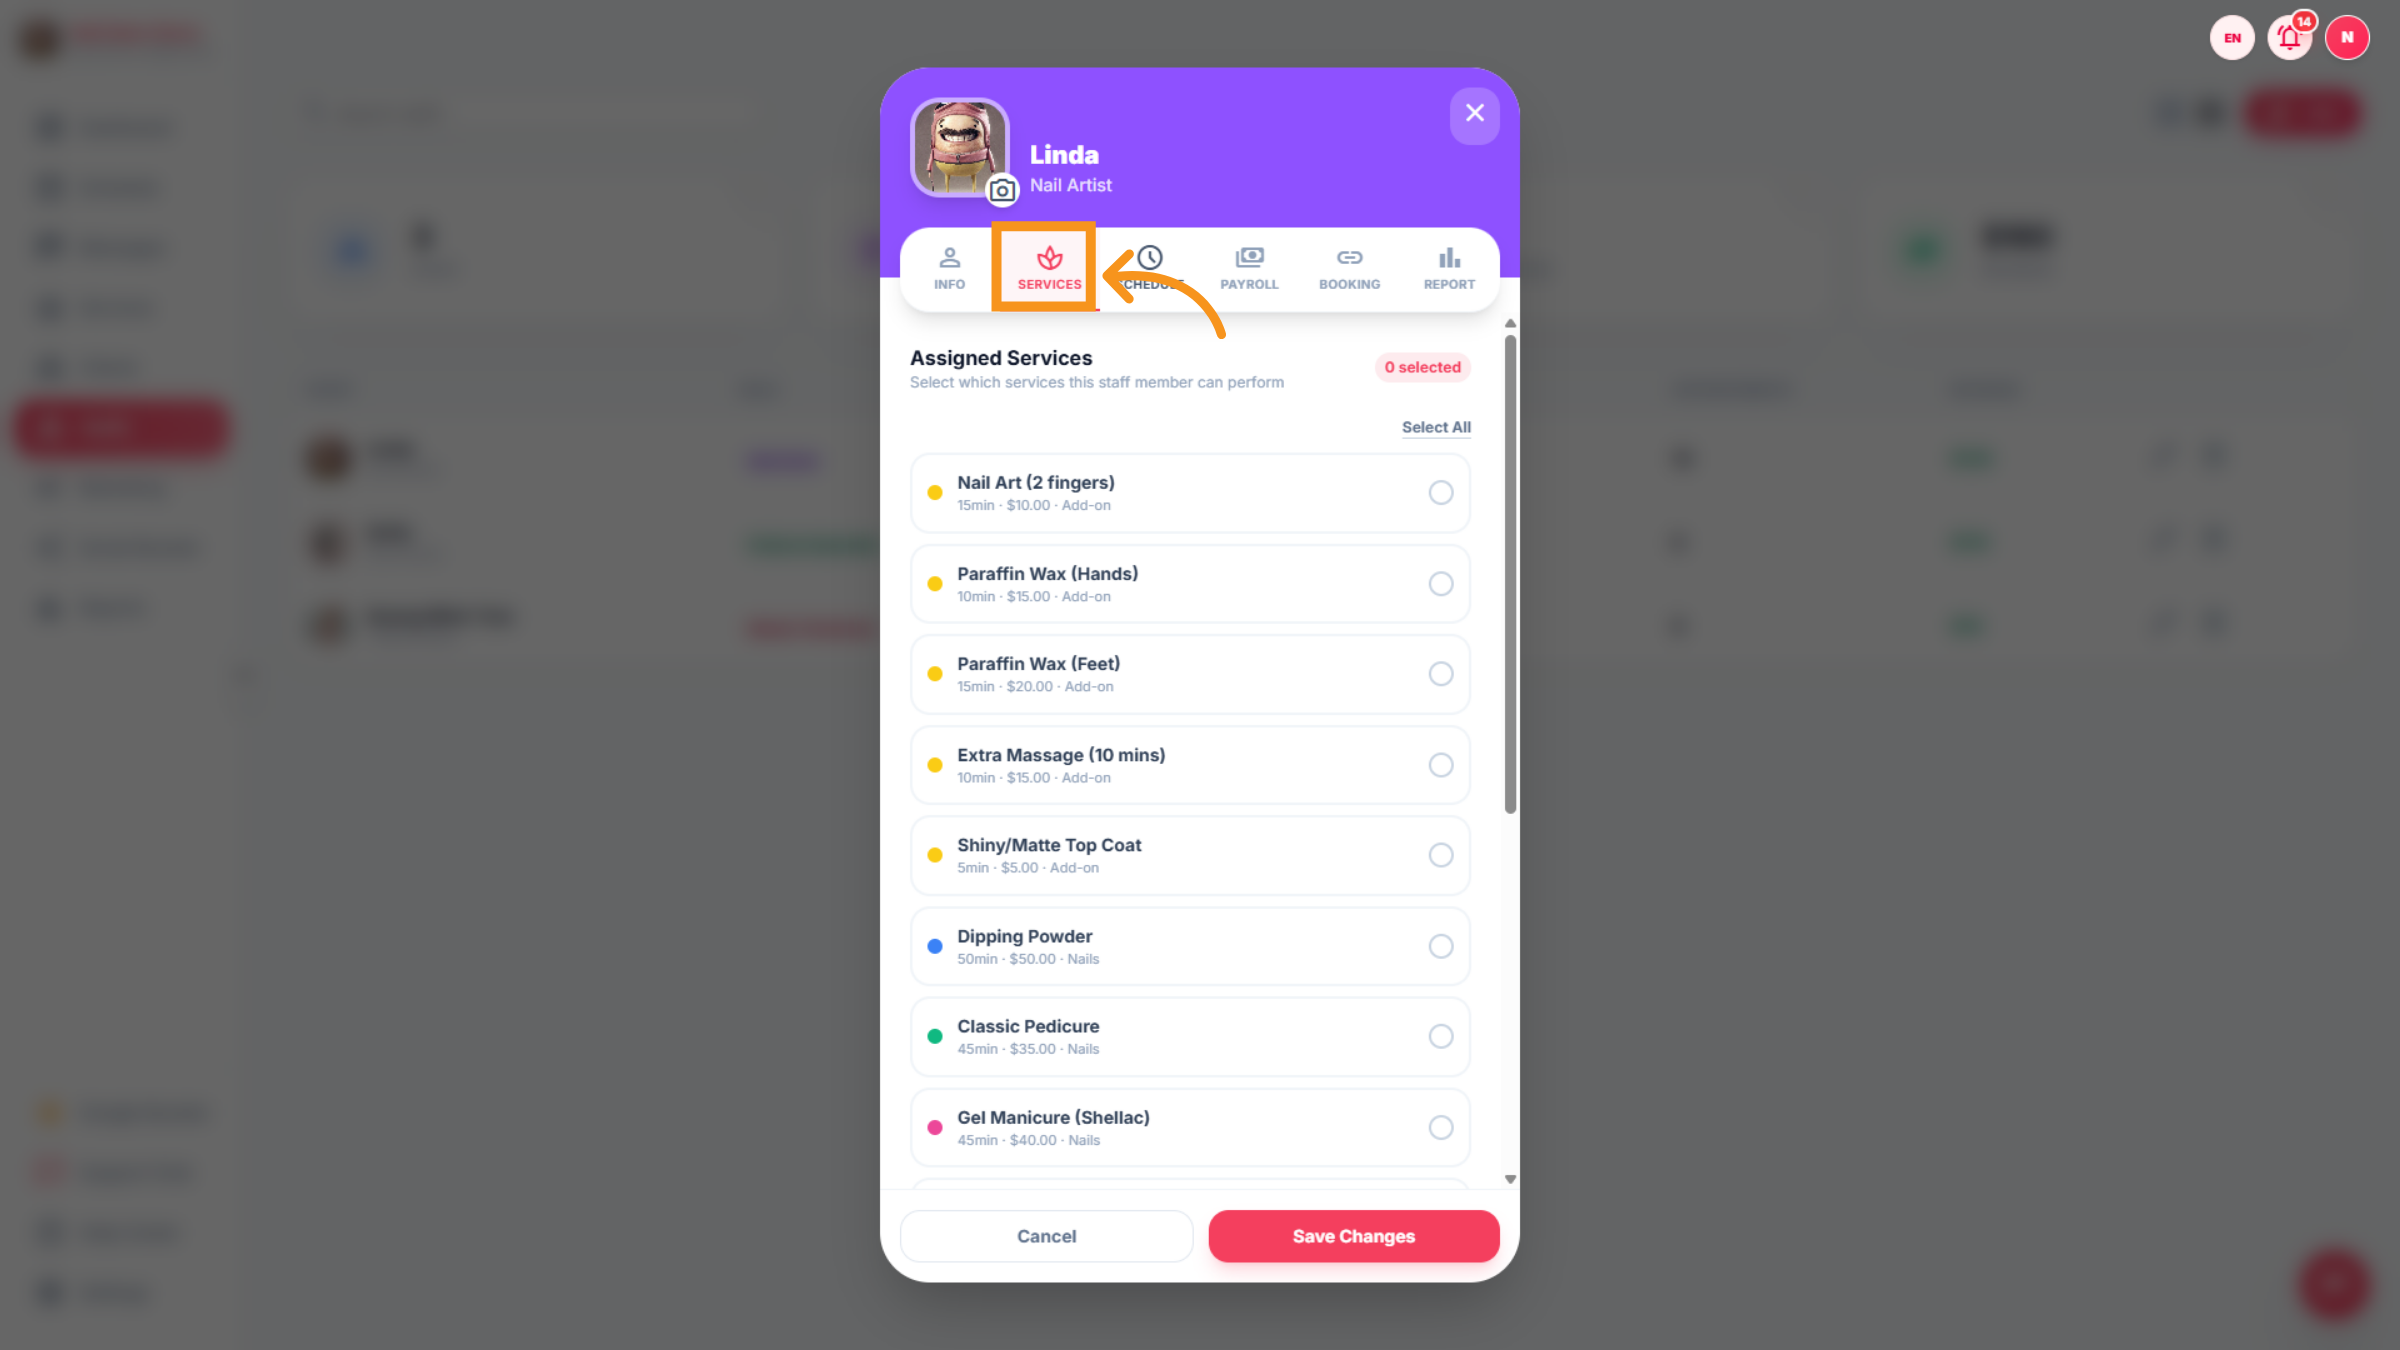
72. STAFF-SERVICE
These are the services a technician can perform. (TECHNICIAN SKILLS)
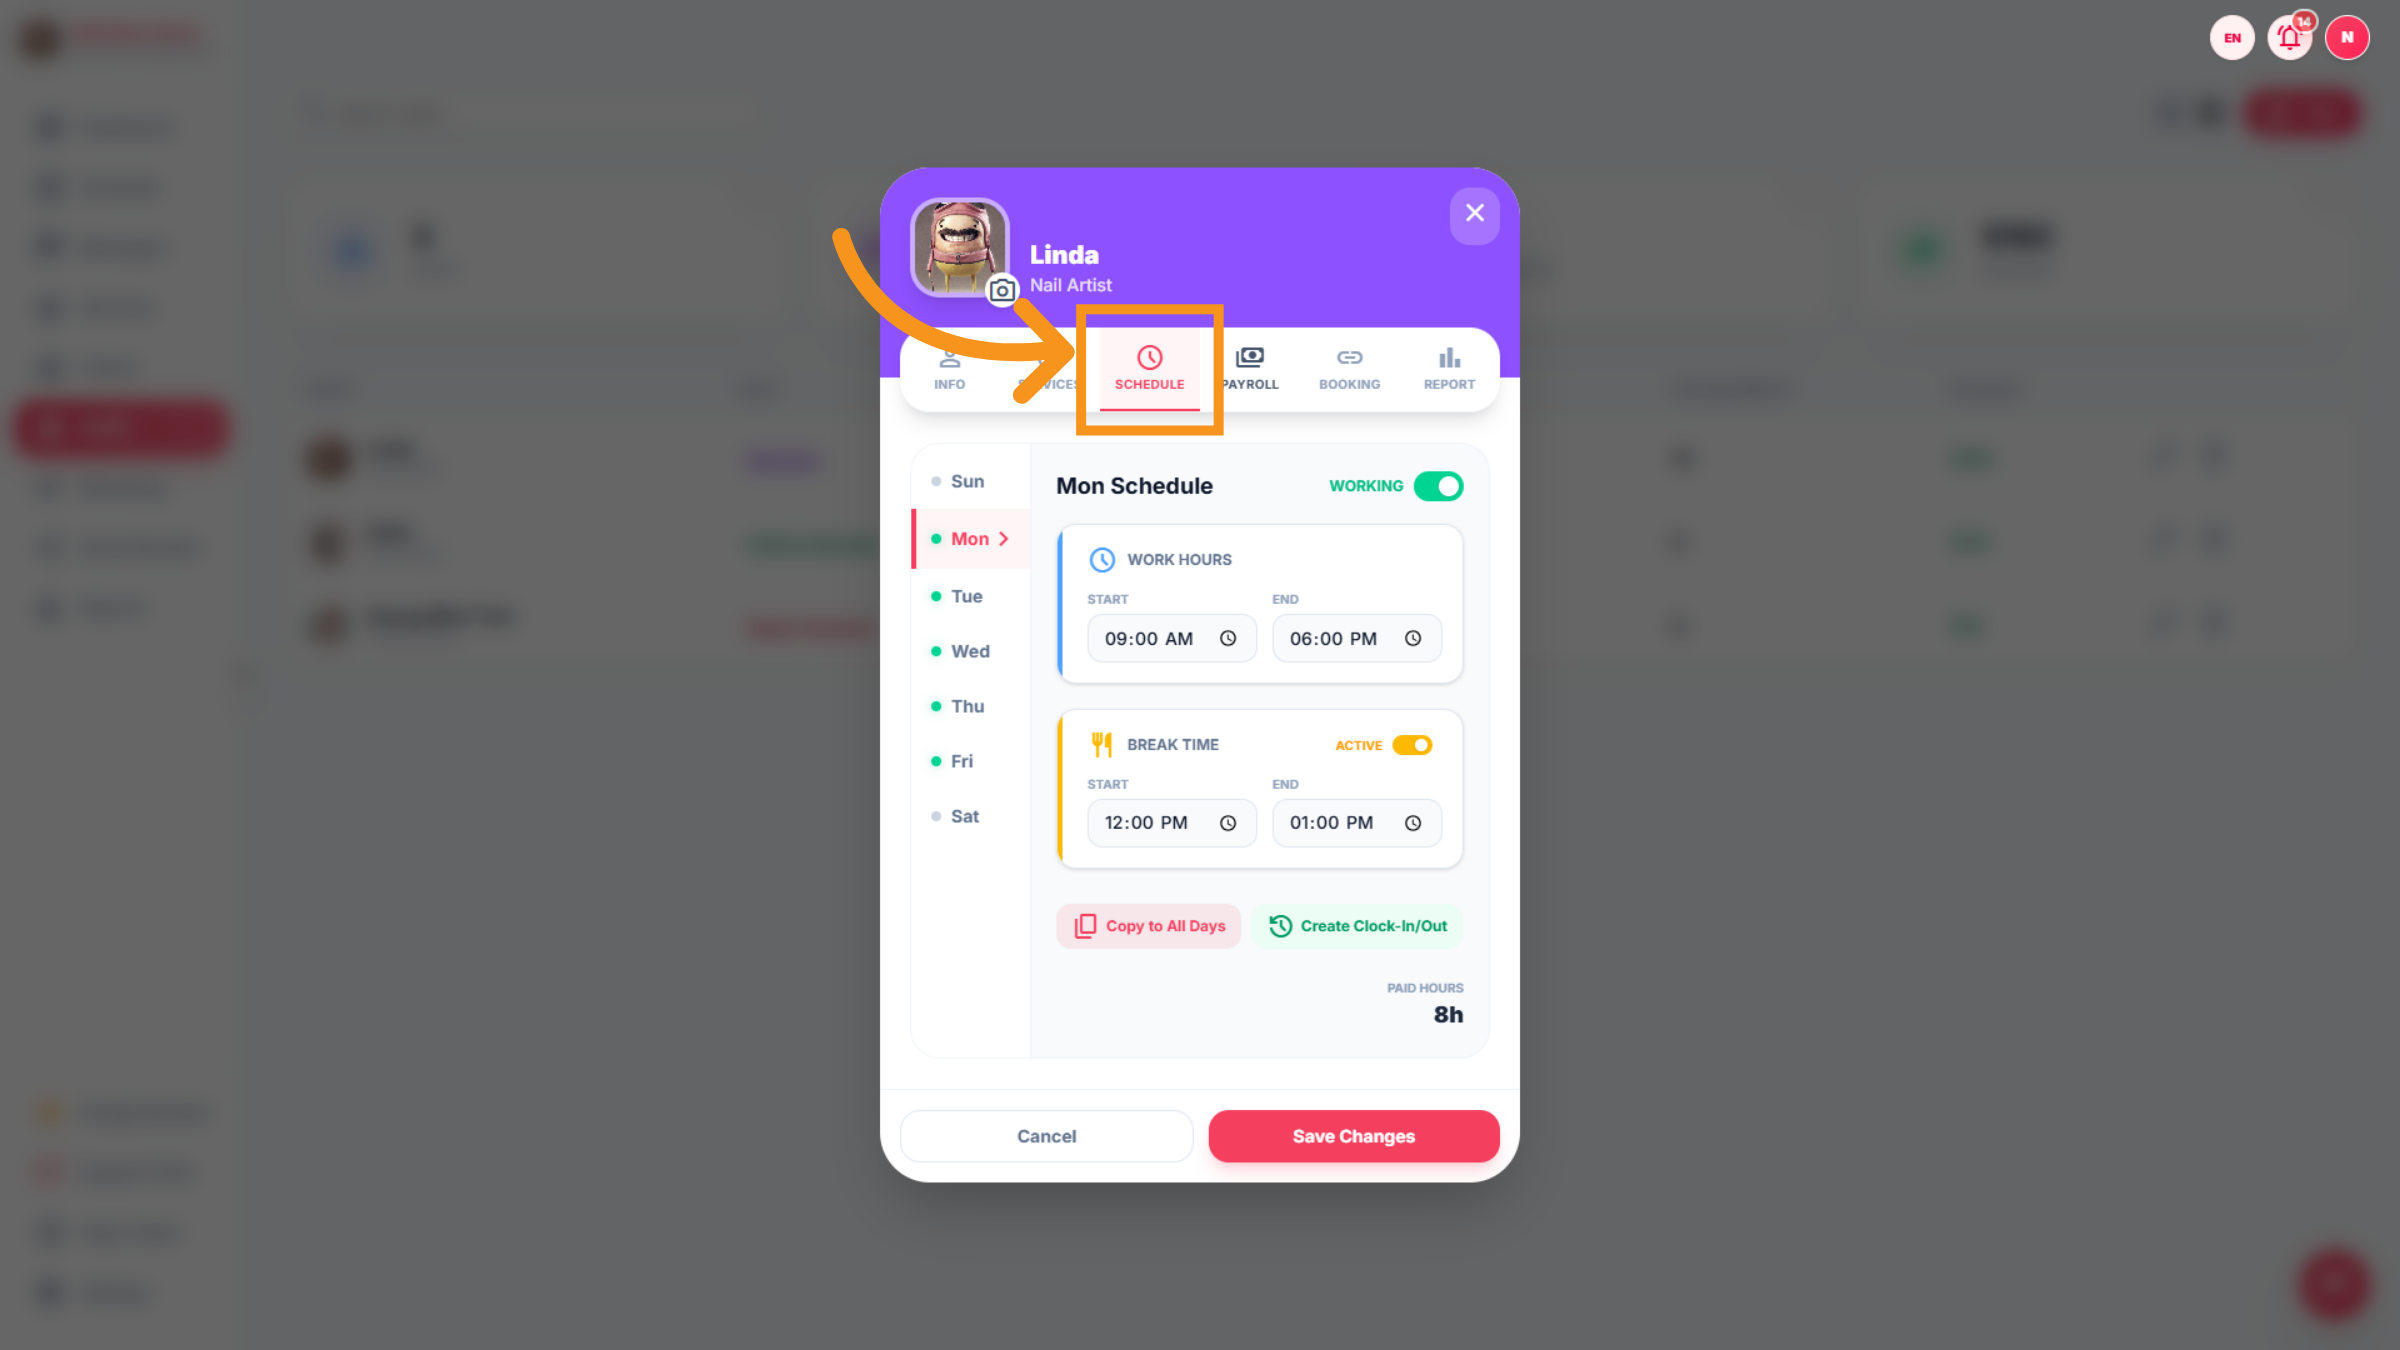
73. STAFF -schedule
SET-UP TECHNICIAN WORKING TIME here.
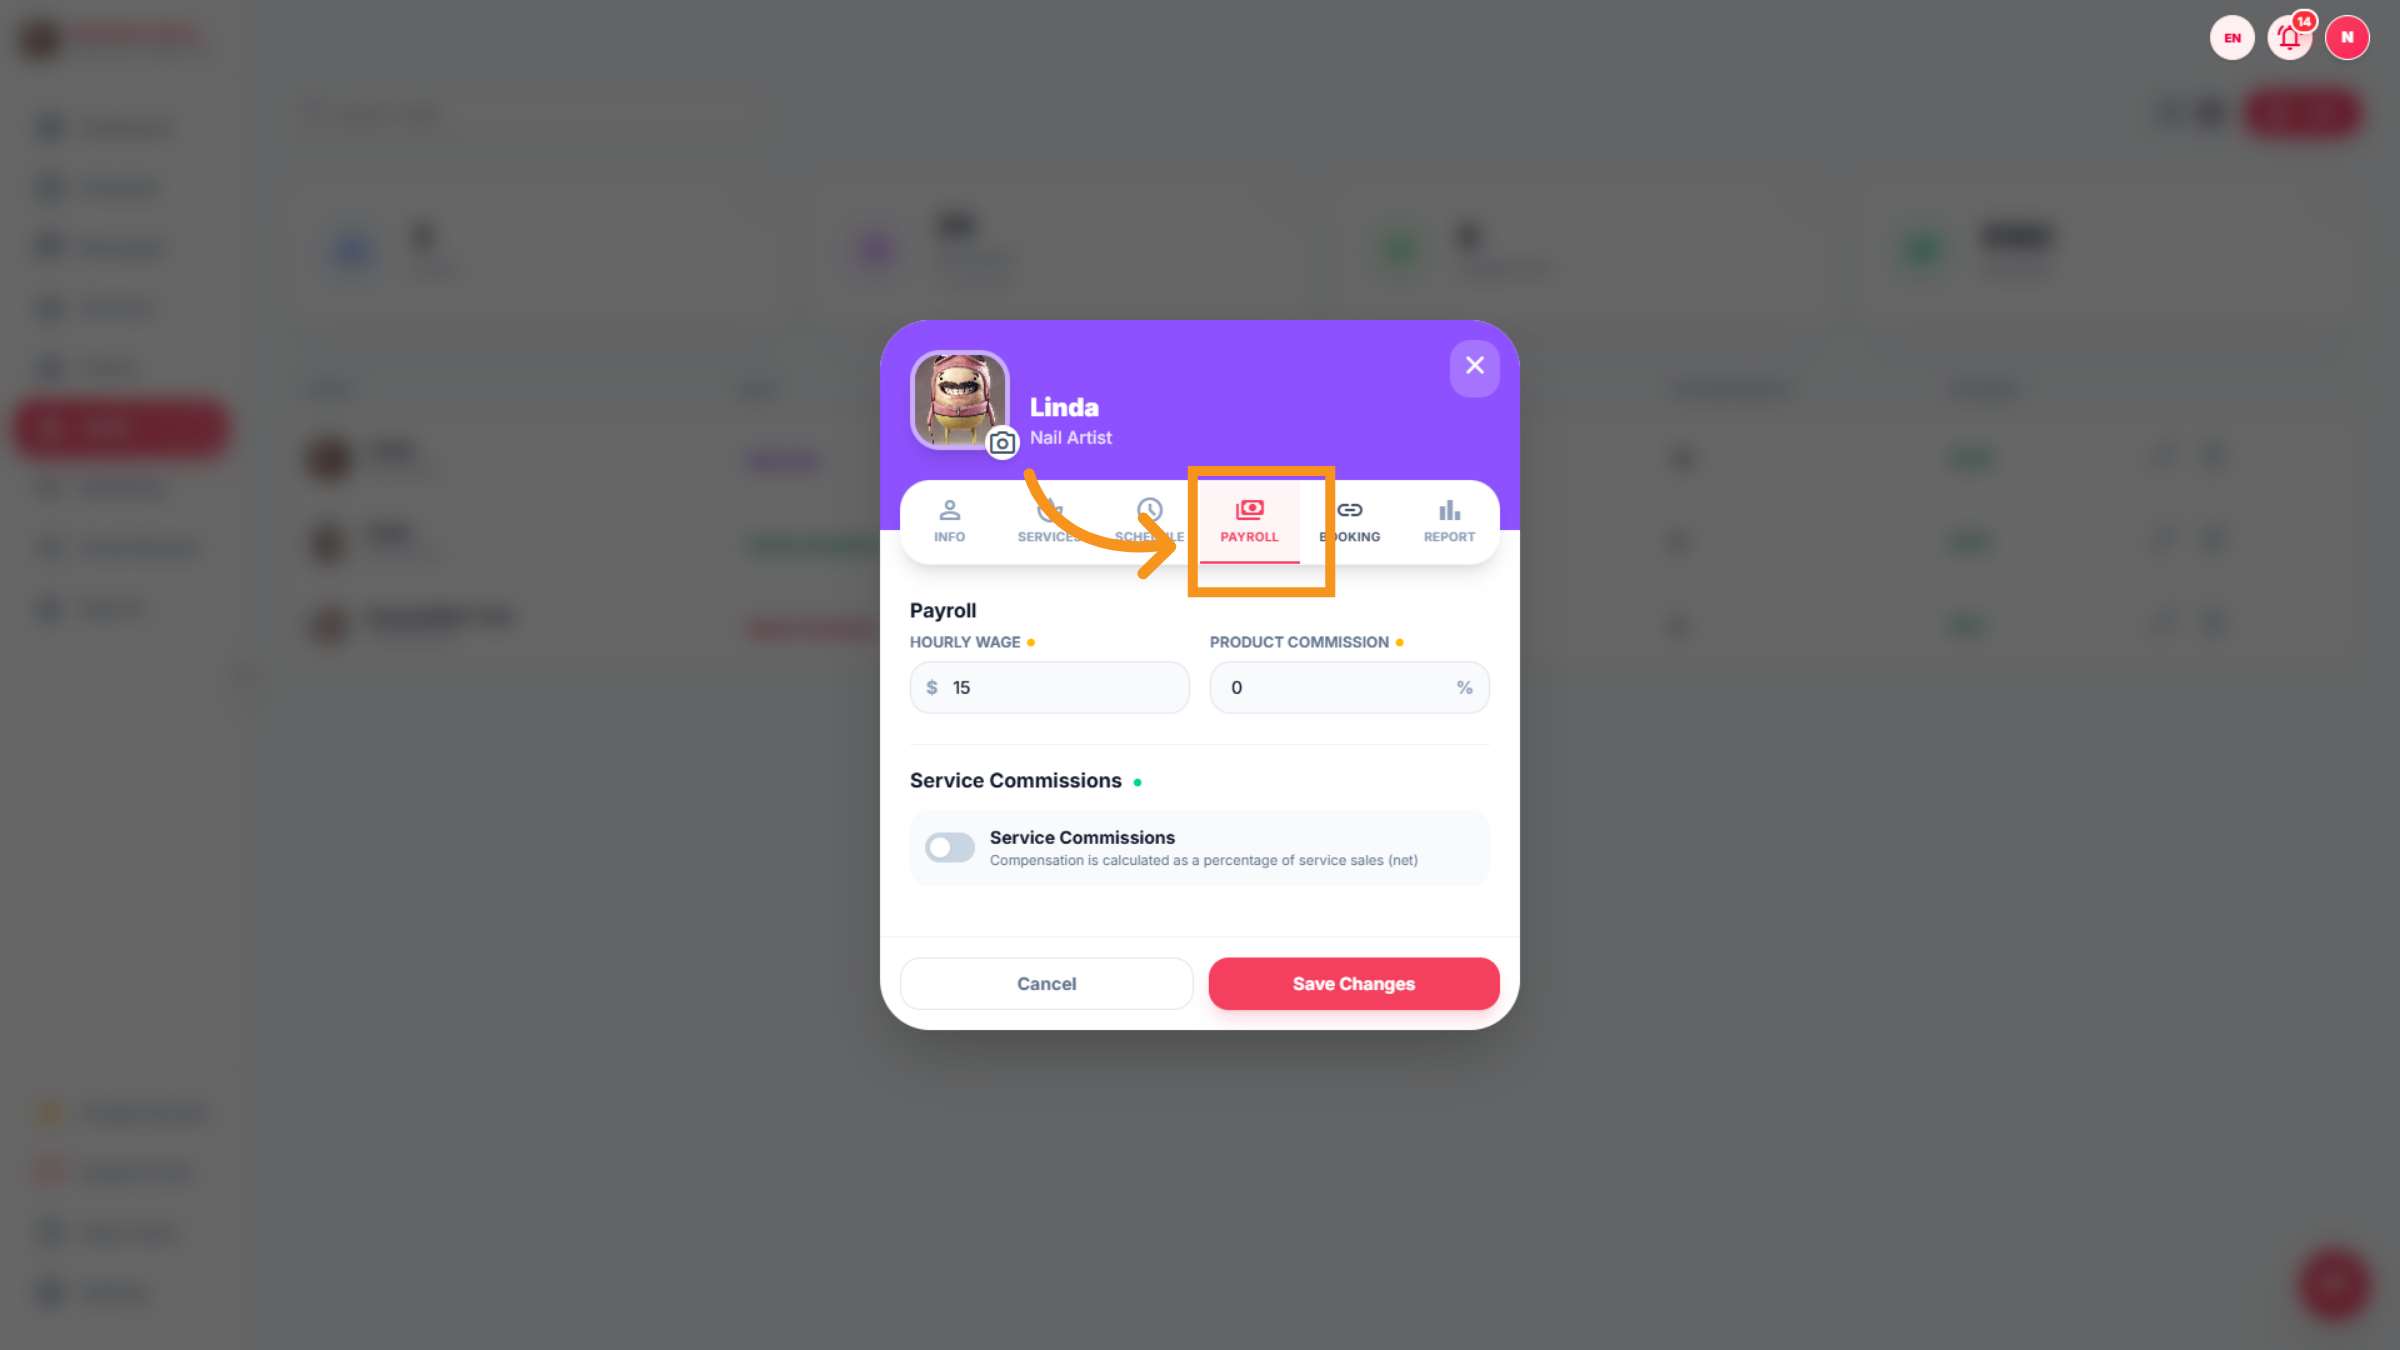
74. STAFF-PAYROLL
This section displays and creates wages and commissions for technicians.
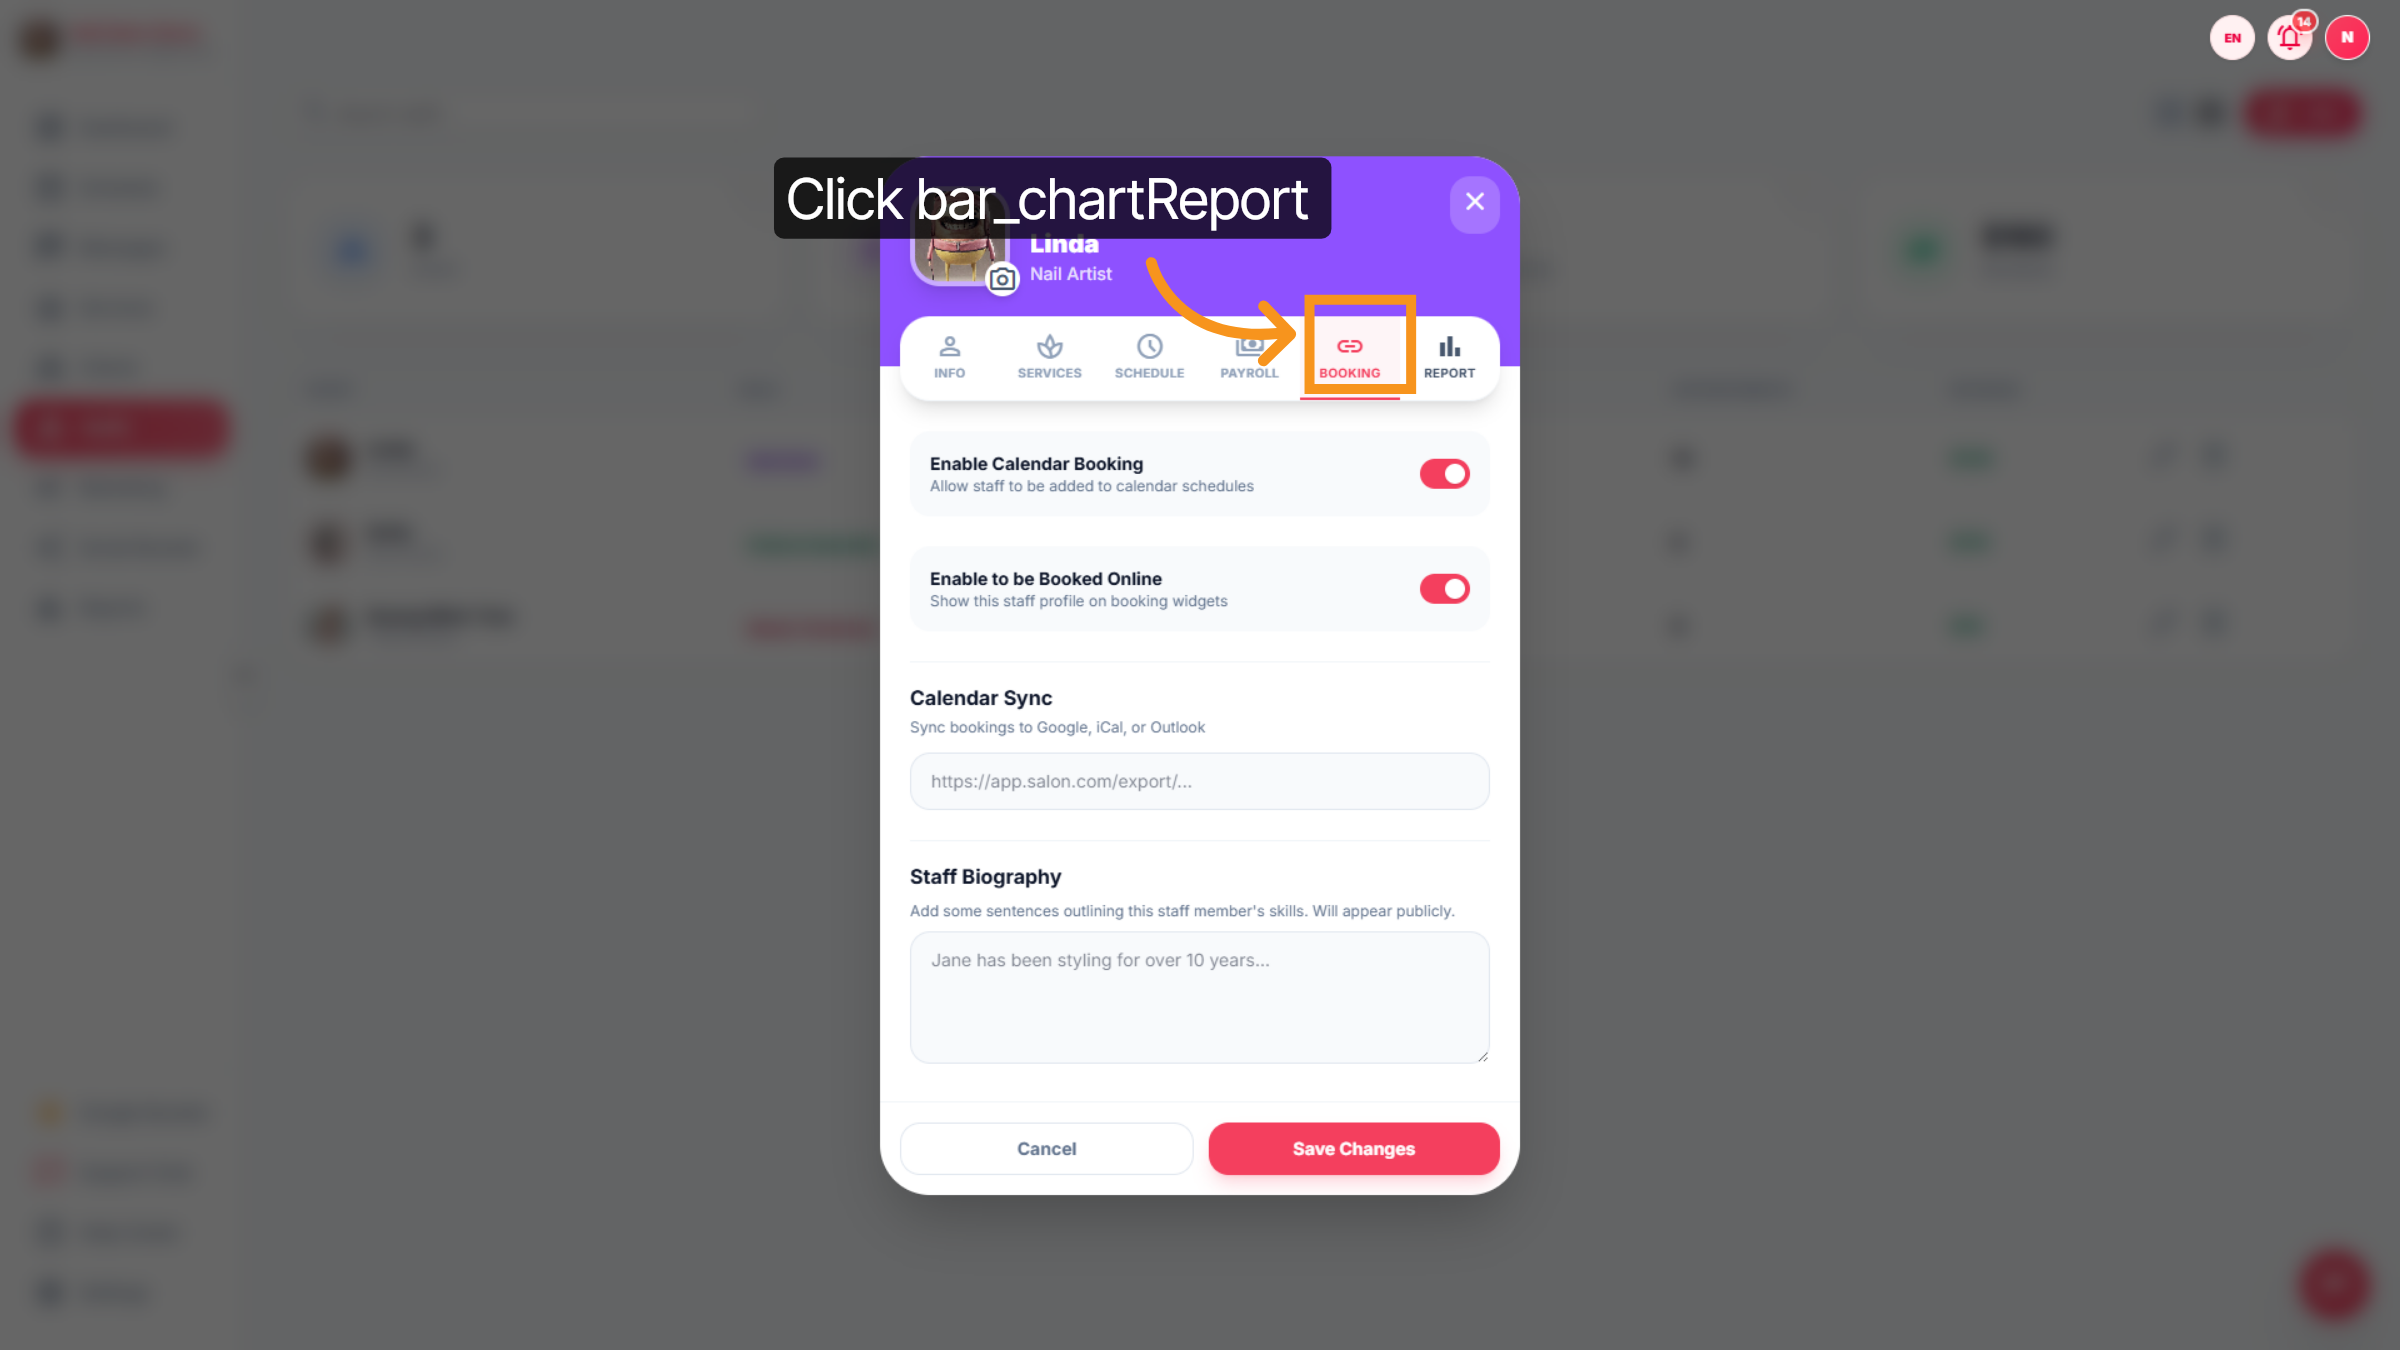
75. Staff- booking
arrange booking for technician
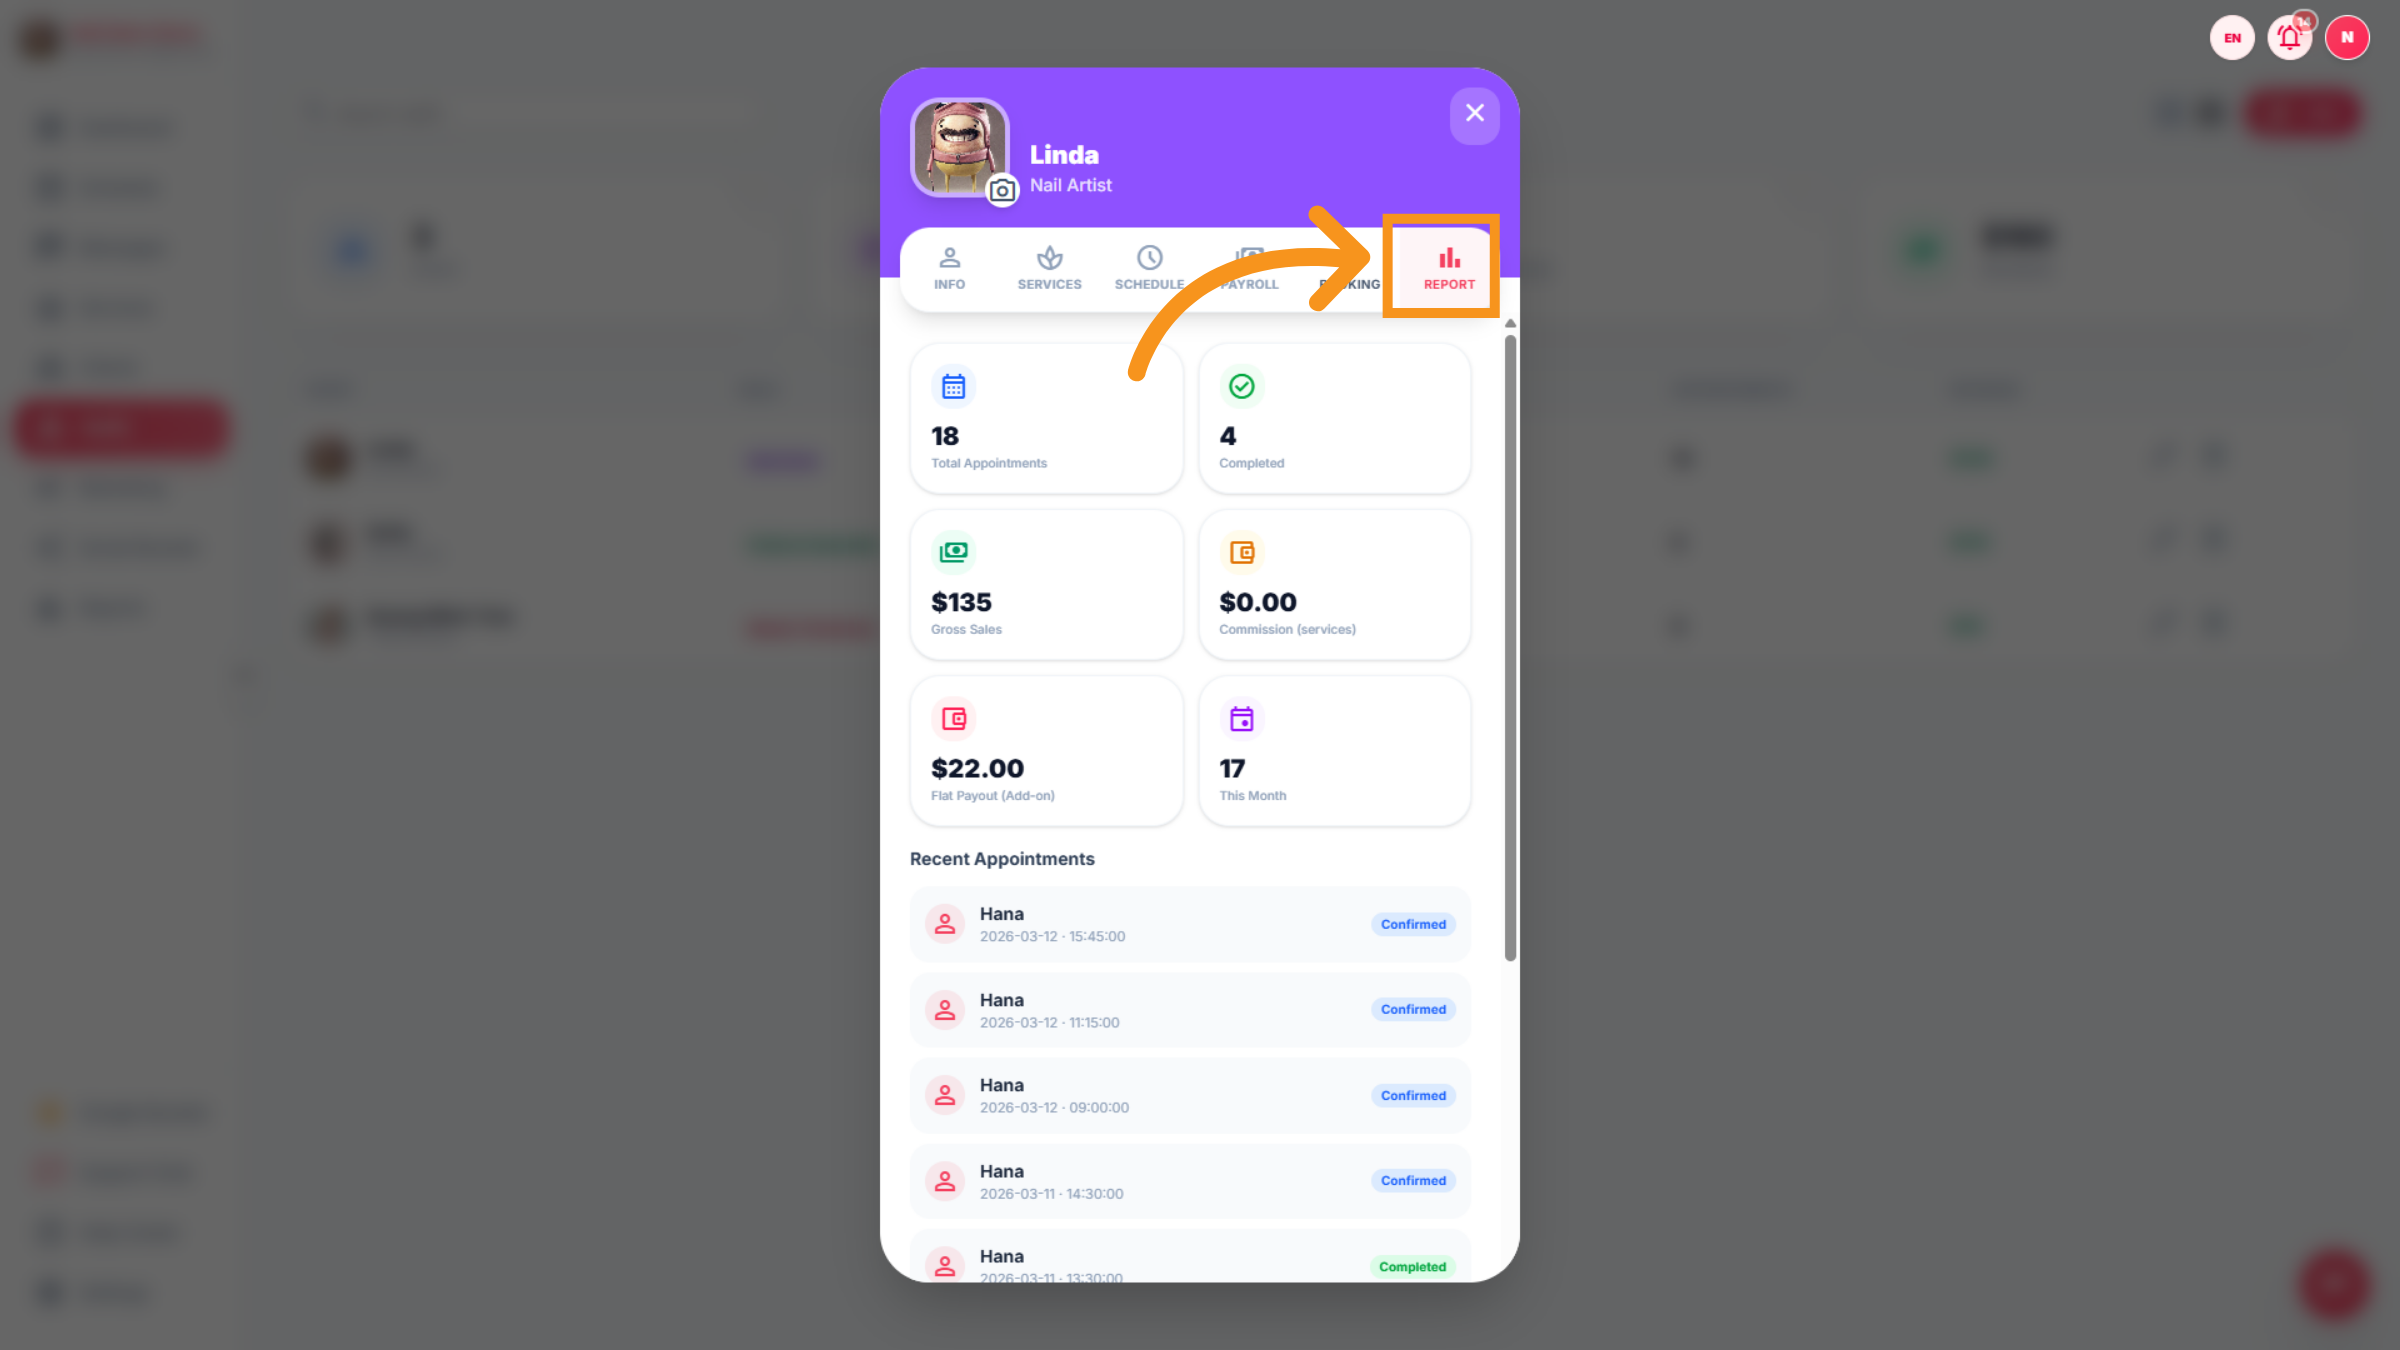
76. STAFF- REPORT
Click "Report" to access the reports section for technician performance and financial analytics.
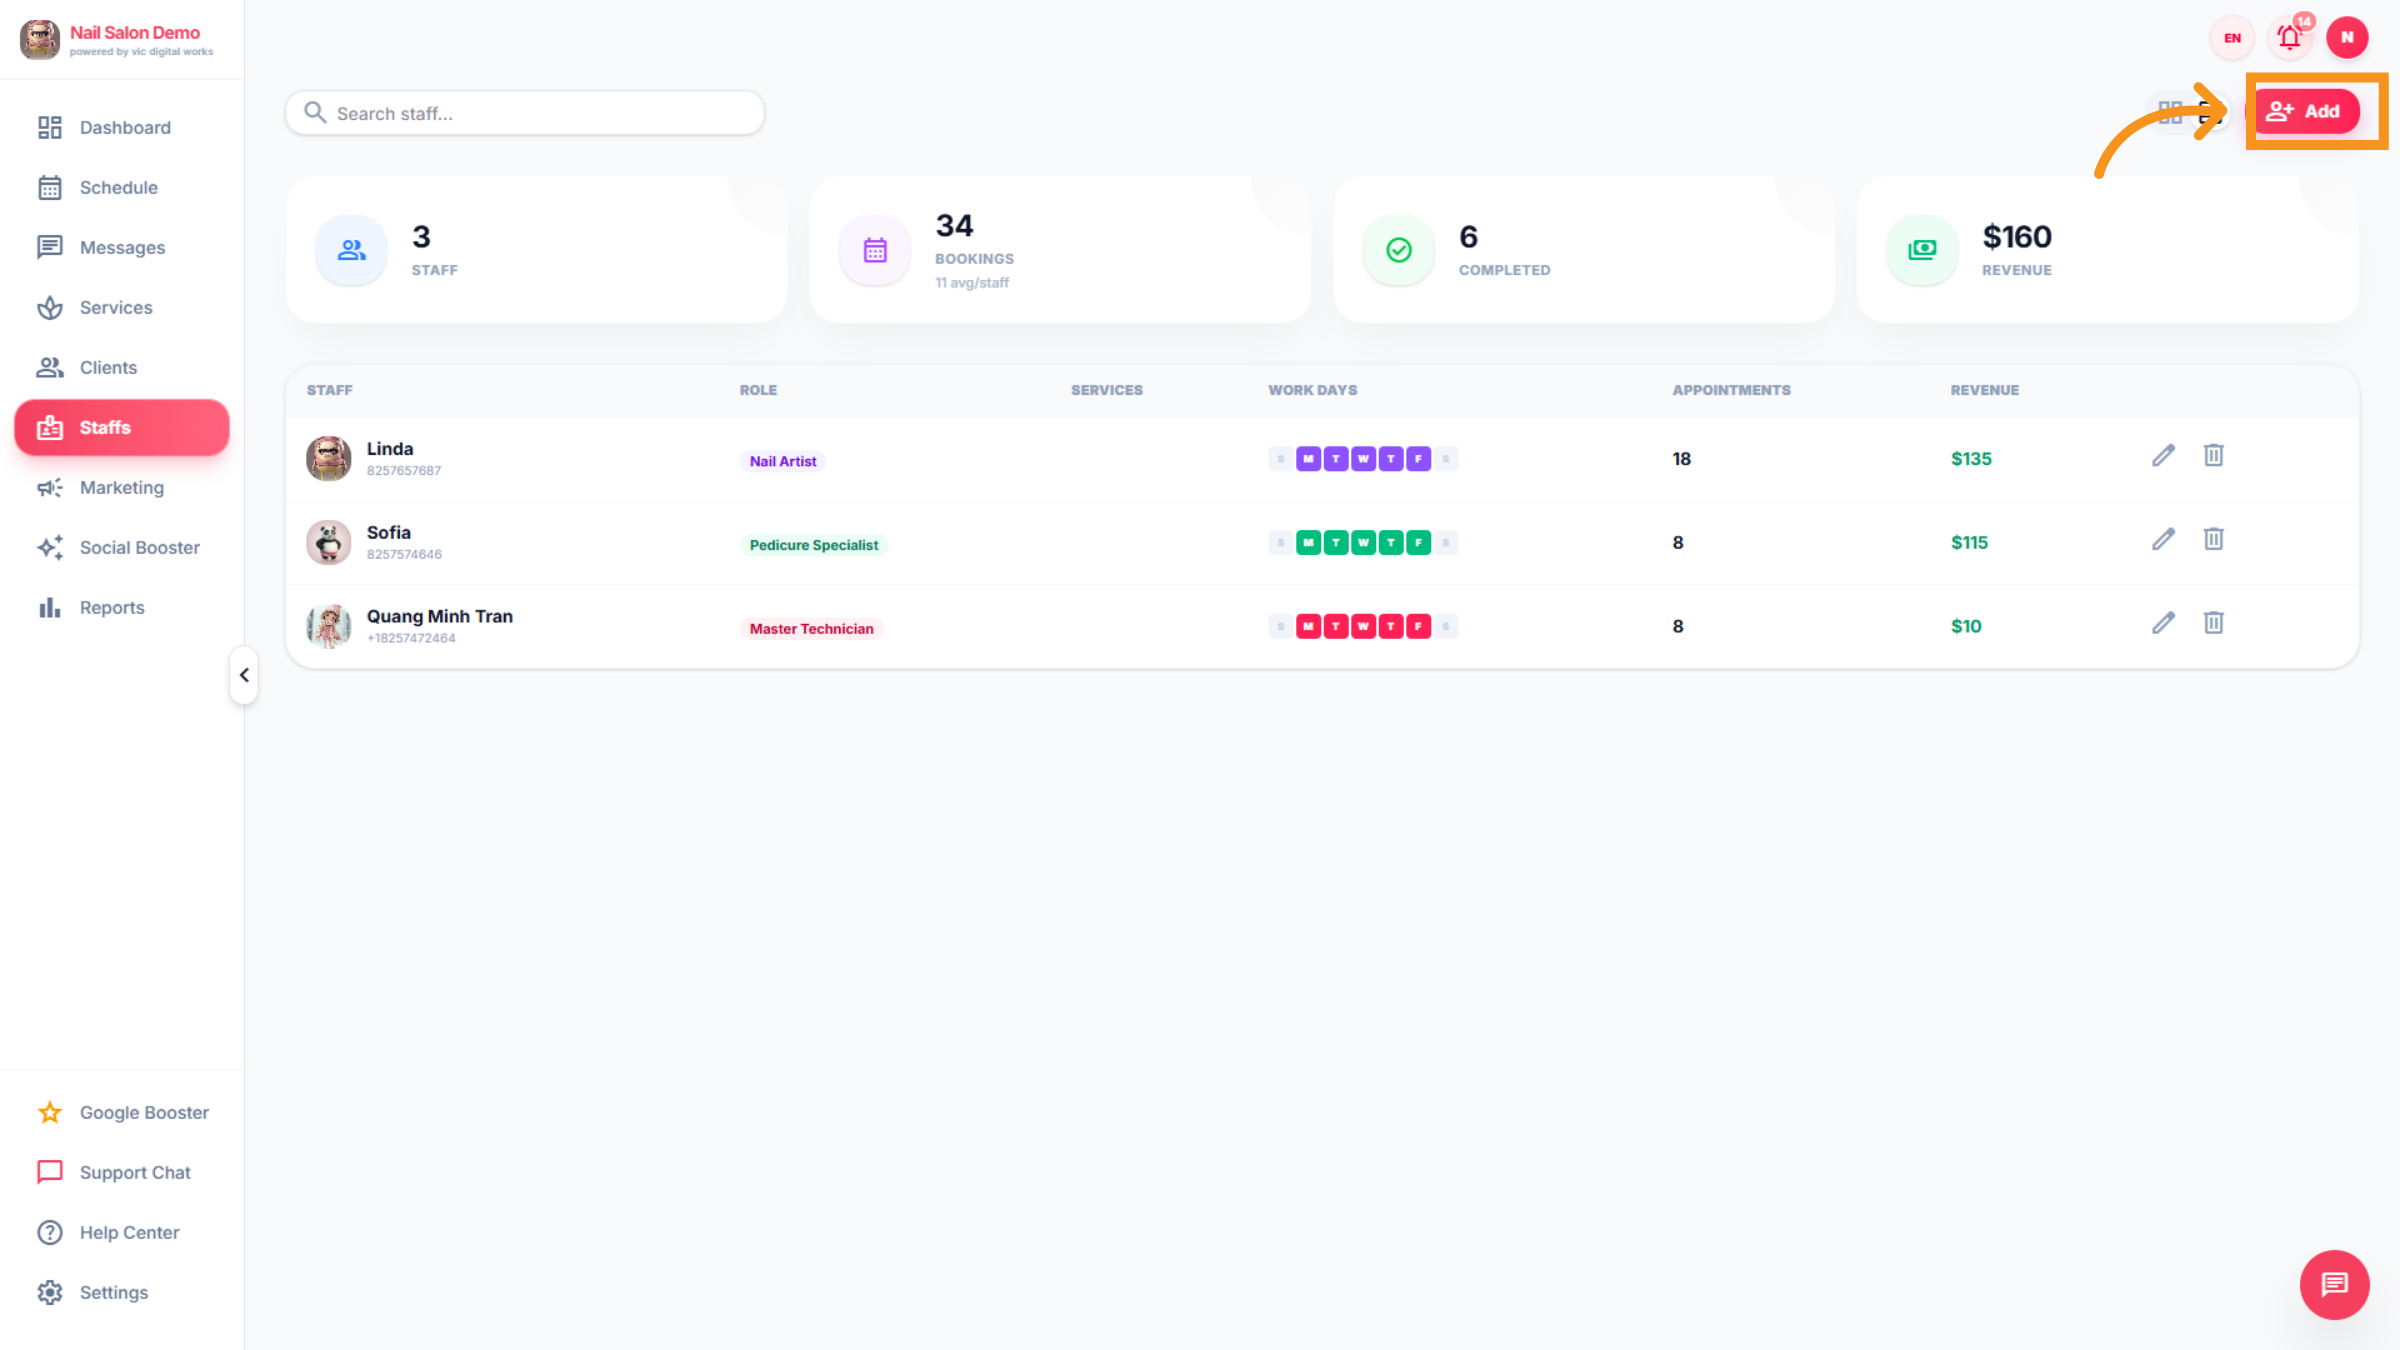
77. Add New Staff
Click "+add" to initiate adding a new staff member .
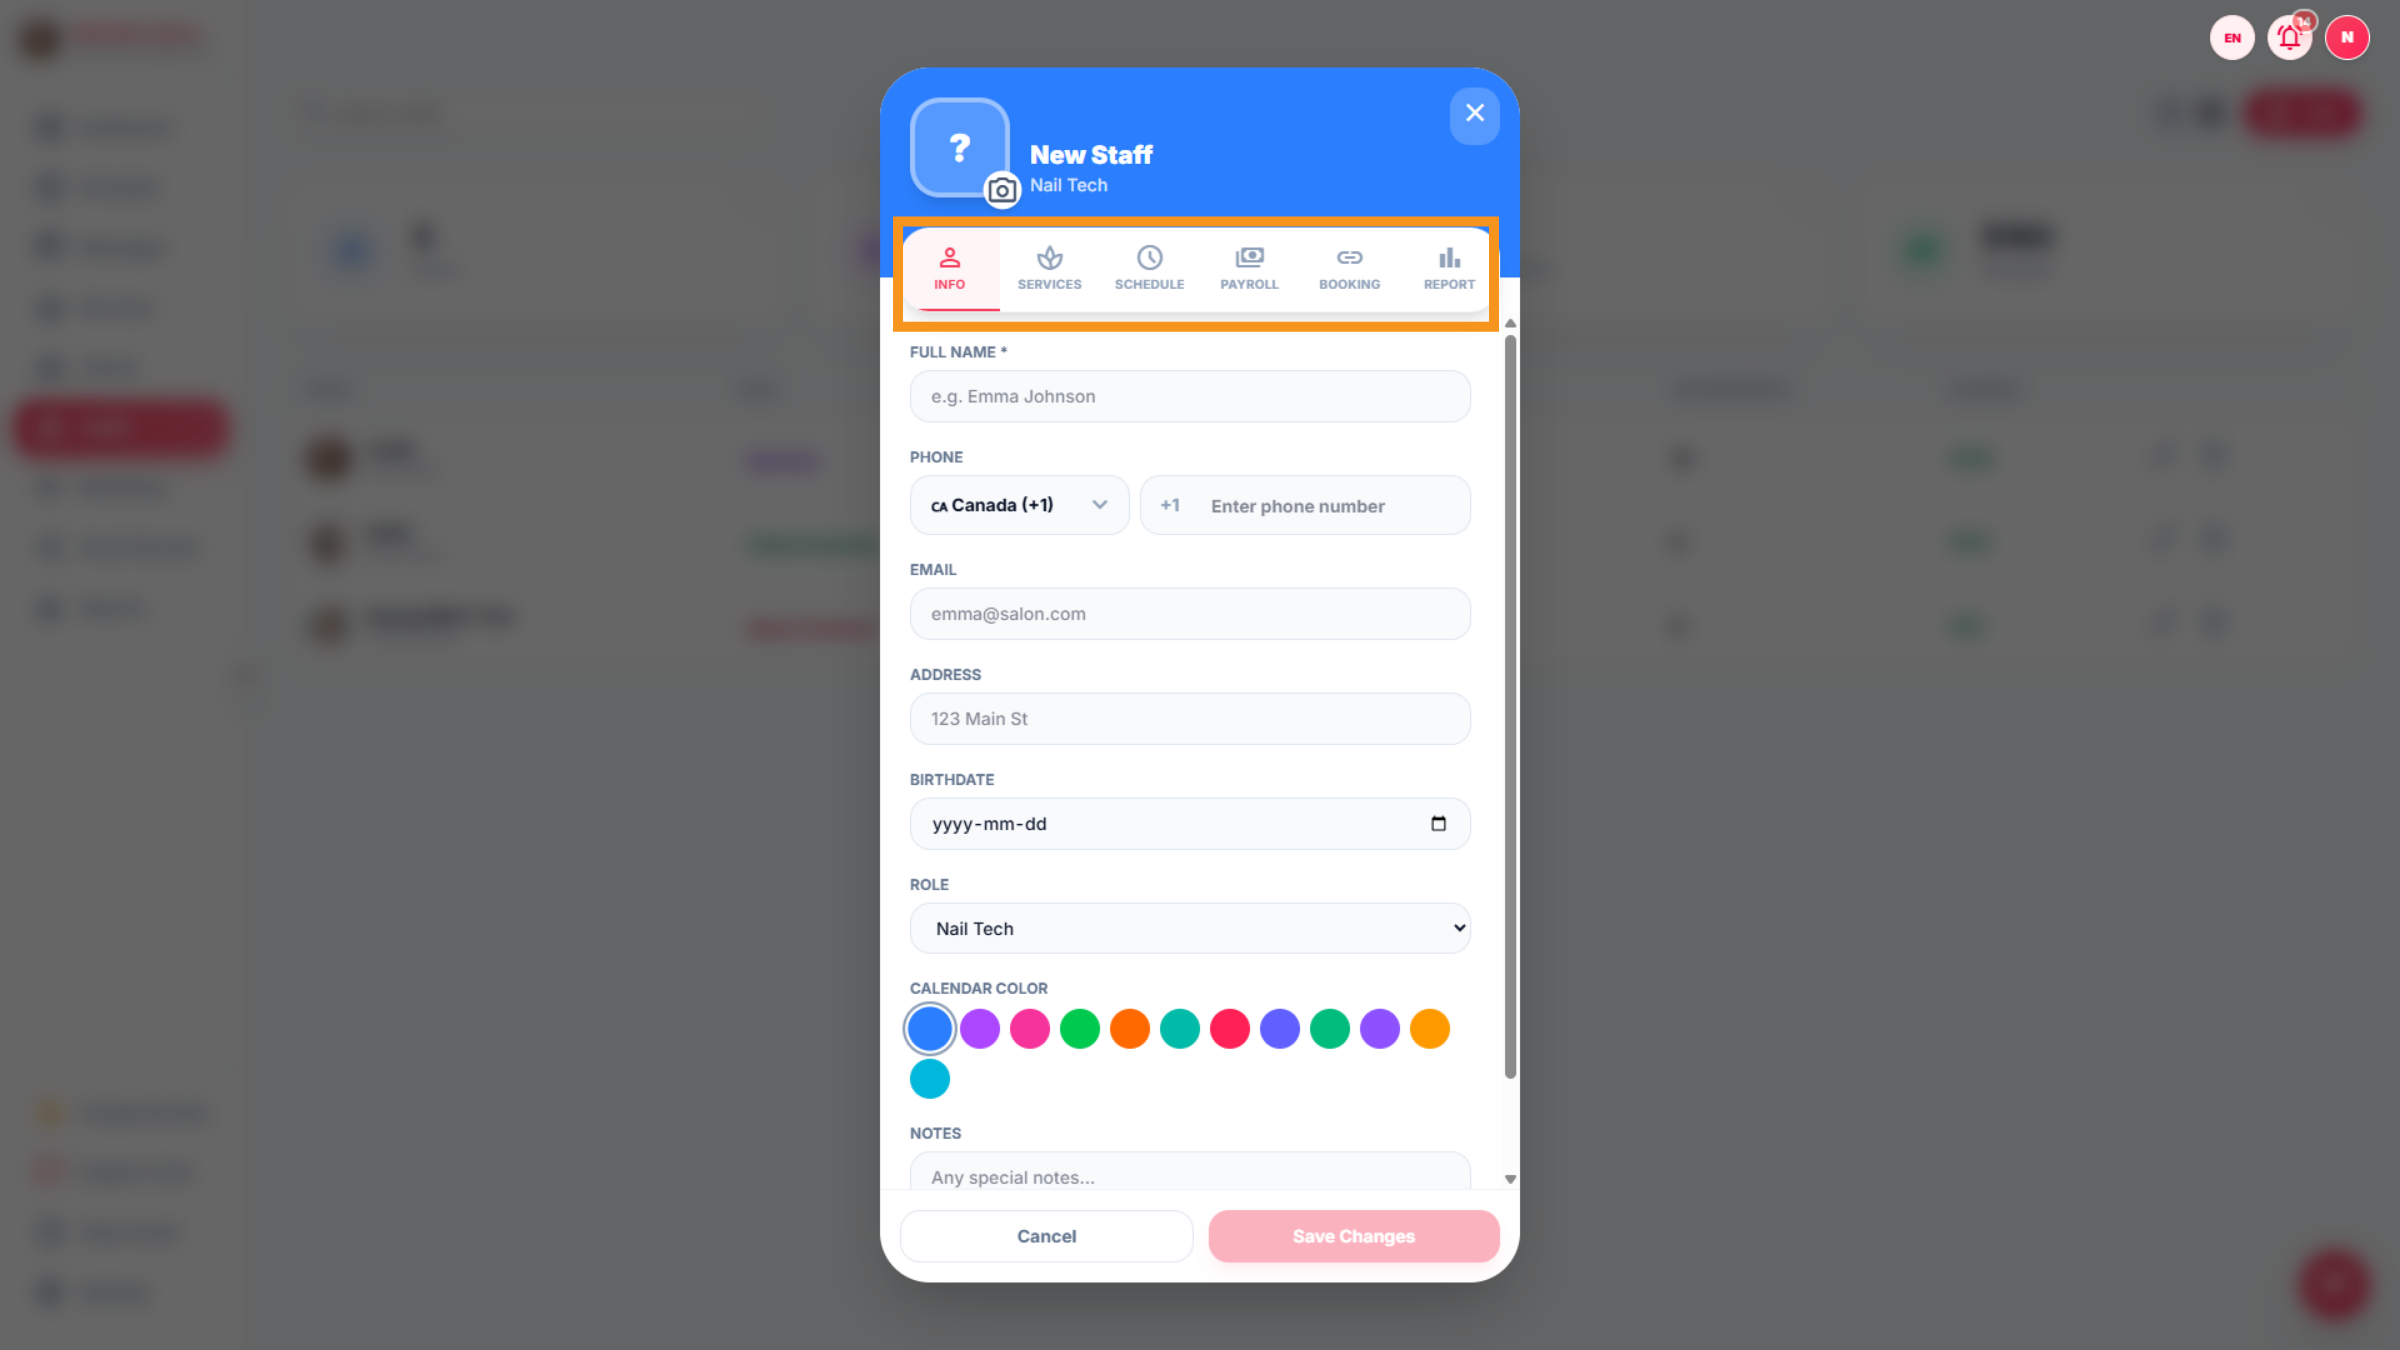
78. New staff
In this section, you can enter the new technician information. Includes : Services (staff skill),Schedule(working hours),Payroll (wave and commission),booking , report...
You have successfully managed appointments, services, and customer details within the Leo-Booking dashboard. This includes booking creation, service customization, and loyalty program management to streamline salon operations.