Settings
Configure POS Settings Efficiently In Serviz Application
This tutorial guides you through configuring various settings in the VICDIGITALWORKS POS system.
Go to serviz.ca
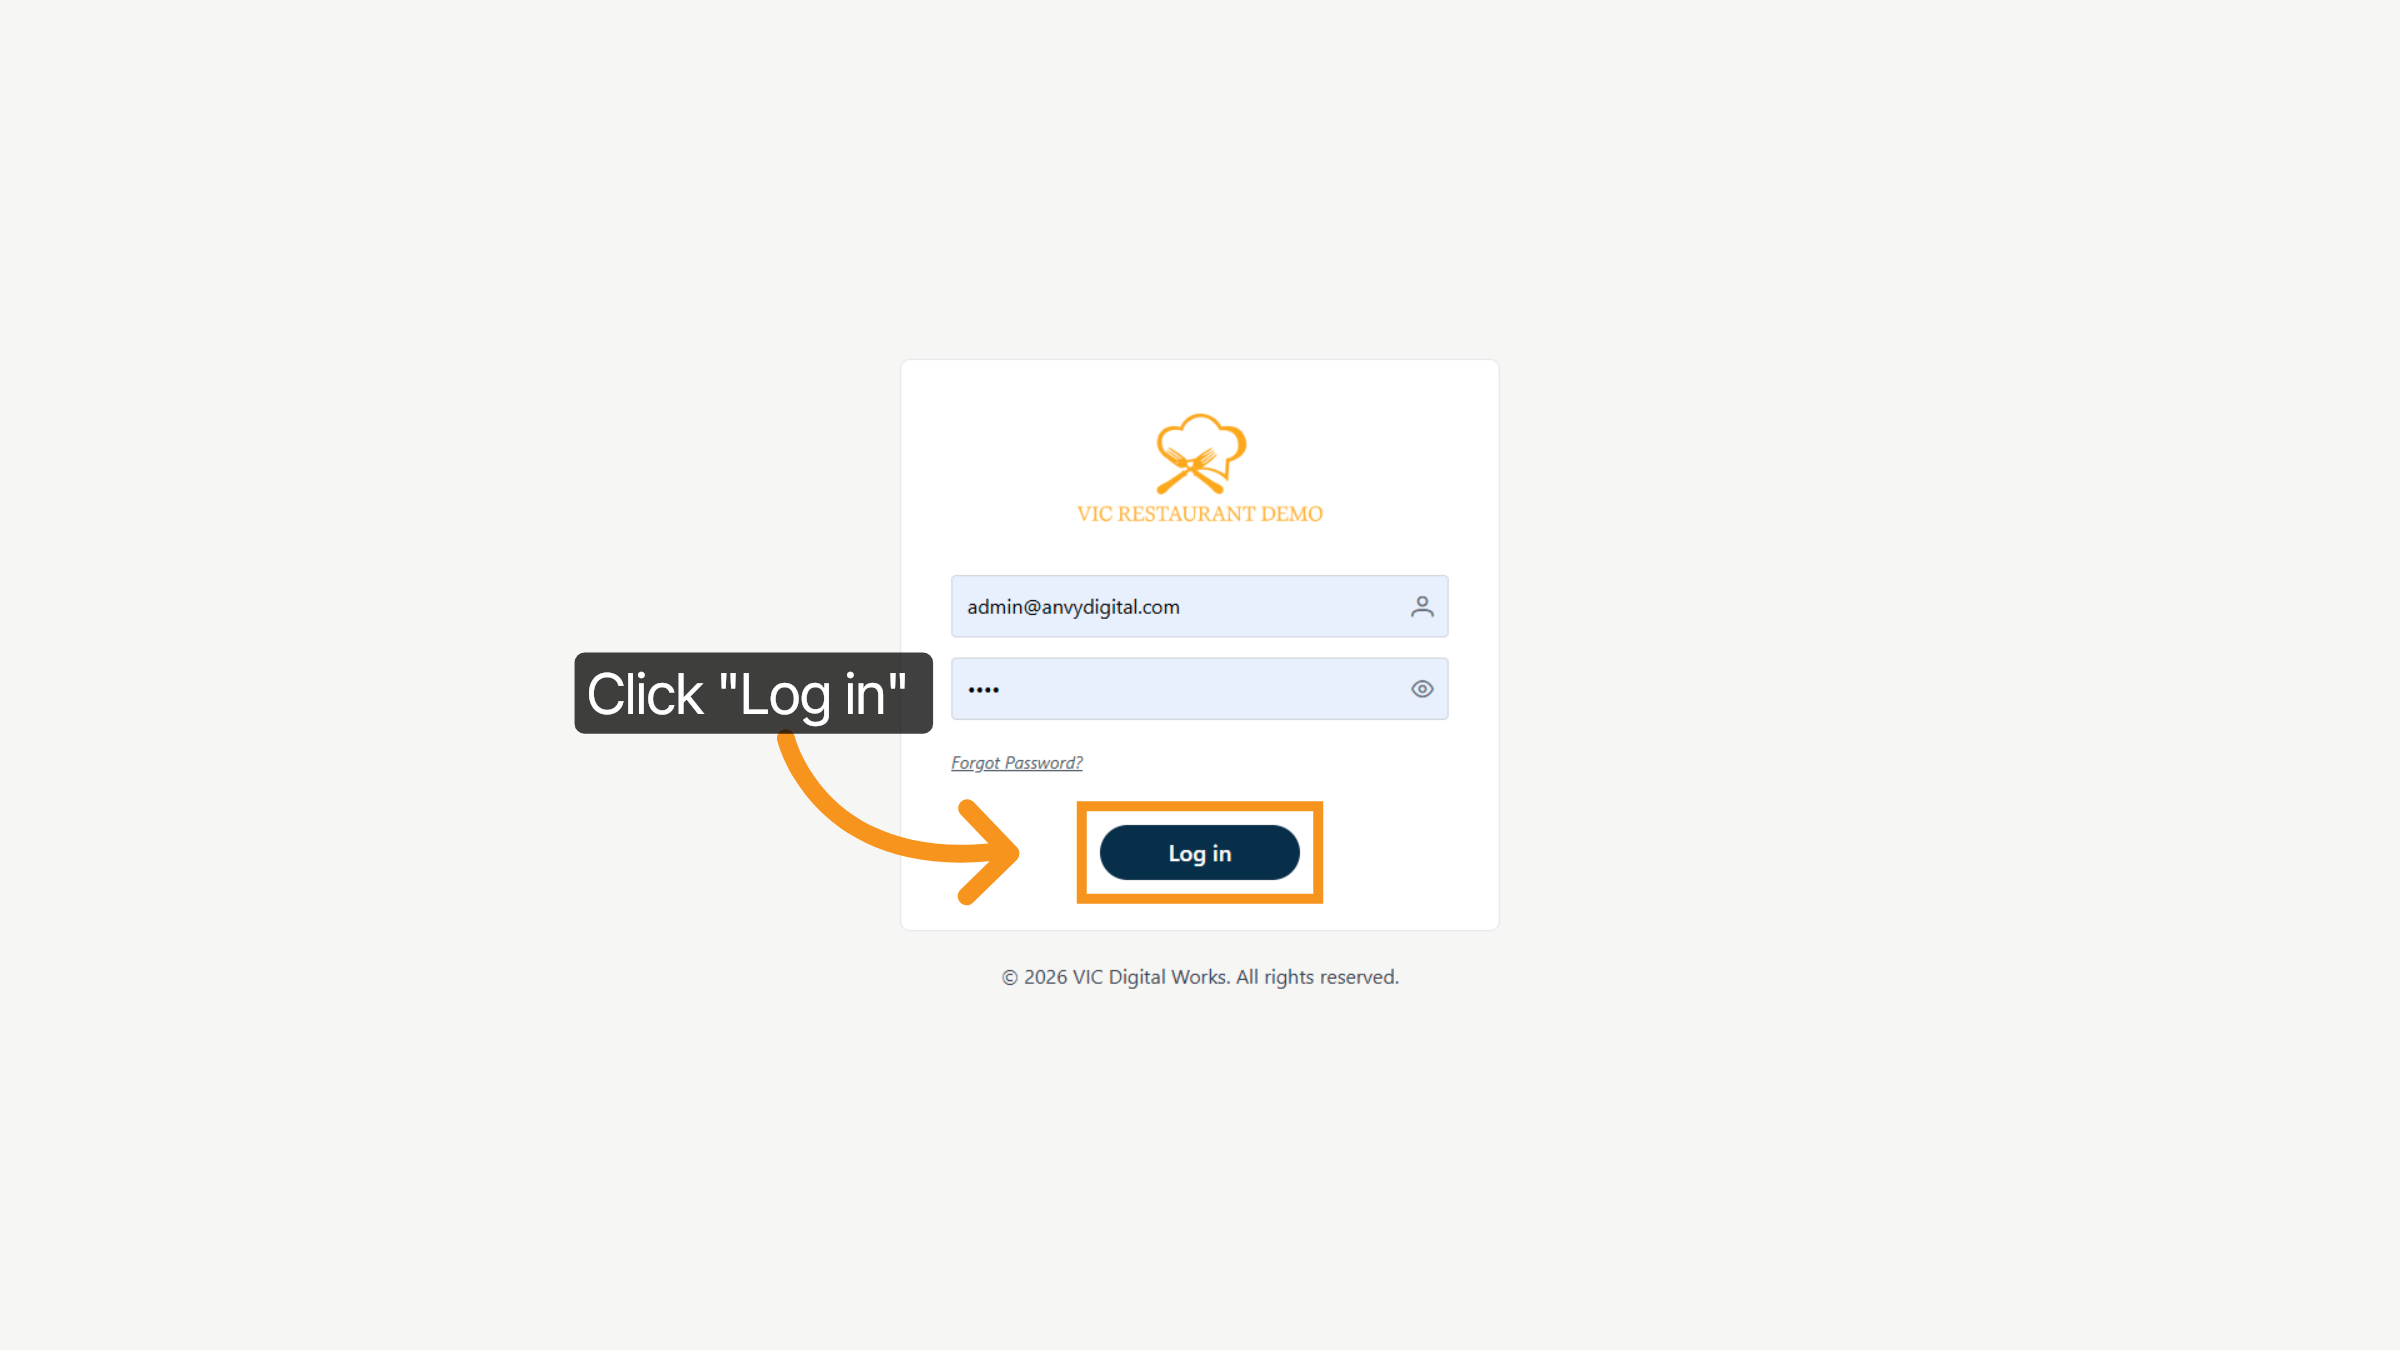
1. Click Log In Button
Click the Log In button to access the POS system.
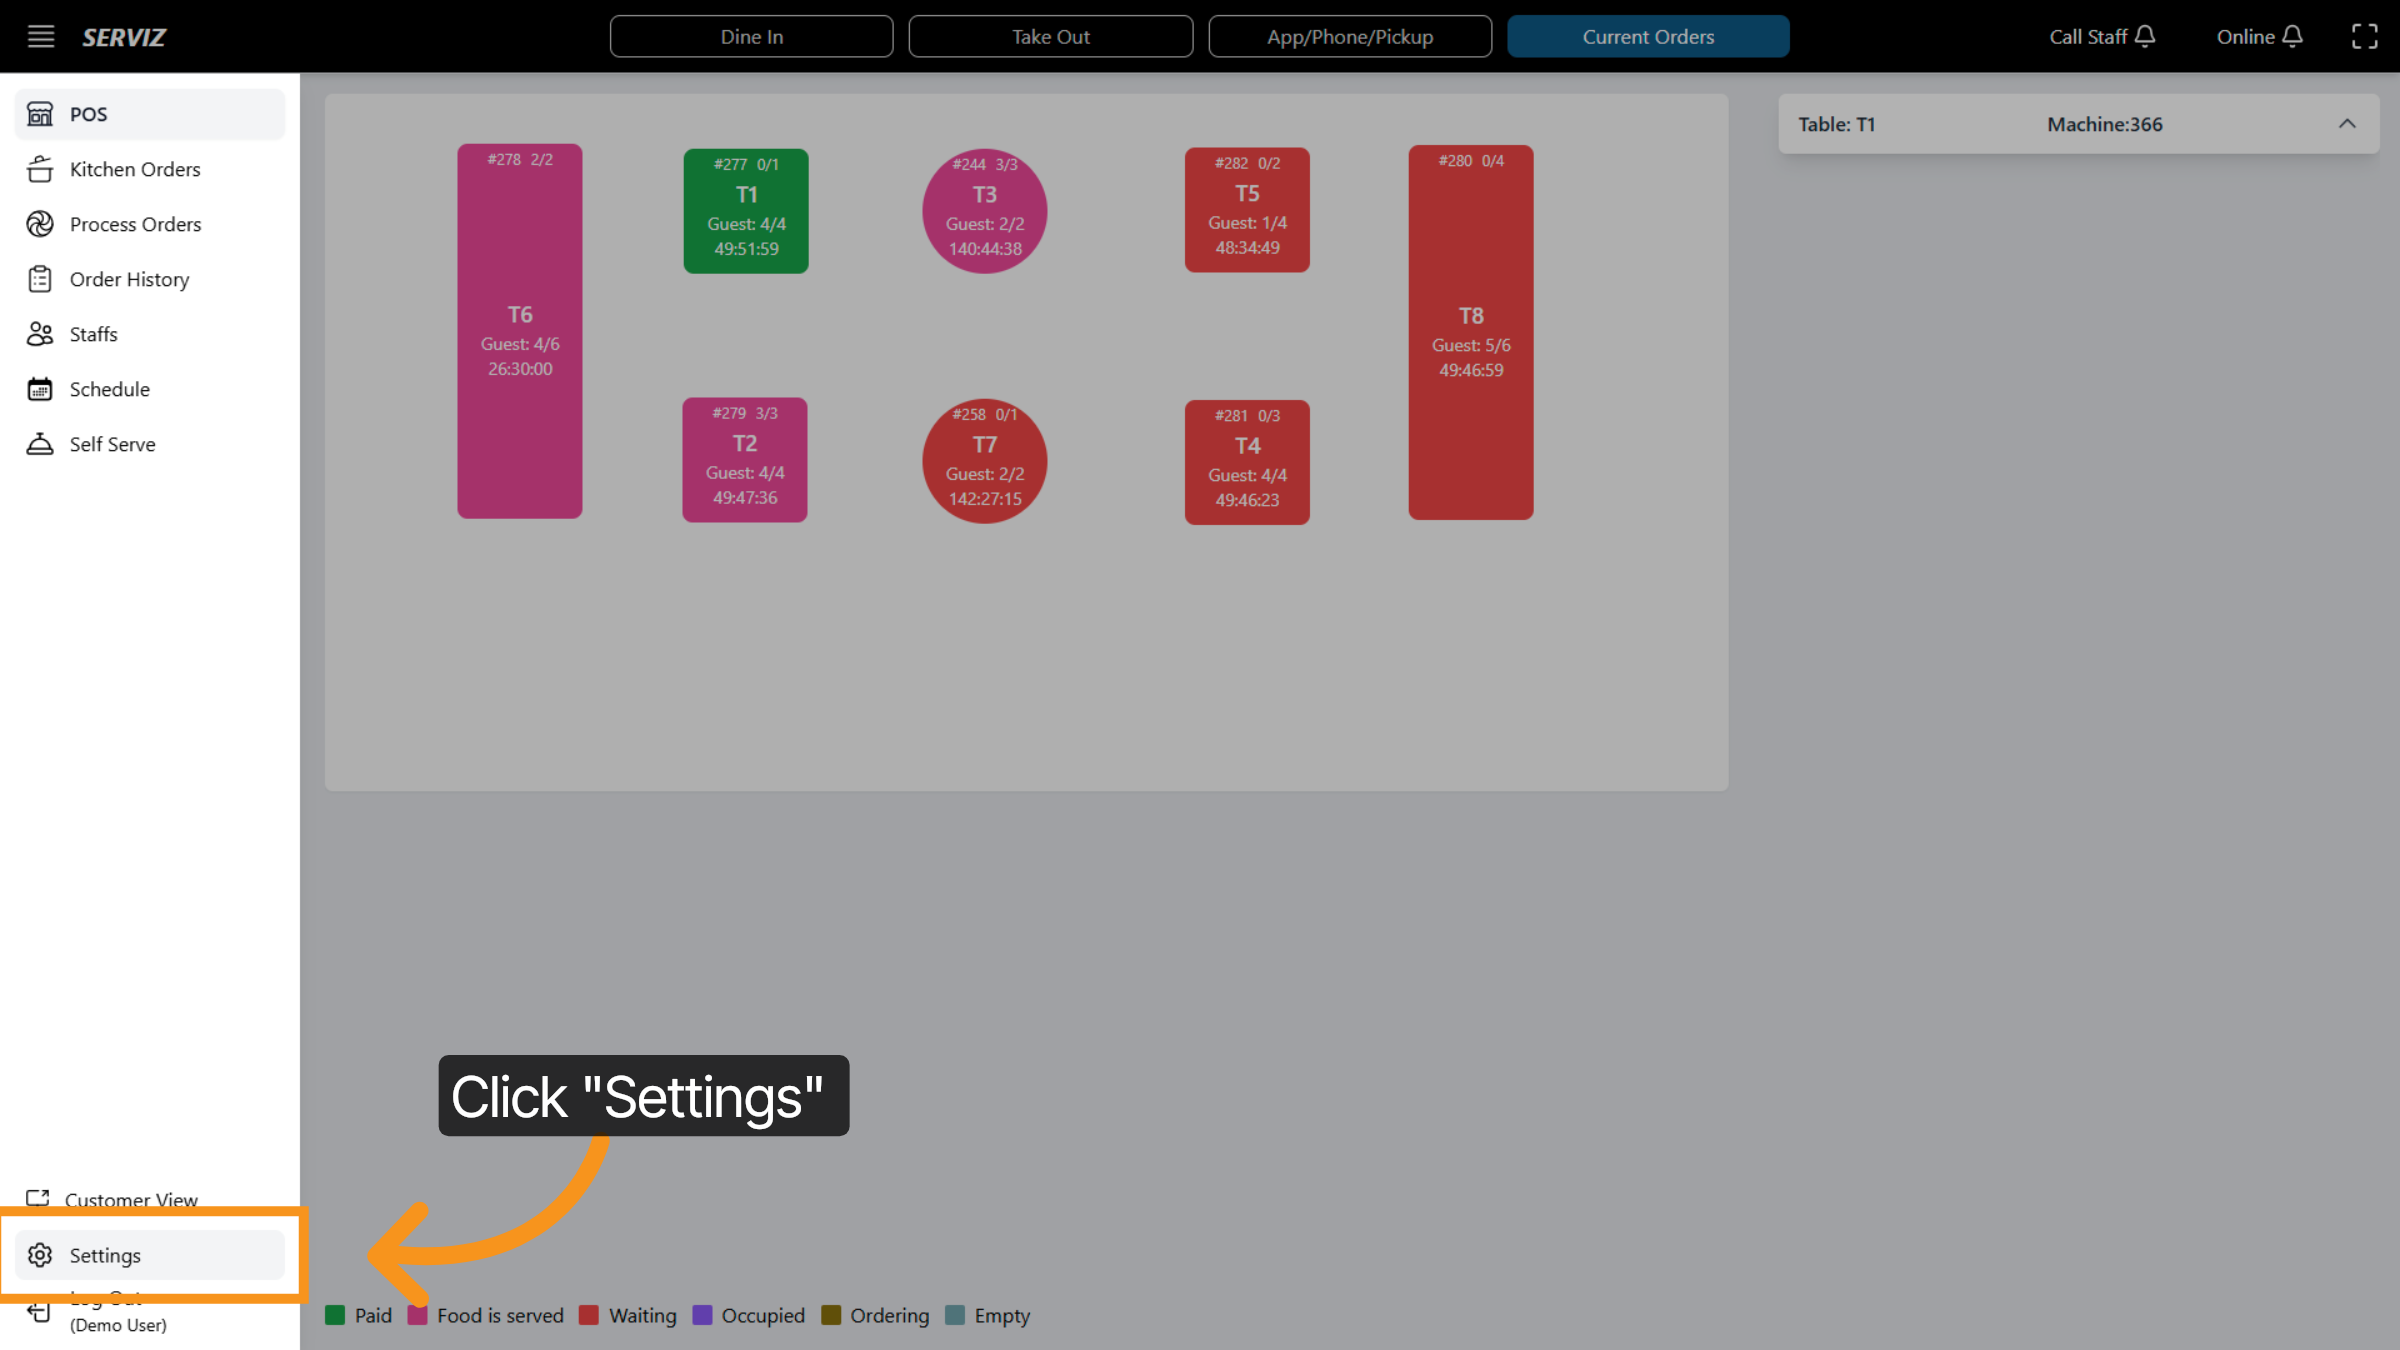
2. Select Settings Option
Click the Settings option to configure your POS system preferences.
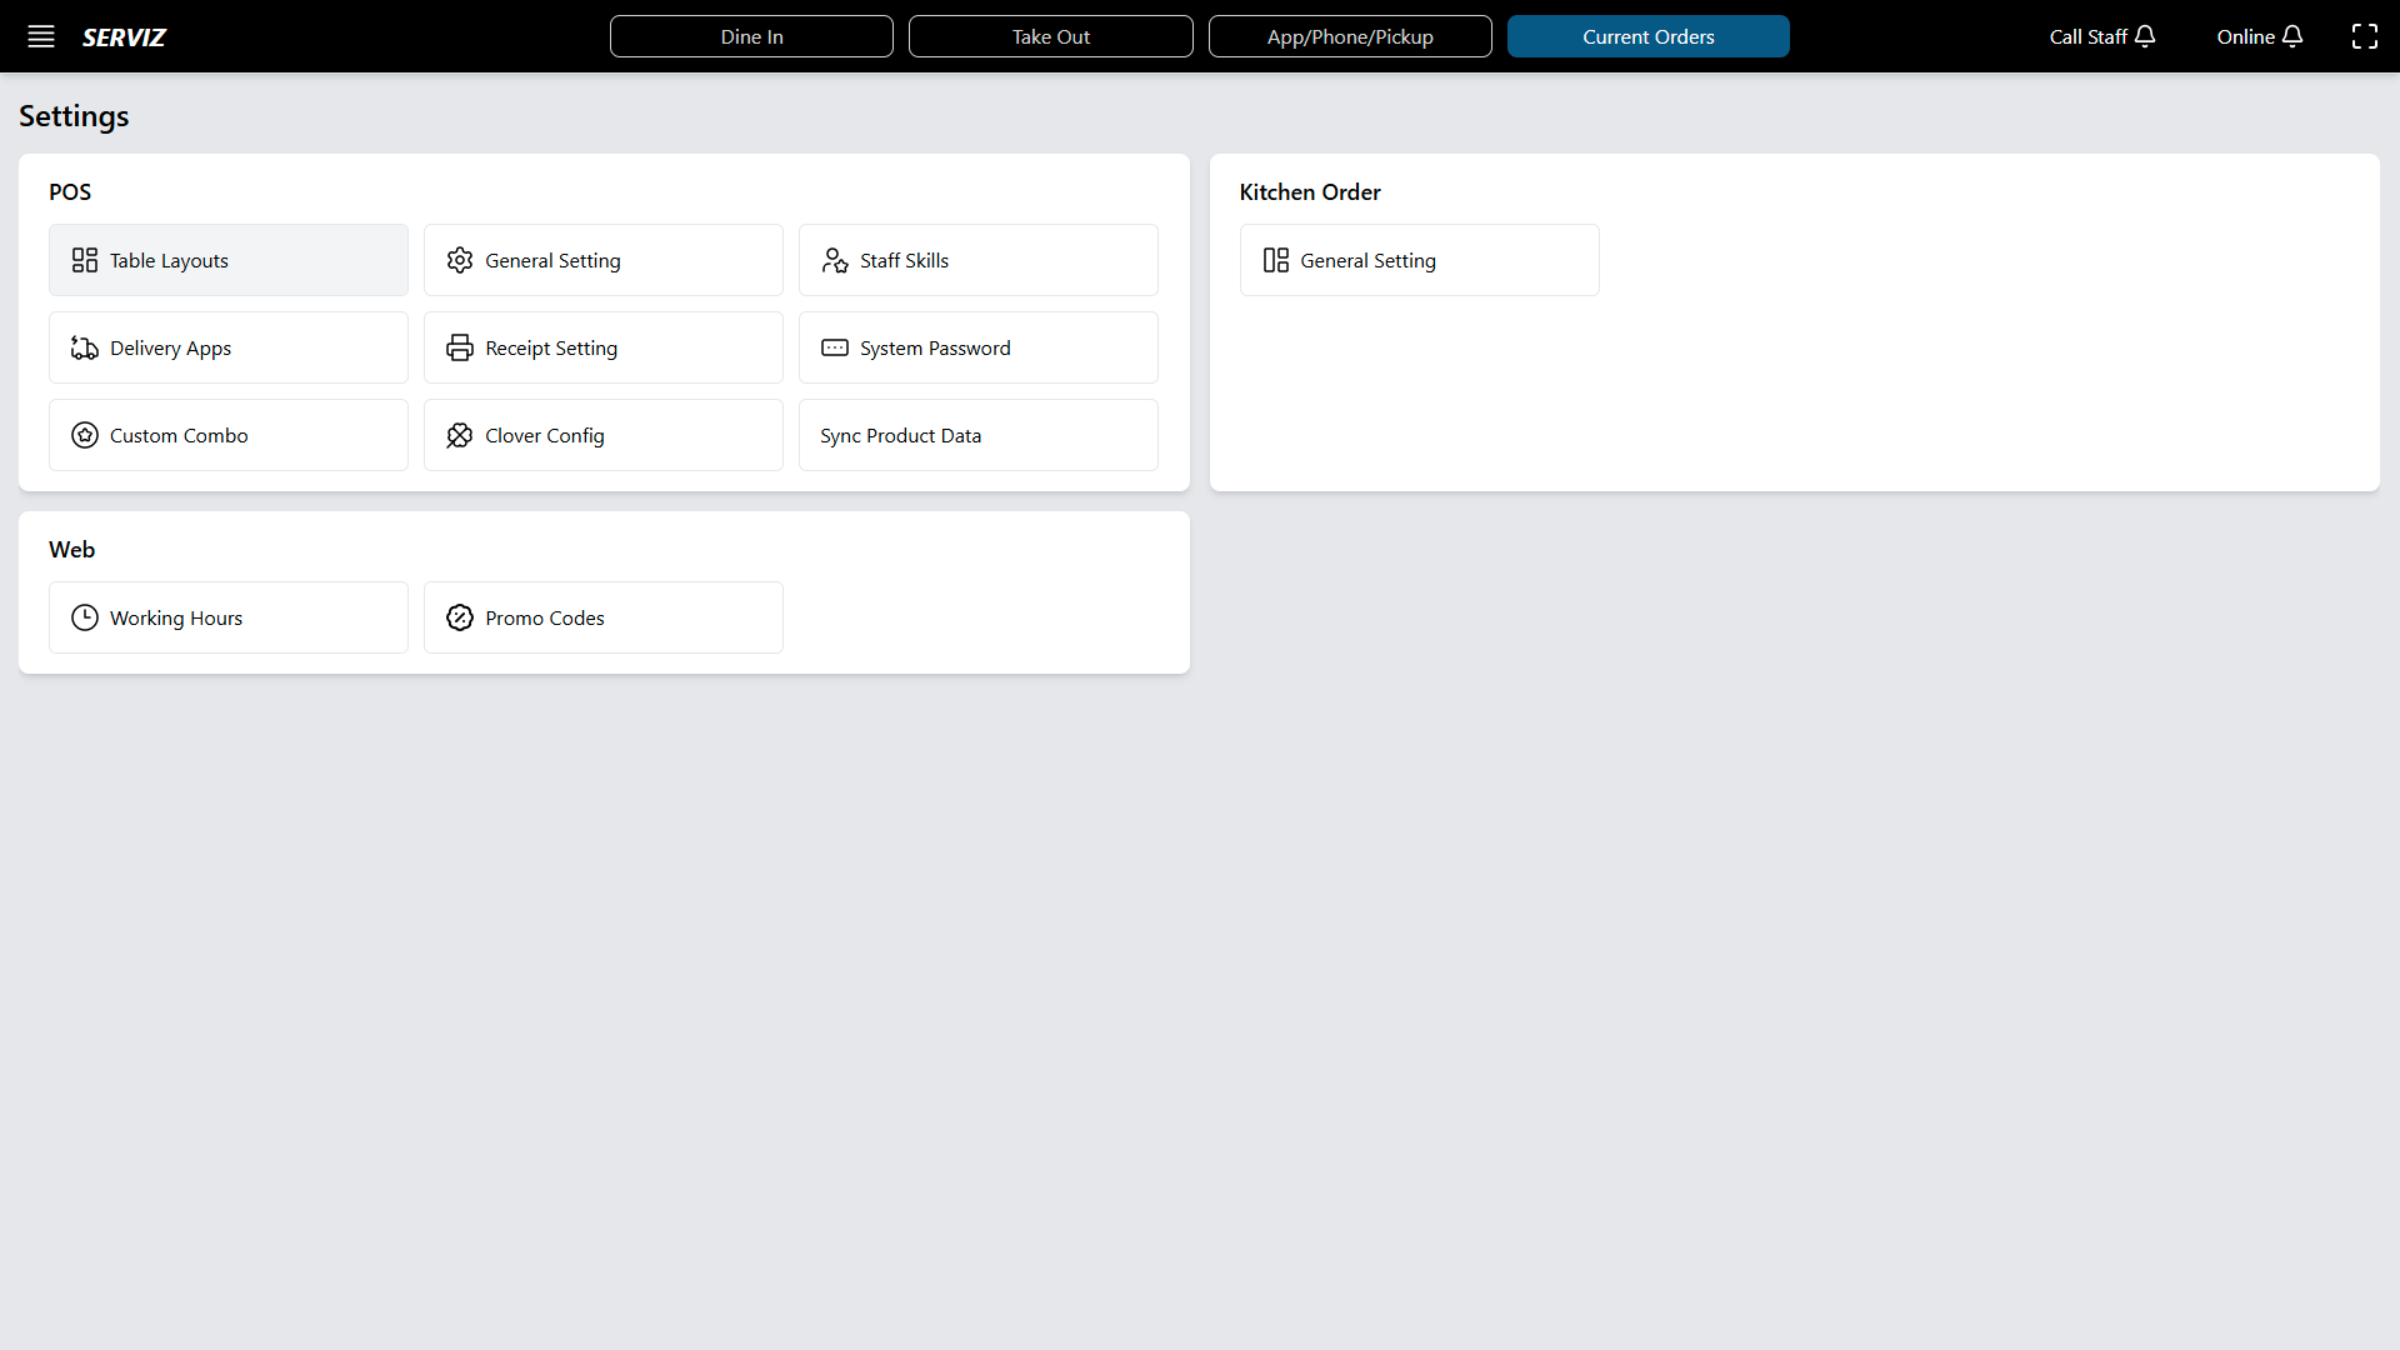
3. SETTINGS SECTION
In Settings, you can manage: Table Layouts; General Settings ;Staff Skills Delivery Apps ; Receipt Settings; System Passwords ; Custom Combos ; Clover Integration; Working Hours; Promo Codes Display Settings.
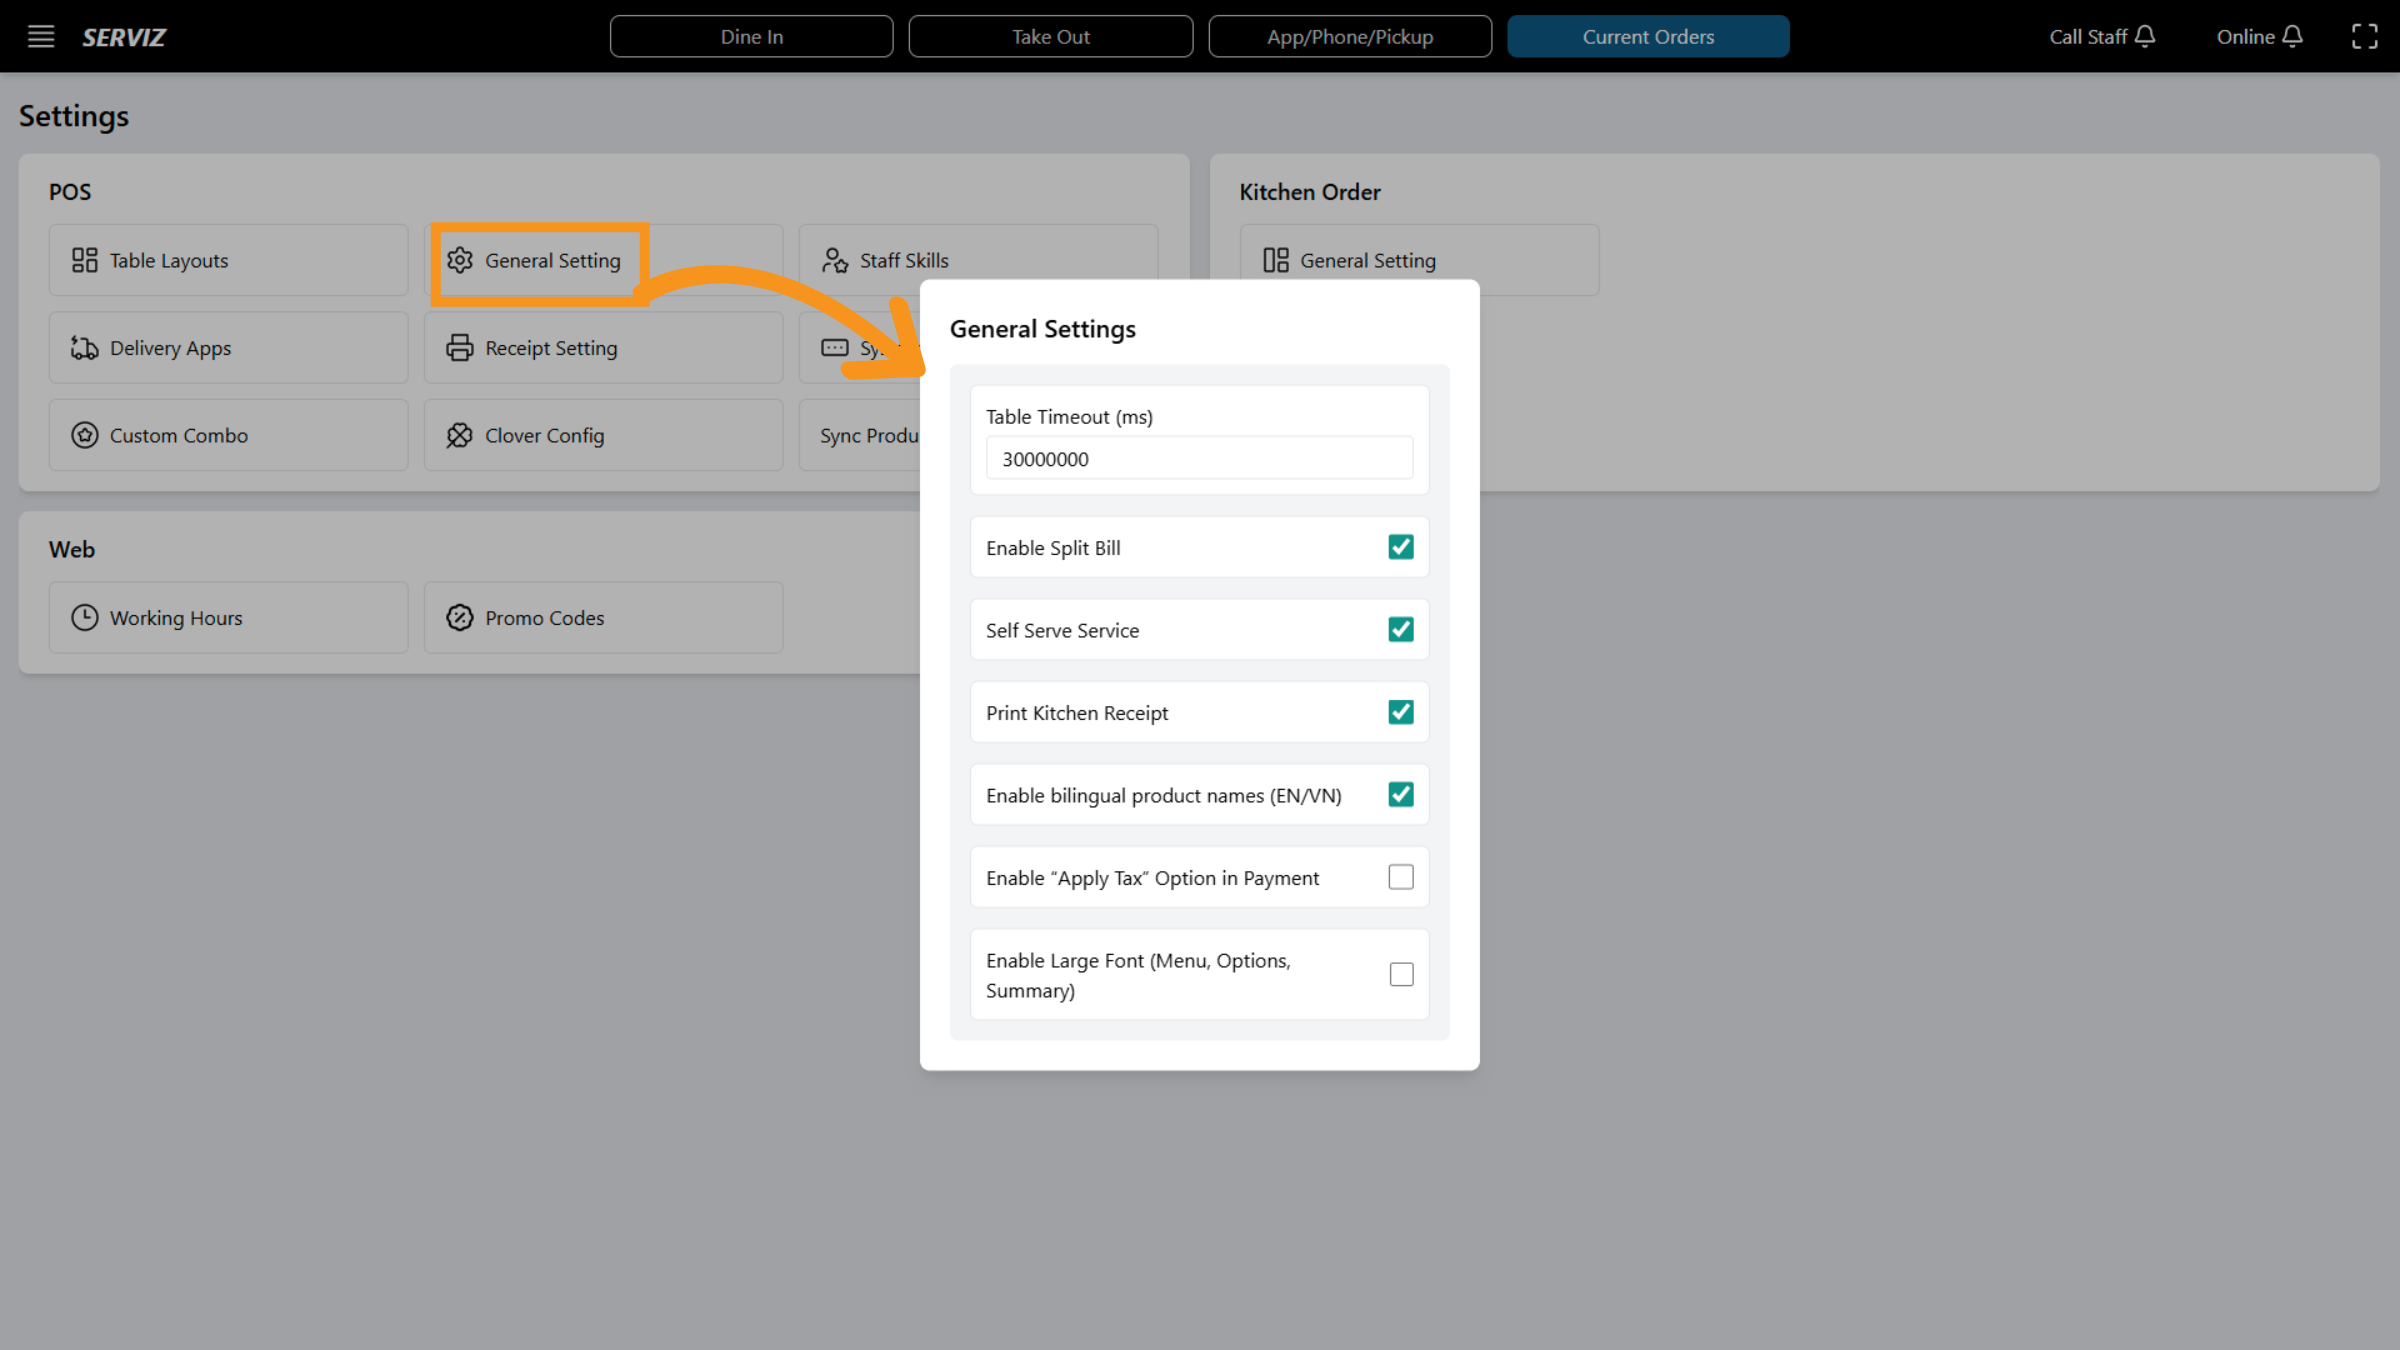
4. Access General Settings
Click the General Setting area to adjust overall system preferences.
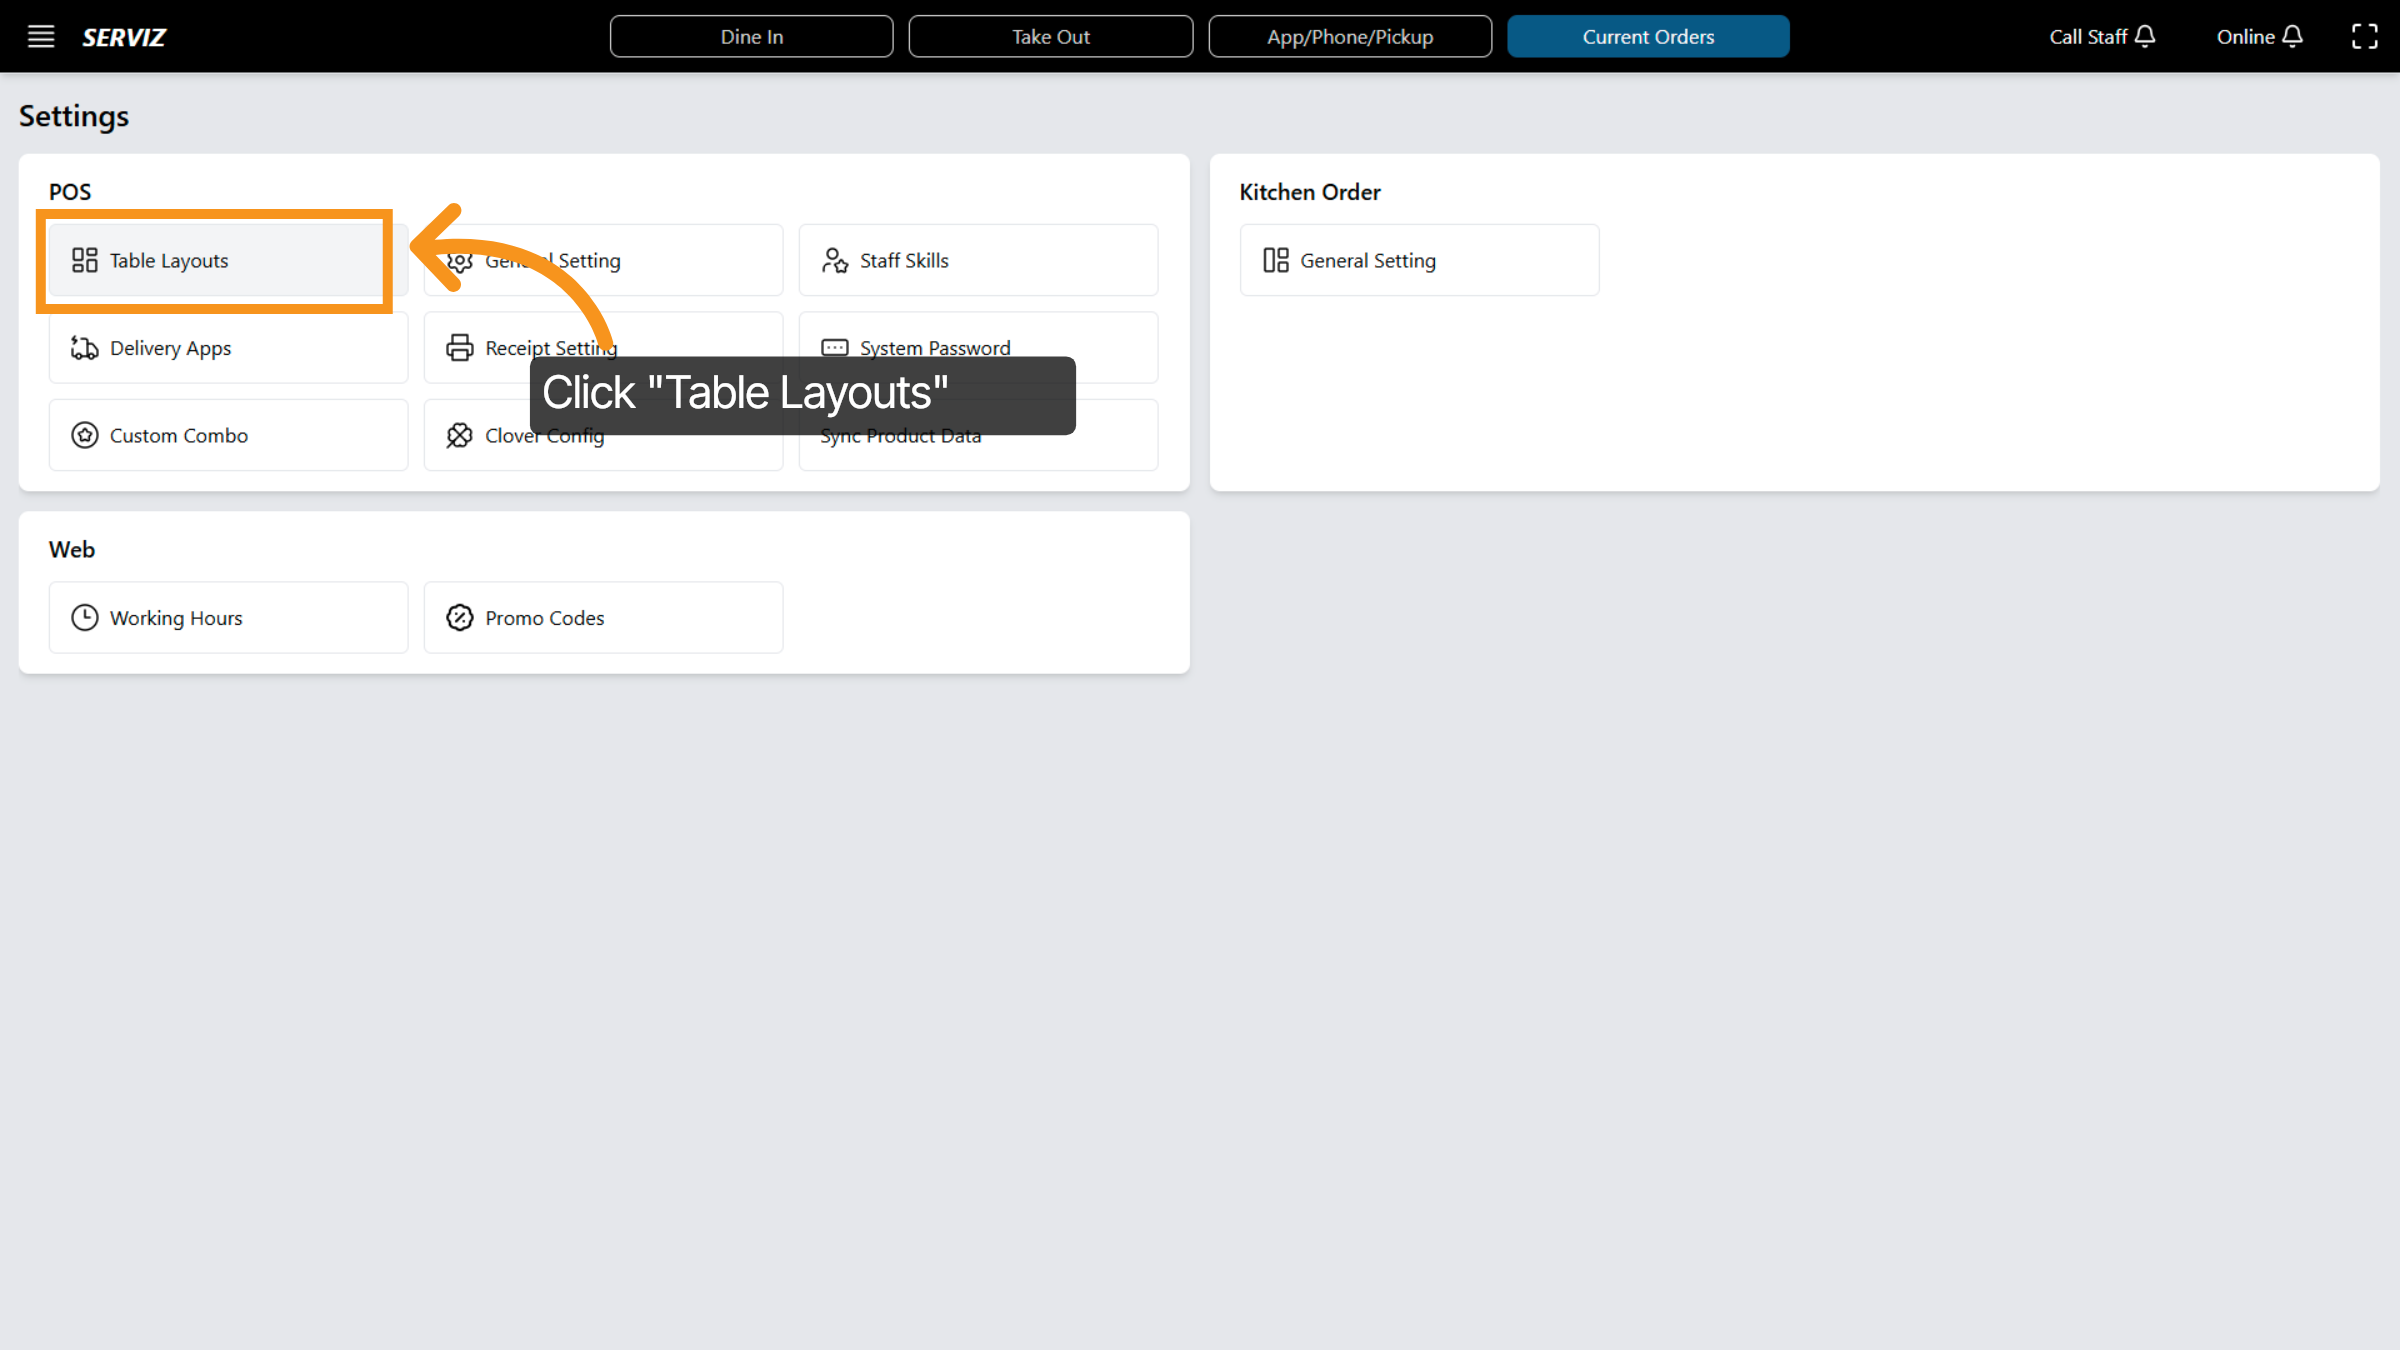
5. Open Table Layouts
Click the Table Layouts option to manage your restaurant's table arrangements.
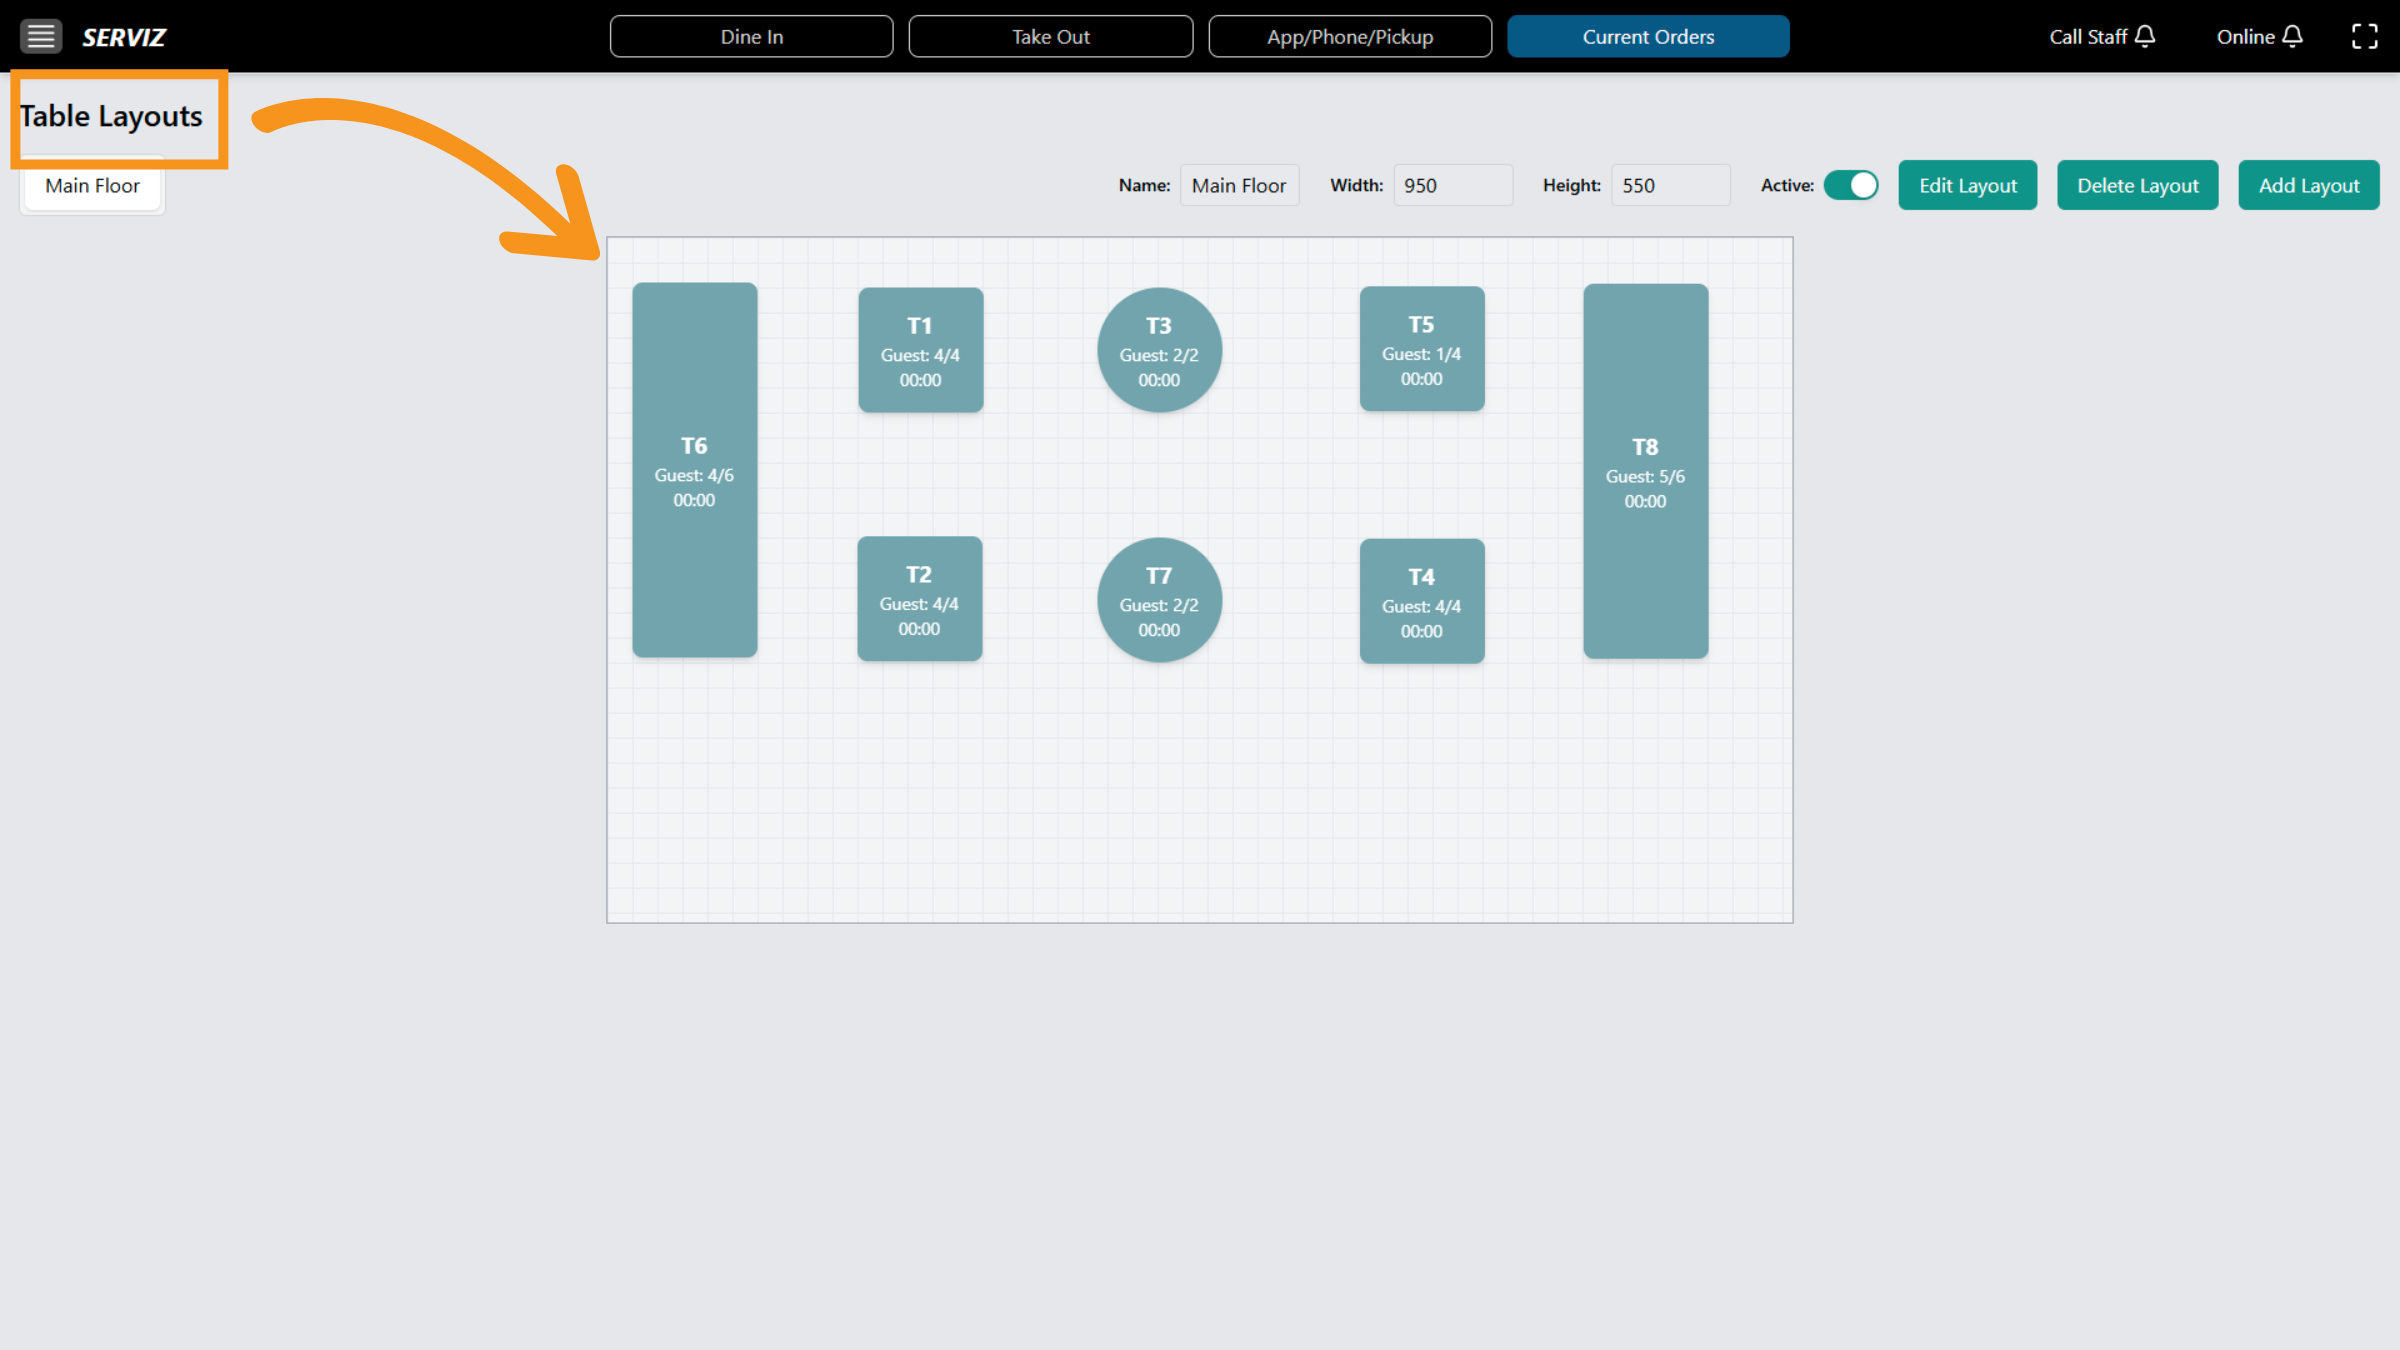
6. Table layout setting
You can edit, add, or delete layouts to make them resemble your restaurant setup more closely.
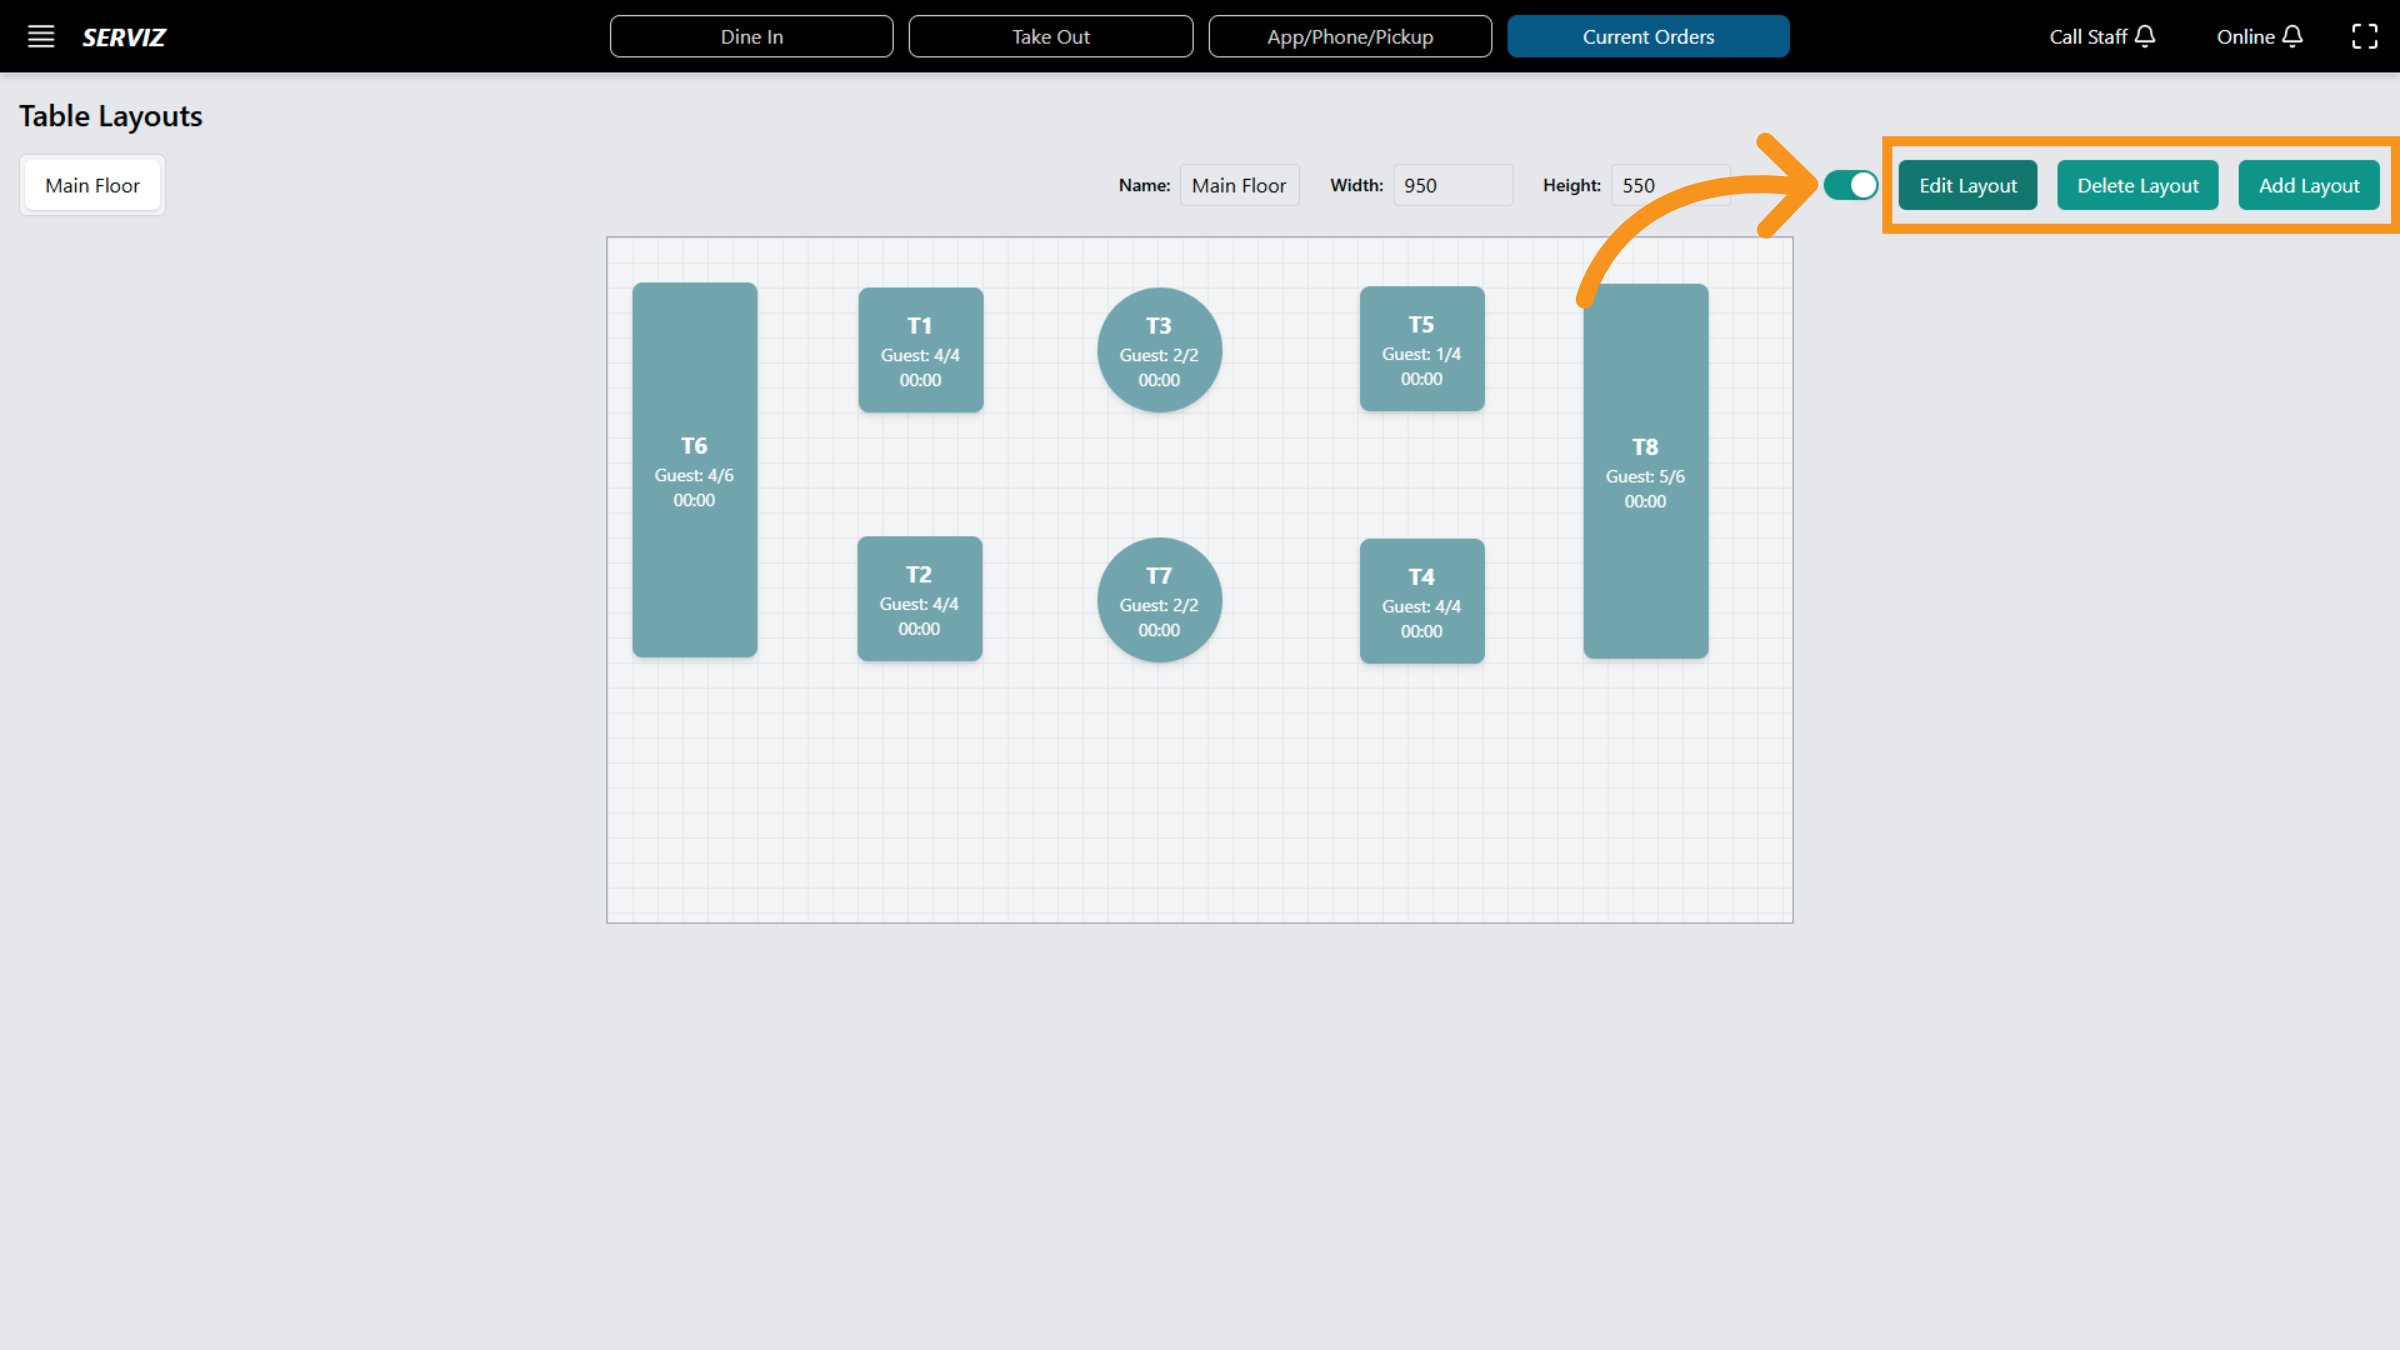
7. Edit Layout
Click Edit Layout/Delete layout/Add layout to modify the current table configuration.
8. Select Layout Element
Click the specified area to select a layout element for editing.
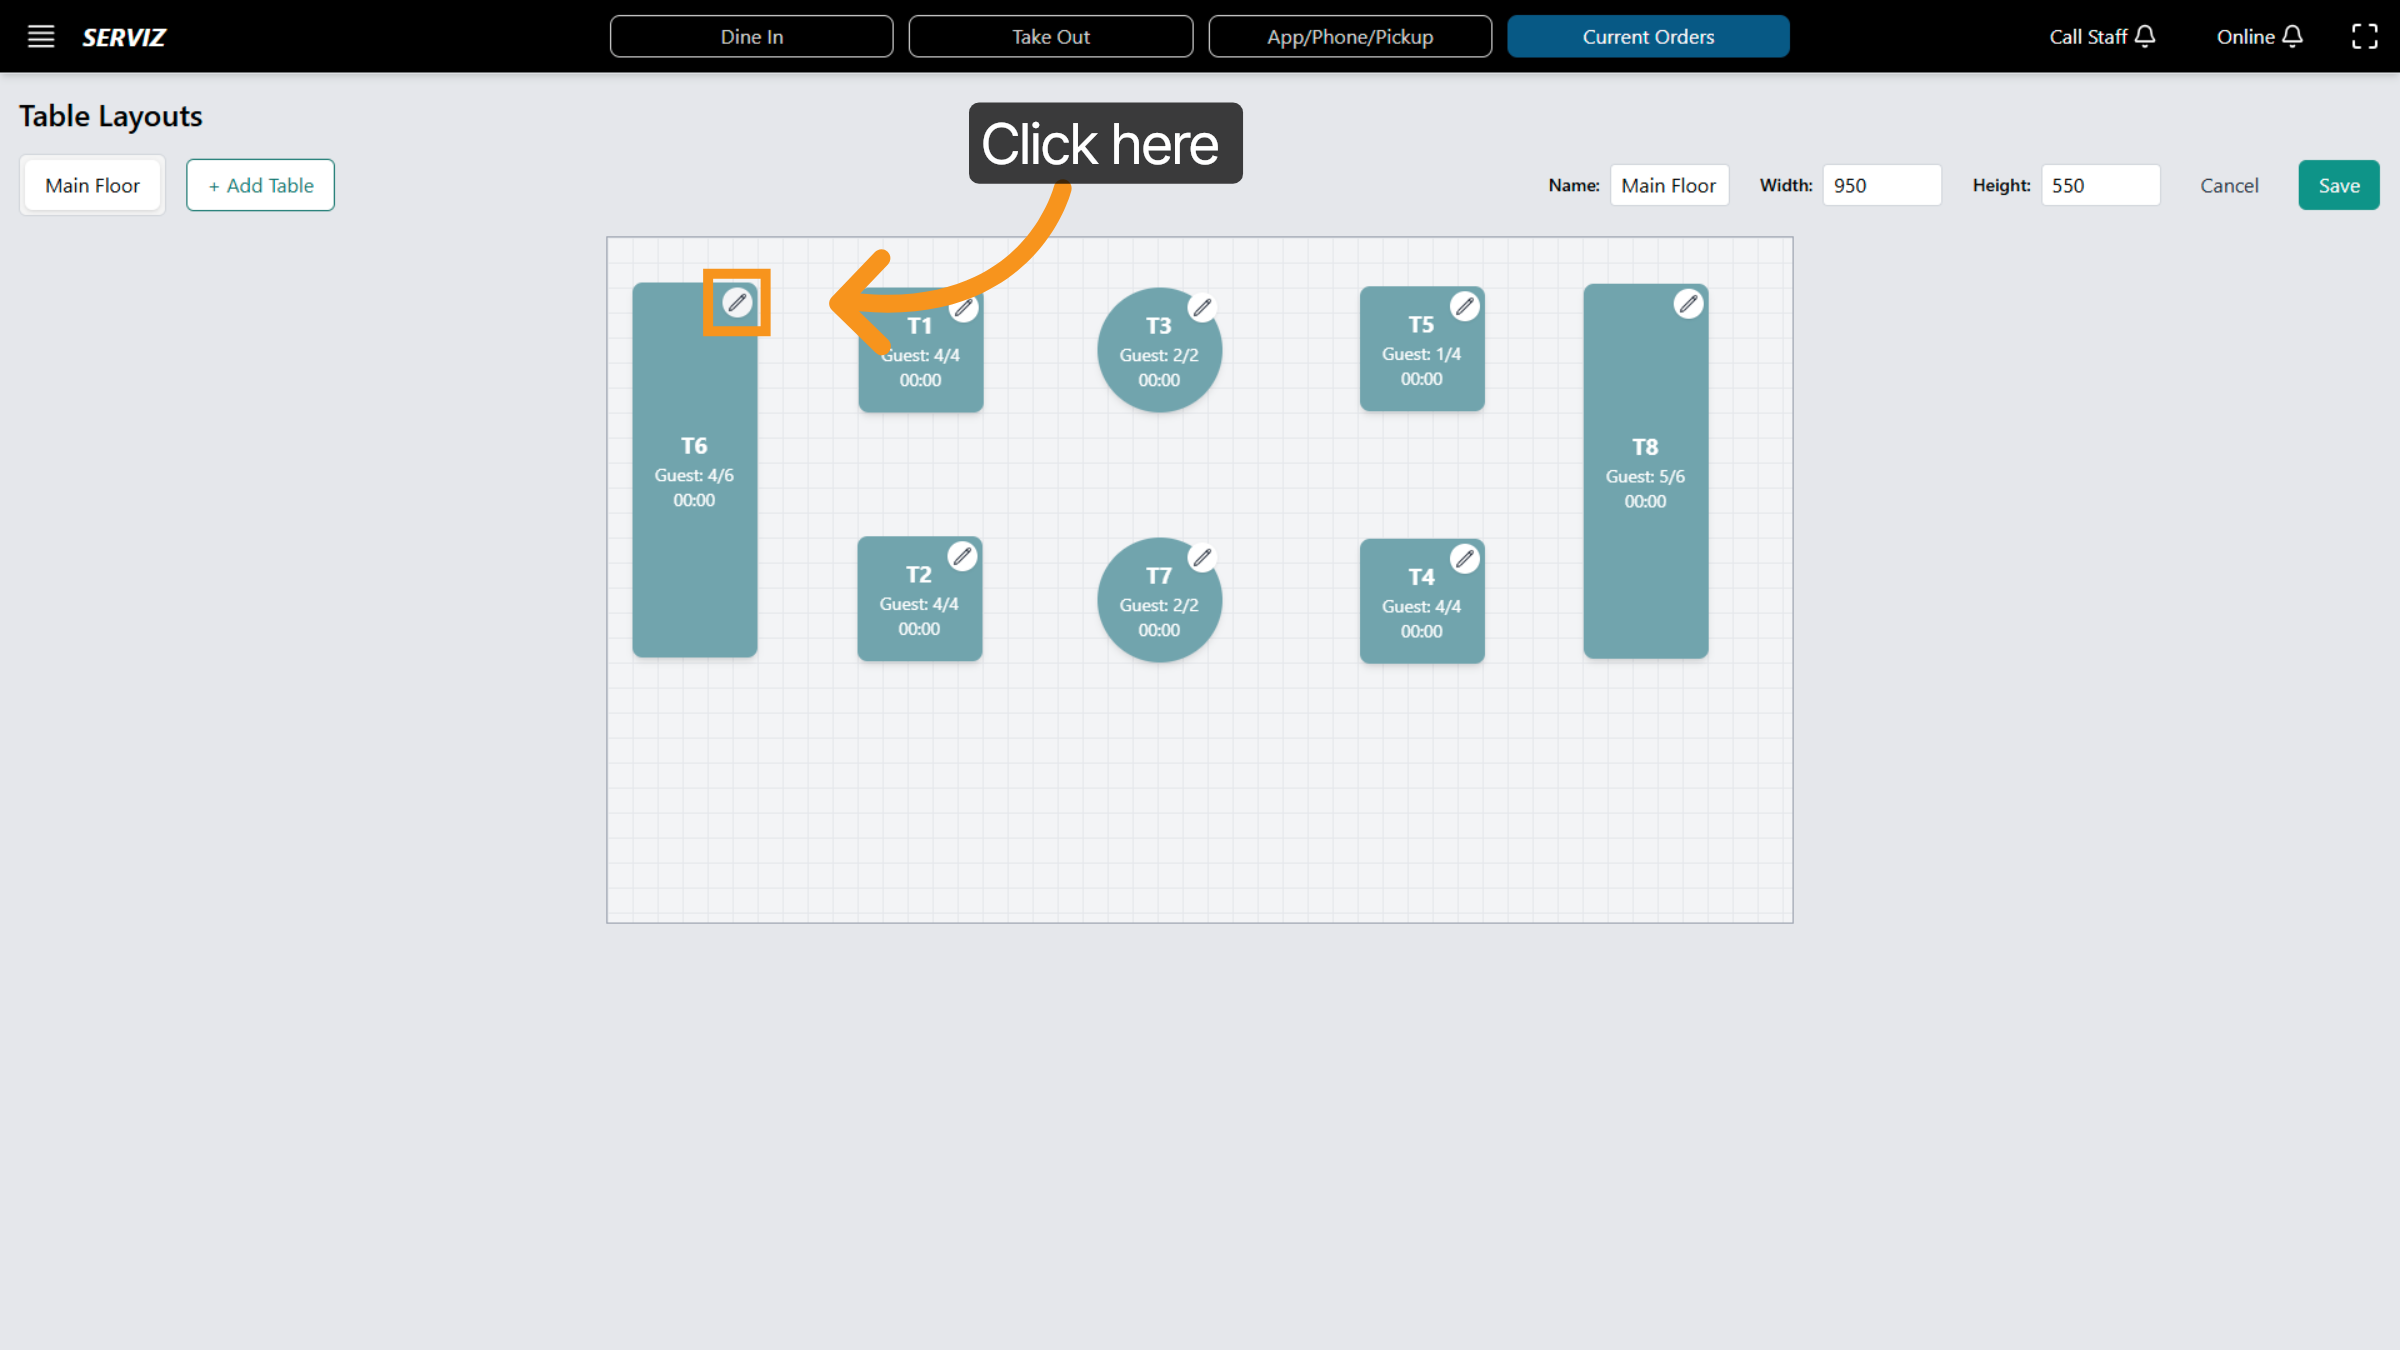
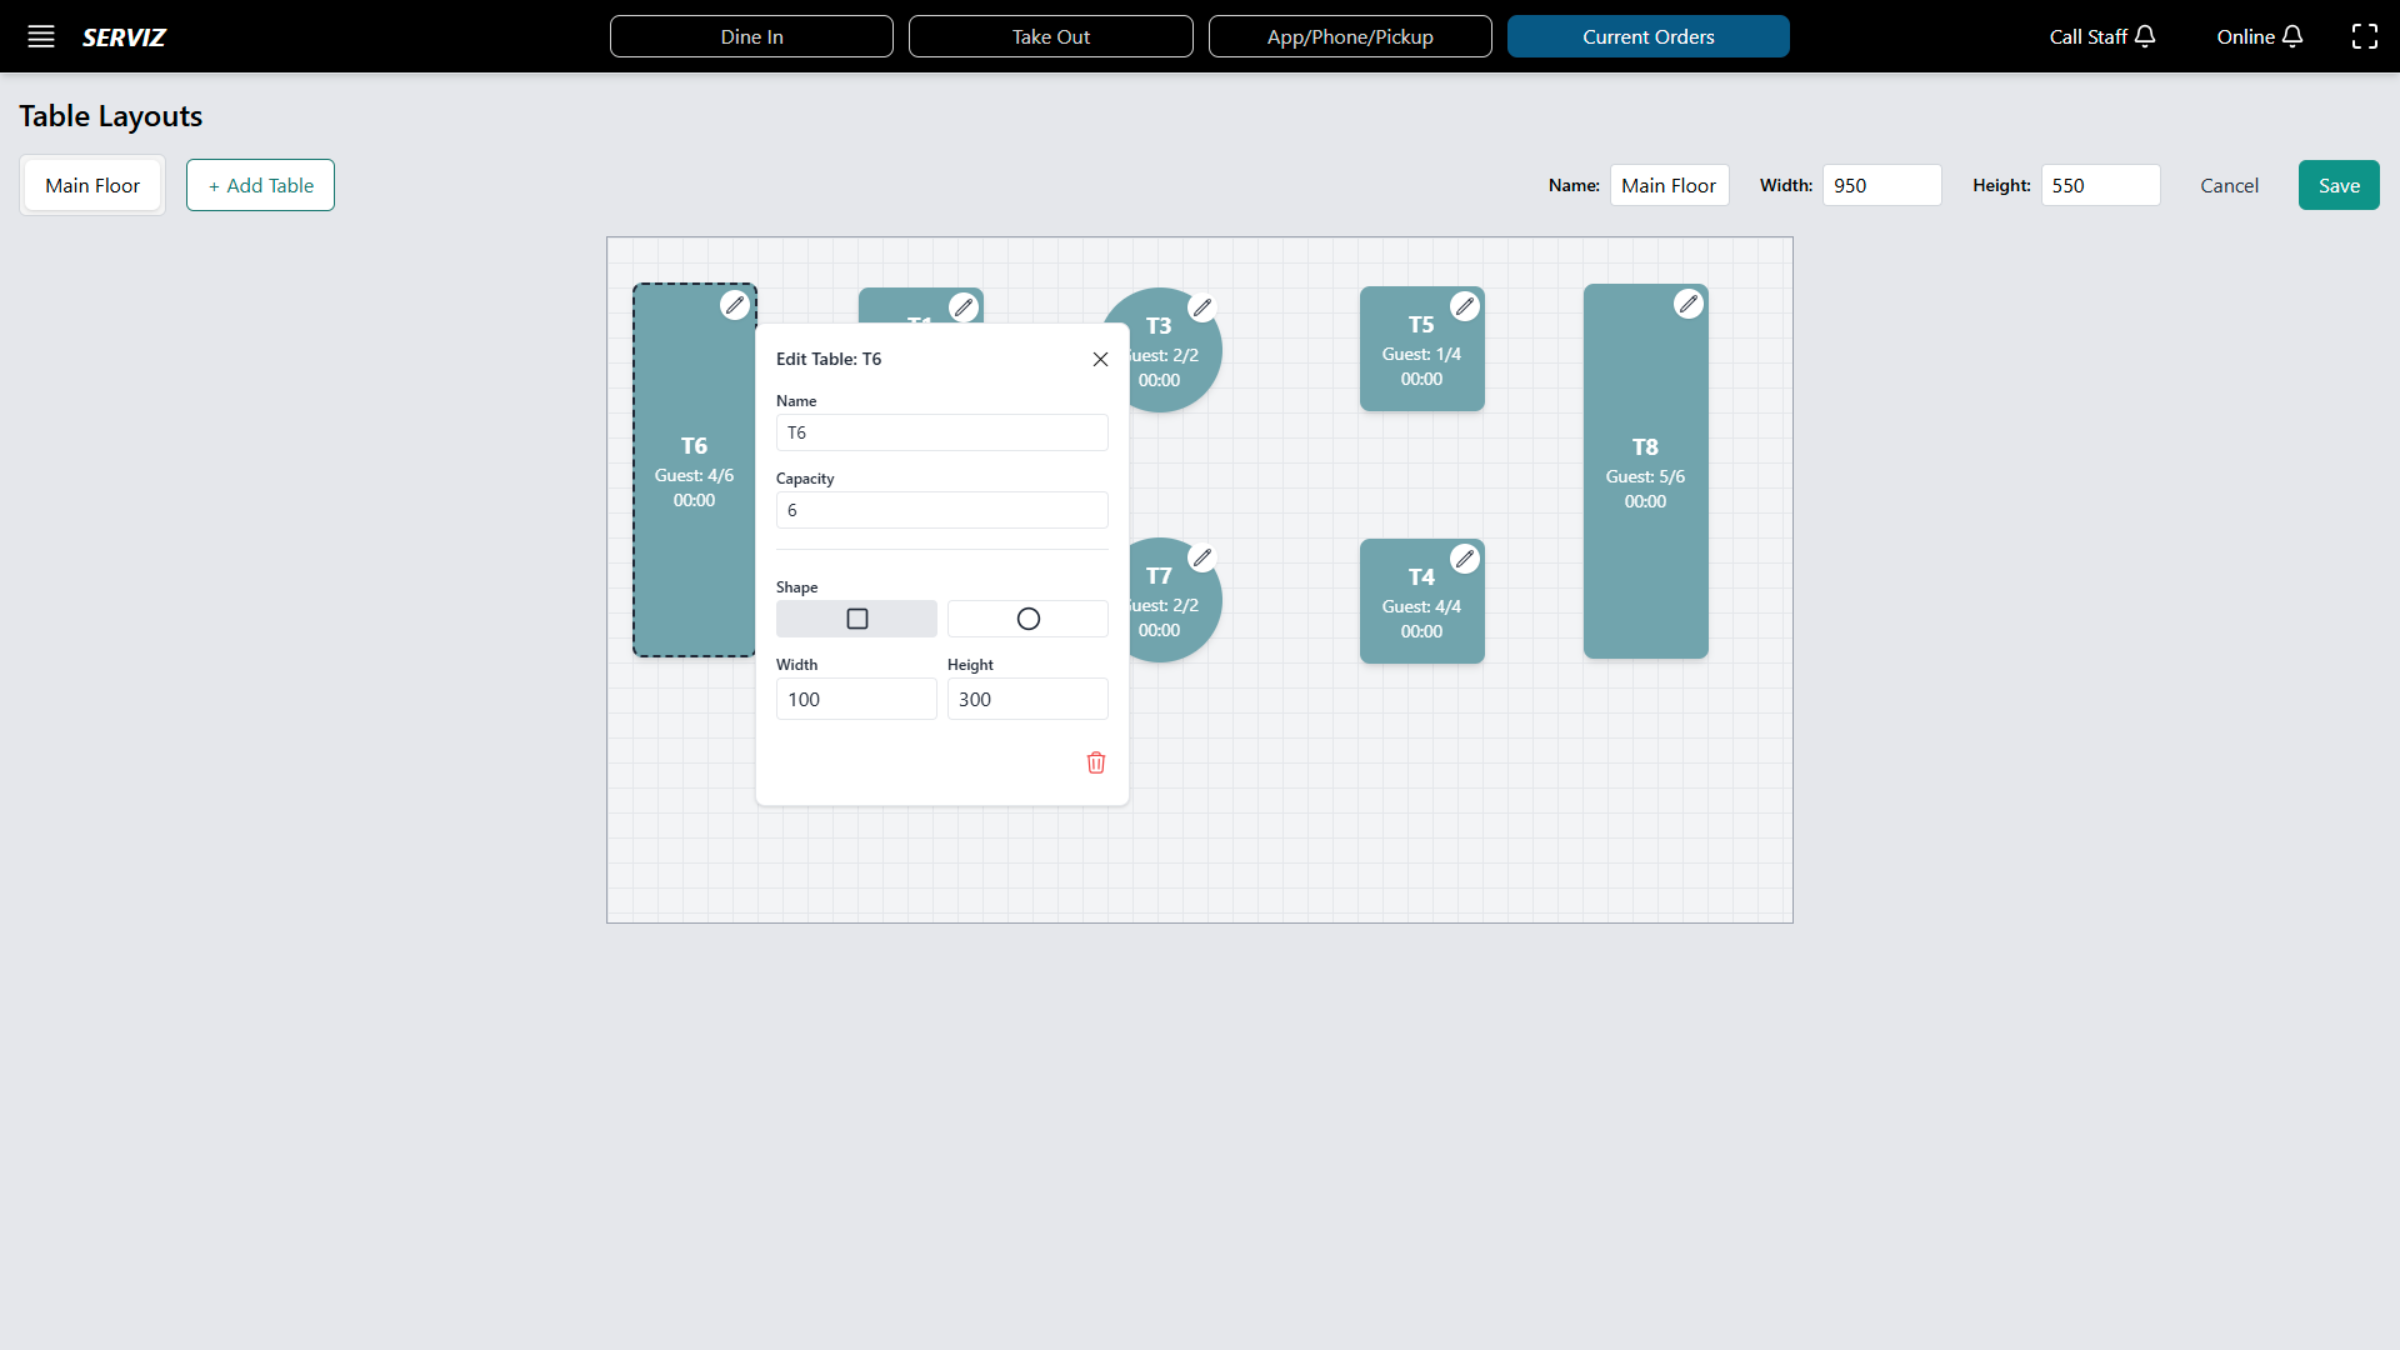
9. Edit table
Click the Edit table to adjust the layout.
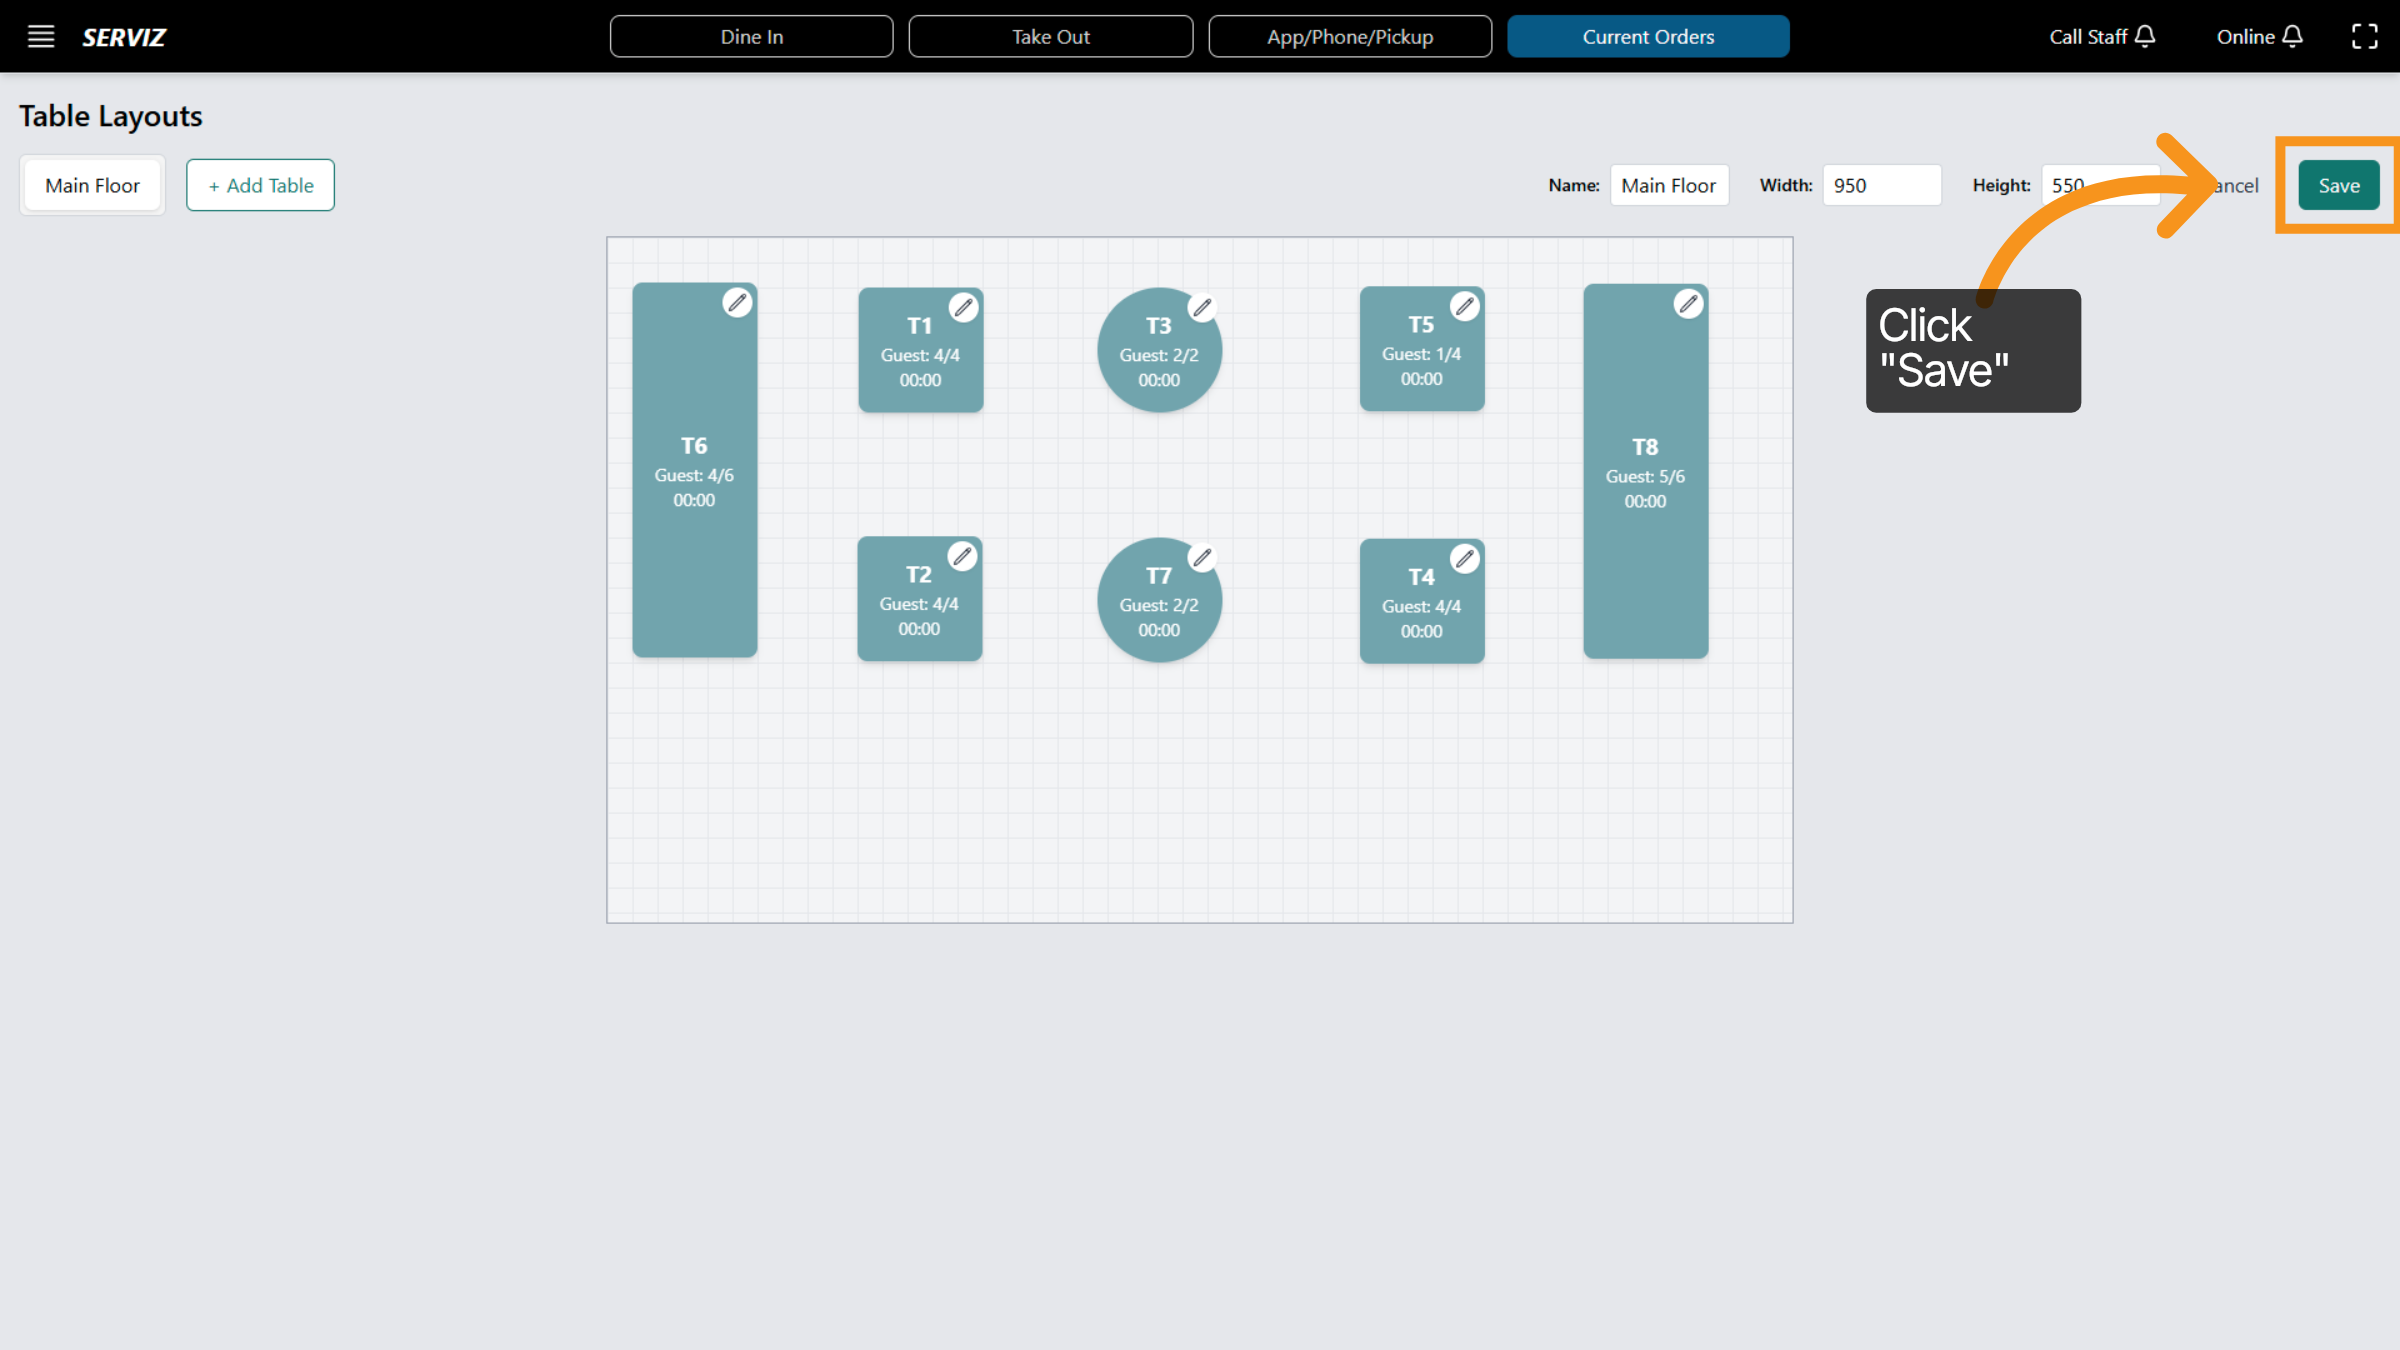
10. Save Layout Changes
Click the "Save" button to apply your changes to the table layout.
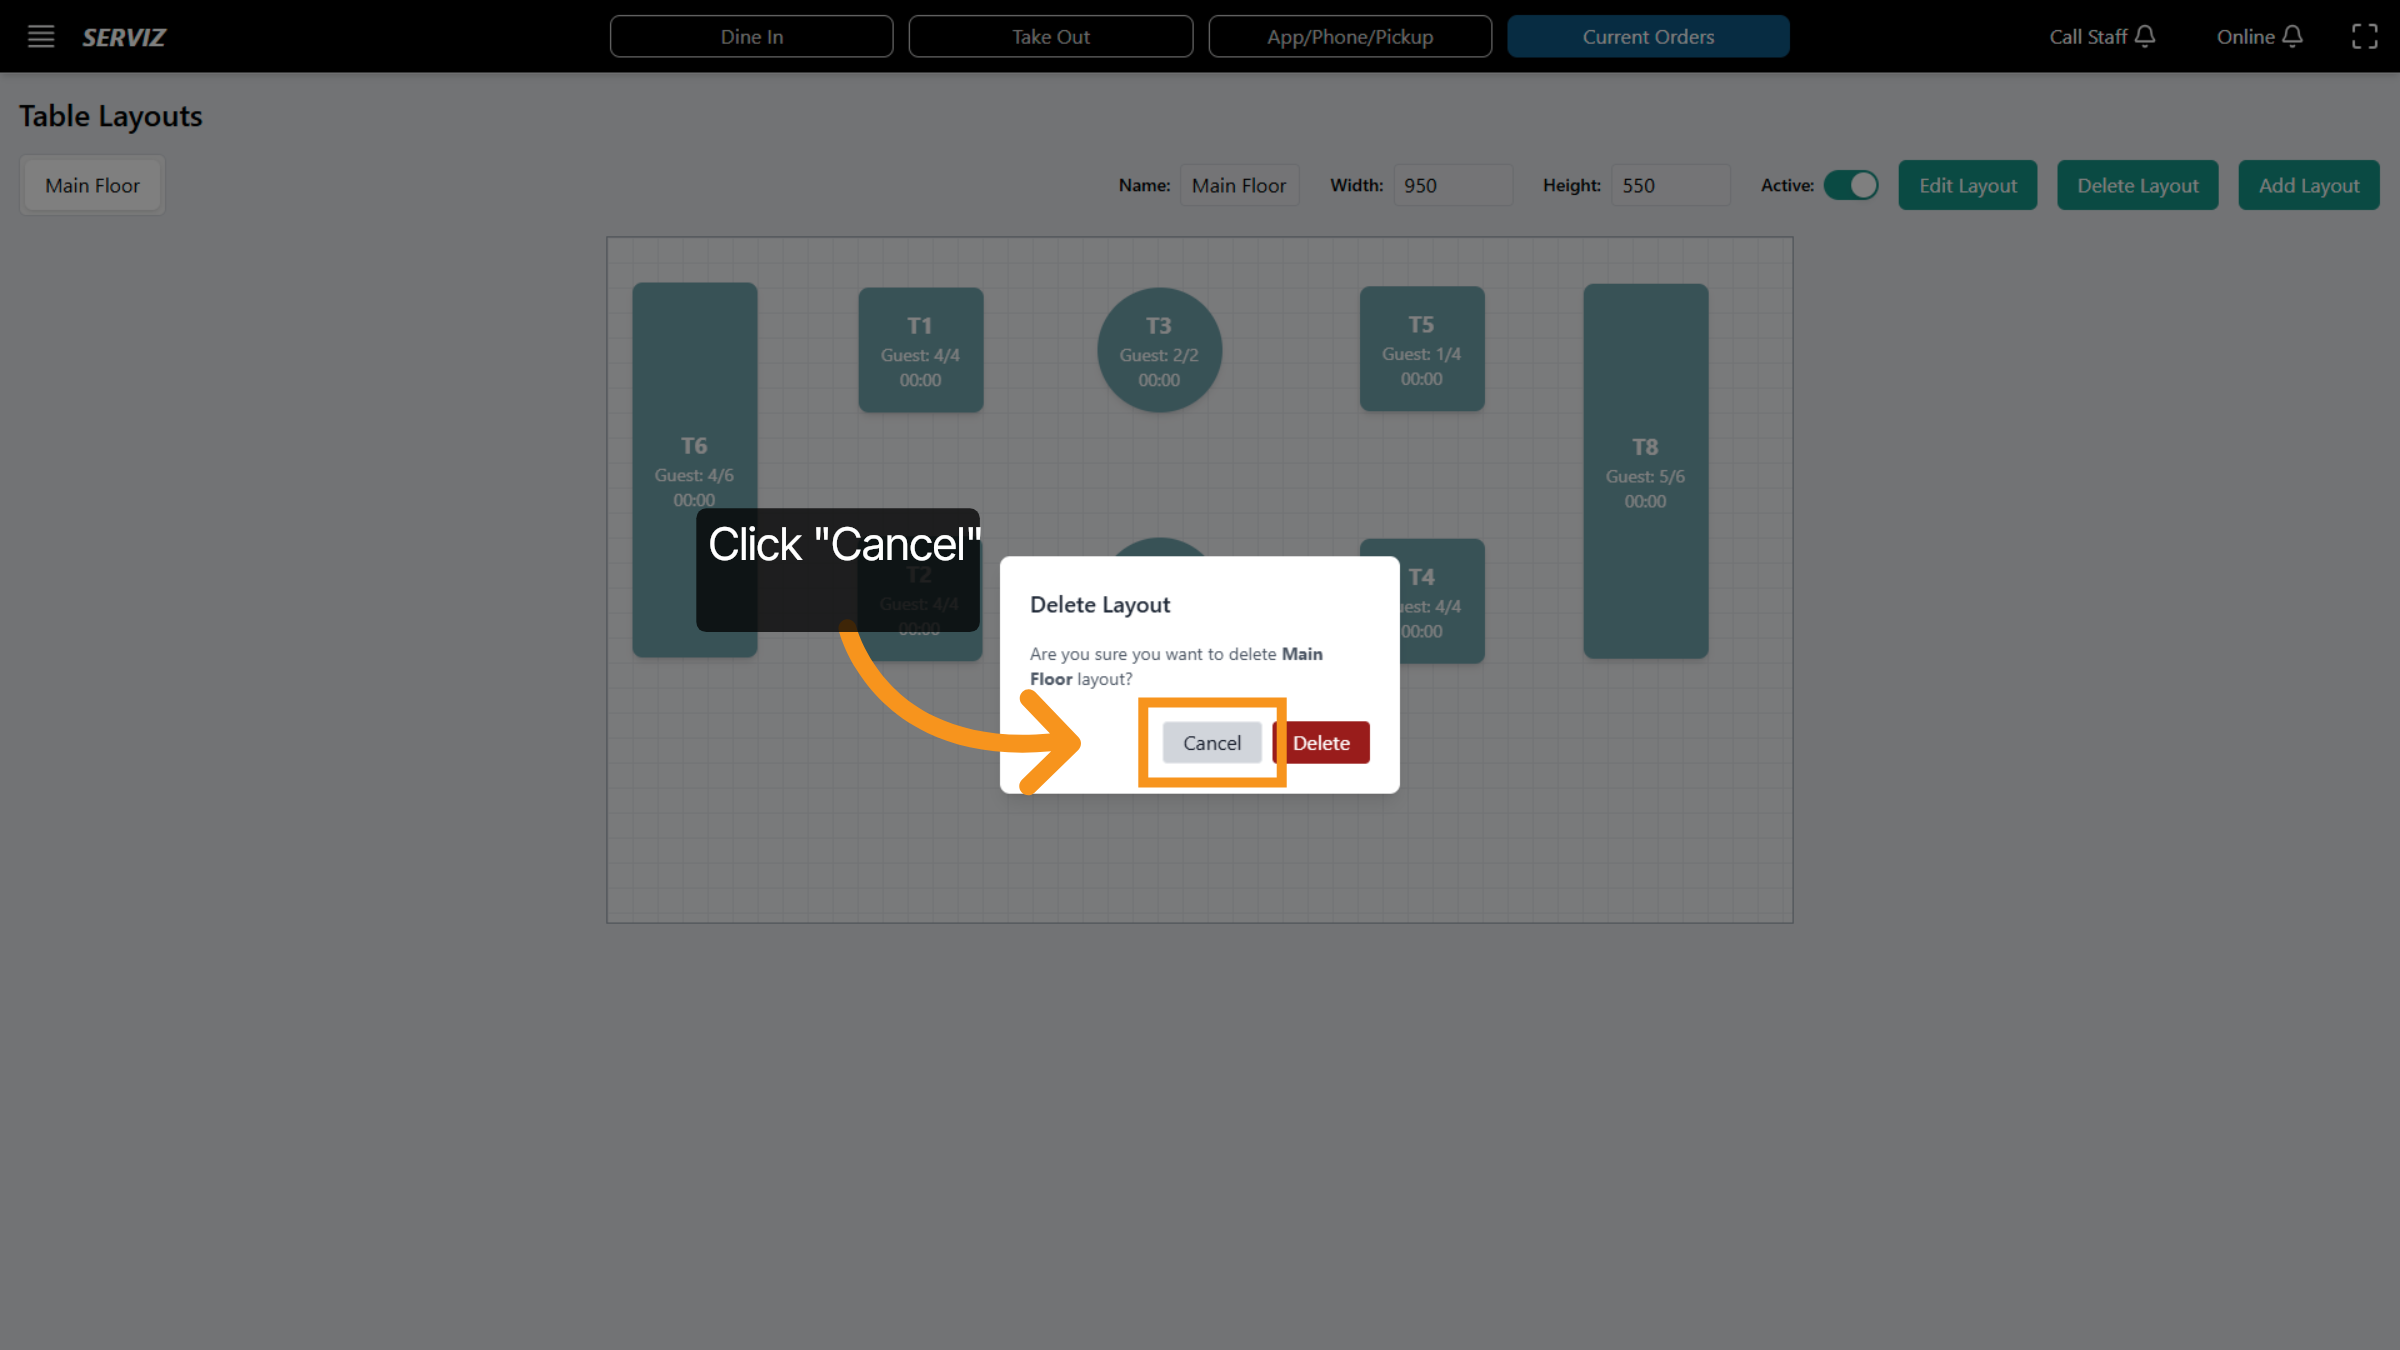
11. Cancel Deletion
Click Cancel to abort the layout deletion and retain the current configuration.
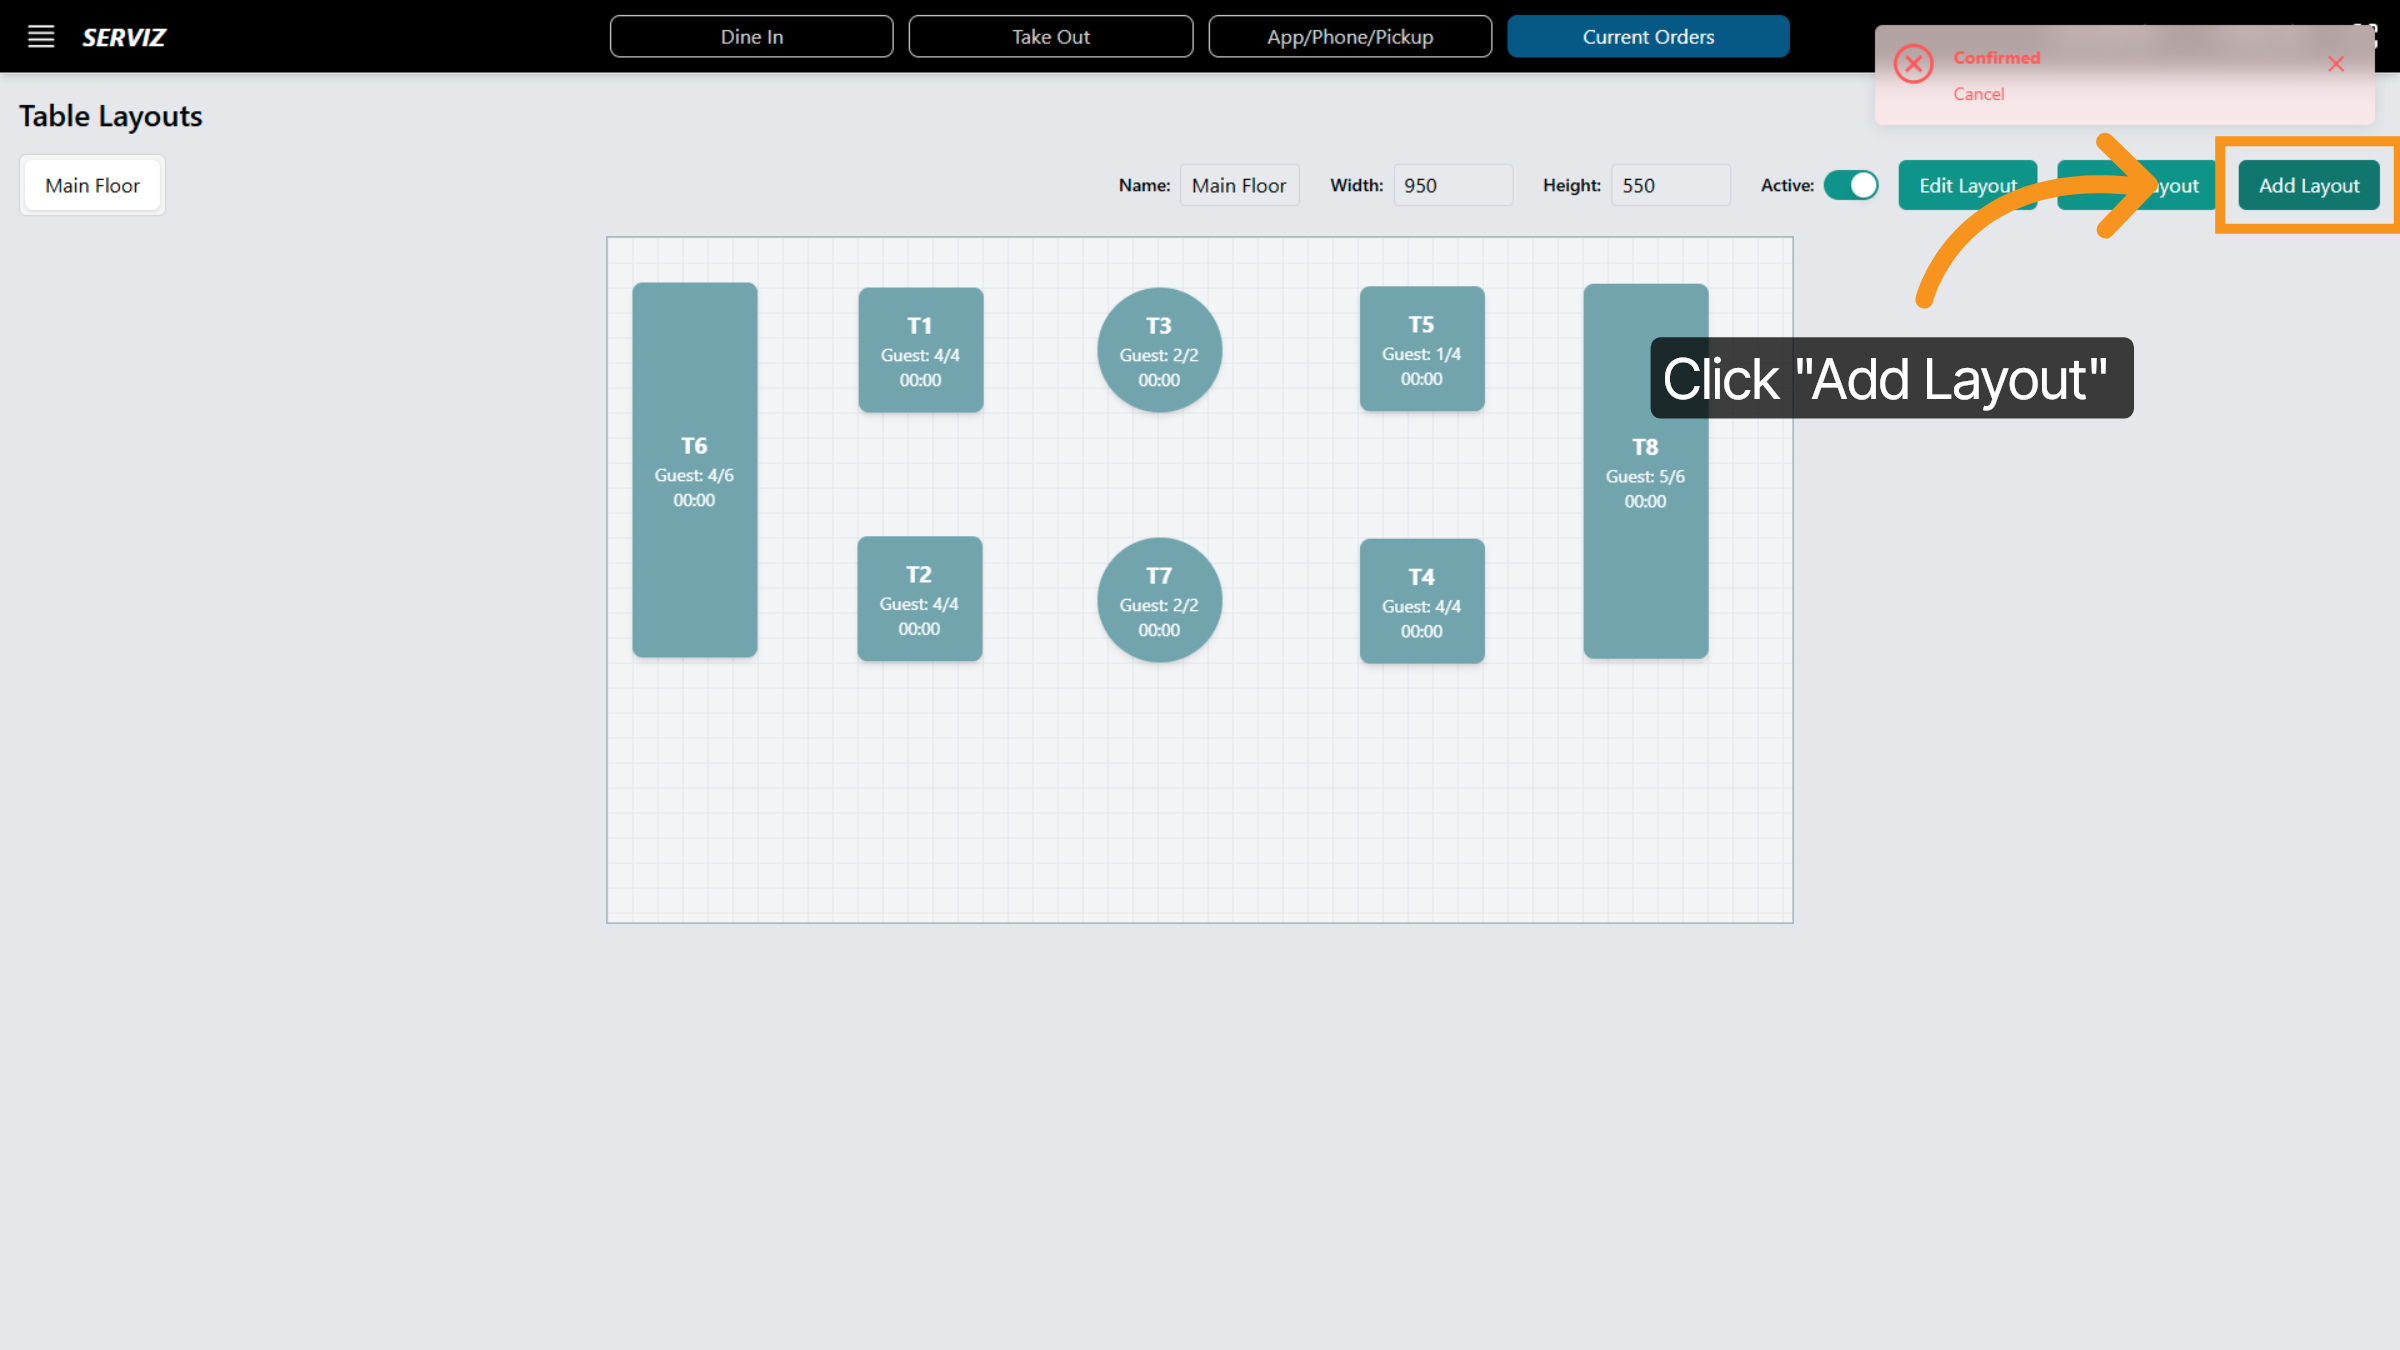
12. Add New Layout
Click Add Layout to create a new table arrangement for your venue.
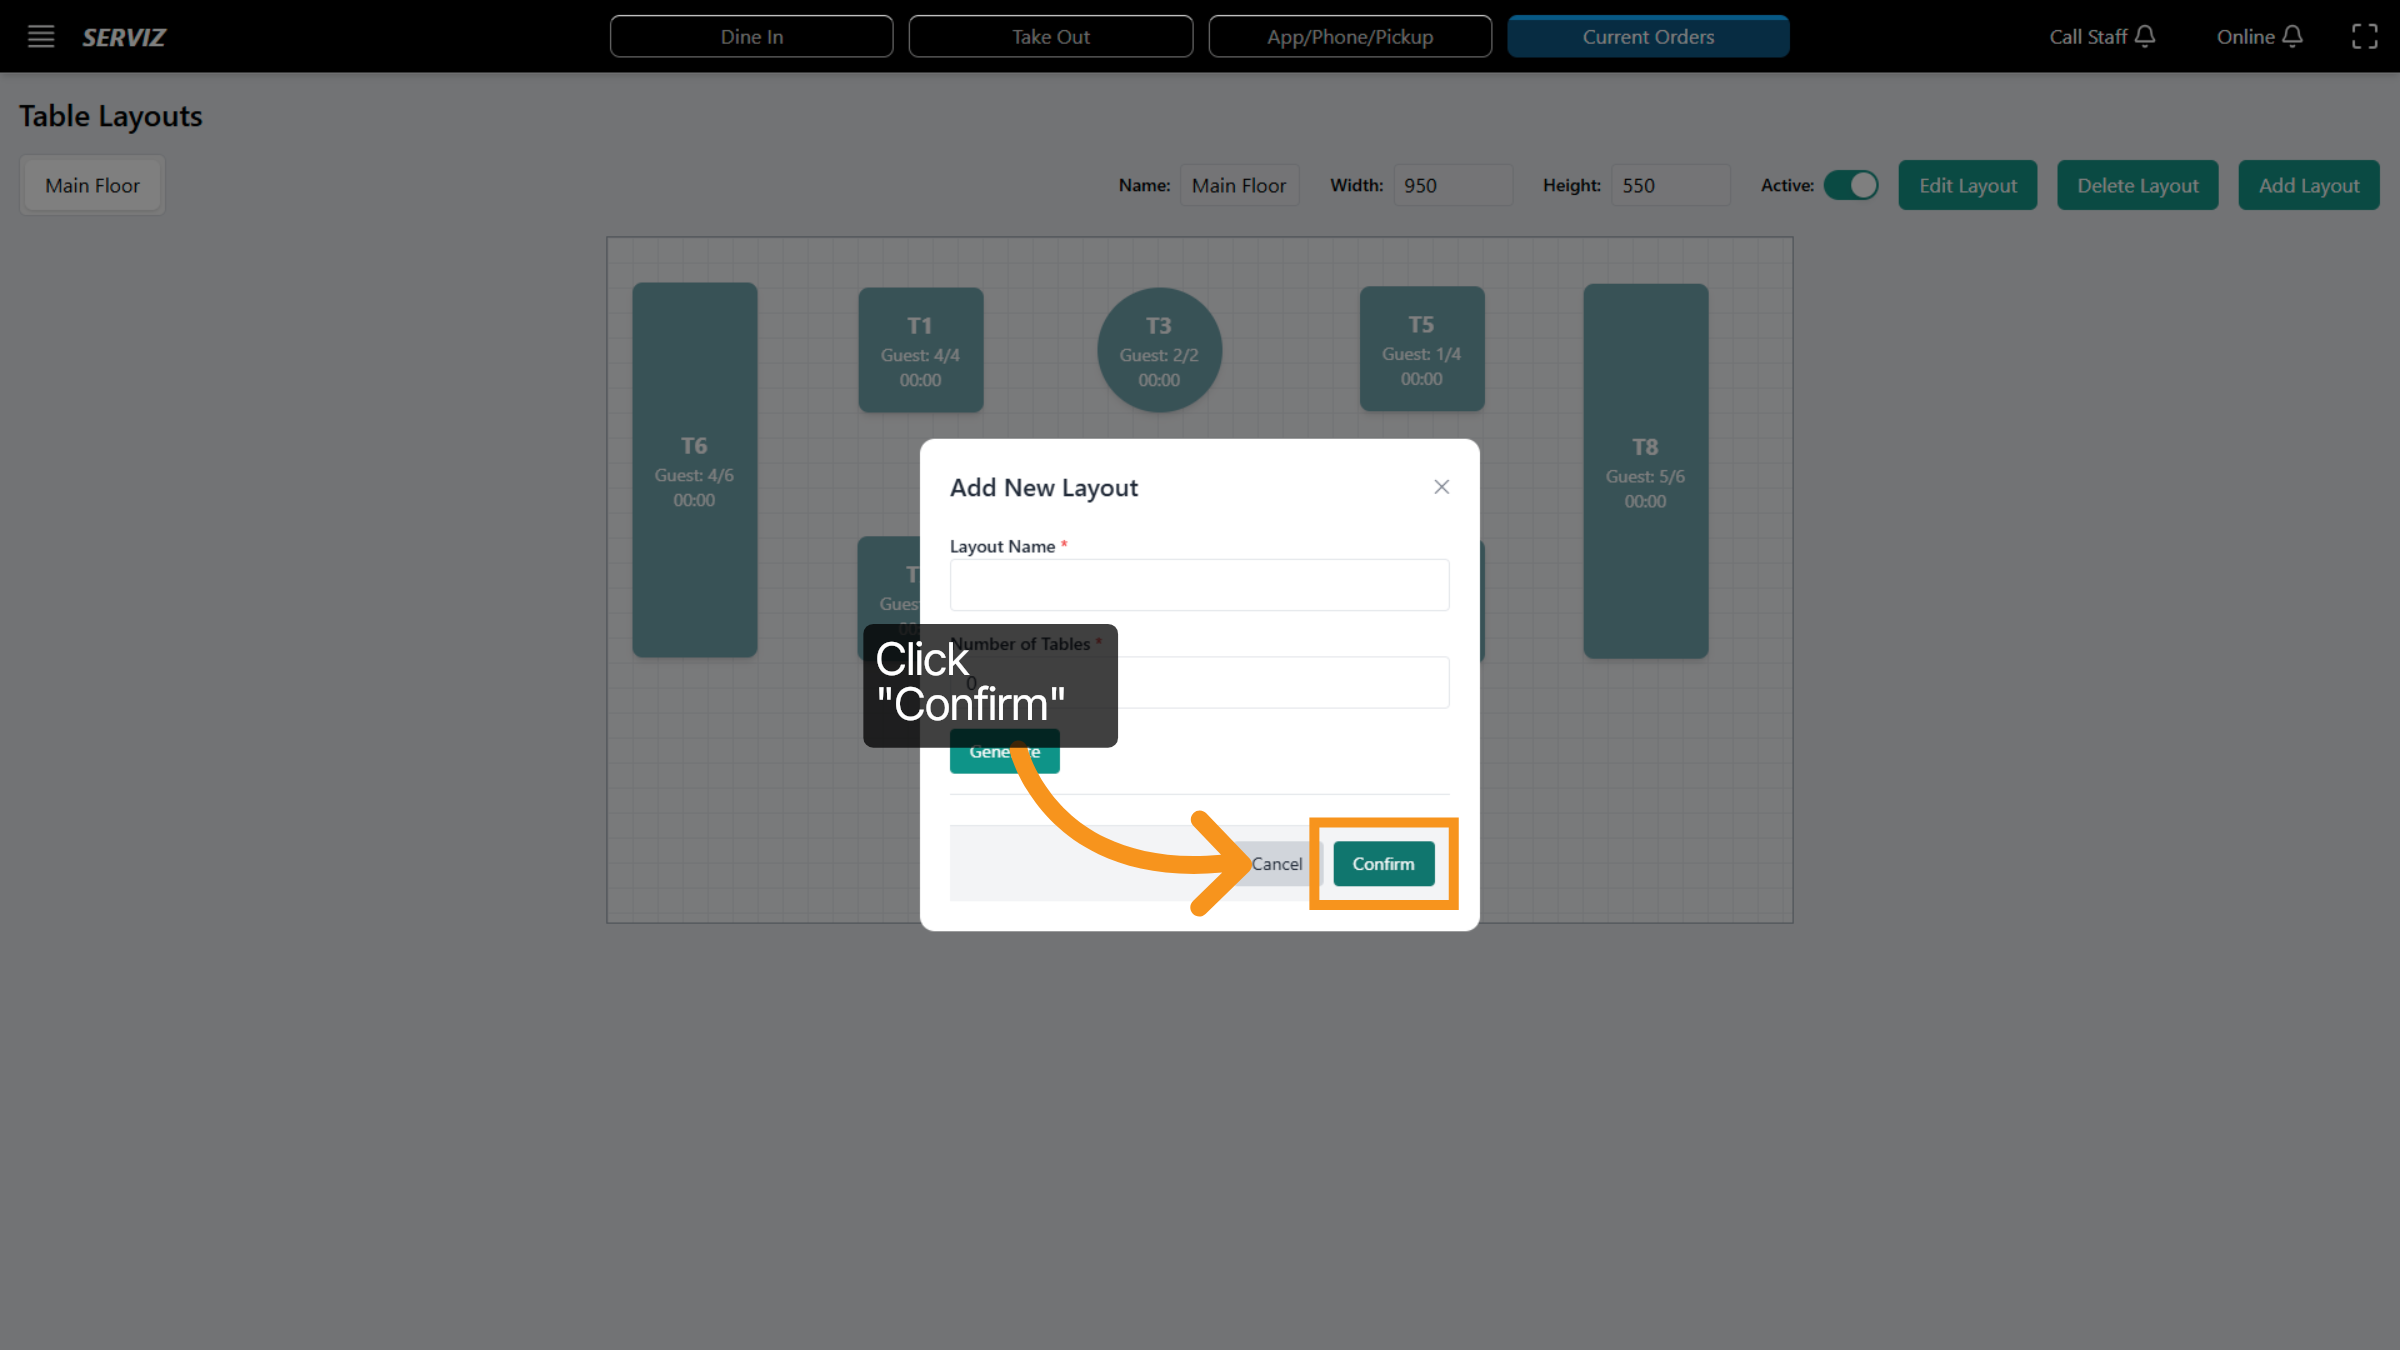
13. Confirm Layout Addition
Click Confirm to finalize the creation of the new table layout.
14. Choose General Setting
Click General Setting to adjust overall system preferences.

15. Kitchen order -General Setting
Click General Setting of Kitchen to ensure the panel is active for editing.
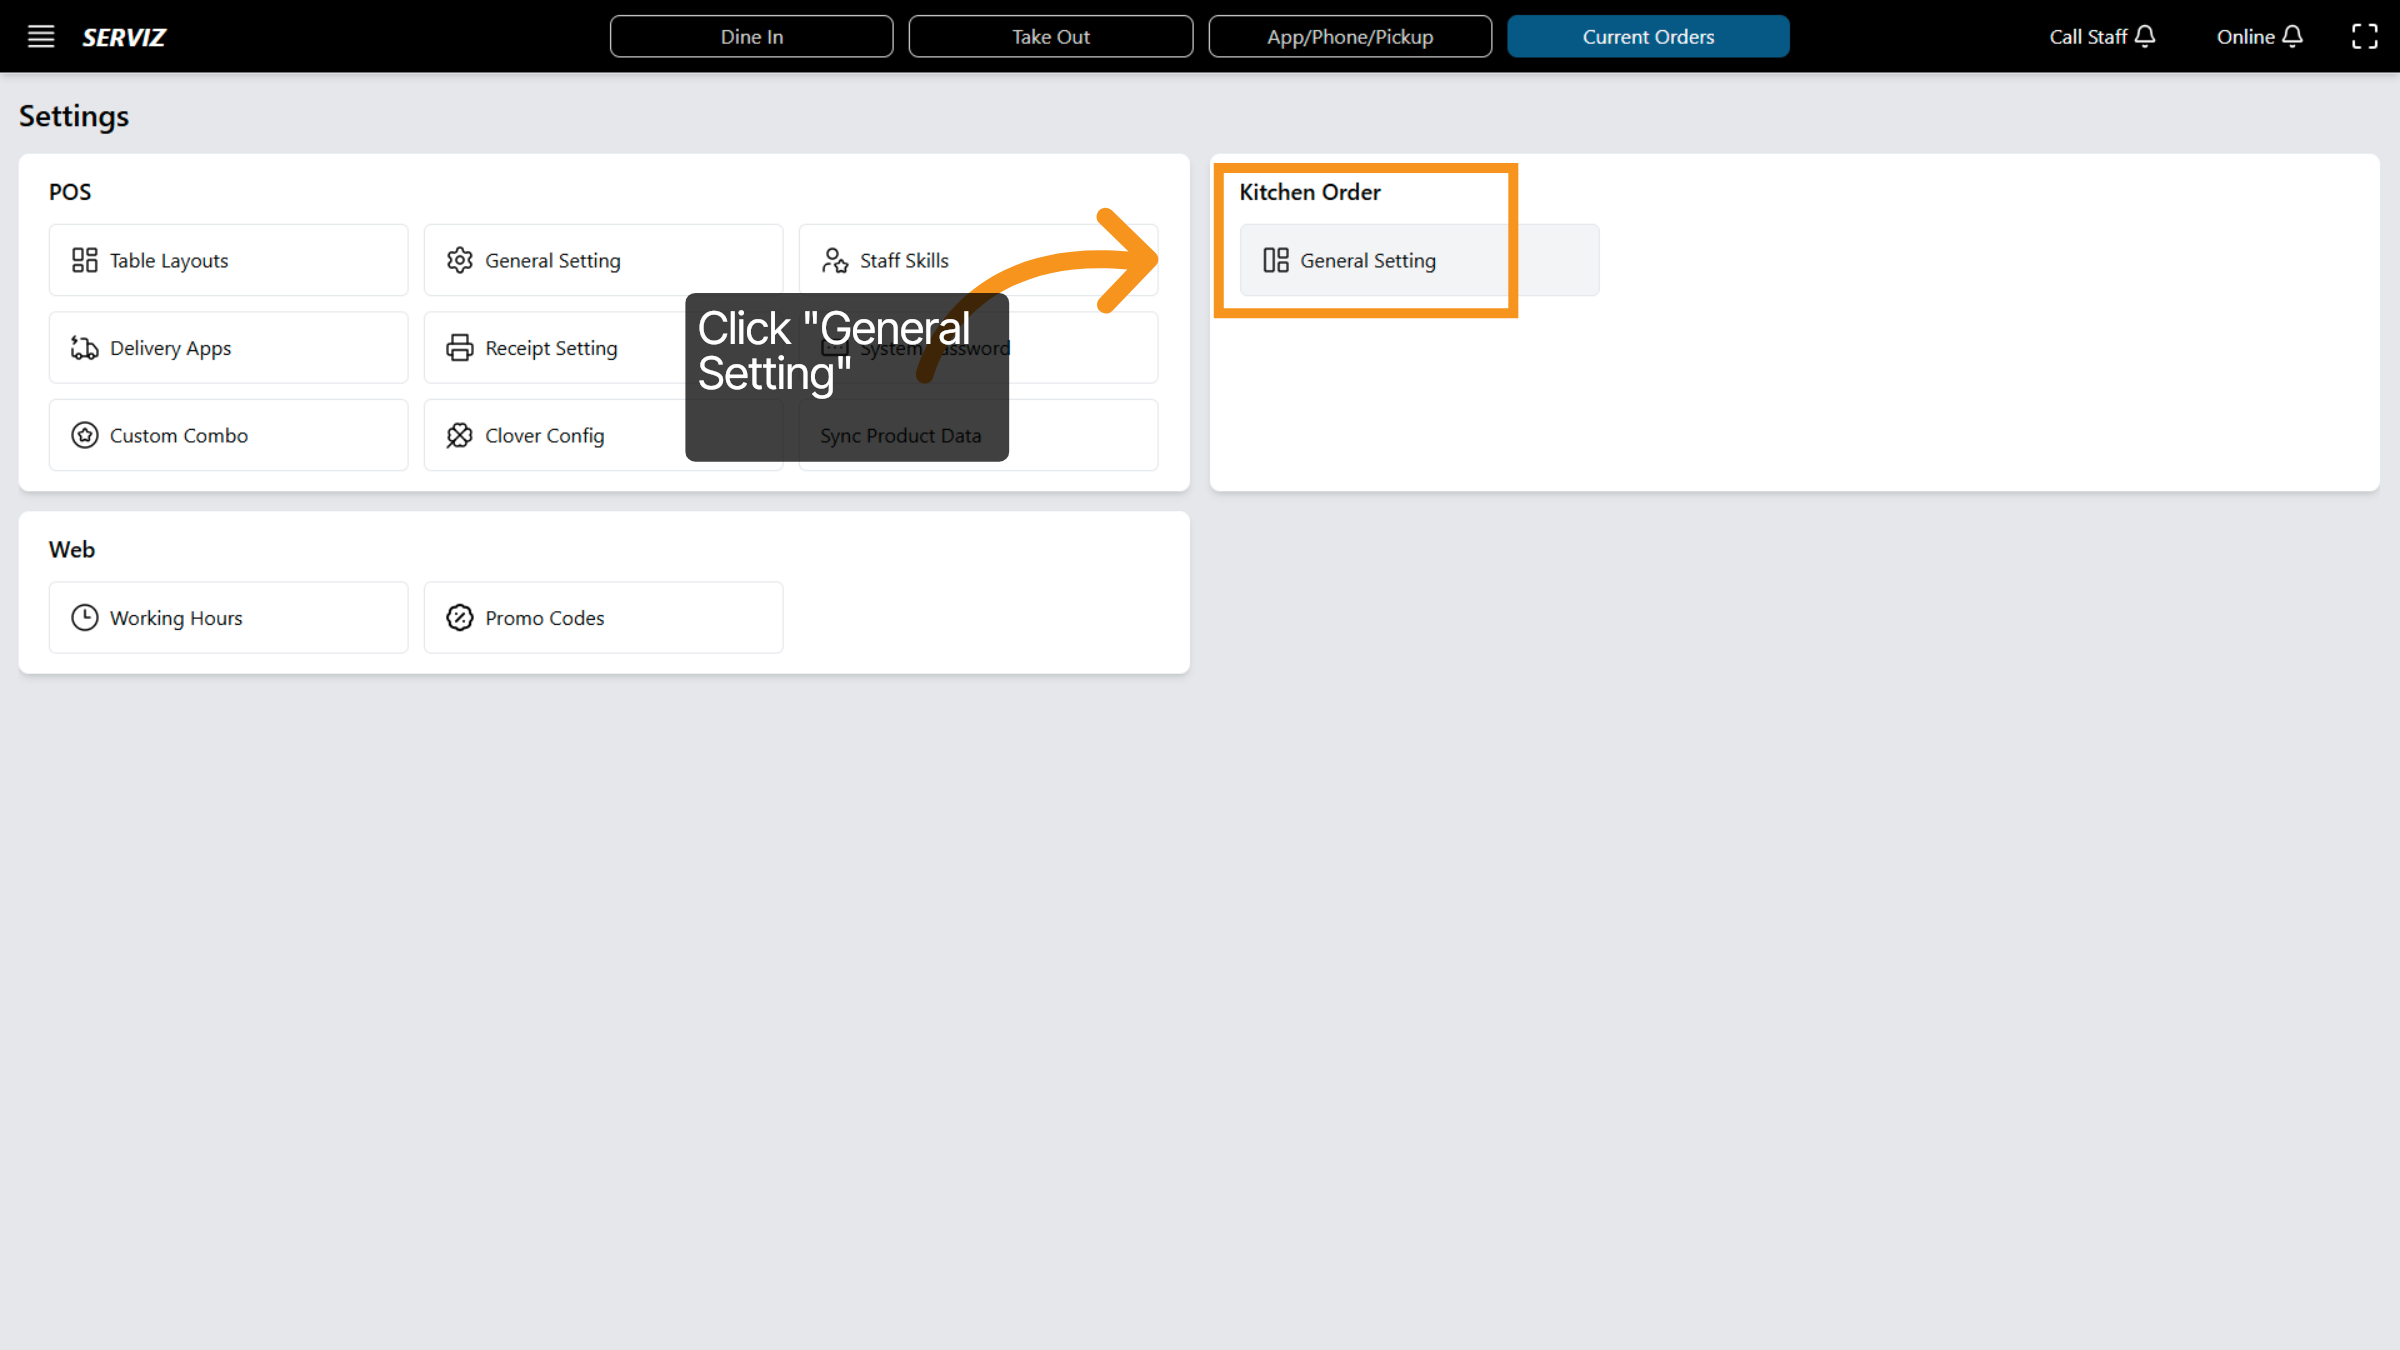
16. Open General Settings
Click the area to access detailed general settings options. This includes adjustments for View type, Layout Columns, Display language, Print language, and Print order mode.

17. Select Language Option
Click to choose the language for the POS system interface.

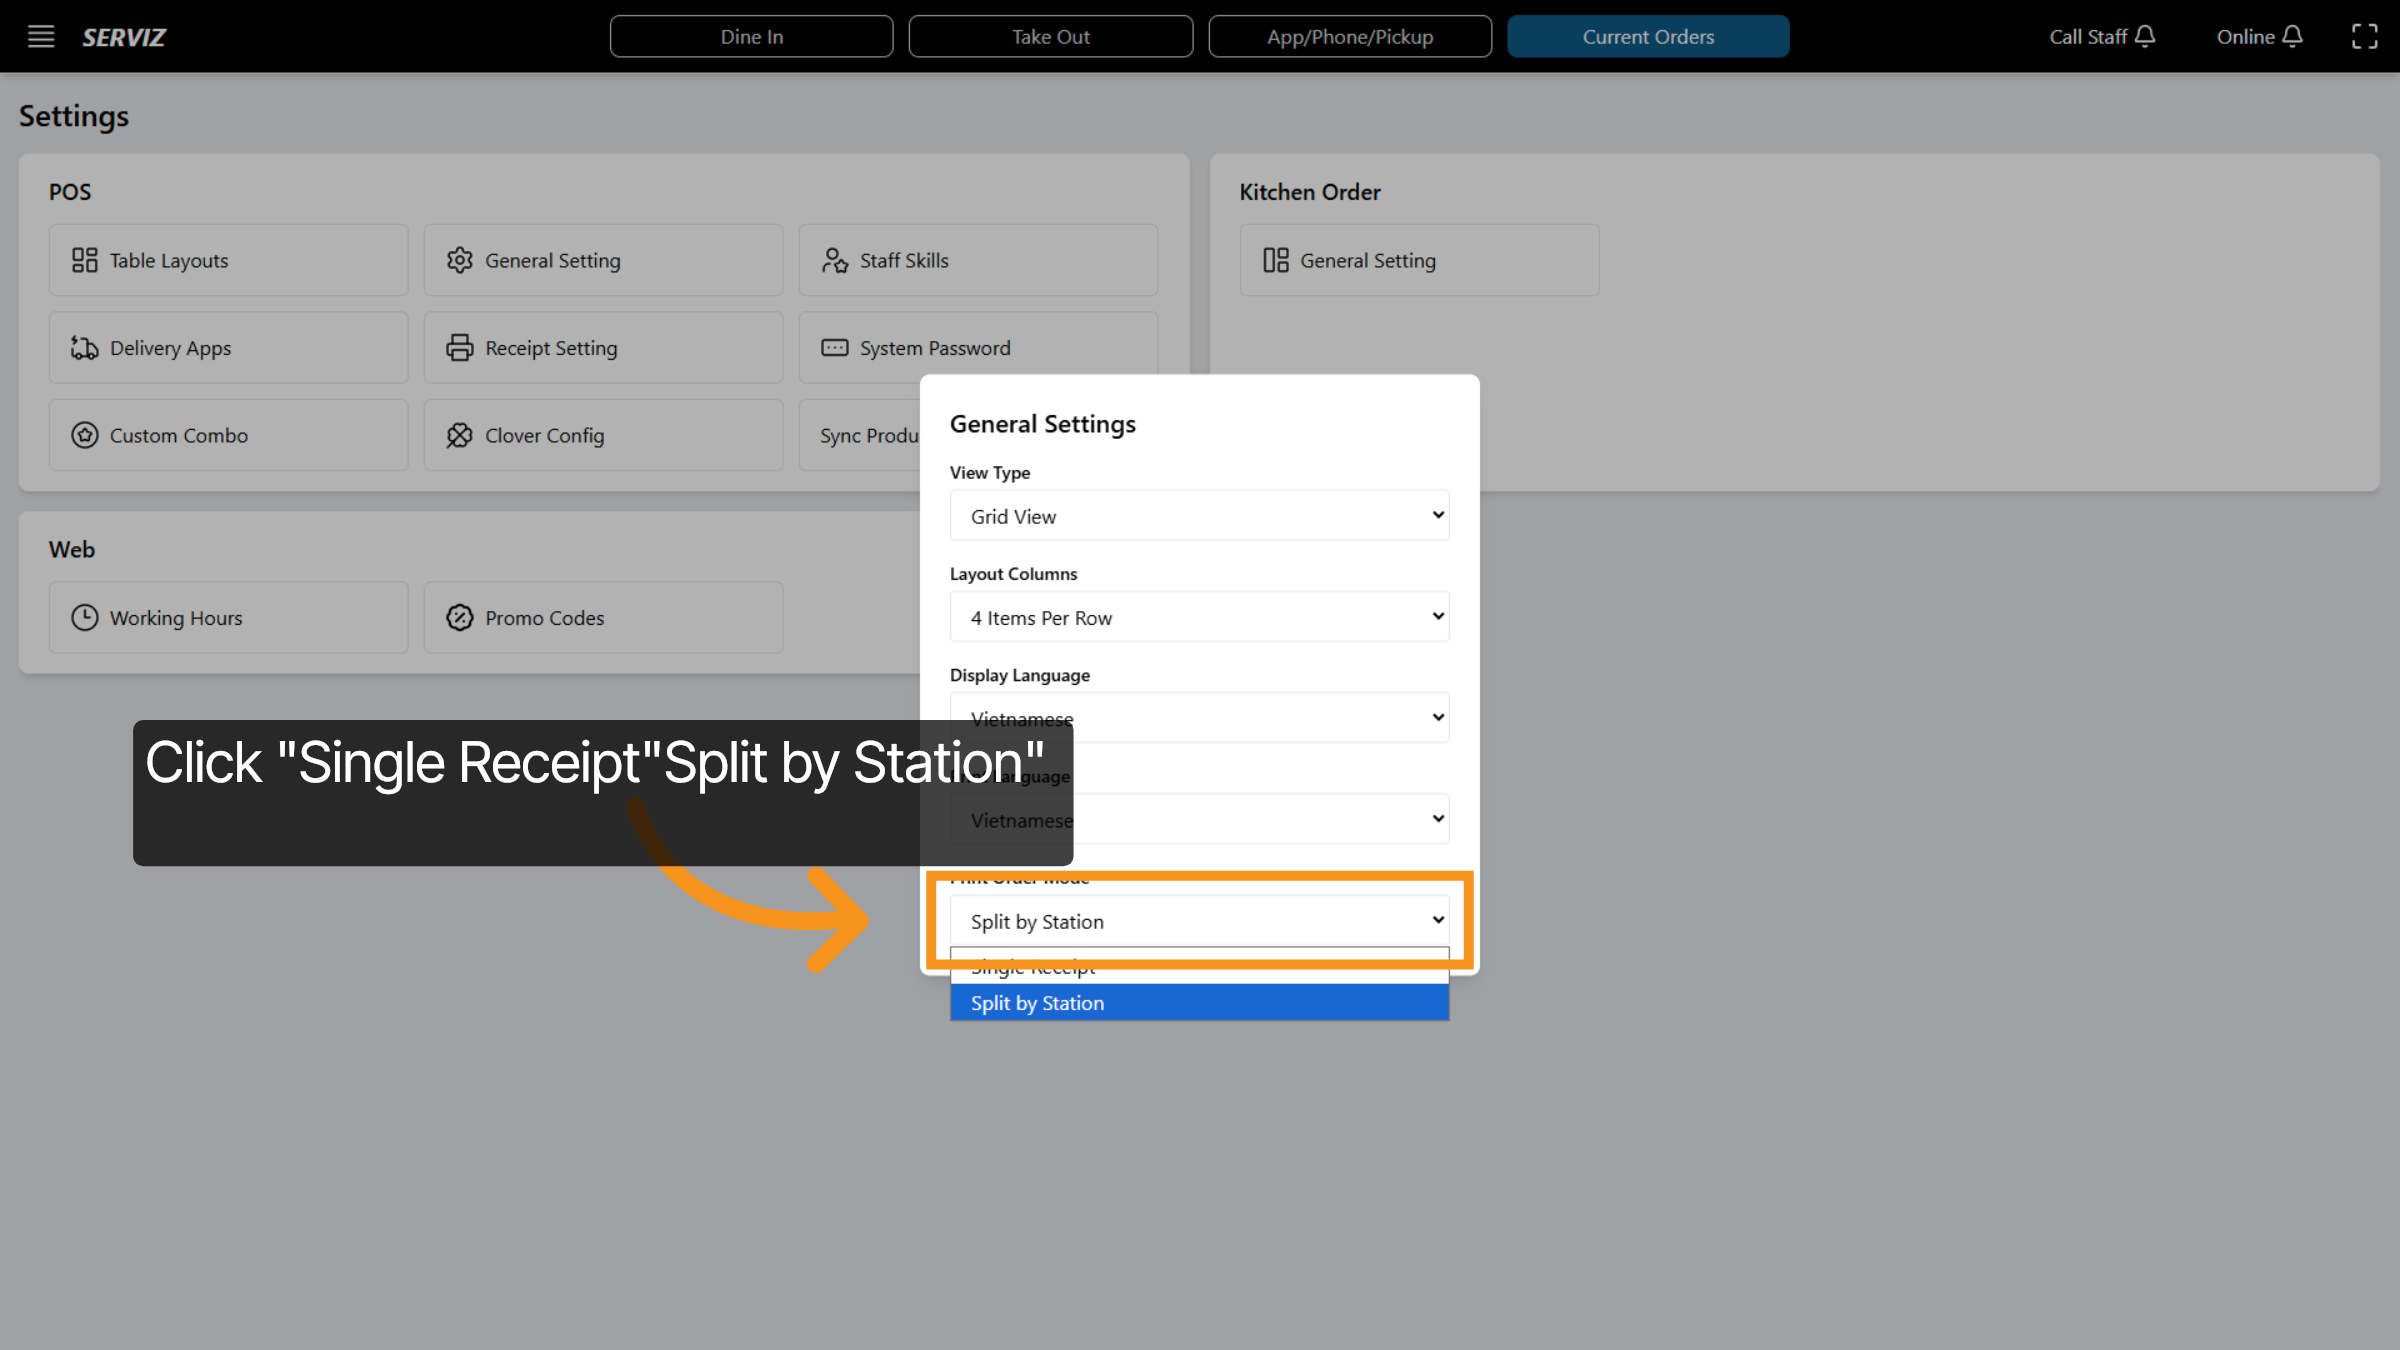
18. Select Receipt Mode
Click to choose between Single Receipt and Split by Station printing options.
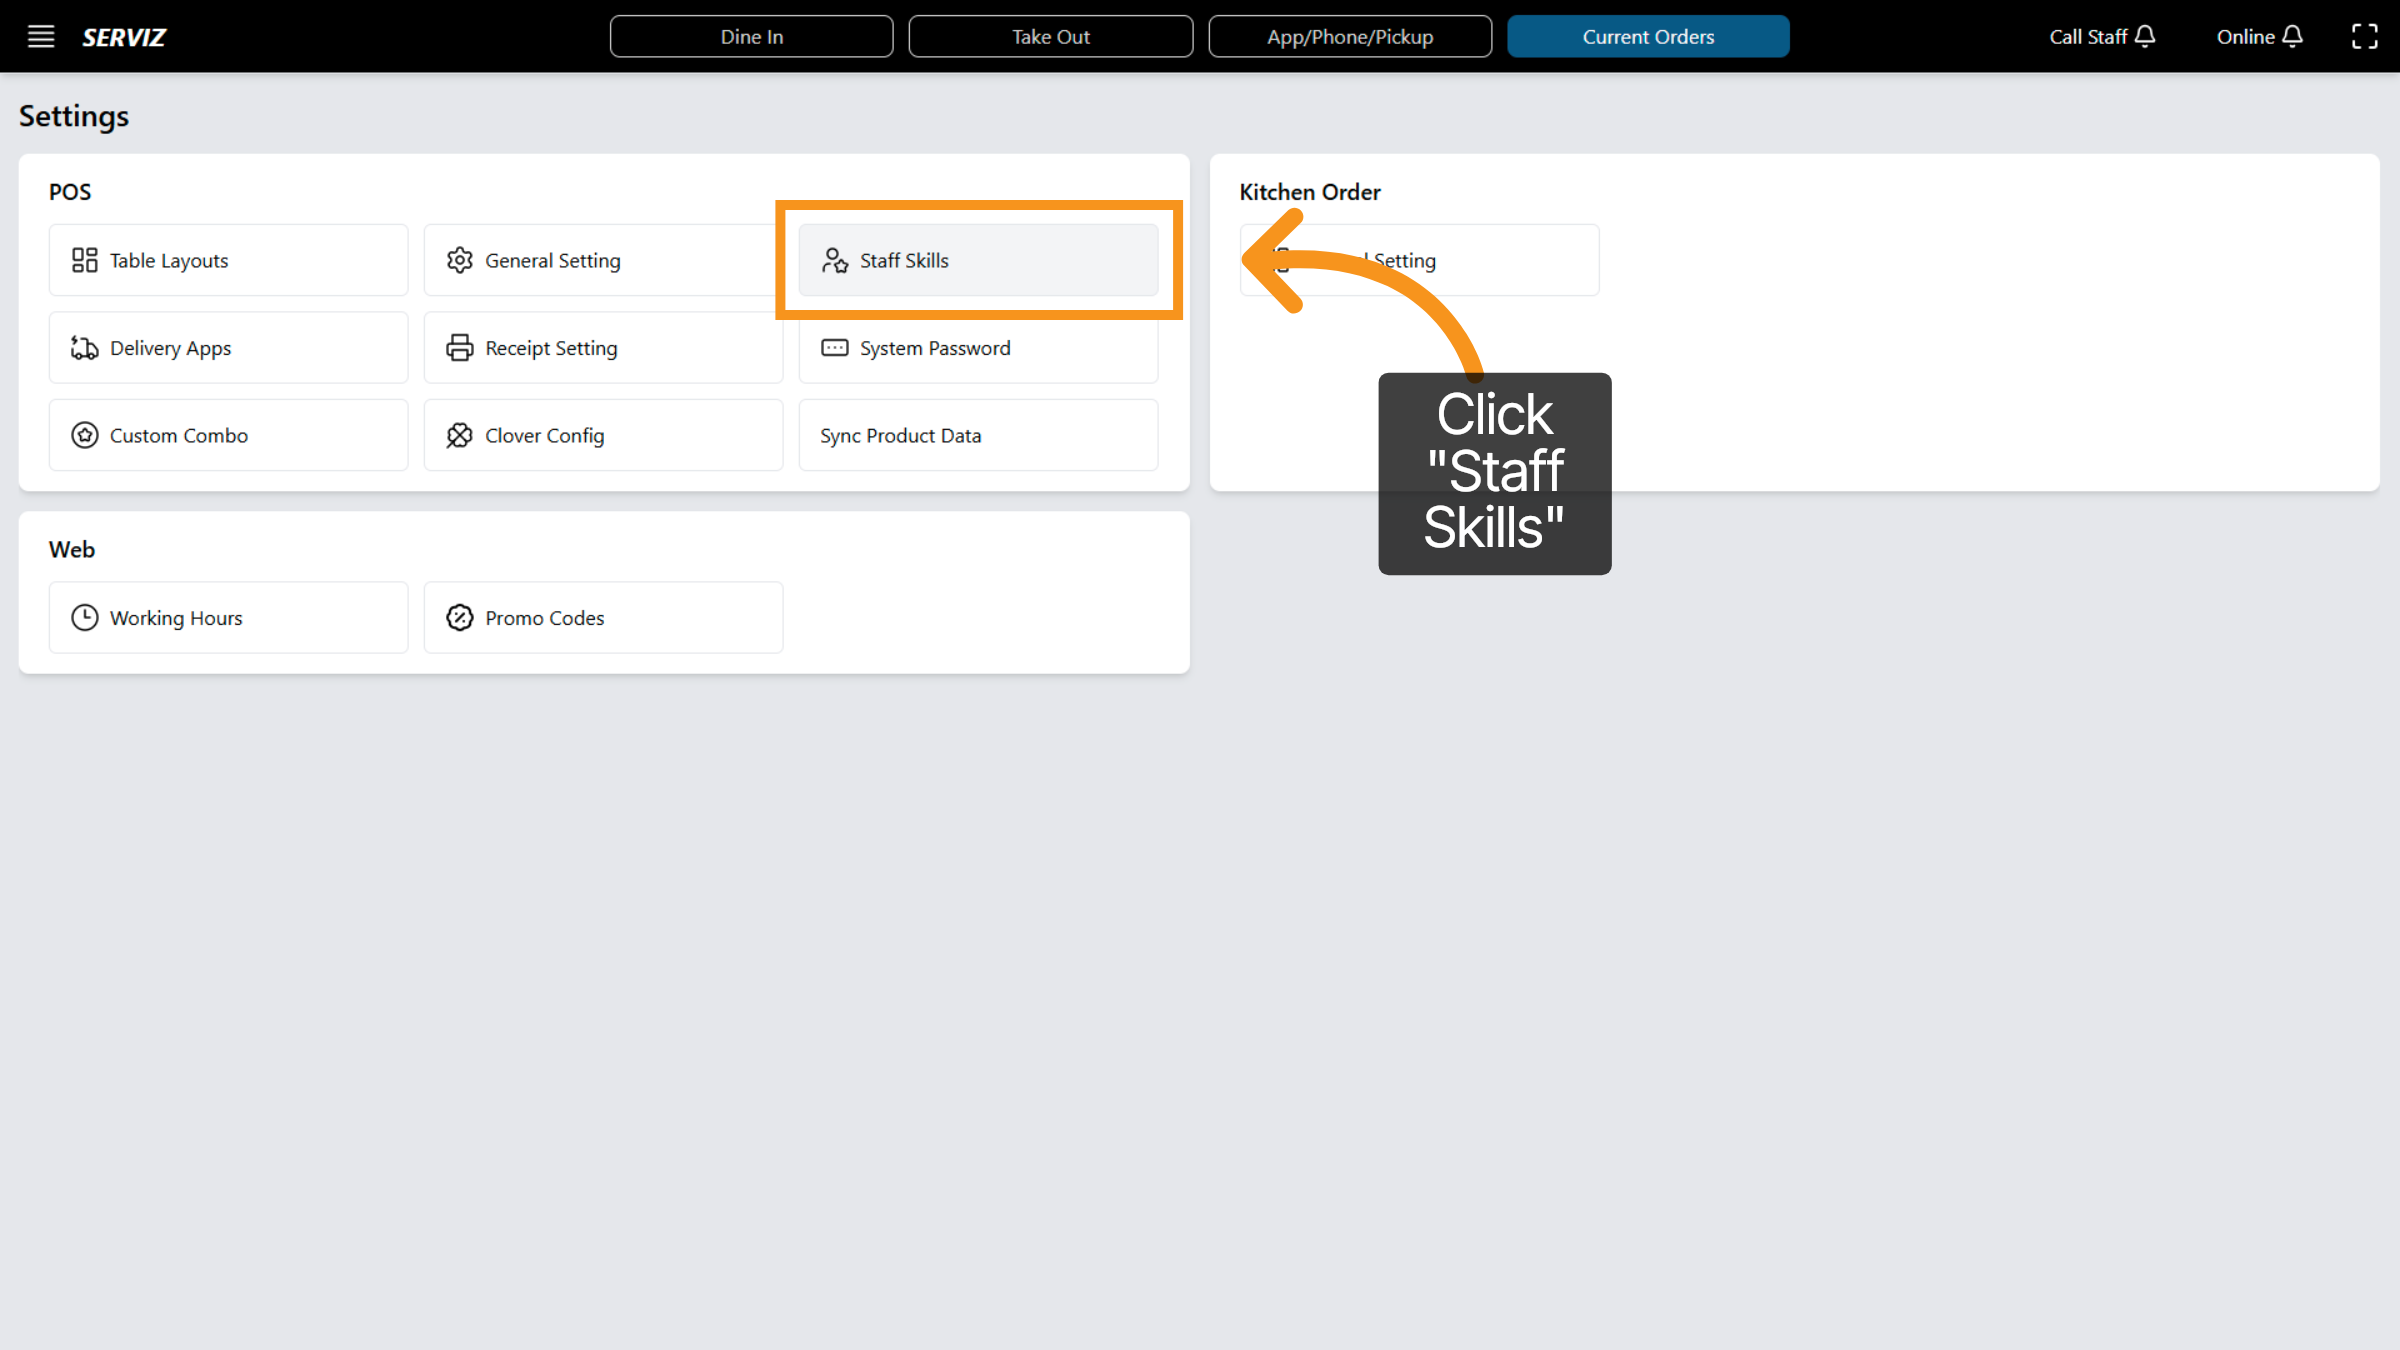
19. Access Staff Skills
Click Staff Skills to manage employee capabilities and assignments.
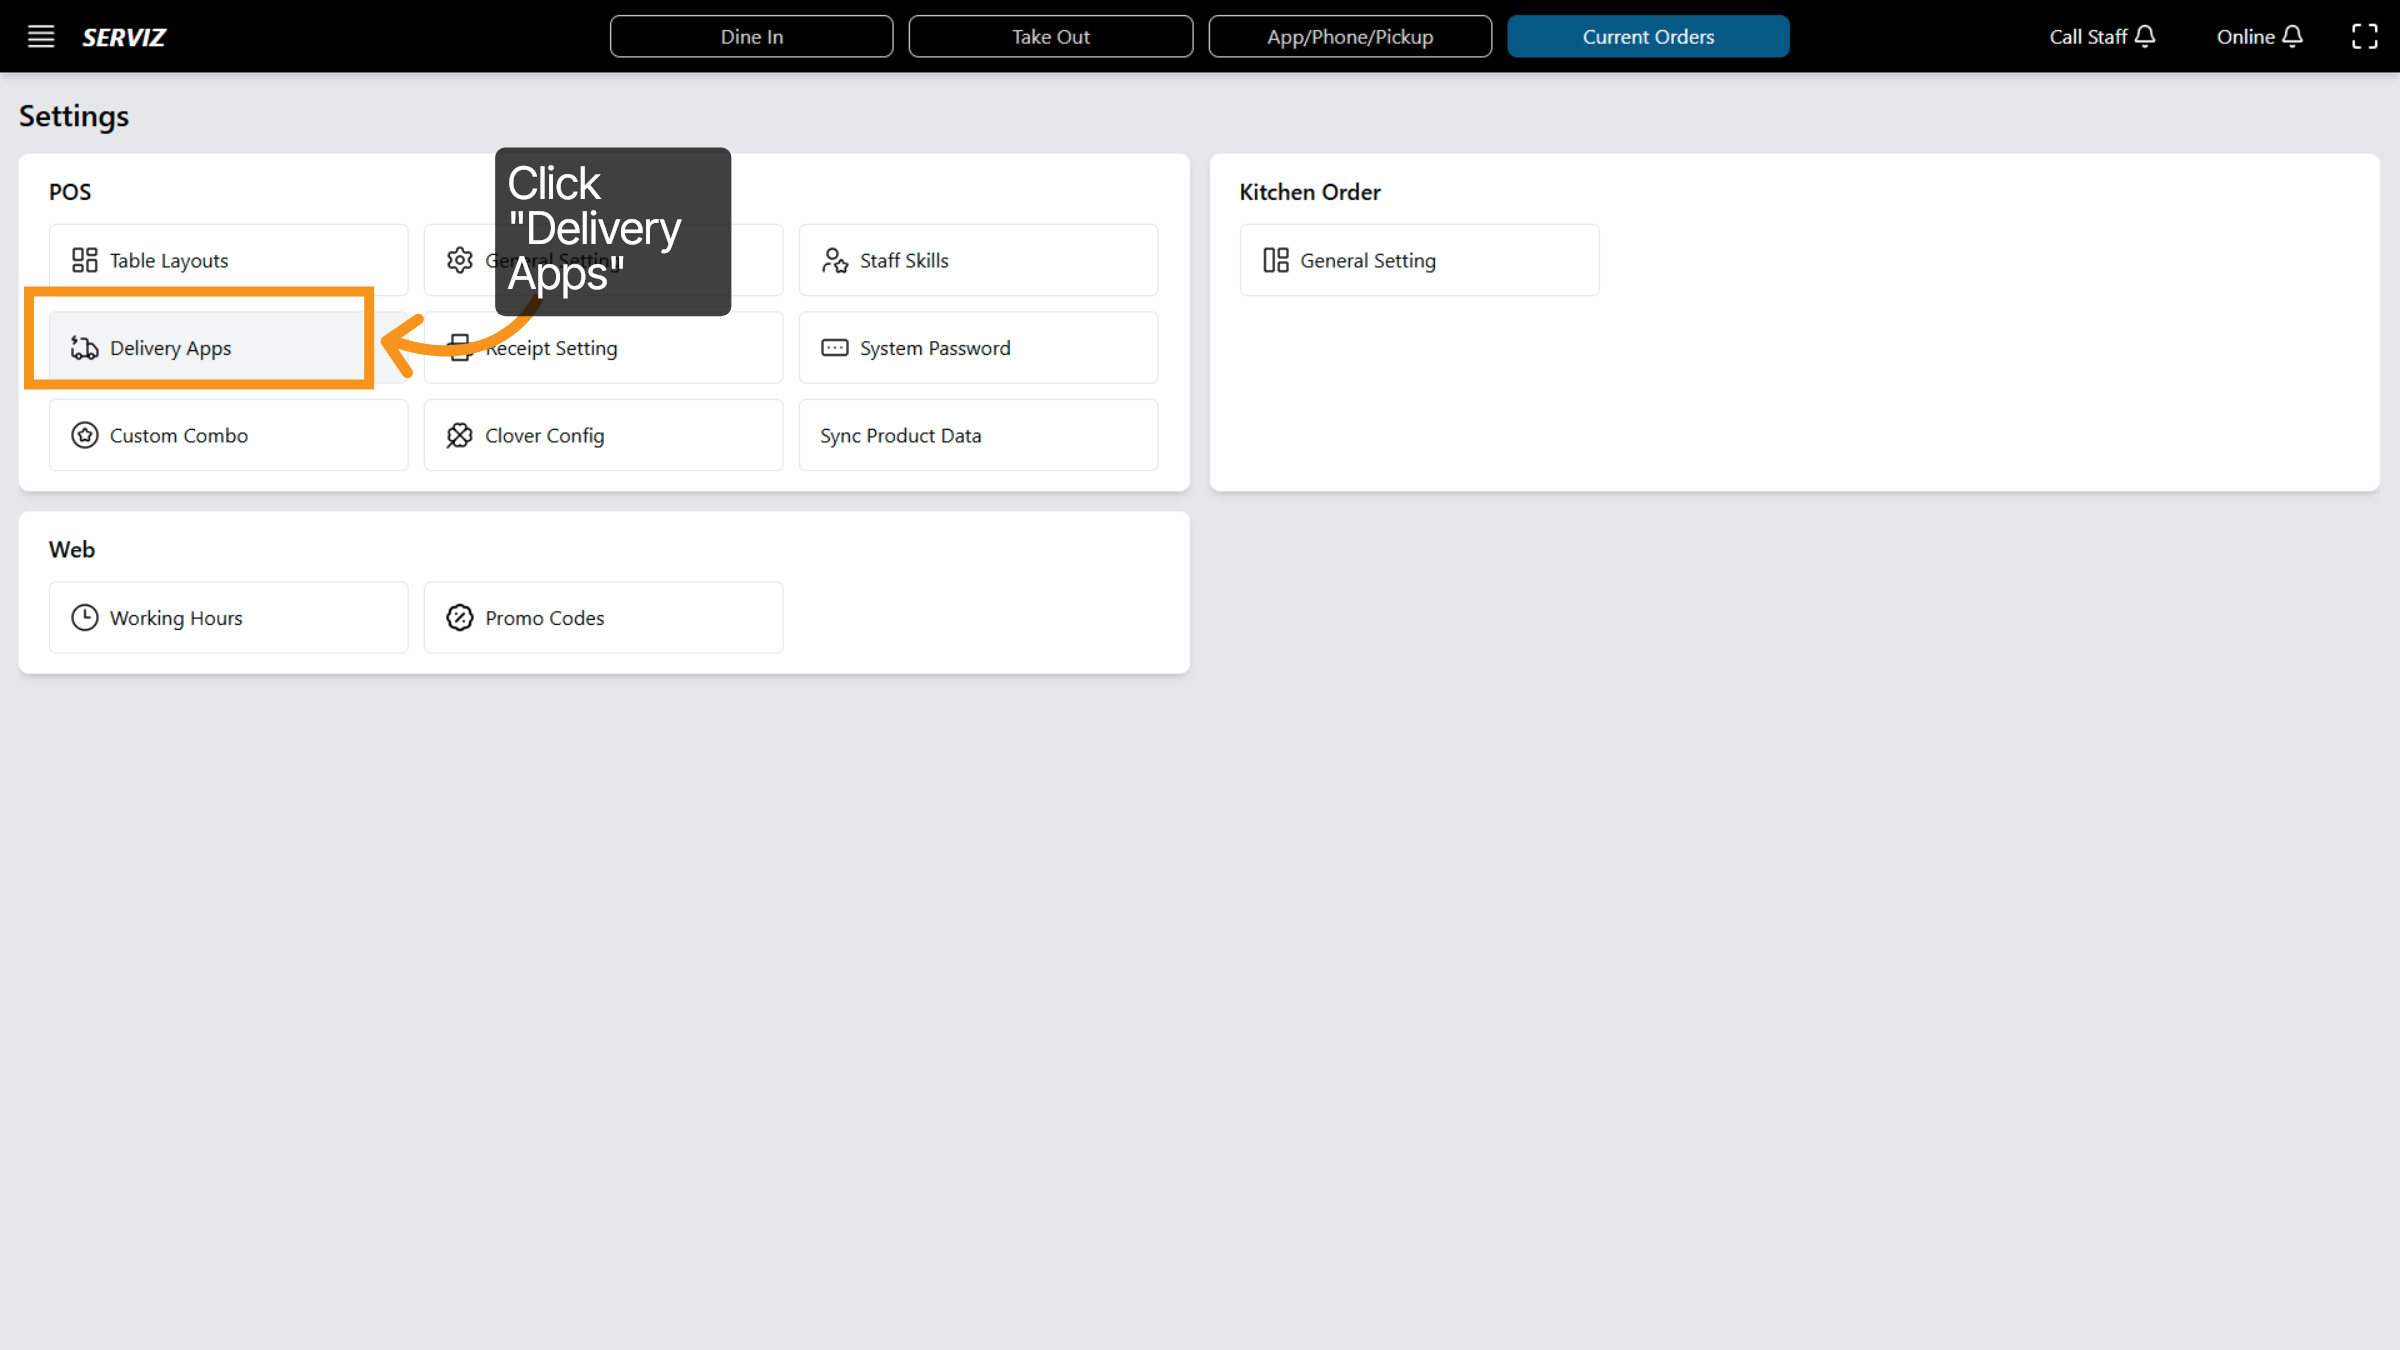
20. Open Delivery Apps
Click Delivery Apps to configure integrations with external delivery services.
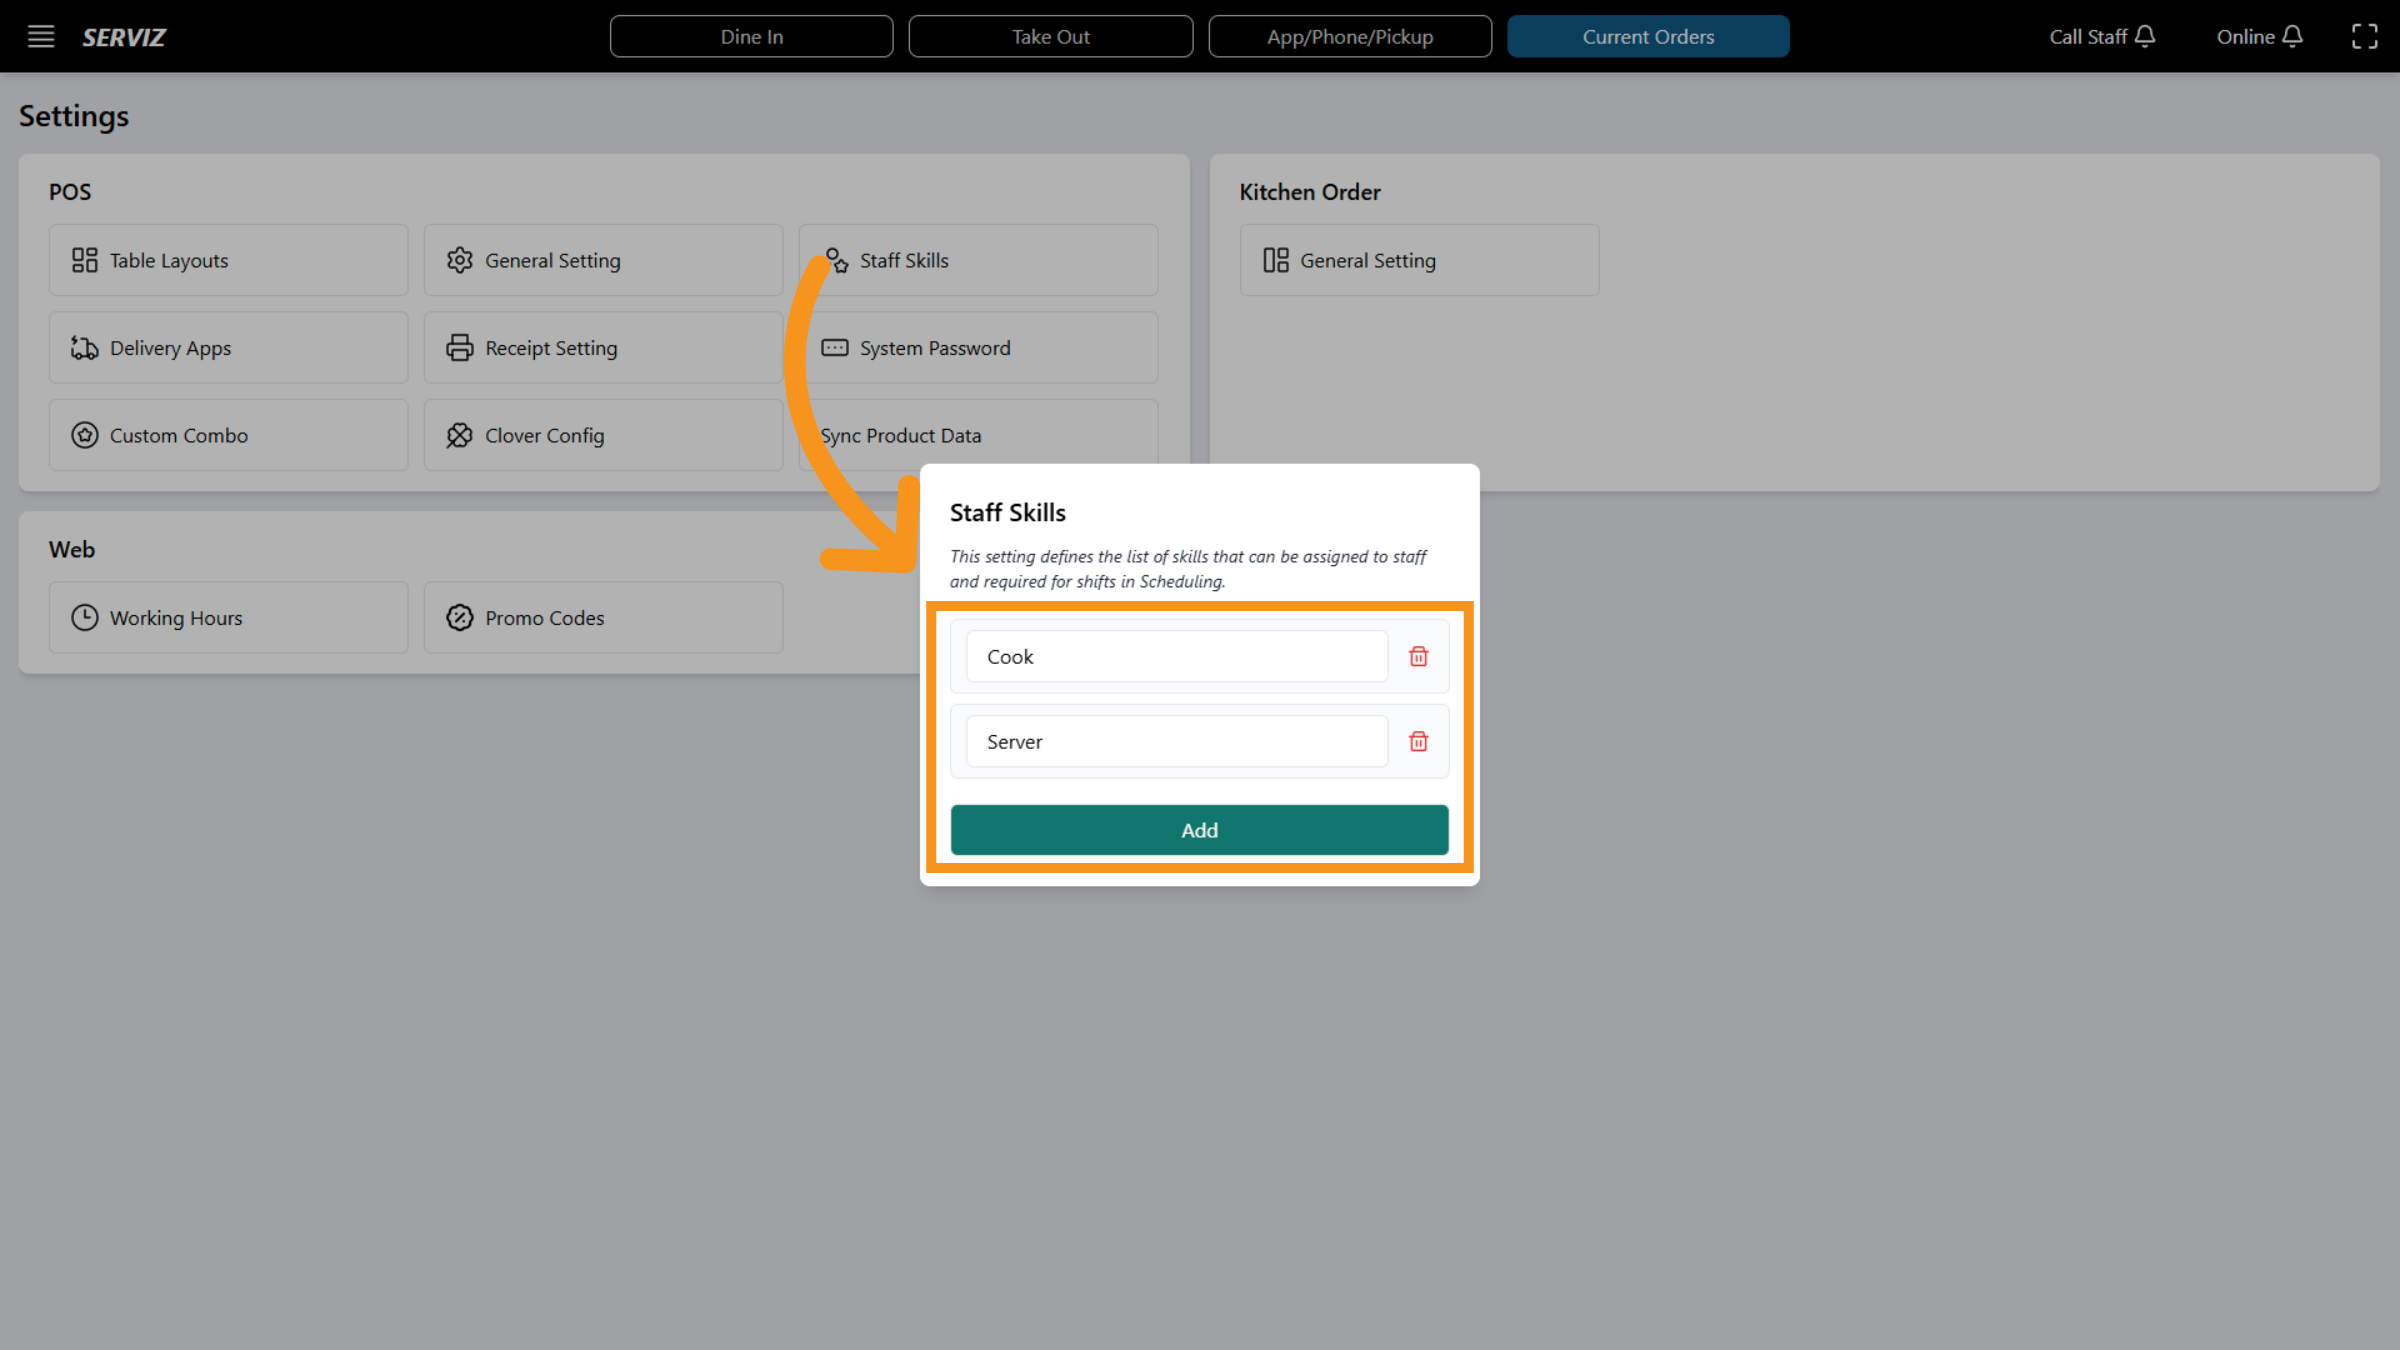
21. Add Staff Skill
Click Add to create a new skill entry for staff members and finalize the new staff skill.
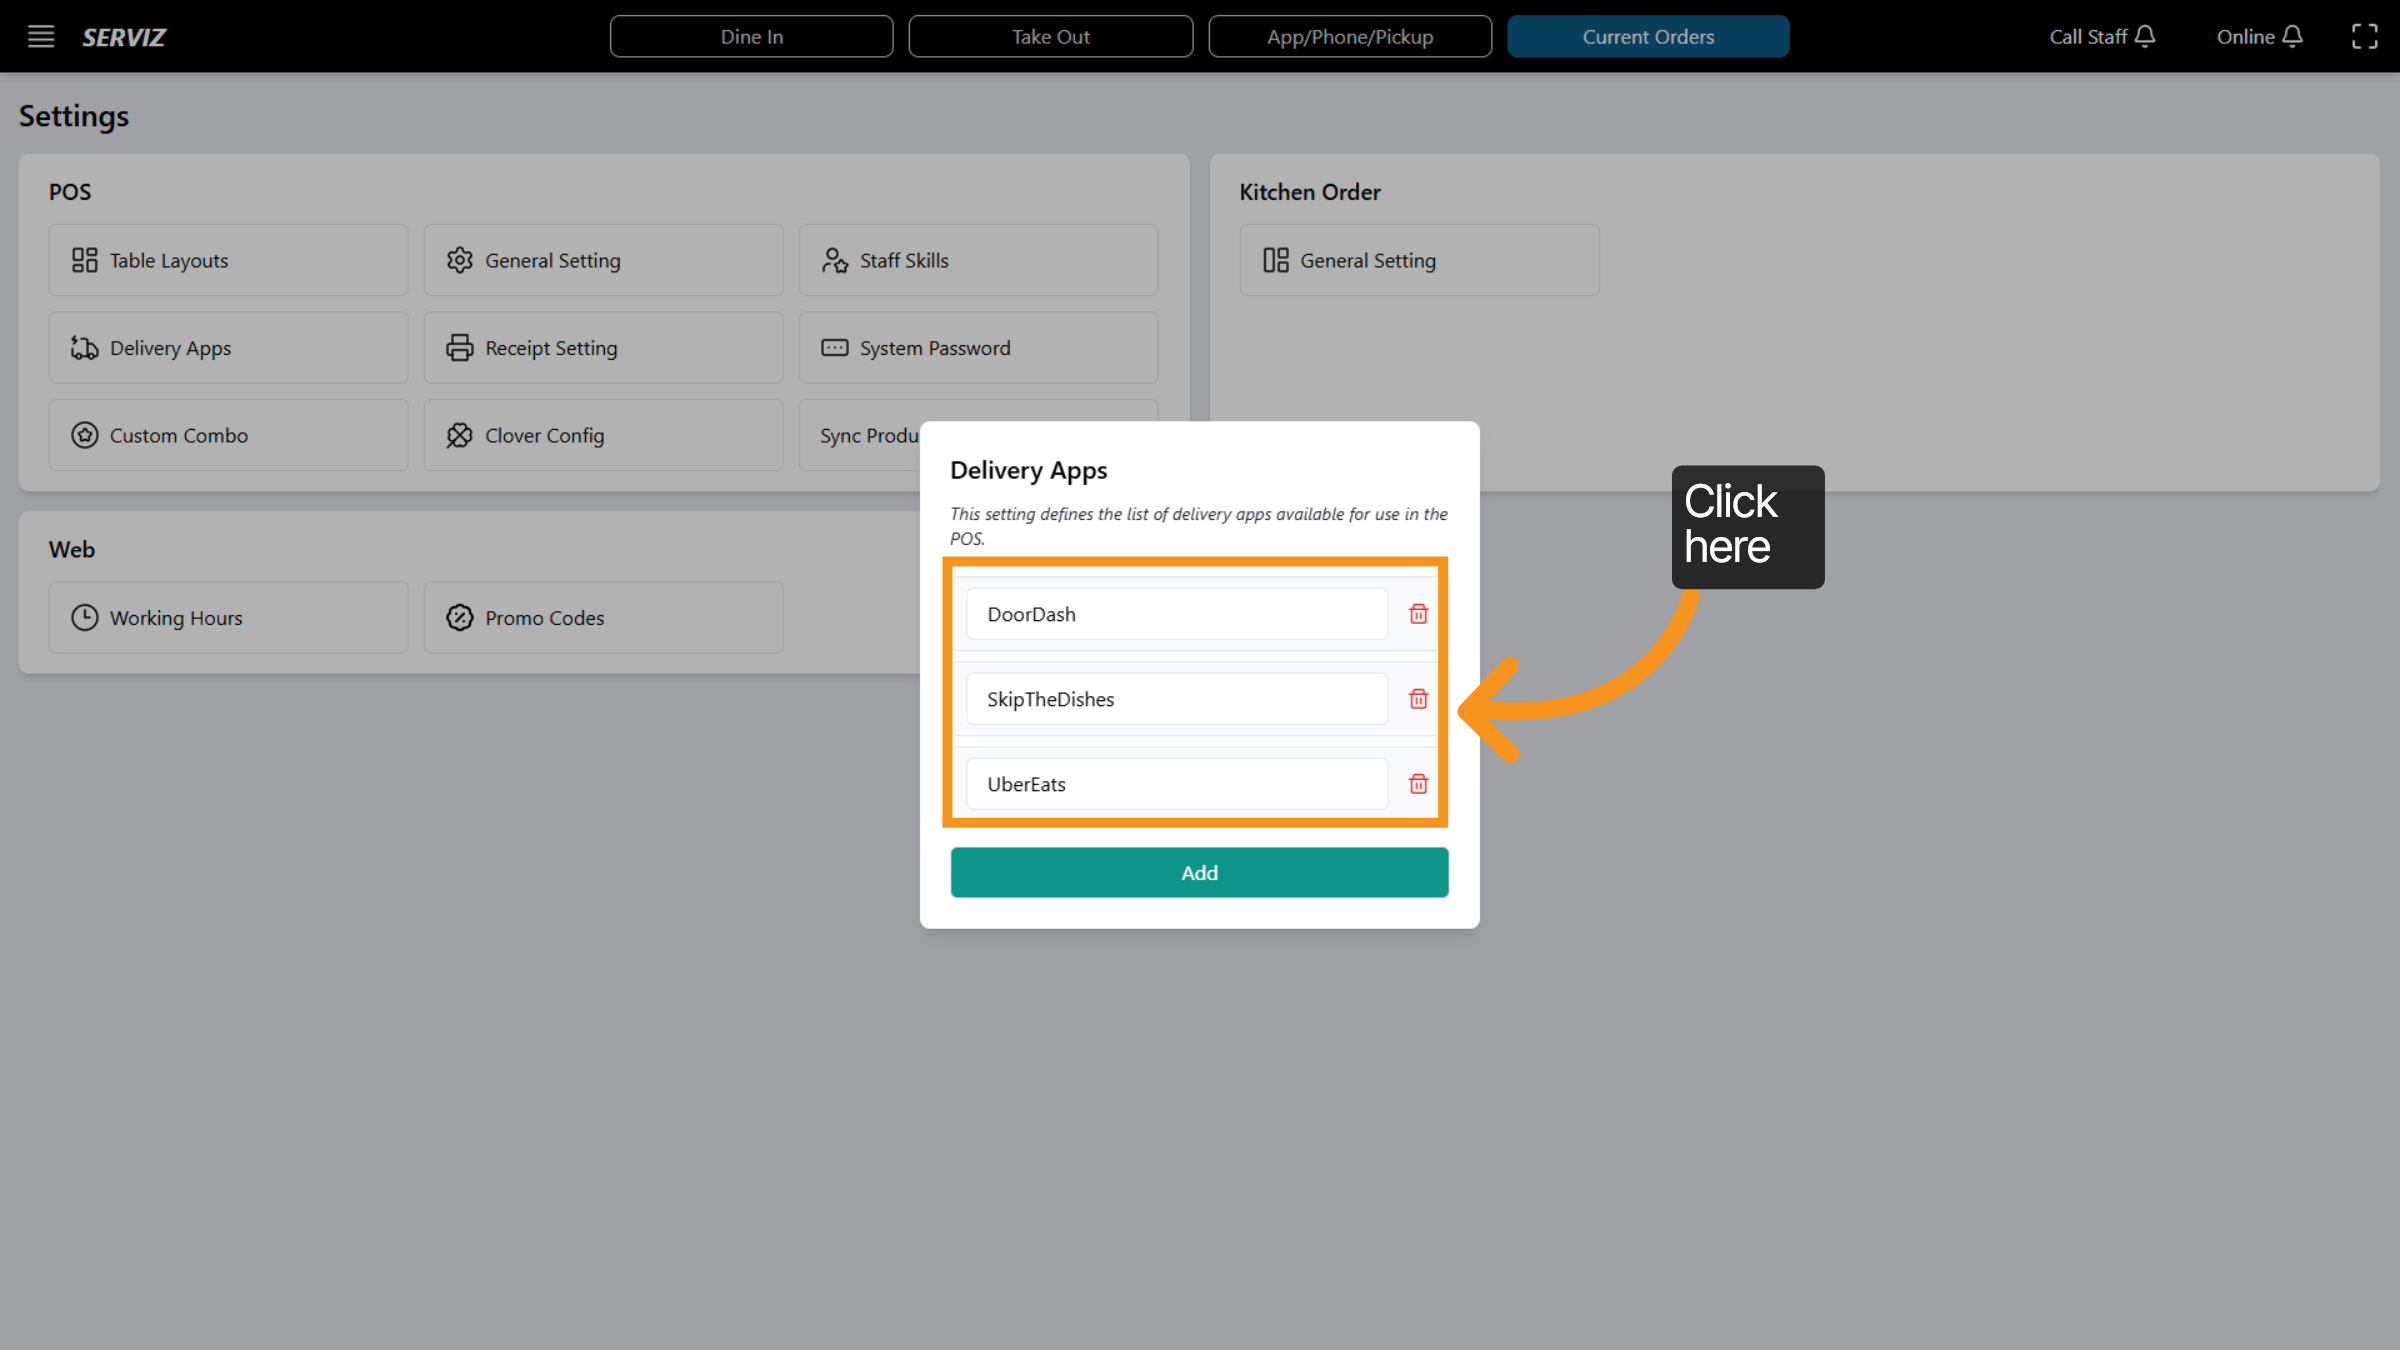
22. Access Delivery Settings
Click the area to open settings related to delivery applications.
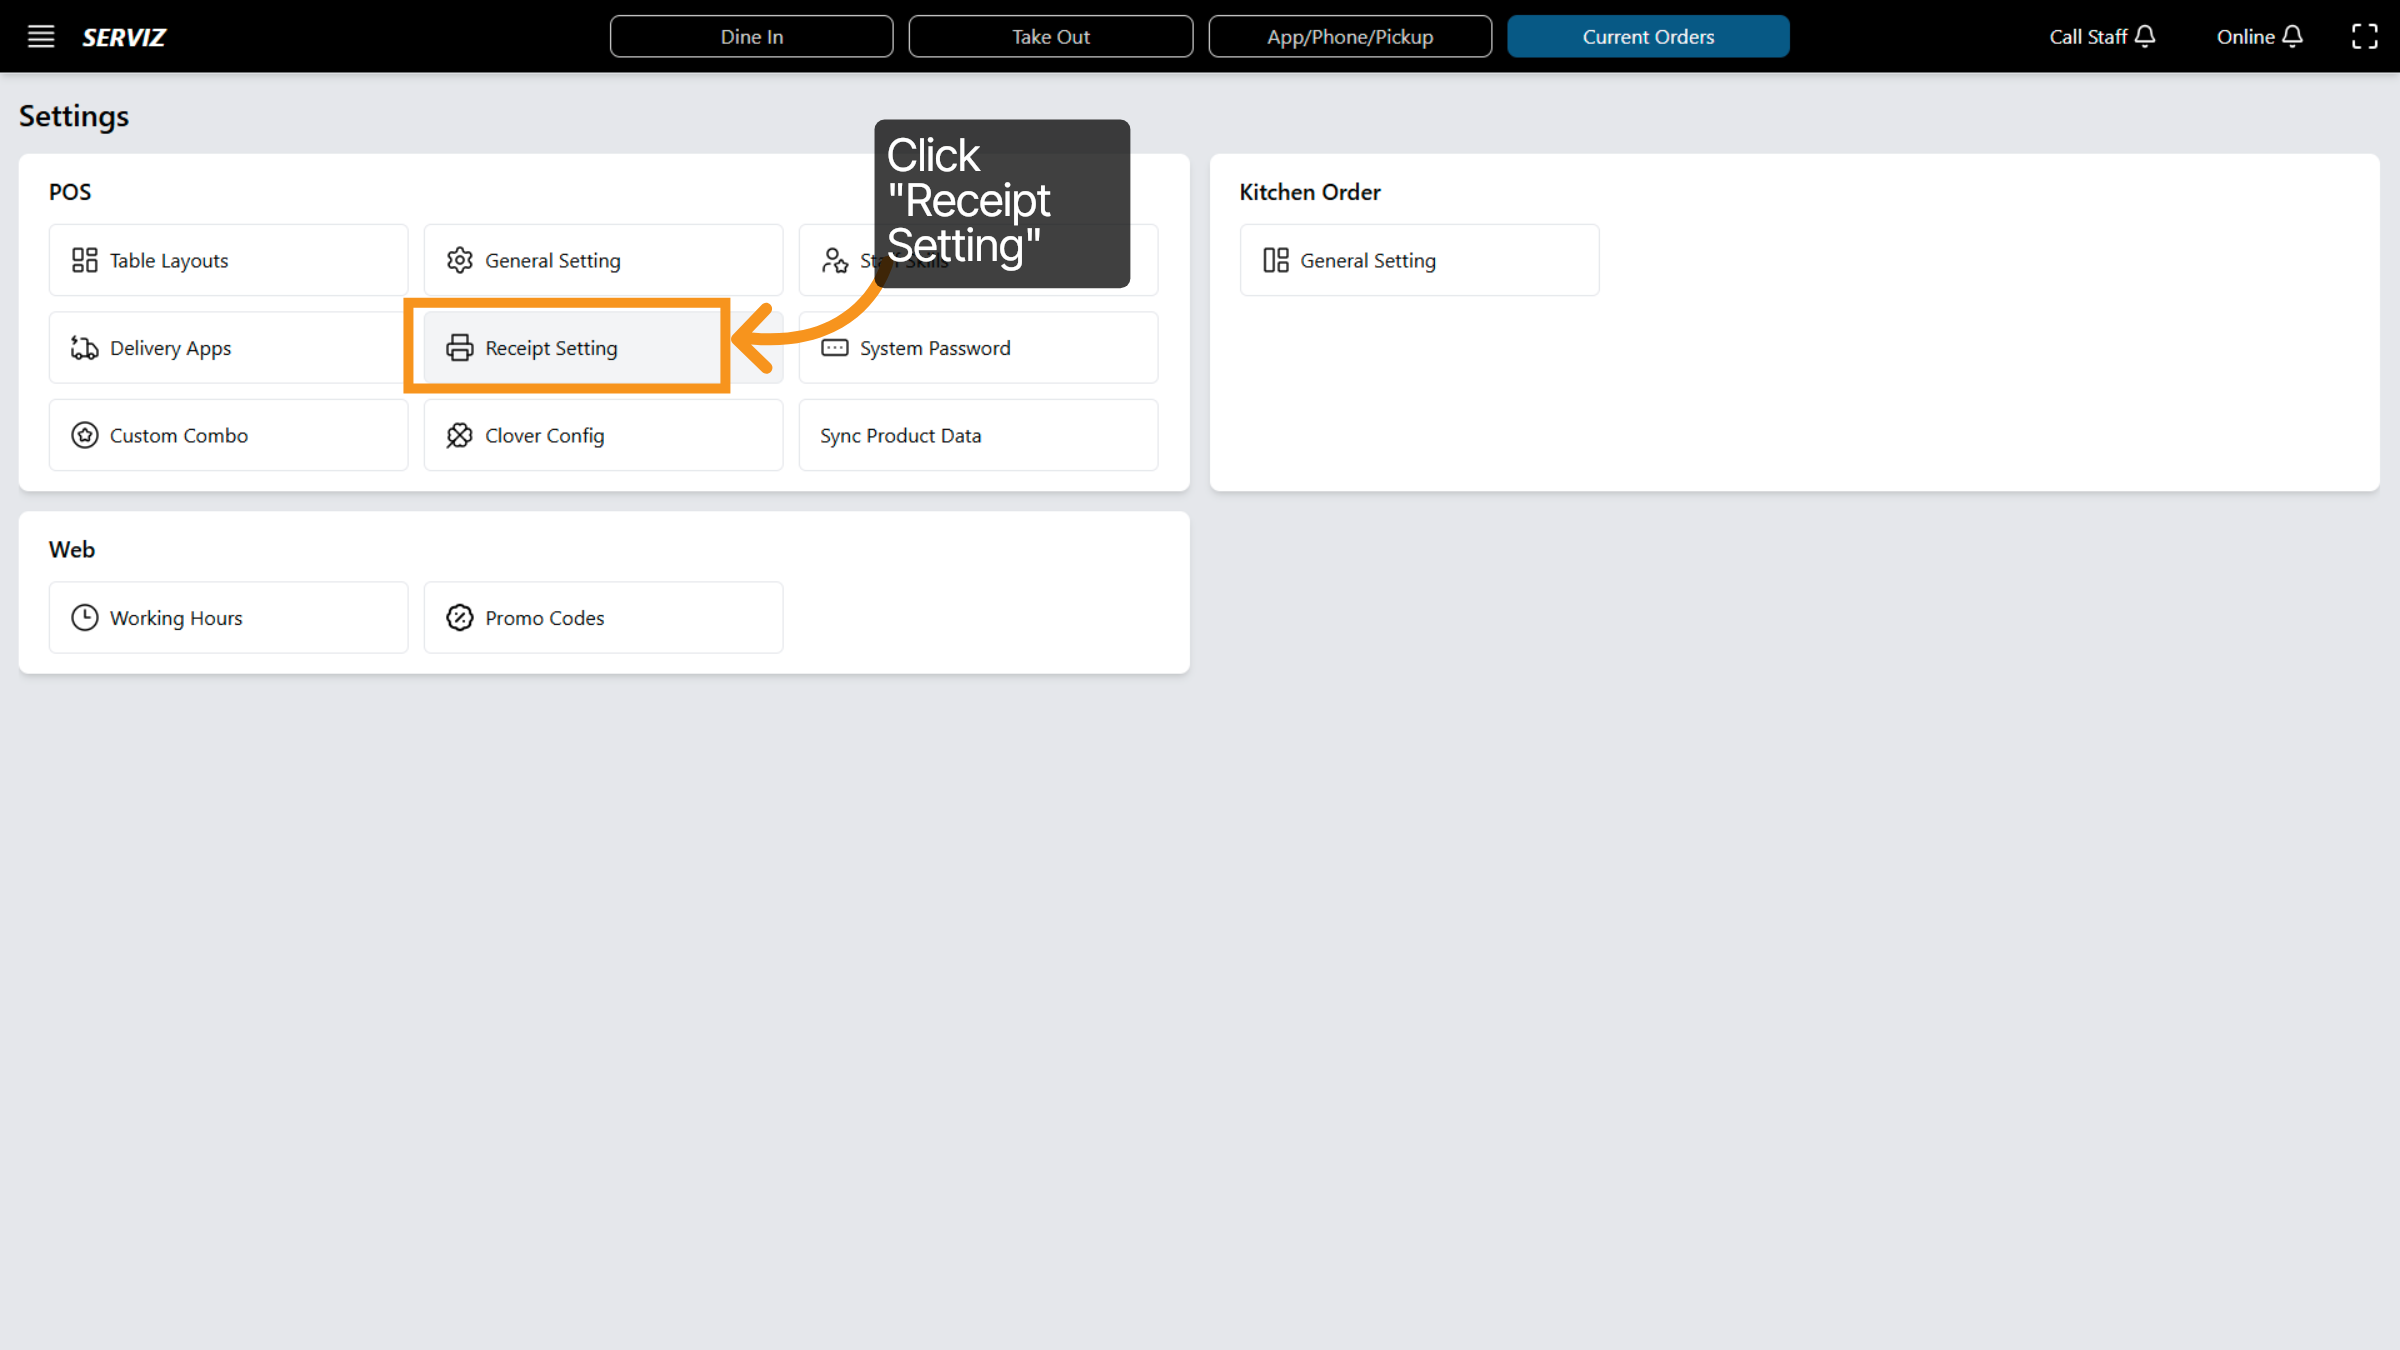
23. Select Receipt Setting
Click Receipt Setting to customize how receipts are printed and formatted.
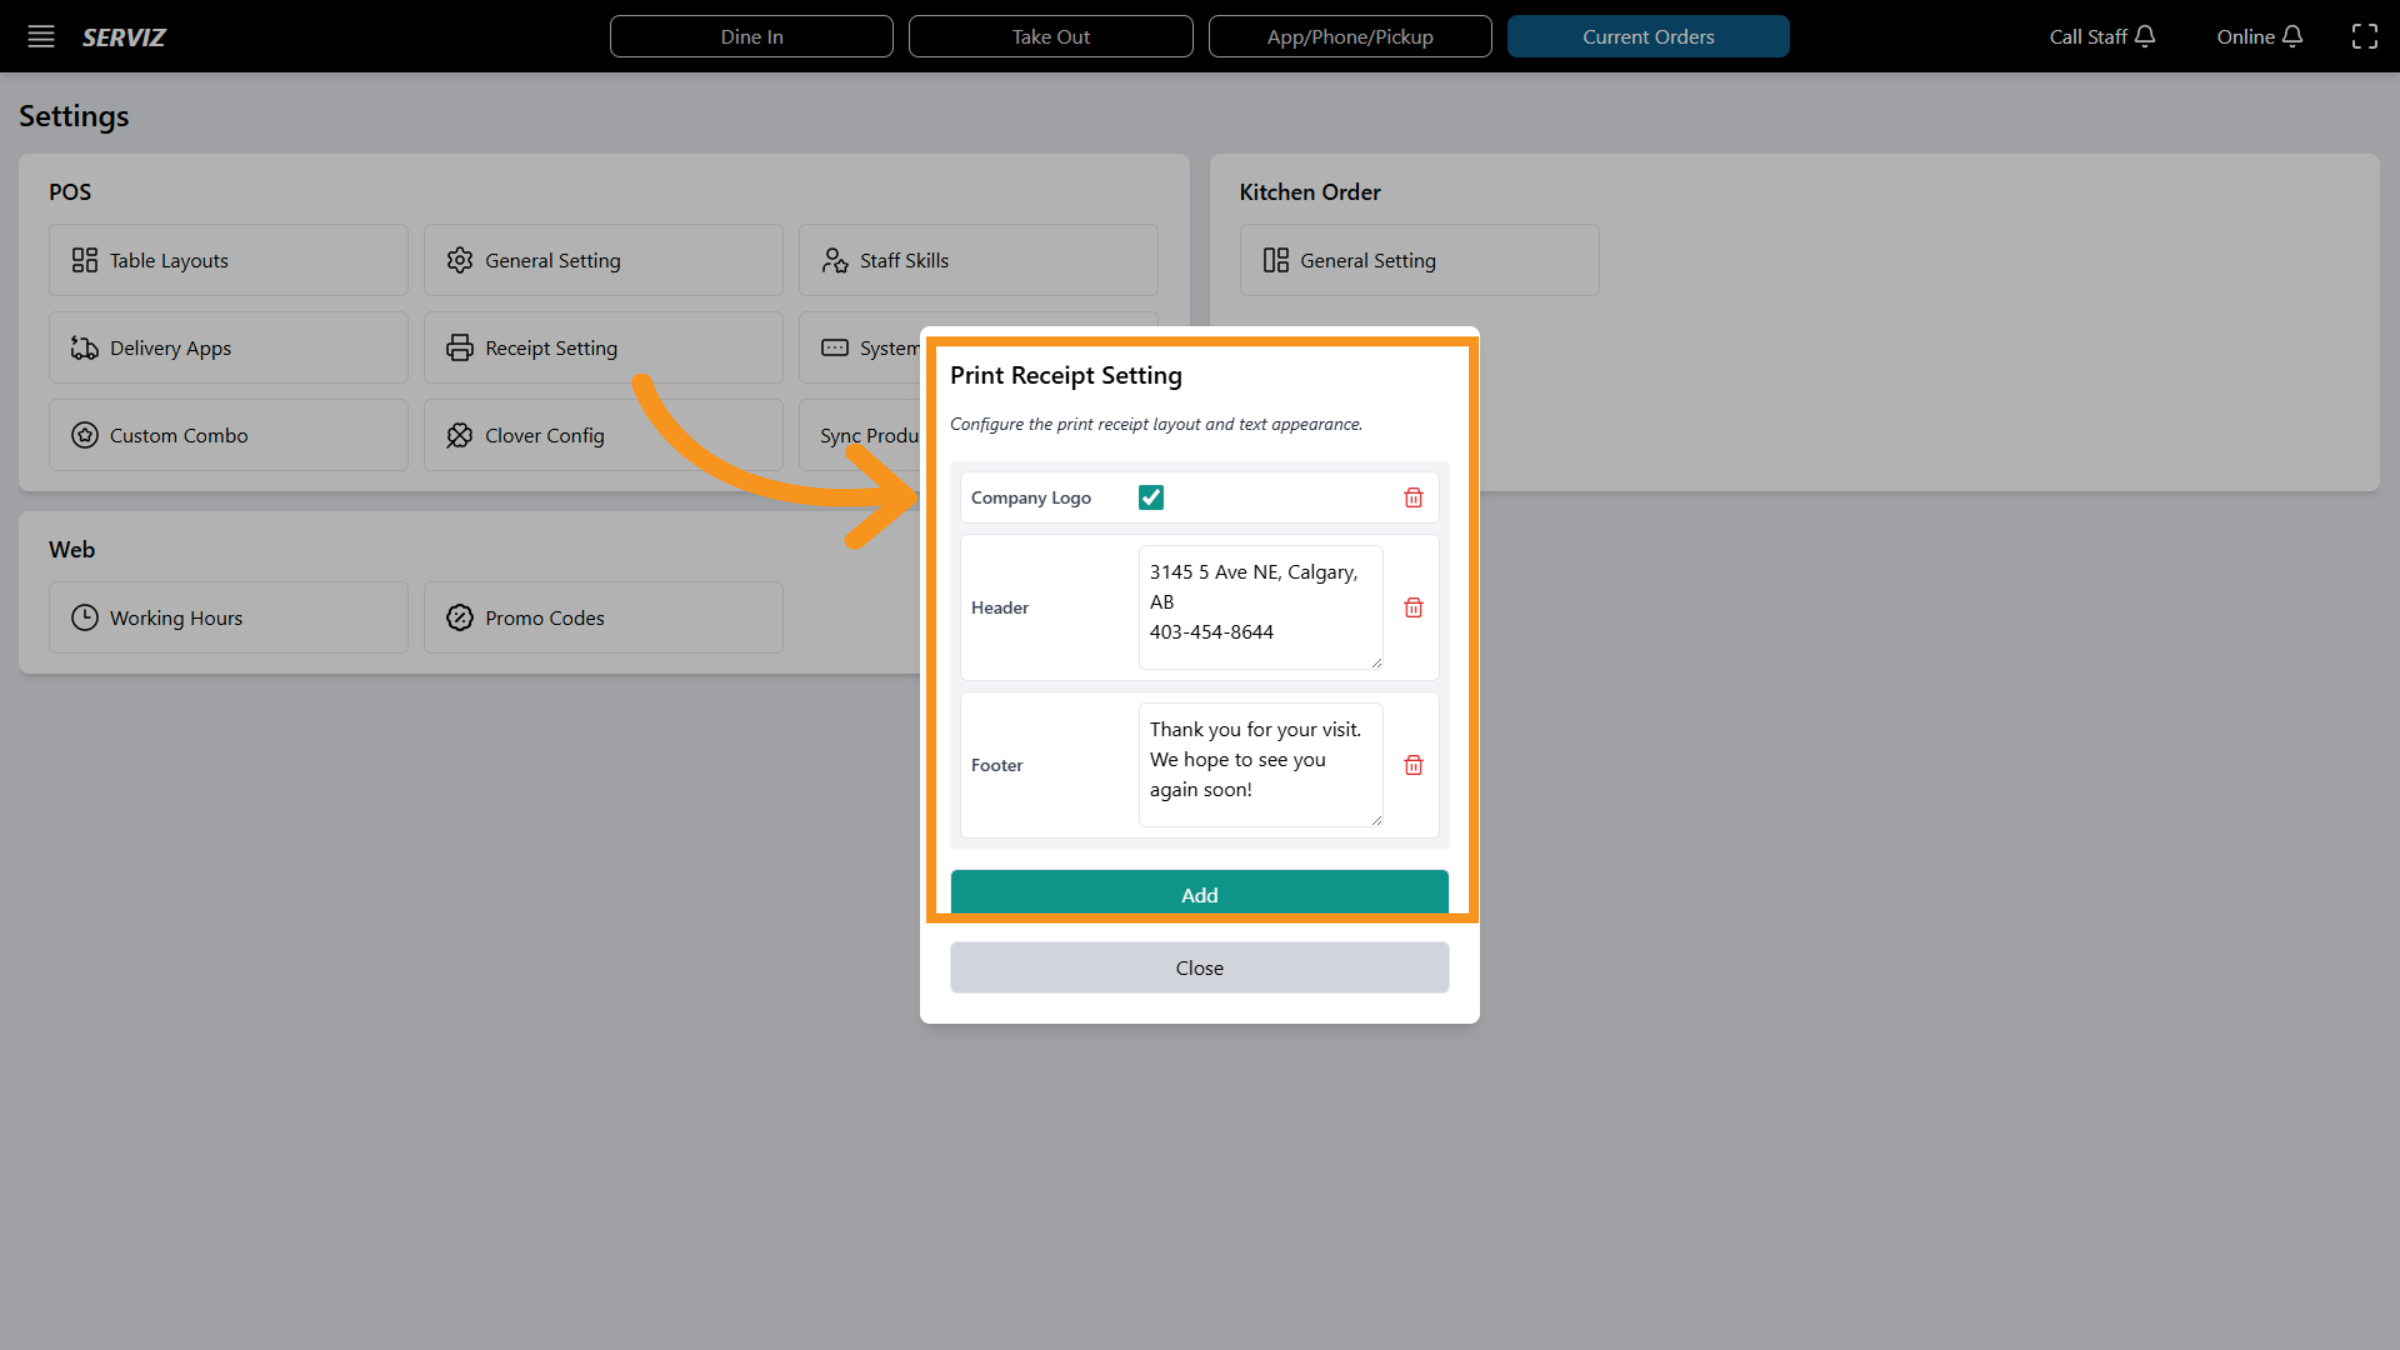
24. Open Receipt Setting
Access the Receipt settings to modify the Receipt information.
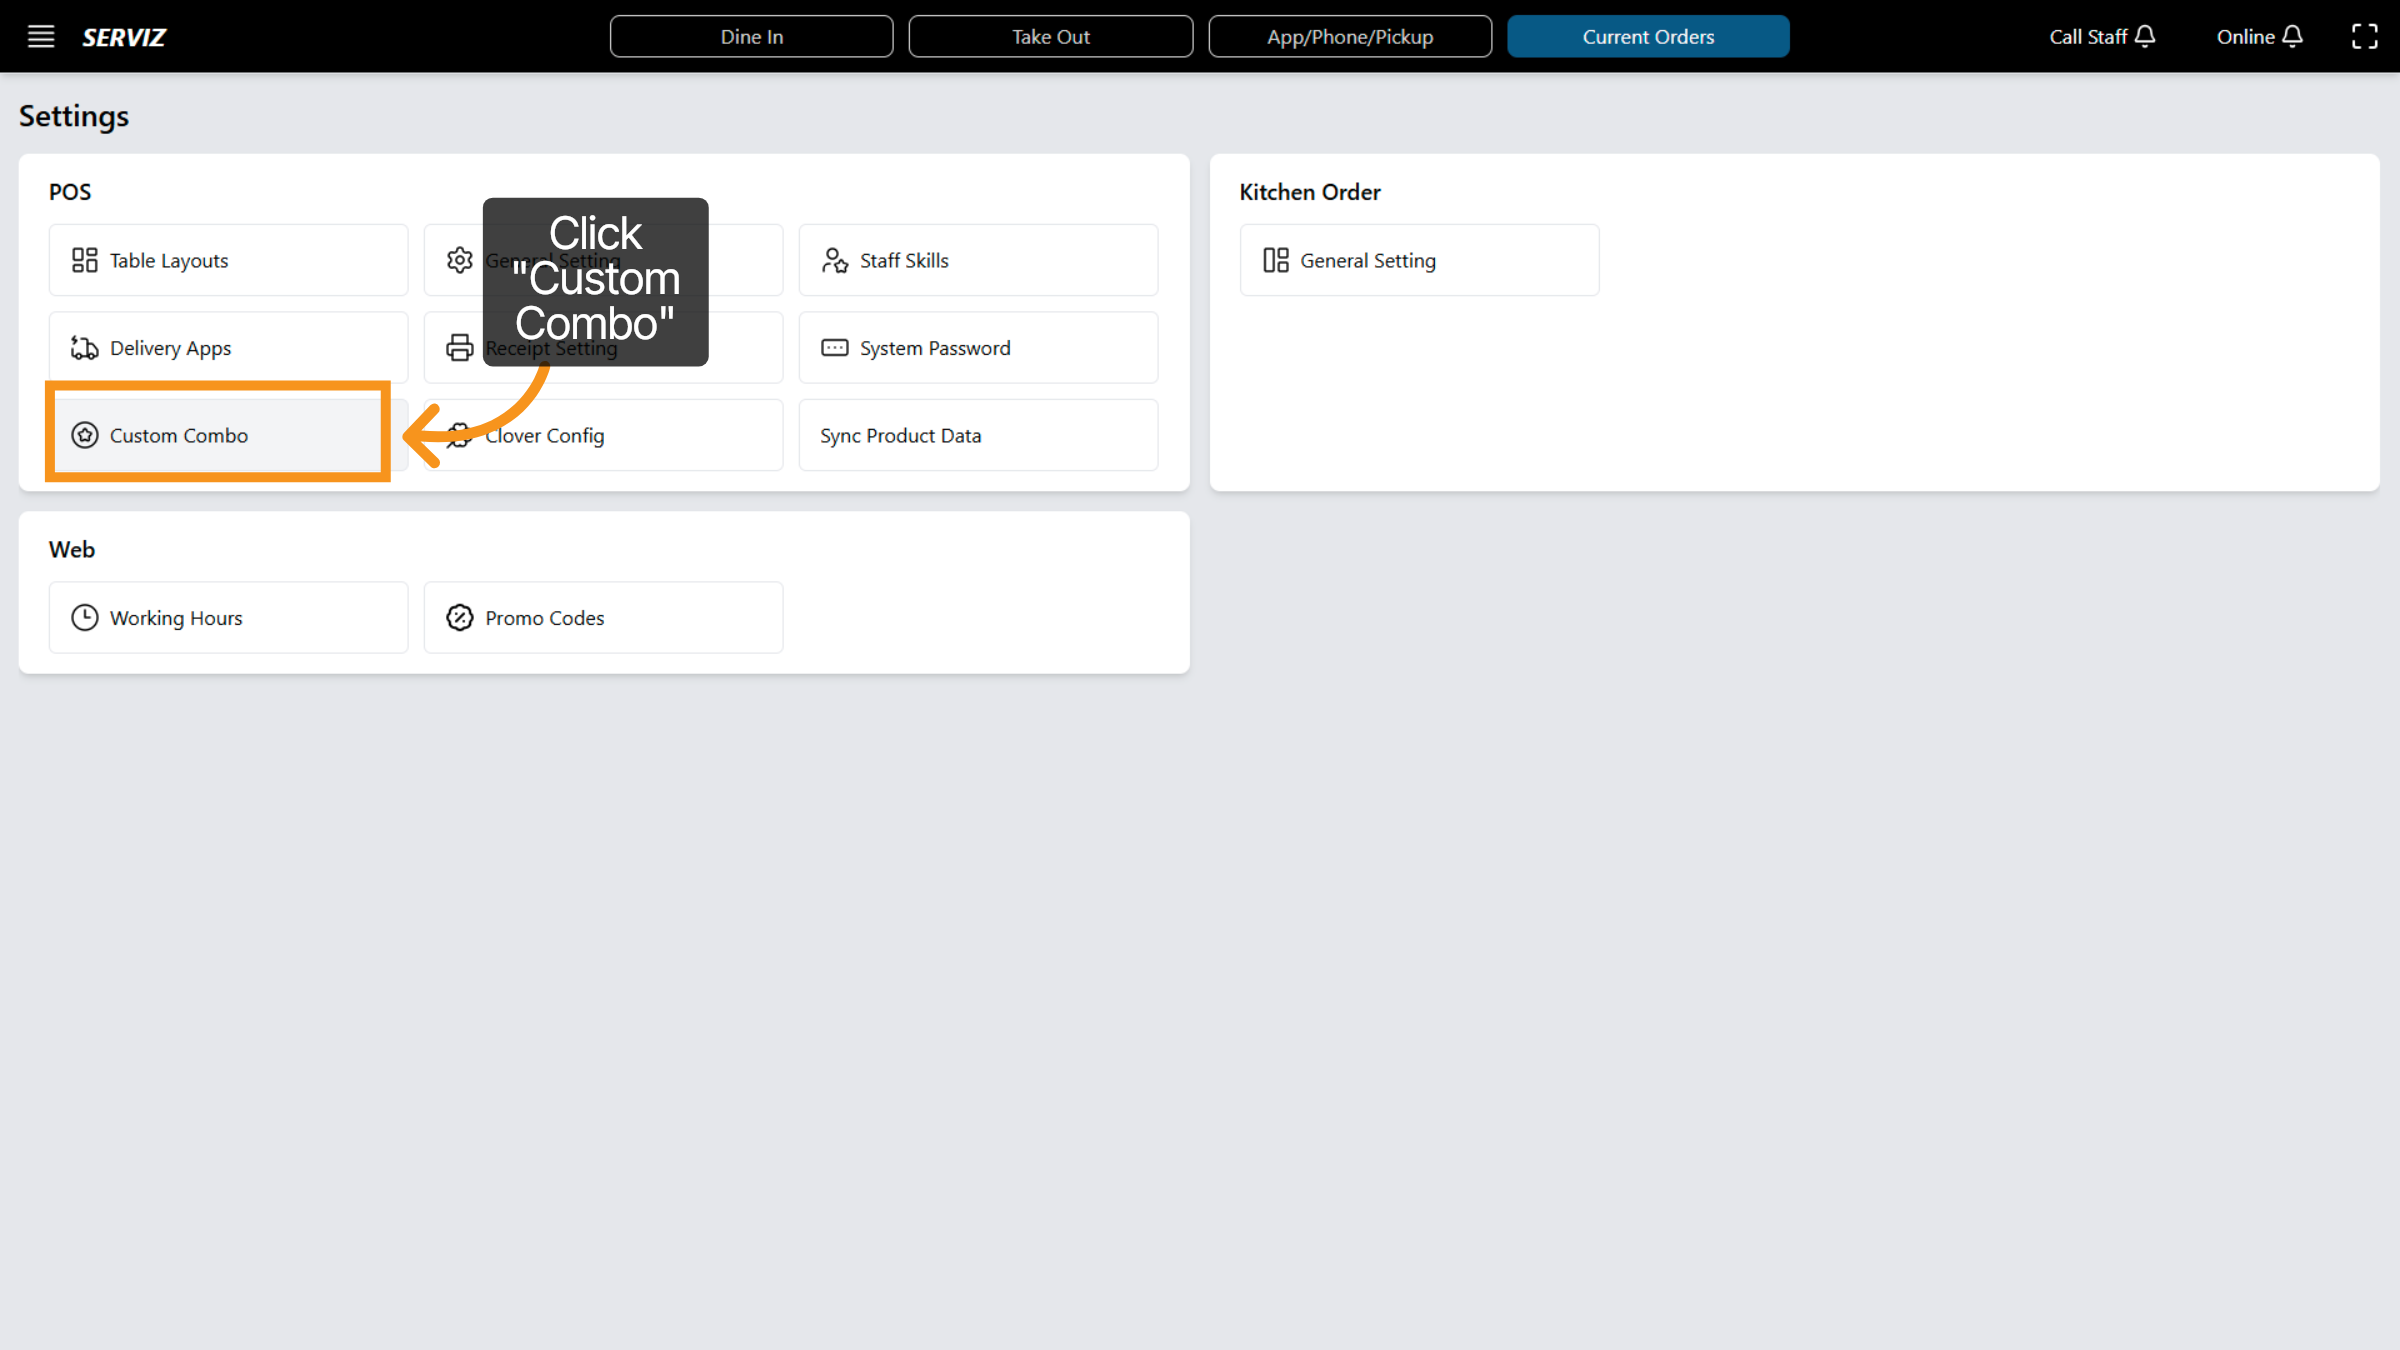
25. Open Custom Combo
Click Custom Combo to create or modify combo meal options.
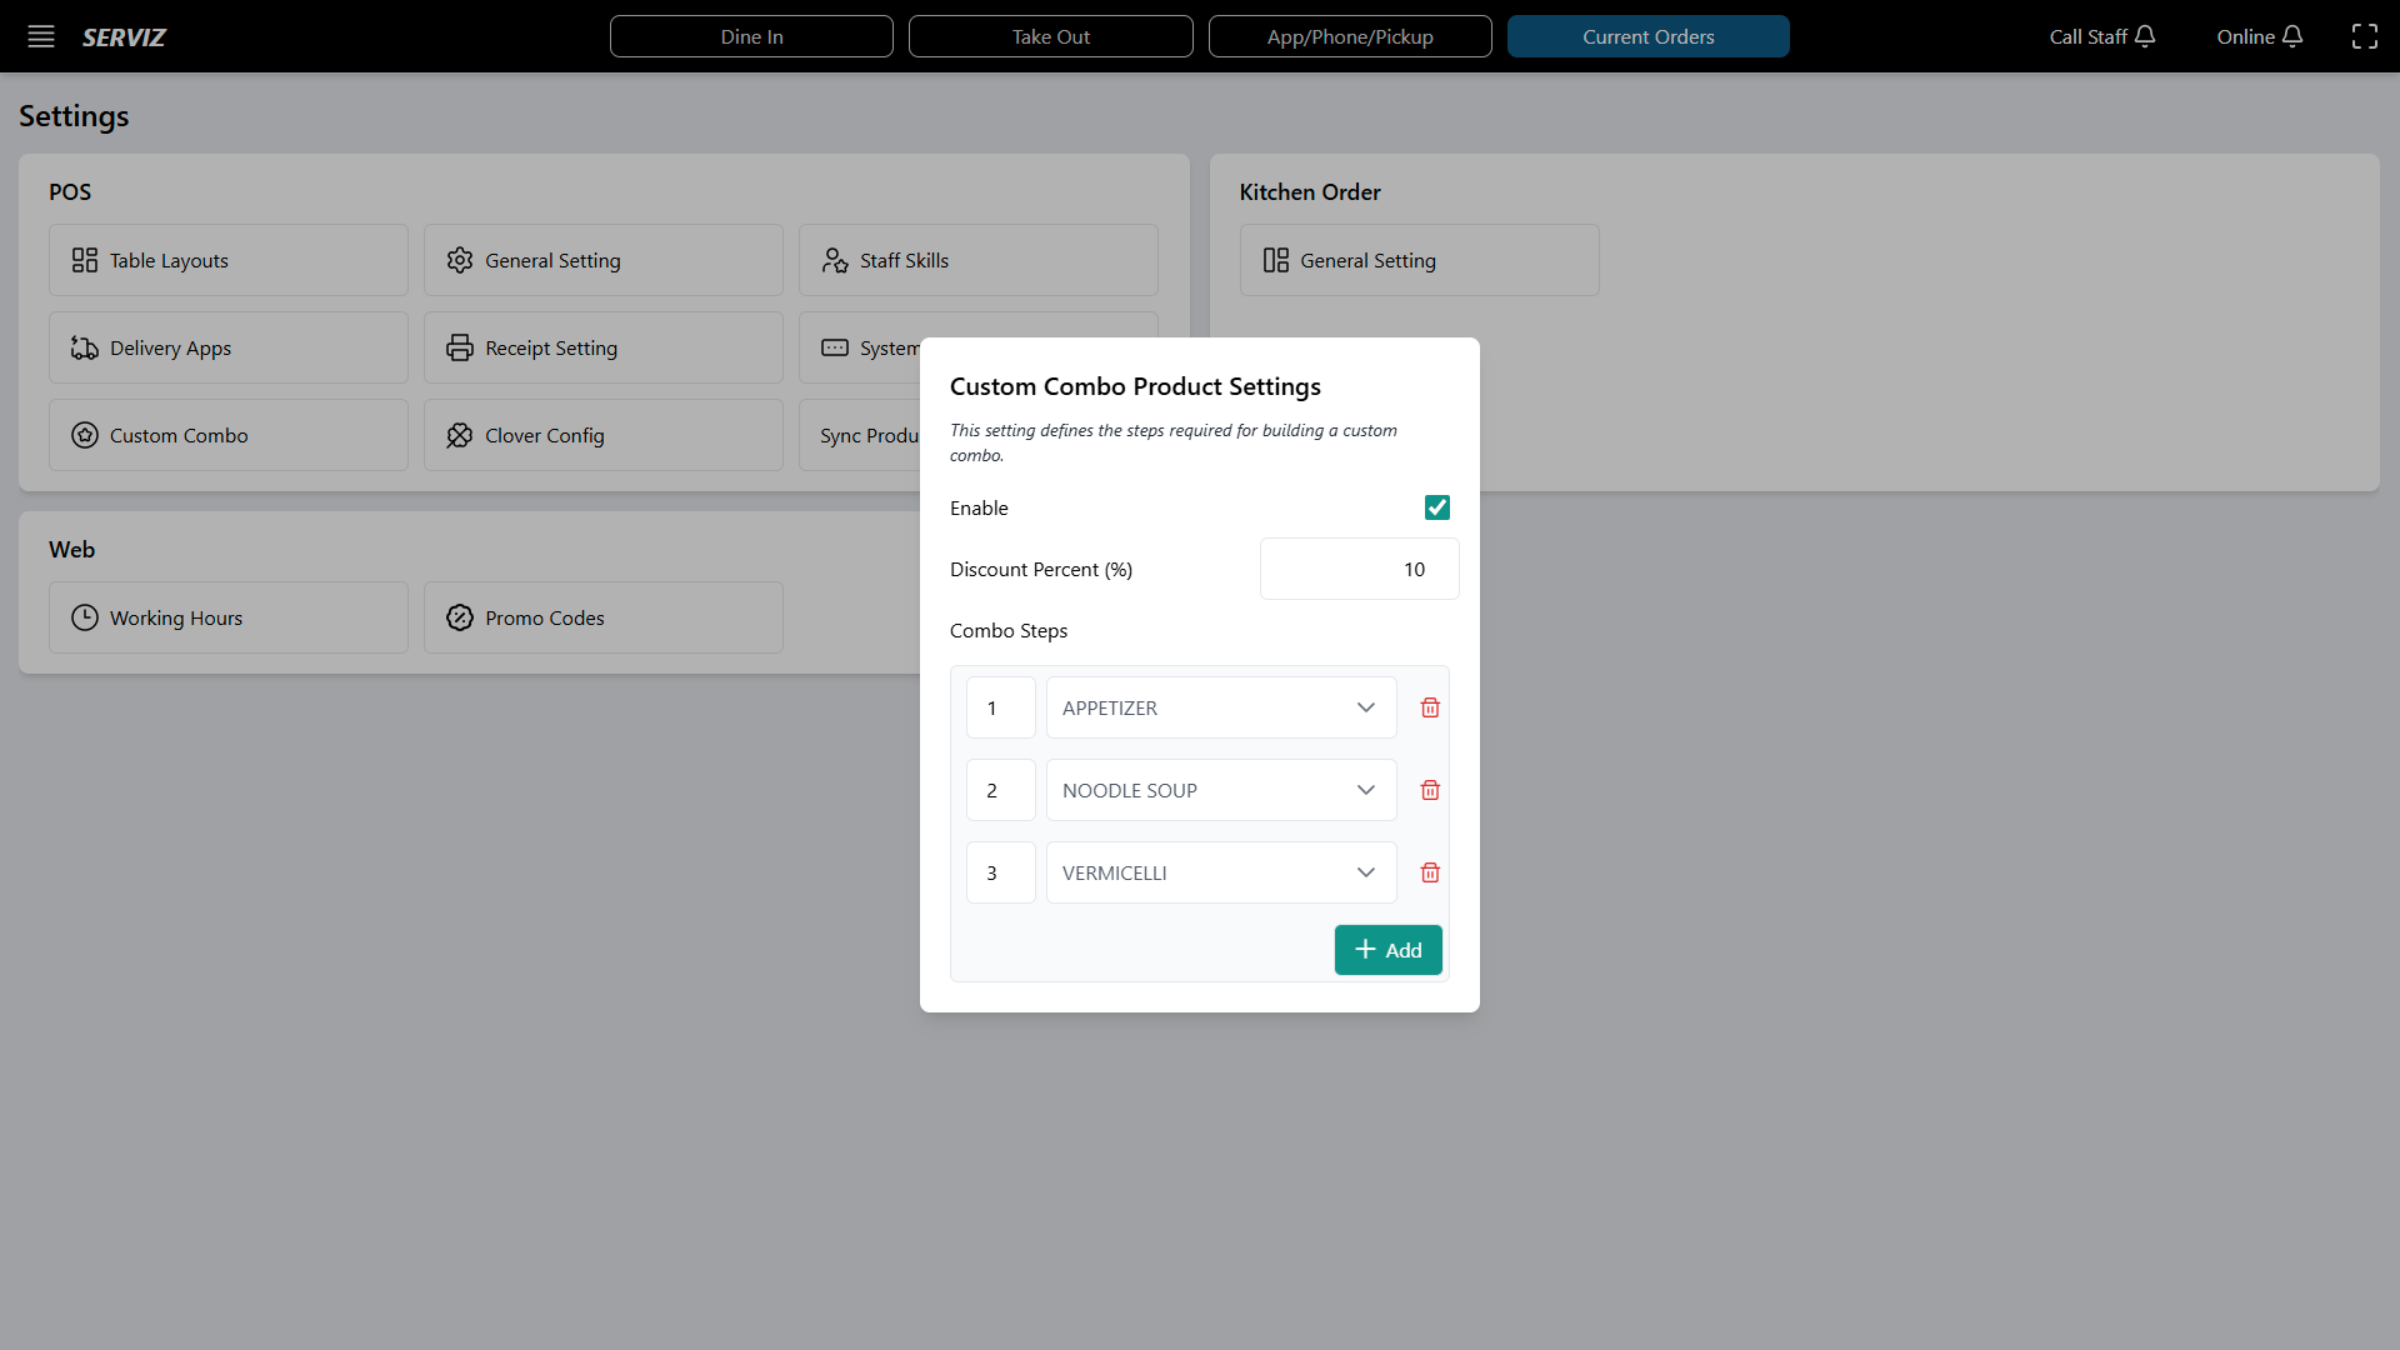
26. Add New Combo
Click Add to create a new custom combo for sale.
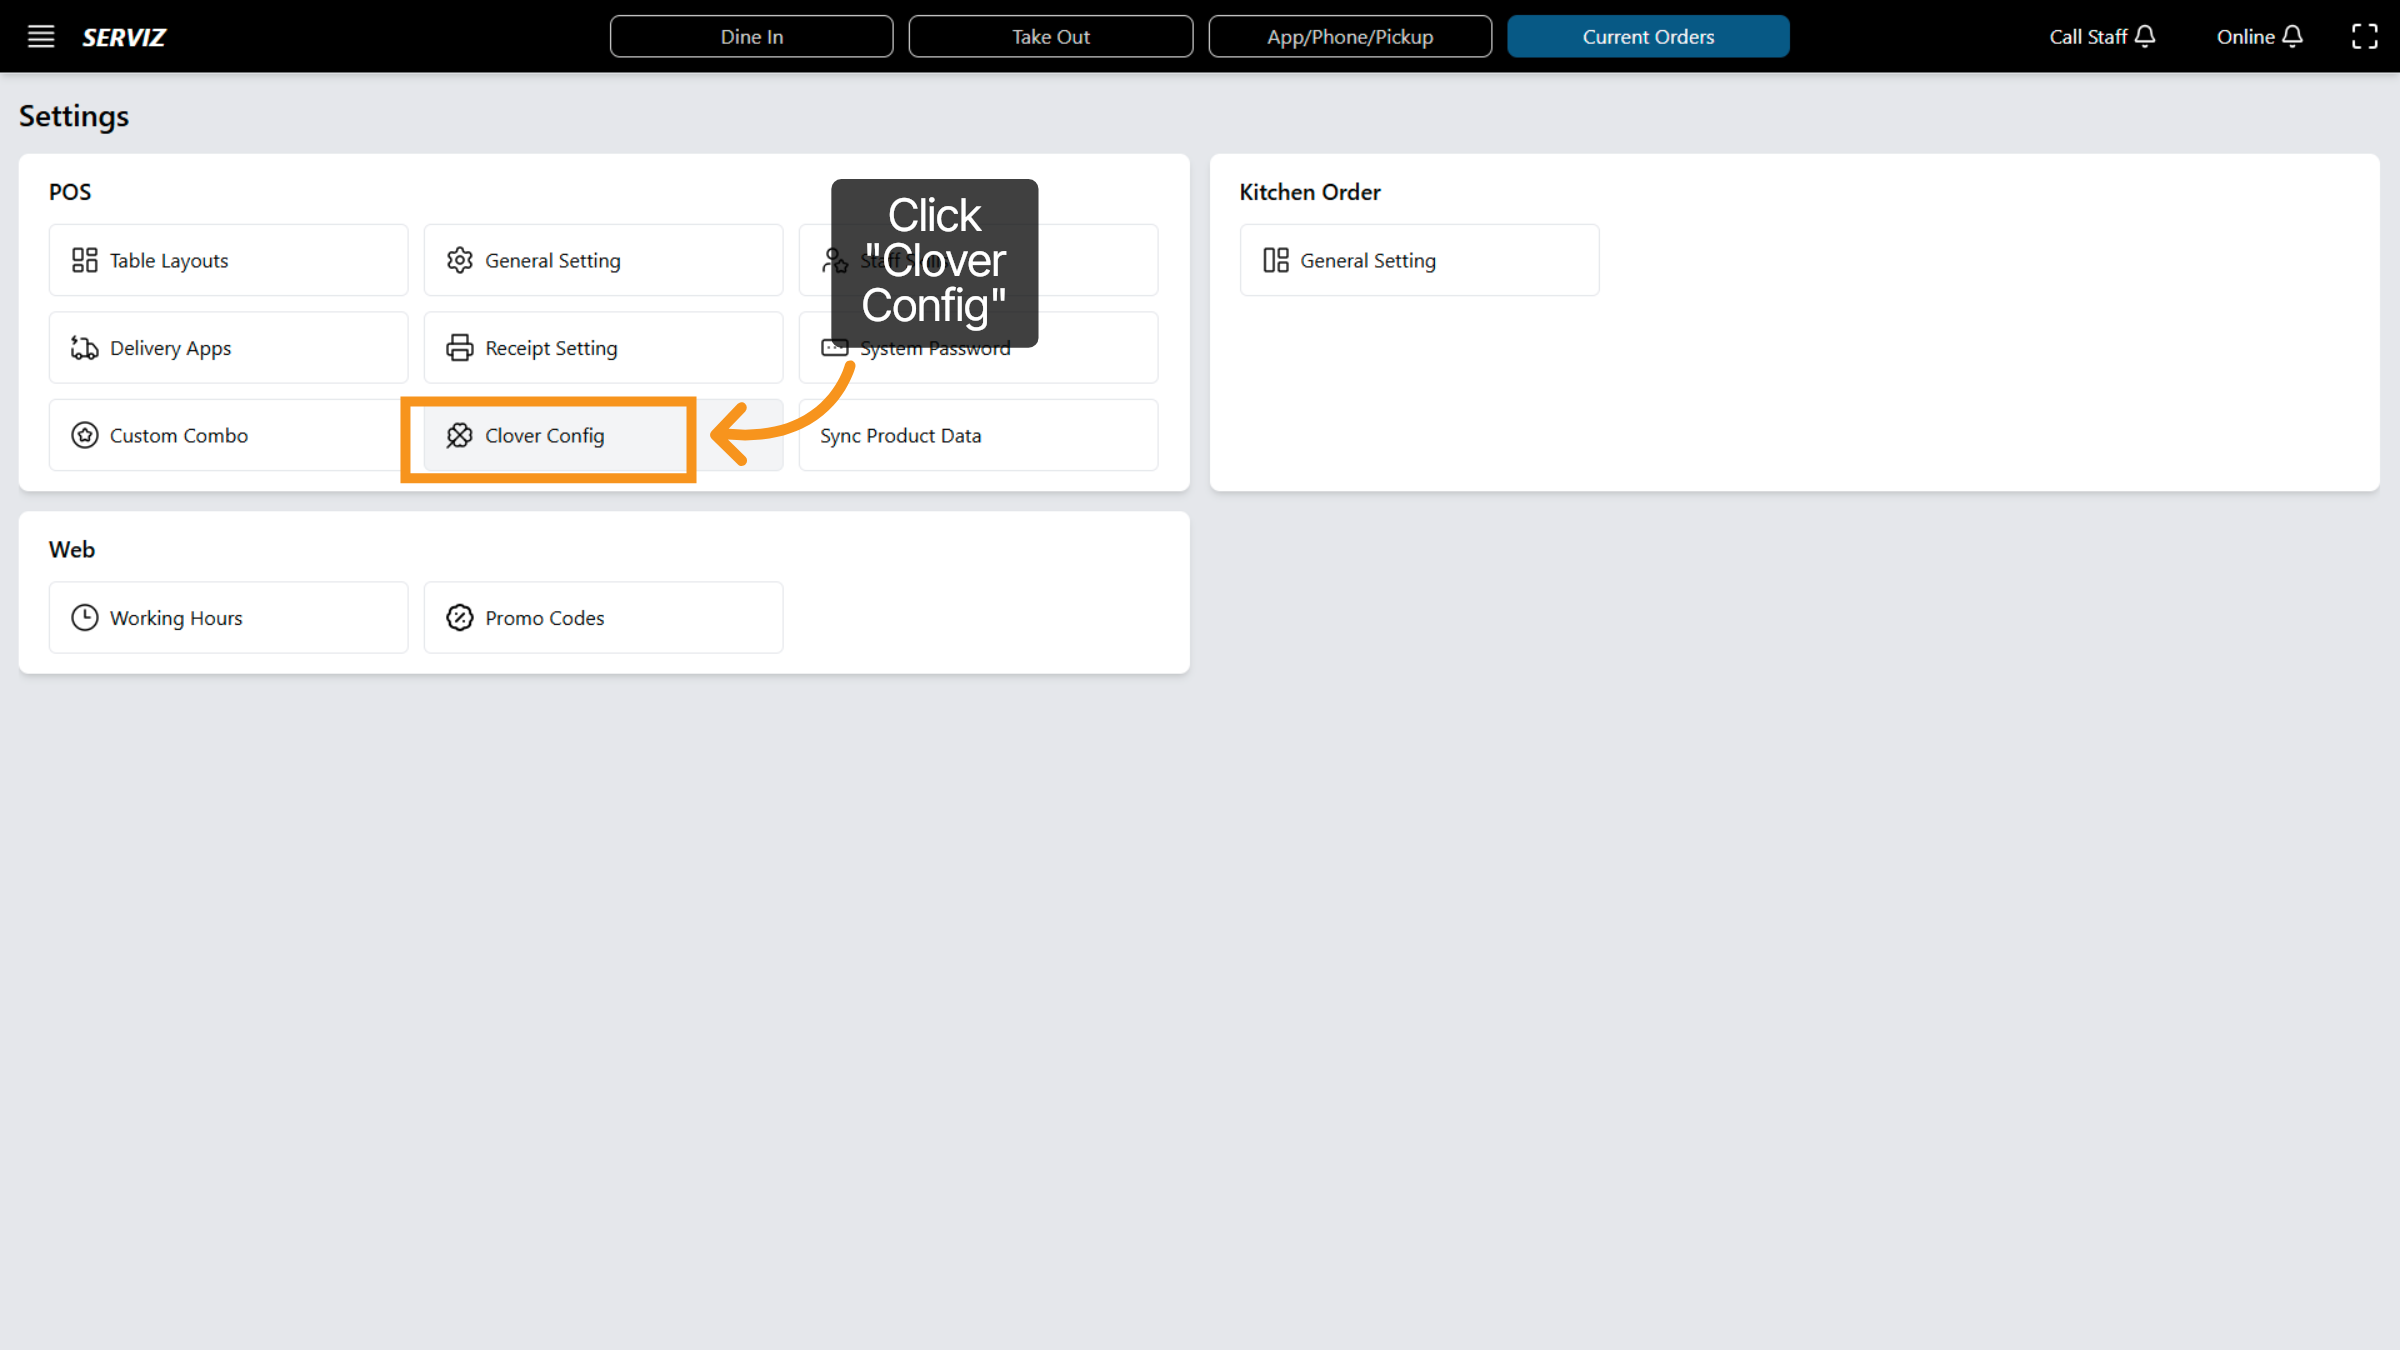
27. Select Clover Config
Click "Clover Config" to set up Clover payment system integration.
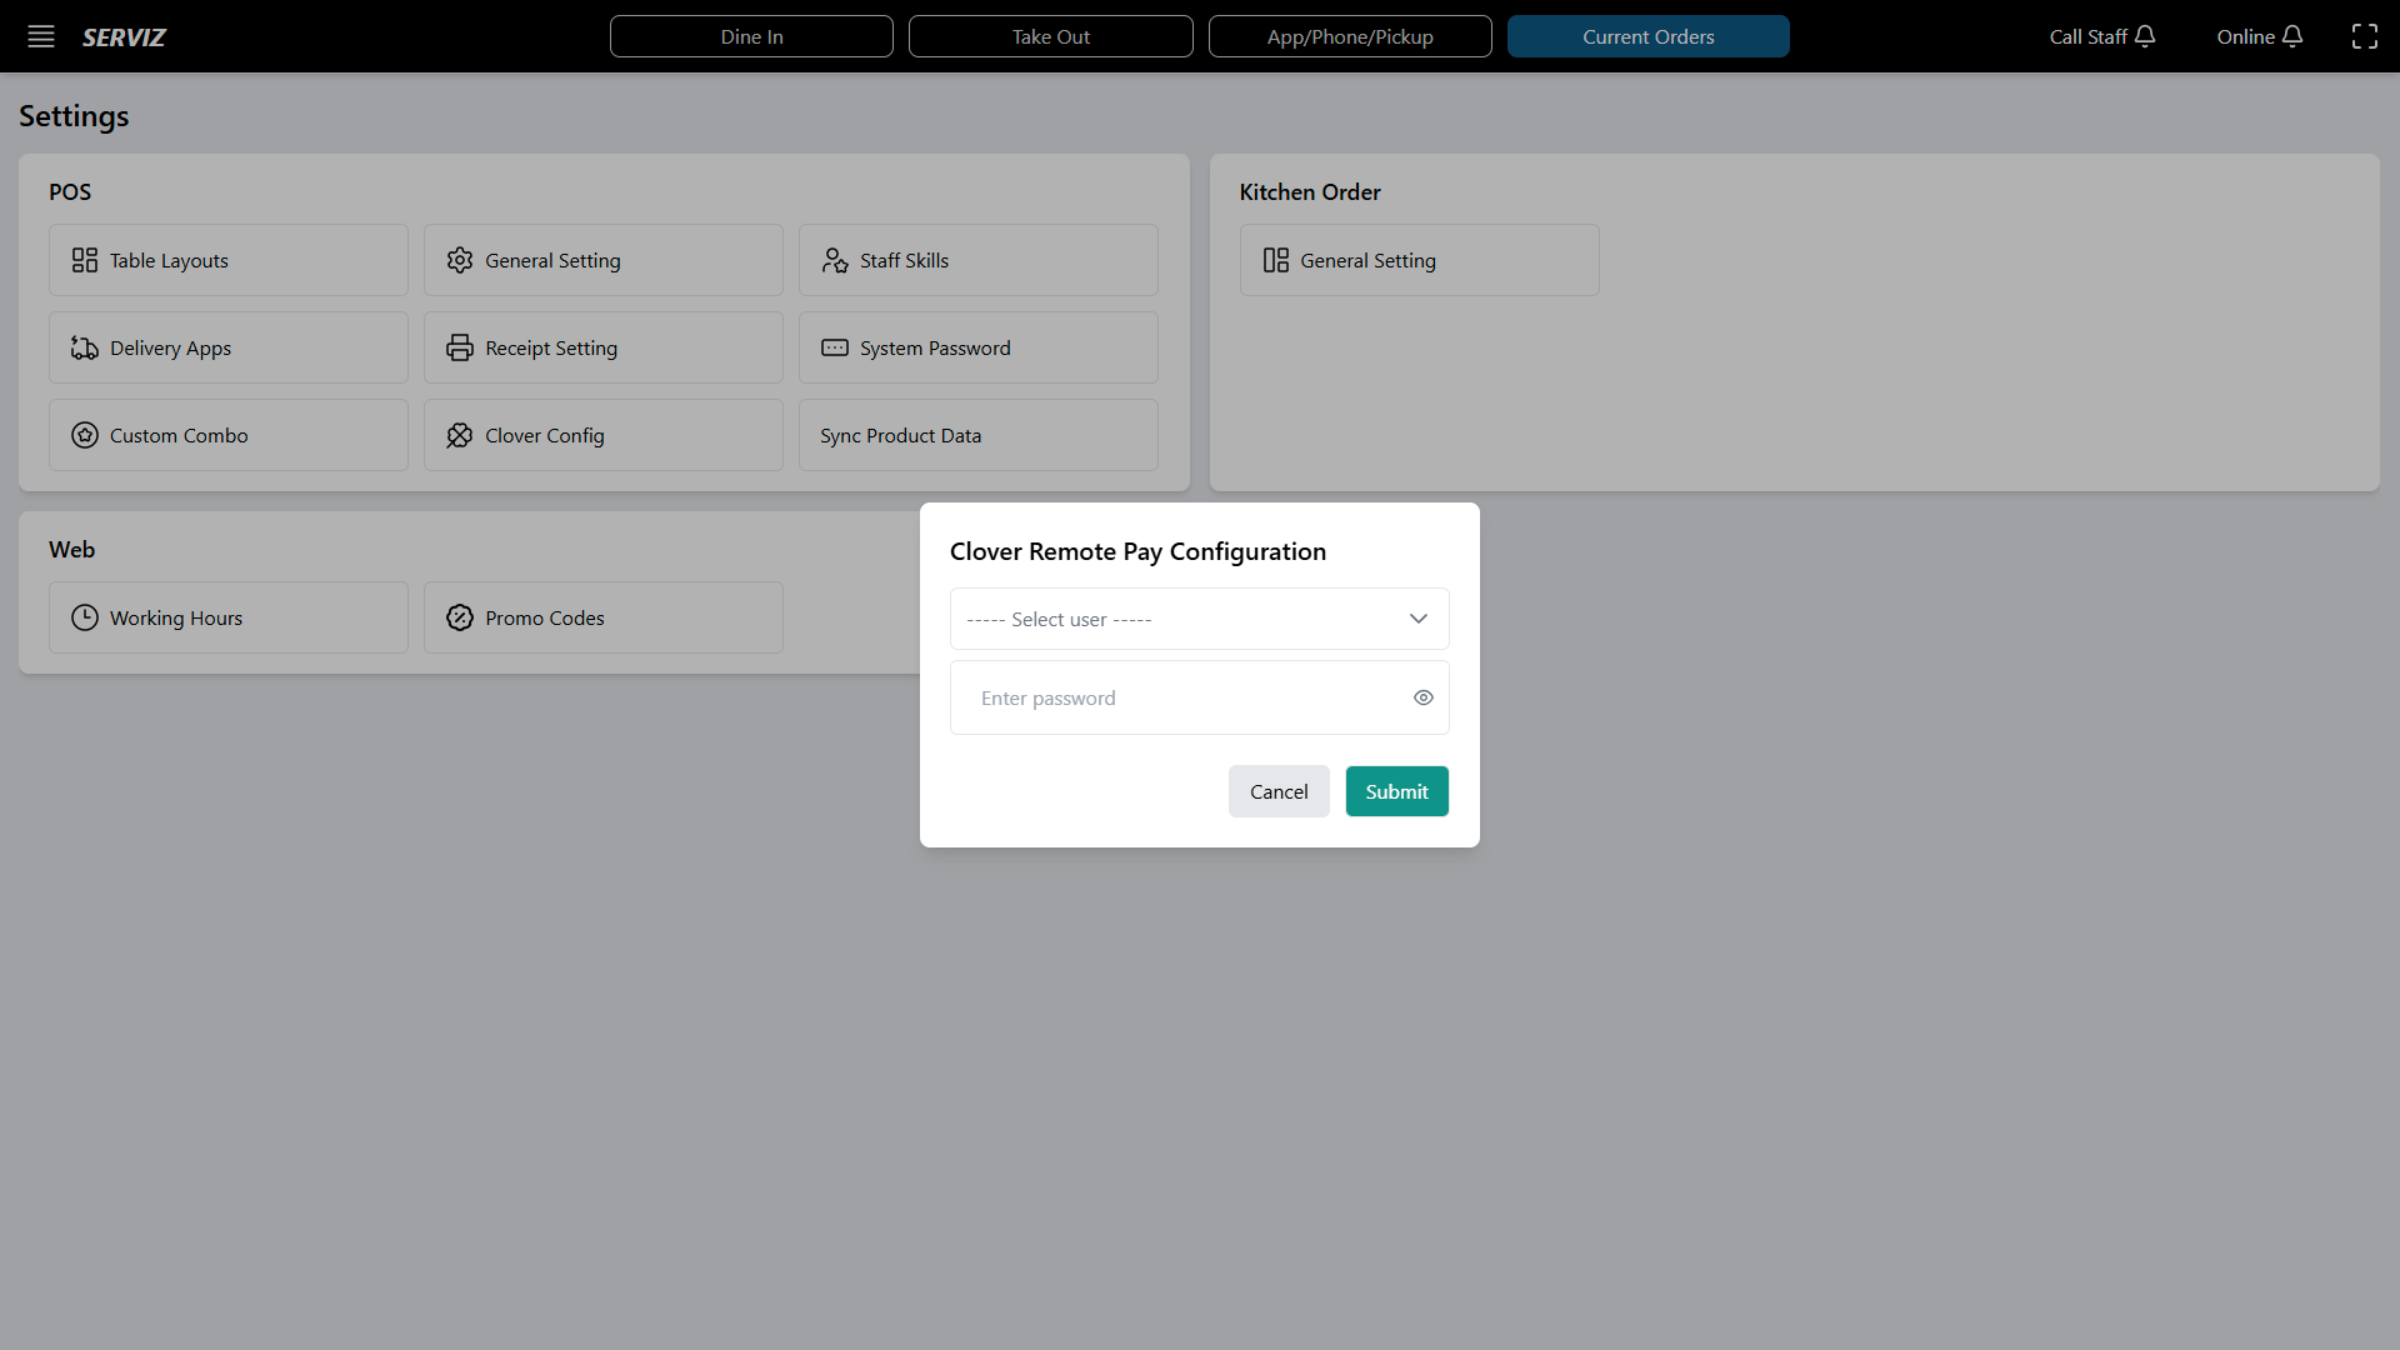
28. Interact with Clover Config
Click to select a user for Clover configuration settings.
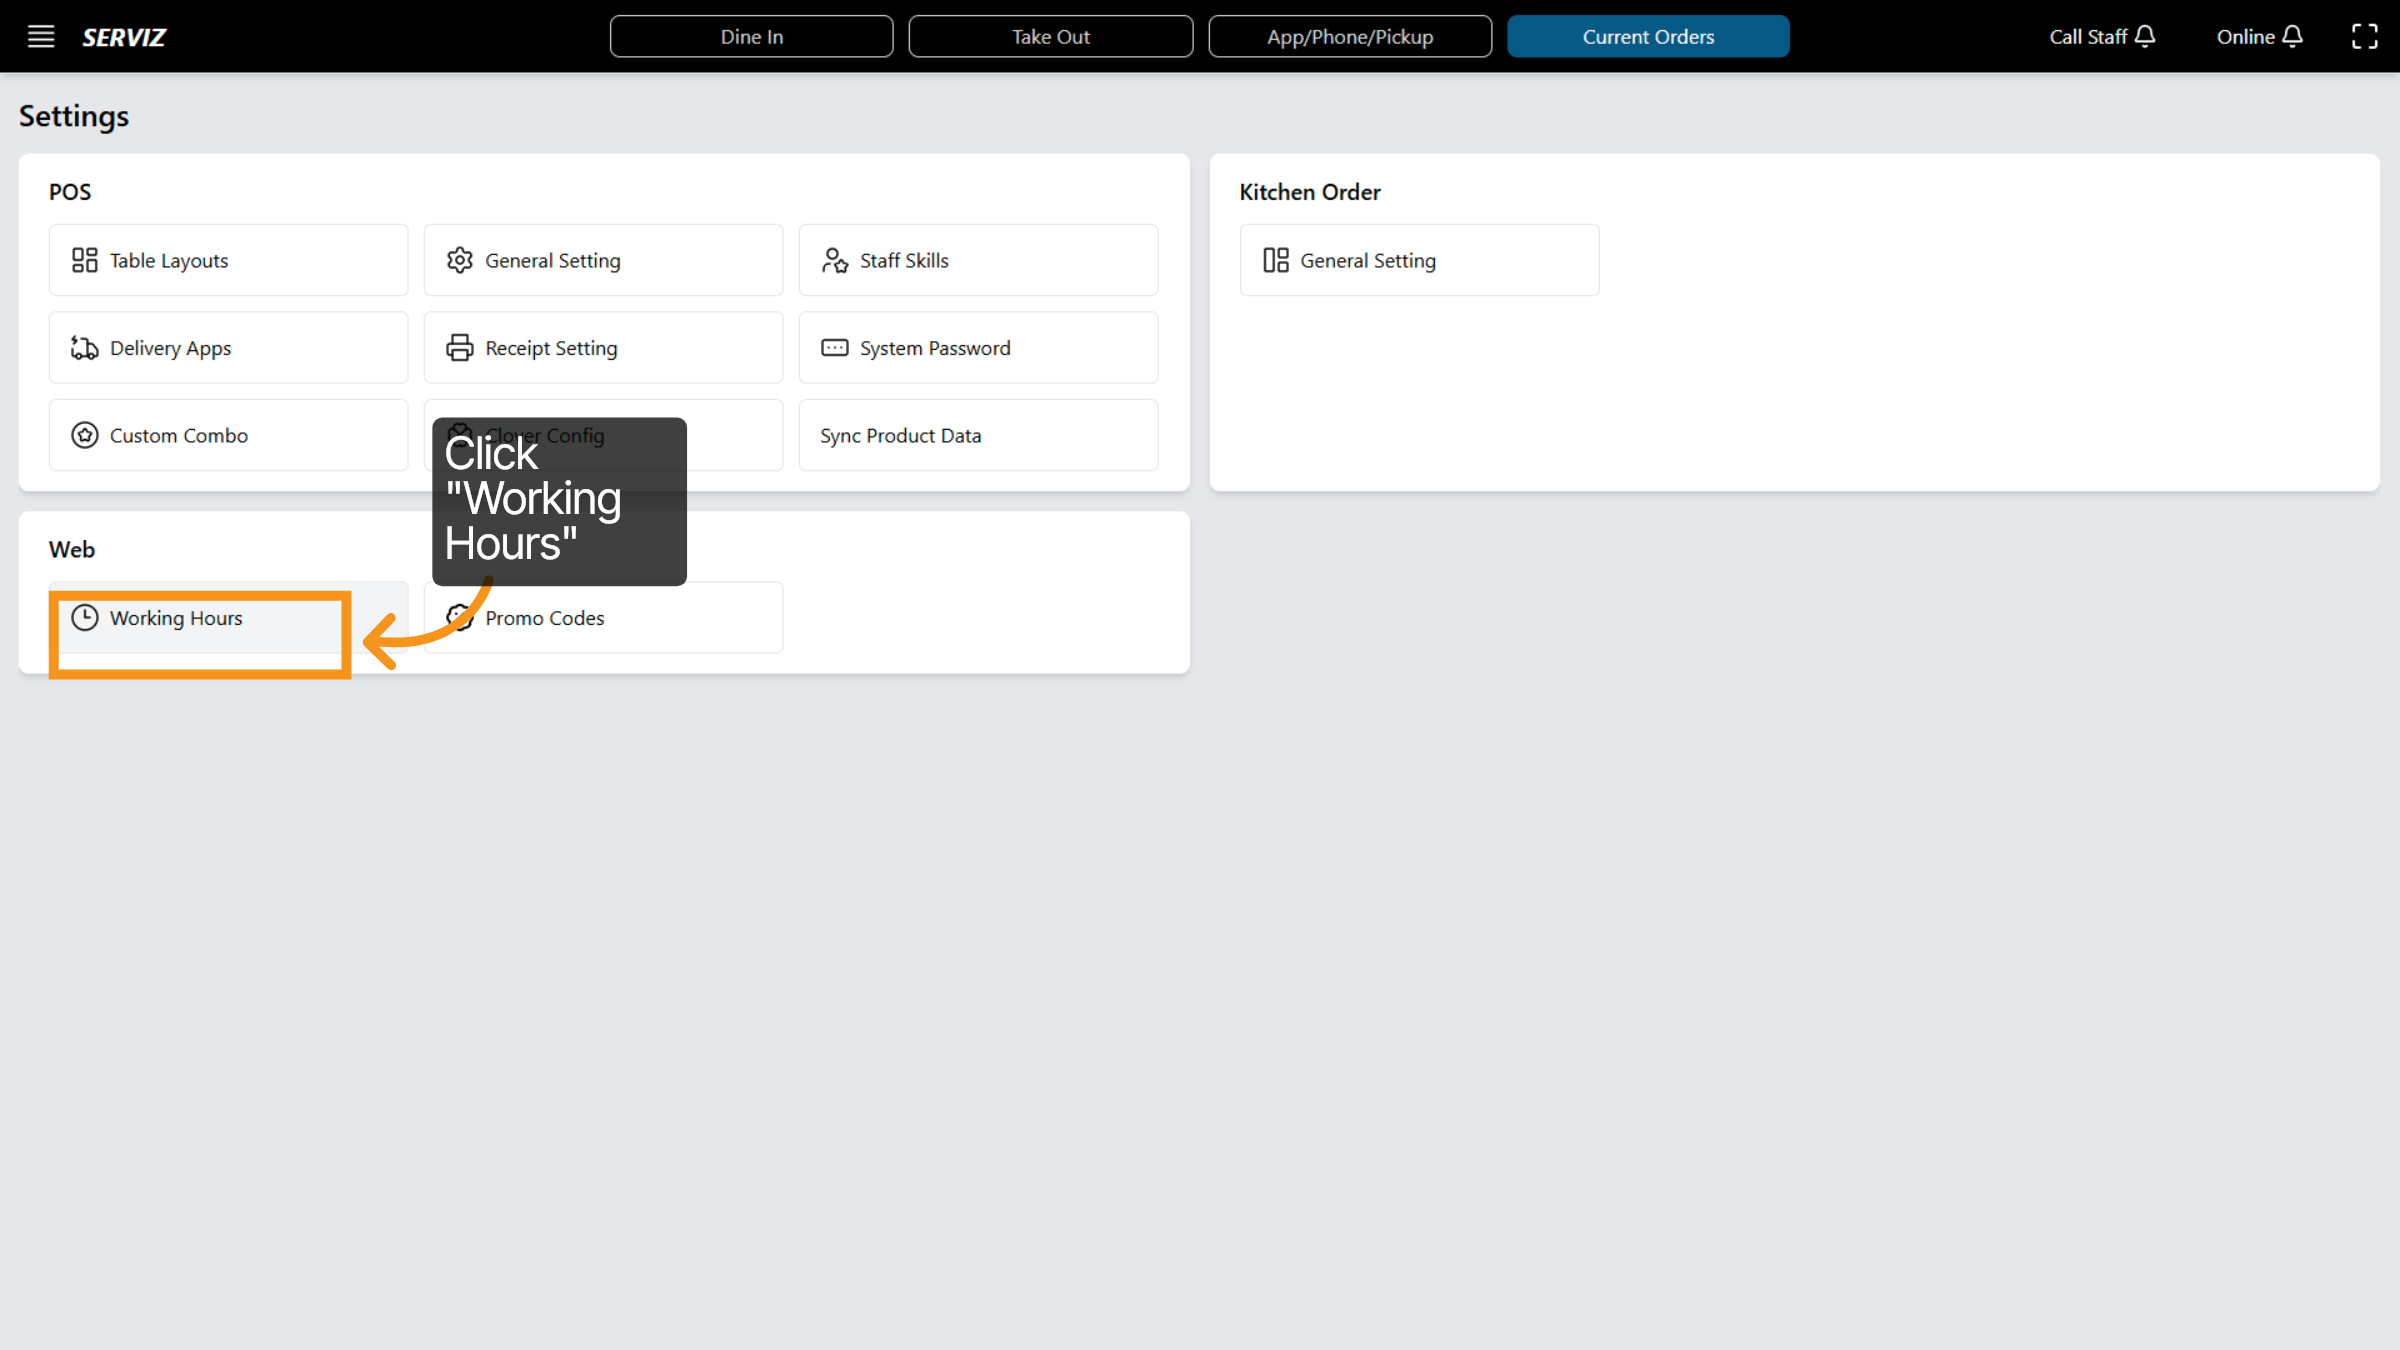
29. Access Working Hours
Click Working Hours to set or modify employee schedules.
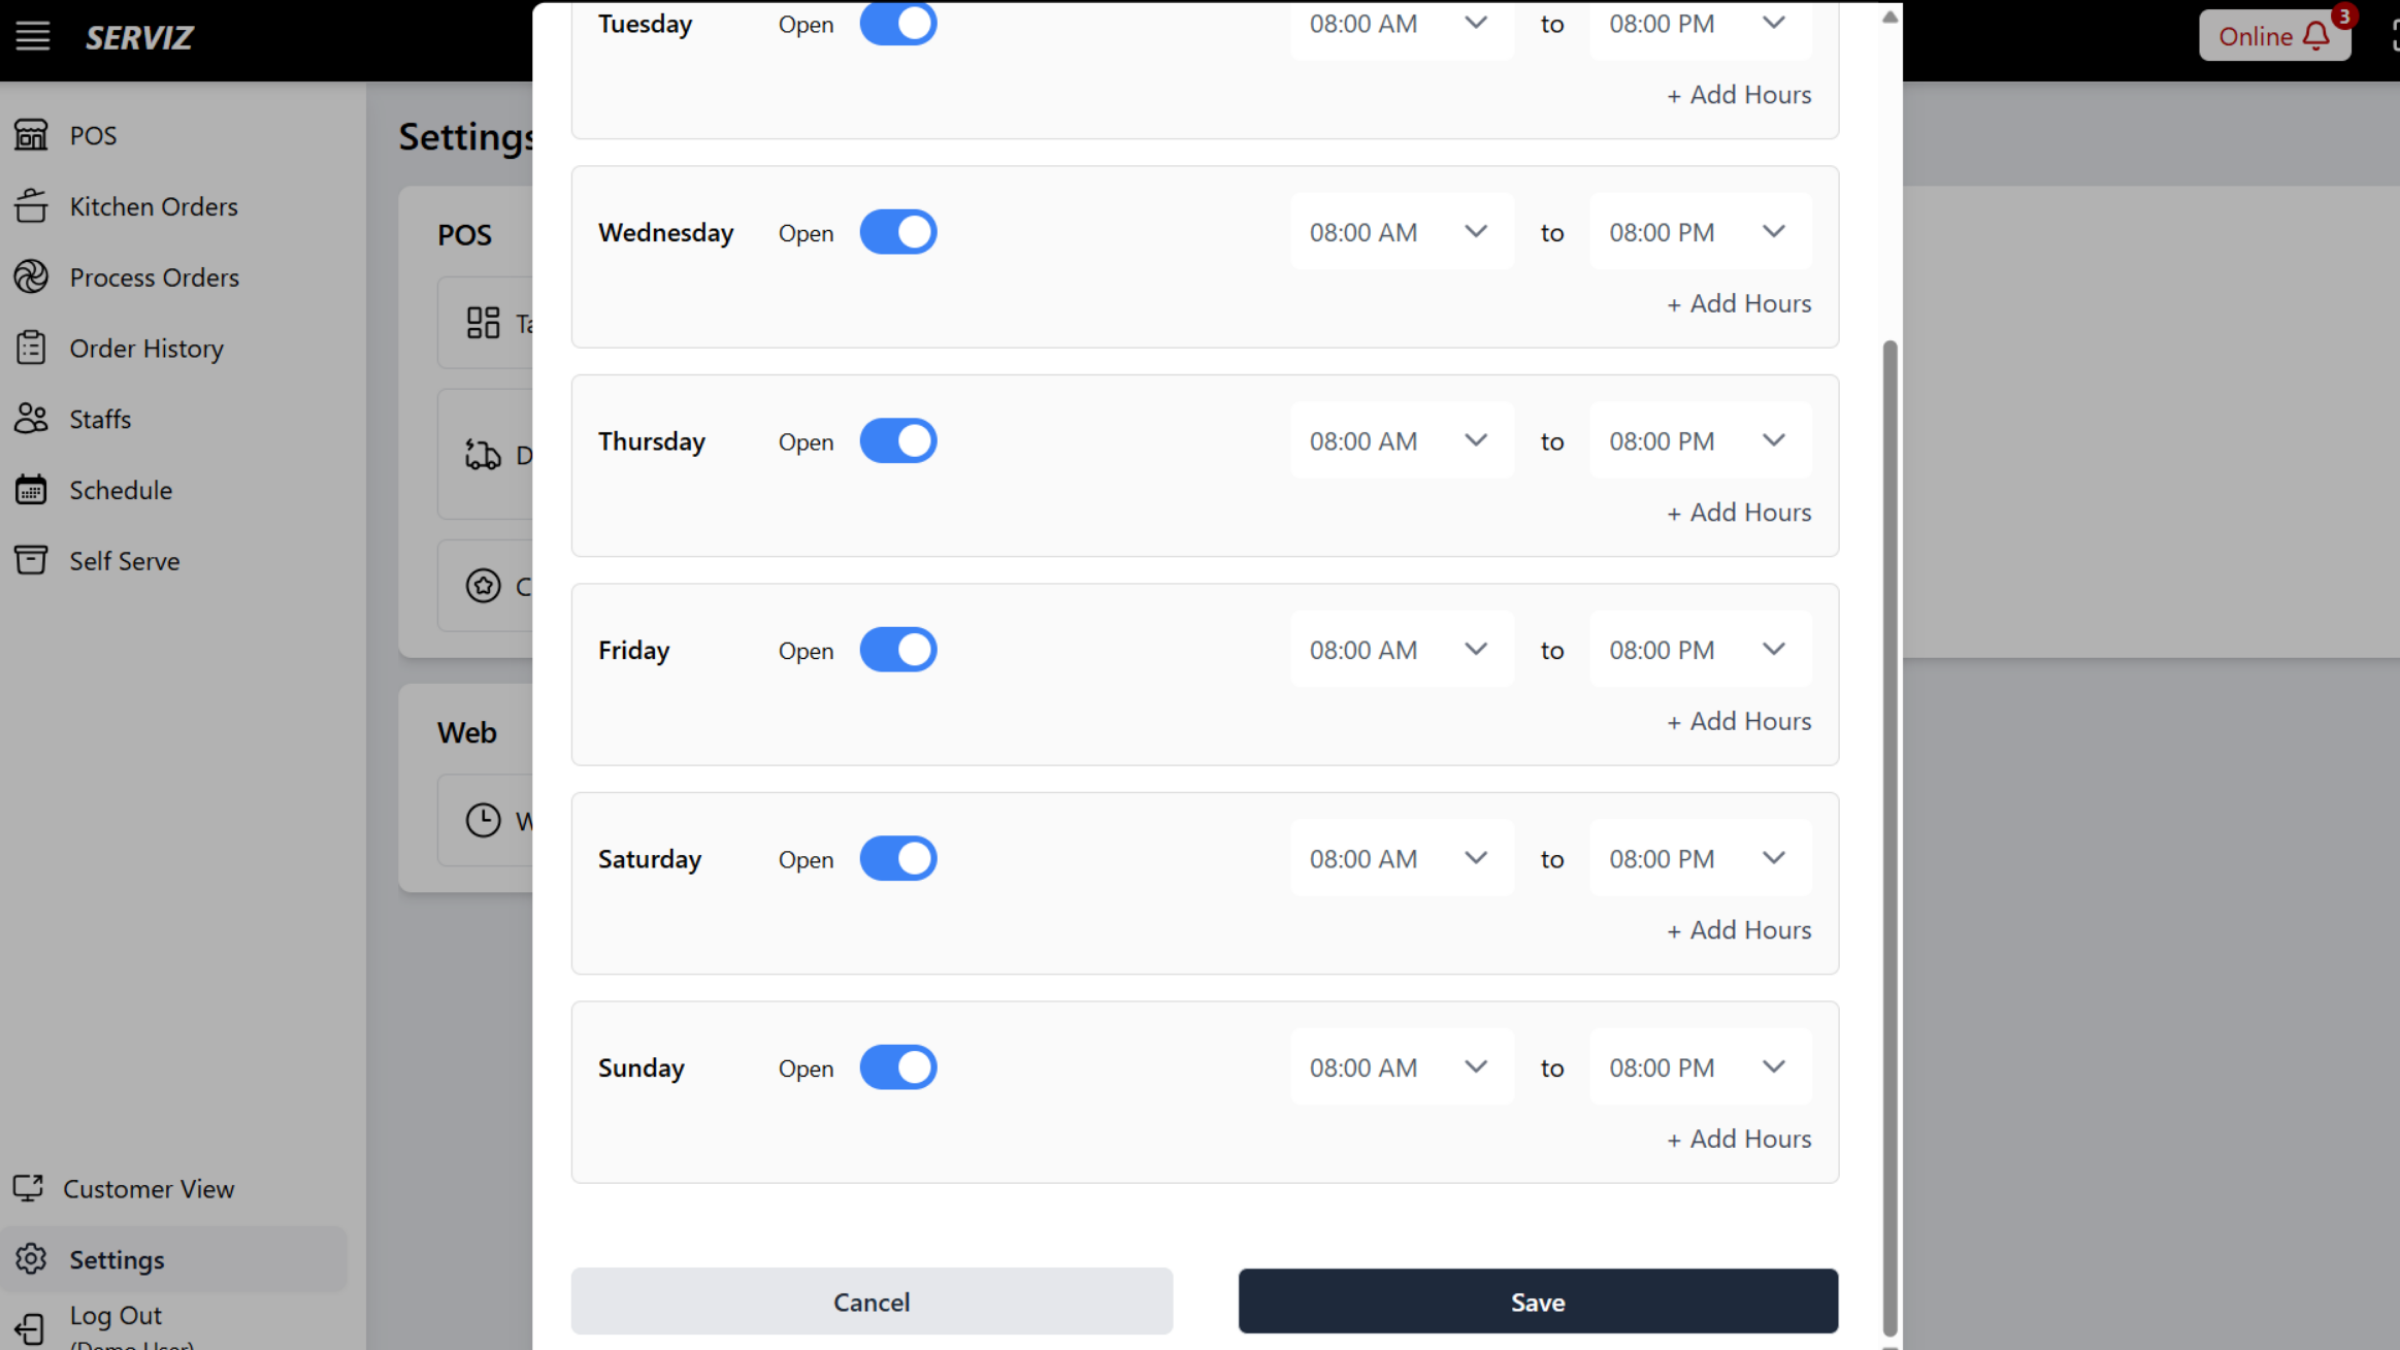
30. Working house Edit
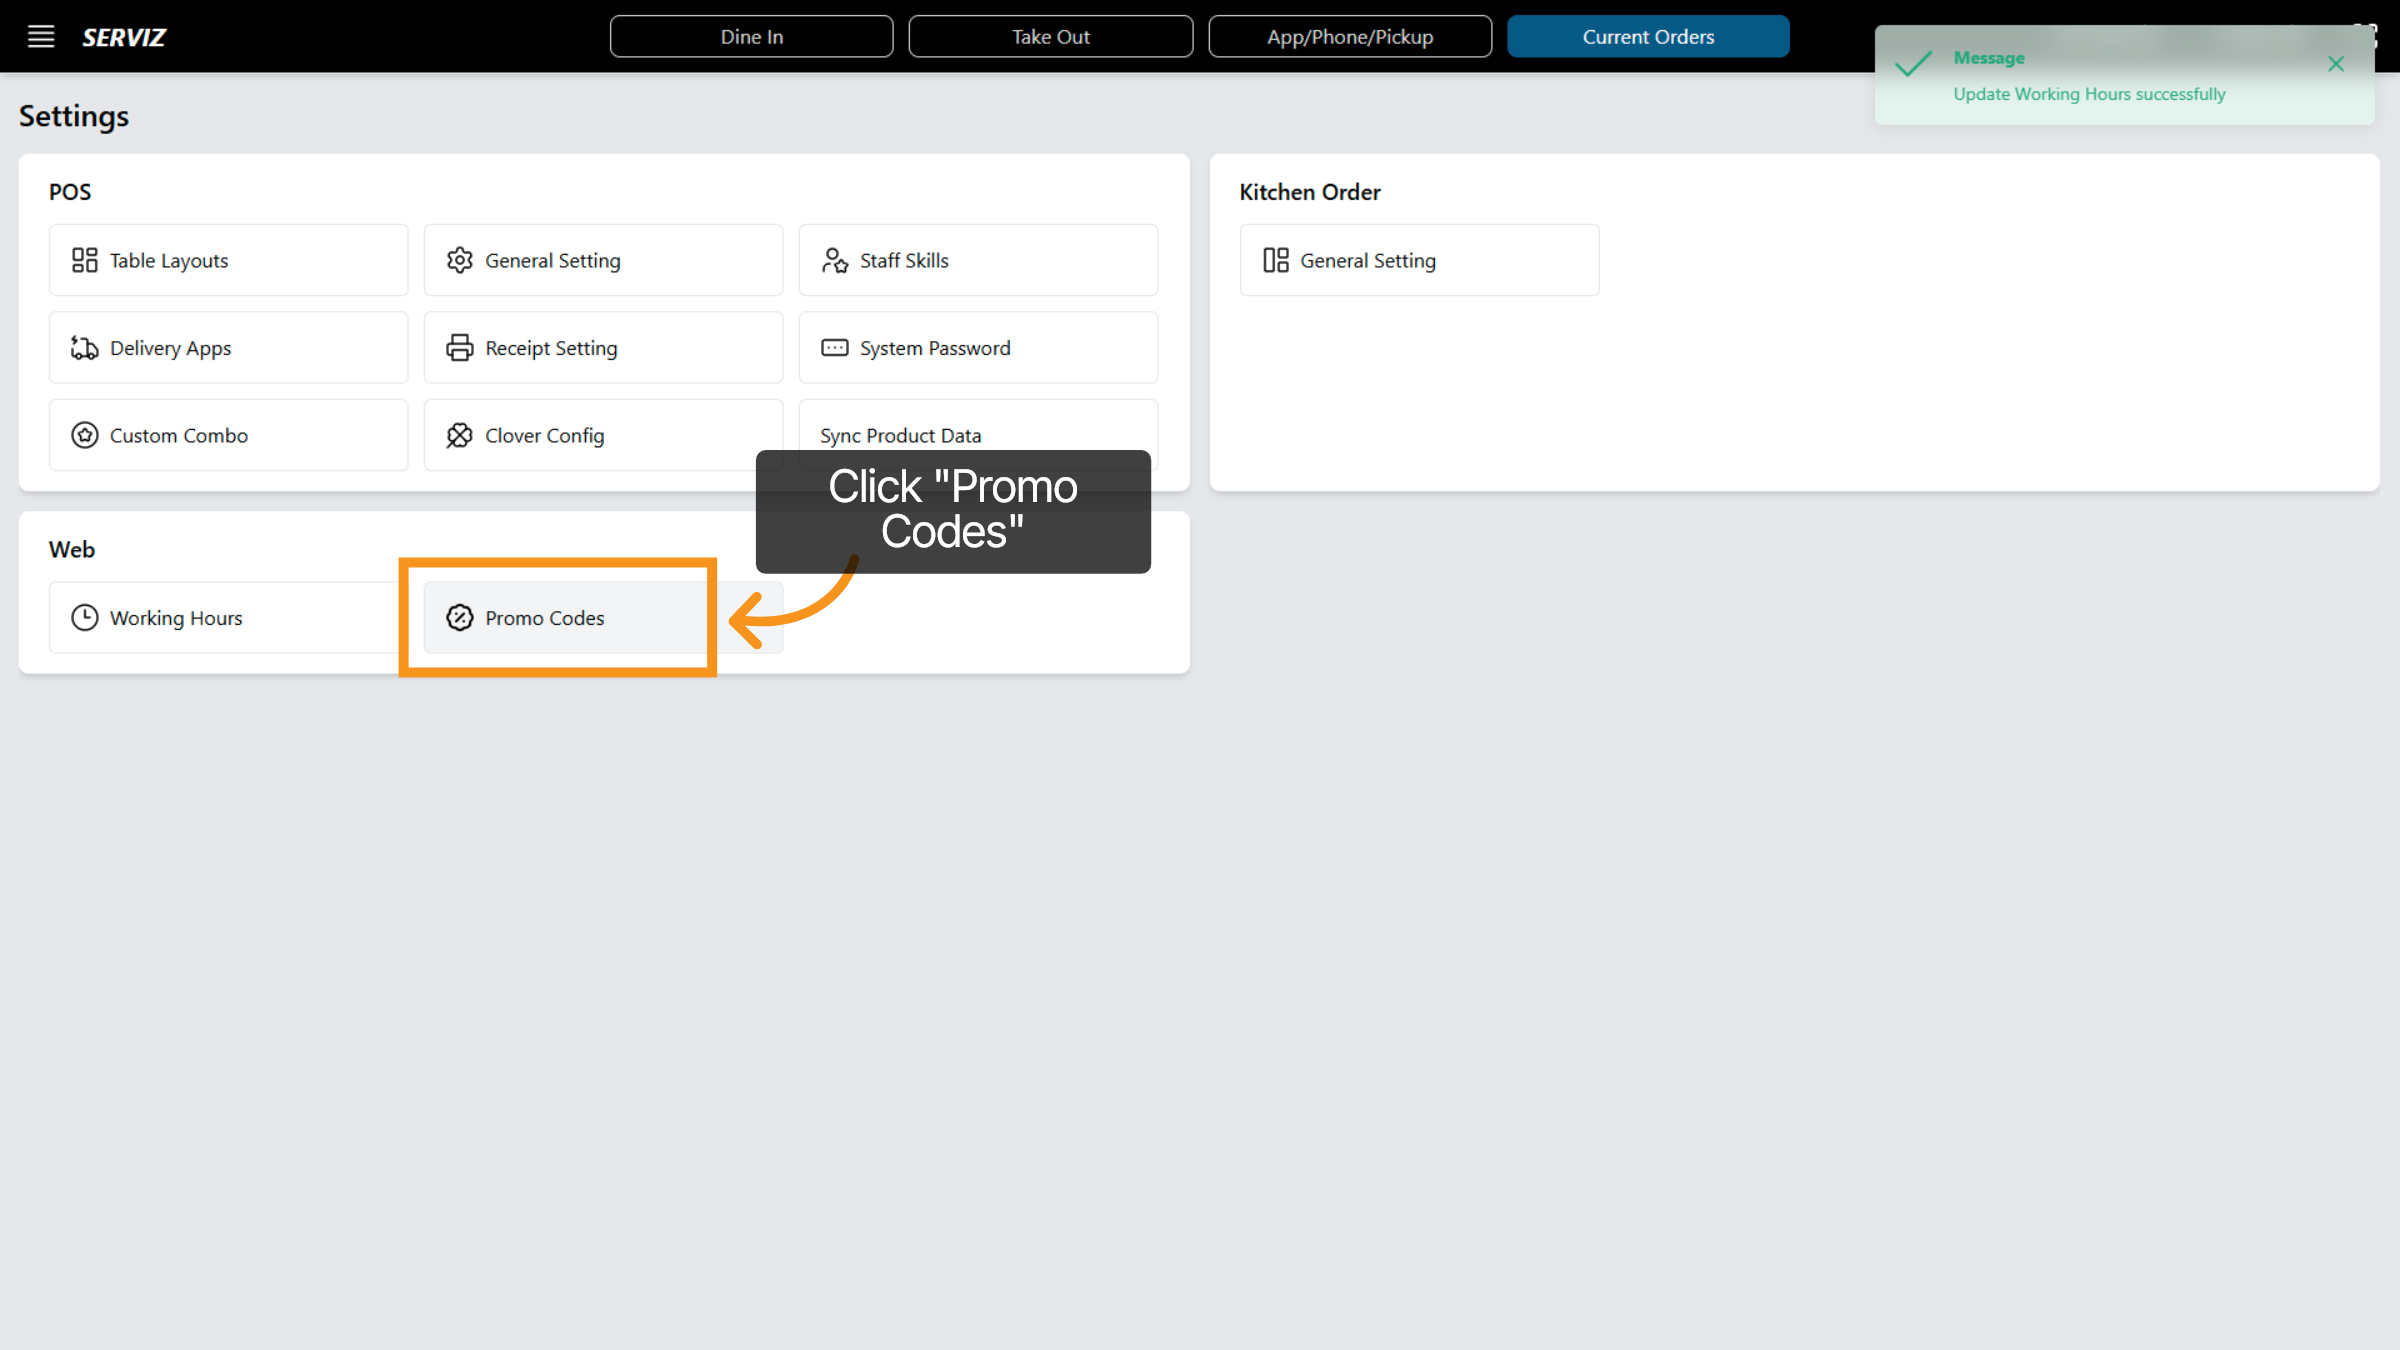
31. Access Promo Codes
Click Promo Codes to manage discount and promotional offers.
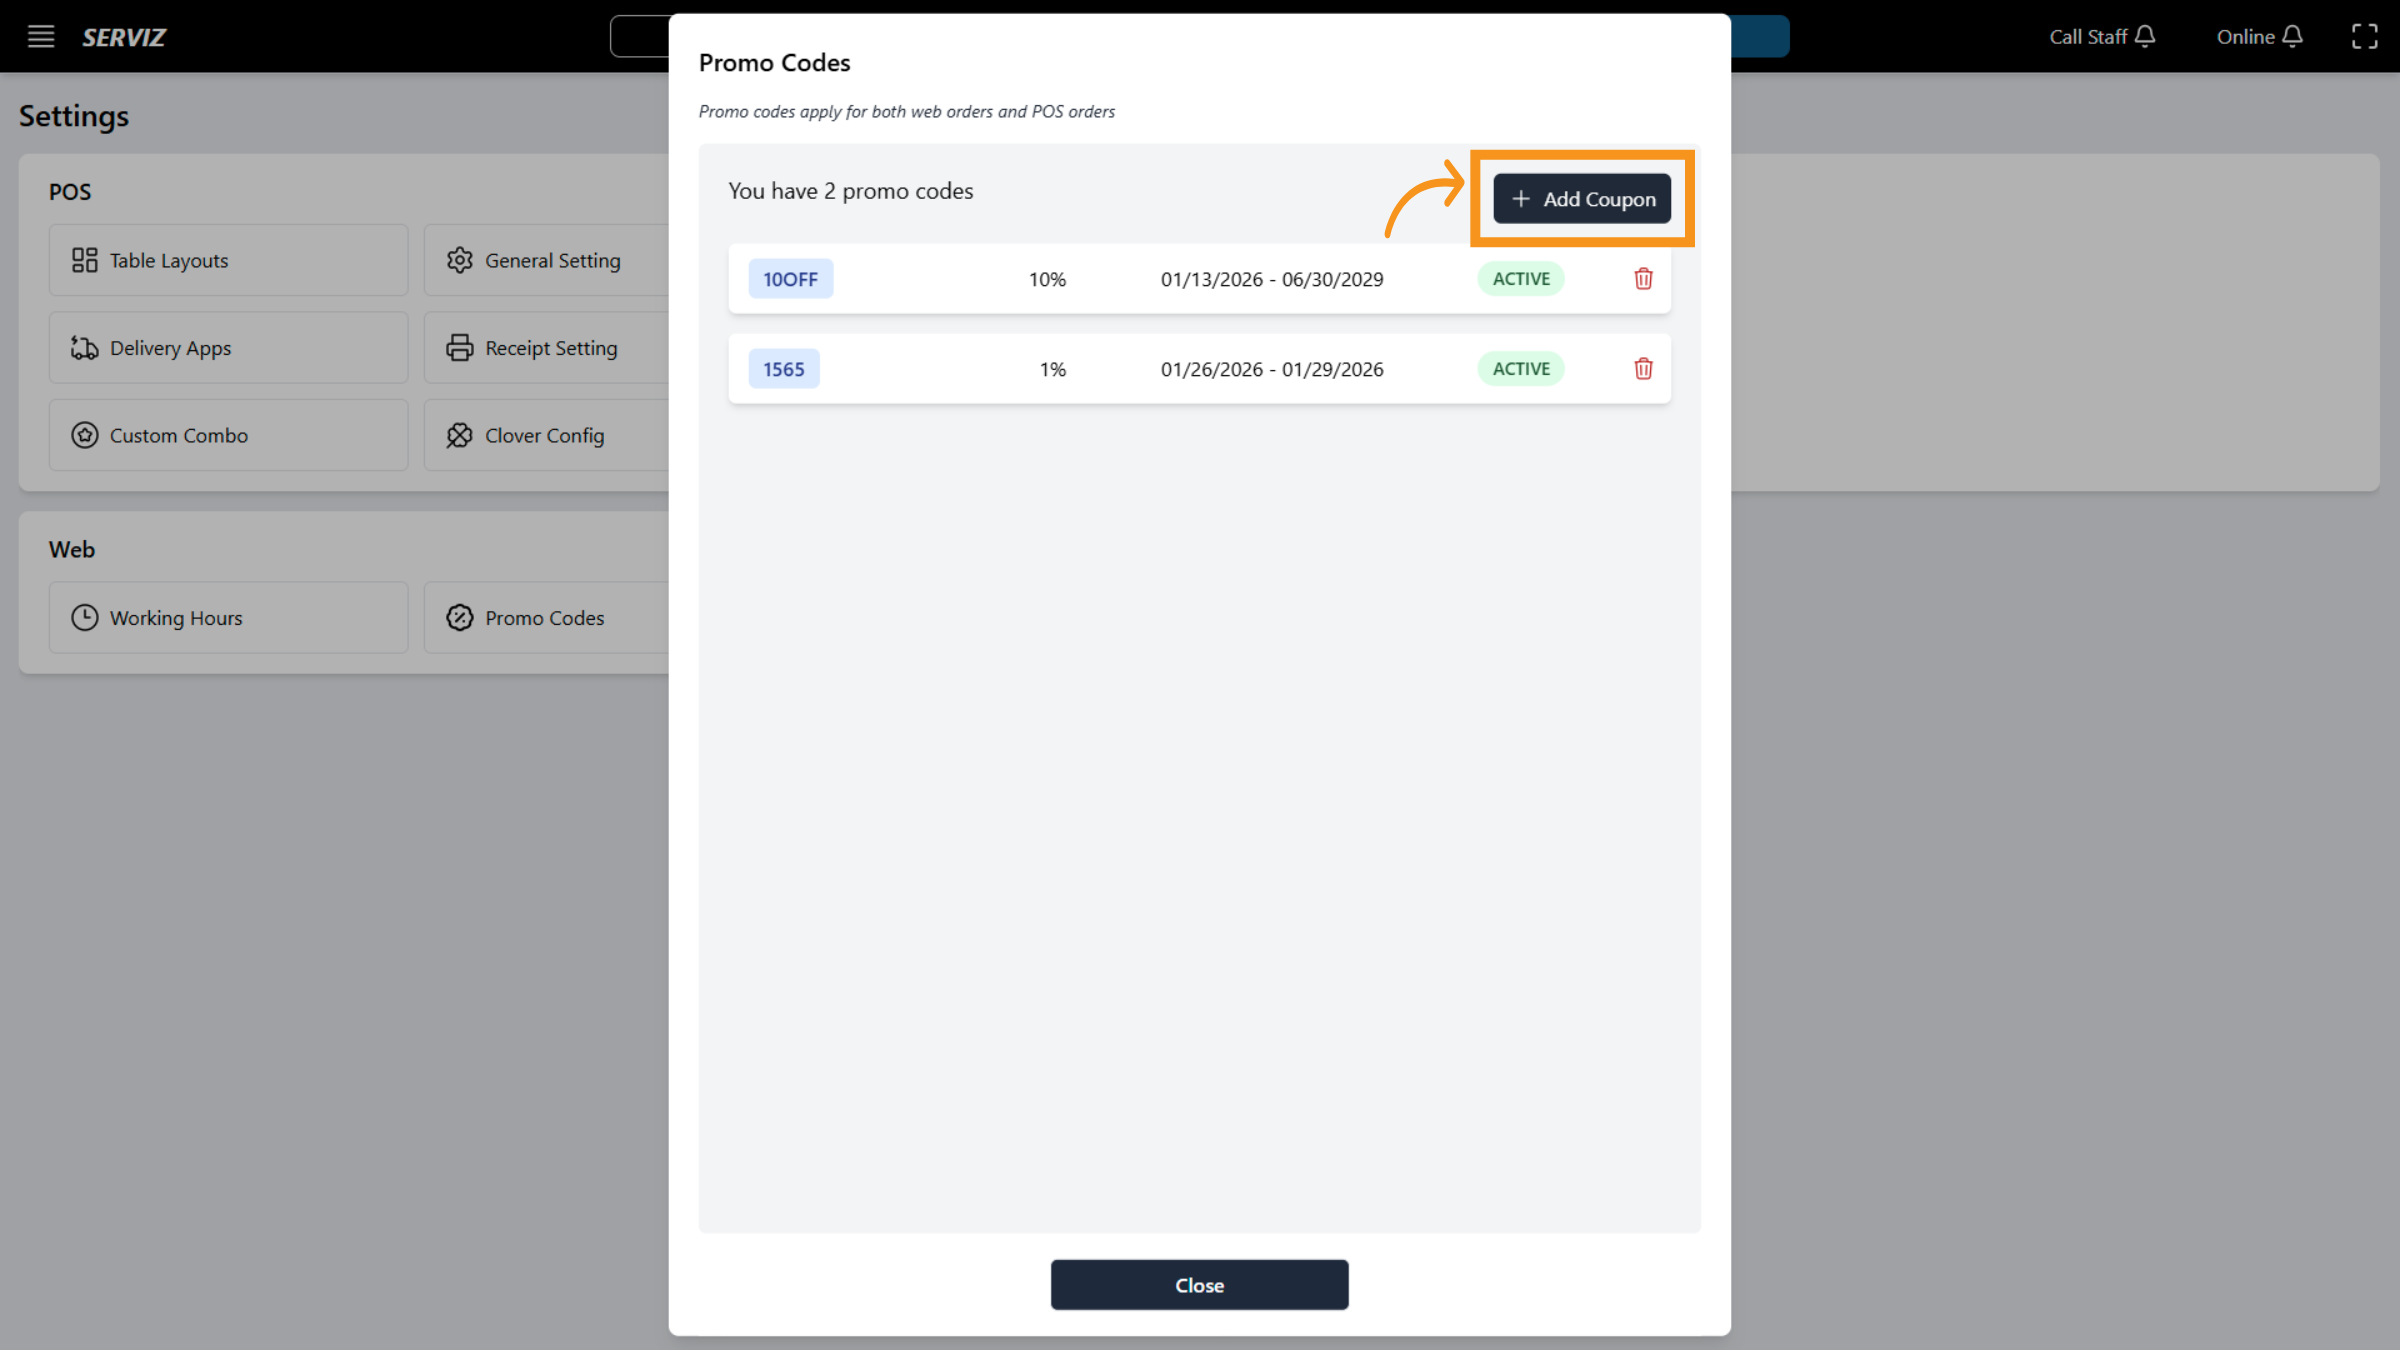
32. Add New Coupon
Click Add Coupon to create a new promotional discount code.
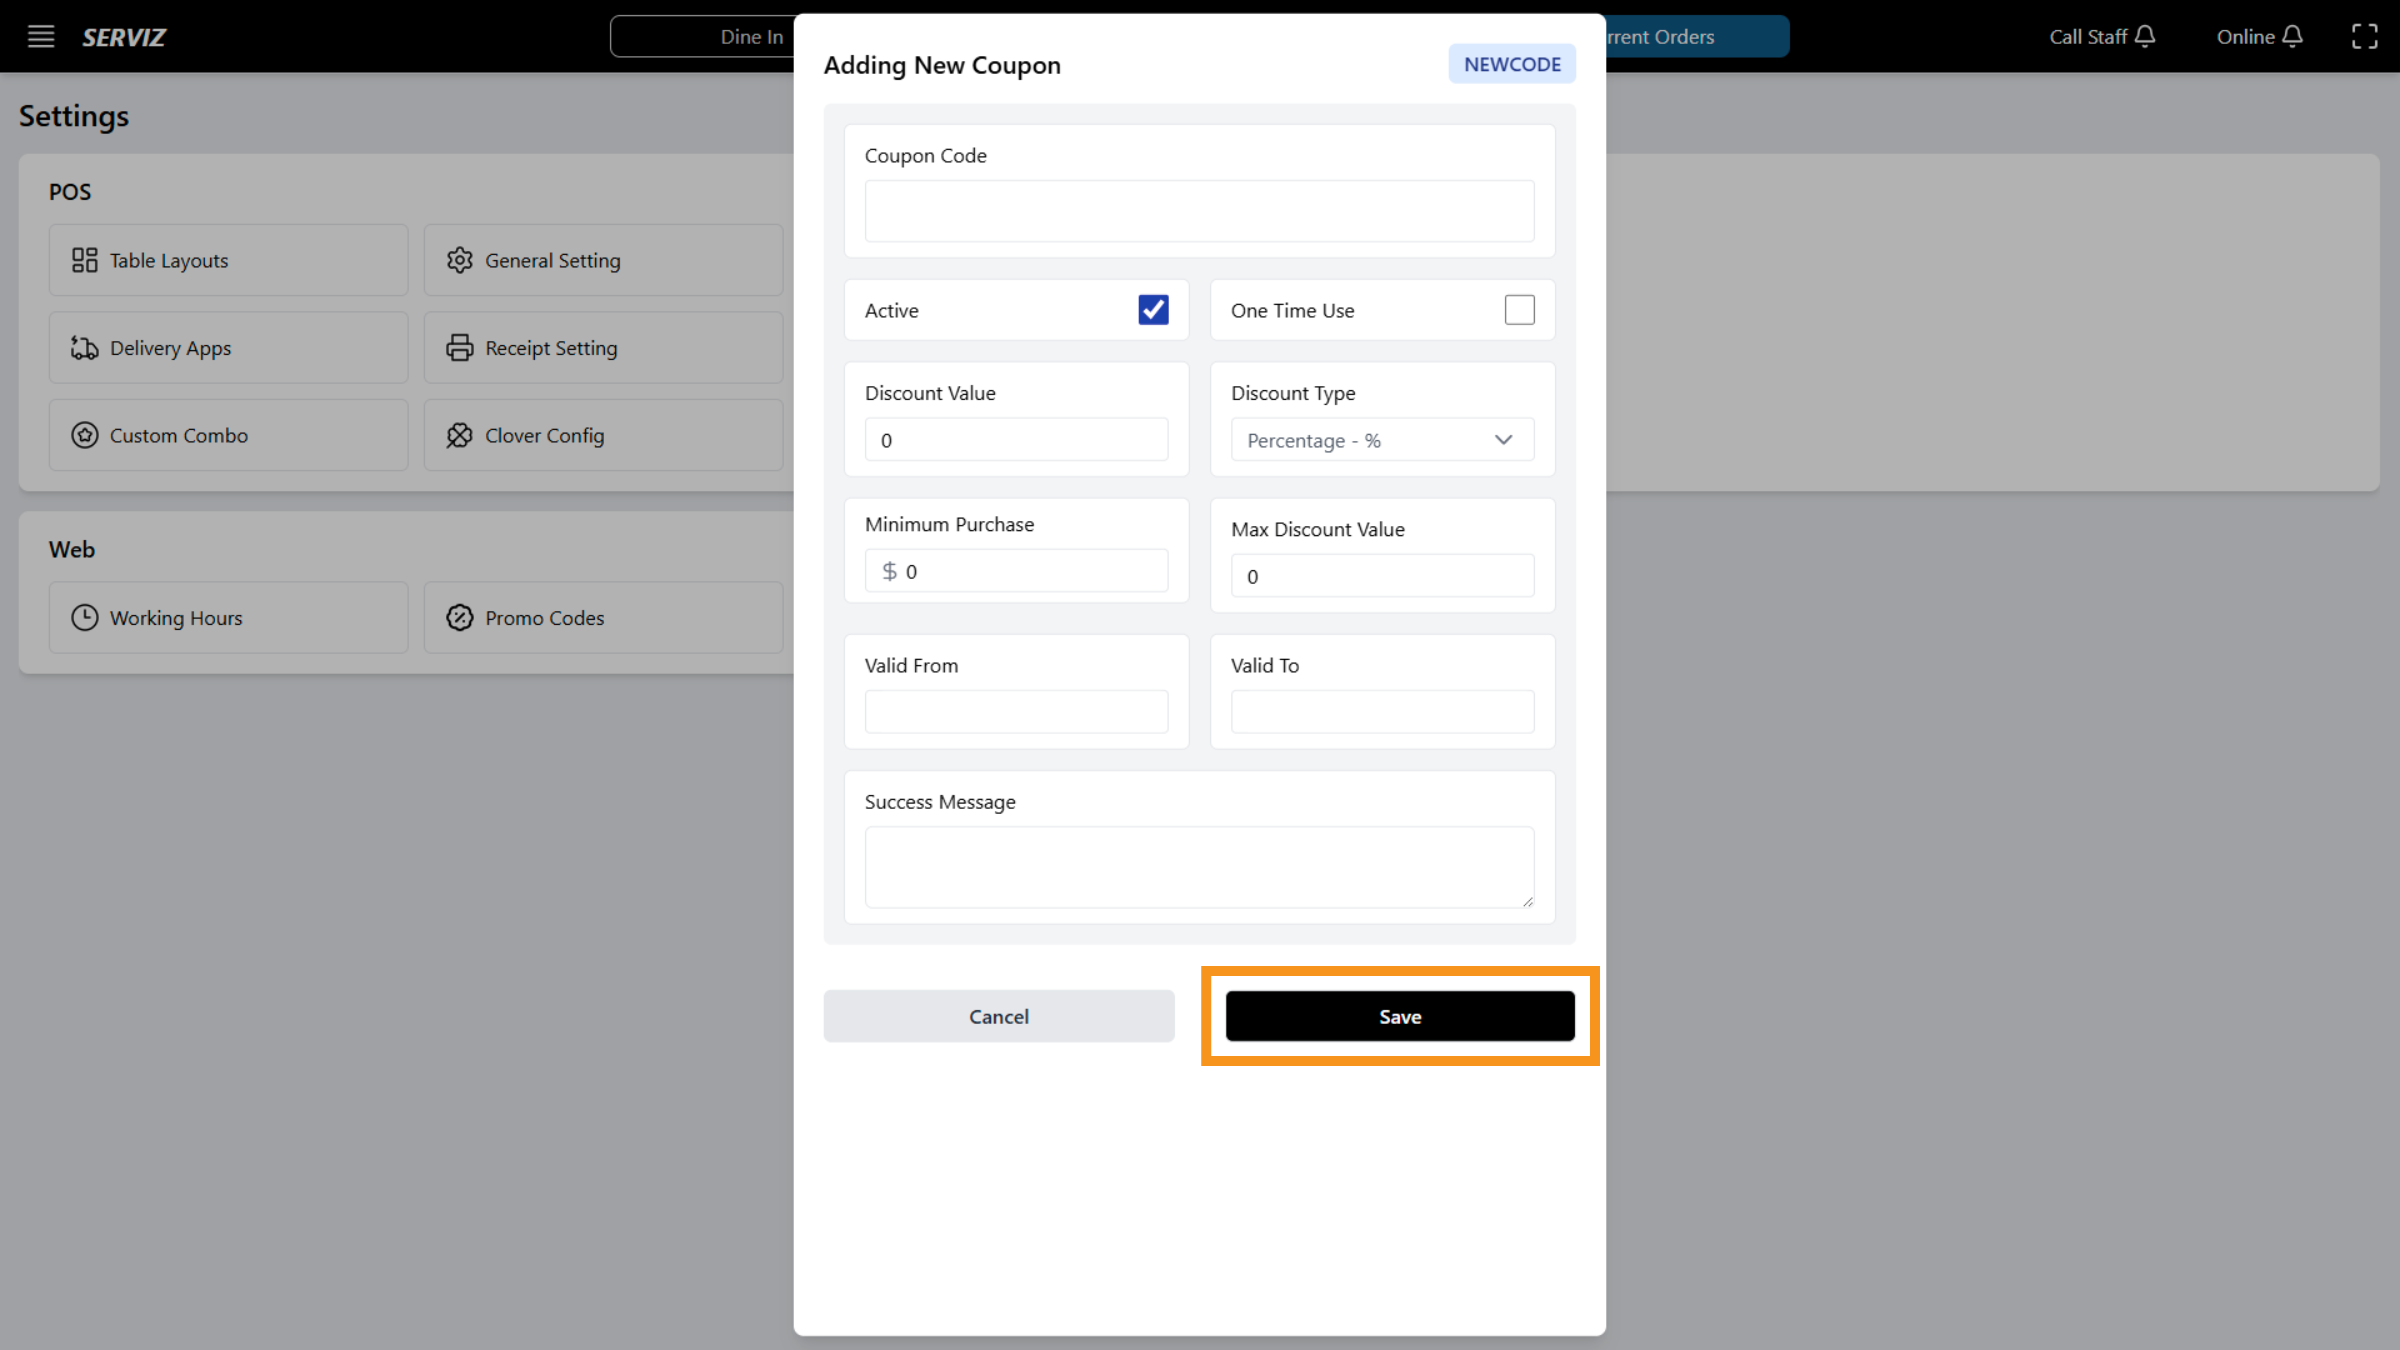
33. Save Coupon
Click Save to finalize and activate the new coupon.
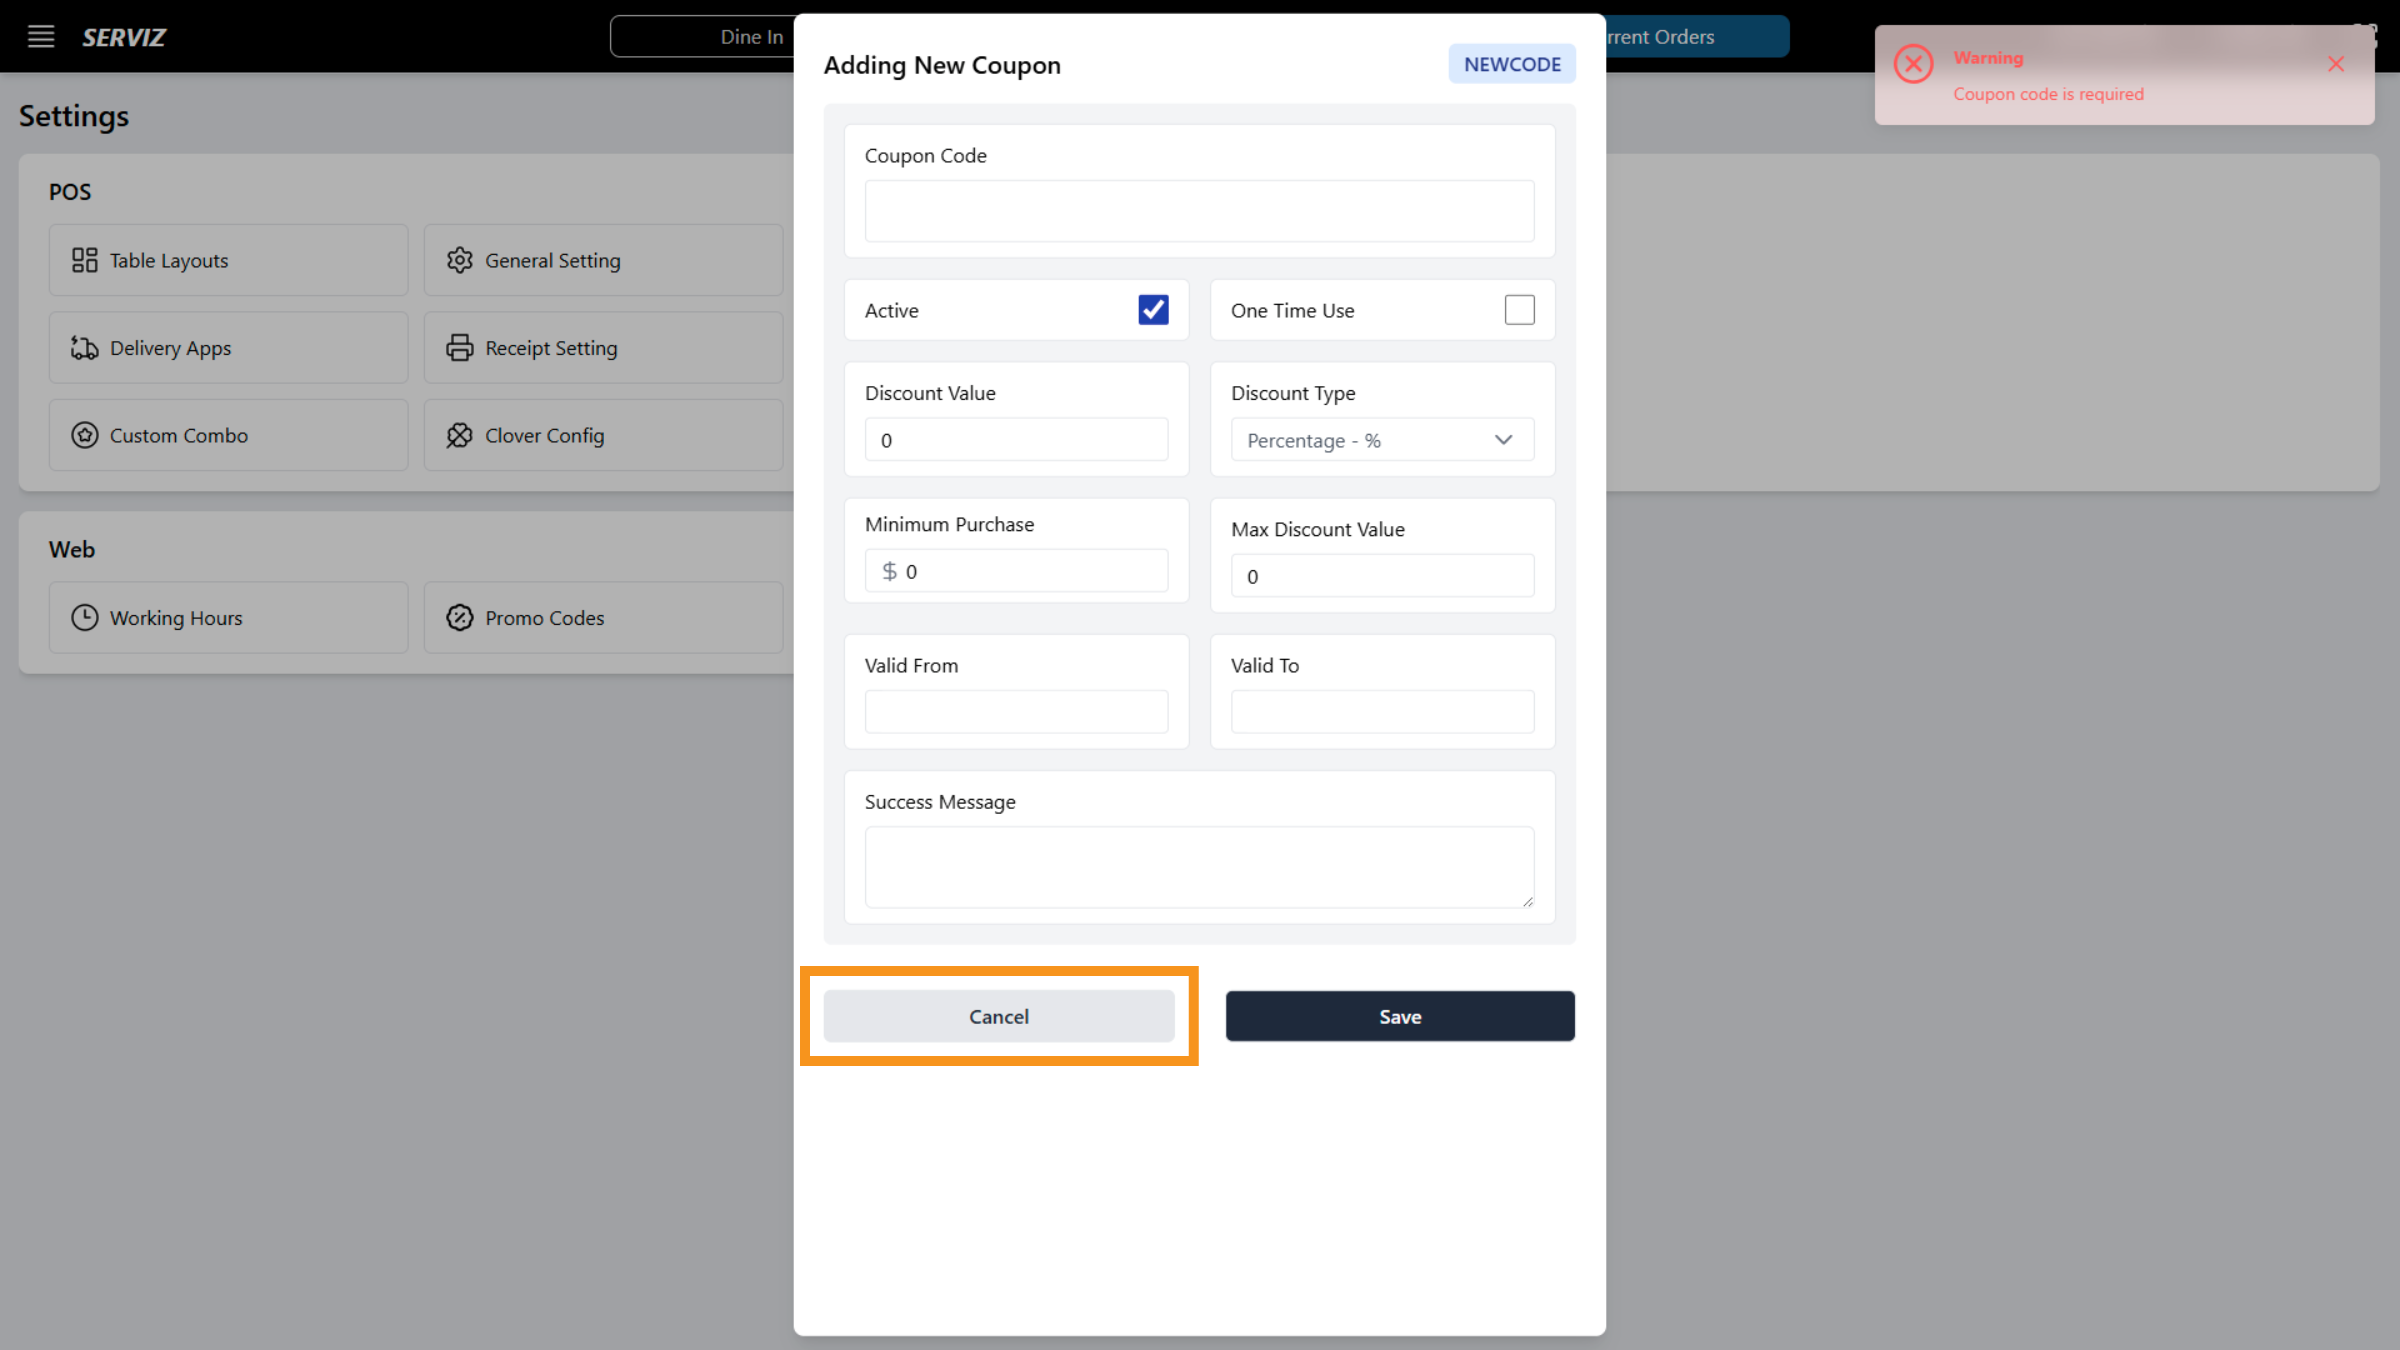
34. Cancel Coupon Creation
You can cancel to discard the new coupon and return to the promo codes list.
You have successfully configured key POS settings including layouts, general preferences, staff skills, and promotional codes in the Serviz application. This setup ensures your POS system is tailored for efficient operation and ready for daily use.