Create and Deploy a New Printing Demo Site
This tutorial guides you through the process of creating and deploying a demo printing site, ensuring that each customer has an individual site.
Video Tutorial
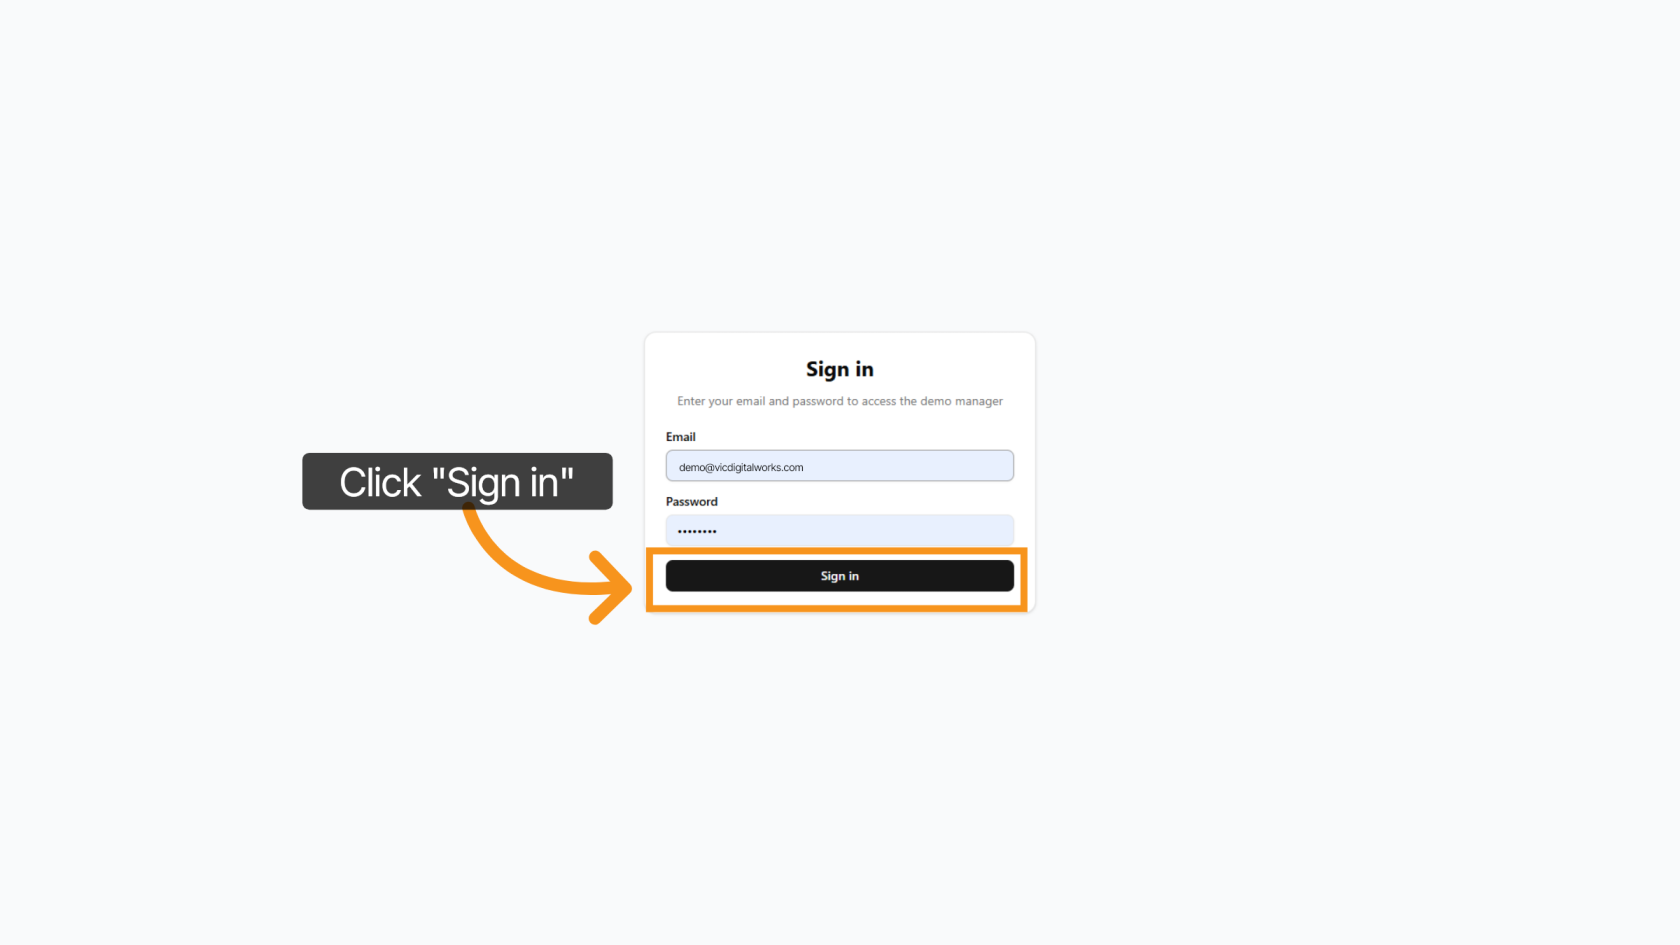
1. Log inLogin to Admin SettingsSetting
Access tothe https://demo-printing.vicdigitalworks.com/,Vic thenDigital Printing Demo Admin, enter your email and password, and after thatthen click on '"Sign In'In".
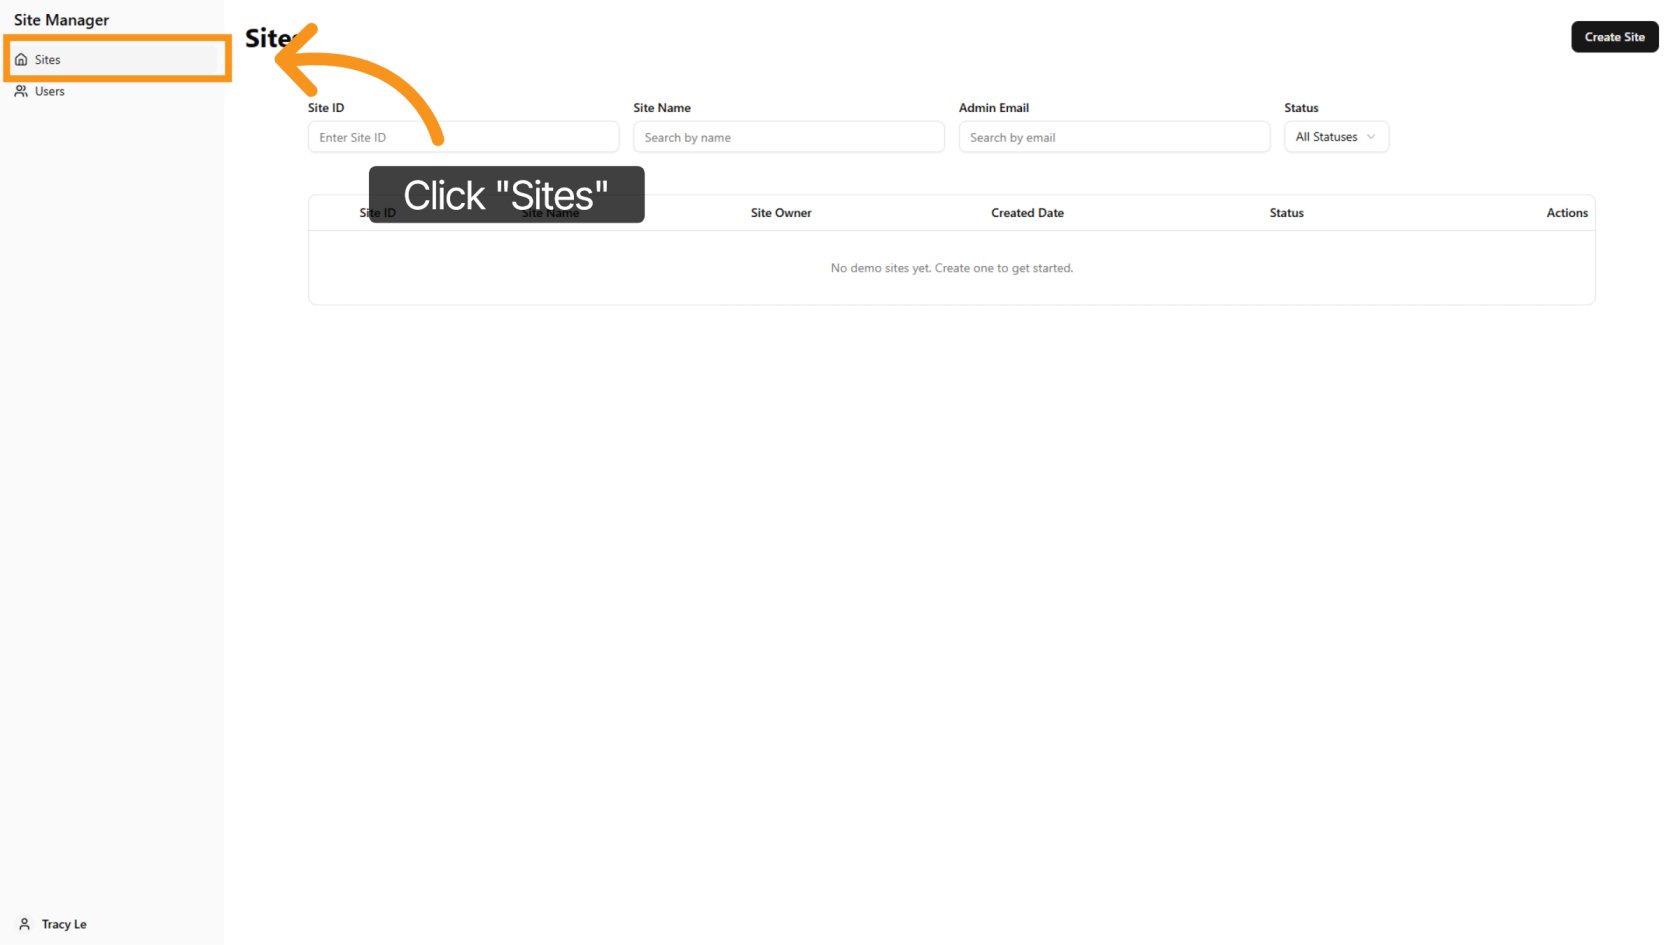
2. CreateAccess Demothe SiteSites Section
Click 'Create"Sites" Site' to startopen settingthe upsite yourmanagement newsection where you can view and manage demo site.sites.
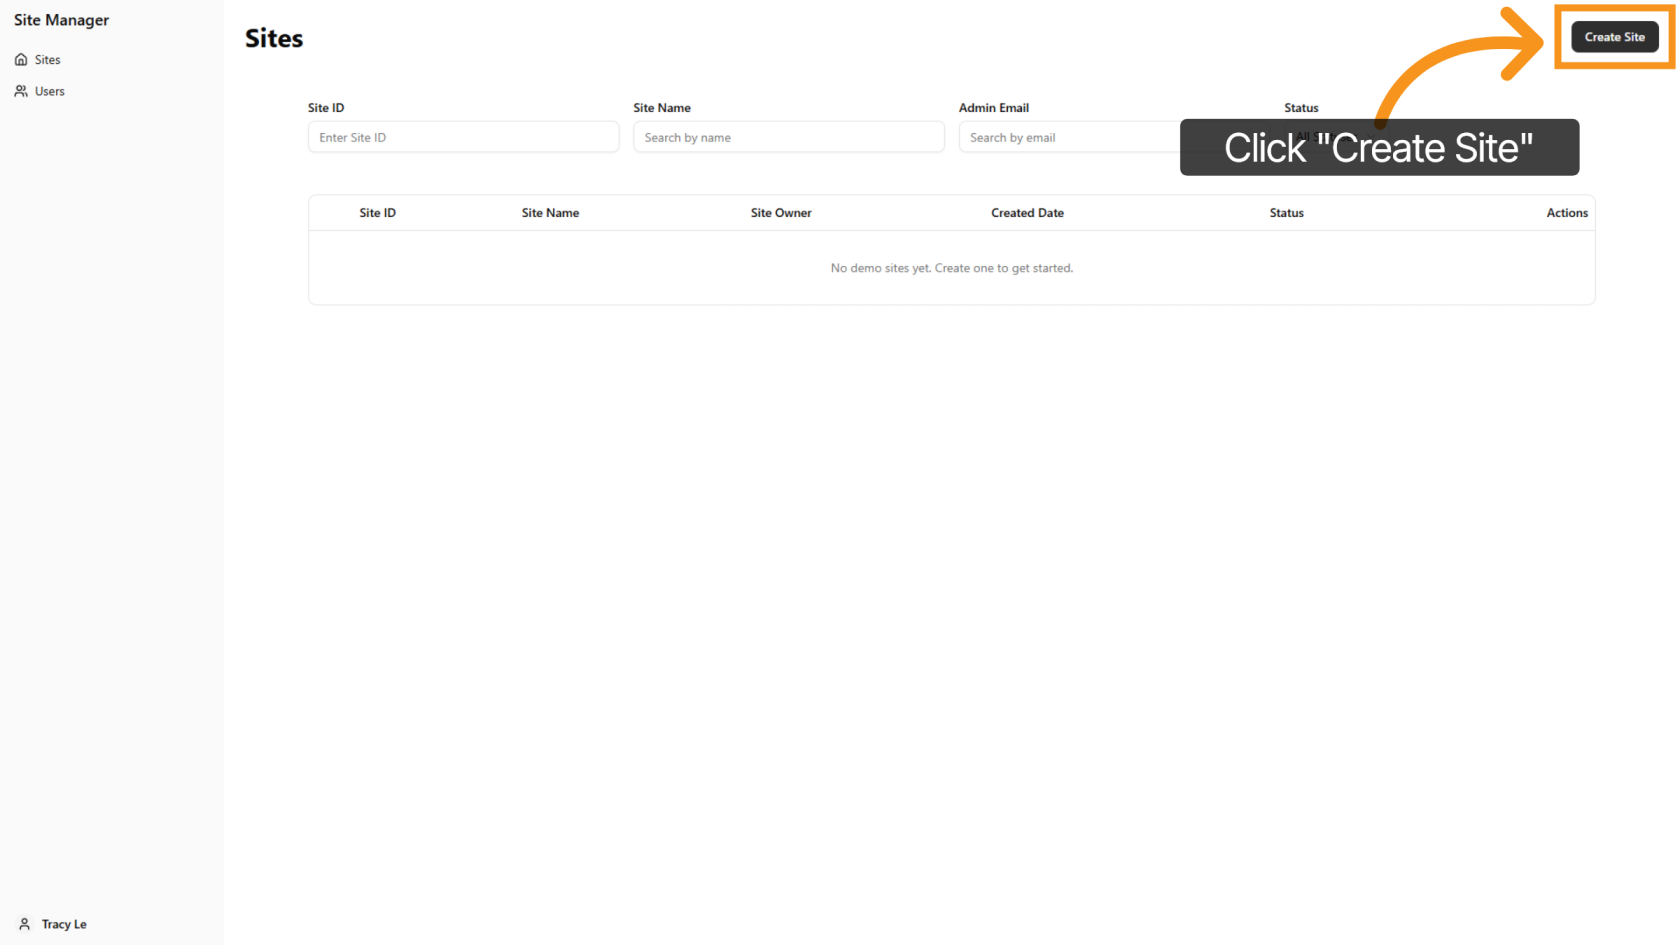
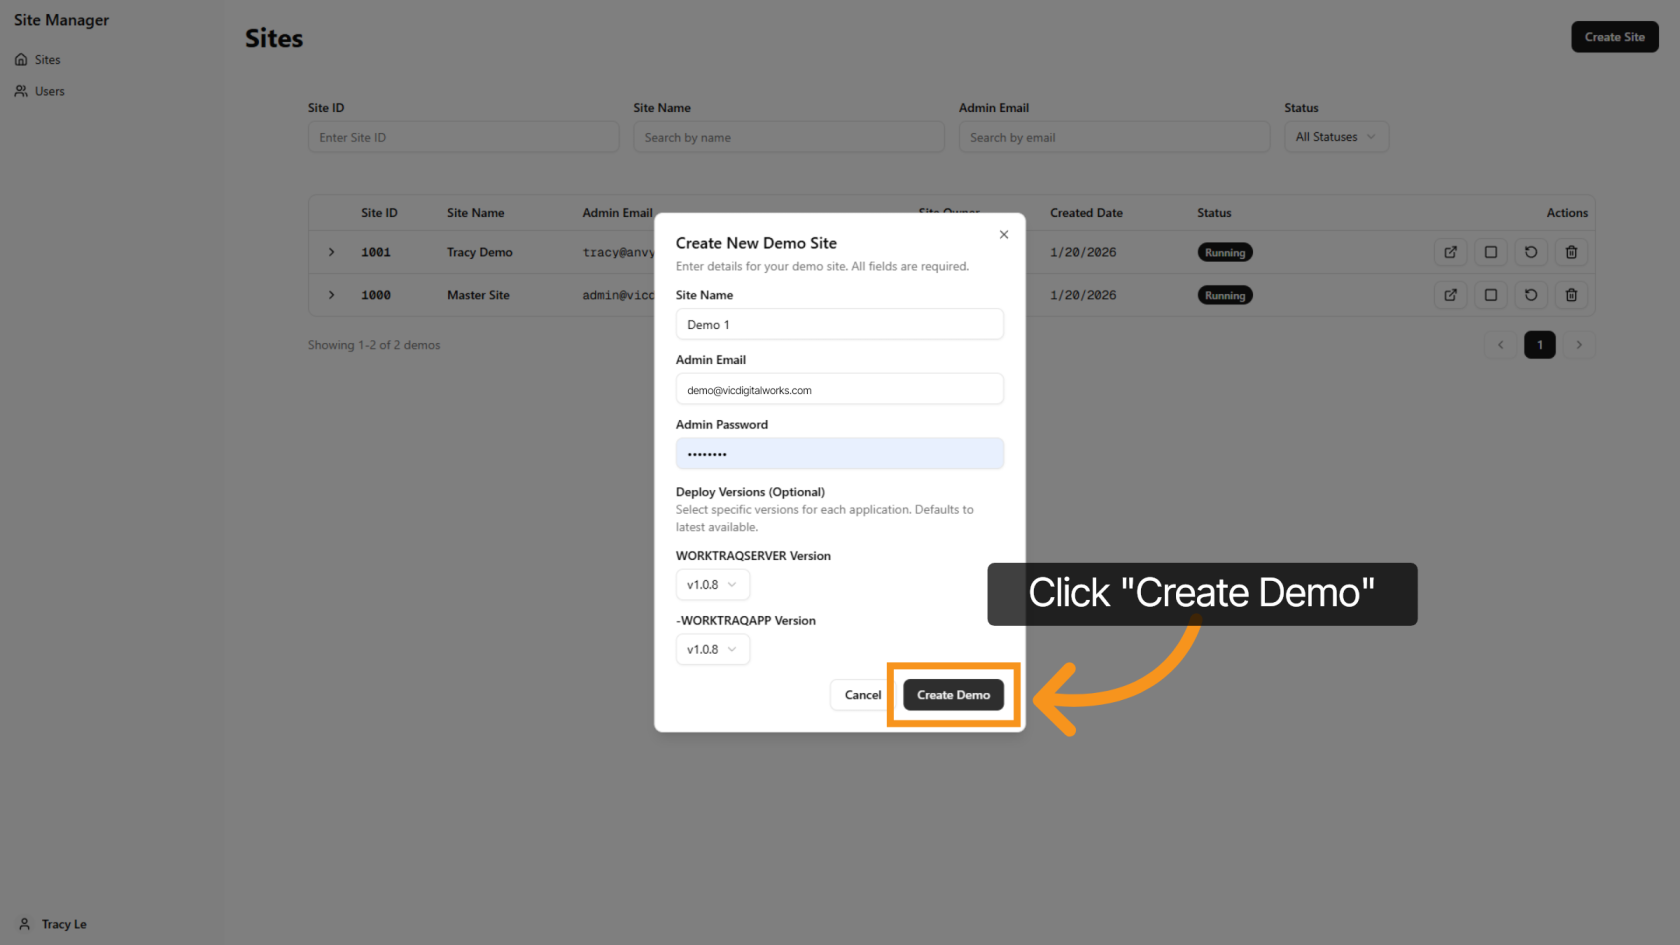
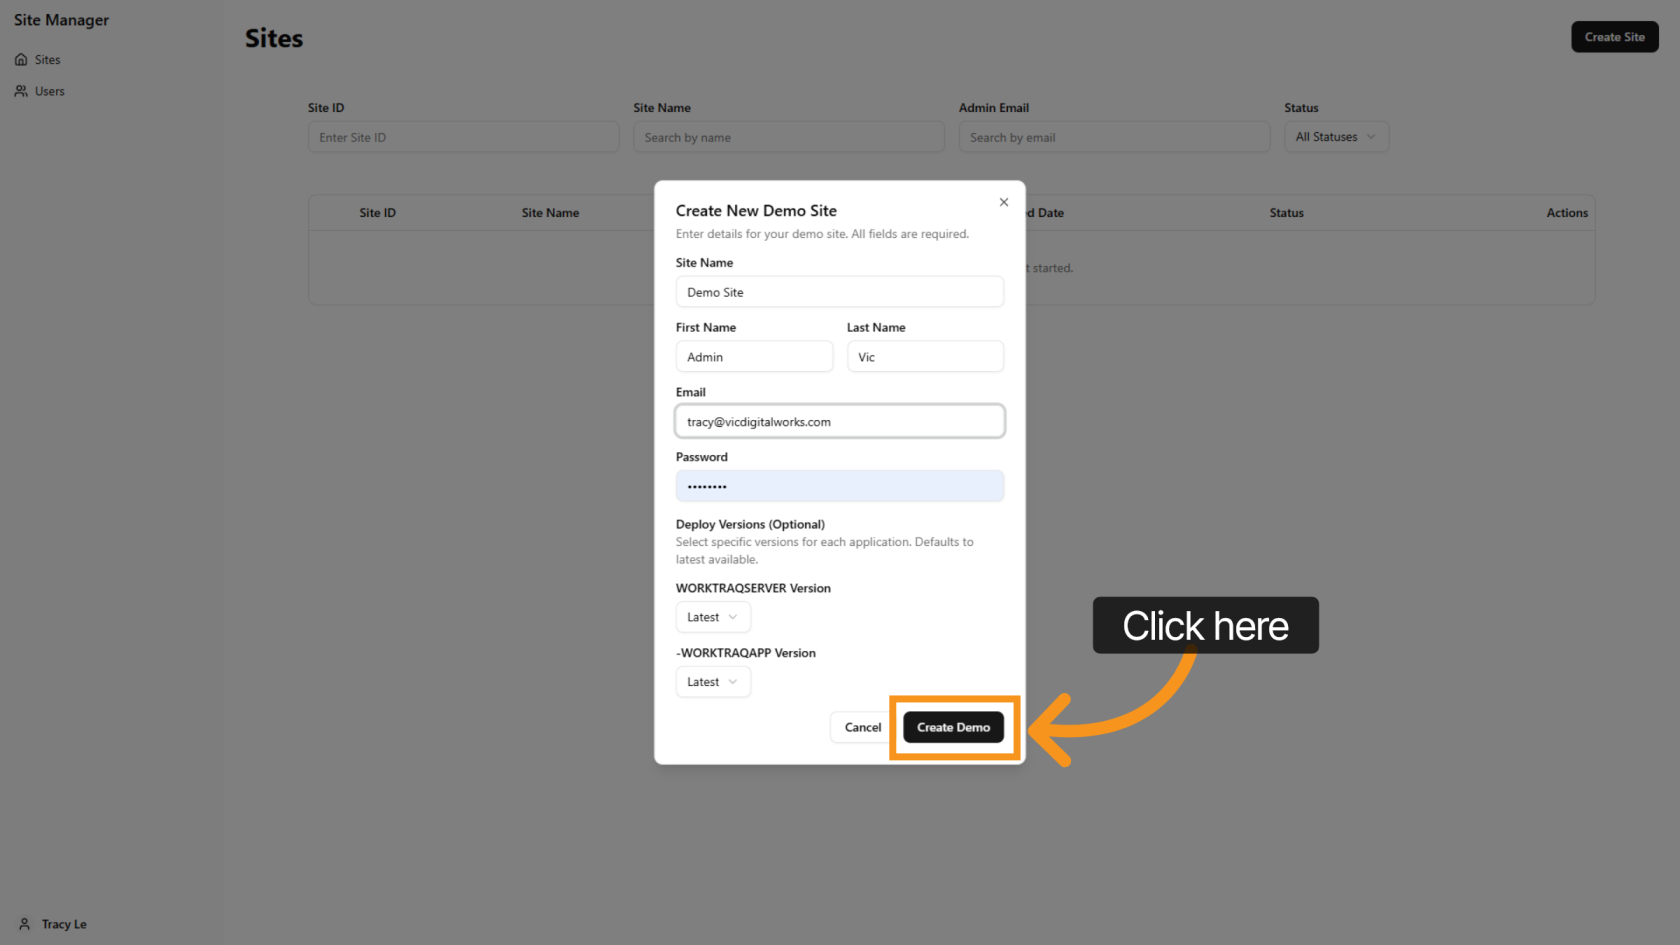
3. Open Demo Site Form
Click "Create Site" to open the form for entering the new demo site details.
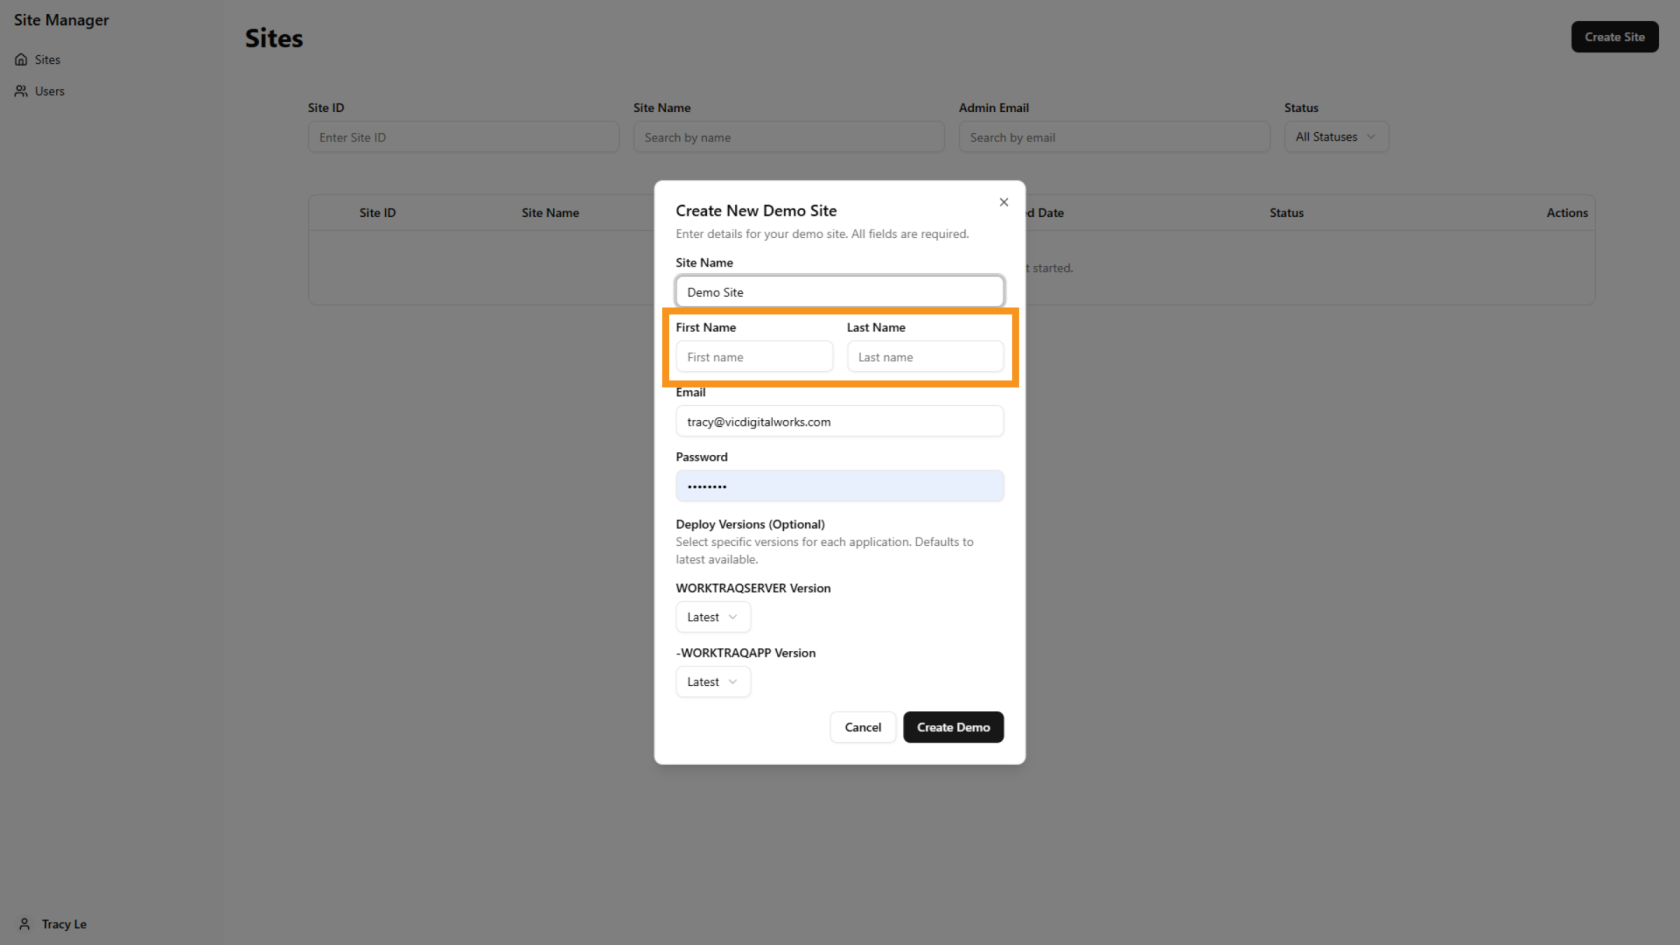
4. Enter Site Name
Enter your desiredthe site name to clearly identify yourthe demo site. This can be the customer’s company name.
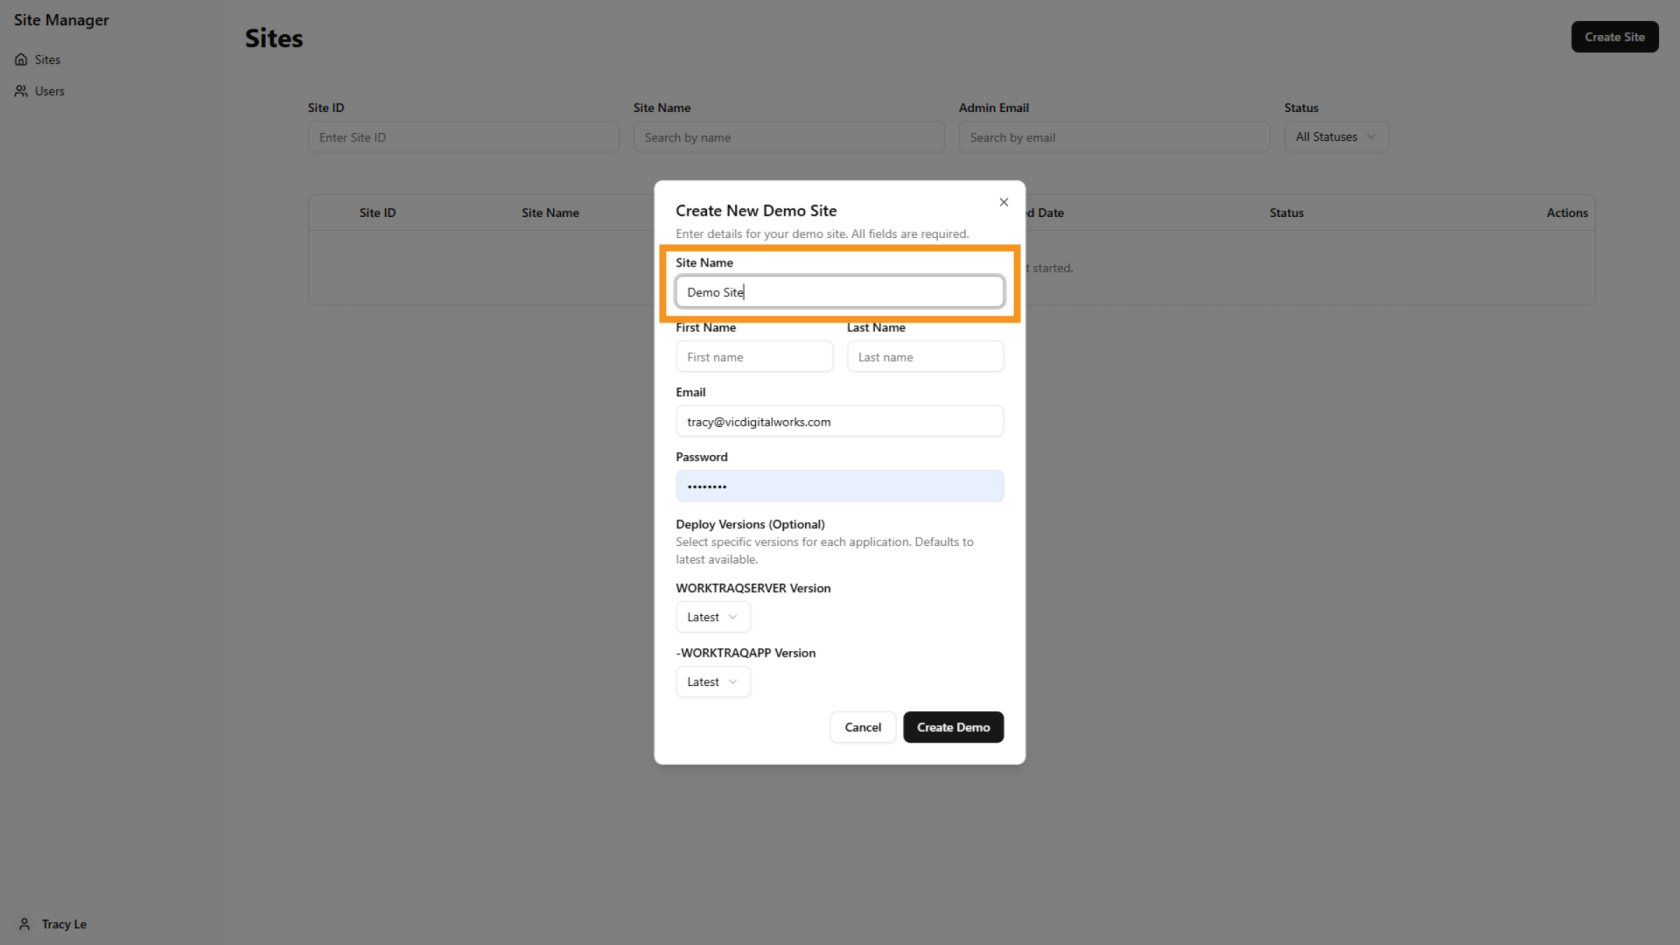
4.5. Enter AdminCustomer EmailName
InEnter the 'Admincustomer’s Email'first field,name pleaseand enterlast yourname. customerThis emailwill address, which isbe used as the username to log in to the WorkTraqsystem system.later.
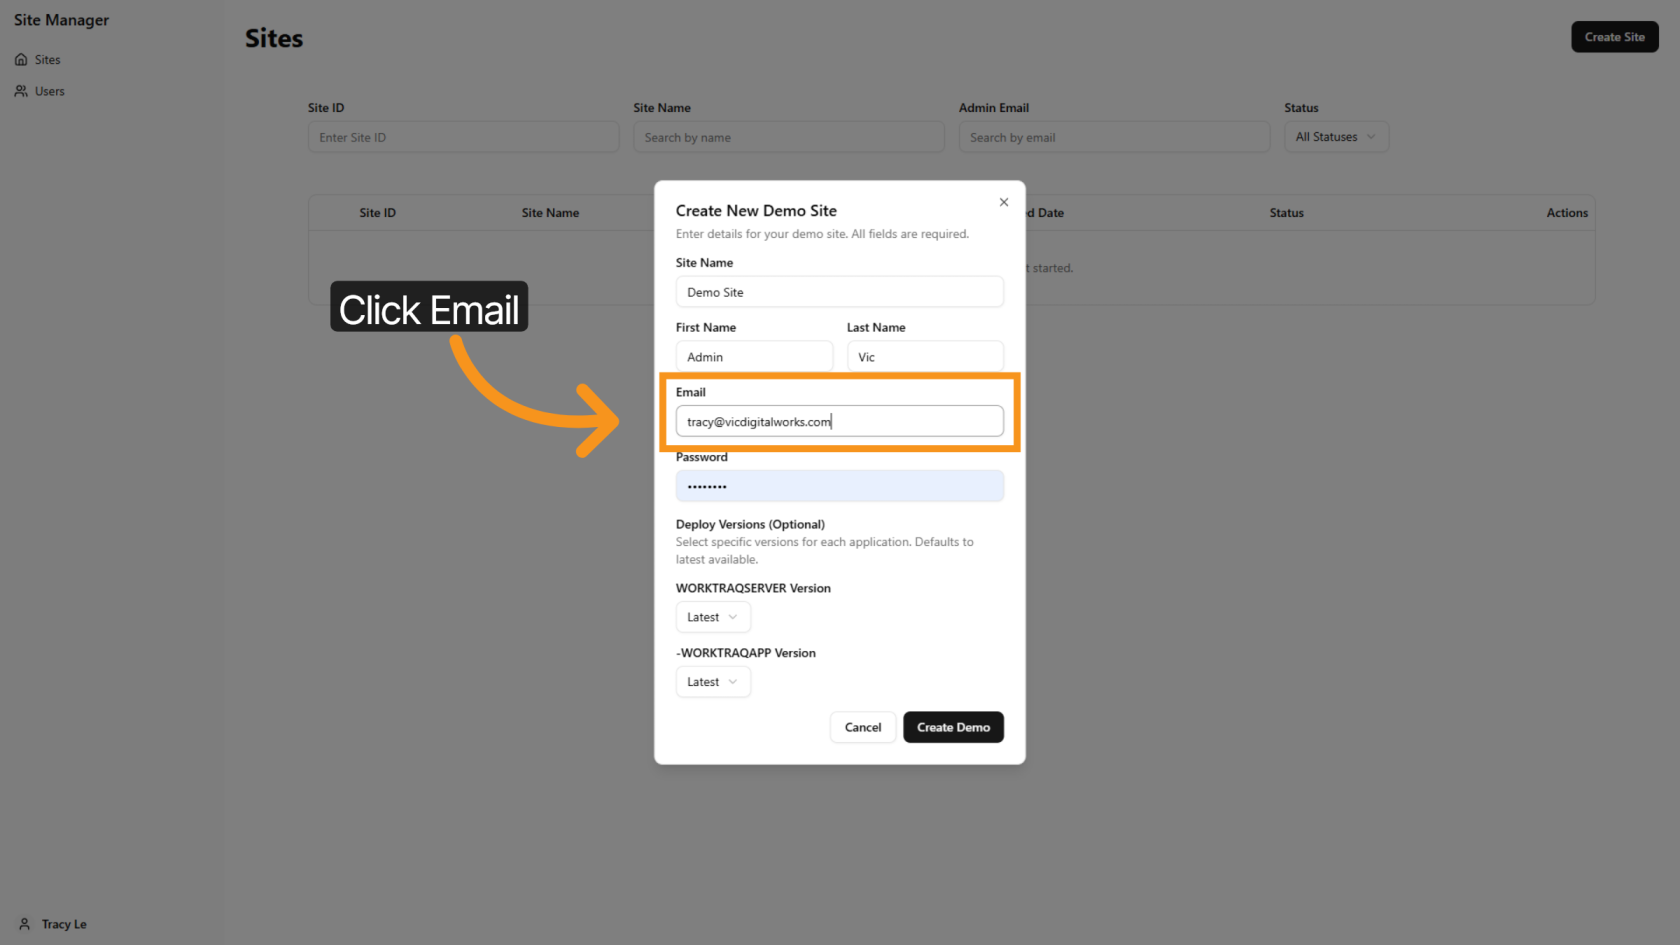
5.6. Enter AdminEmail EmailAddress
InEnter the 'Admincustomer’s Password'email field,address.
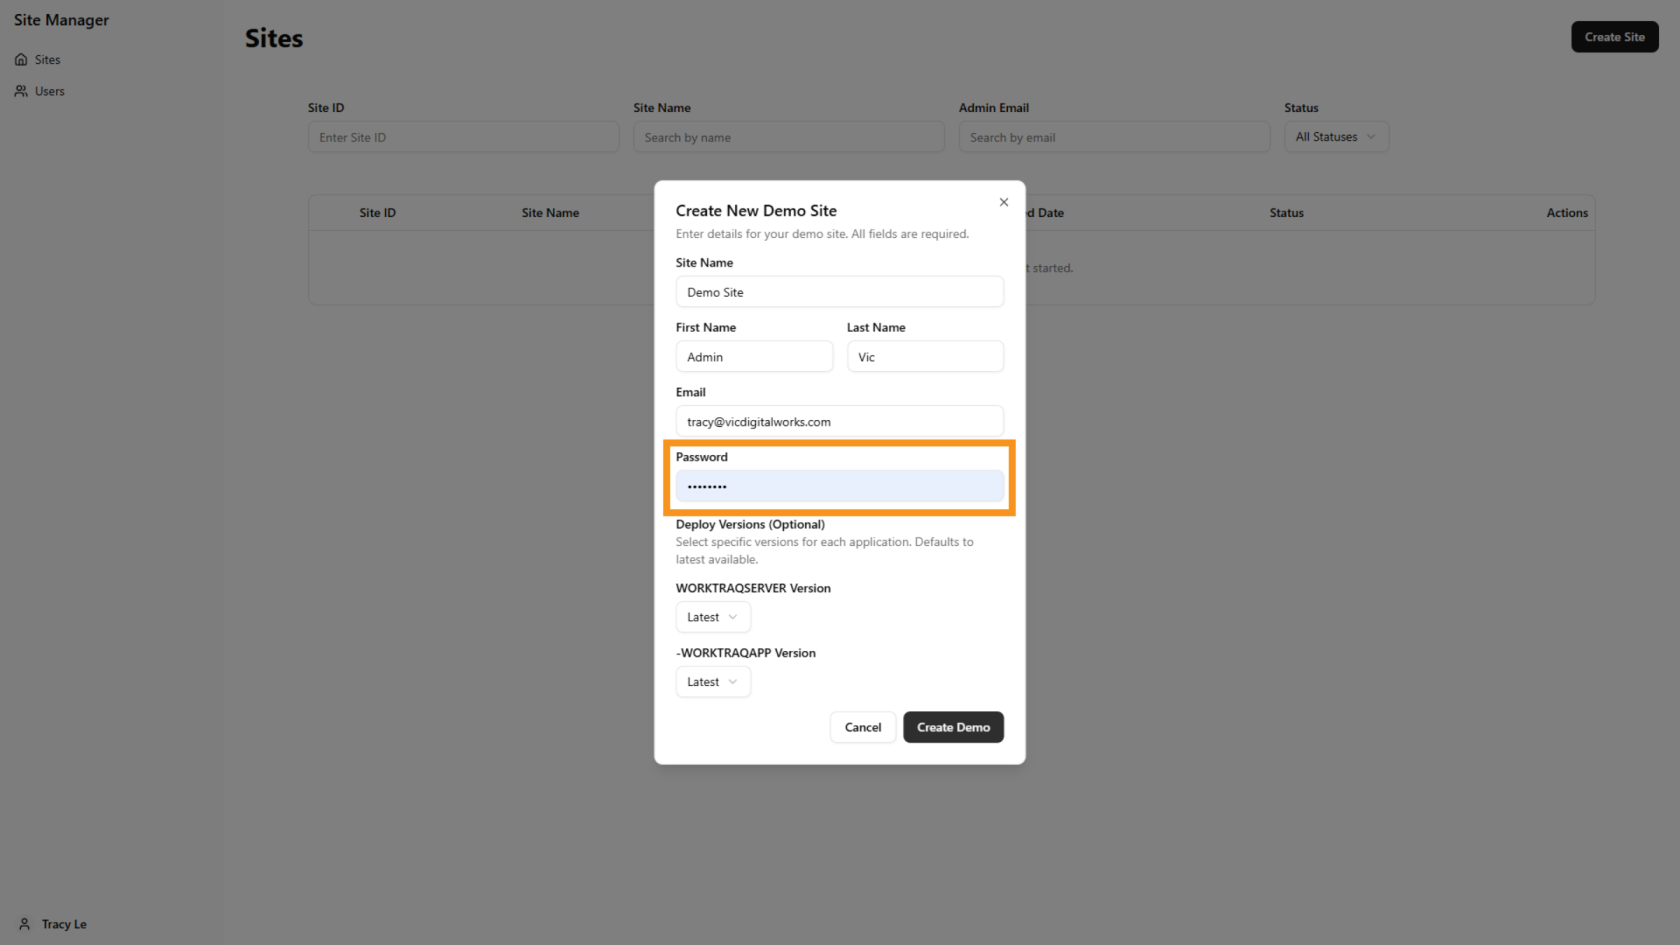
7. Enter Password
Enter the password that will be used later to log in to the WorkTraq system.
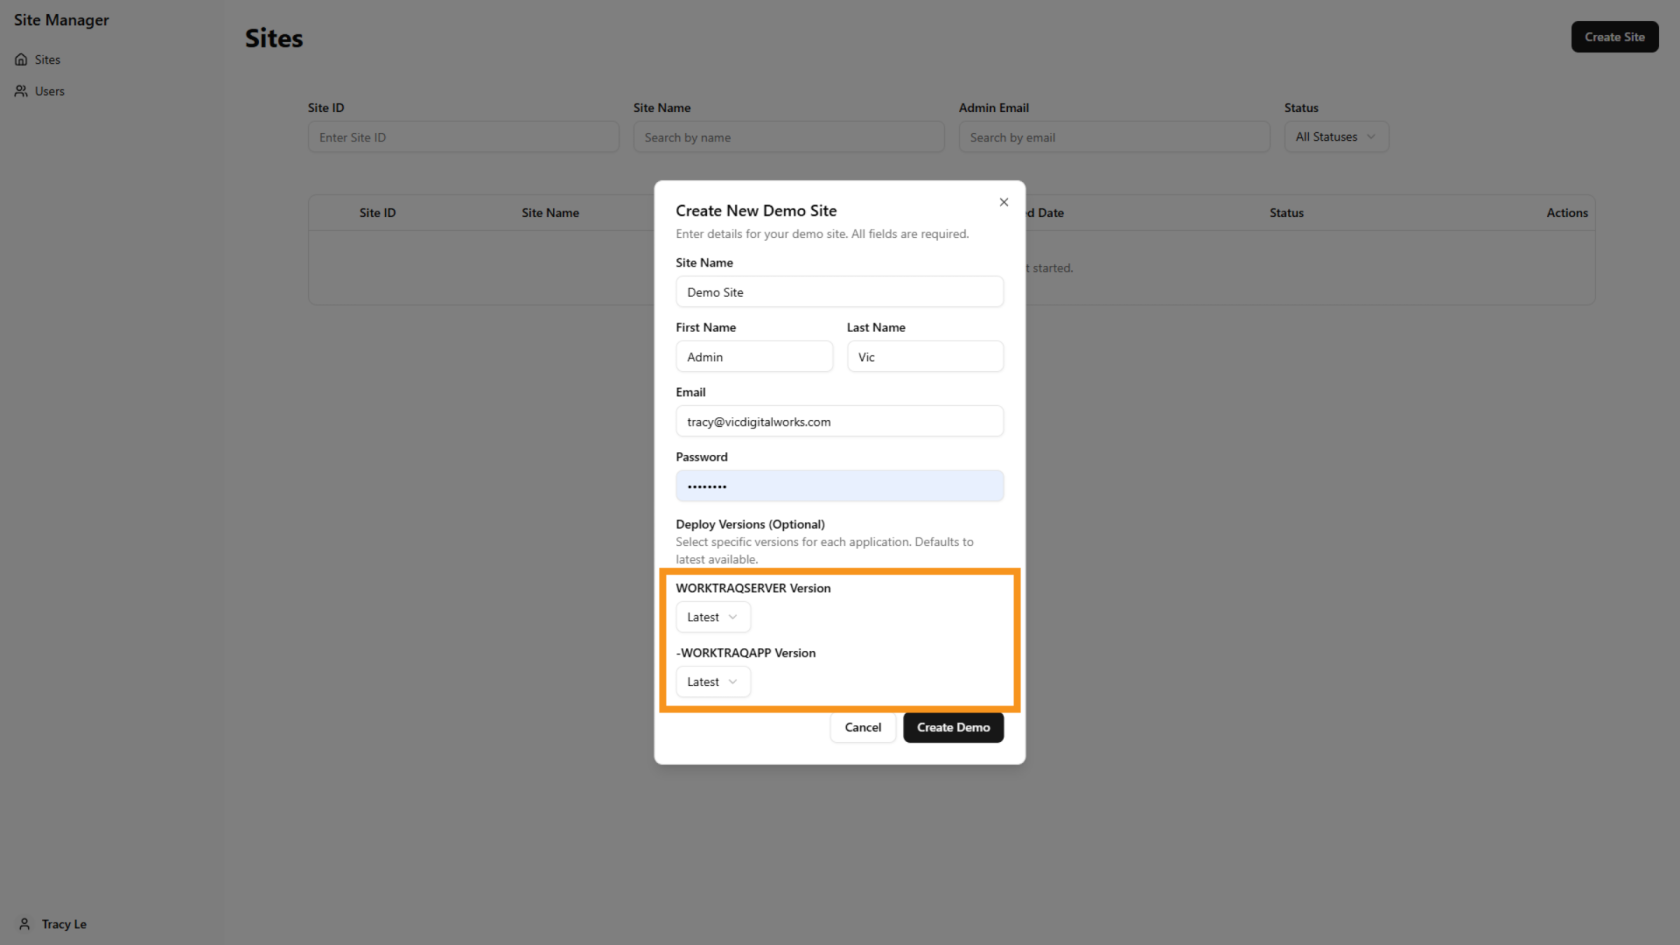
6.8. Select Version
TheBy default, the system willcreates automaticallythe selectsite using the latest version;version, however,but you can customizechoose thea different version youif prefer.needed. Please note that the olderlatest version willincludes lackthe newnewest functions.features and updates.
7. Click9. Create Demo
Click 'Create Demo' to initiate the demo site creation with your settings.
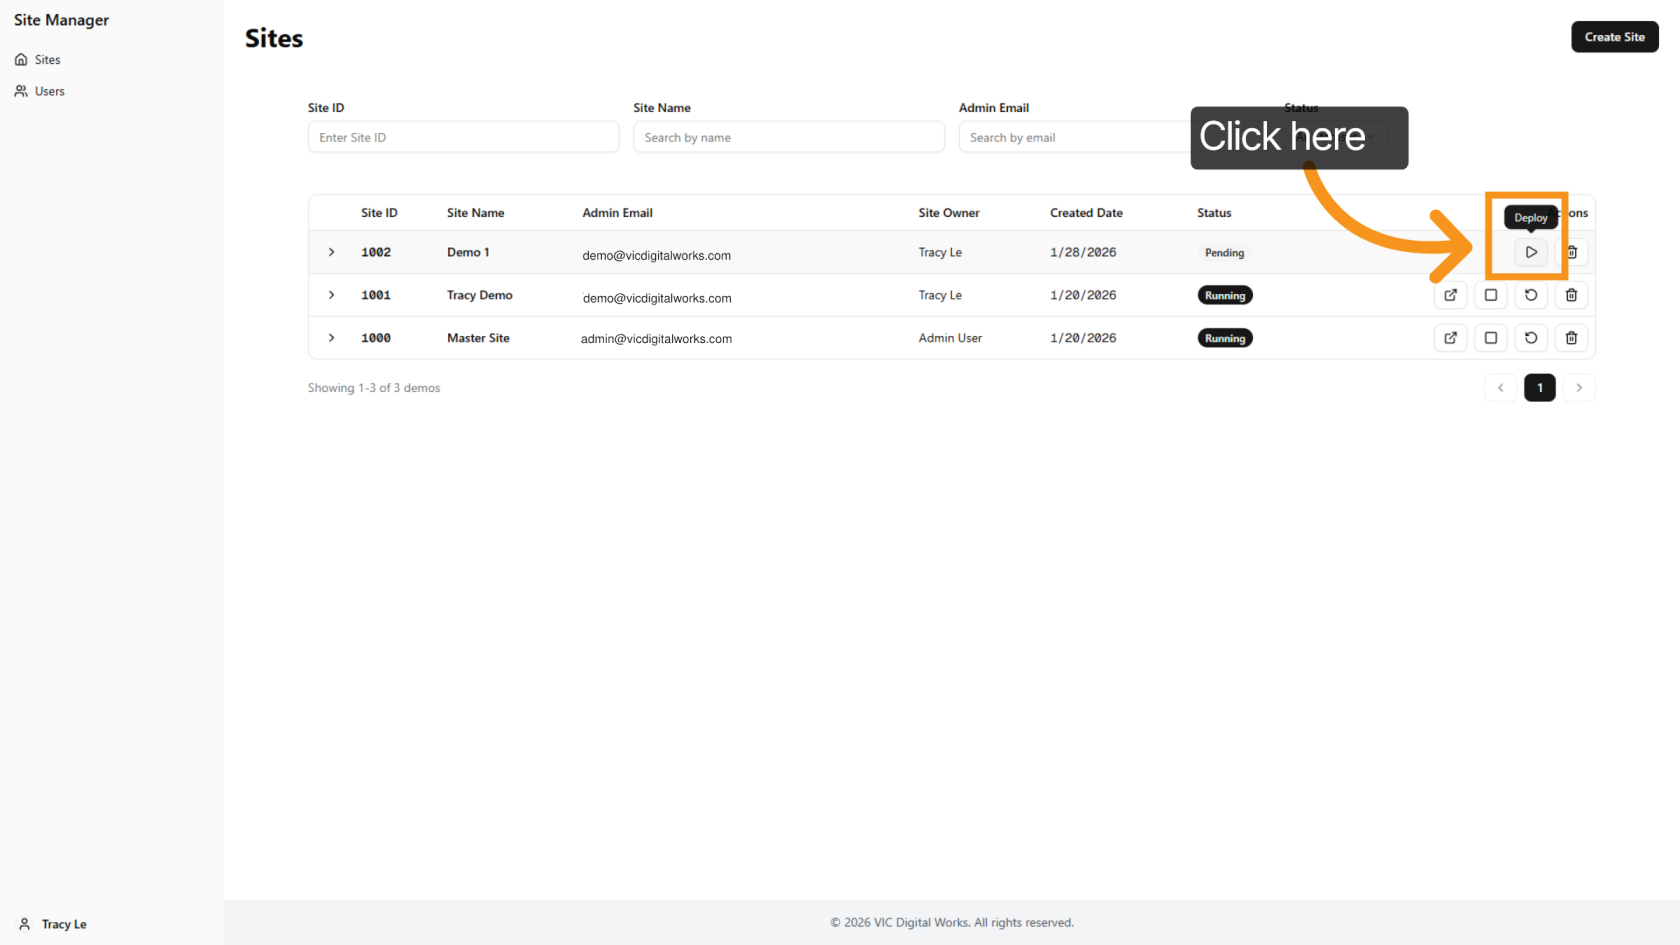
8. Deploy Demo Site
ReturningClick "Create Demo" to the main screen, you will notice that a new site has been added to the system. Click on the 'Deploy' icon to initiate the deployment of a new demo site.
9. Successfully Deployed
Please wait a couple of minutes for the site to deploy. Once you see the "Open Deployment" icon,create the demo will be successfully deployed.site.
10. ViewStart Deloy the Site
Click the ![]() deploy icon to begin the deployment process.
deploy icon to begin the deployment process.
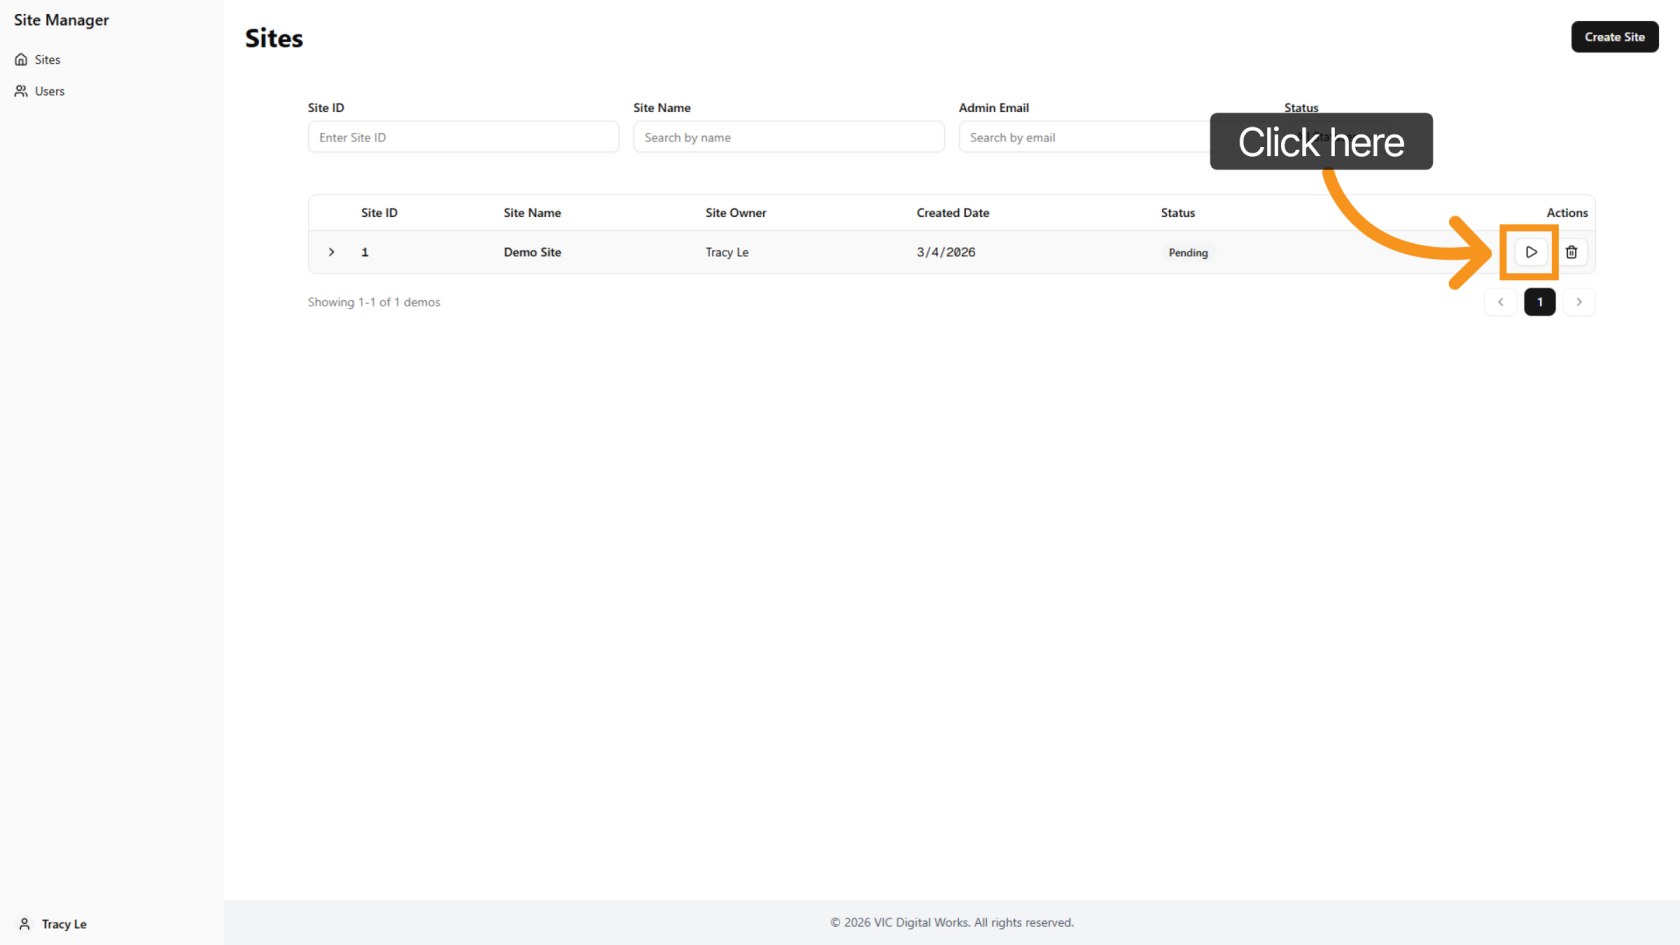
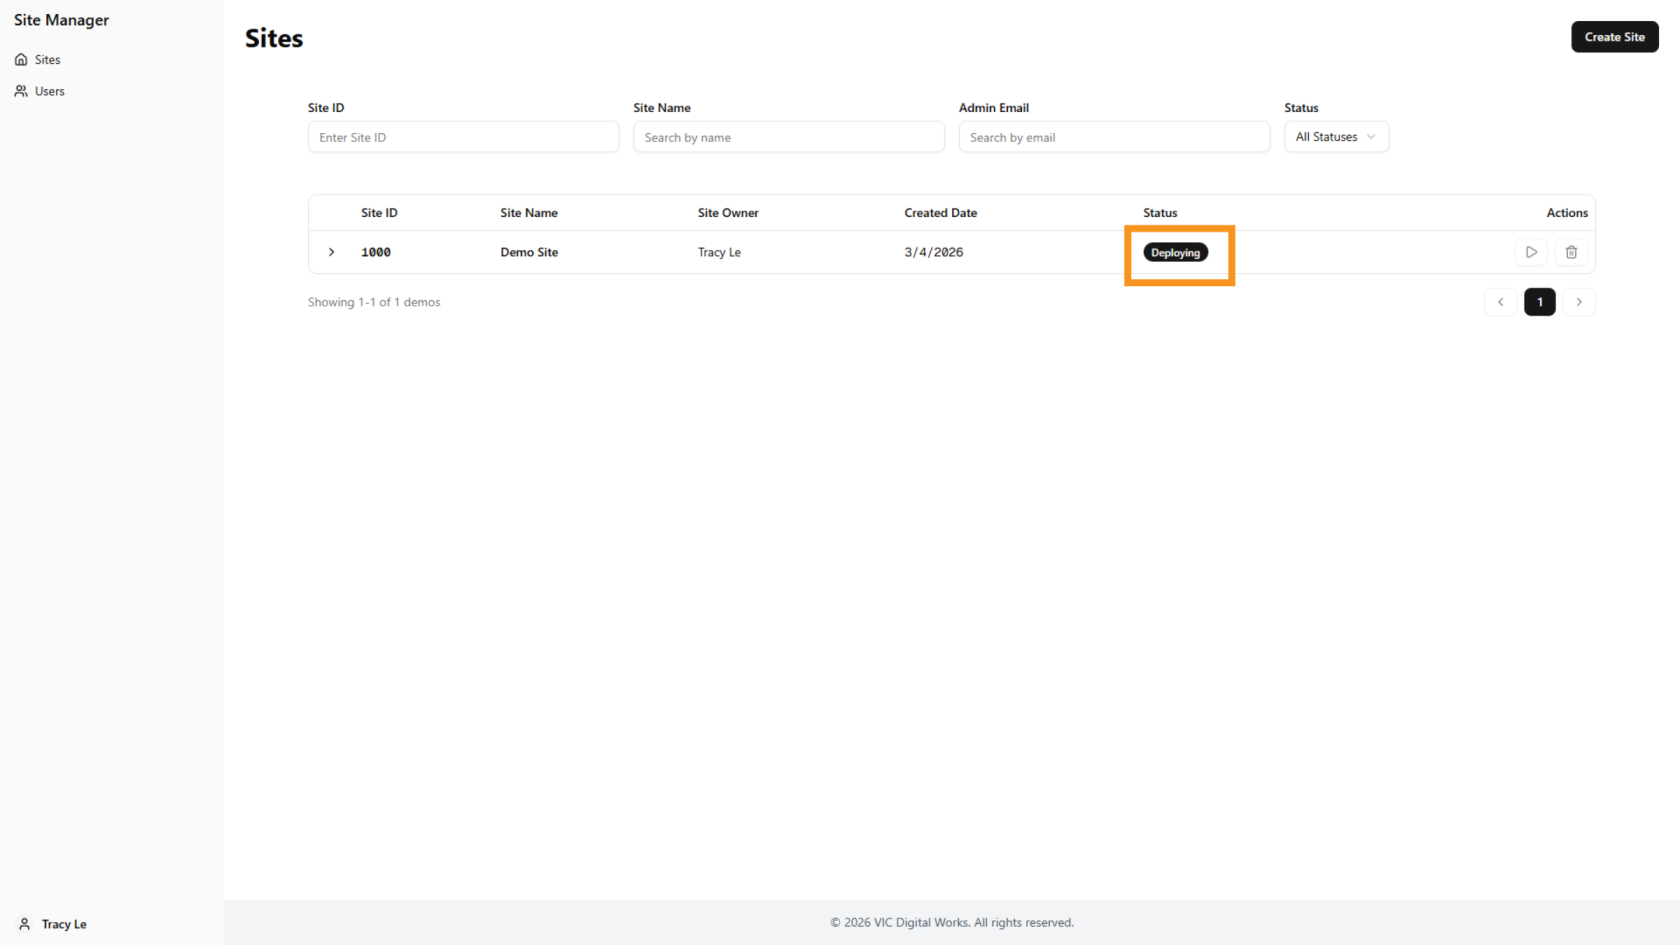
11. Check Site Status
The demo site status will update to Deploying.
12. Demo Site Ready
When the ![]() open icon appears, the site is ready to use.
open icon appears, the site is ready to use.
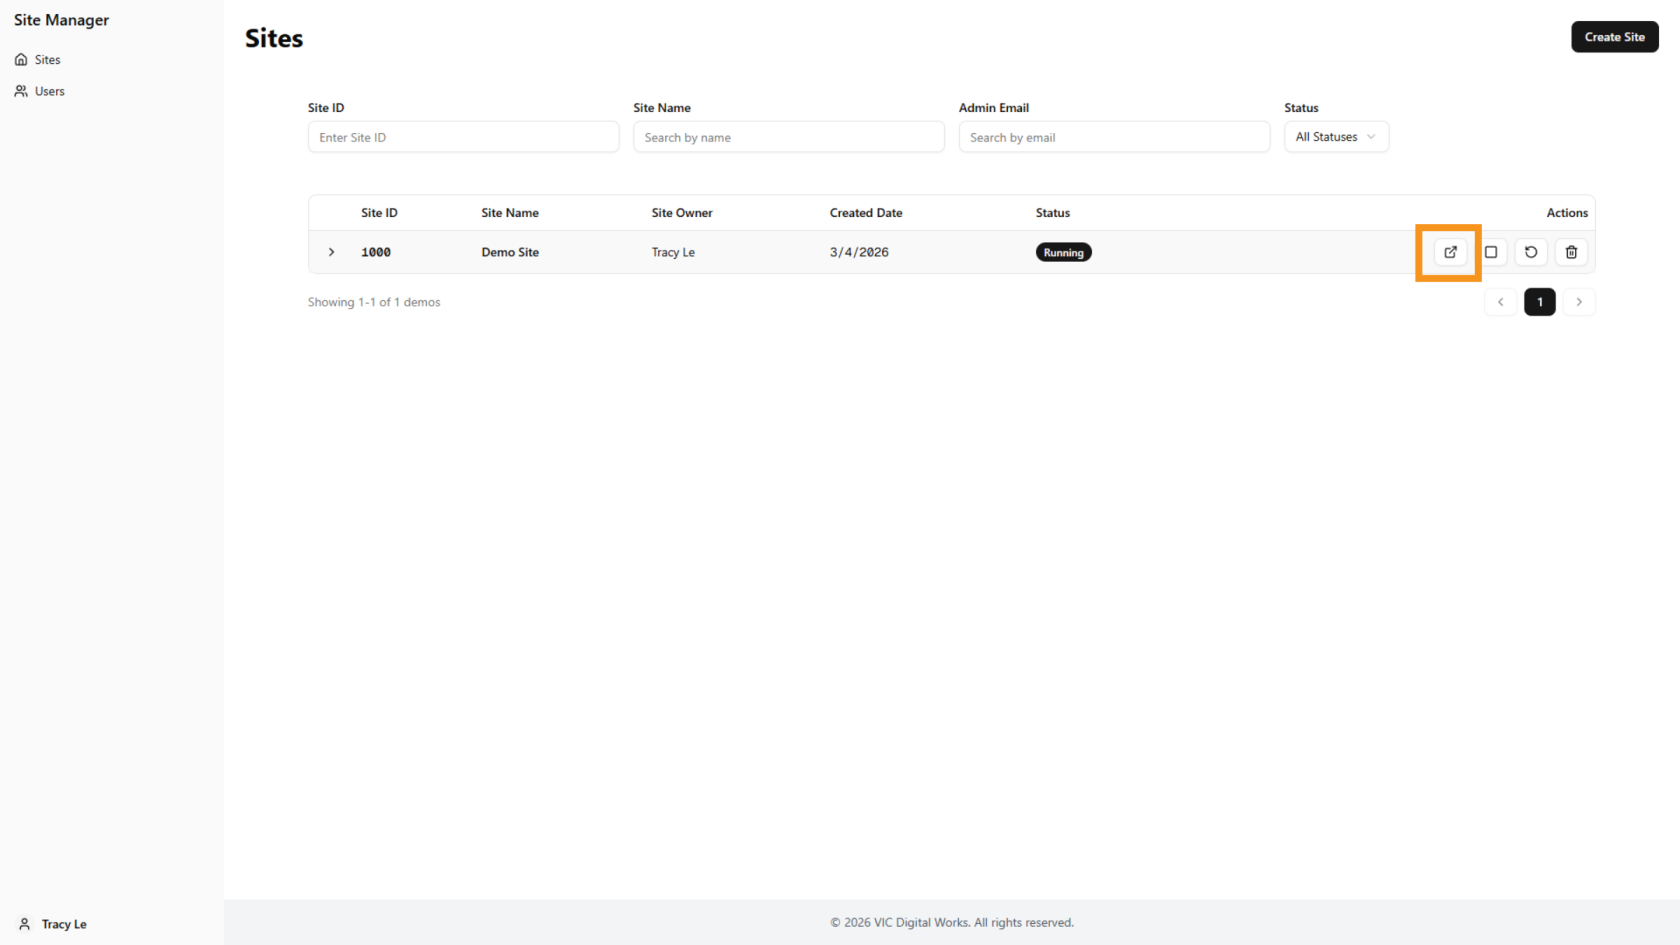
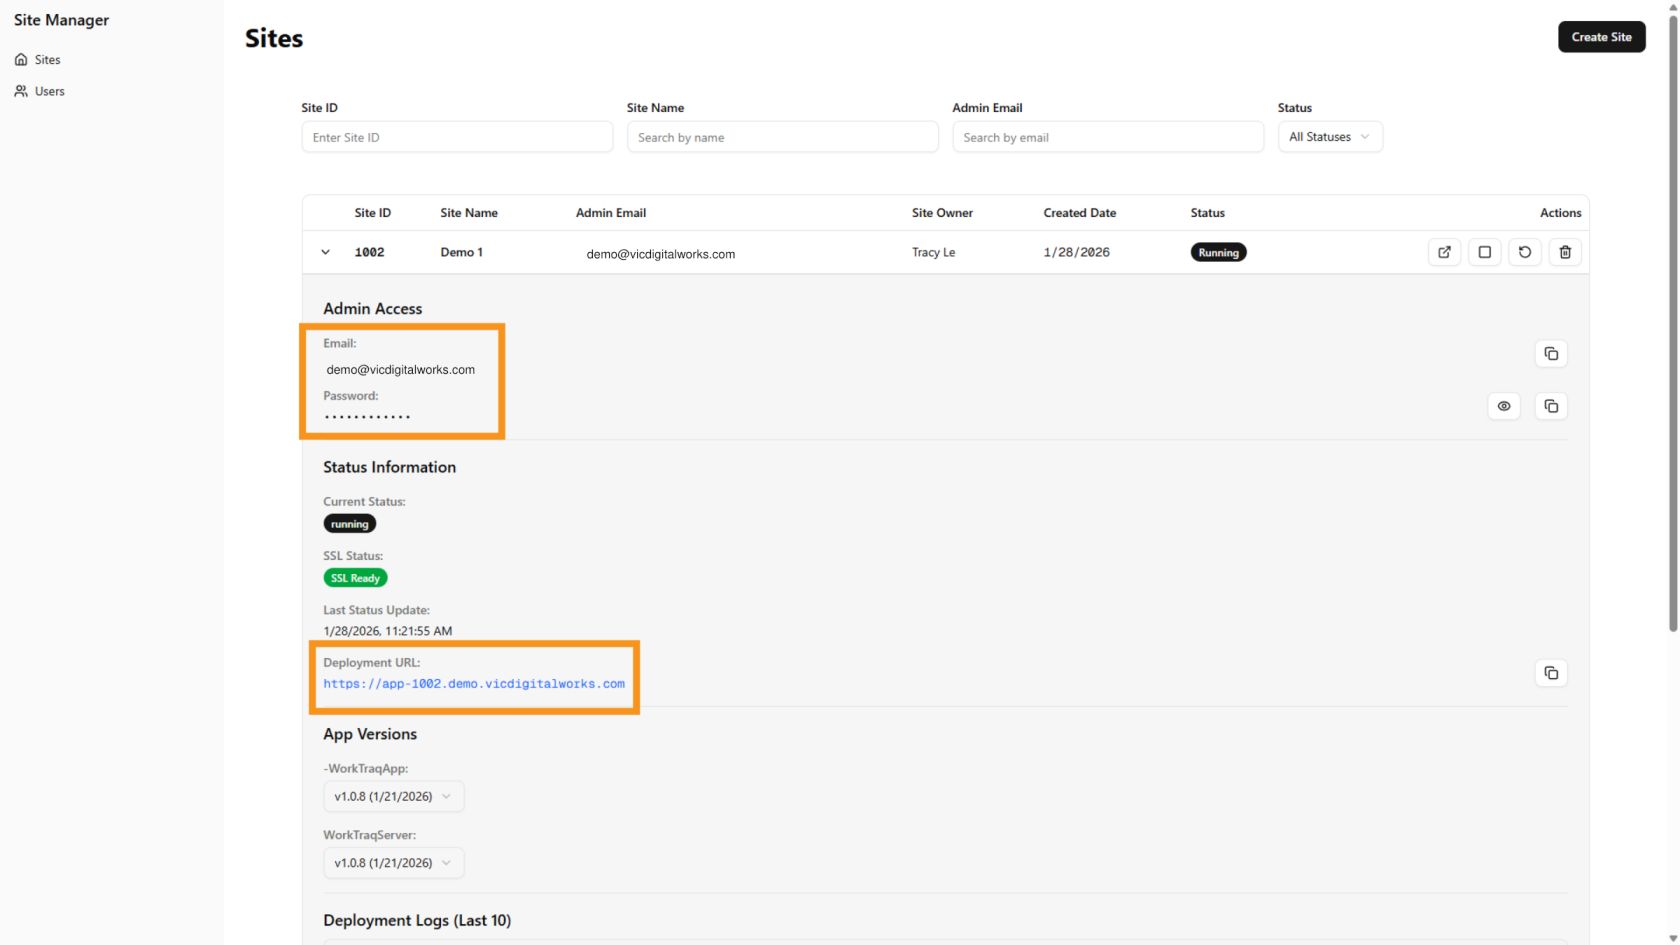
13. View Site Details
Click the ![]() arrow
arrow icon to view all the new demosite details.
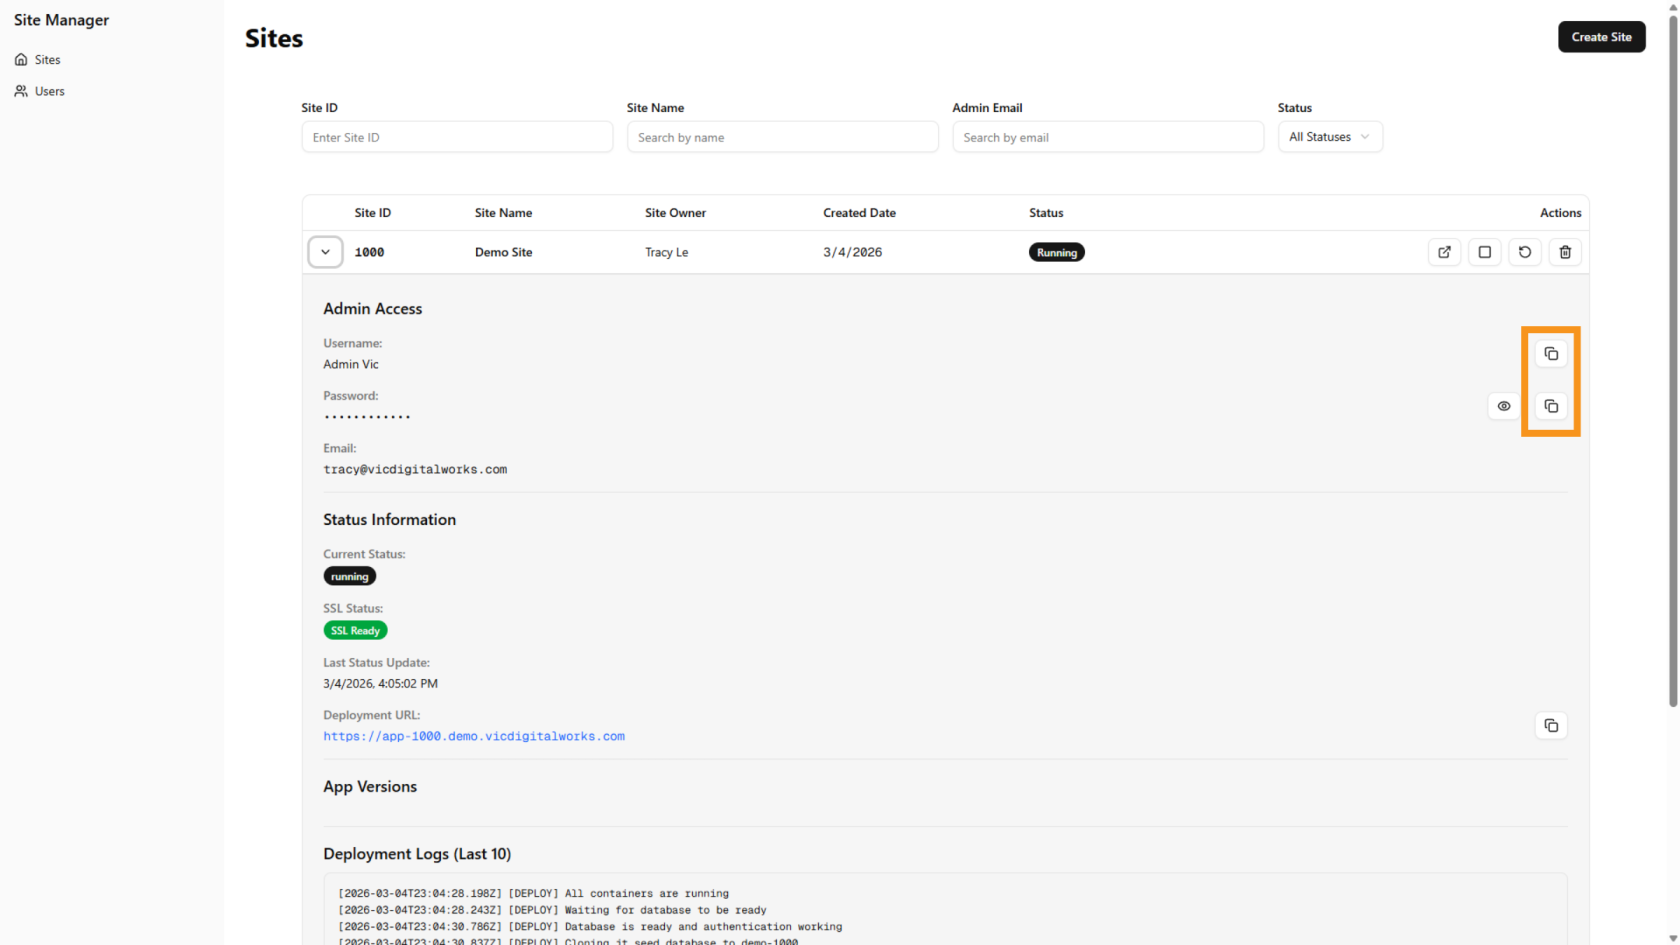
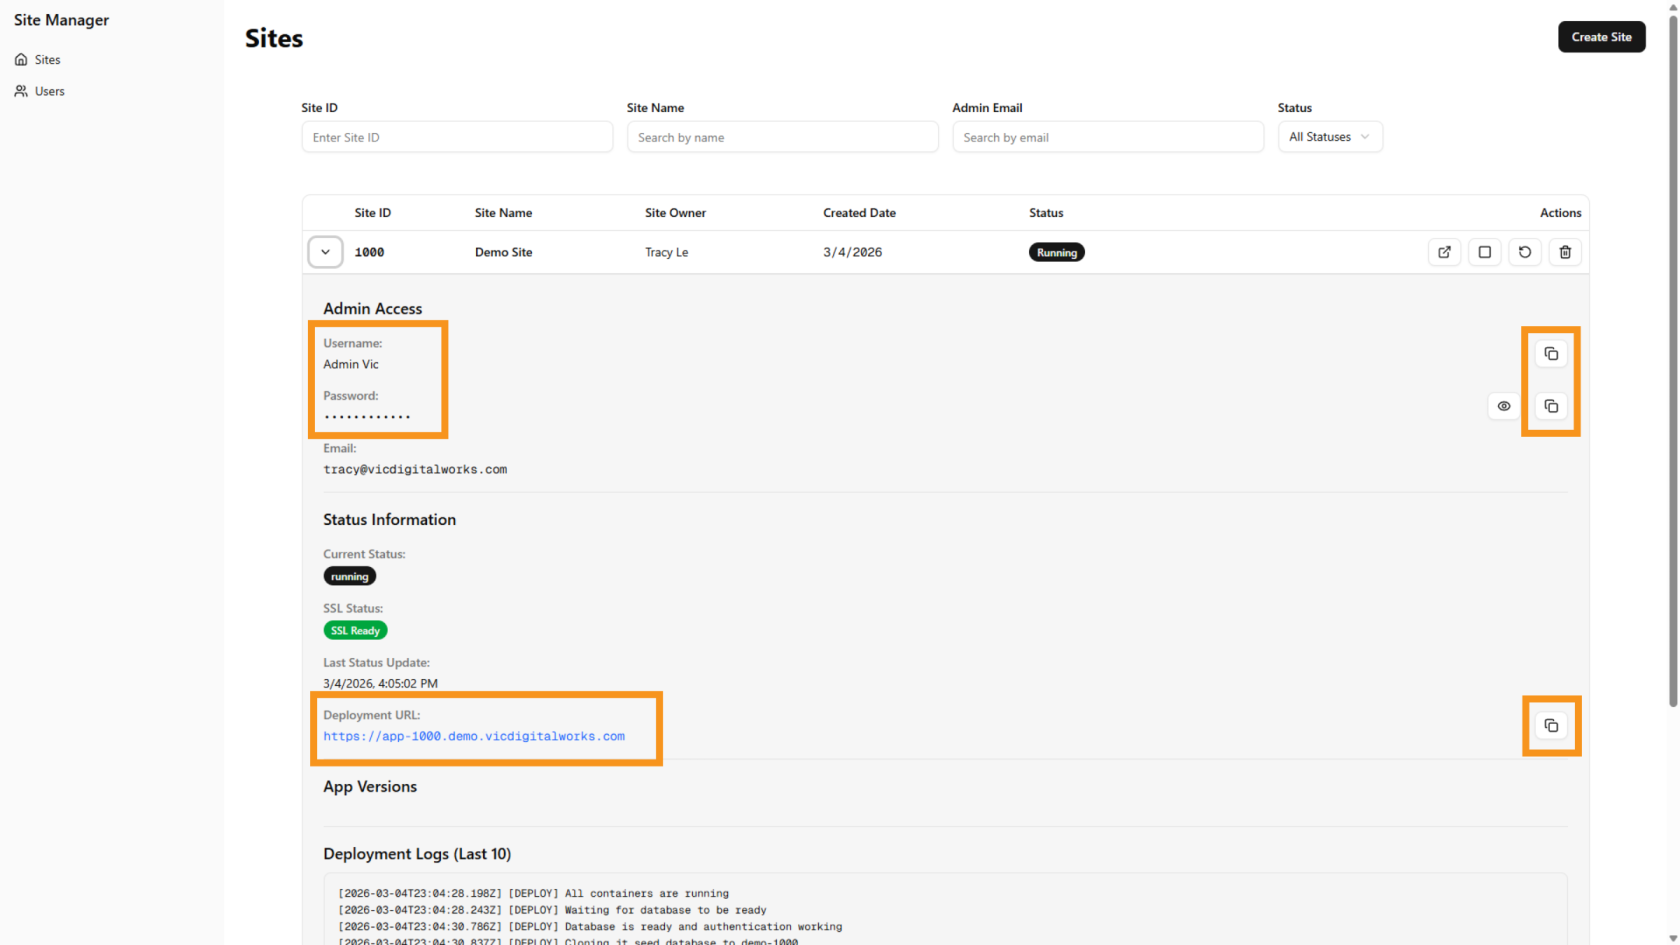
11.14. EssentialCopy DetailUsername and Password
Use the ![]() copy icon to copy the username and password for login.
copy icon to copy the username and password for login.
15. Open the Site
Click the ![]() open icon to access the site.
open icon to access the site.
16. Log Inin to WorkTraq
In the details, you need to provide your customer with three pieces of information to log into the WorkTraq system: Deployment URL, Email, and Password.
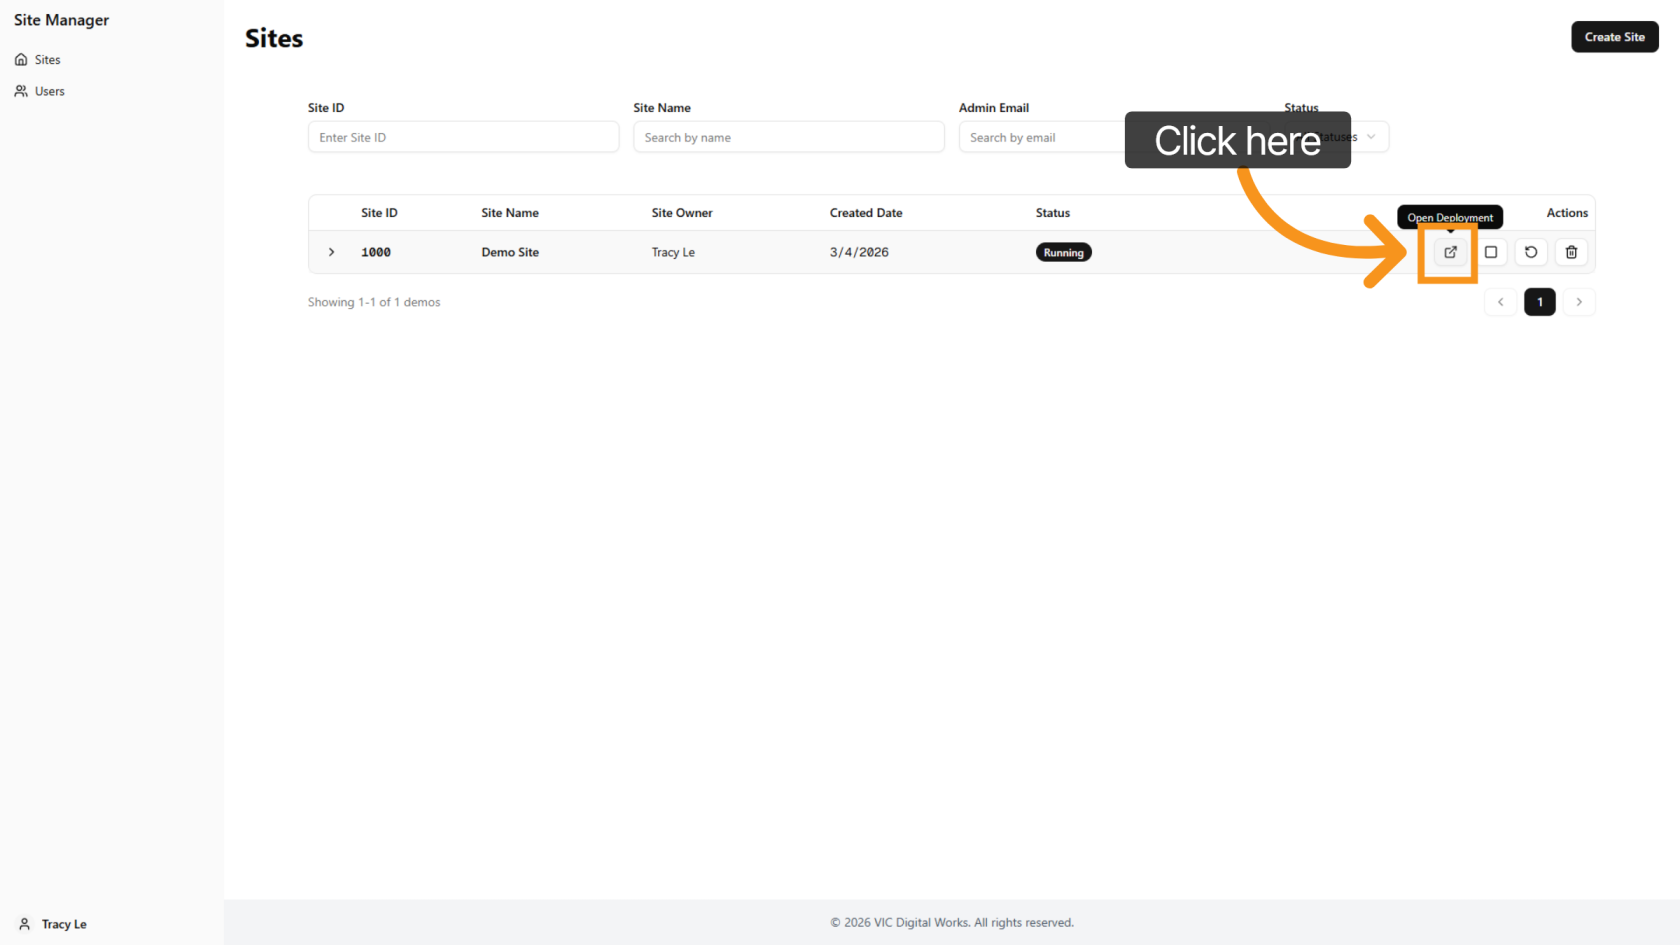
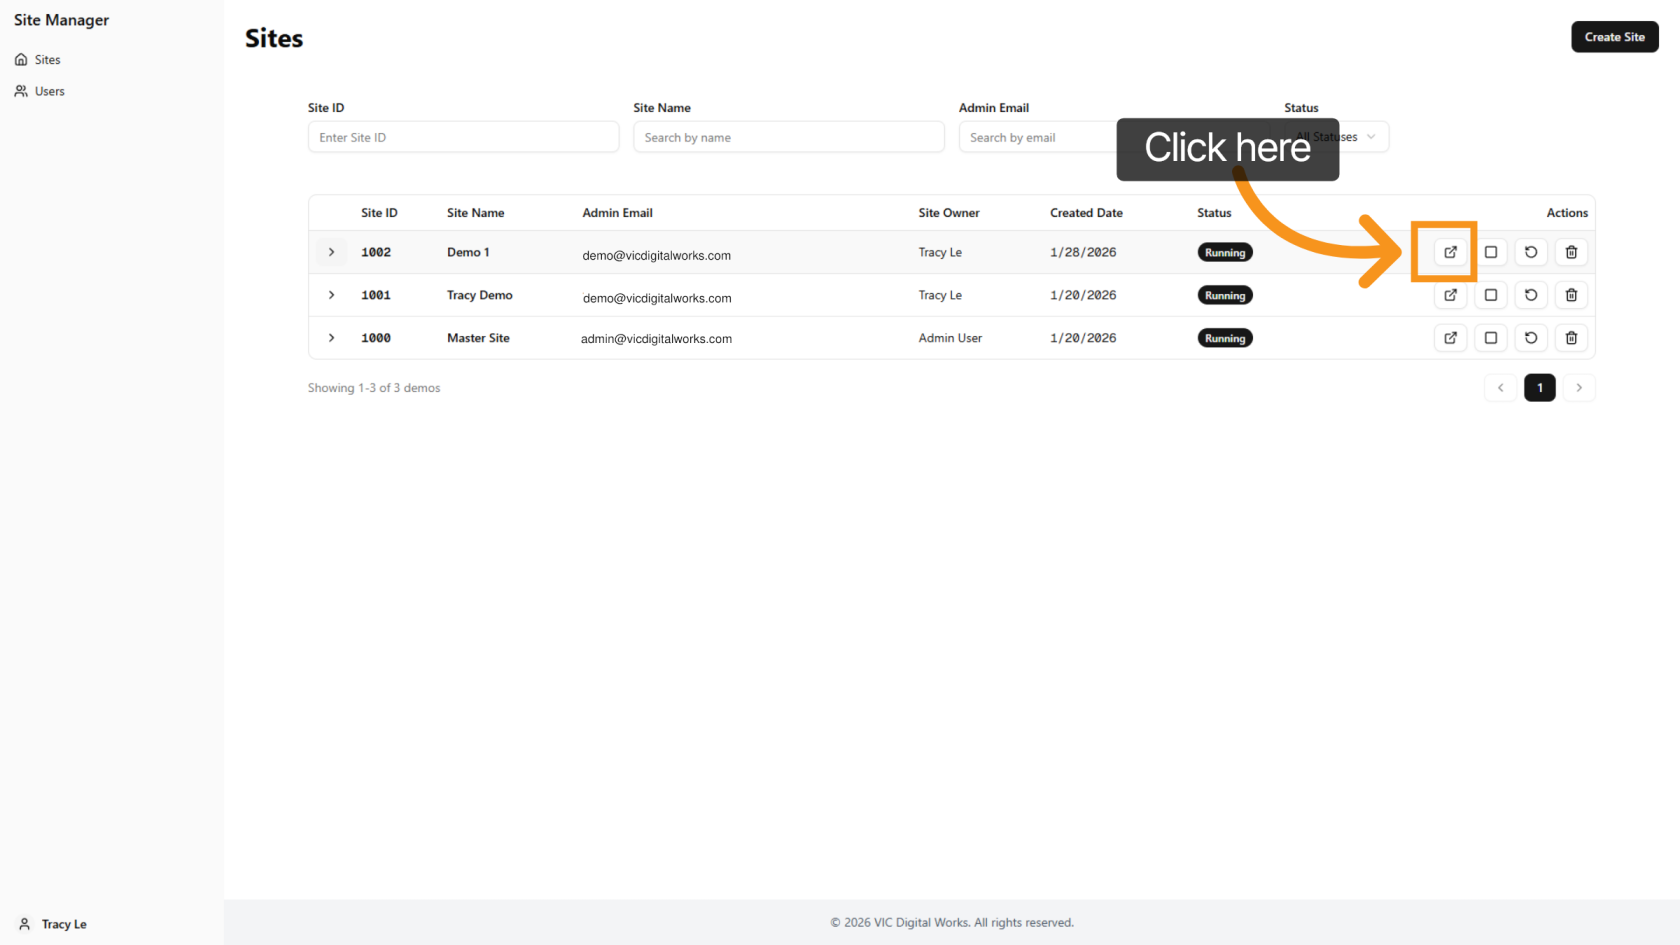
12. Quick Access to Customer Site
Click 'Open Deployment' next to each site to quickly navigate to the customer site.
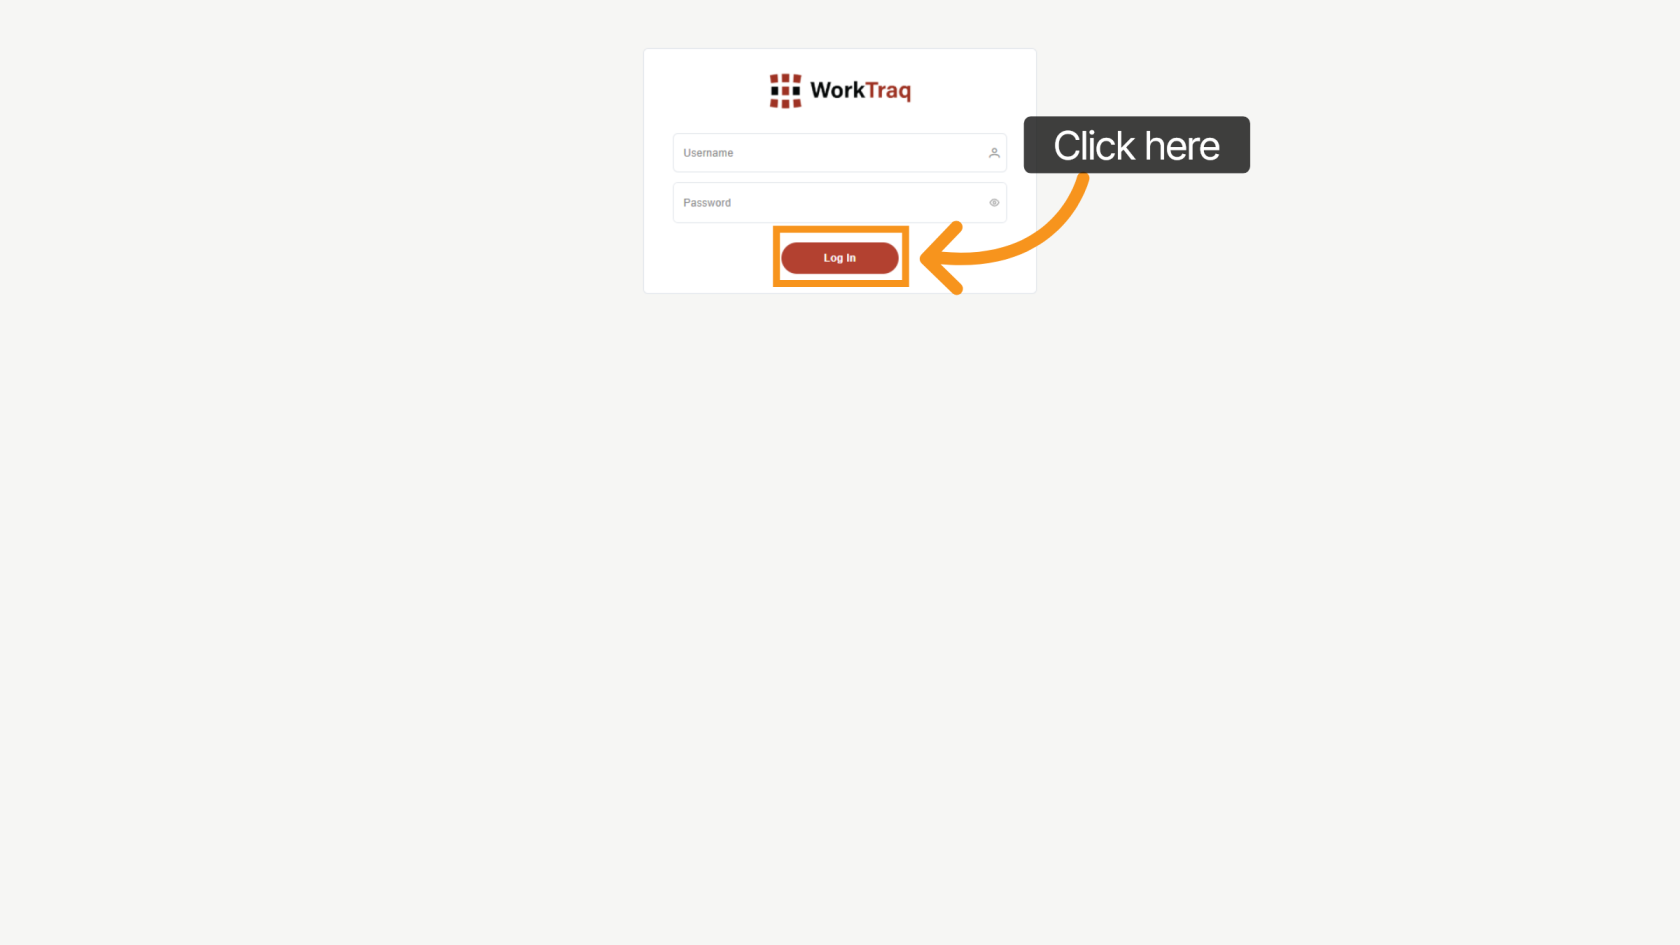
13. Log in WorkTraq
Use the Admin Emailusername and Admin Password youpassword created earlier to log in to WorkTraq.
After entering the WorkTraqdetails, system.click "Log In".
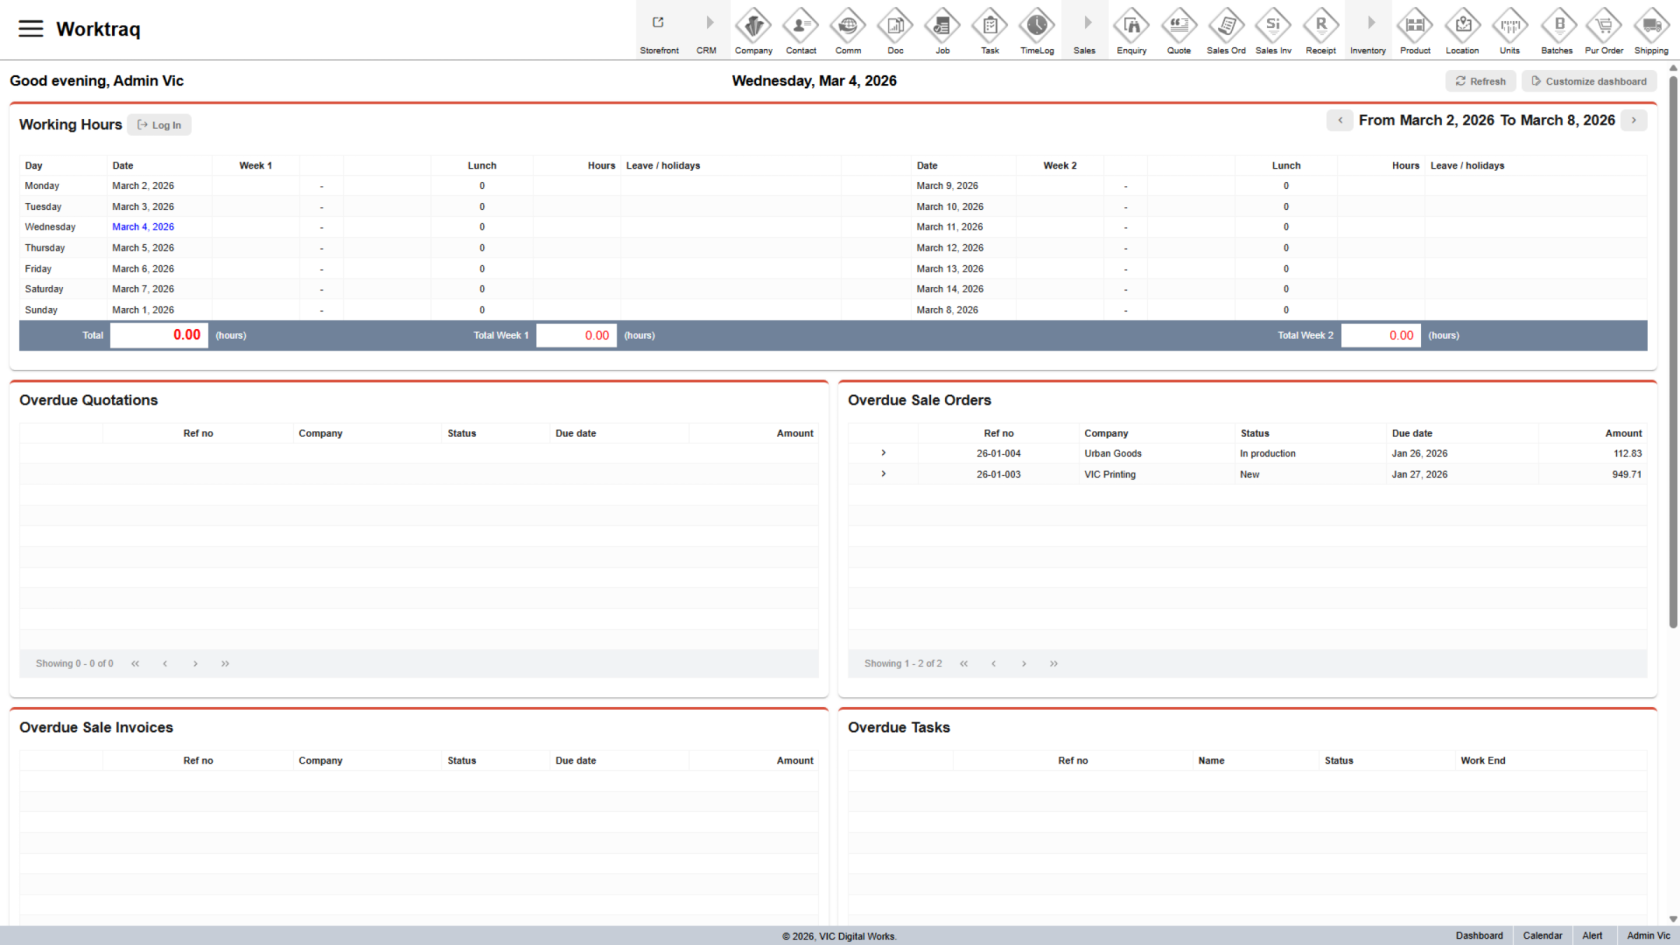
17. Access WorkTraq
The demo site is now ready to be shared with the customer.
18. Send Details to Customer
Send the customer the demo site details so they can try it.
The three important details are the deployment URL, username, and password.
All of these can be found in the demo site details. Use the copy icon to copy and send them.
You have successfully created and deployed a demo printing site. Please verify the site details and deployment status to ensure the site is ready for use.