Create and Deploy a New Printing Demo Site
This tutorial guides you through creating and deploying a demo printing site, ensuring that each customer has an individual site.
Video Tutorial
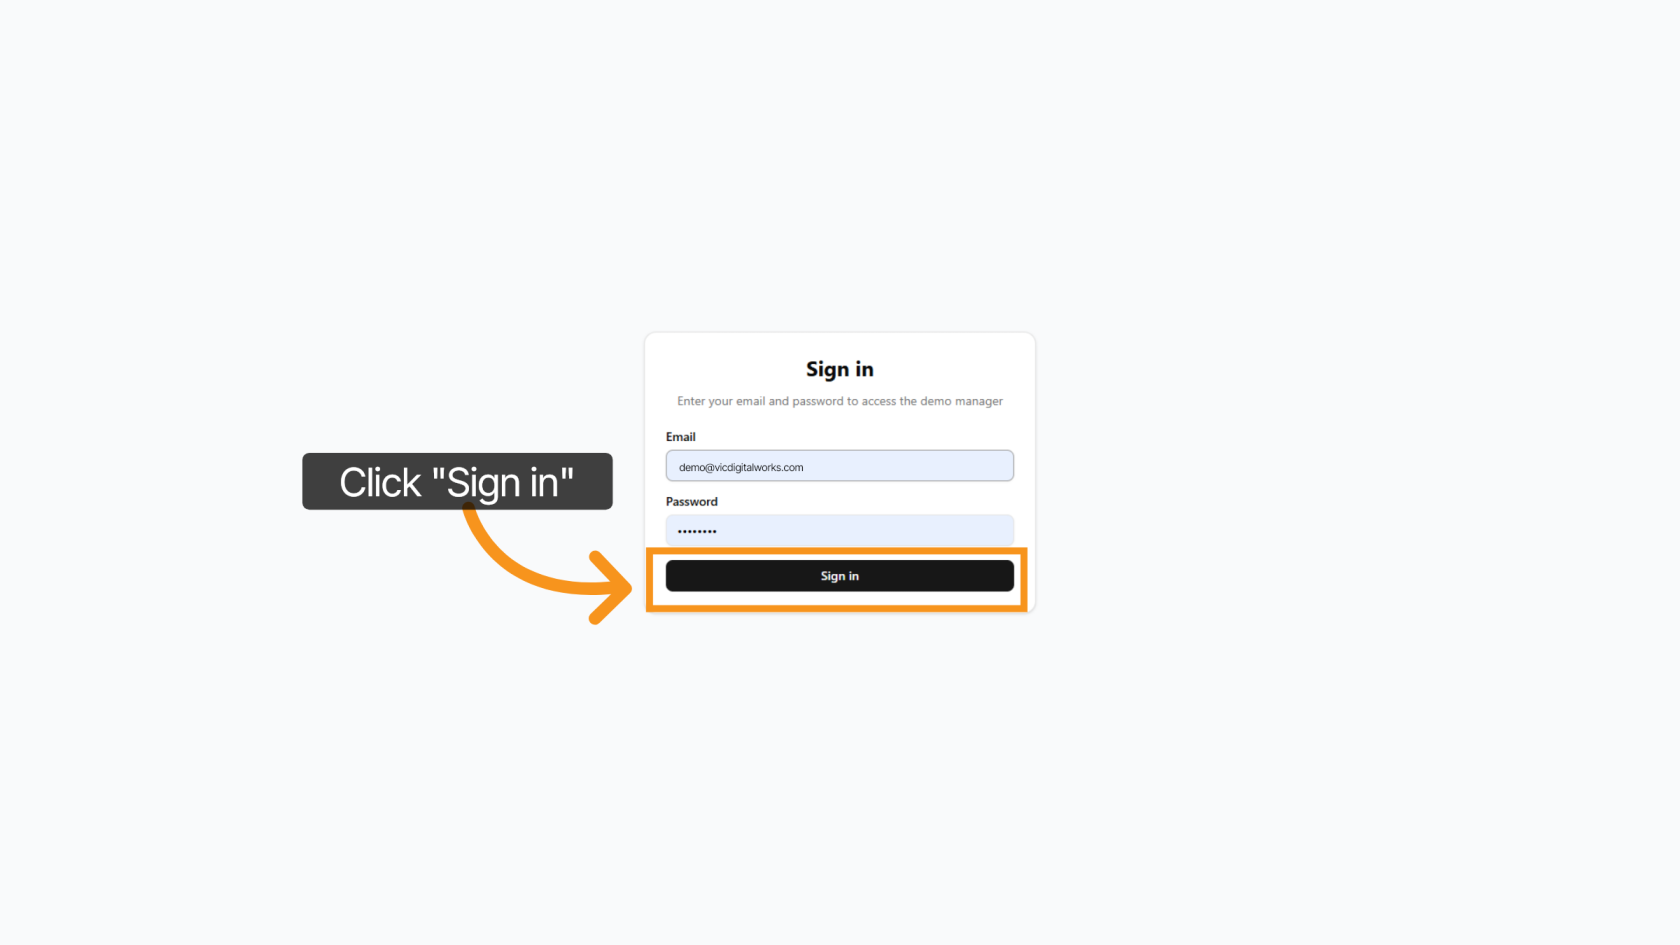
1. Login to Admin Setting
Access the Vic Digital Printing Demo Admin,demo-printing.vicdigitalworks.com, enter your email and password, then click "Sign In".
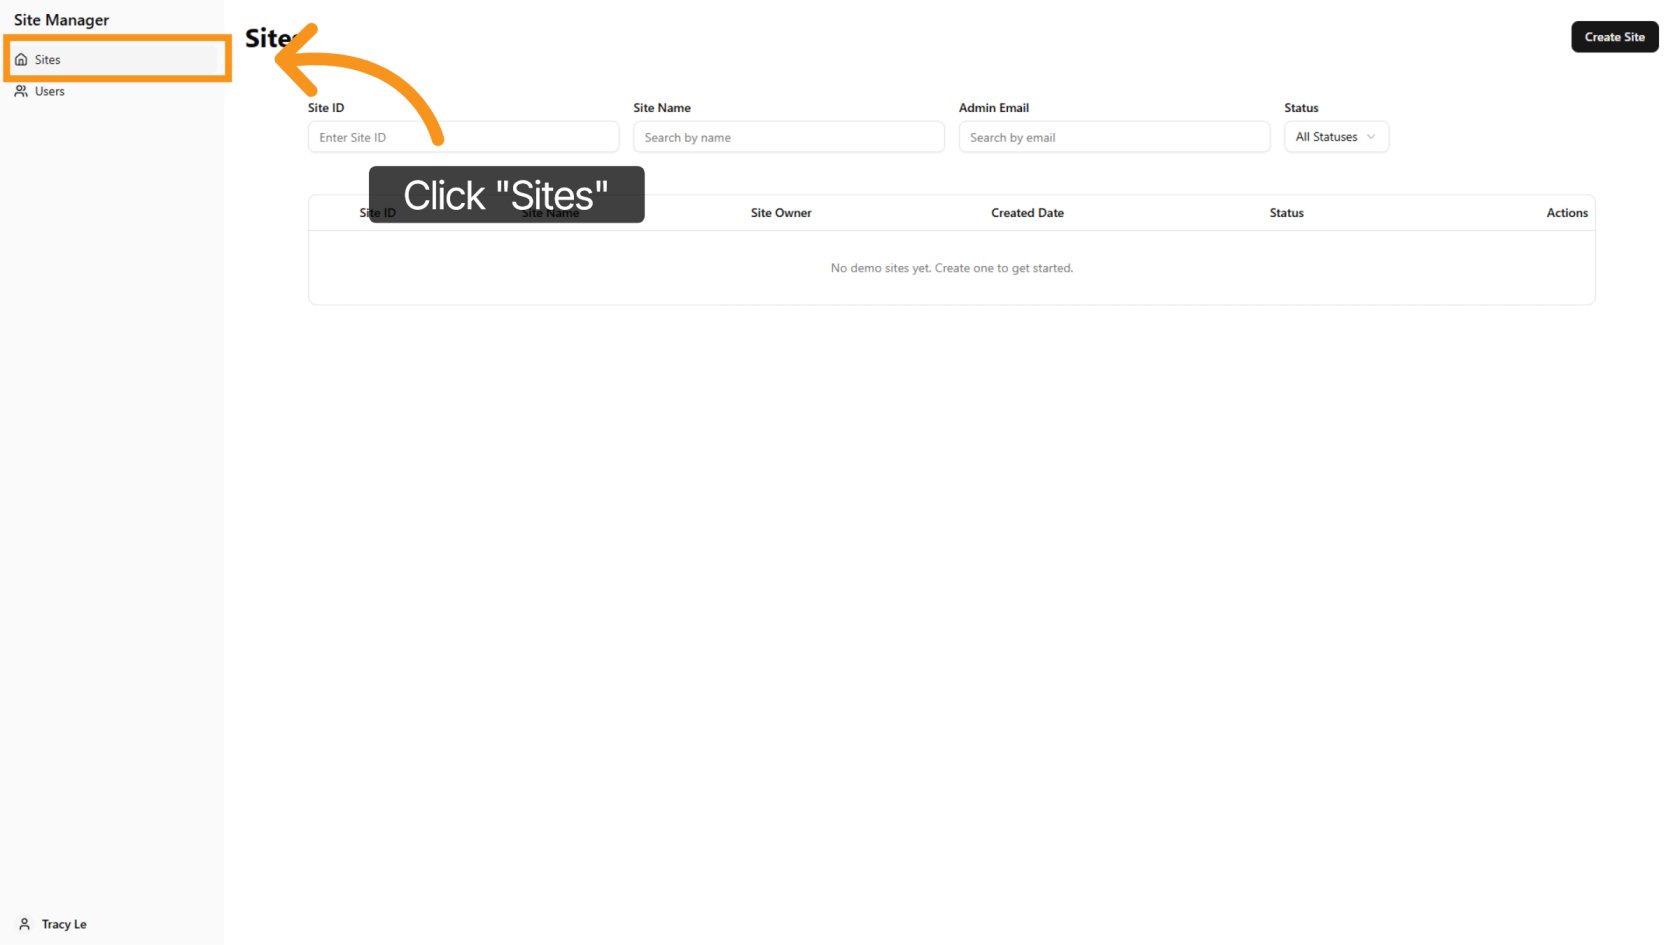
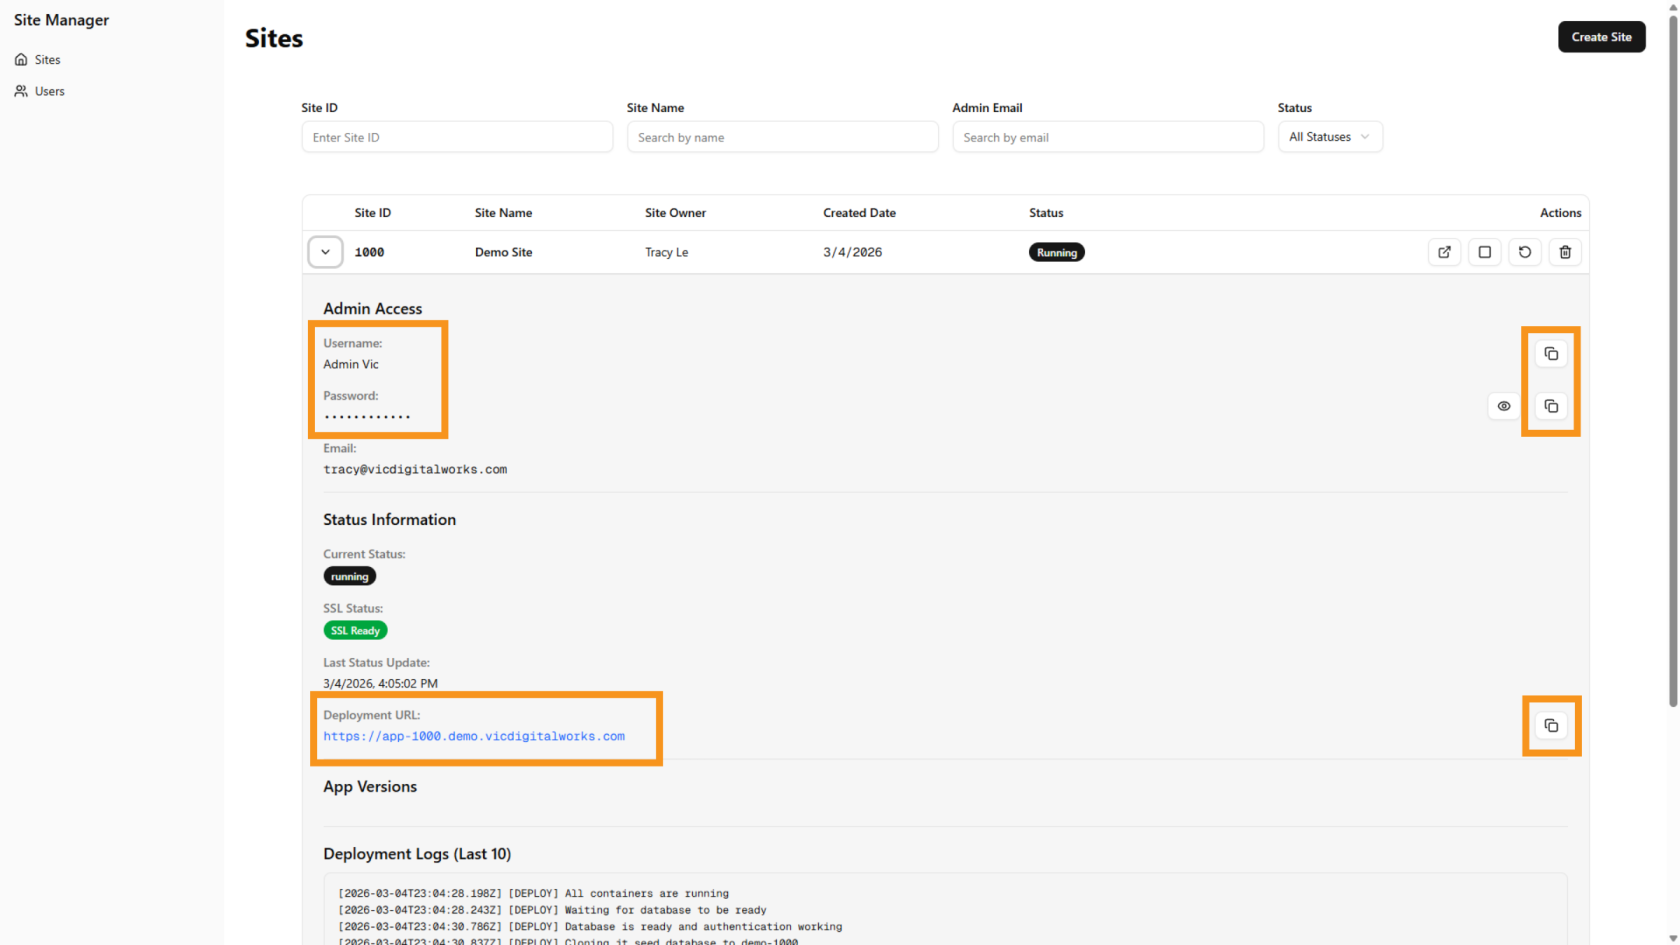
2. Access the Sites Section
Click "Sites" to open the site management section where you can view and manage demo sites.
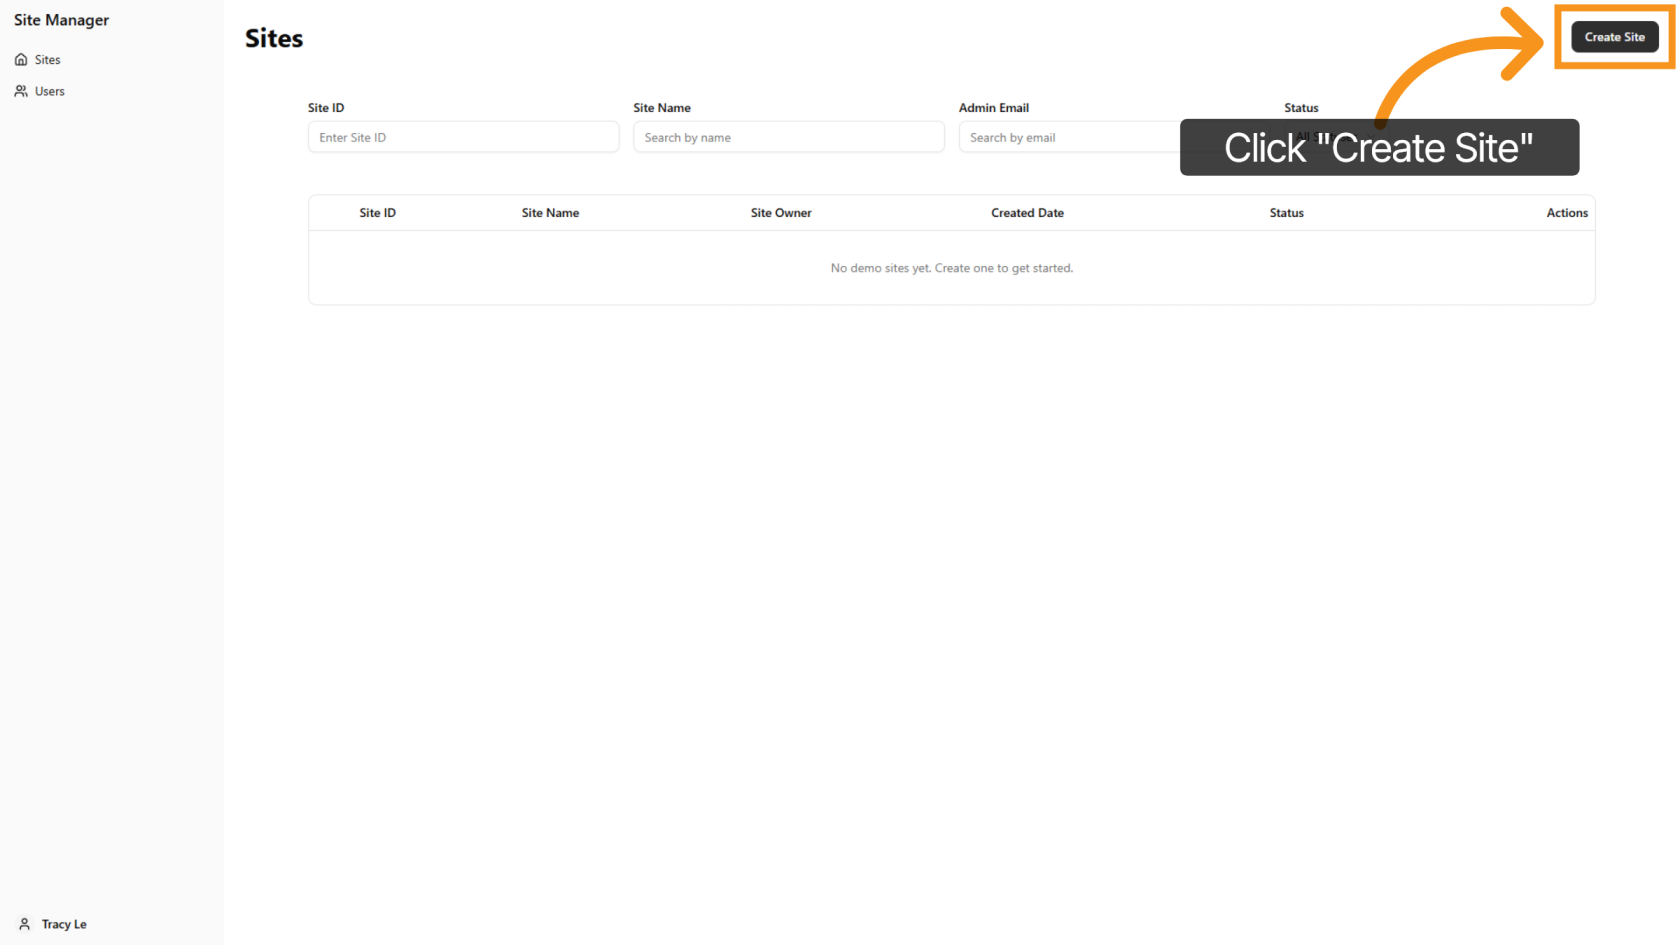
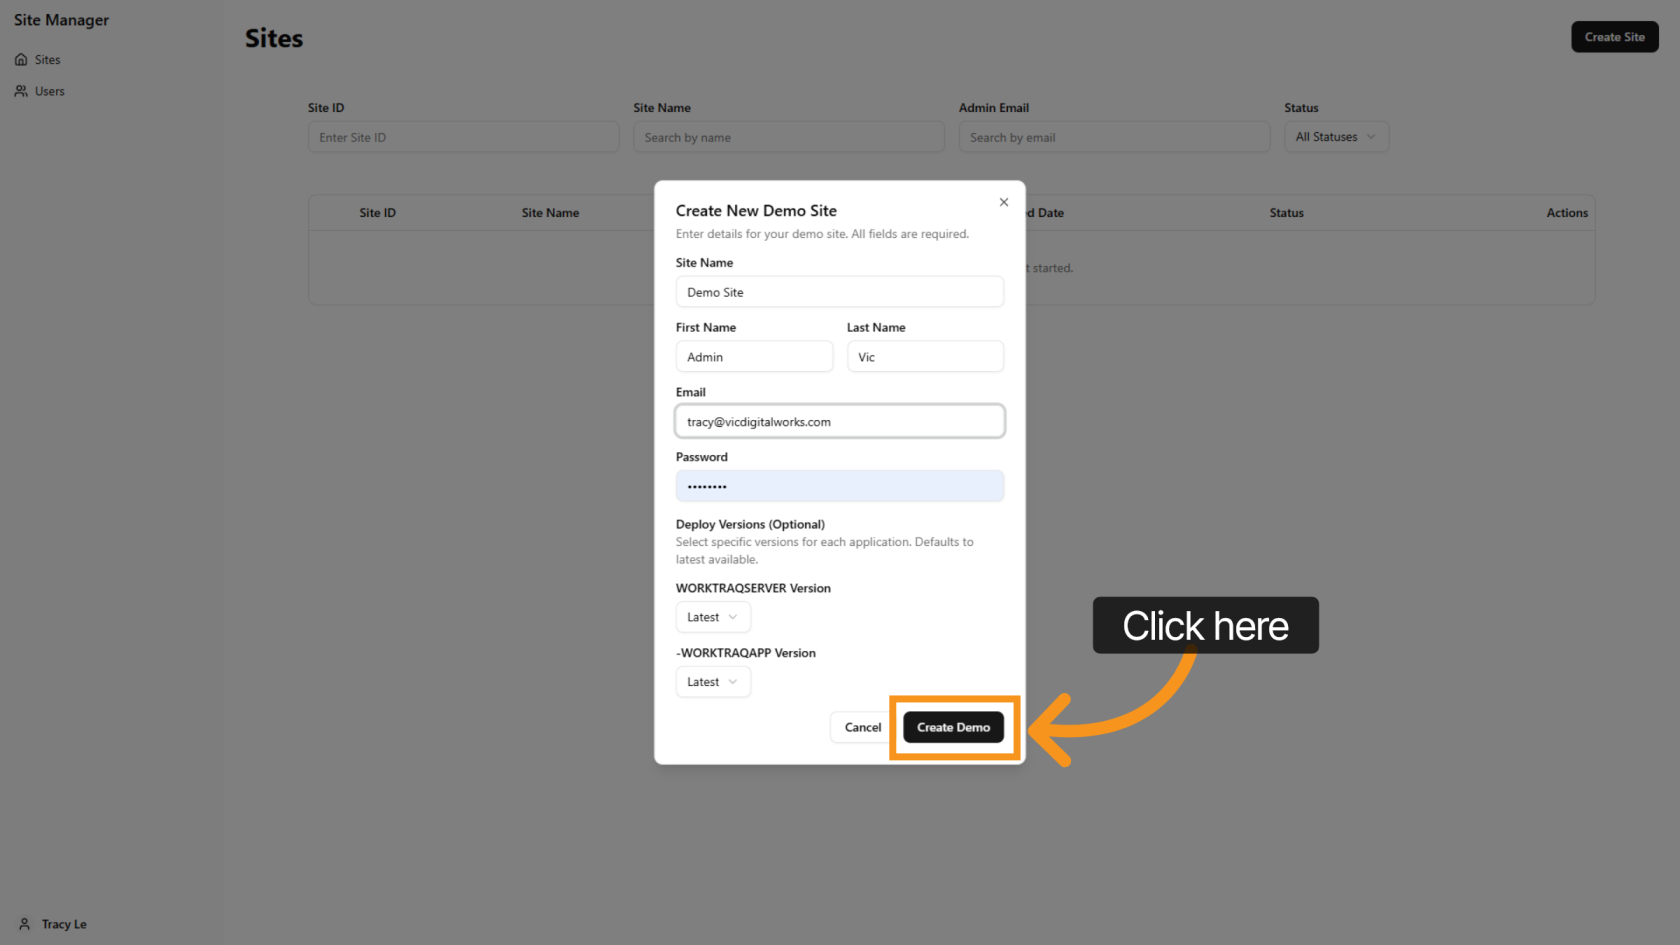
3. Open Demo Site Form
Click "Create Site" to open the form for entering the new demo site details.
4. Enter Site Name
Enter the site name to clearly identify the demo site. This can be the customer’s company name.
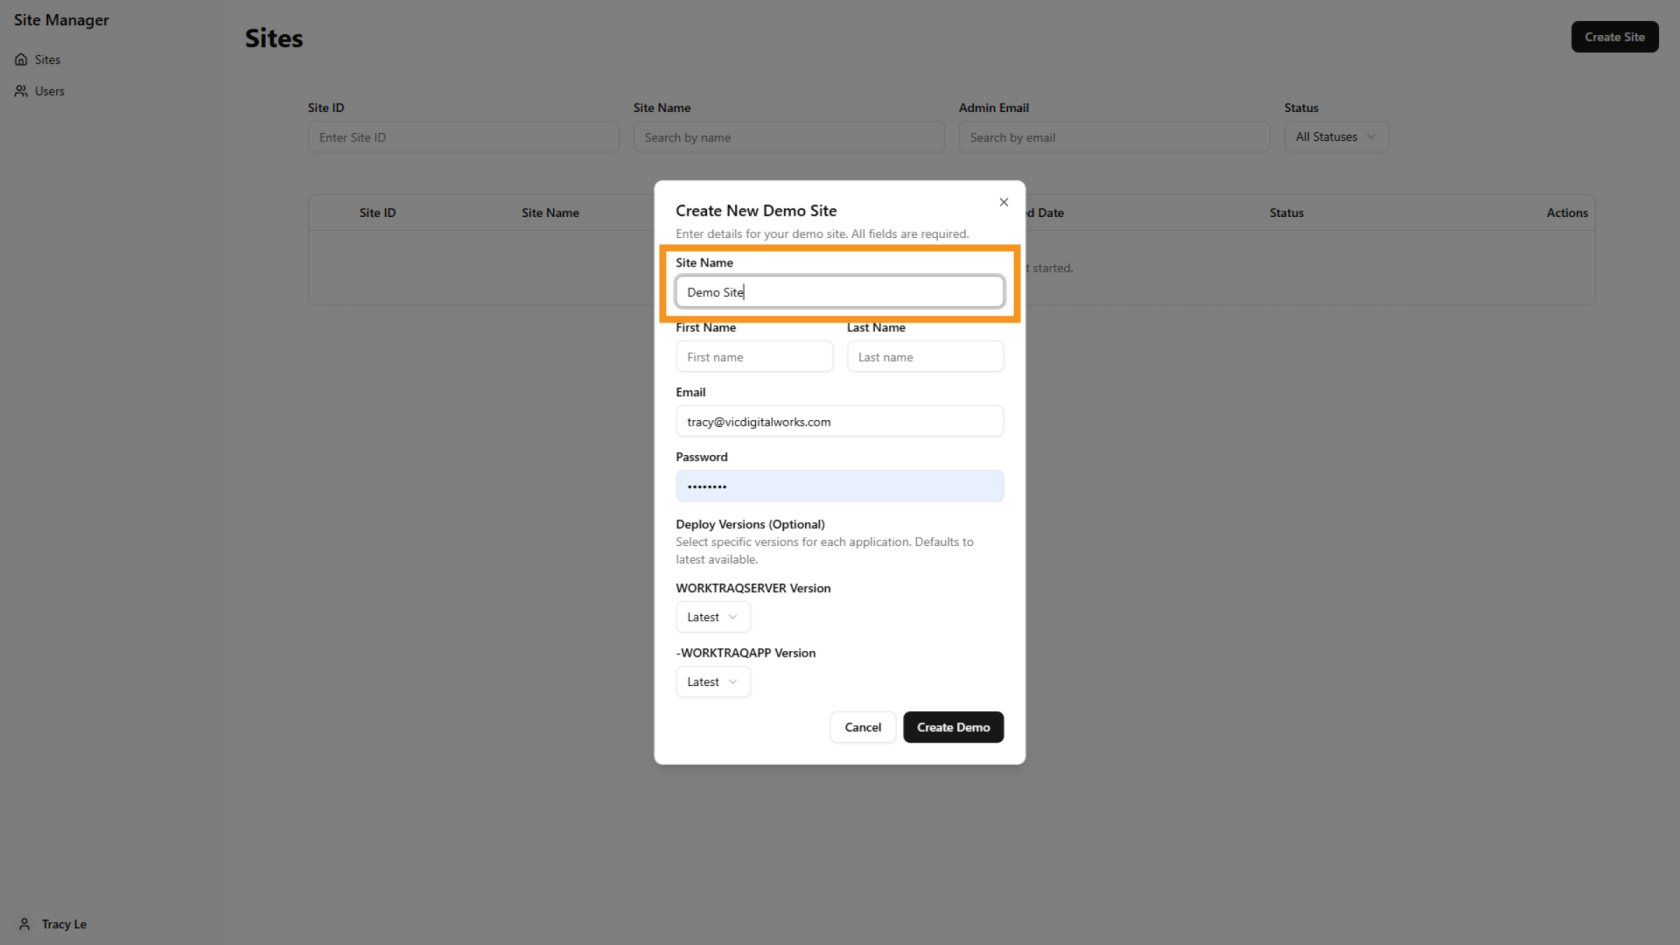
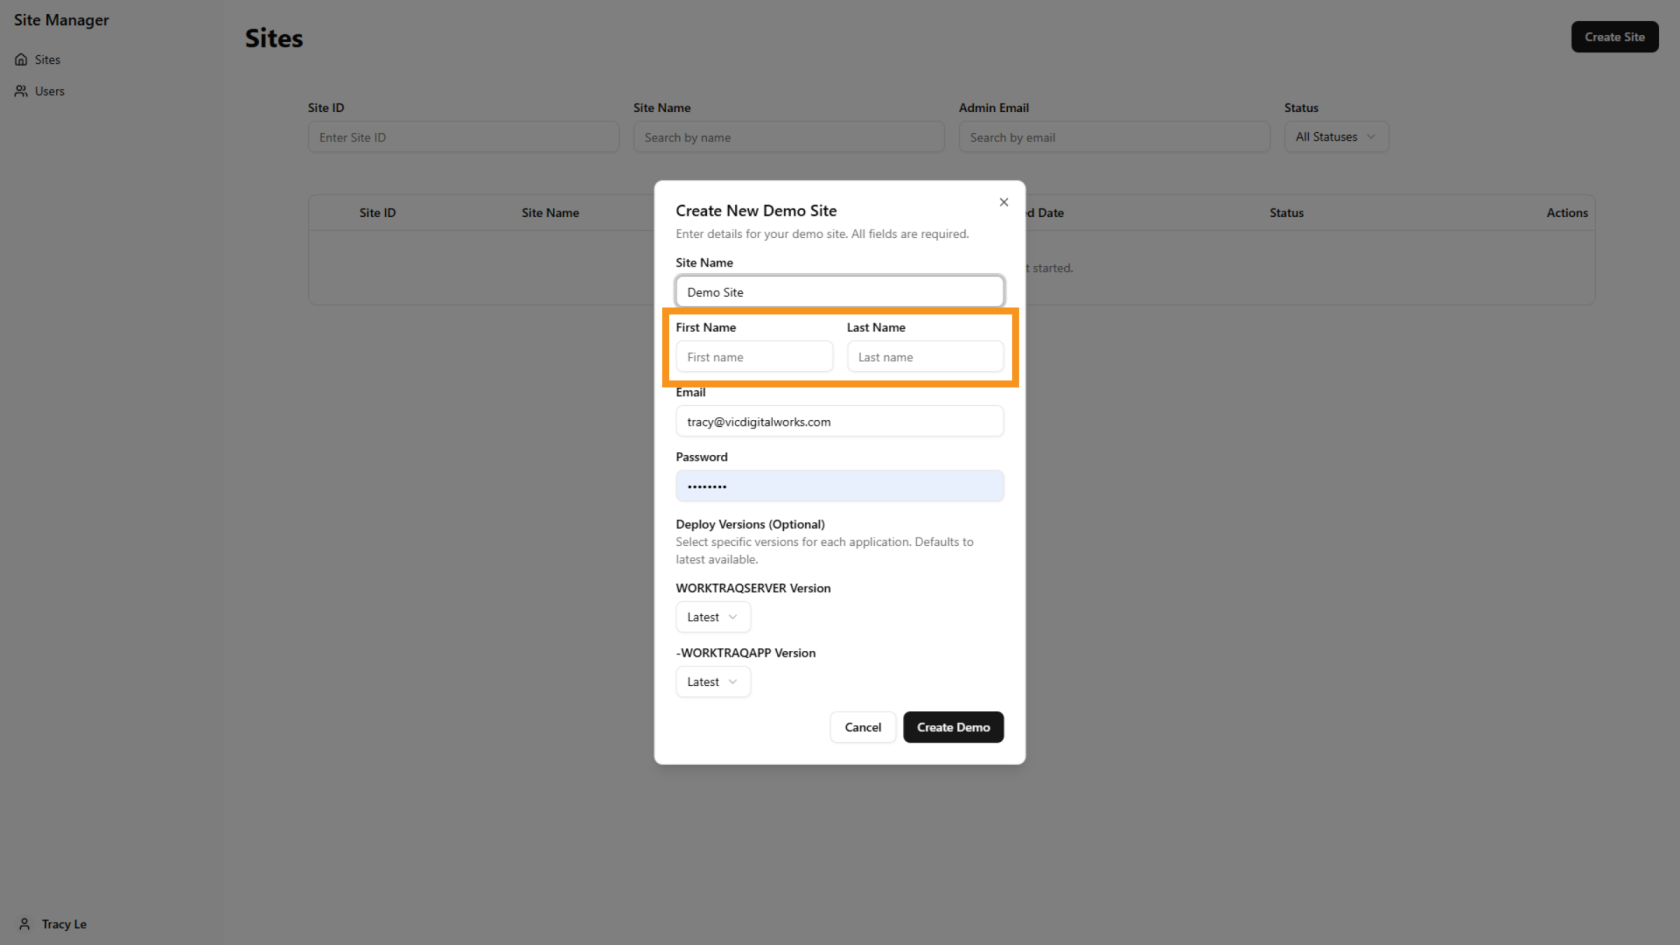
5. Enter Customer Name
Enter the customer’s first name and last name. This will be used as the username to log in to the system later.
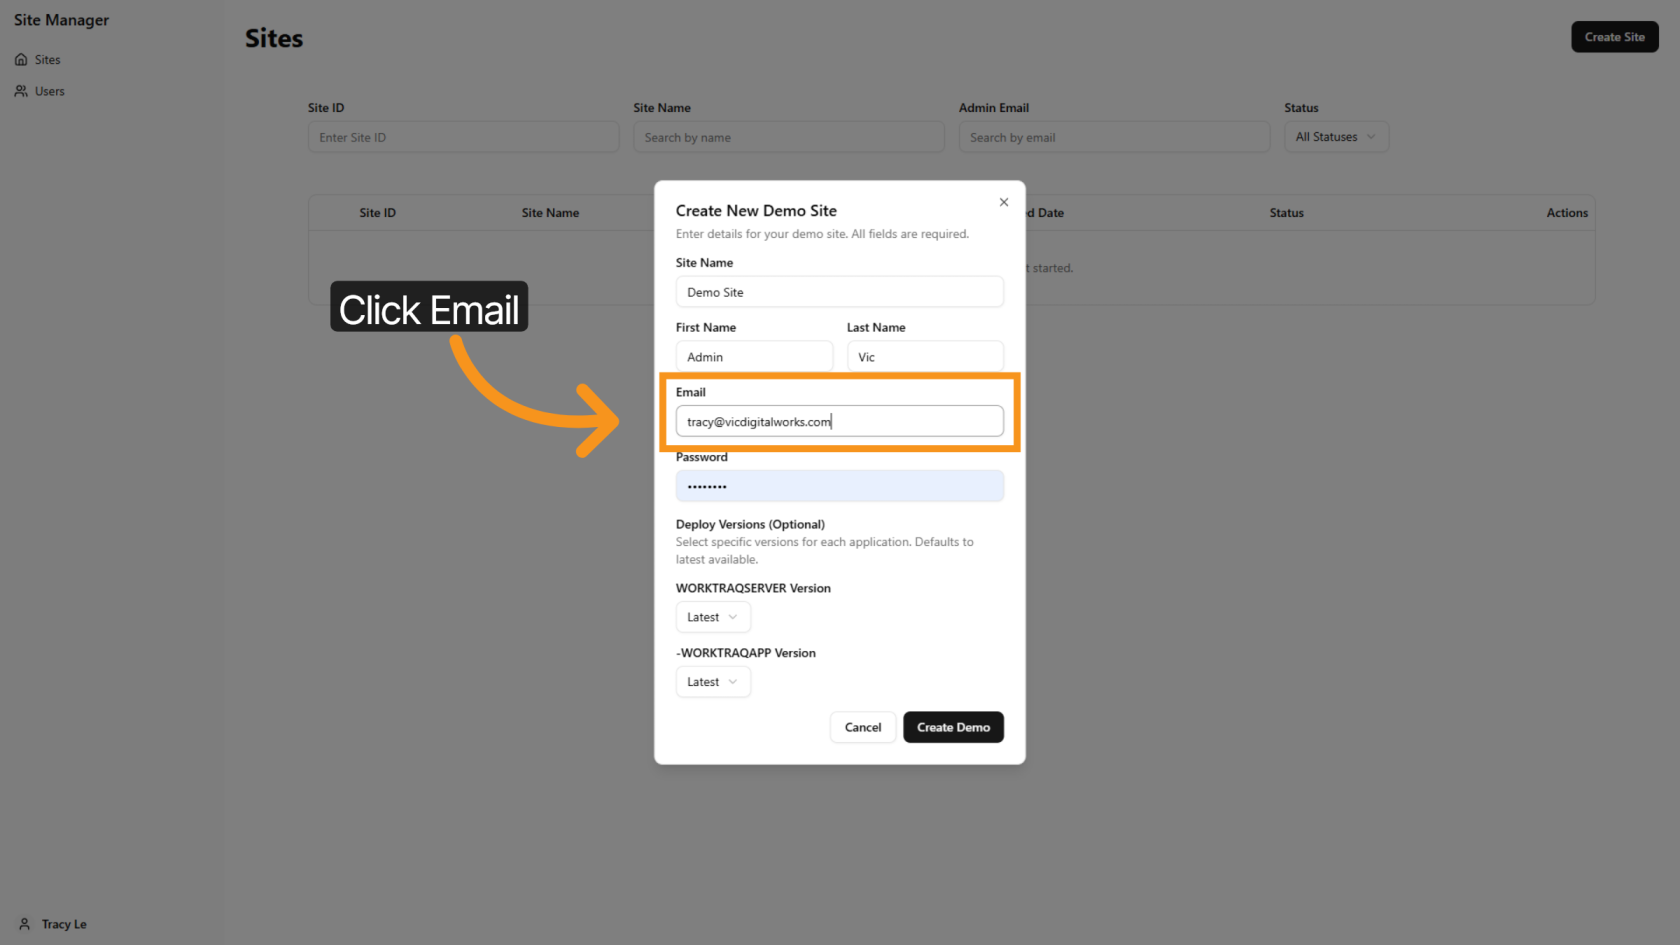
6. Enter Email Address
Enter the customer’s email address.
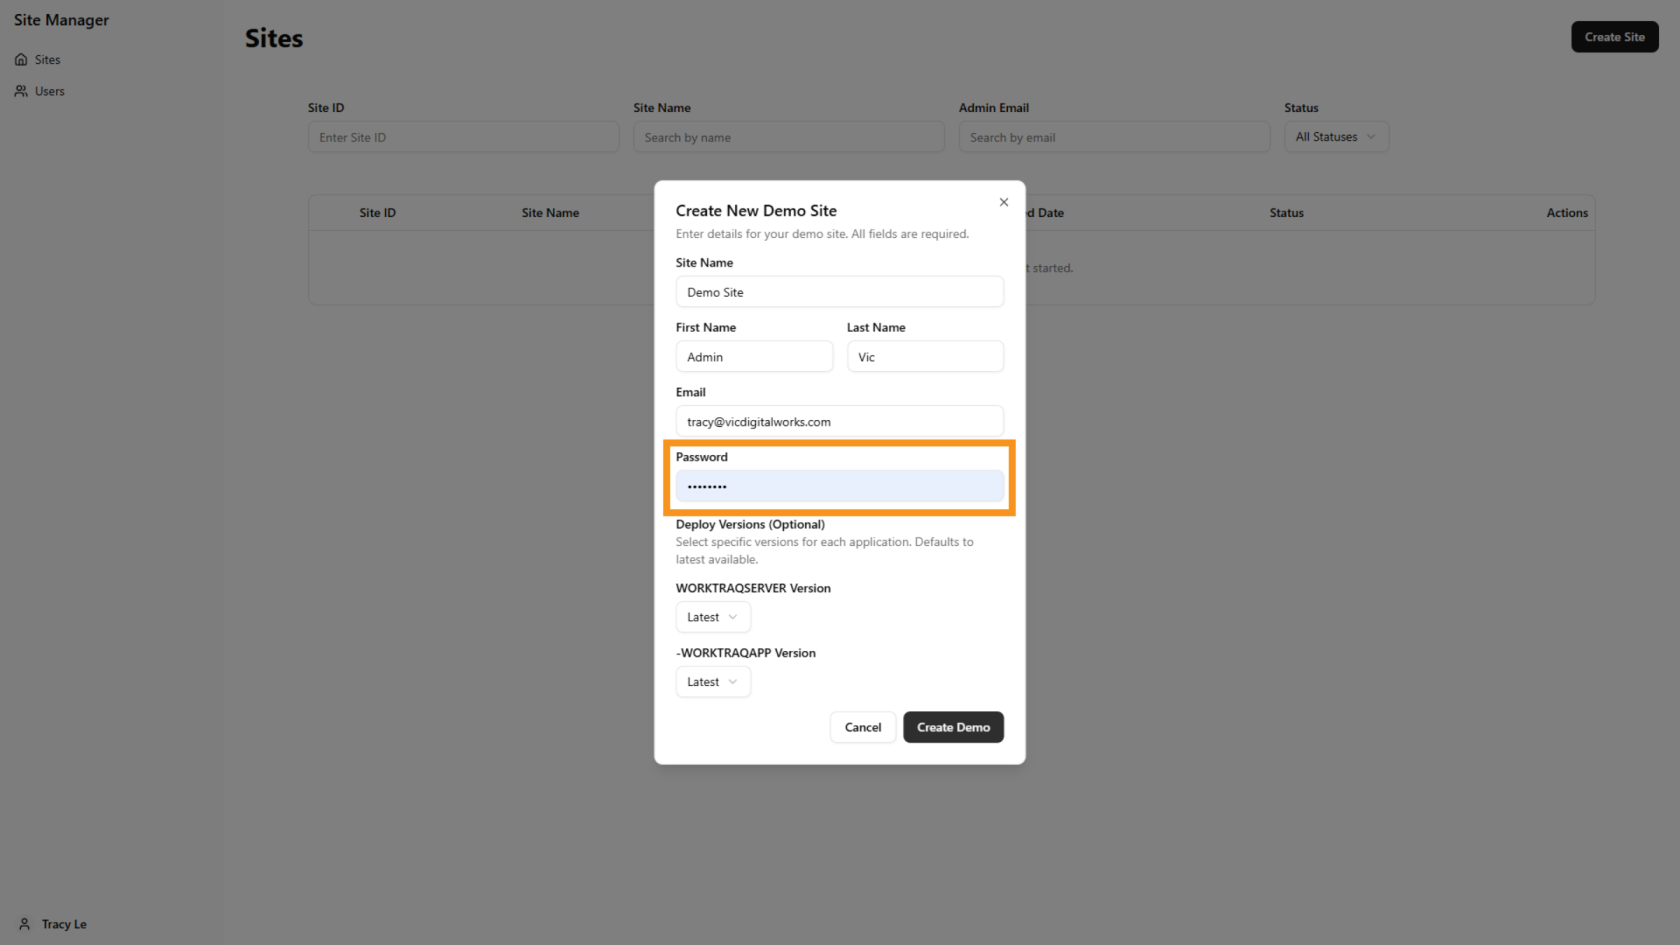
7. Enter Password
Enter the password that will be used later to log in to the system.
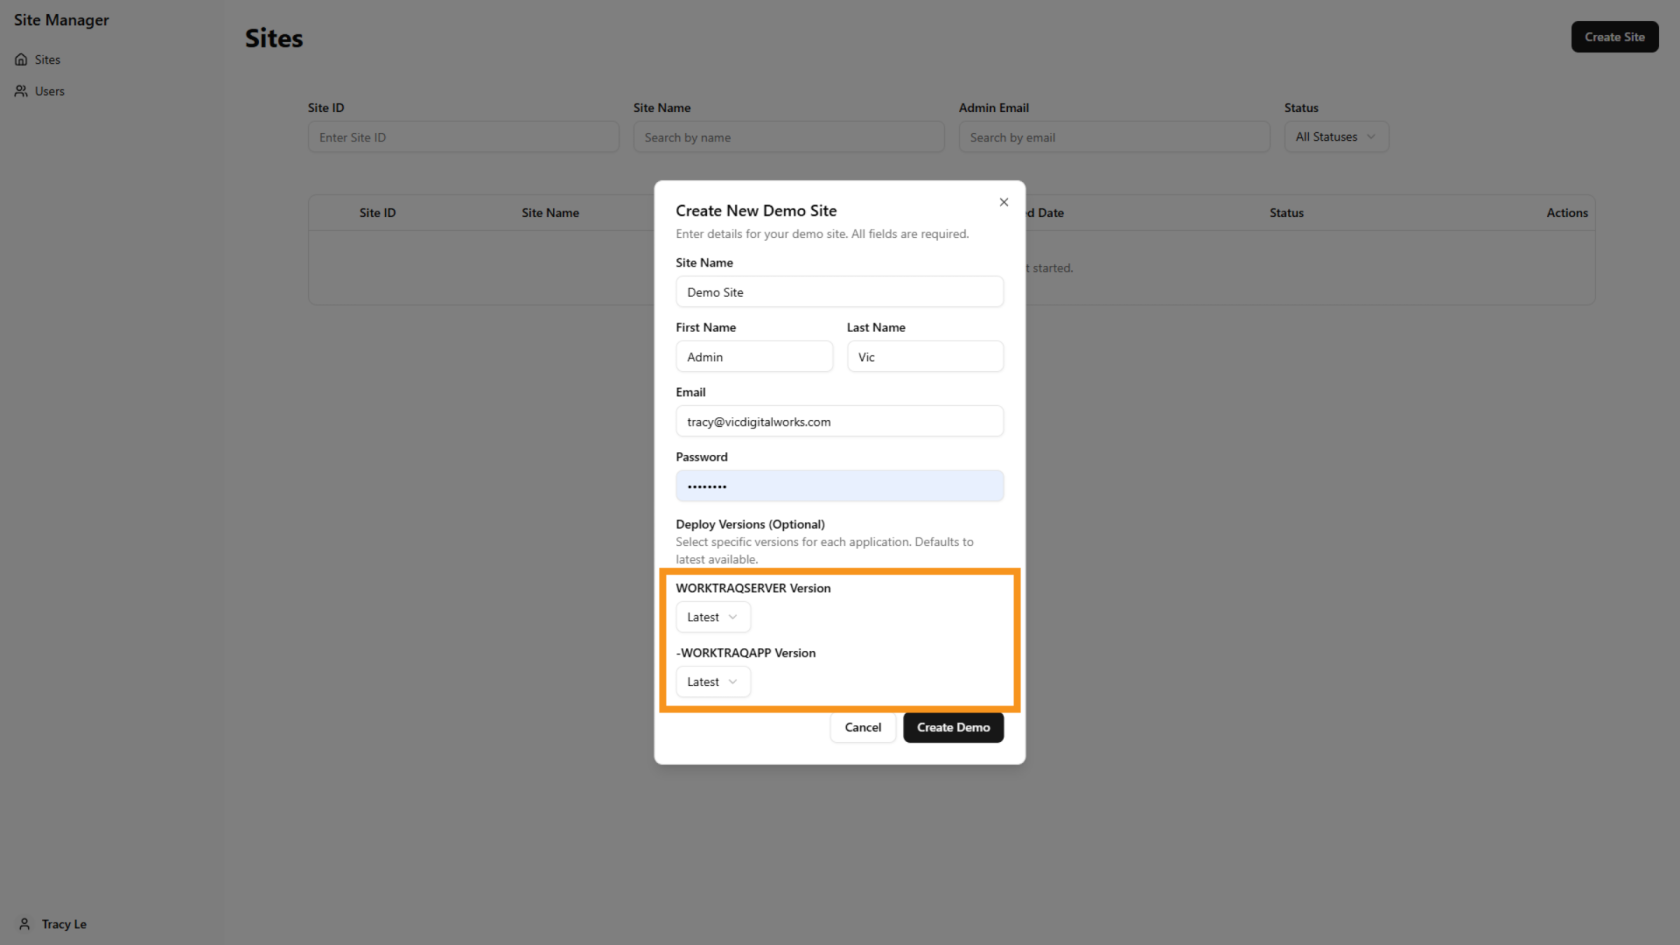
8. Select Version
By default, the system creates the site using the latest version, but you can choose a different version if needed. Please note that the latest version includes the newest features and updates.
9. Create the Demo Site
Click "Create Demo" to create the demo site.
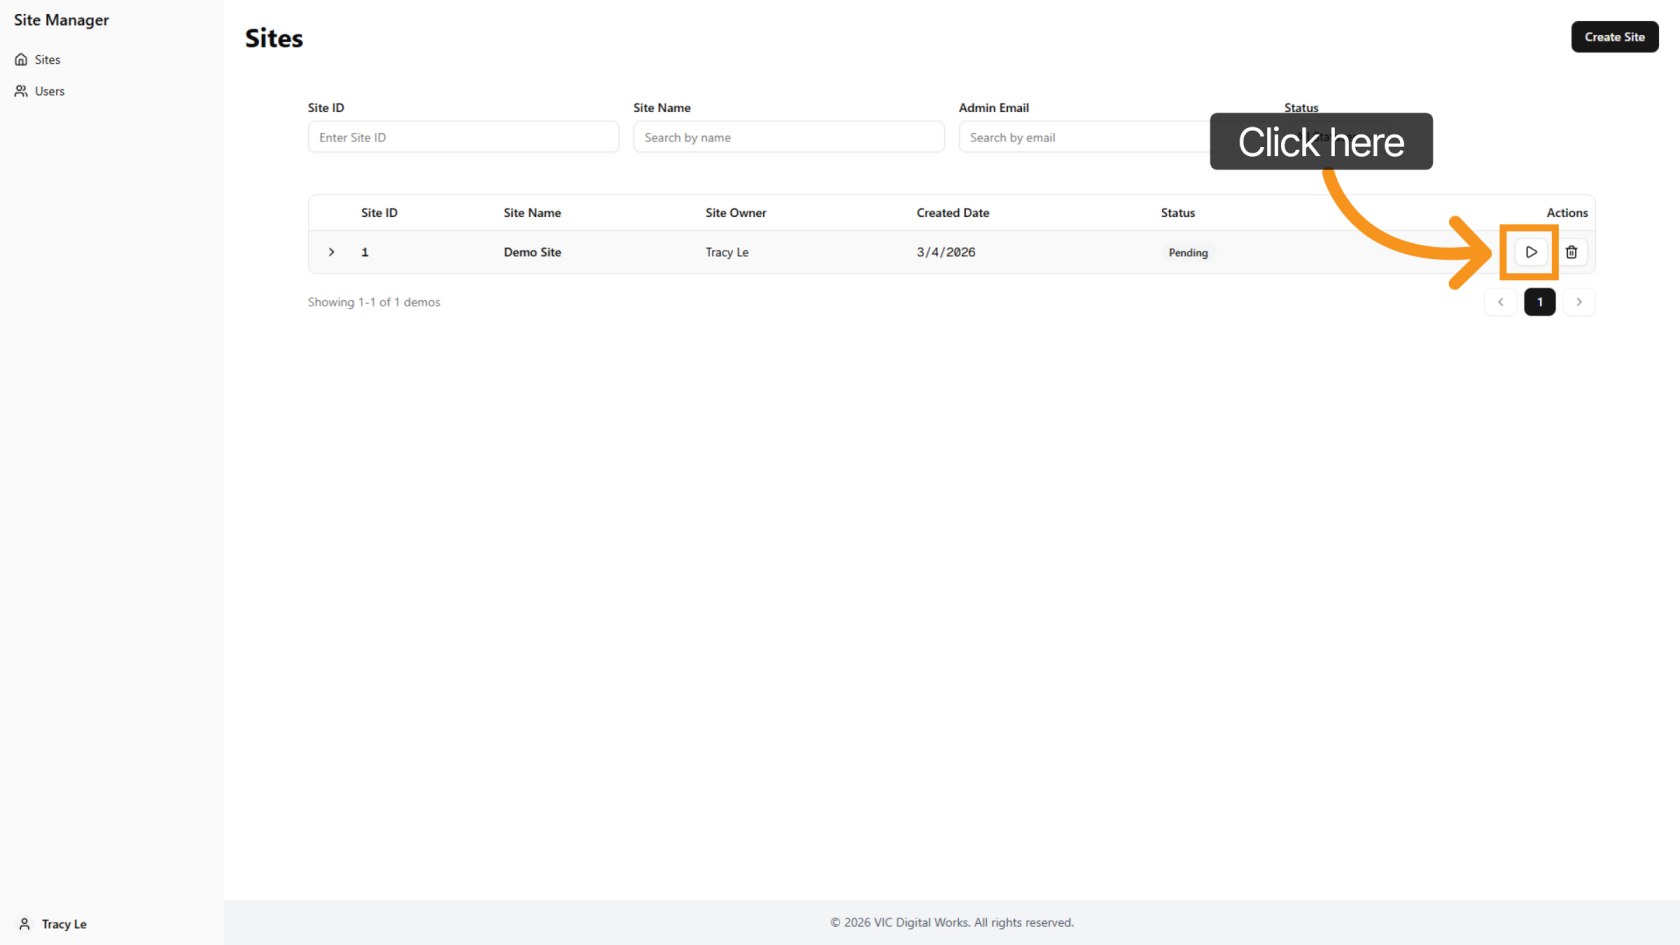
10. Start Deloy the Site
Click the ![]() deploy icon to begin the deployment process.
deploy icon to begin the deployment process.
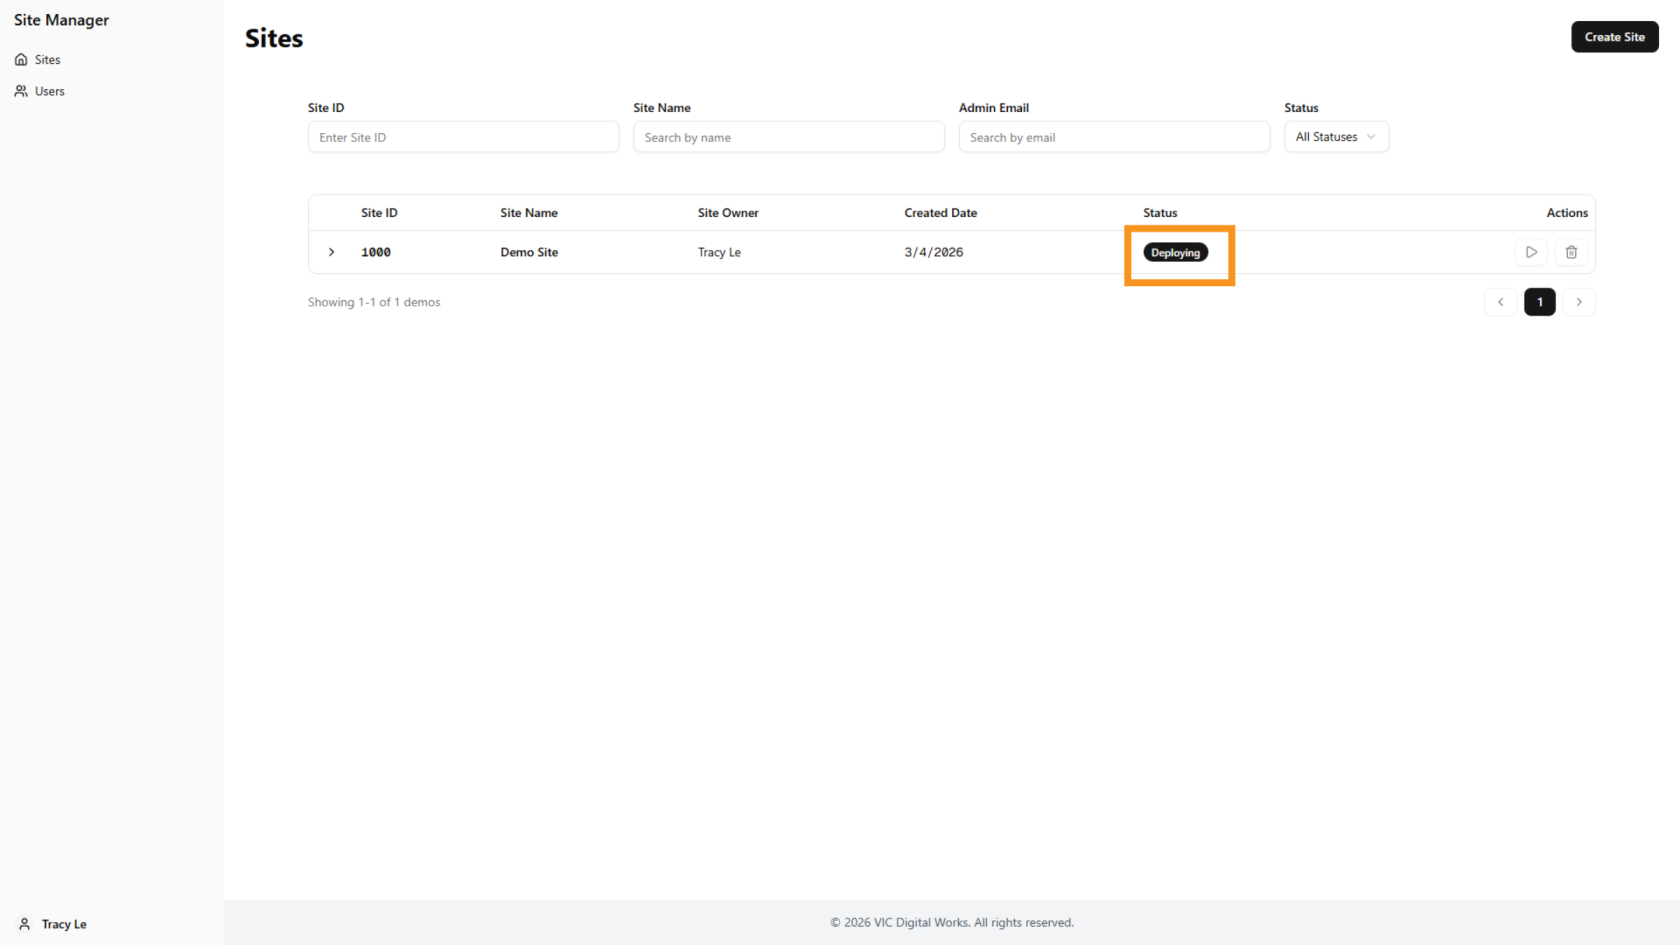
11. Check Site Status
The demo site status will update to Deploying.
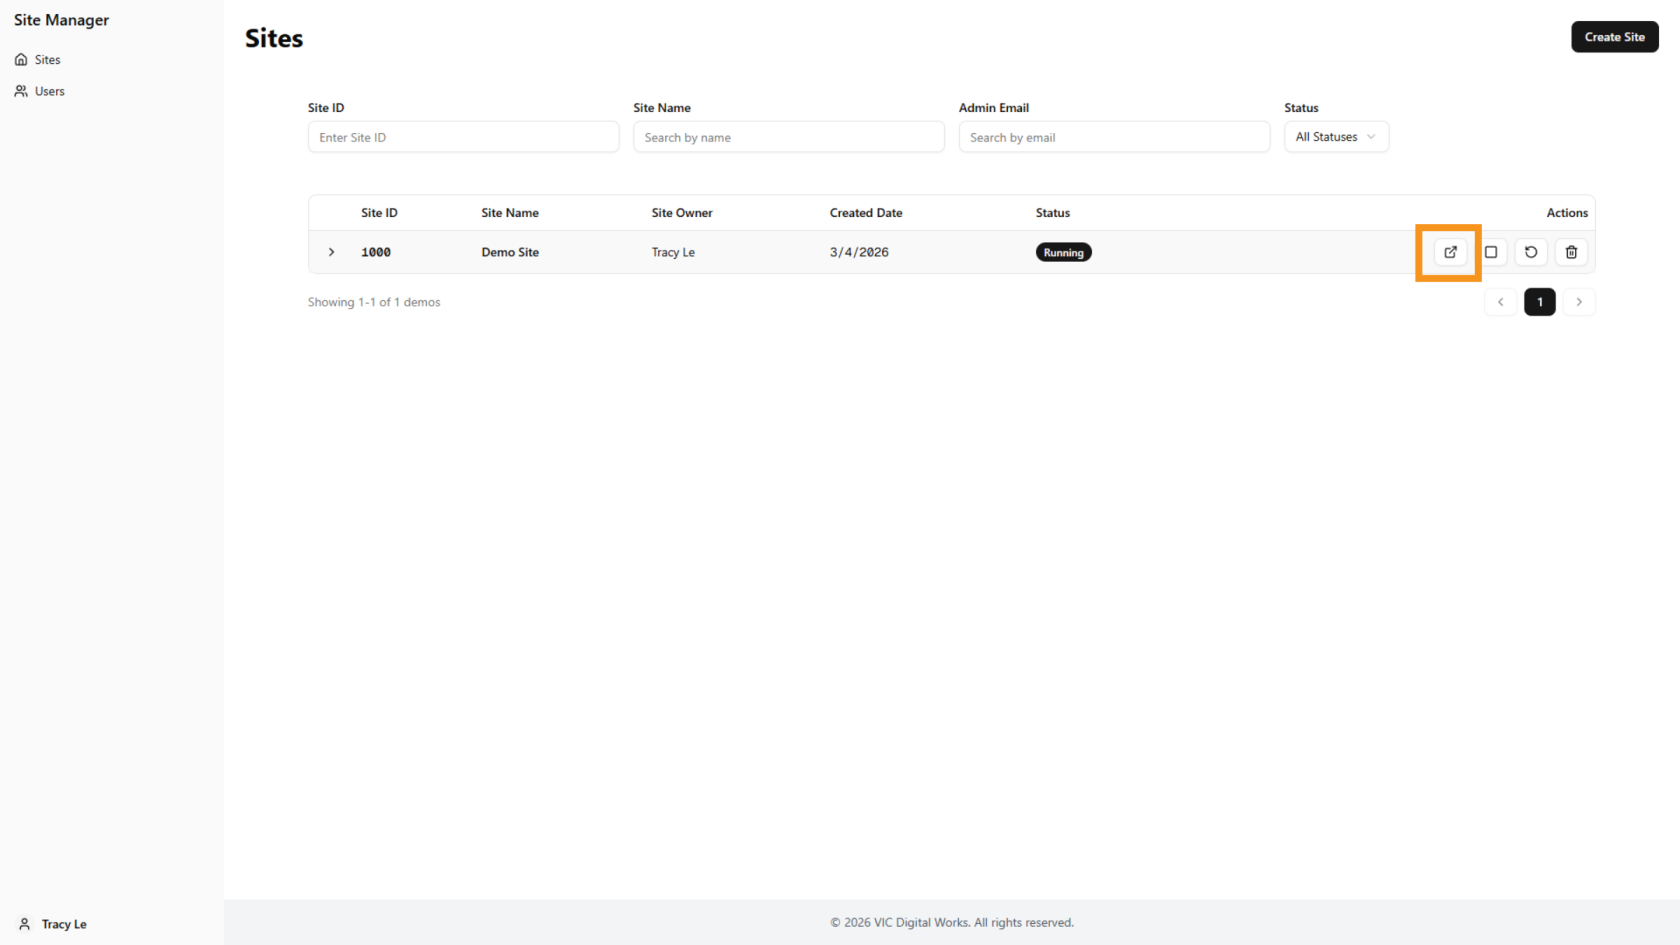
12. Demo Site Ready
When the ![]() open icon appears, the site is ready to use.
open icon appears, the site is ready to use.
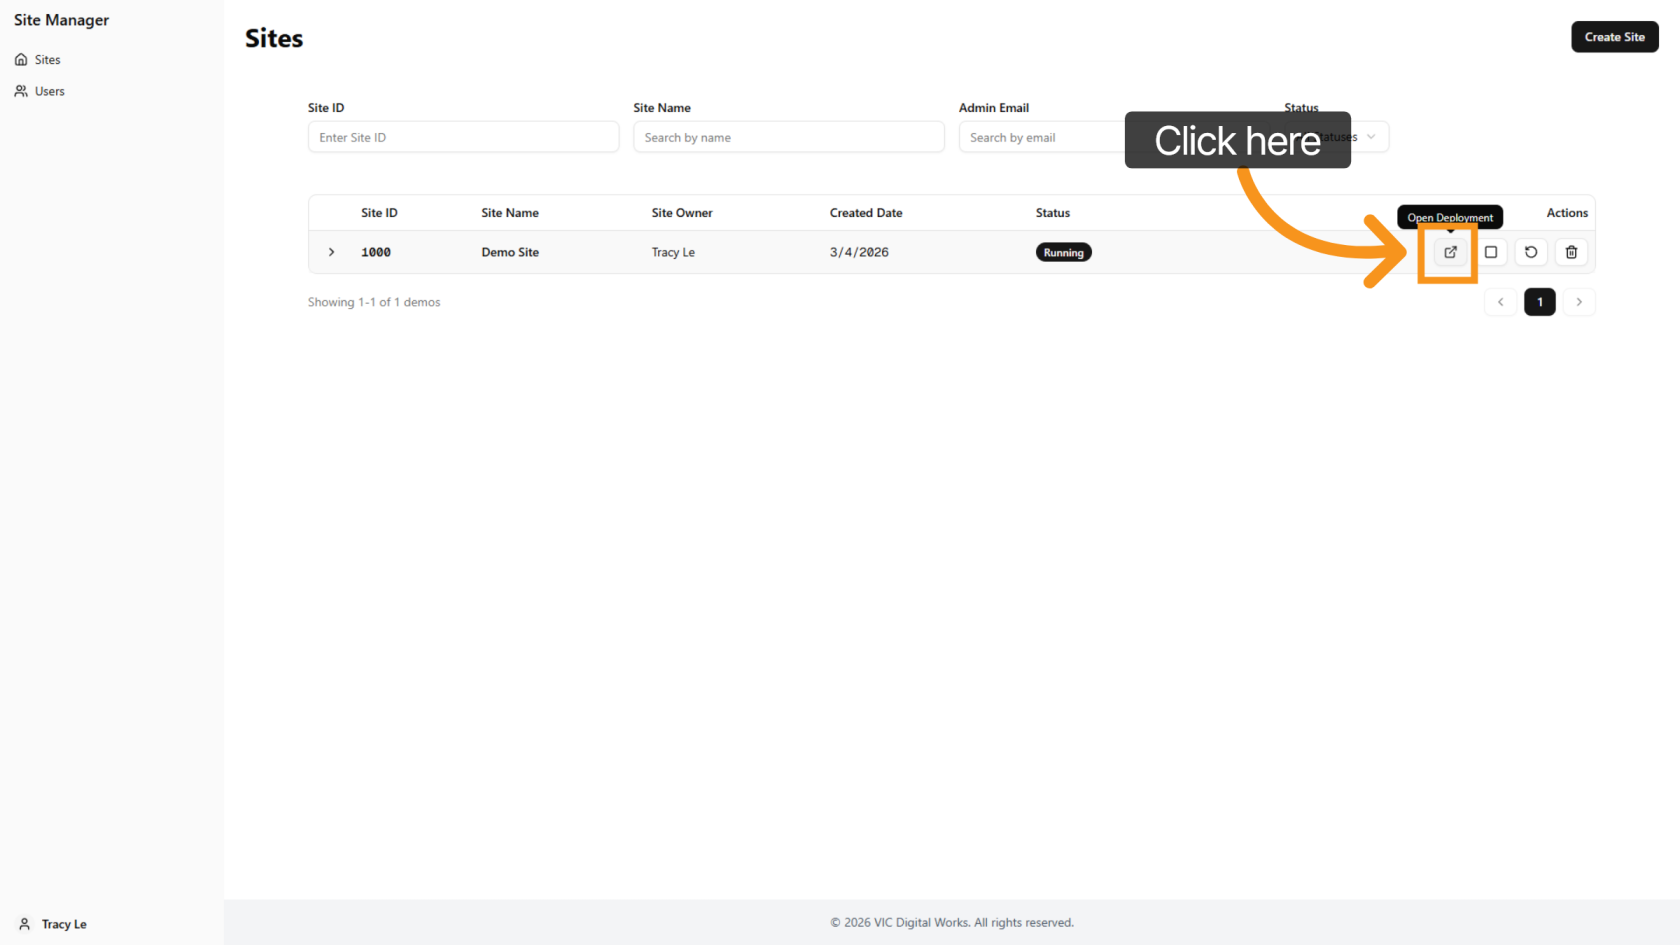
13. View Site Details
Click the ![]() arrow to view all site details.
arrow to view all site details.
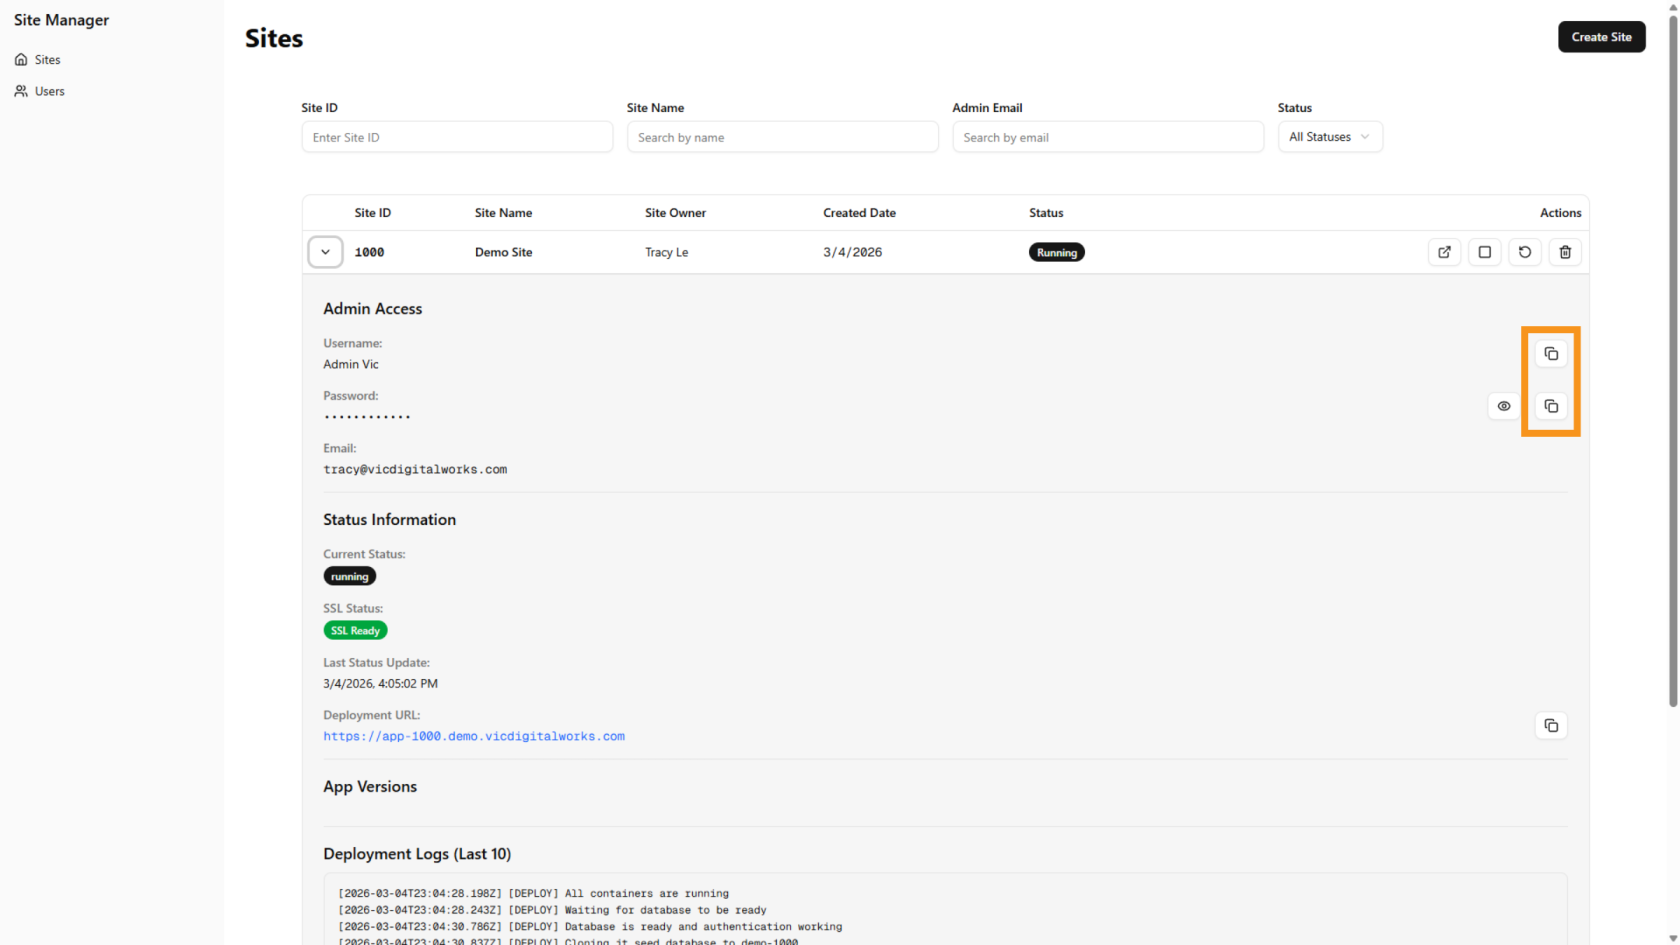
14. Copy Username and Password
Use the ![]() copy icon to copy the username and password for login.
copy icon to copy the username and password for login.
15. Open the Site
Click the ![]() open icon to access the site.
open icon to access the site.
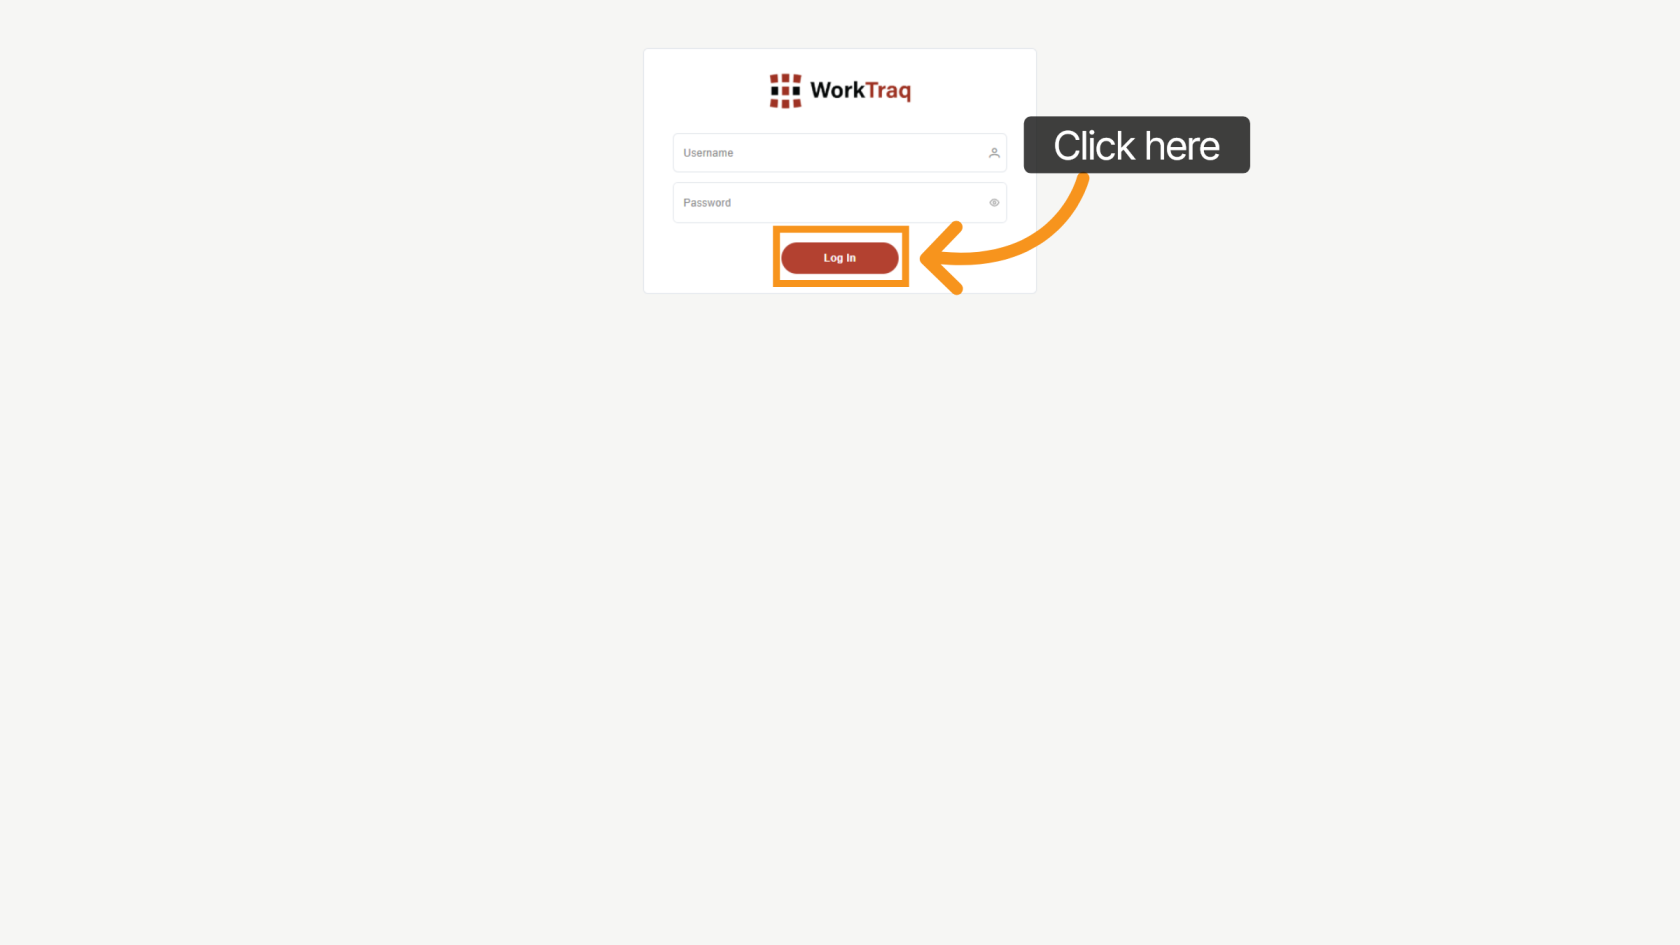
16. Log in to WorkTraq
Use the username and password created earlier to log in to WorkTraq.
After entering the details, click "Log In".
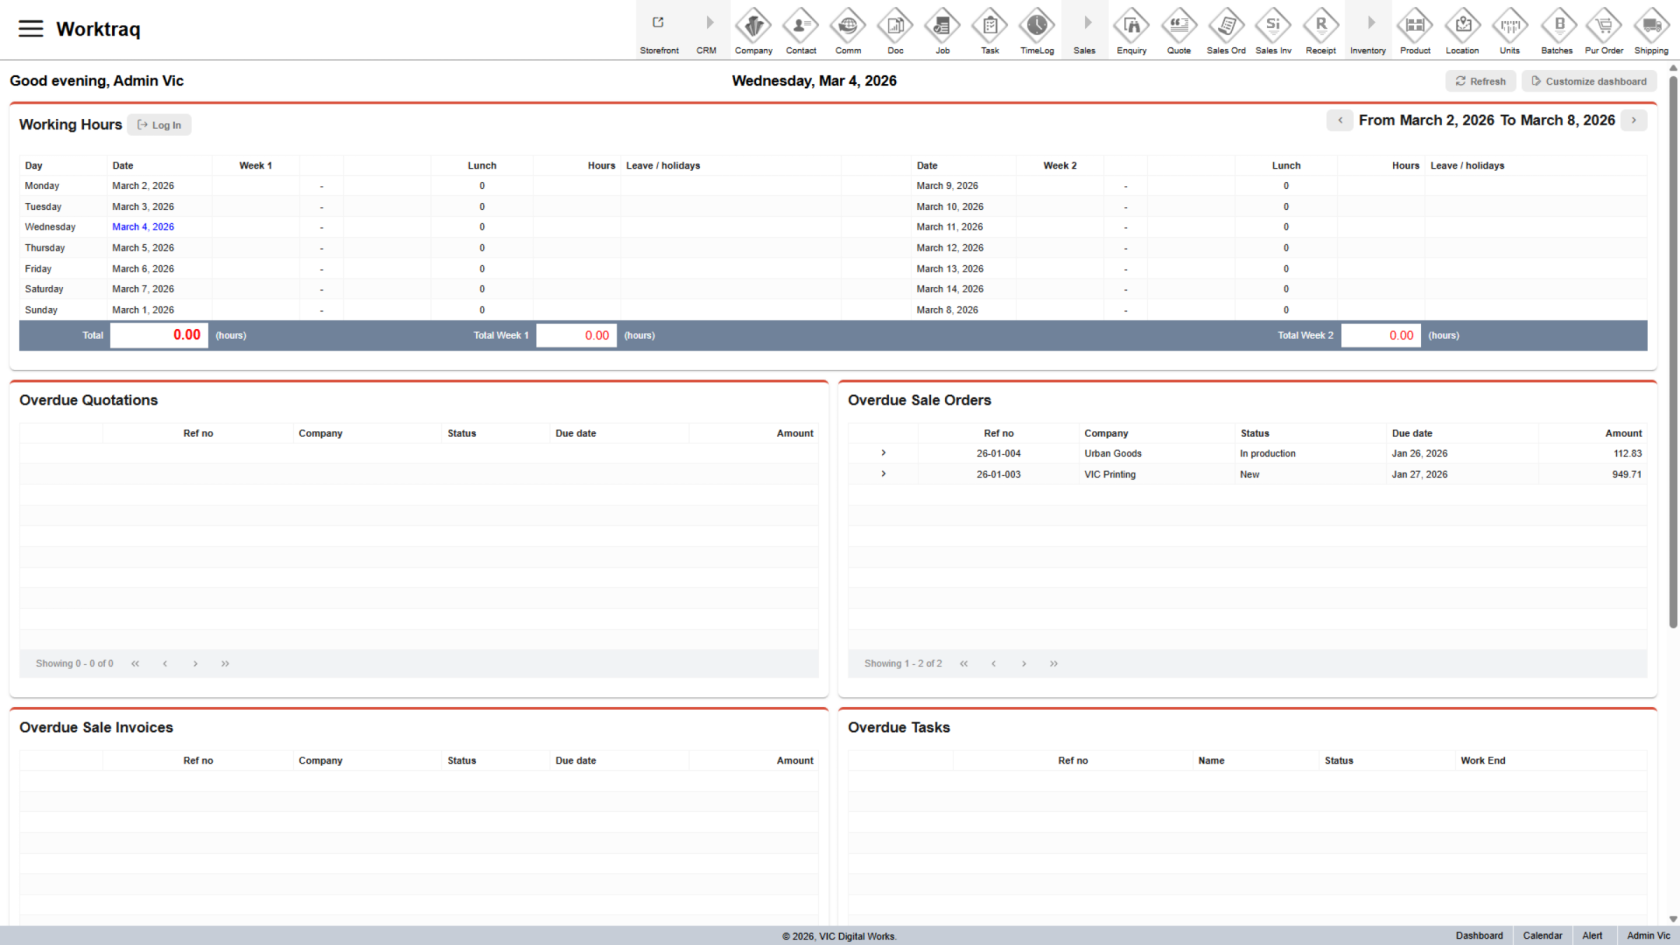
17. Access WorkTraq
The demo site is now ready to be shared with the customer.
18. Send Details to Customer
Send the customer the demo site details so they can try it.
The three important details are the deployment URL, username, and password.
All of these can be found in the demo site details. Use the copy icon to copy and send them.
You have successfully created and deployed a demo printing site. Please verify the site details and deployment status to ensure the site is ready for use.