New Page
This tutorial explains how to record a payment (receipt) for an invoice in the application.
Video Tutorial
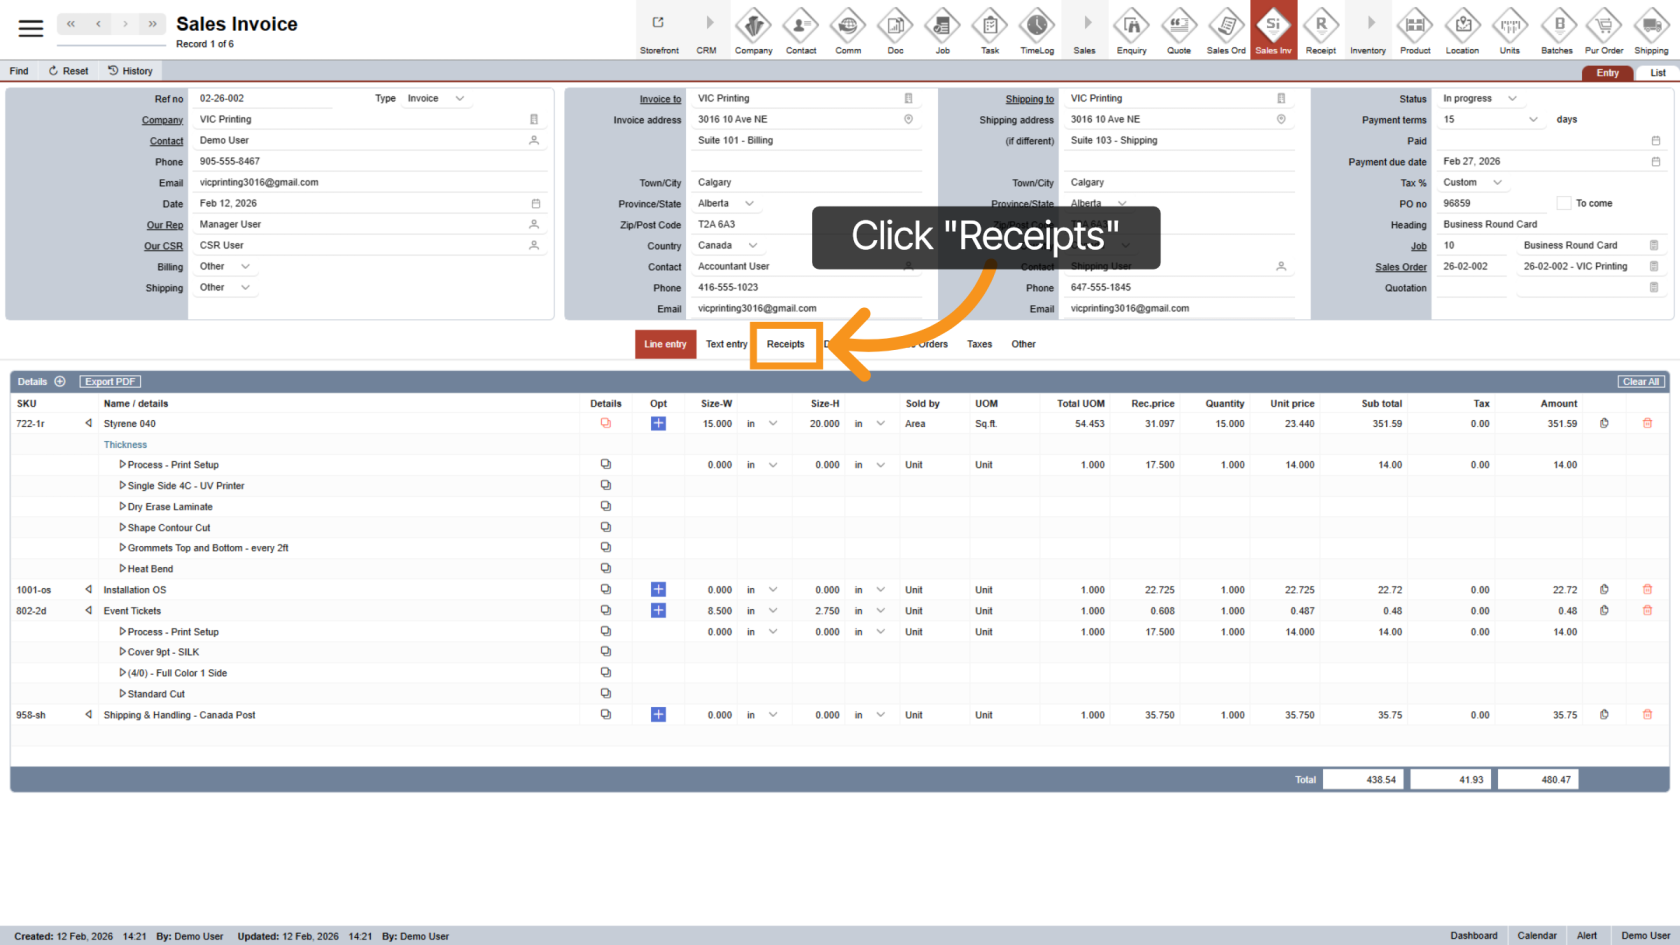
1. Open the Receipts Section
Click "Receipts" to manage payments related to the invoice.
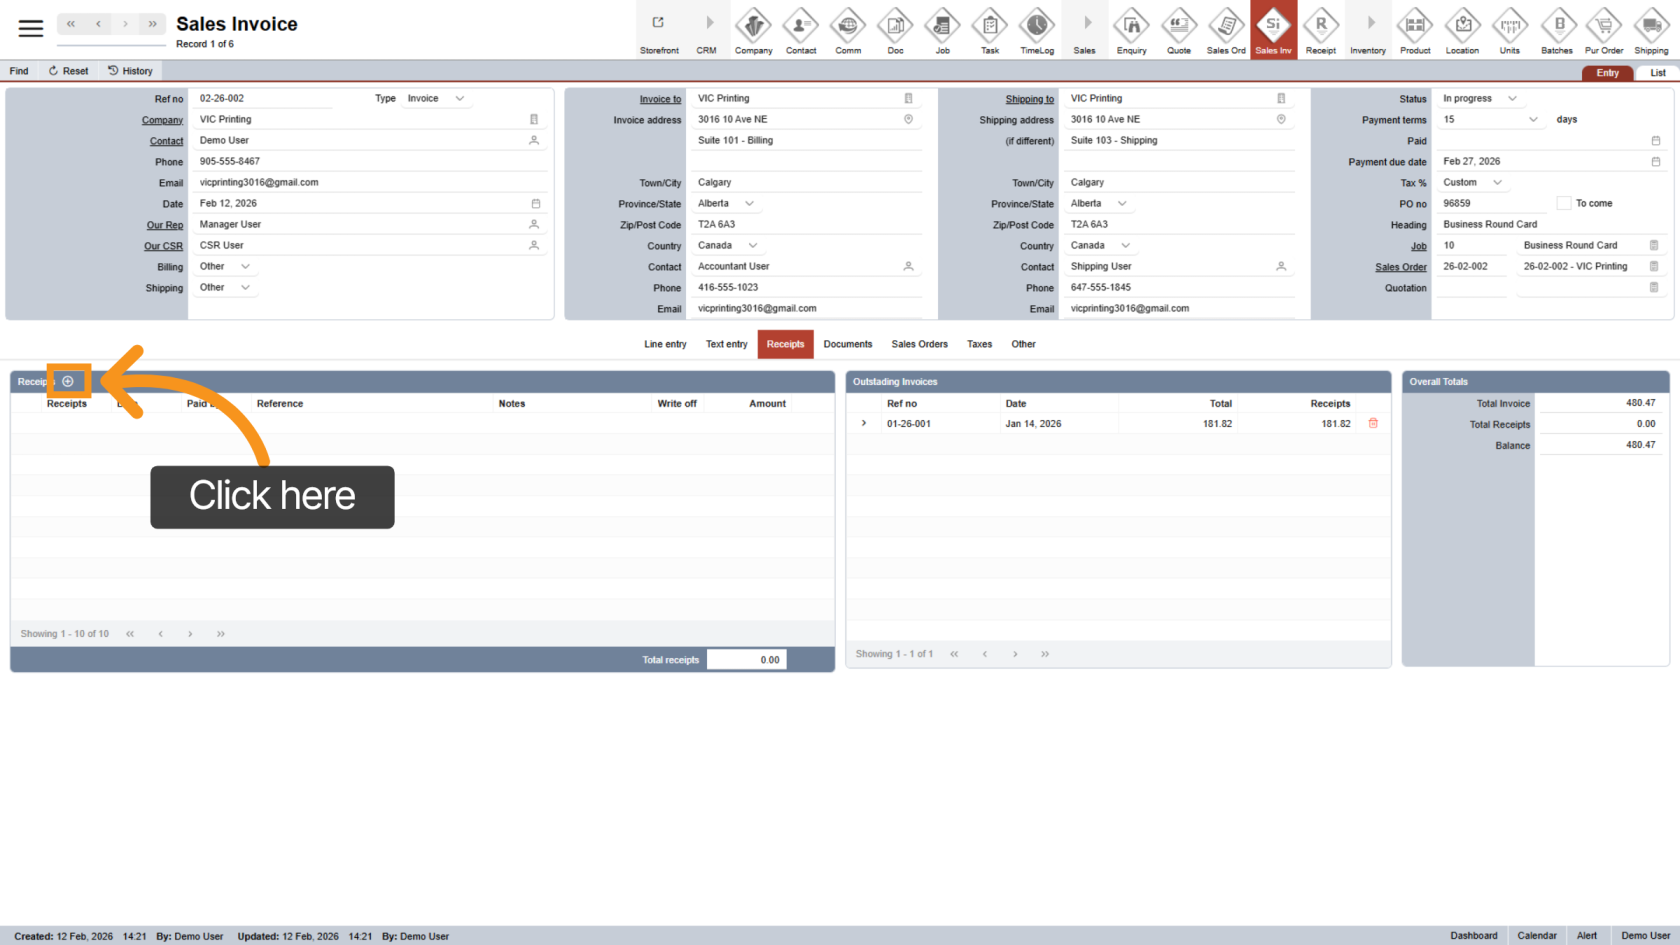
2. Create a Receipt
Click the ![]() plus icon to create a new receipt for the current invoice.
plus icon to create a new receipt for the current invoice.
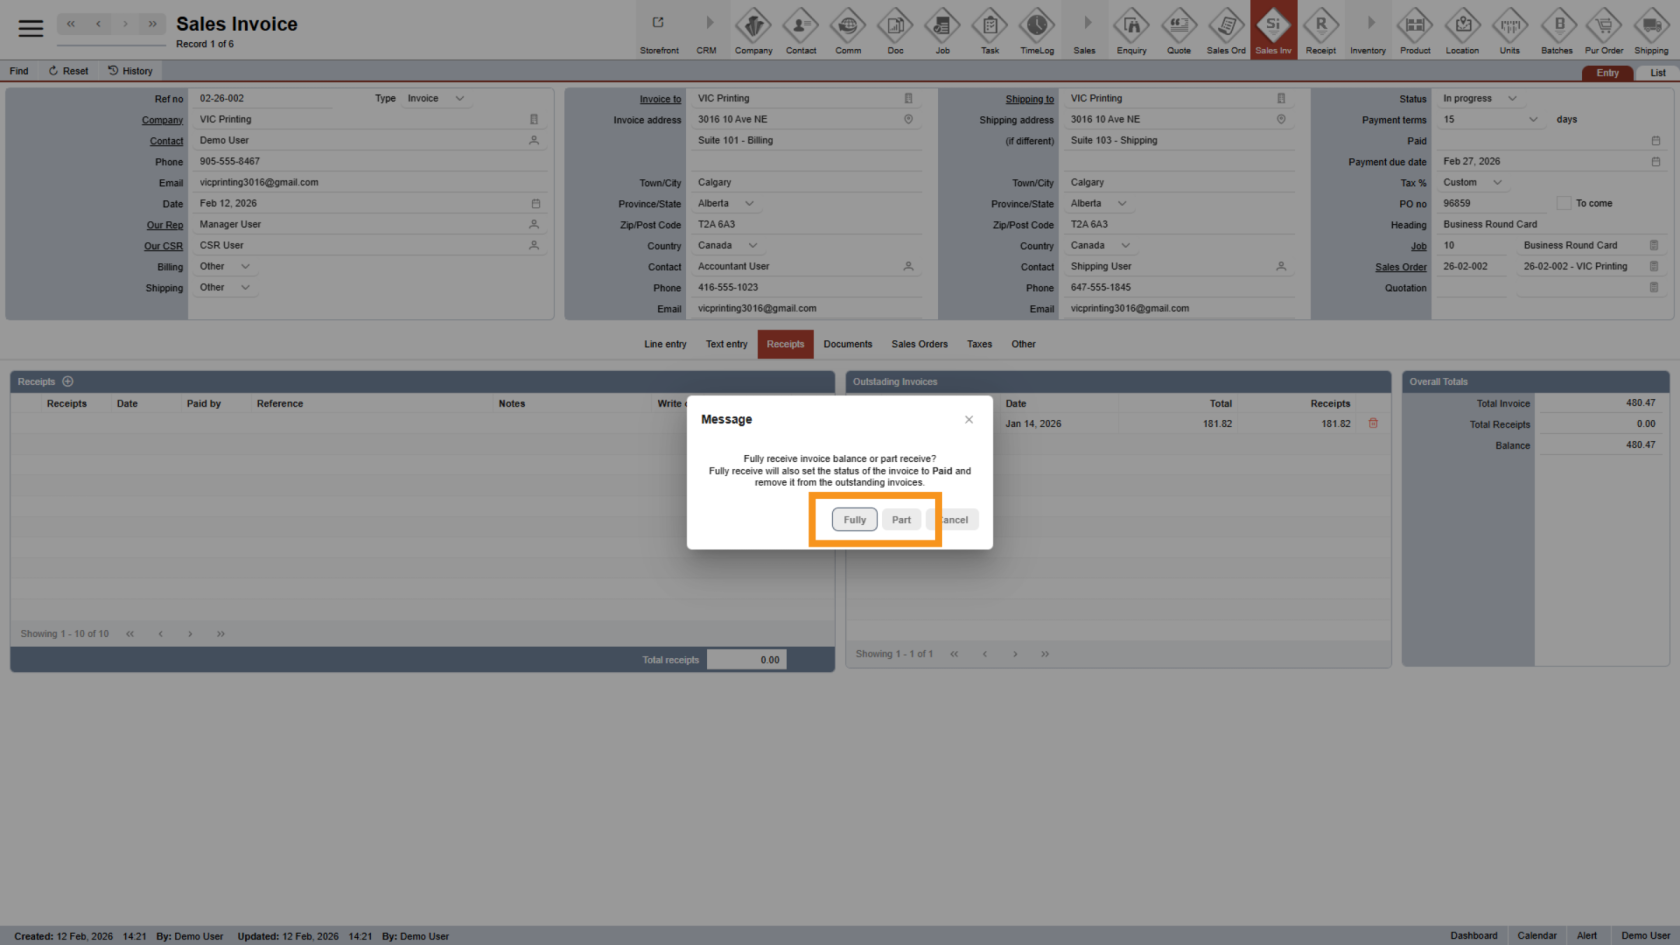
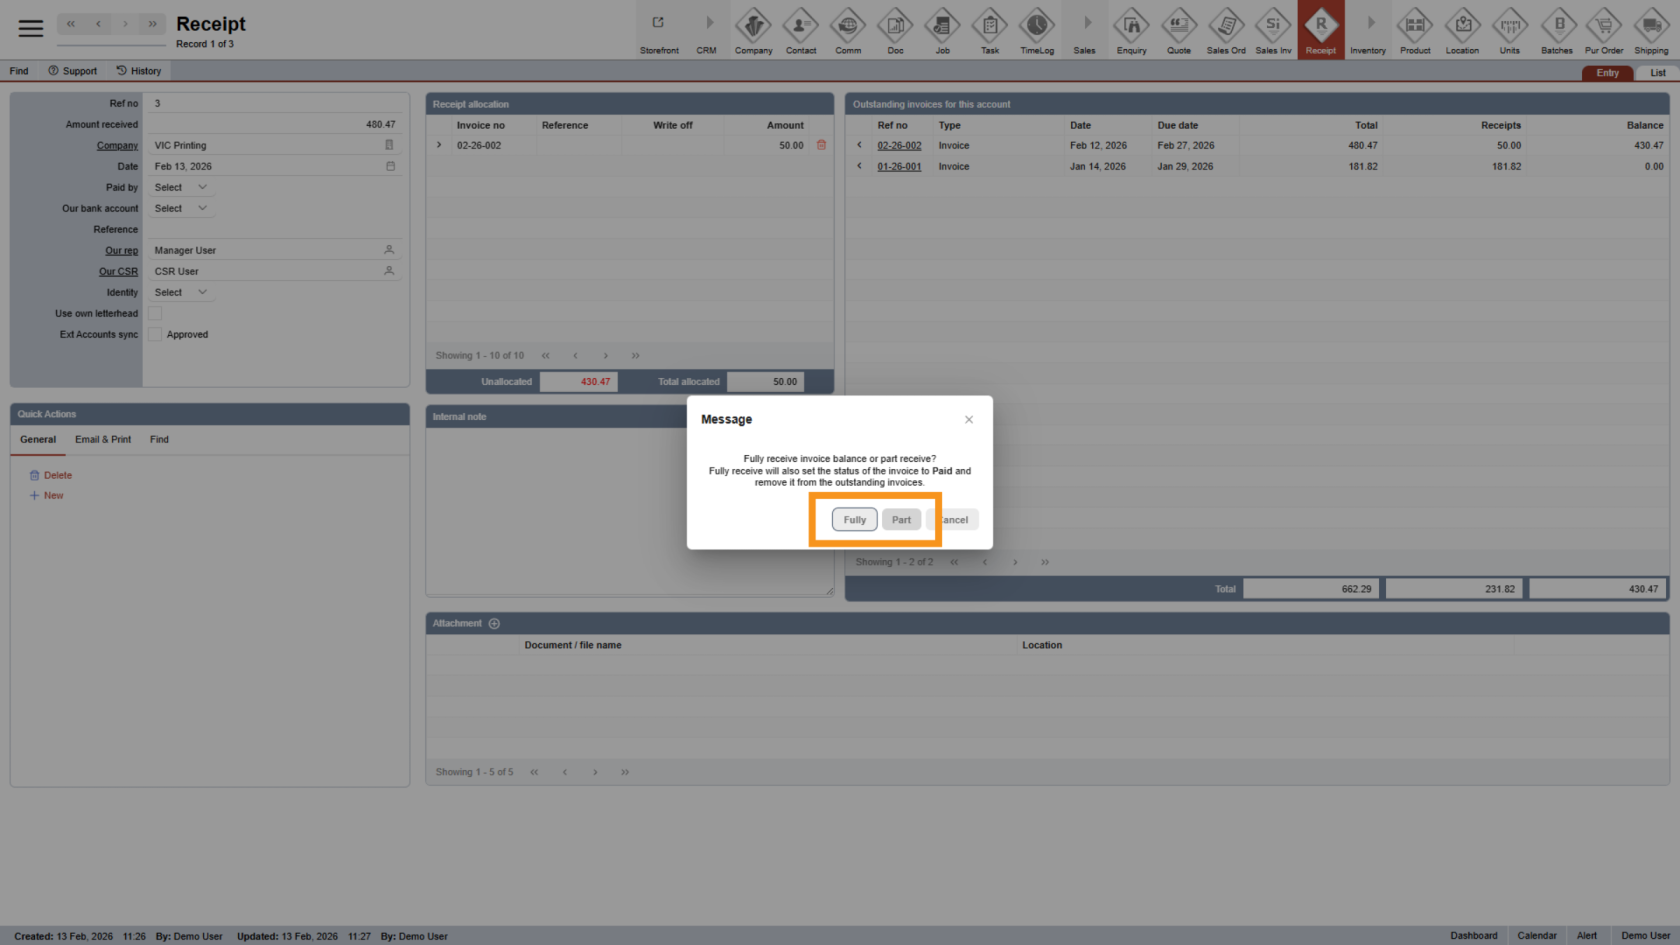
3. Choose Receipt Type
Select one of the following options:
- Fully: Record full payment for the invoice.
- Part: Record a partial payment
4. Open the New Receipt
After selecting an option, the system will automatically open the new receipt.
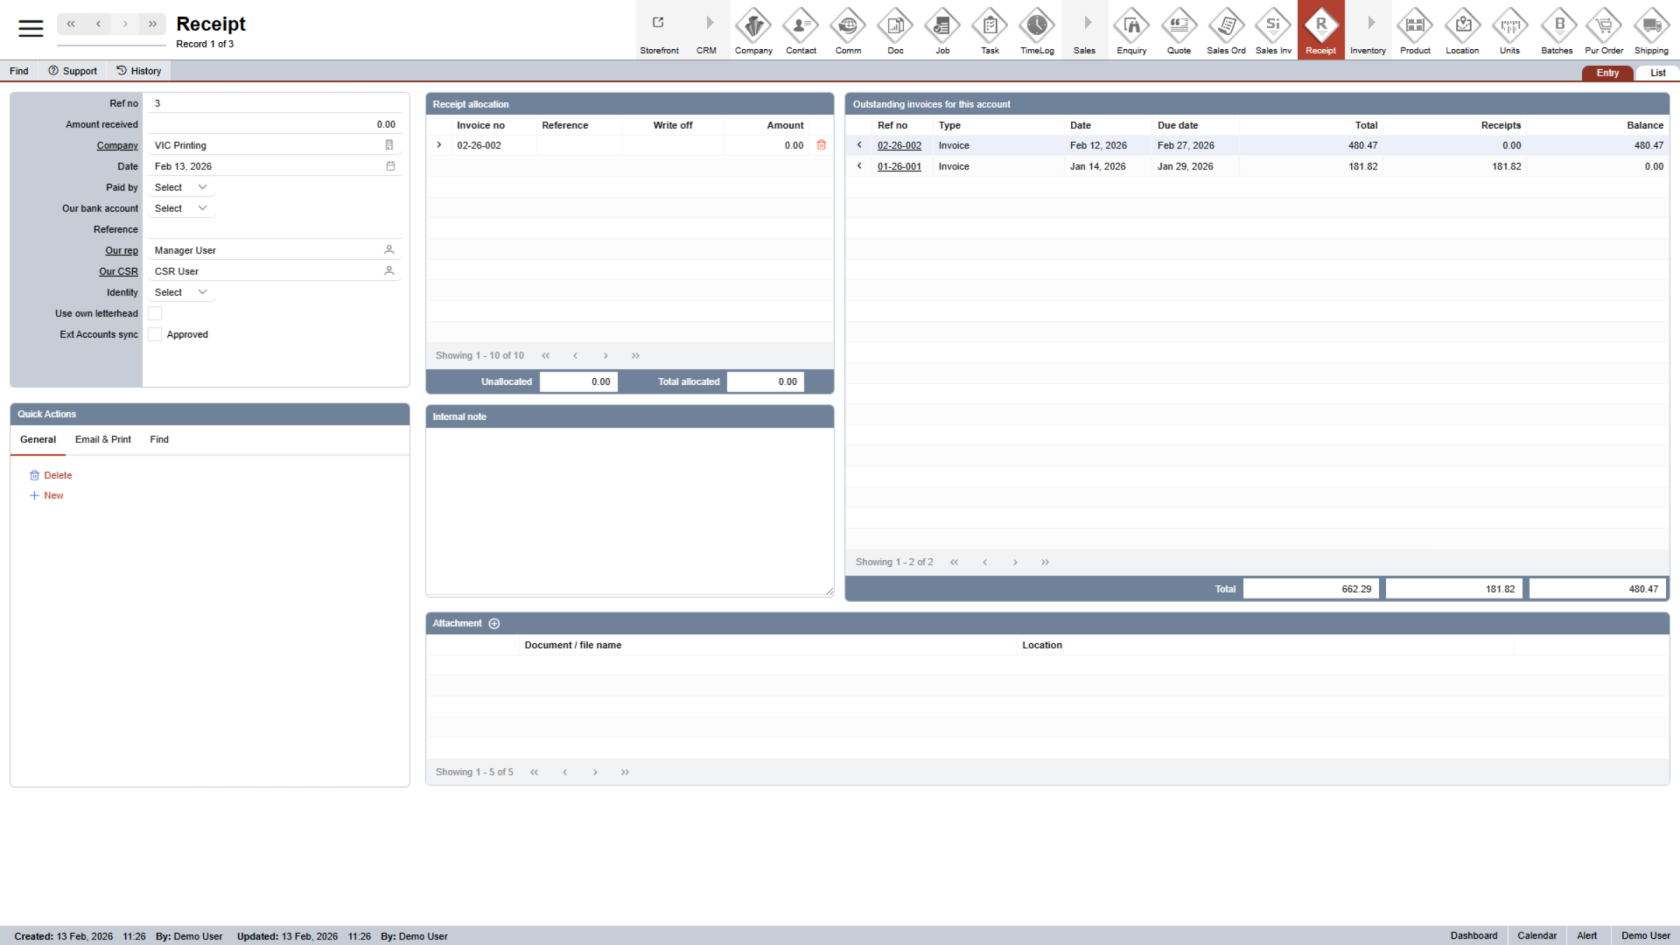
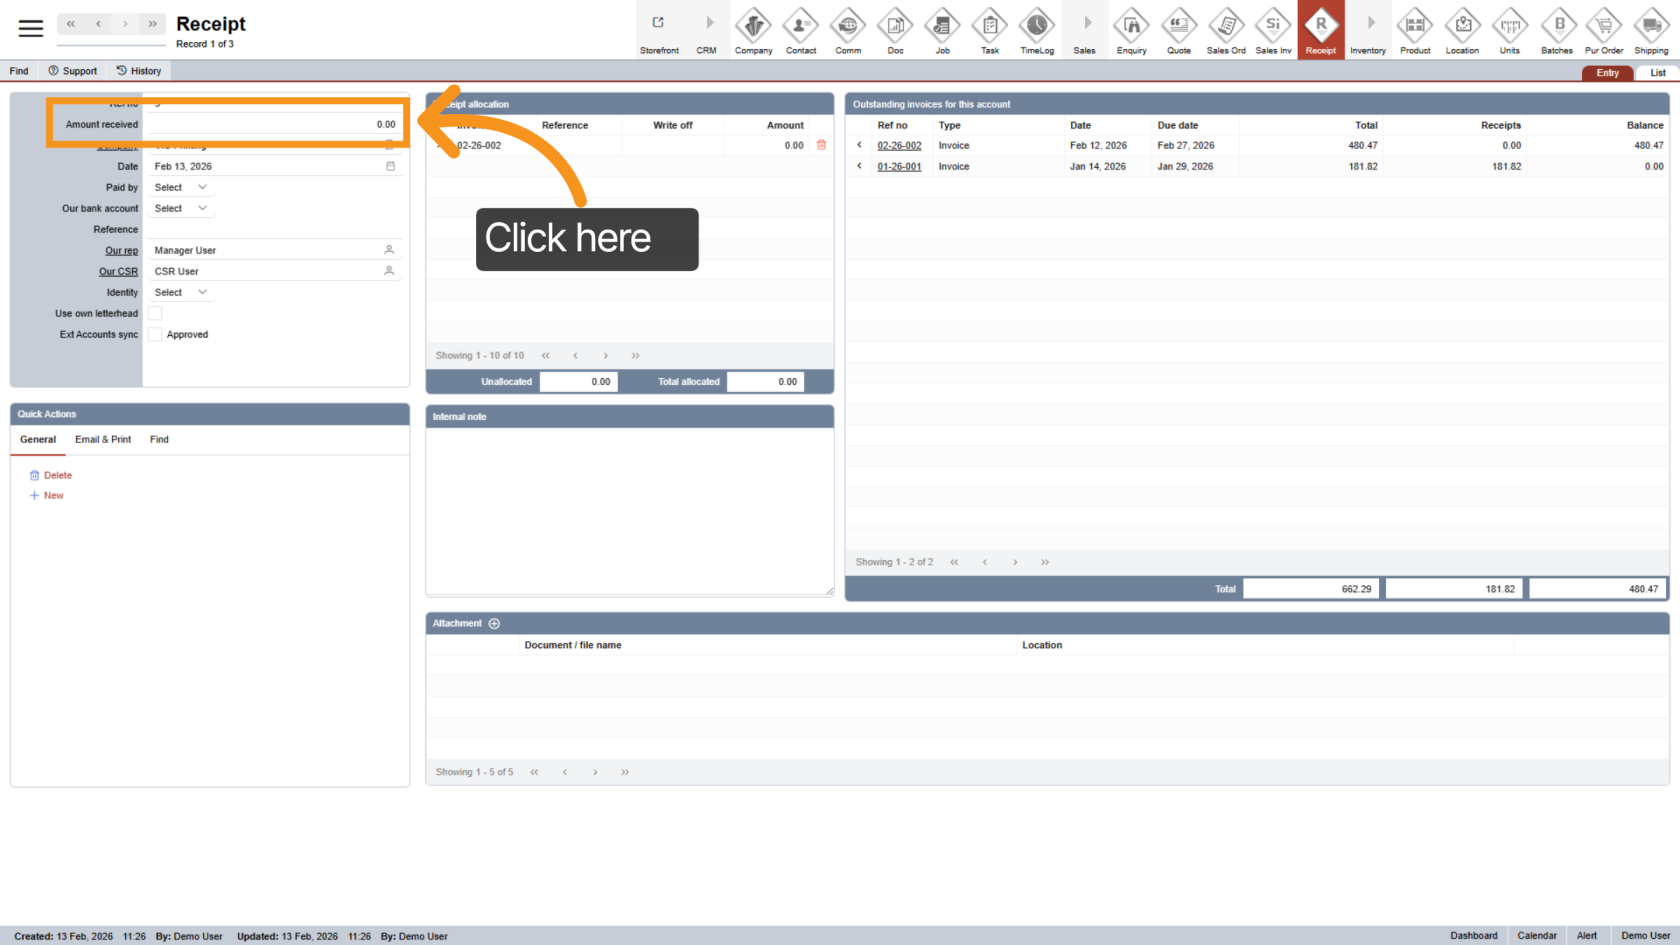
5. Enter Amount Received
Enter the payment amount in the Amount Received field.
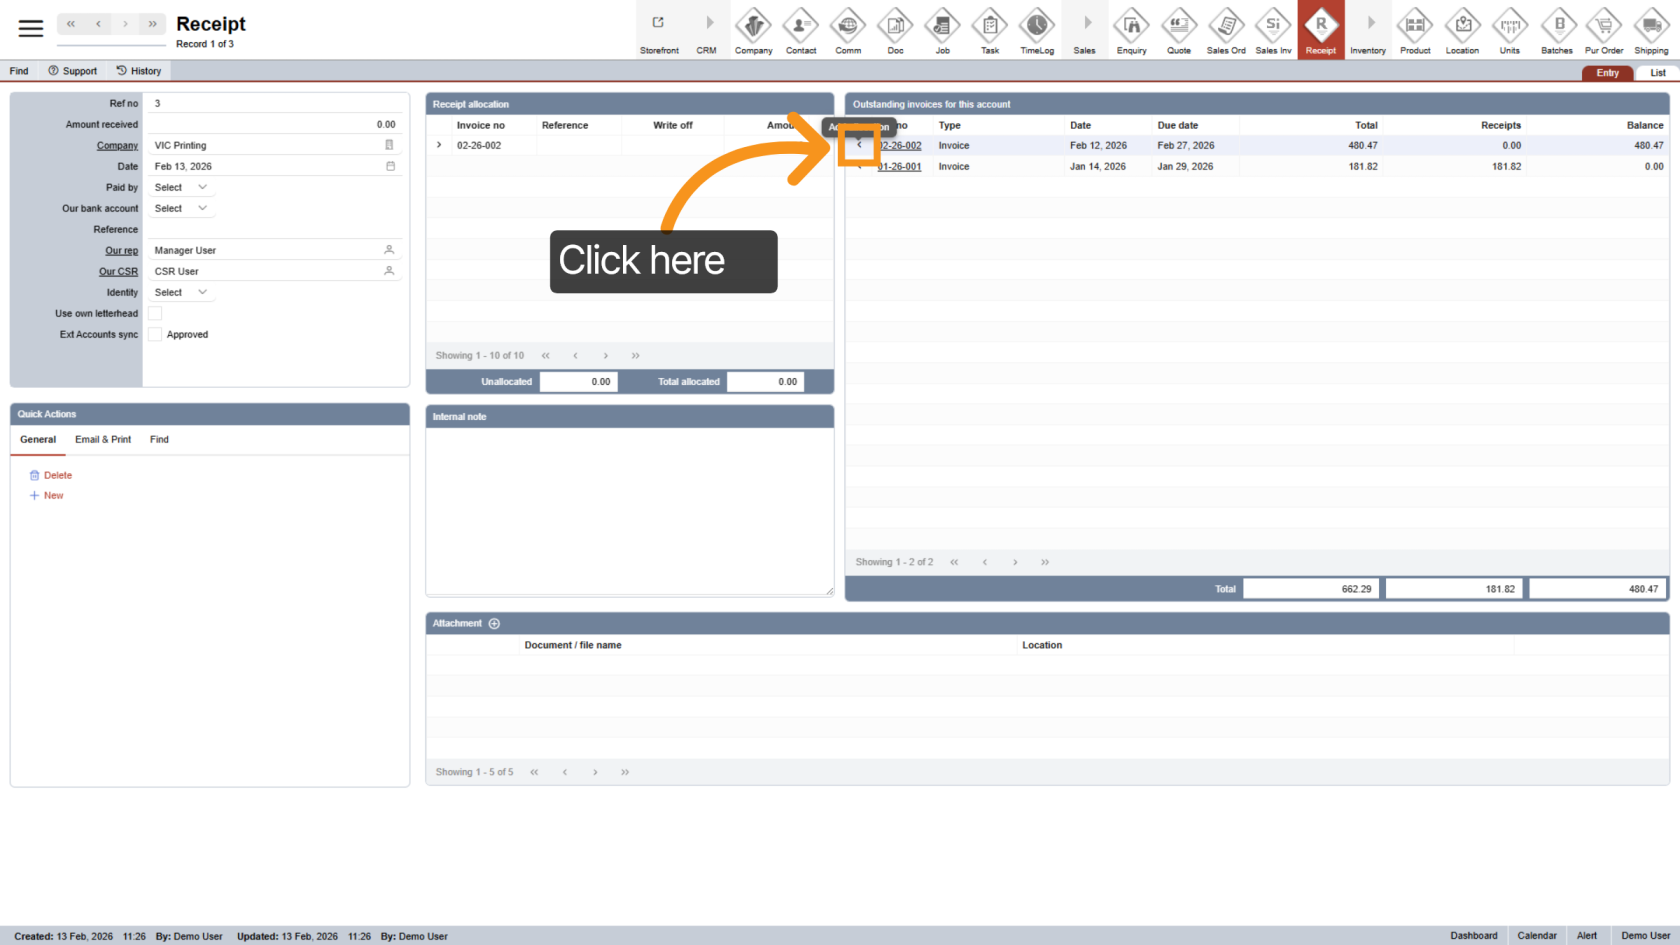
6. View Outstanding Invoices
On the right side, you will see a list of all outstanding invoices for the current company.
The system may automatically allocate the payment, but you can adjust allocations if needed.

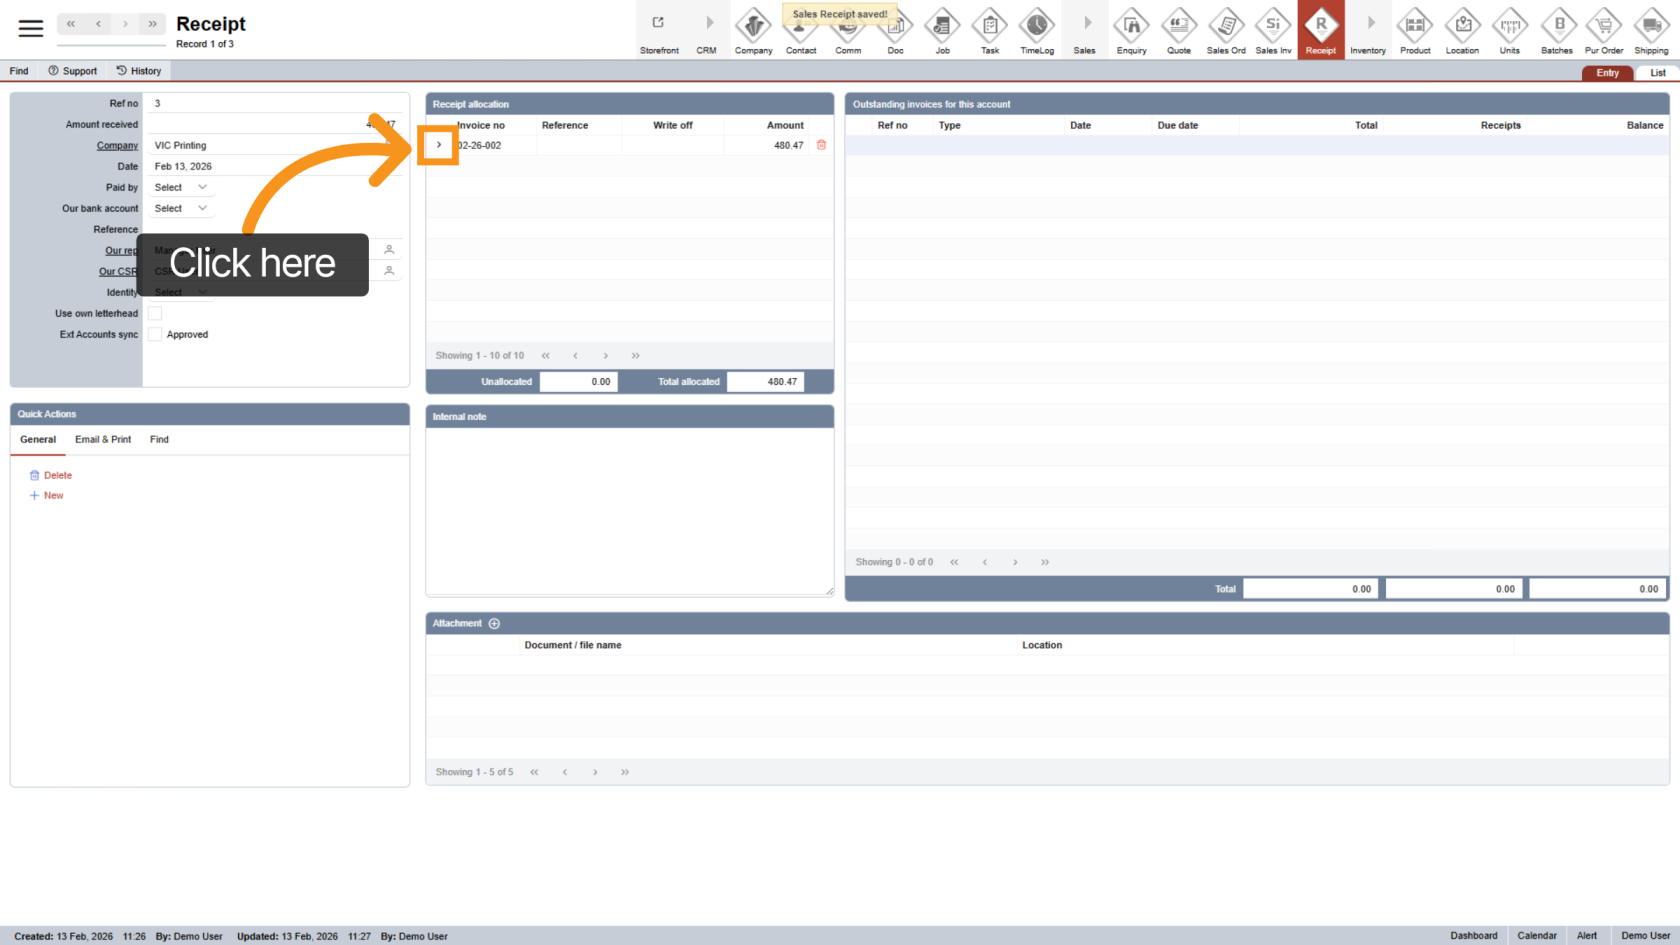
7. Allocate an Invoice
Click the ![]() arrow icon next to the invoice you want to allocate.
arrow icon next to the invoice you want to allocate.
8. Confirm Allocation
Select the receipt option for the invoice you are allocating.
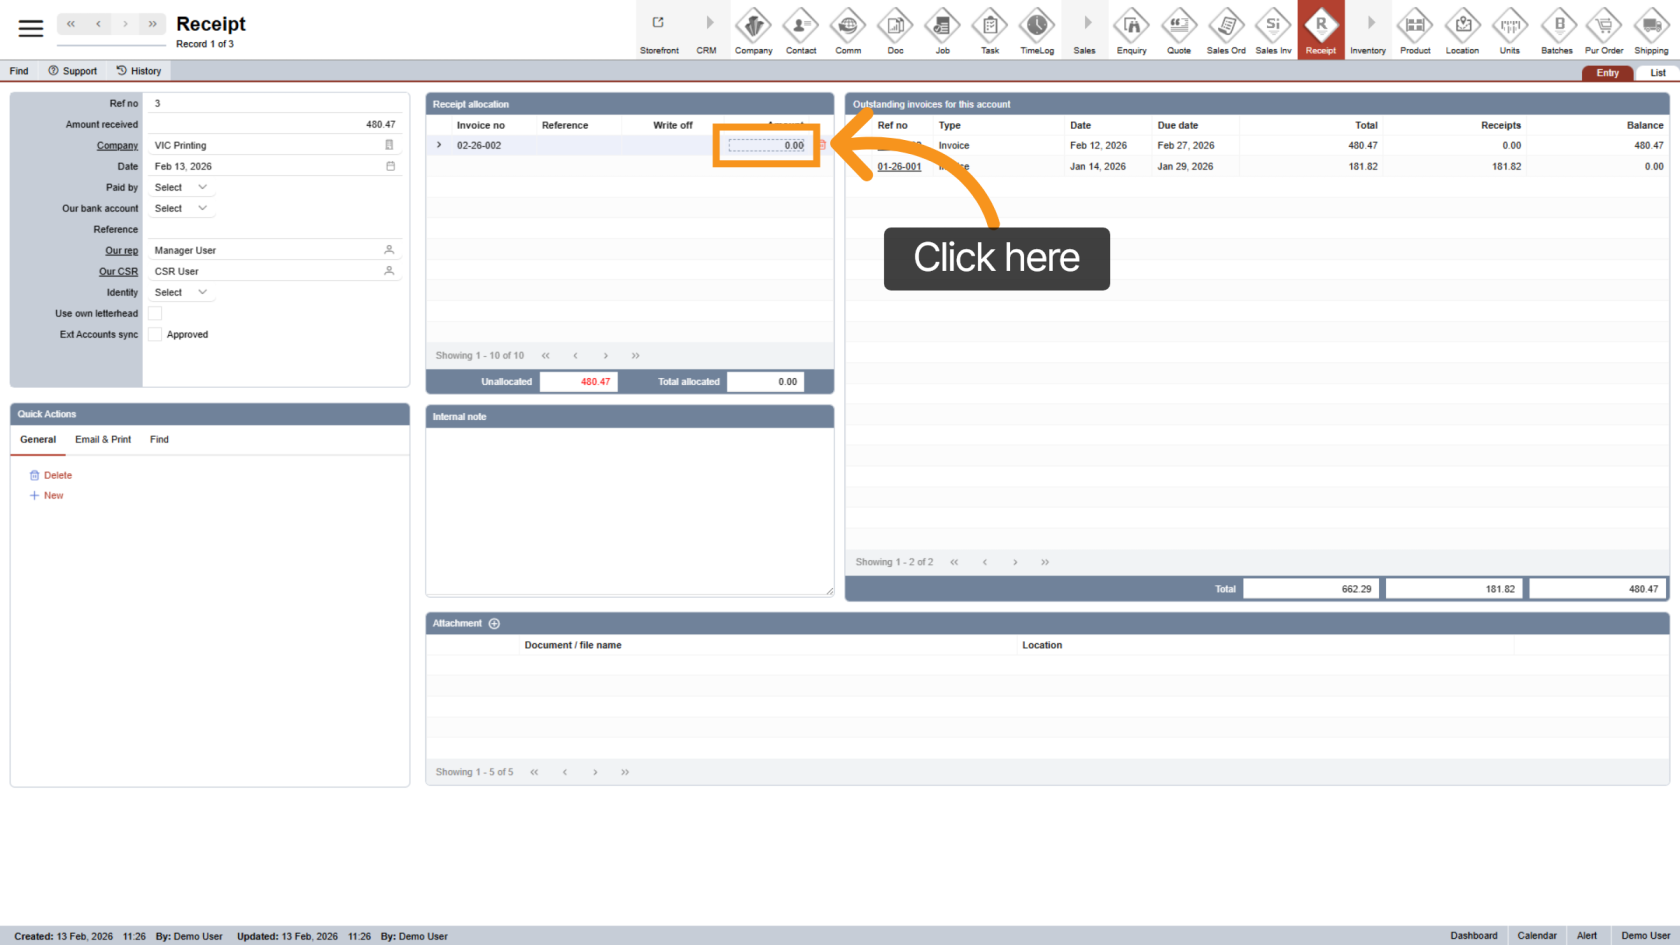
9. Enter Allocation Amount
Enter the amount you want to apply to each invoice.
Once an invoice is fully paid:
- It will automatically be removed from the outstanding list.
- Its status will update to Paid
10. Remove an Allocation (Optional)
Click the ![]() delete icon to remove an allocated line if needed.
delete icon to remove an allocated line if needed.

11. Return to Invoice
Click the ![]() arrow to return to the invoice.
arrow to return to the invoice.
12. Confirm Invoice Status
After full payment allocation, the invoice status will automatically update to Paid.
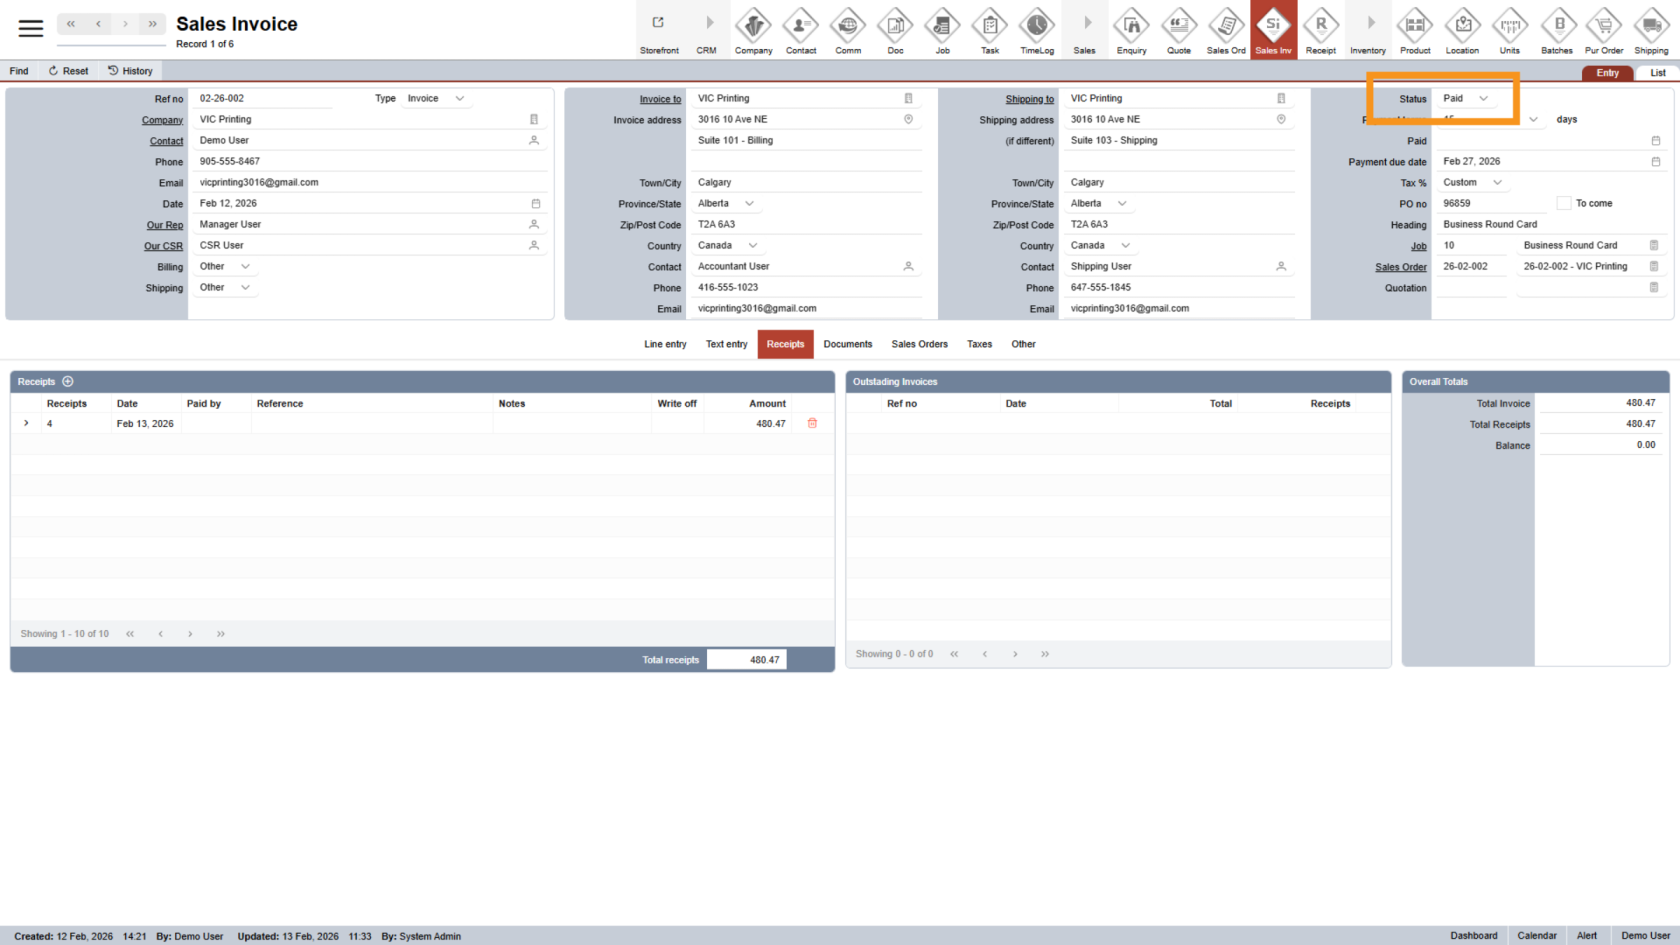
You have successfully completed the invoice receipt process by recording and allocating the payment correctly.