Product Workspace
This tutorial will assist you in navigating and configuring the Product Workspace within the WorkTraq system.
Video Tutorial
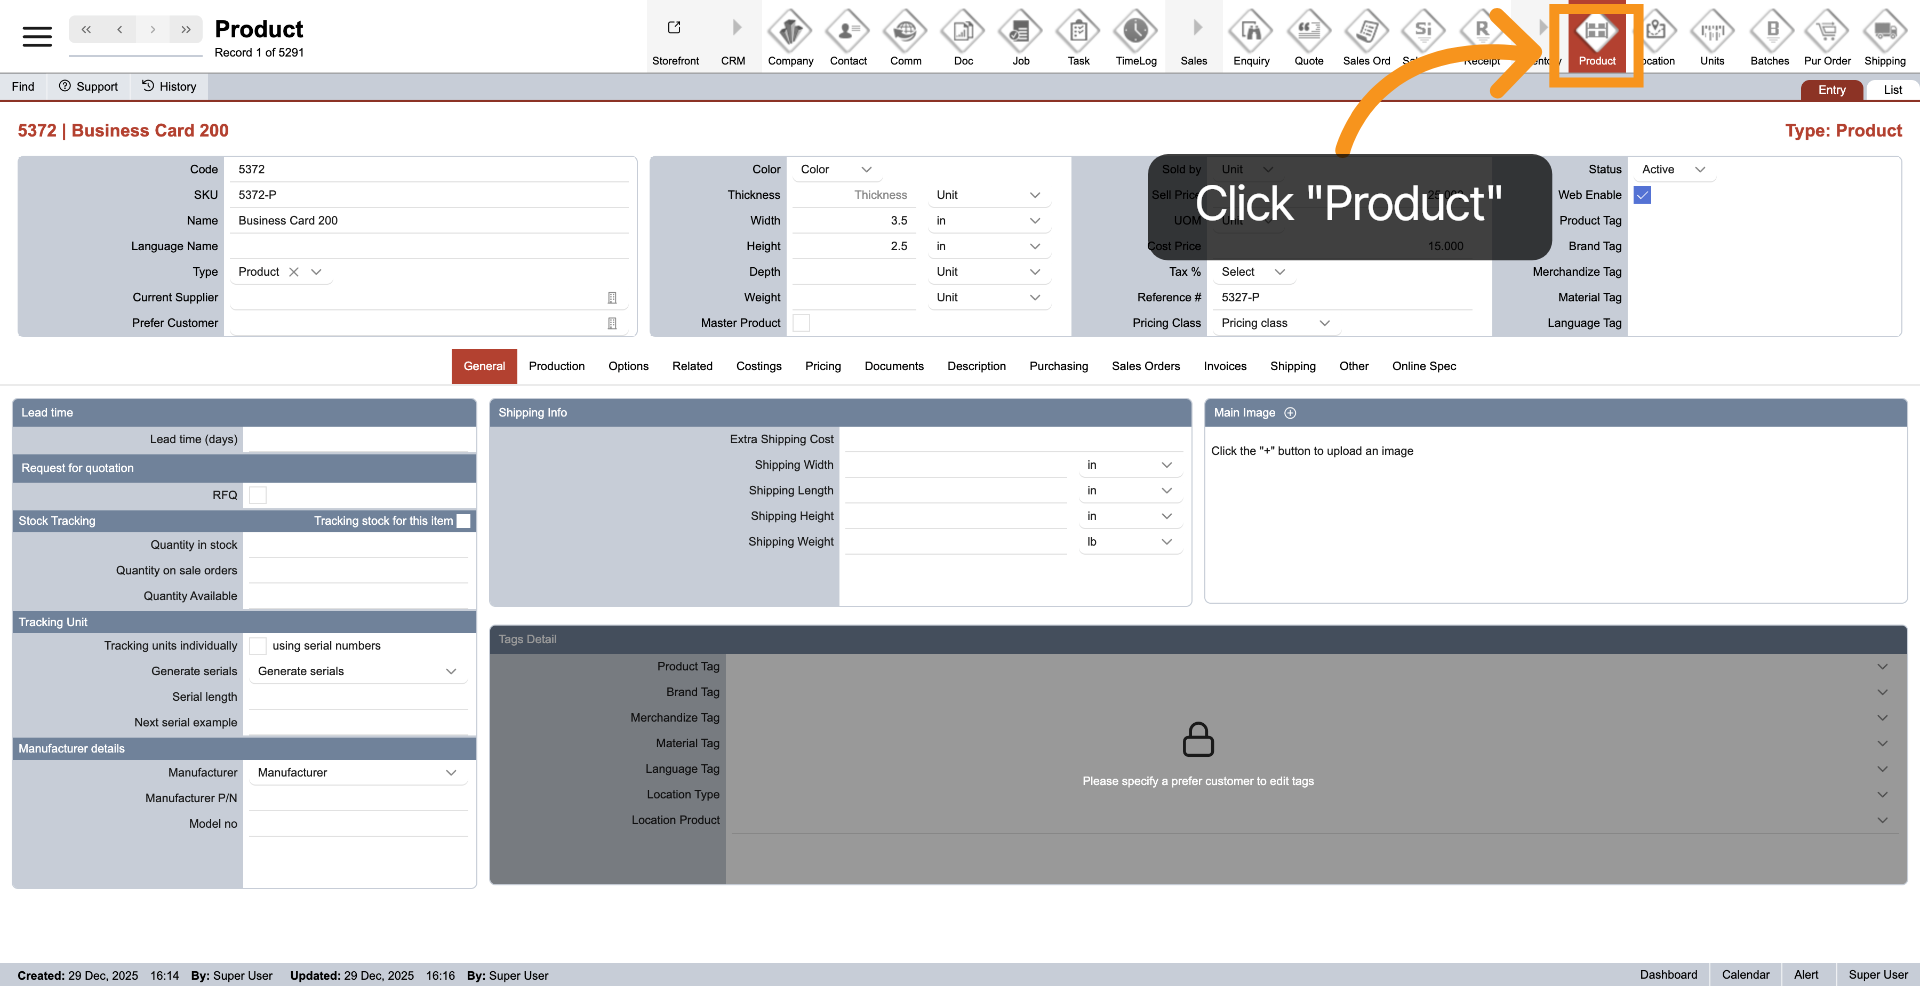
1. Open Product Module
To access the Product module, click on "Product" in the main top menu.
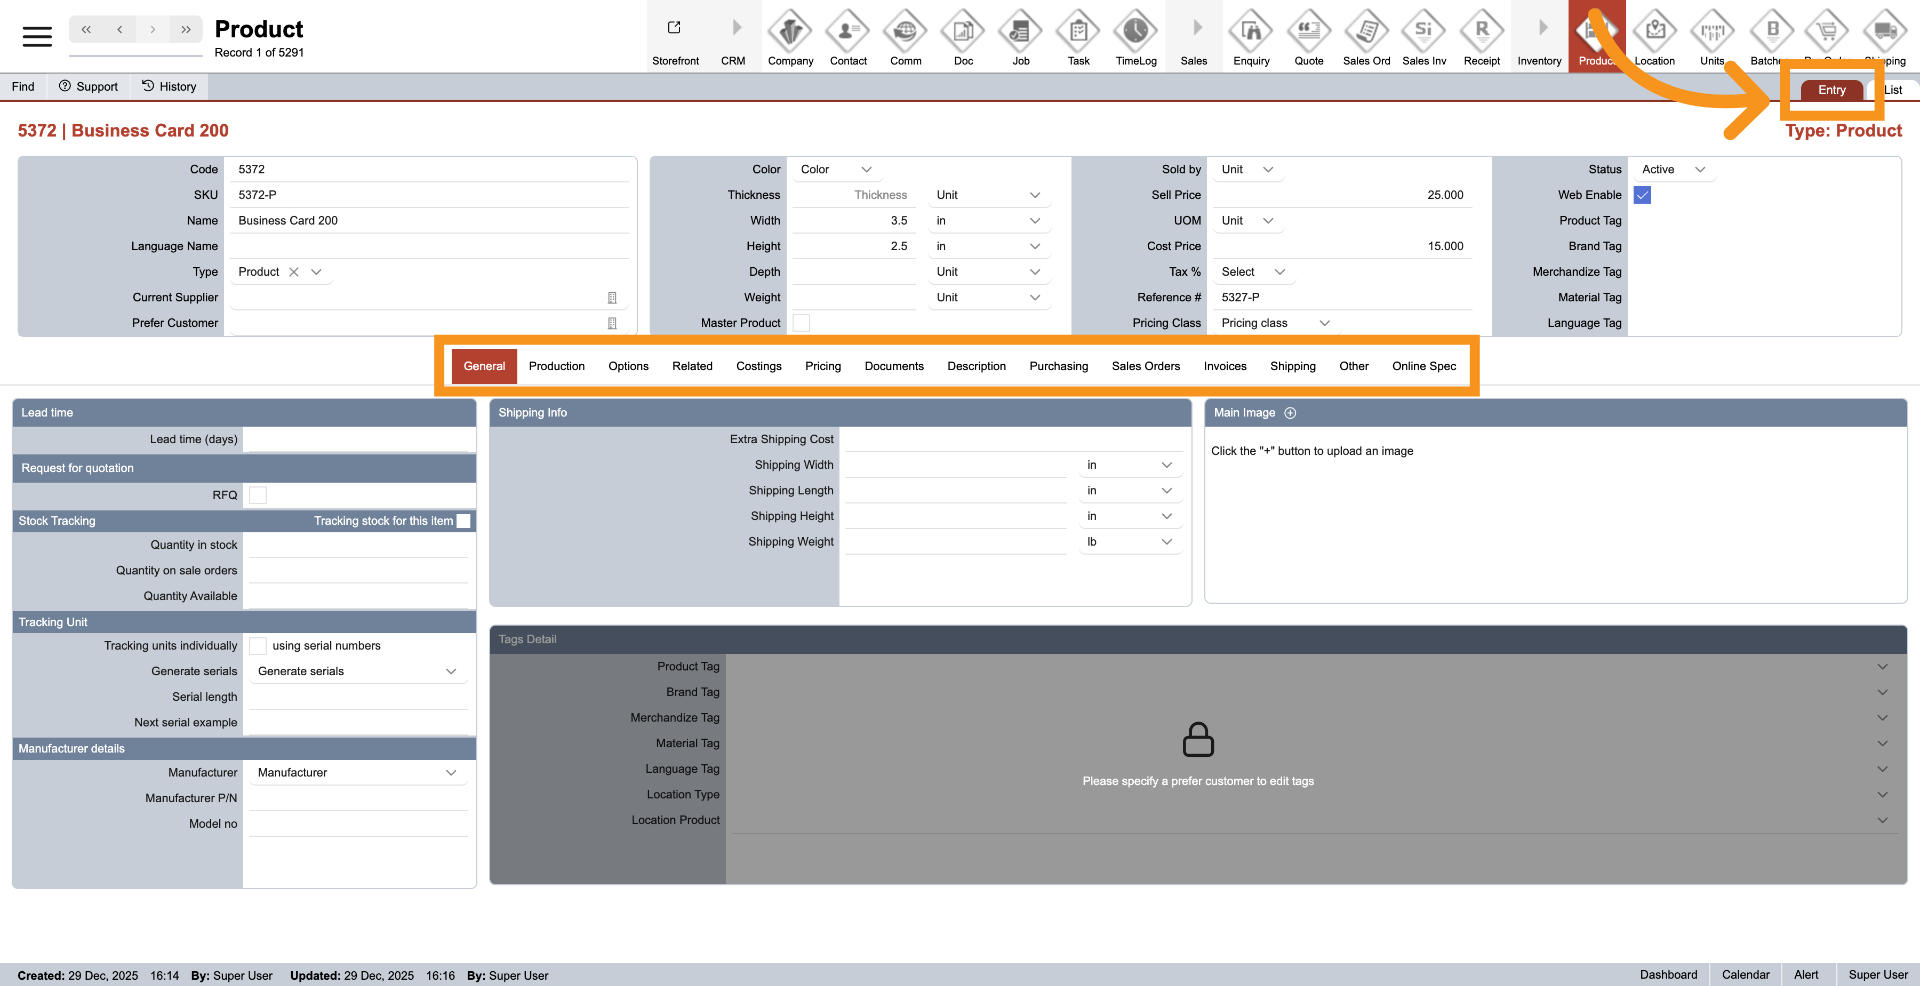
2. Entry View
The "Entry" displays all the details of the product. It features a menu in the center that allows navigation to various product sections, such as tags, costs, and pricing.
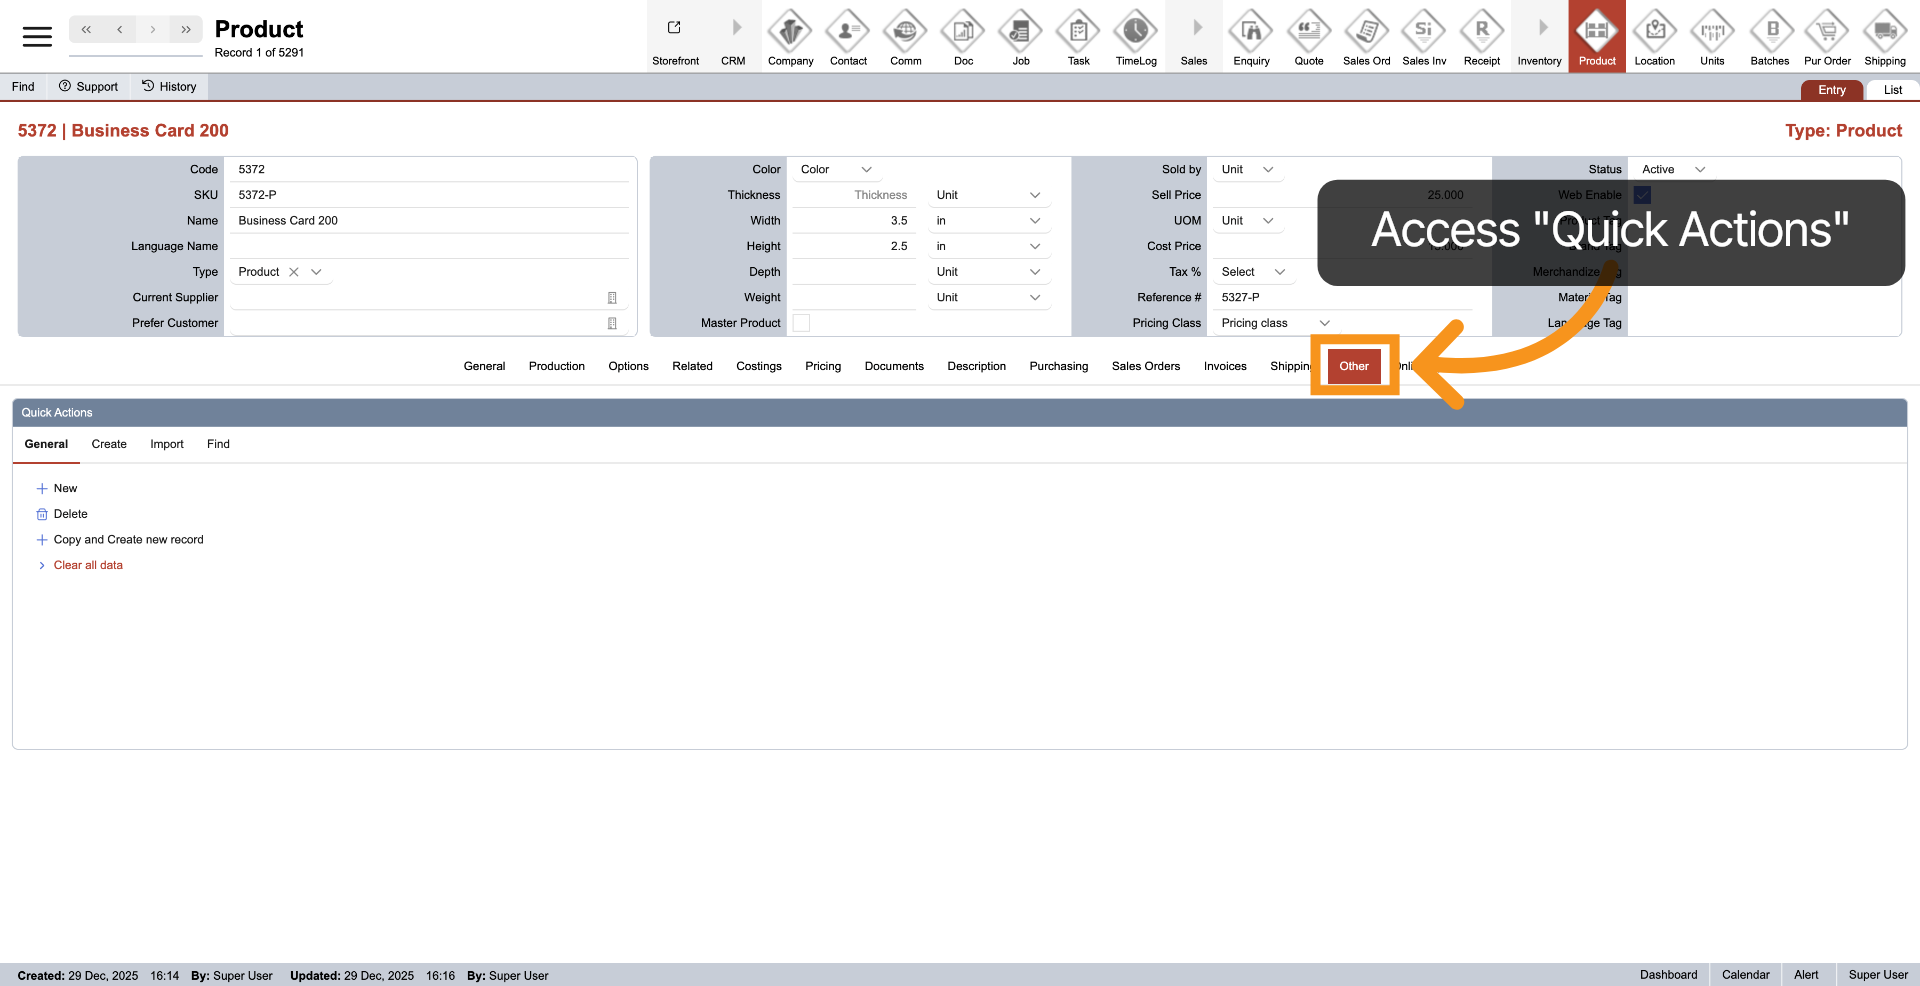
3. Open Quick Actions Menu
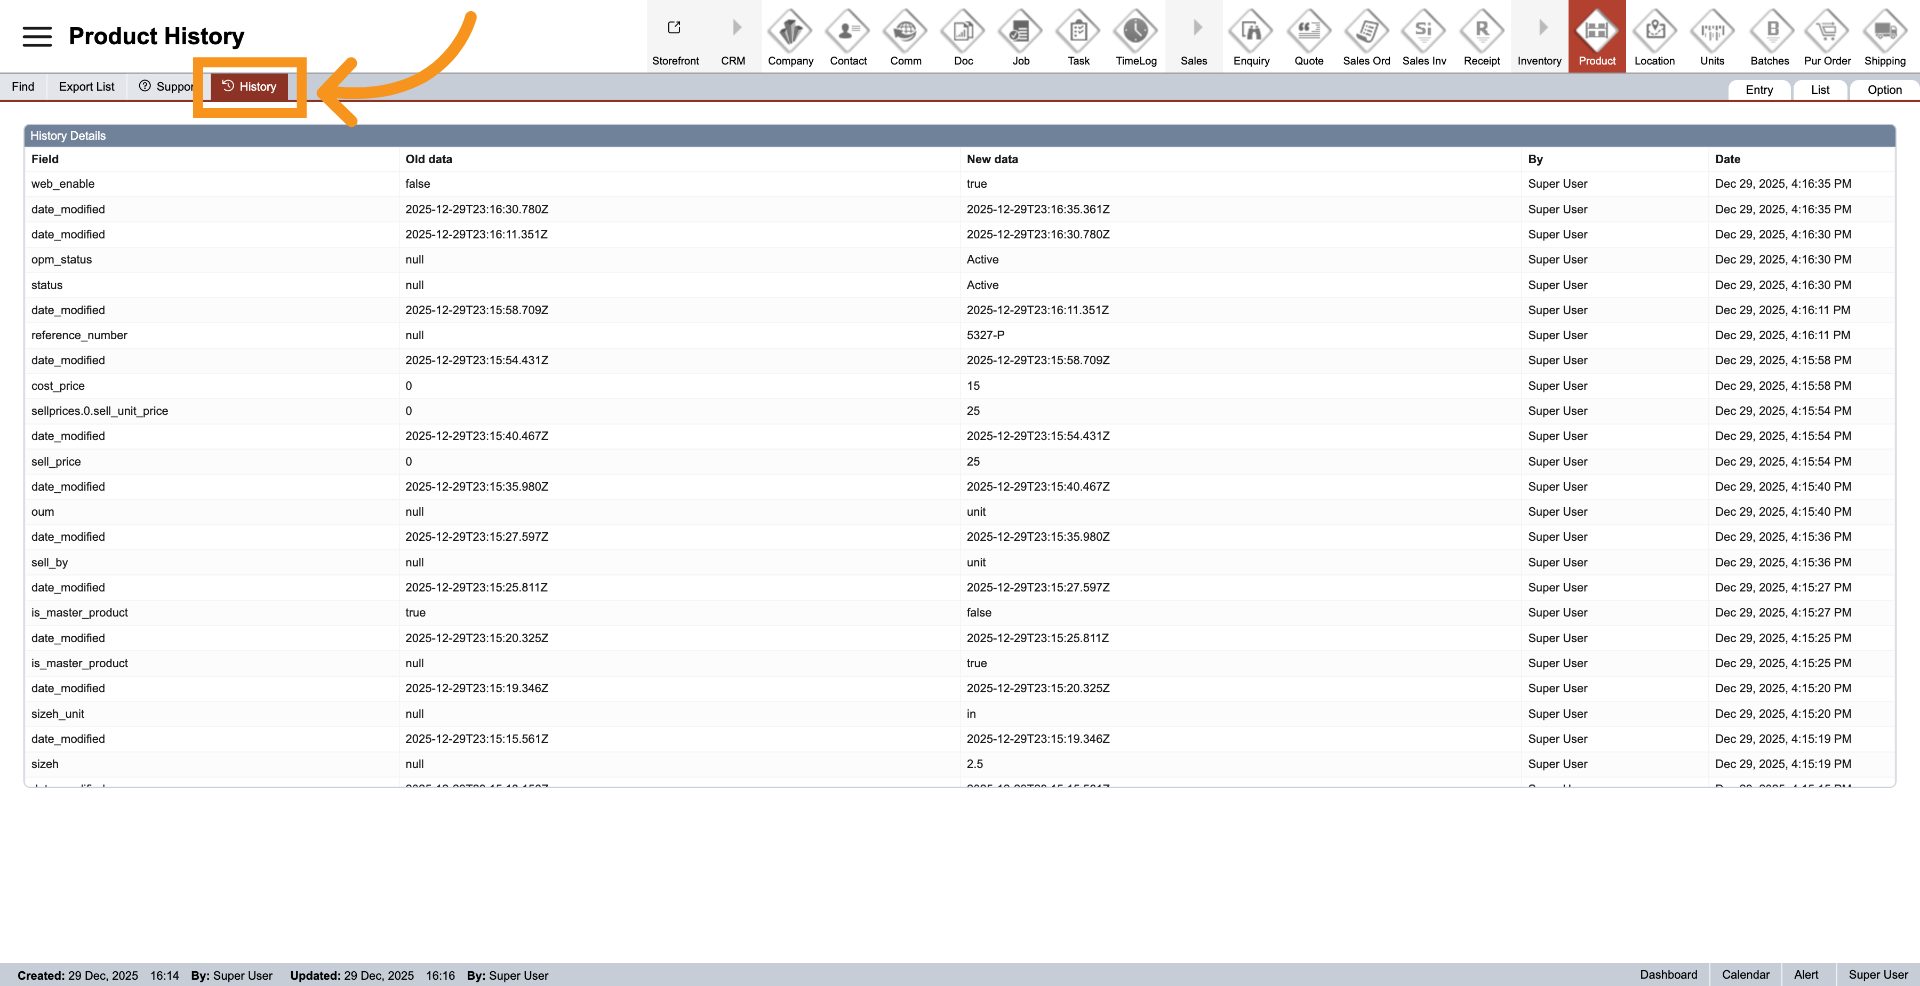
4. Access History
Click on "History" to view the changes or activity logs associated with the current product.
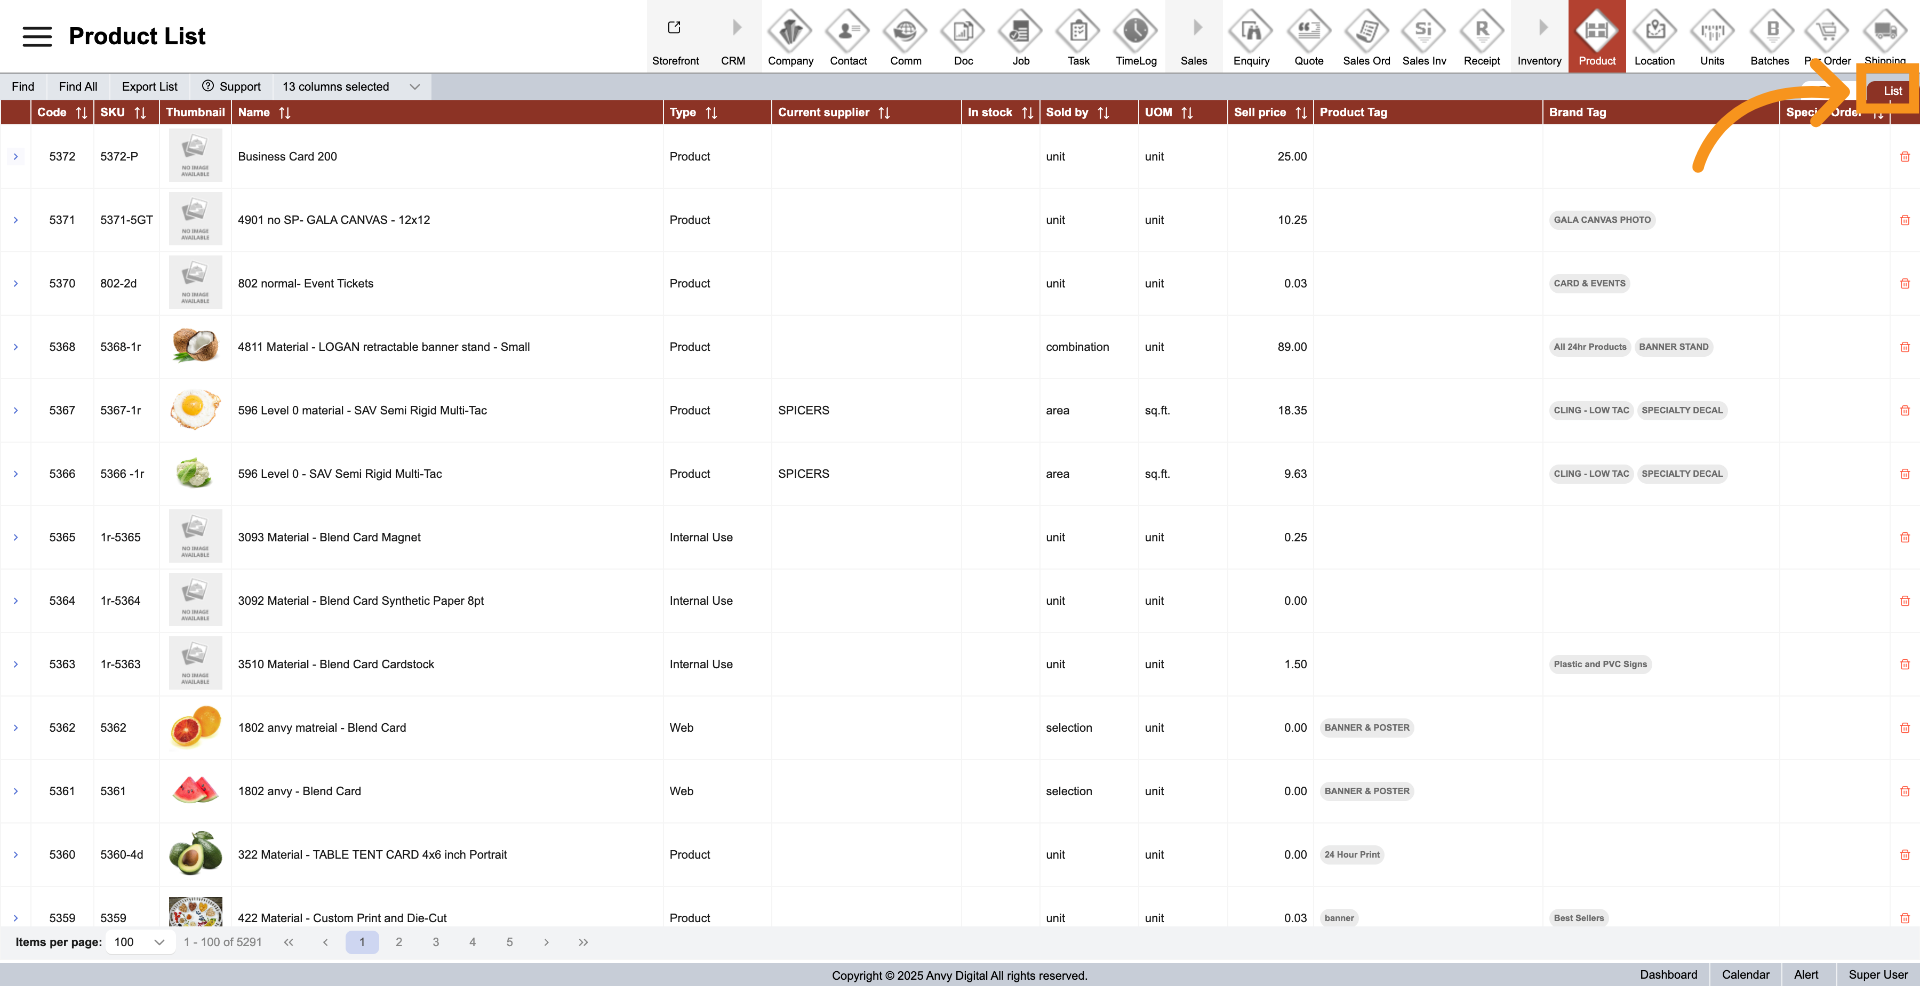
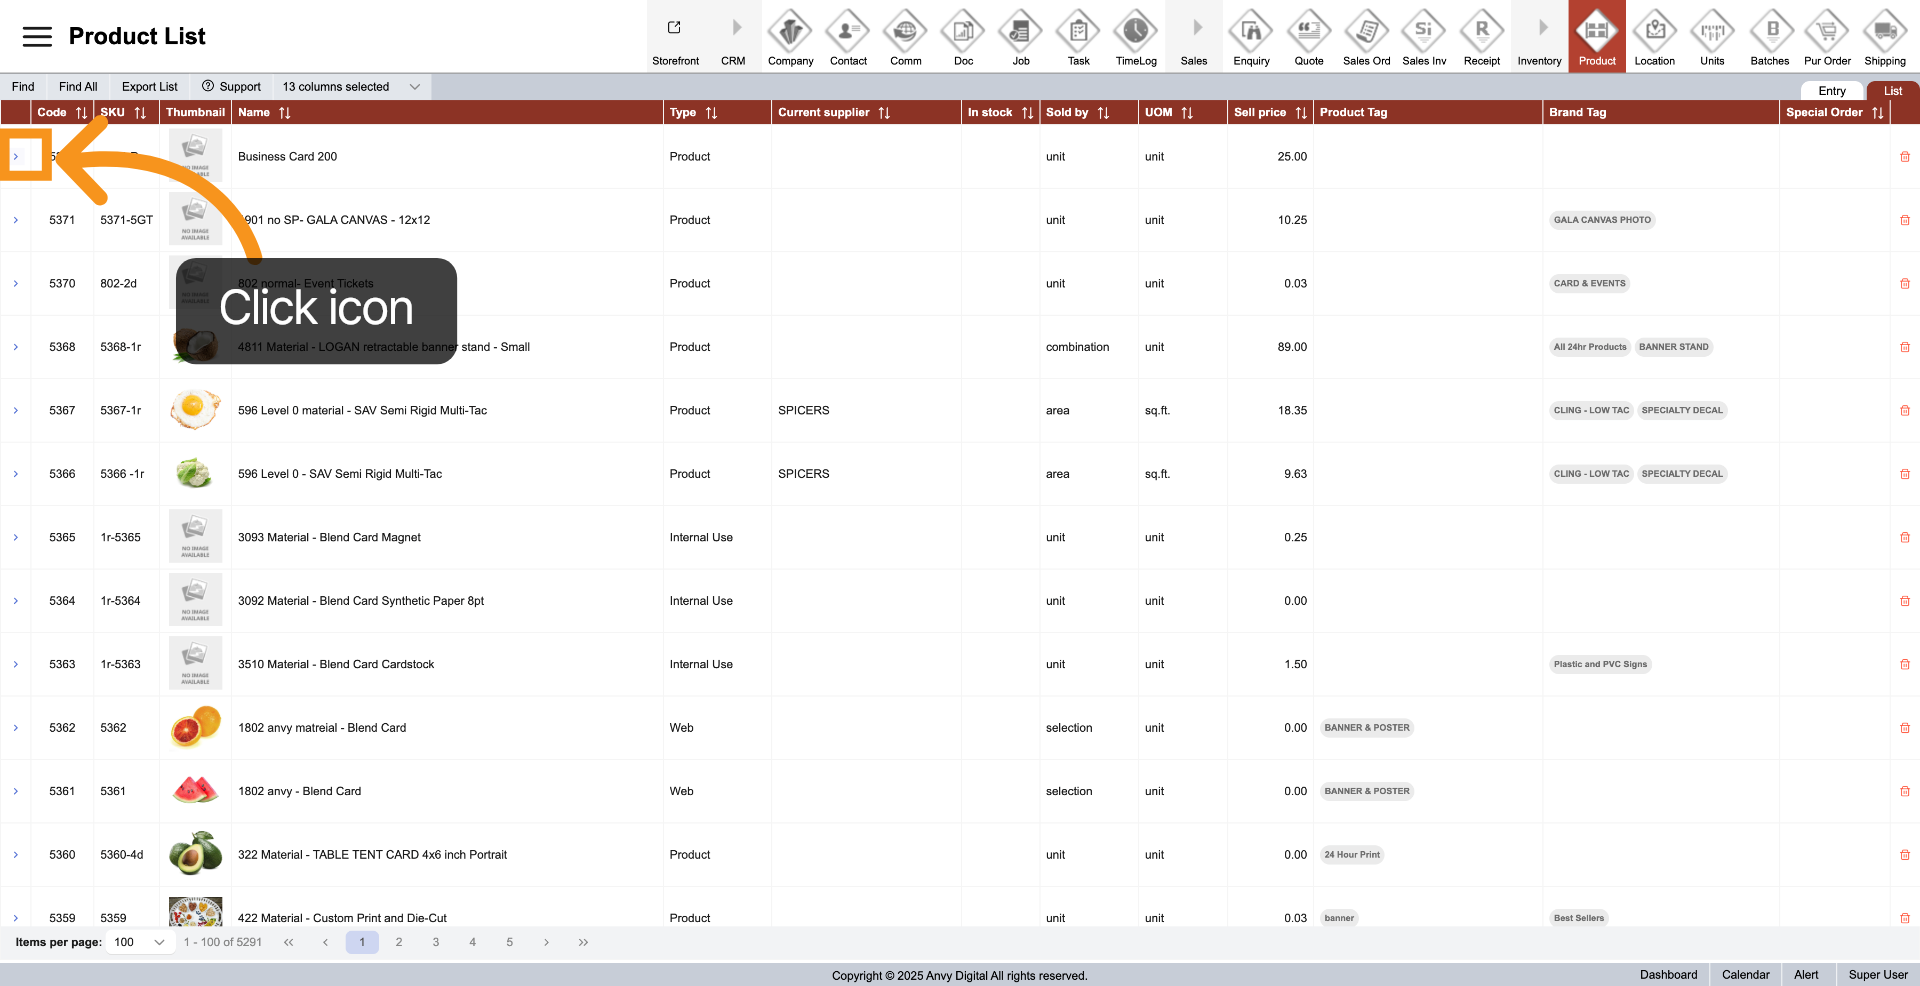
5. Product List
Click "List" to view all products available in the WorkTraq system.
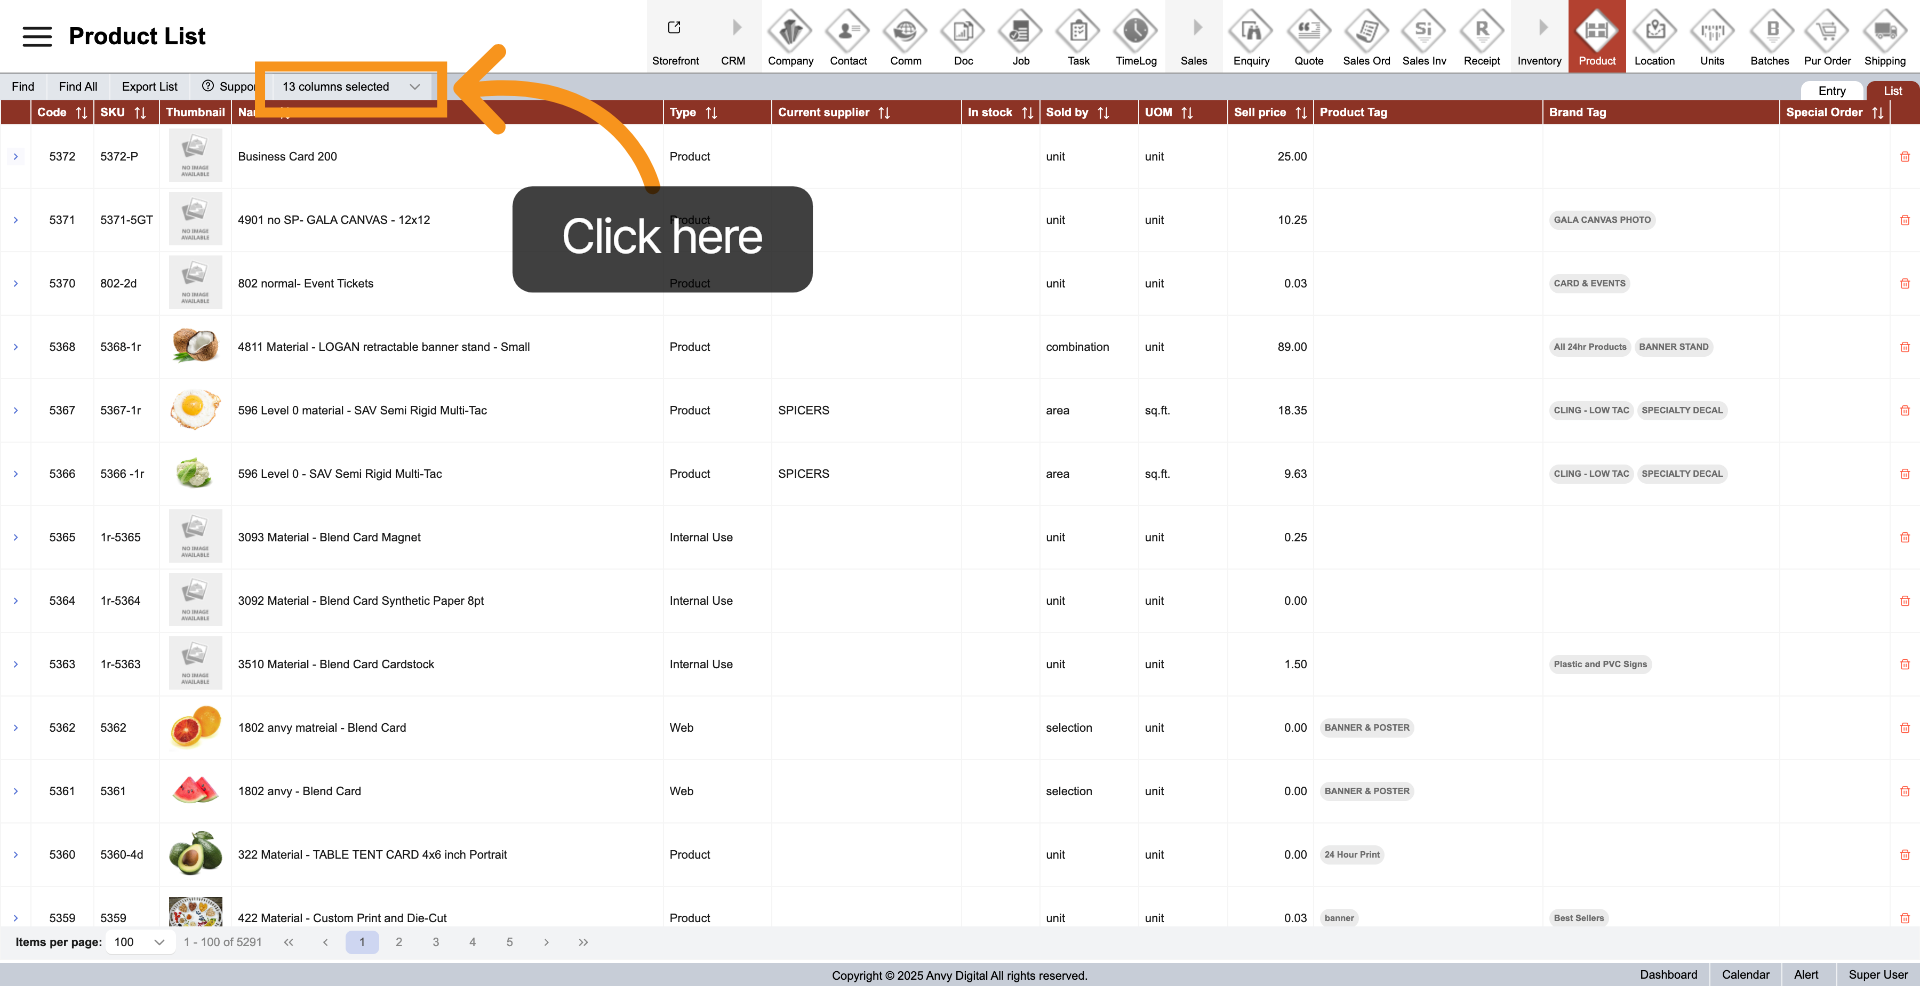
6. Custom List View
In the "List", click "Column Selected" and then choose the columns you want to display in the list.
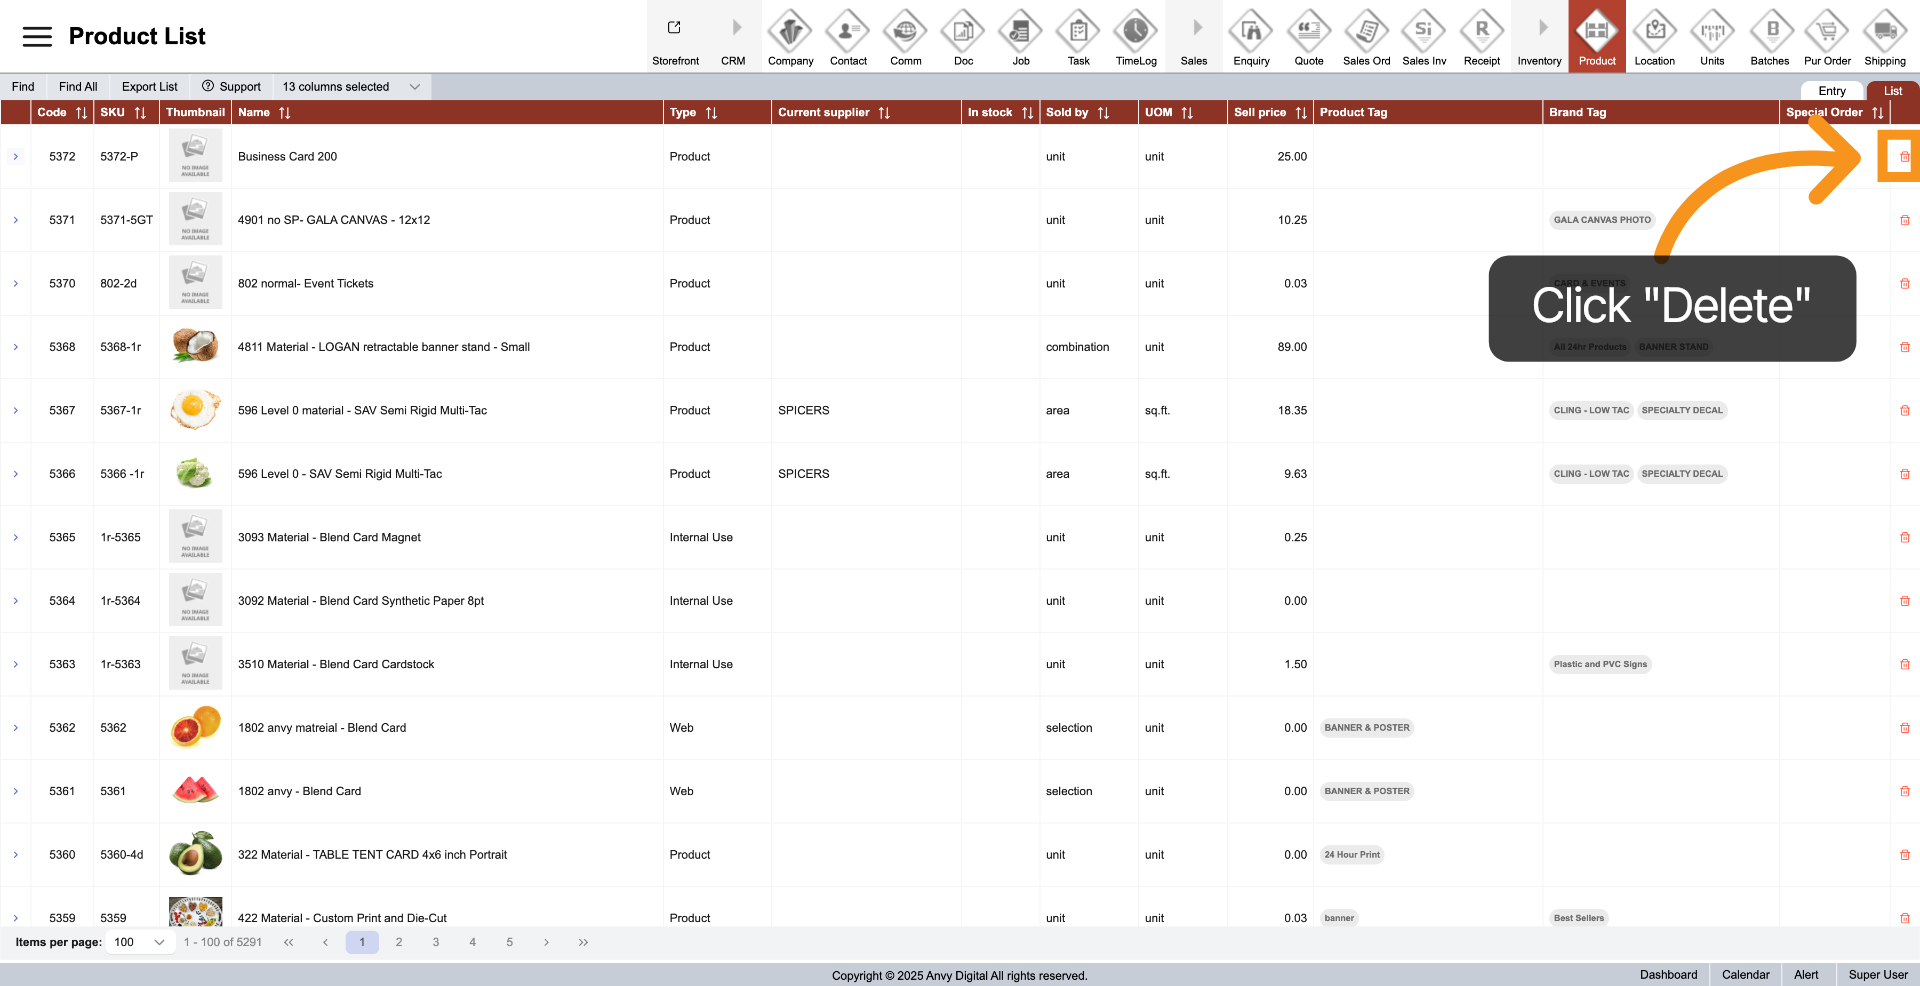
7. Delete Product
You can delete a product by clicking the "Delete" icon next to the item you want to remove.
8. View Specific Product
Click the arrow next to the product you want to view to access the product entry.
9. Find Product
Click "Find" to quickly locate a product using specific filters. This makes it easier to find the product you are looking for efficiently.
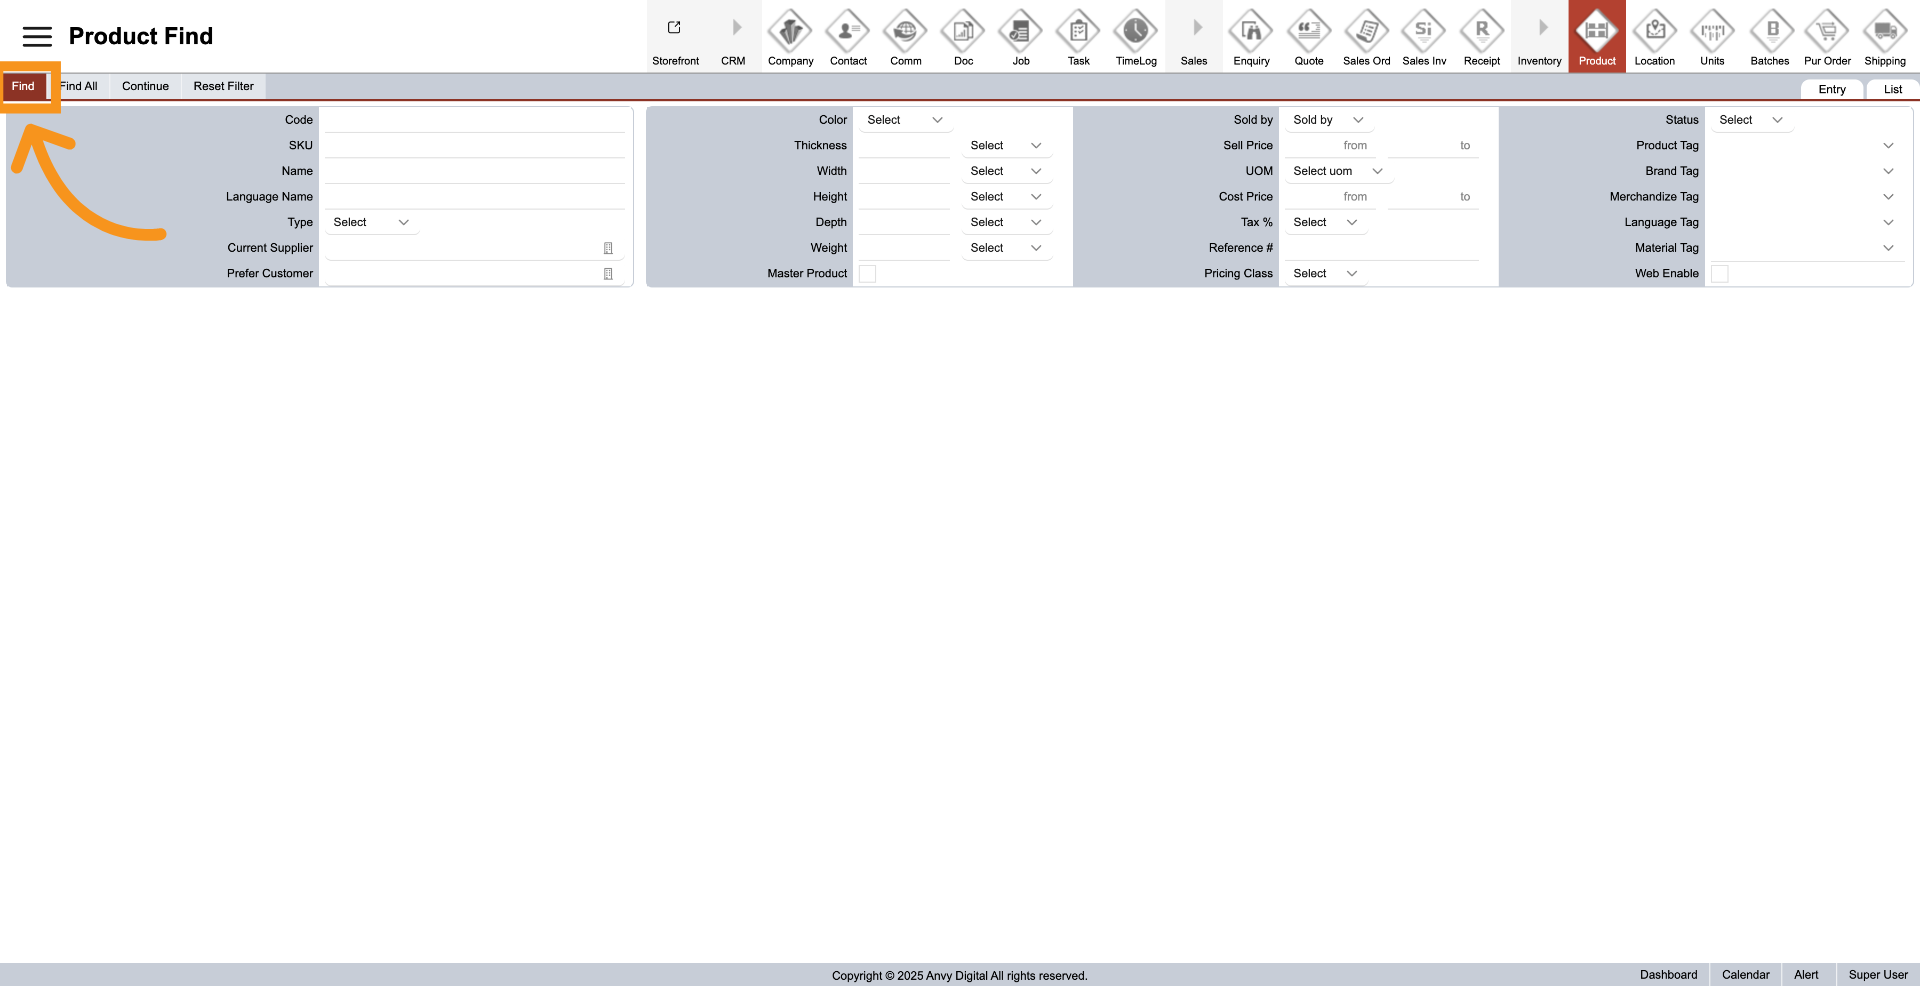
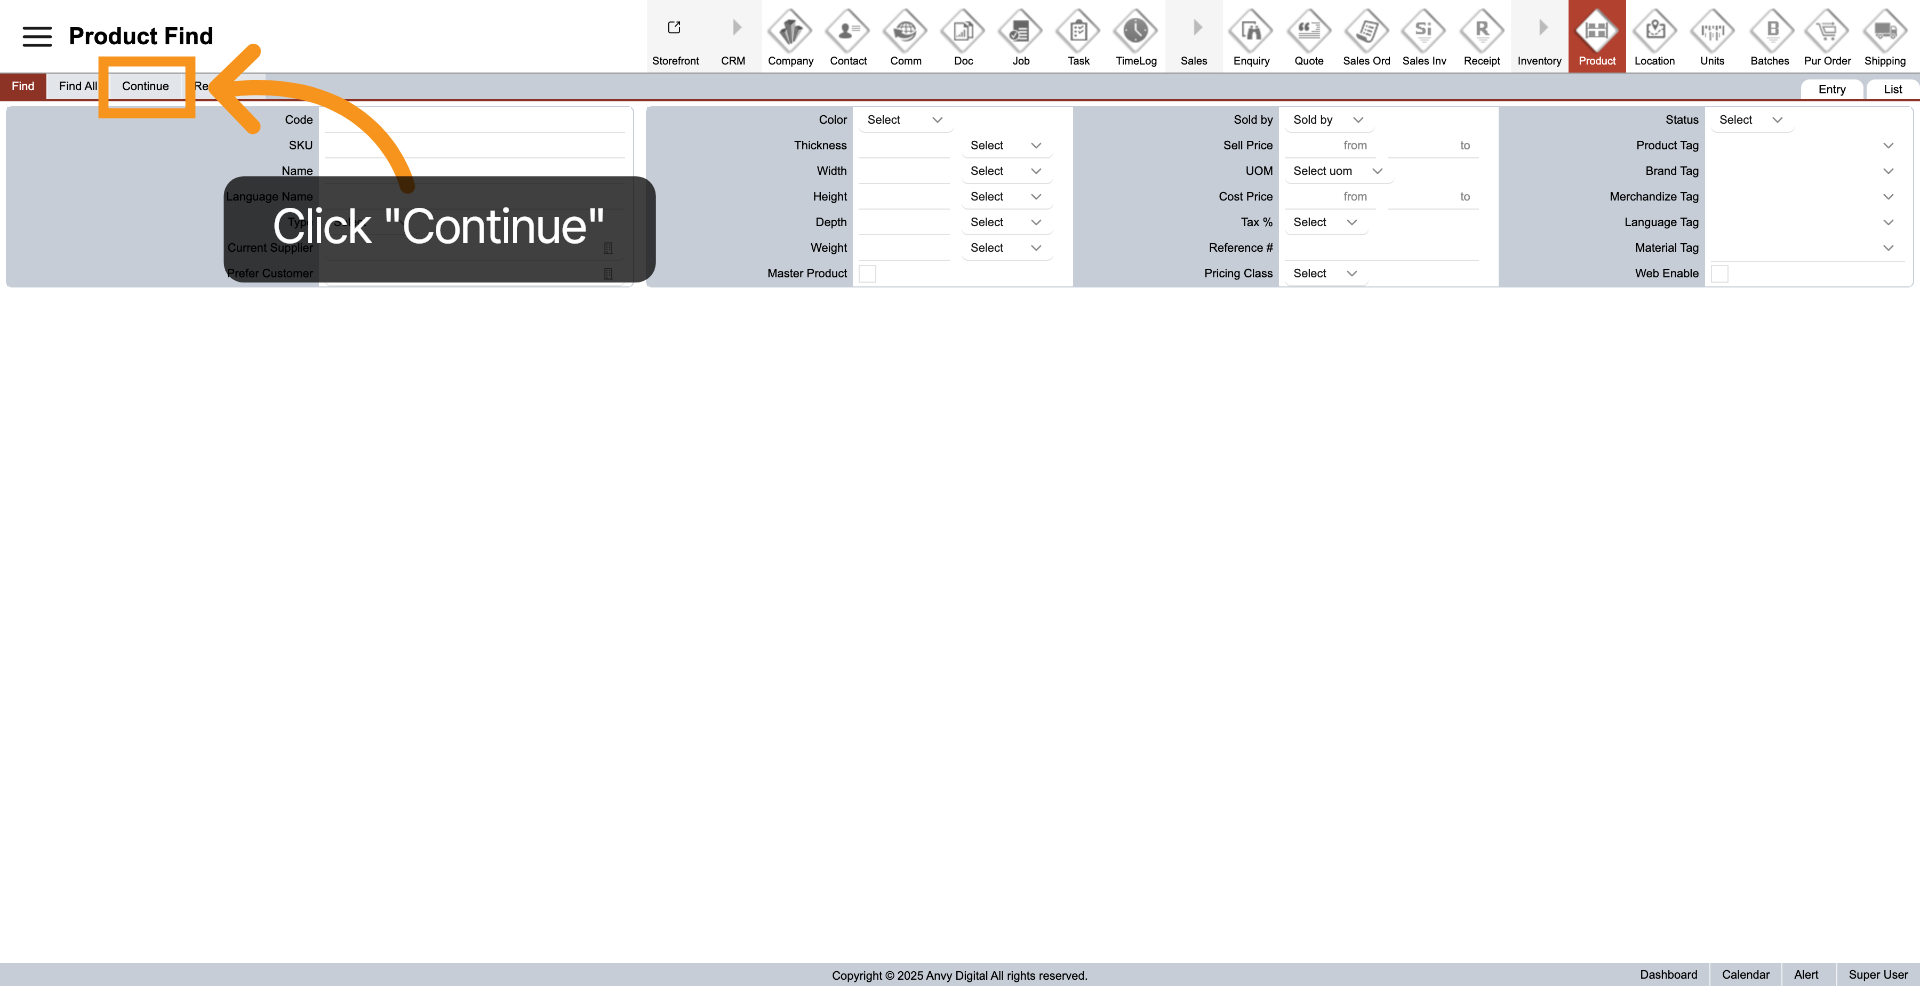
10. Start Find Product
In "Product Find", after filling in the required information, click "Continue" to start finding your product. All the fields can be combined together to narrow down specific products.