Run Invoicing
This tutorial guides you through running the automated invoicing process after a sale order has been shipped.
Video Tutorial
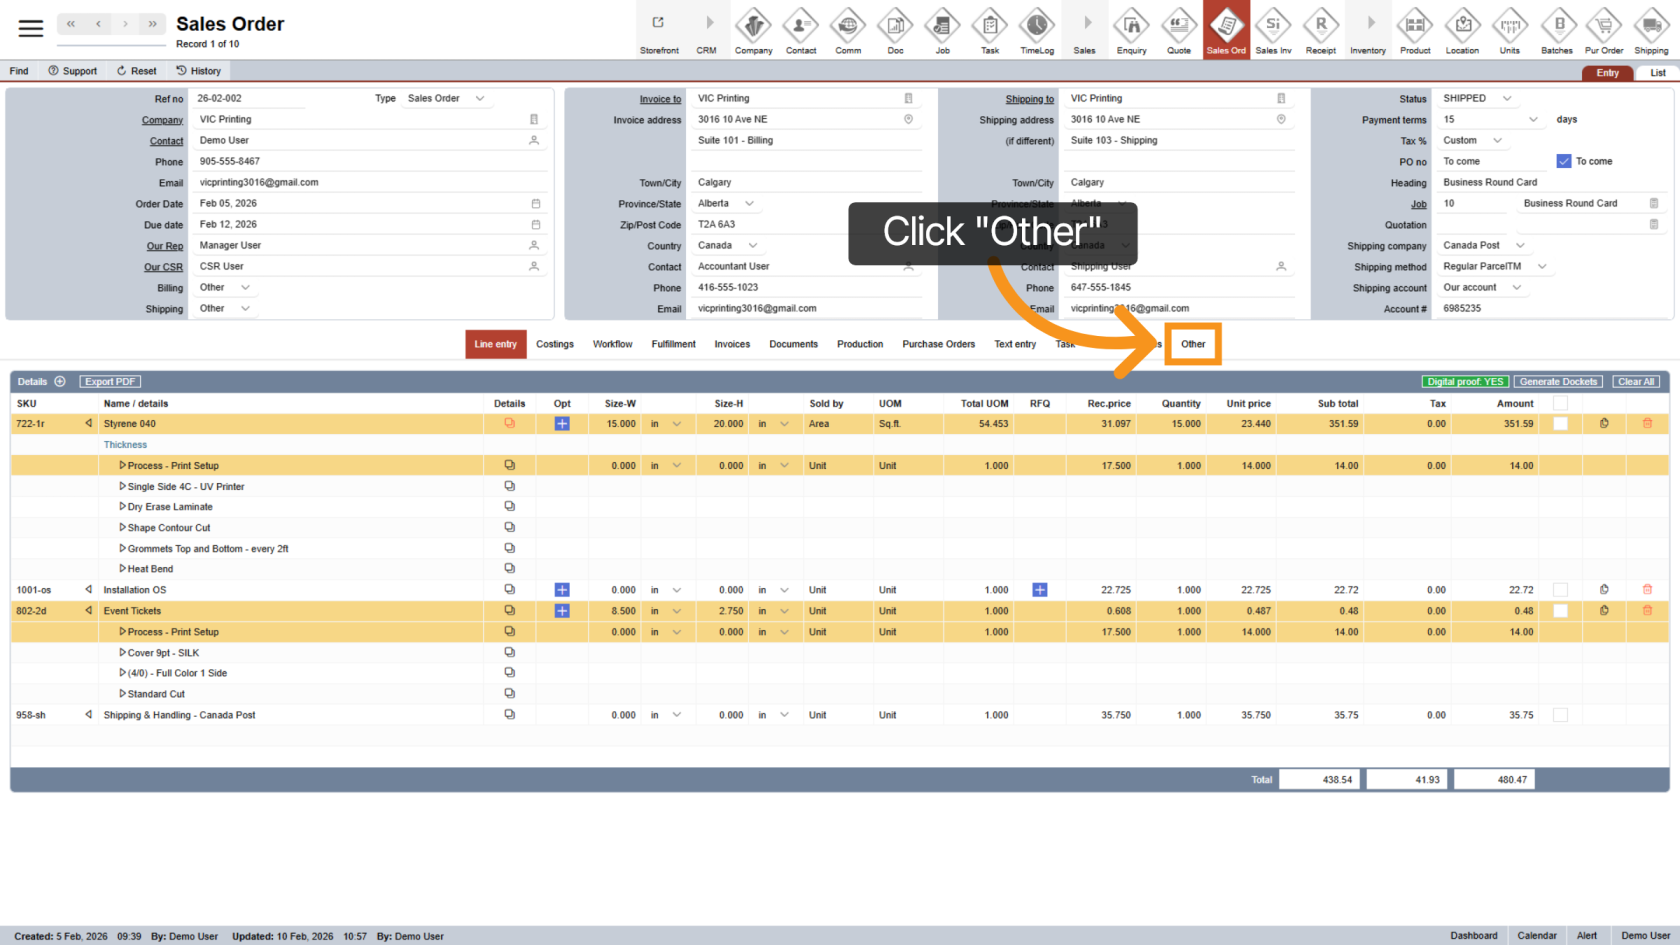
1. Open Other section
Click the "Other" menu to access additional options related to your order.
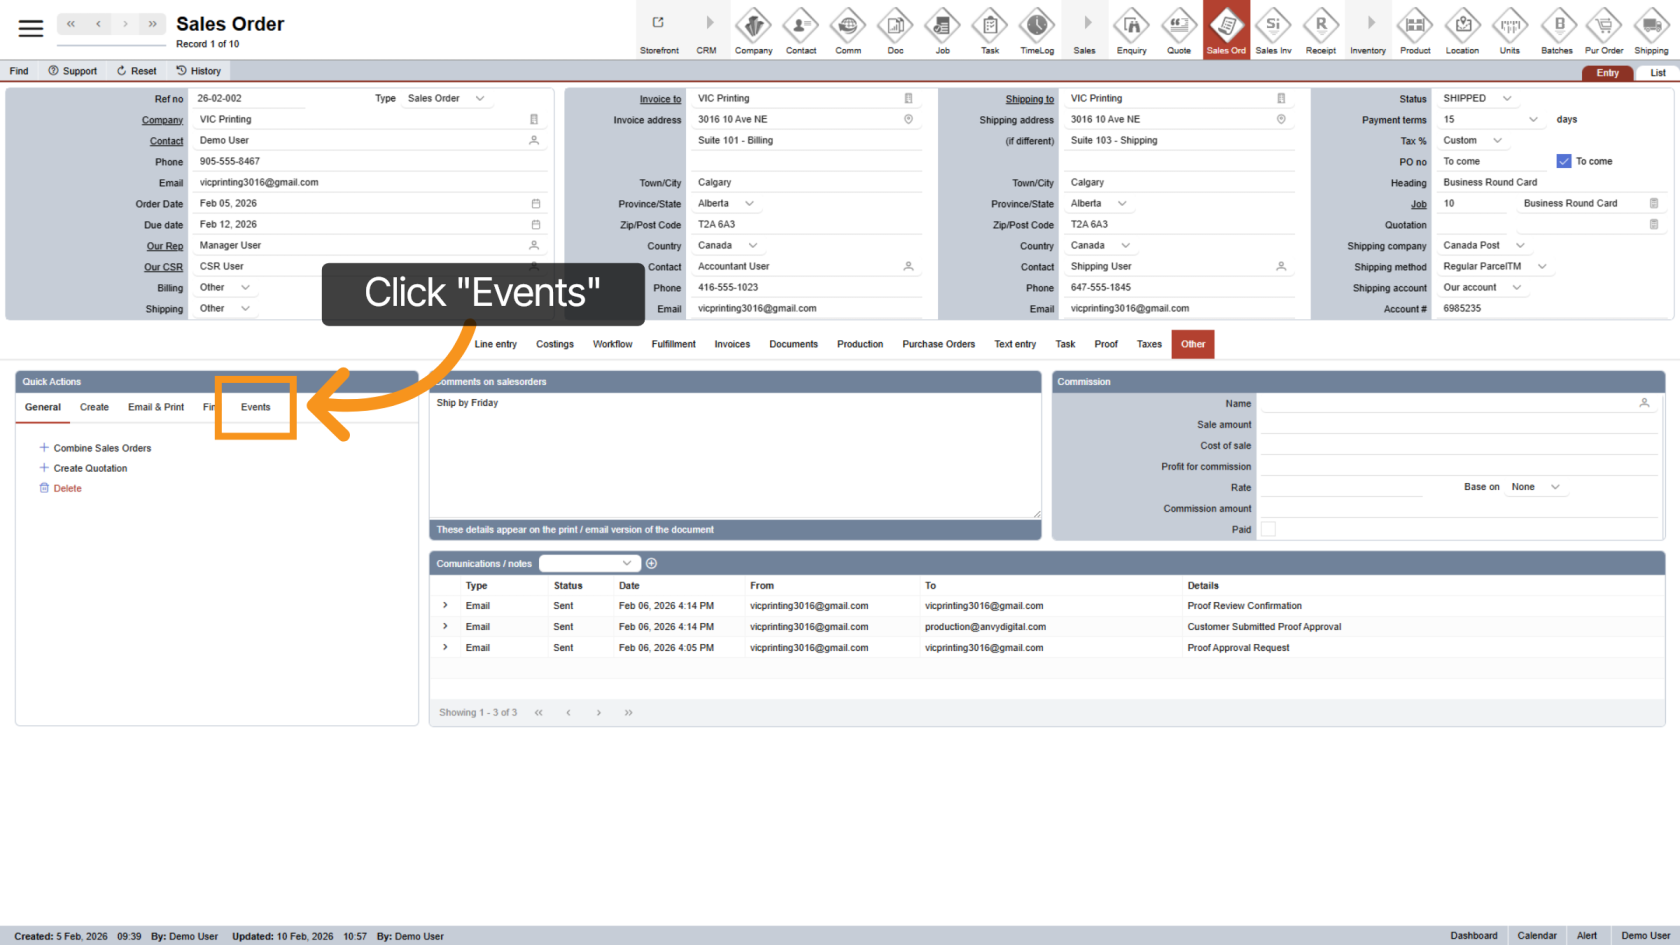
2. Open Events
In Quick Actions, click "Events".
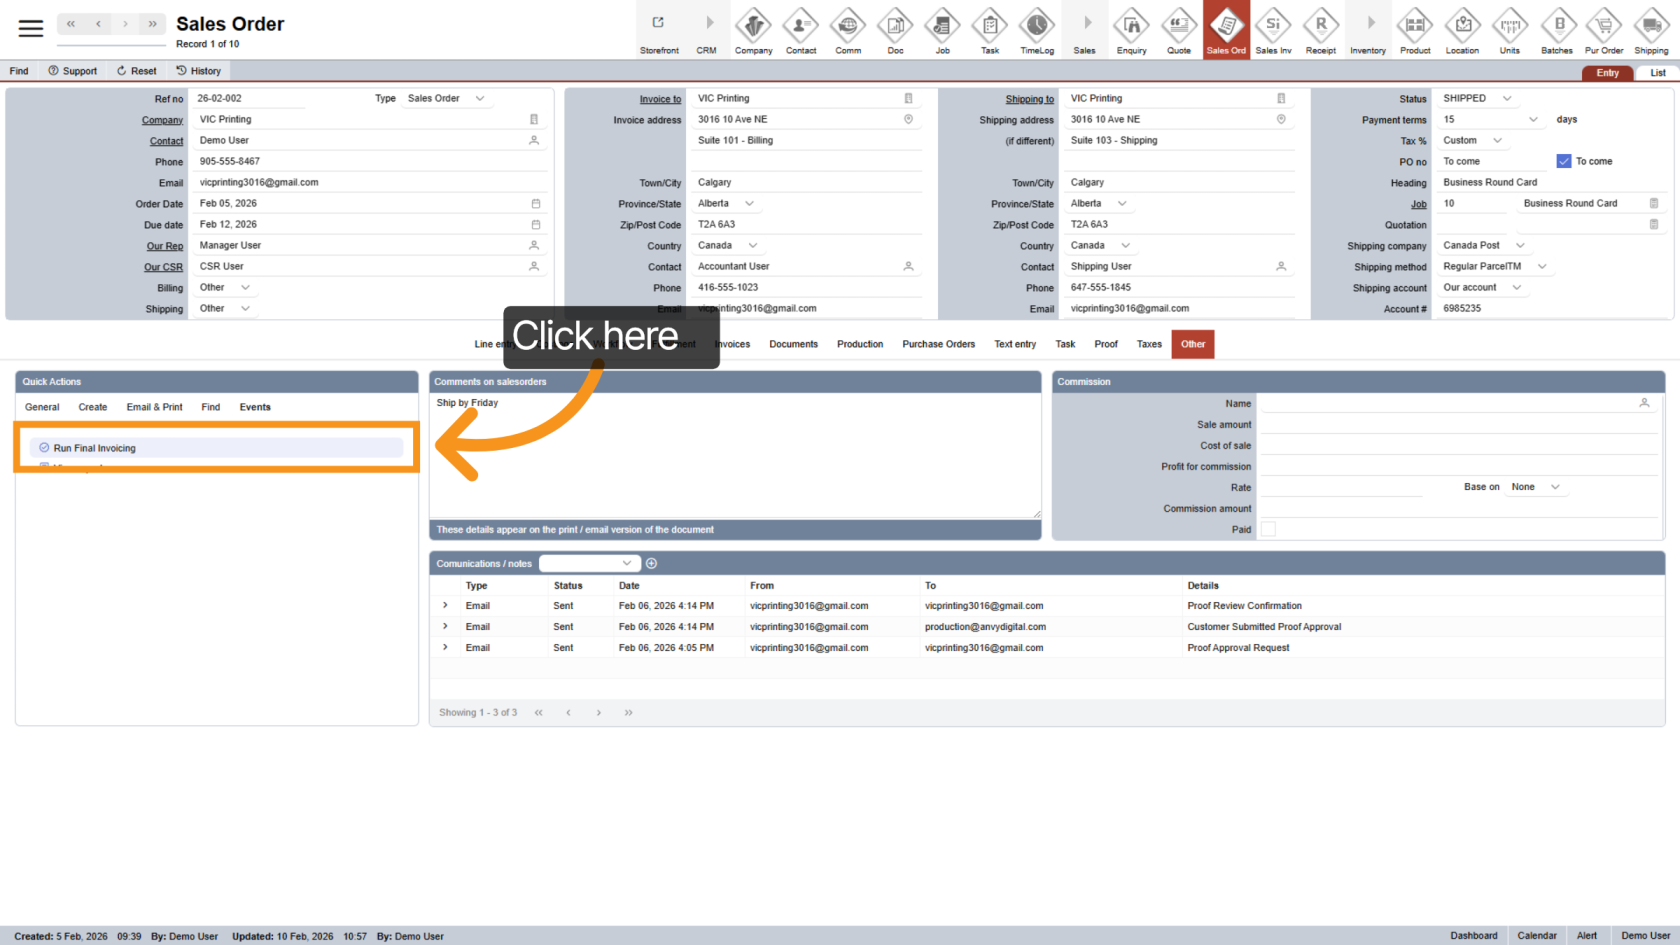
3. Run Final Invoicing
Click "Run Final Invoicing" to start the process.
The system will automatically run through all required checklist steps before generating the invoice.
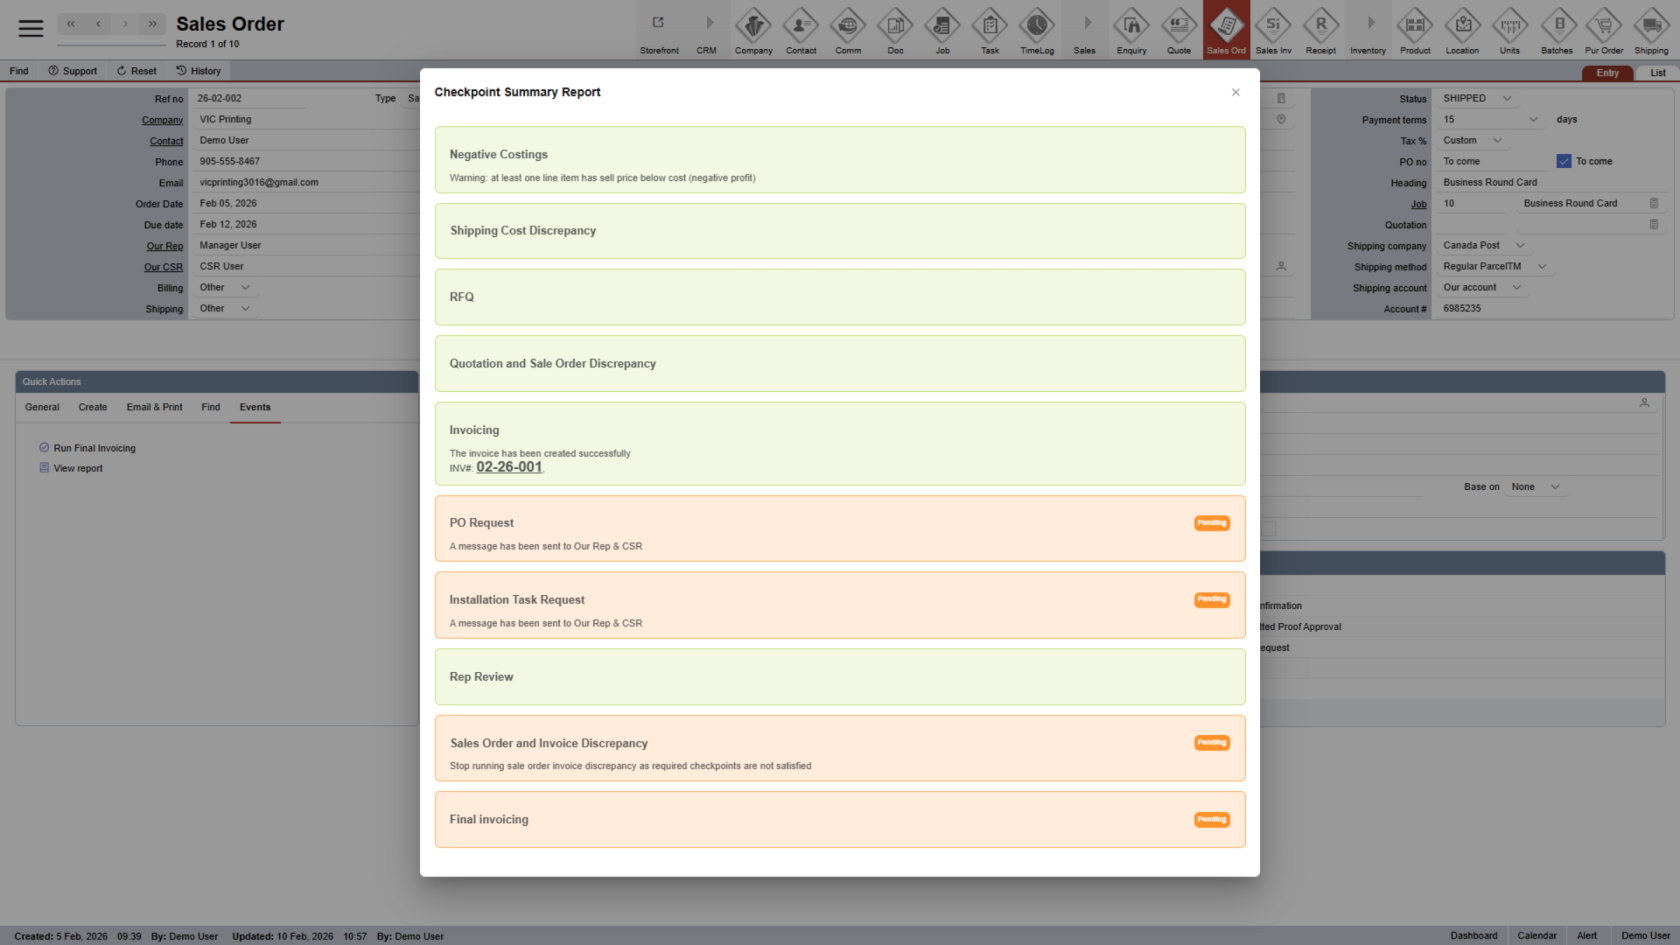
4. Handle Required Actions (If Any)
If something is missing, the checklist will pause and notify the appropriate person, update the sale order status to Invoicing.
Common requests may include:
- REP or CSR PO number
- Completion of installation tasks
- Review and approval of invoicing.
After that SO status will auto update to Invoicing
Note: At the end of the day, the system will automatically recheck only sales orders that are in Invoicing status and have a related job that is still In Progress. Orders that do not meet both conditions will not be rechecked.
5. Invoice Is Sent Automatically
If no issues are found, the system will automatically send the invoice to:
- The sale order billing contact
- Any additional billing contacts set up in the company settings.
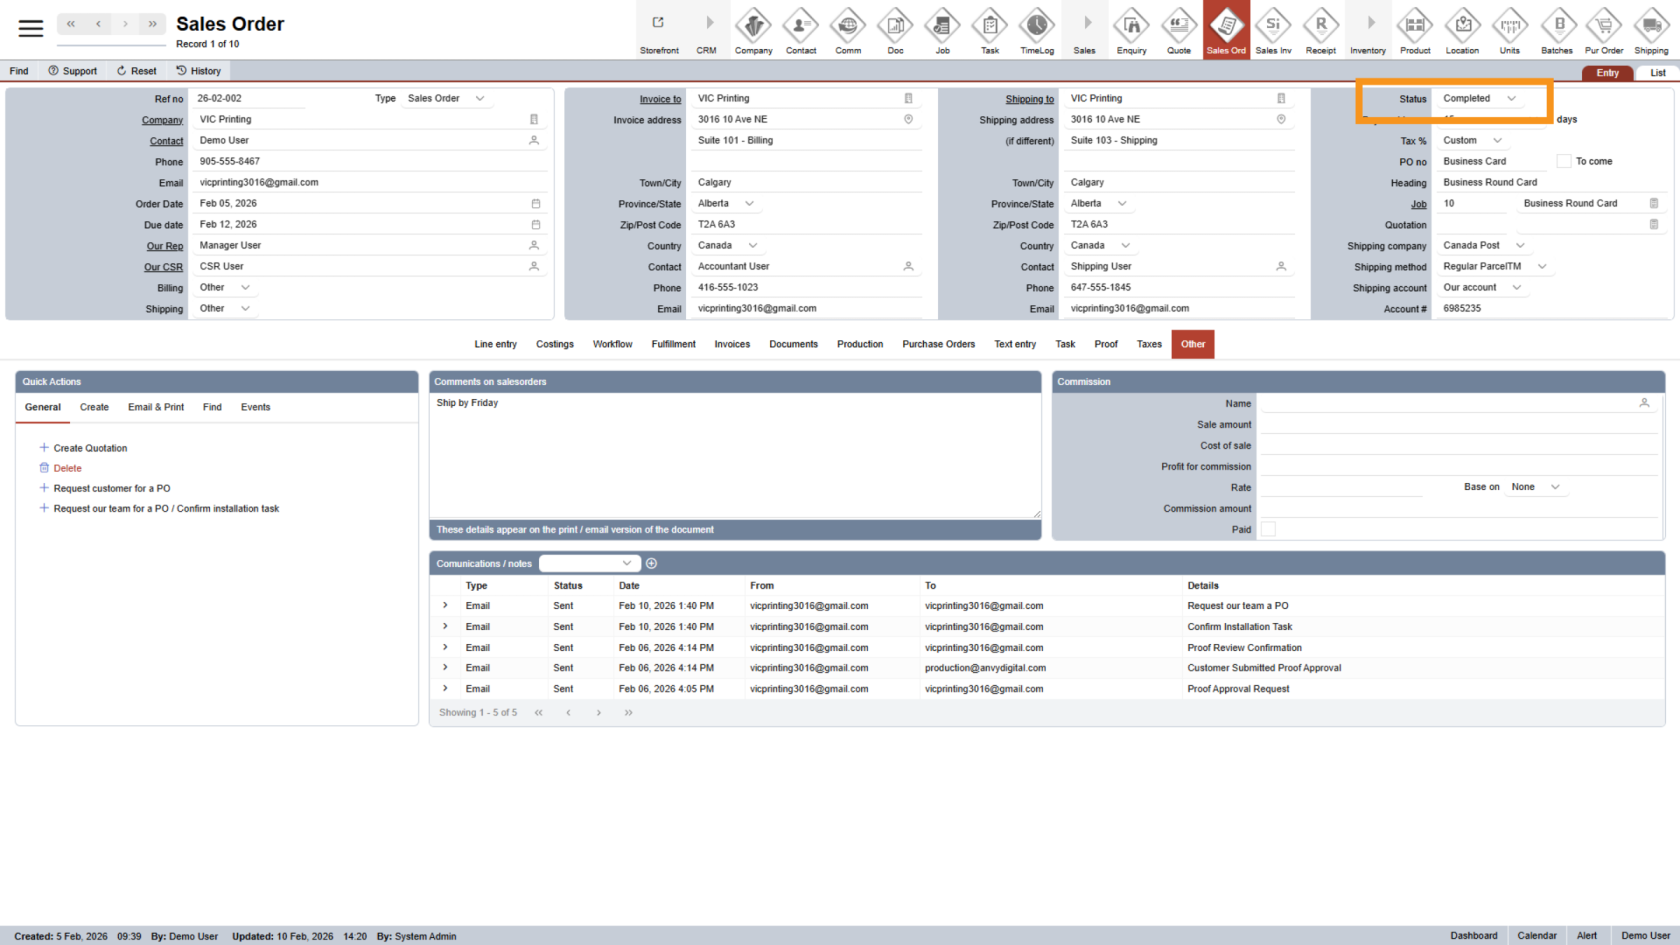
6. Sale Order Status Updates
Once the invoice is sent
- Sale order status updates to Complete
- Sales invoice status updates to Complete
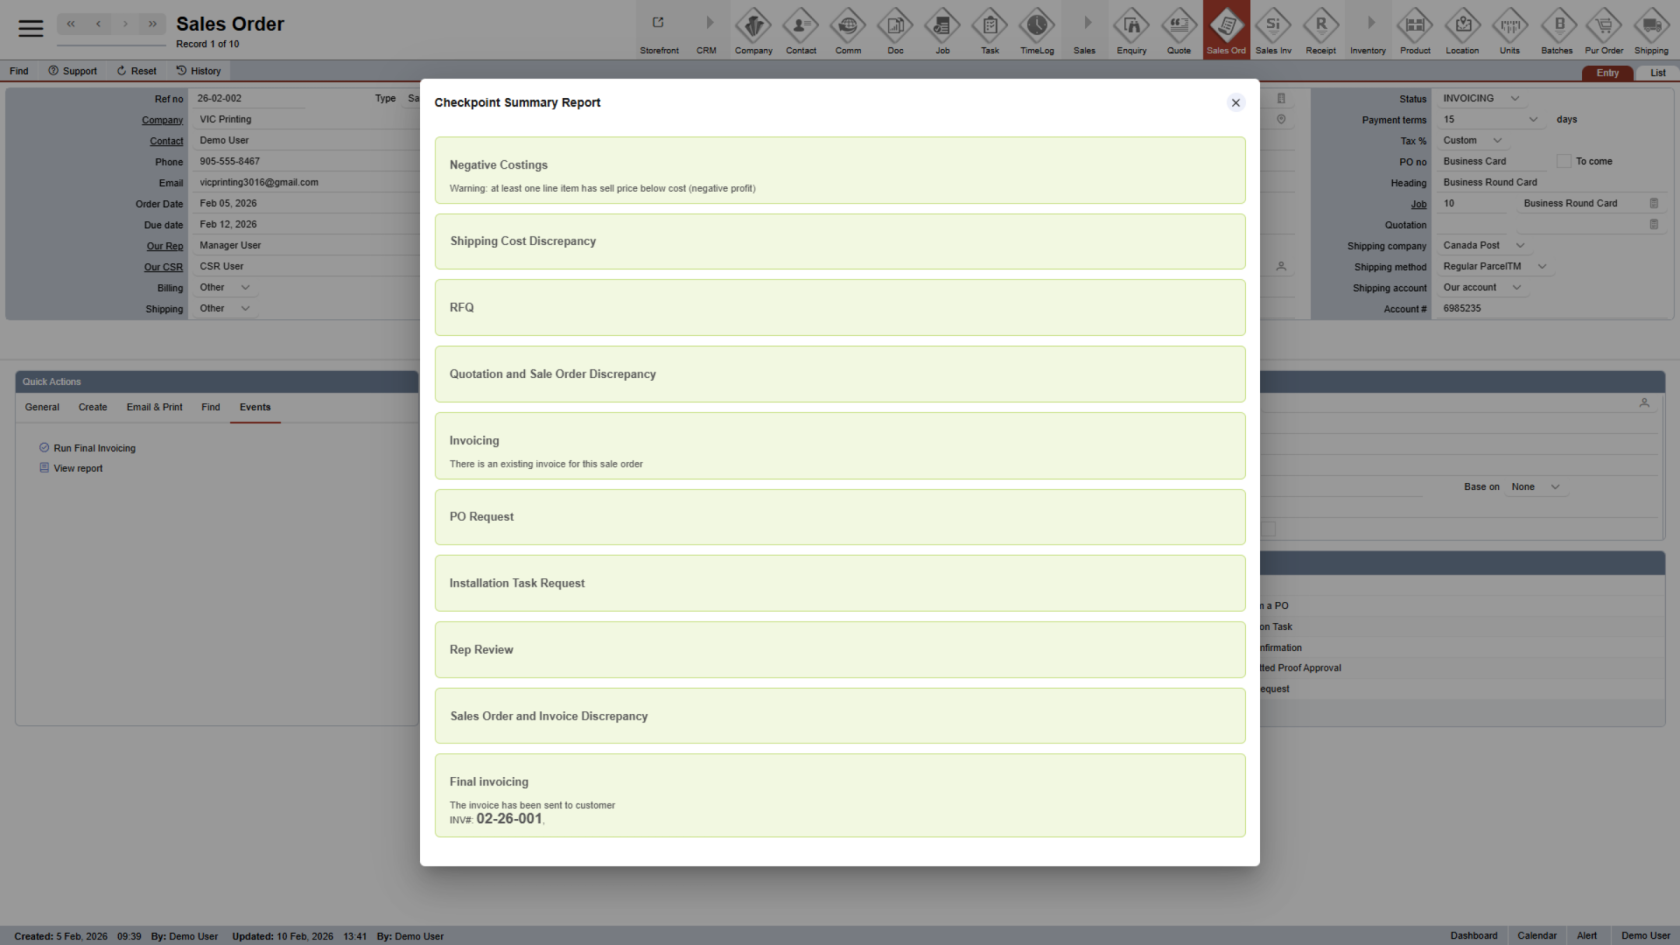
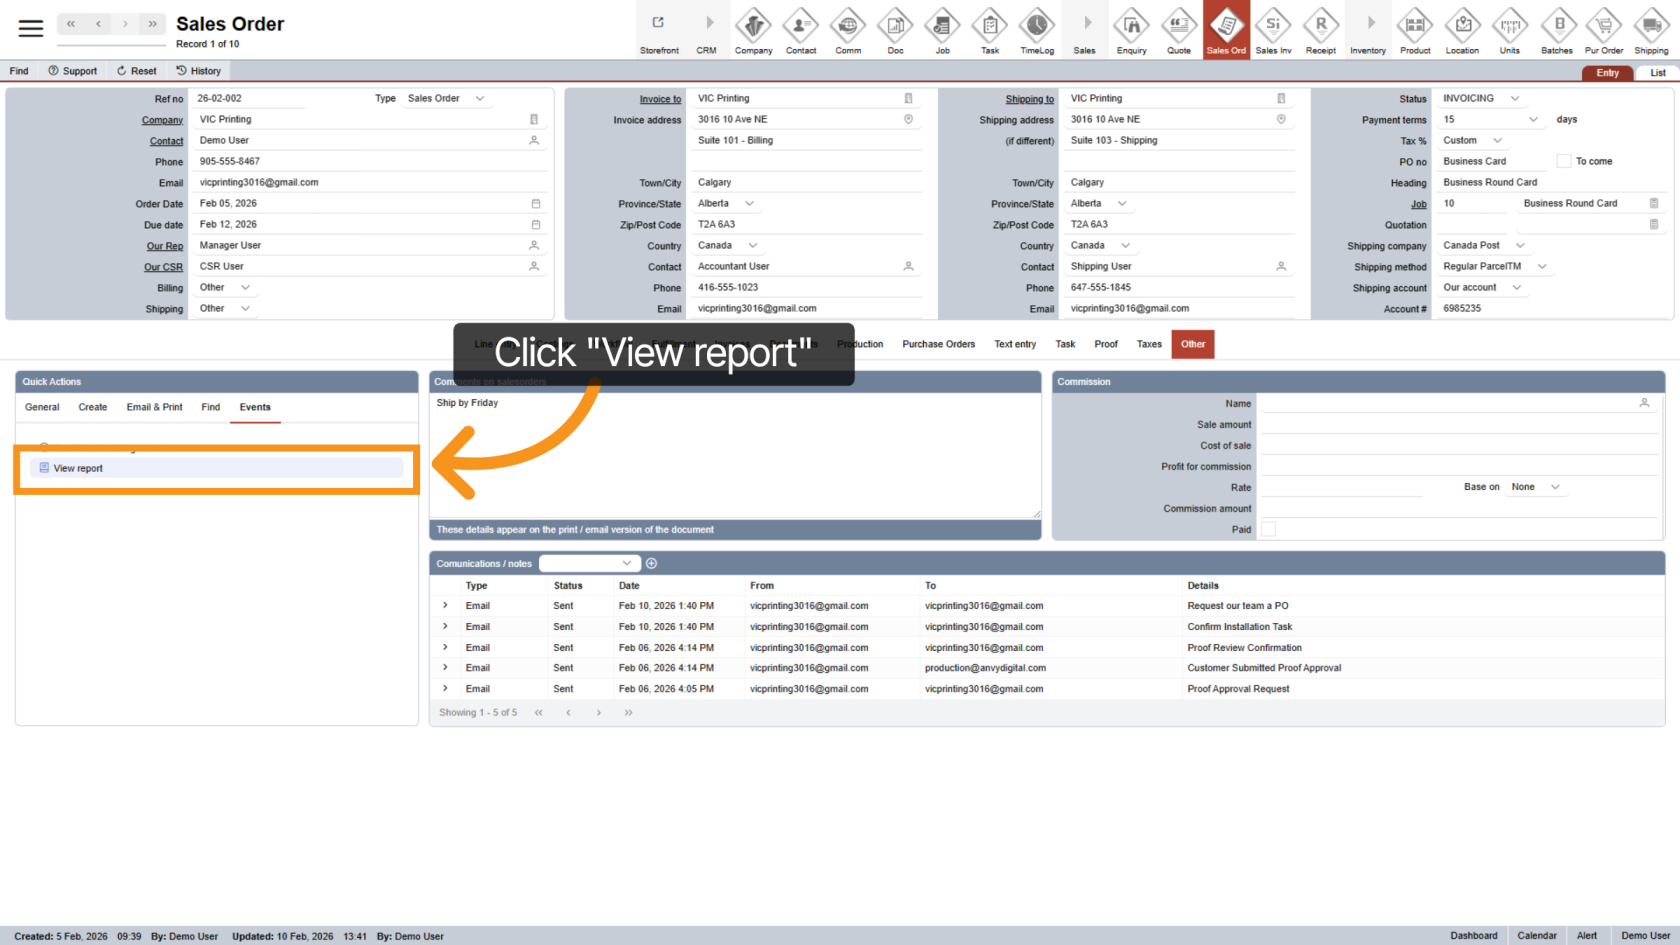
7. Review Invoicing Checklist Report
Click "View Report" to review the invoicing checklist and results.
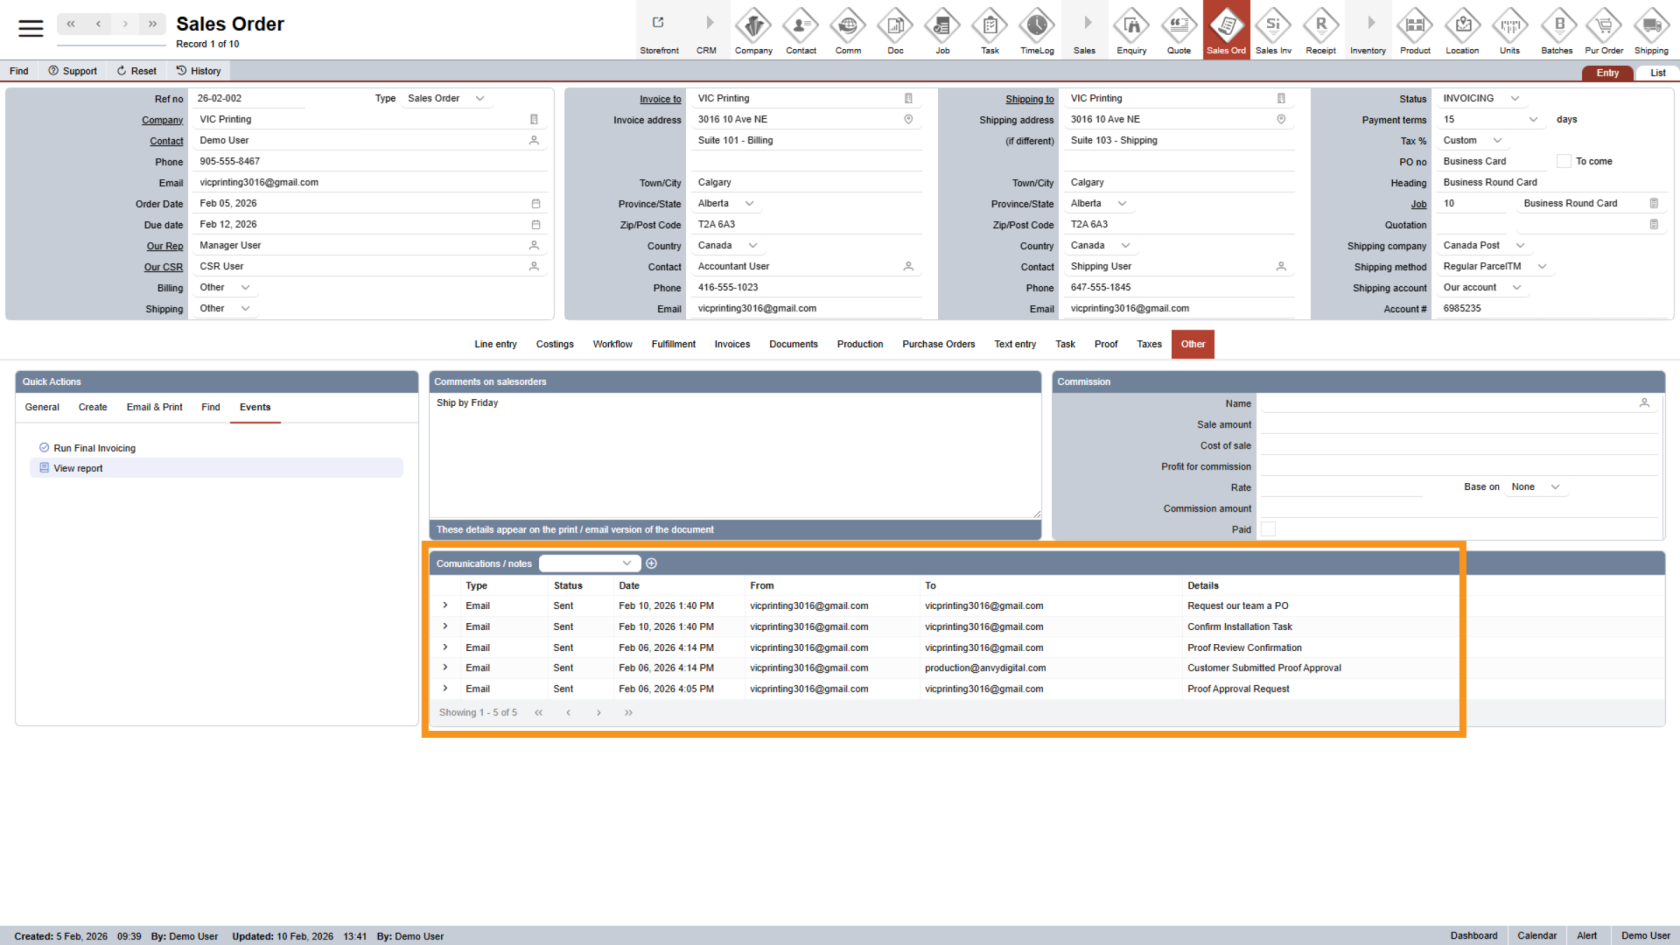
8. Communications
All communications related to the Sale Order checklist will be displayed under Communications.
You have successfully completed the invoicing process. The order is now fully finalized.