
Customize Dashboard
This tutorial shows you how to customize your WorkTraq dashboard by arranging gadgets and creating custom views to display the information most important to you.
Video Tutorial
1. Customize the Layout
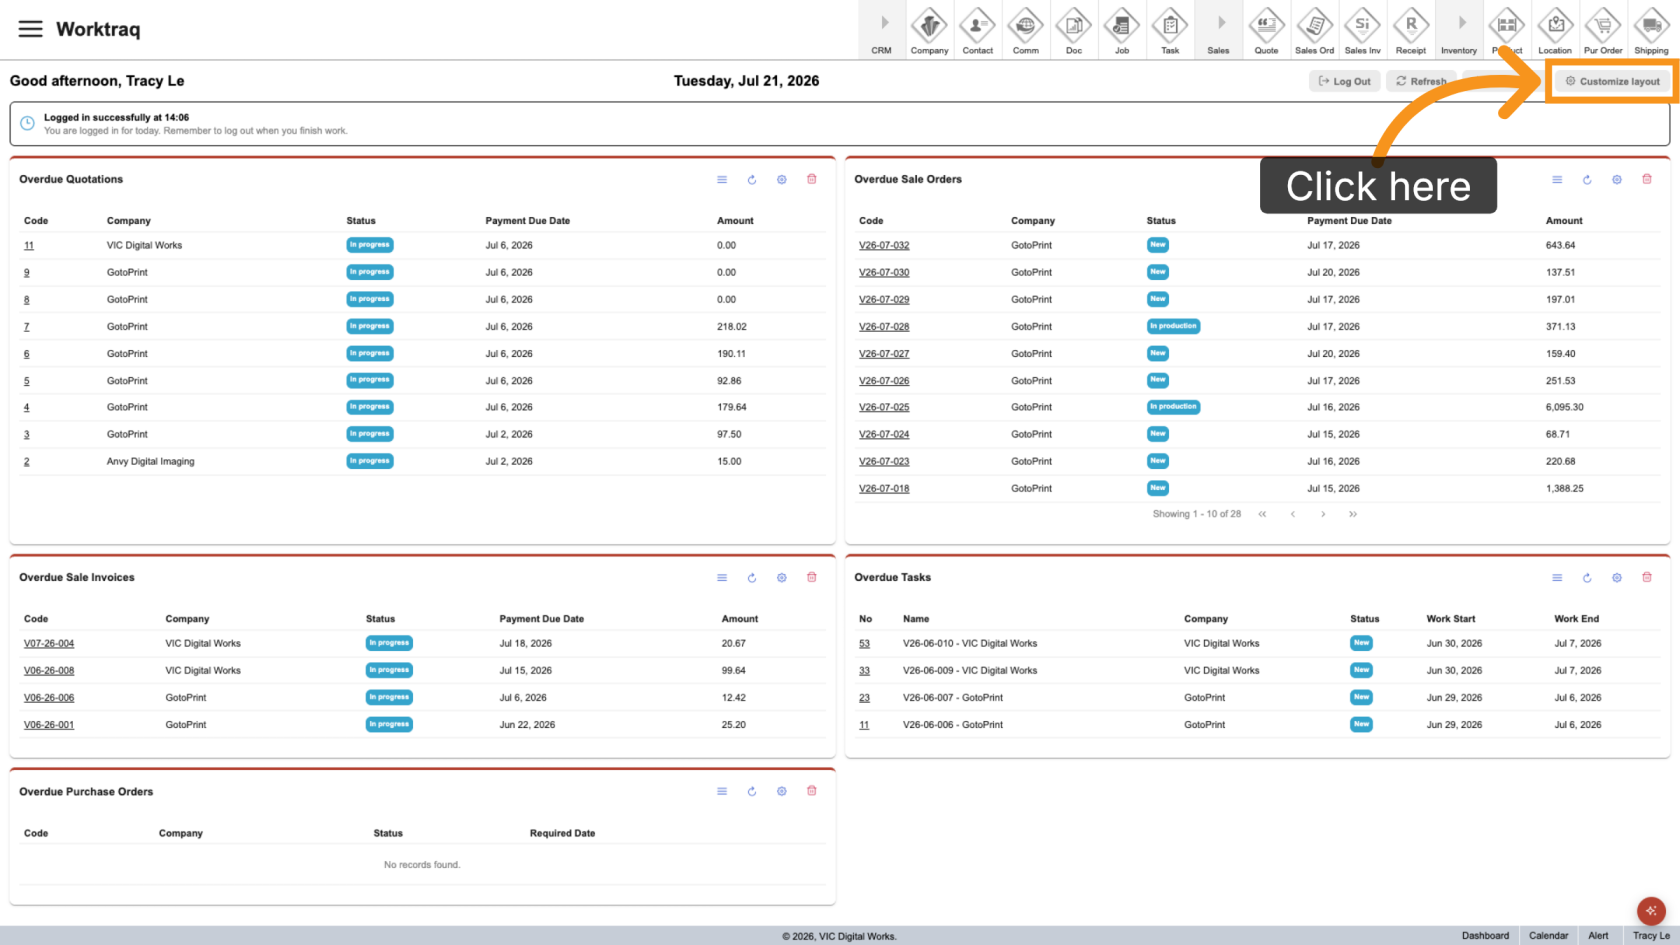
Click Customize Layout to choose how many columns you want on your dashboard.
2. Refresh the dashboard
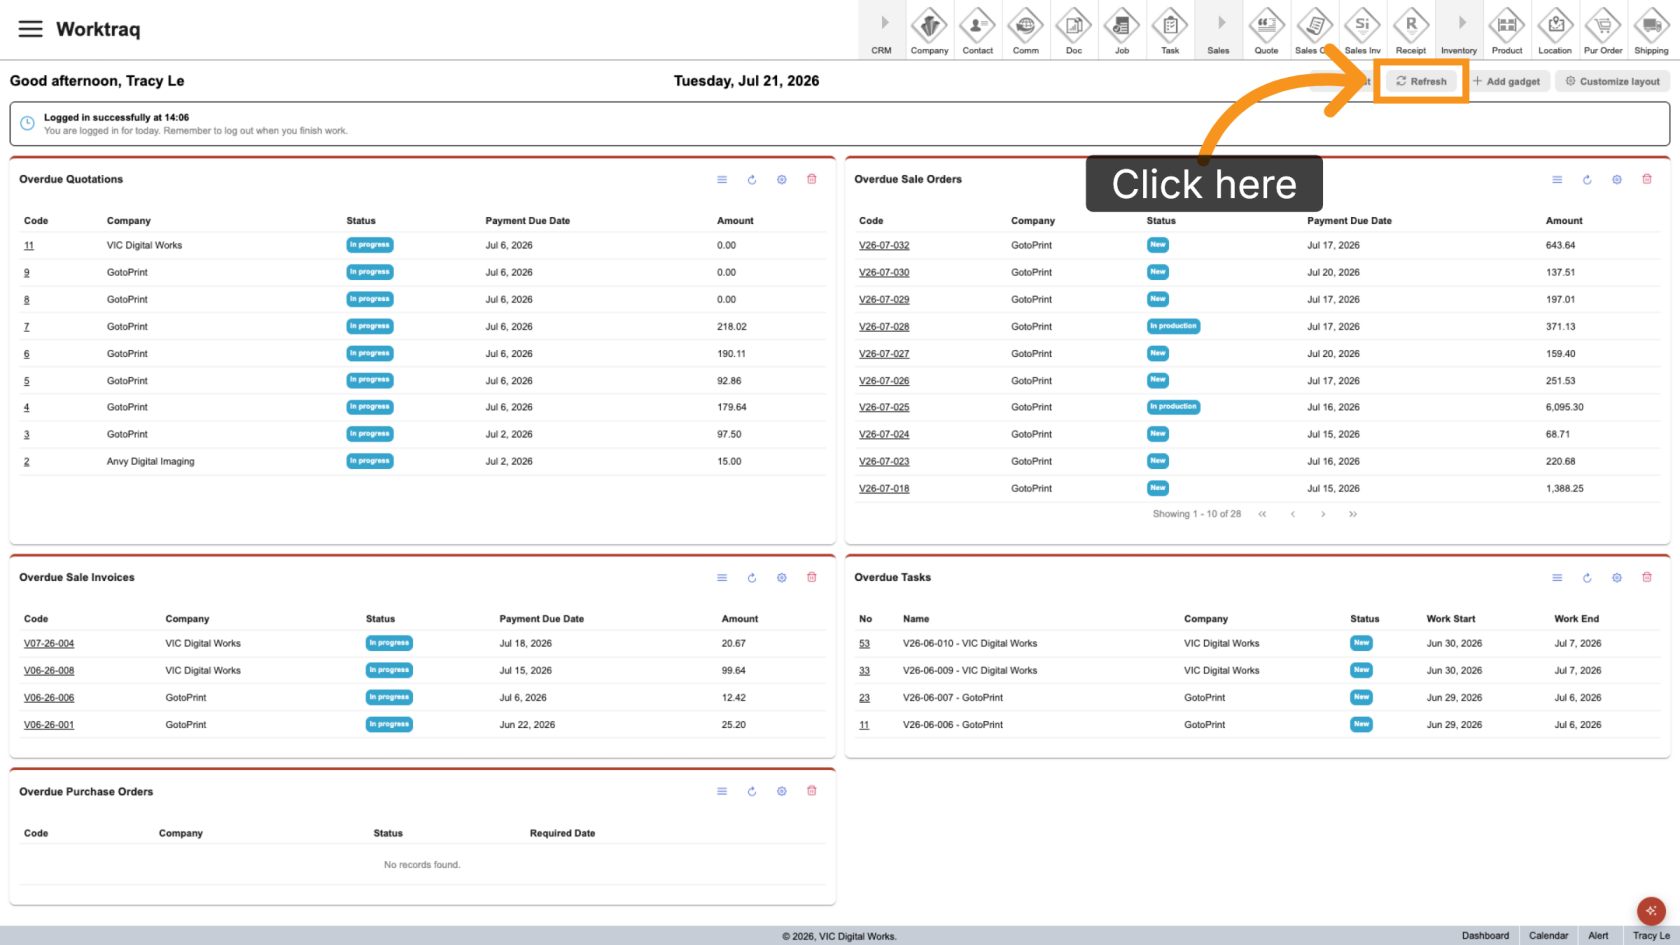
Click Refresh to load the latest data for all gadgets on the dashboard.
3. Review the Default Dashboard
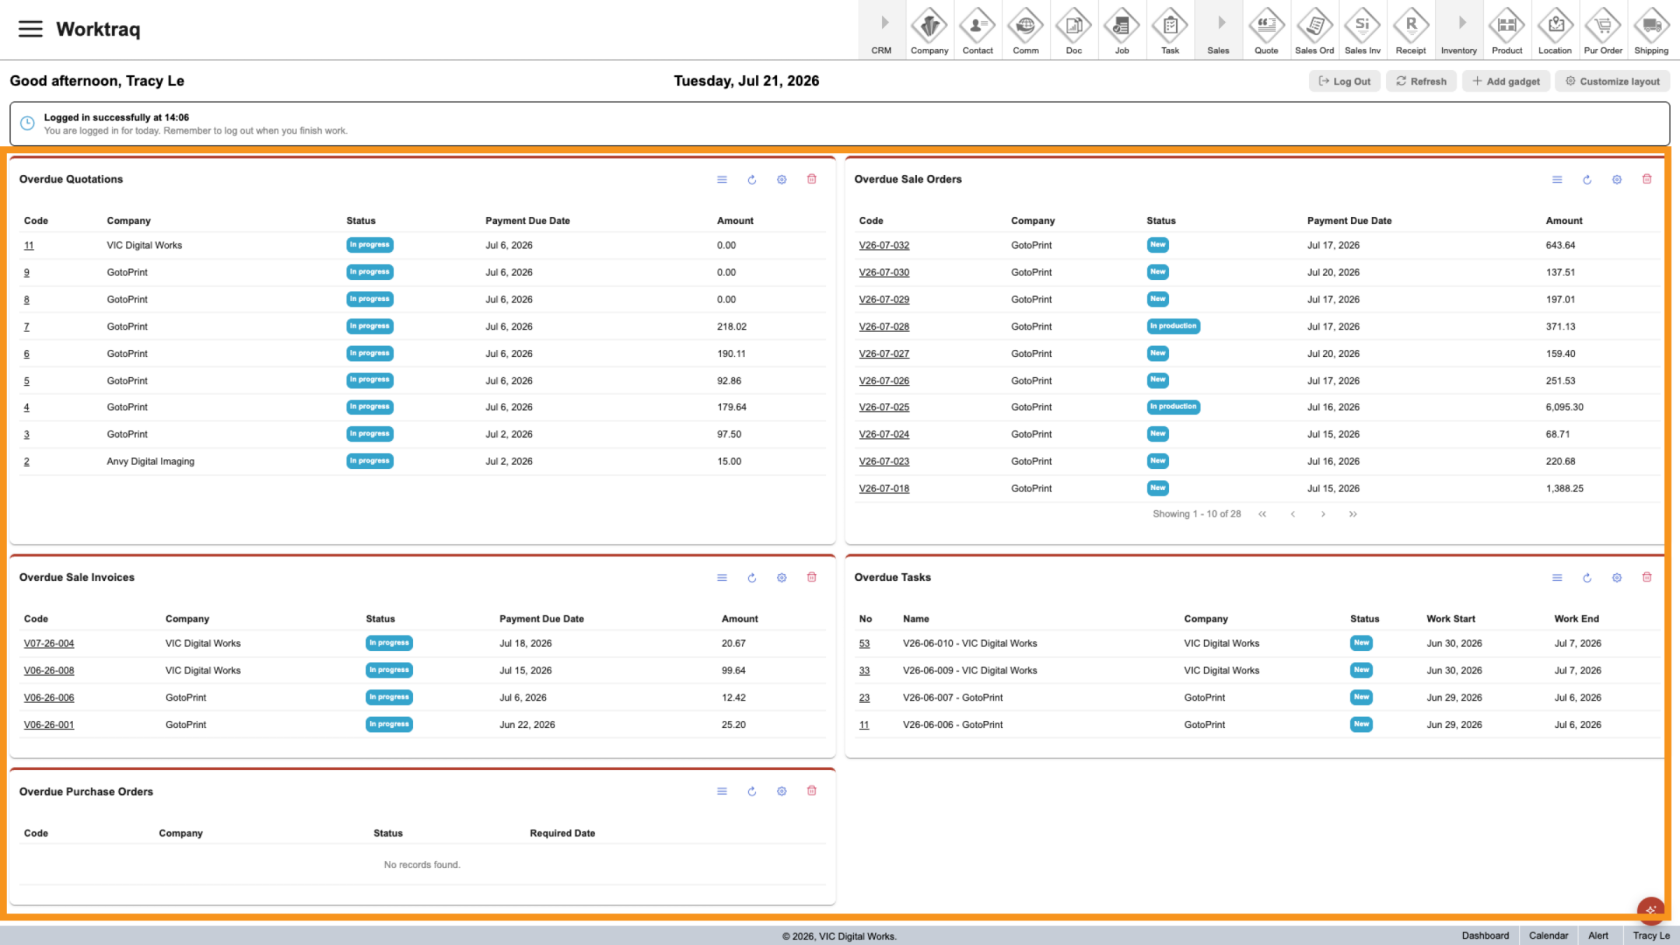
The dashboard includes several default gadgets, such as overdue items. You can edit, rearrange, or remove them.
Note: To create your own, continue to Step 8.
4. Rearrange Gadgets
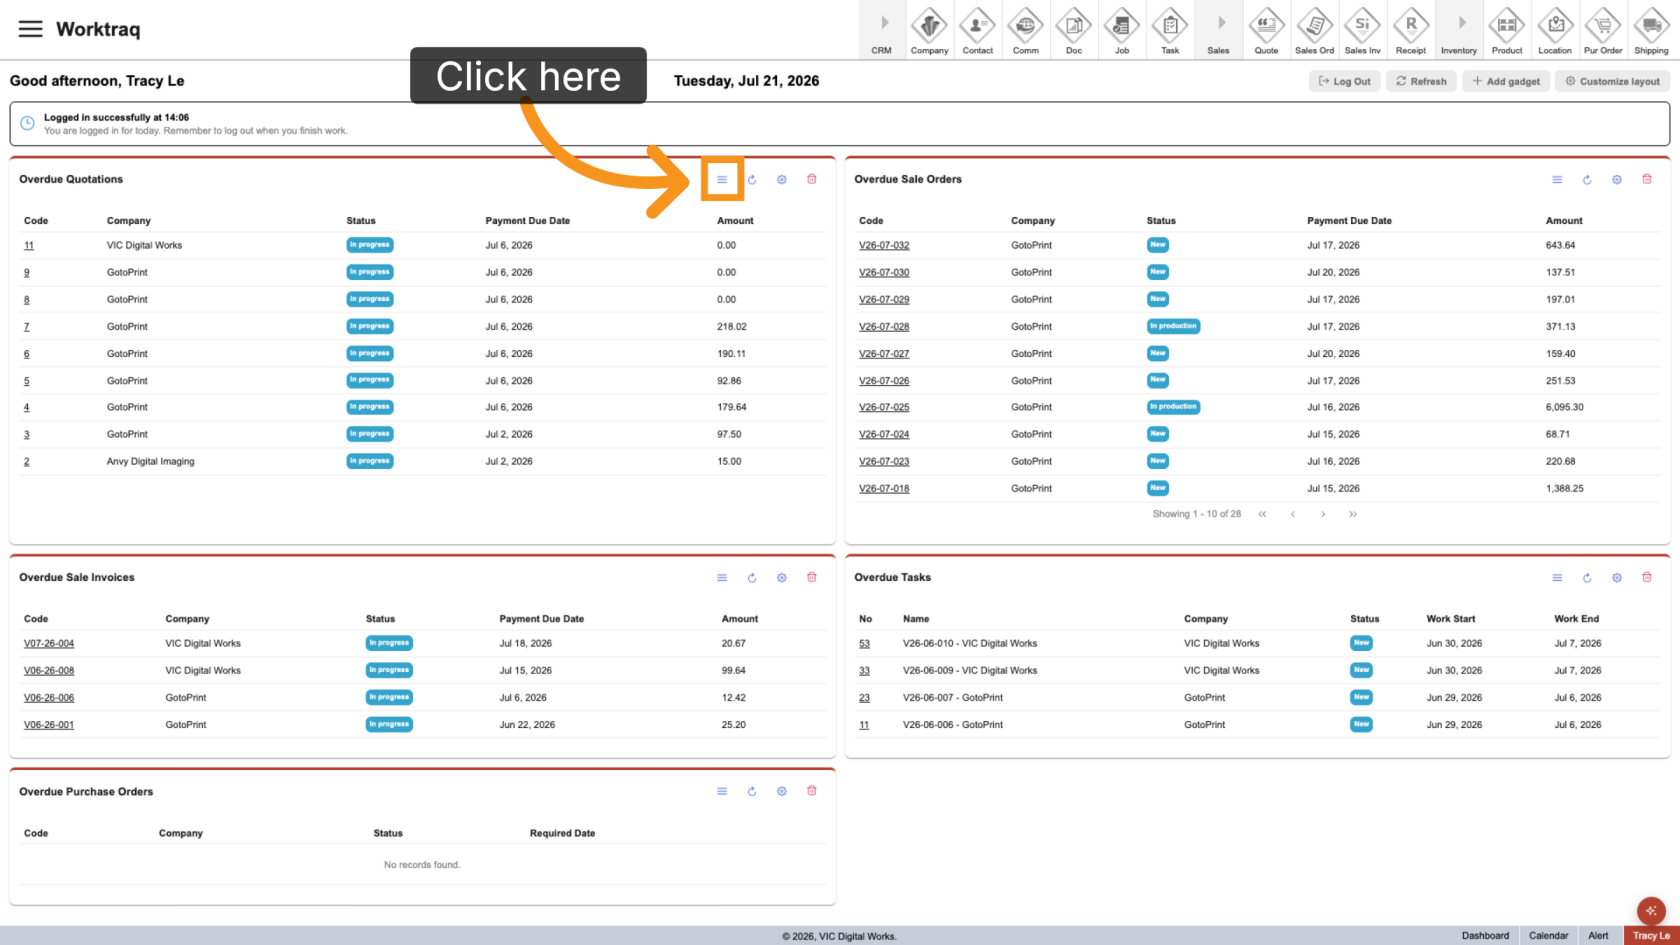
Click the Drag icon to change its position on the dashboard.
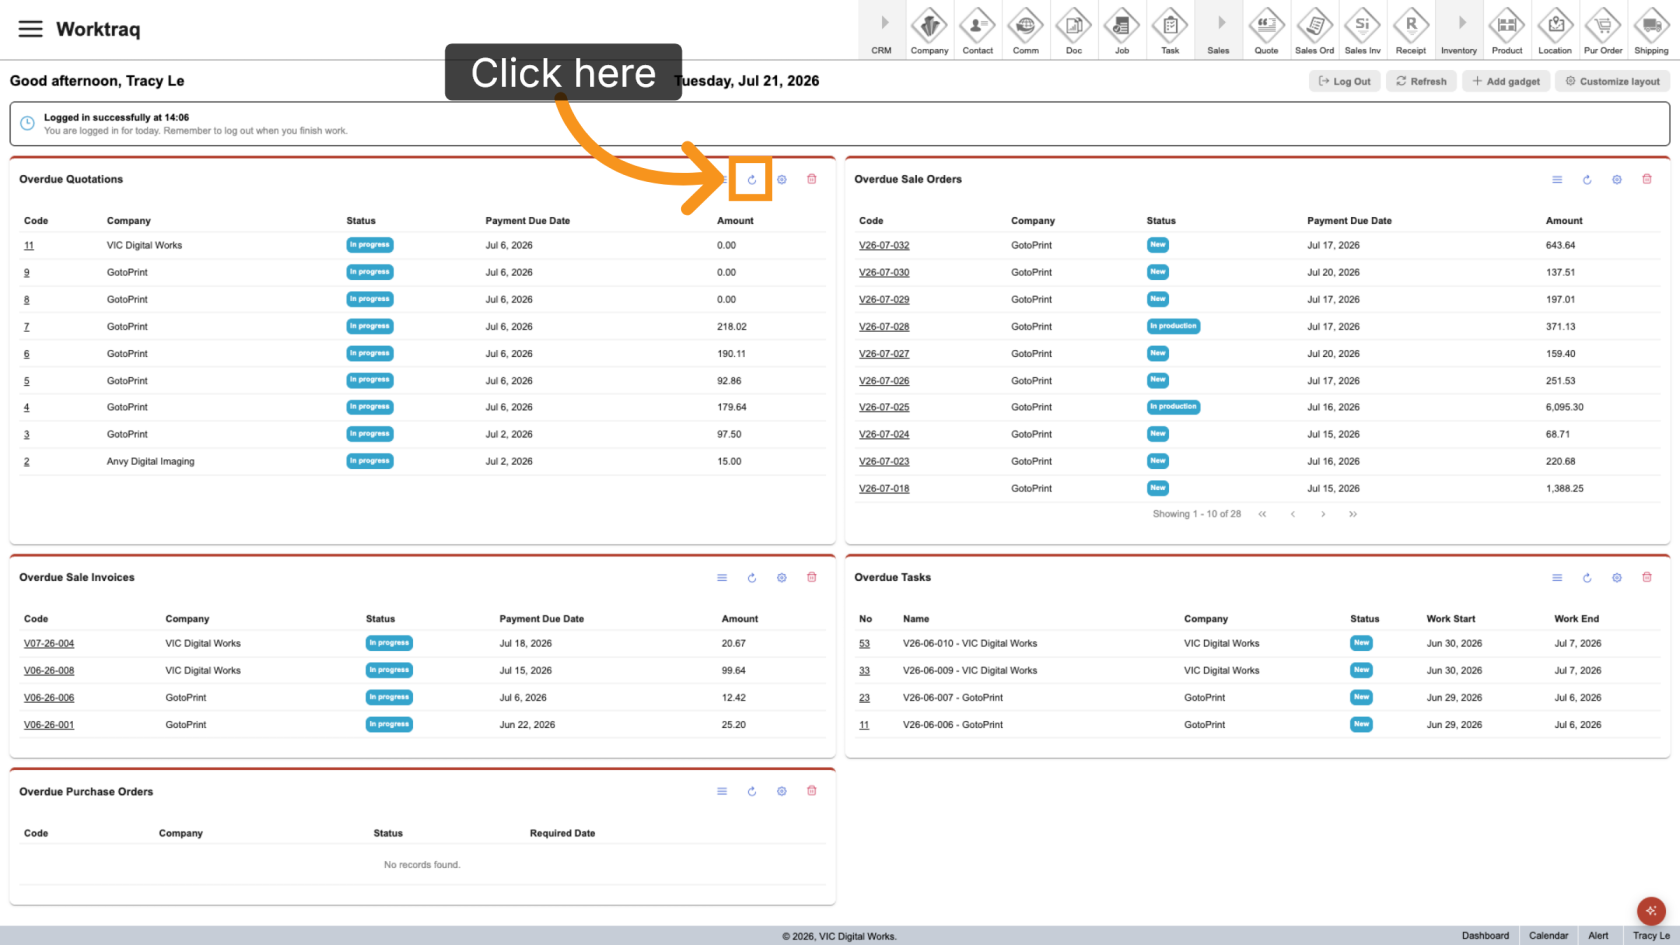
5. Refresh a Gadget
Click the Refresh icon to update the selected gadget with the latest data.
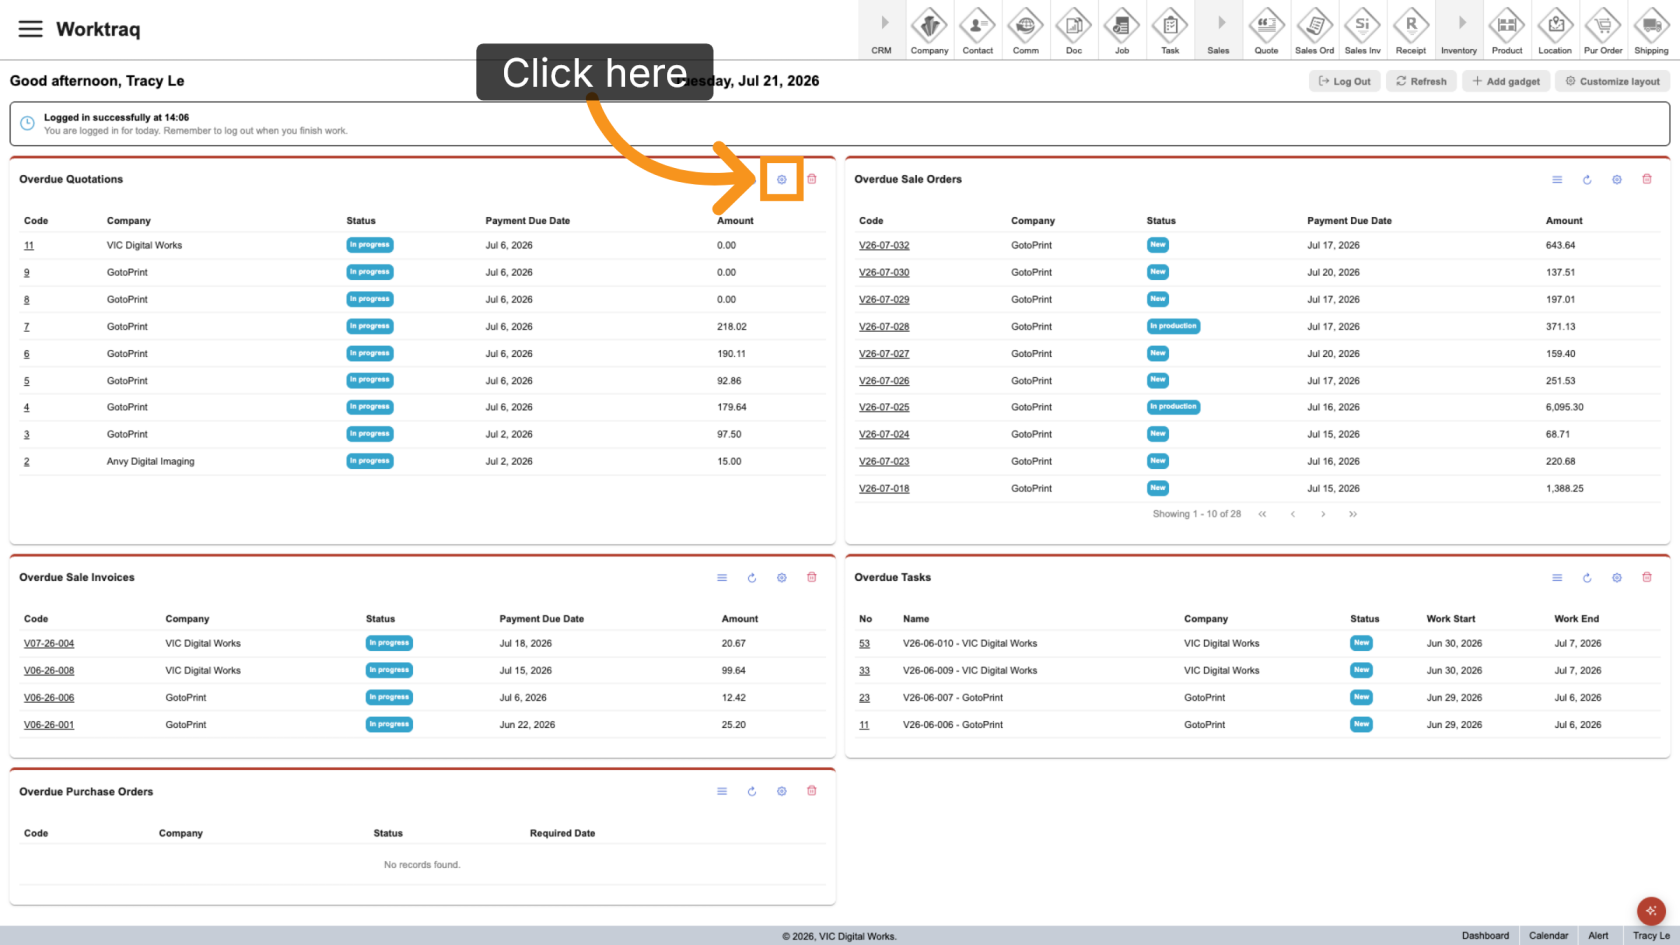
6. Edit a Gadget
Click the Settings icon to modify its configuration.
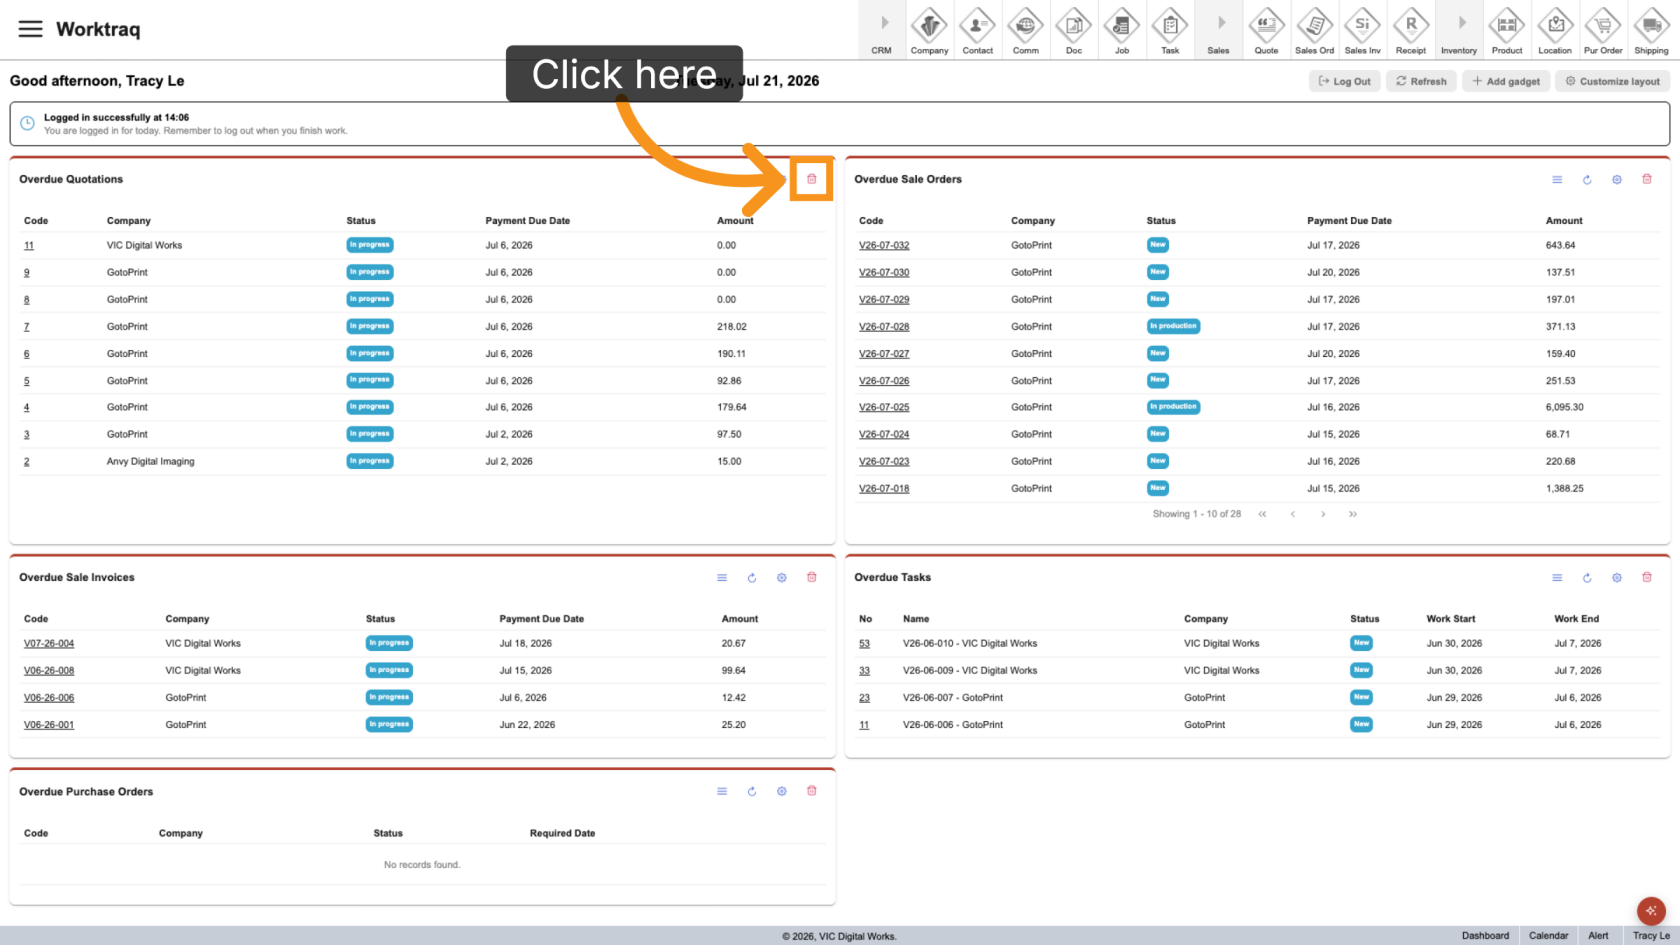
7. Remove a Gadget
Click the Delete icon to remove it from the dashboard.
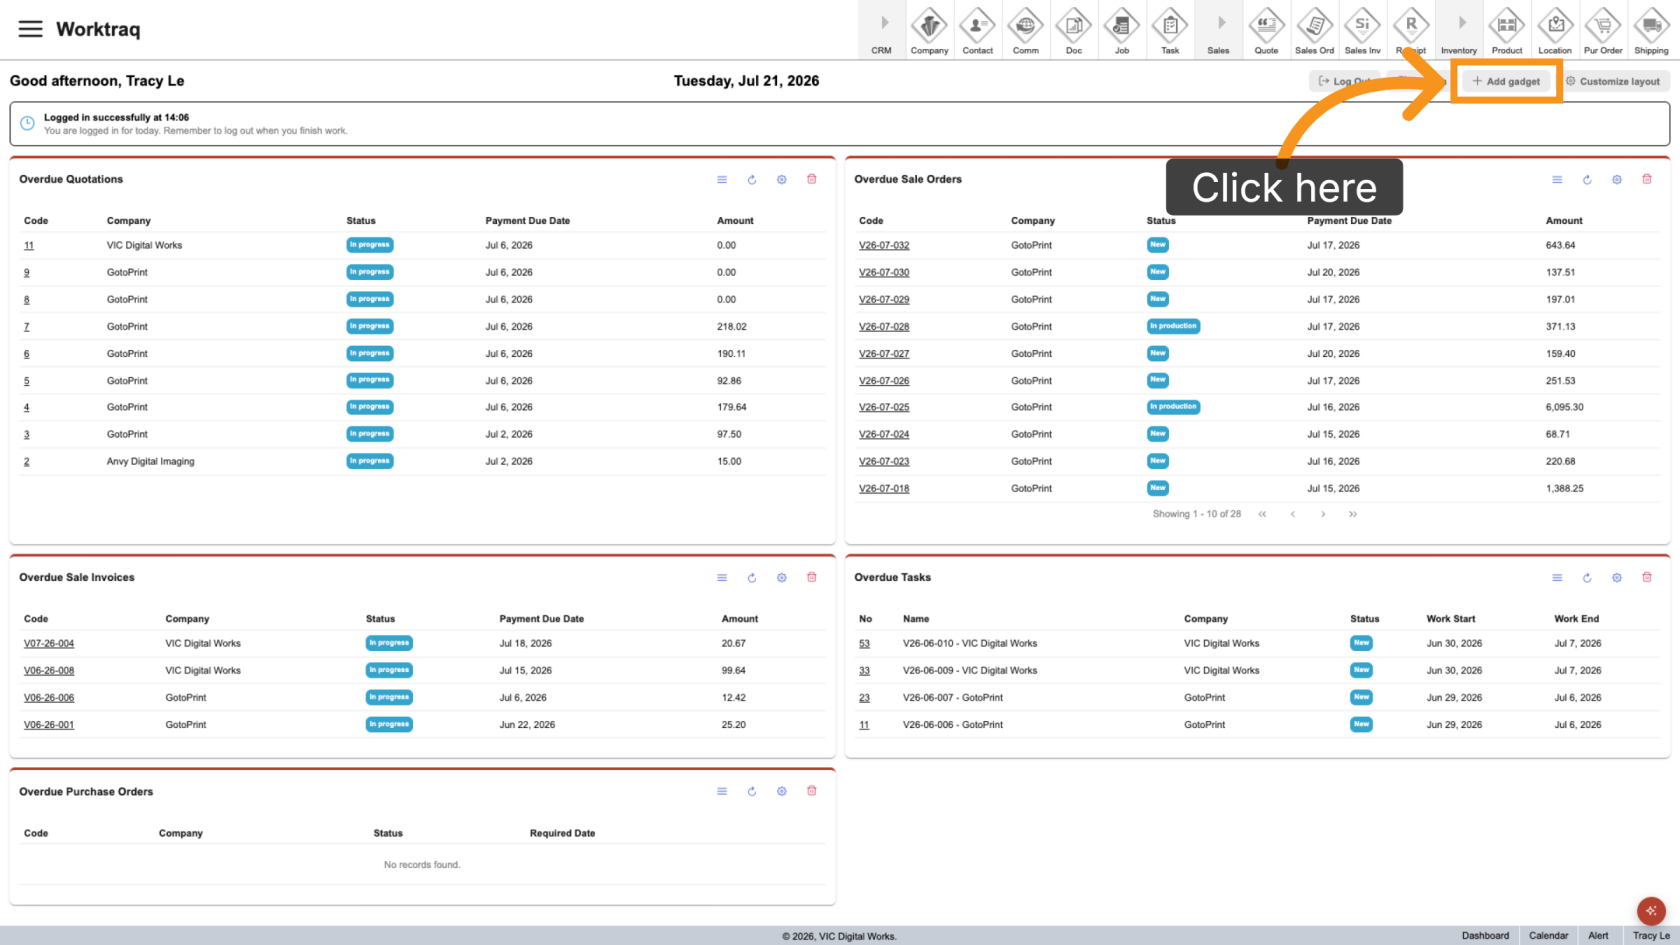
8. Add a Custom Gadget
Click Add Gadget to create a new dashboard gadget.
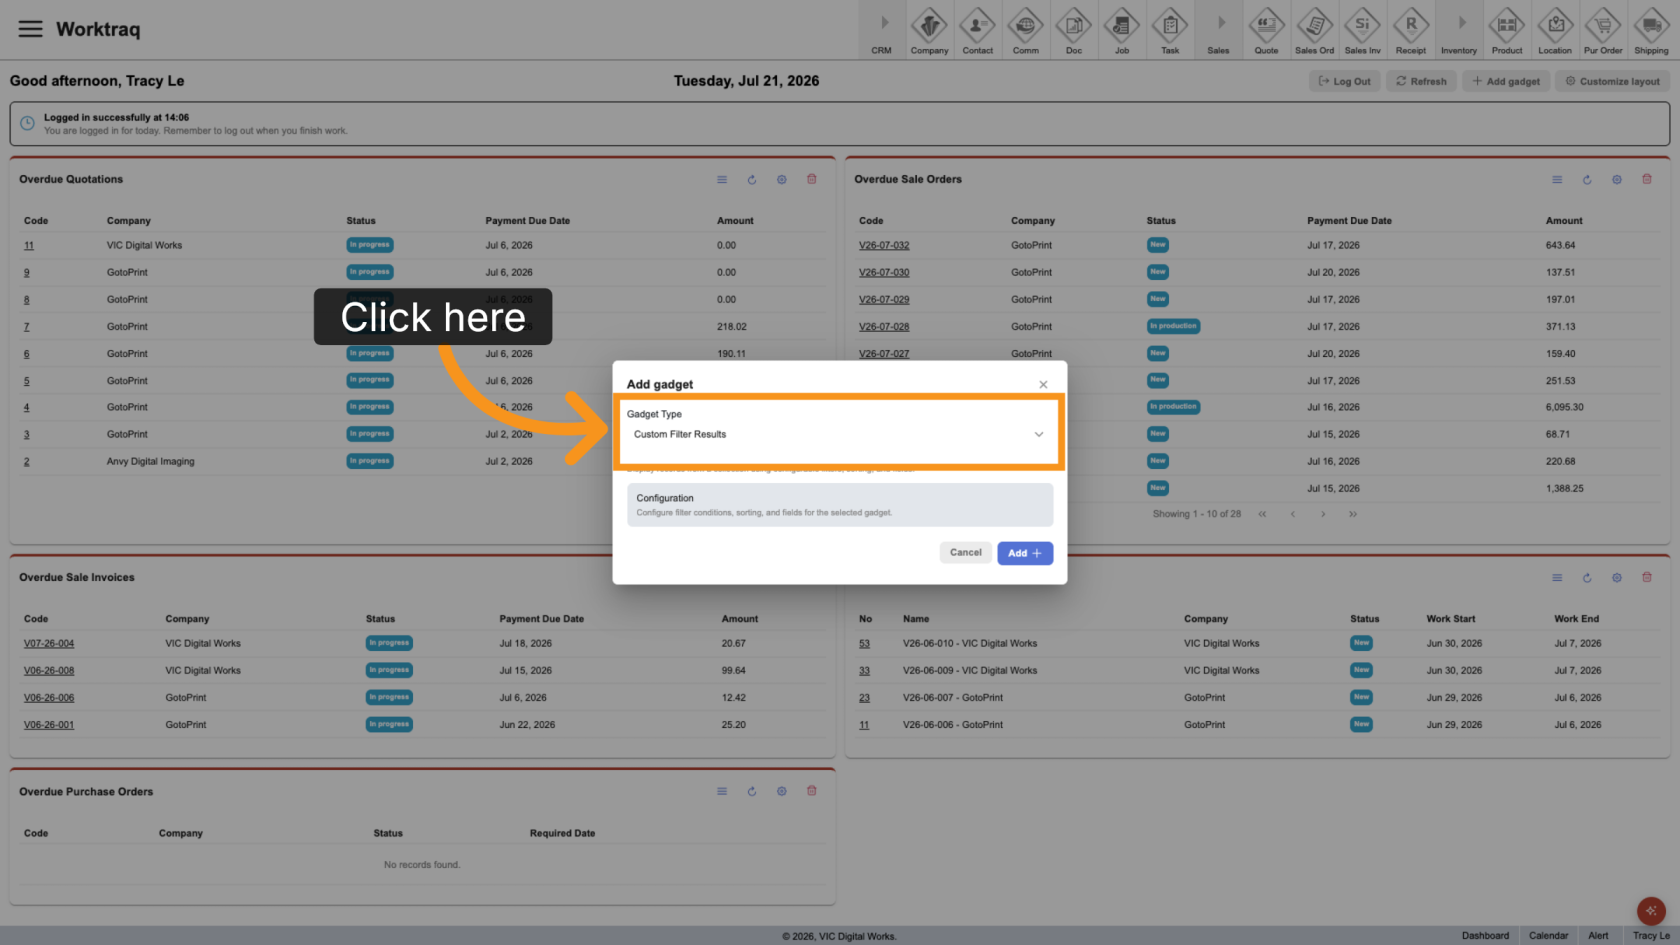
9. Select the Gadget Type
Choose Custom Filter Results as the gadget type.
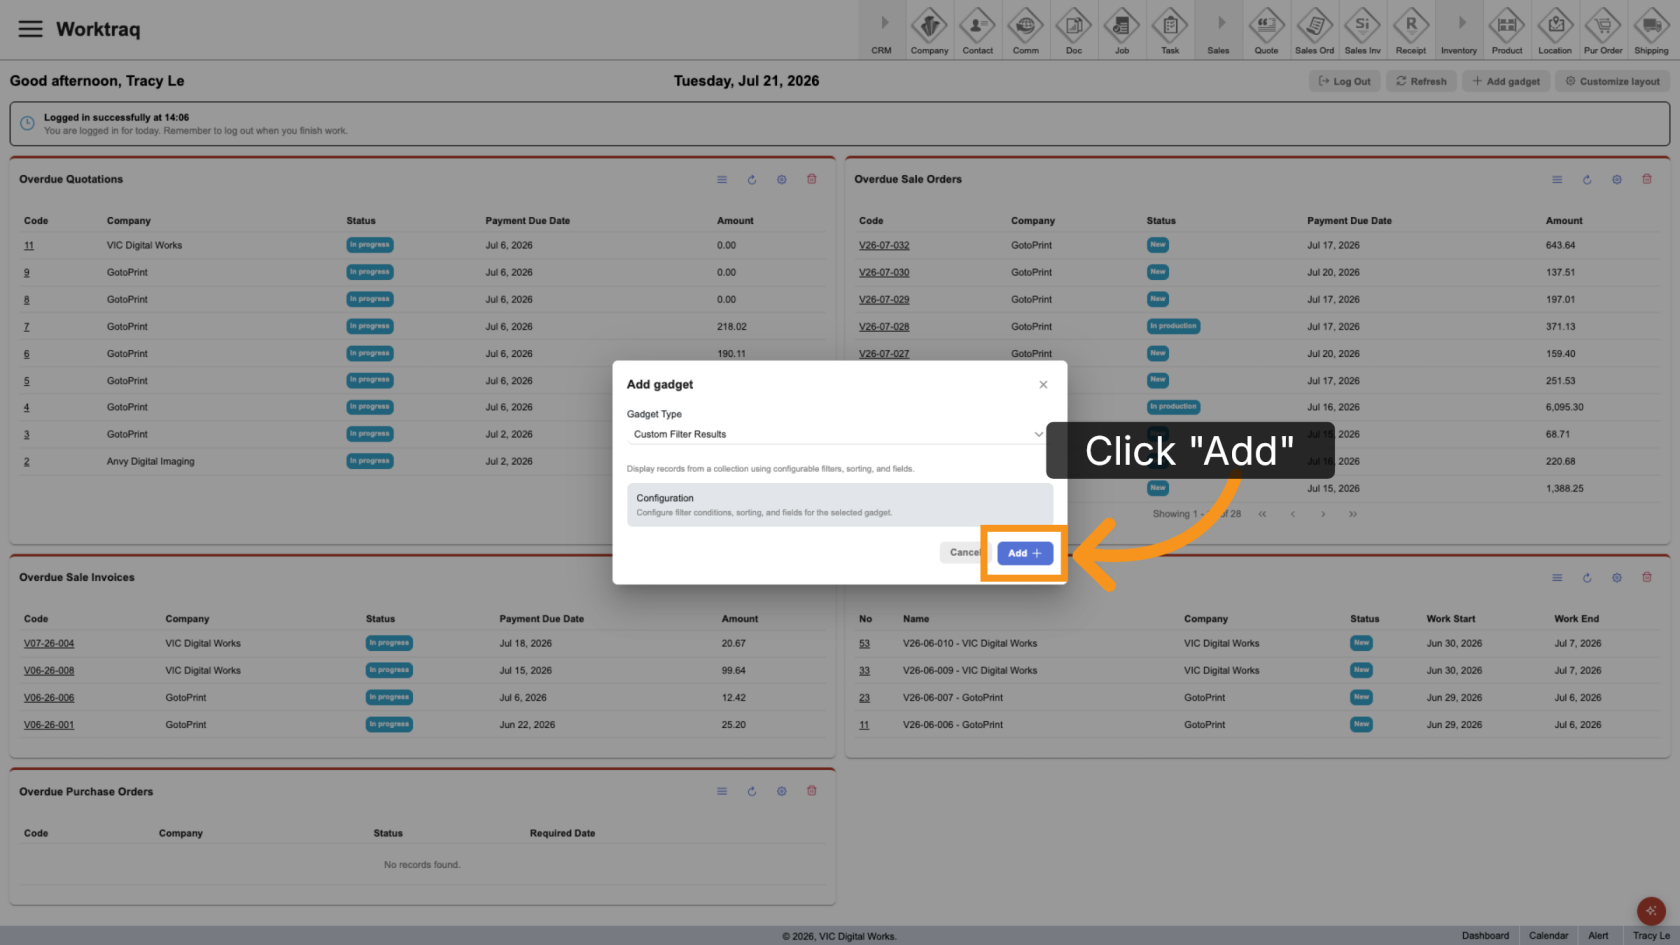
10. Continue
Click Add to continue configuring the gadget.
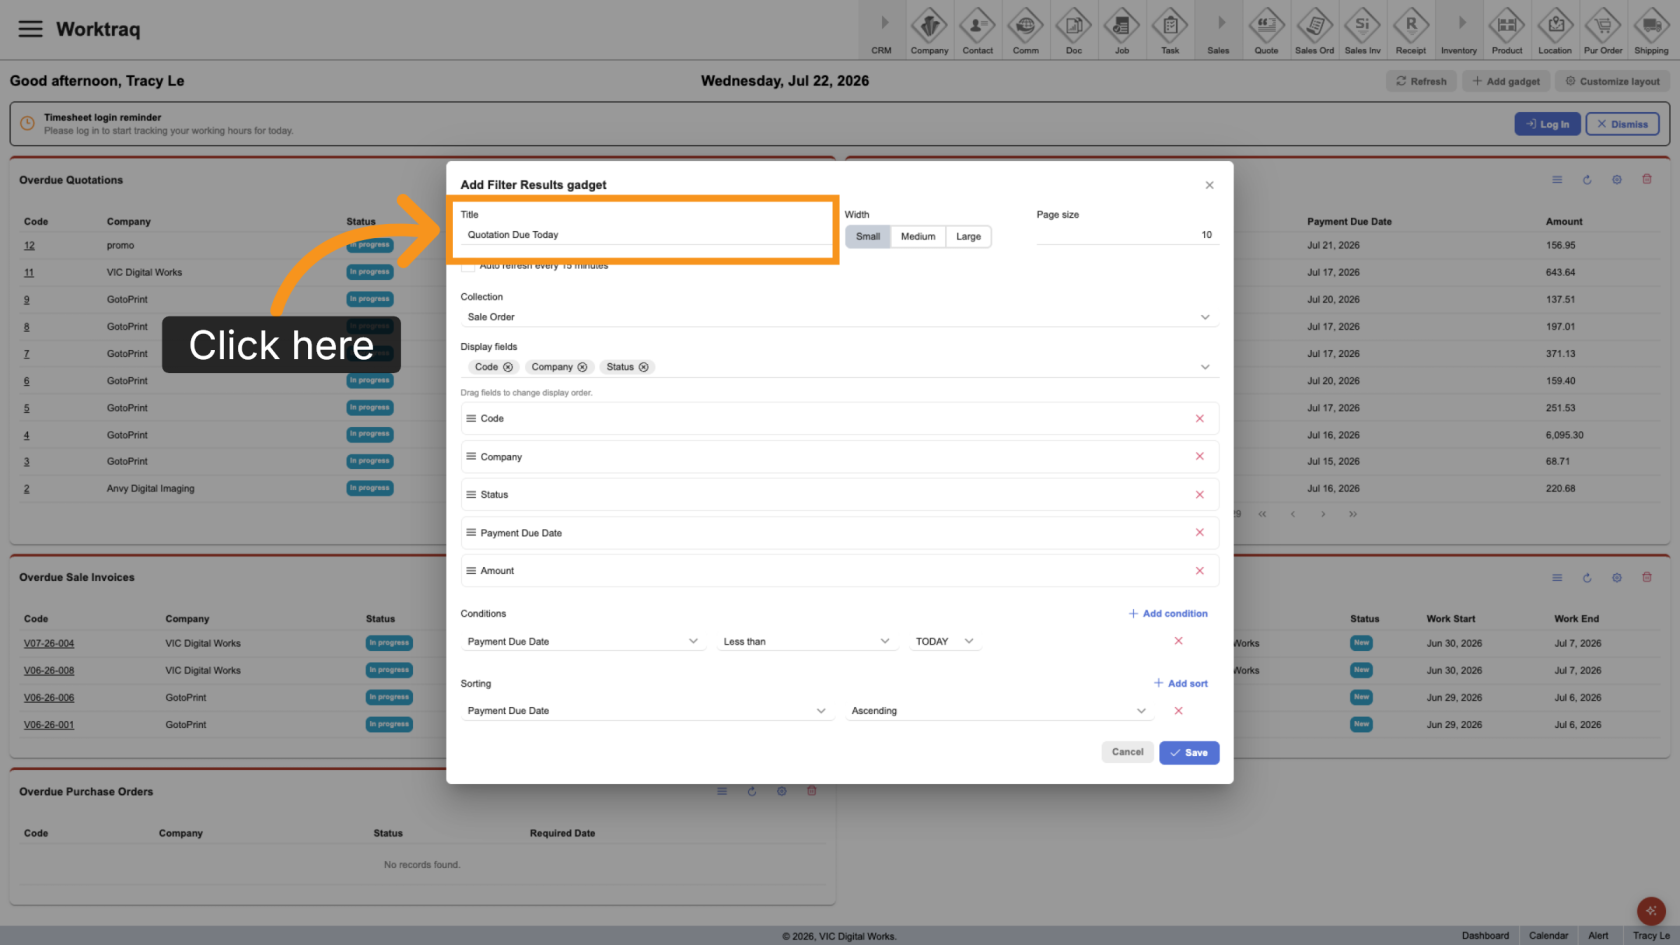
11. Enter a Title
Enter a descriptive title so you can easily identify the information displayed.
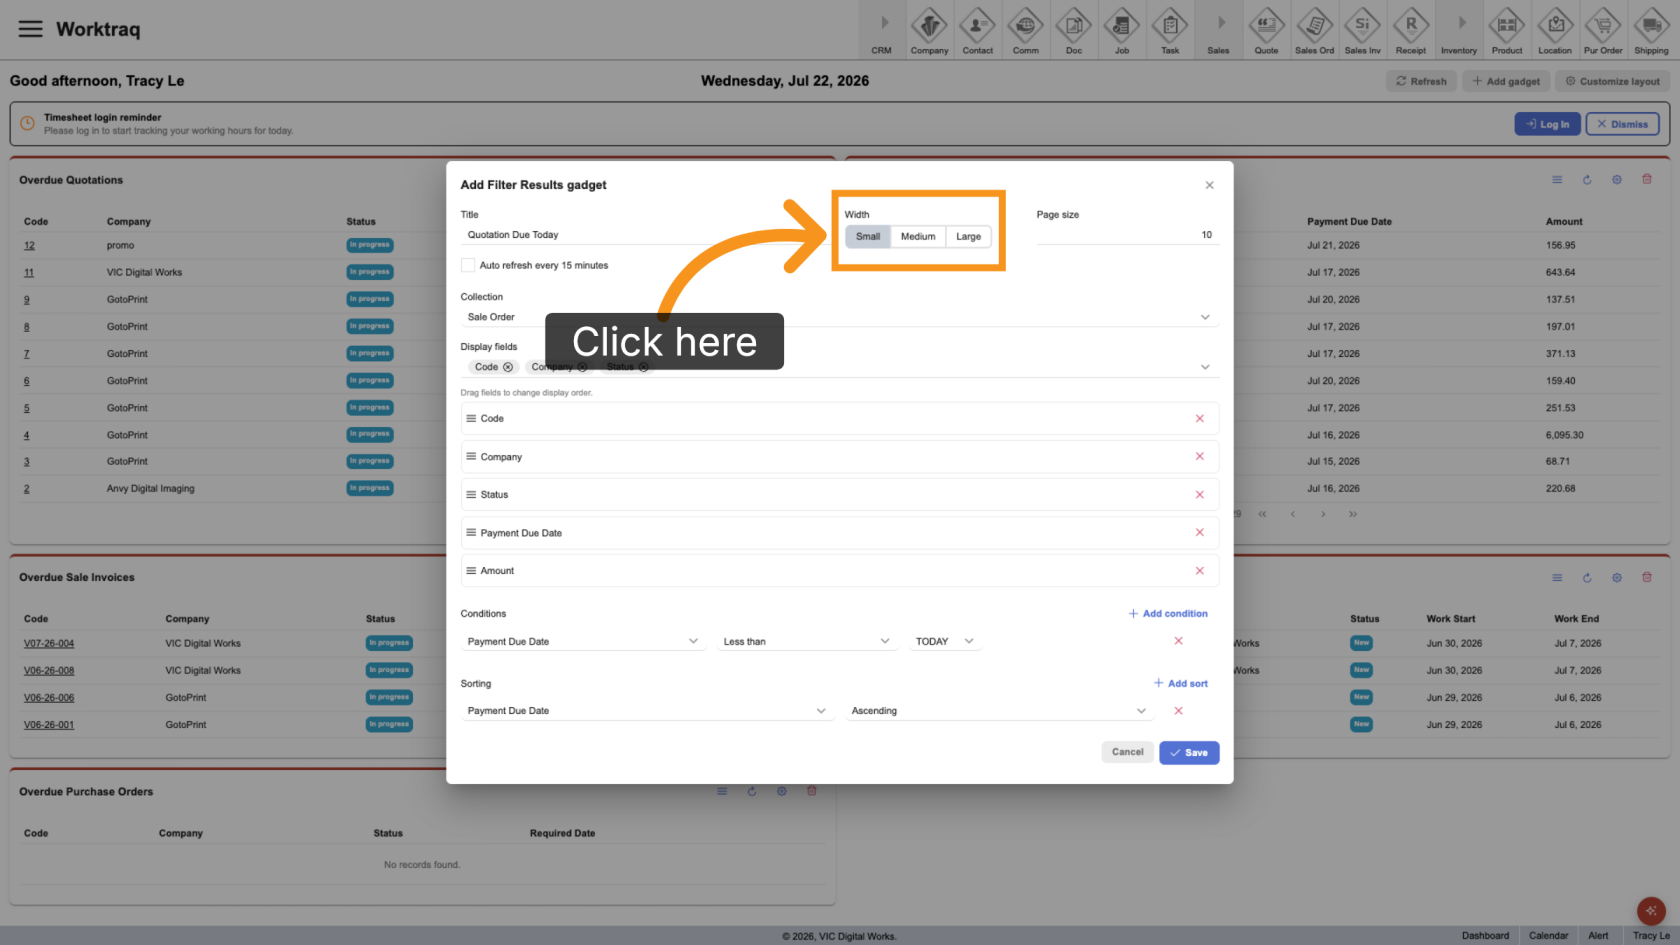
12. Select the Width
Select how wide the gadget should appear on the dashboard.
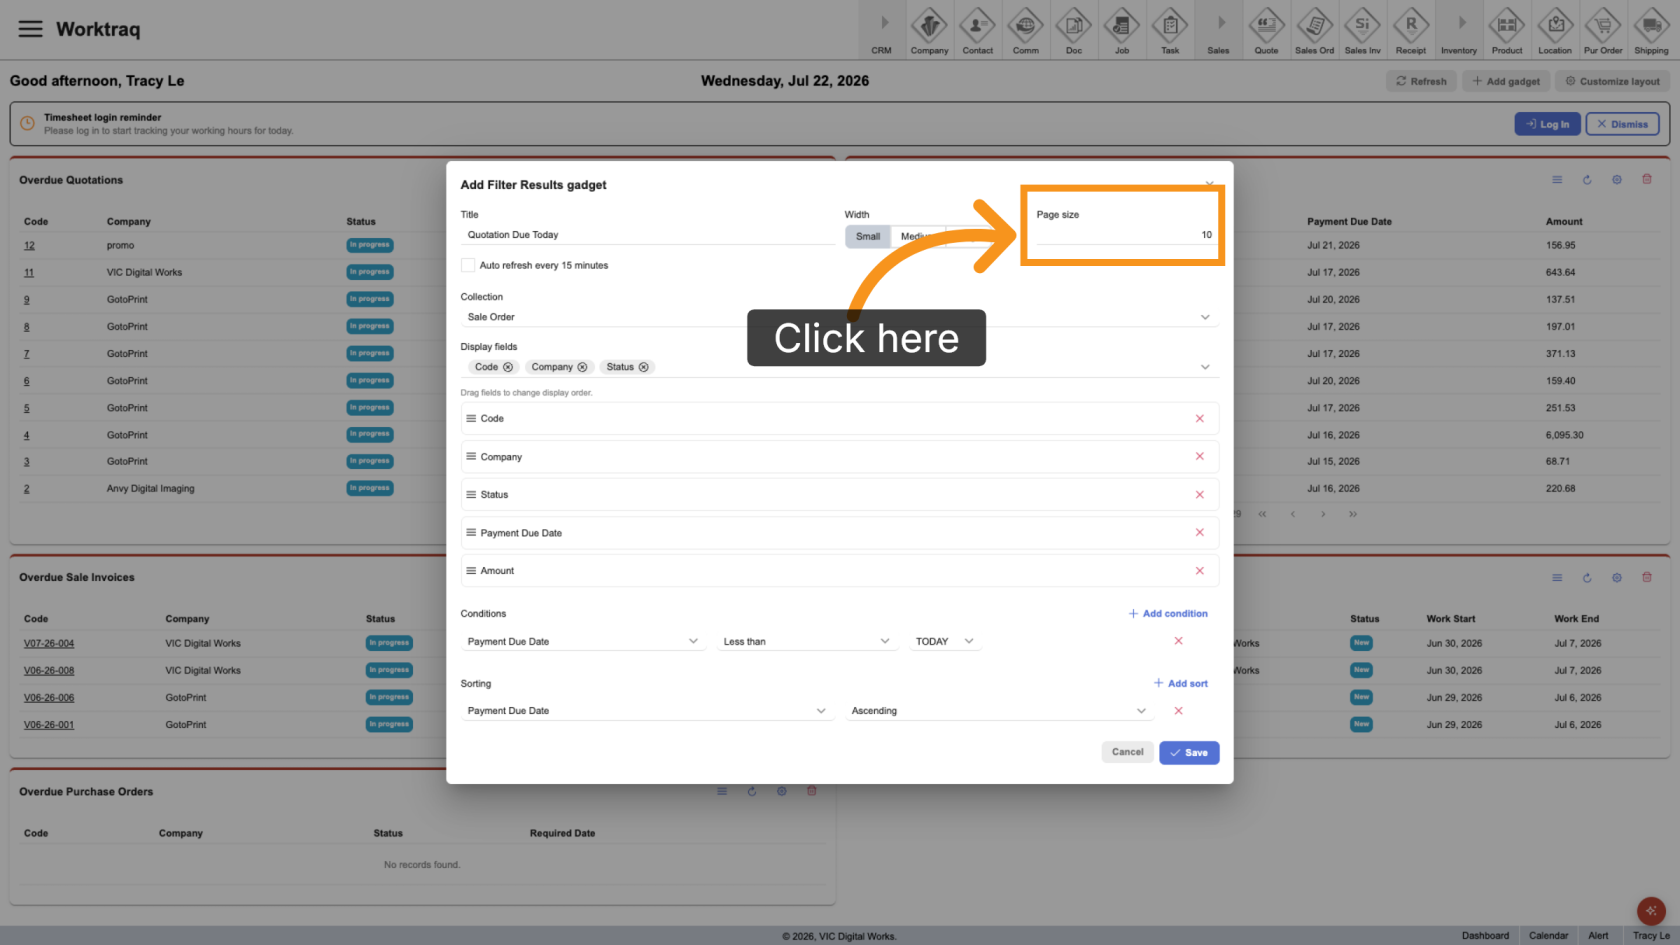
13. Set Rows Per Page
Enter the number of rows to display on each page.
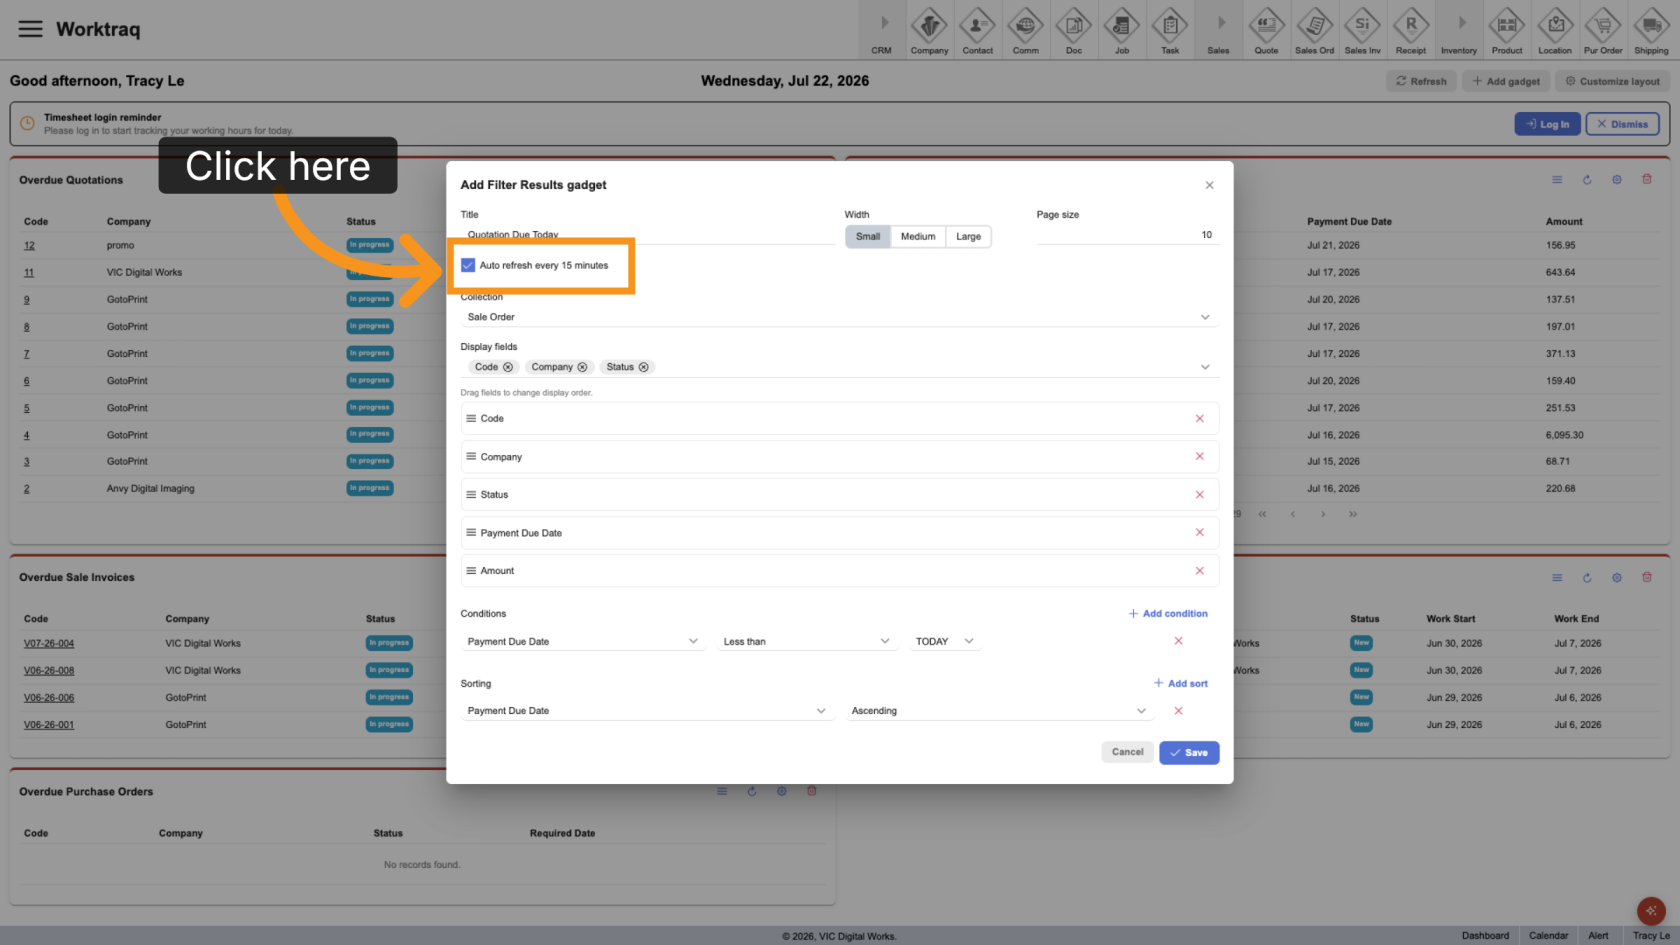
14. Enable Auto Refresh
Enable Auto Refresh if you want the data to update automatically every 15 minutes.
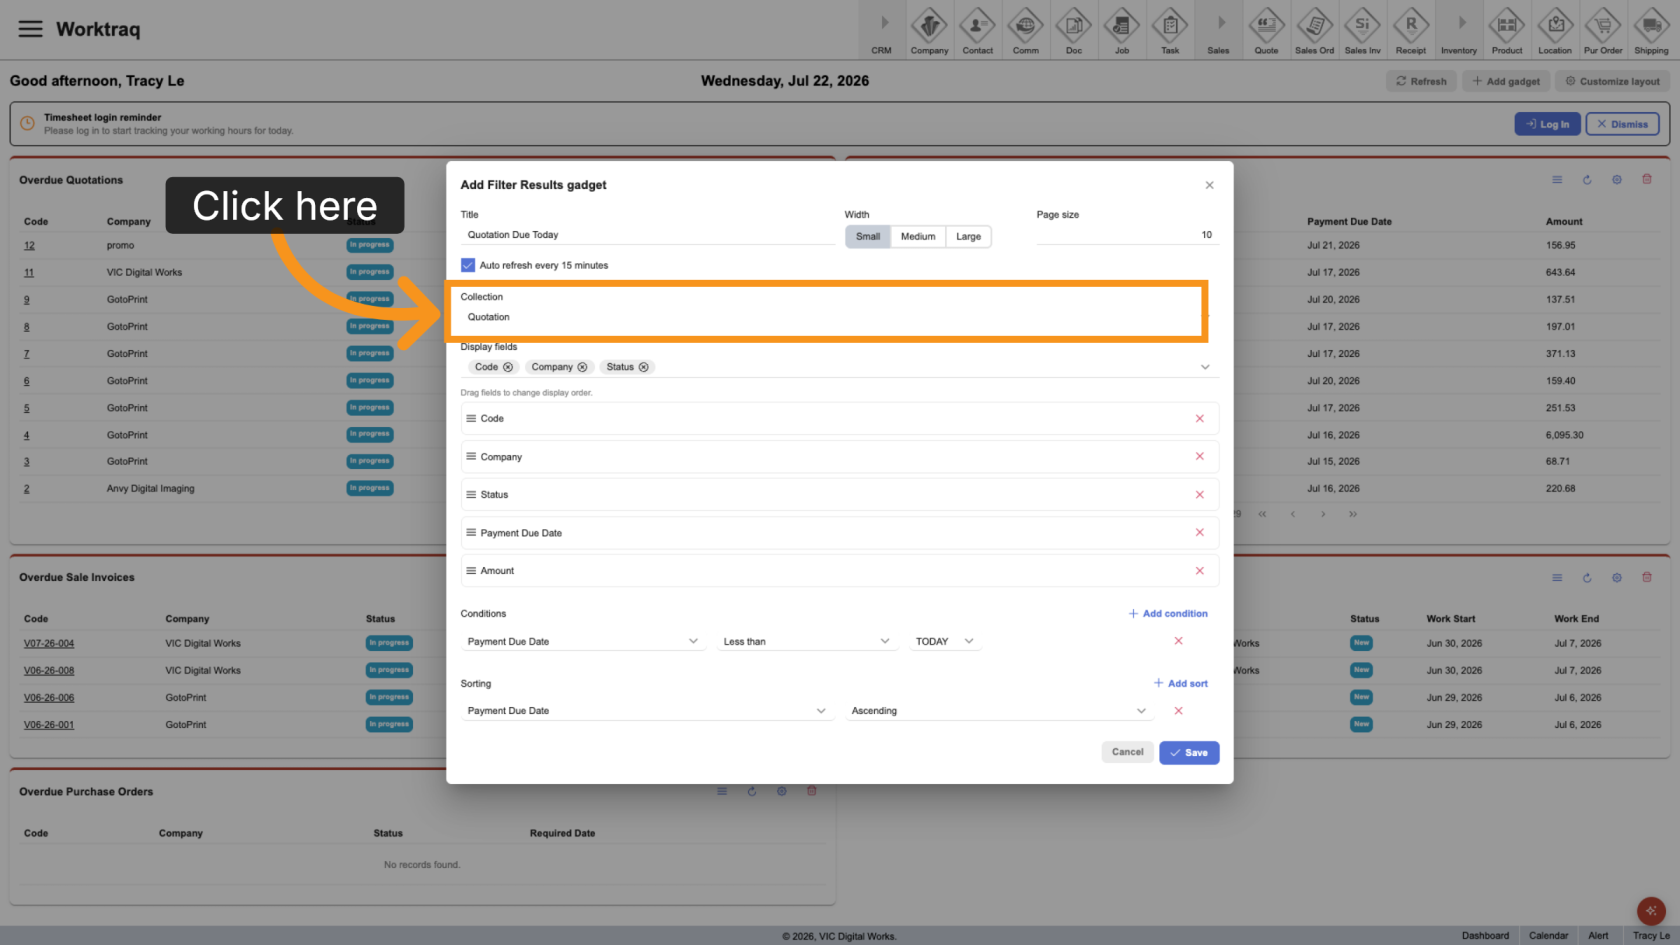
15. Select a Collection
Choose the collection that contains the records you want to view.
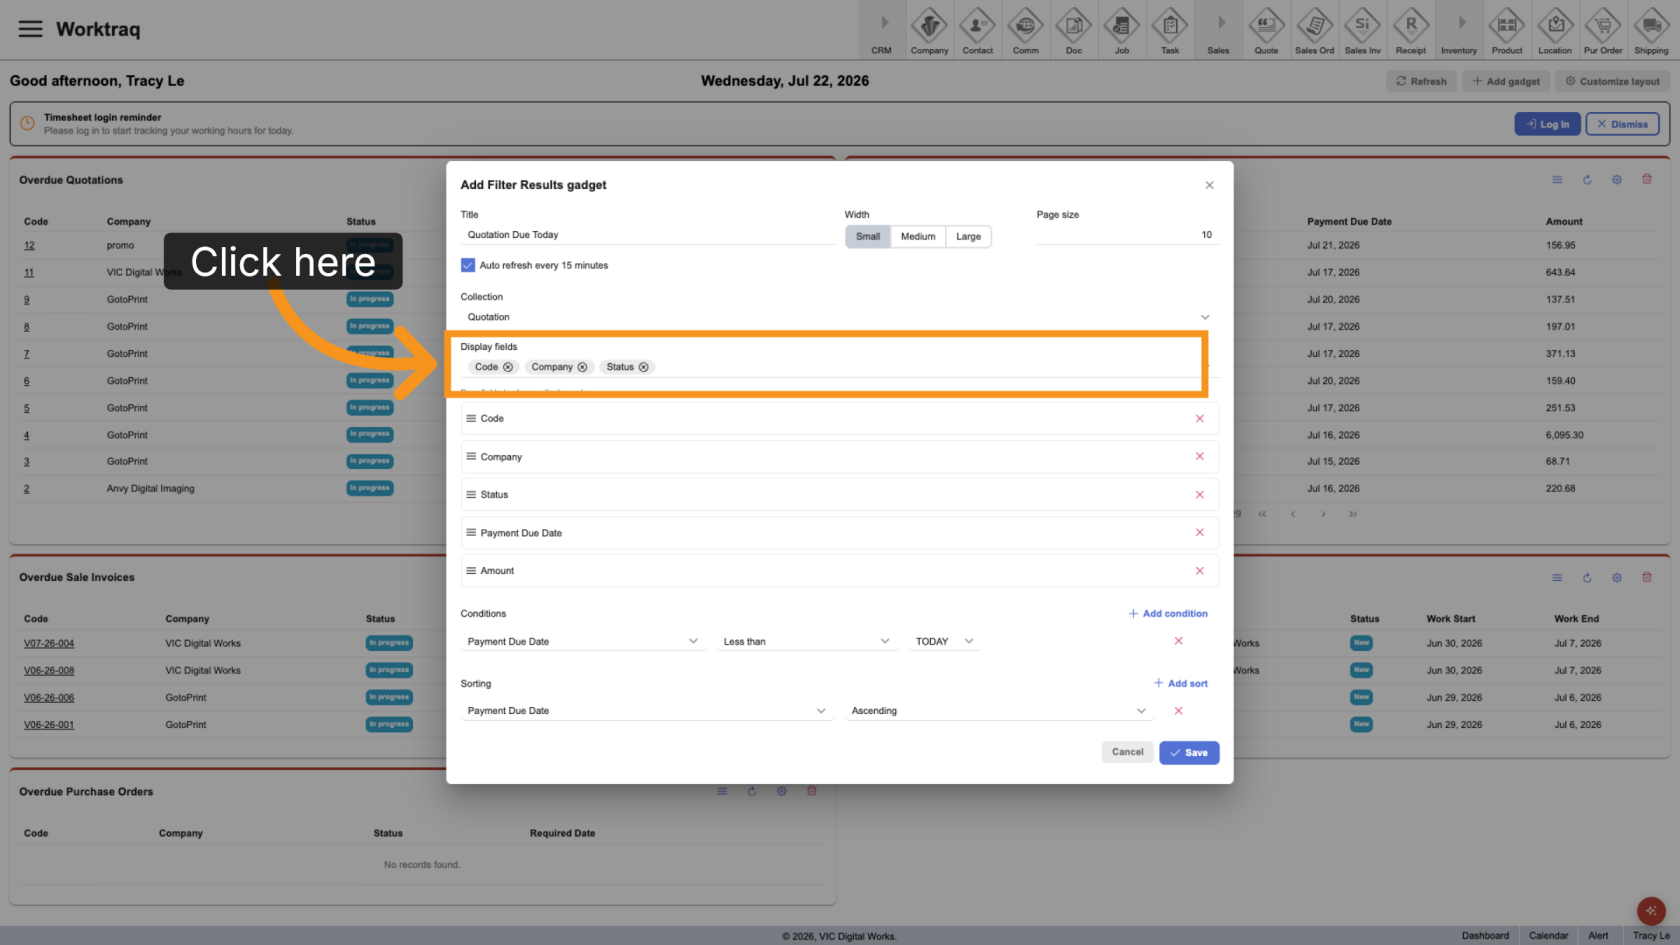
16. Select Display Columns
Select the columns you want to include.
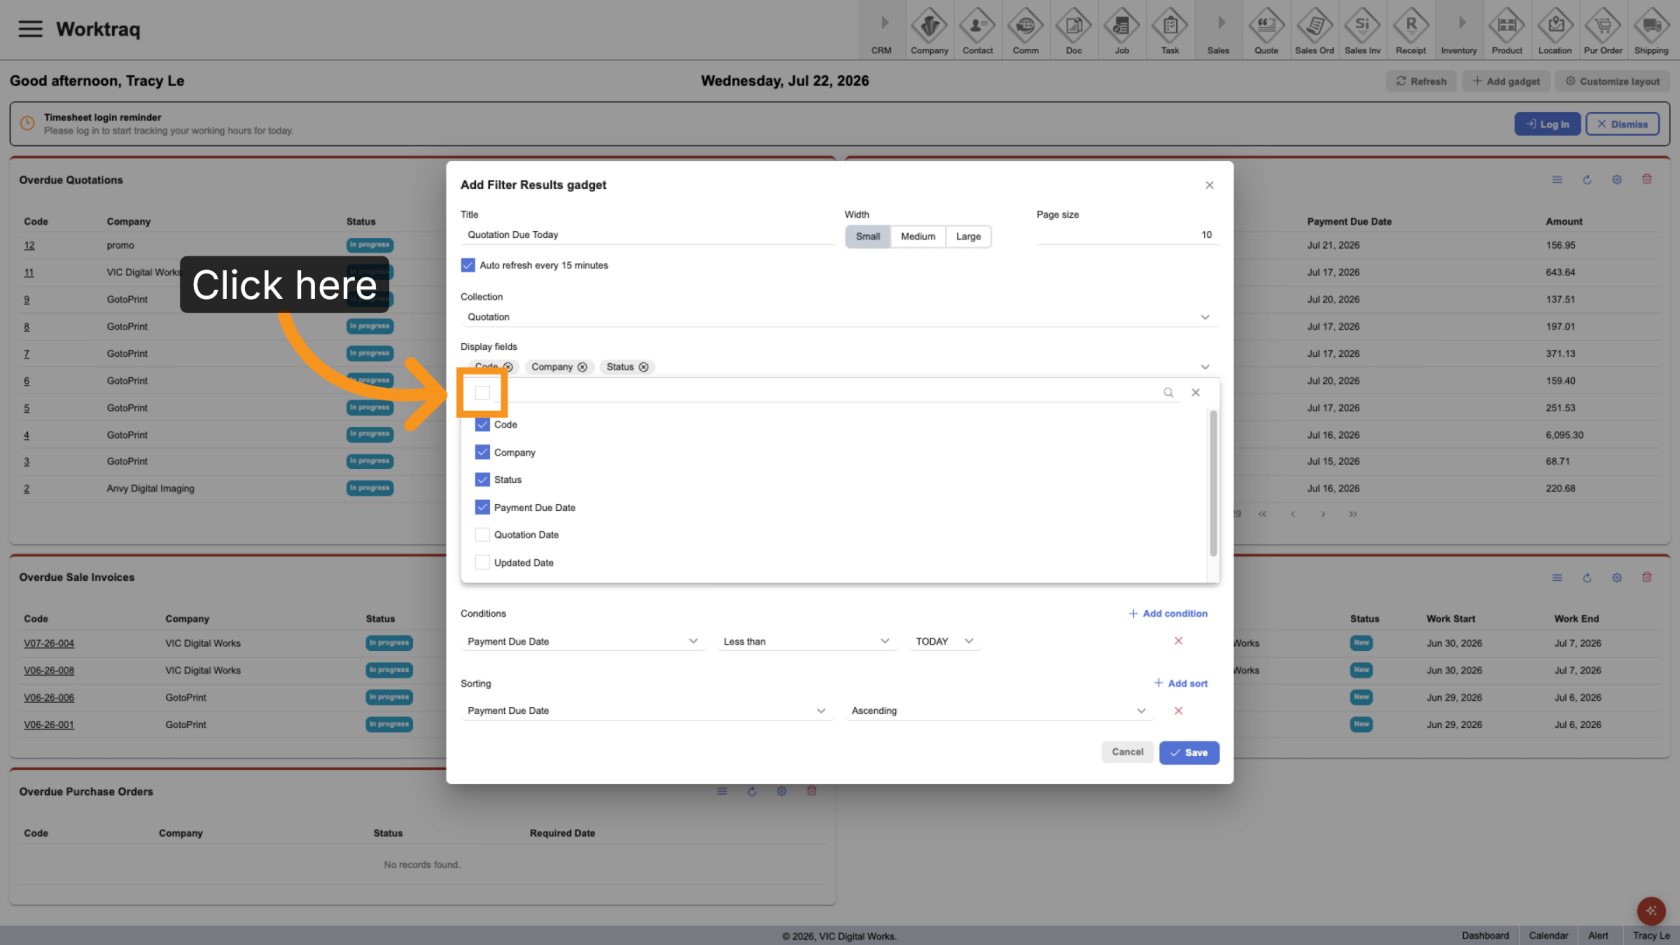
17. Select All Columns
To quickly select every available column, click the checkbox at the top of the list.
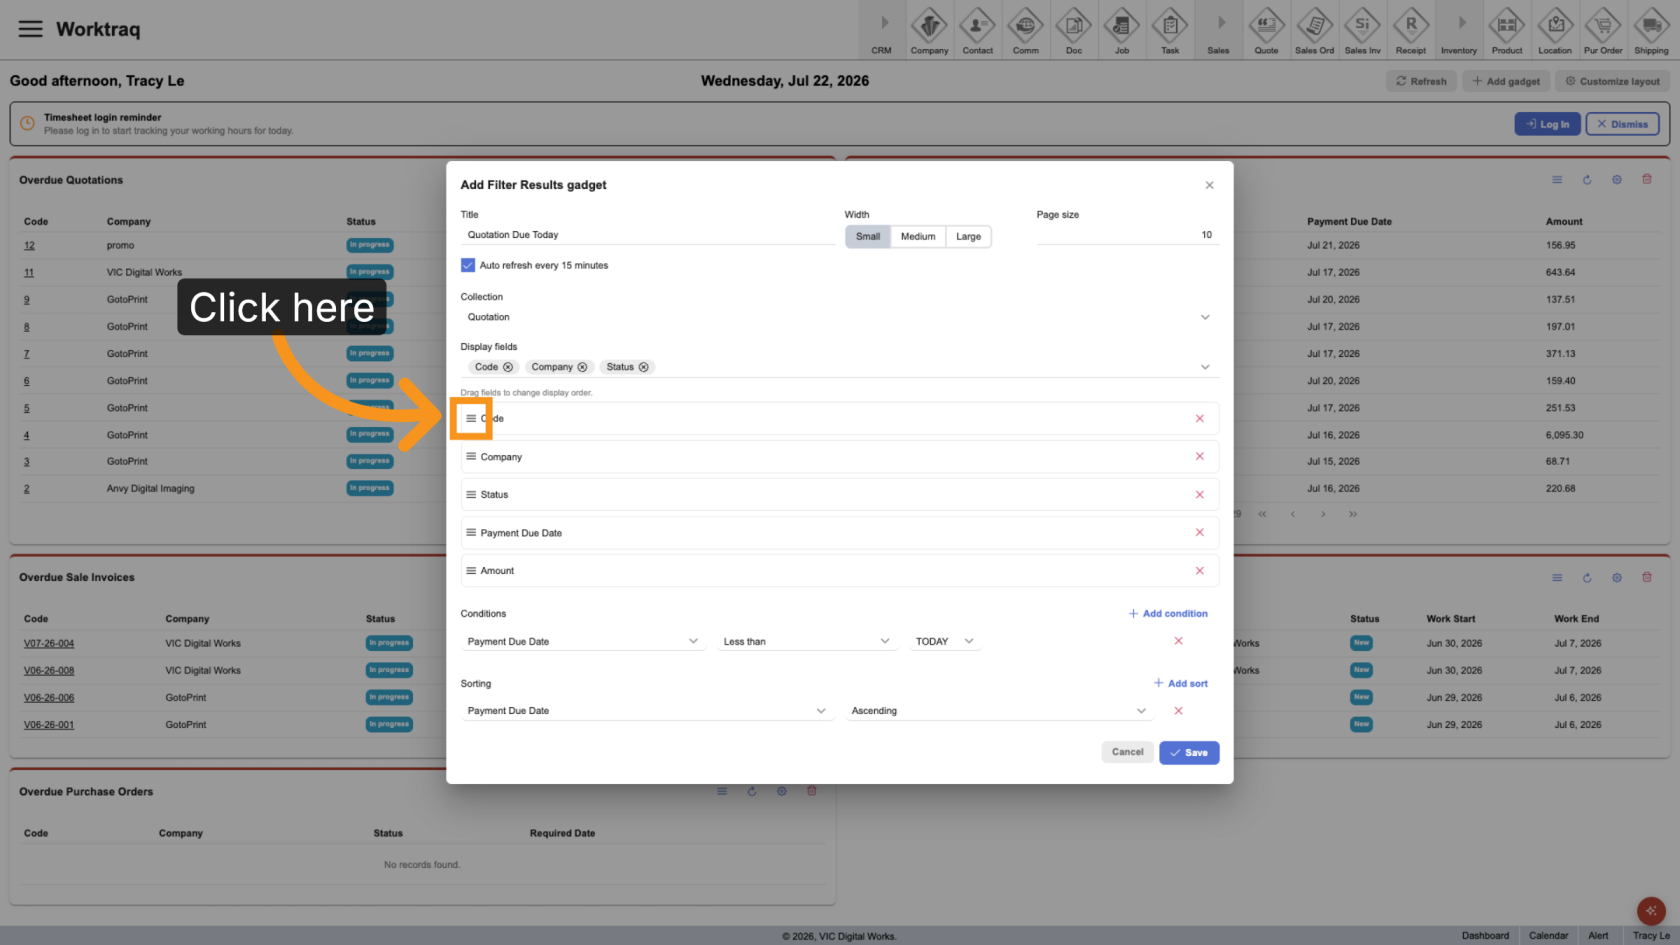
18. Arrange the Columns
Drag and drop the selected columns to change their order.
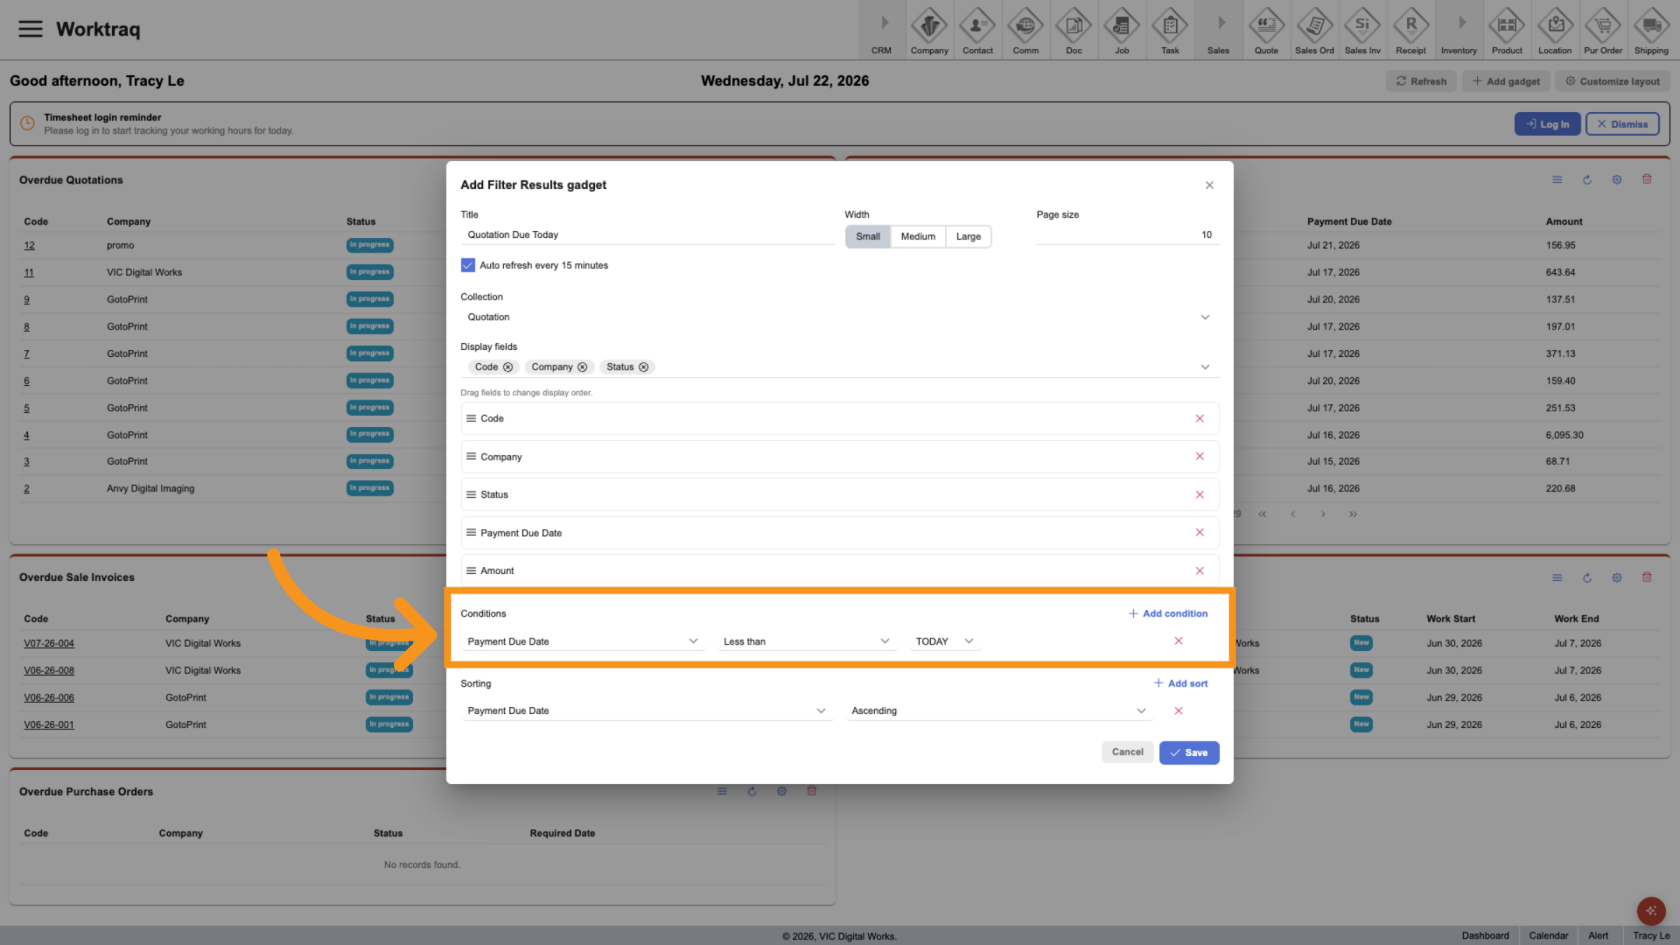
19. Filter Conditions
Add one or more conditions to control which records are displayed.
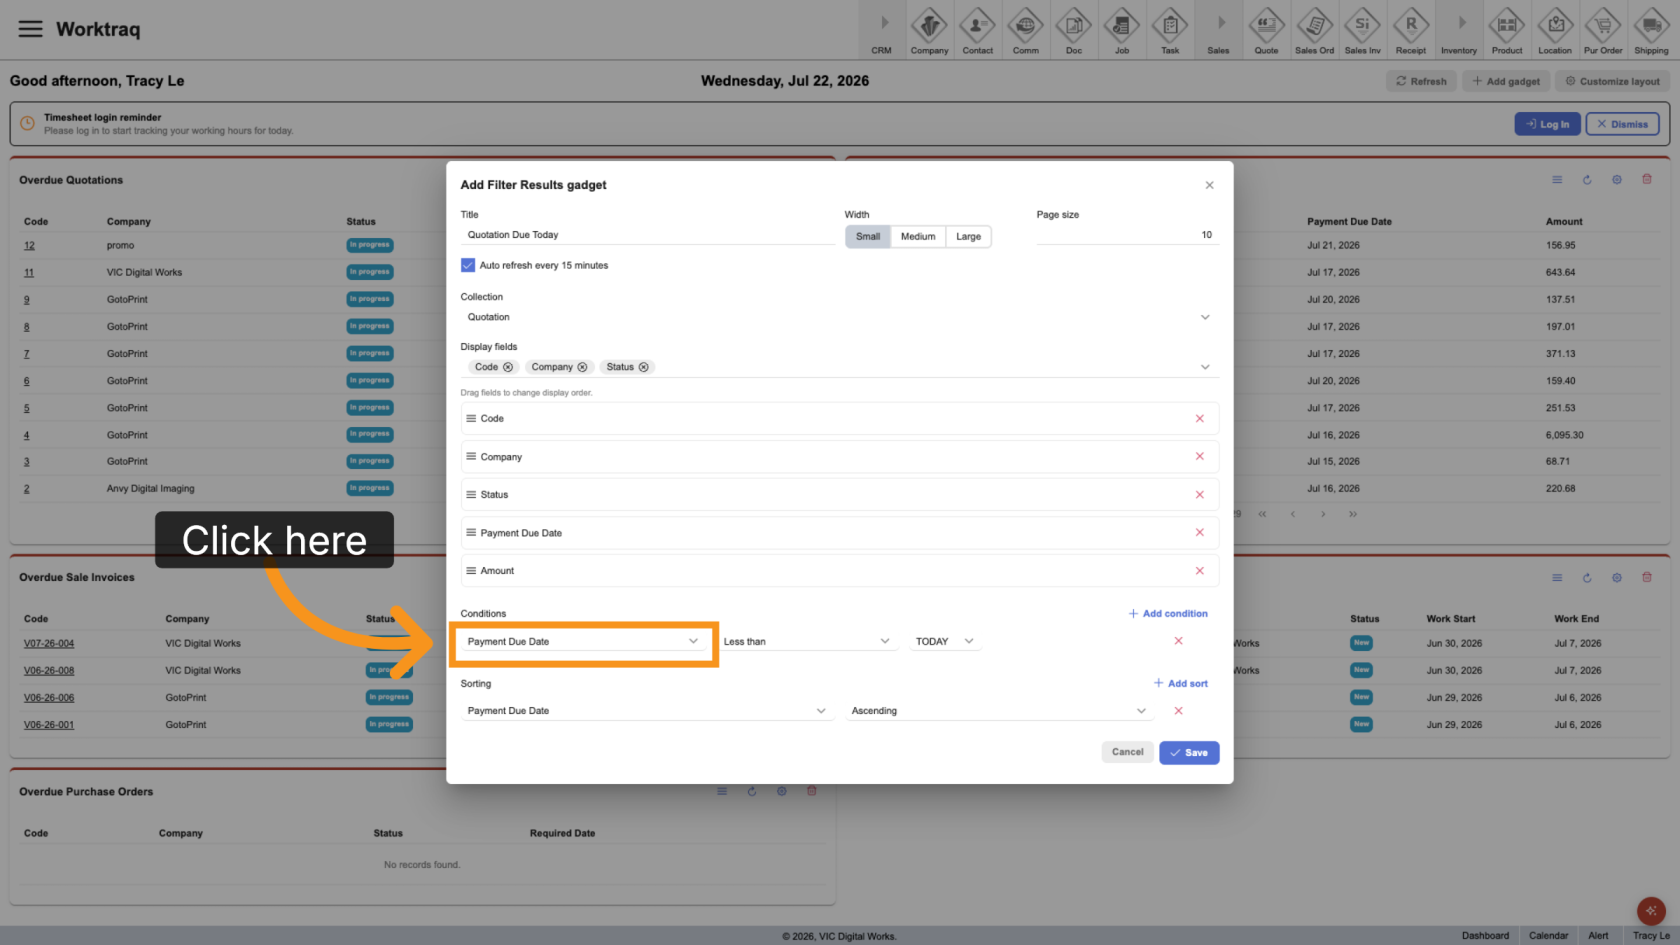
20. Select a Field
Choose the field you want to filter.
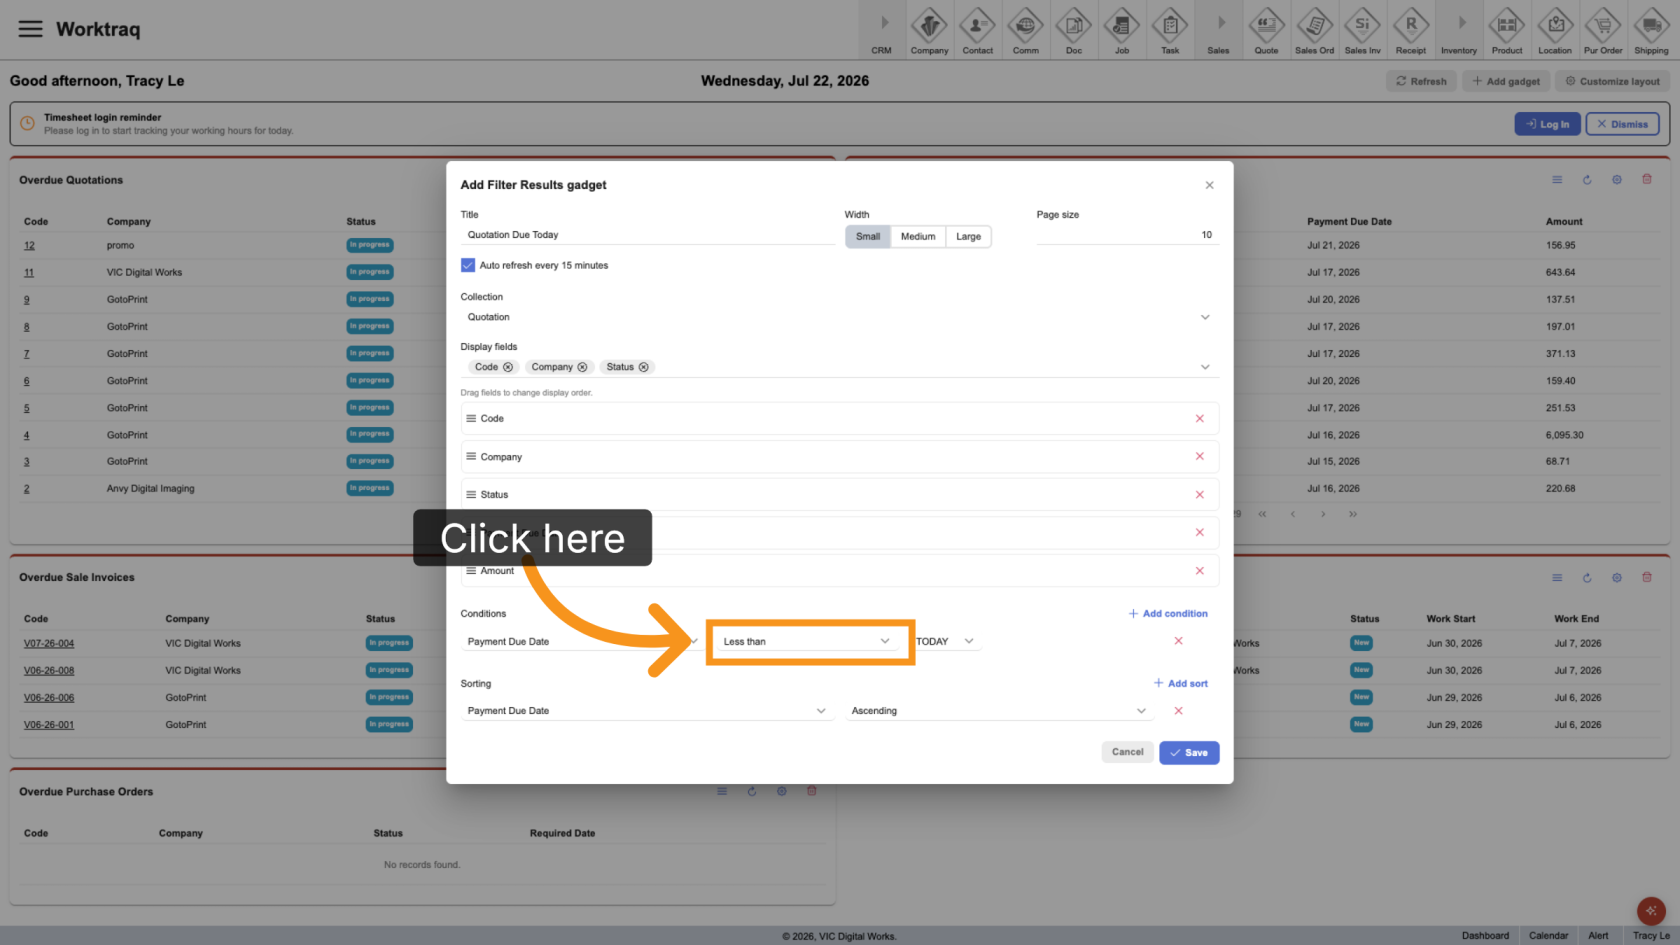
21. Select an Operator
Choose how the field should be compared.
- Equal – Matches the exact value.
- Not Equal – Excludes the exact value.
- In – Matches any value in the list.
- Not In – Excludes values in the list.
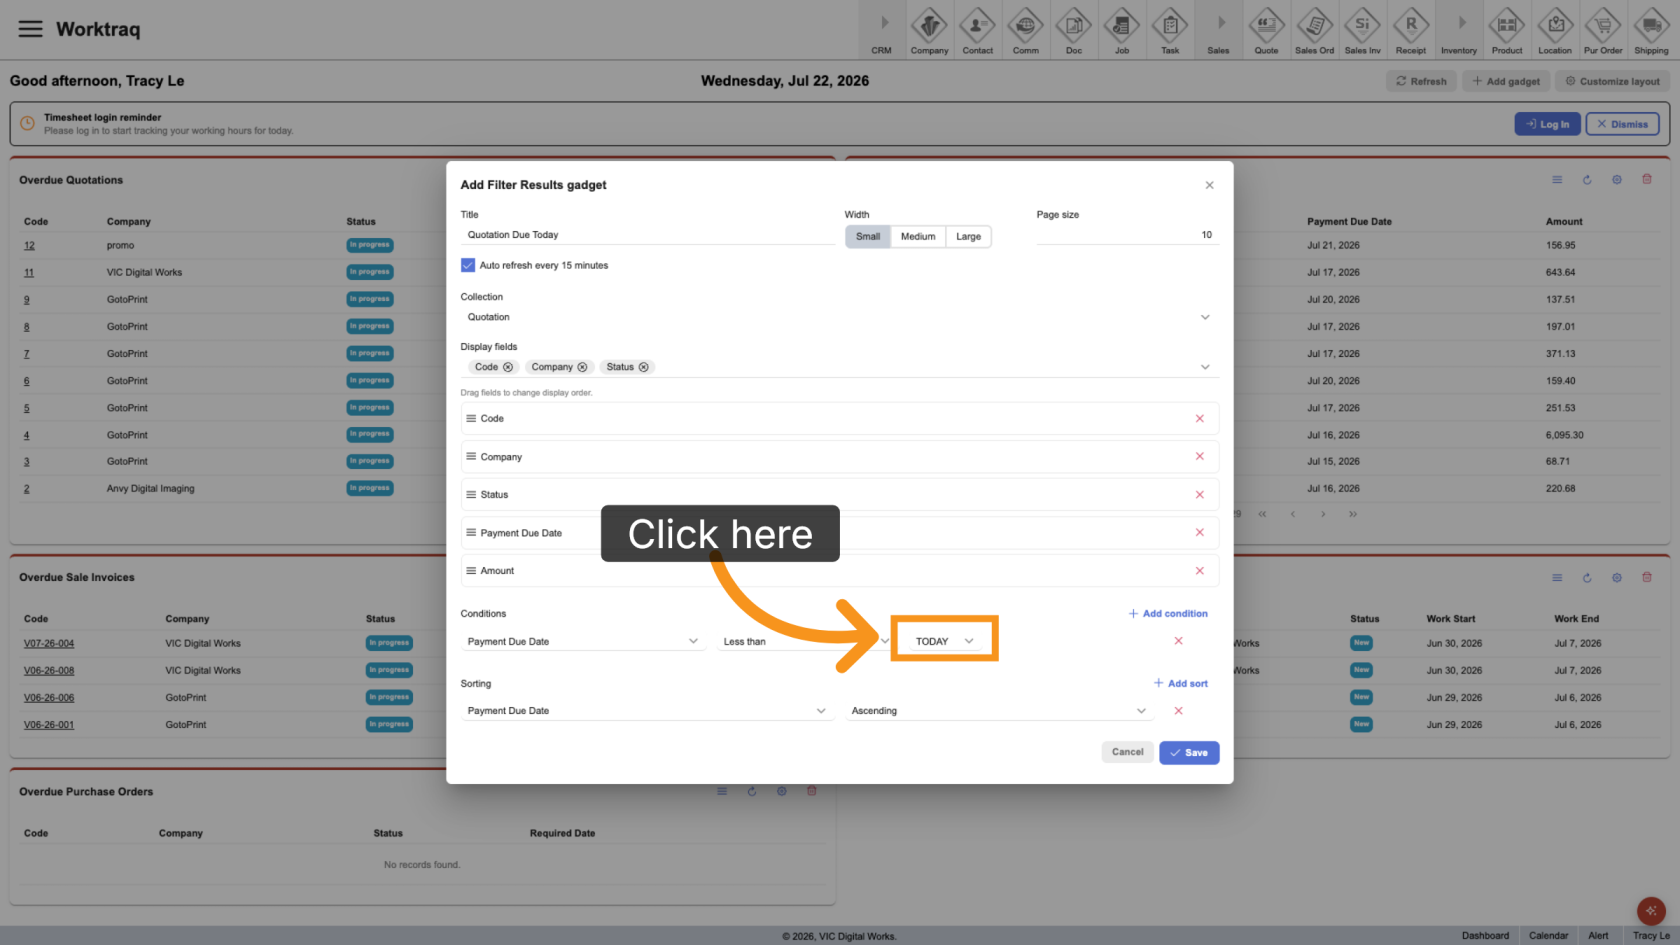
22. Enter a Value
Enter or select the value for the selected filter.
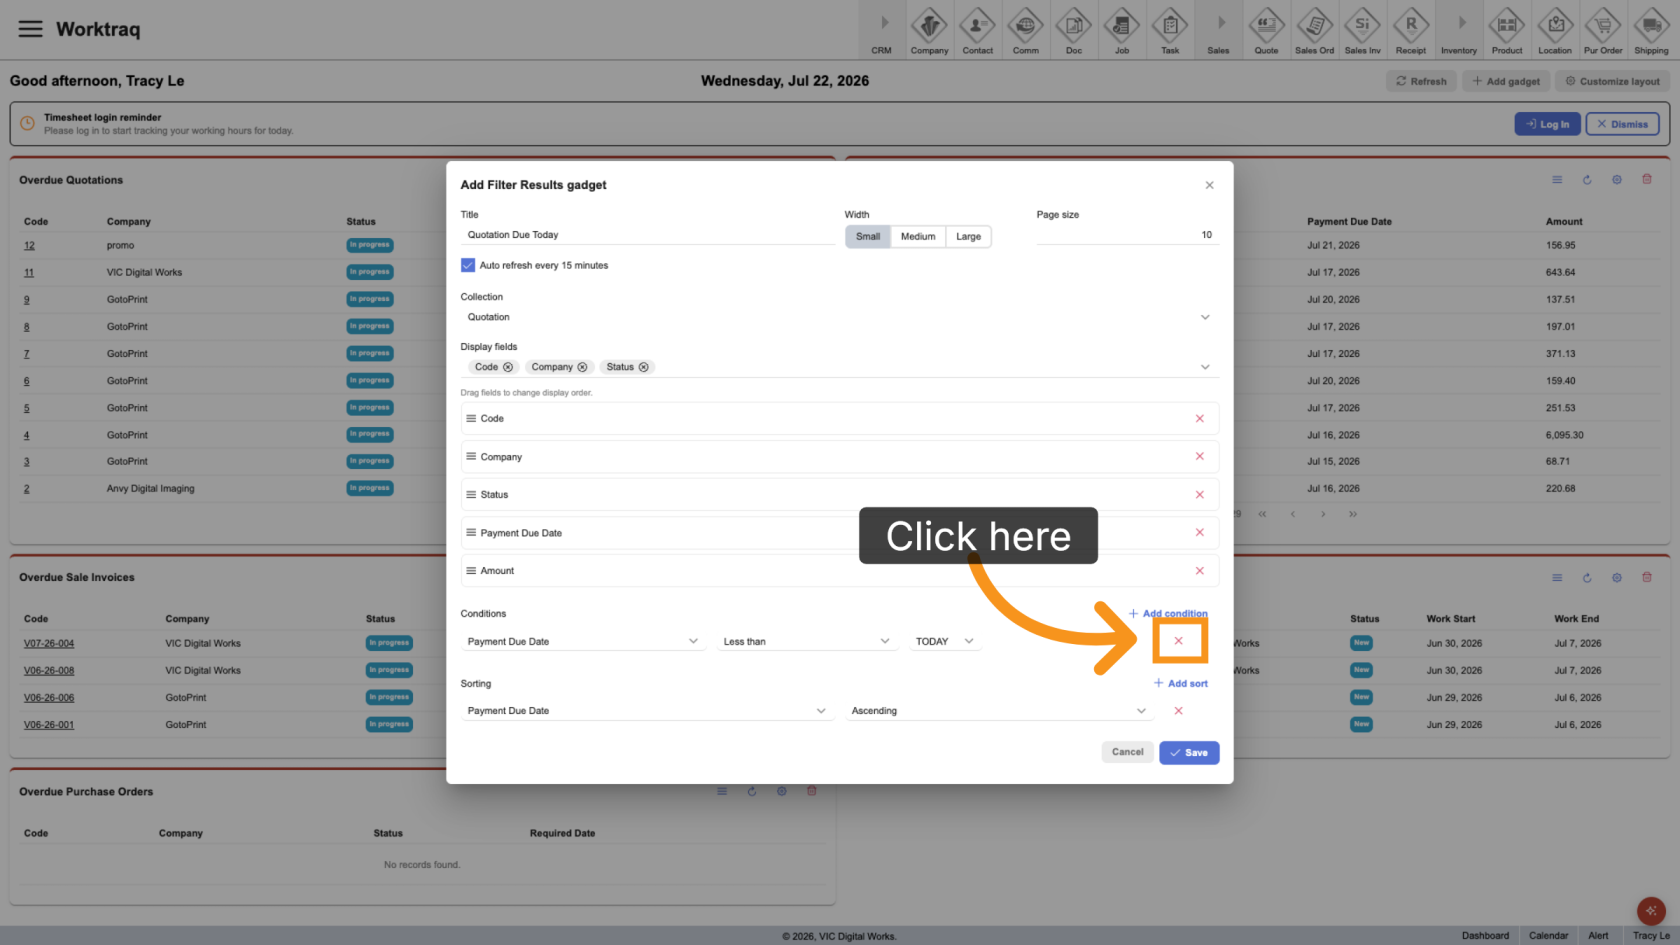
23. Remove a Condition
Click the Delete icon beside a condition to remove it.
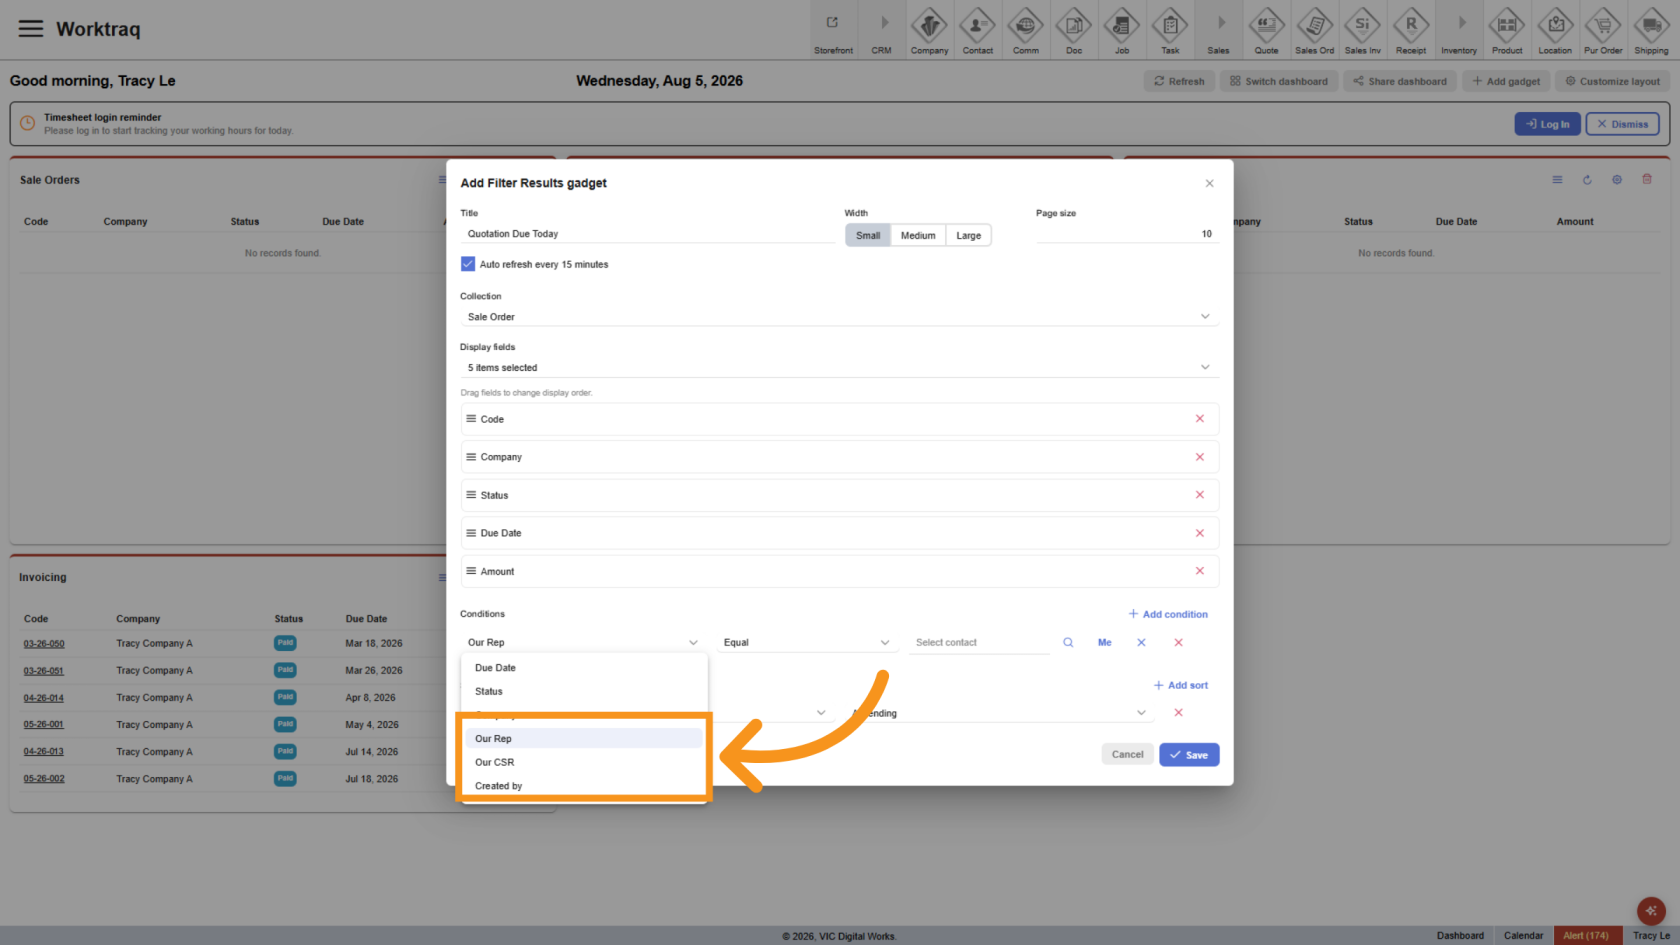
24. Select an Assigned User
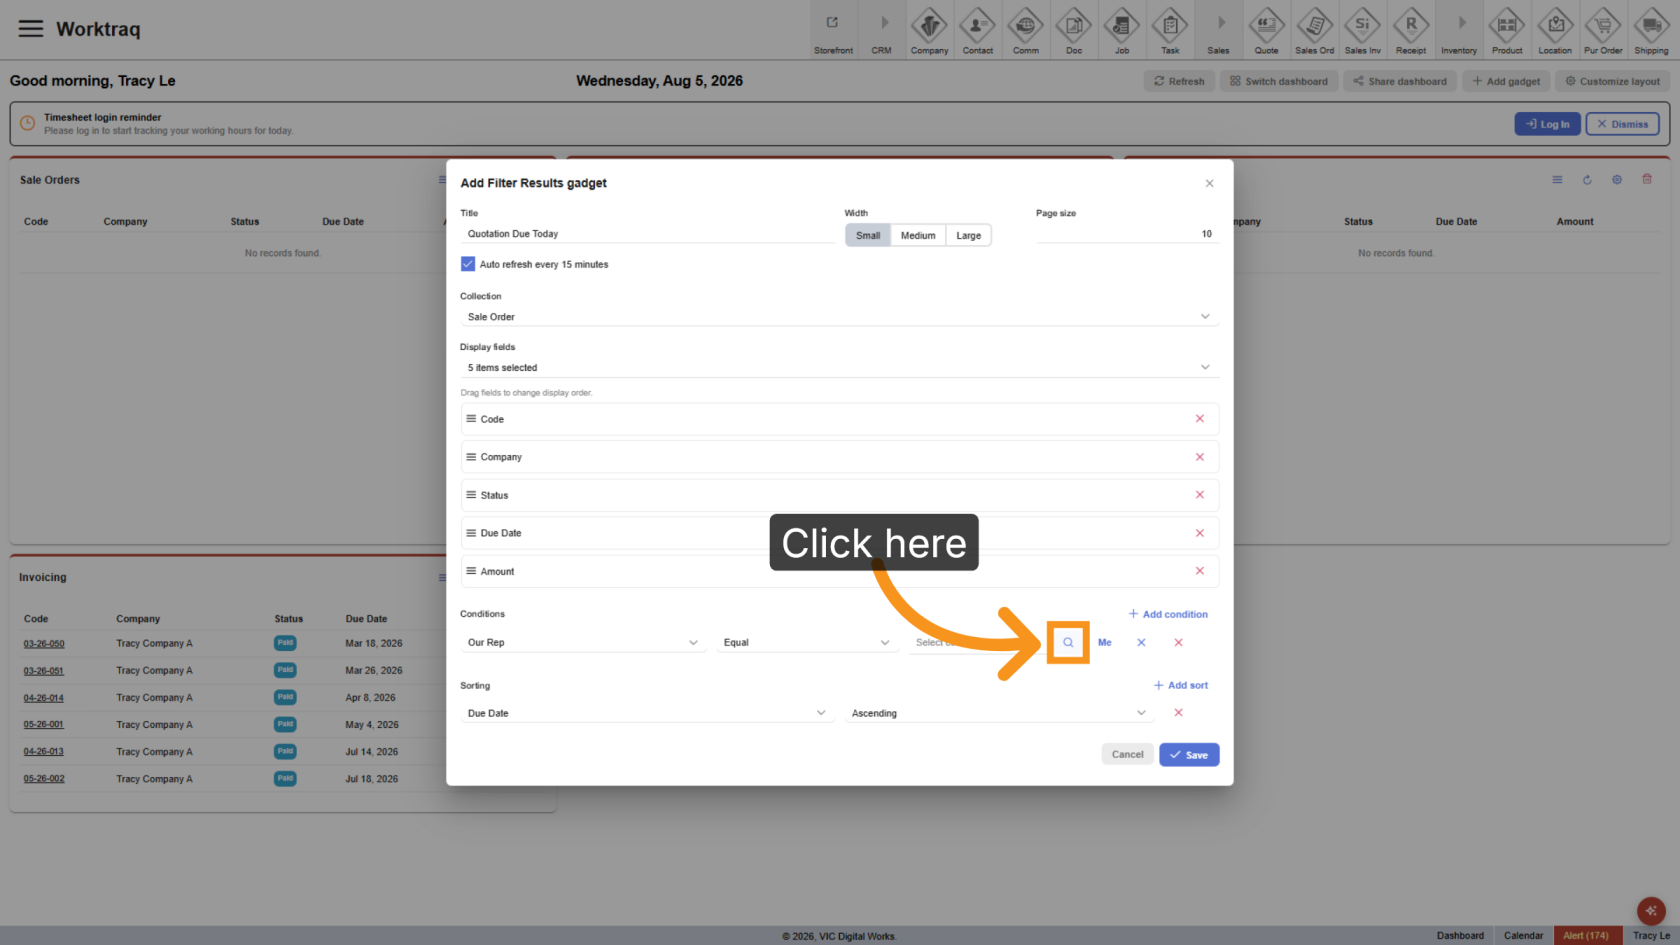
25. Select a Specific User
Click the Search icon to find and select a specific user.
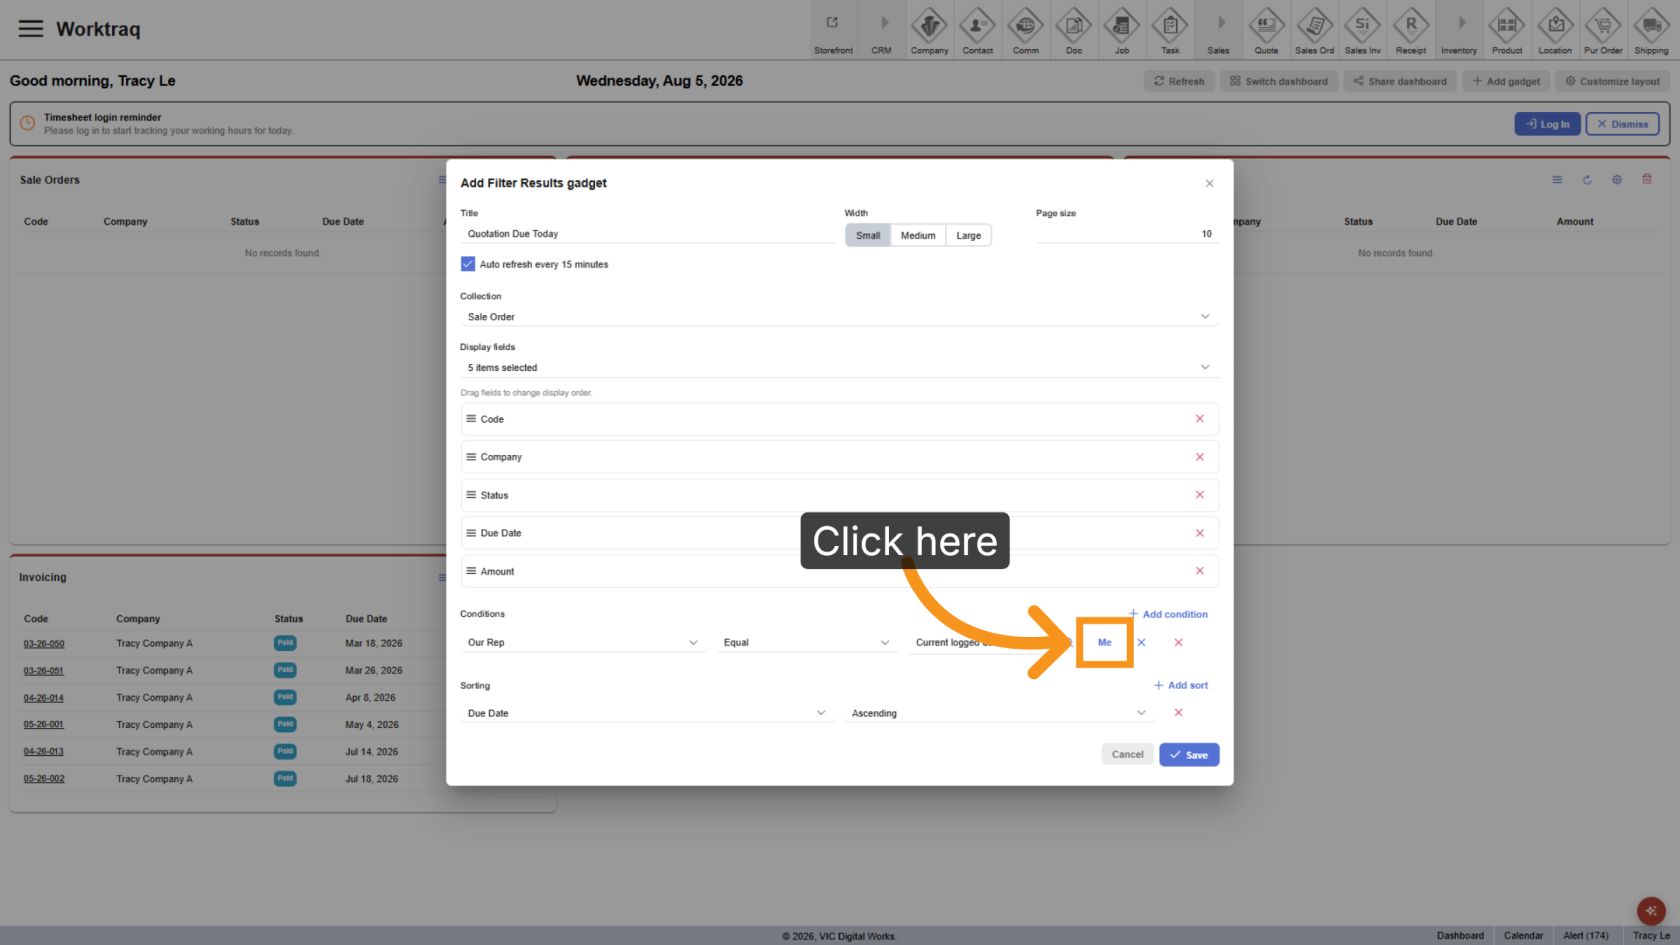
26. Select a Dynamic User
Click Me to use the current logged-in user as the filter value. This is especially useful when creating shared dashboards, as the gadget automatically displays records for the user viewing it.
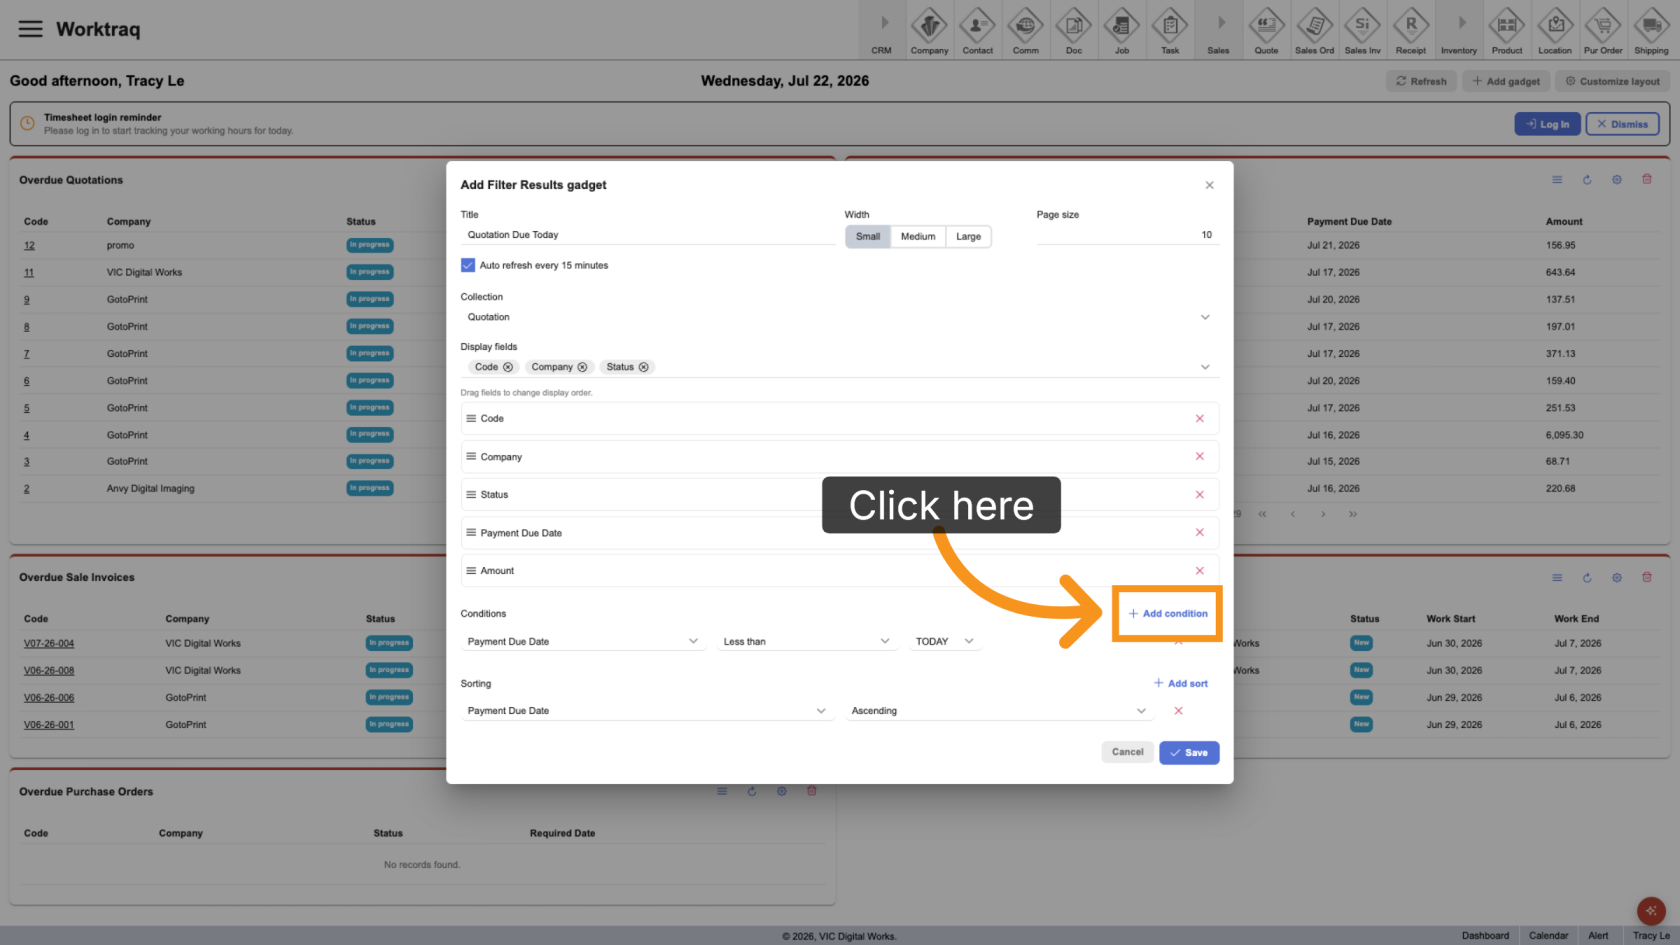
27. Add More Conditions
Add additional conditions to further refine the results.
25.28. Configure Sorting
Configure how the records should be sorted.
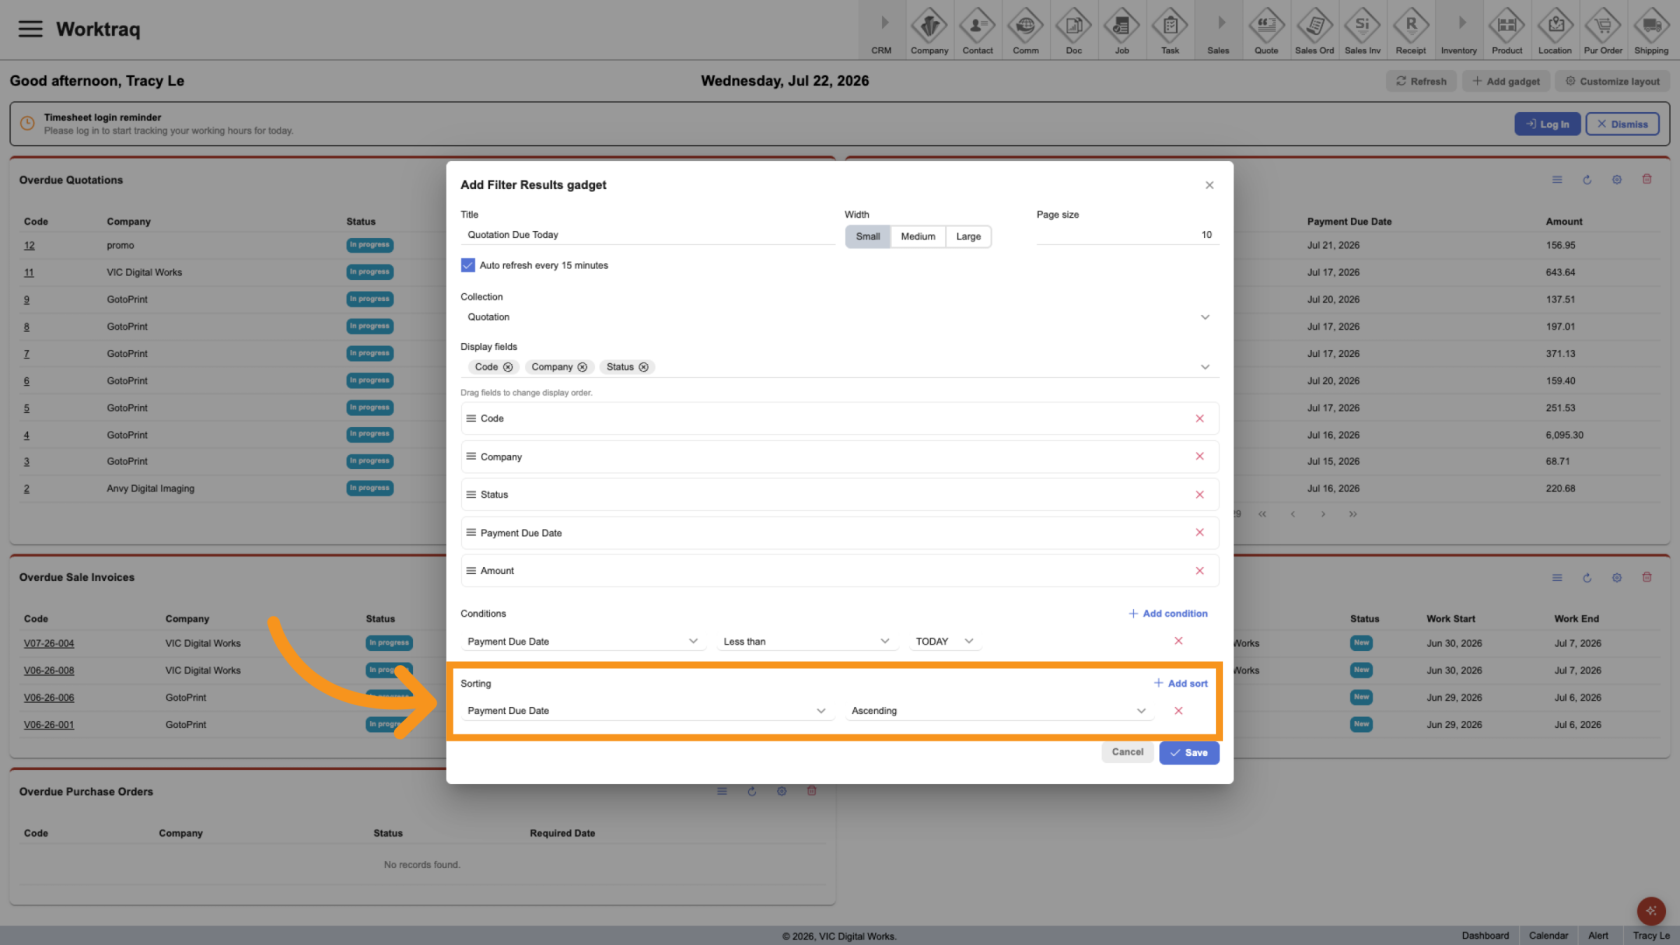
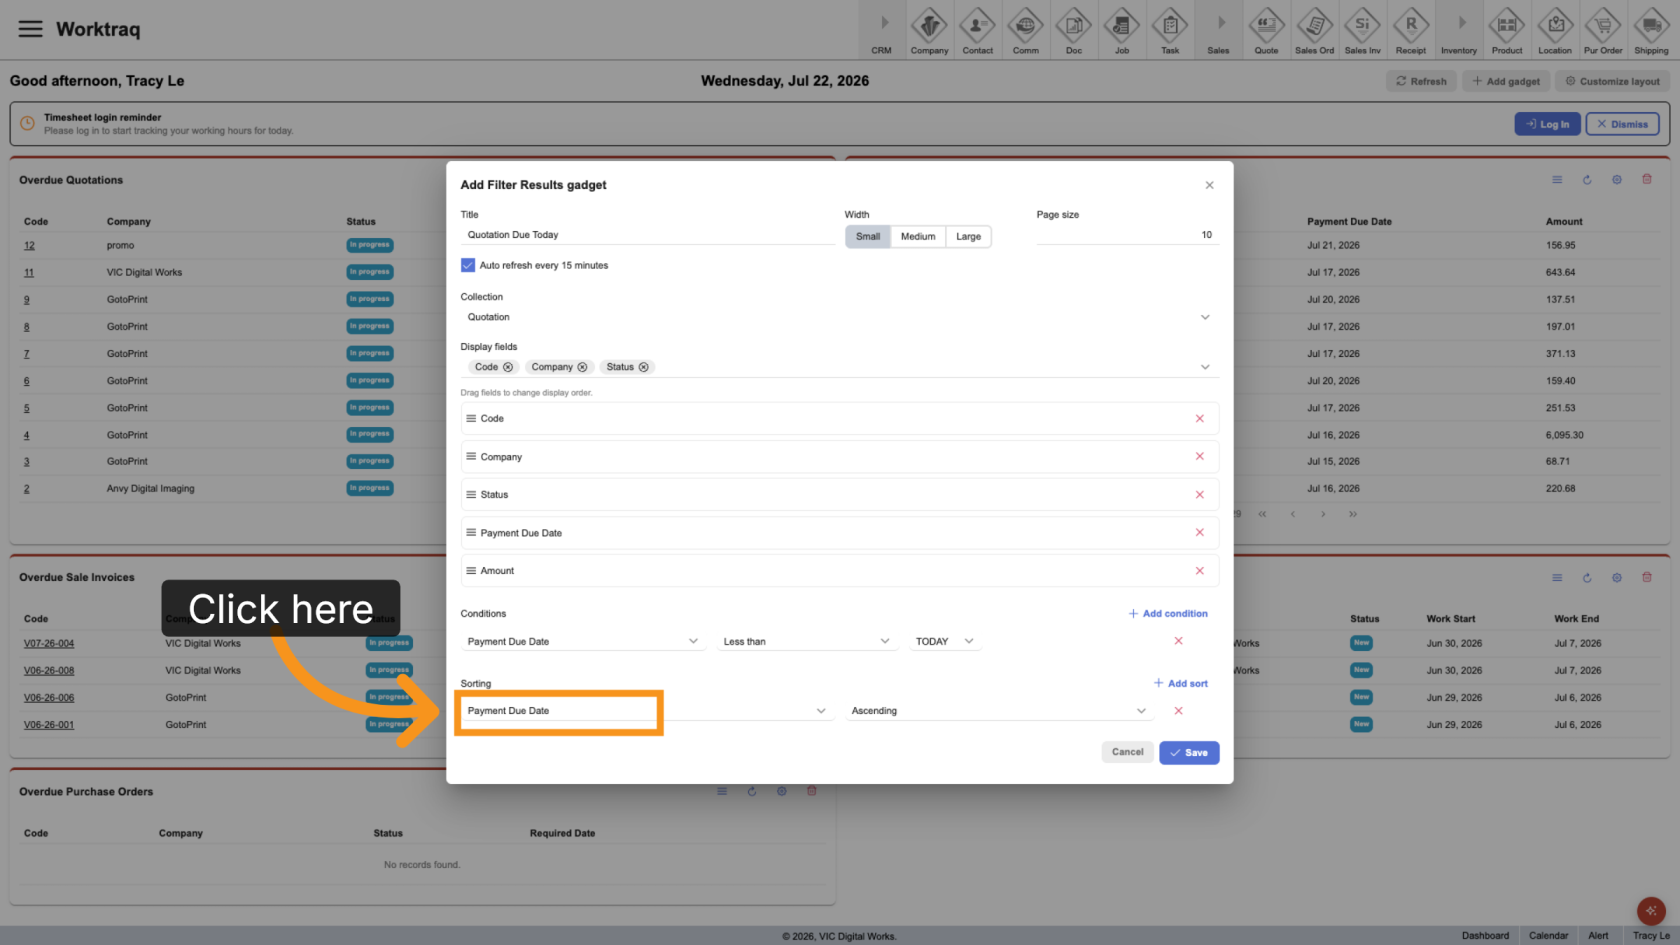
26.29. Select the Sort Field
Choose the field used for sorting.
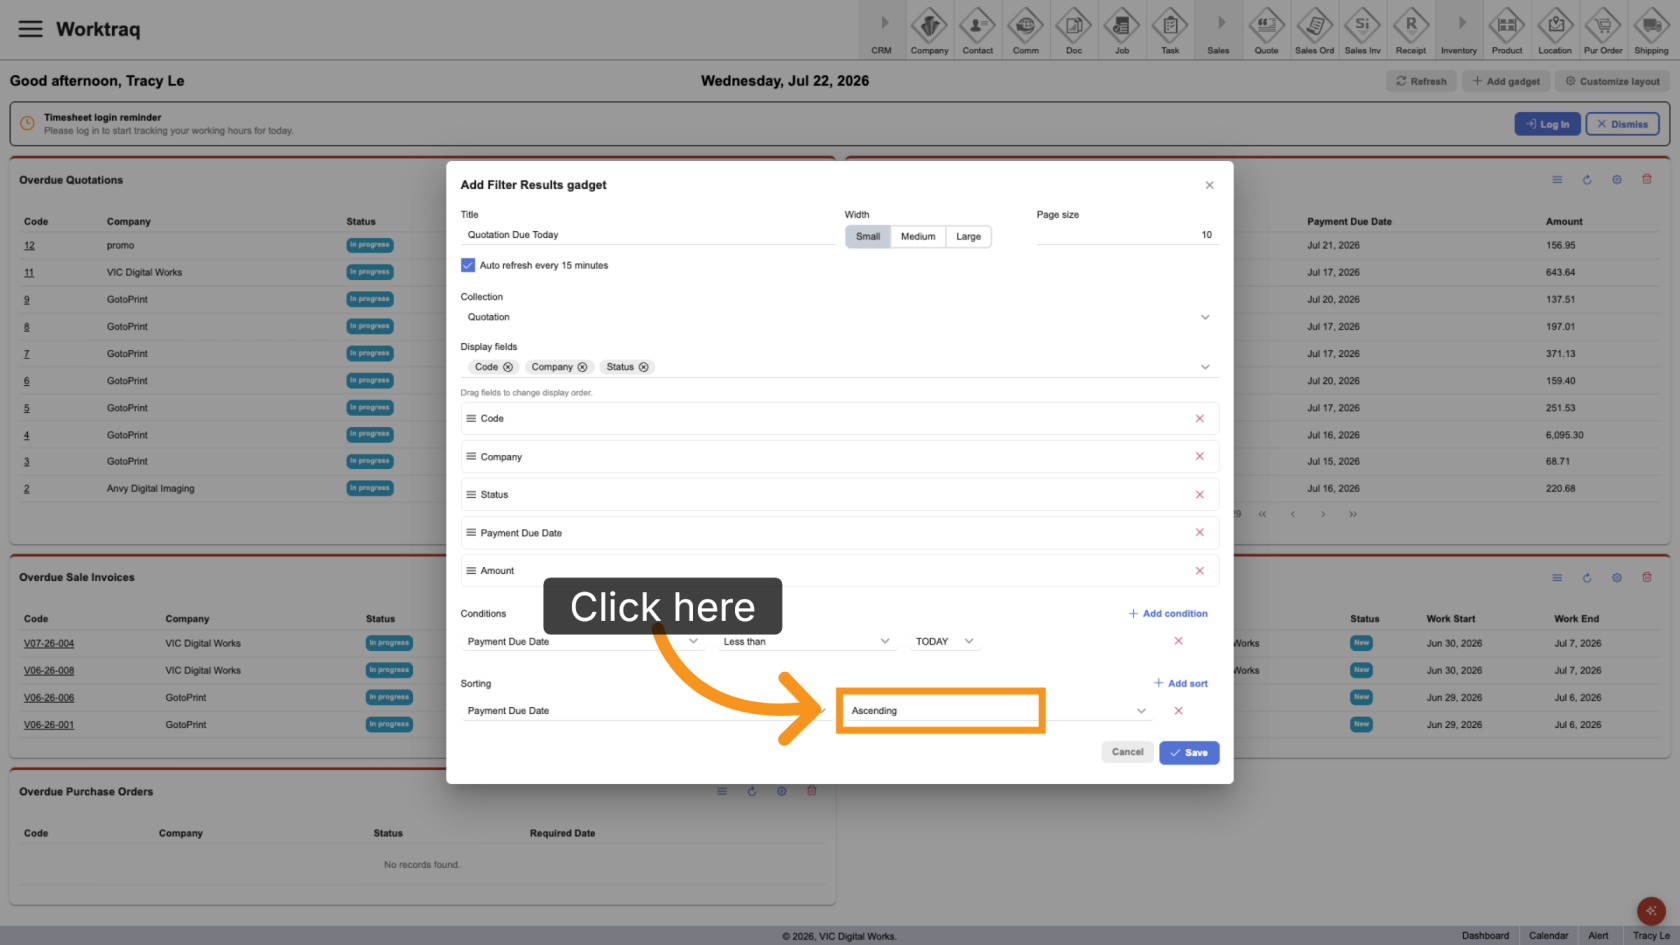
27.30. Select the Sort Order
Specify whether the results should be sorted in Ascending or Descending order.
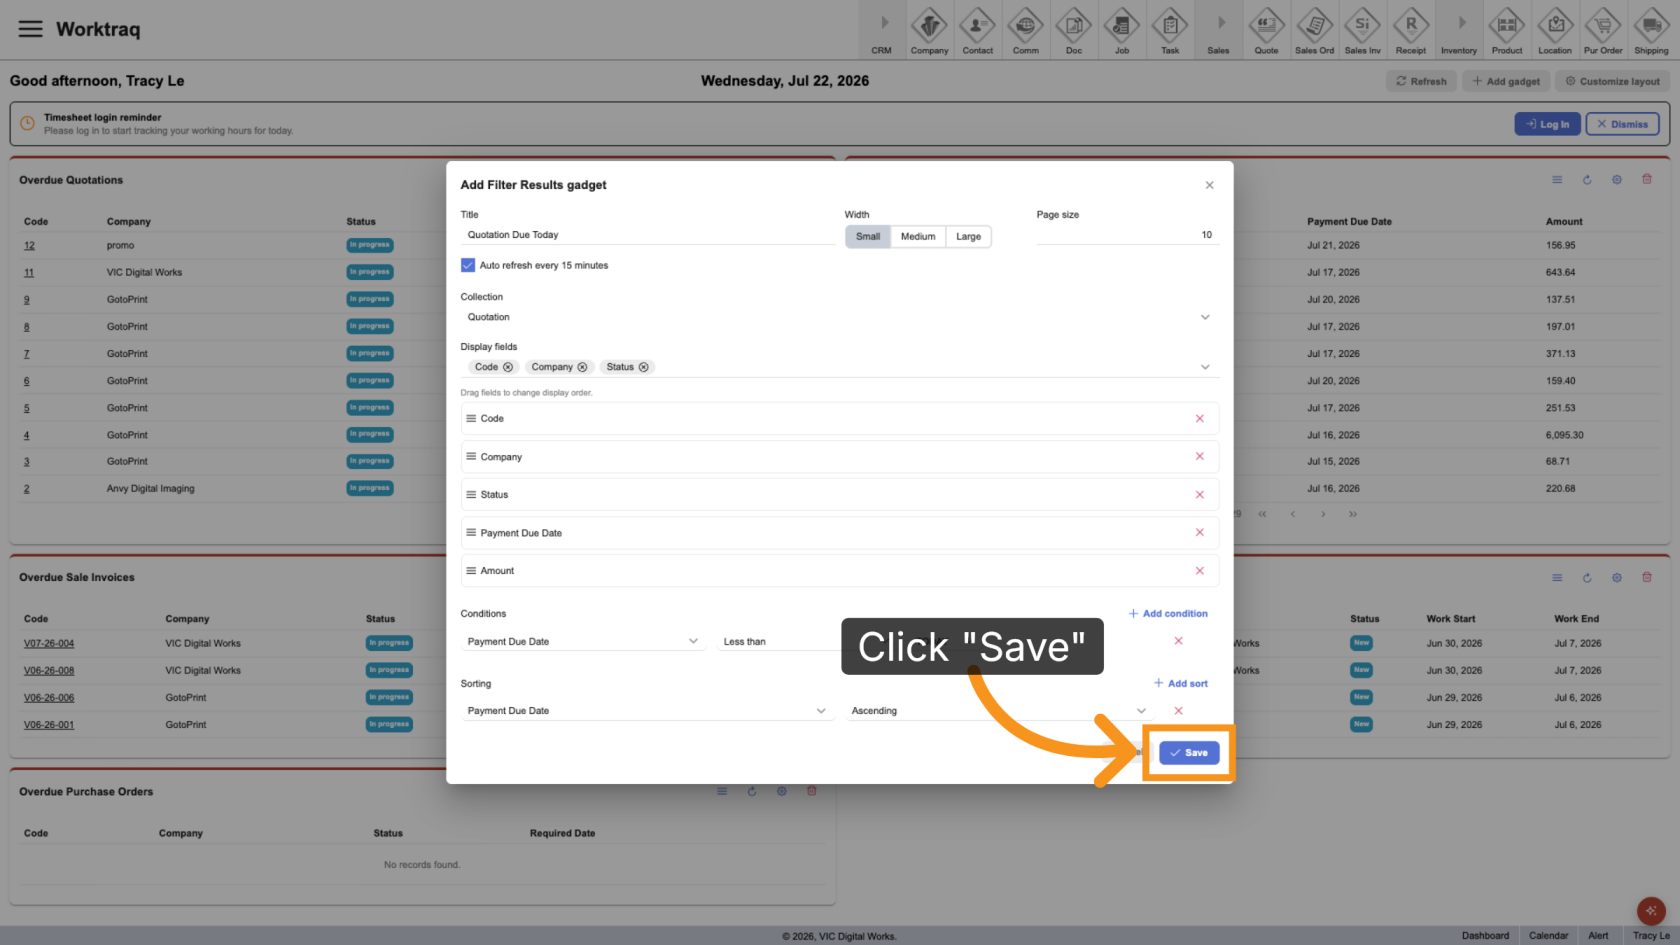
28.31. Save Your Changes
Click Save to apply and save your dashboard configuration.
29.32. Review the Results
Return to the dashboard and verify that the new gadget displays the expected information.
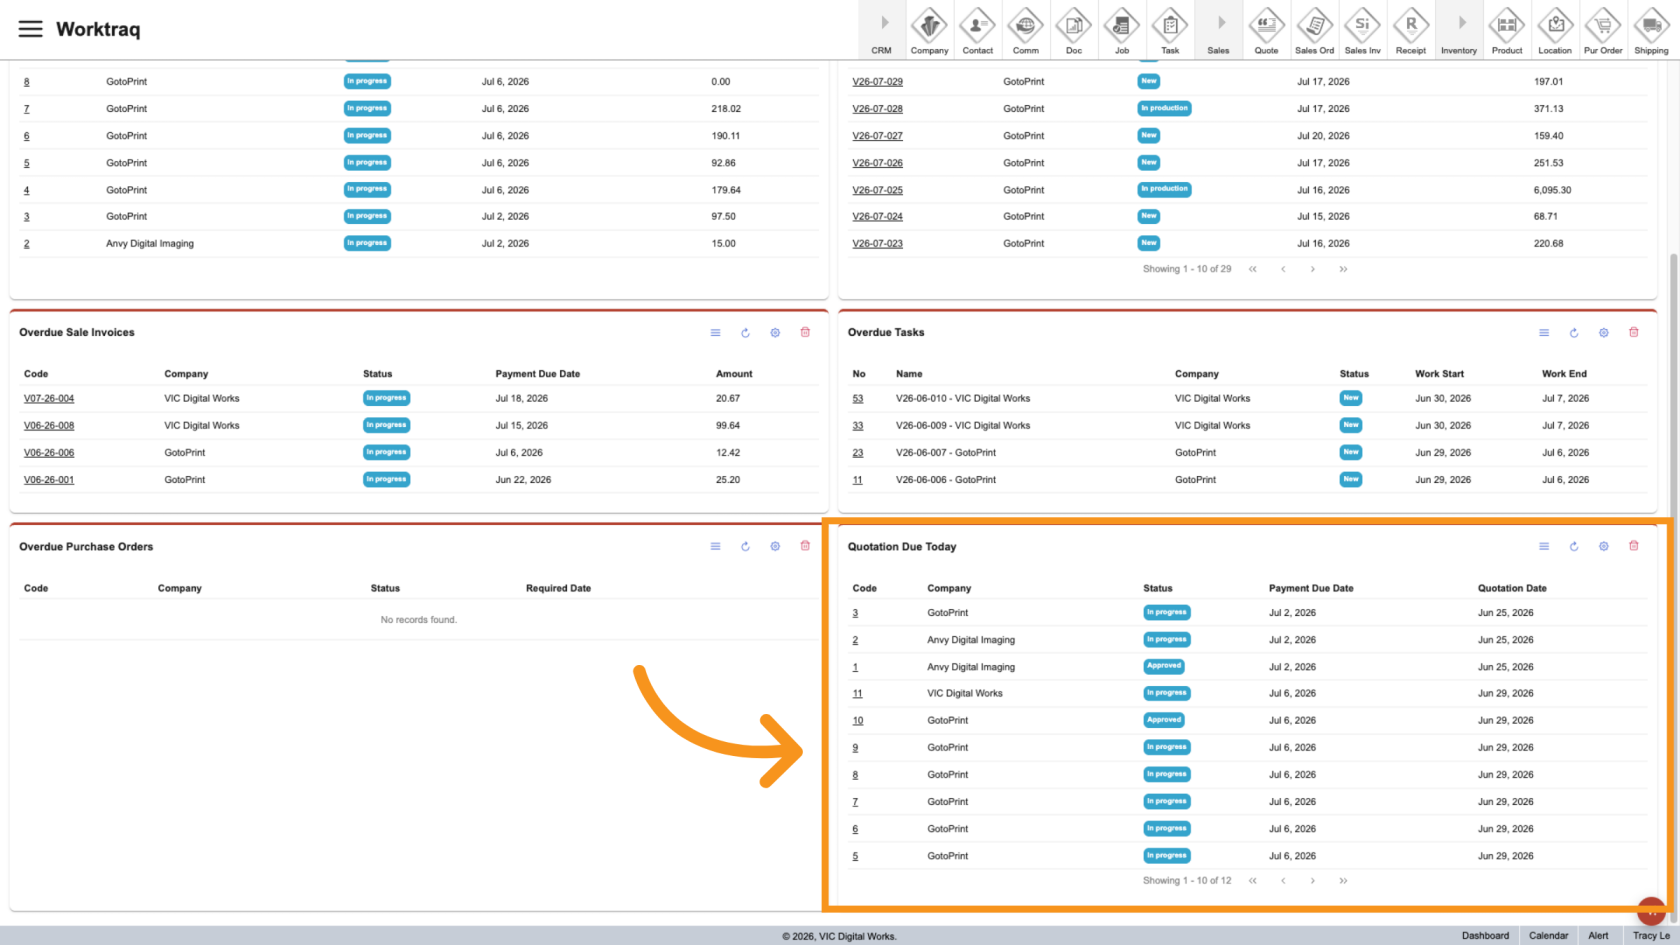
You have successfully customized your WorkTraq dashboard to fit your workflow.