Introduction to POS
by VIC Digital Works
Welcome to the VIC Digital Works Point of Sale system. This POS system is designed to help you manage orders efficiently, communicate seamlessly with the kitchen, and complete transactions accurately. In this video, we will walk you through the main interface and the essential features you will use during daily operations.
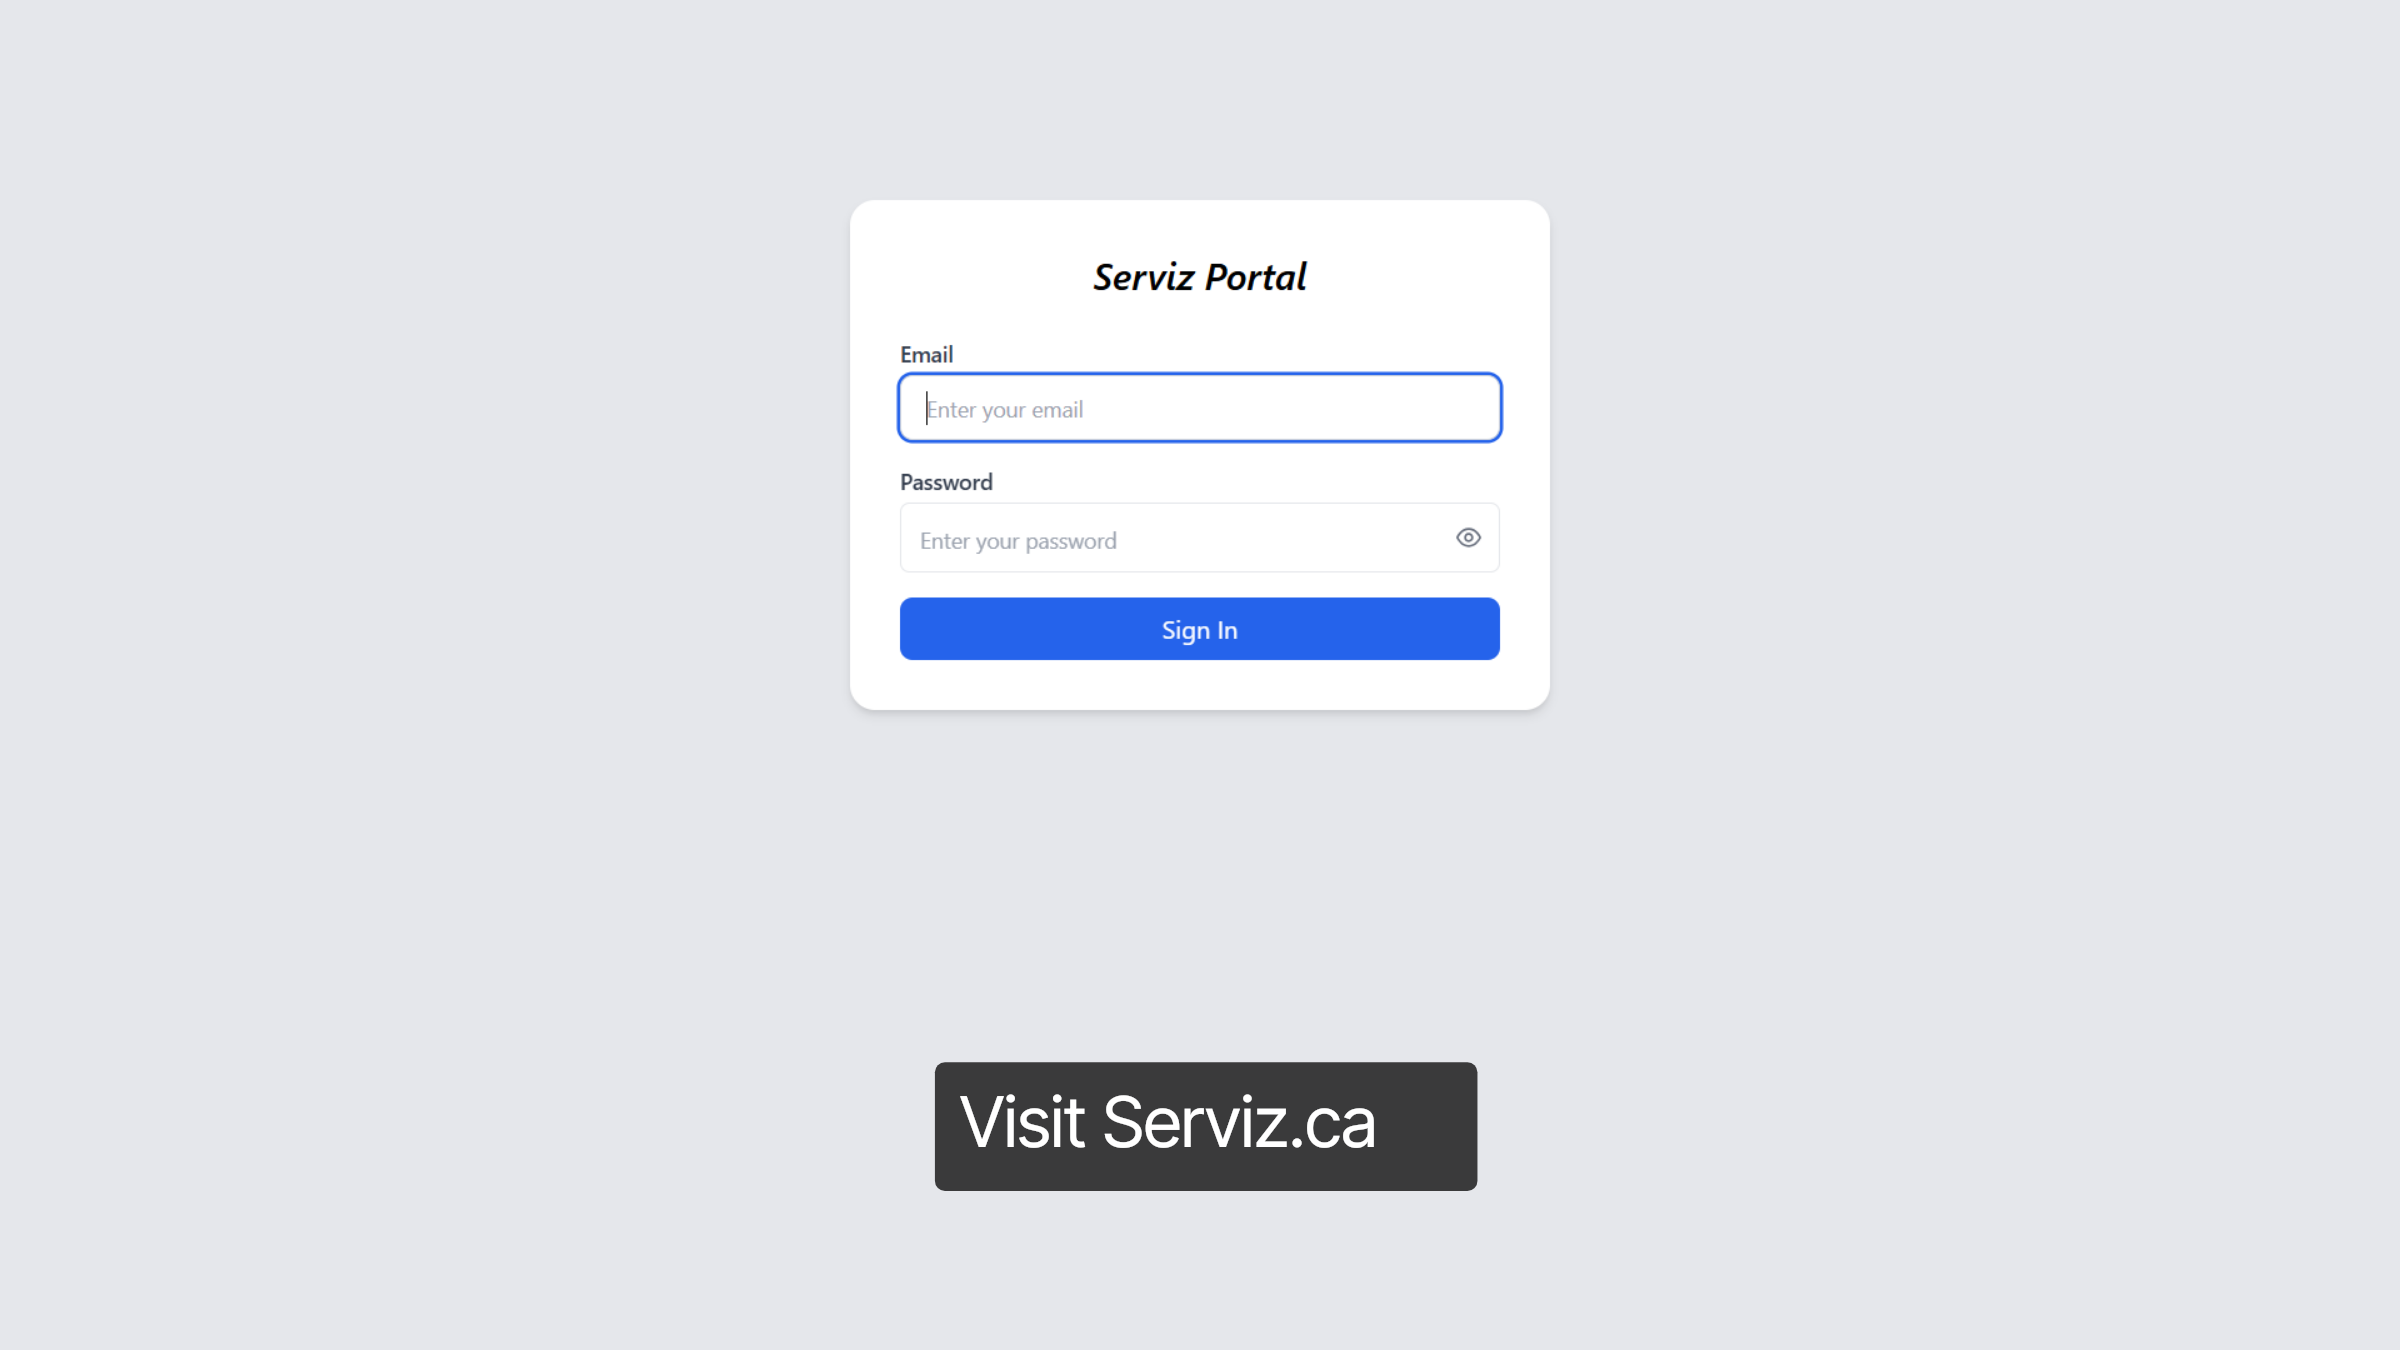
Go to serviz.ca
1. Access Serviz.ca
To begin, open your web browser and visit serviz.ca. As a client of VIC Digital Works, you will have access to the Serviz Portal.
2. Enter Your Login Credentials
Click the username and password fields to enter your credentials.
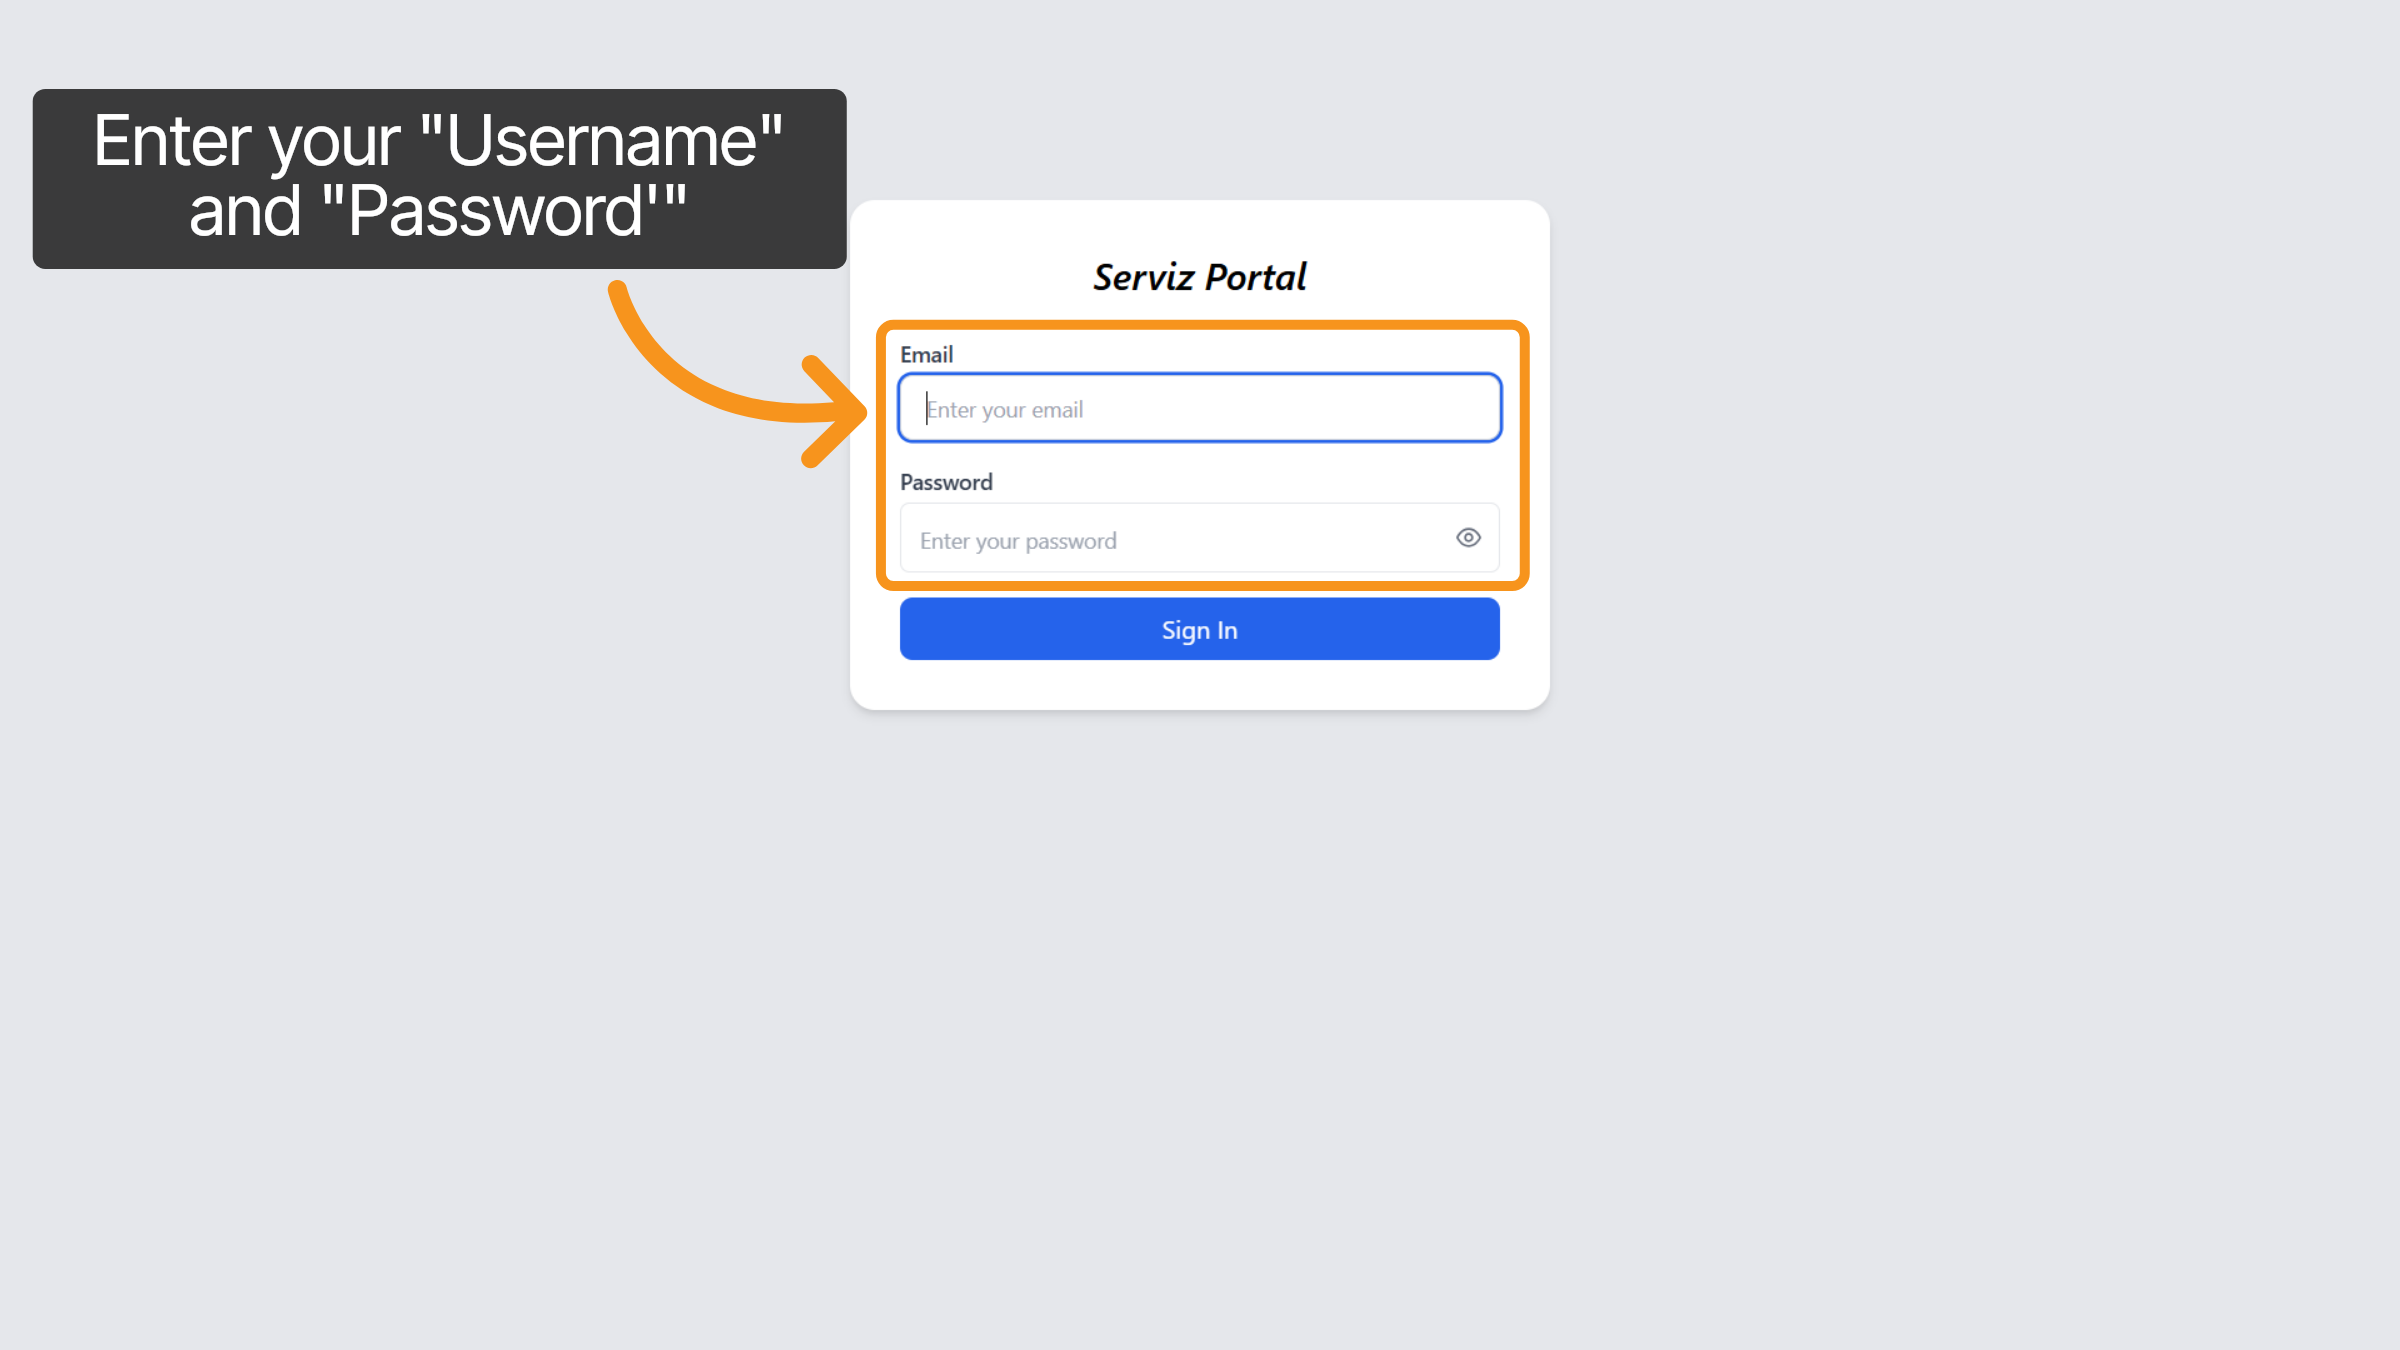
3. Click the Sign In Button
Click Sign In to access your Serviz account dashboard.

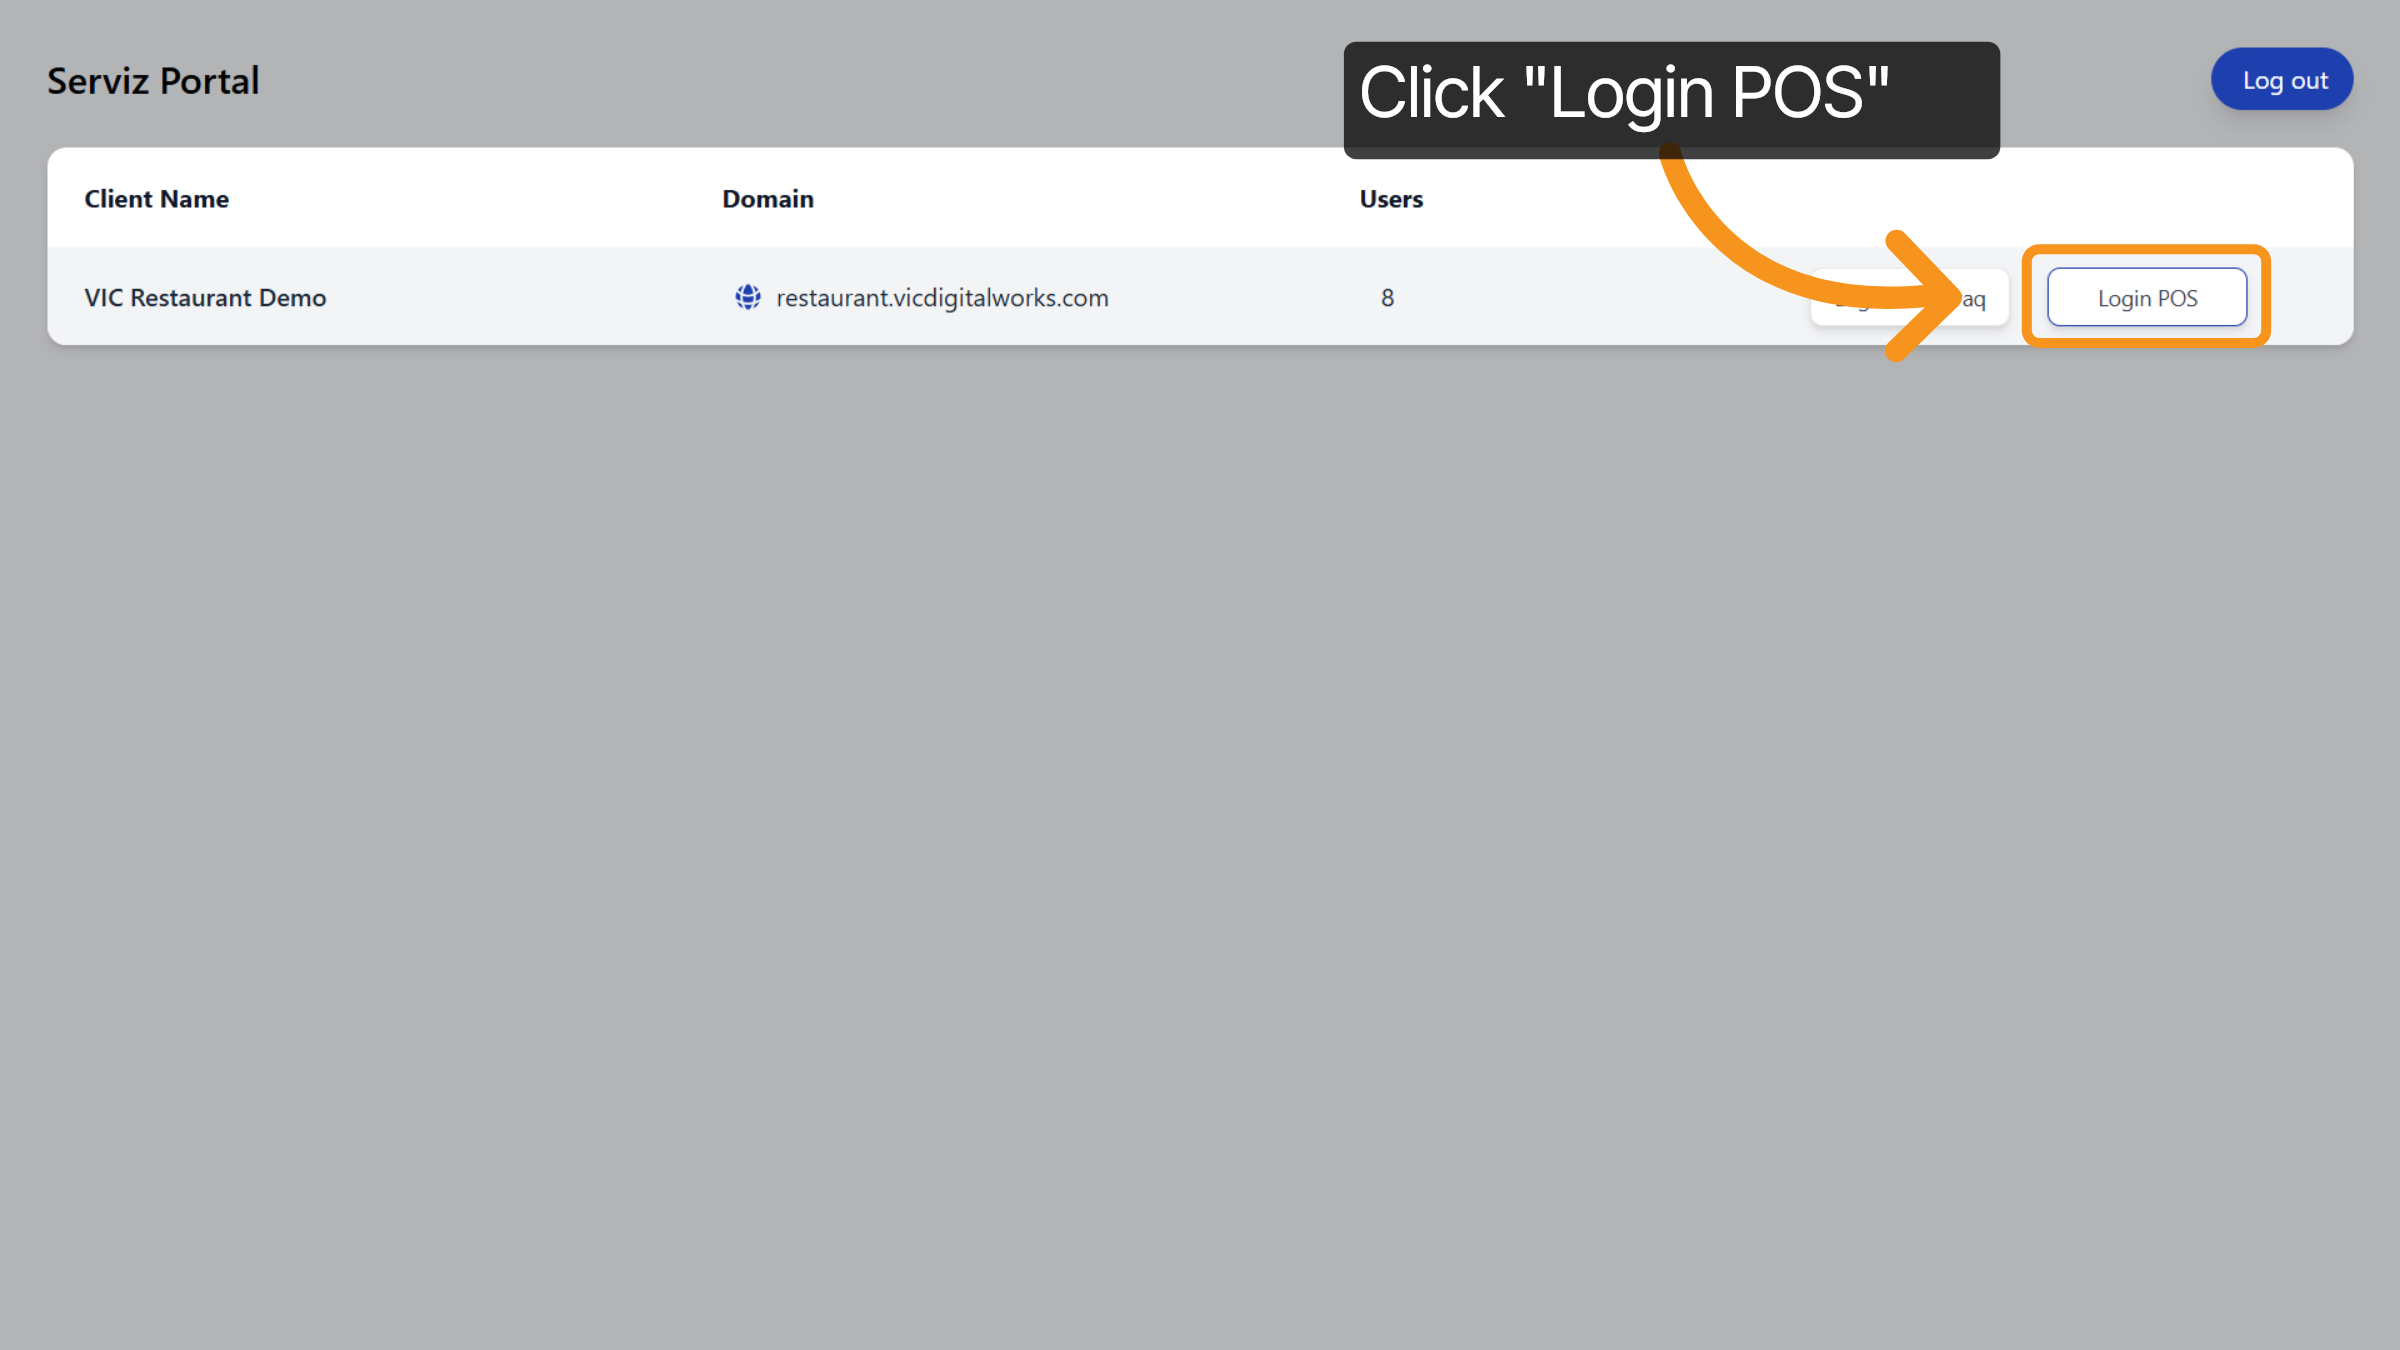
4. Serviz Dashboard Overview
Once logged in, you will see your company name, domain name, total users, and two login options: WorkTraq and POS.
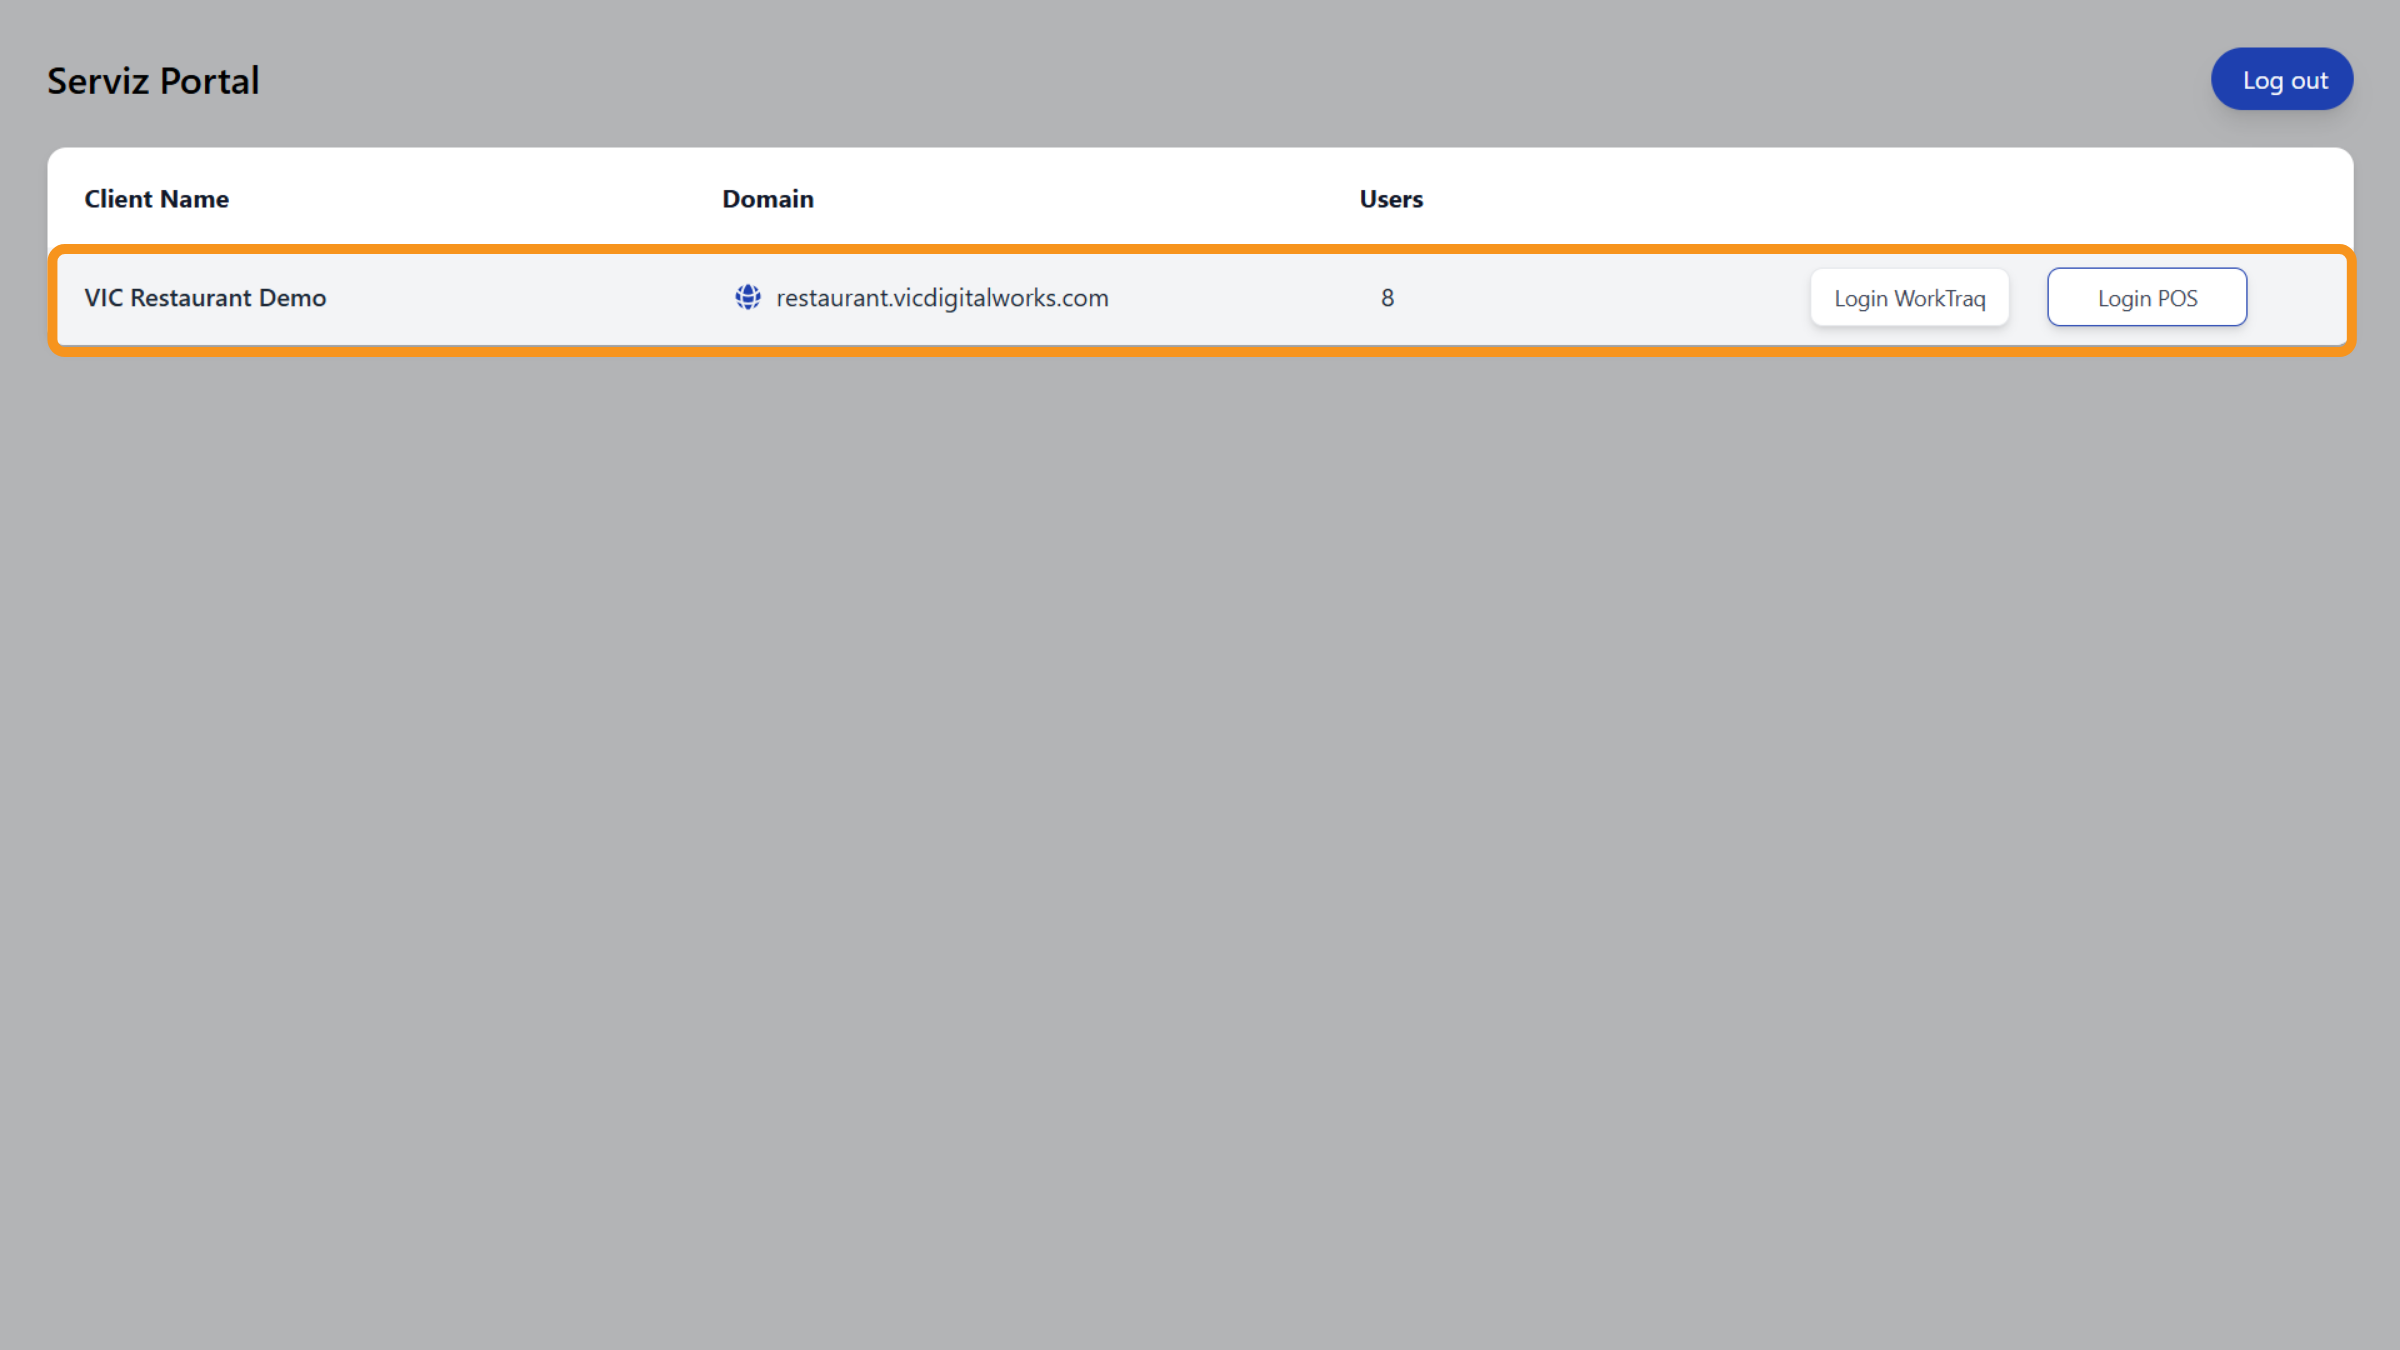
5. Select Login POS
In this video, we will focus on the POS Interface. So, let's click on the Login POS button to proceed.
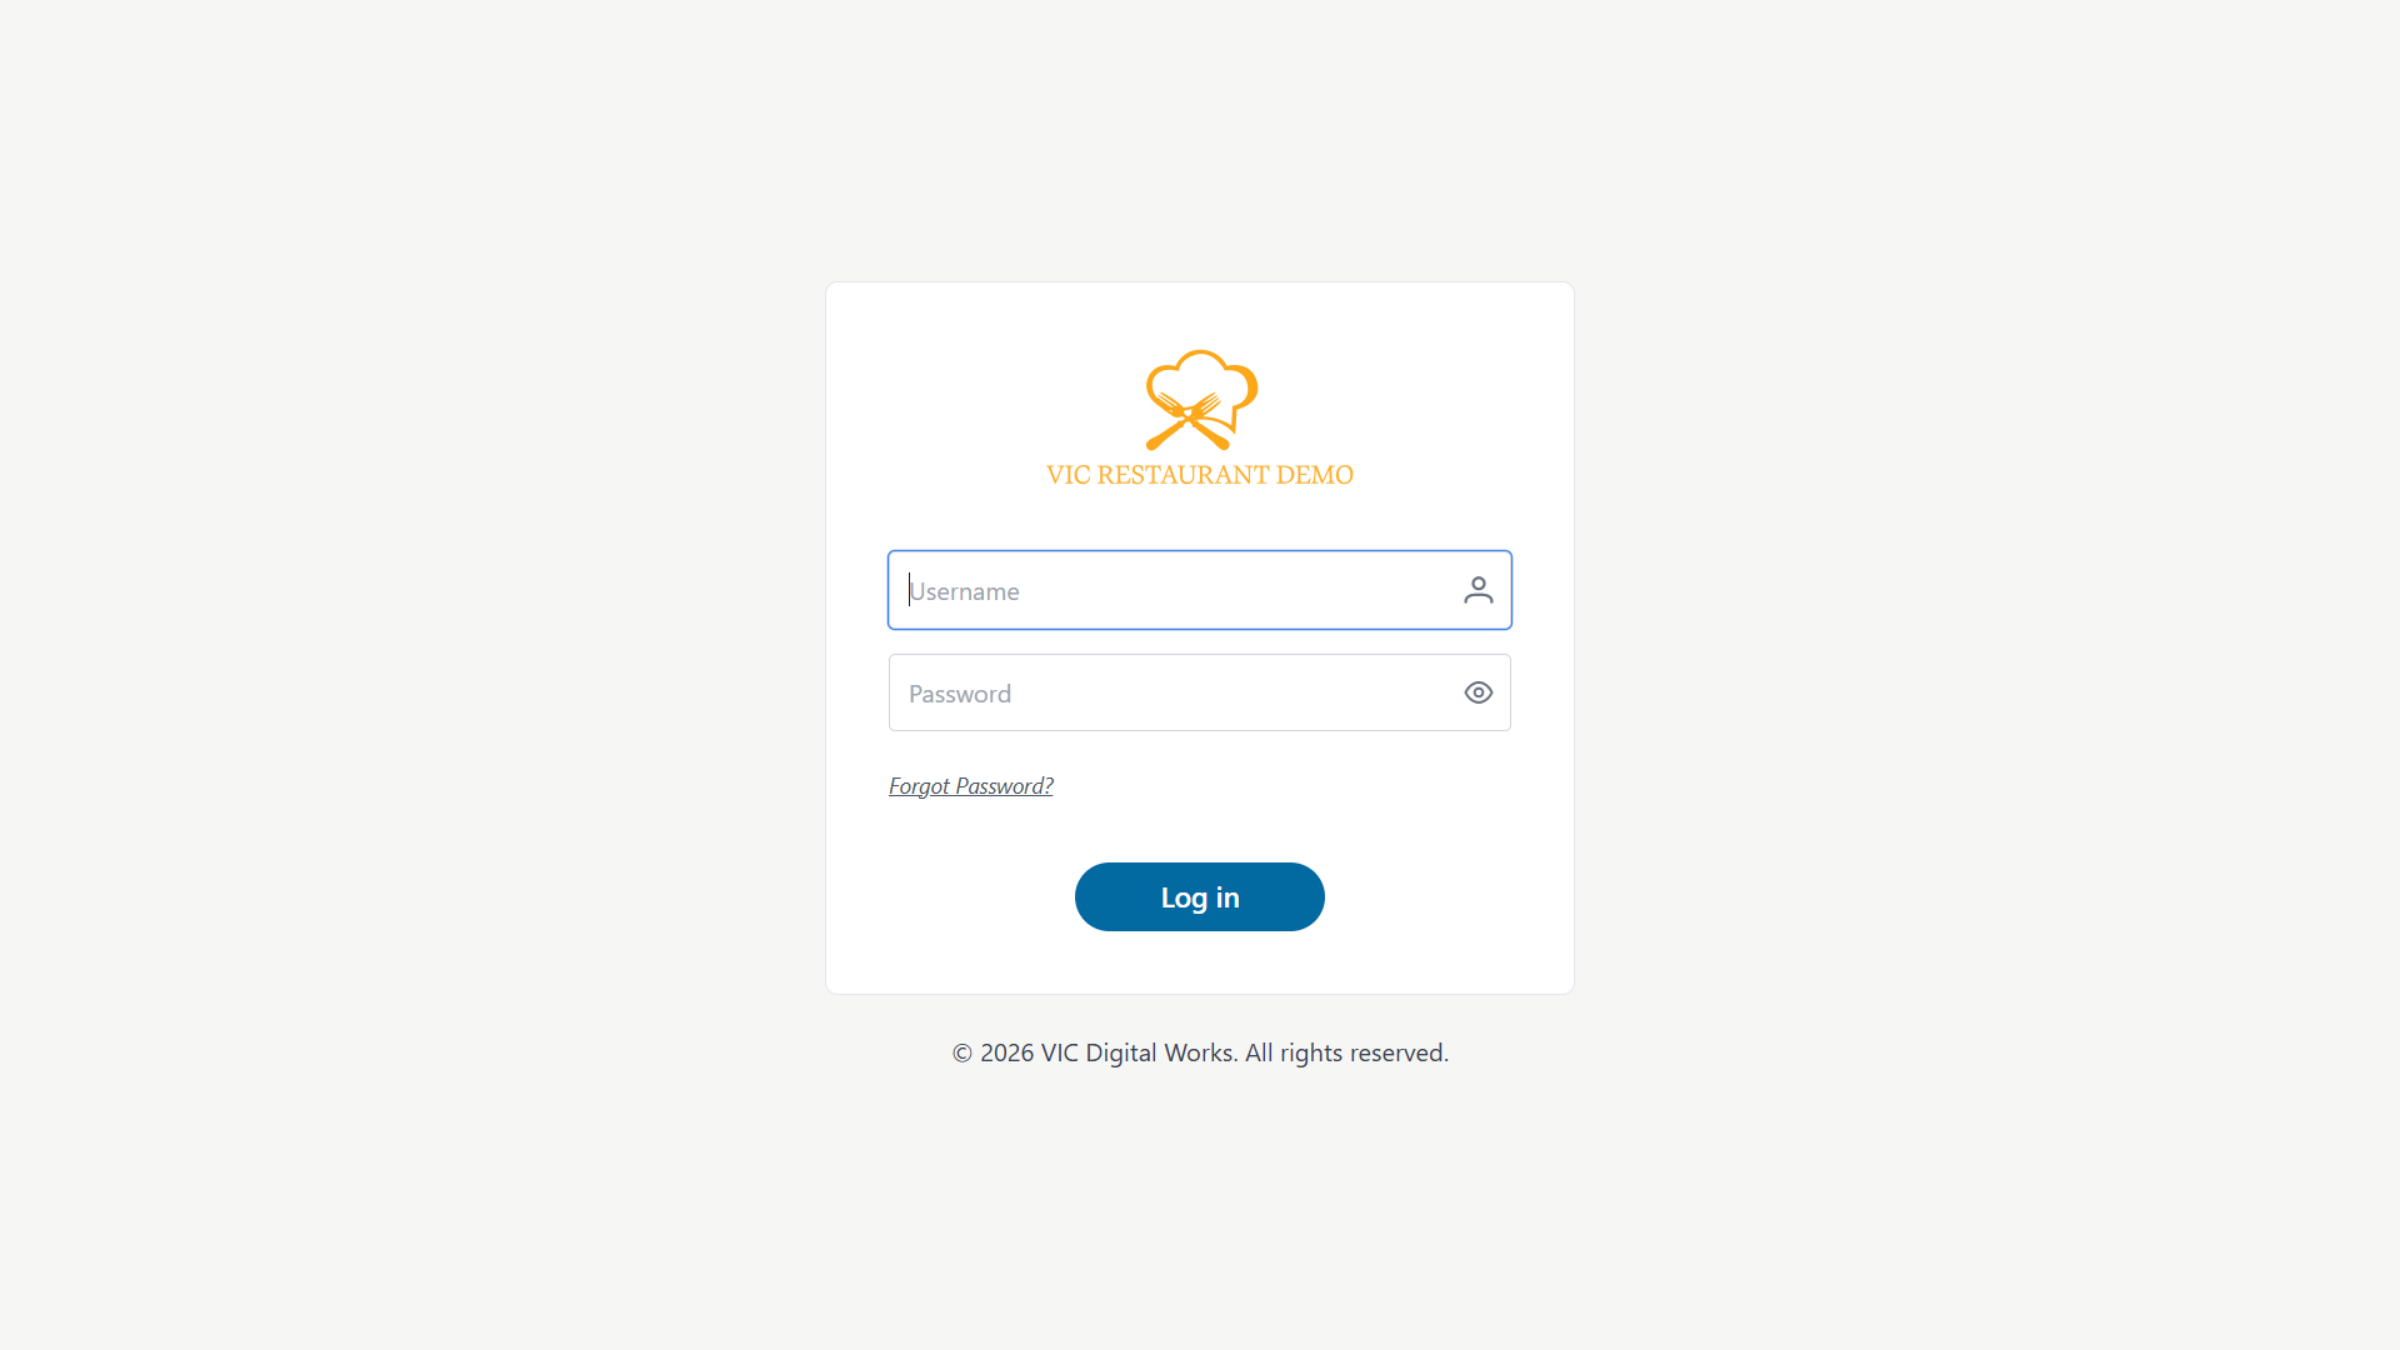
6. POS Login Page
A new browser tab will open displaying the POS login page.
7. Enter POS Username and Password
Enter your POS username and password.
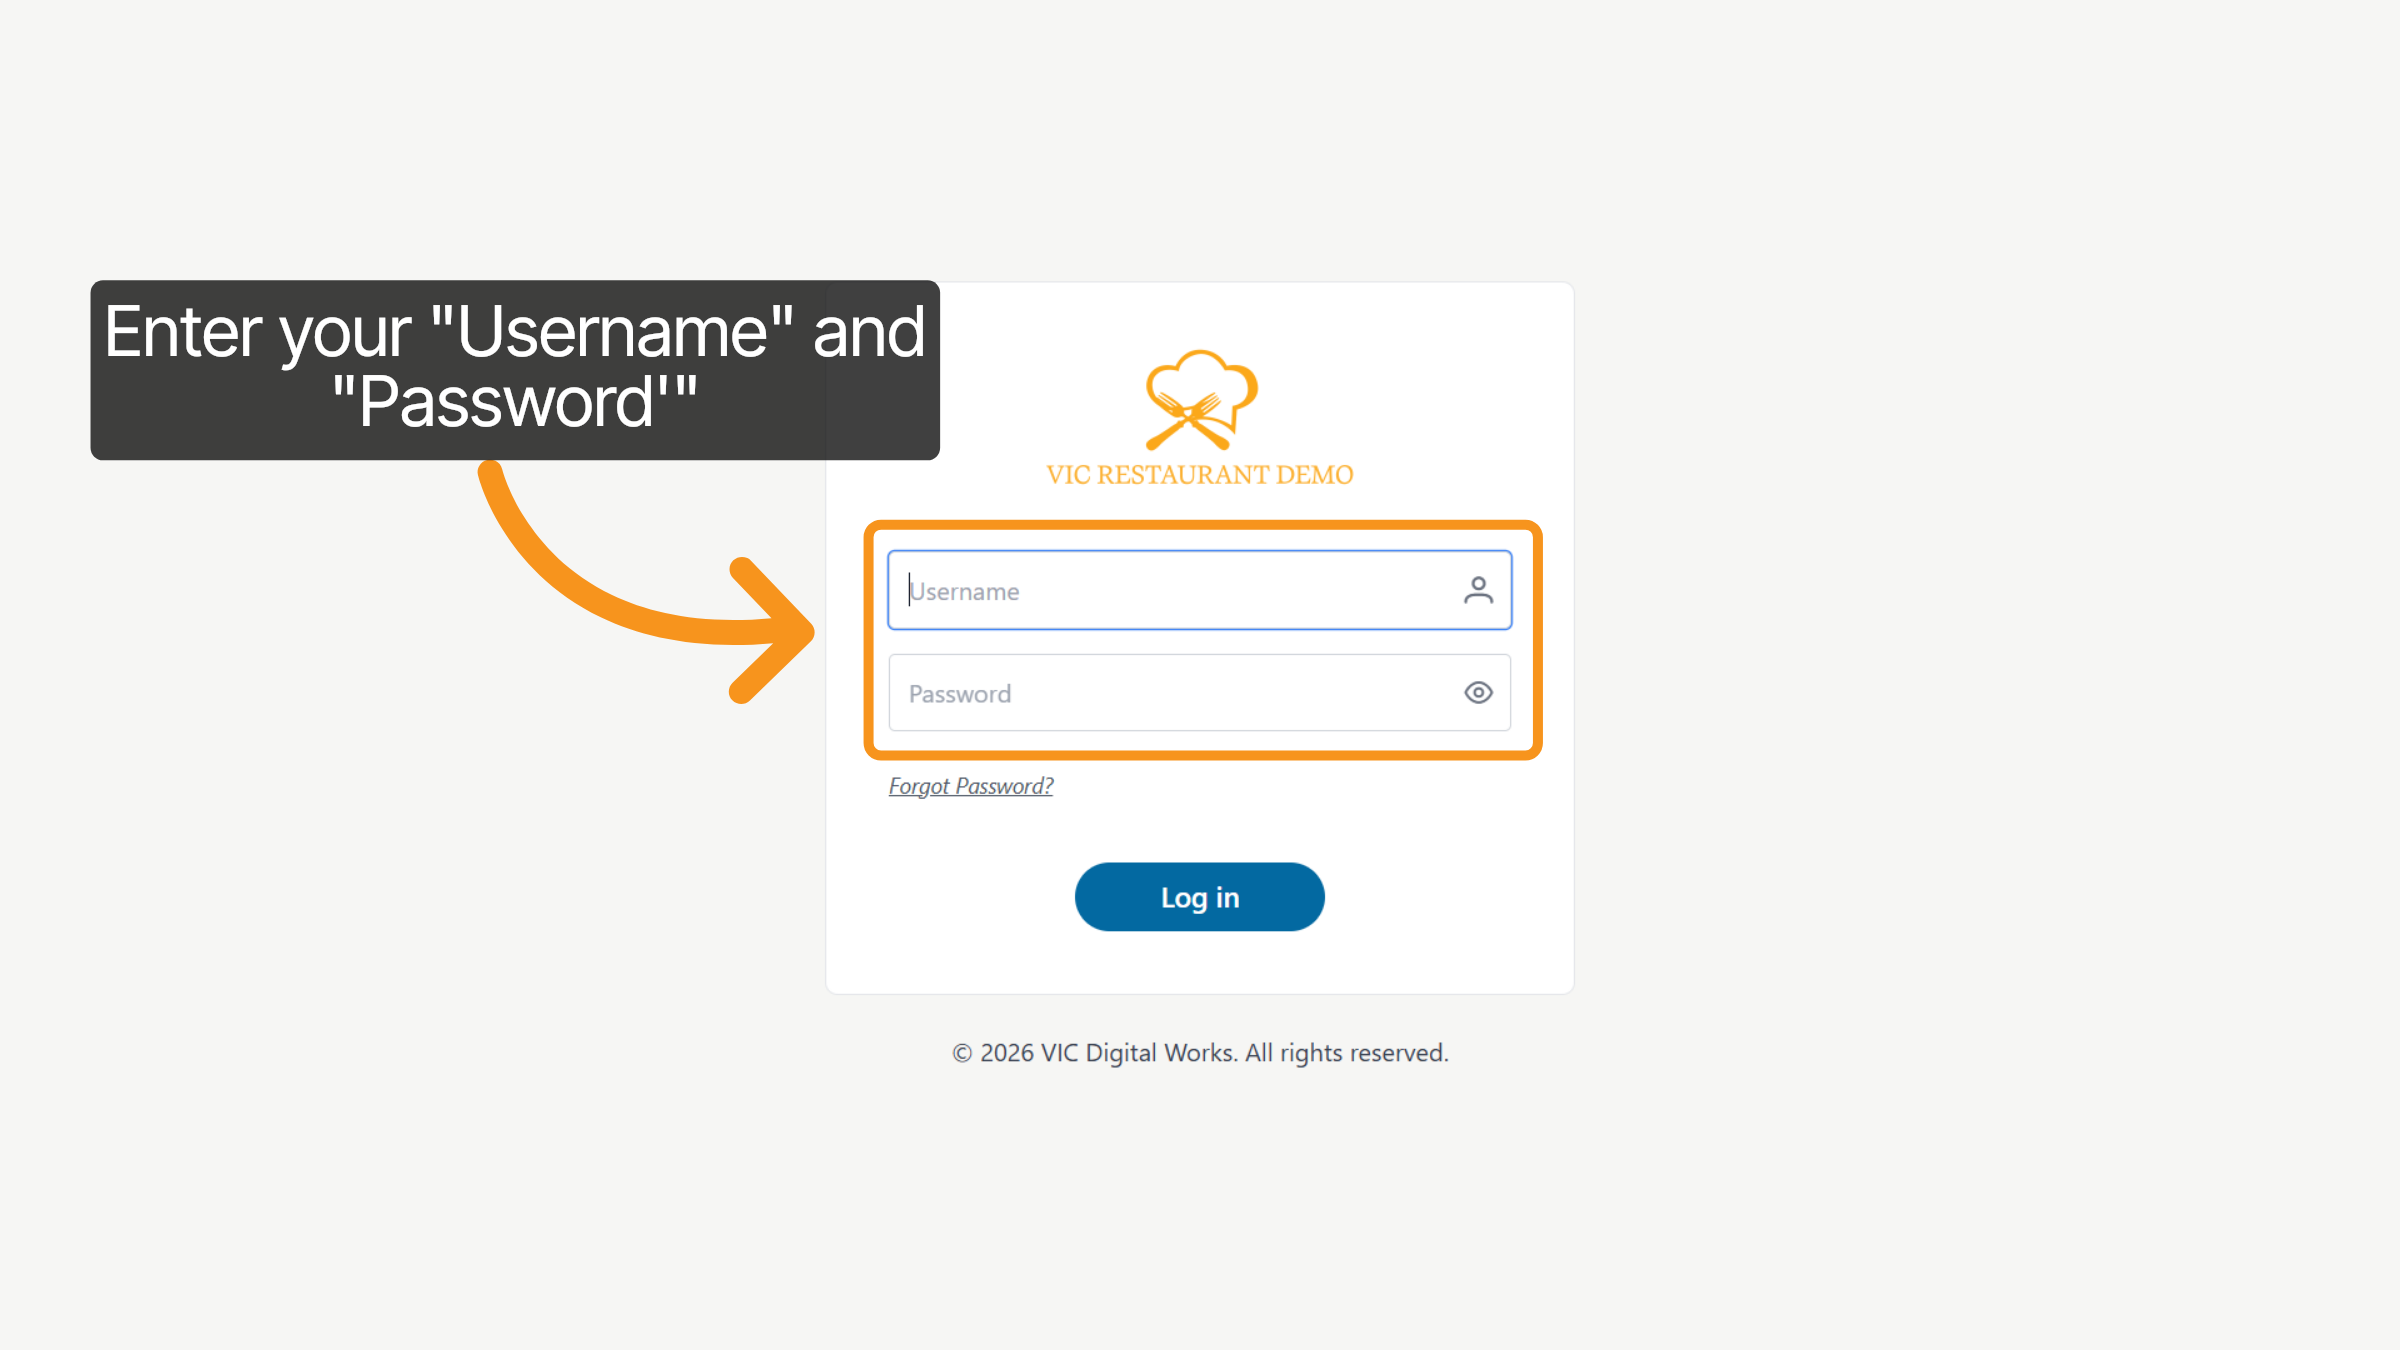
8. Click POS Log In
Click Log in to access the POS dashboard.

9. Explore the POS Menu
After logging in, you will see the main order-taking screen. The left sidebar contains the main navigation menu, including: POS, Kitchen Orders, Process Orders, Order History, Staff, Schedule, Self Serve, Settings, and Log Out. We will review each section throughout this video.
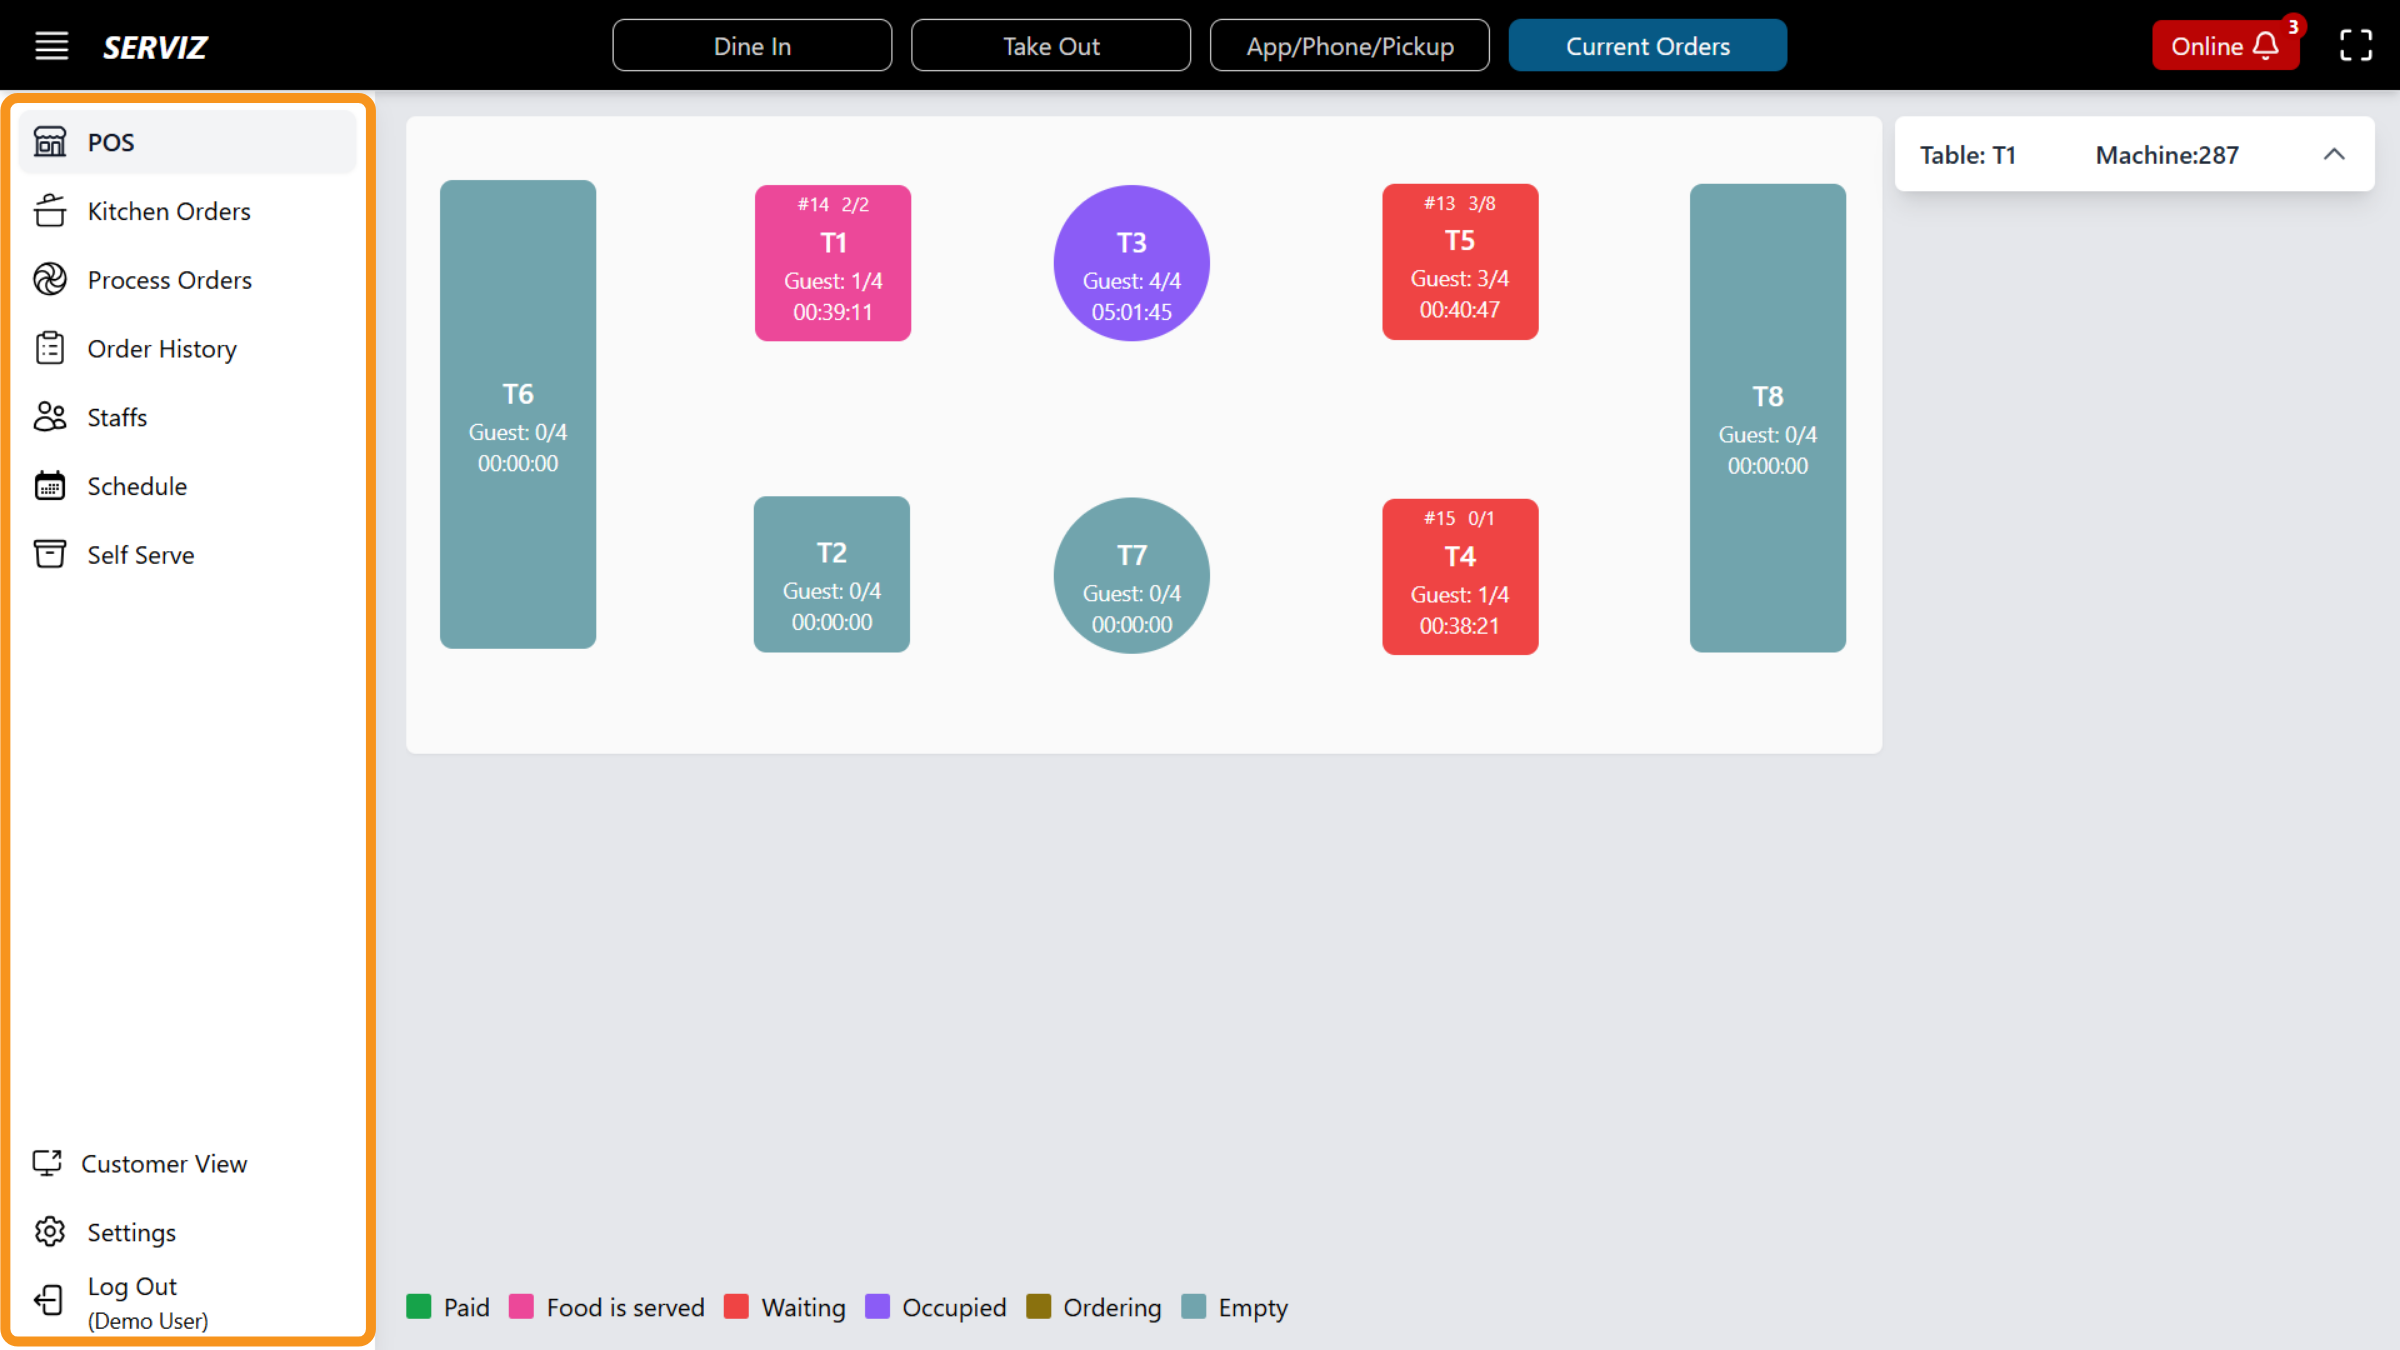
10. POS Order-Taking Screen
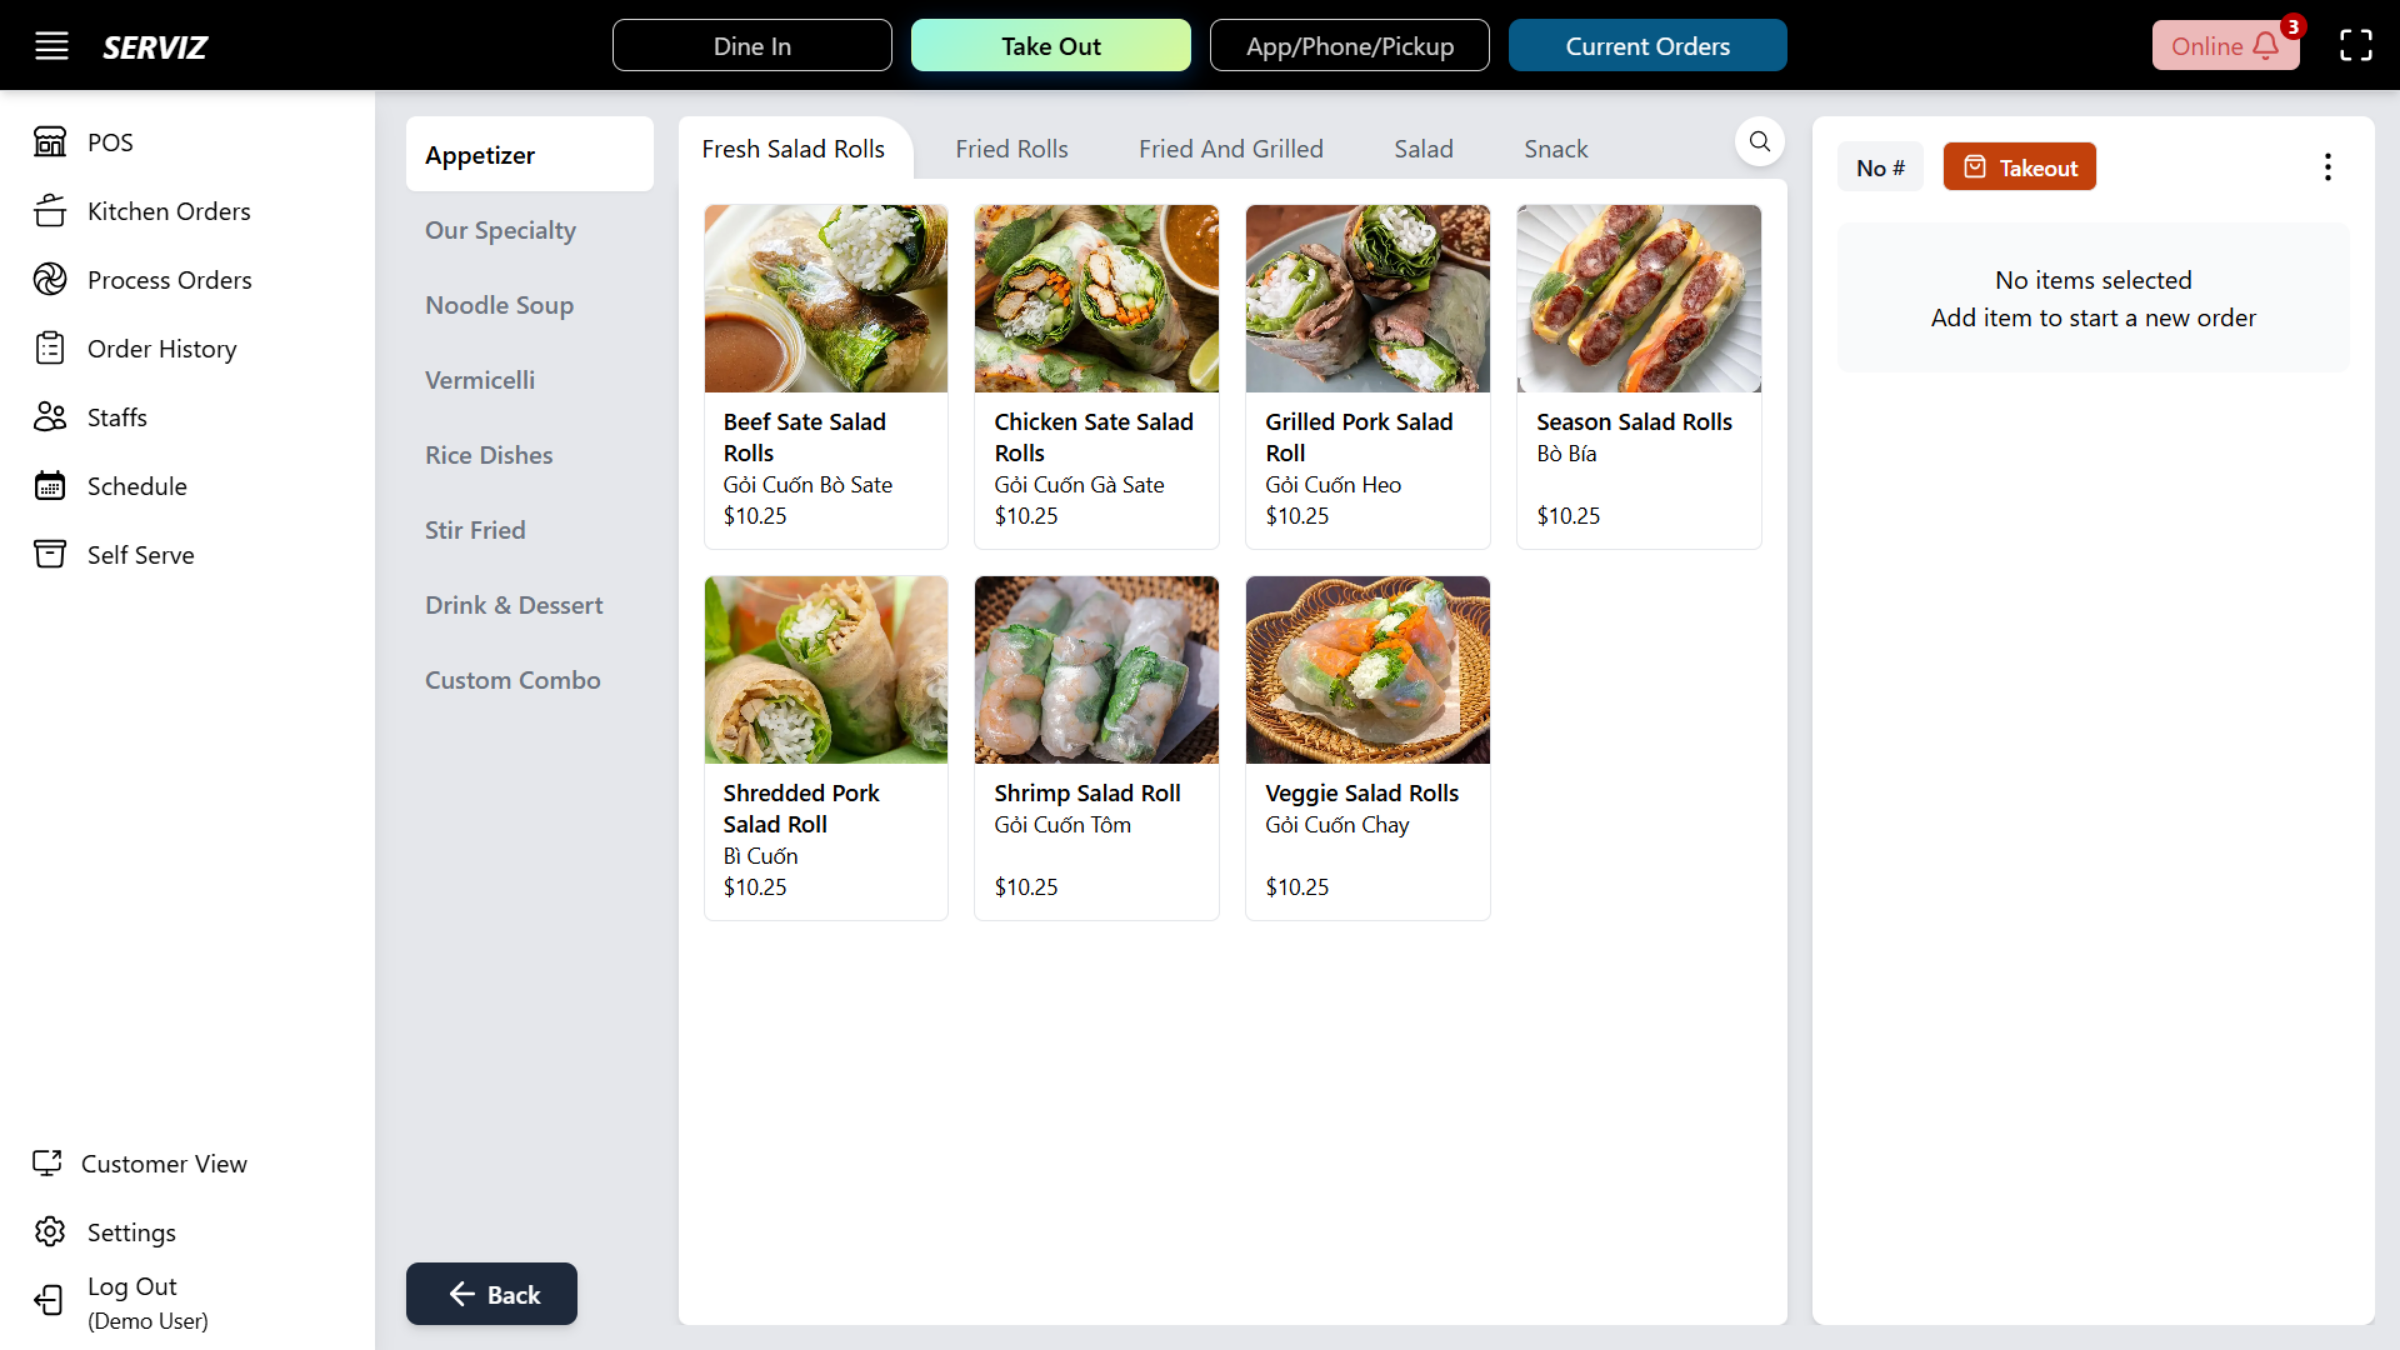
Let's begin with the first option: POS. The POS section is the primary order-taking screen. By default, Dine-In is selected, but you can easily switch to Takeout, Pickup, or Delivery as needed.
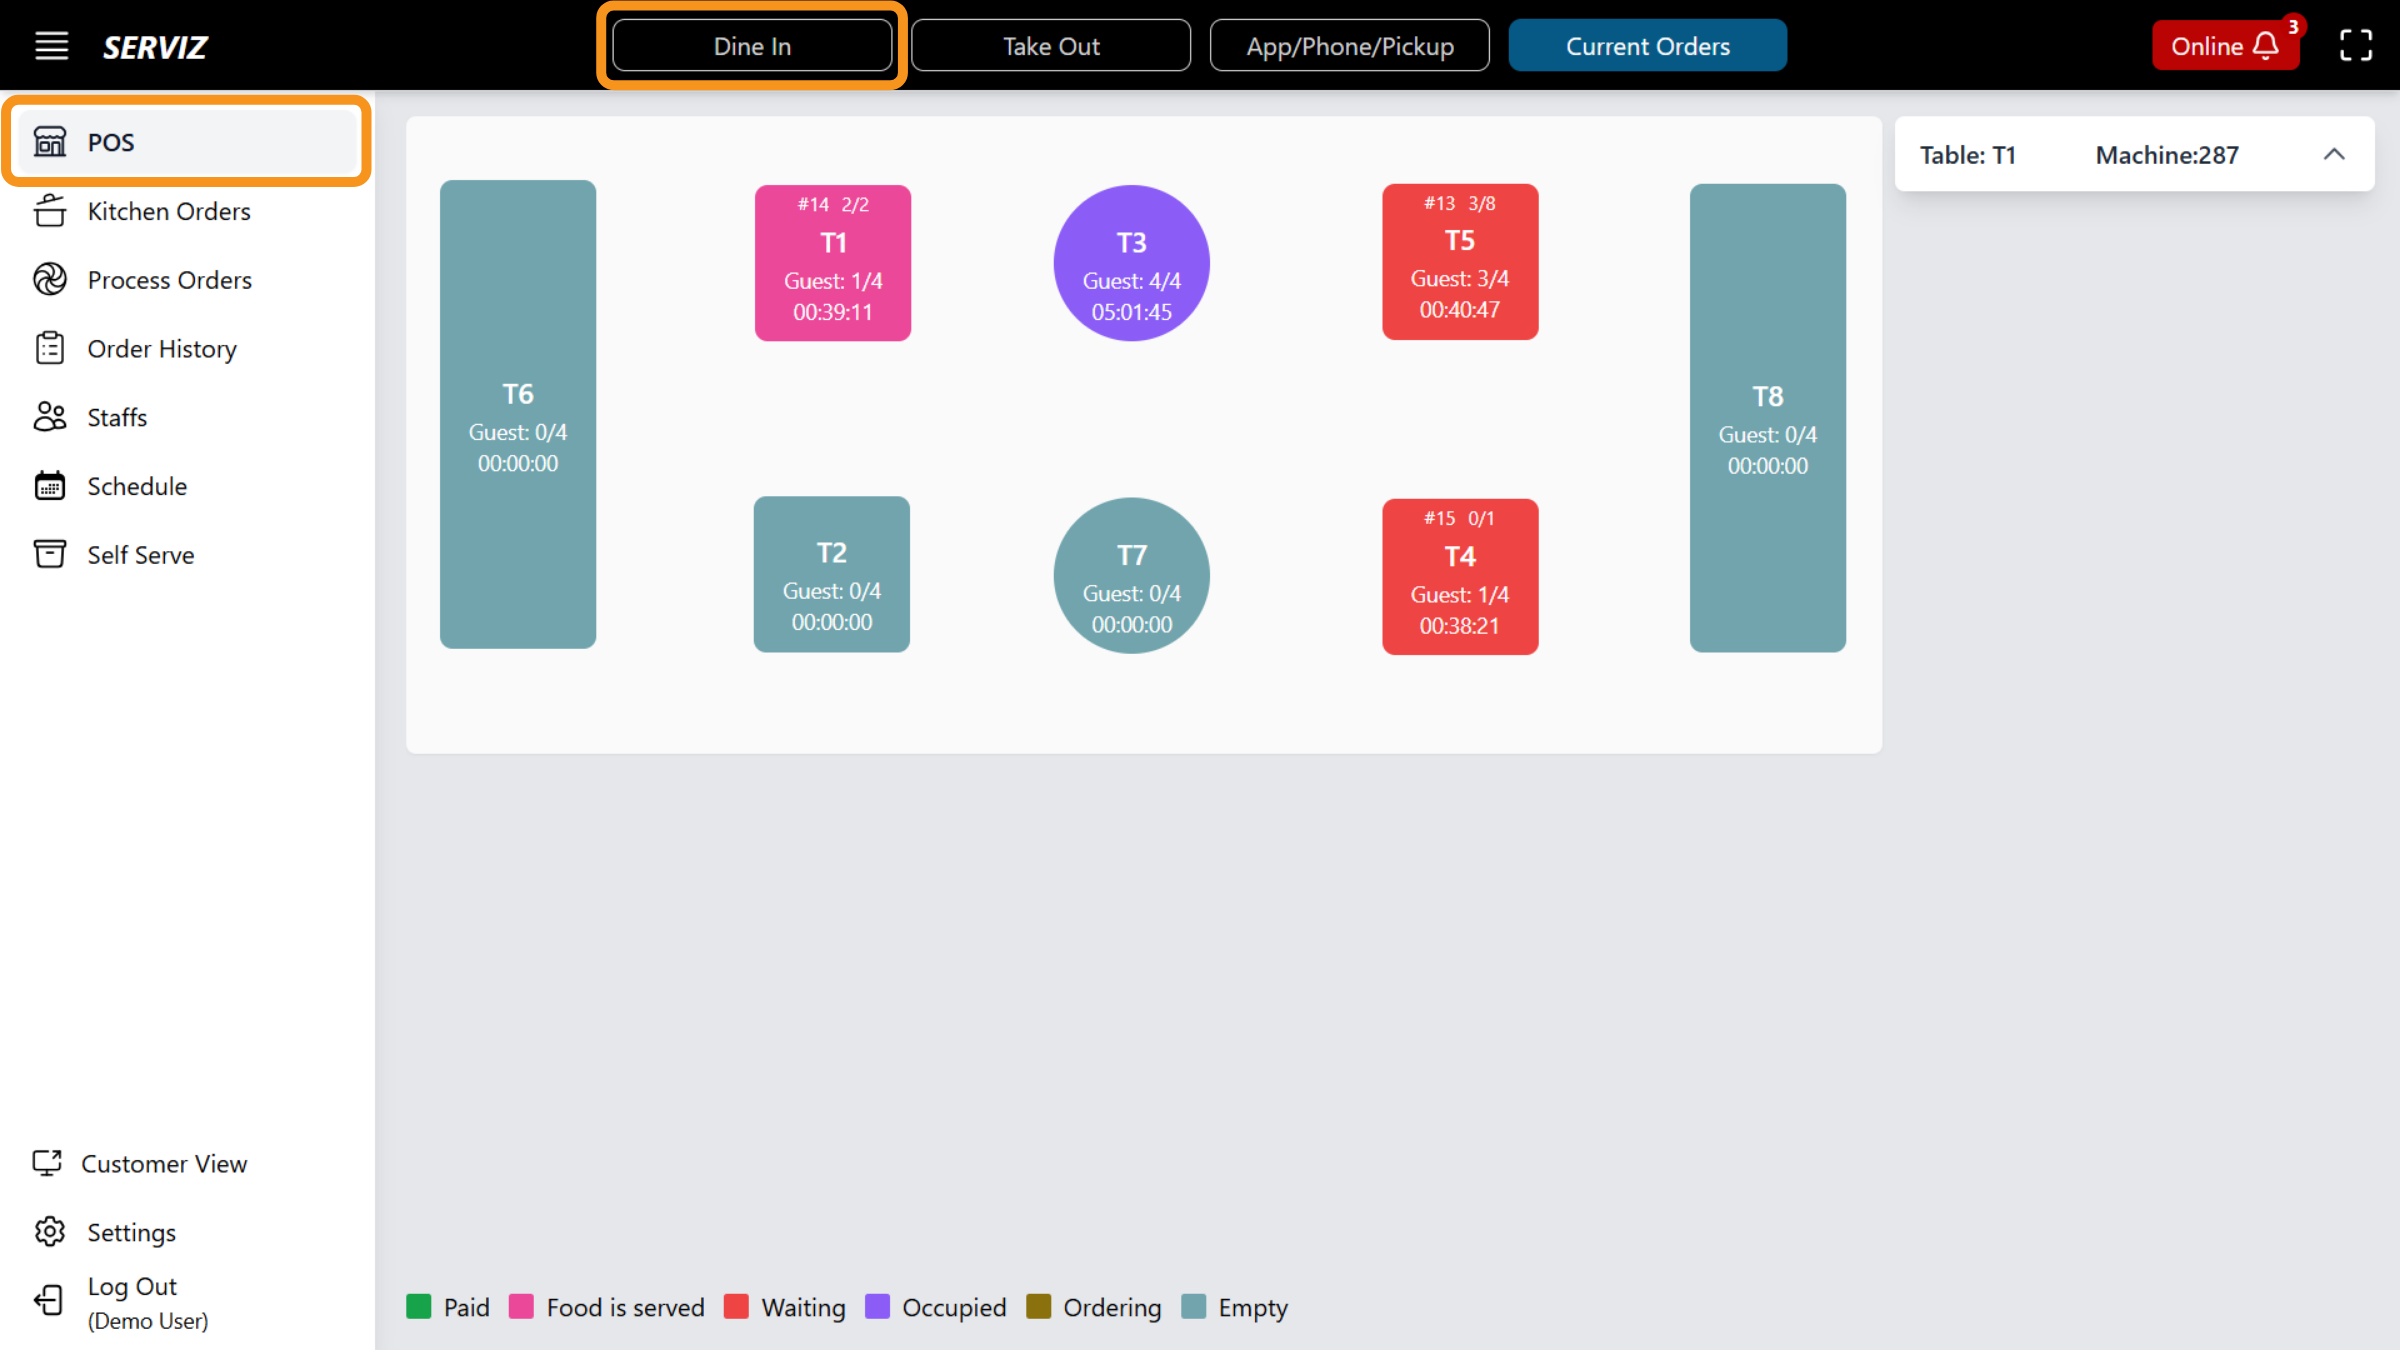
11. Floor Layout Overview
The floor layout is displayed at the center of the screen. Each box represents a table. It shows: The table number, guest count, duration of the table has been active. At the bottom, you can find the color reference for the table status.
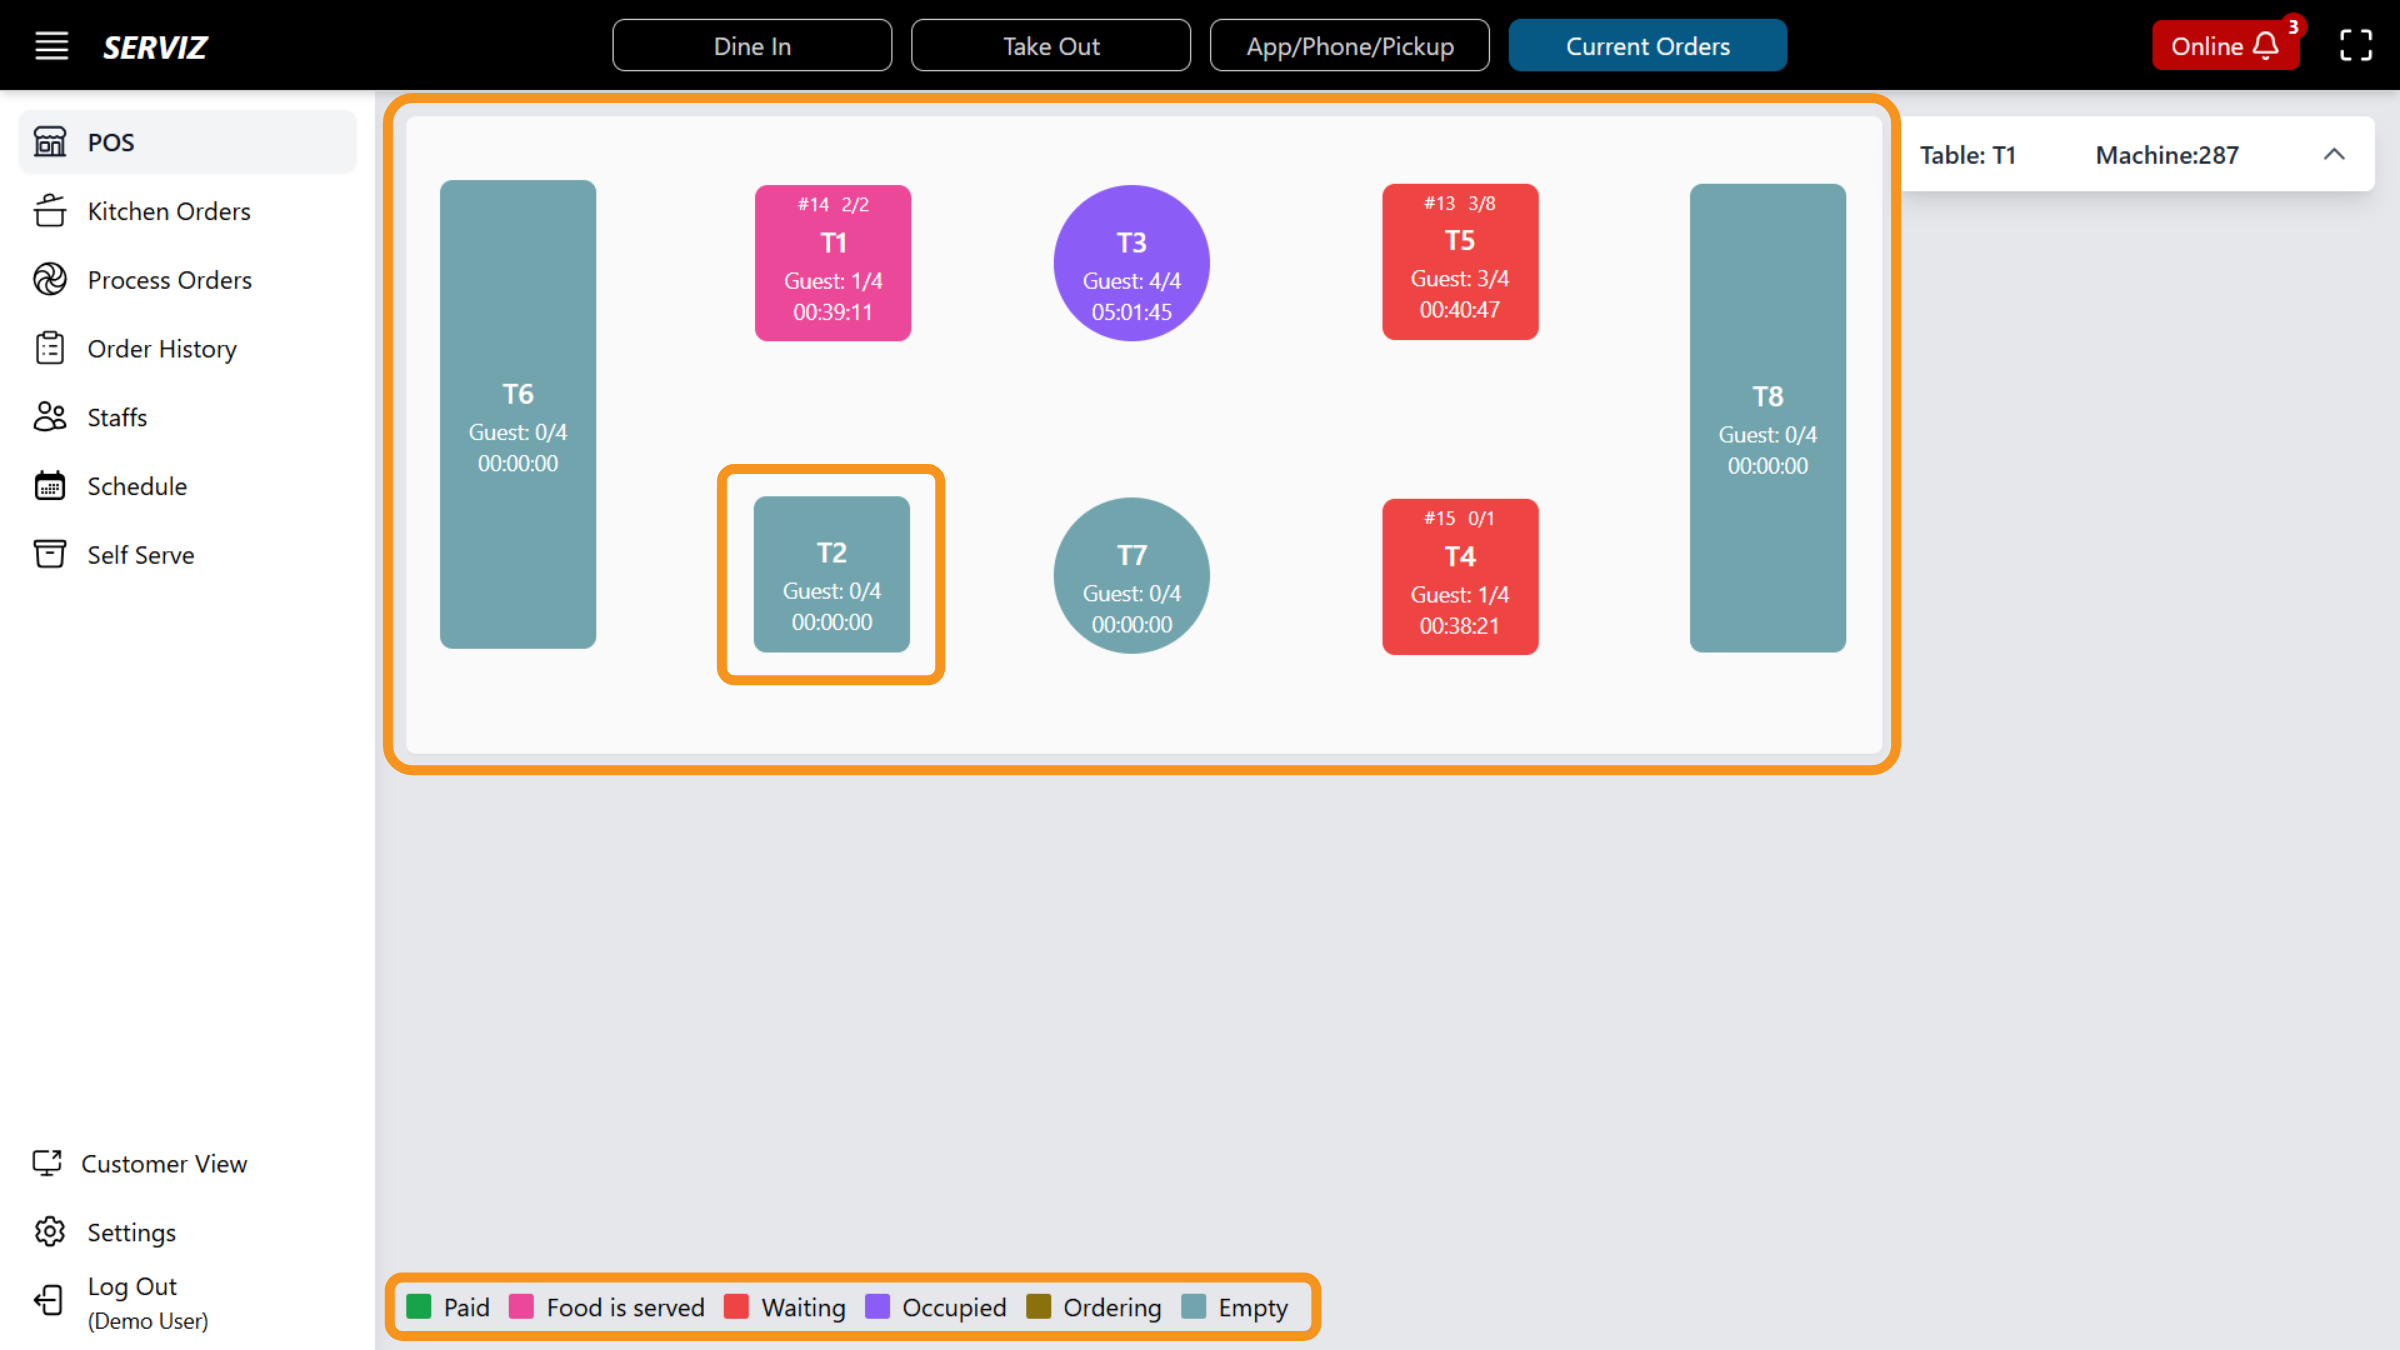
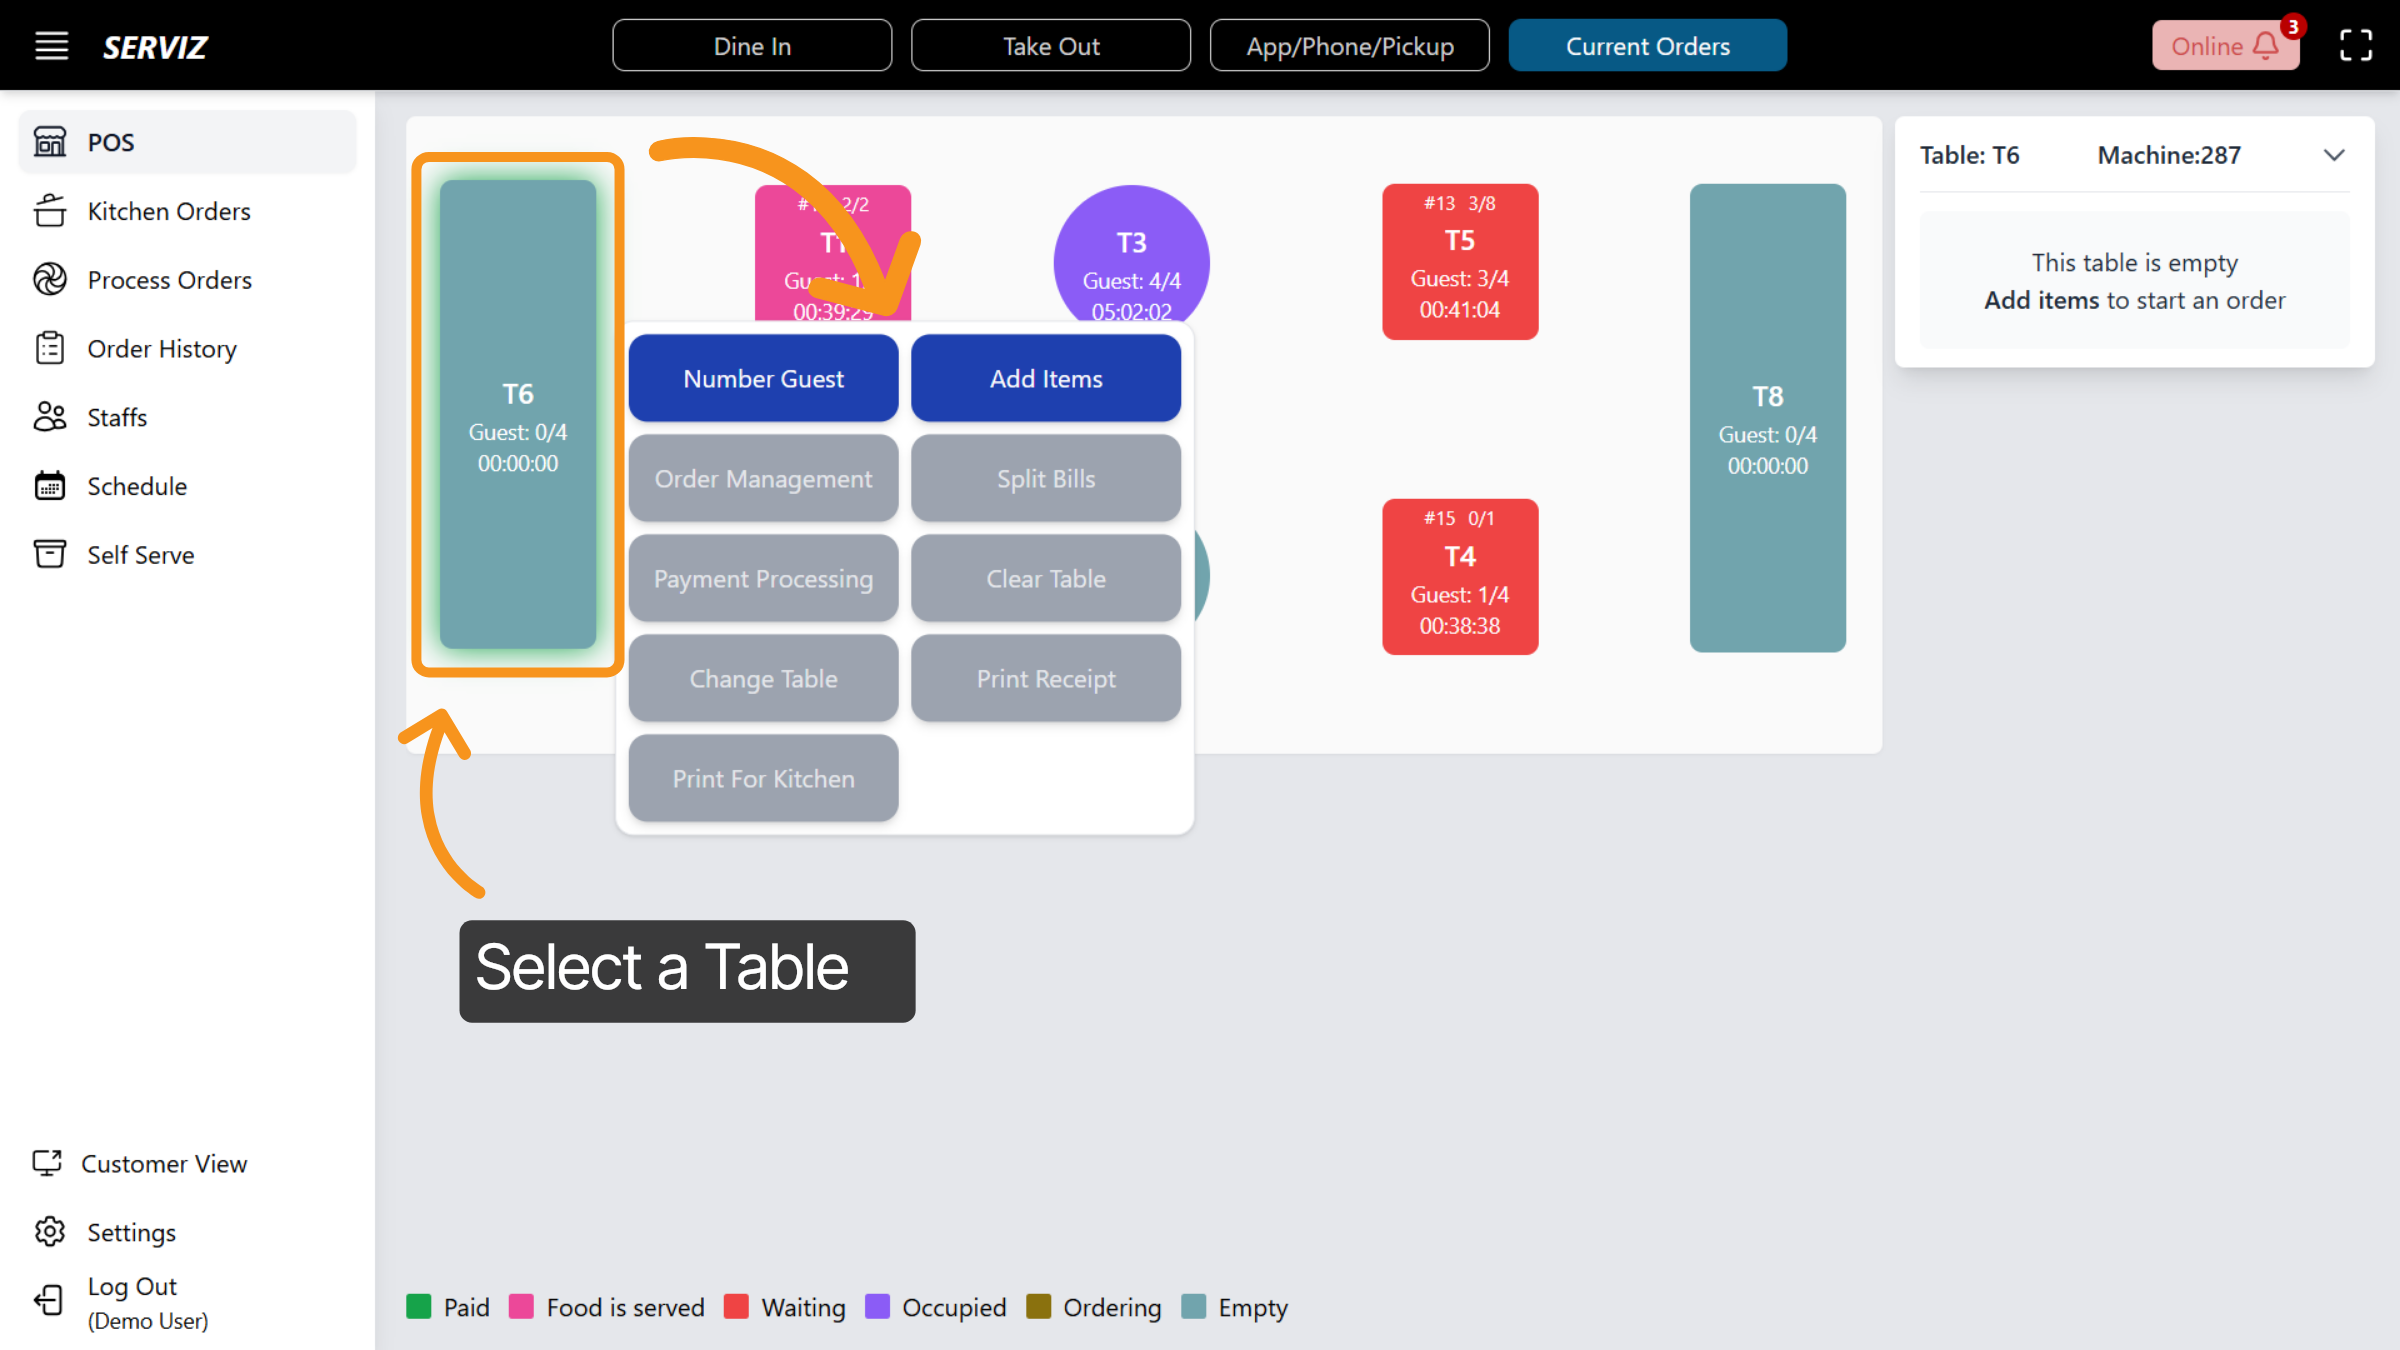
12. Open a Table
When you select a table, options will appear for you to add the number of guests, items, manage the order, split or process payment, print the receipt, change table or clear the table, and more.
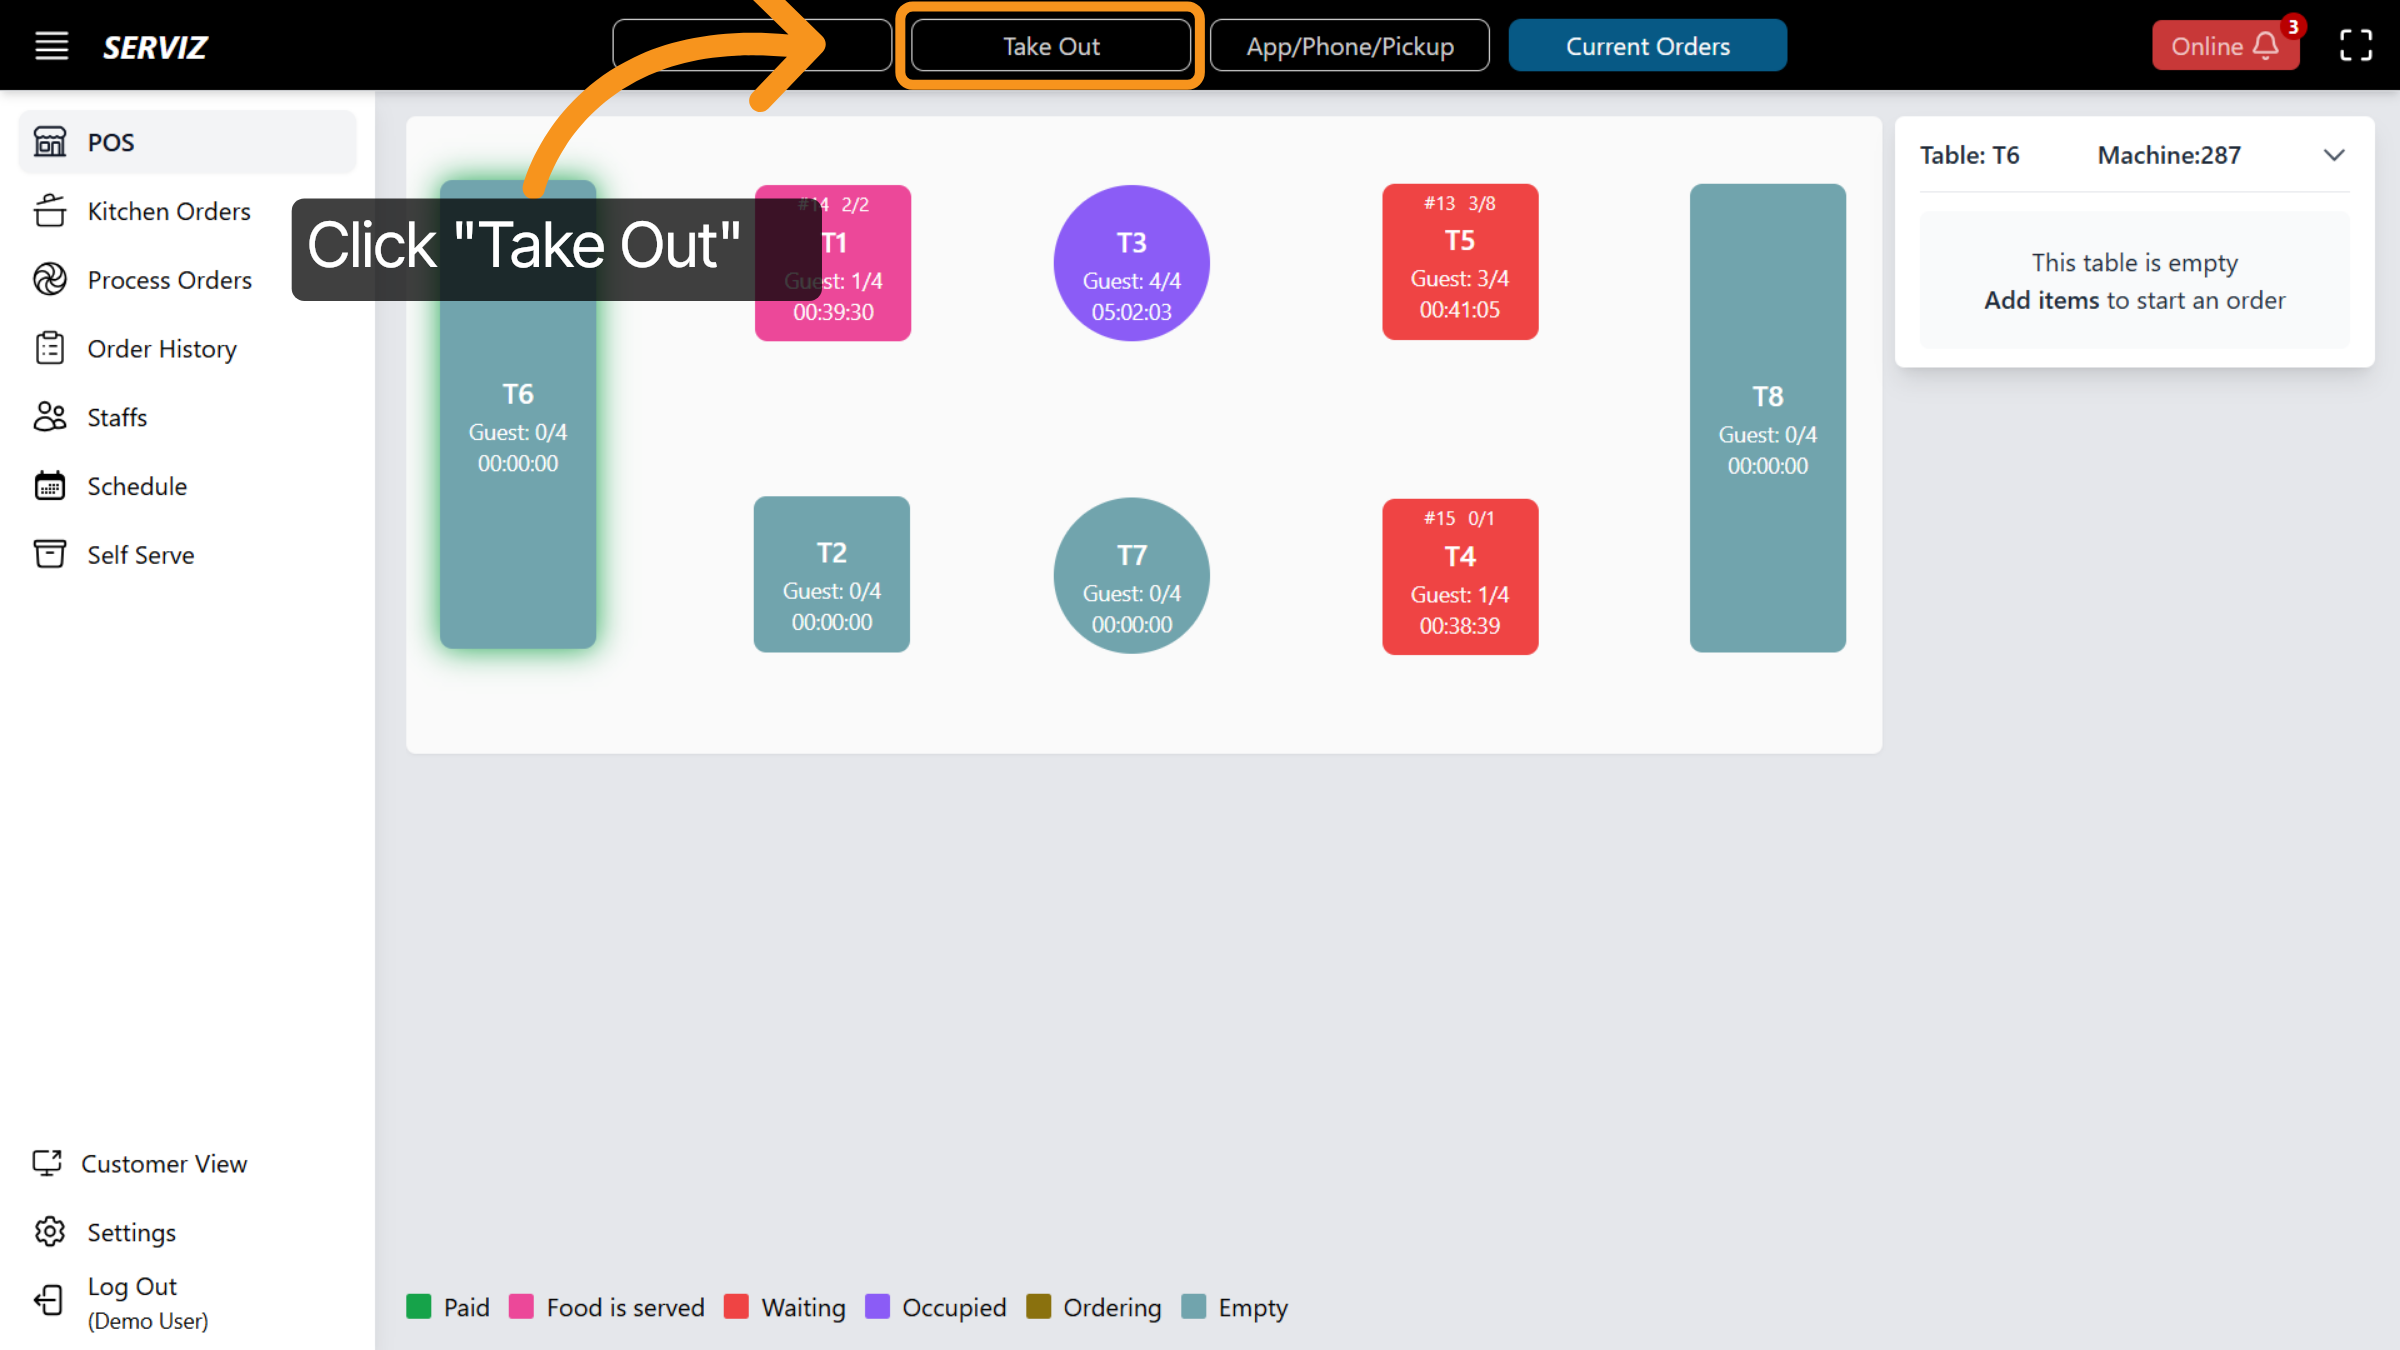
13. Select Takeout Orders
Click Takeout at the top of the screen to manage takeout orders.
14. Takeout Order Overview
Here, you can add menu items, collect customer details, and complete payments. A detailed step-by-step guide for takeout orders will be covered in the next video.
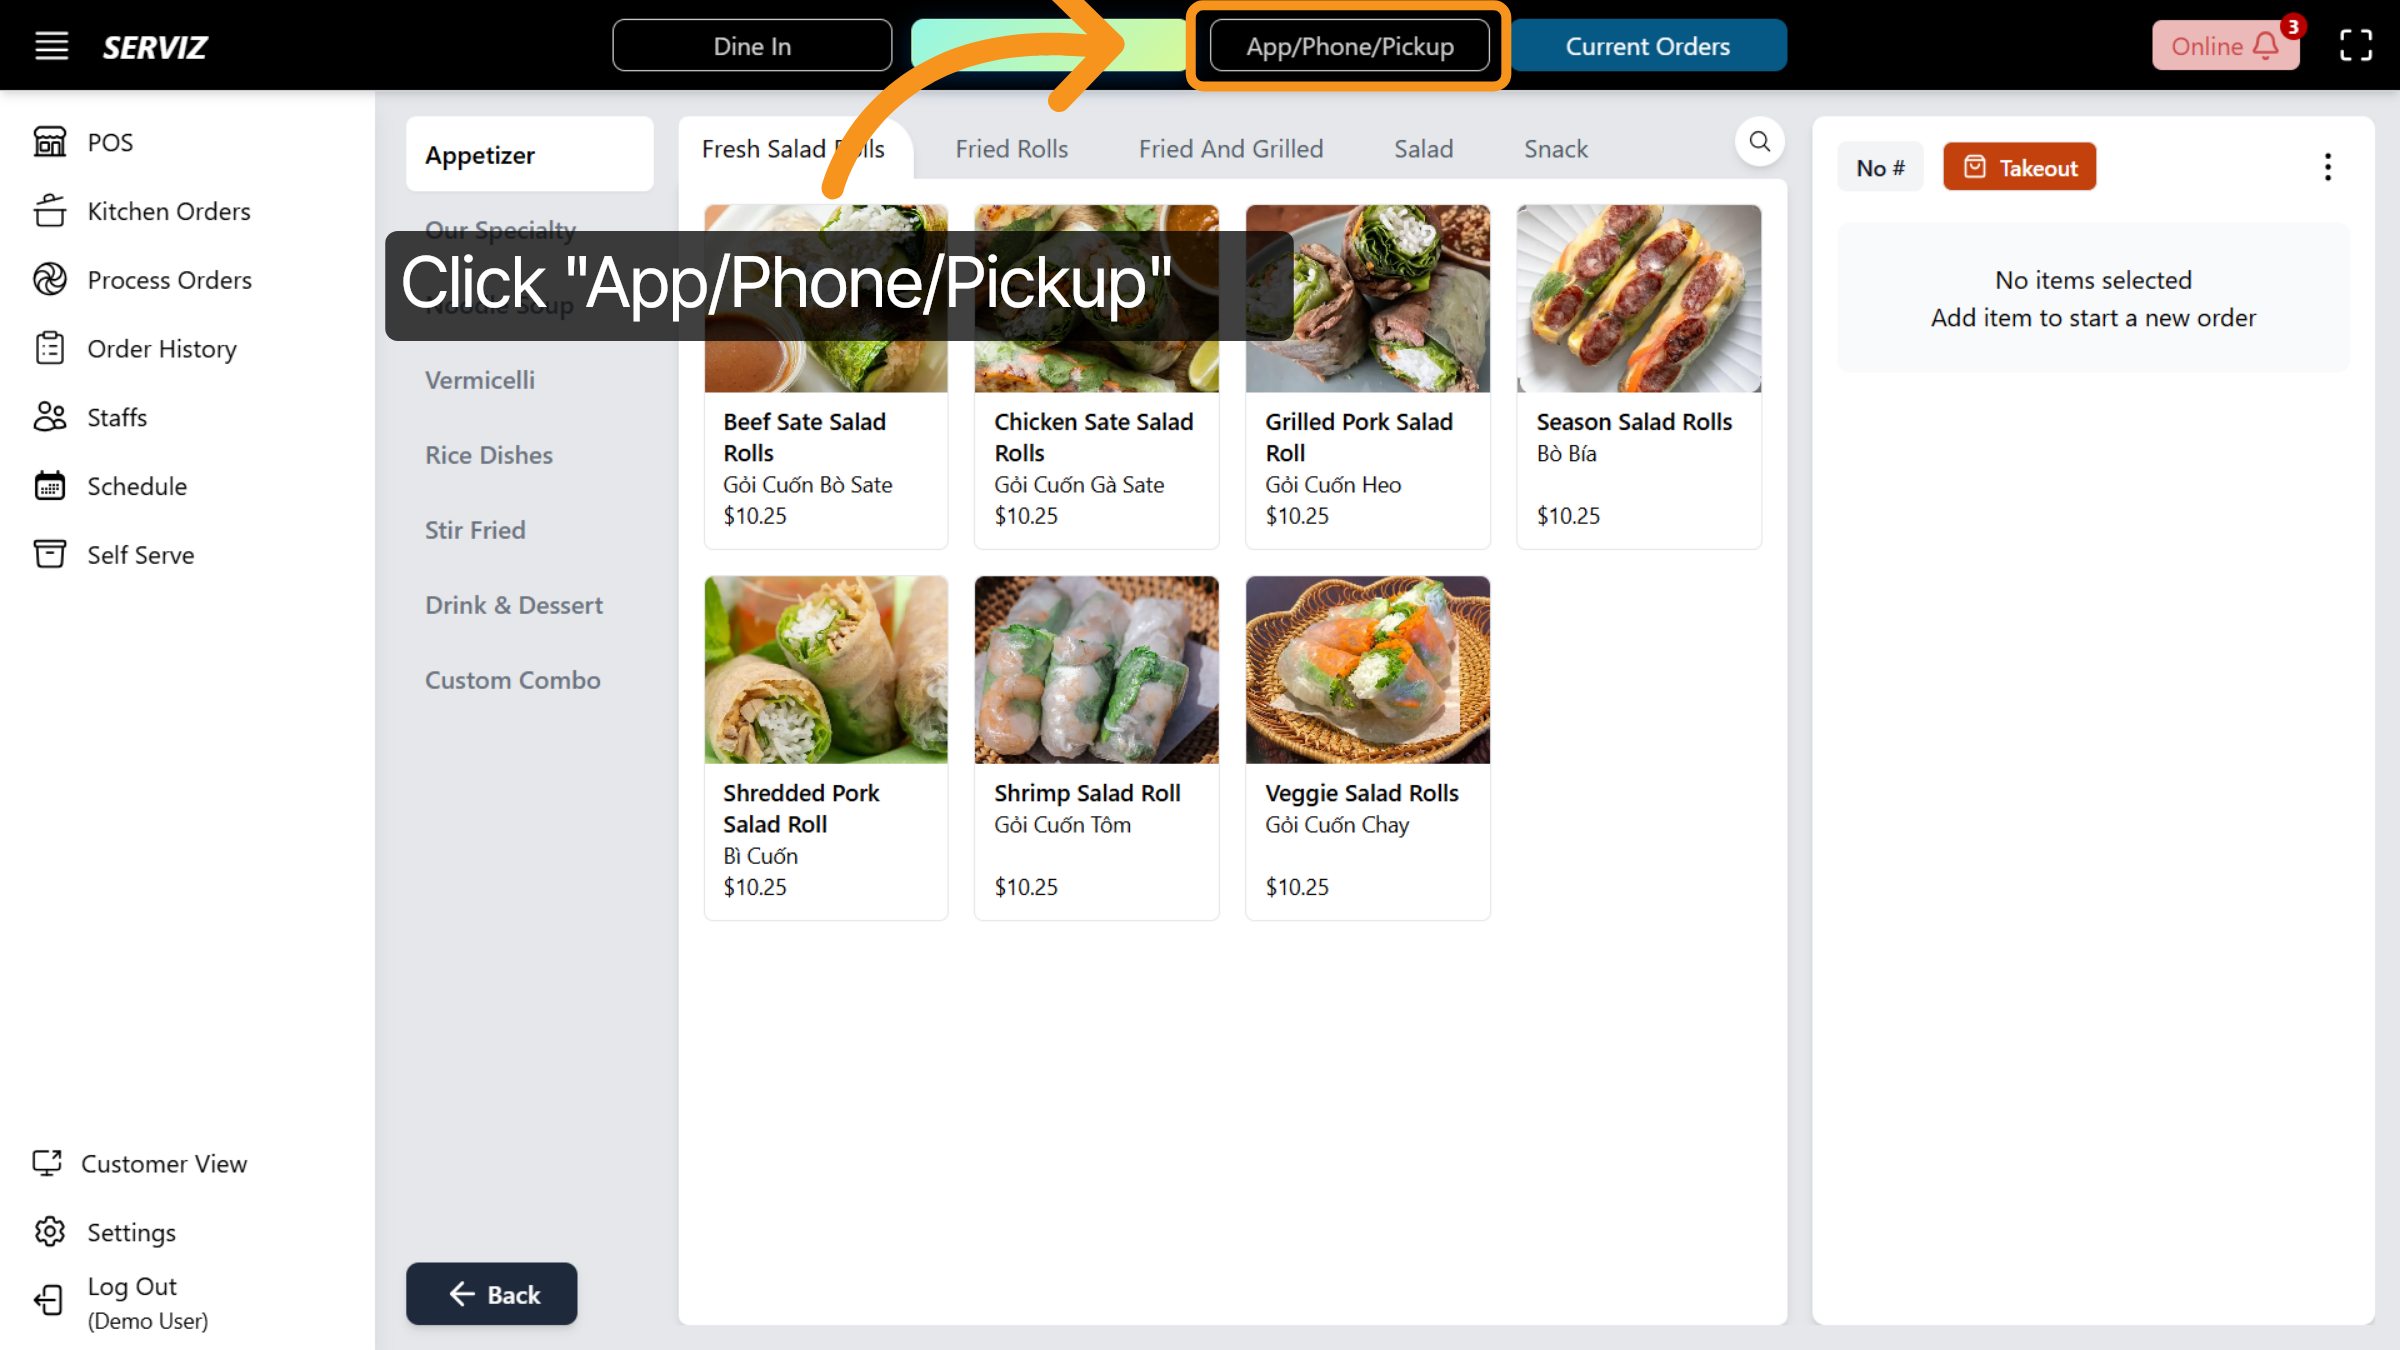
15. Select App/Phone/Pickup
Click on App/Phone/Pickup to specify the order source and fulfillment method.
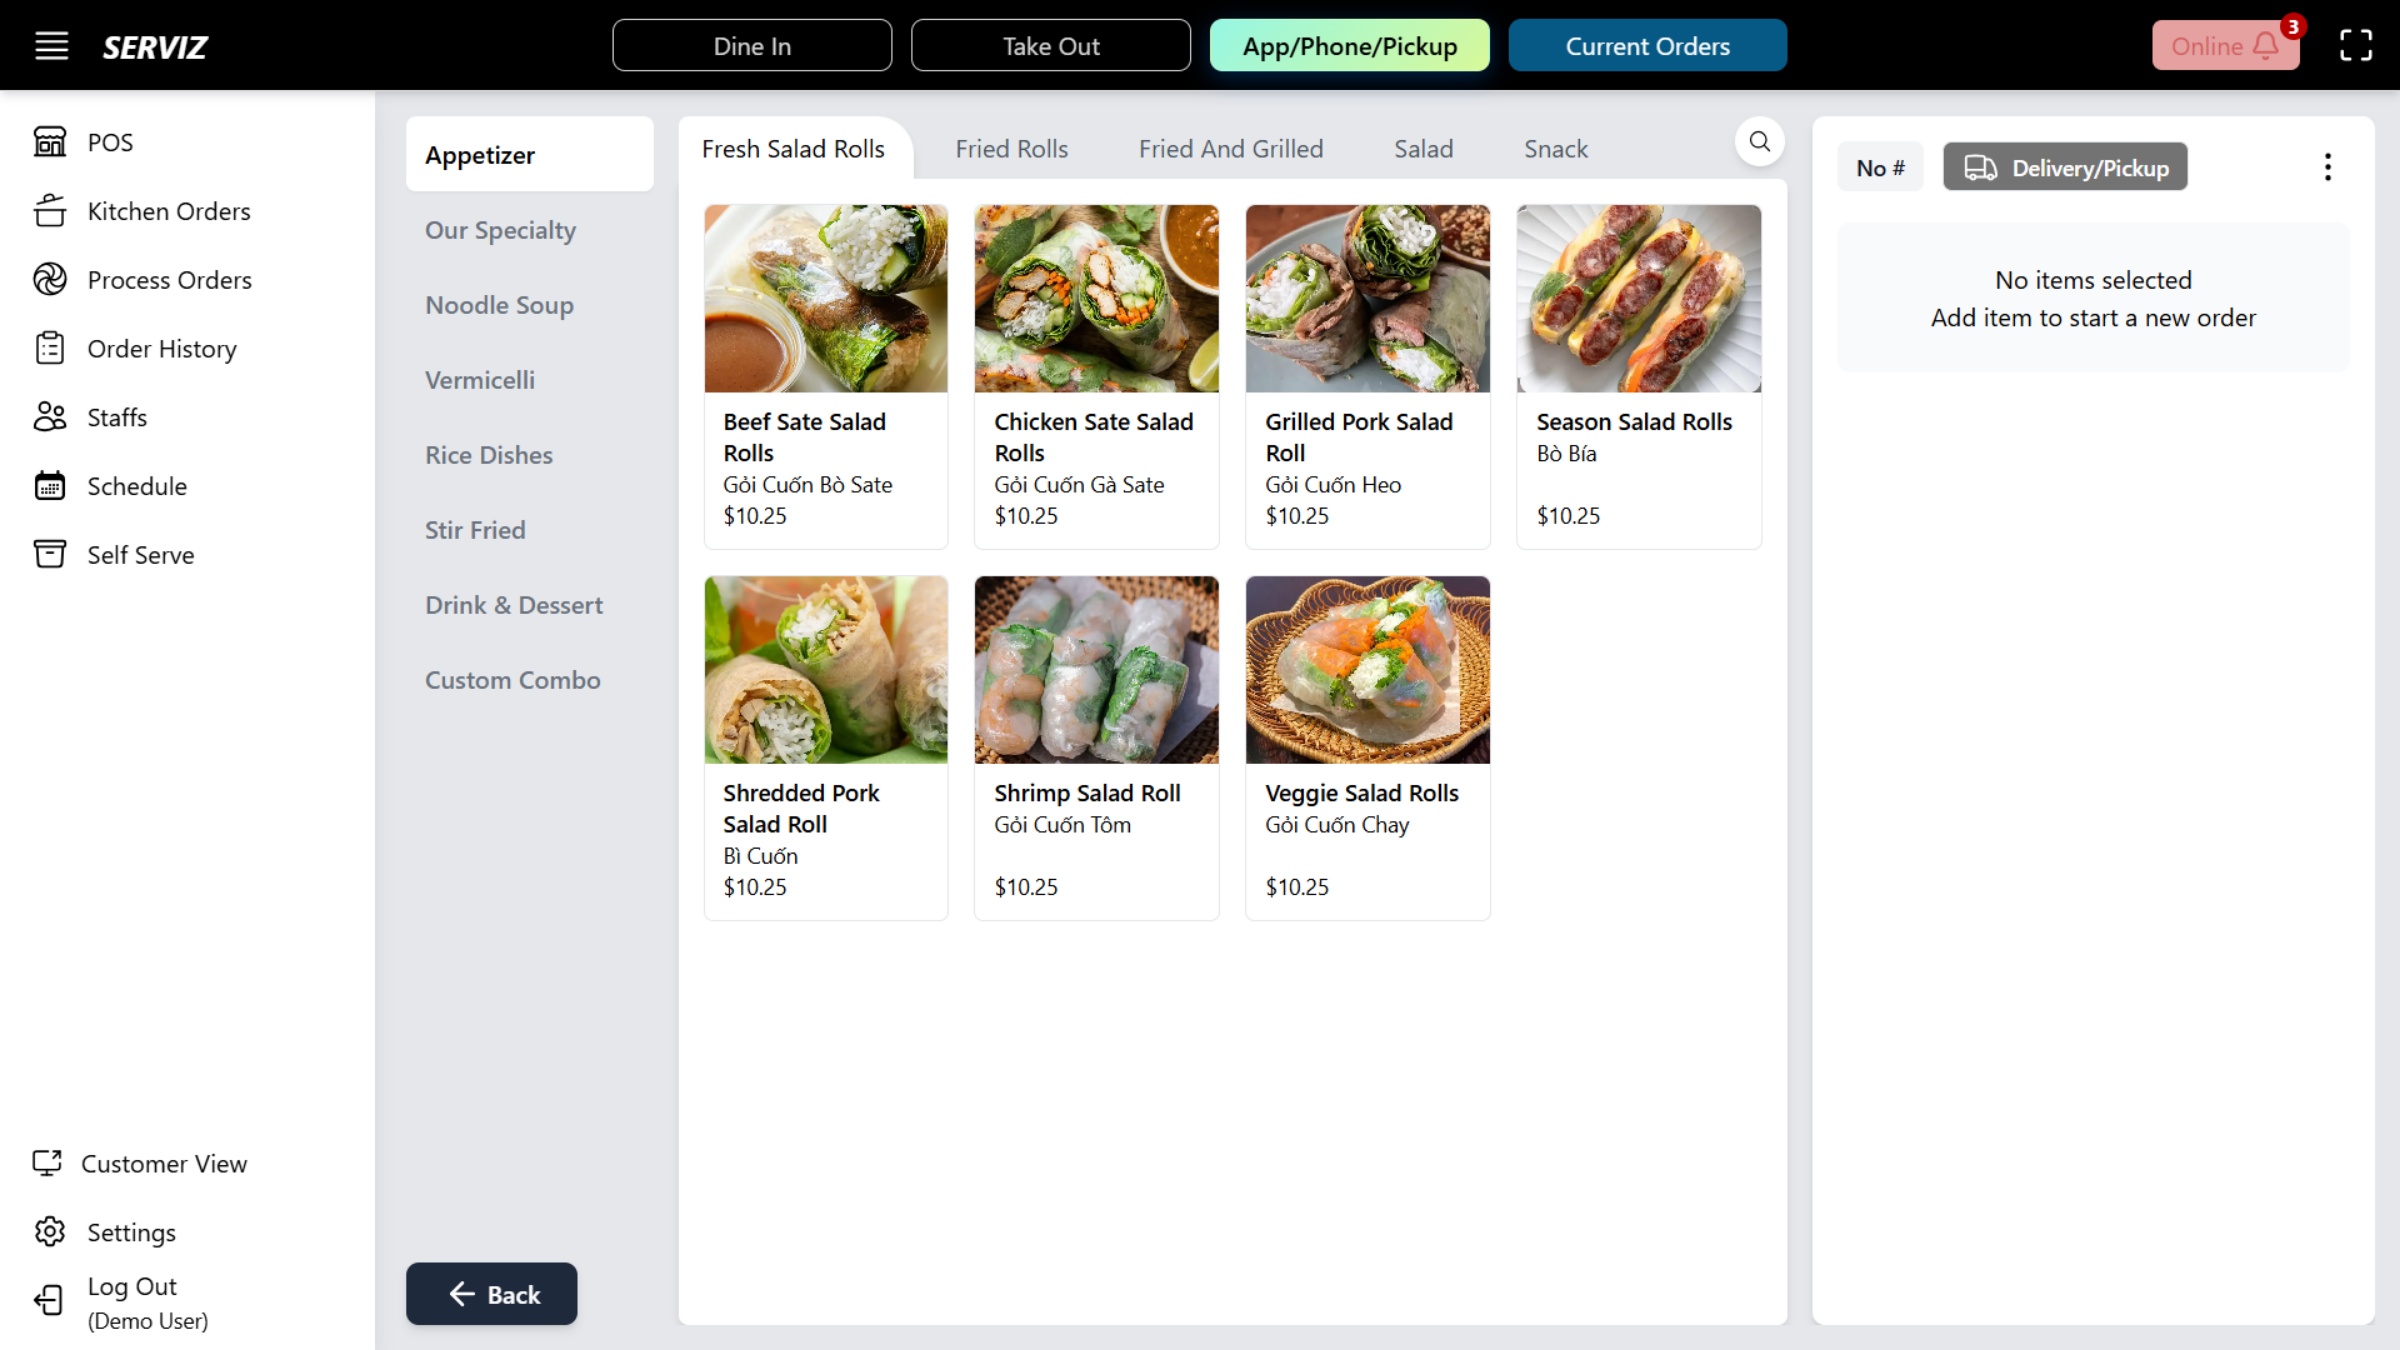
16. Pickup/ Delivery Tab
The Pickup and Delivery tabs provide access to the full menu and use the same ordering features as Takeout tabs.
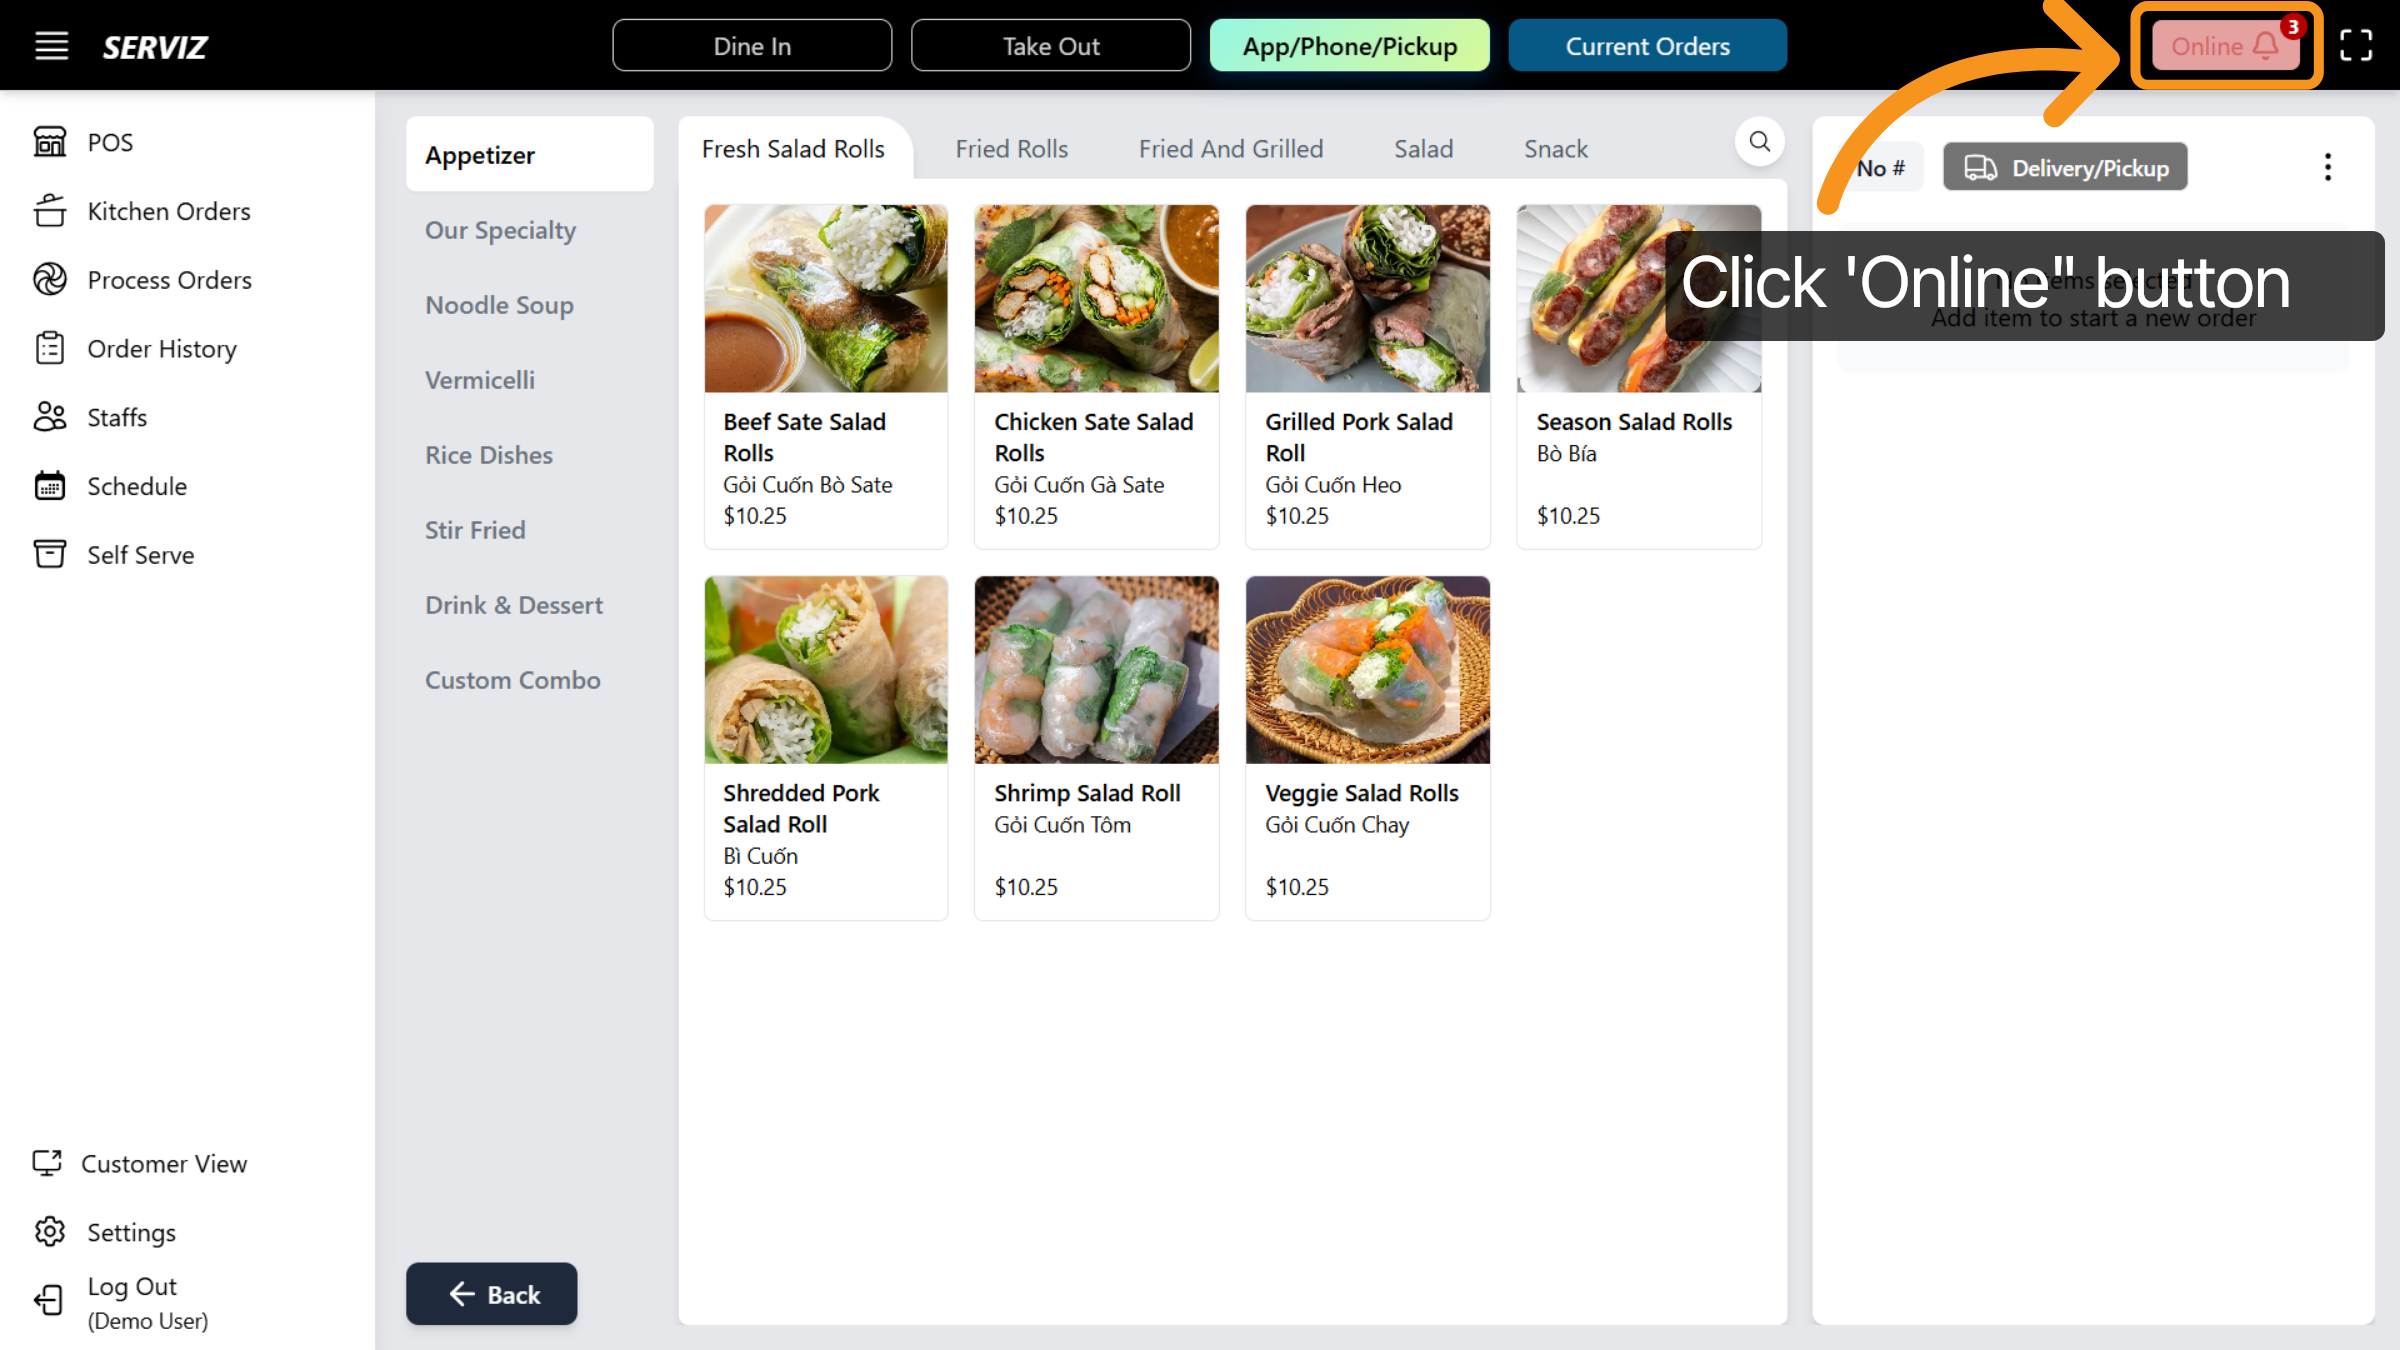
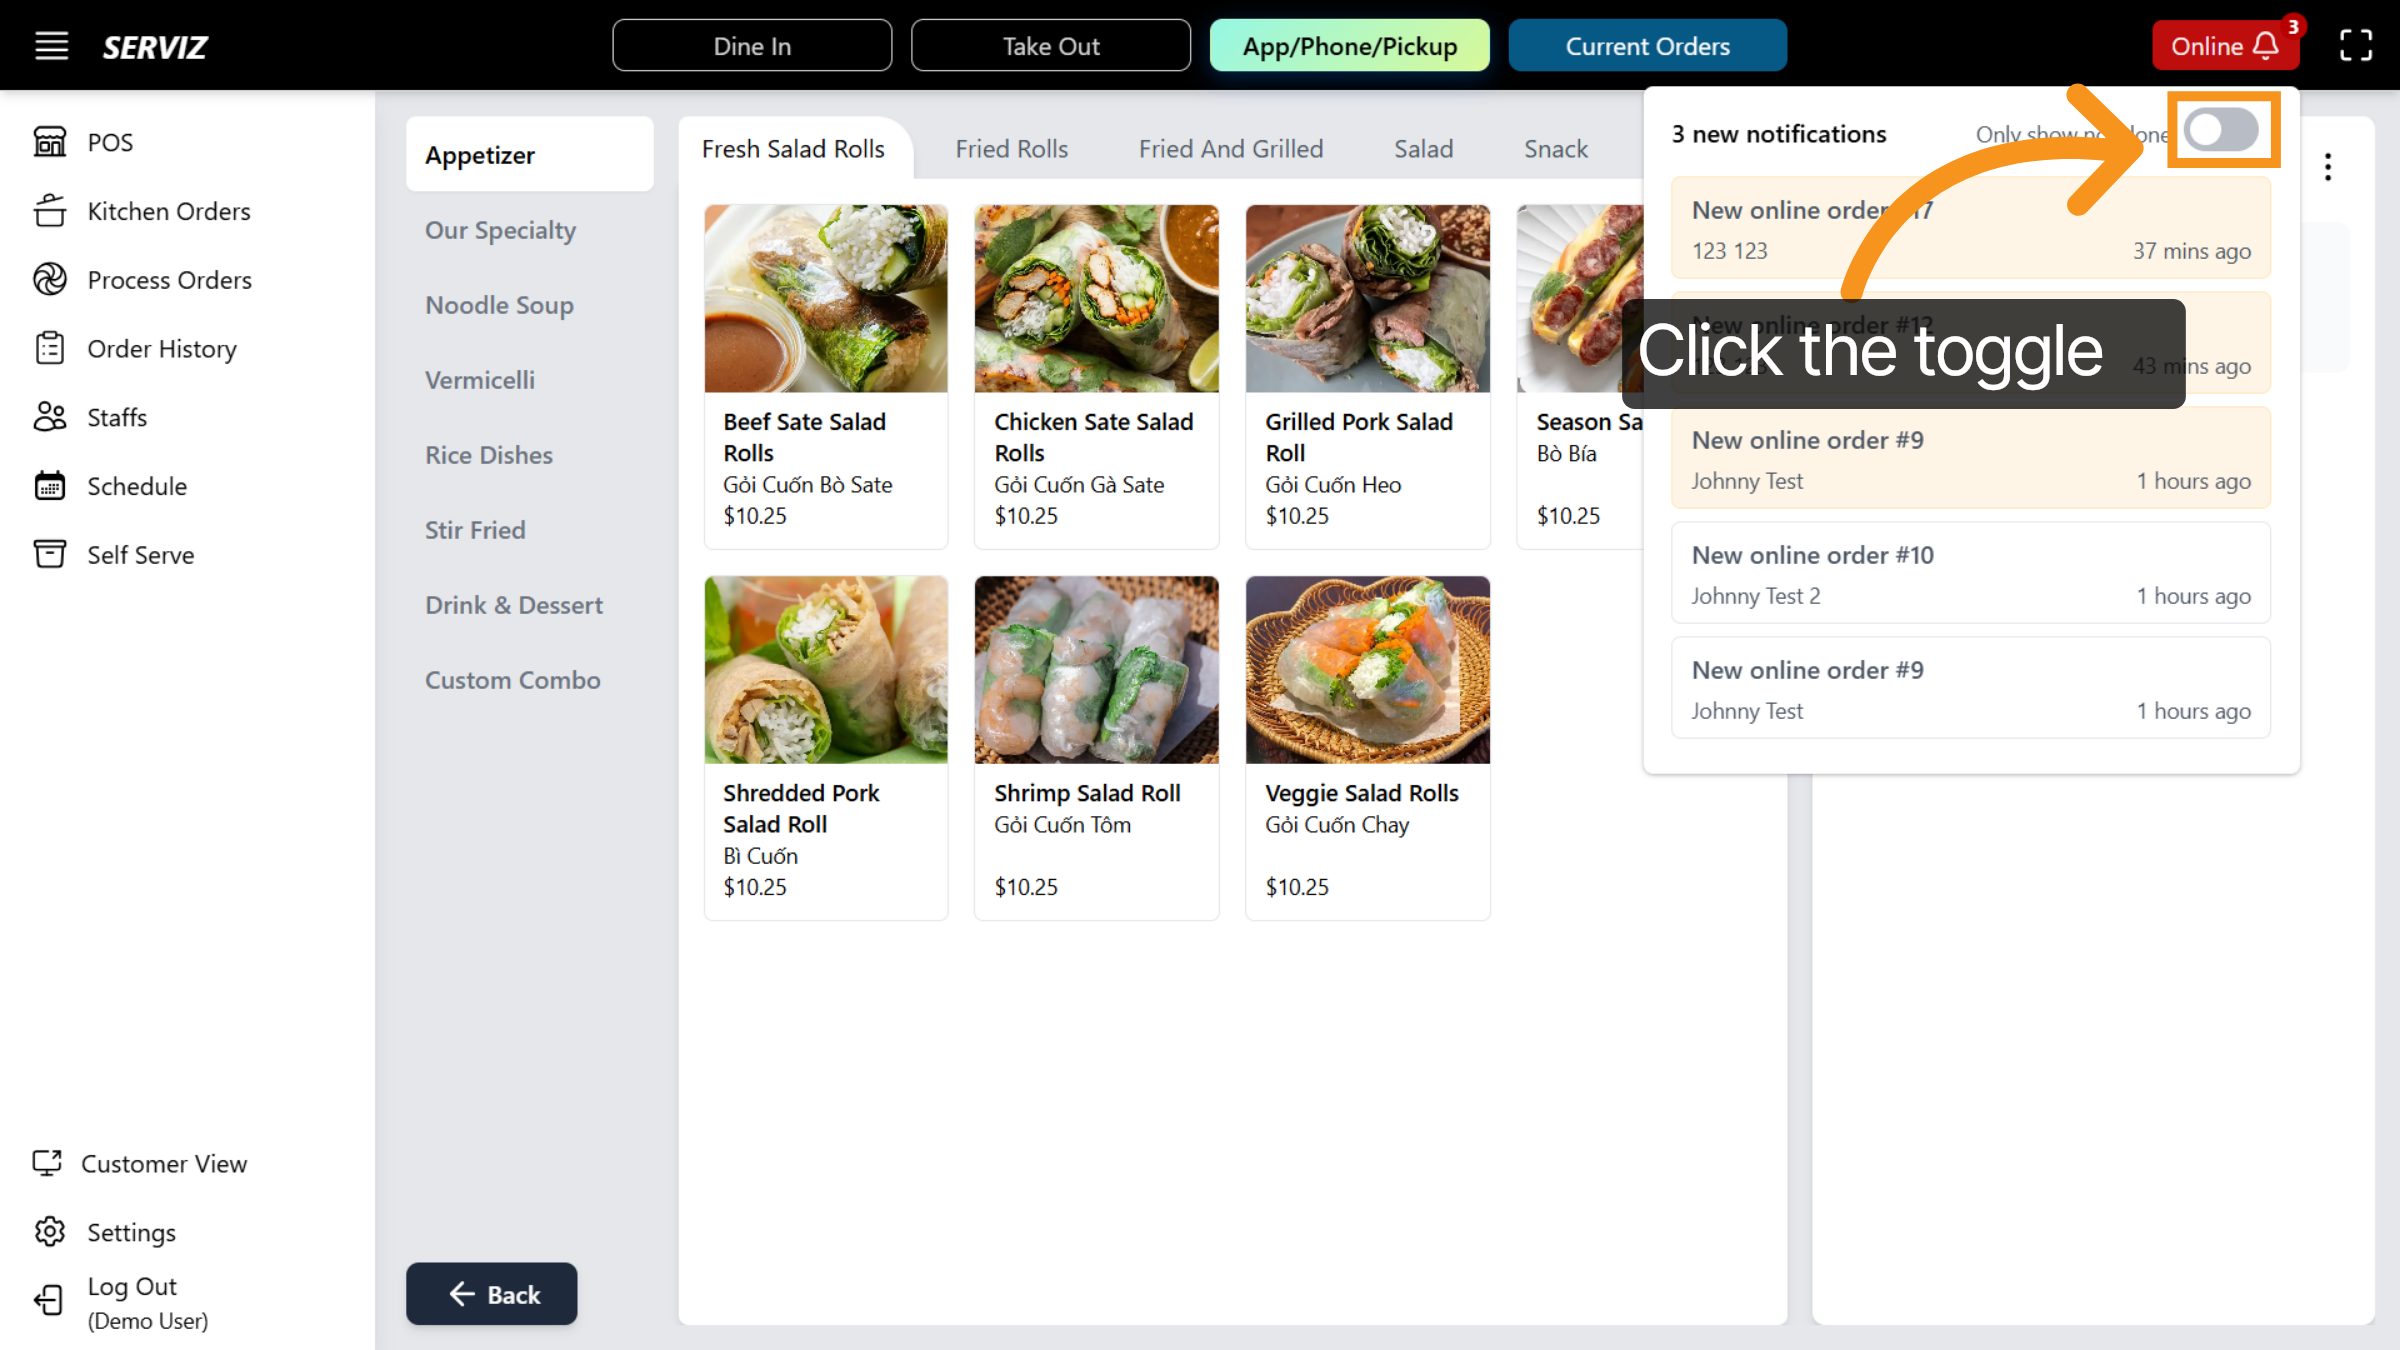
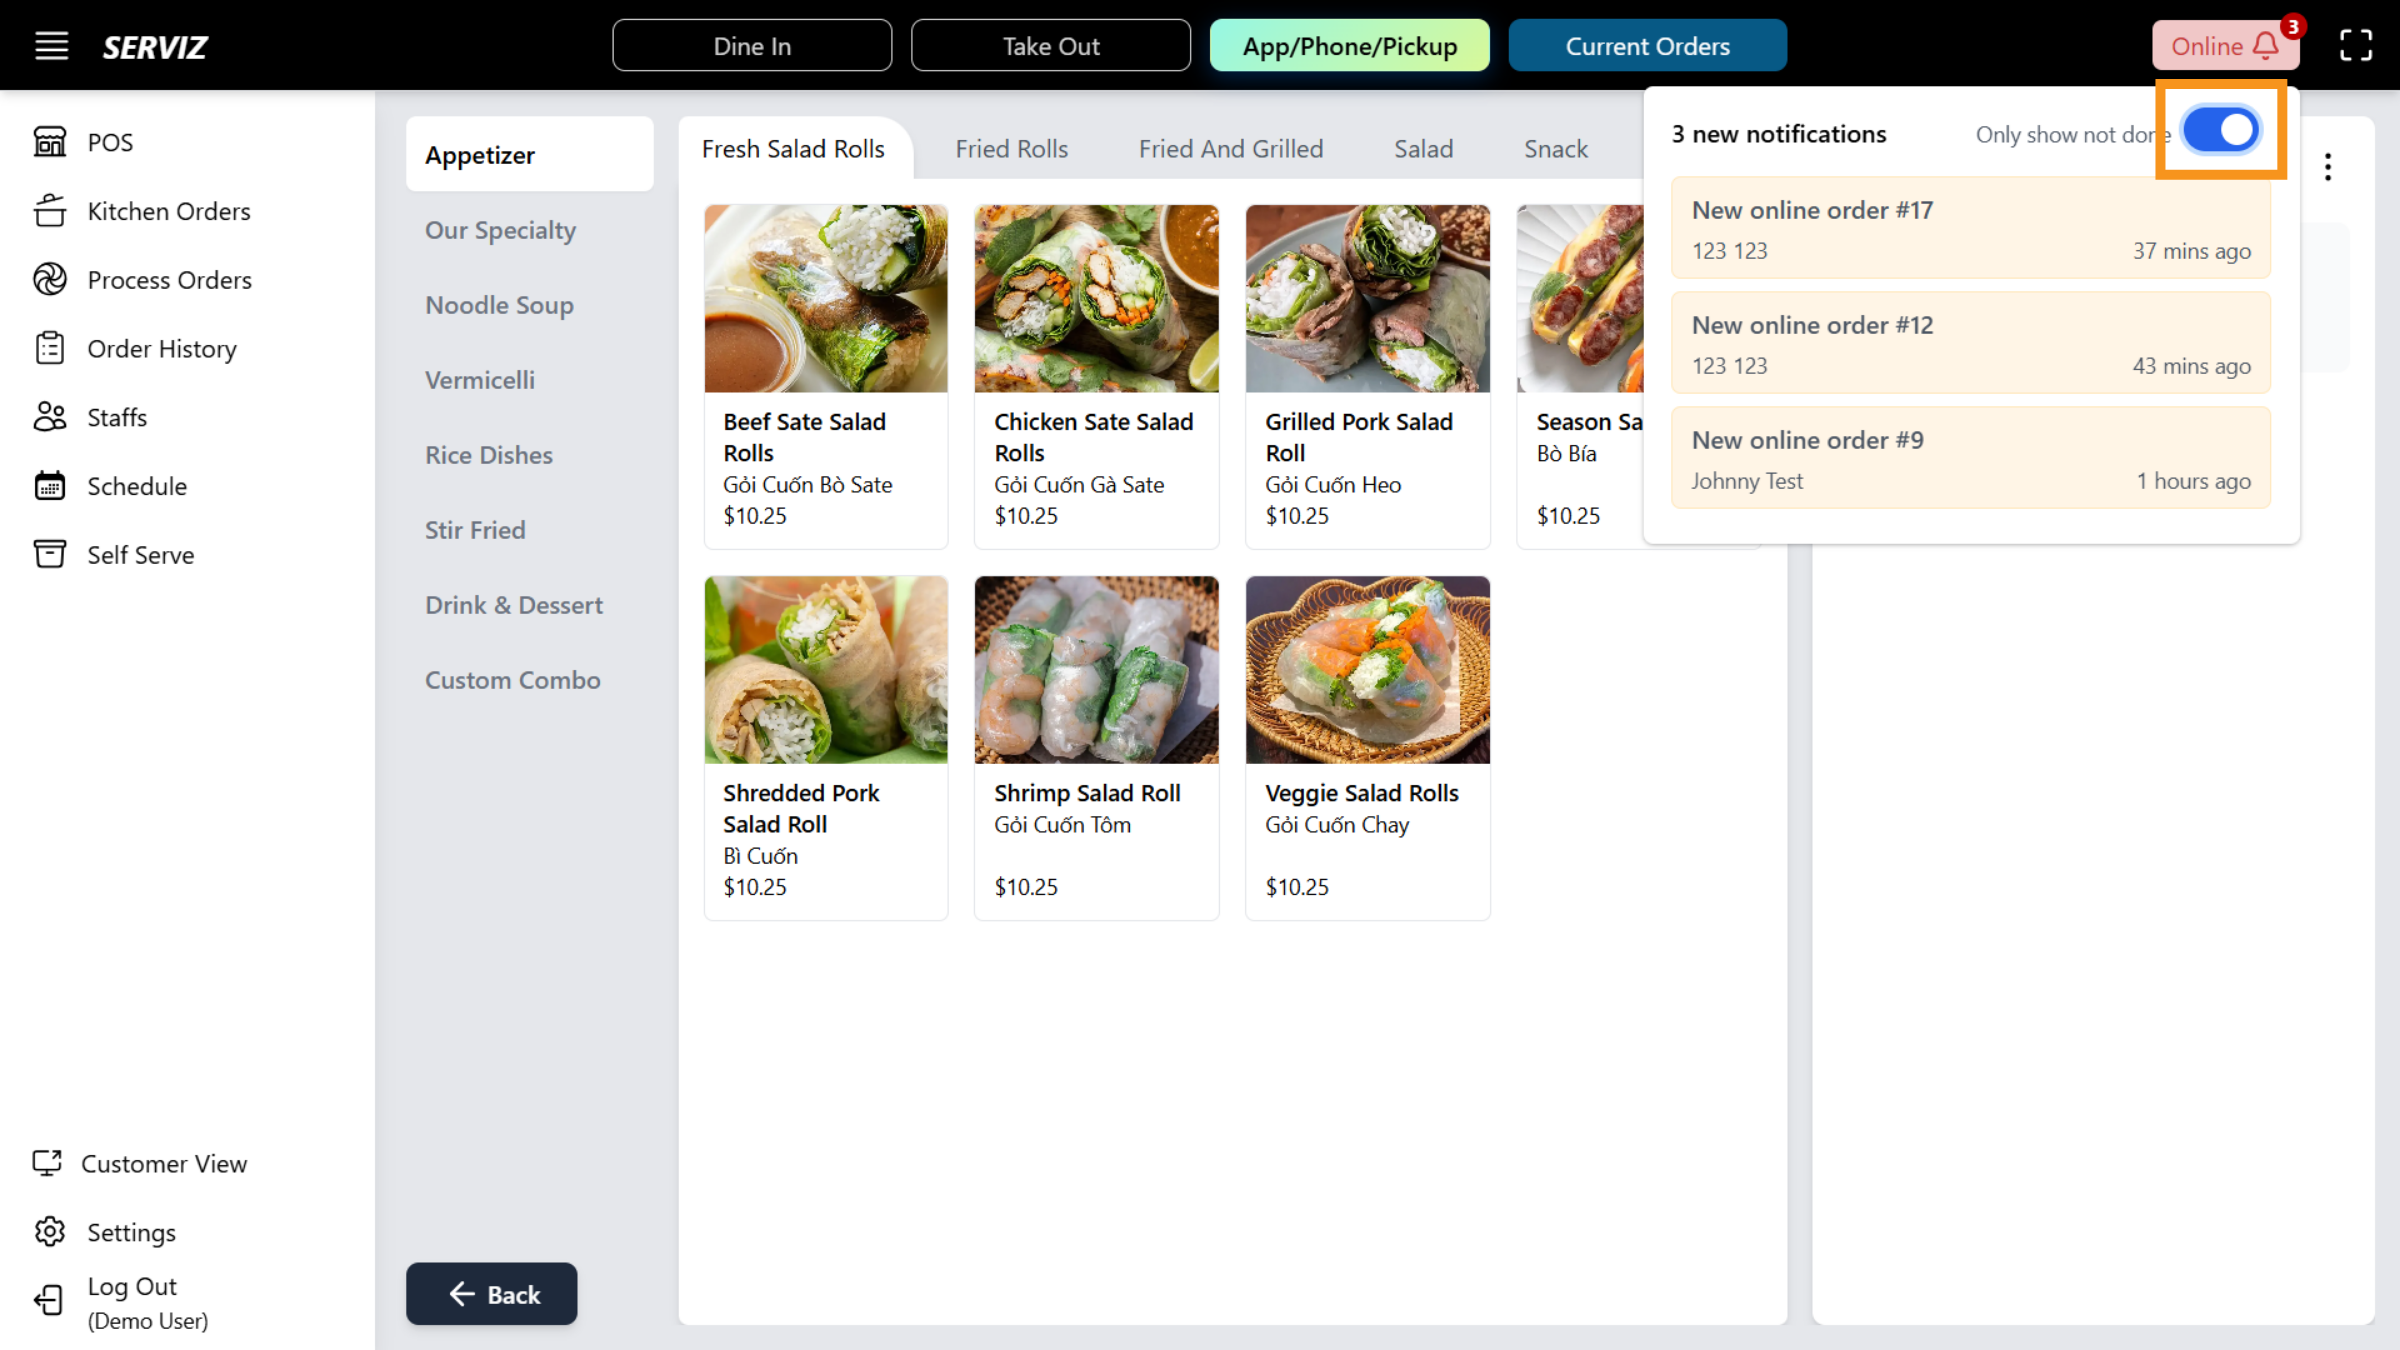
17. "Online Orders Notification" Button
Click the Online Order Notification button to view incoming online orders. When the button background turns red and a number appears in the top right corner, it indicates the number of active online orders. This means there is either an online order arriving or currently in progress. If there are no active online orders, the button will remain black.
18. View "Online Order"
19. Continue "Online Order"
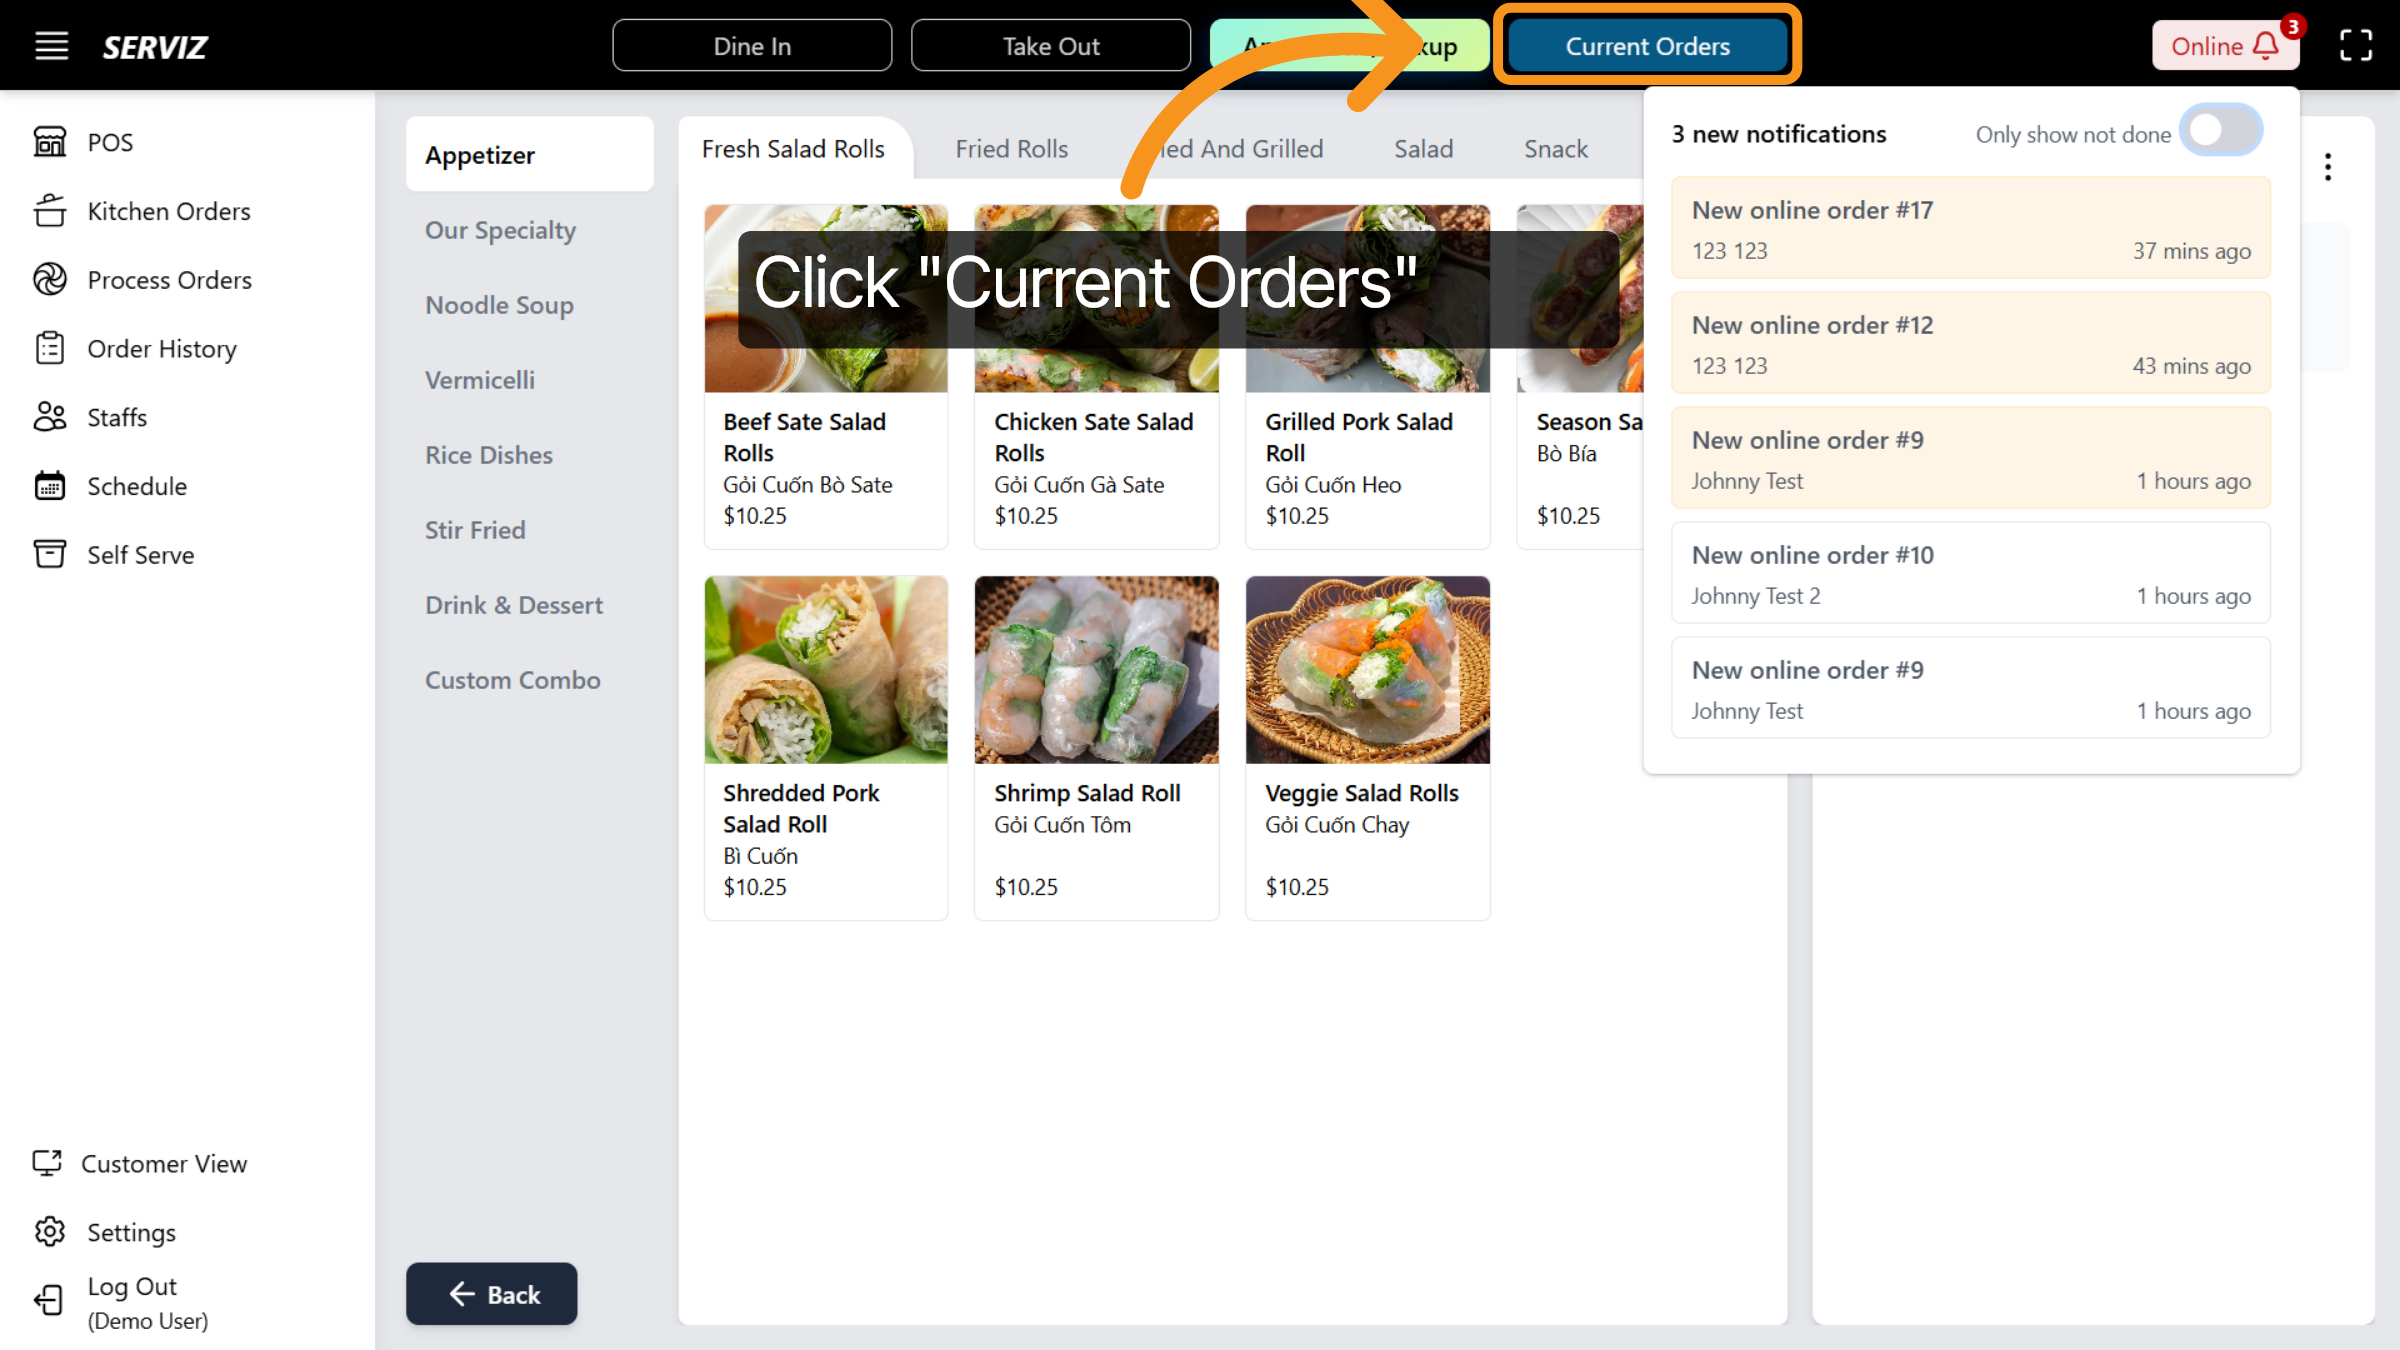
20. View Current Orders
Click Current Orders to view all active orders awaiting preparation or completion.
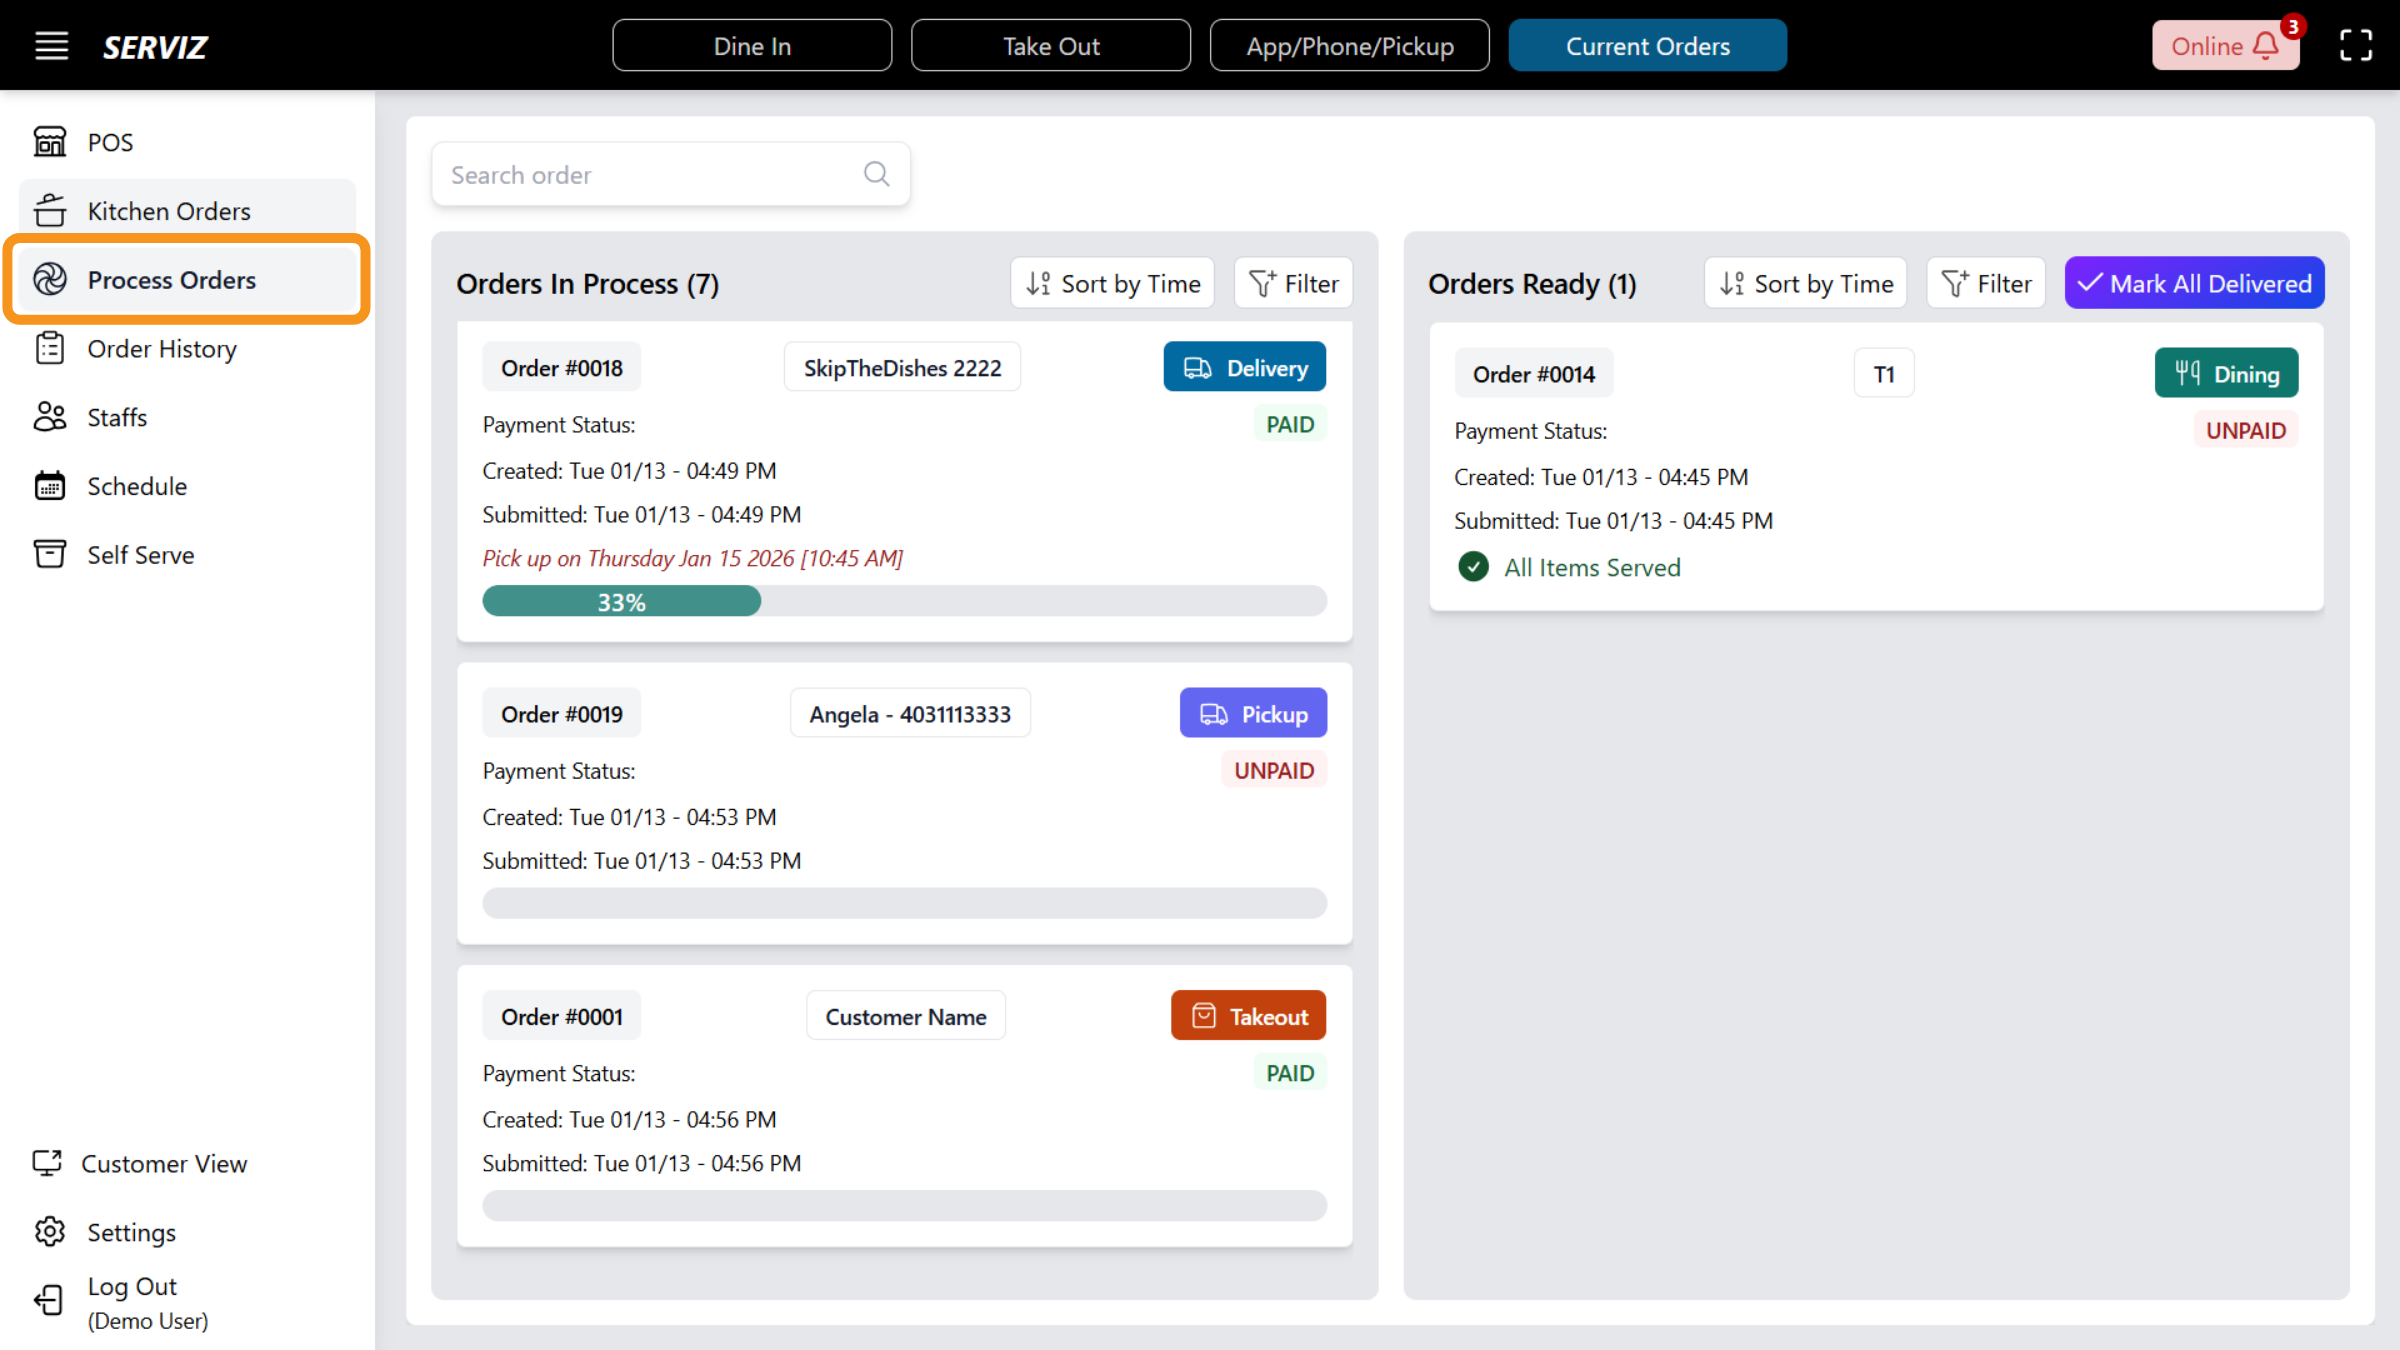
21. Access Process Orders
The system automatically directs you to Process Orders, where orders are grouped as: Orders in Process and Orders Ready to Serve
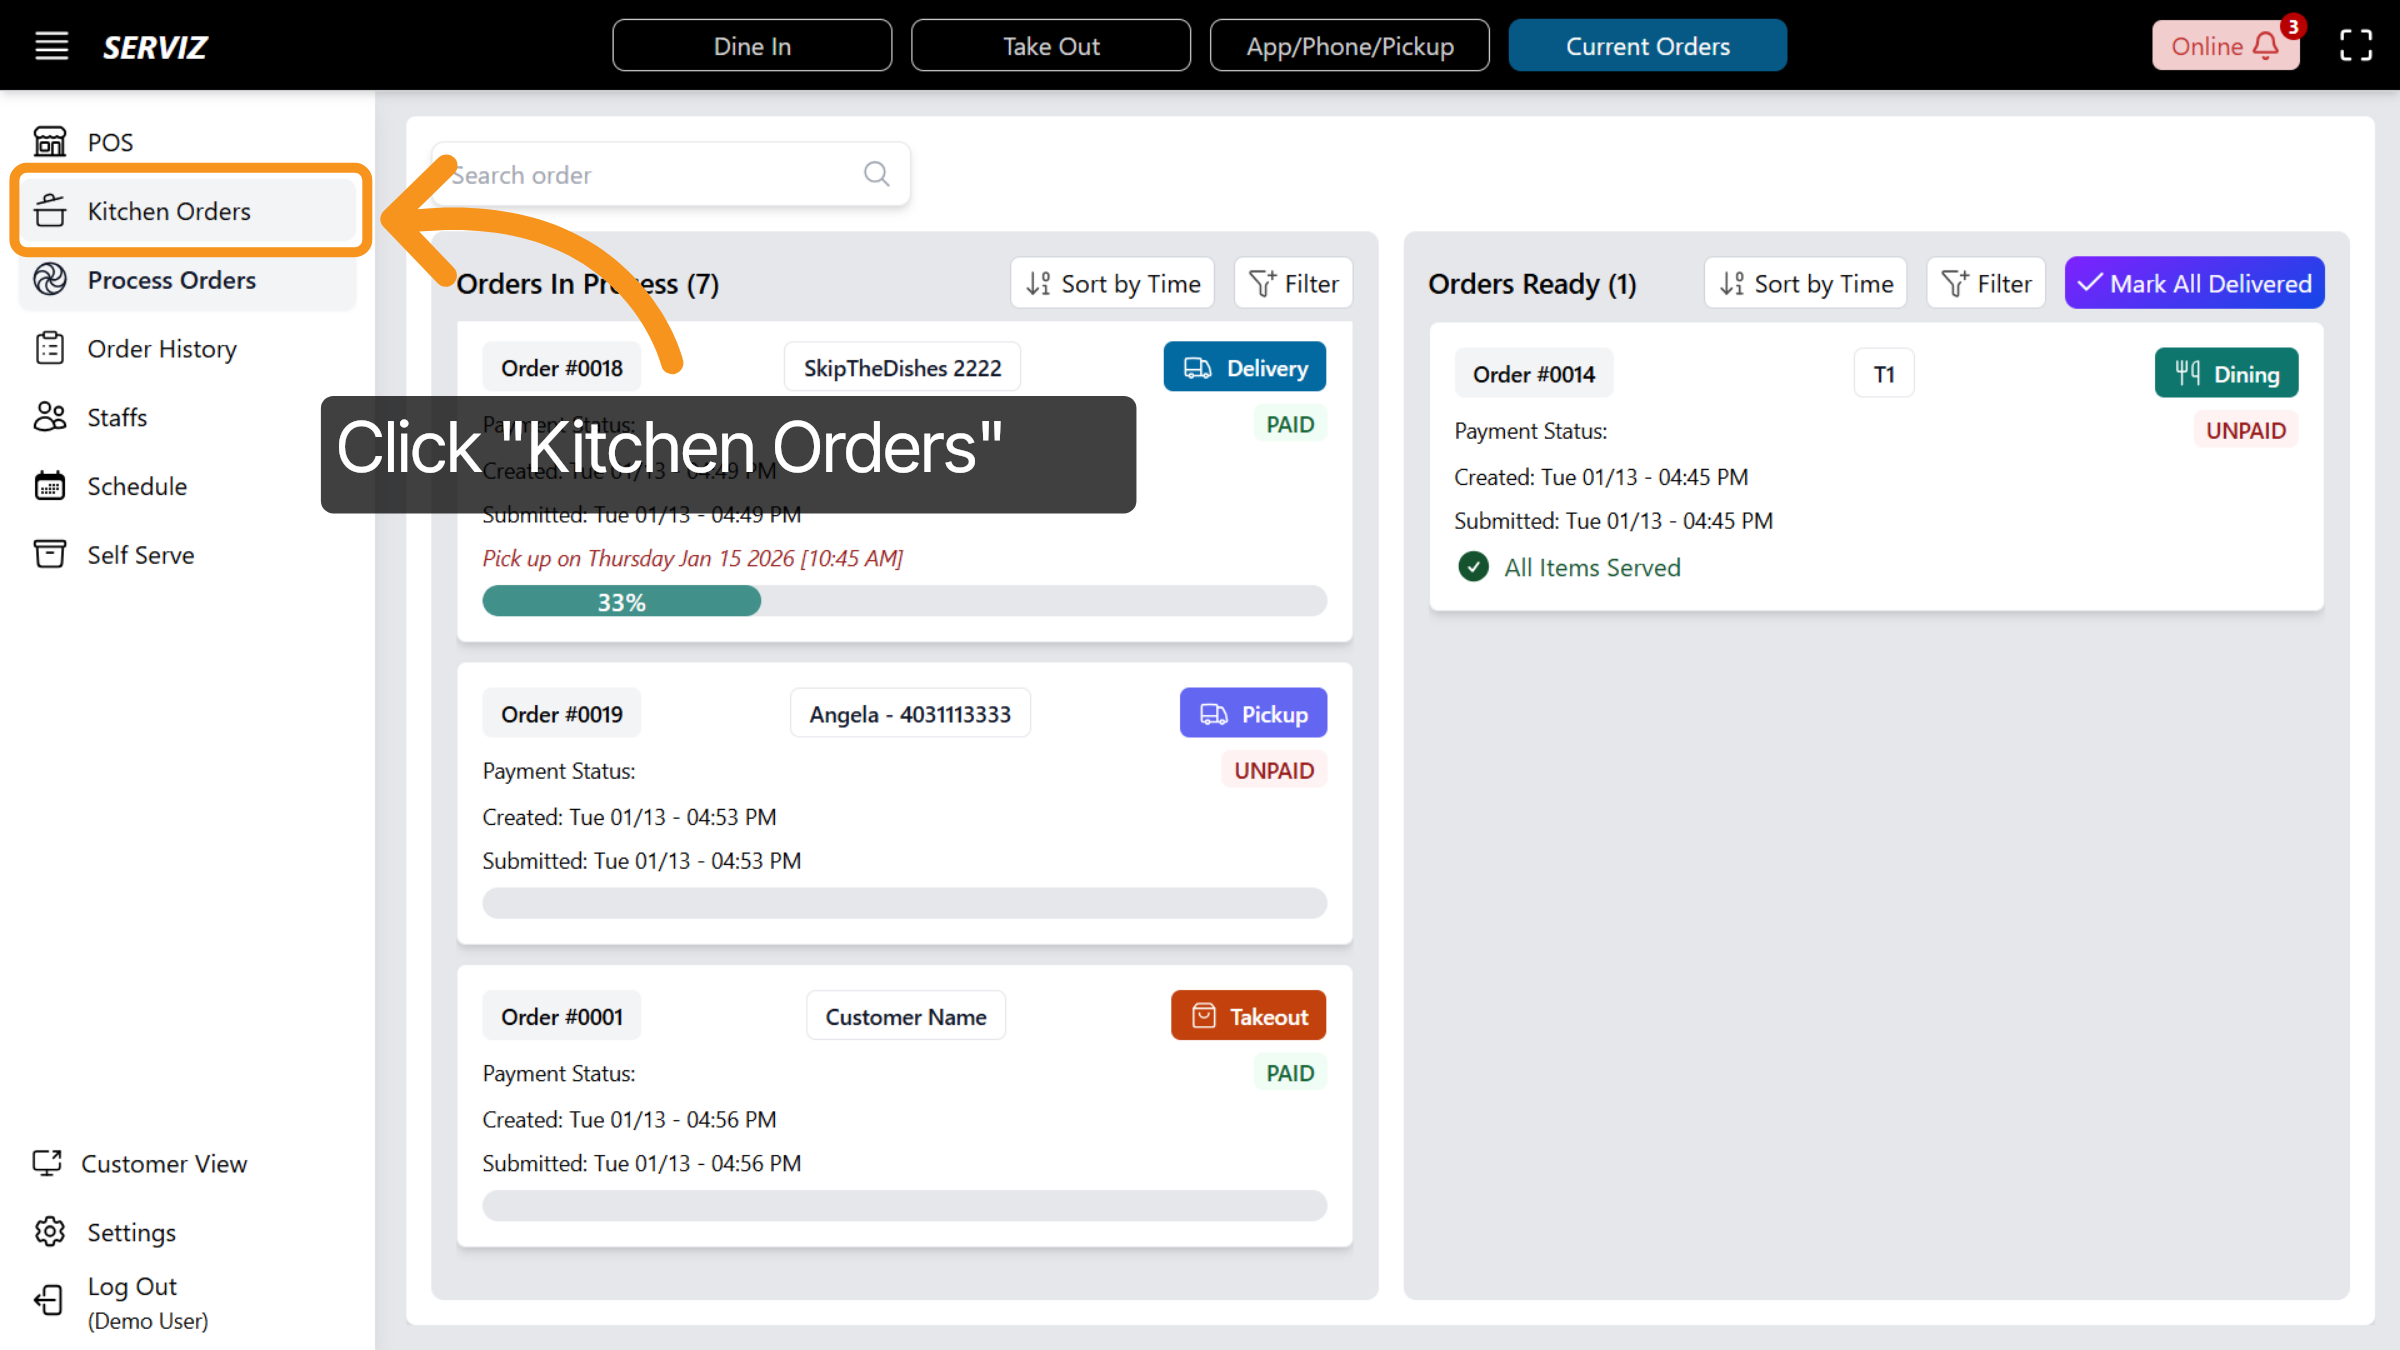
22. Access Kitchen Orders
Click Kitchen Orders to monitor orders being prepared.
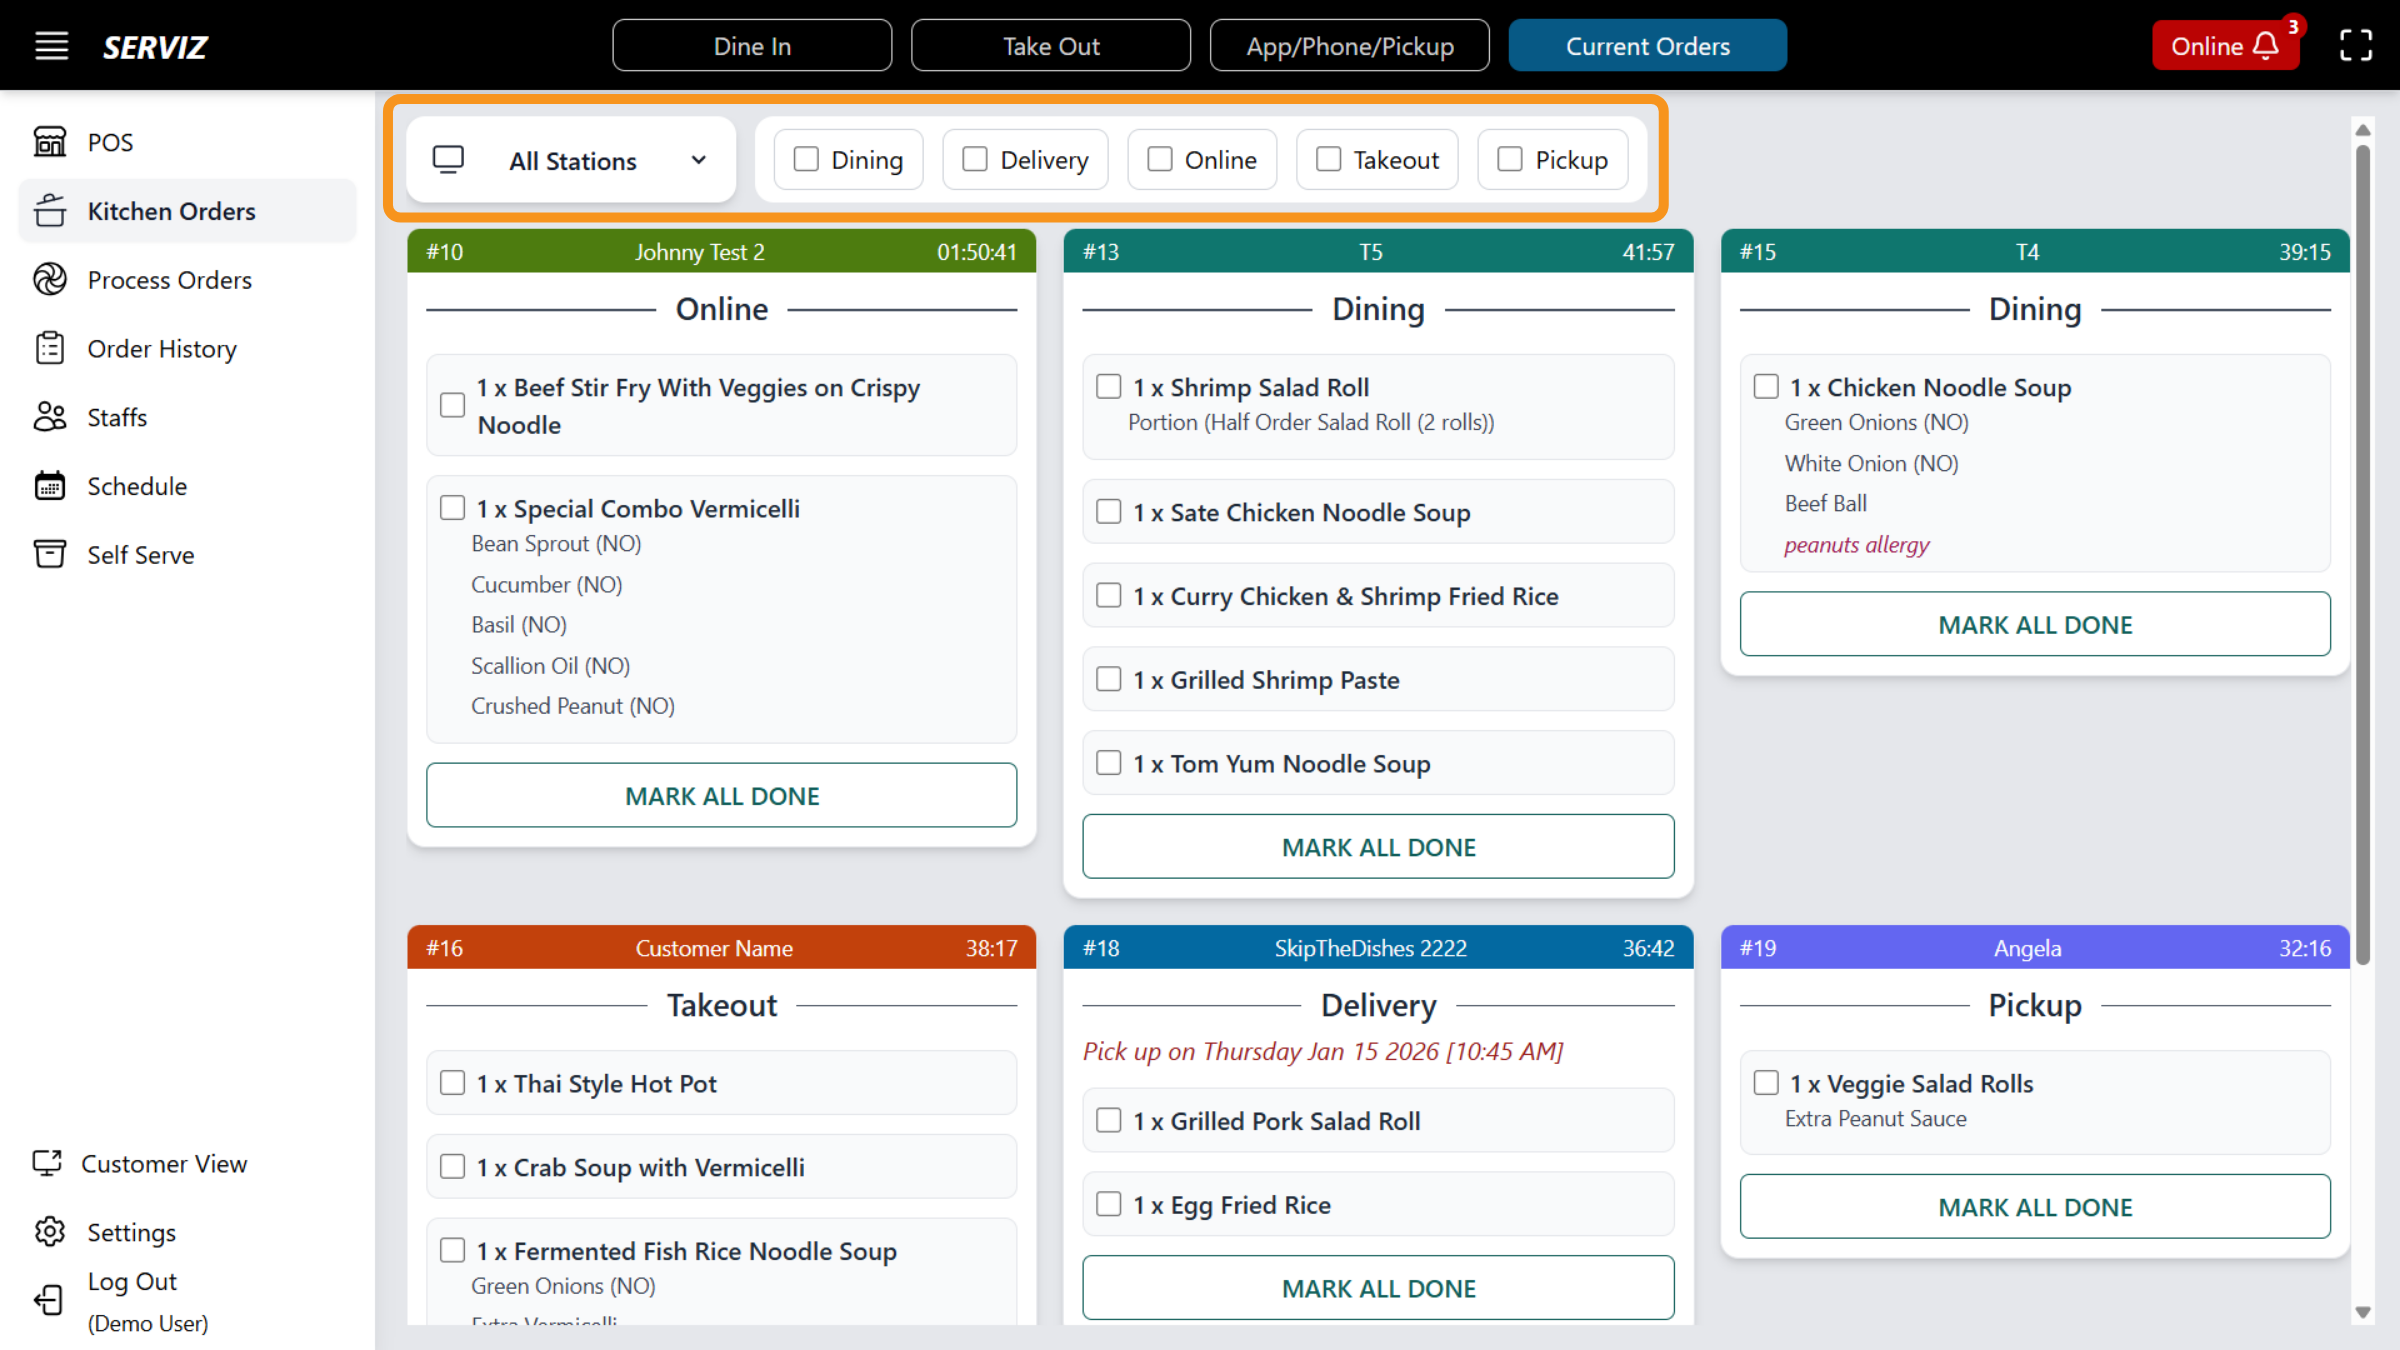
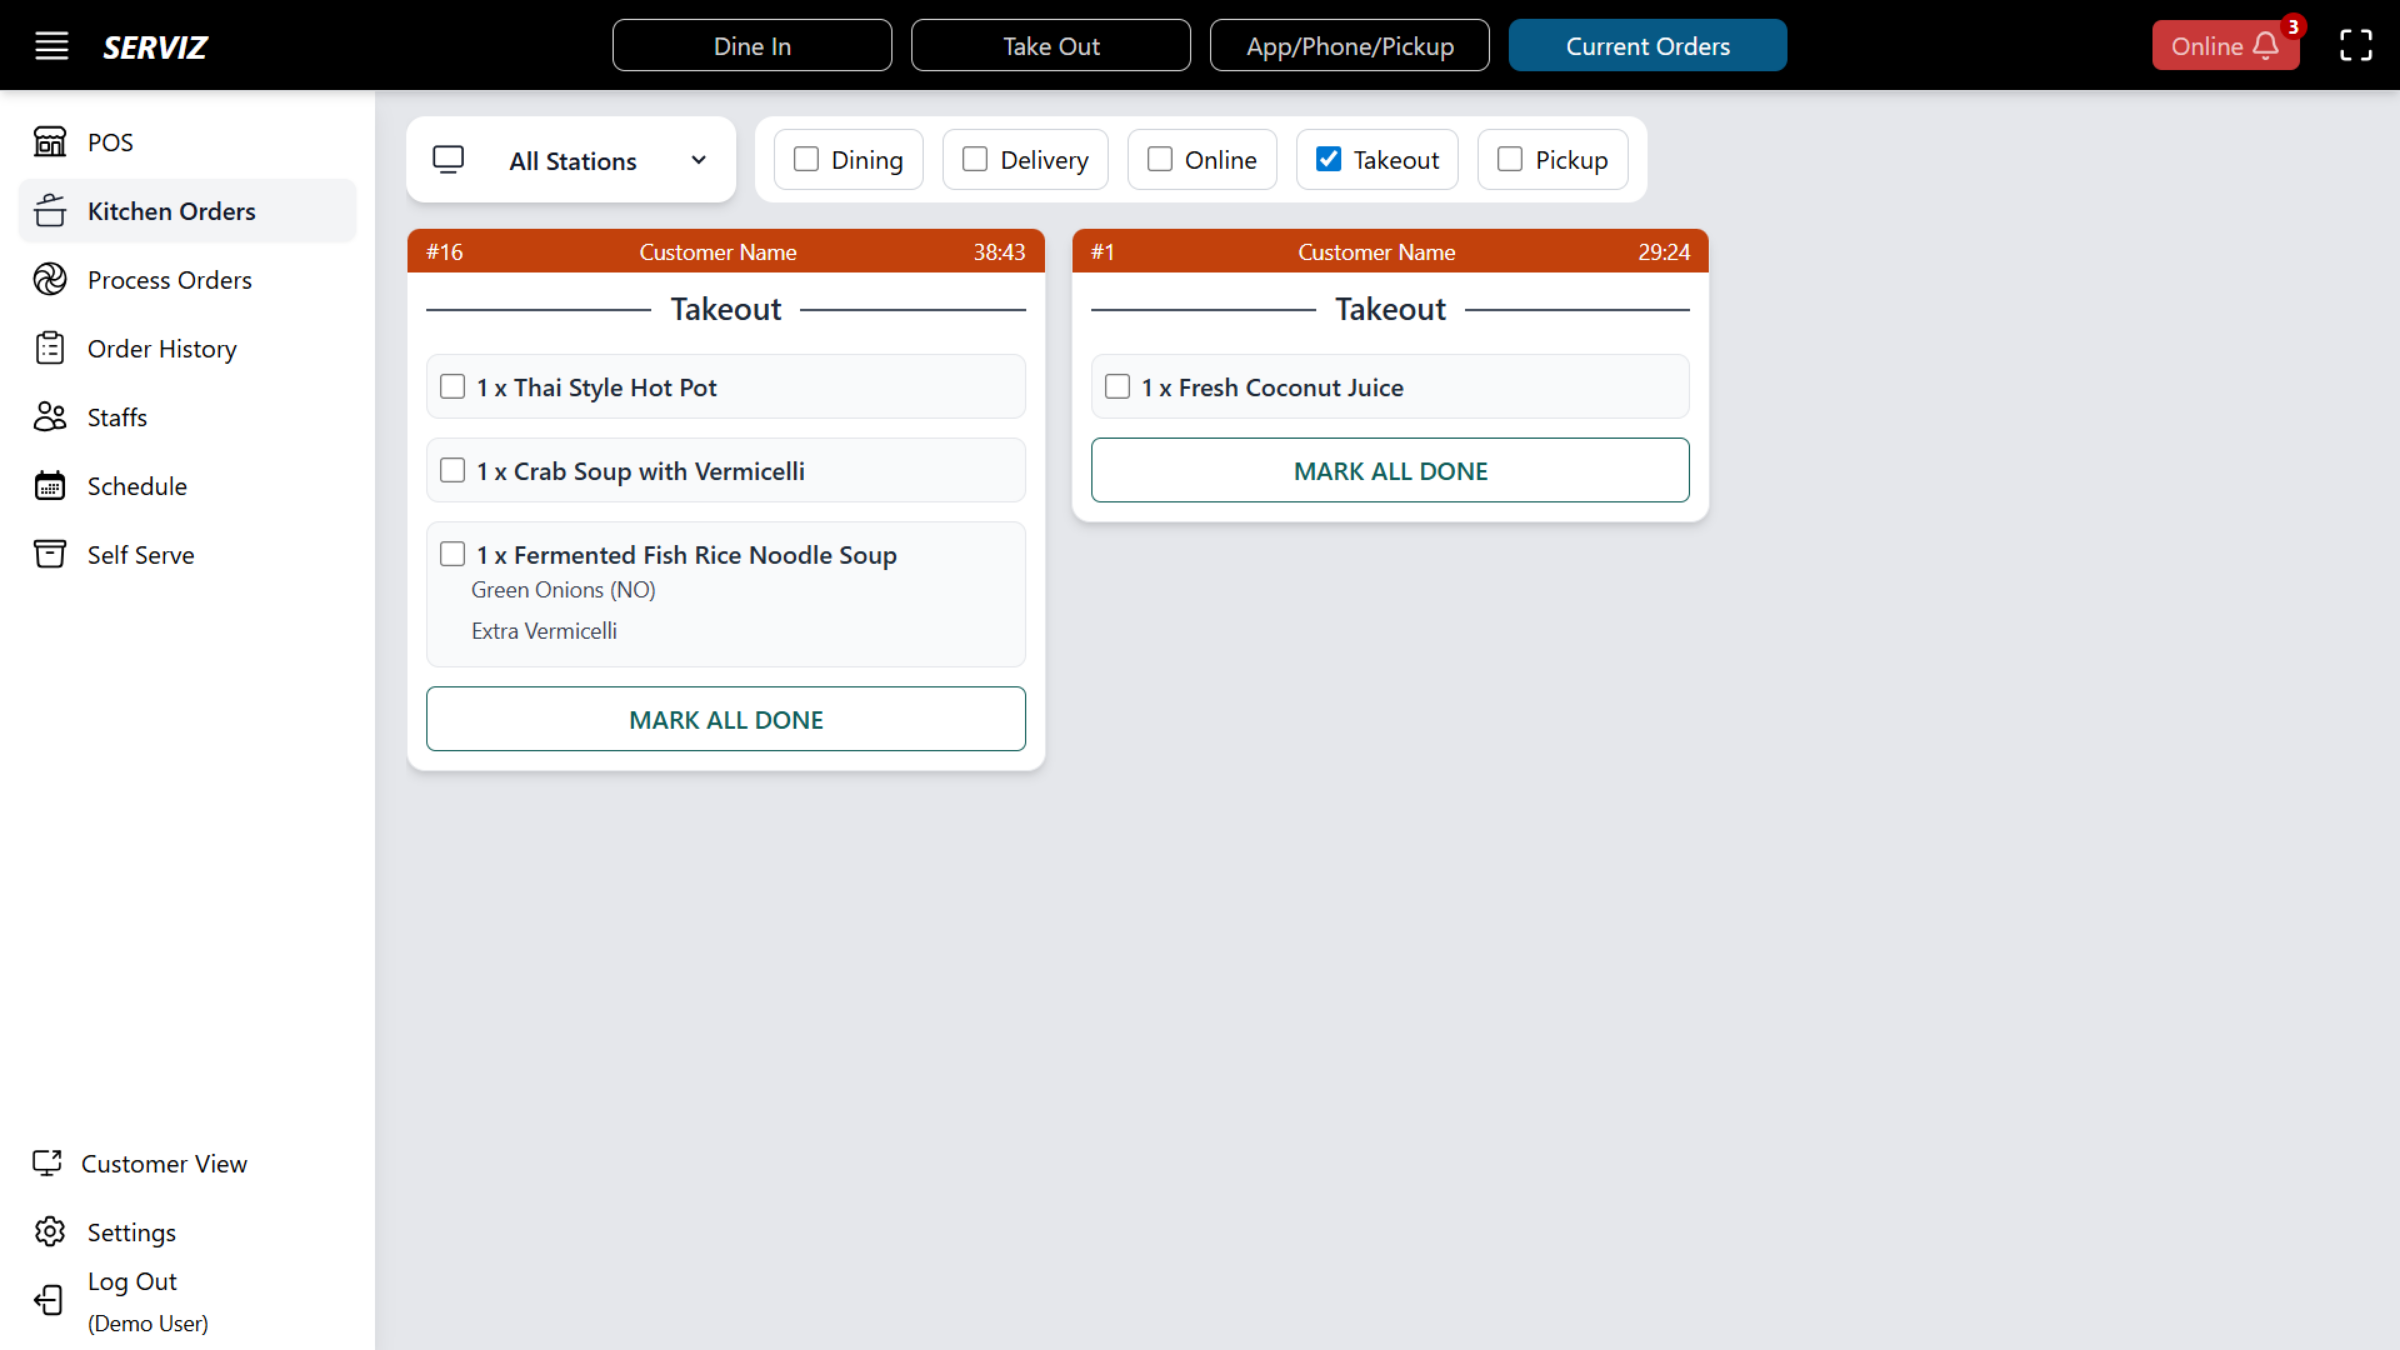
23. Kitchen Order Display Overview
In the Kitchen Orders section, the default setting displays all stations while unselecting fillers. This configuration enables you to monitor all active orders in the kitchen and improve communication between staff.
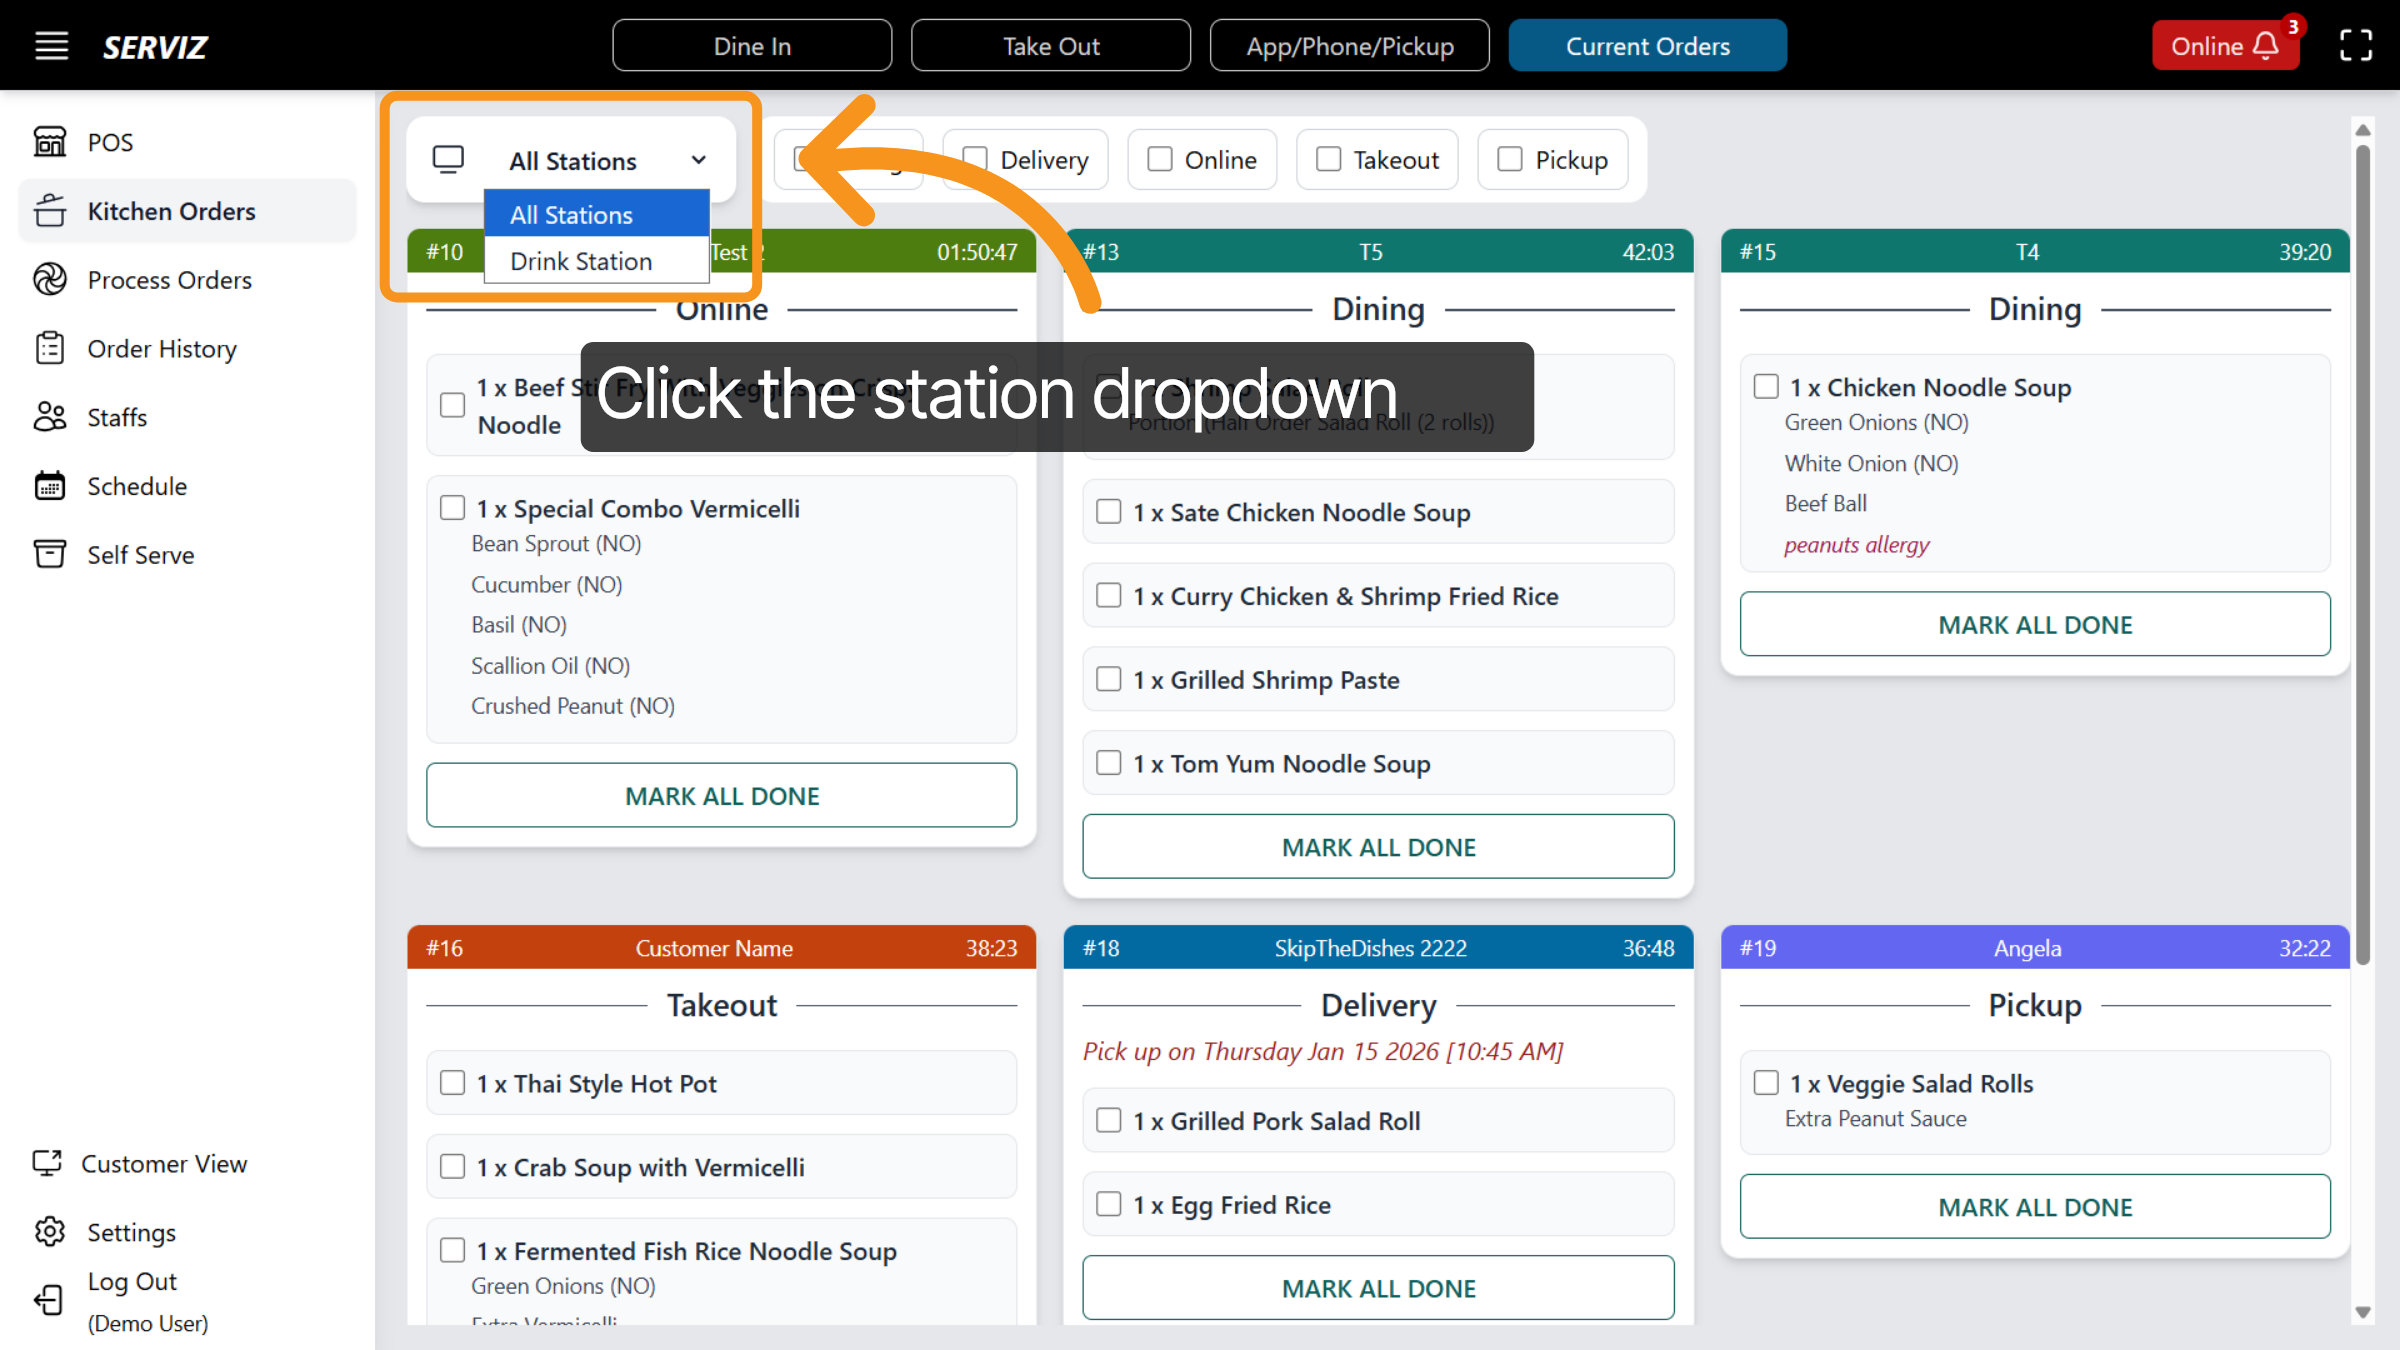
24. Station Selection
You can click the station dropdown menu to switch to a different station view, such as the drink station or soup station if applicable.
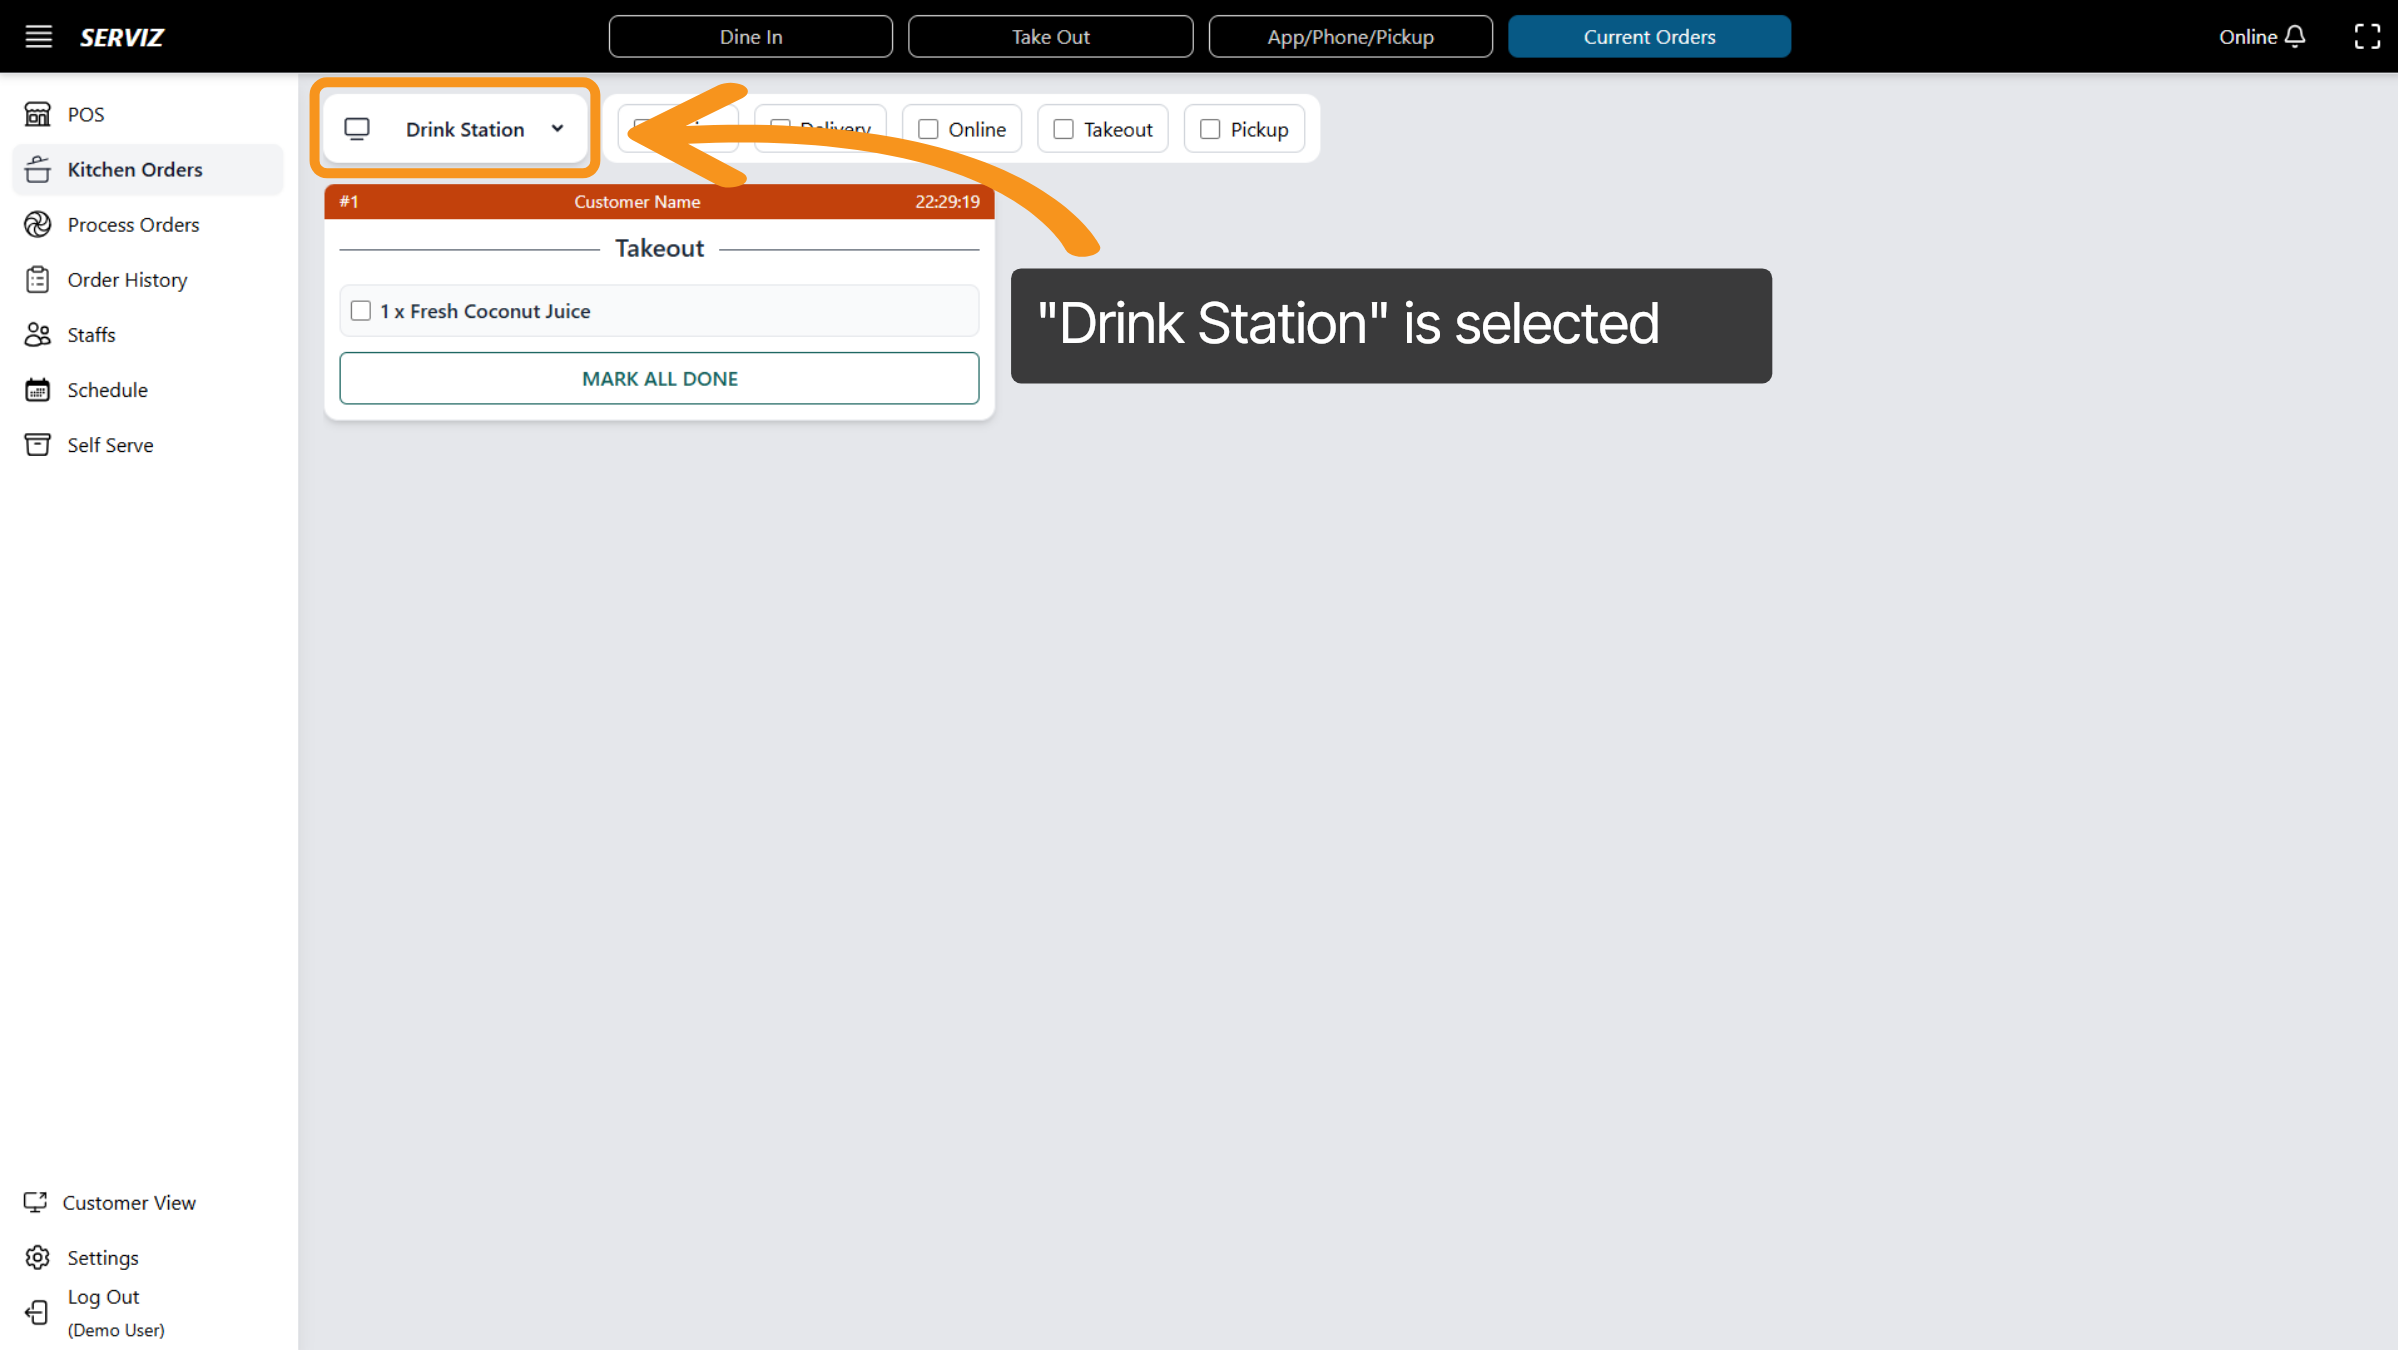
25. Drink Station-Specific View
When the drink station is selected, only relevant items for that station will be displayed.
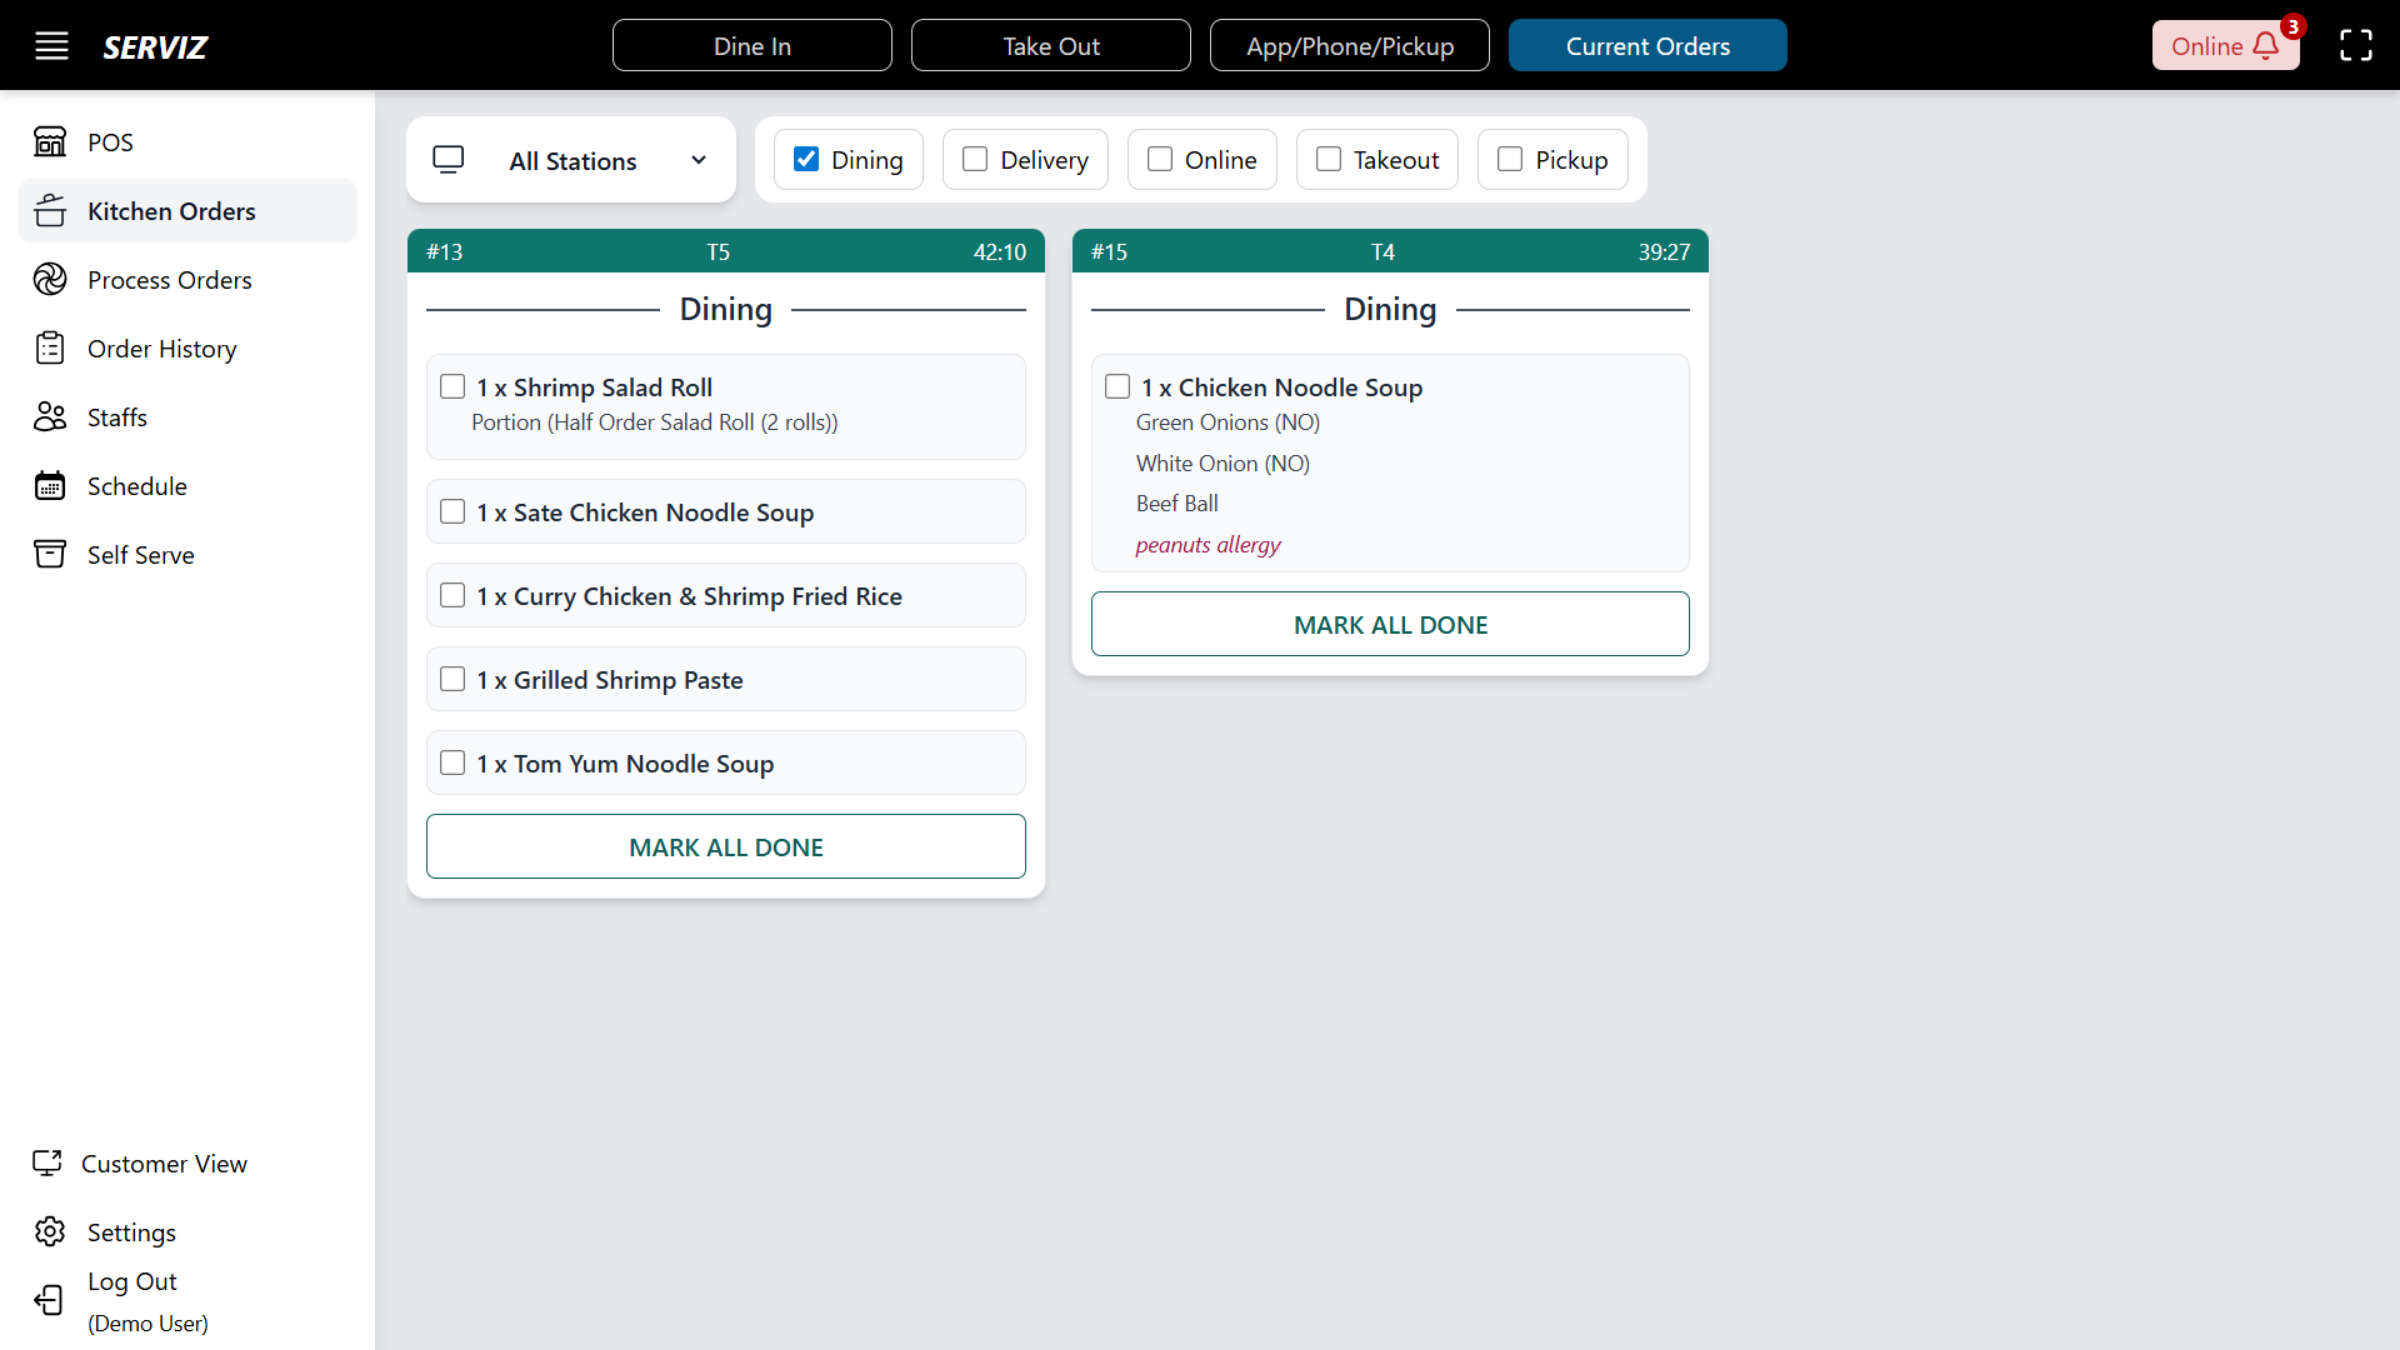
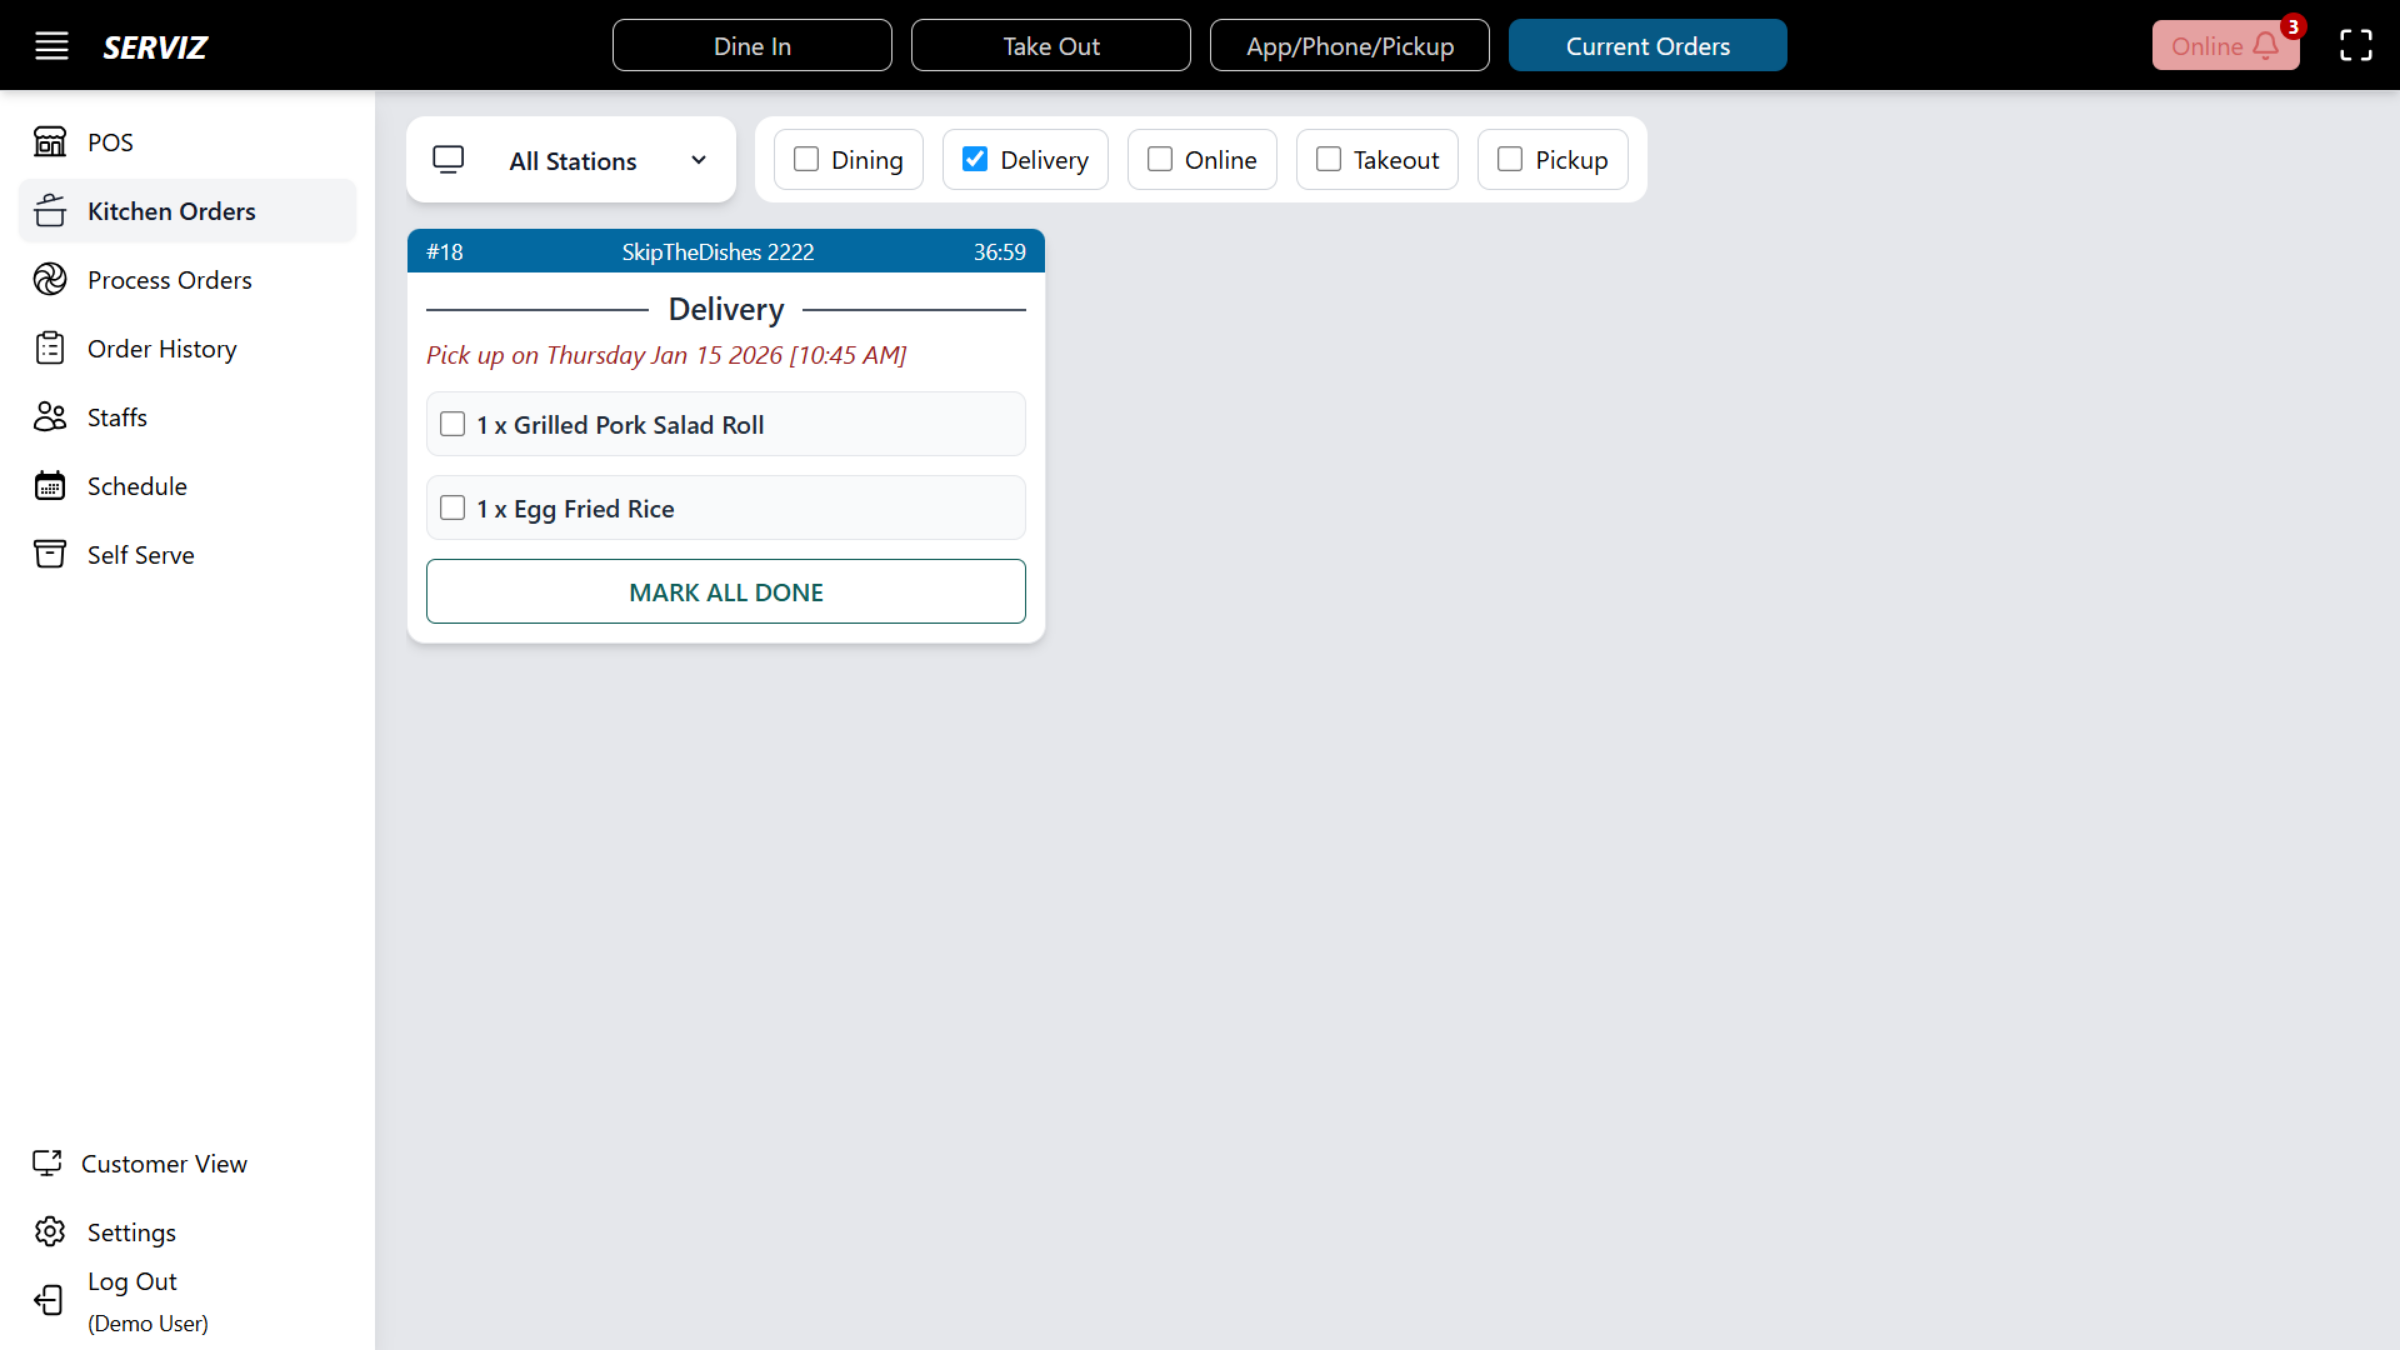
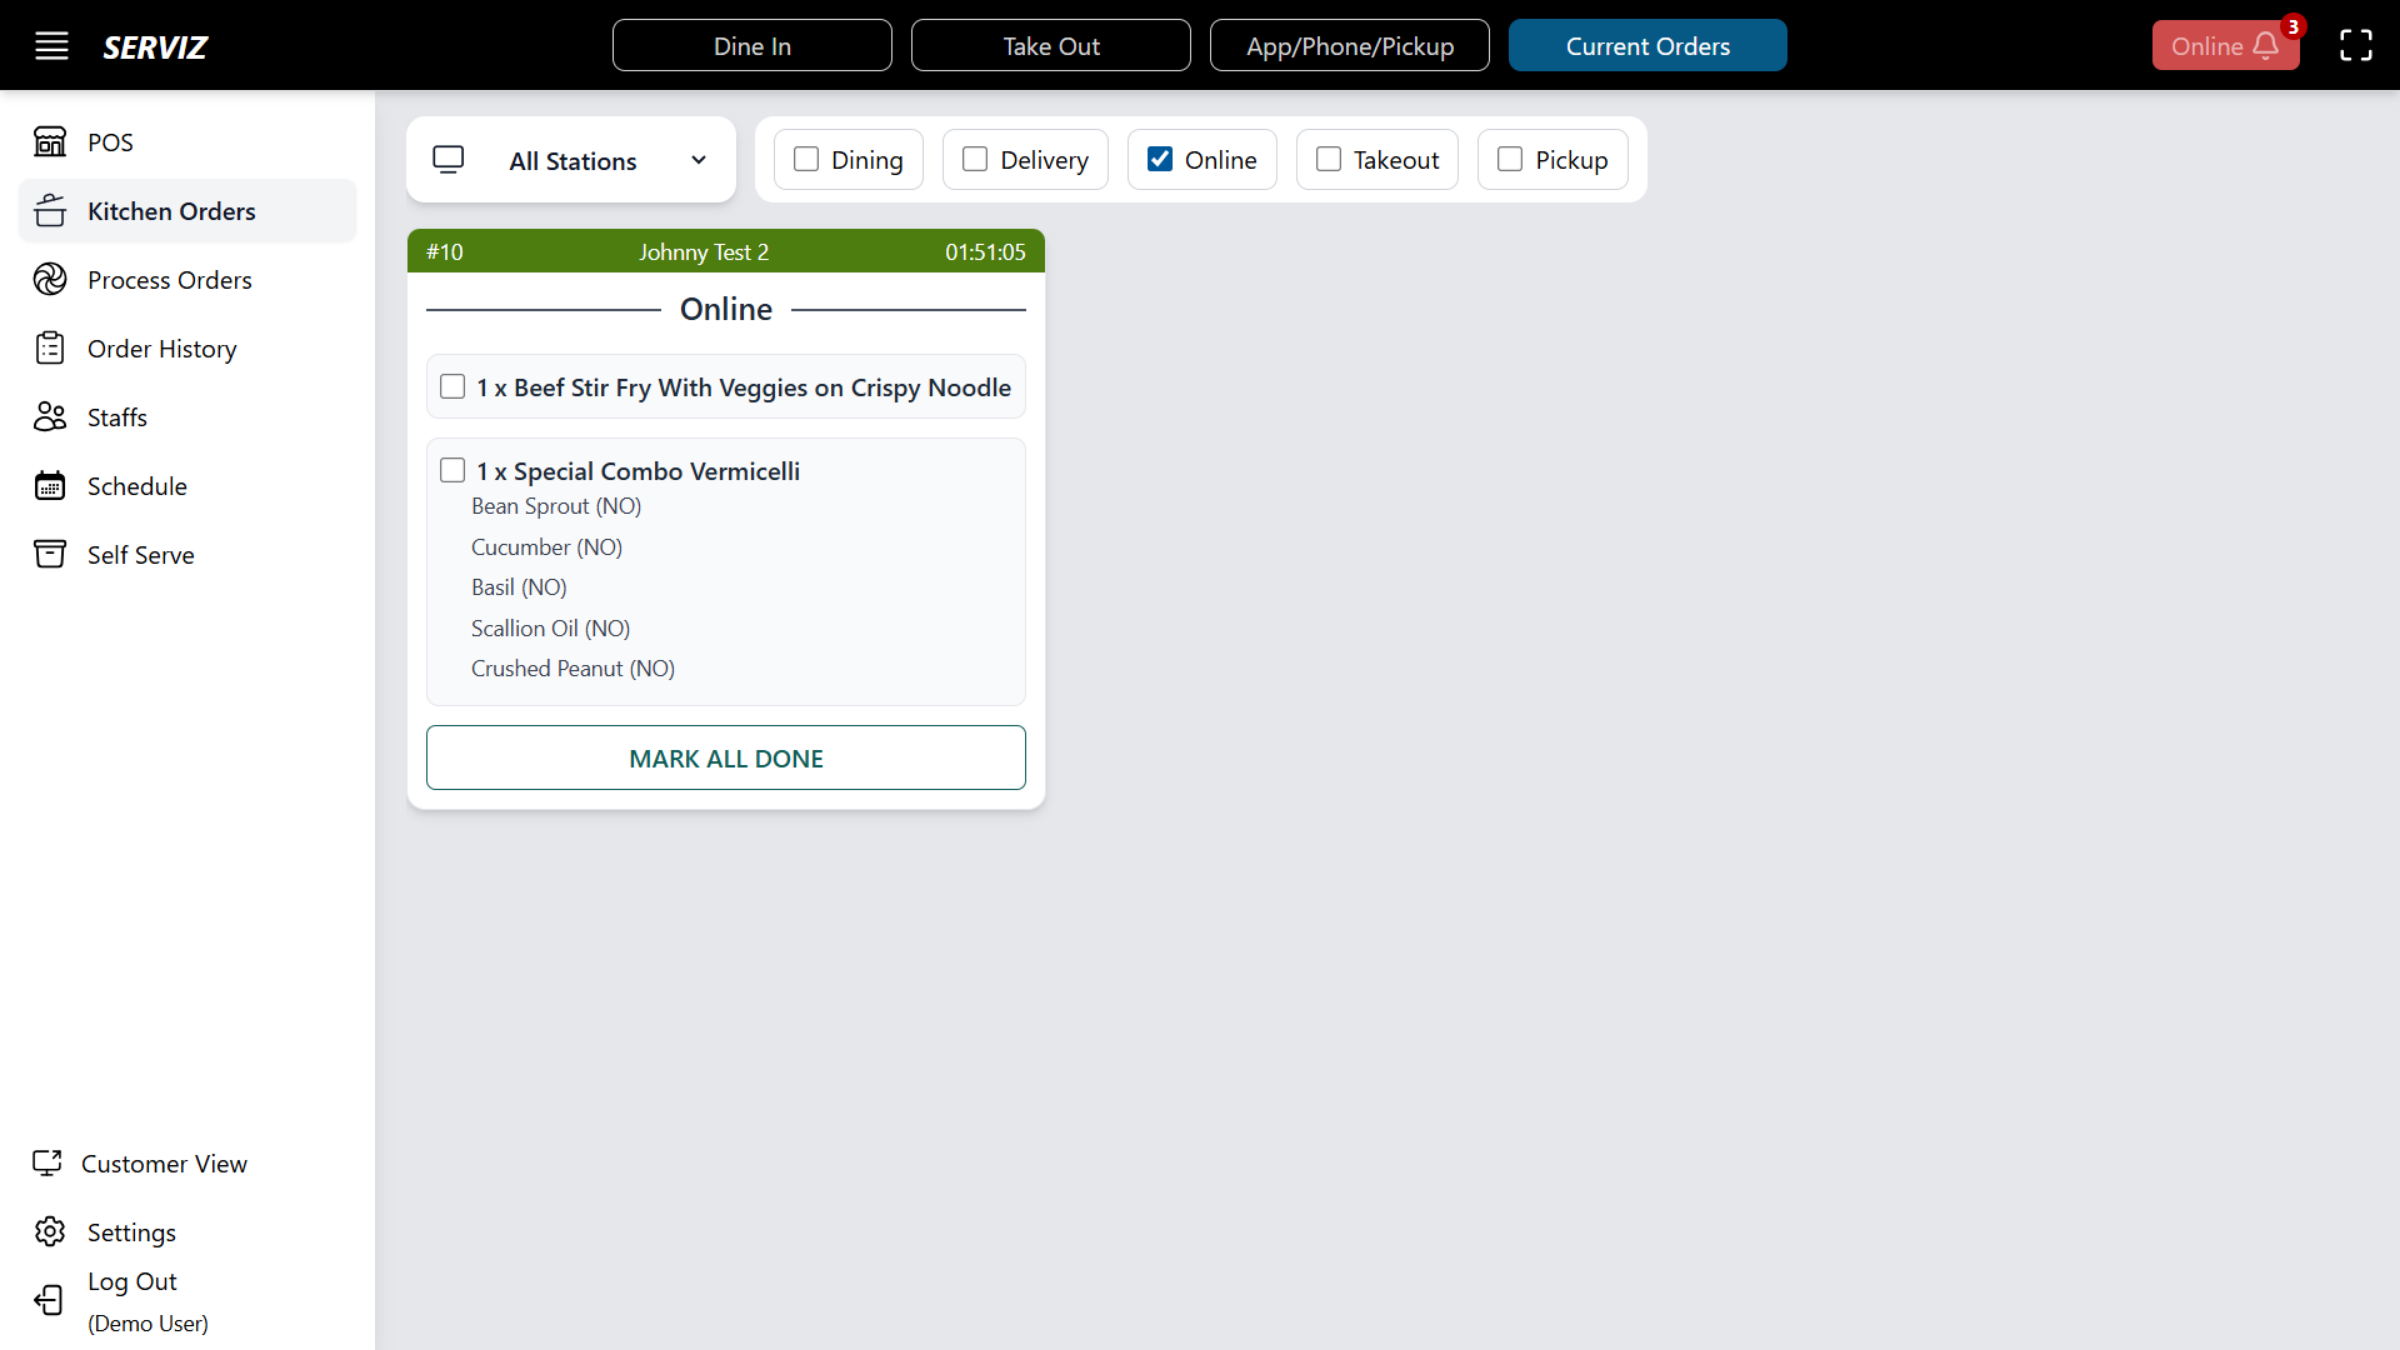
26. Select Dining Option
Additionally, you may use the checkboxes to filter orders by dining, delivery, online order, takeout, and pickup.
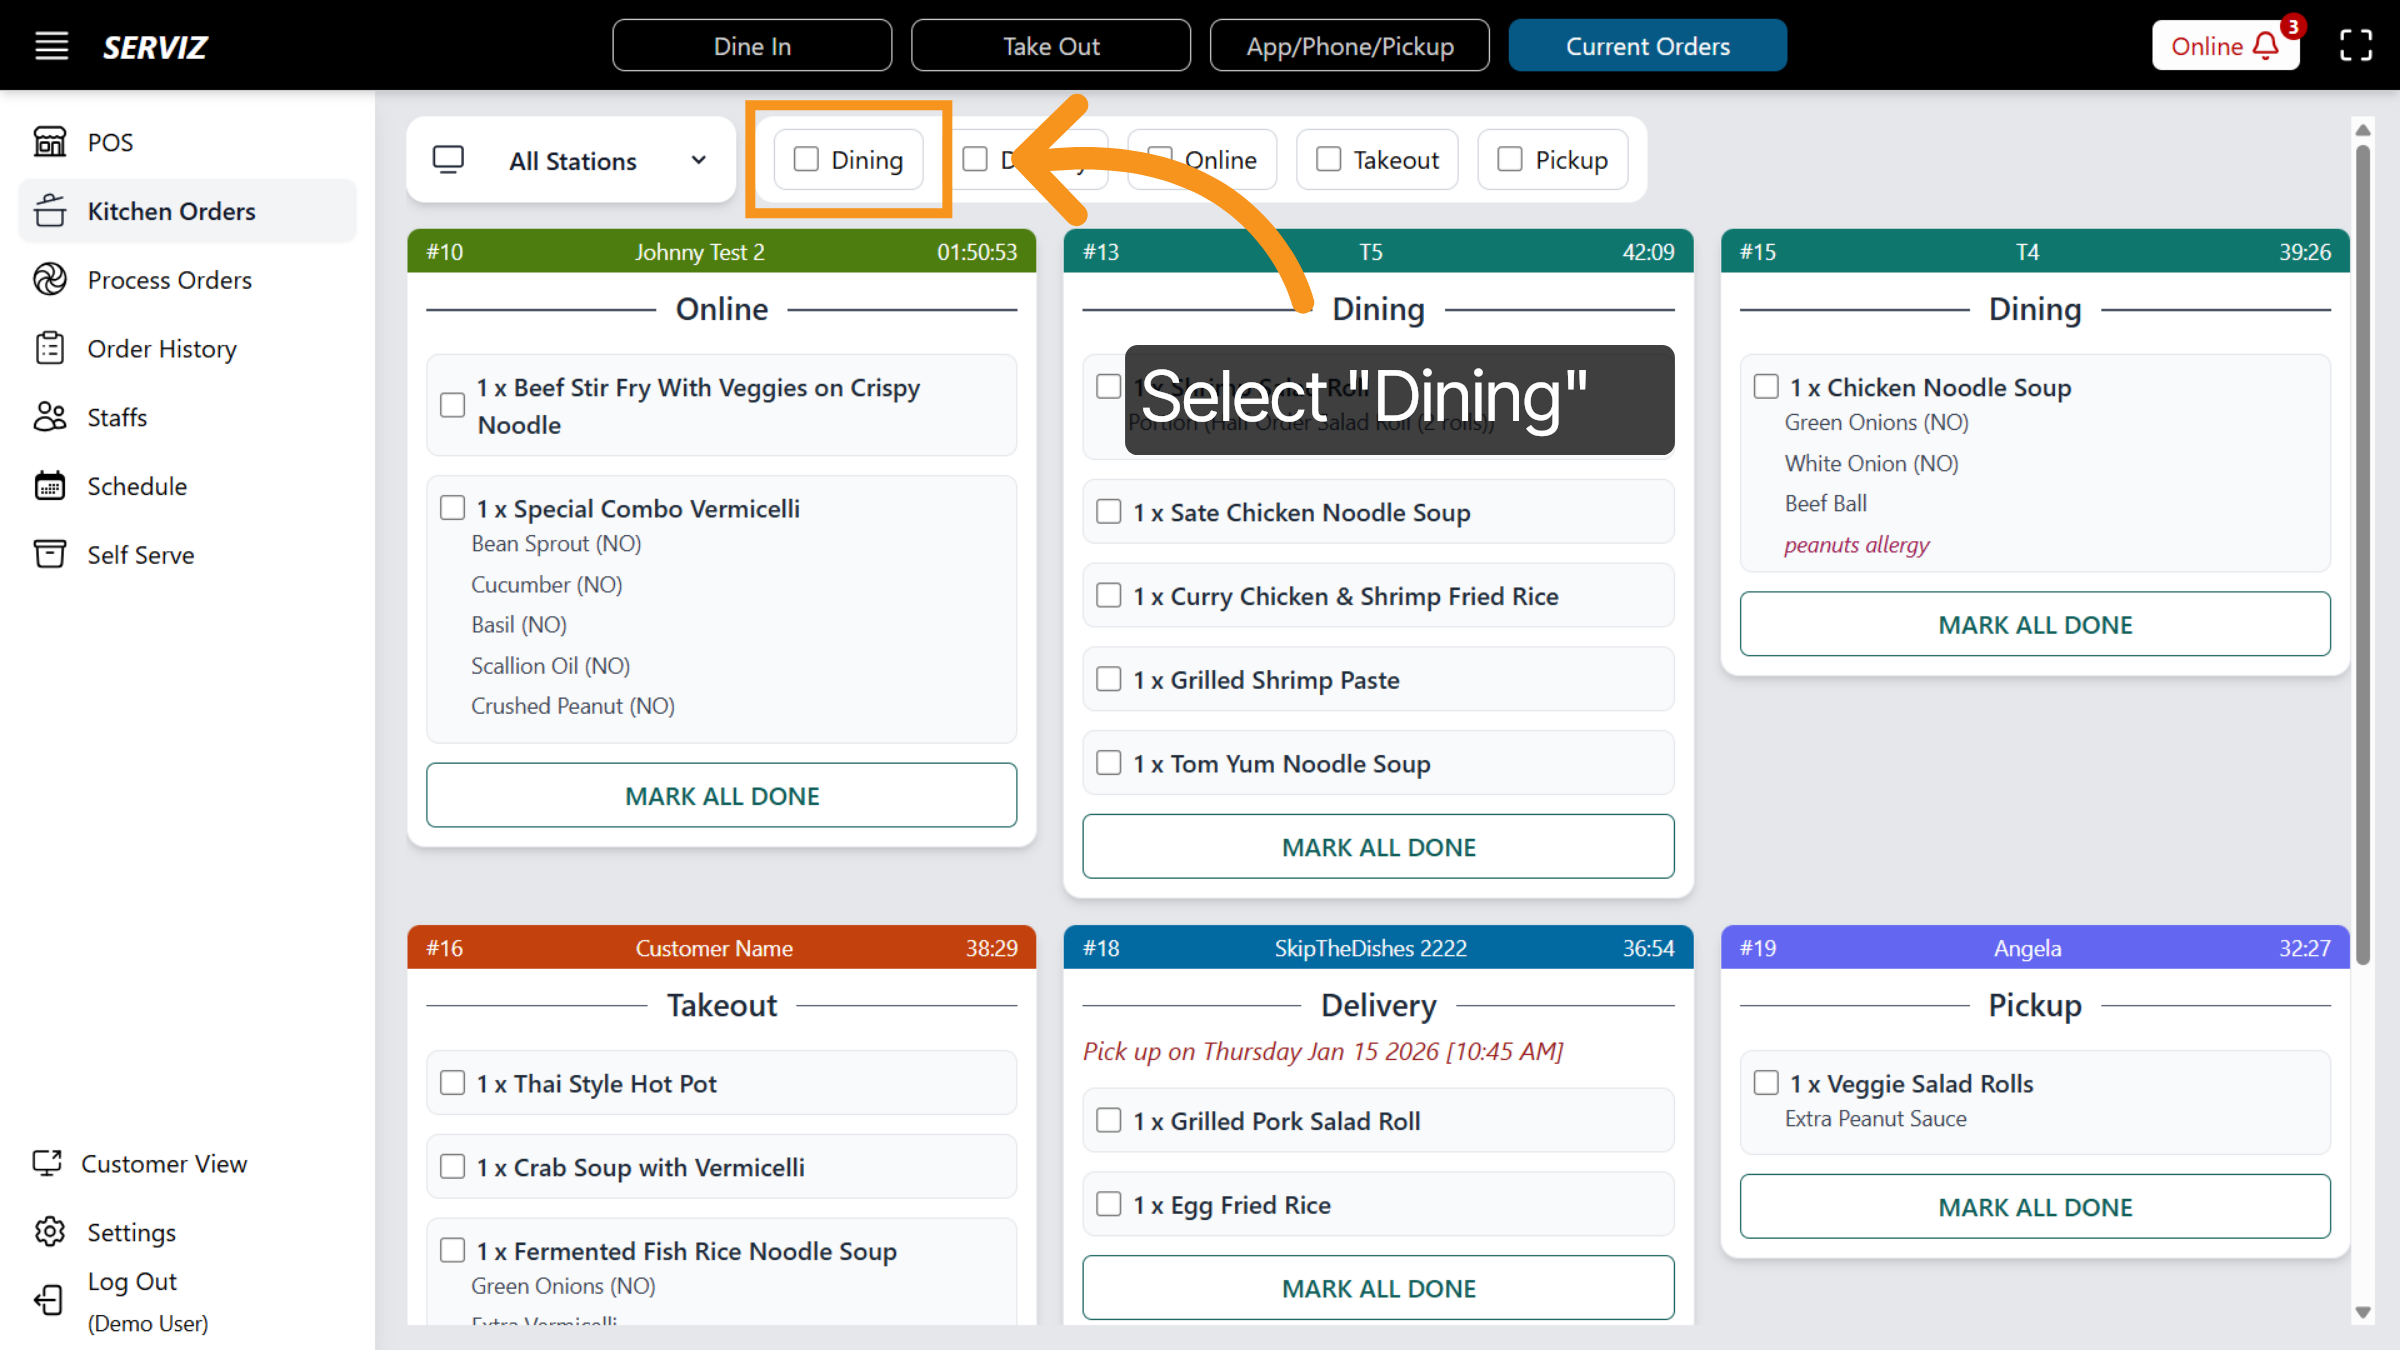
27. Dining selected
28. Delivery selected
29. Online Orders selected
30. Takeout selected
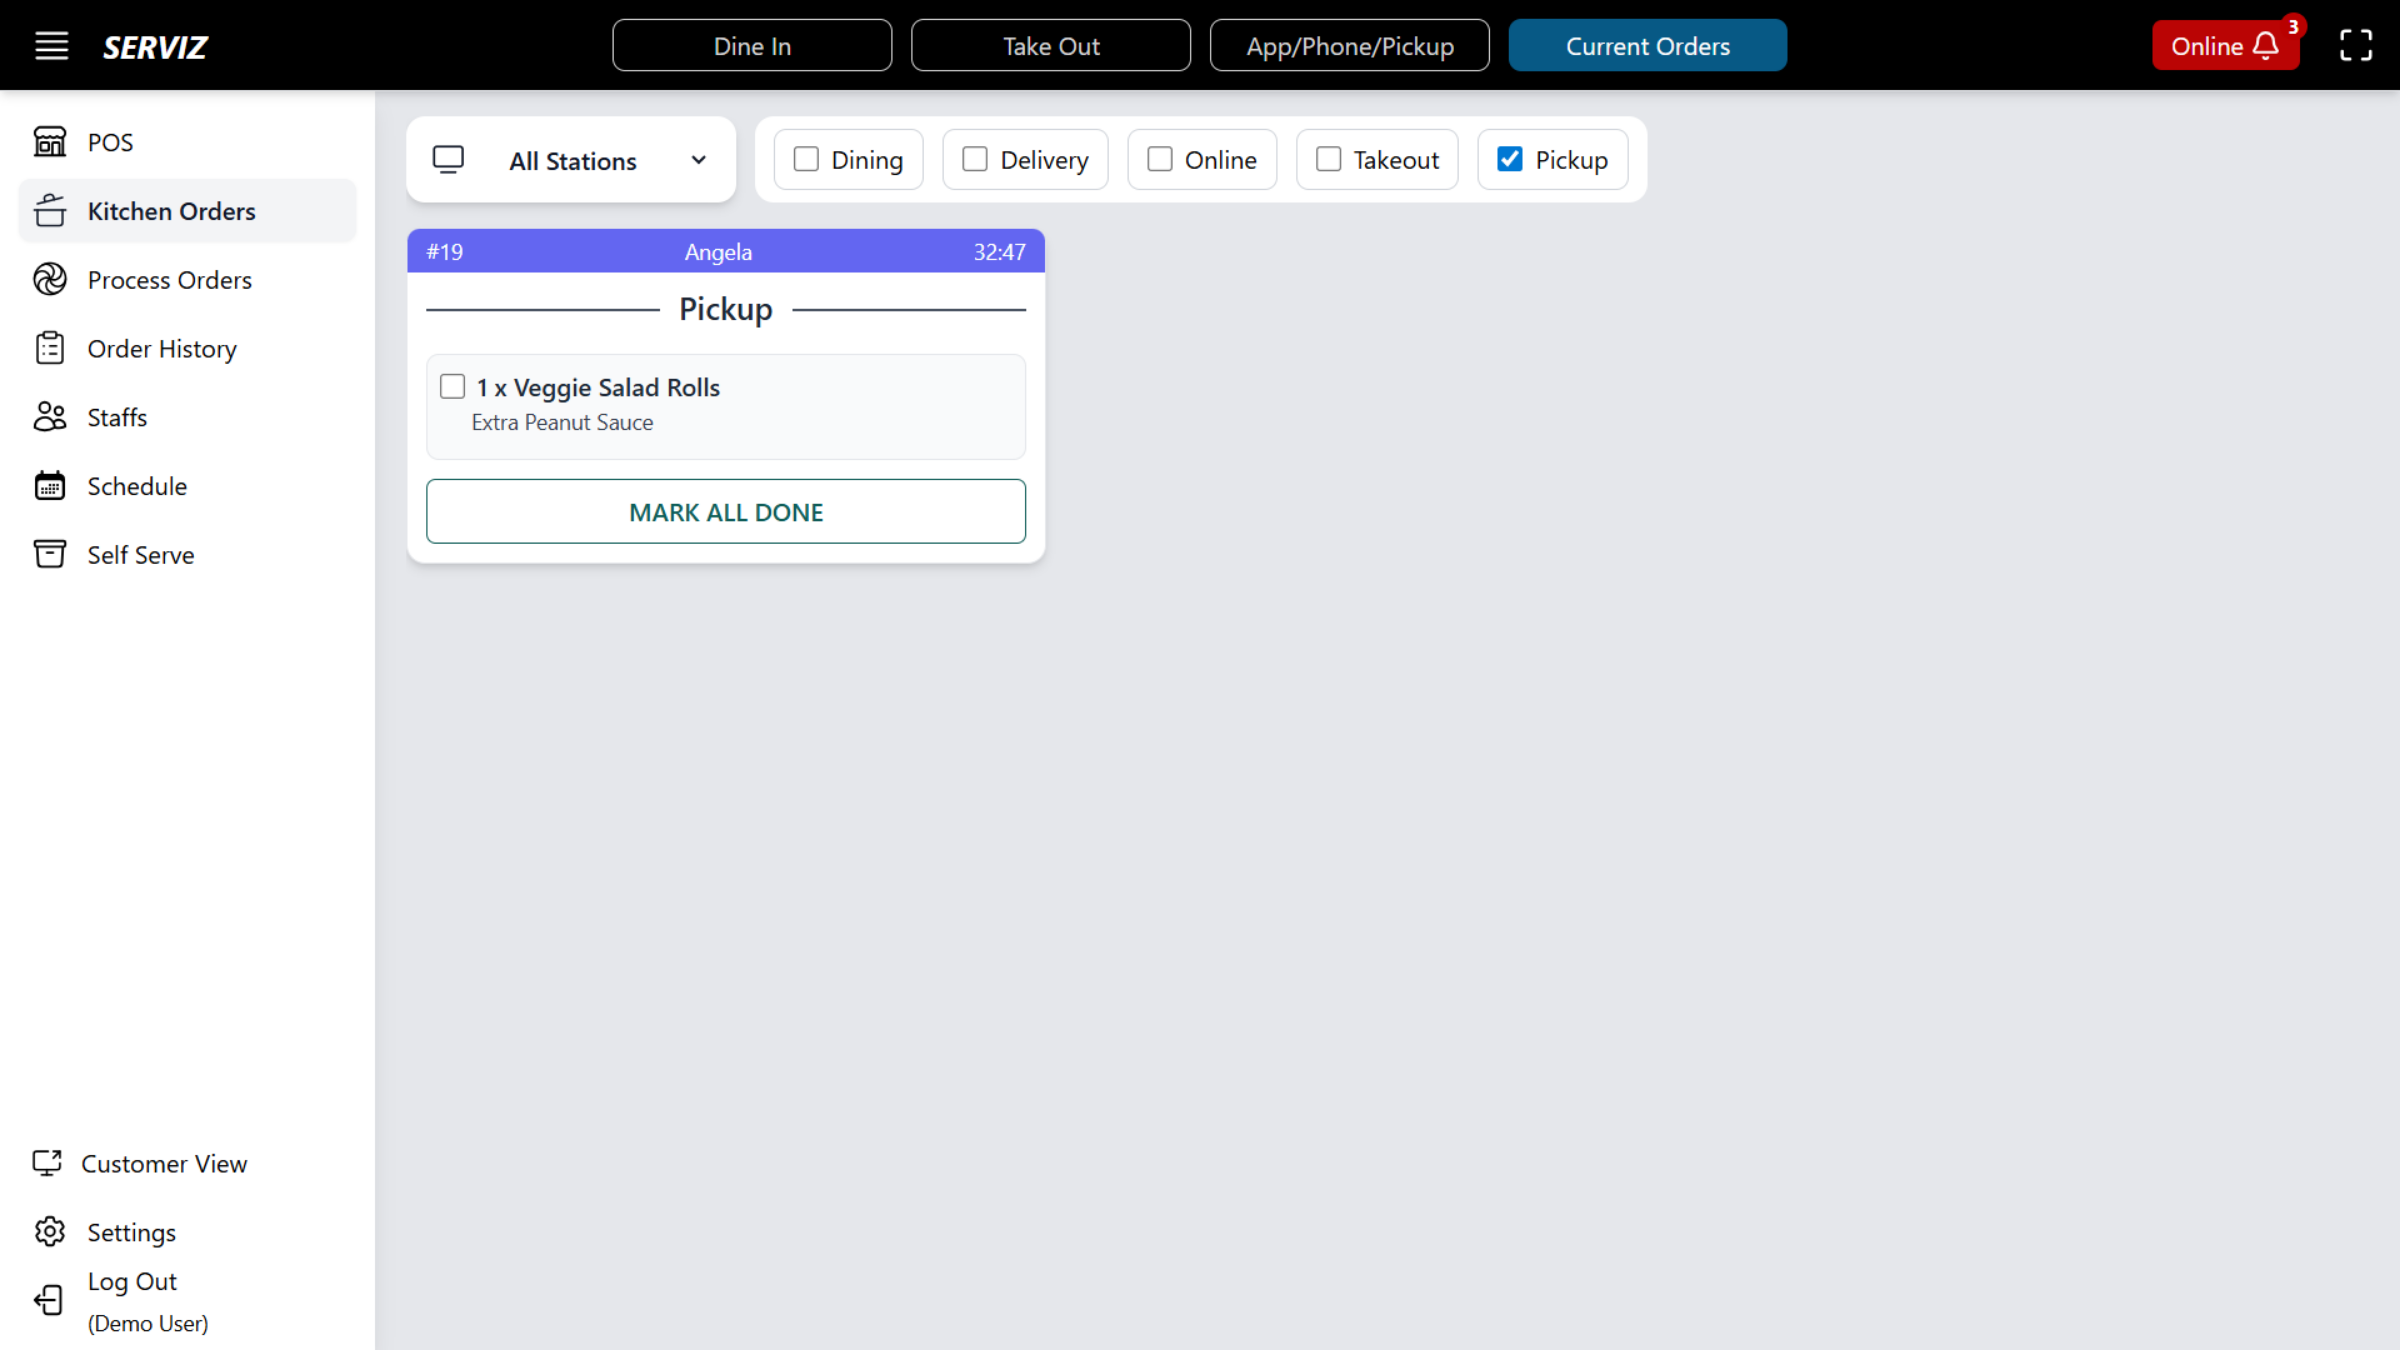
31. Pickup selected
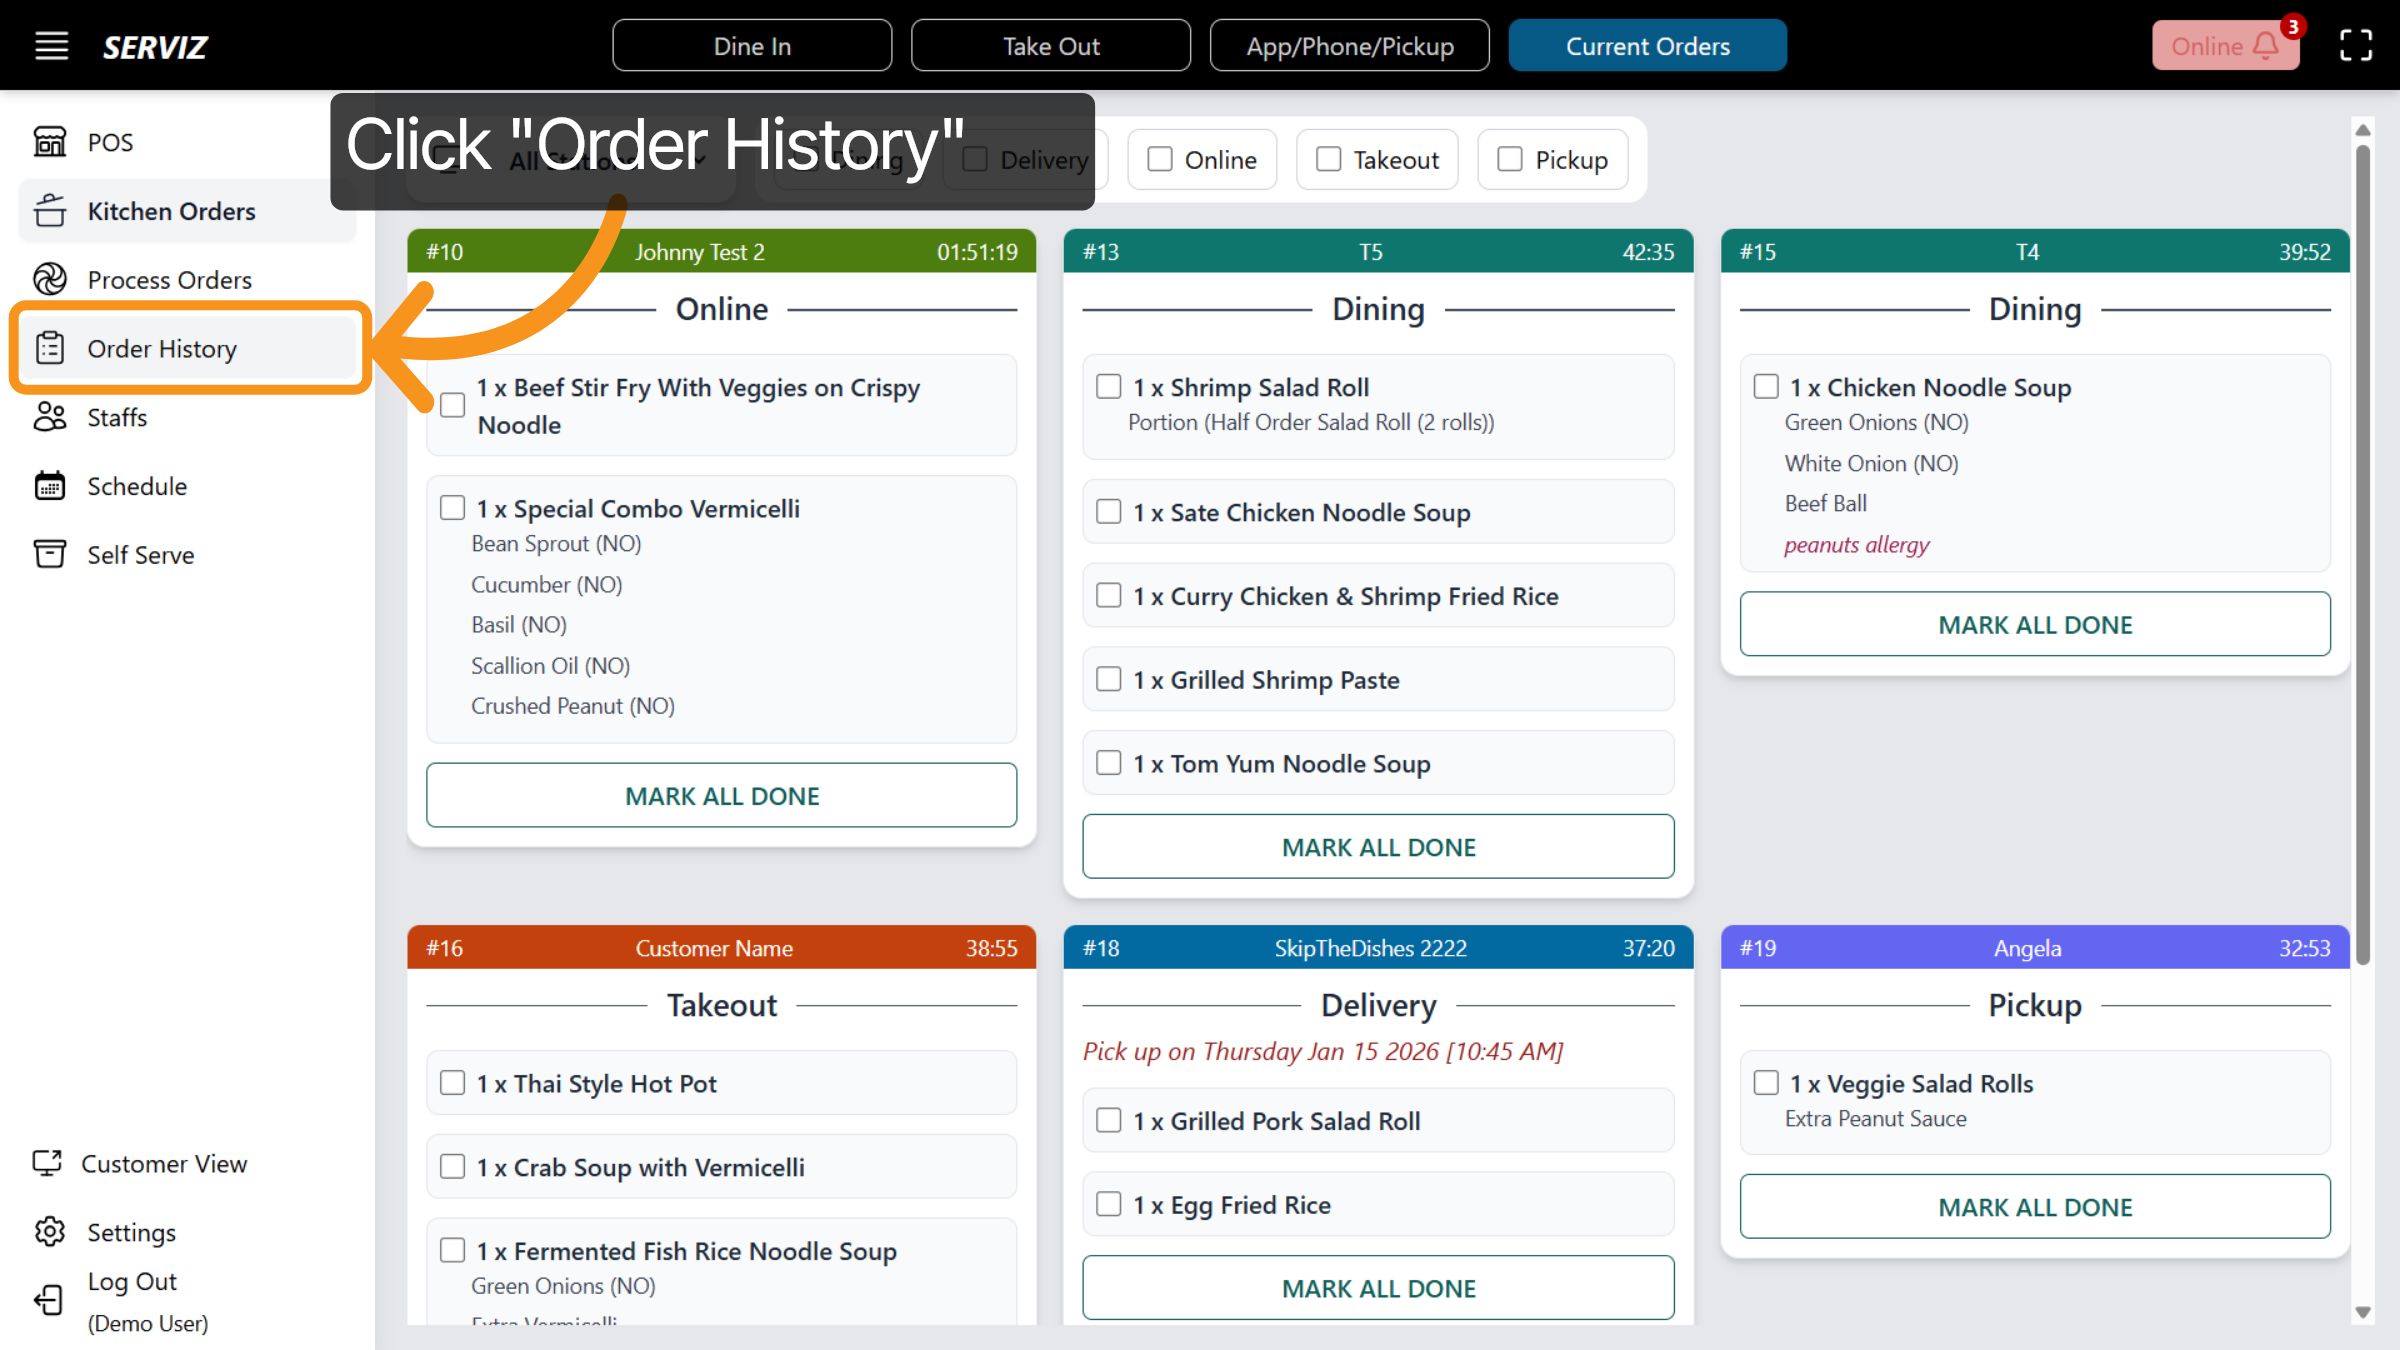
32. Access "Order History"
Now, let's click Order History to review all orders and transaction records.
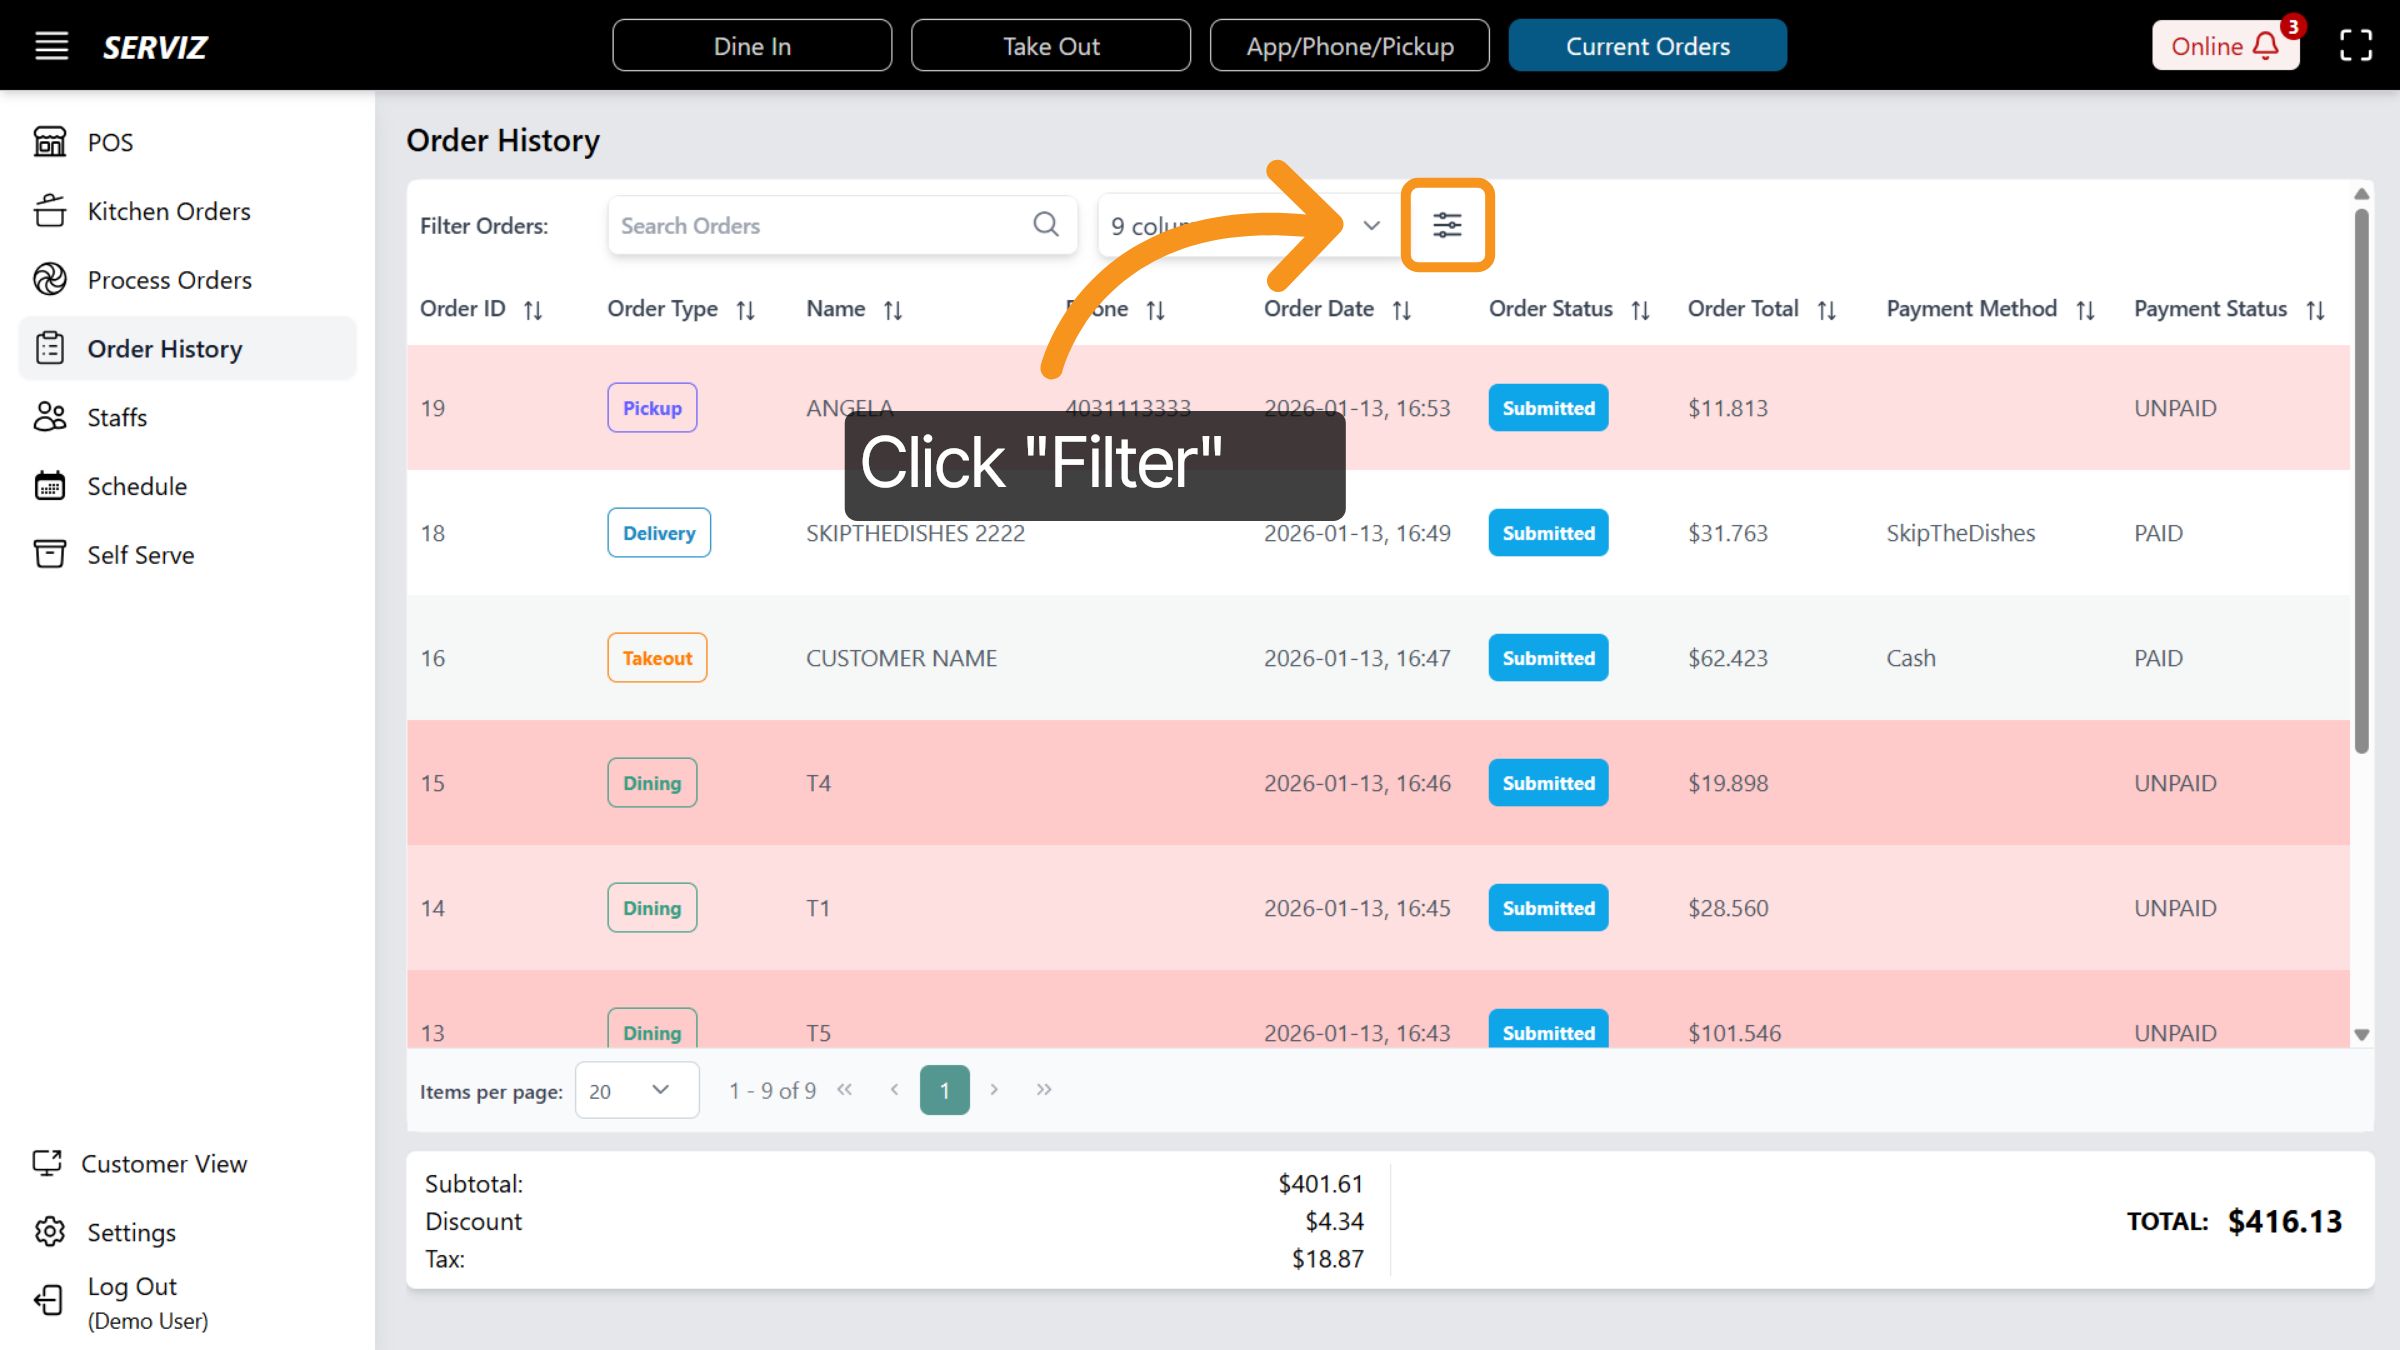
33. Order History Filters
Within the Order History section, you can search orders by Order ID, Order Type, customer name, phone number, Date, Status, Total, Payment Method, and Payment Status.

34. Click "Filter"
You can click “Filter” to view additional filtering options.
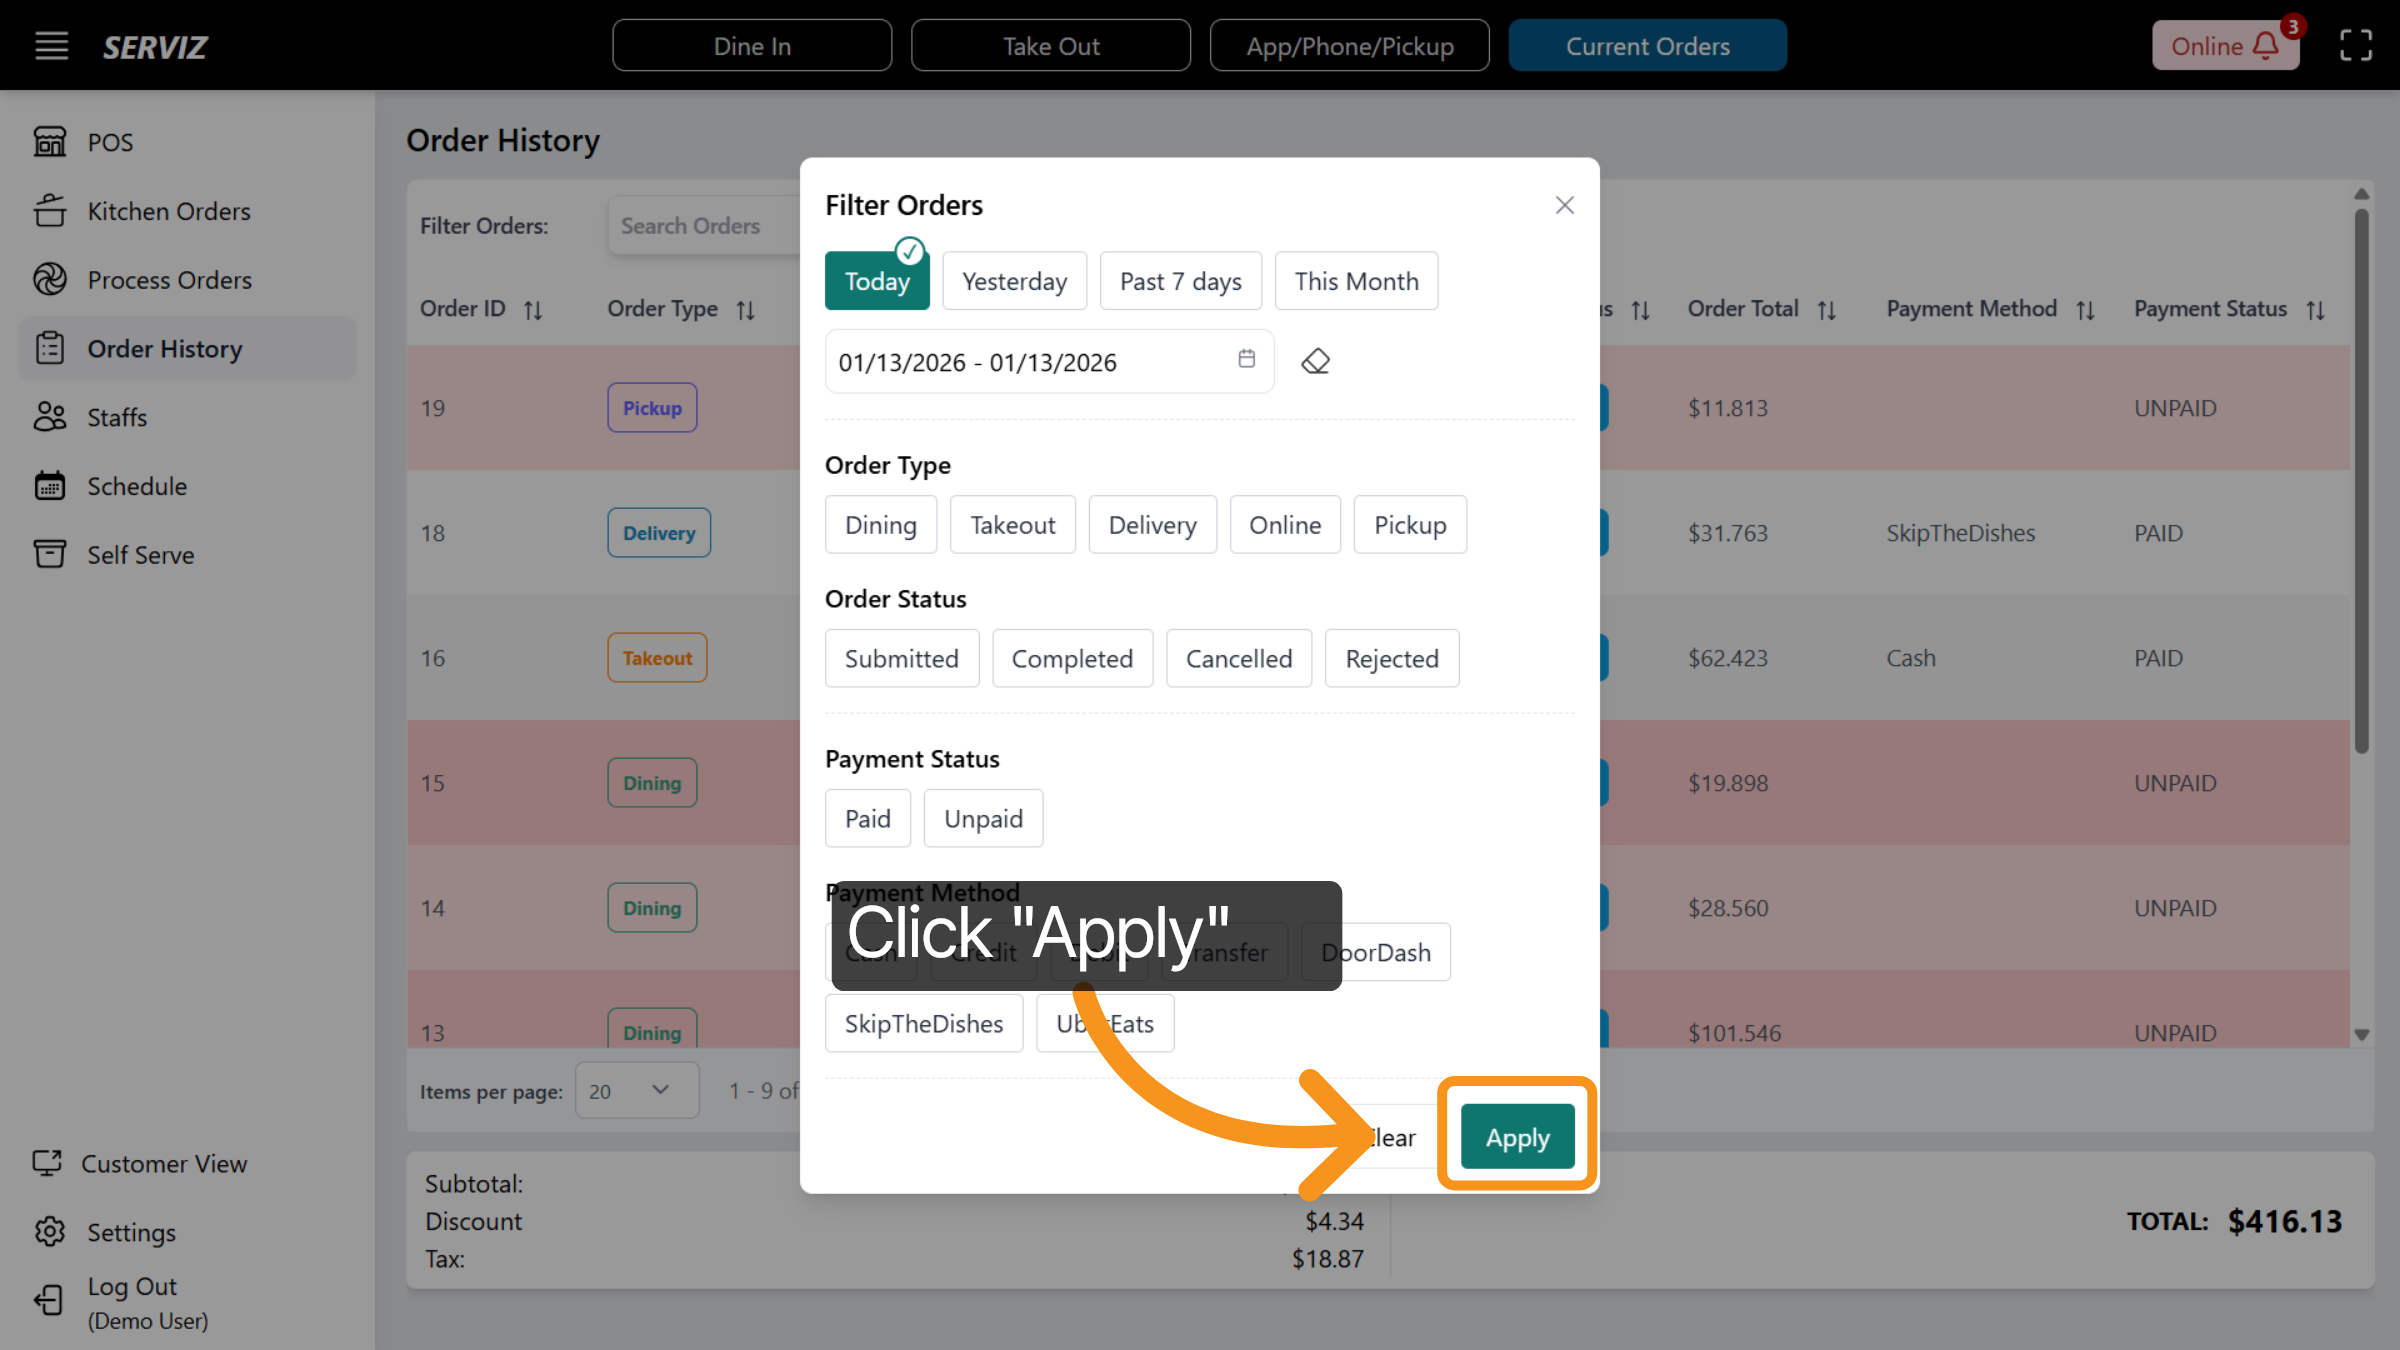
35. Select Today Filter
It is possible to filter orders based on specific timeframes, including Today, Yesterday, the Past 7 Days, the Current Month, or a Custom Date Range.
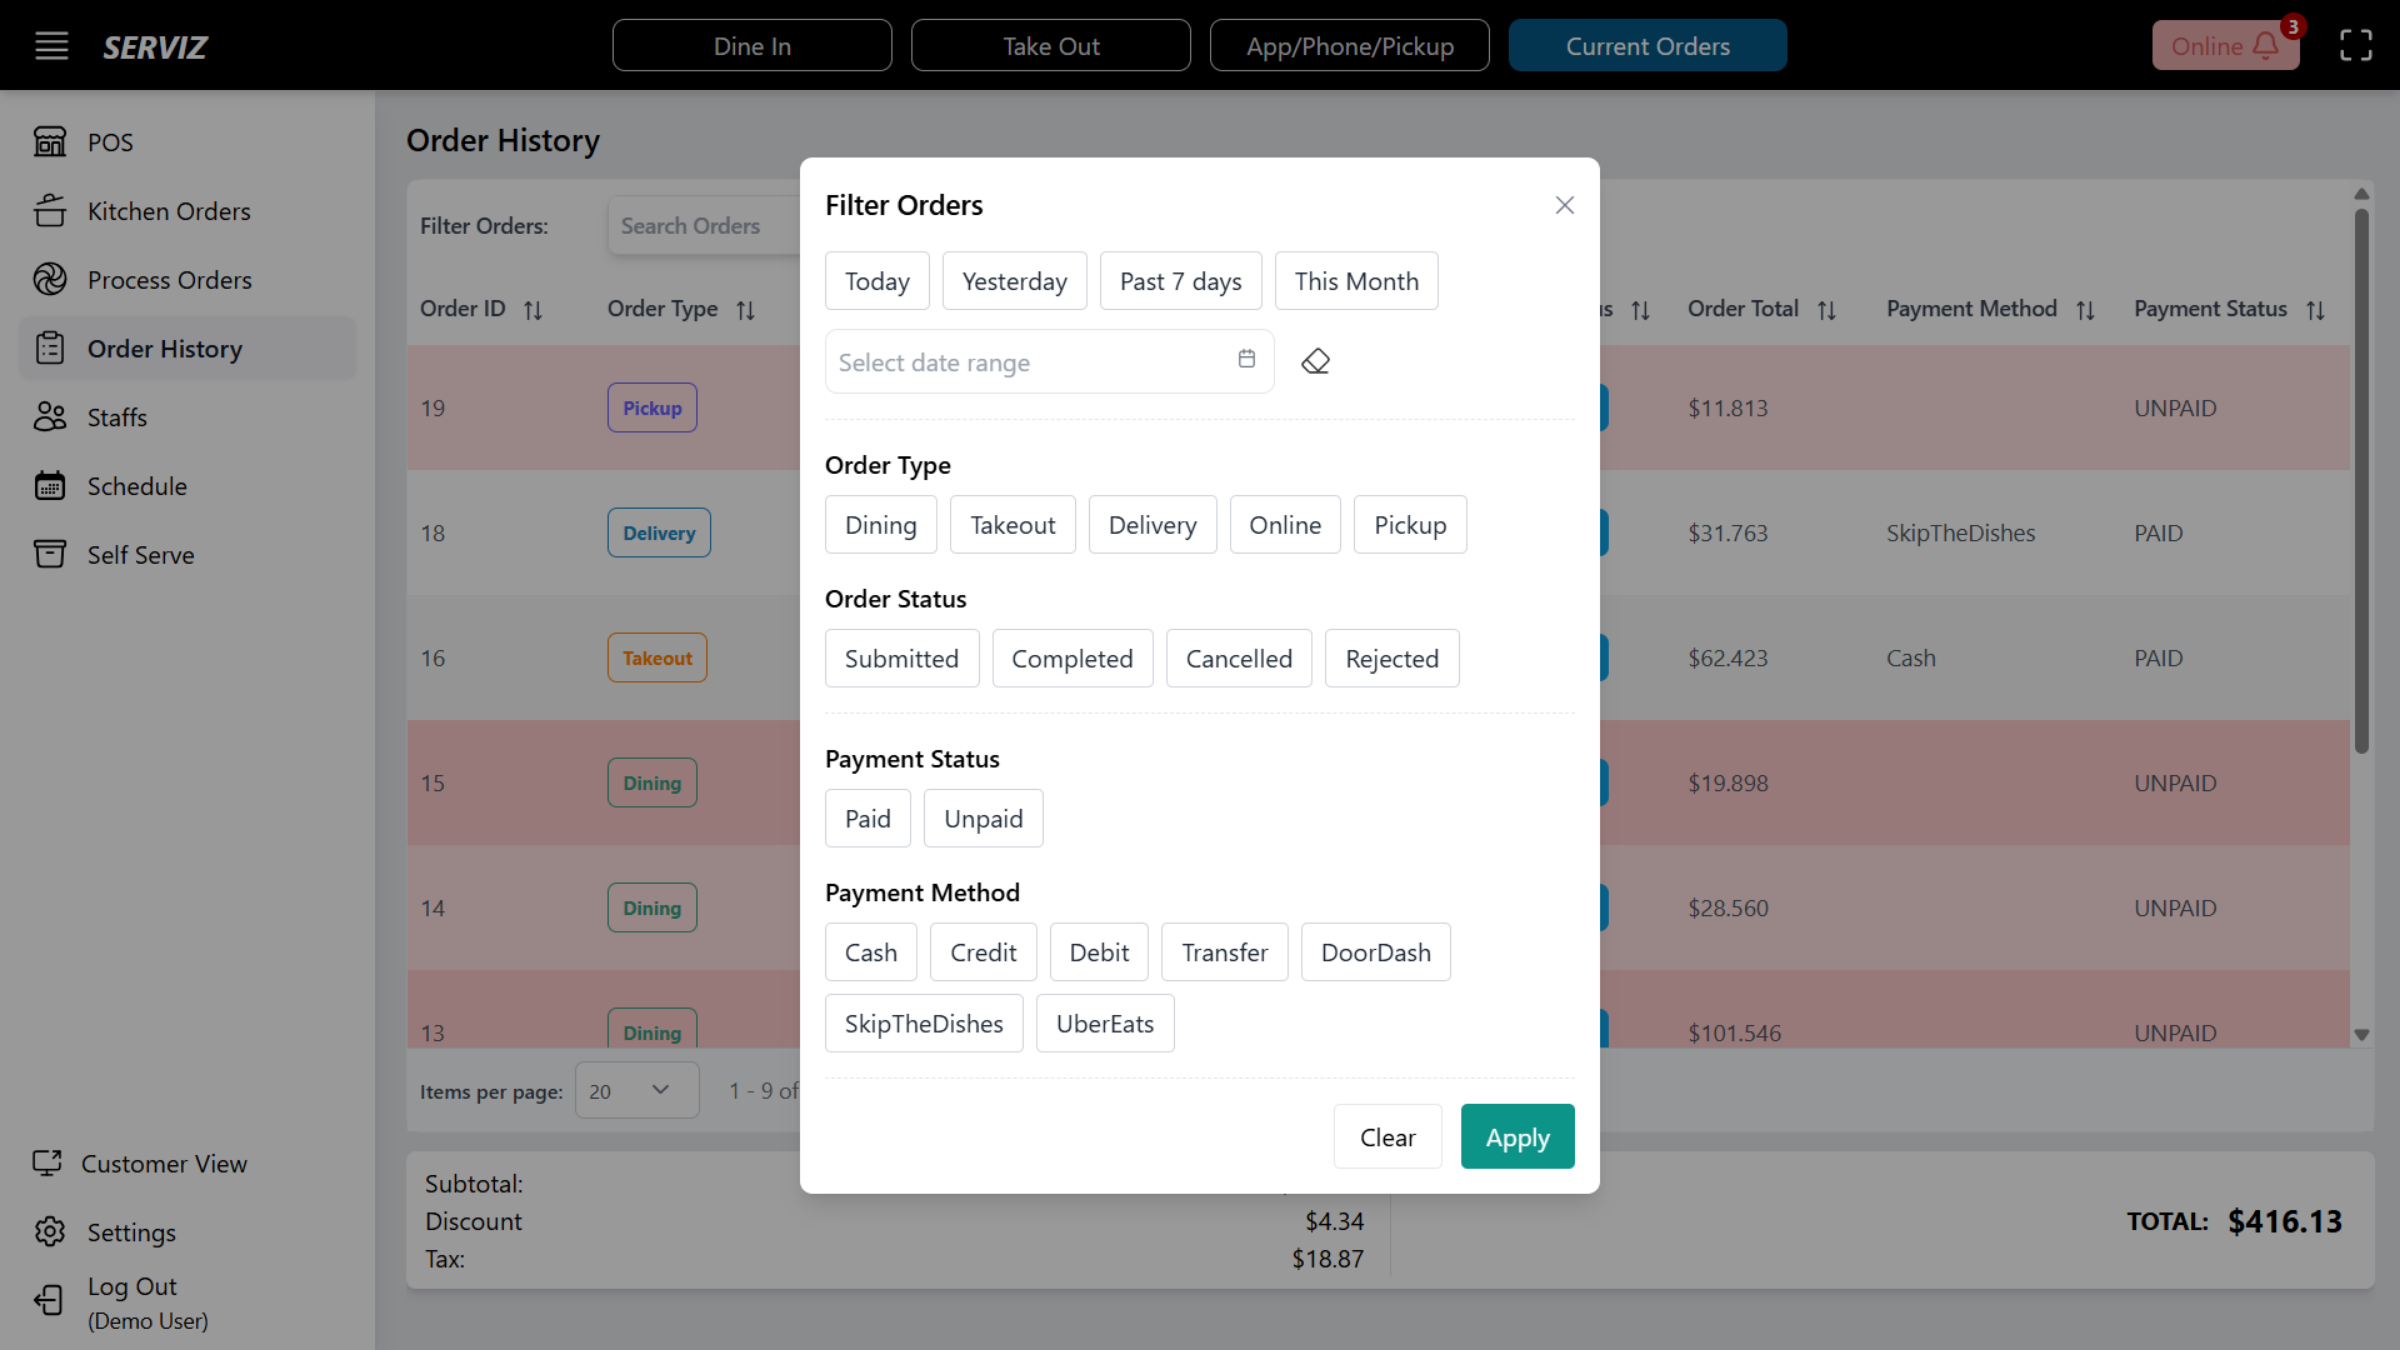
36. Apply and Clear Filters
Click Apply to activate filters or Clear to reset
37. Order History Continue
At the bottom of the page, you can observe the subtotal, applicable discounts, and taxes associated with the selected time frame.
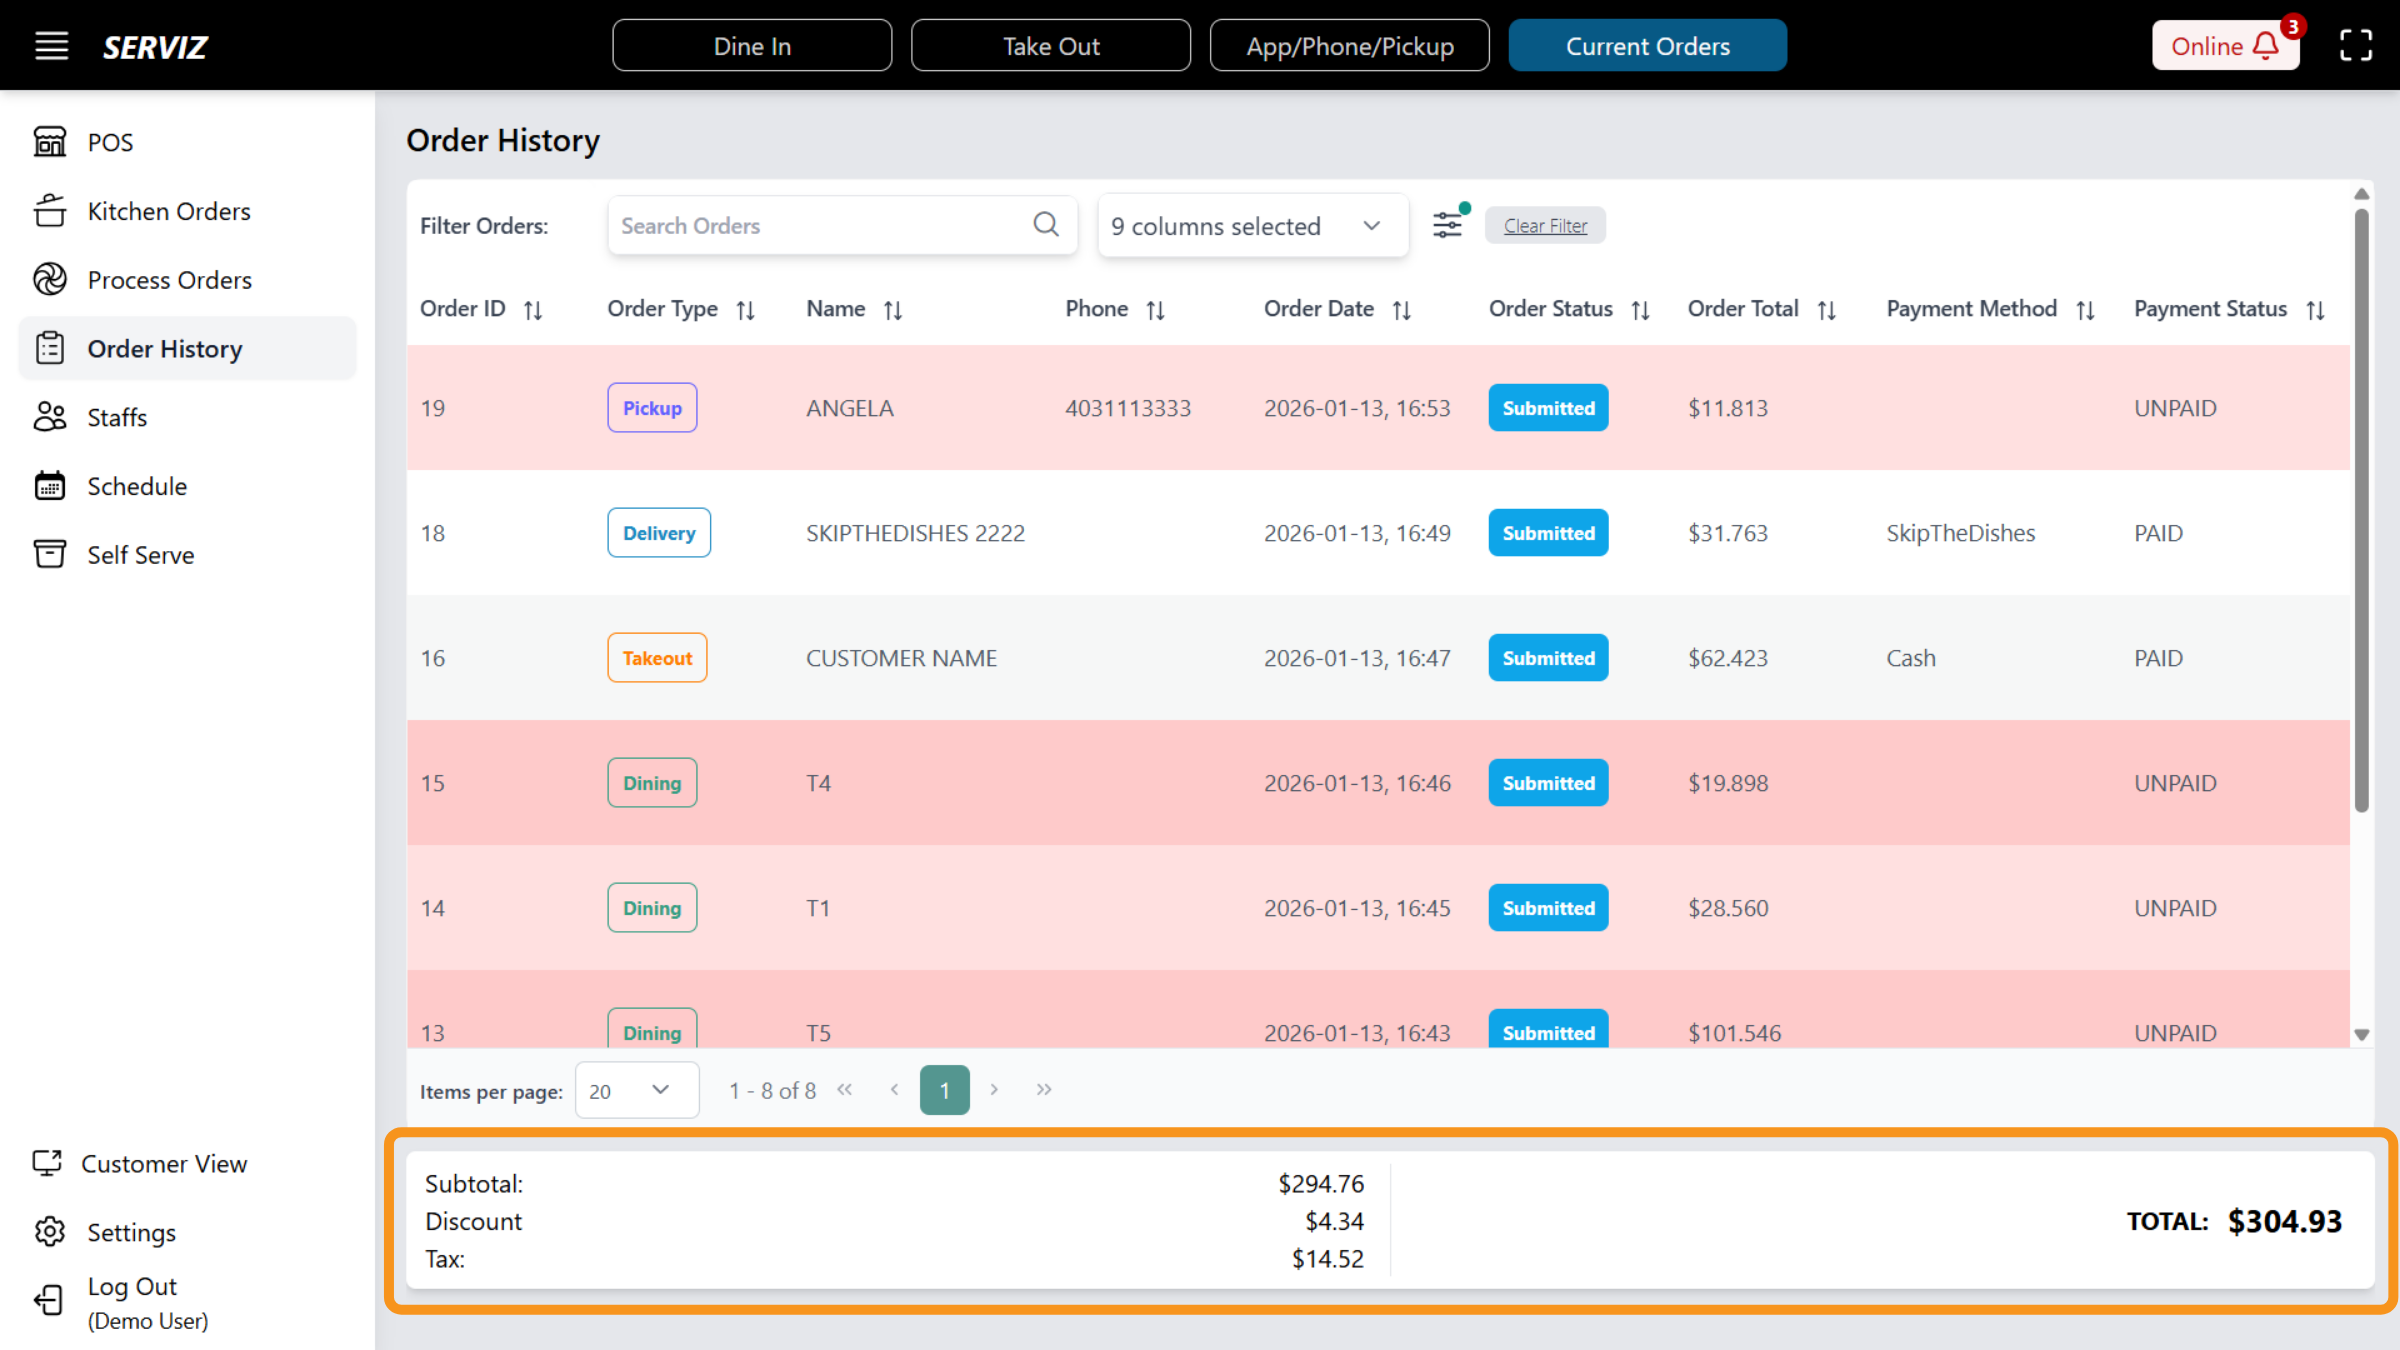
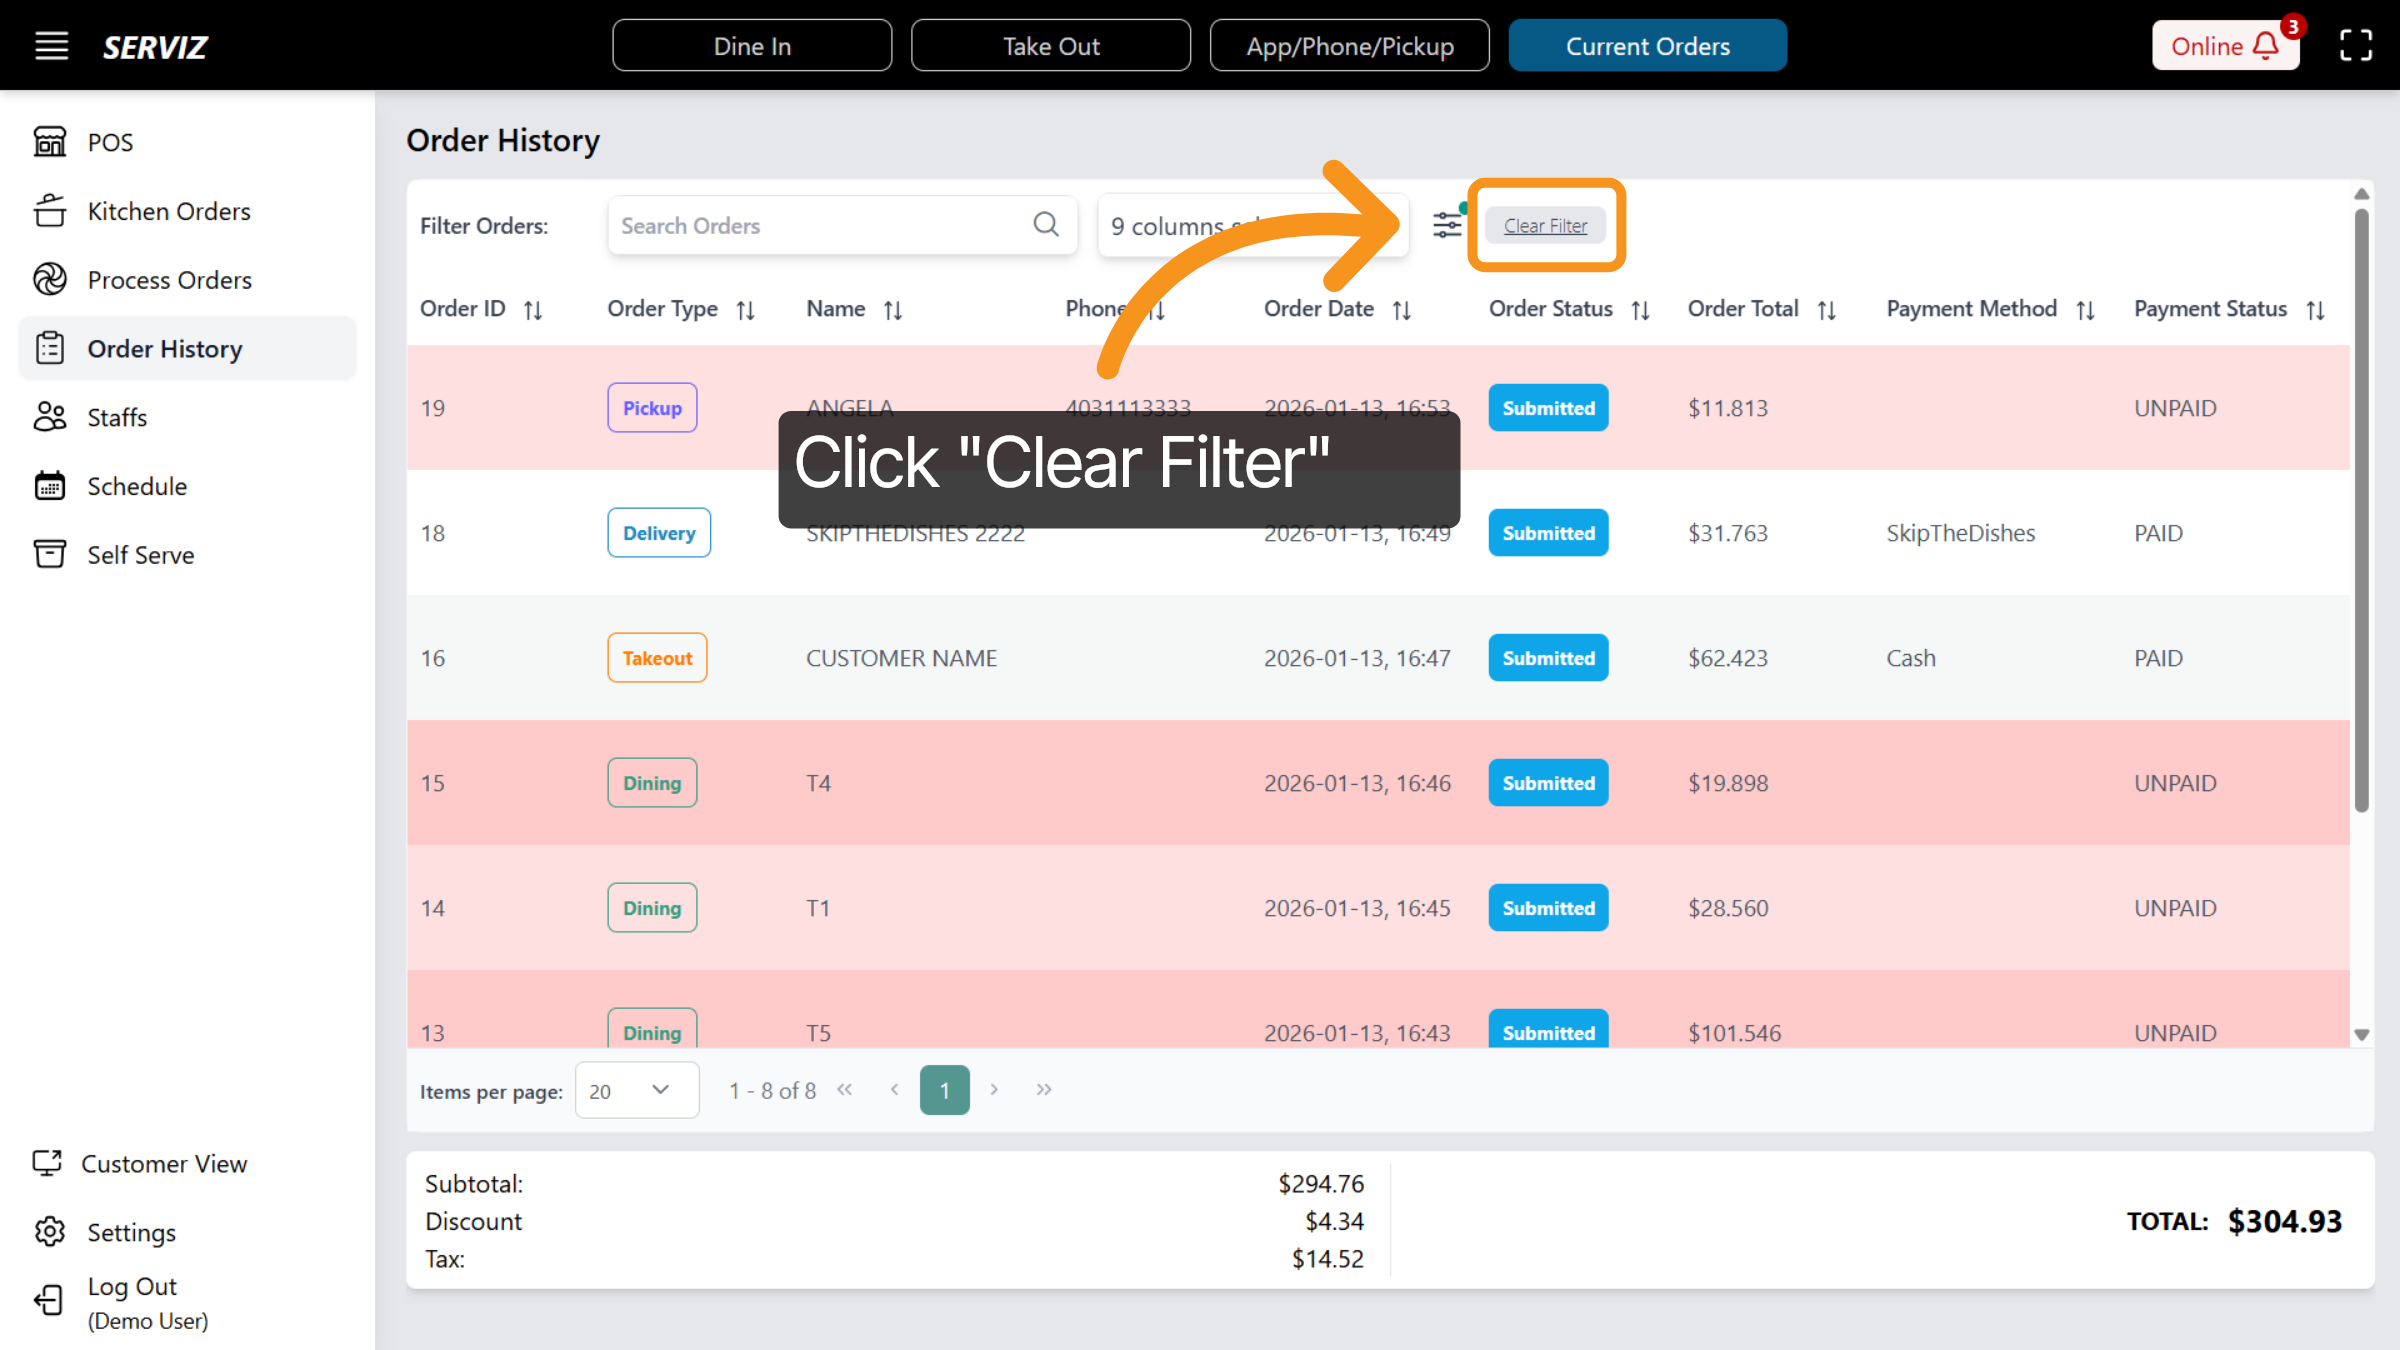
38. Clear Filters
To reset all search and filter options, you can click Clear Filter.
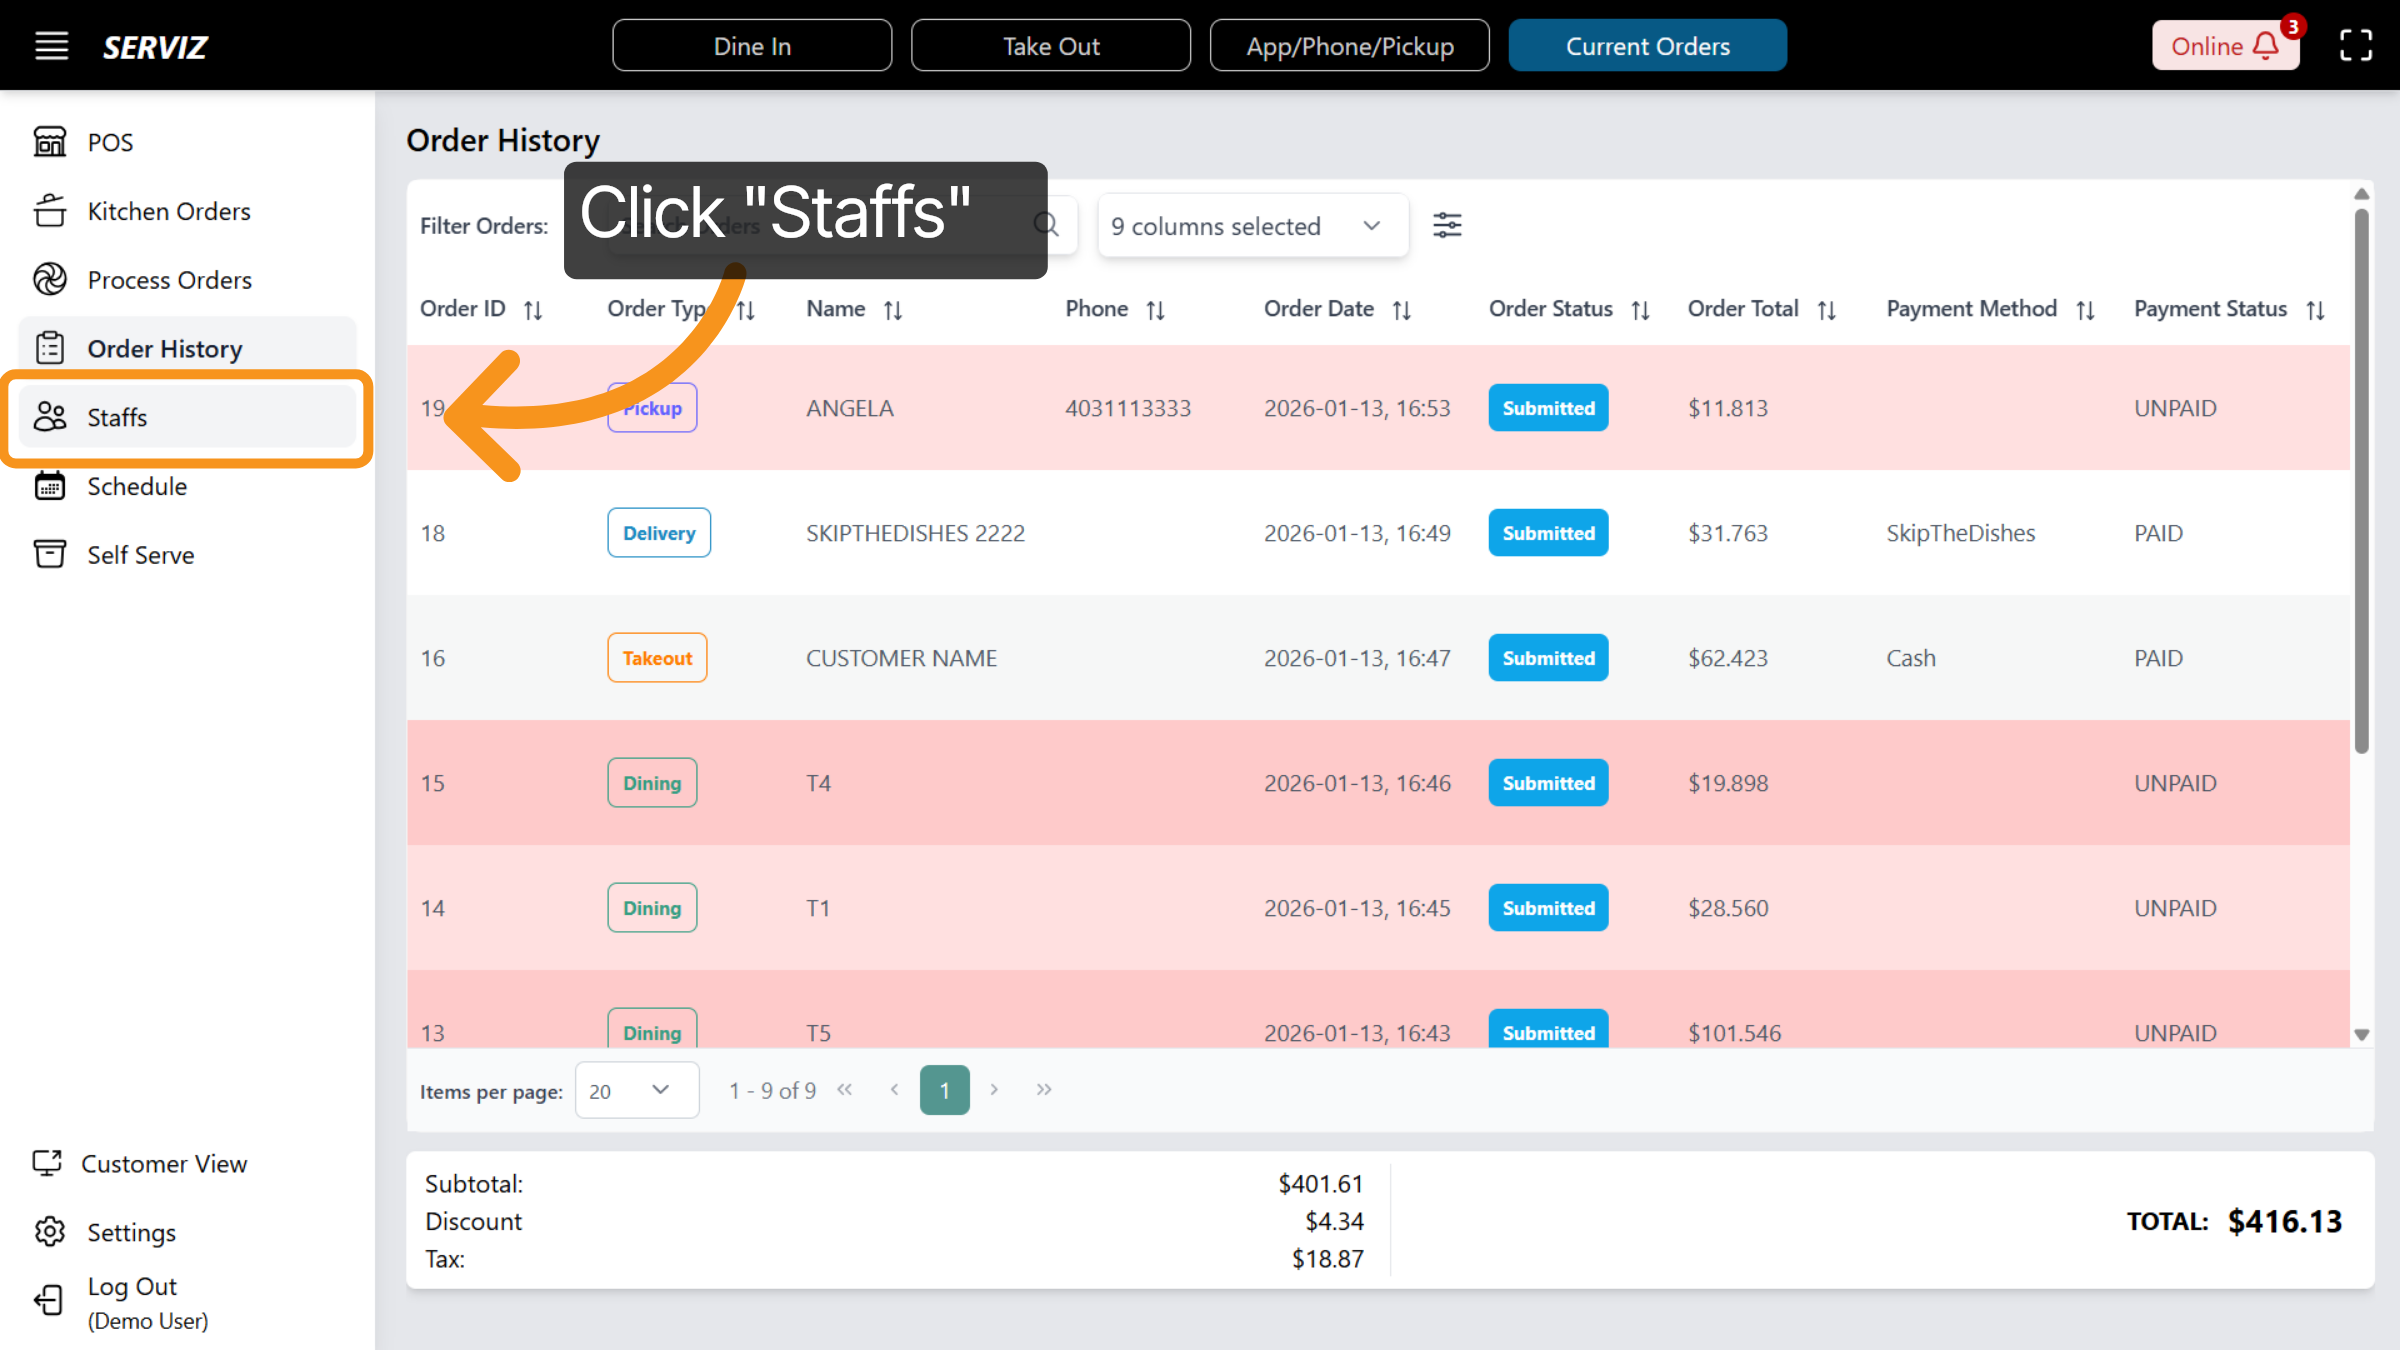
39. Access Staffs Section
Let's move on to Staff where you can access the employee login and logout terminal.
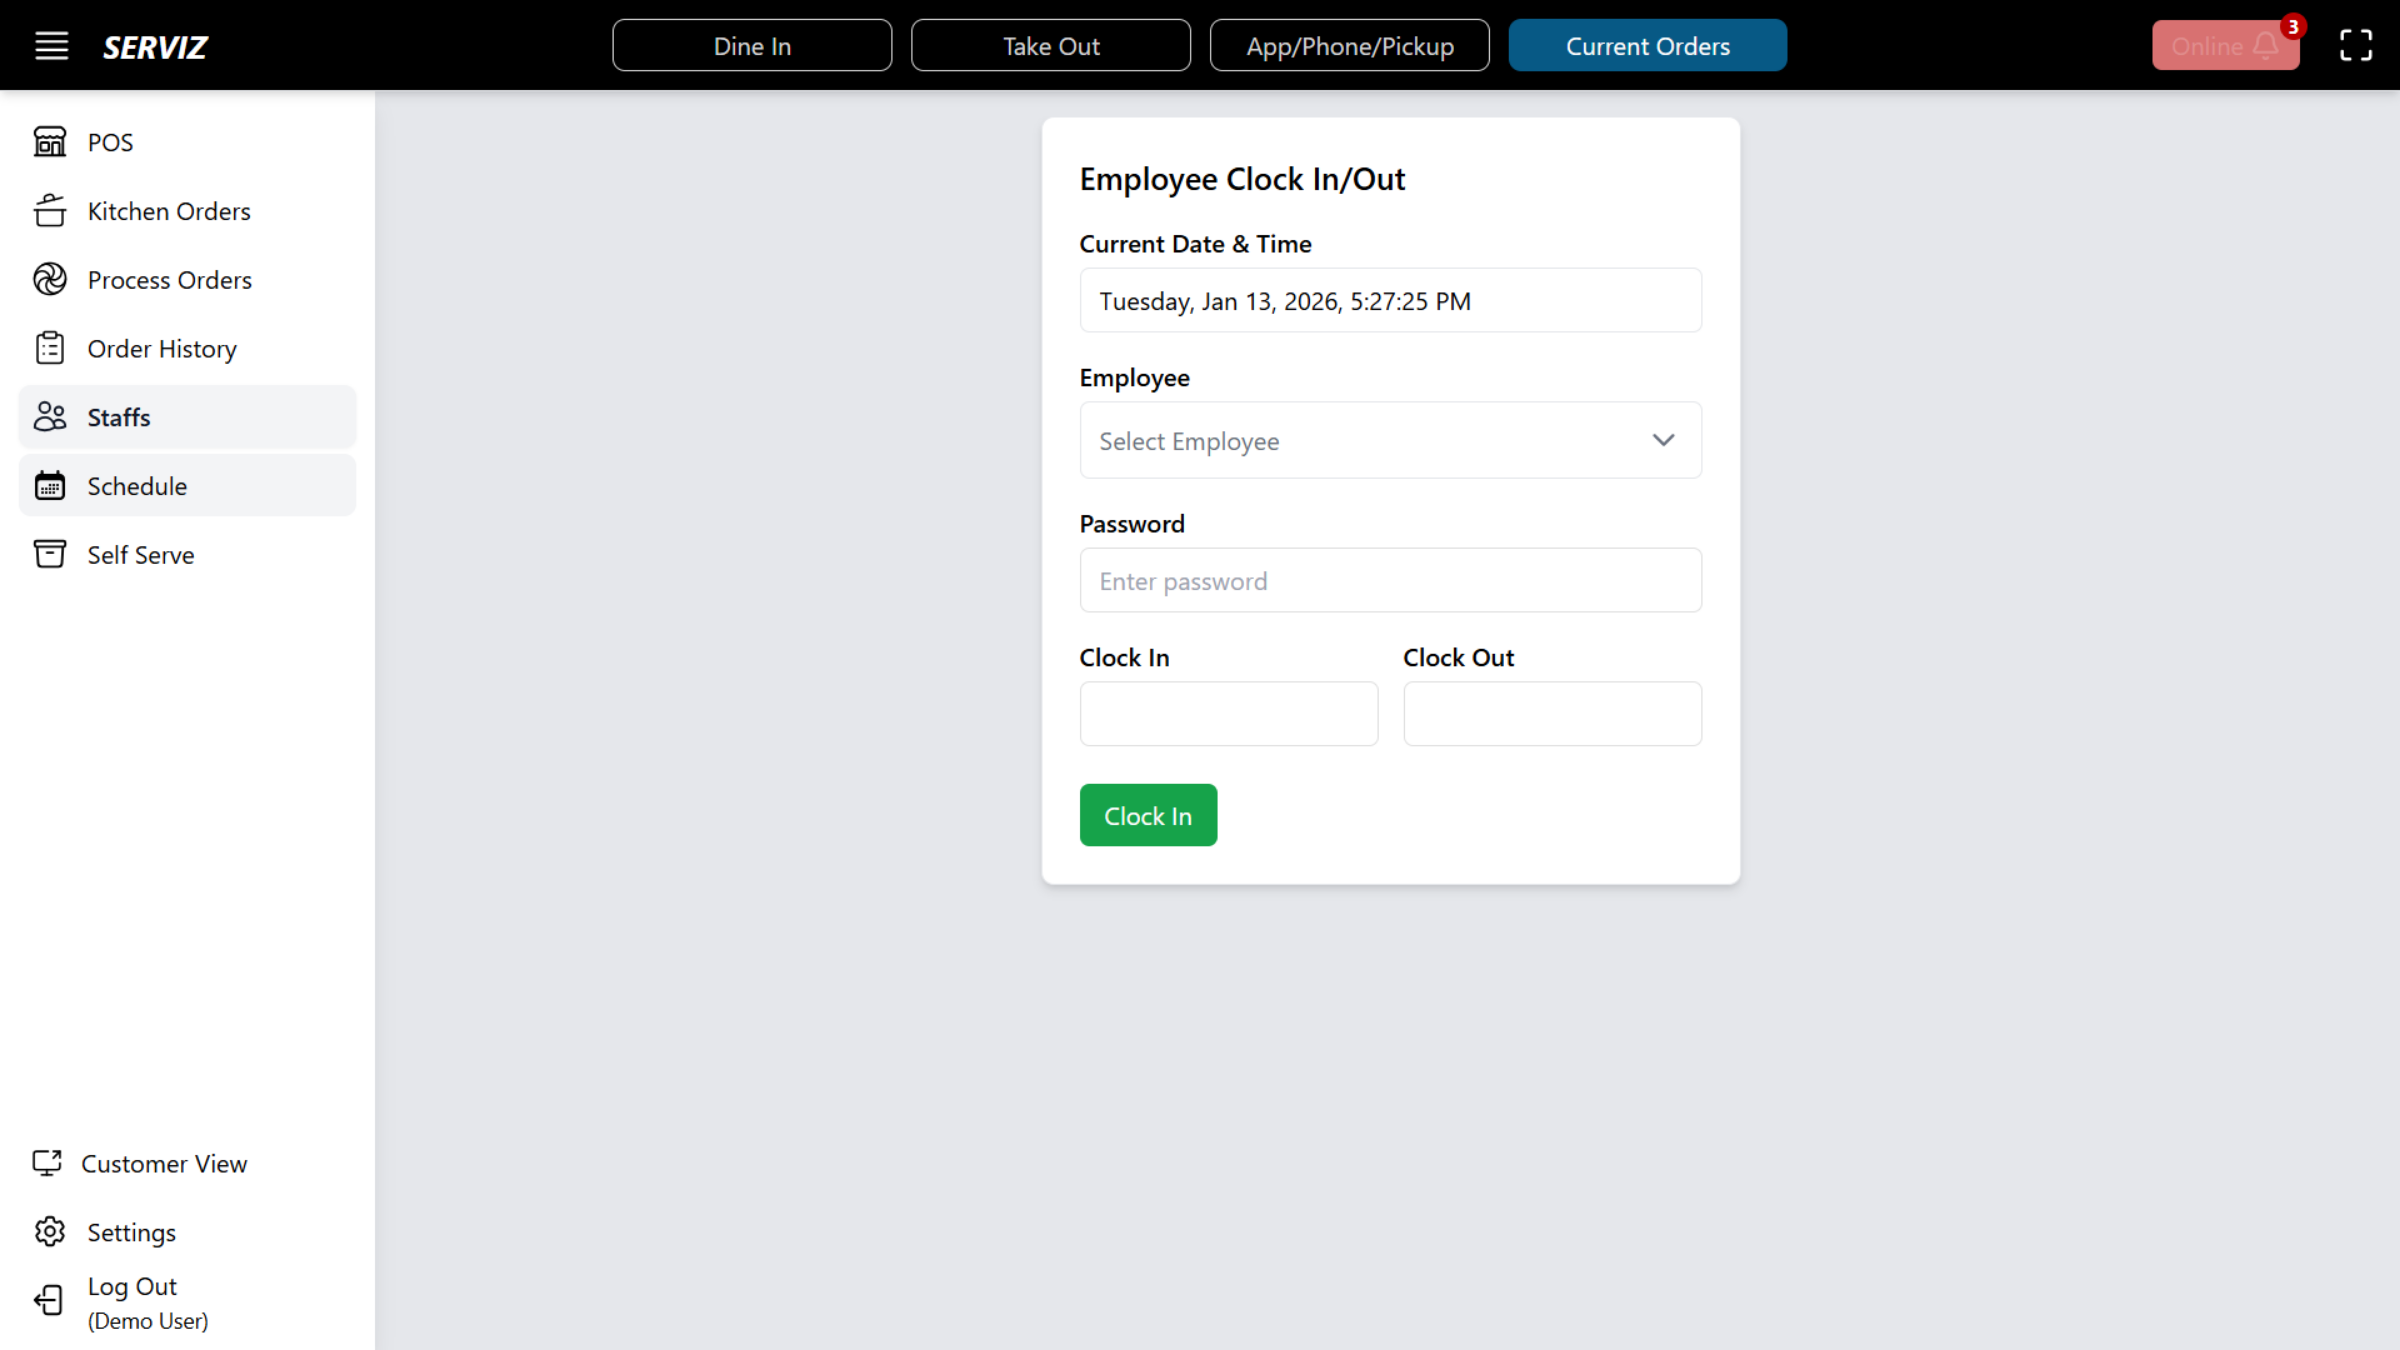
40. Employee Clock in/ Clock out Terminal
Employees must input their password to clock in at the start of their shift and clock out at the end.
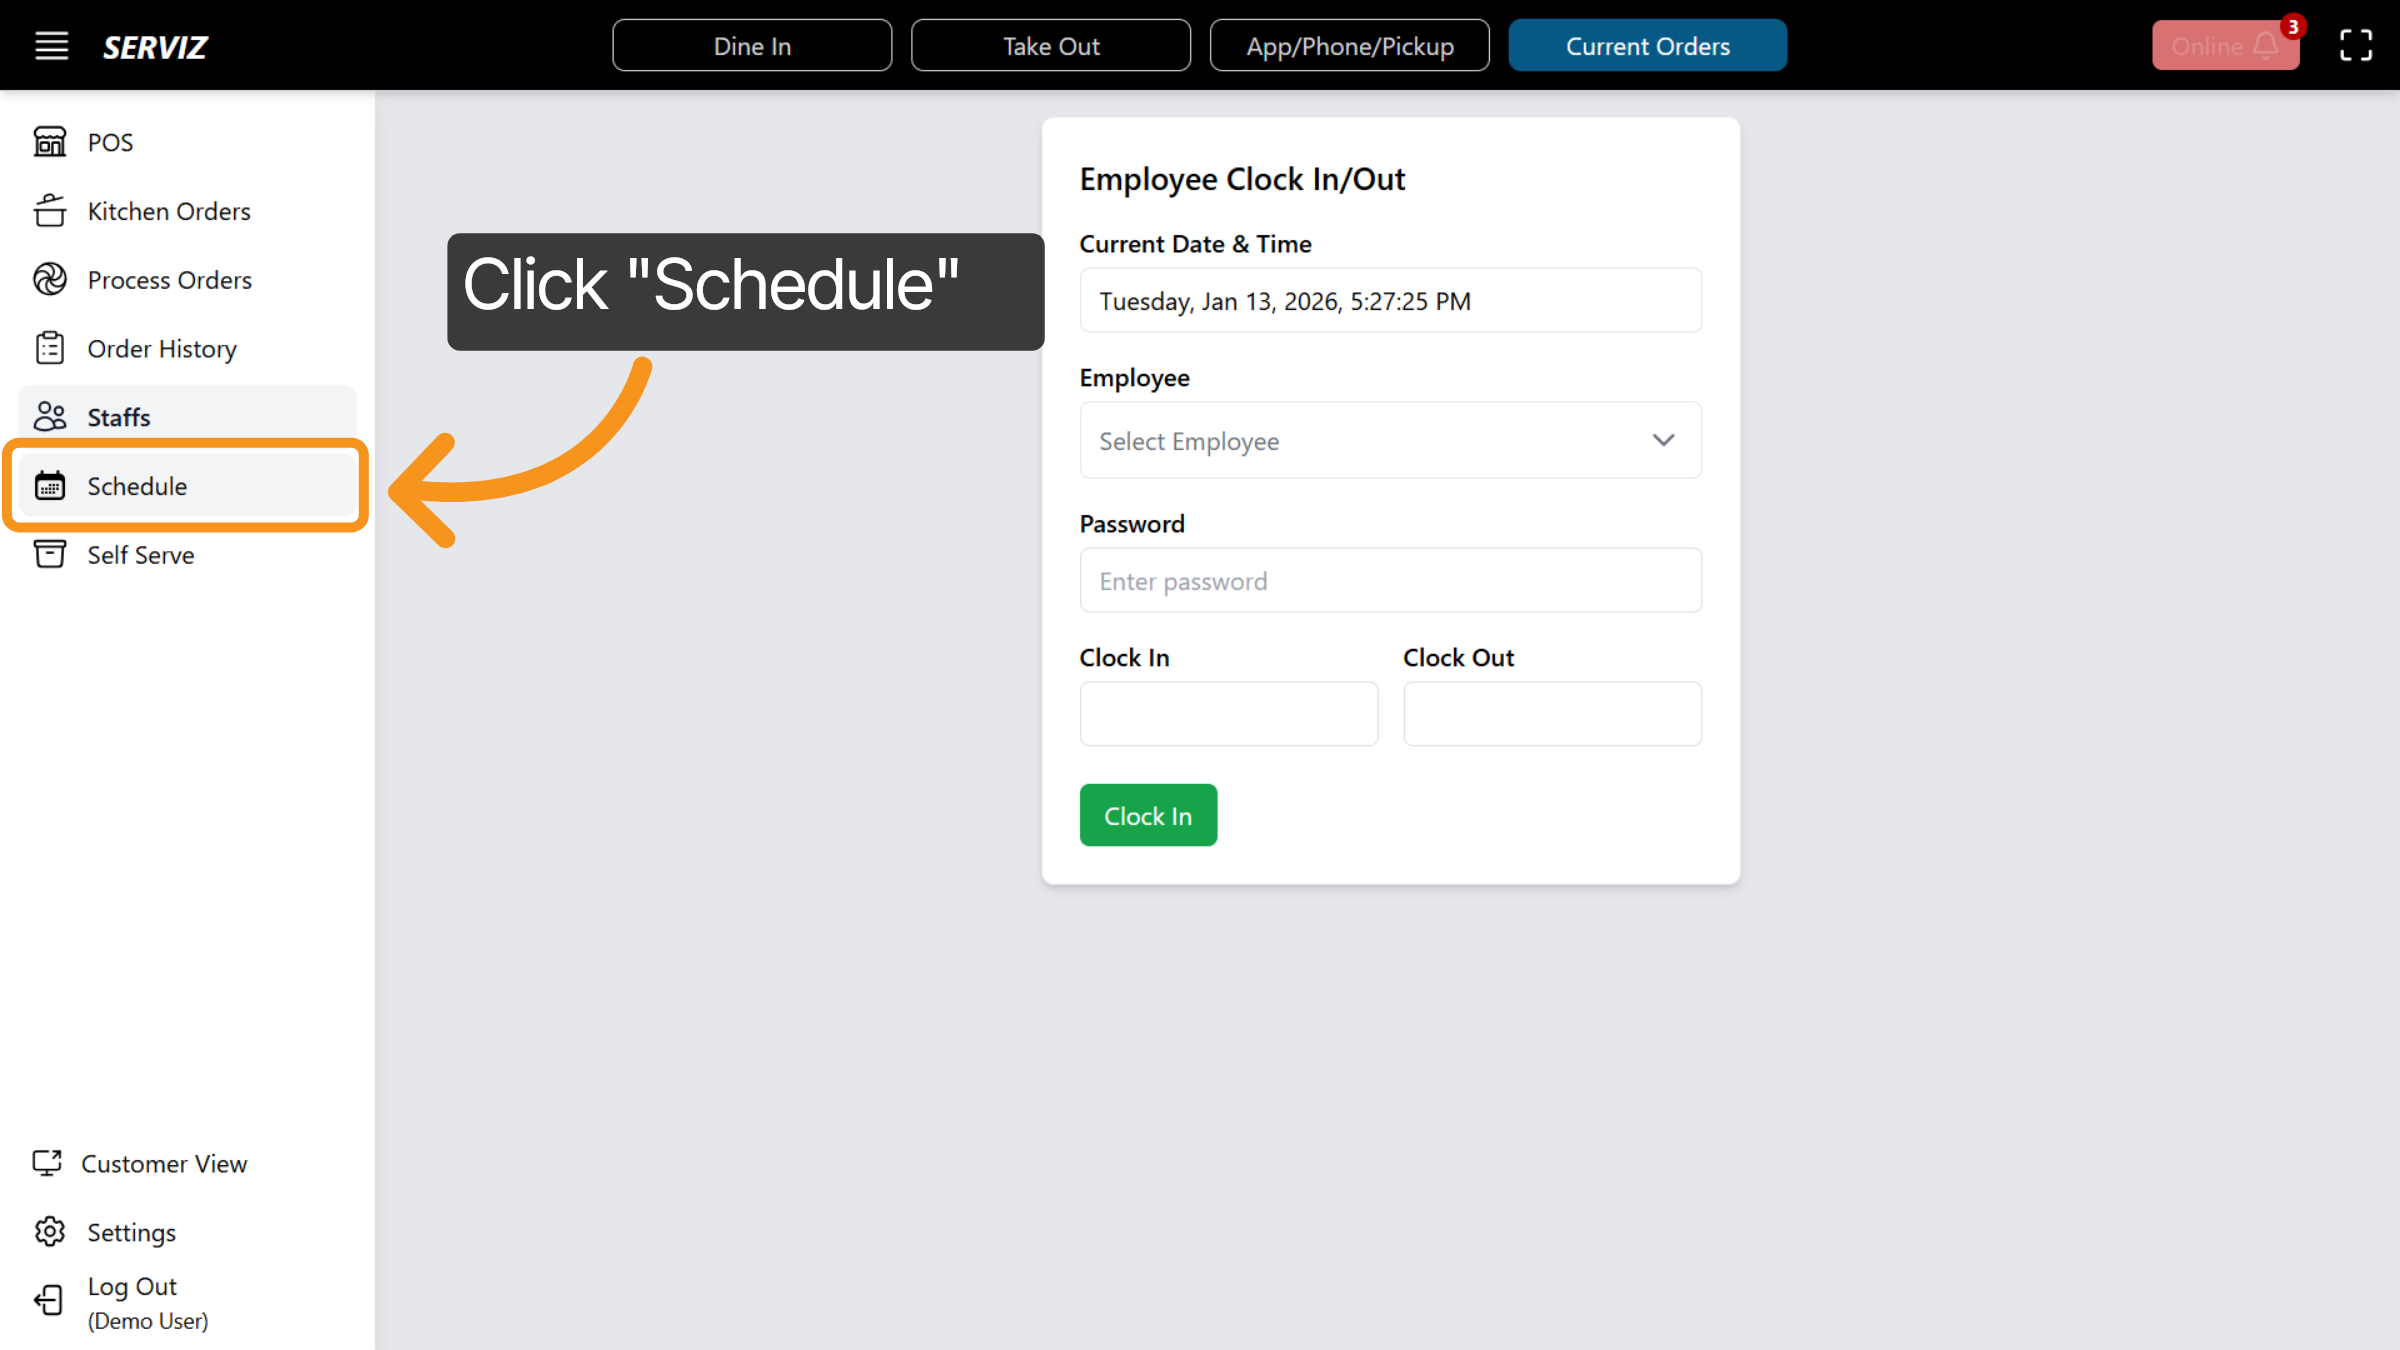
41. Open Schedule
The admin staff can click on Schedule to manage staffing and shift assignments.
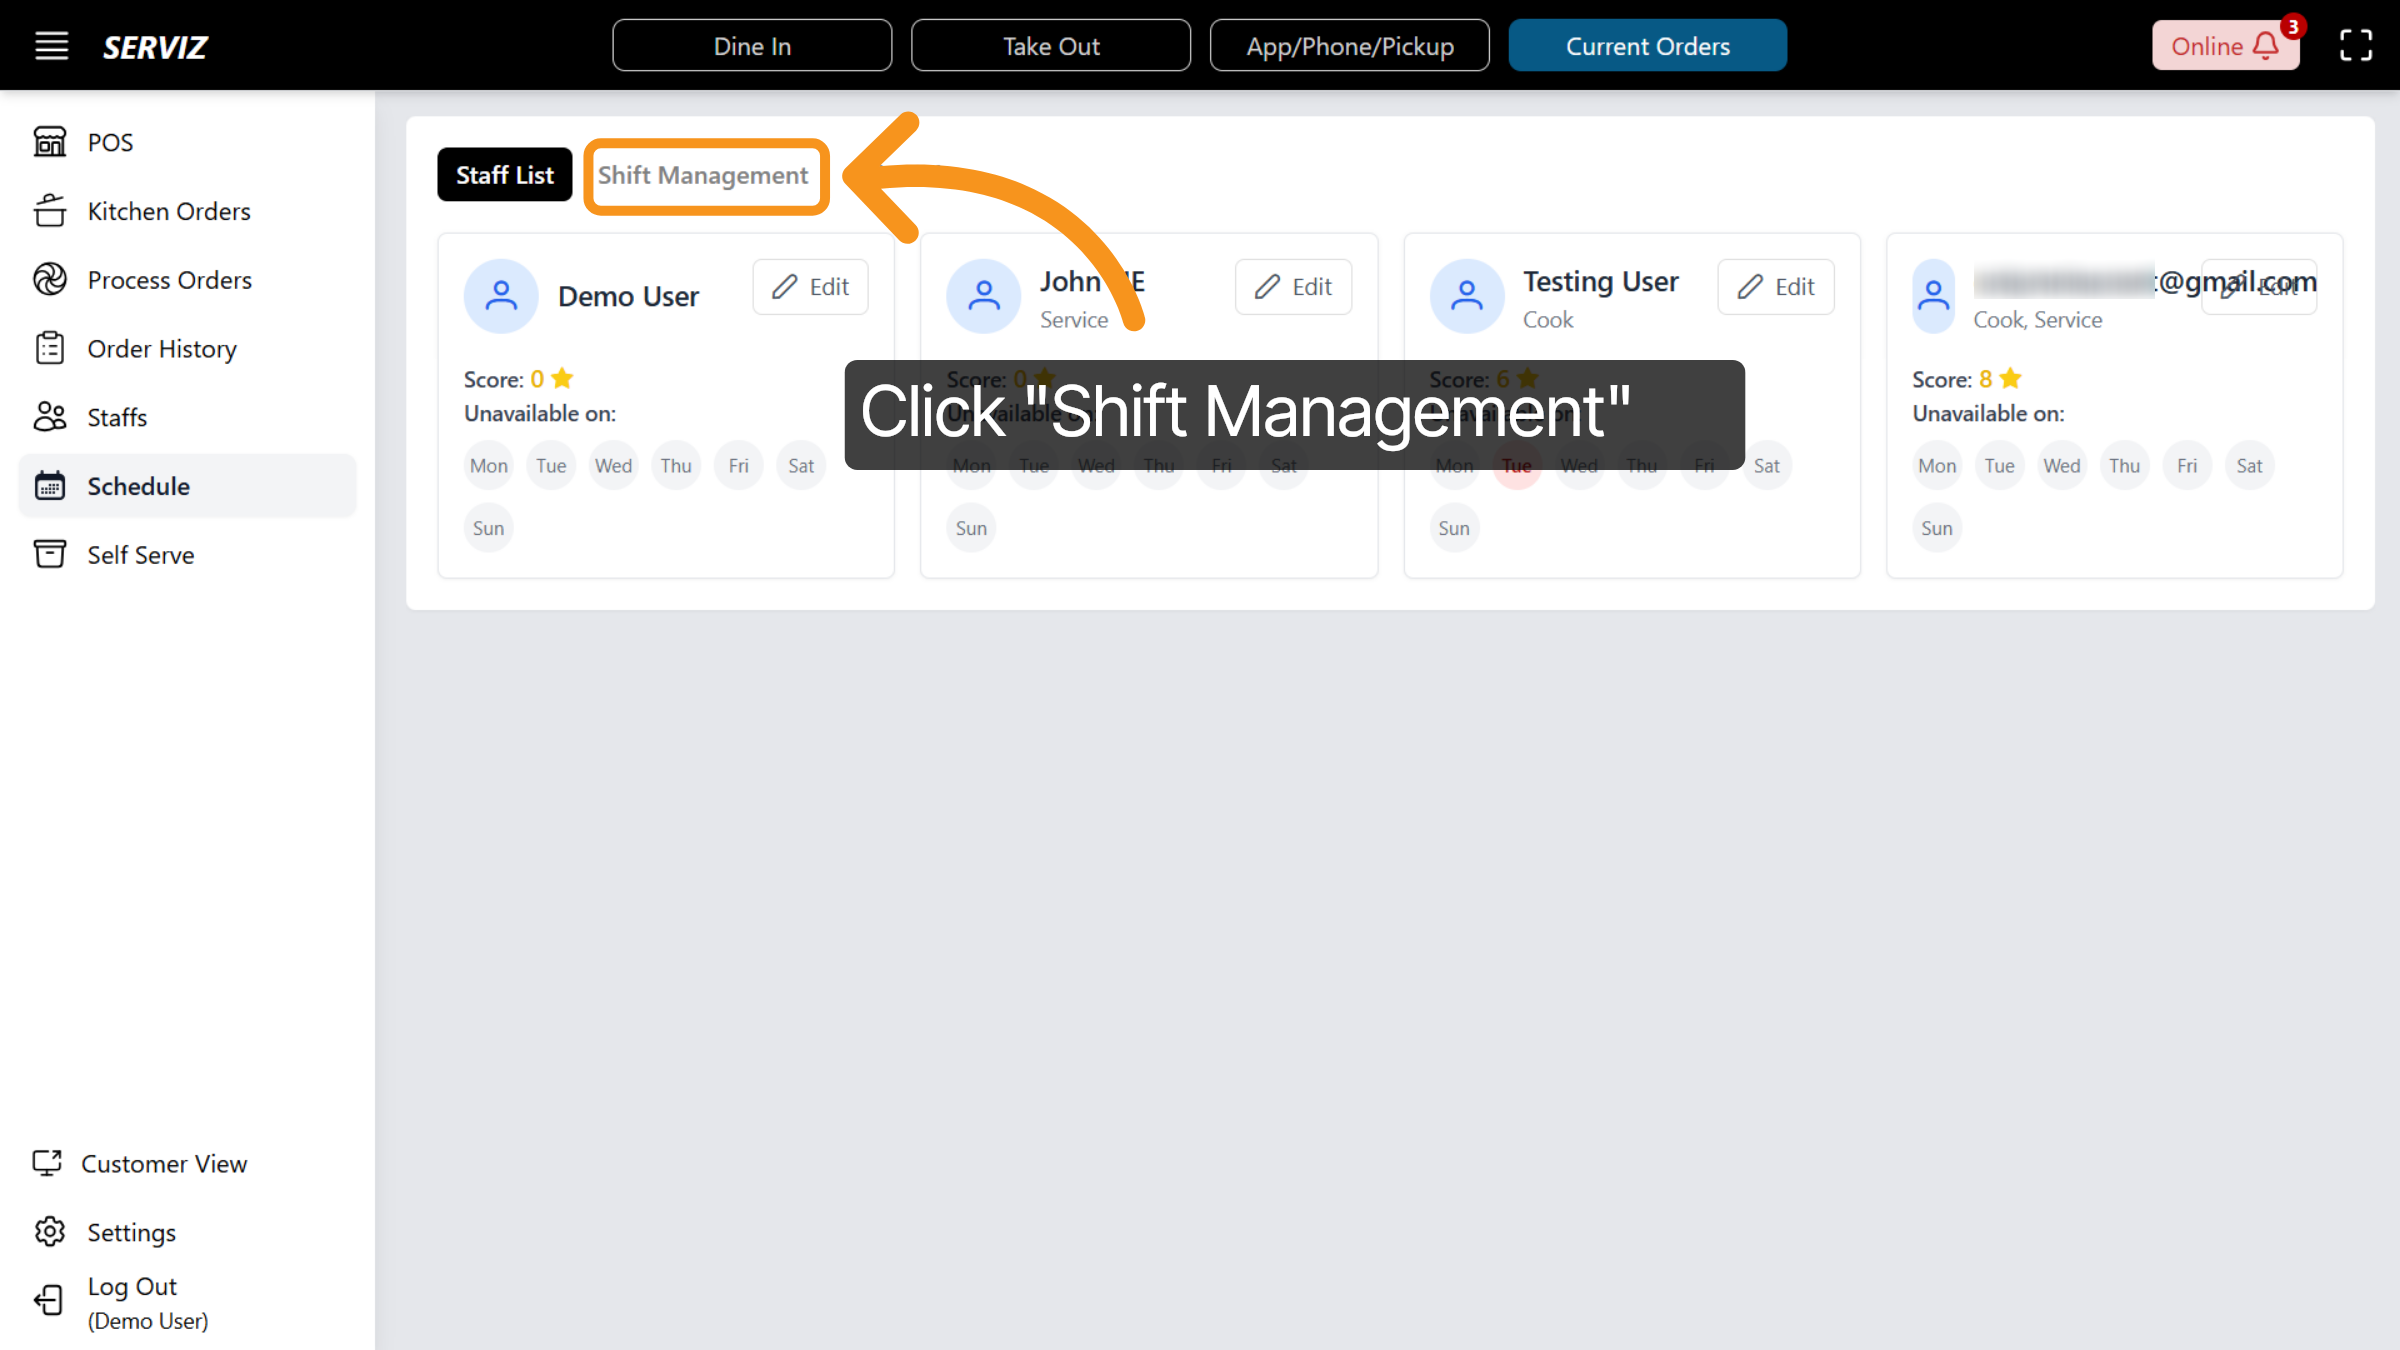
42. Open Shift Management
In this section, you will begin by reviewing the staff list, where you can input each employee’s availability, skills, and performance ranking. Once completed, click "Shift Management" to manage shifts.
43. Shift Management Overview
In Shift Management, you can view shifts for all seven days of the week and modify them by clicking the “+” icon on the desired date to view, edit, or add shifts for that day.
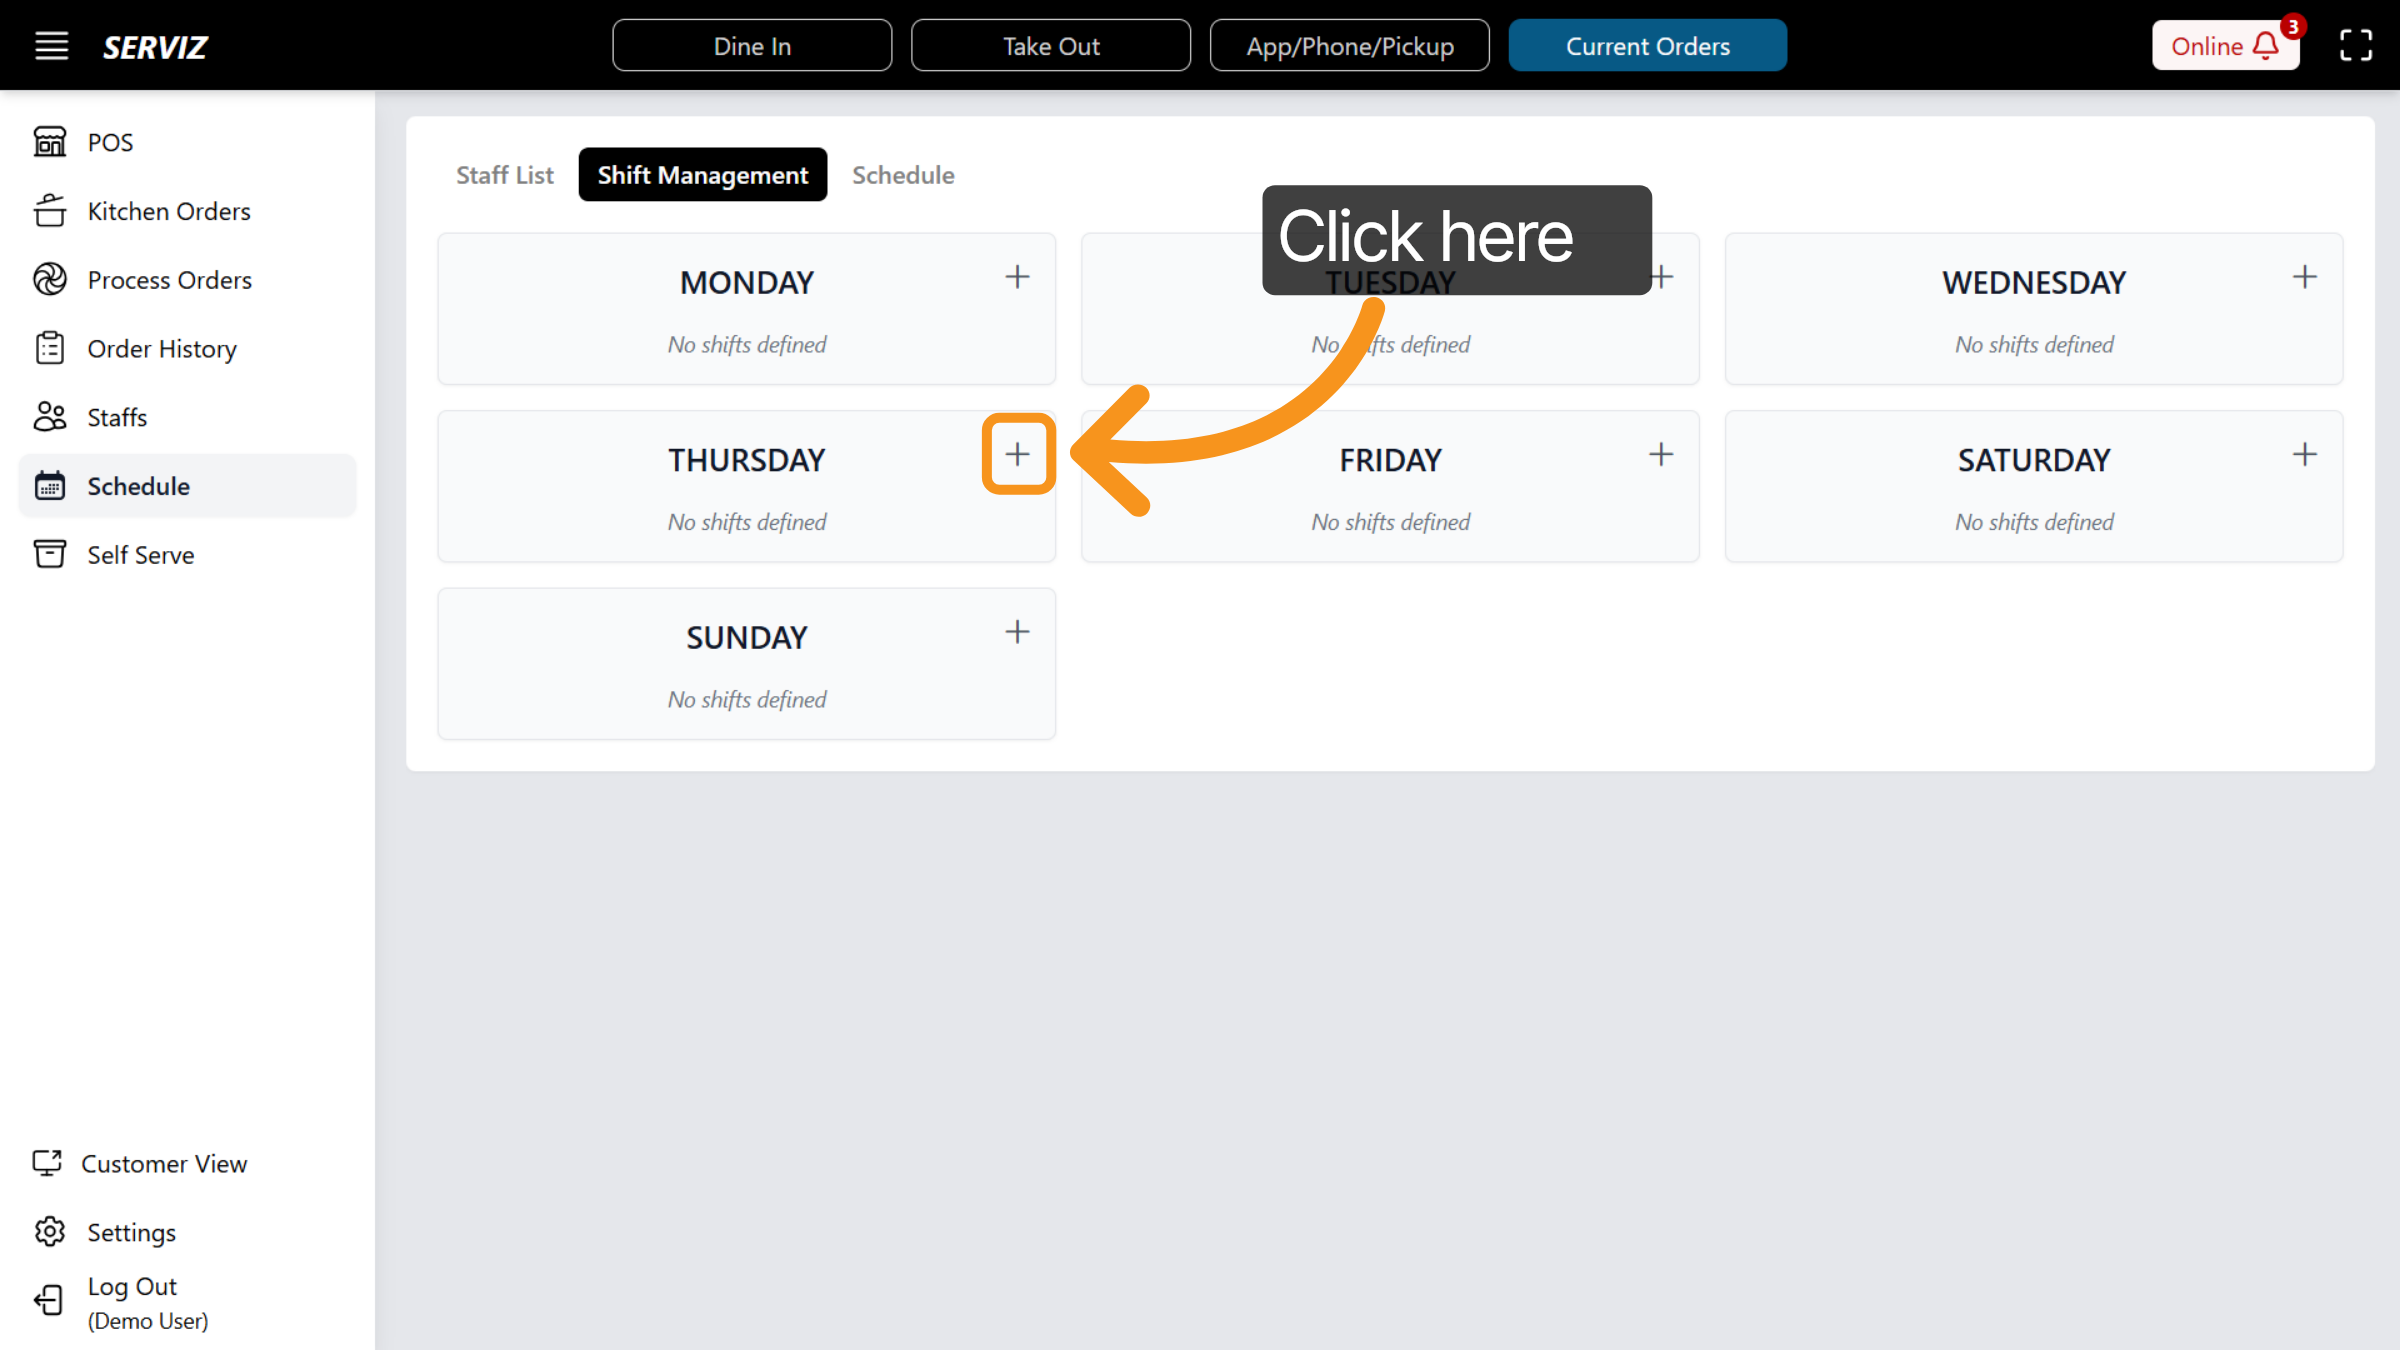
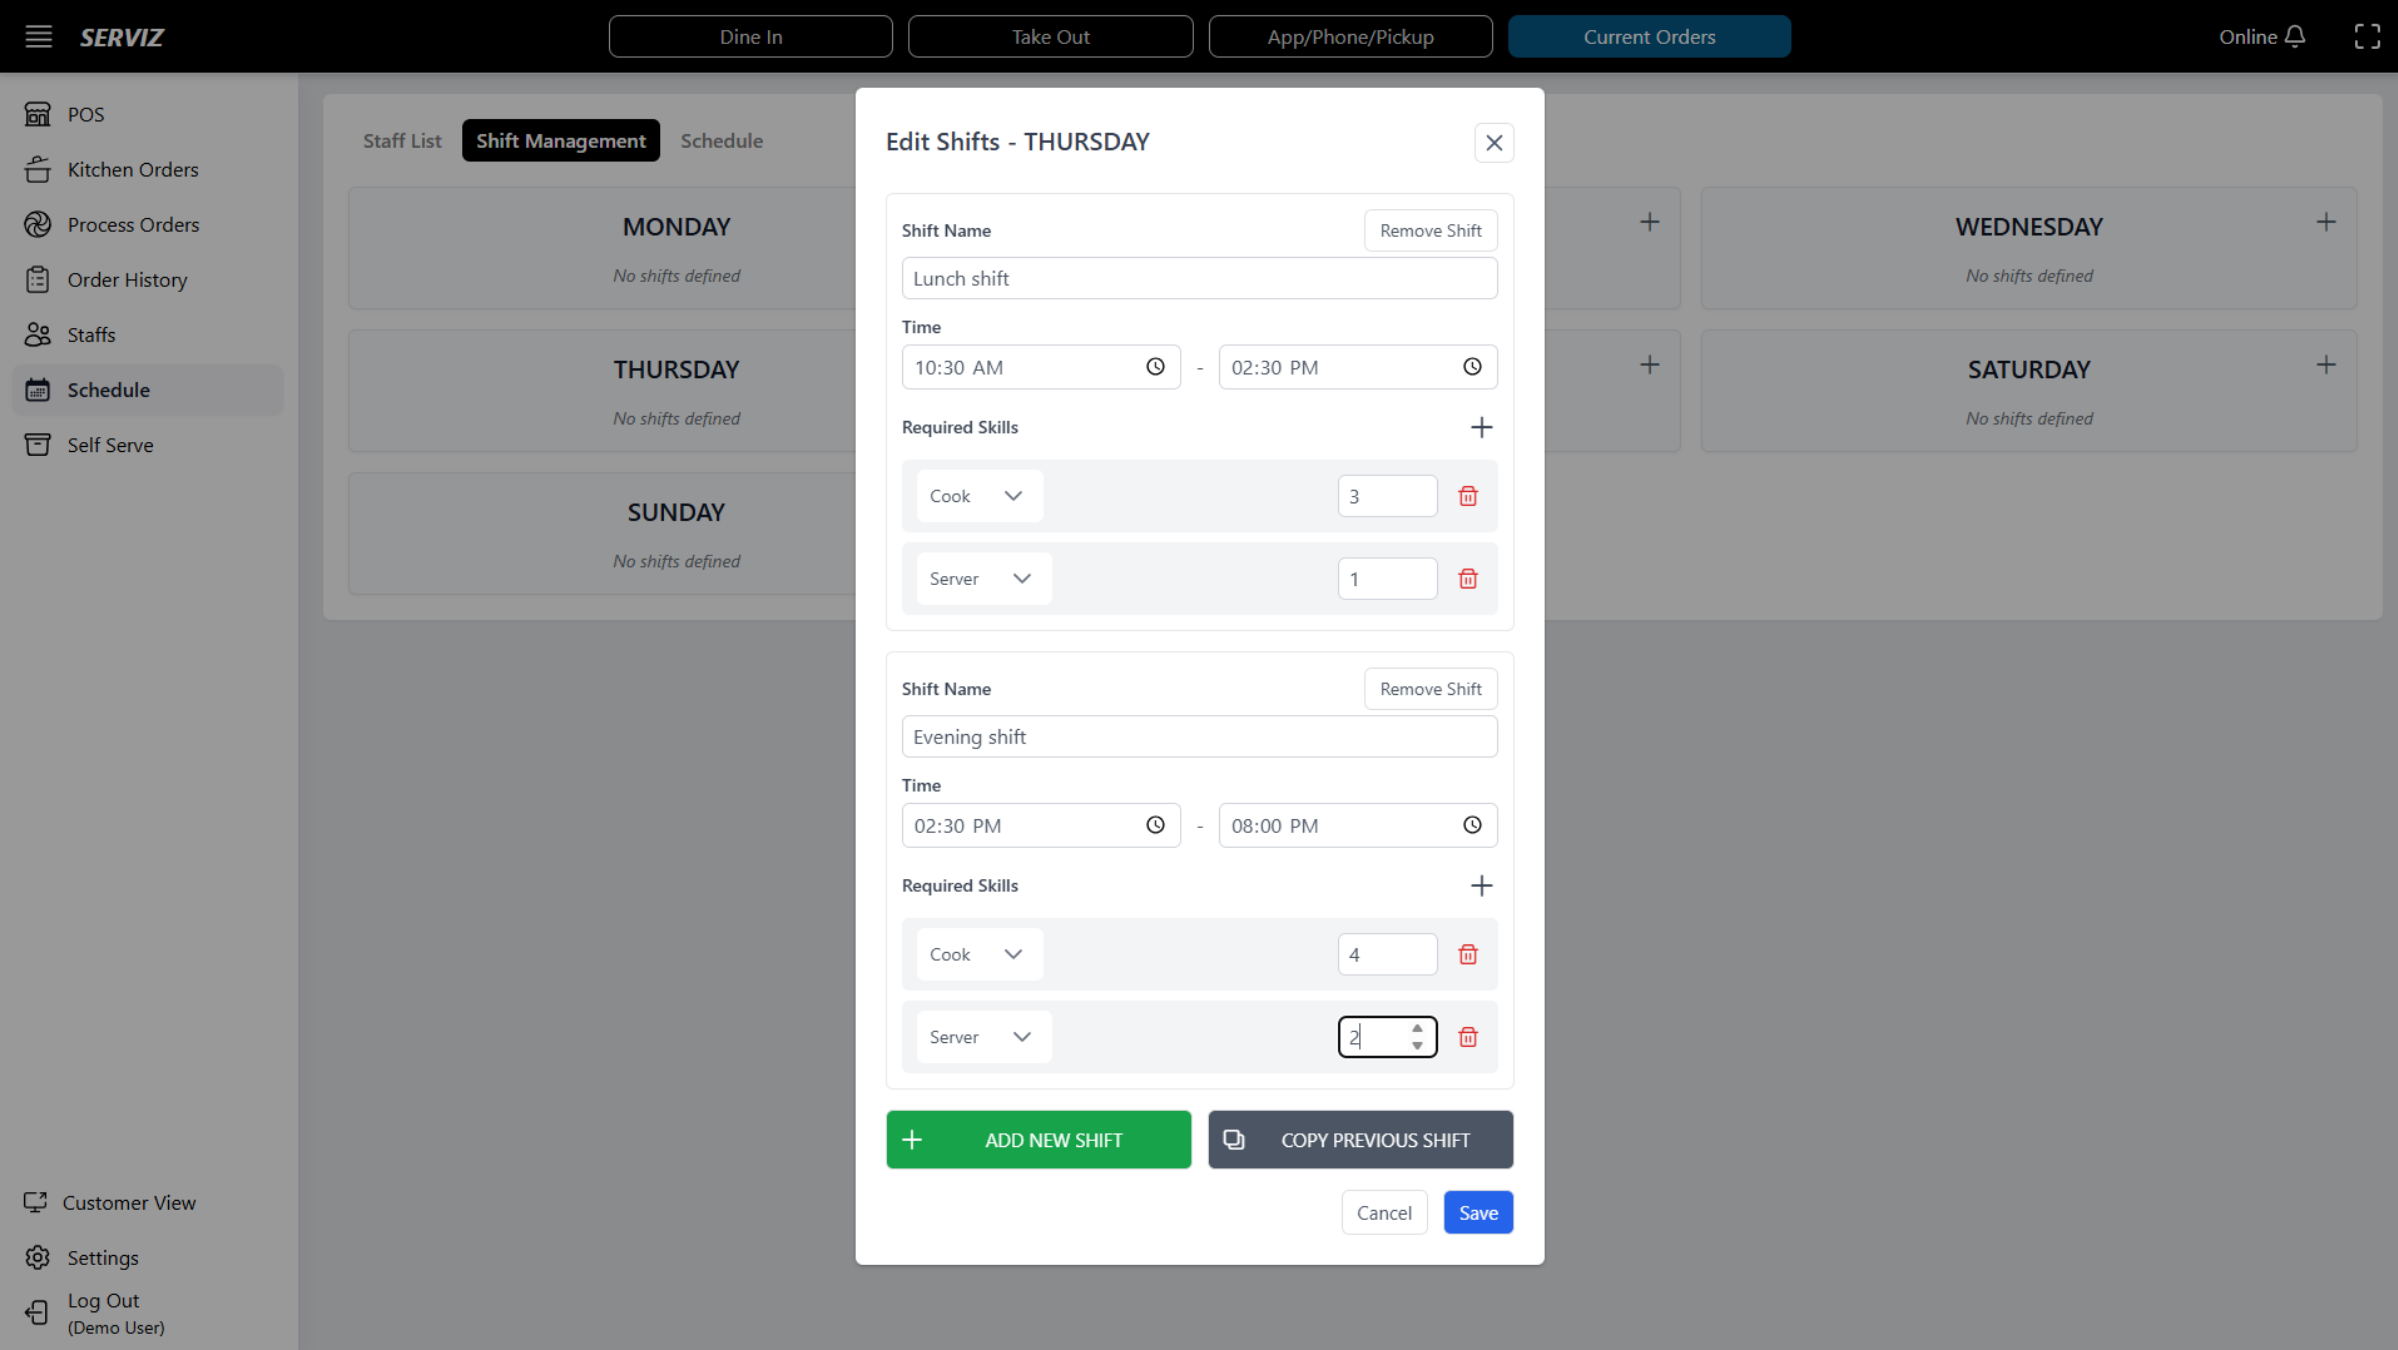
44. Input shifts information
This system opens a pop-up window where you can create or edit shifts by entering the shift name, setting the start and end times, and specifying the required skills, such as the number of cooks, servers, or bartenders needed for that shift.
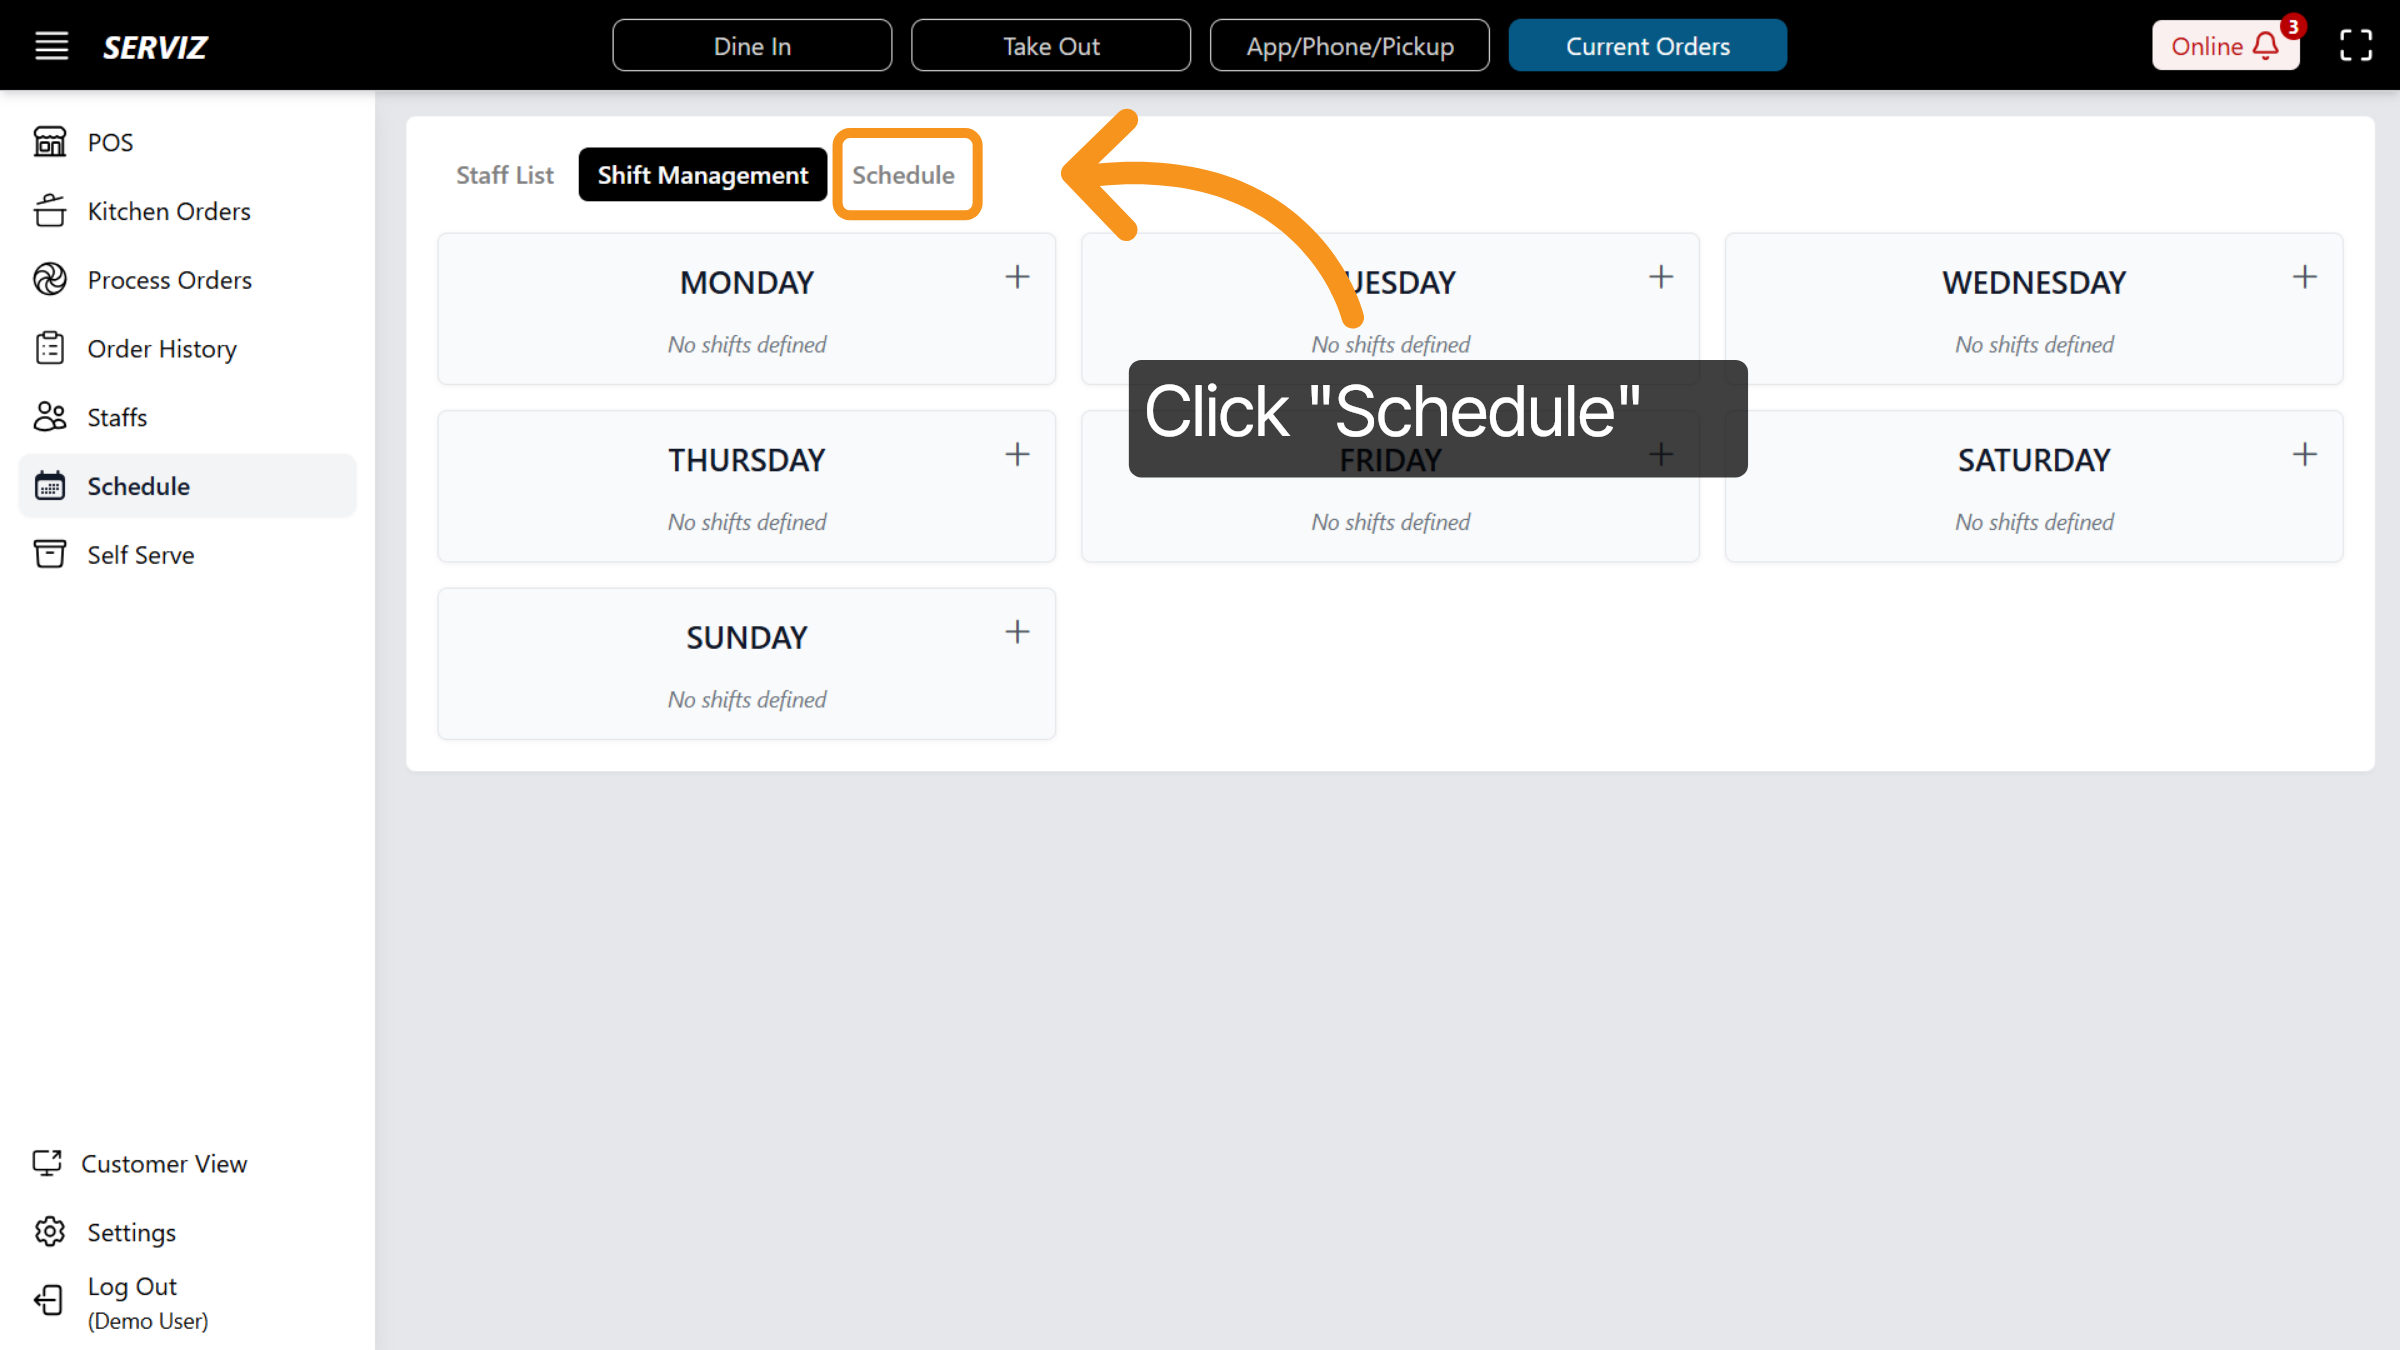
45. Click on Schedule
Once you have completed the Staff List and Shift Management setup, click “Schedule.”
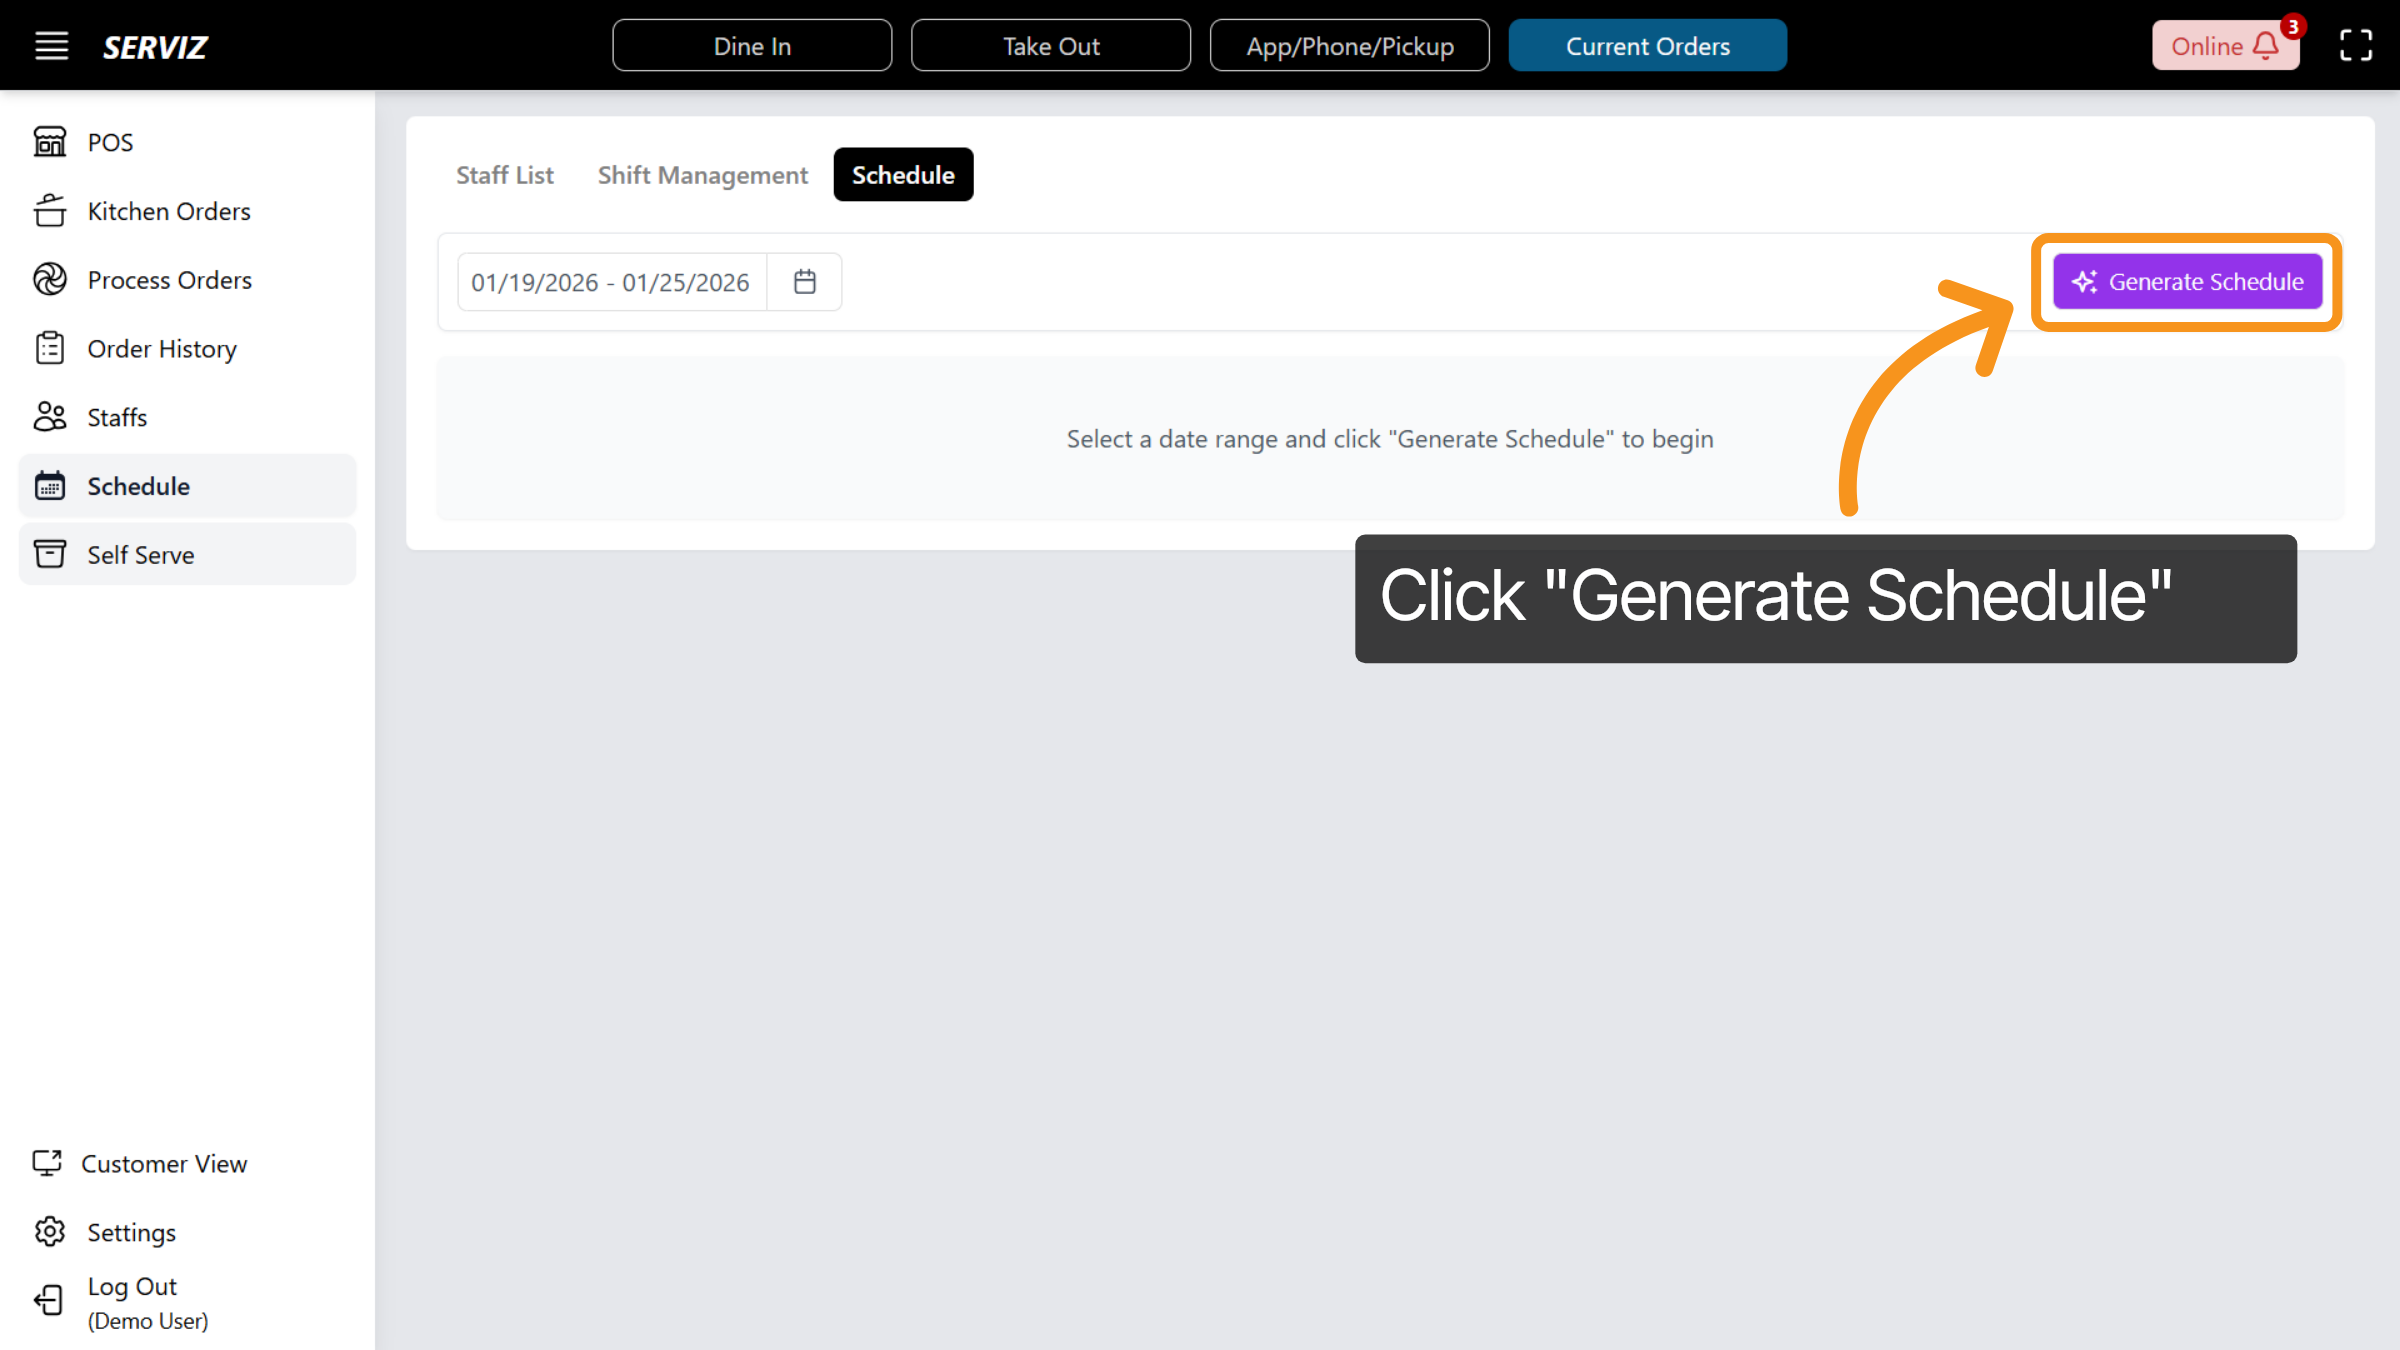
46. Generate schedule
From here, select “Generate Schedule.” The system will automatically create an optimized work schedule for your organization. Once the schedule is generated, you can edit, save, or send the schedule to your staff.
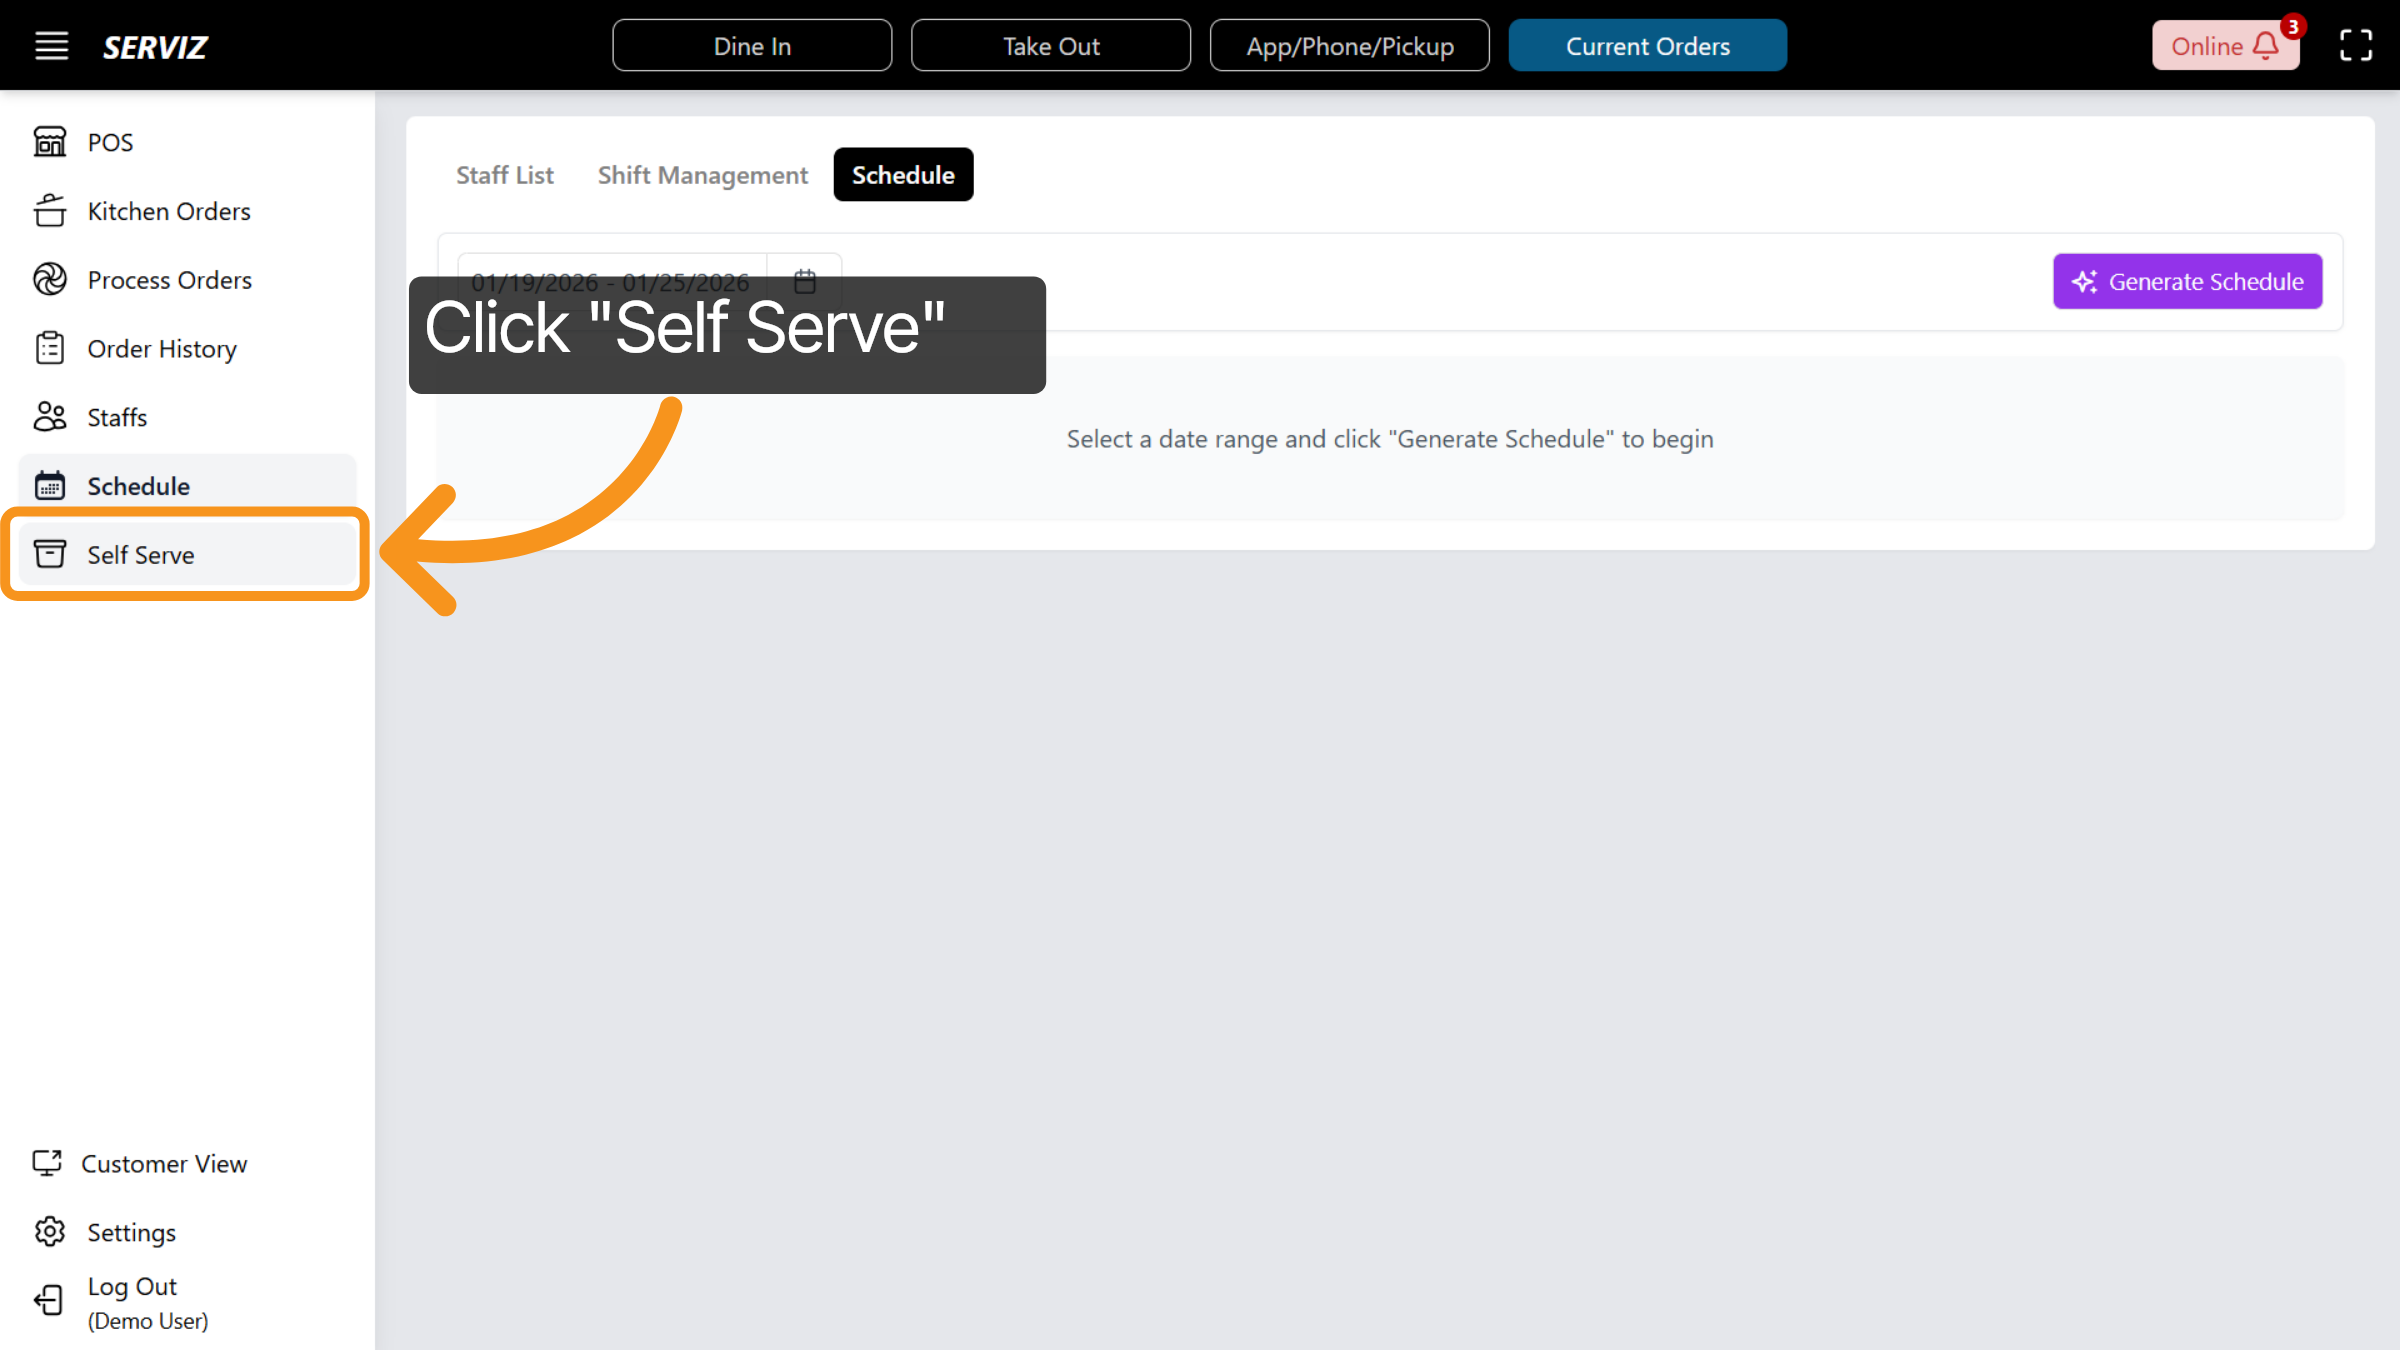
47. Access Self Serve
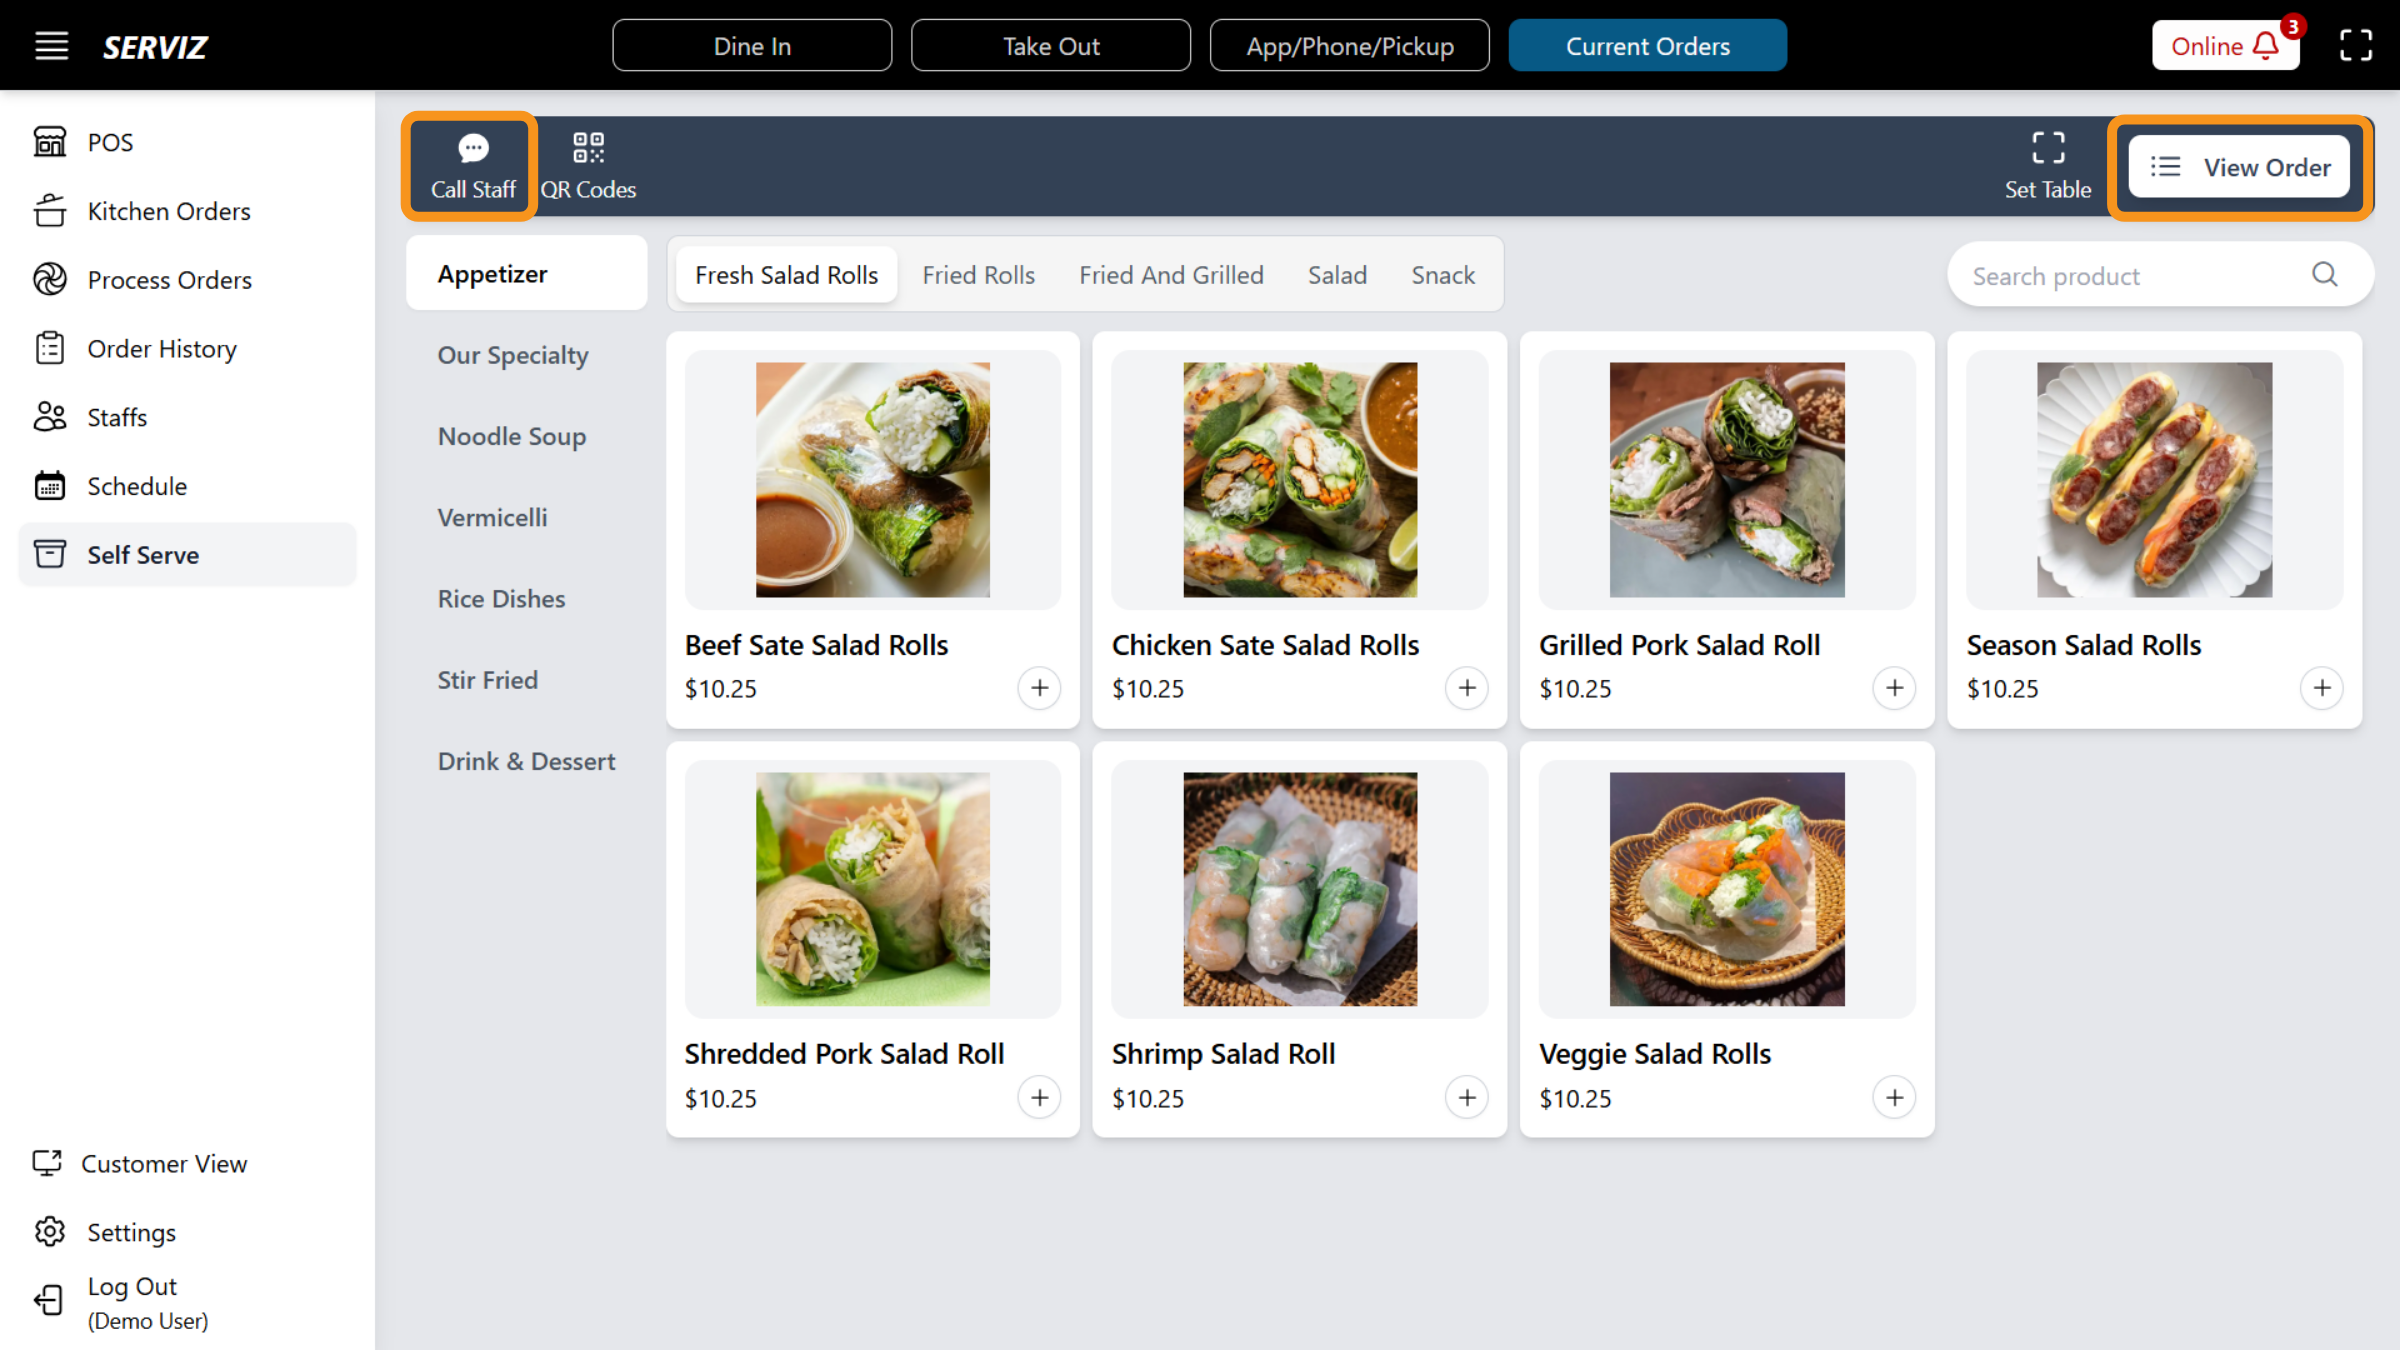
Next, let’s move on to the Self Serve section, where you can enable customer-facing ordering.
48. Self-serve interface
In this section, customers can view the full menu. They can use the Call Staff button to notify staff members or send requests. In the top-right corner, customers can click “View Order” to review and modify their cart, then send the order to the kitchen.
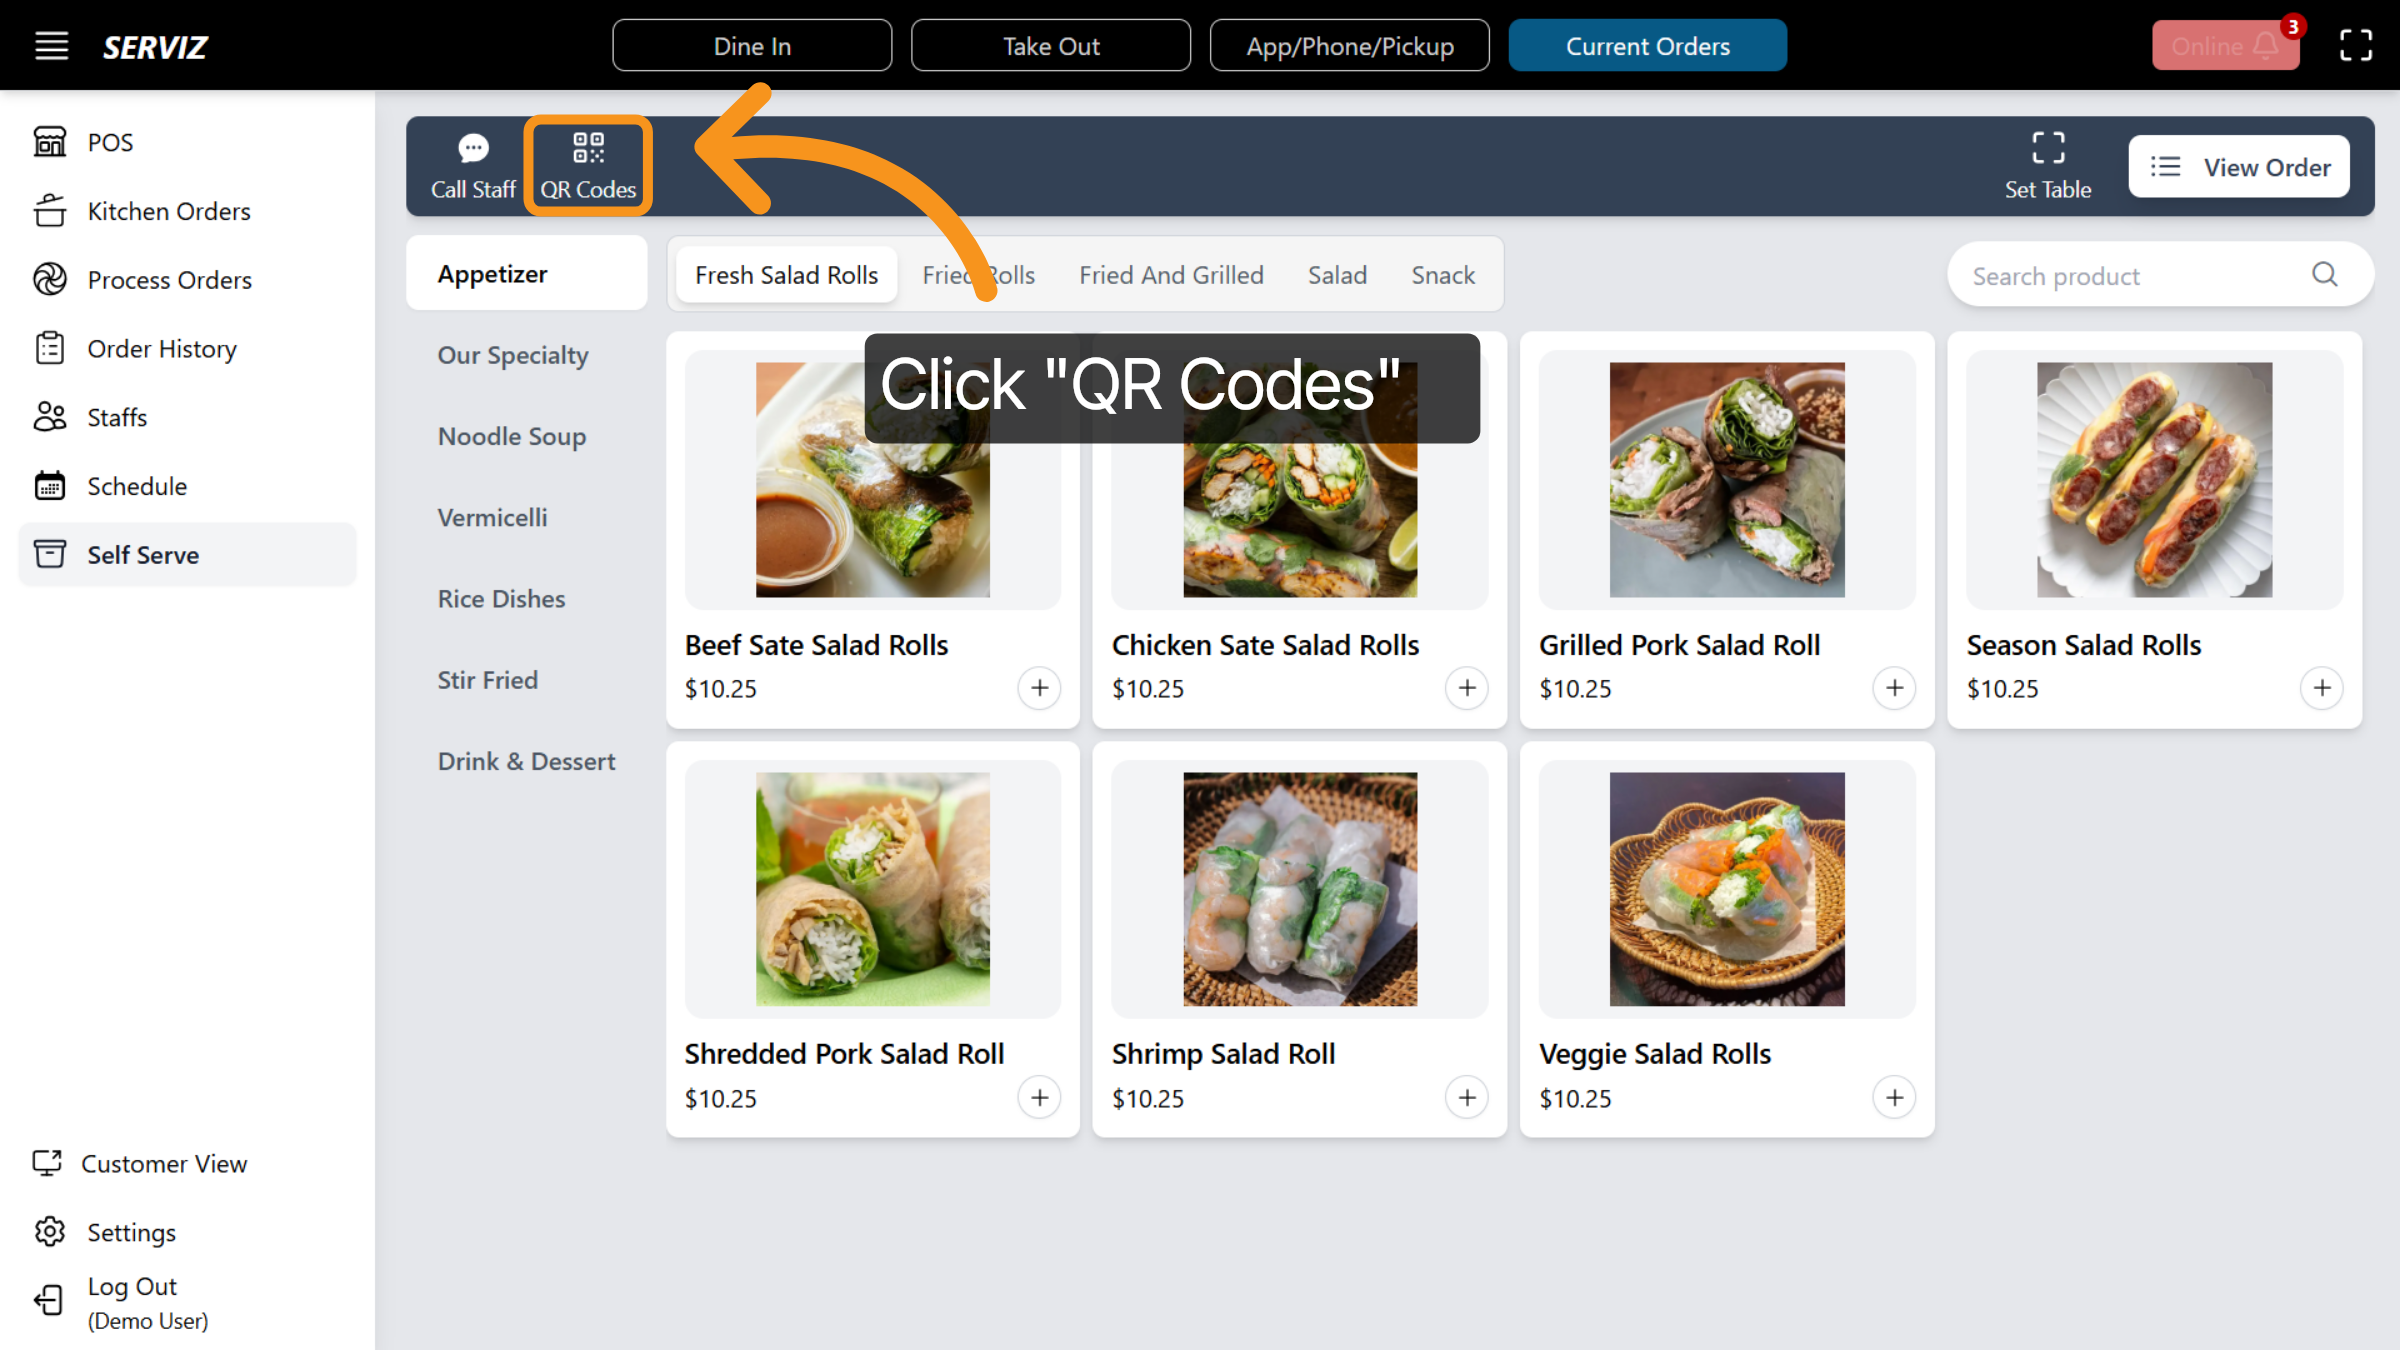
49. Open QR Code
Staff members can also access table settings and view the QR codes assigned to each table.
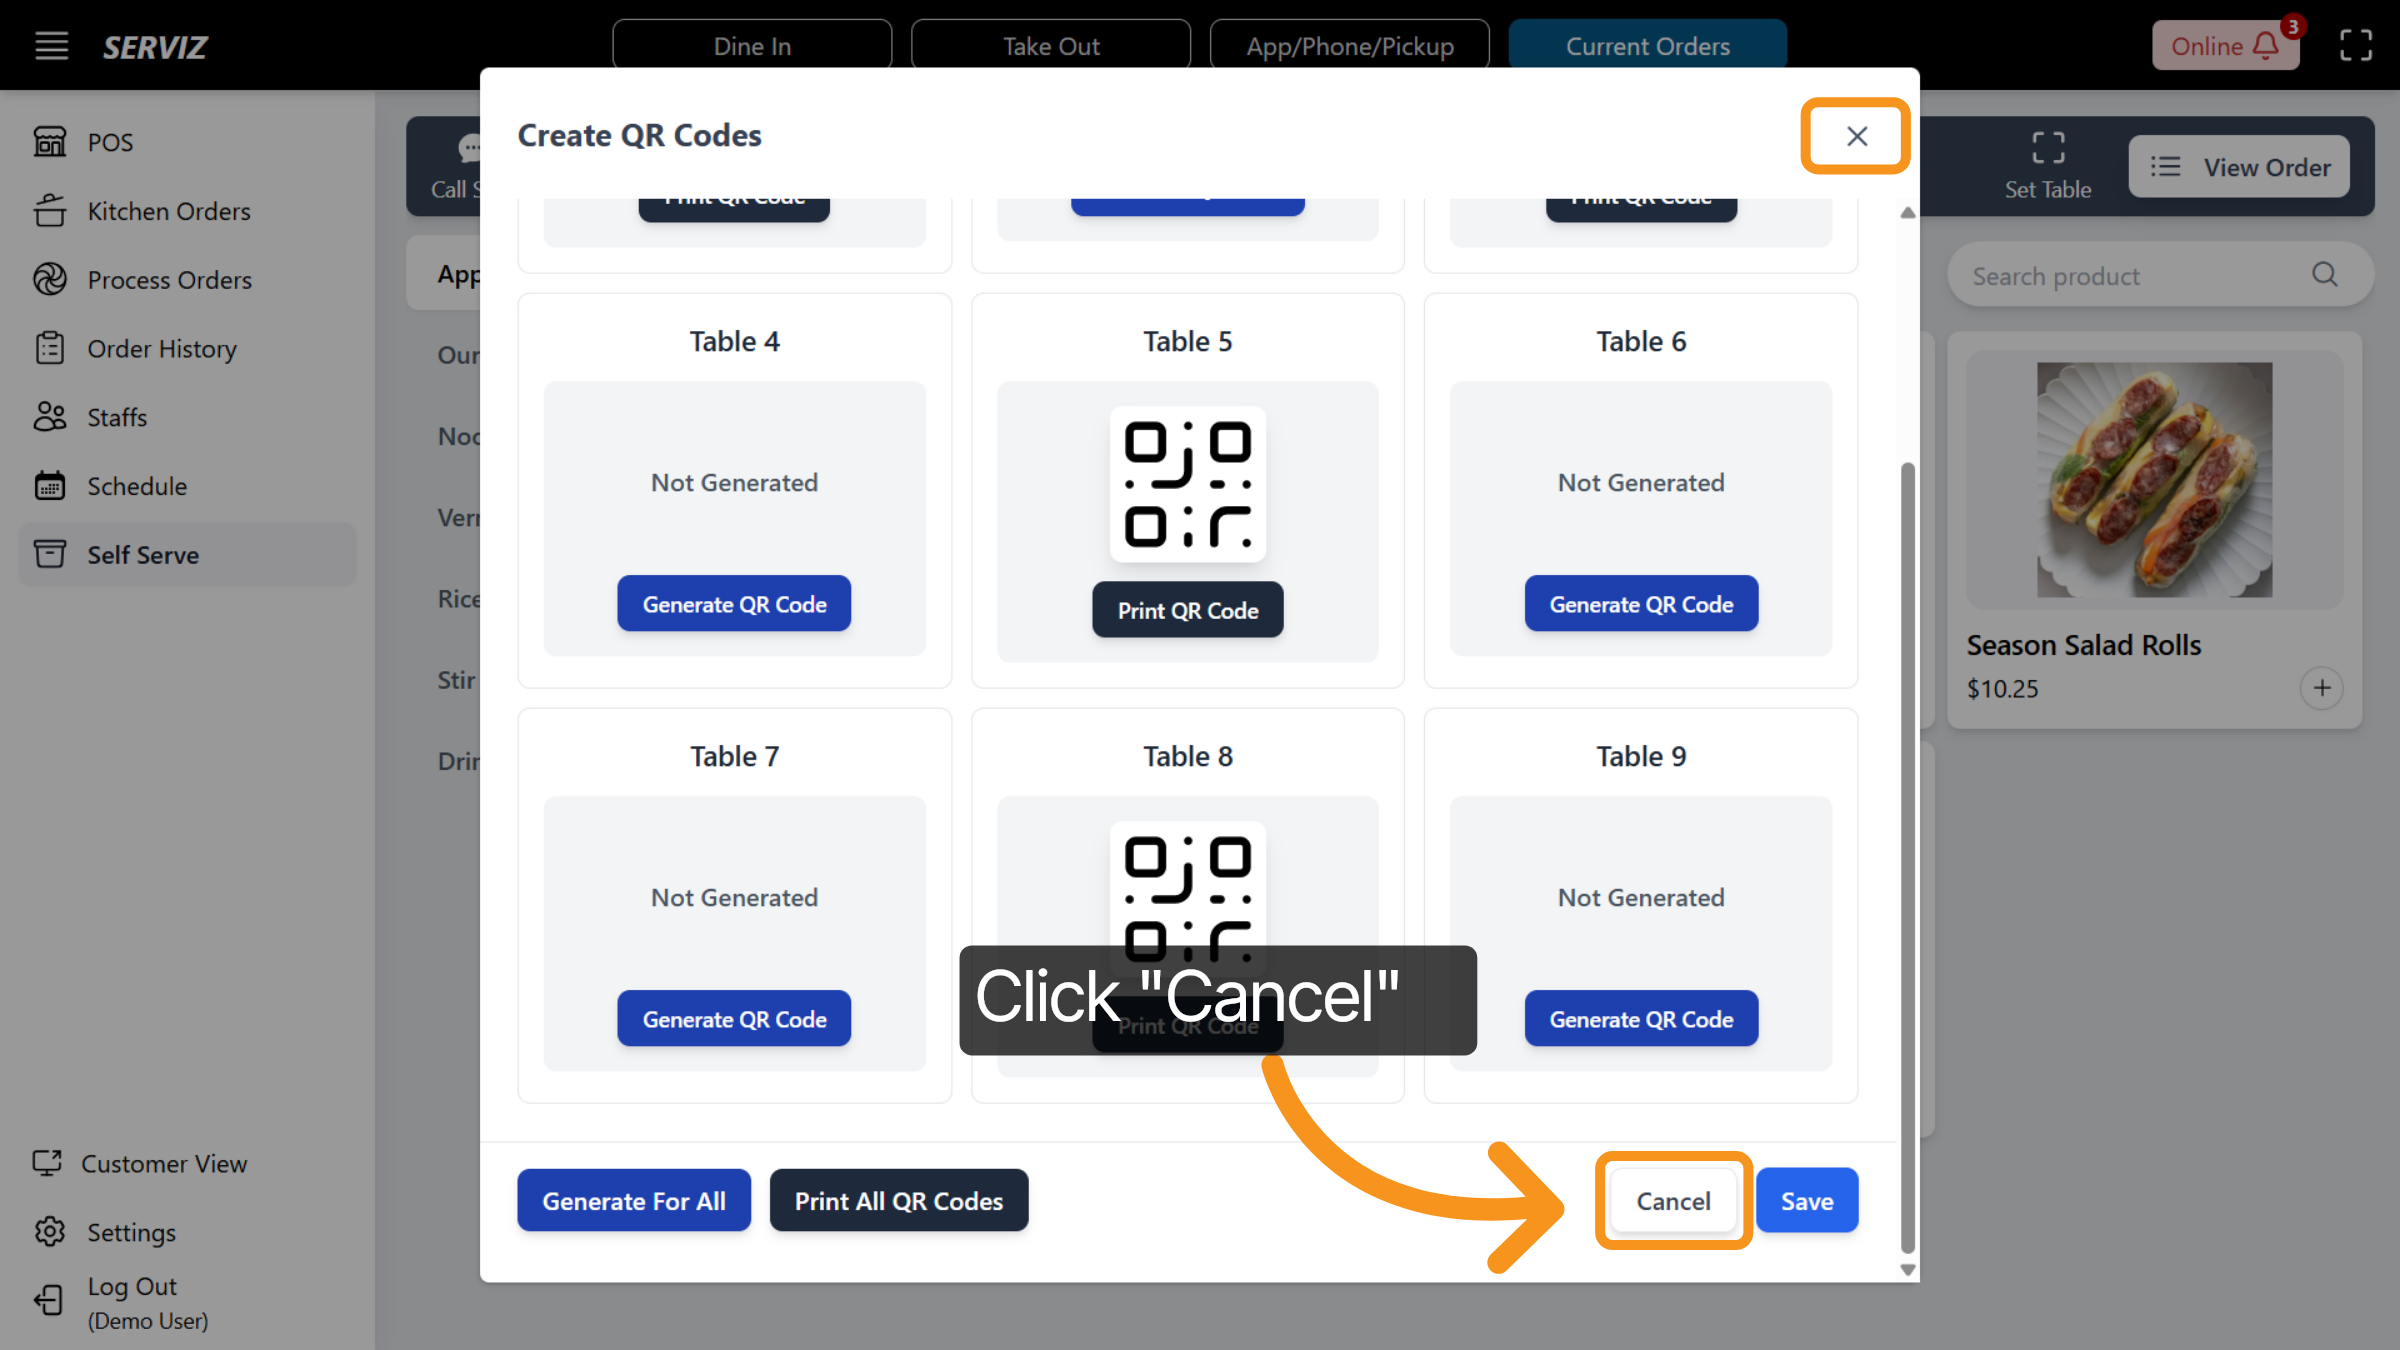
50. Create QR Codes
Under the QR Code, you can generate a new QR code or print the existing one. Then, you can click "Save" to save the changes.
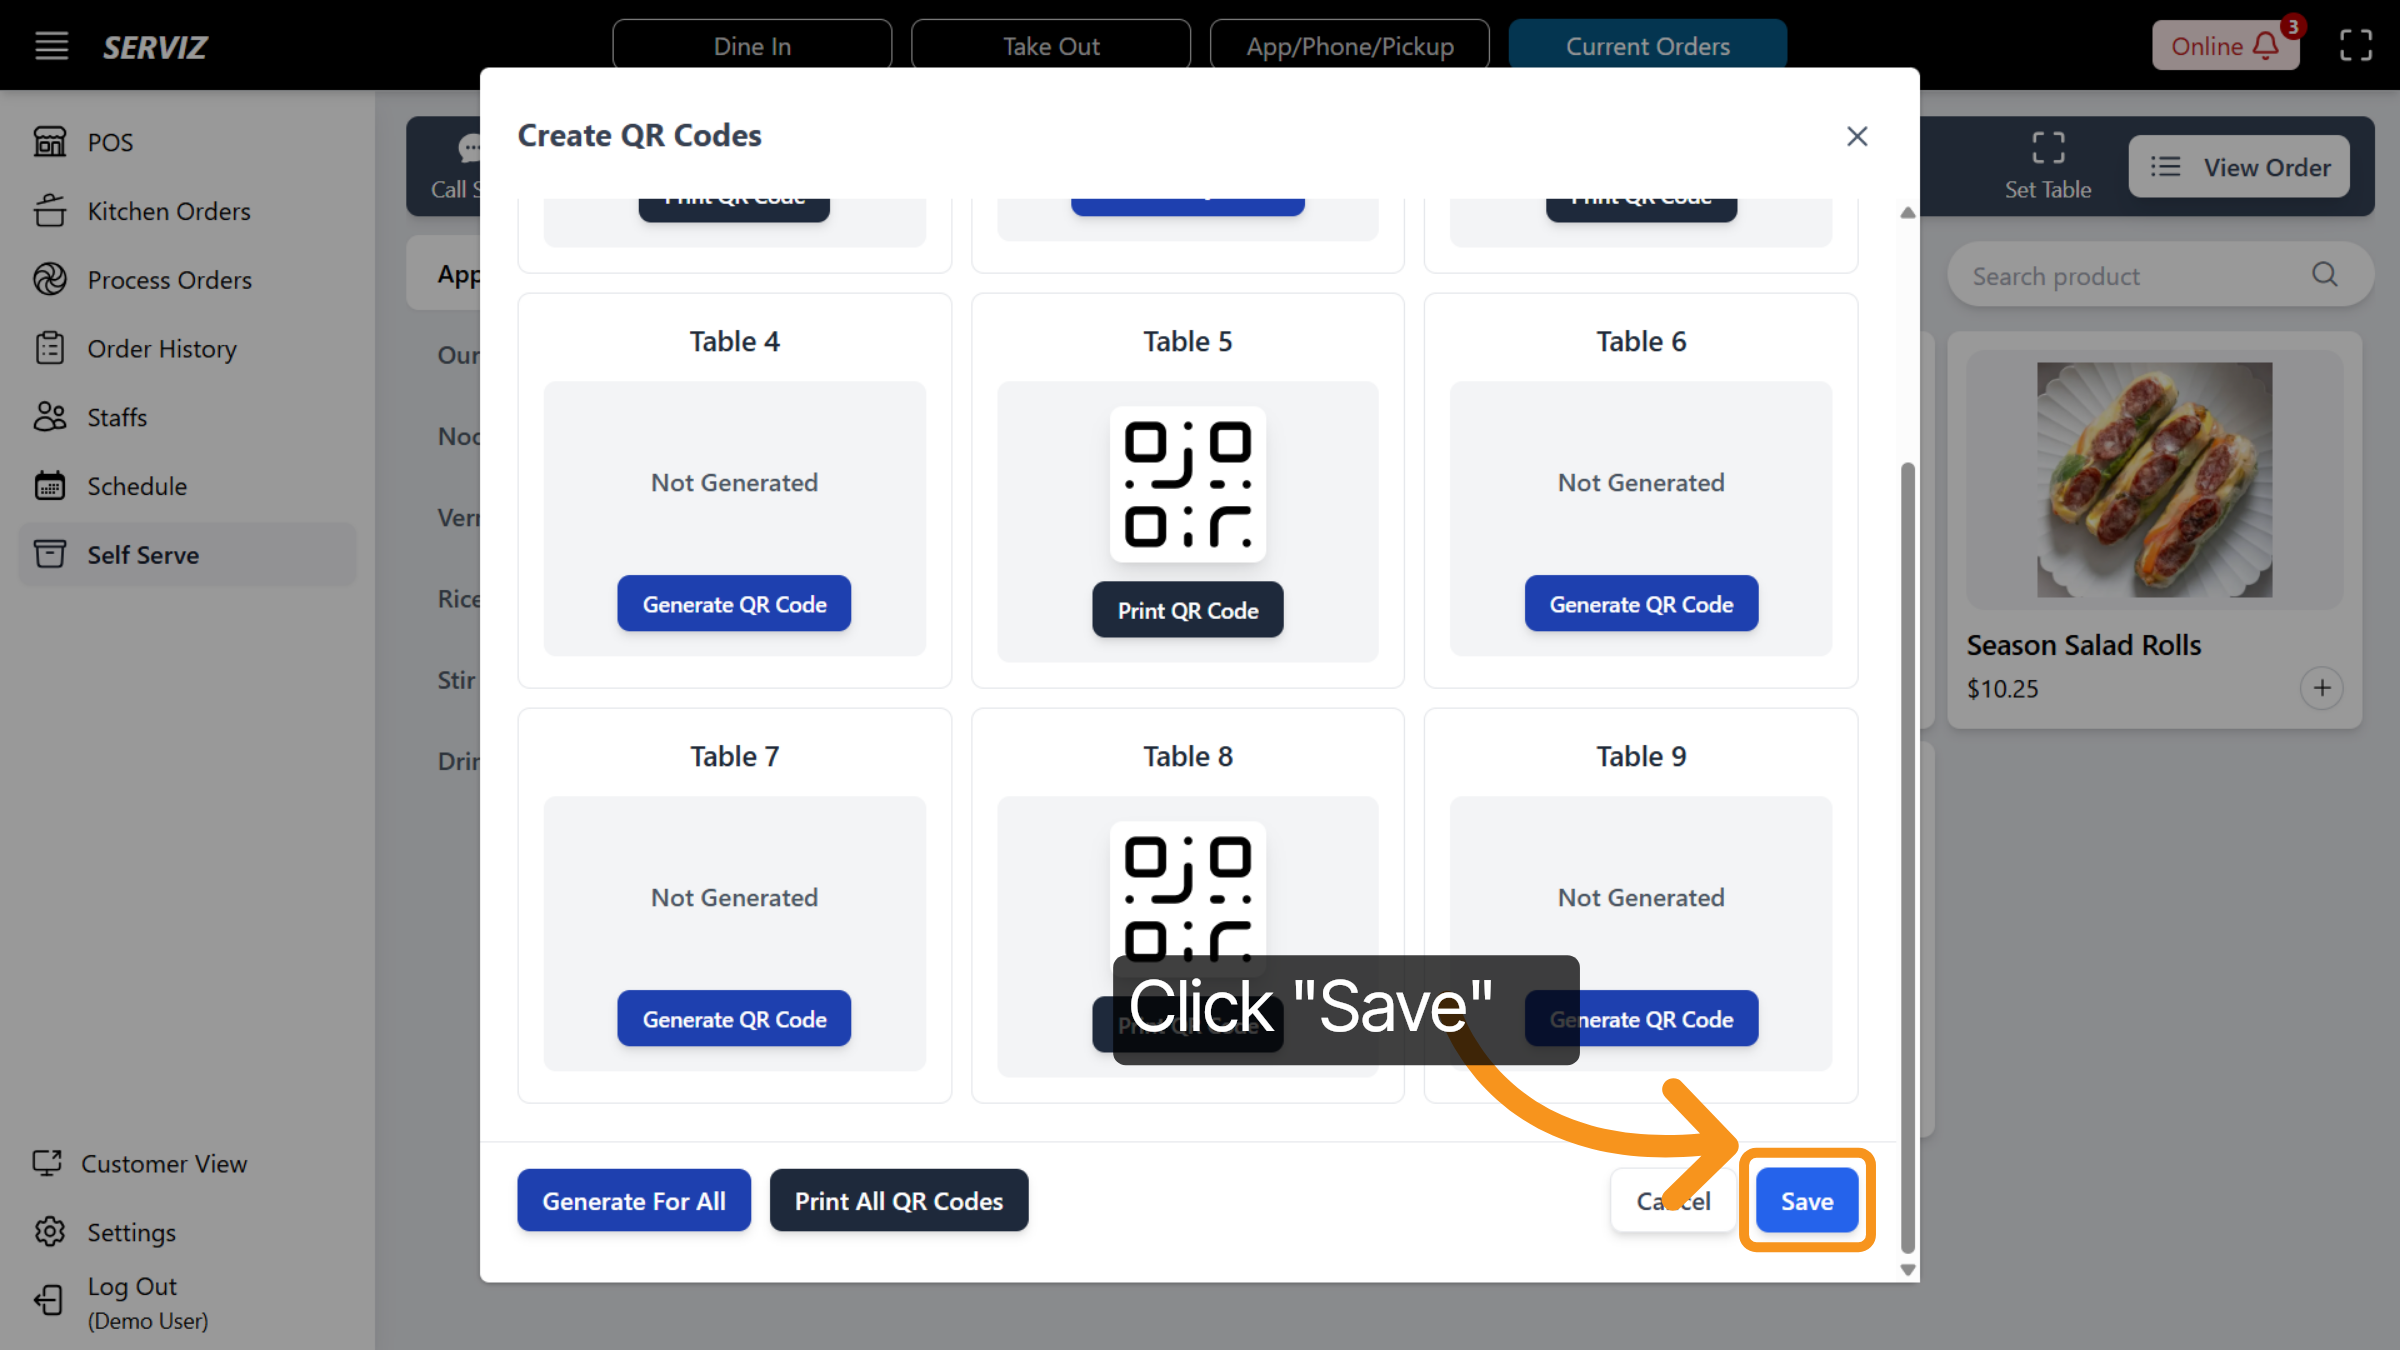
51. Cancel Changes
To discard any unsaved changes, click "Cancel" or the "X" button at the top of the pop-up to close it.
52. Set Table Configuration
Employees can click on Set Table to assign or modify table settings in the POS.

53. Cancel Table Setup
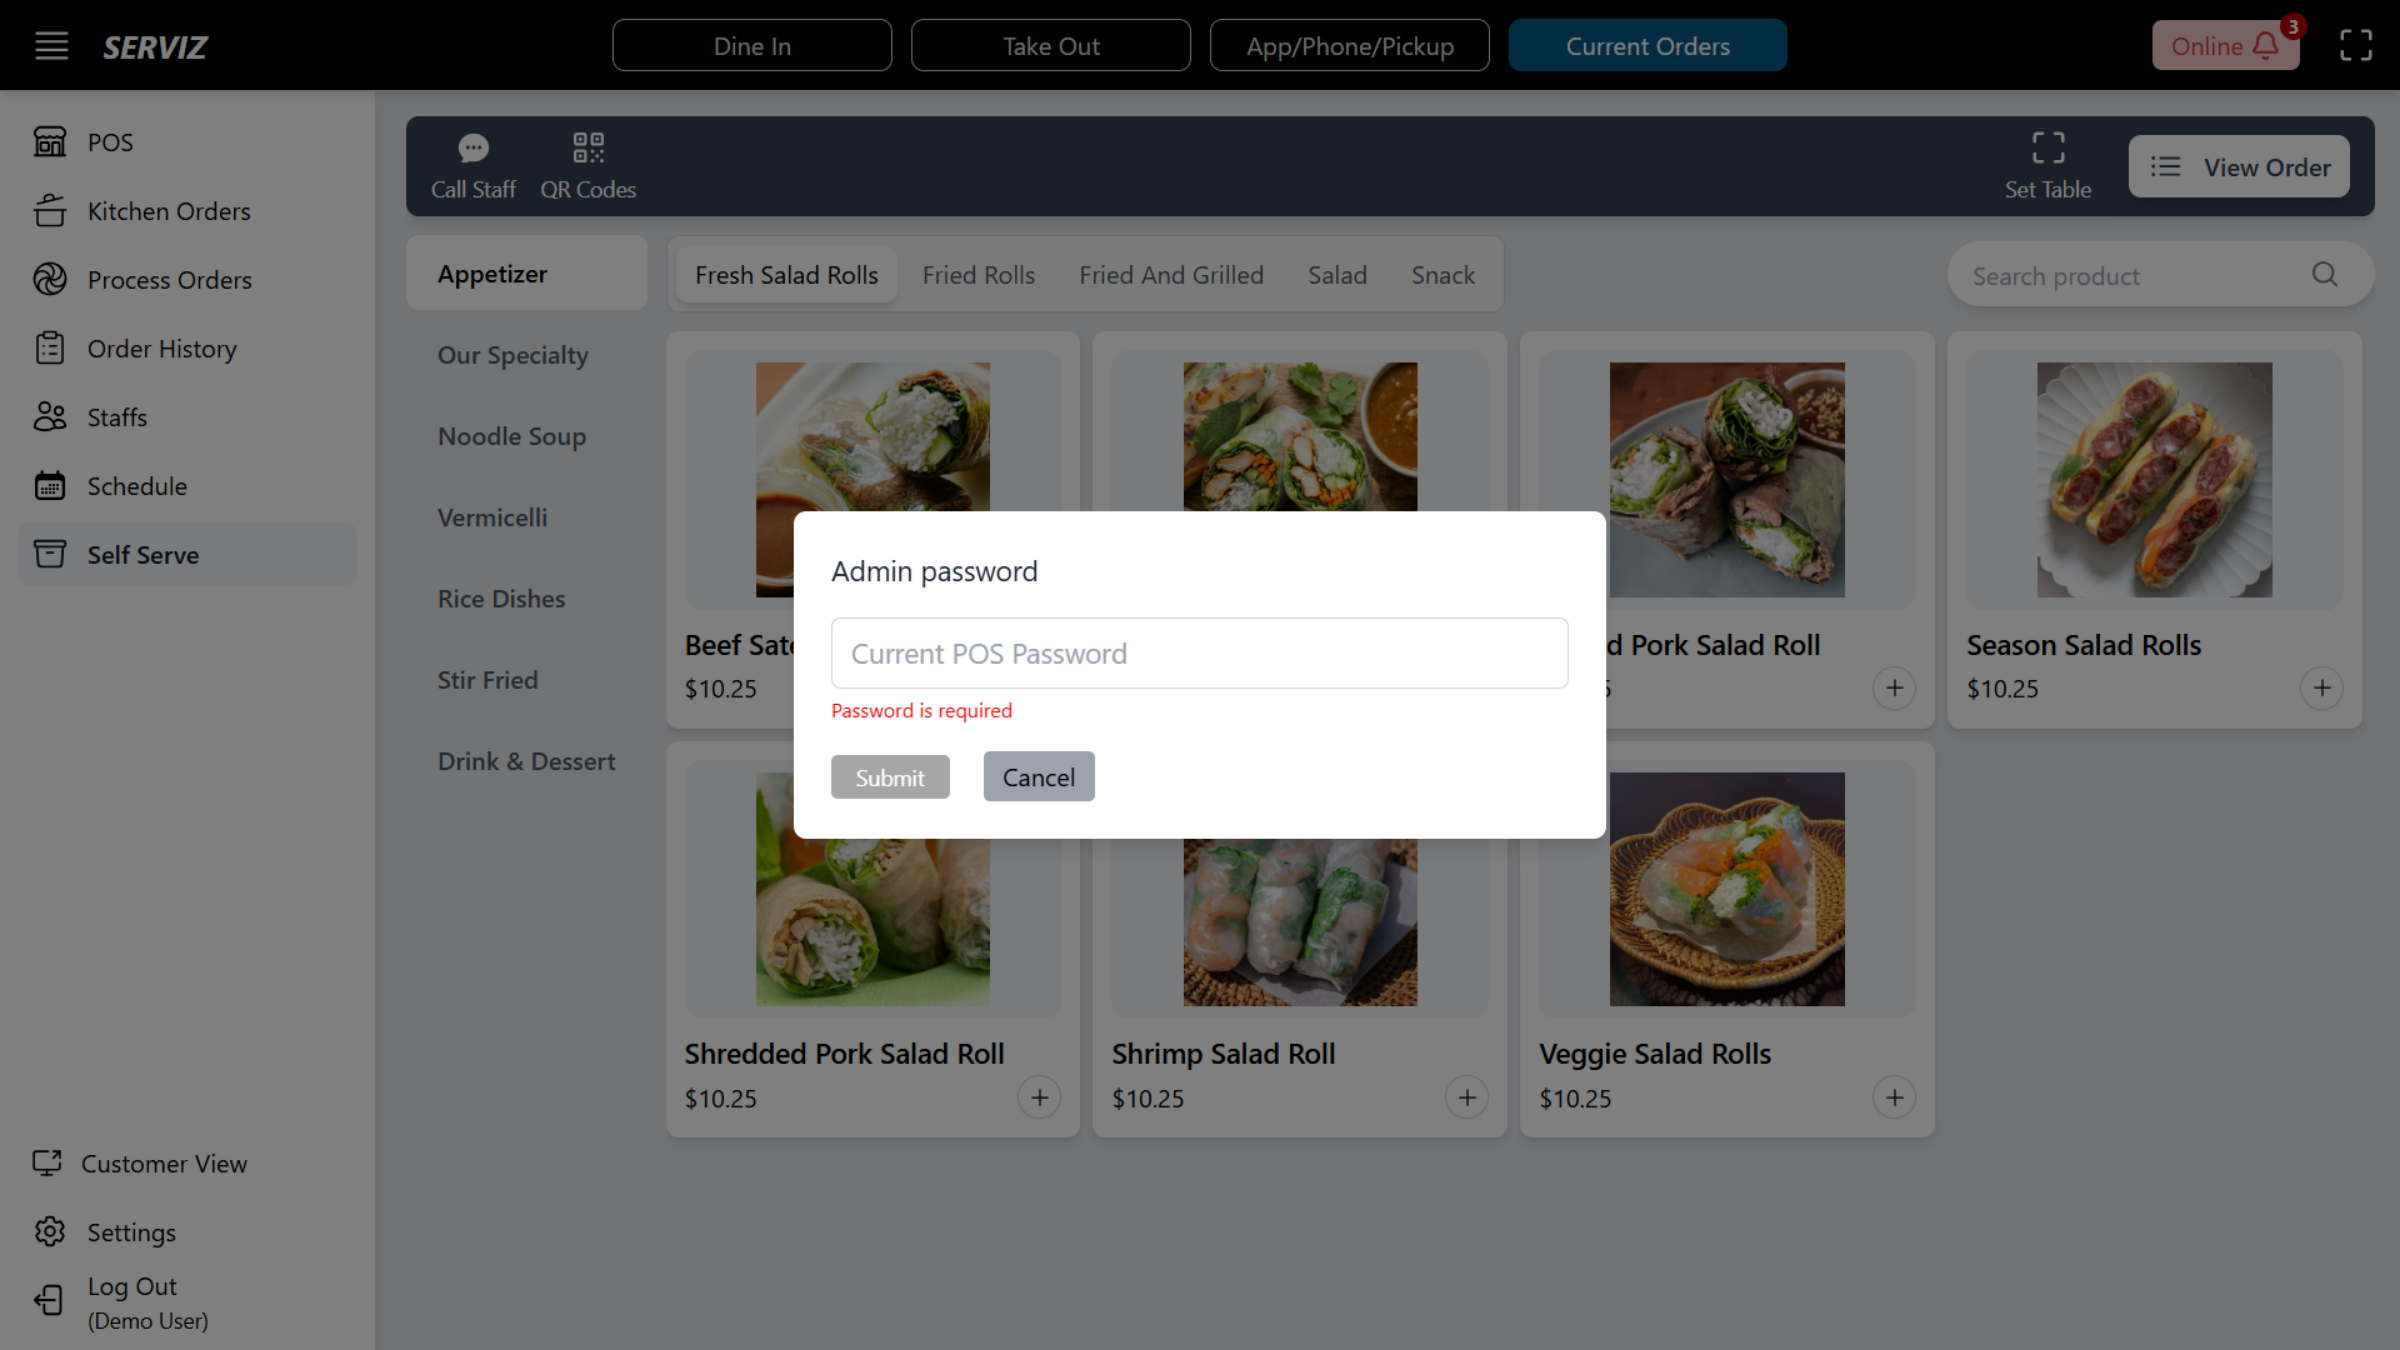
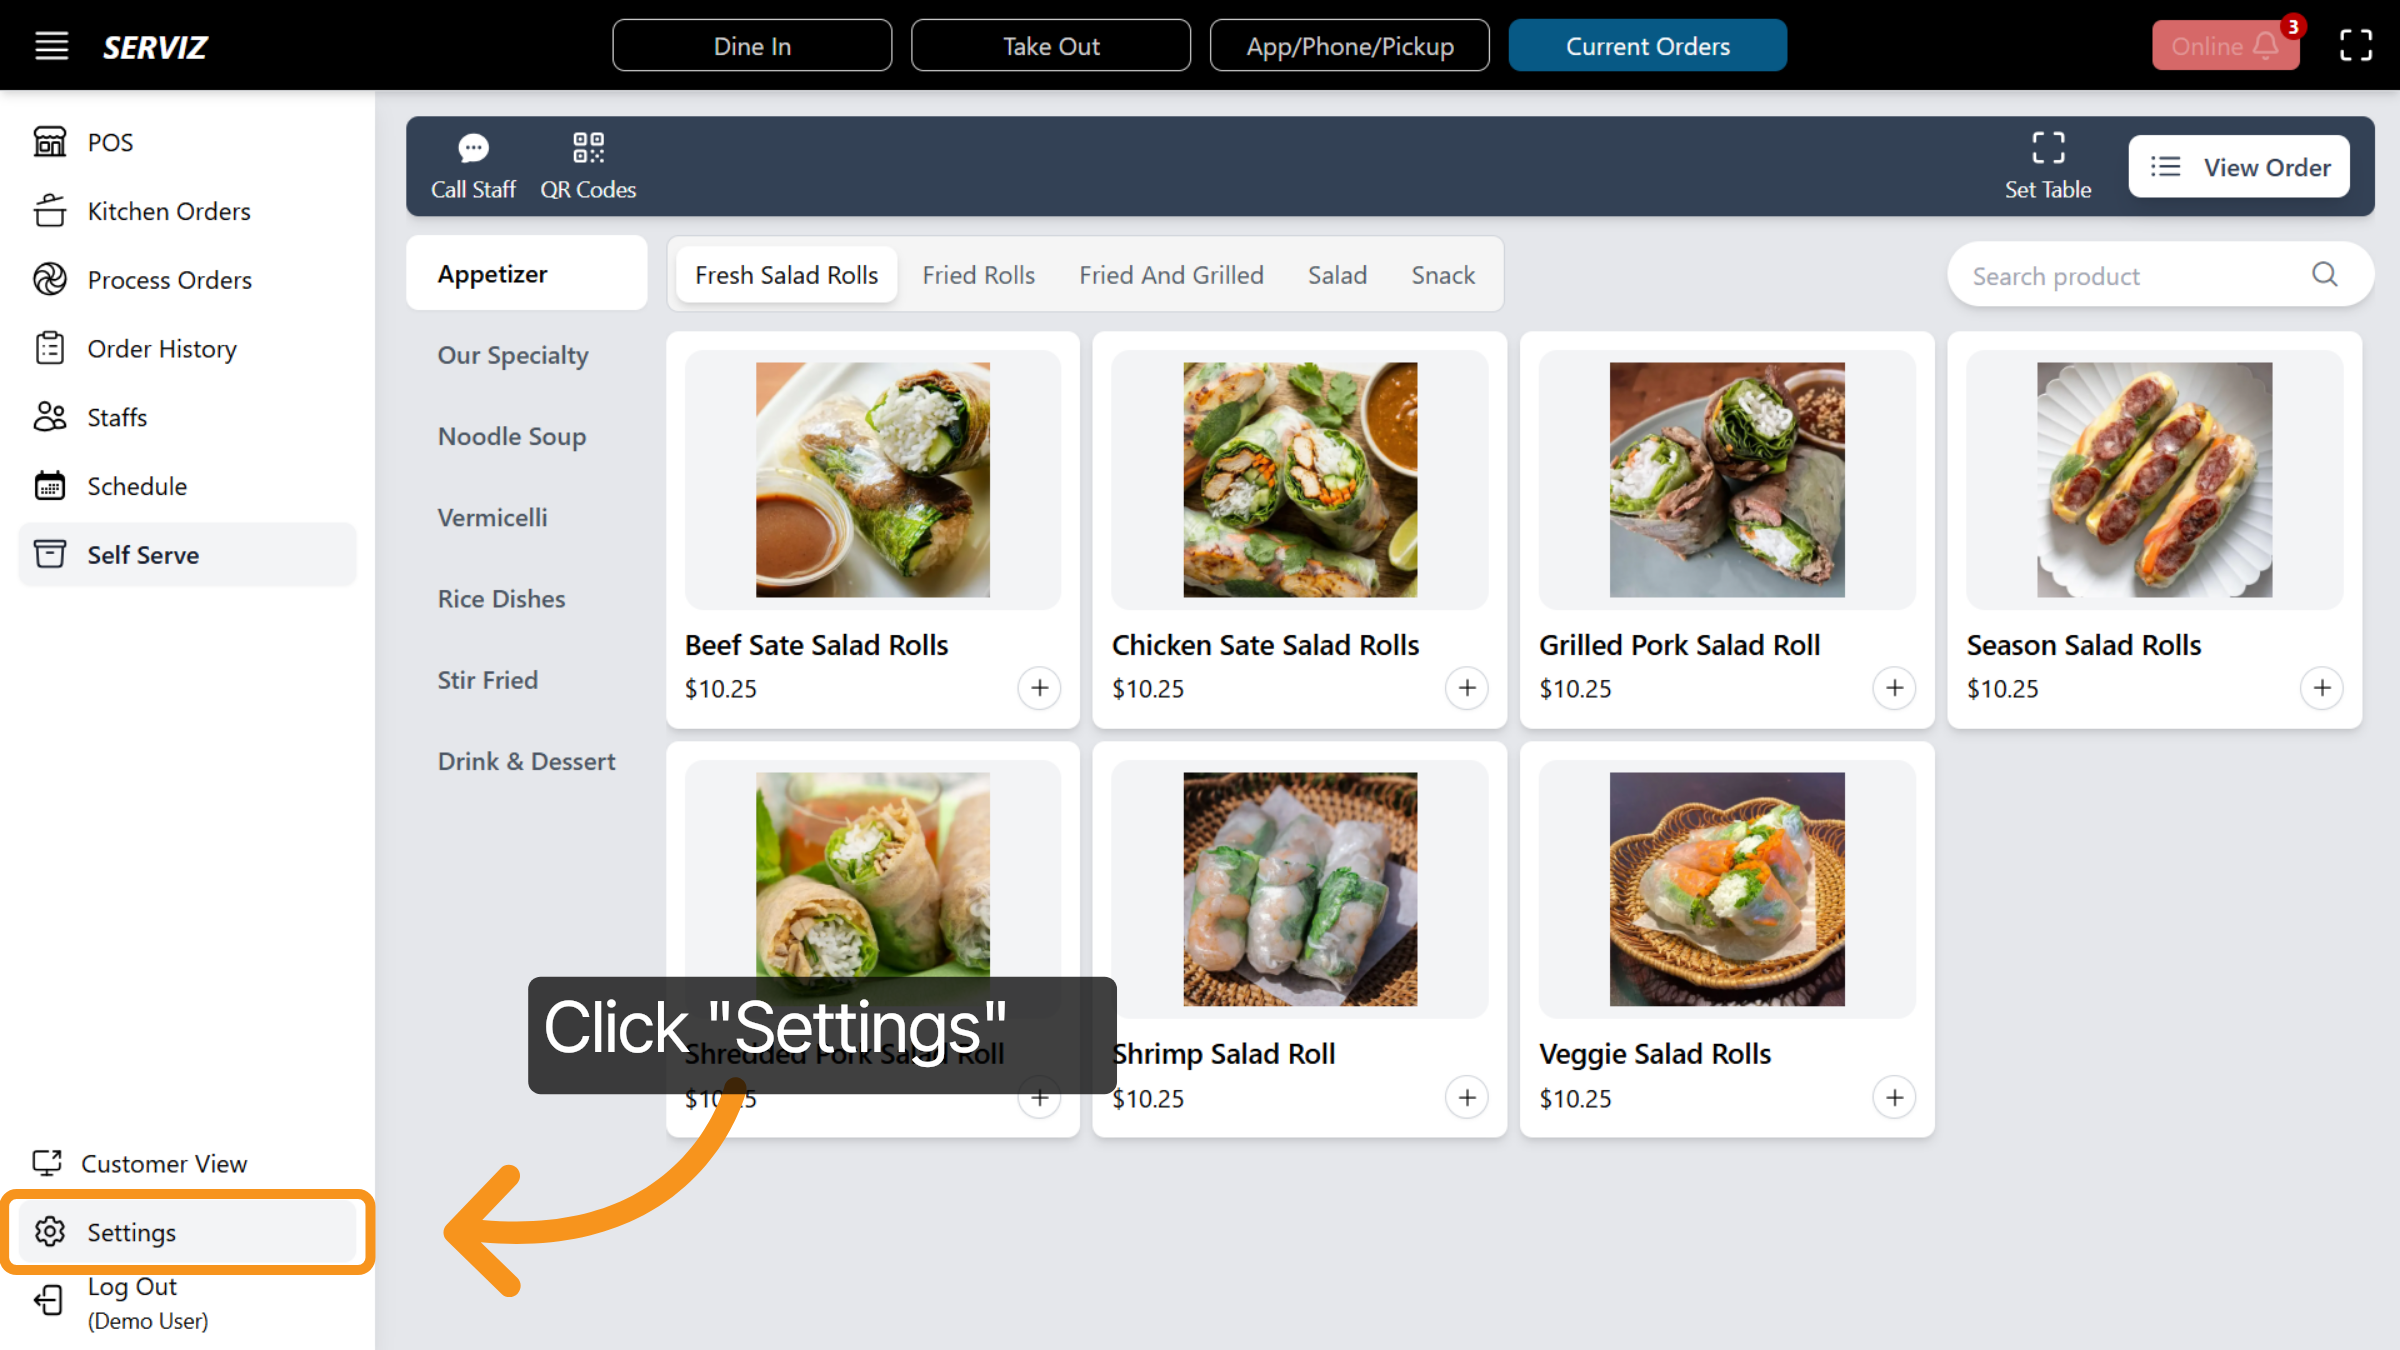
54. Open Settings
Next, click Settings to configure system preferences.
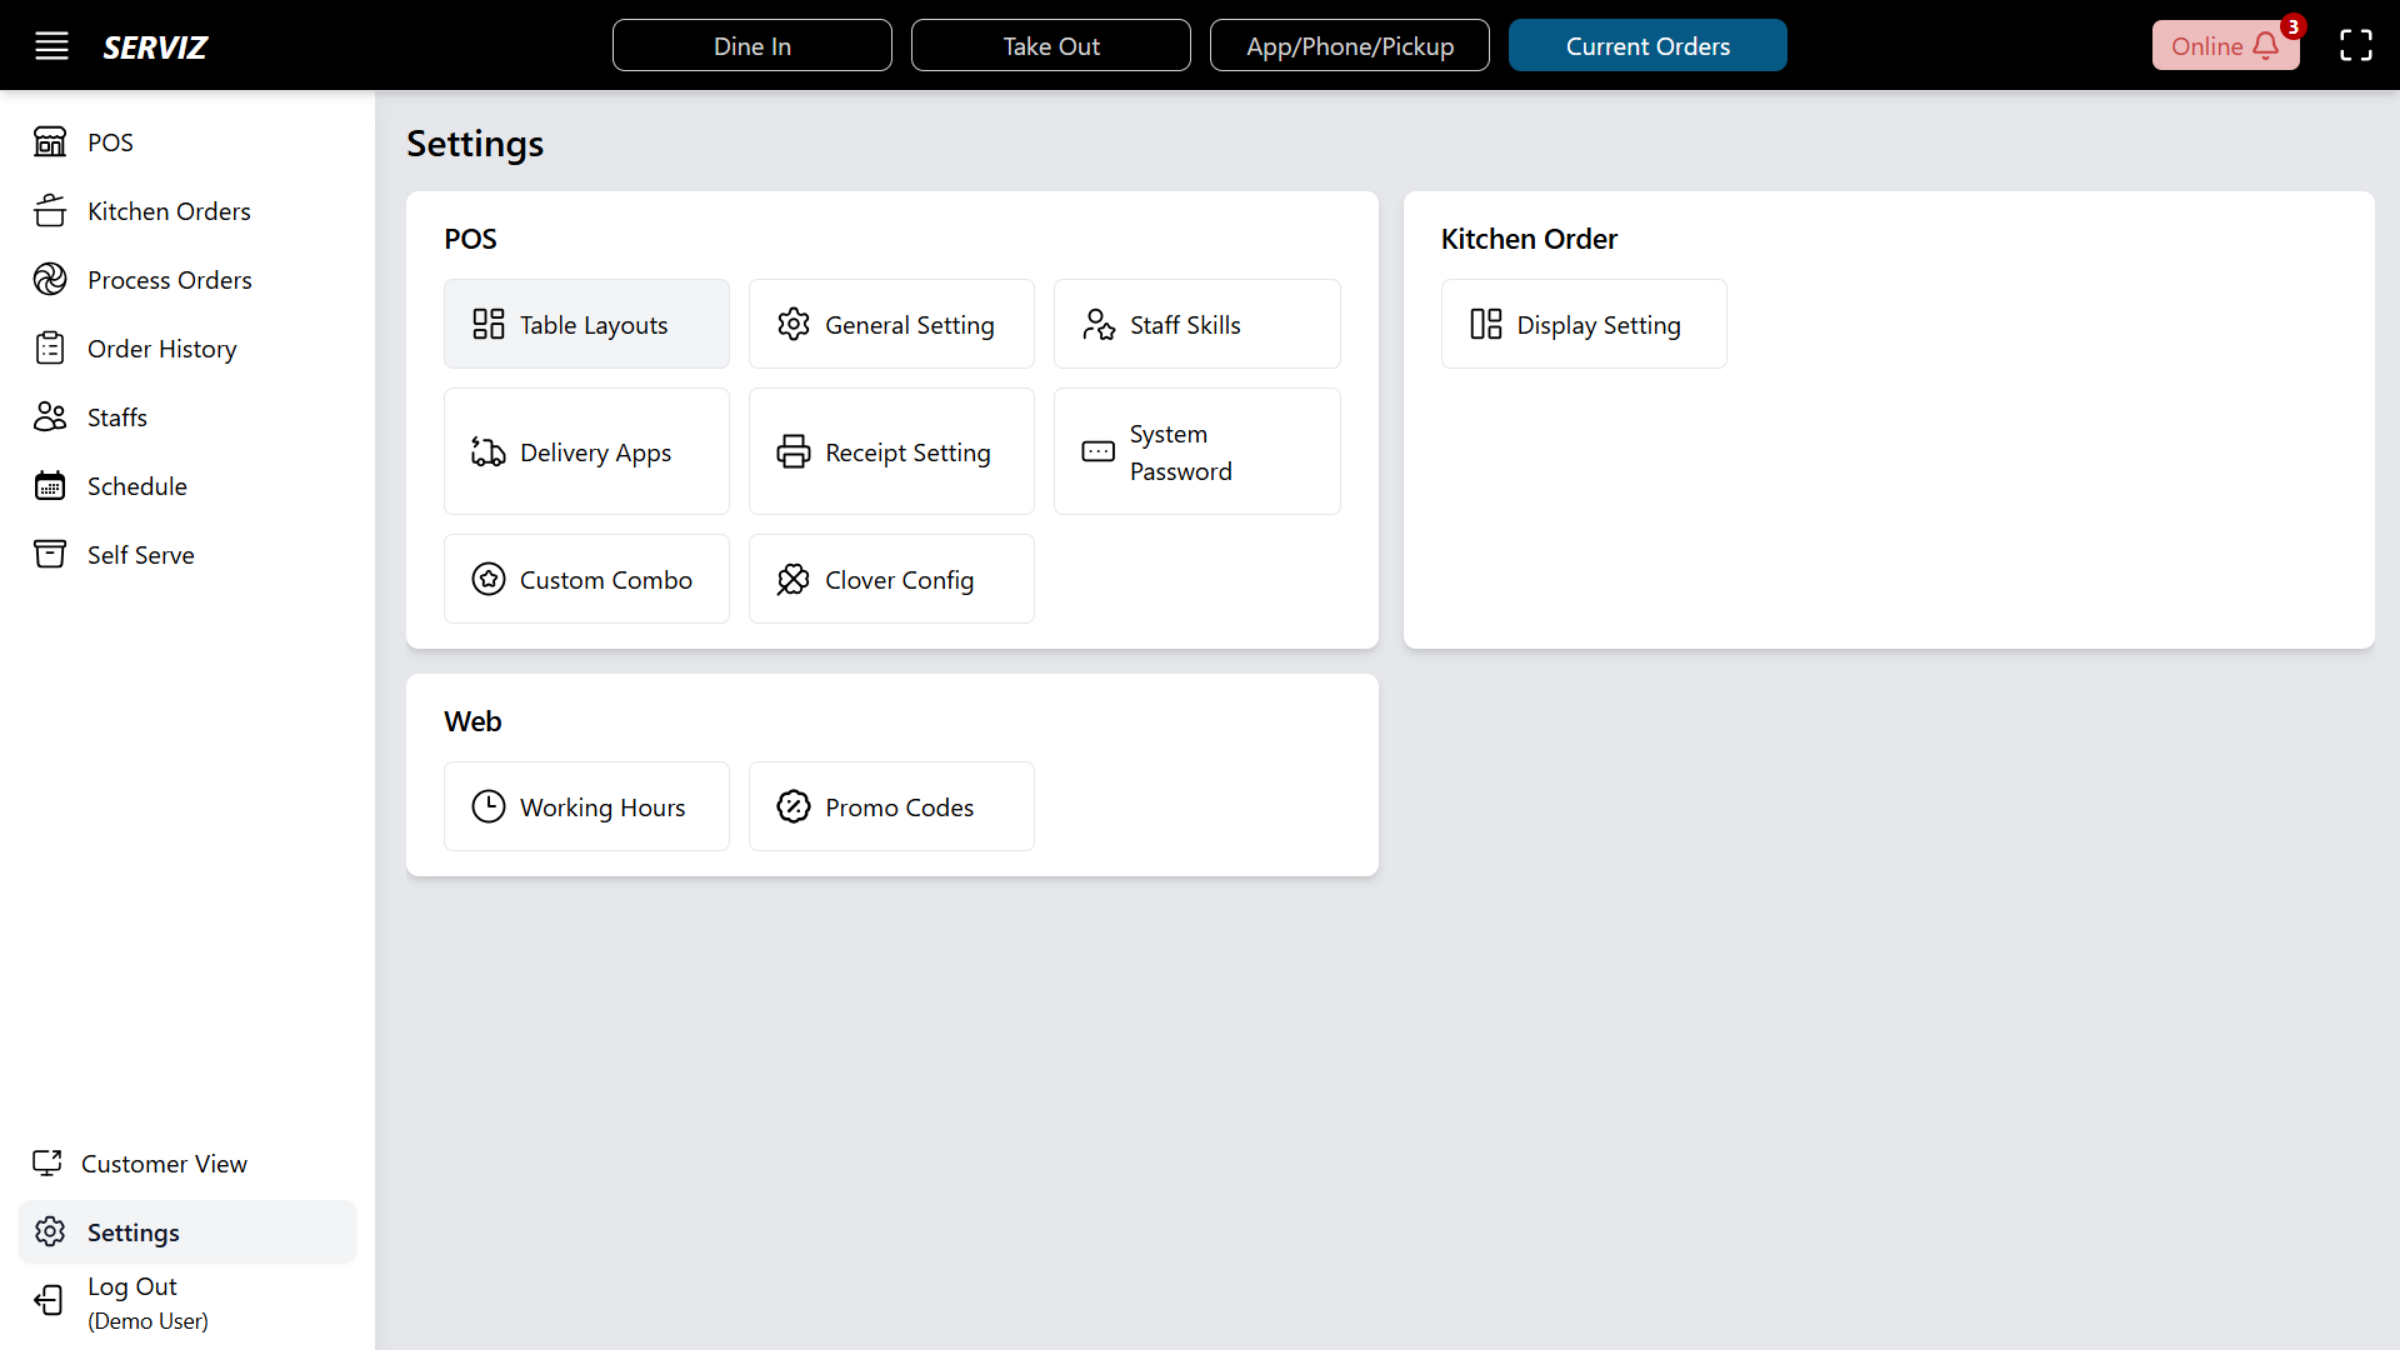
55. Setting Section
Within Settings, you can manage: Table Layouts General Settings Staff Skills Delivery Apps Receipt Settings System Passwords Custom Combos Clover Integration Working Hours Promo Codes Display Settings
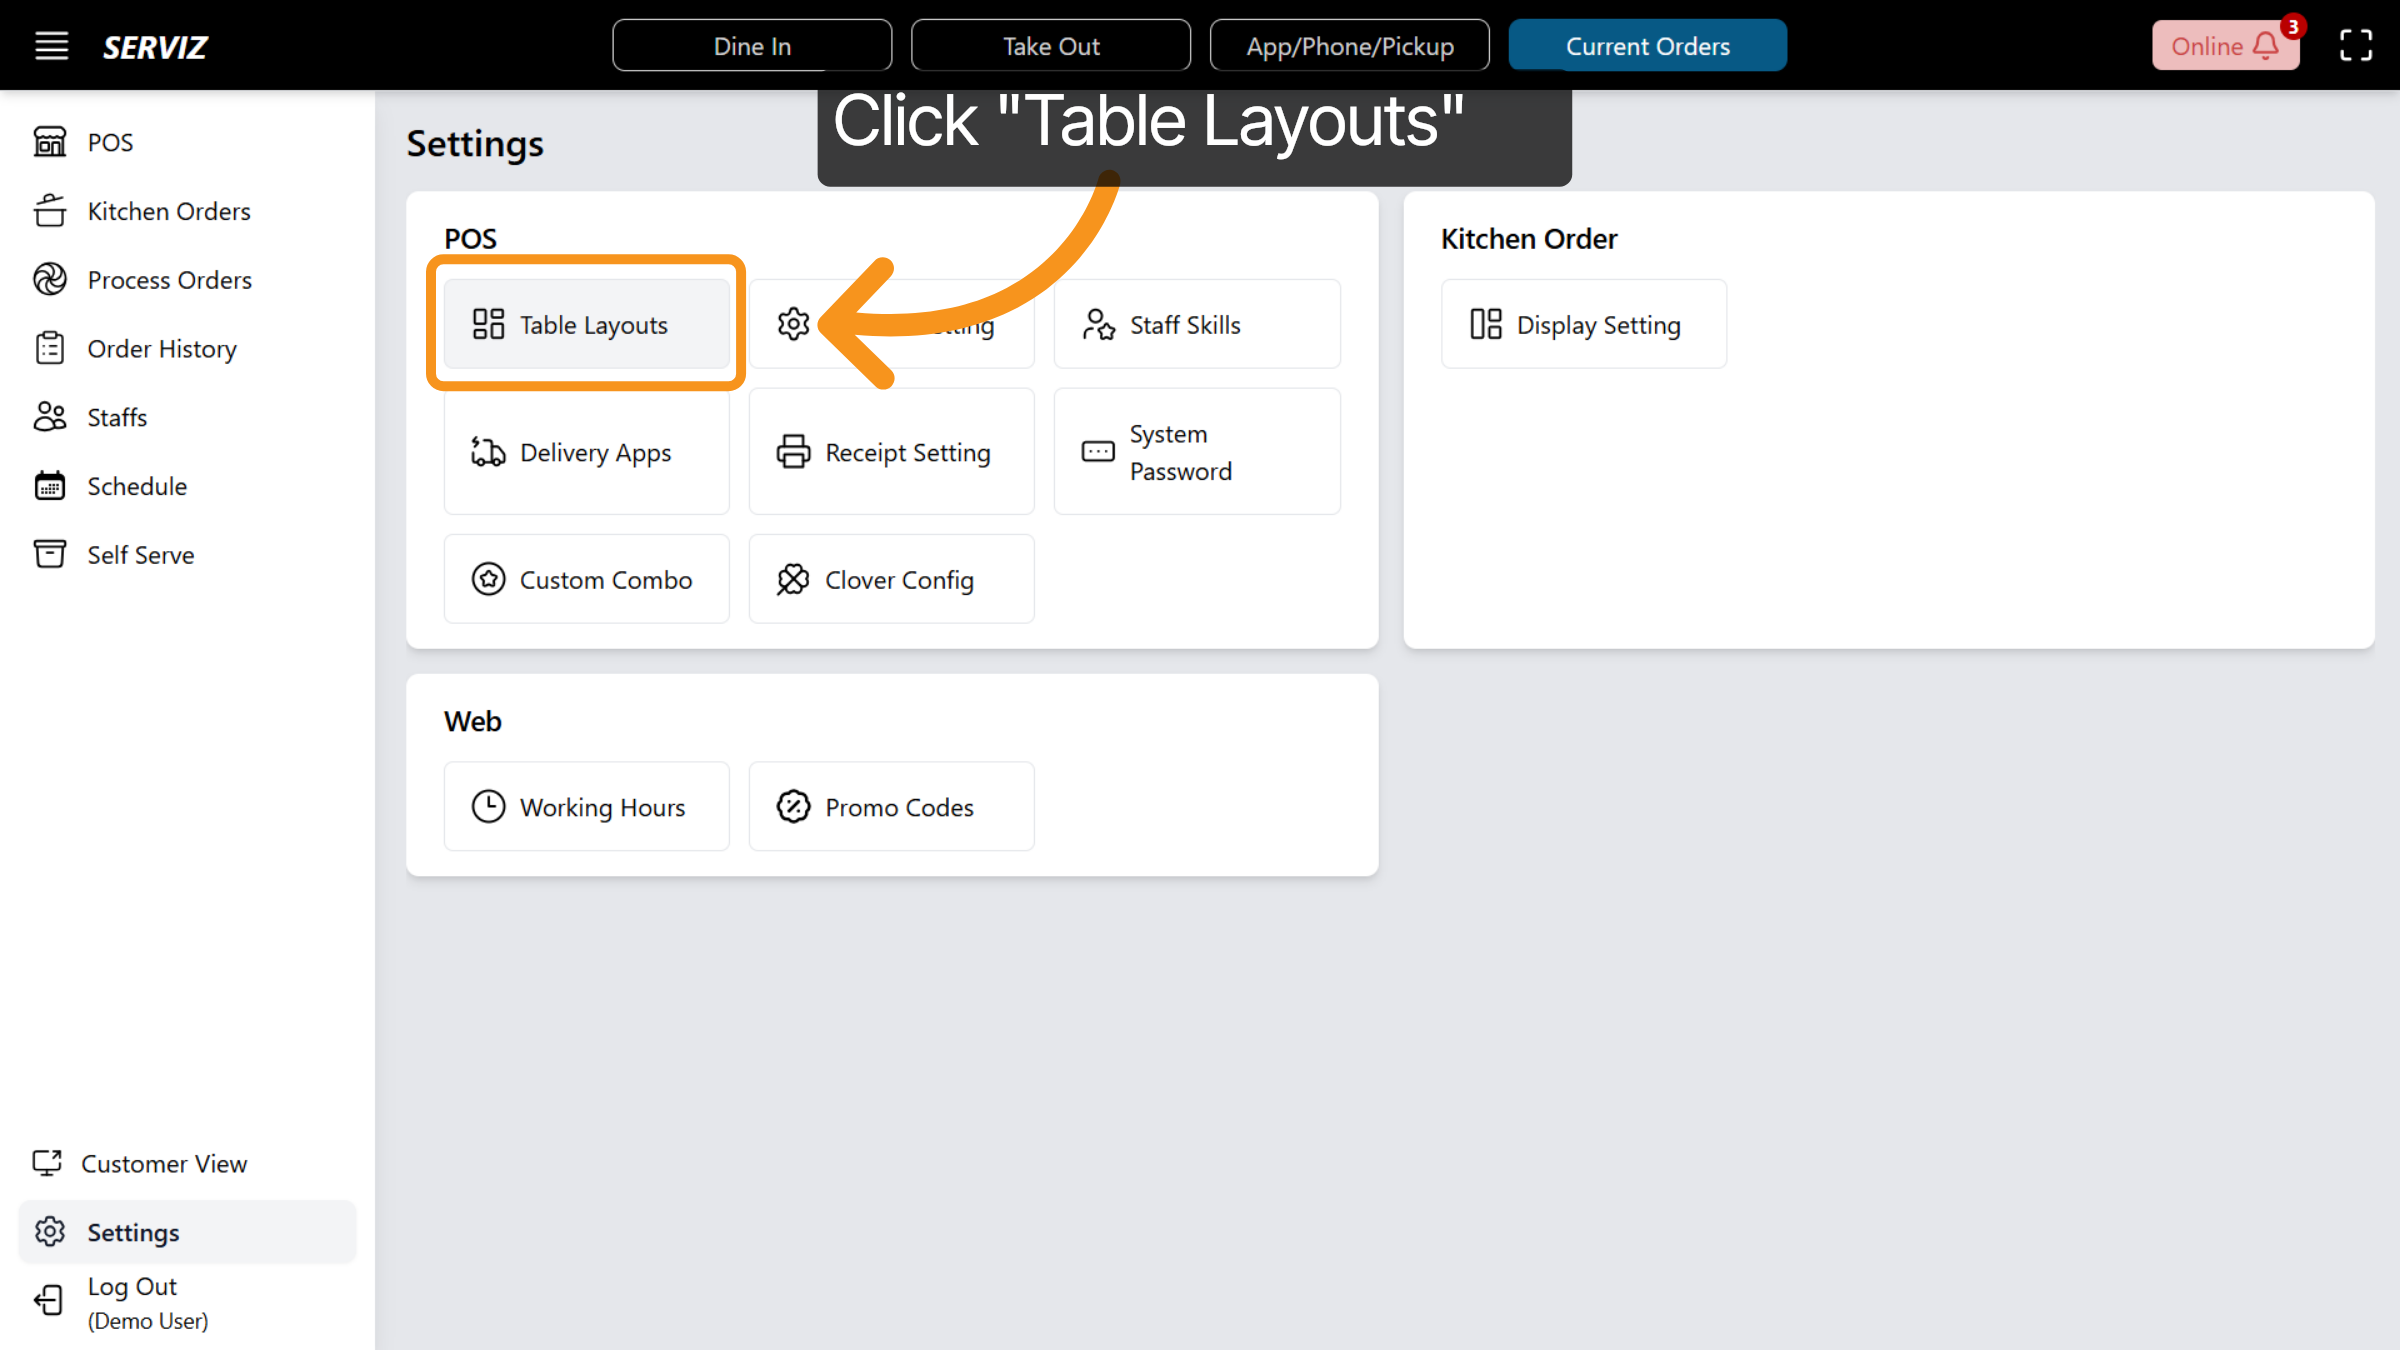
56. Access Table Layouts
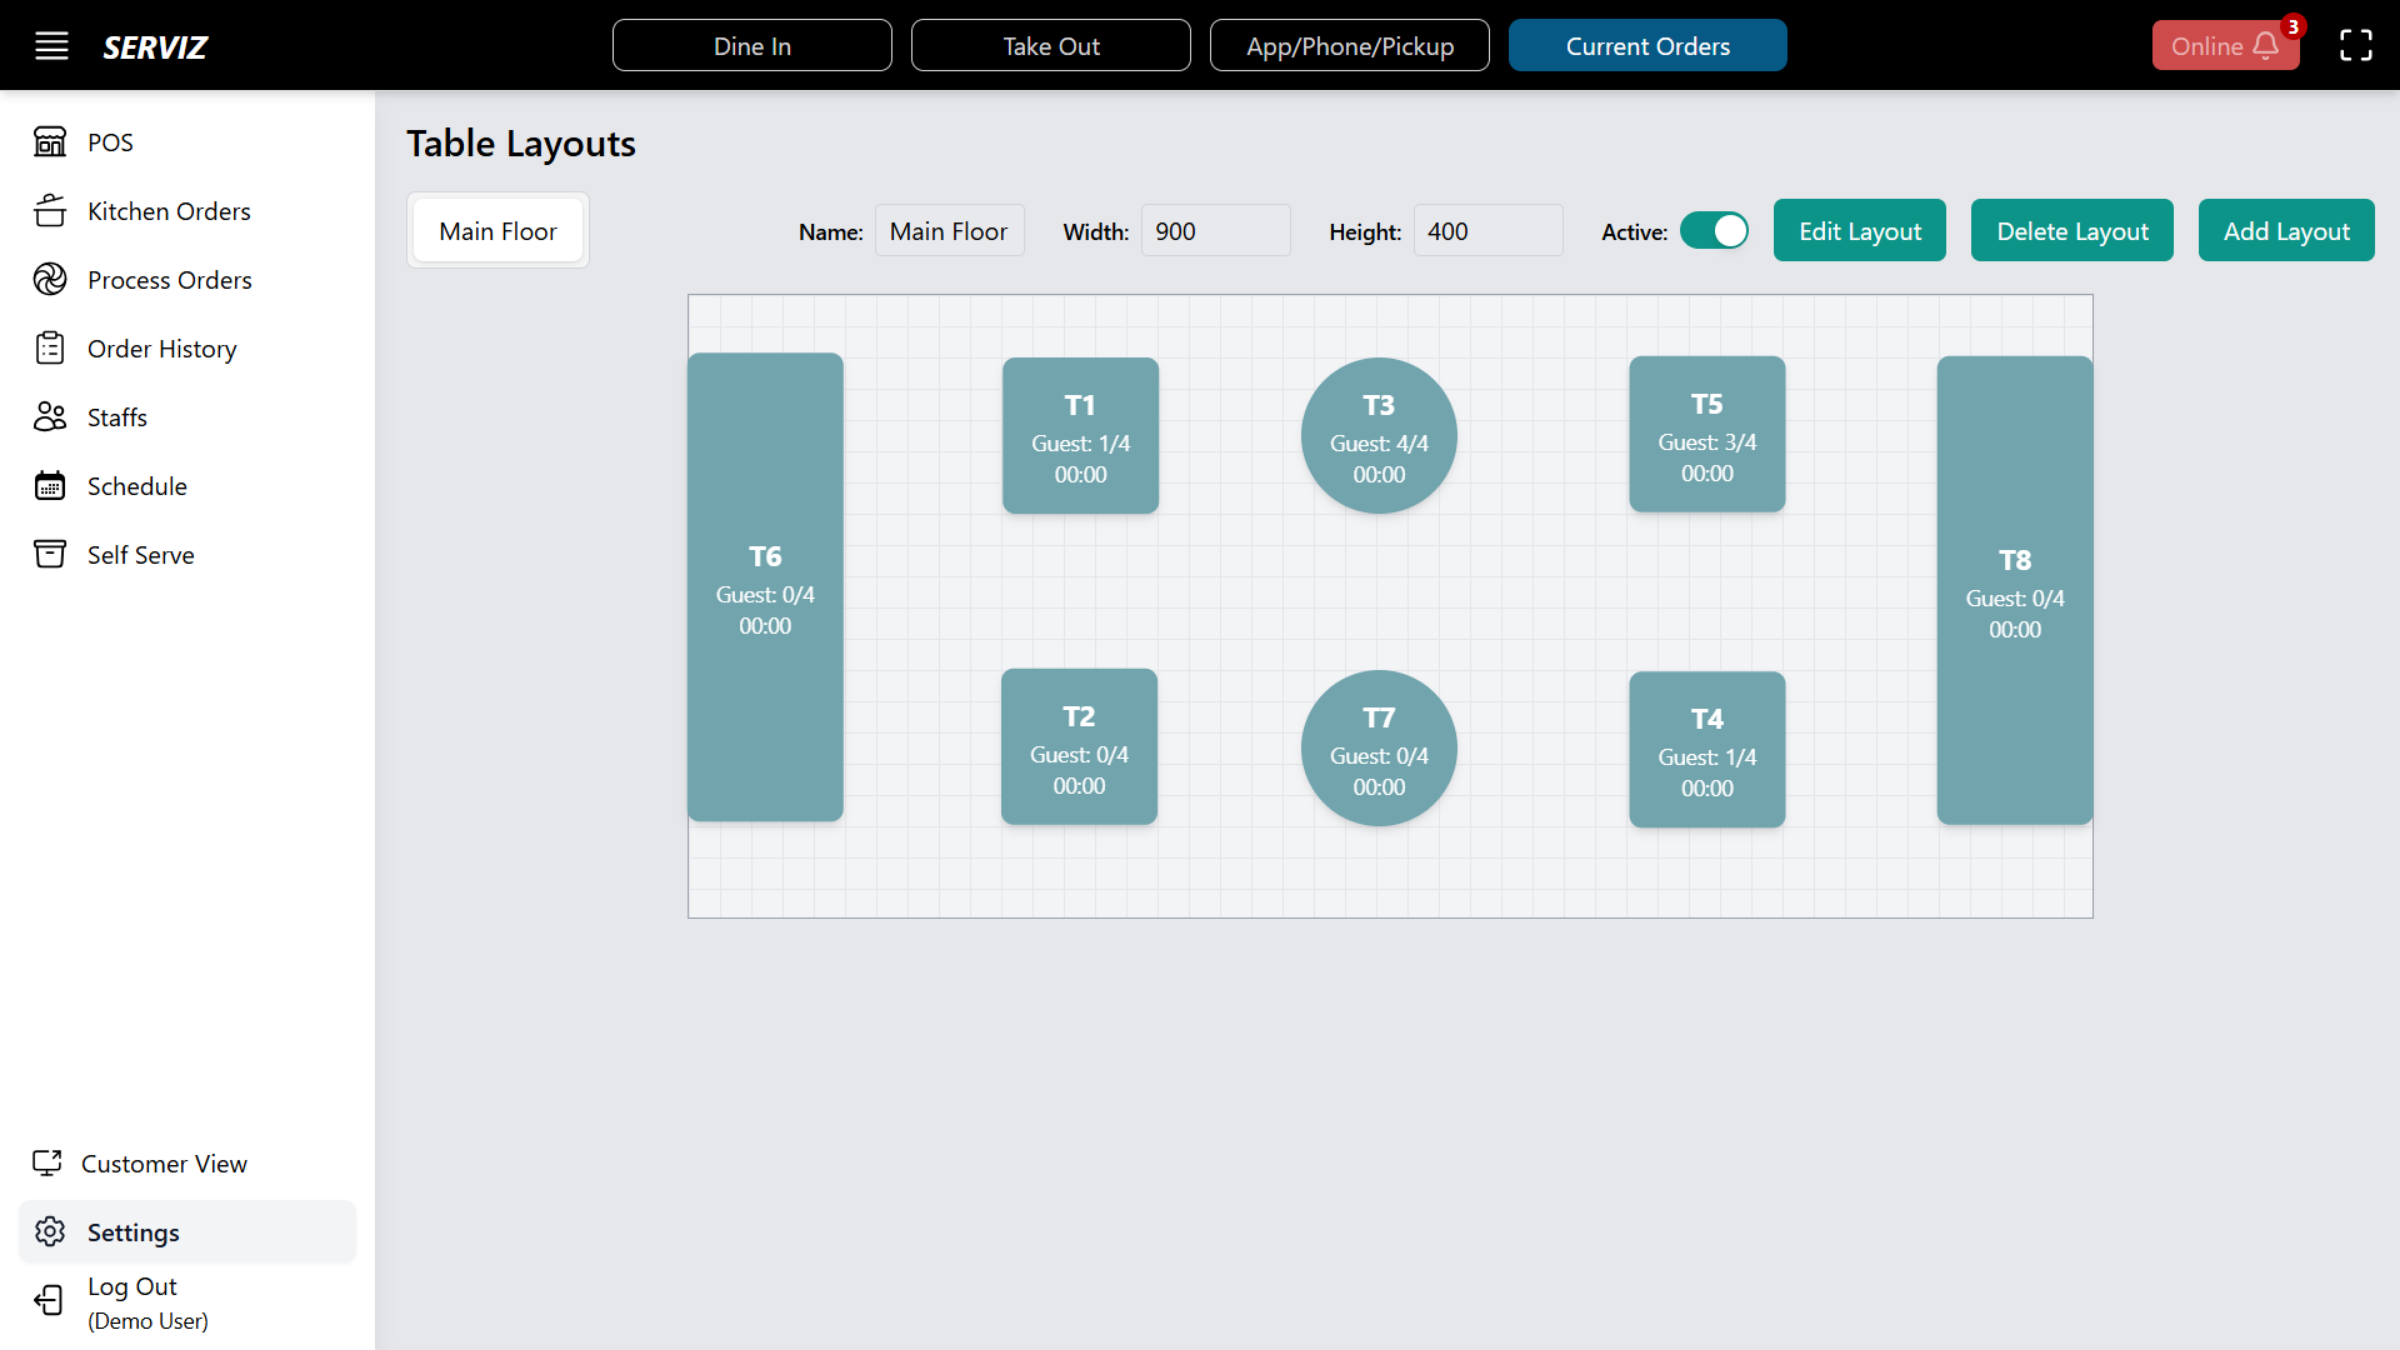
Click "Table Layouts" to manage the arrangement of tables.
57. Table Layout Setting
You can edit, add, or delete layouts to make them resemble your restaurant setup more closely.
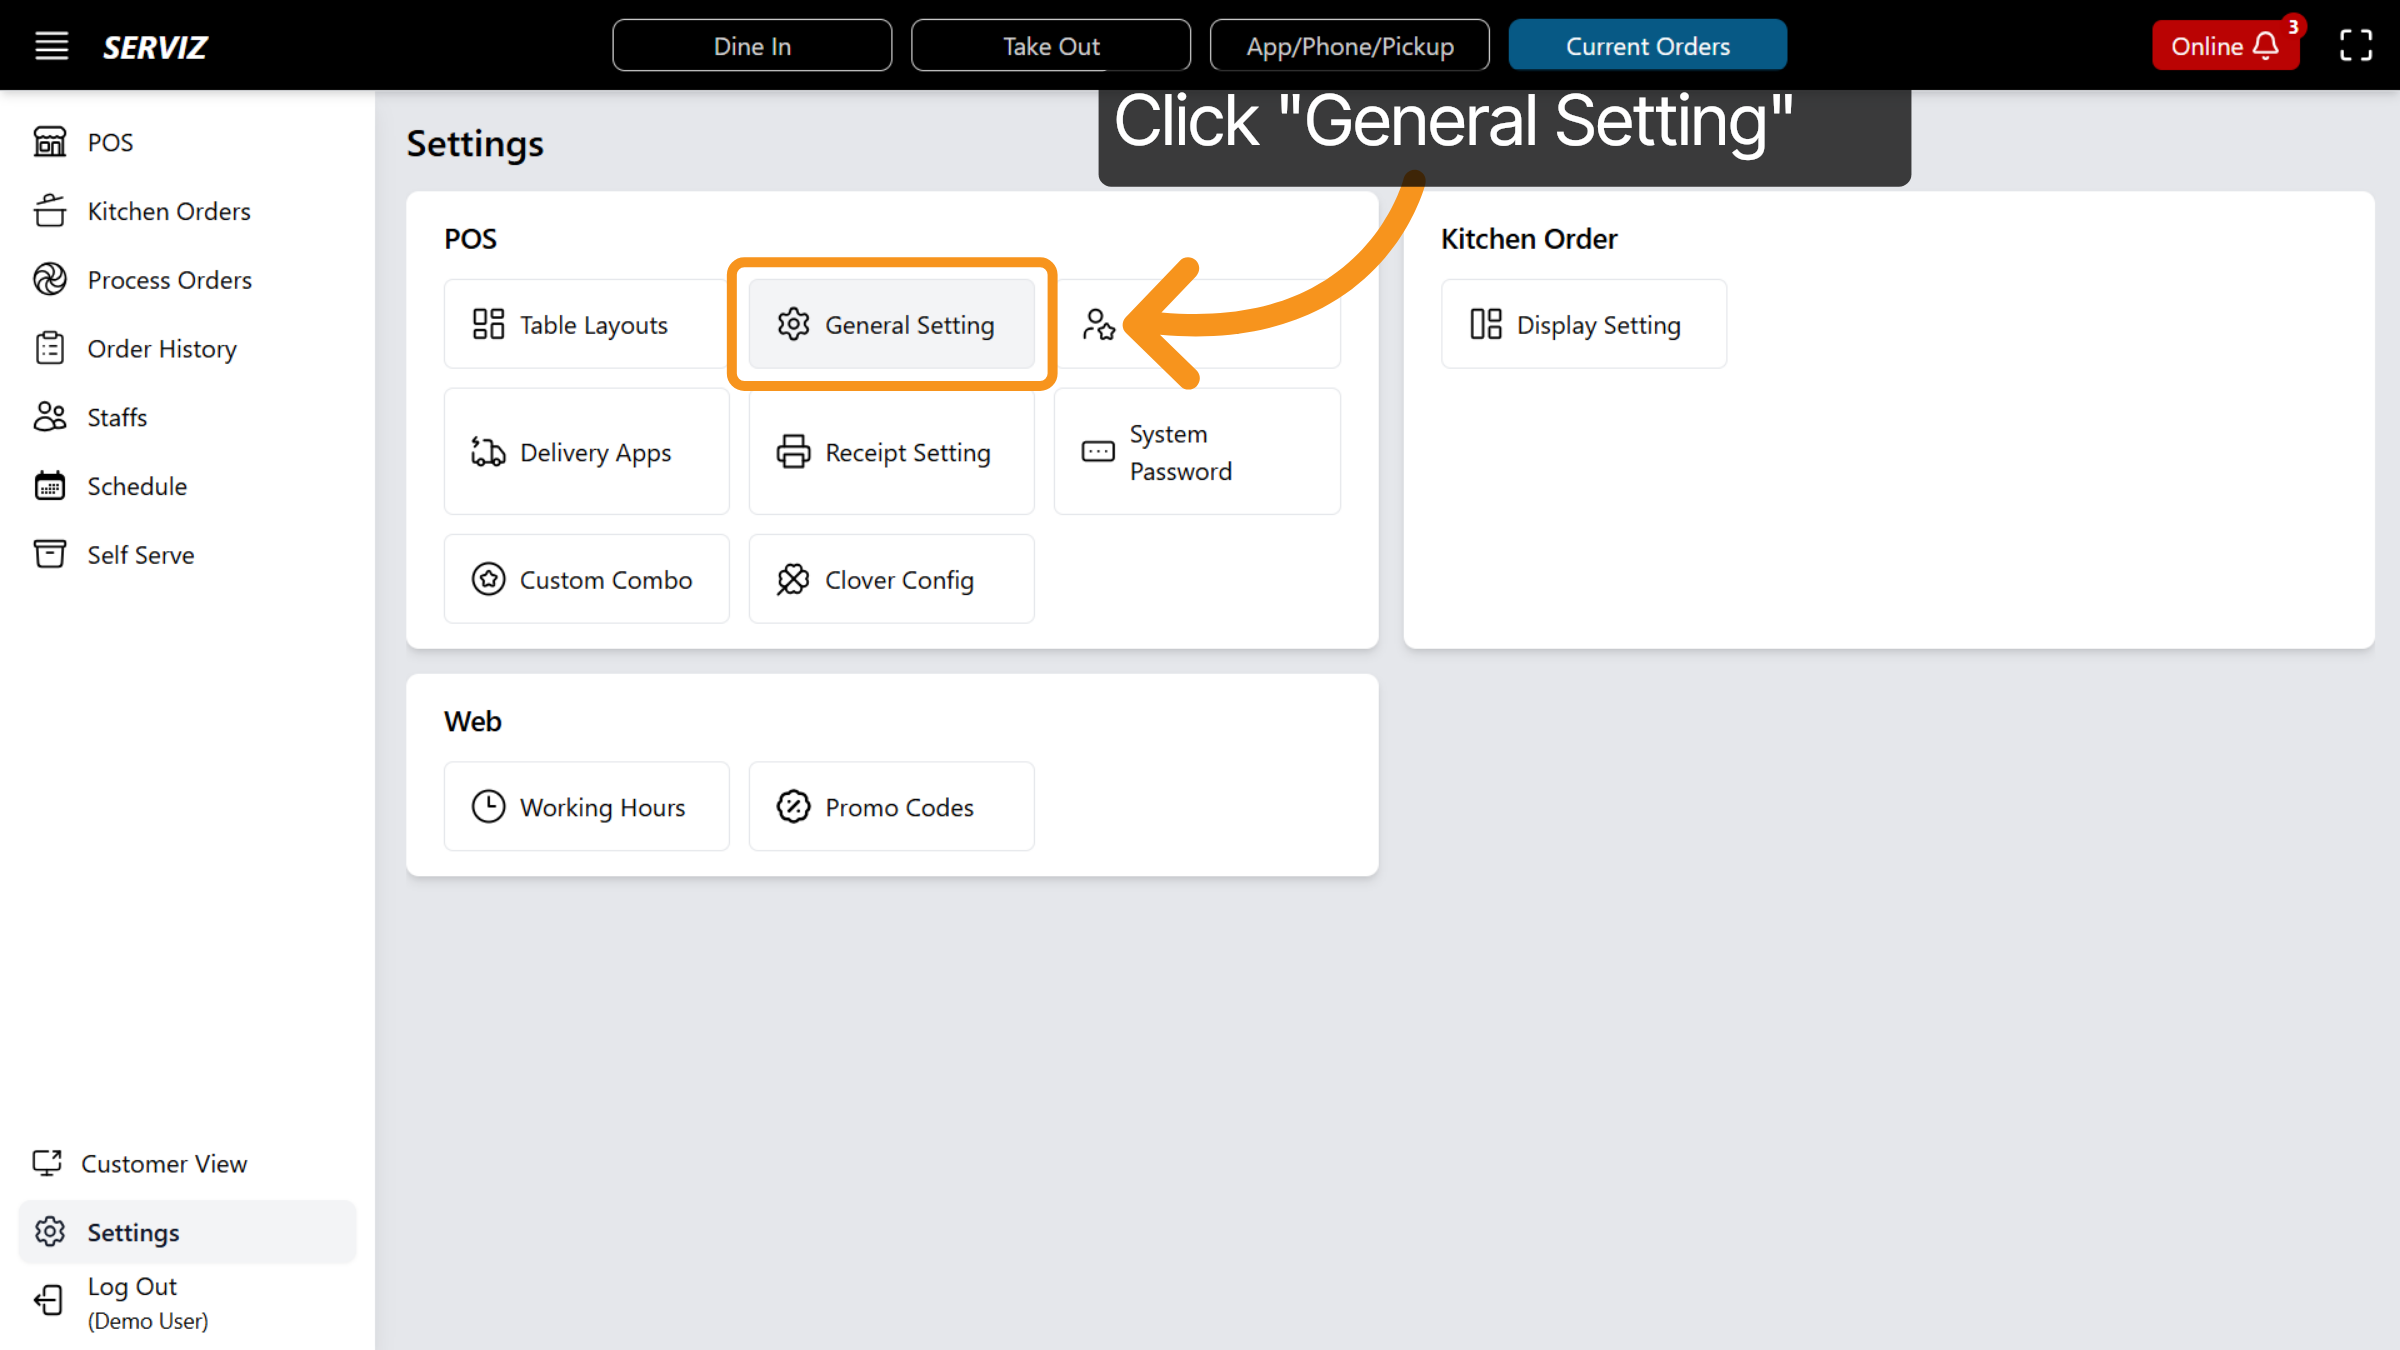
58. Open General Settings
Click General Setting to adjust overall system preferences.
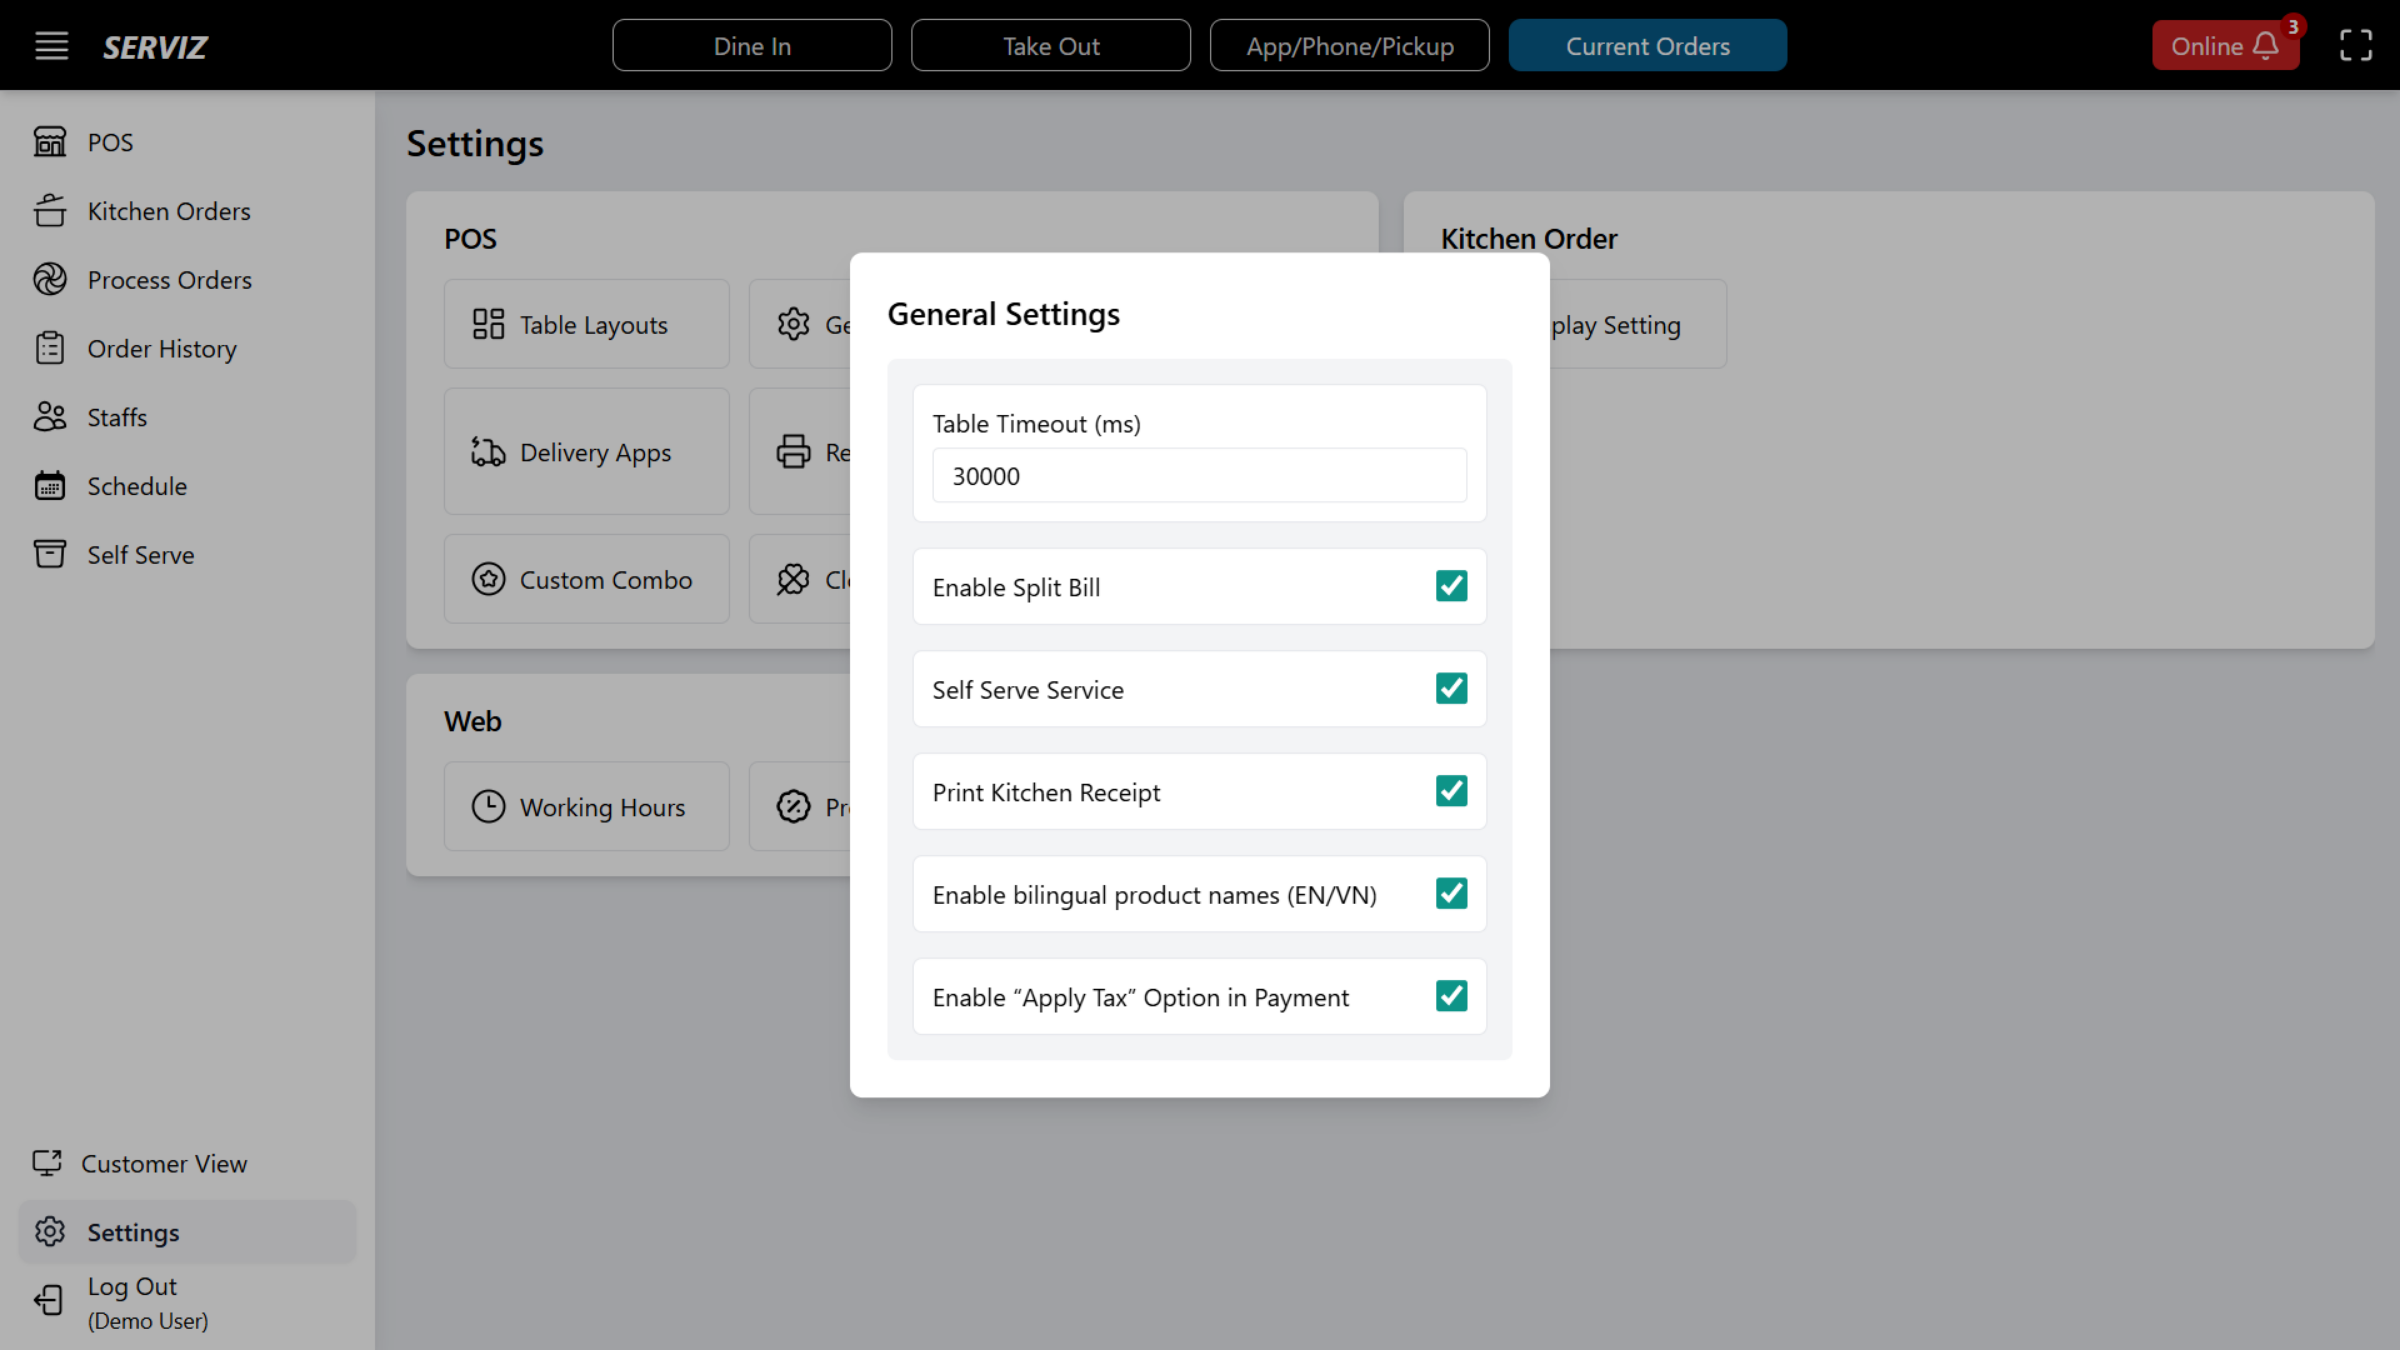
59. General Settings
From here, you can Enable or disable options such as split bill, Self Serve Service, Print Kitchen Receipt, Bilingual Product Name, "Apply Tax" Option in Payment
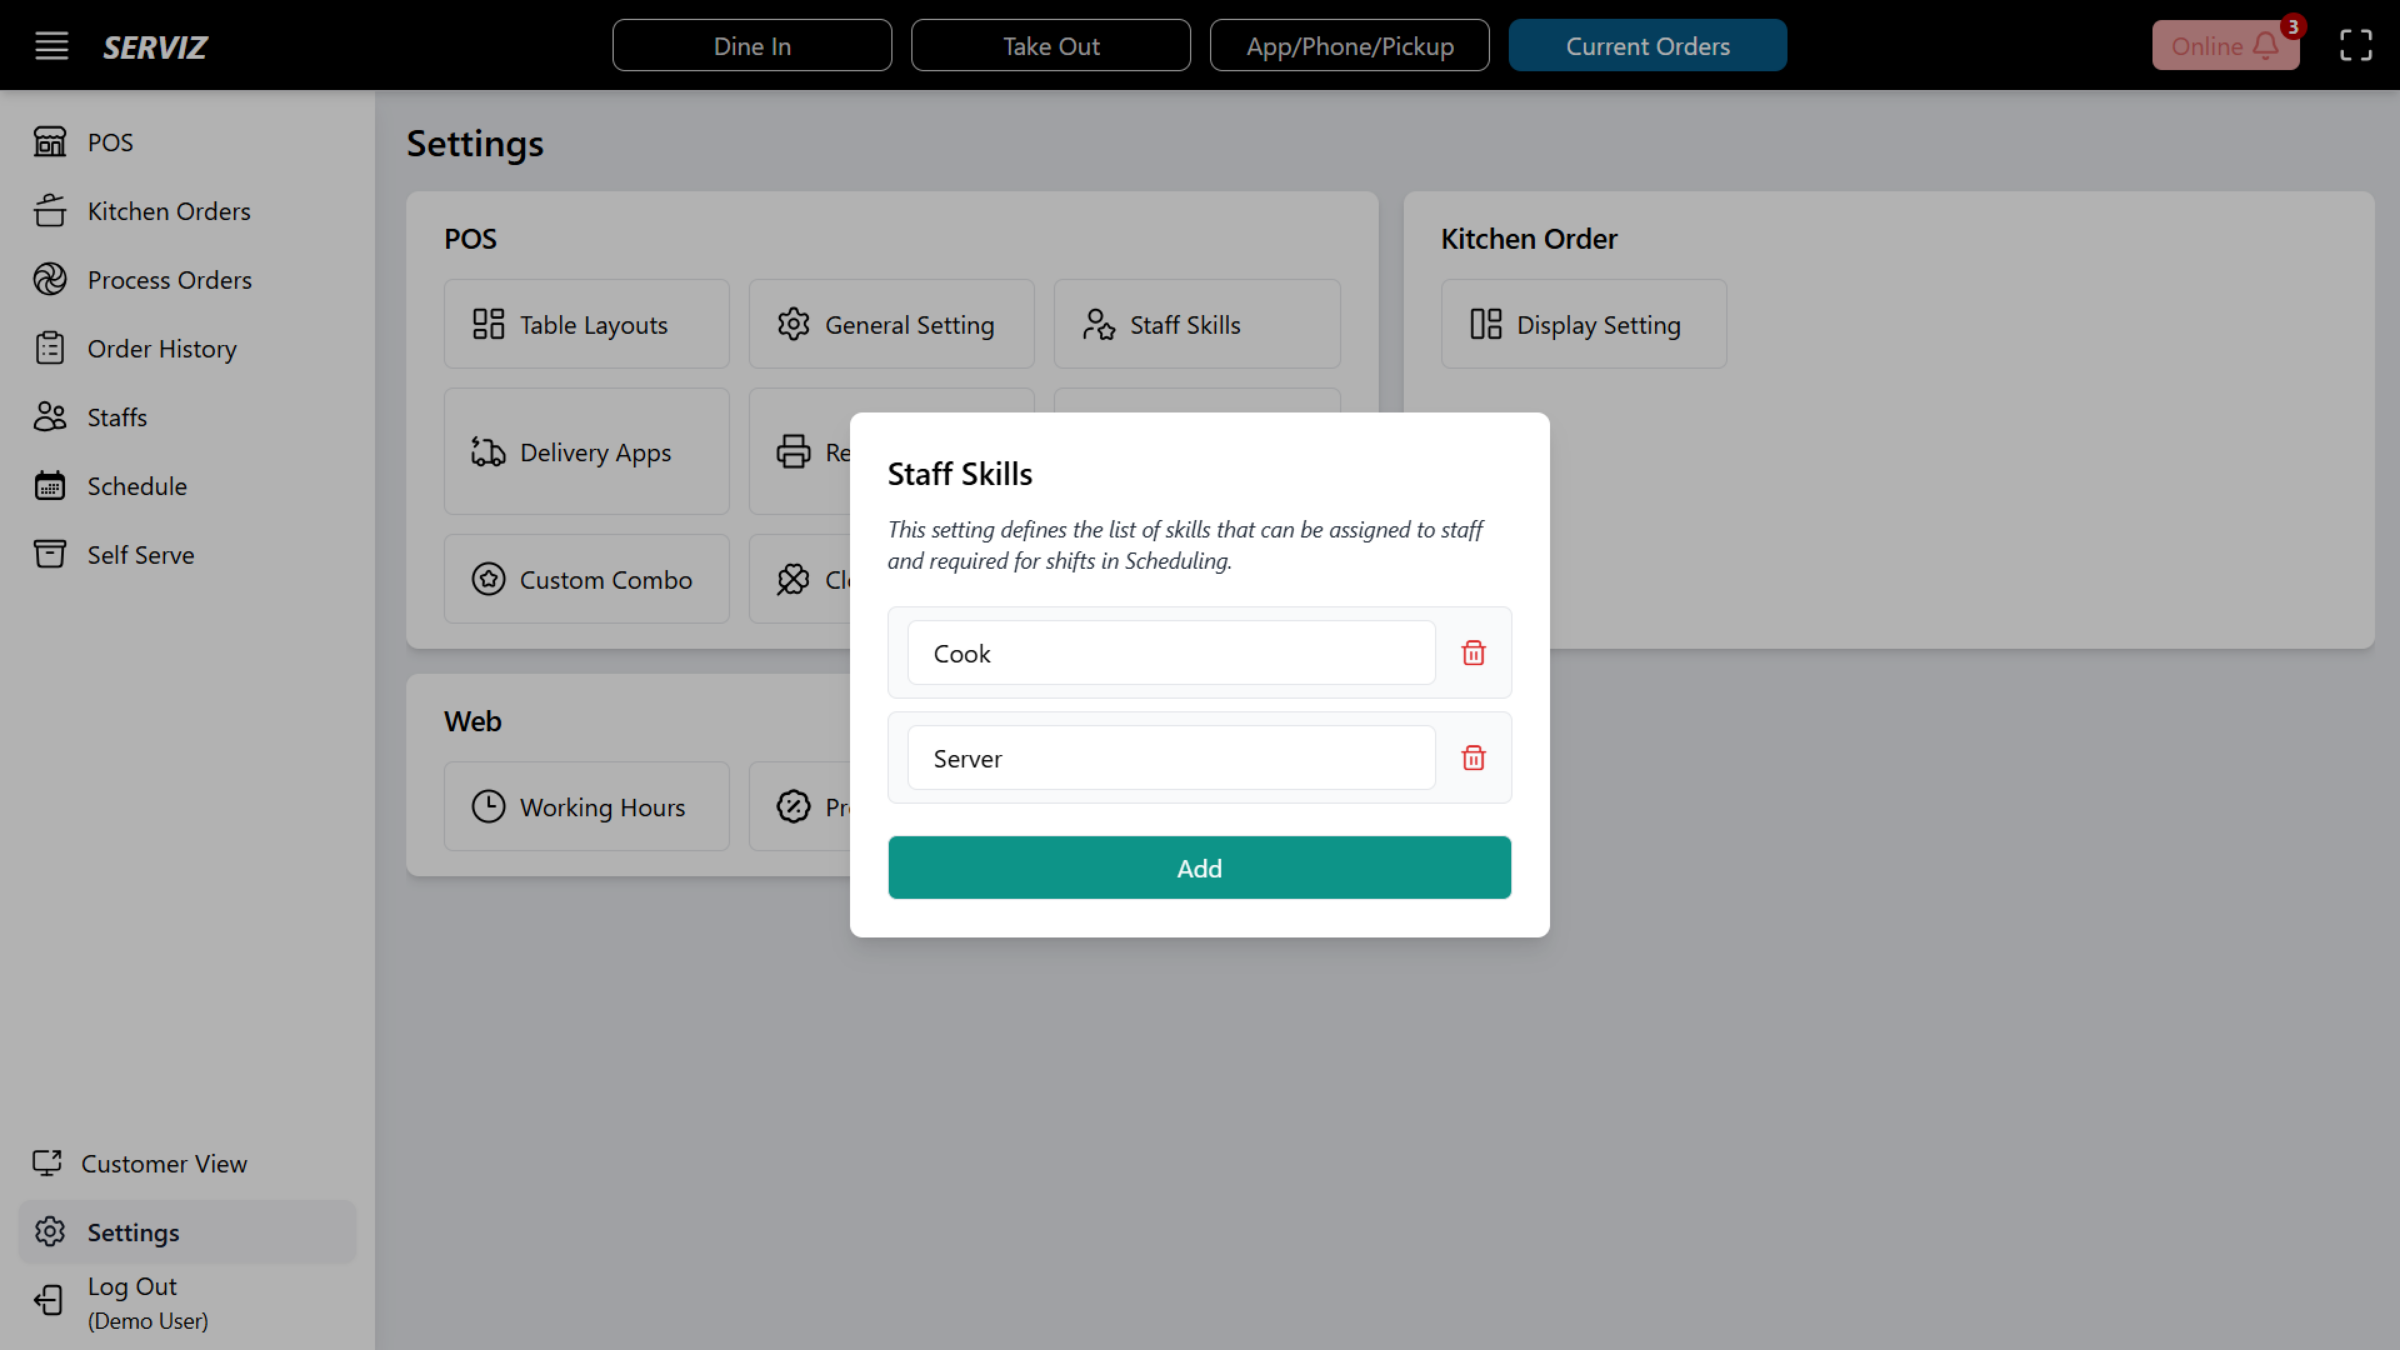
60. Manage Staff Skills
Click Staff Skills to add or delete employee skill sets and roles.
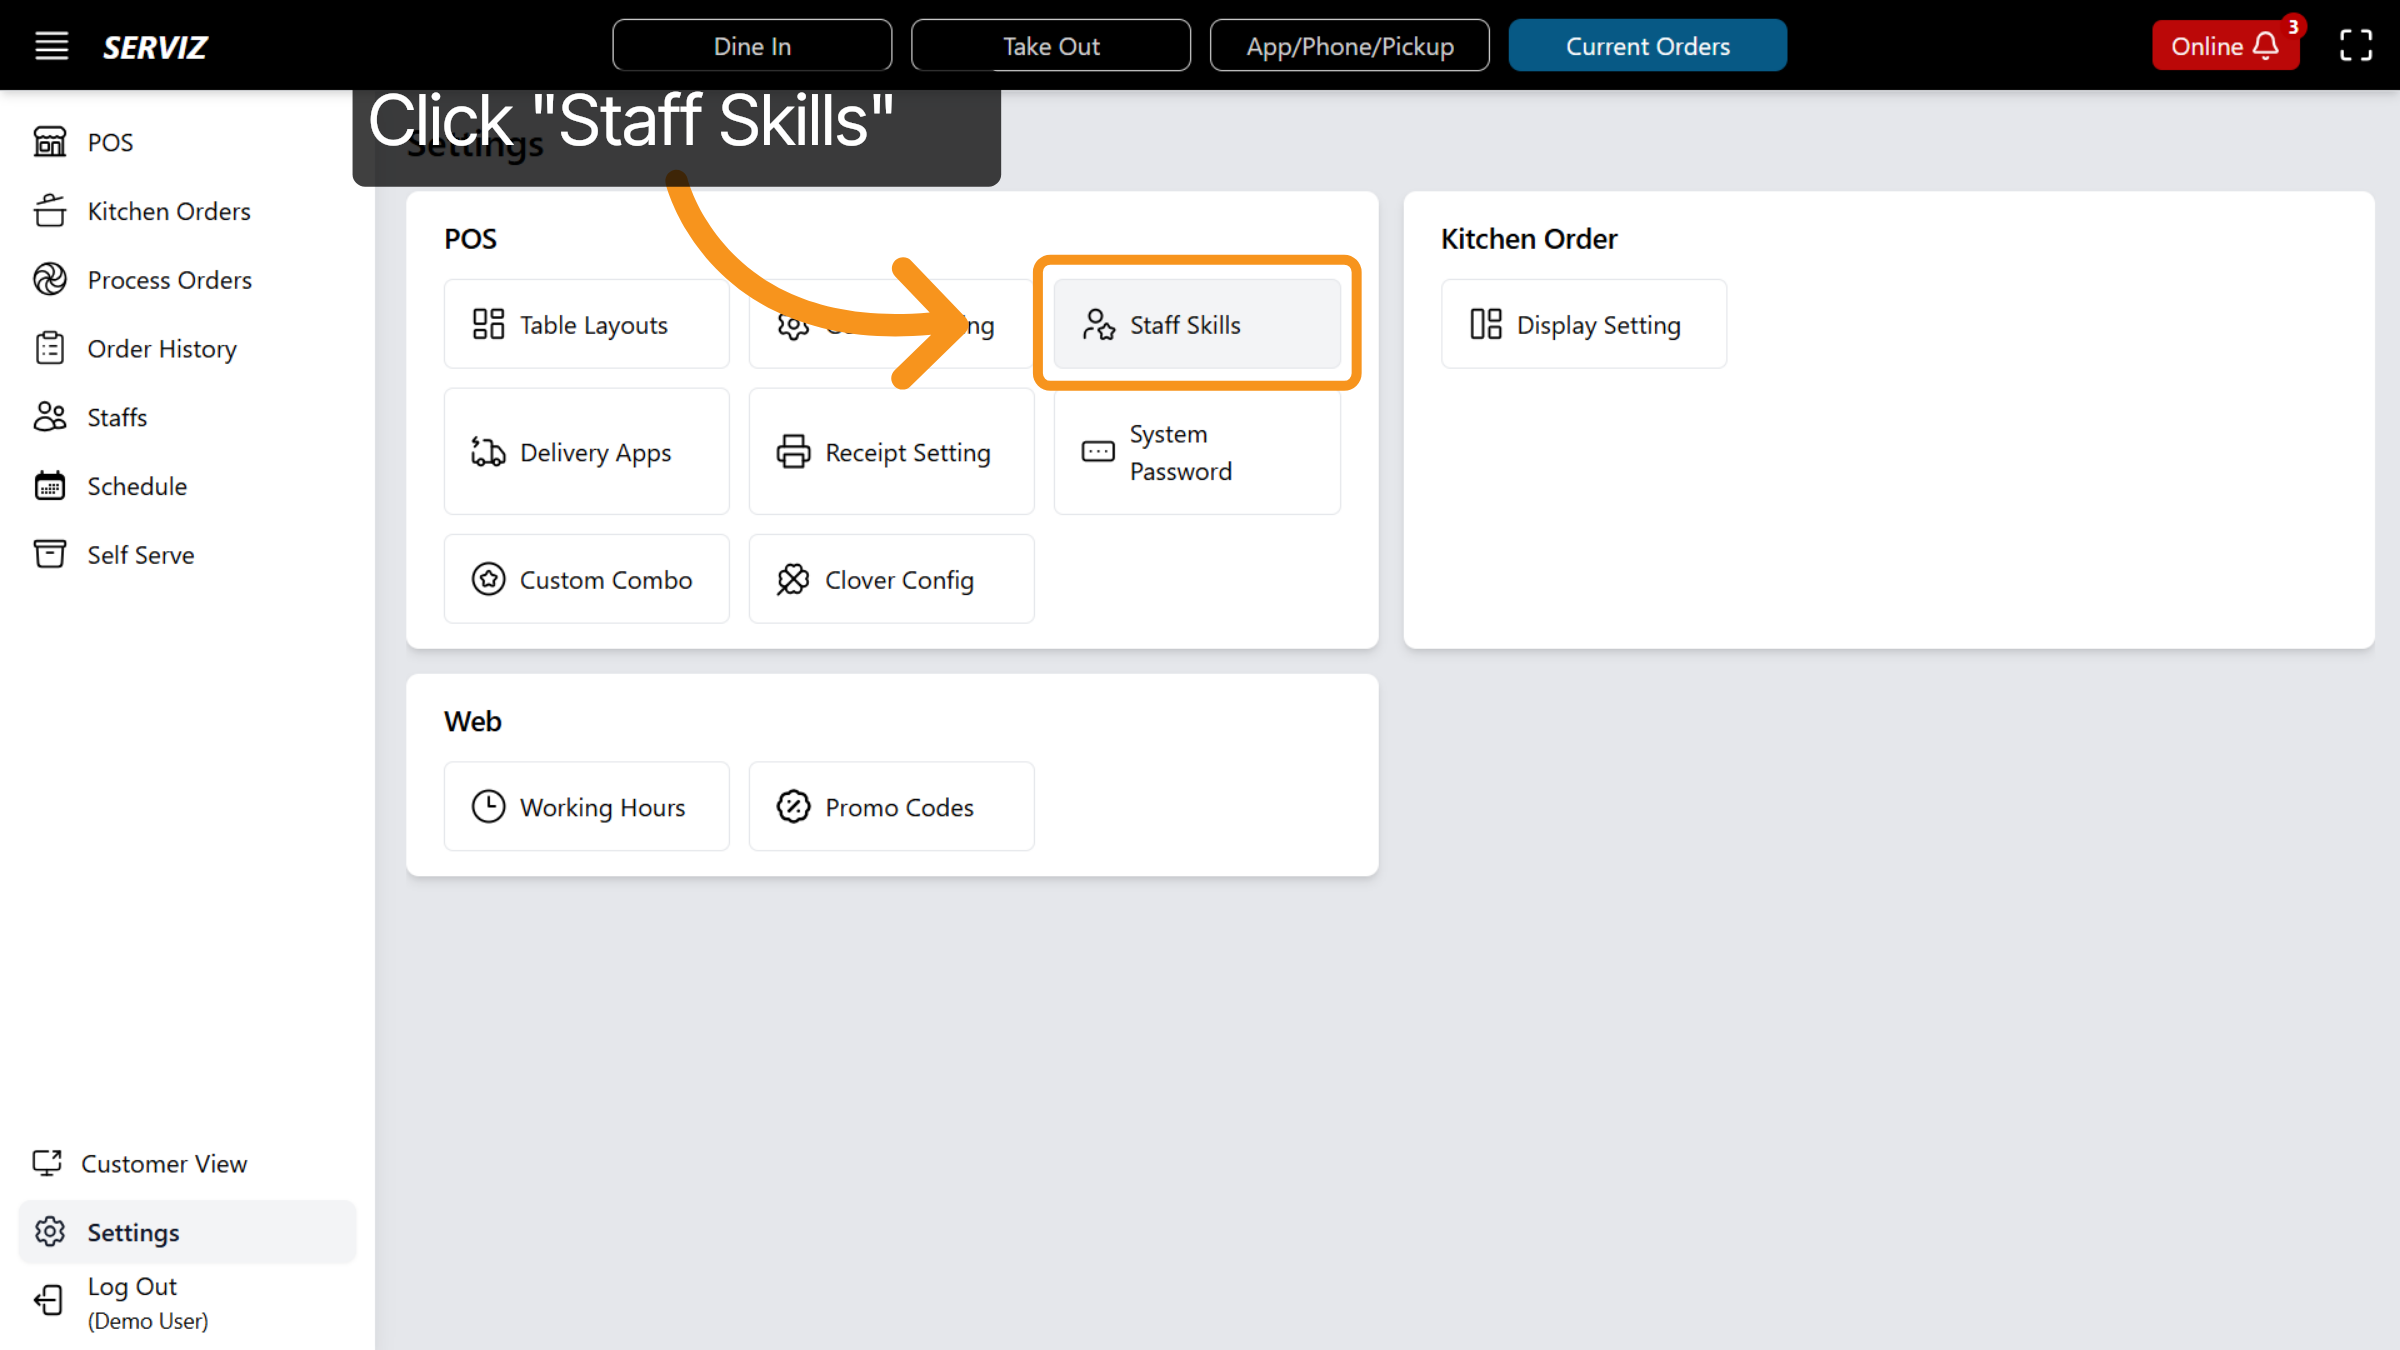
61. Select Staff Skills Option
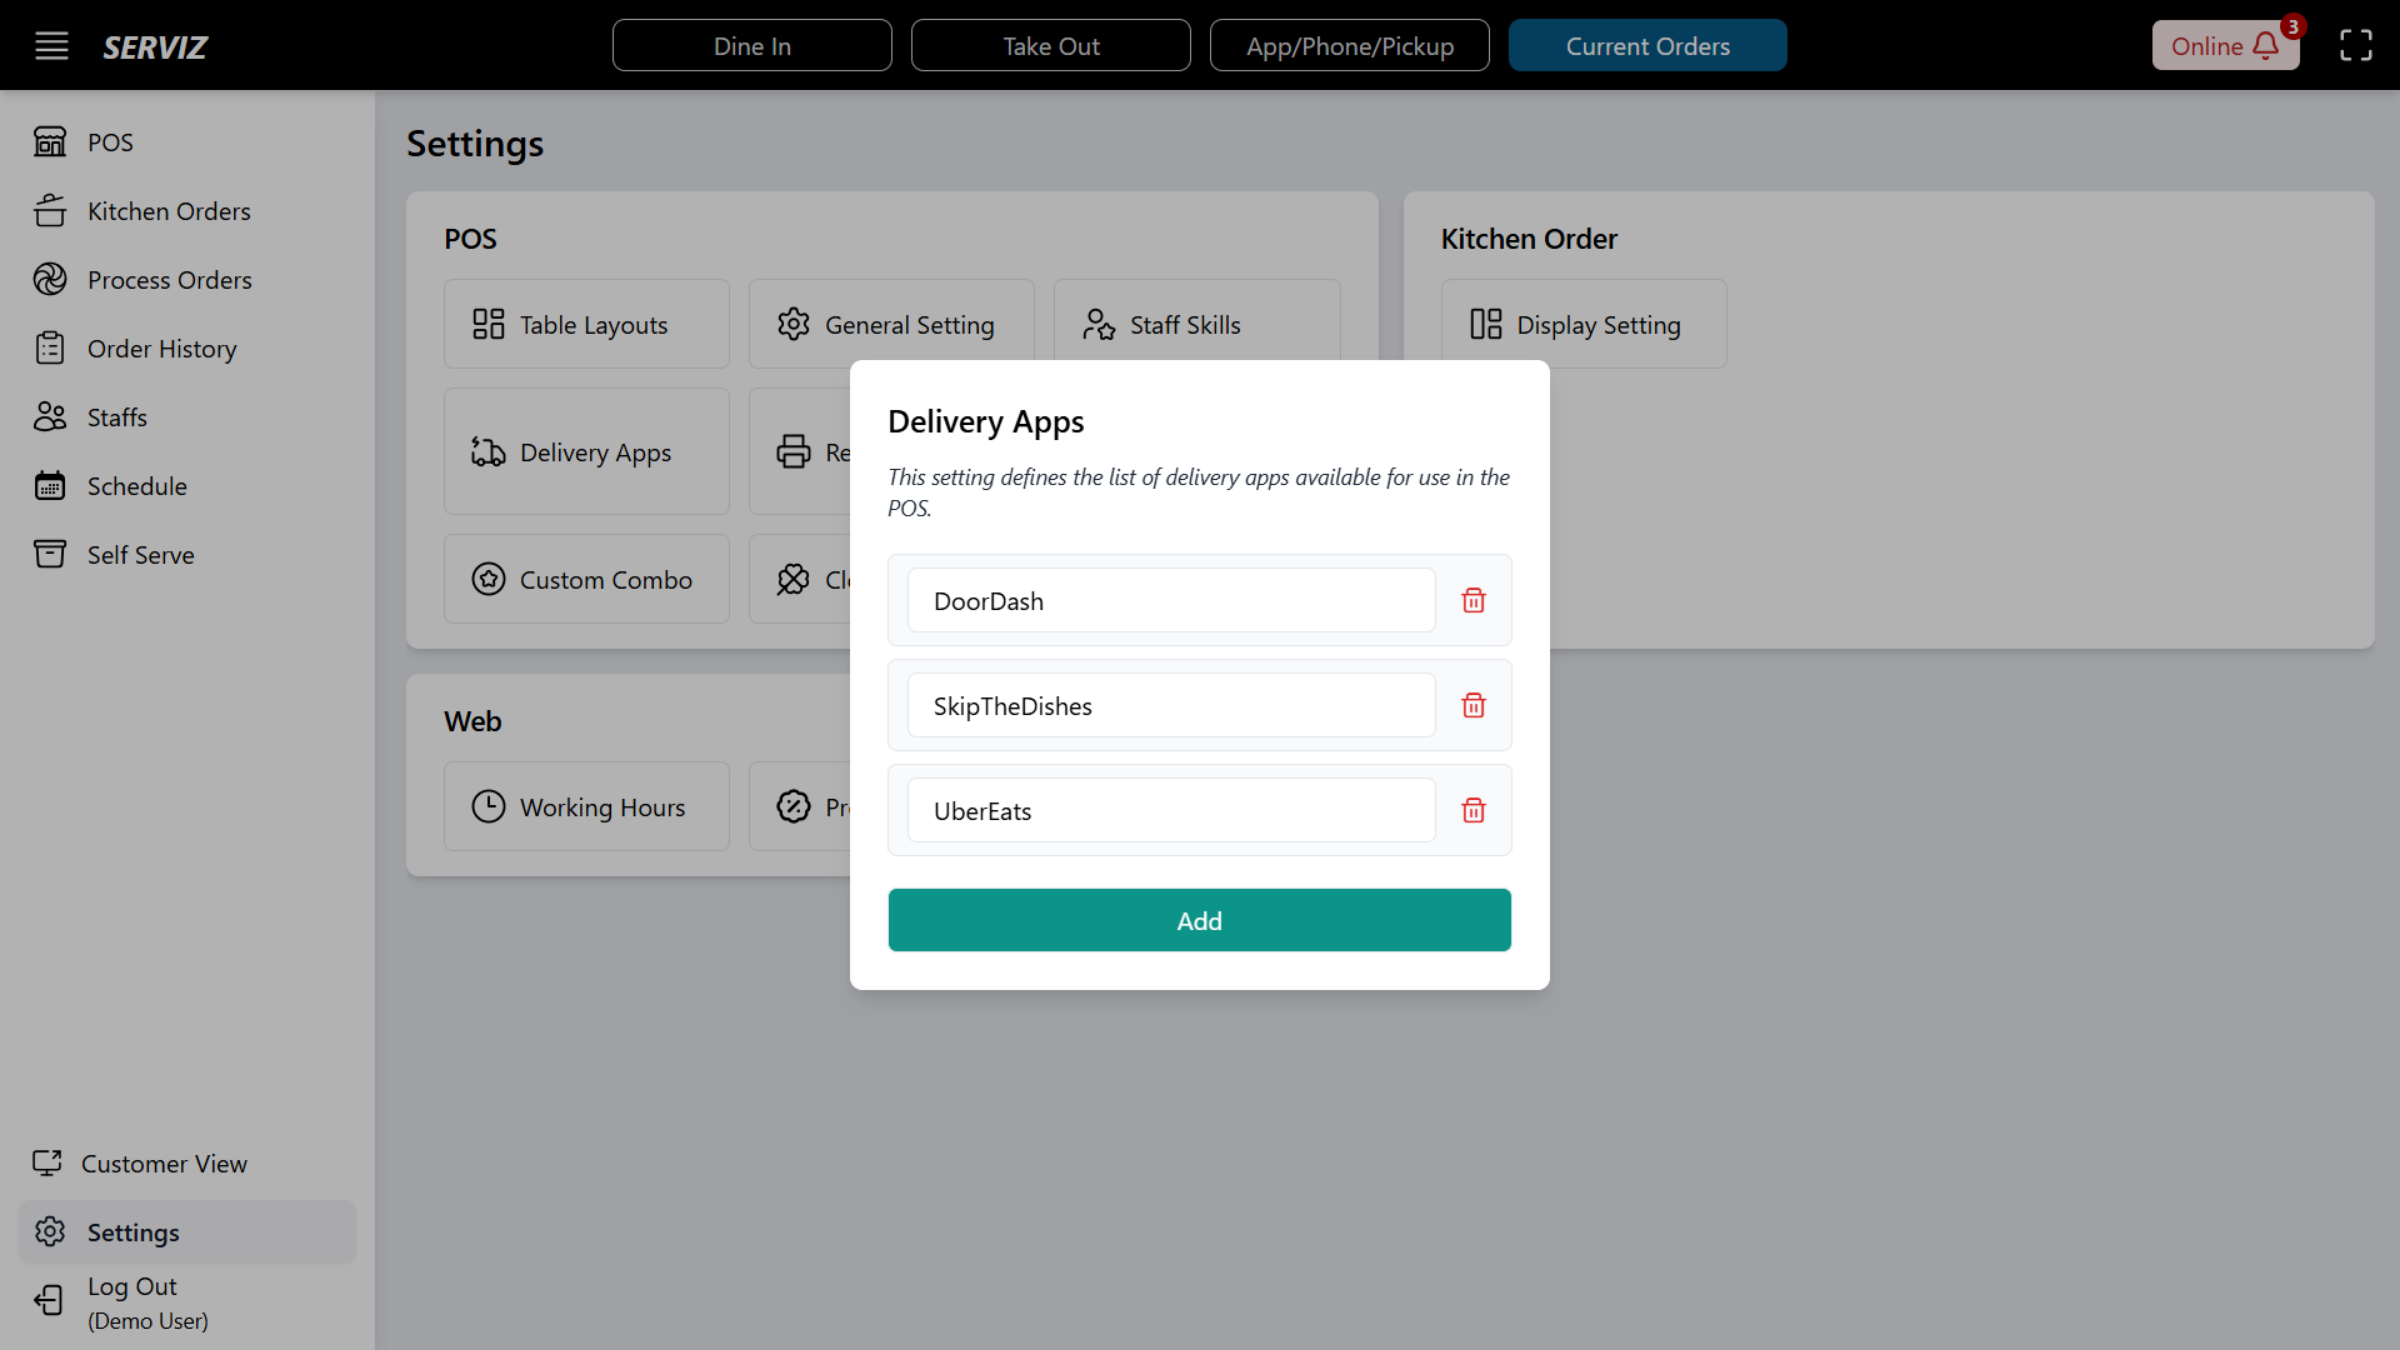
62. Open Delivery Apps
Click Delivery Apps to configure third-party delivery integrations.
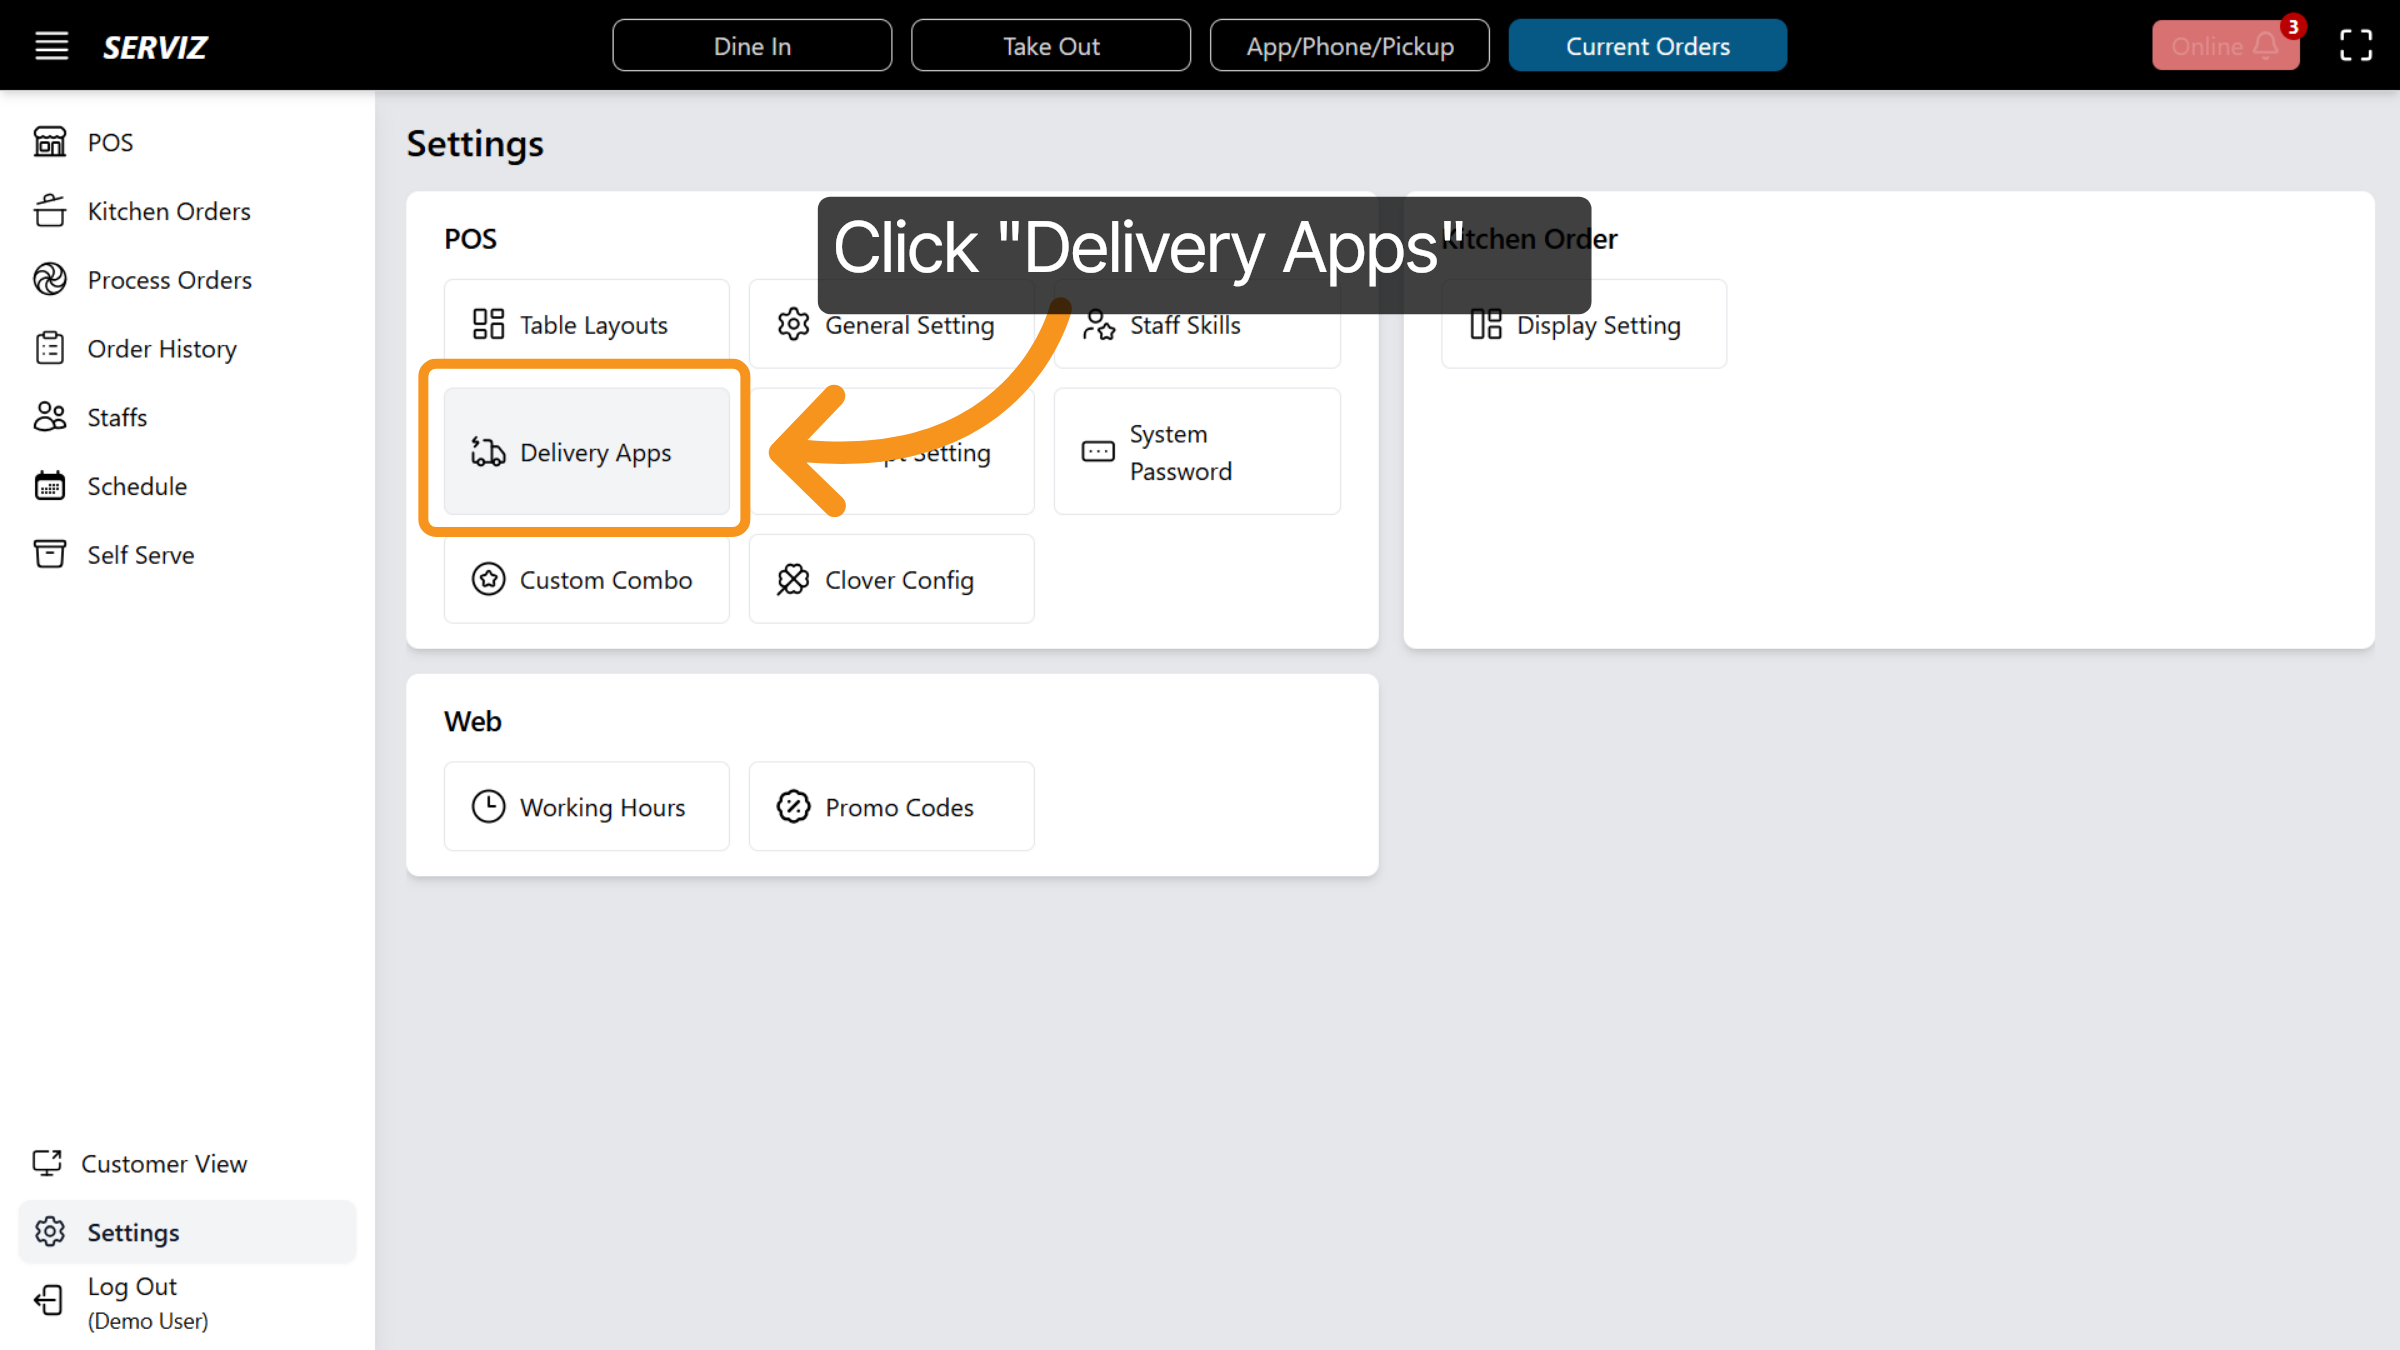
63. Interact with Delivery Apps
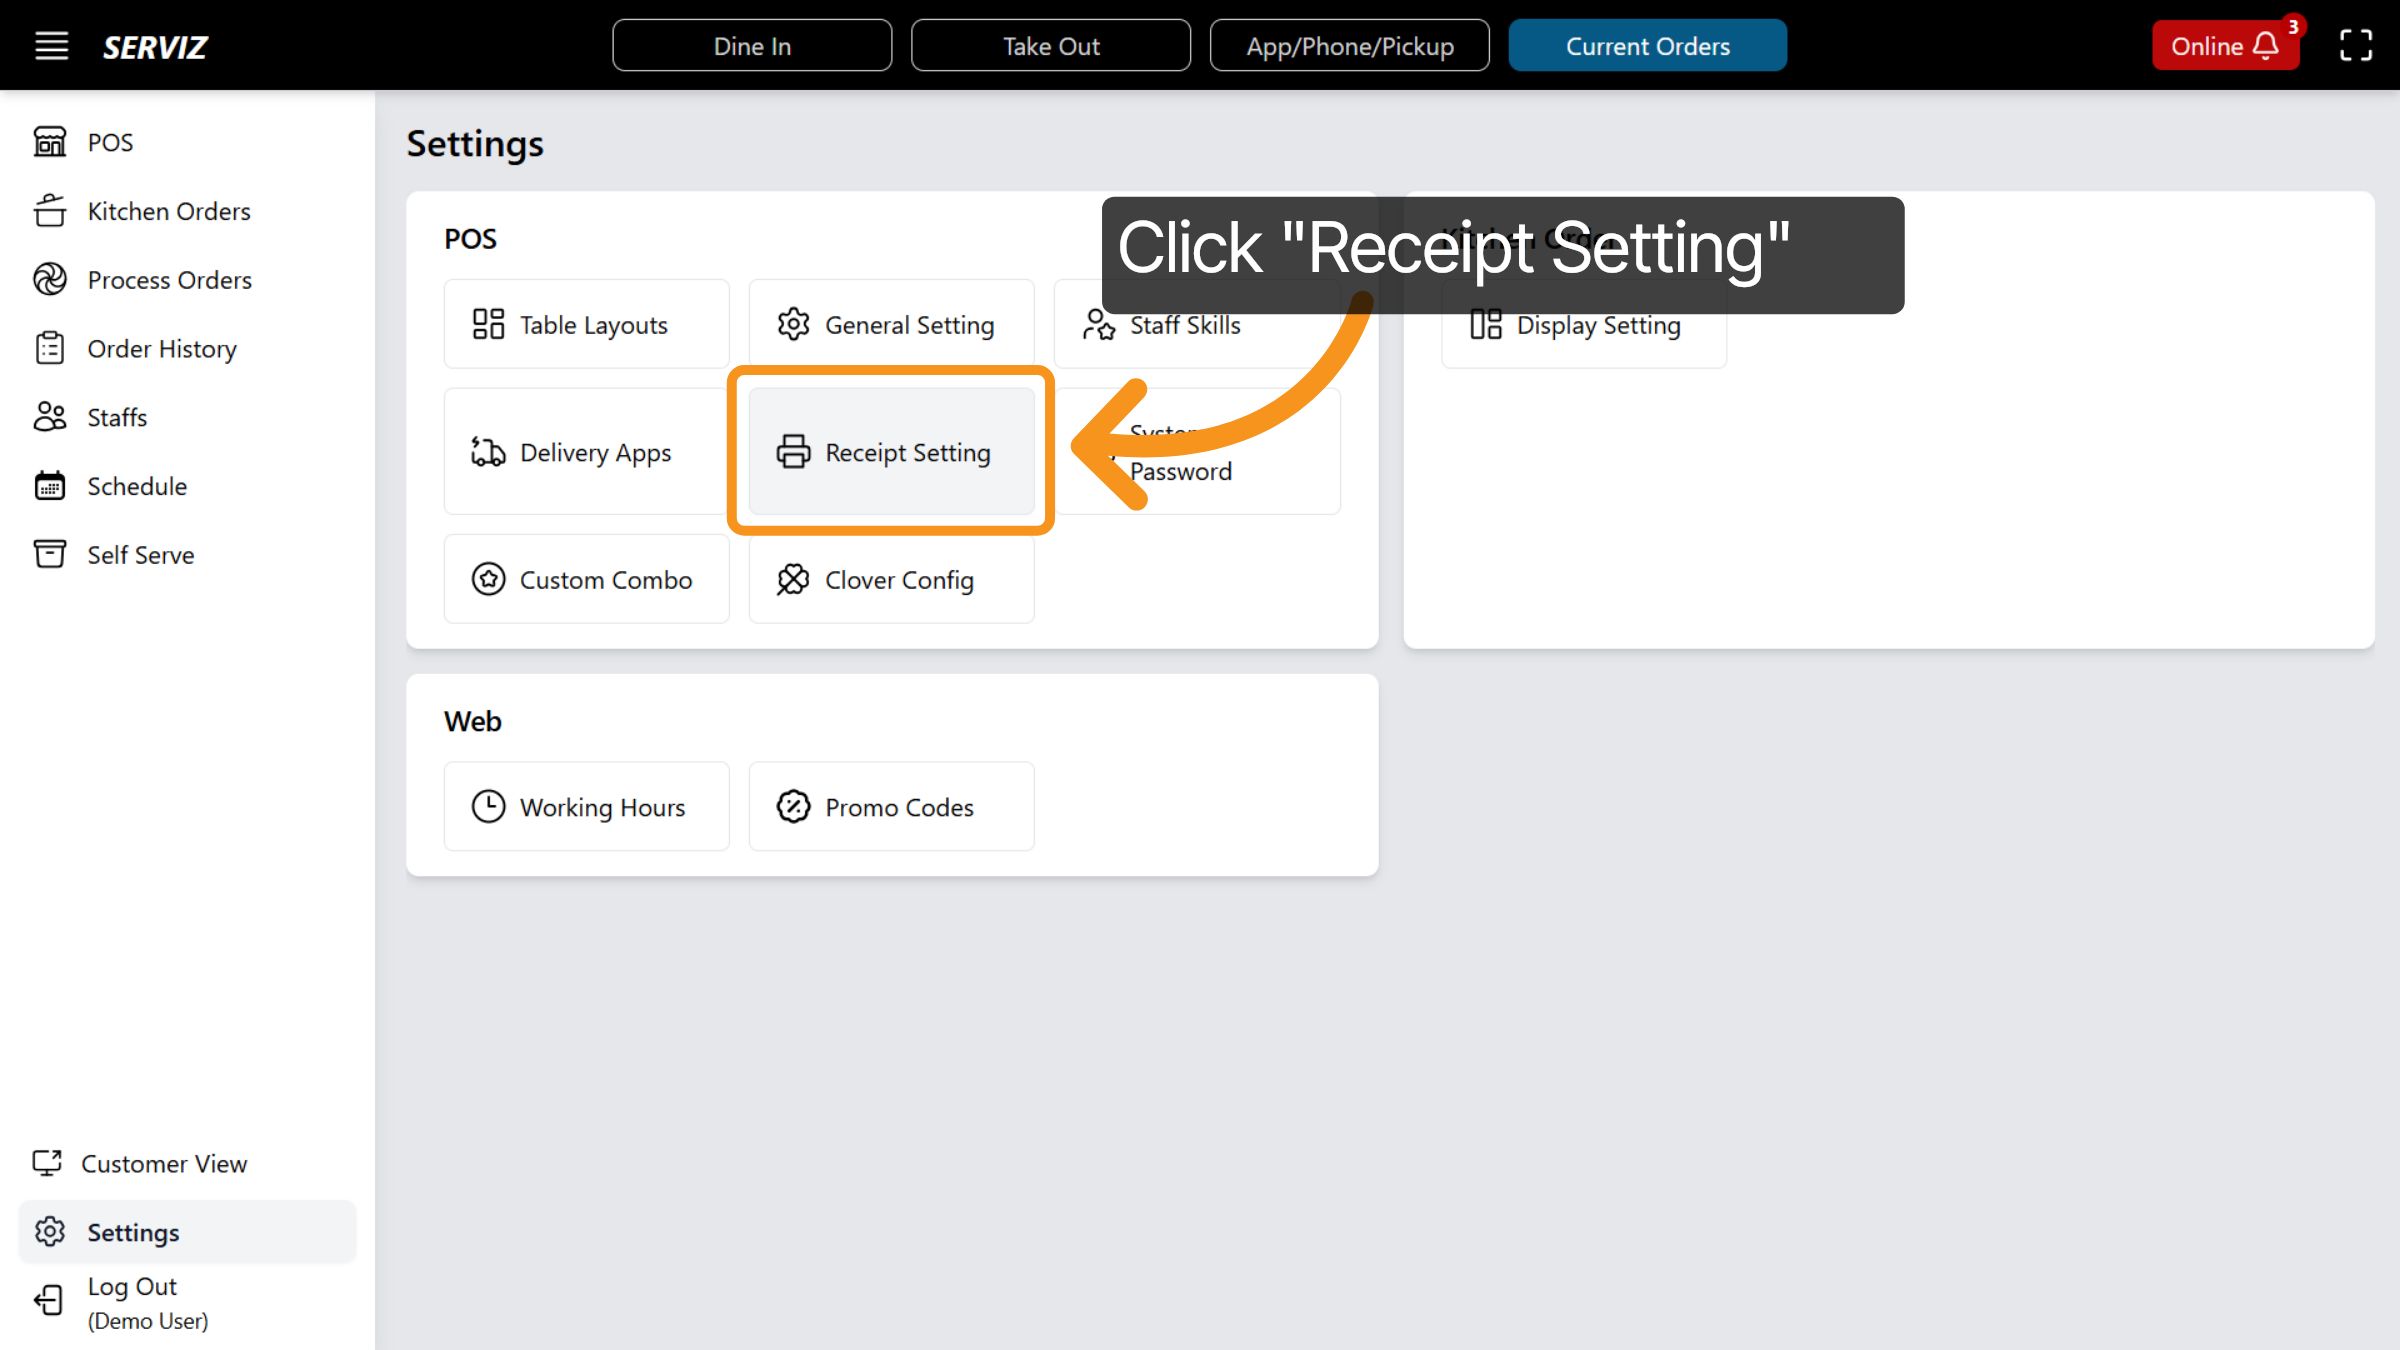
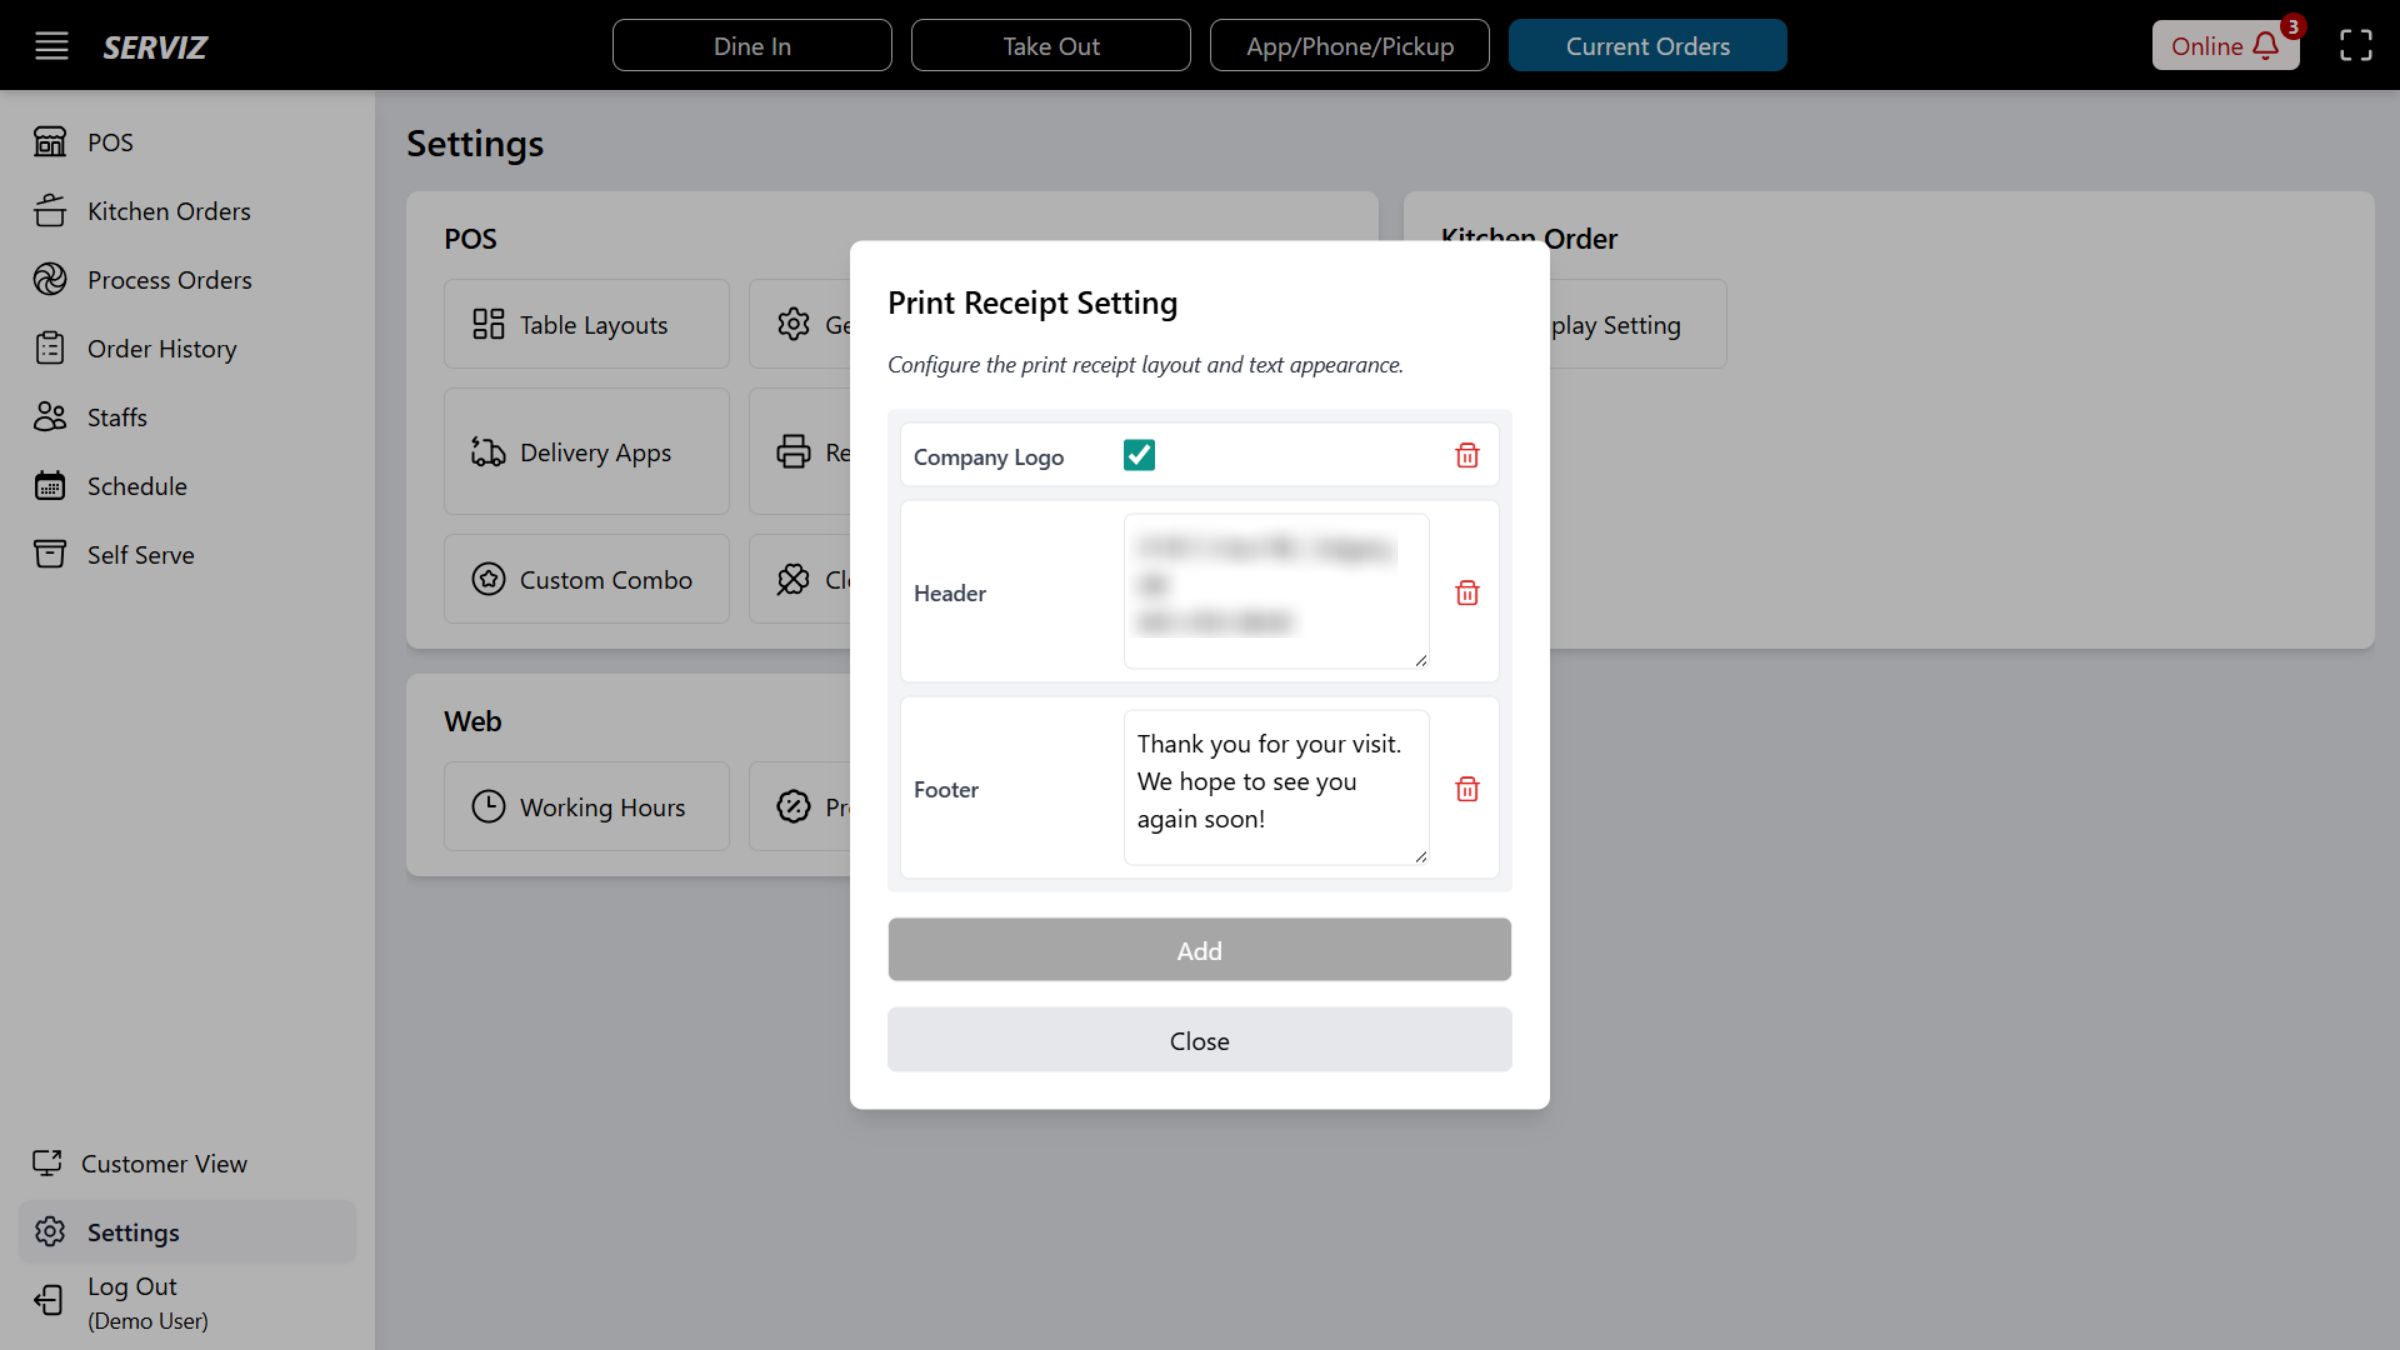
64. Access Receipt Settings
Click Receipt Setting to customize printed receipt formats and details.
65. Modify Receipt Settings
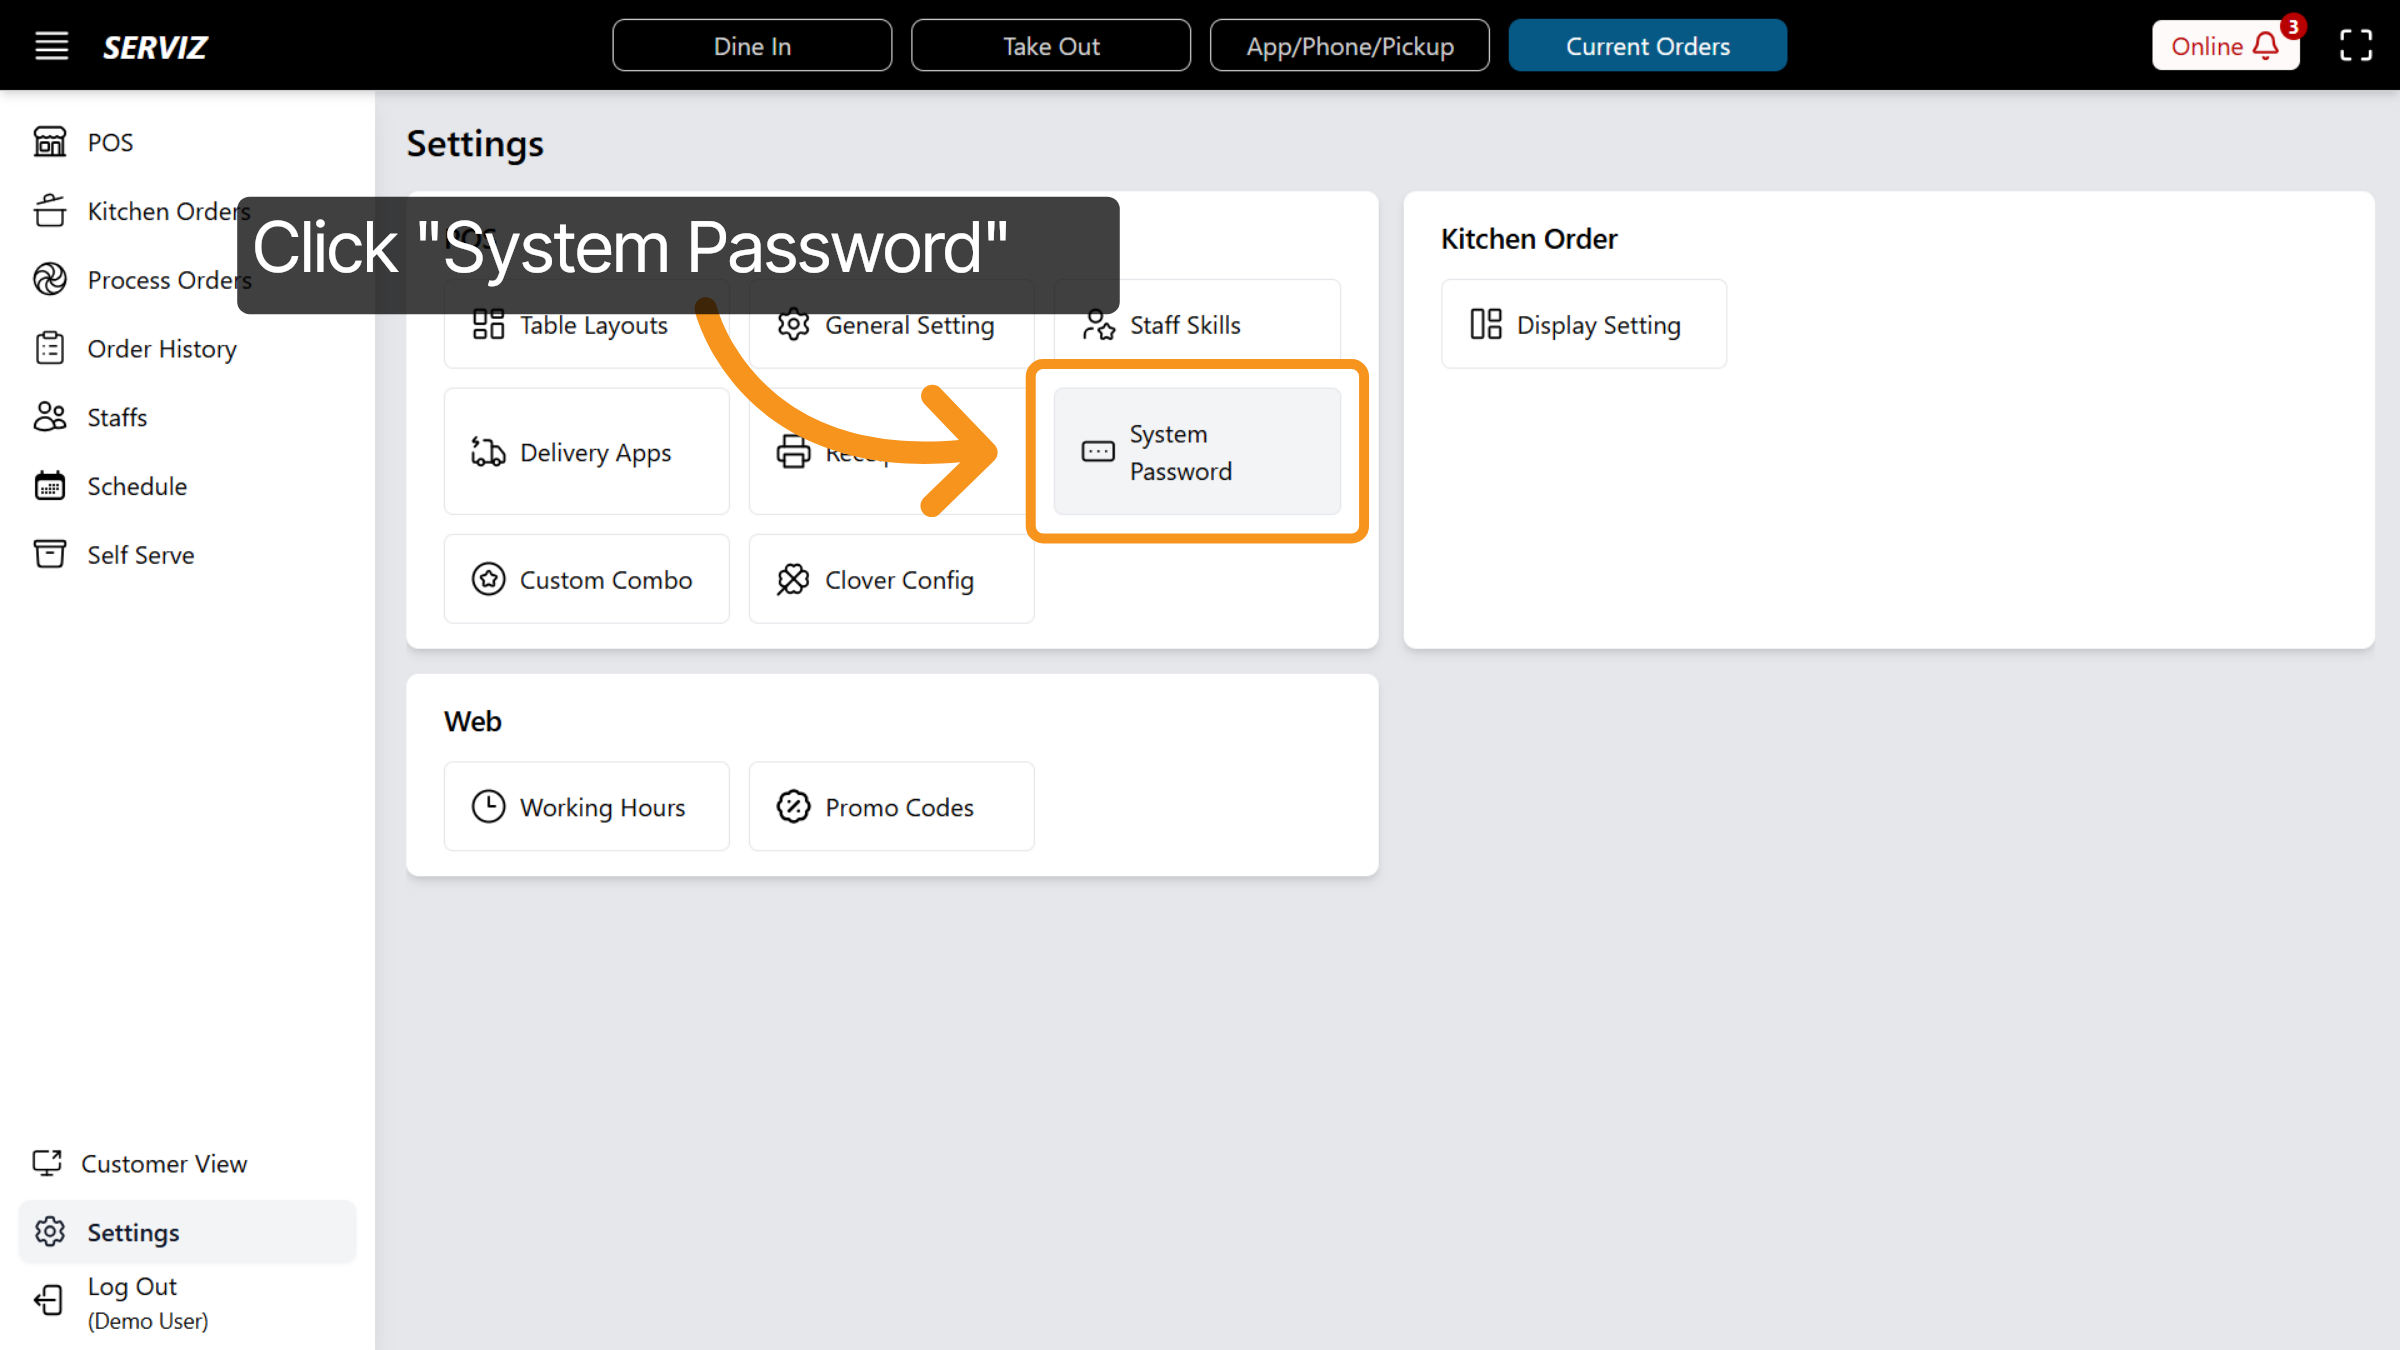
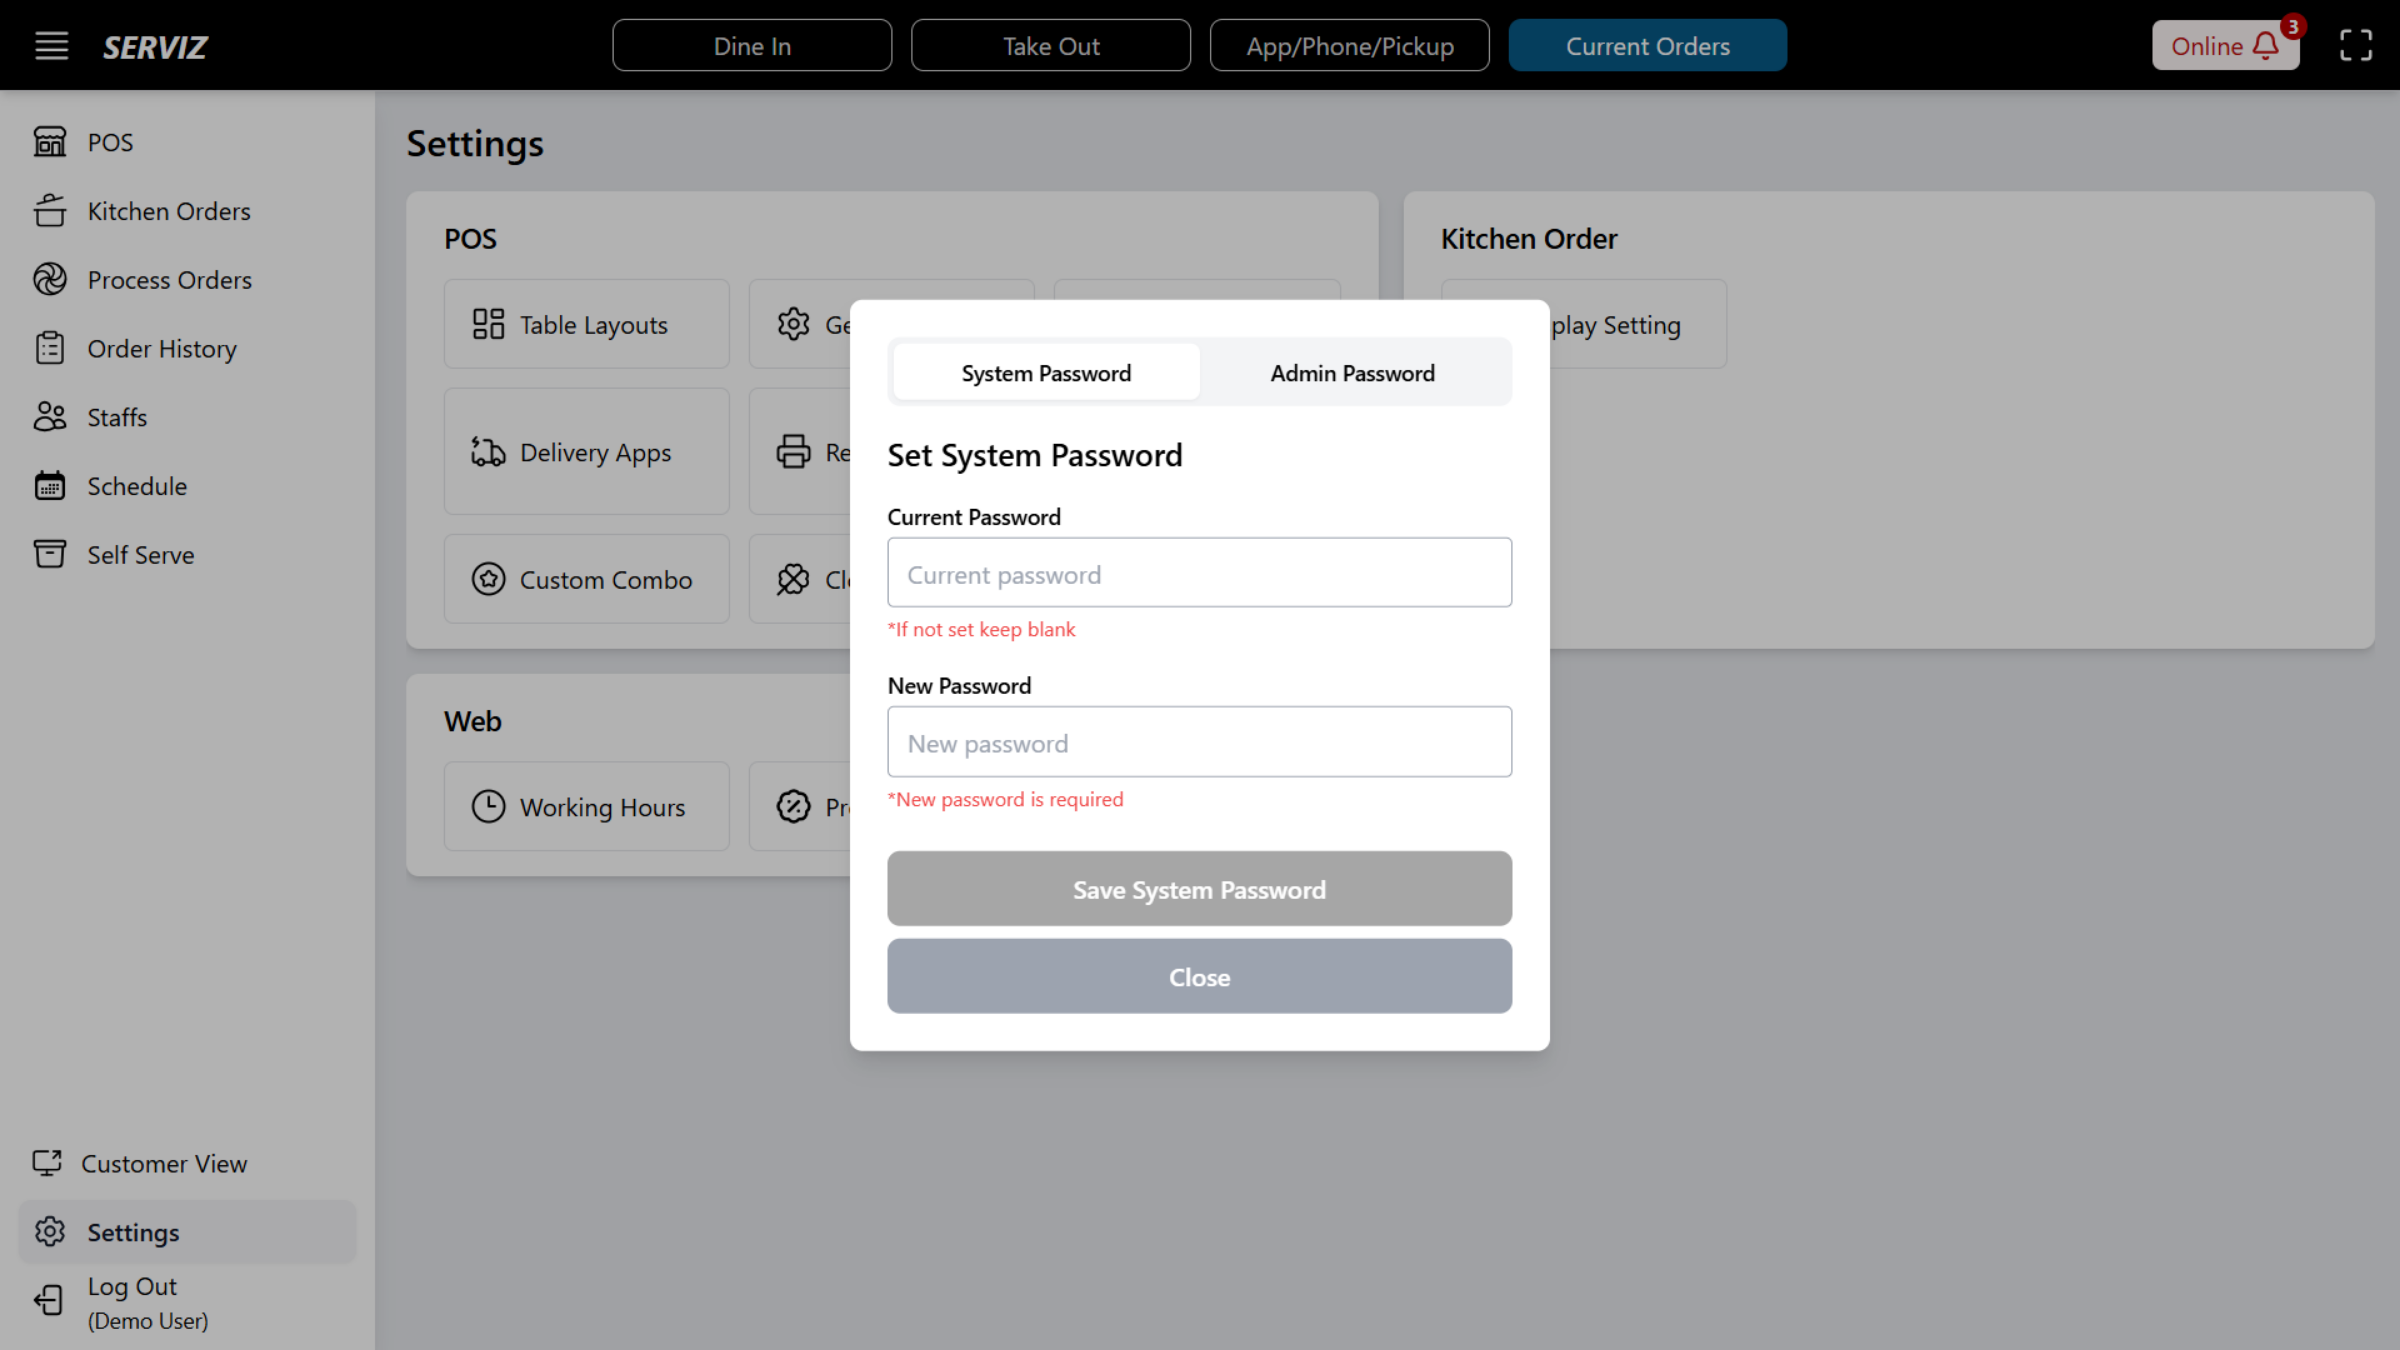
66. Open System Password
Click System Password to change or set system access credentials.
67. Interact with Password Settings
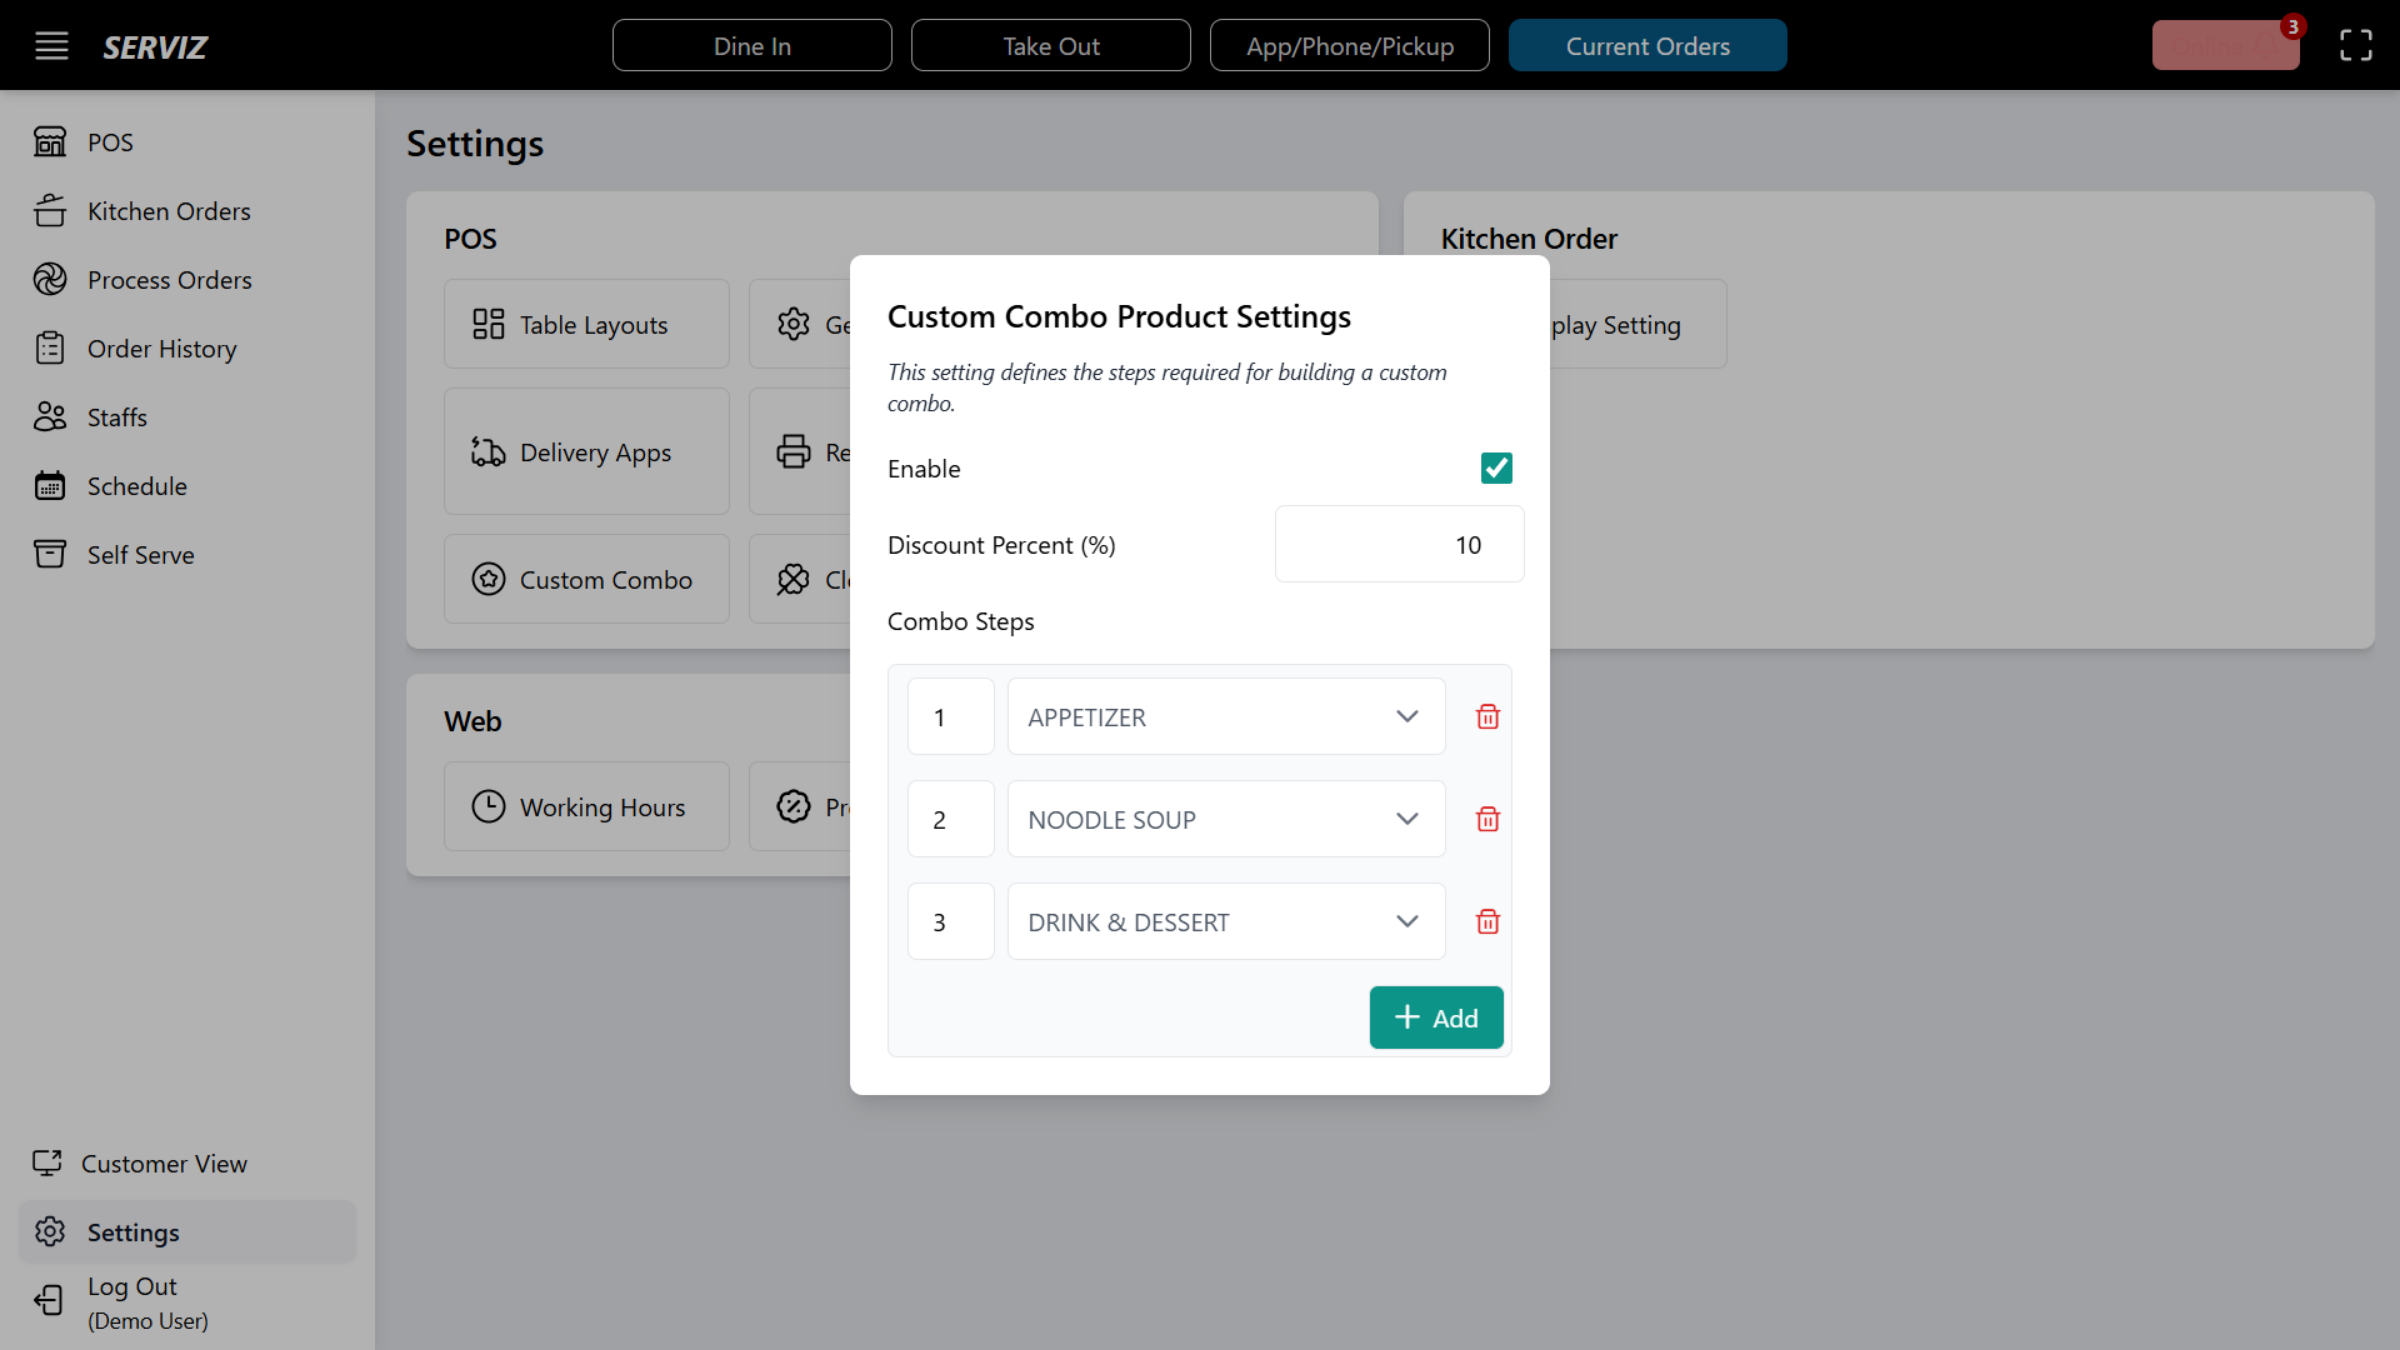
68. Manage Custom Combos
Click Custom Combo to create or modify combo meal options.
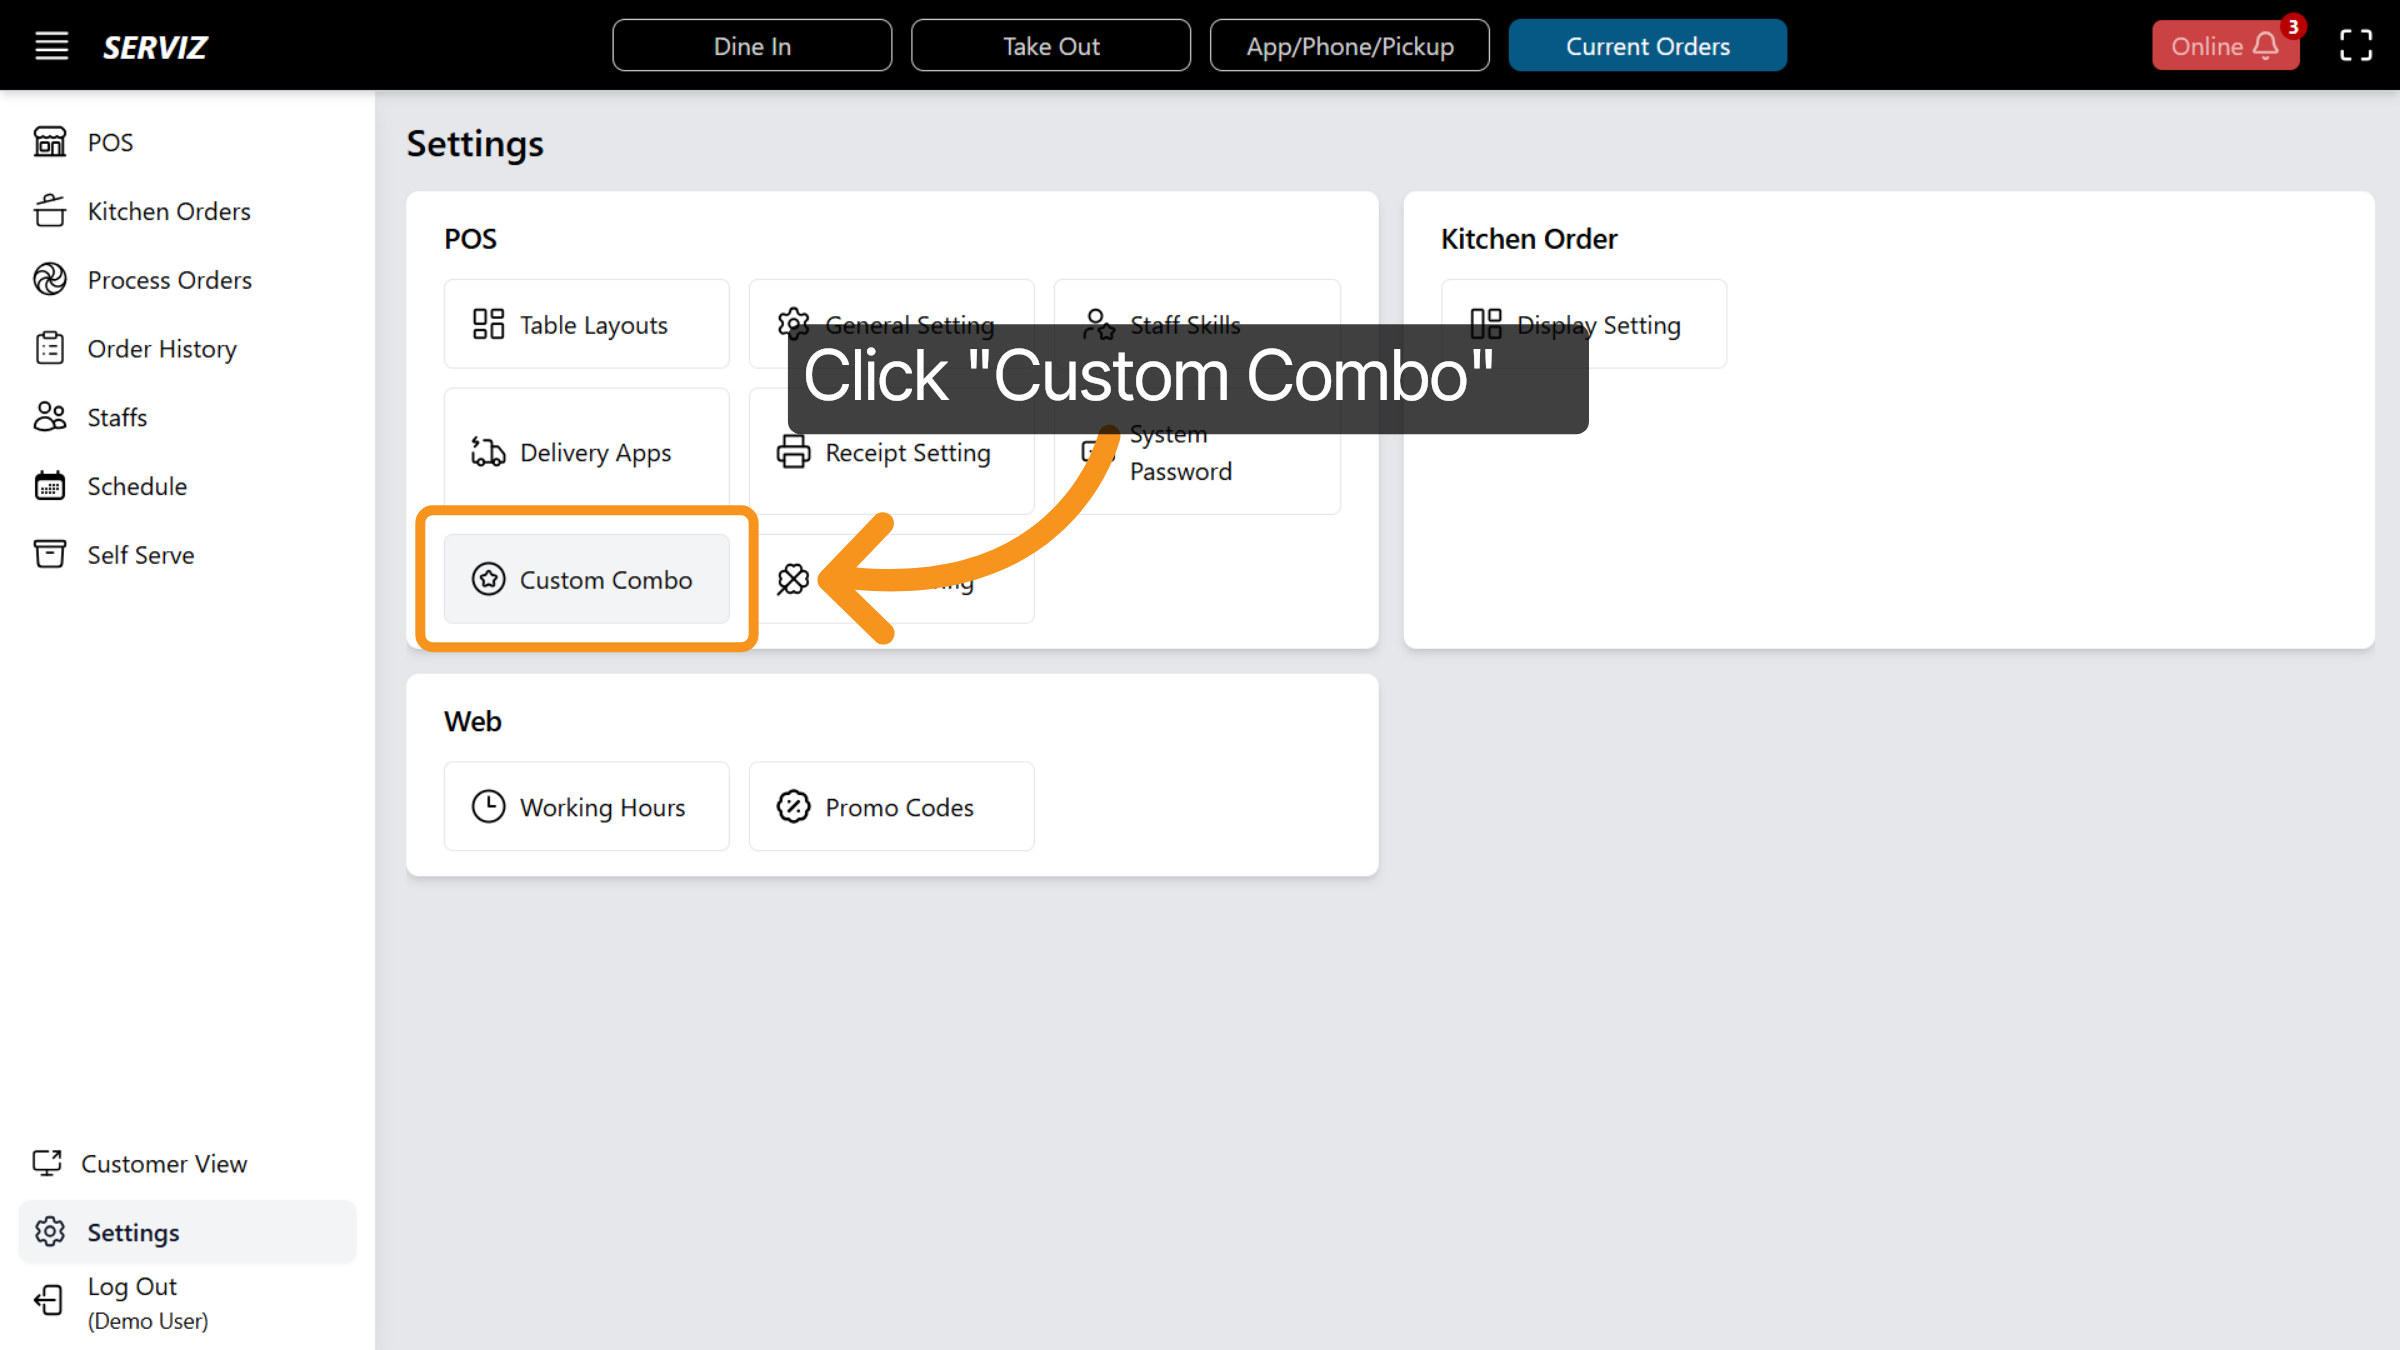
69. Select Custom Combo Option
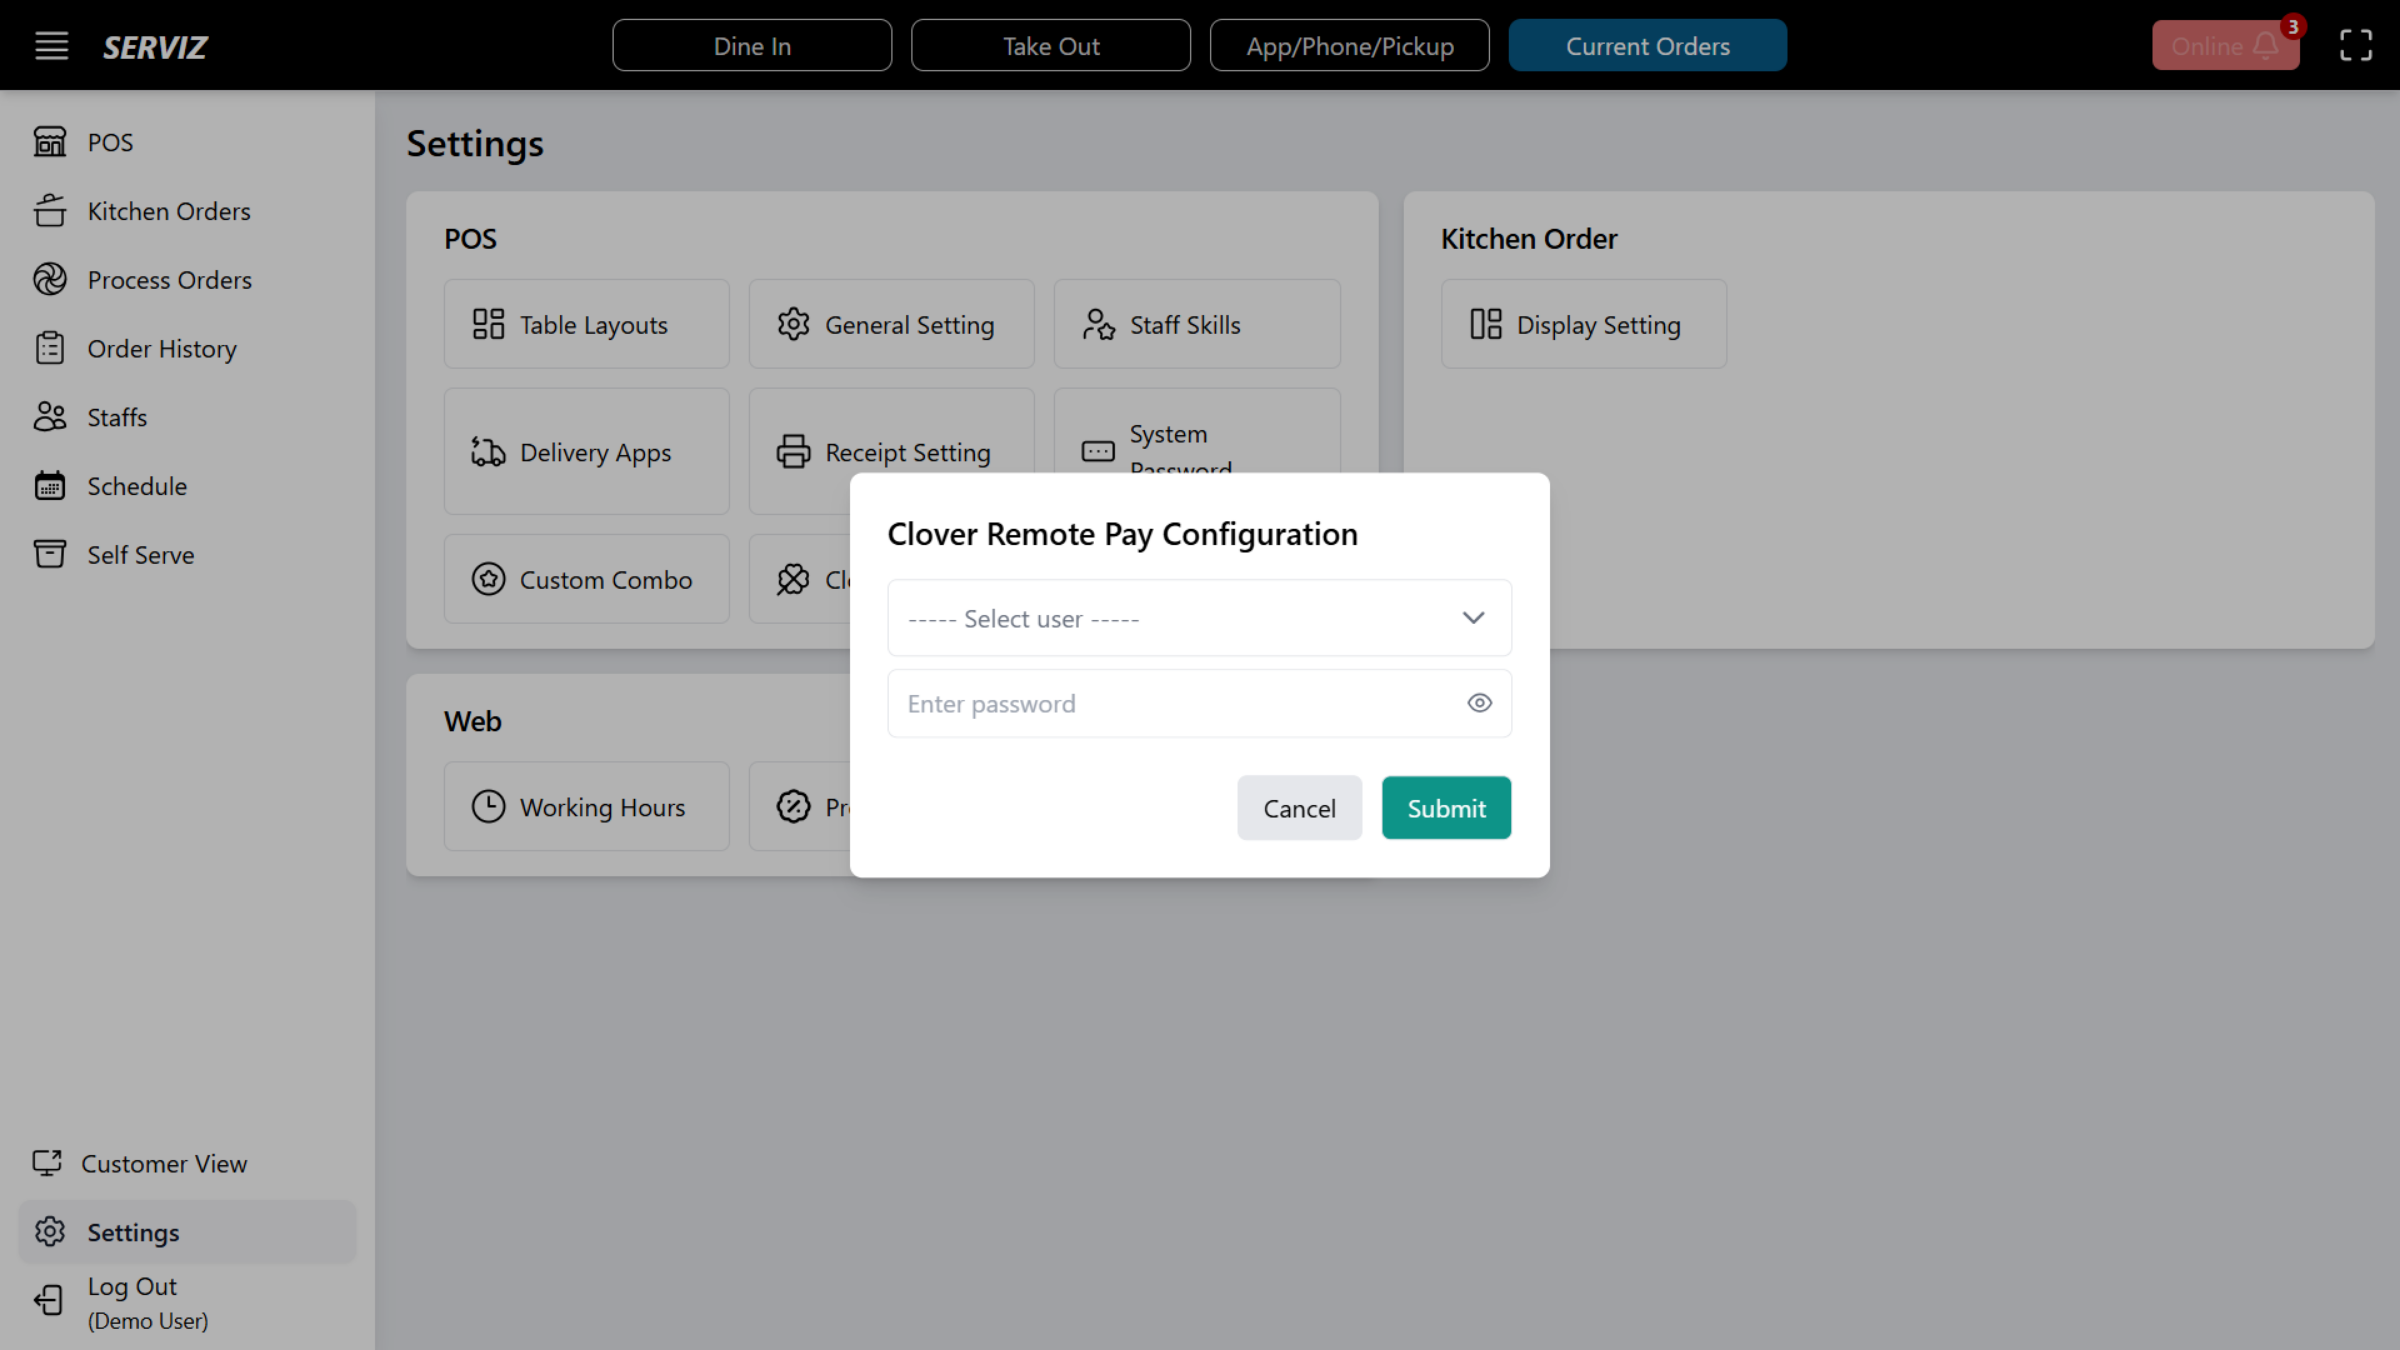
70. Open Clover Config
Click Clover Config to set up Clover payment system integration.
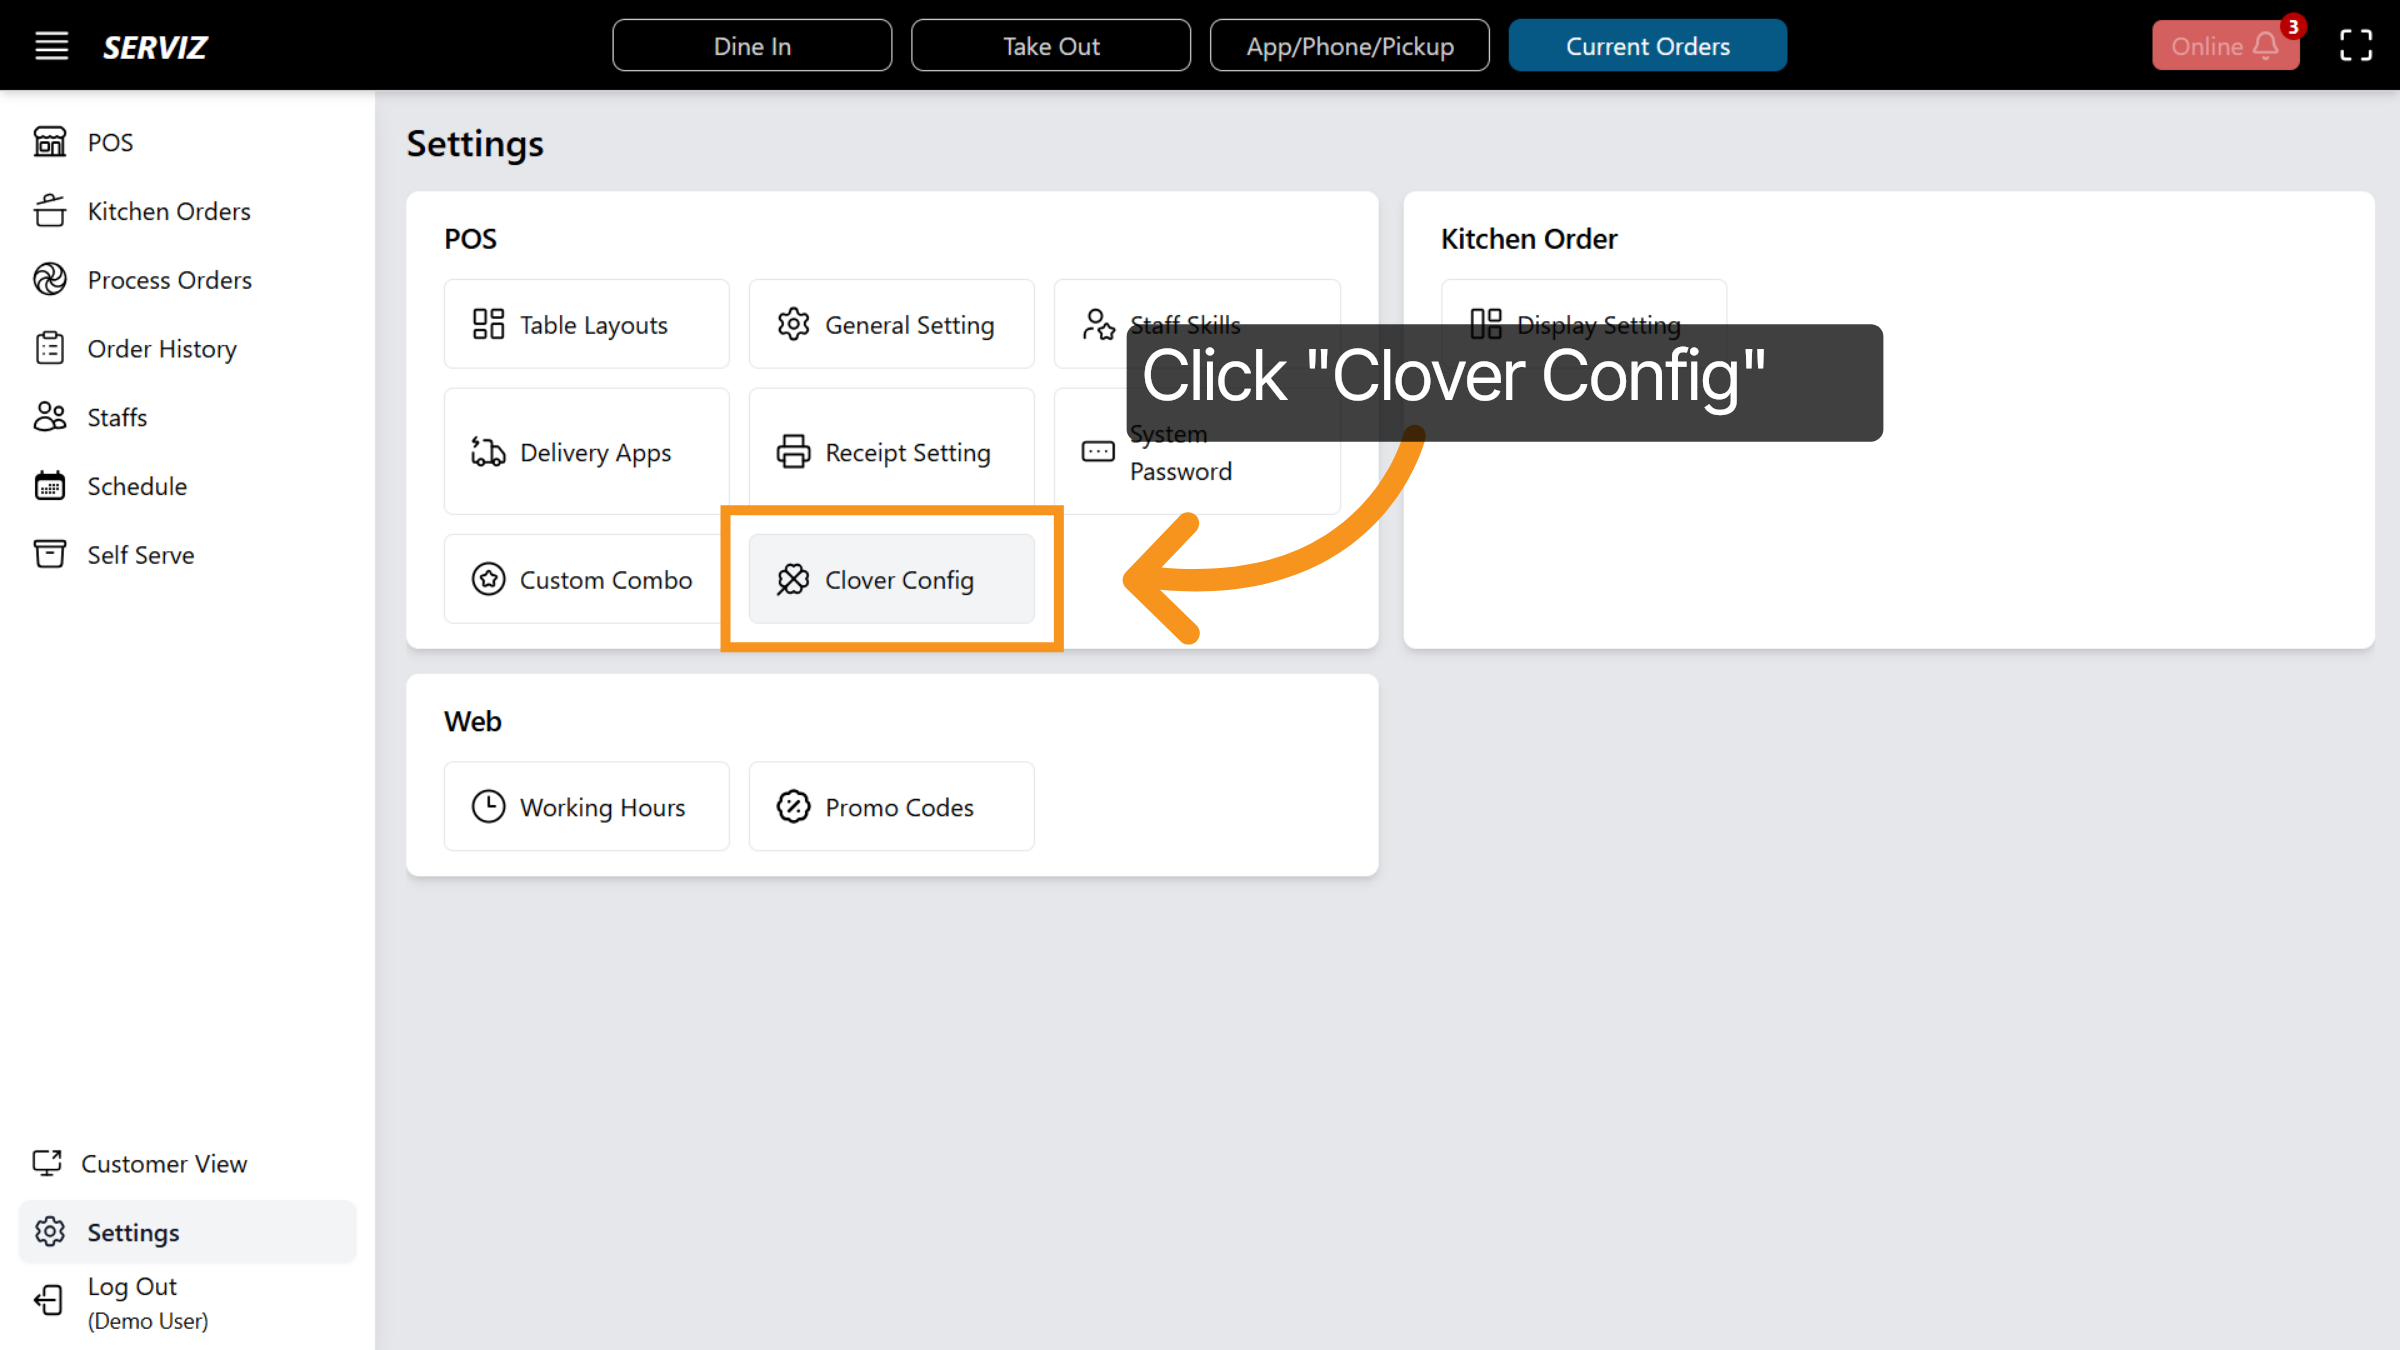
71. Interact with Clover Config
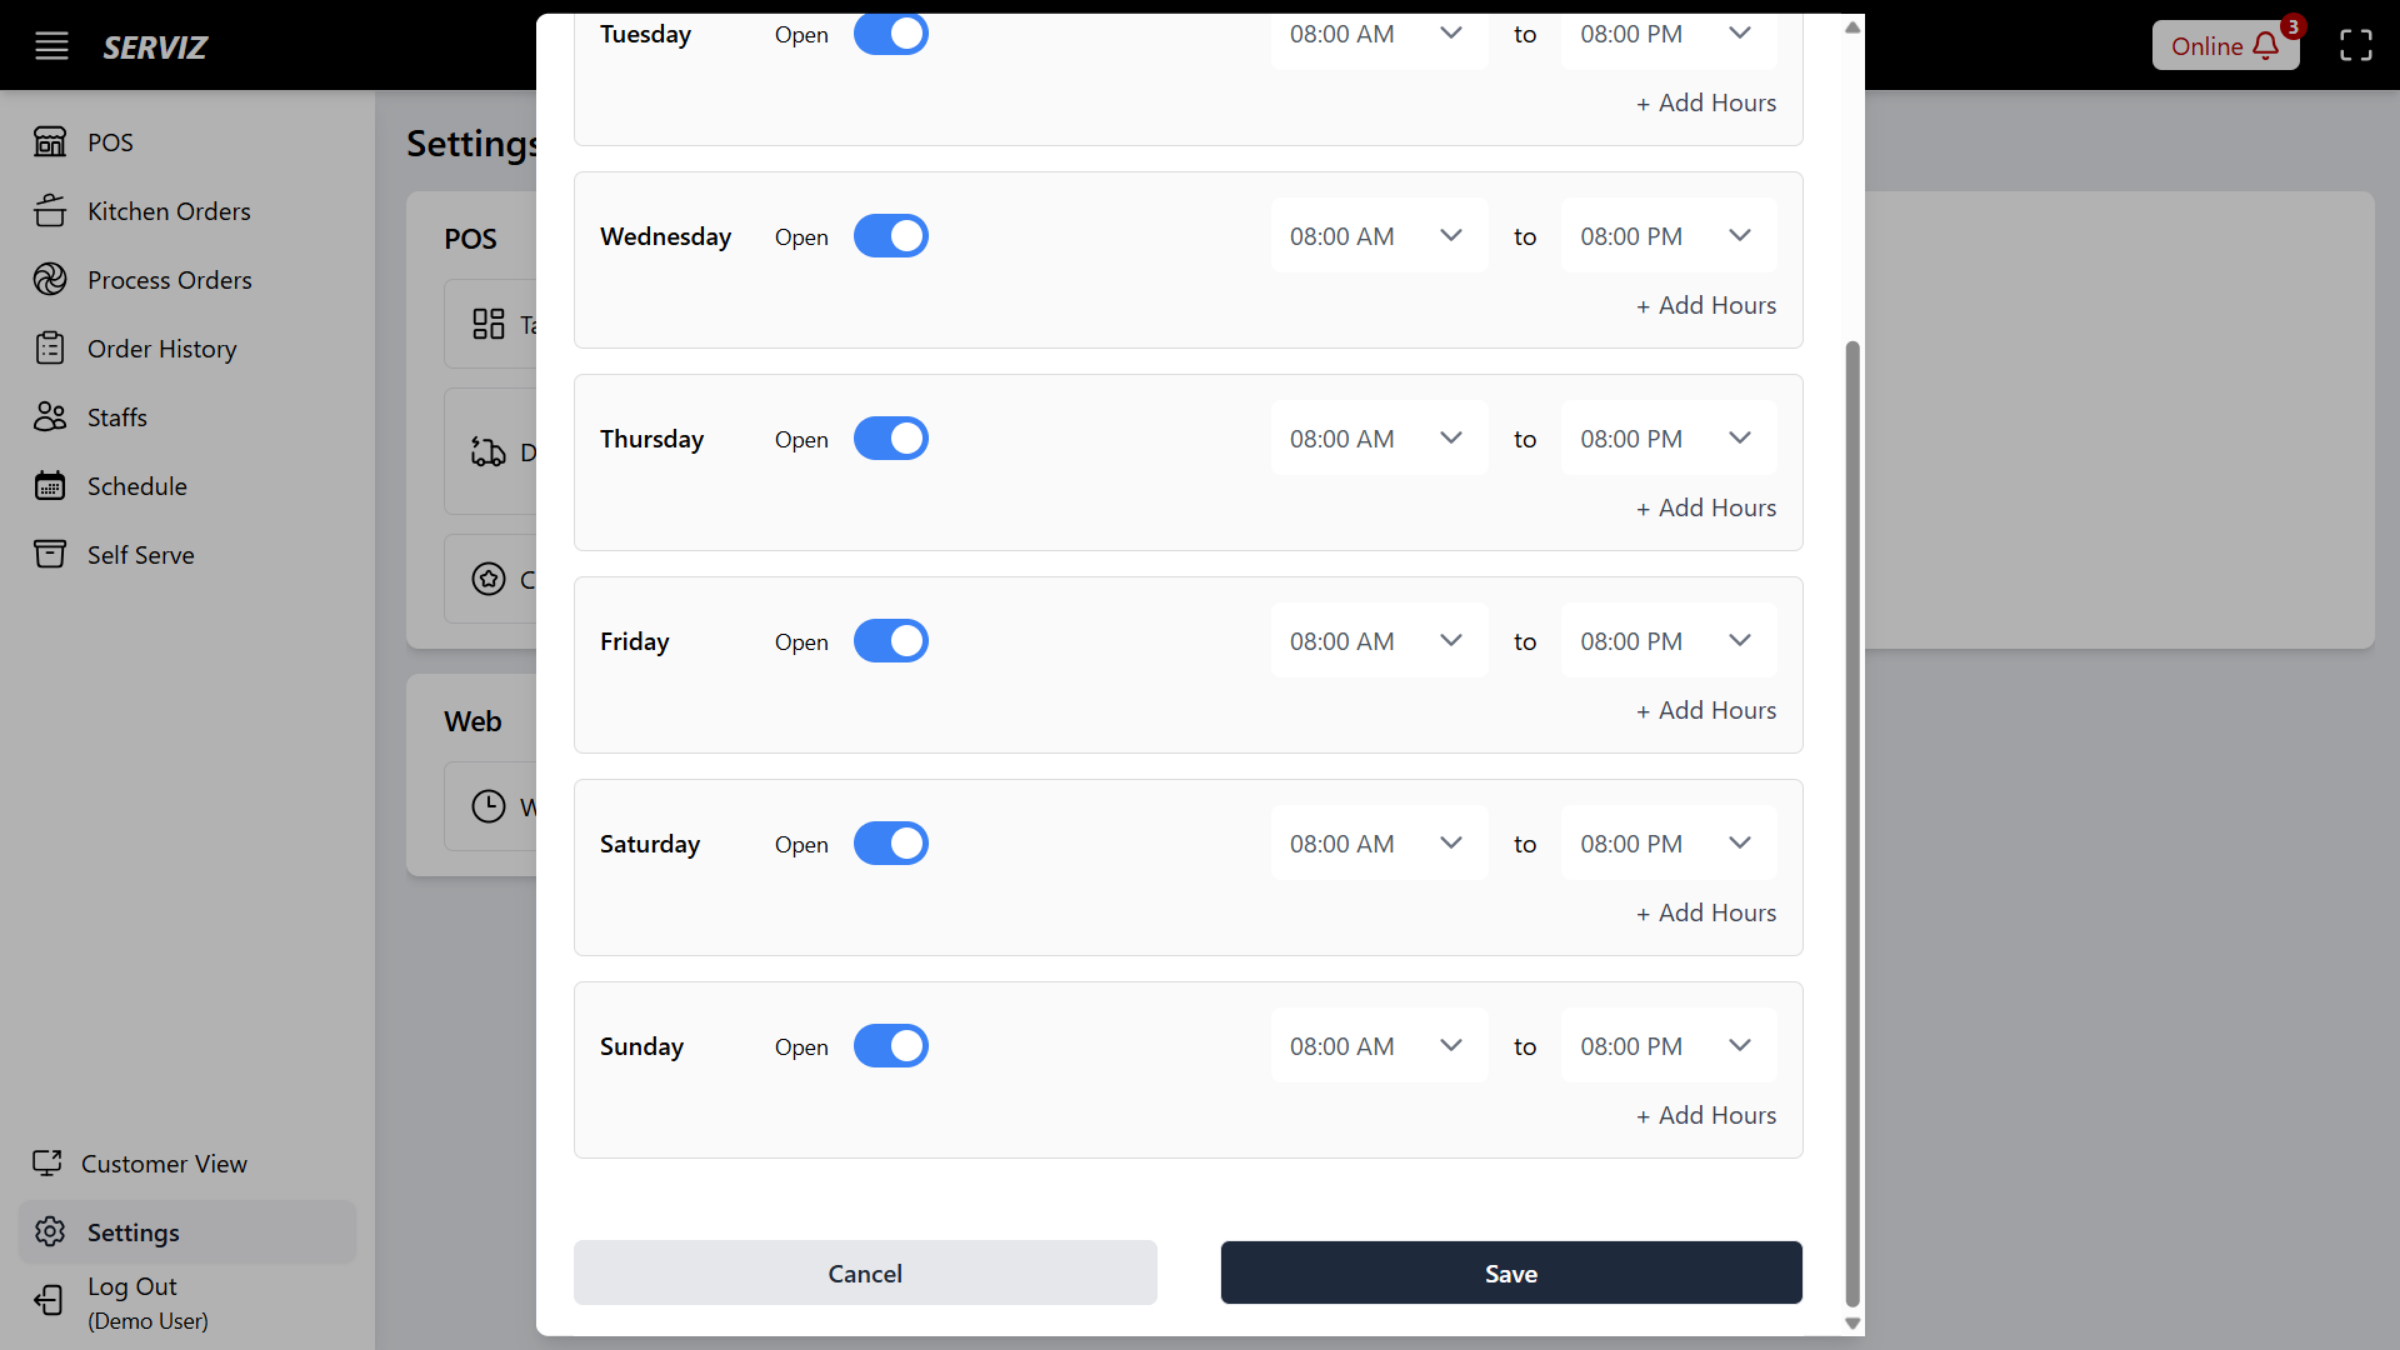
72. Access Working Hours
Click Working Hours to set business operation times.

73. Working Hours Edit
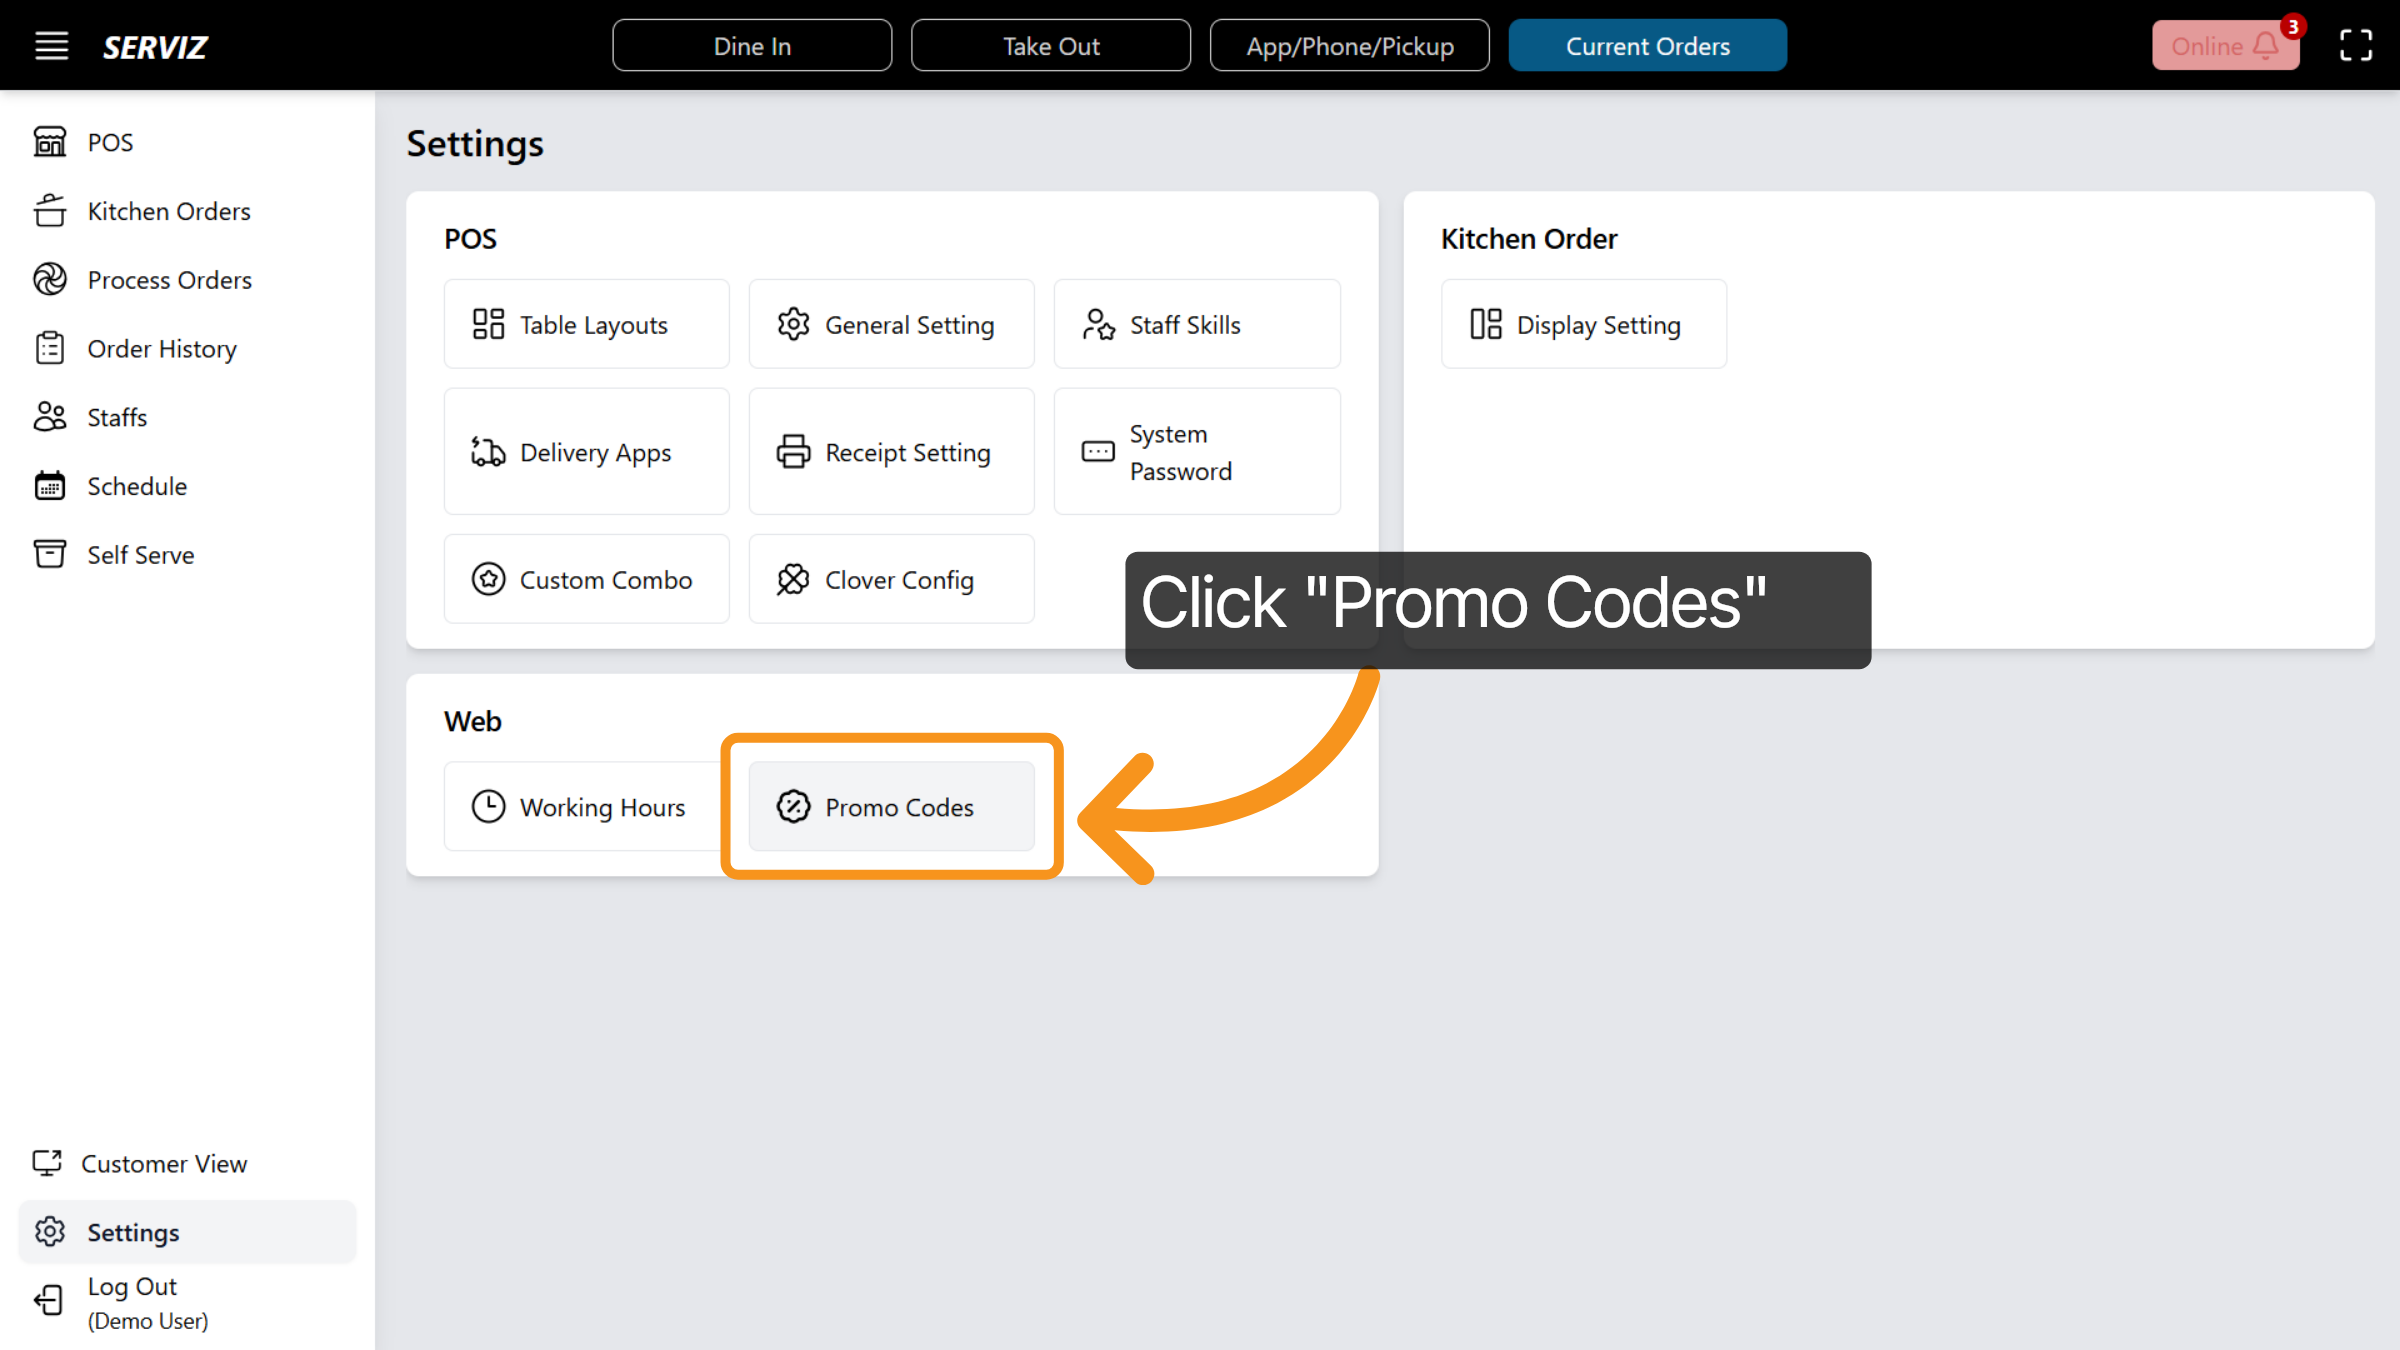
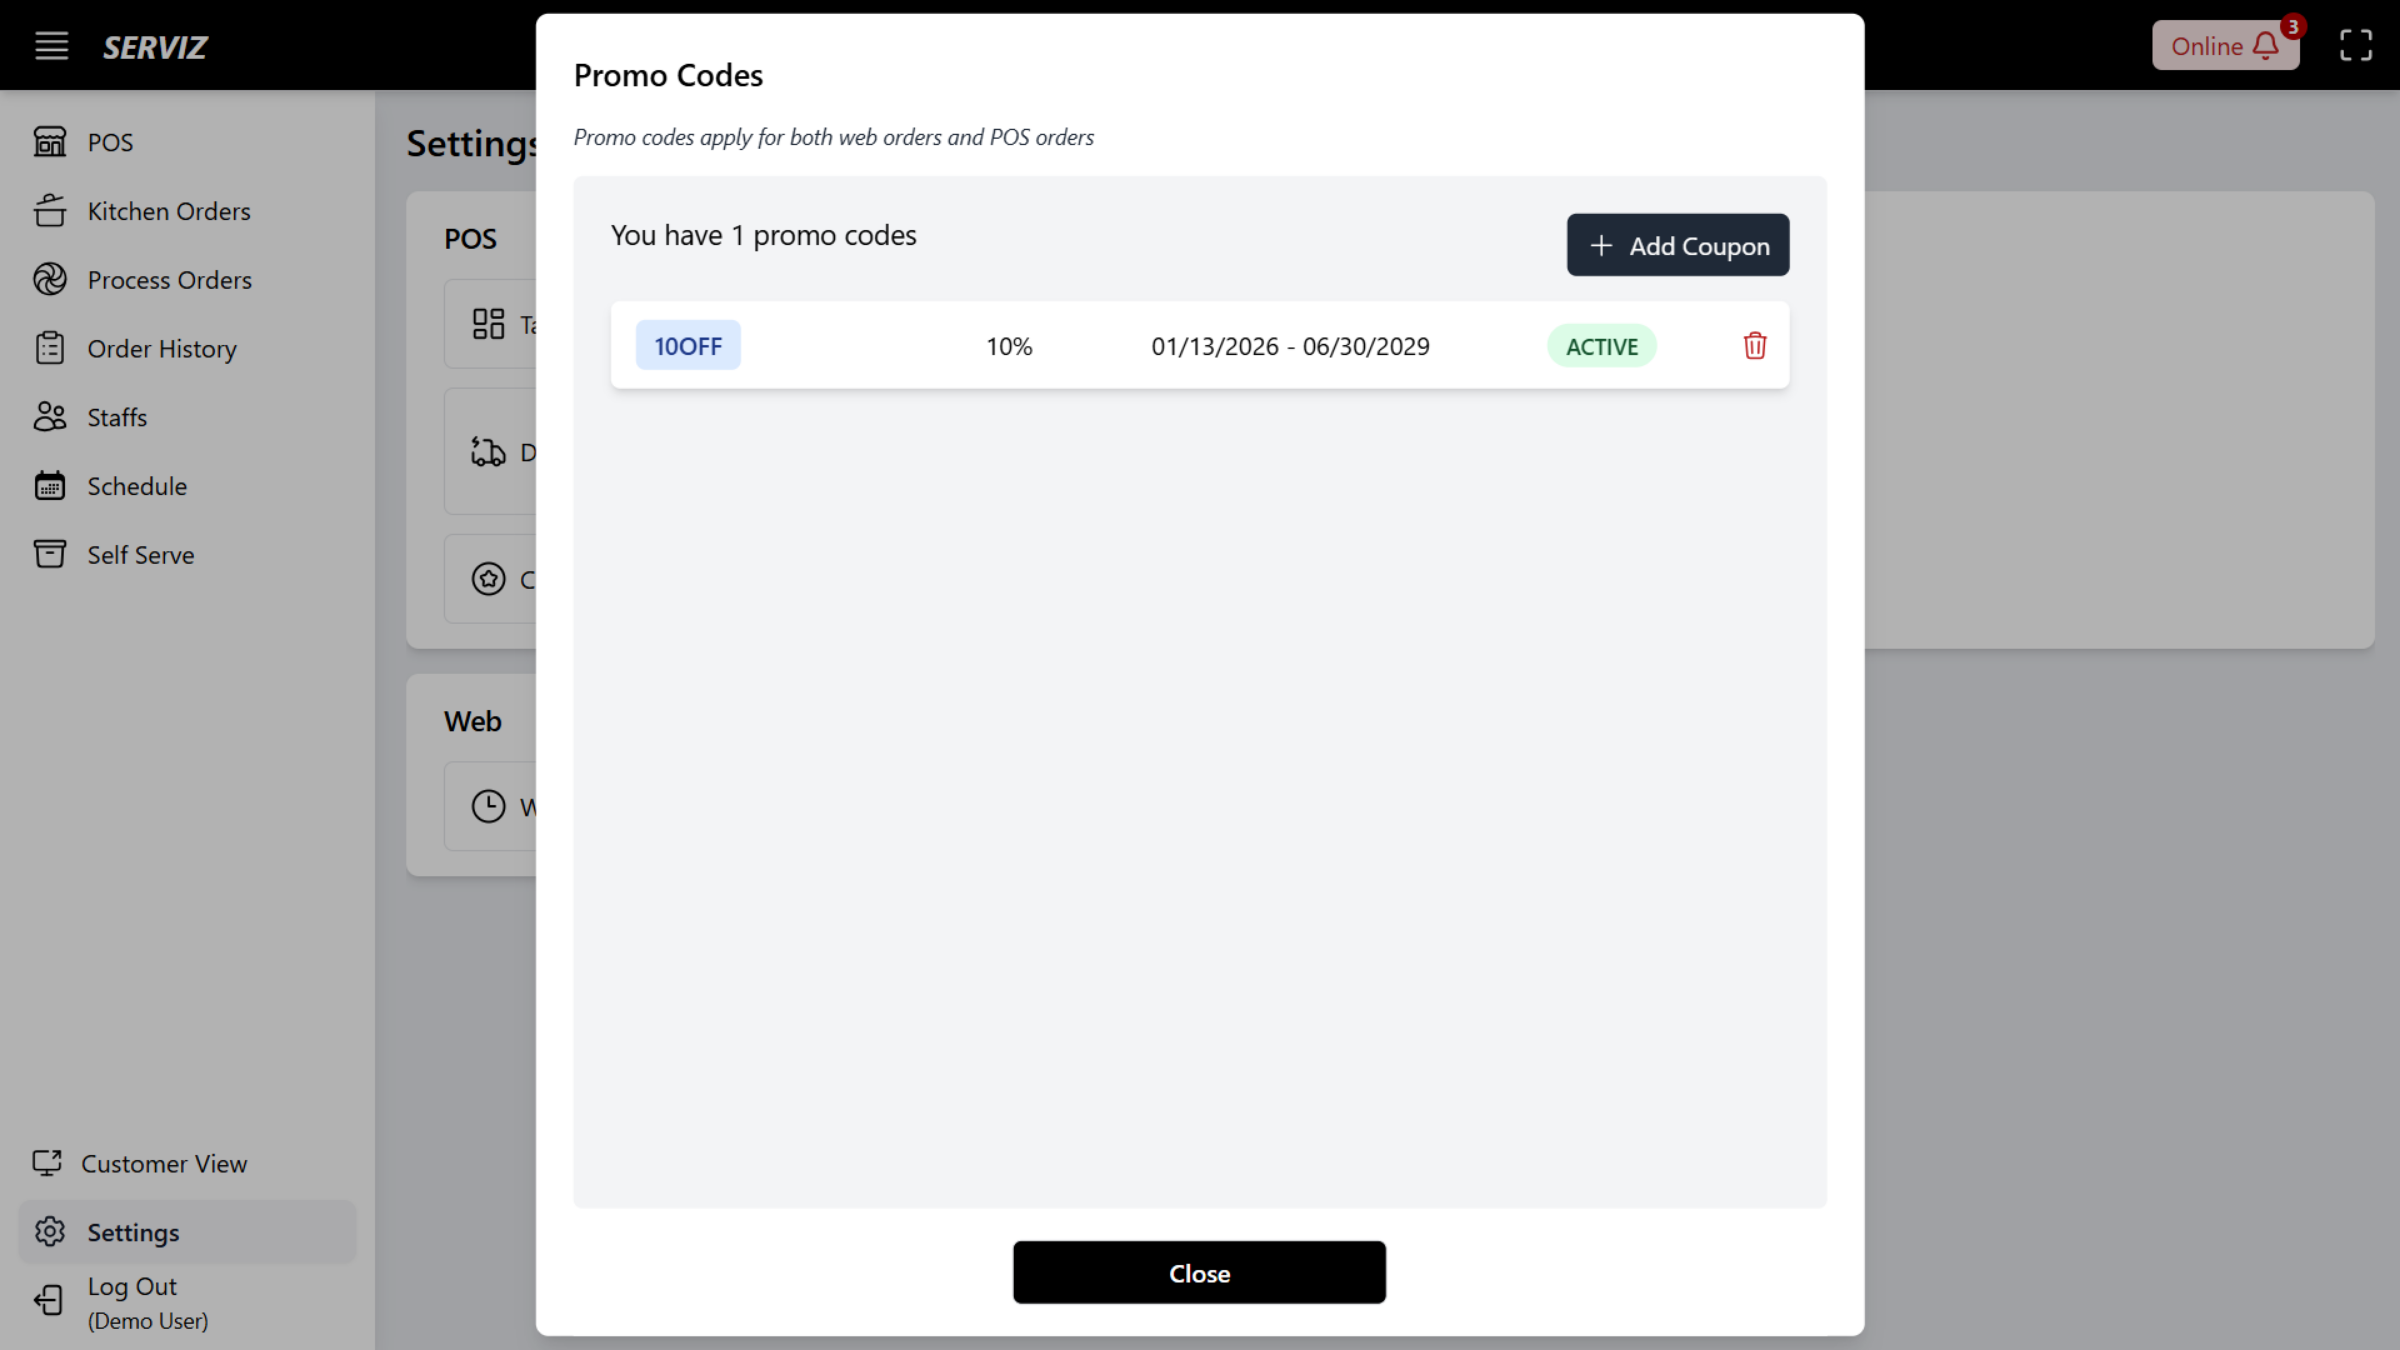
74. Open Promo Codes
Click Promo Codes to add, manage, and delete discount and promotional offers.
75. Promo Codes
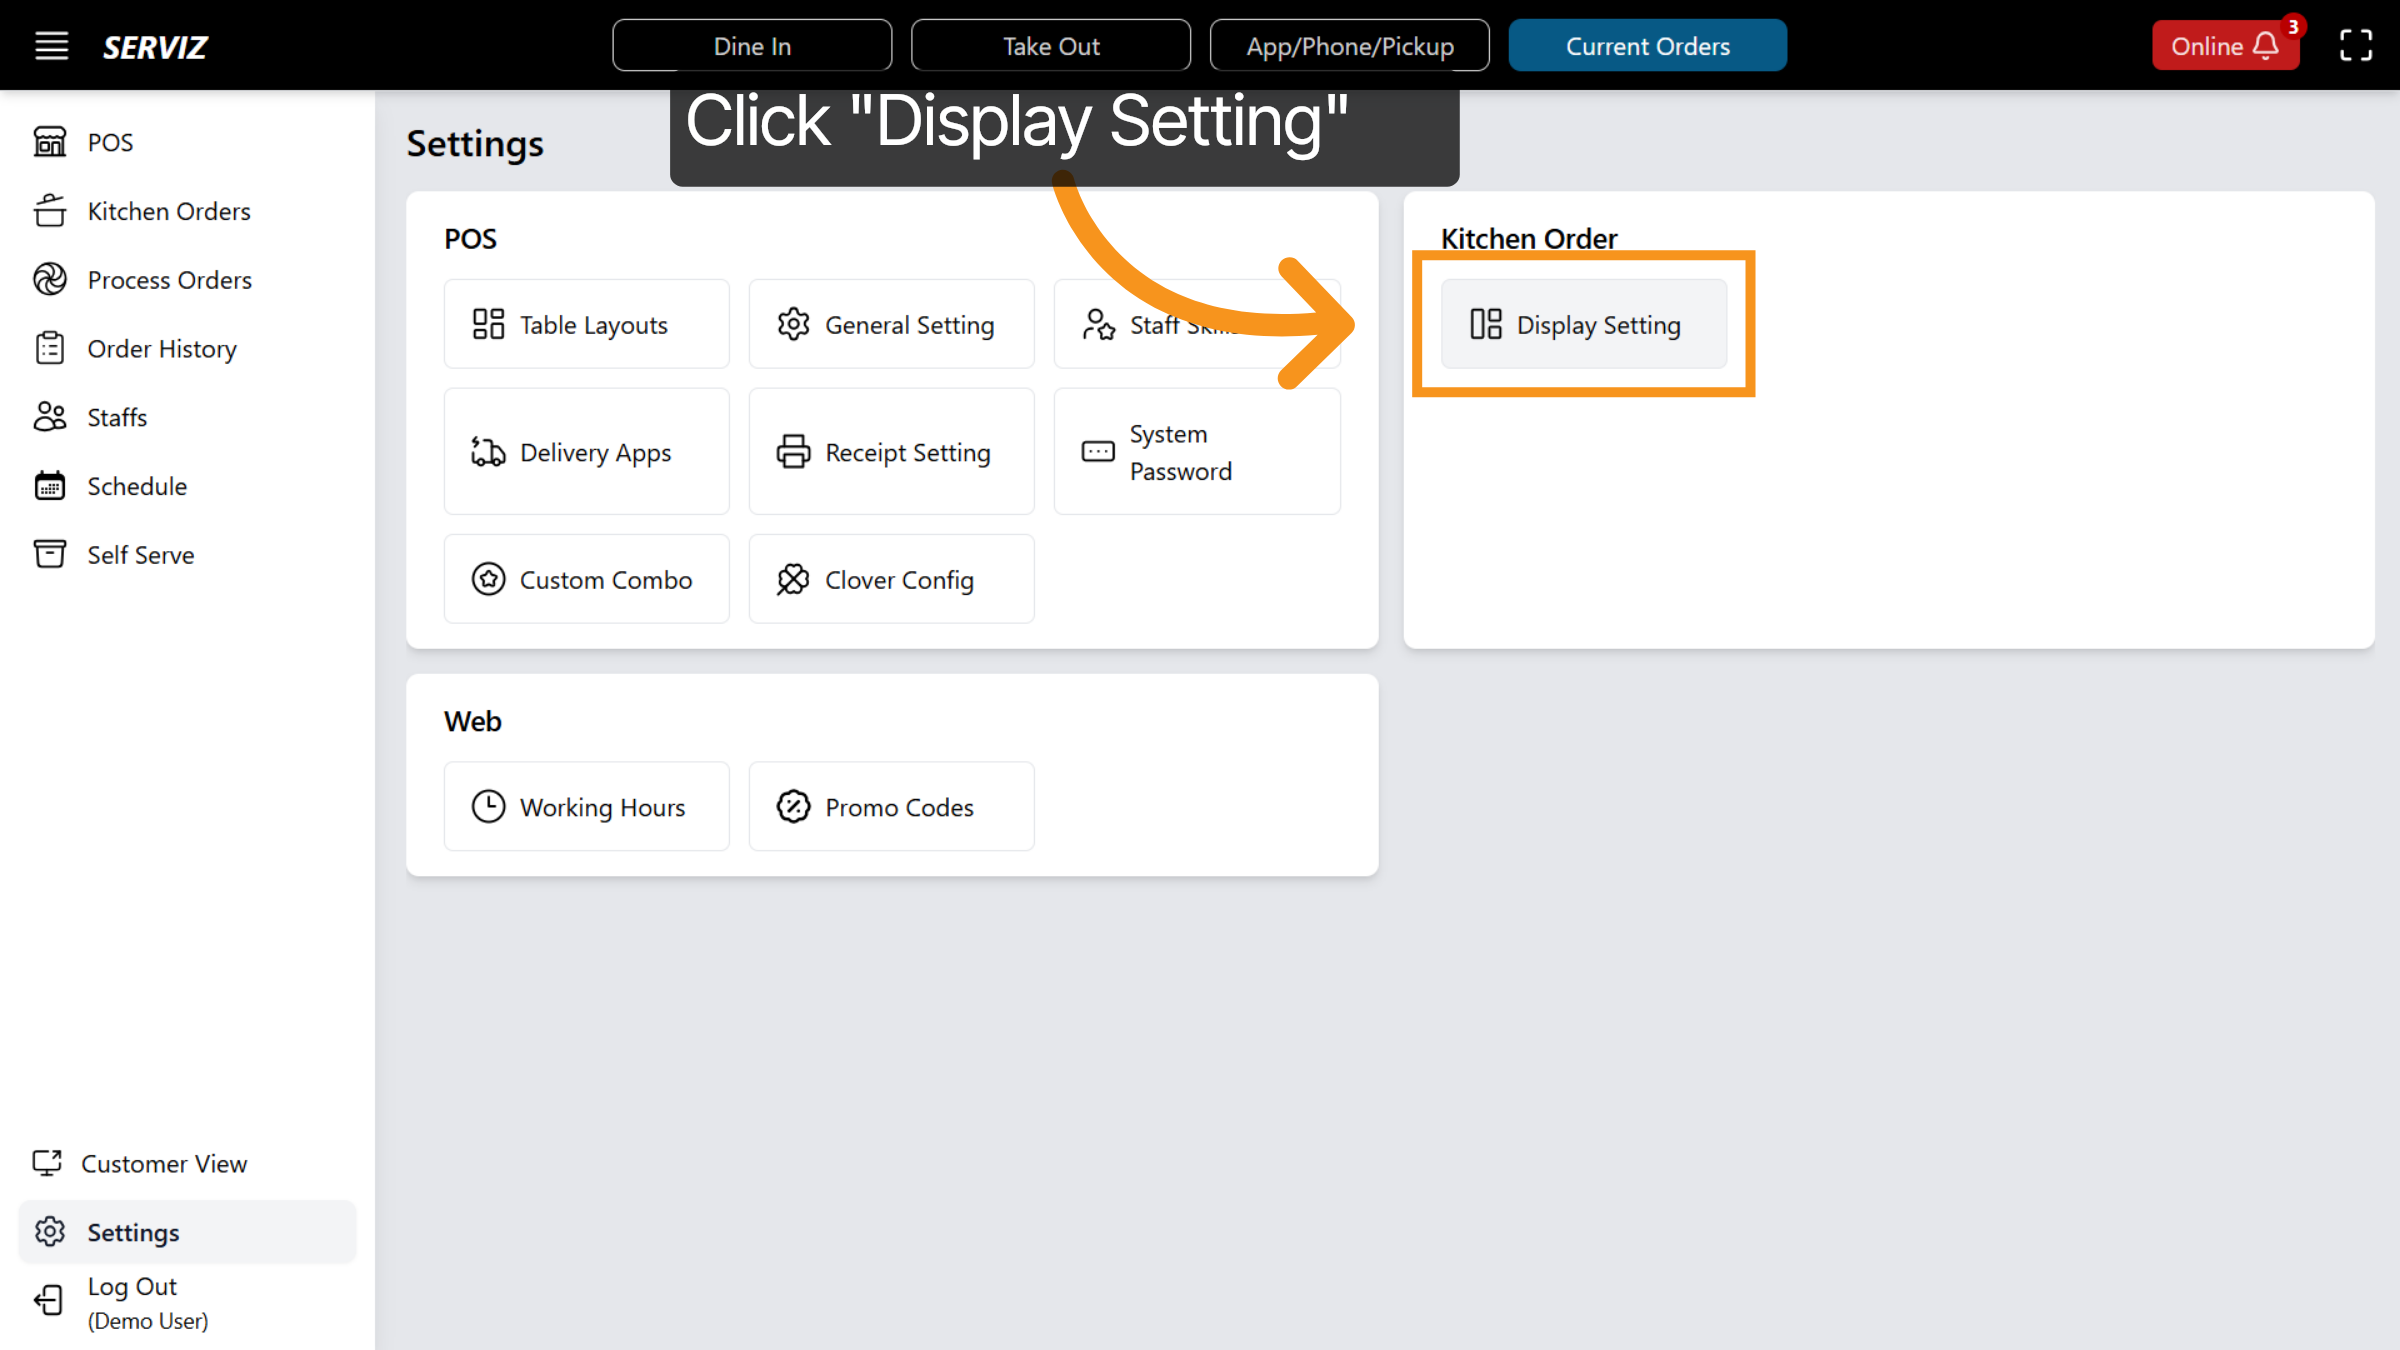
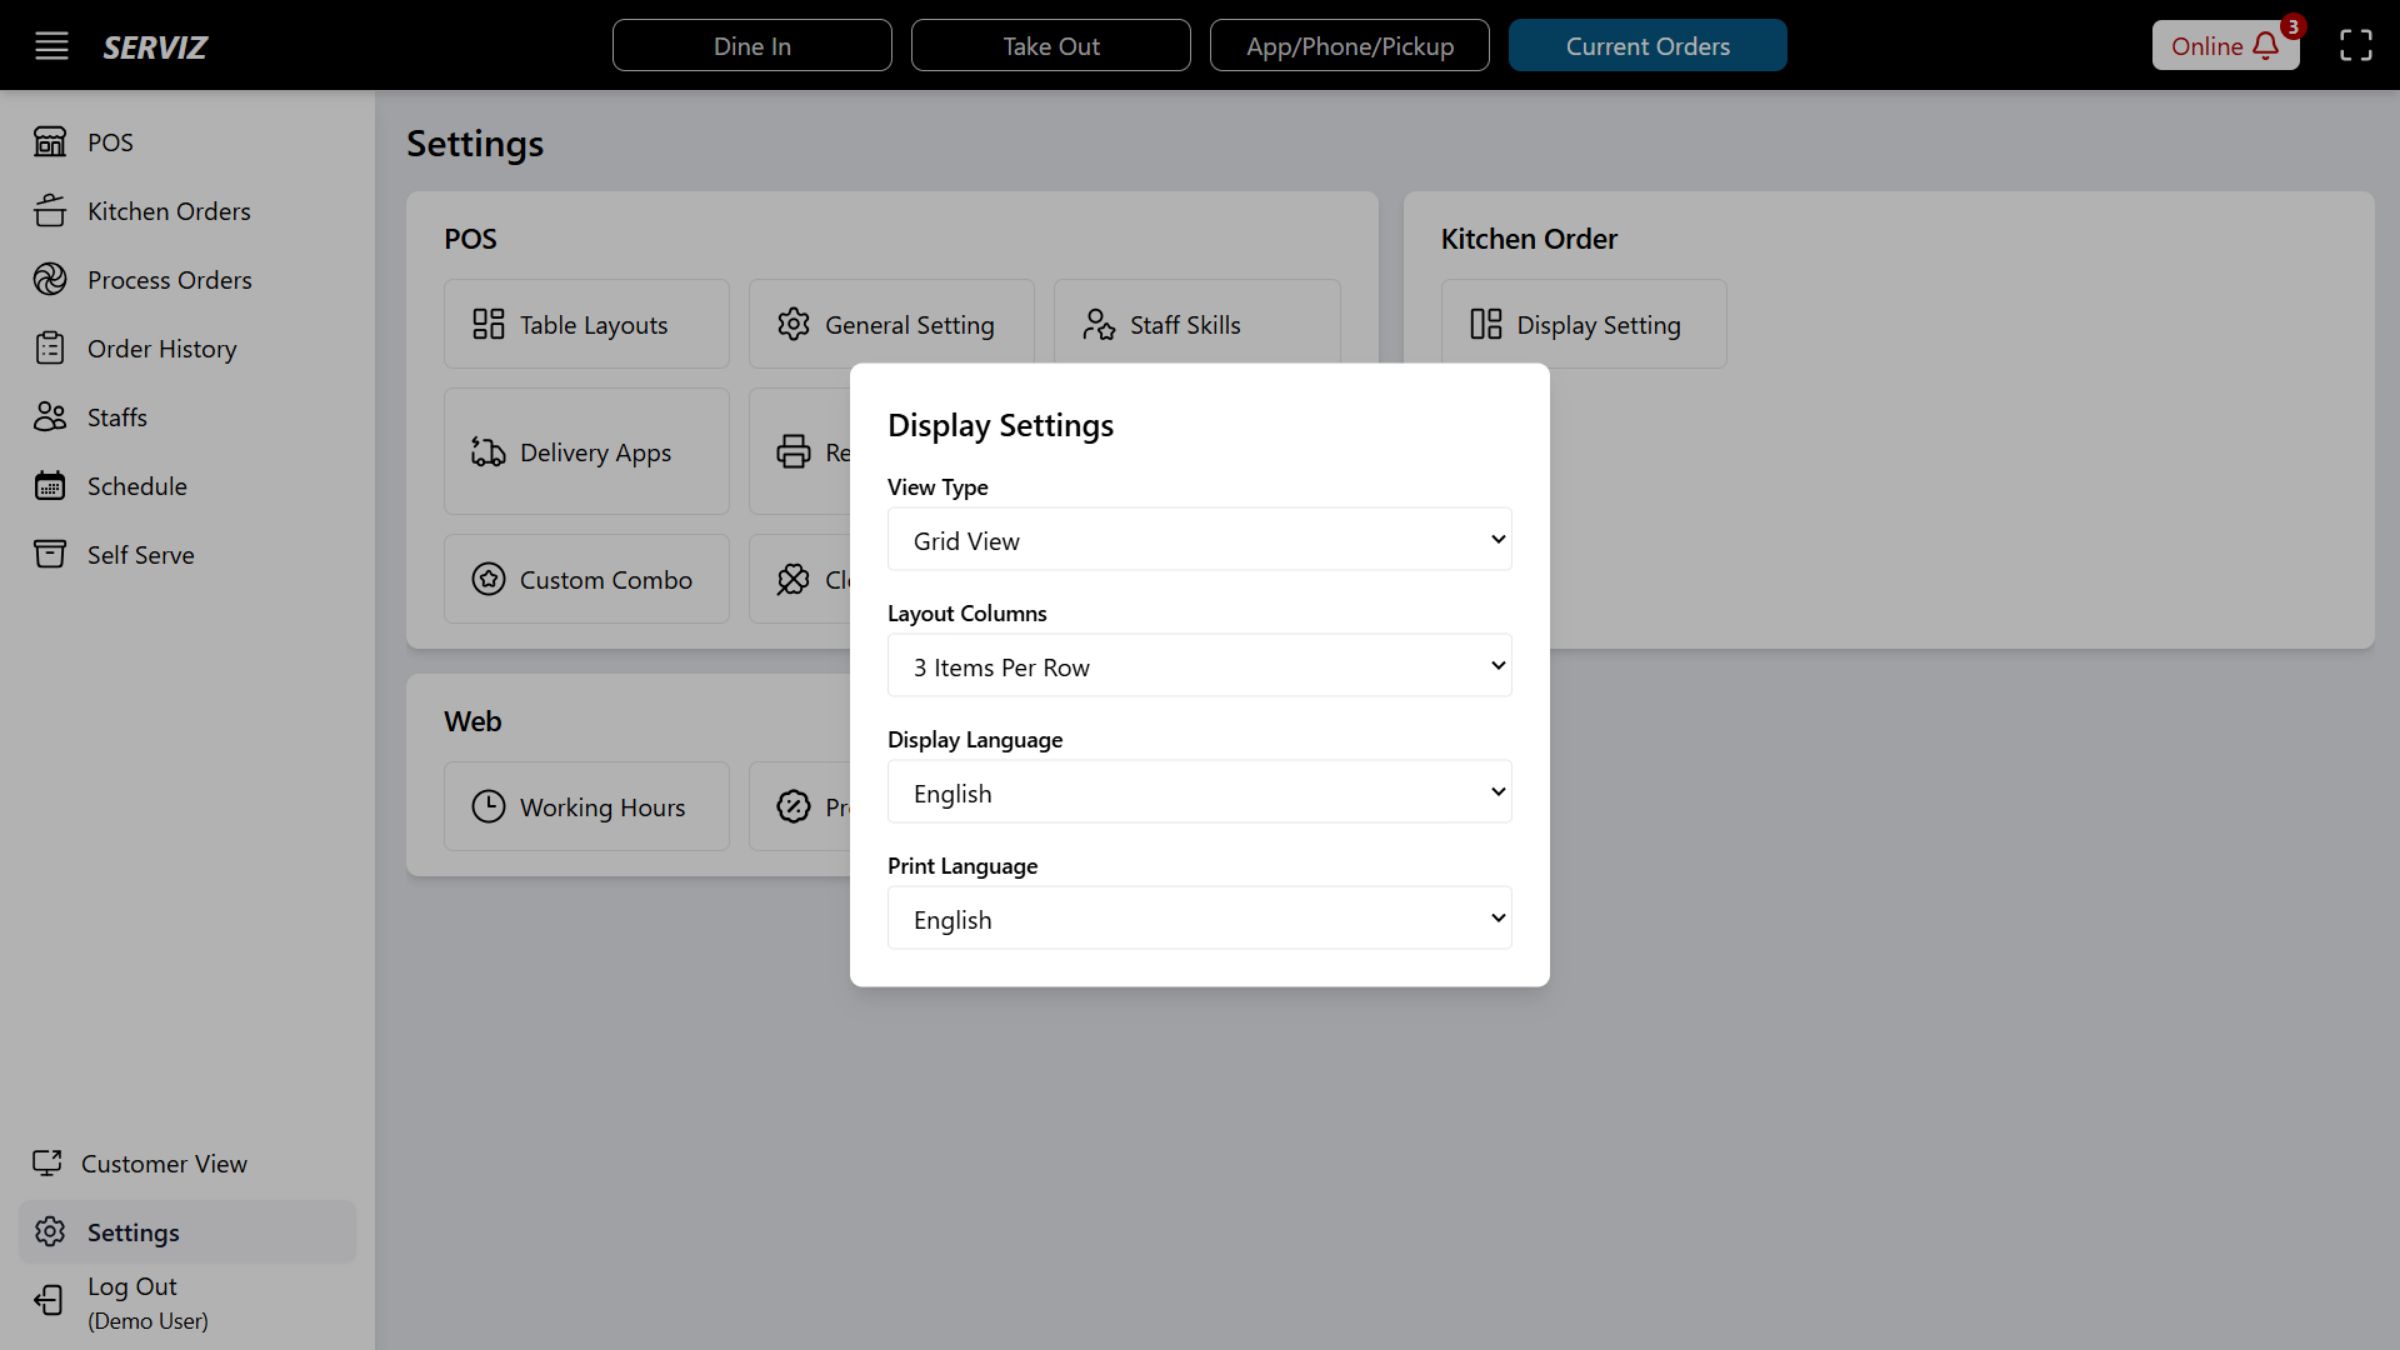
76. Access Display Settings
Click Display Setting to configure screen and interface display options.
77. Interact with Display Settings
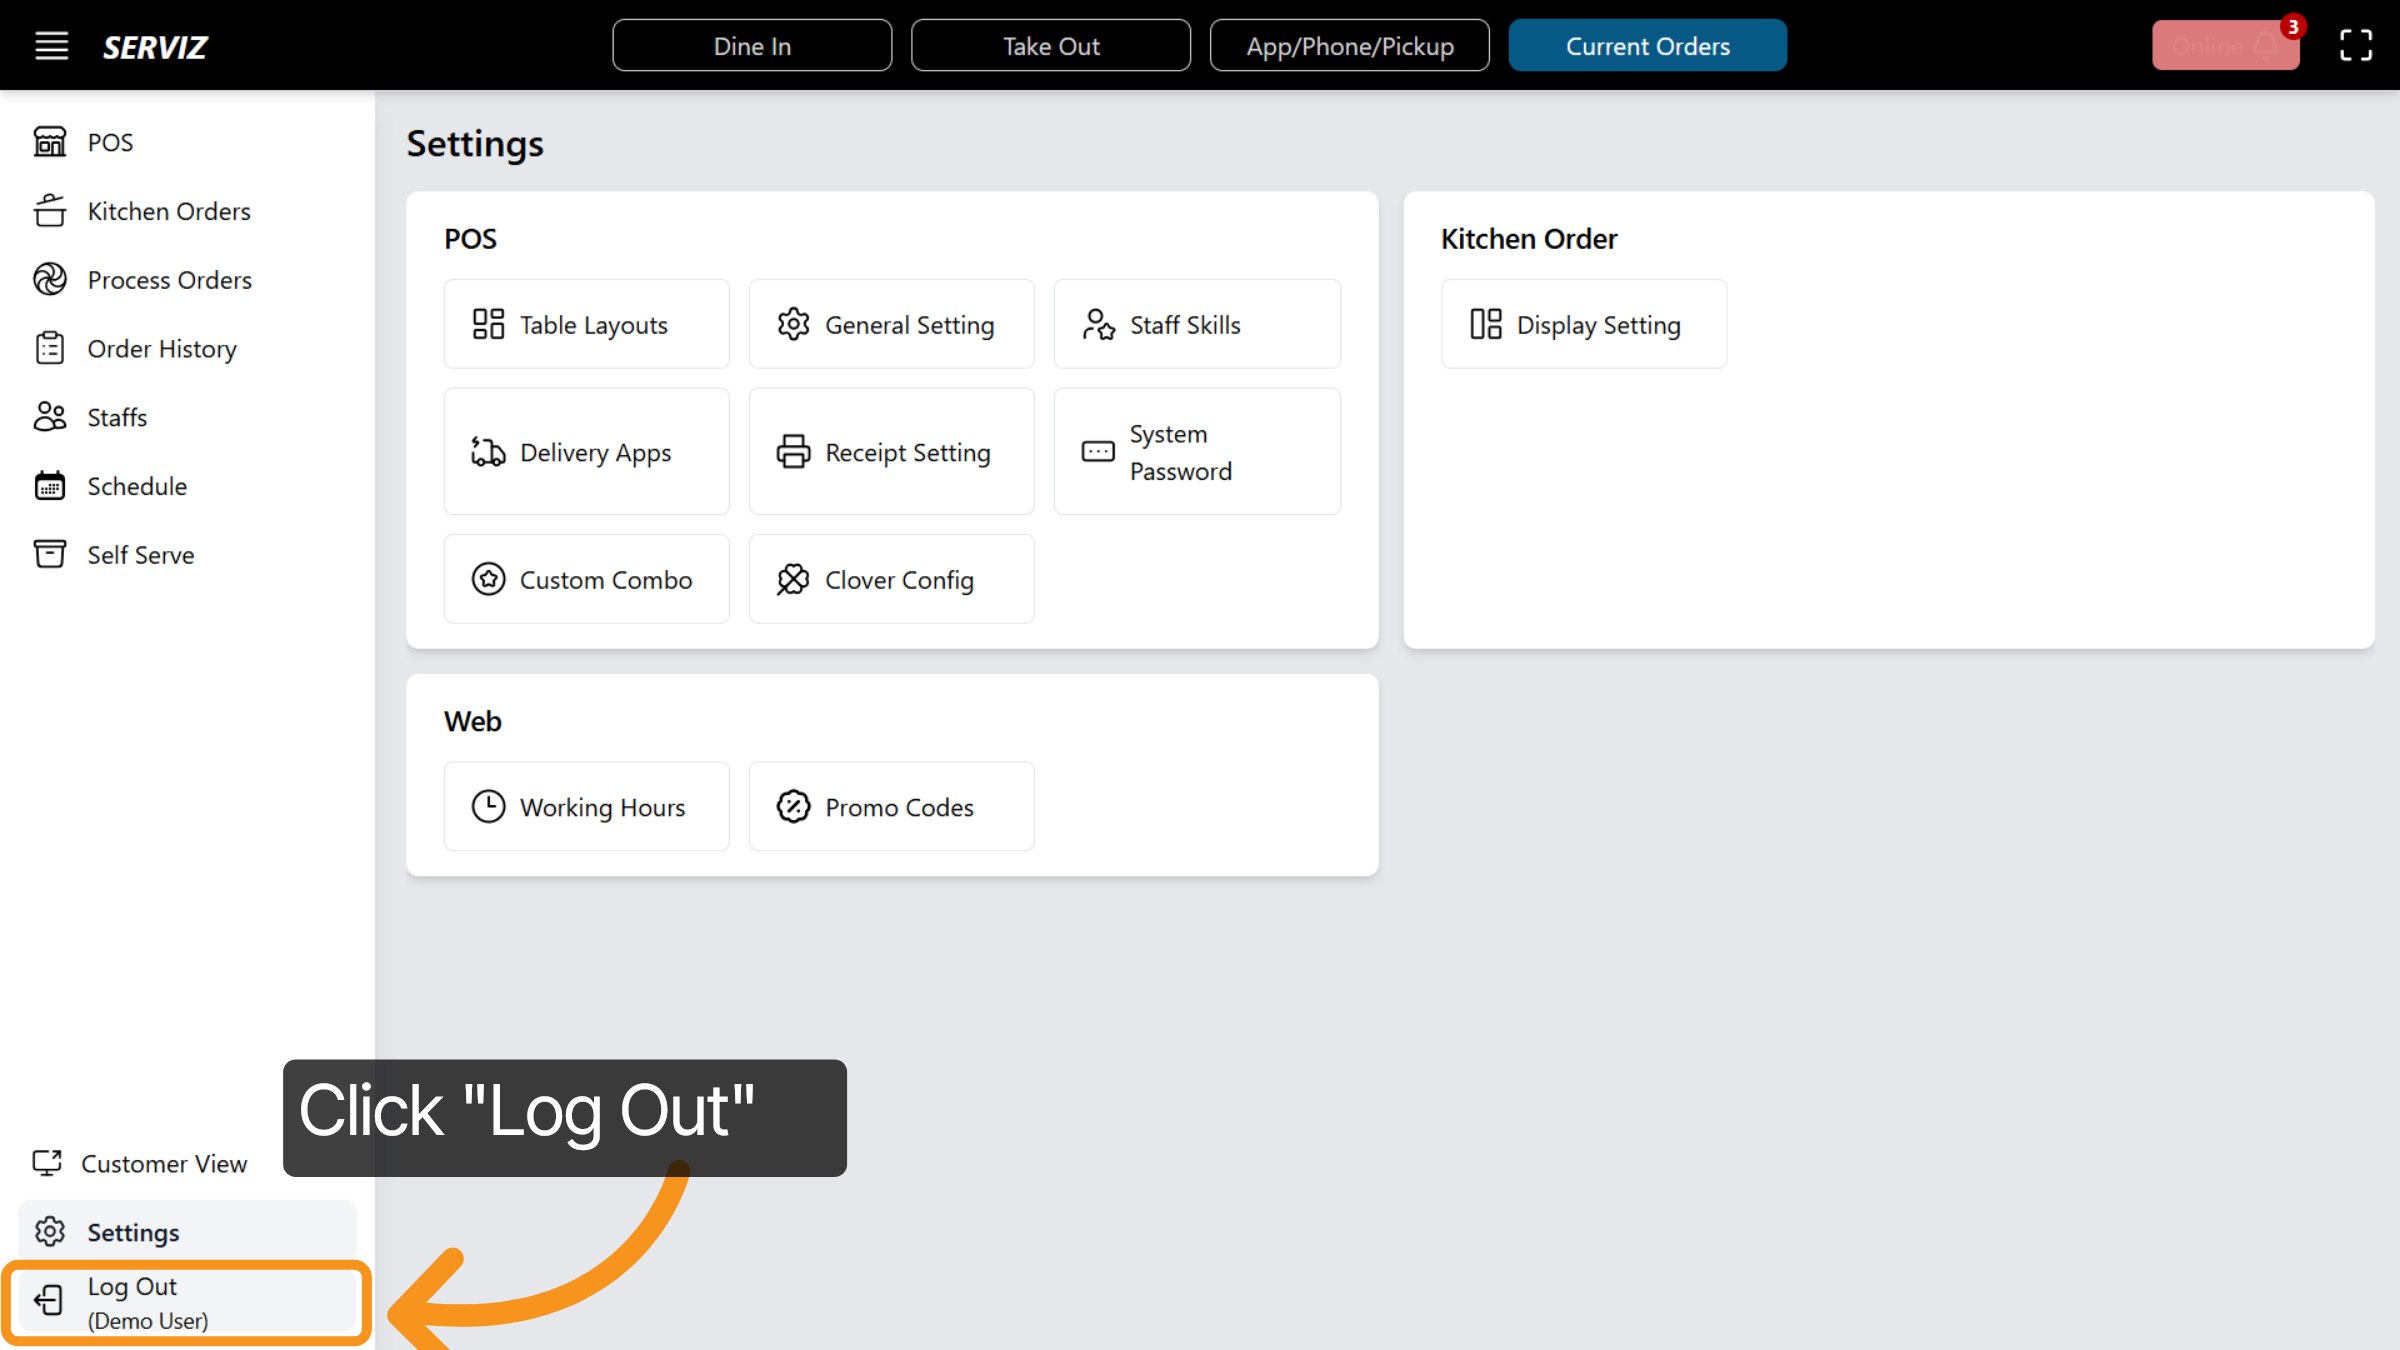
78. Log Out of POS
Always remember to click Log Out when leaving the terminal to prevent unauthorized use.