POS / Service Areas
Configure and Manage POS Orders in Vicdigitalworks System
This tutorial guides you through managing orders using the Vicdigitalworks POS system for restaurants.
Go to serviz.ca
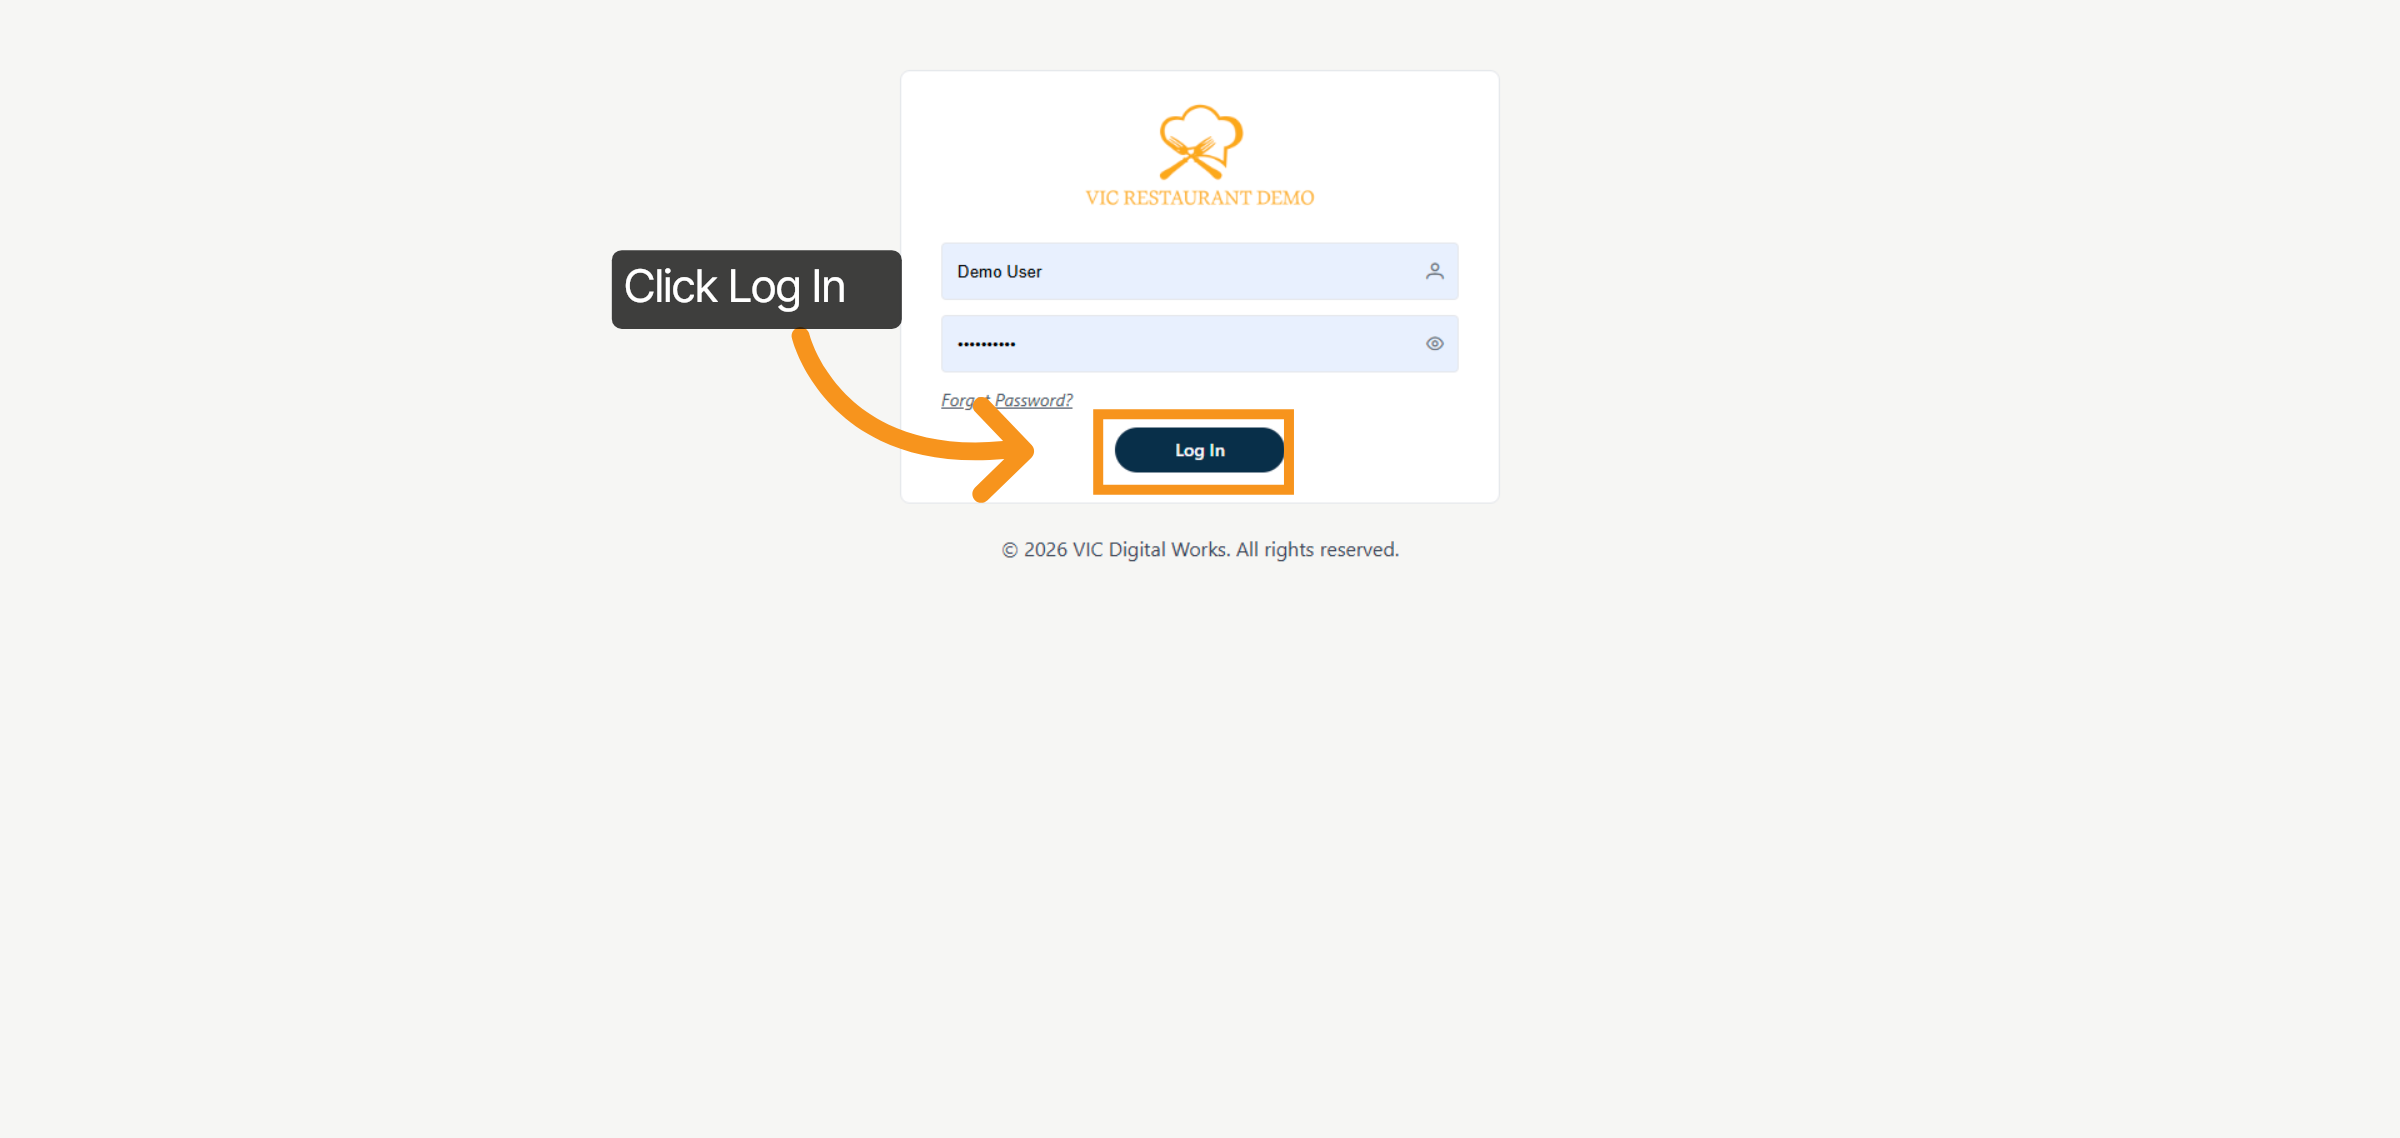
1. Access POS Login Screen
You will log in using the account set up by Vic.Click "Log In" to access the POS system login screen.
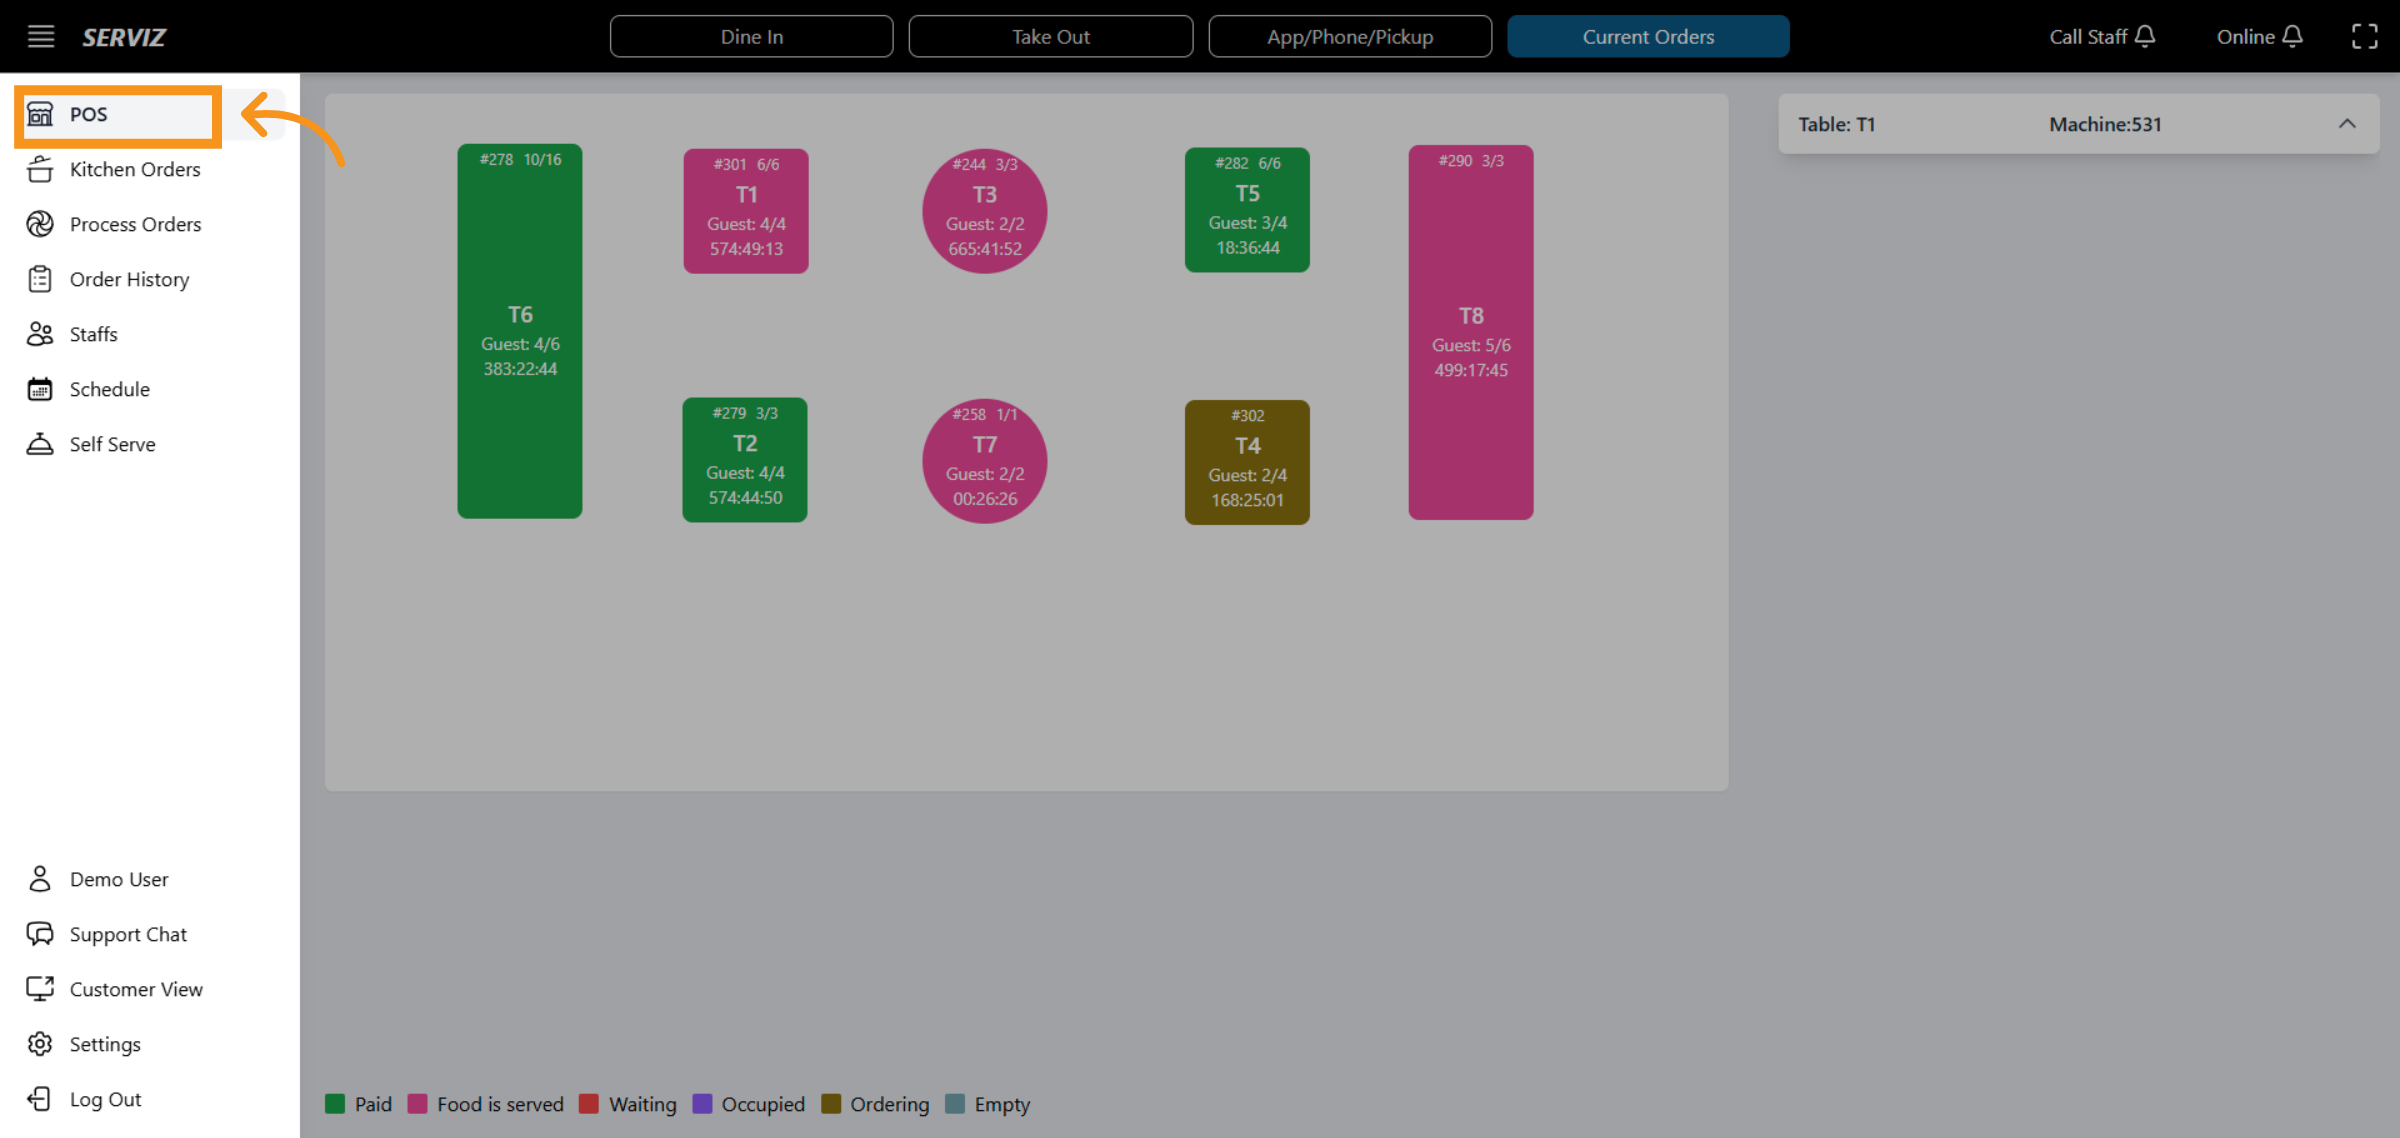
2. Access POS
Click the highlighted area to access the detailed POS interface for order management.
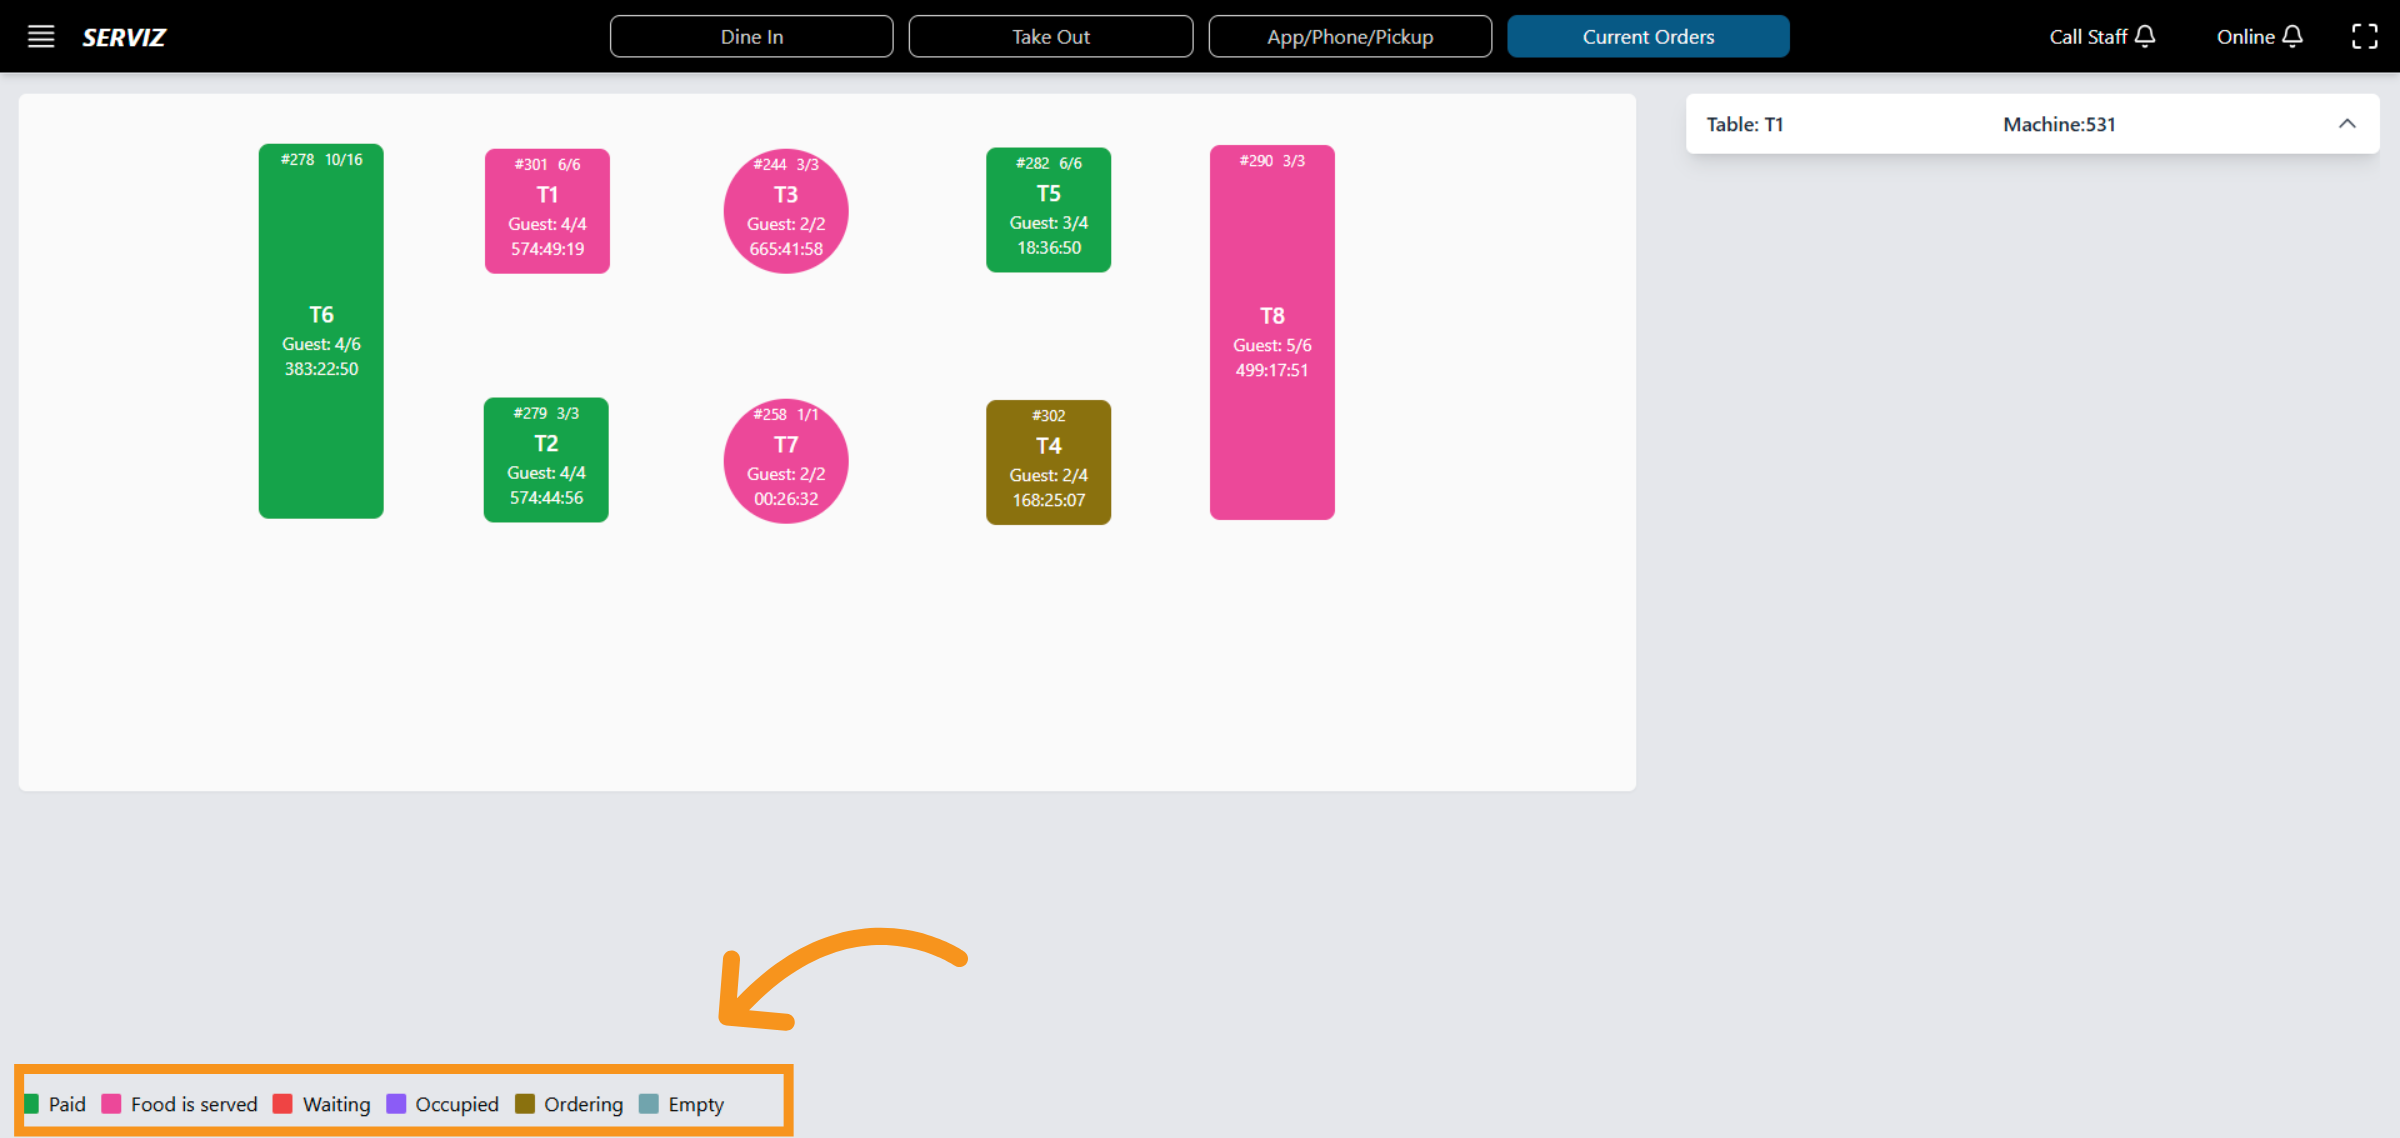
3. POS Layout overview
You can view the interface of the POS system, which includes: Dine In, Take Out, Apply/Phone/Pickup, Current Orders, and the layout. You will learn how to navigate orders, update guest details, handle payments, and manage tables effectively. The floor layout is displayed at the center of the screen.
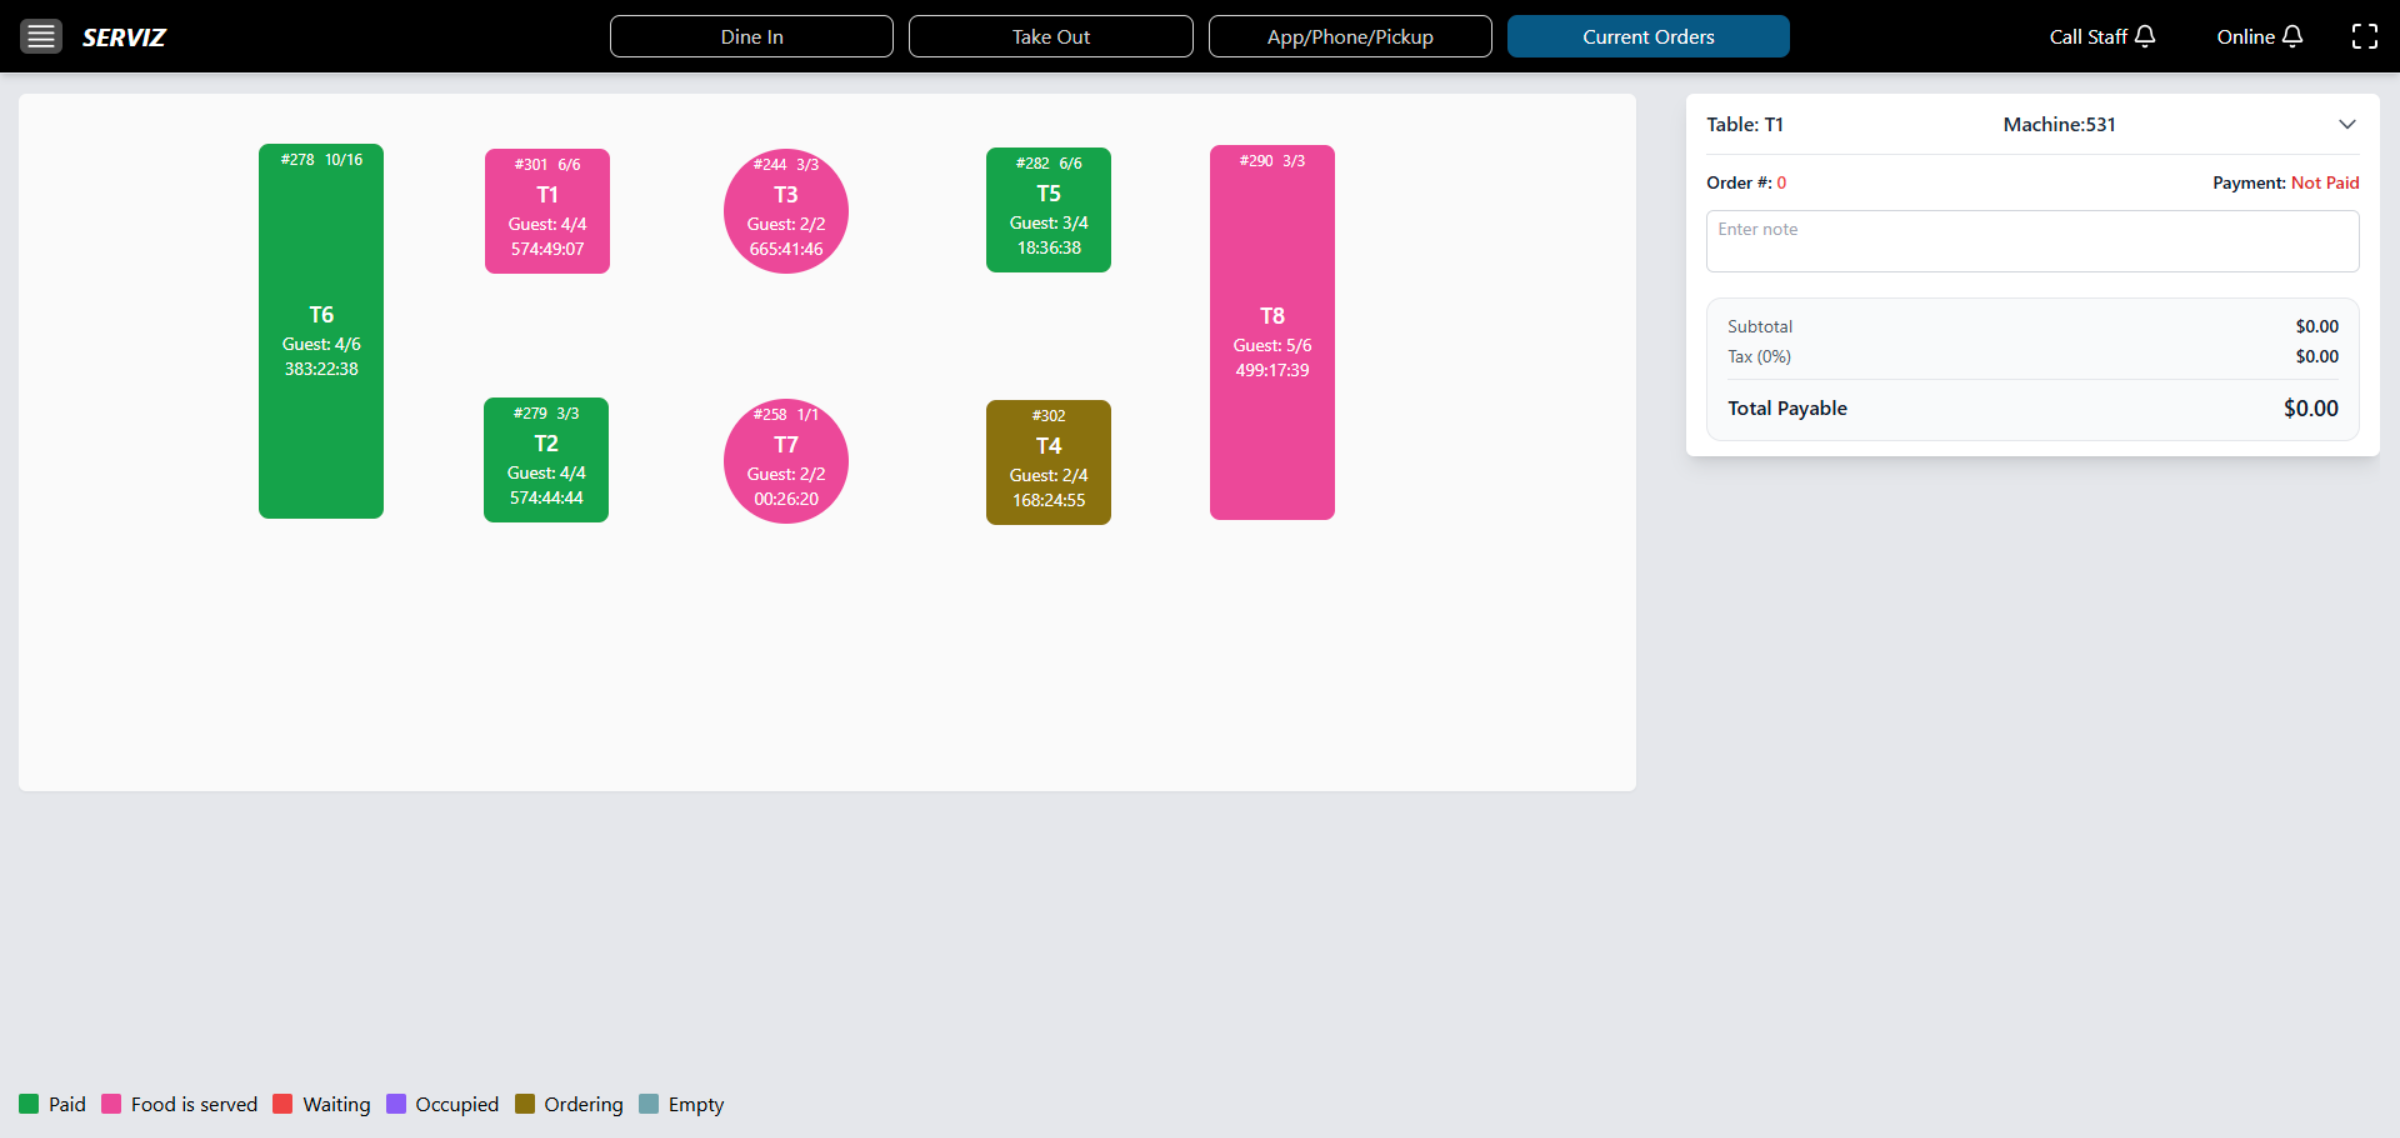
4. The separate color to represent status.
At the bottom, you can find the color reference for the table status.
Green : PAID
Pink : Food is serviced
Red : Waiting
Purple : Occupied
Brown : Ordering
Blue : Empty (Available)
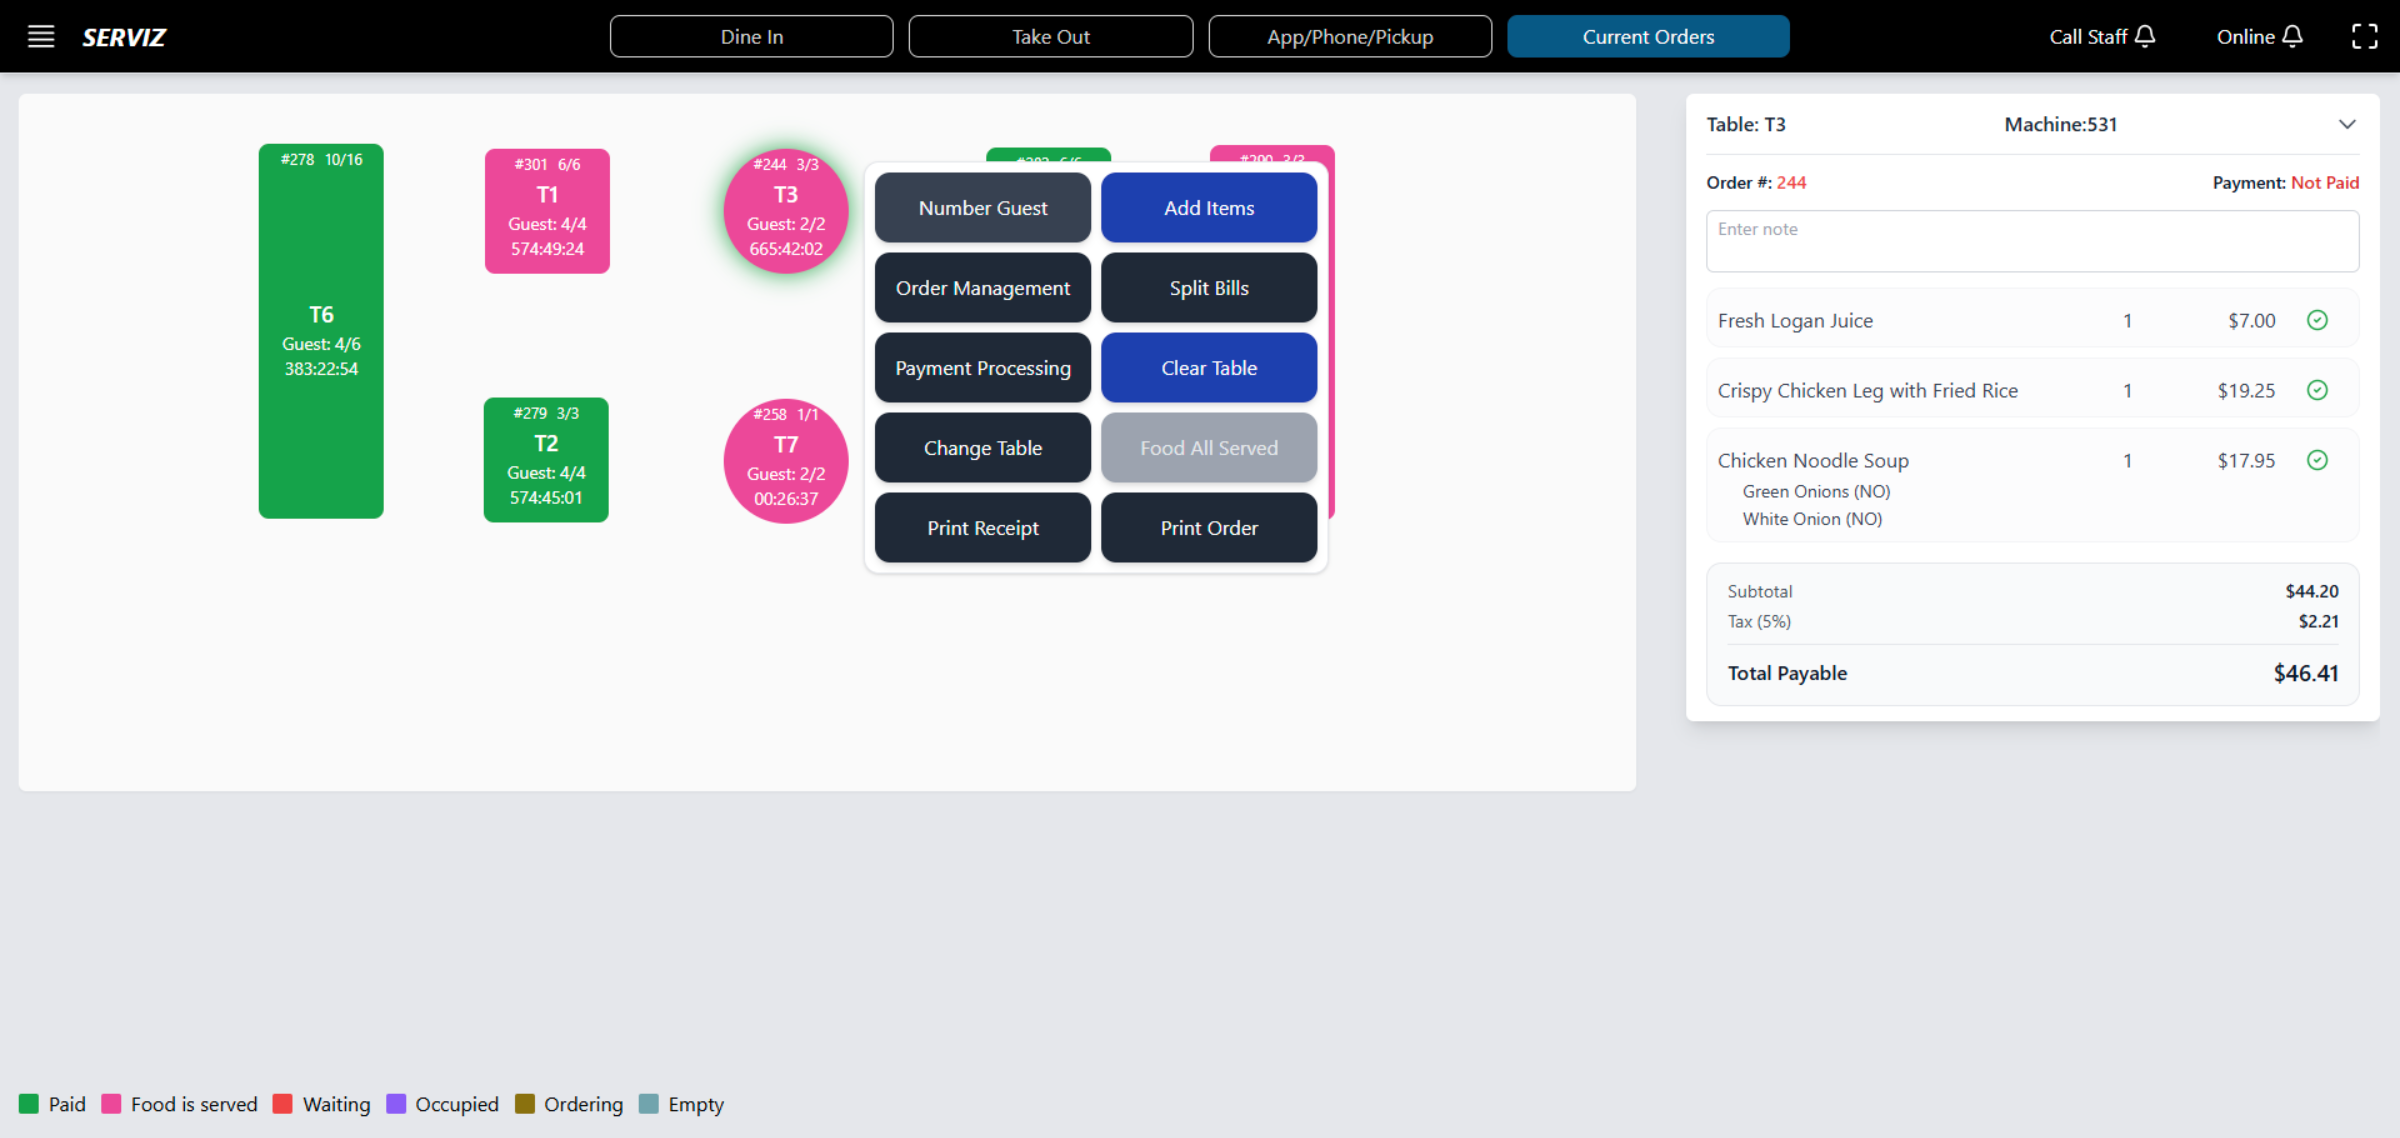
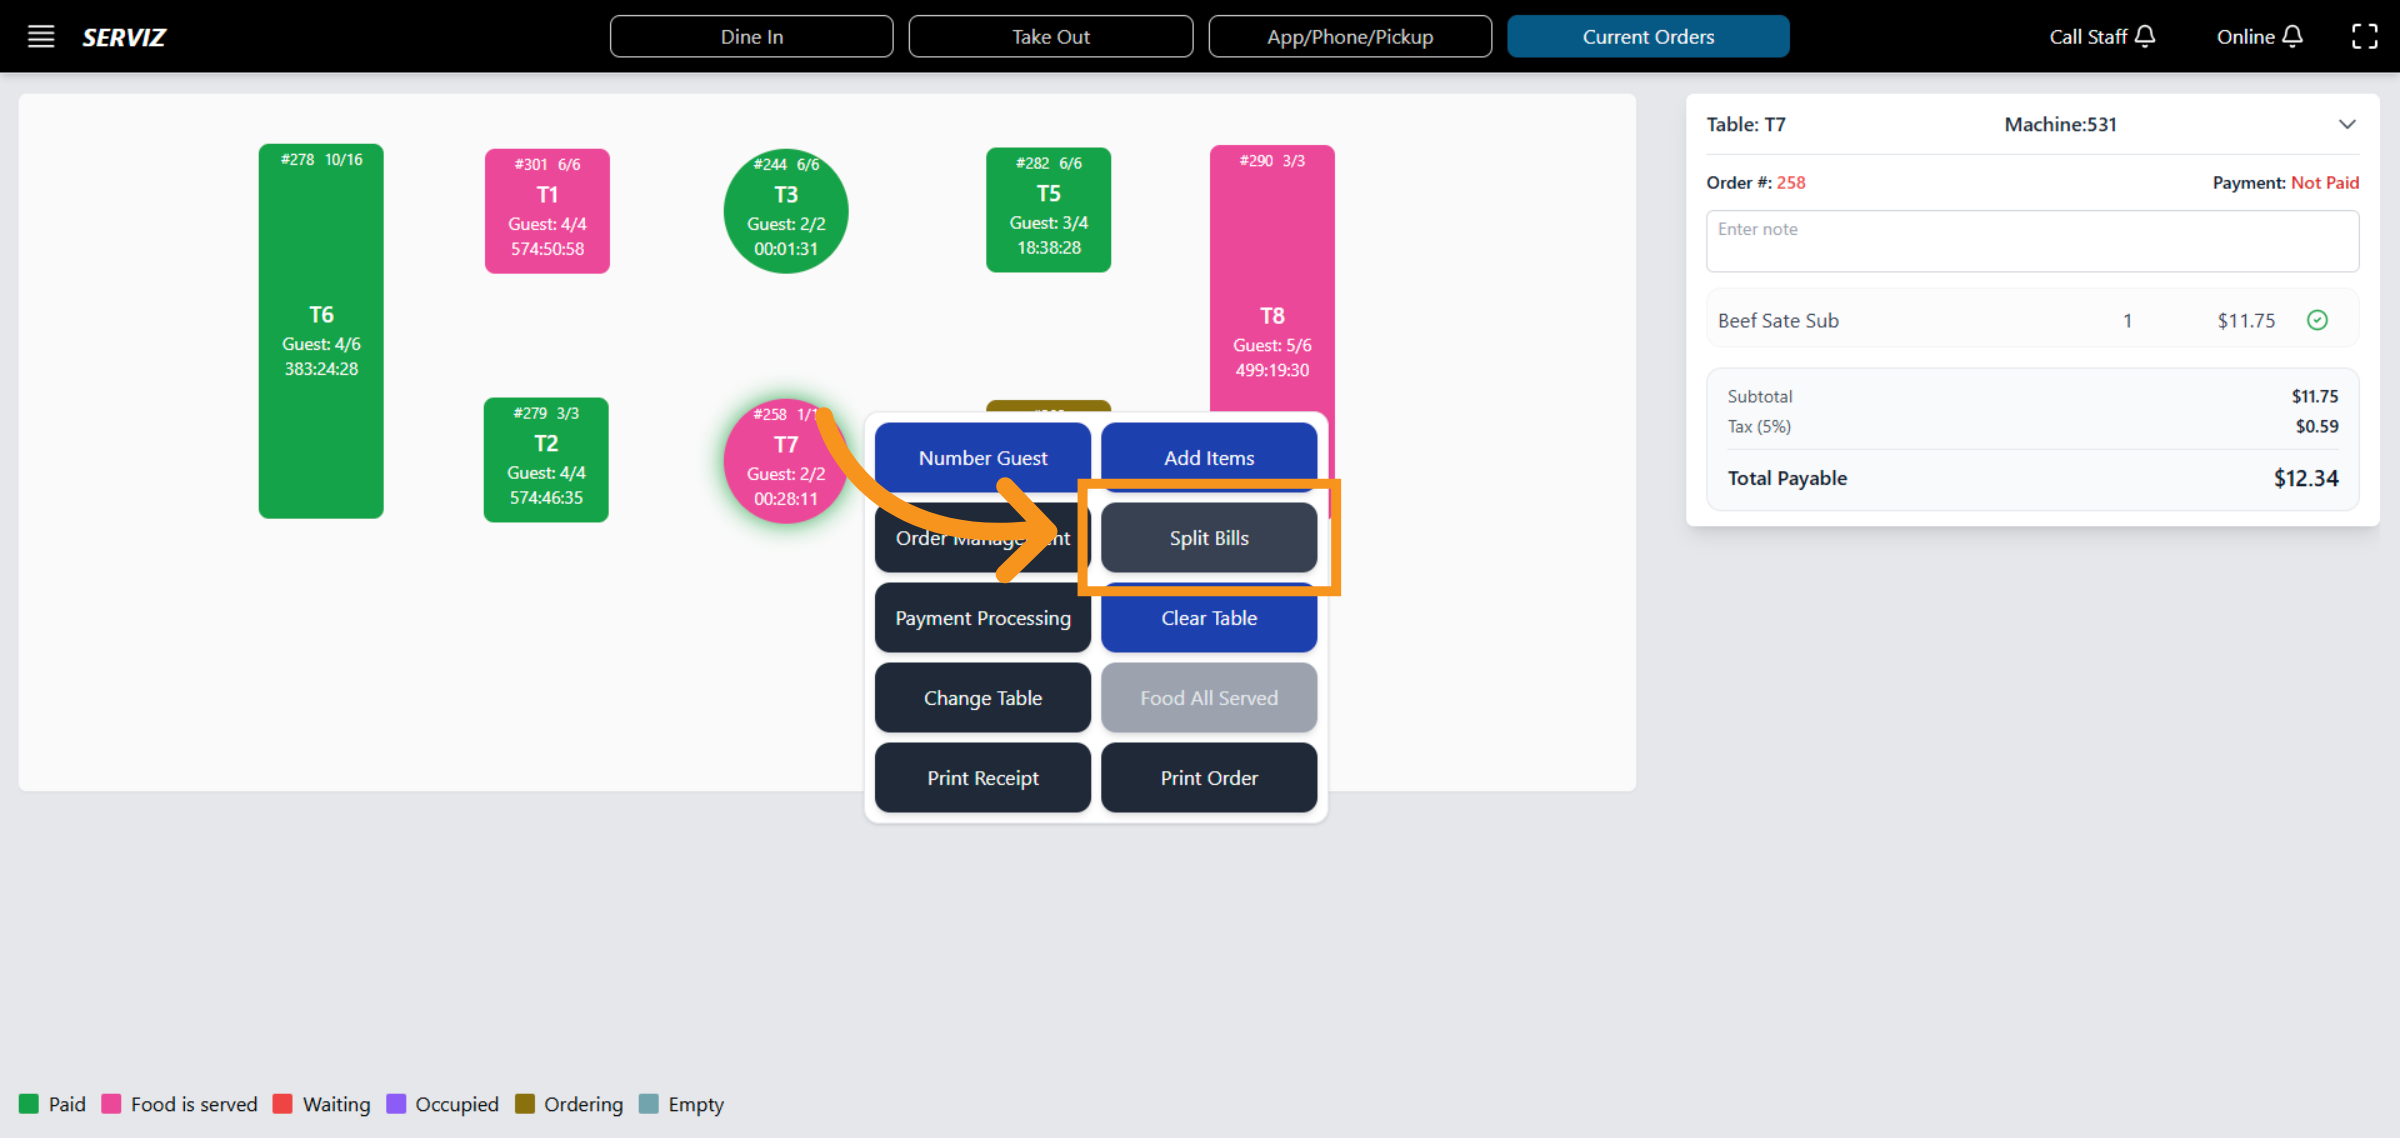
5. Current status Check
When you select on each table, and a card will appear with :
-Number guest : confirm the number of guest for the order
-Order management: fill in the name of the user who is responsible for the order.
-Payment Processing : Payment processing enables us to manage payment options and transactions for orders.
-Change table: control -arranging tables for guests appropriately.
-Print receipt: generate a physical or digital copy of the order receipt.
- Add items: Control and add additional items.
-Split bill: manage and allocate the bill based on customer requests.
-Clear table : enable to control and move anytime
-Food on Served : notice that all ordered food items have been successfully delivered to the guests.
- Print order: Print Order to generate a physical or digital copy of the order details.
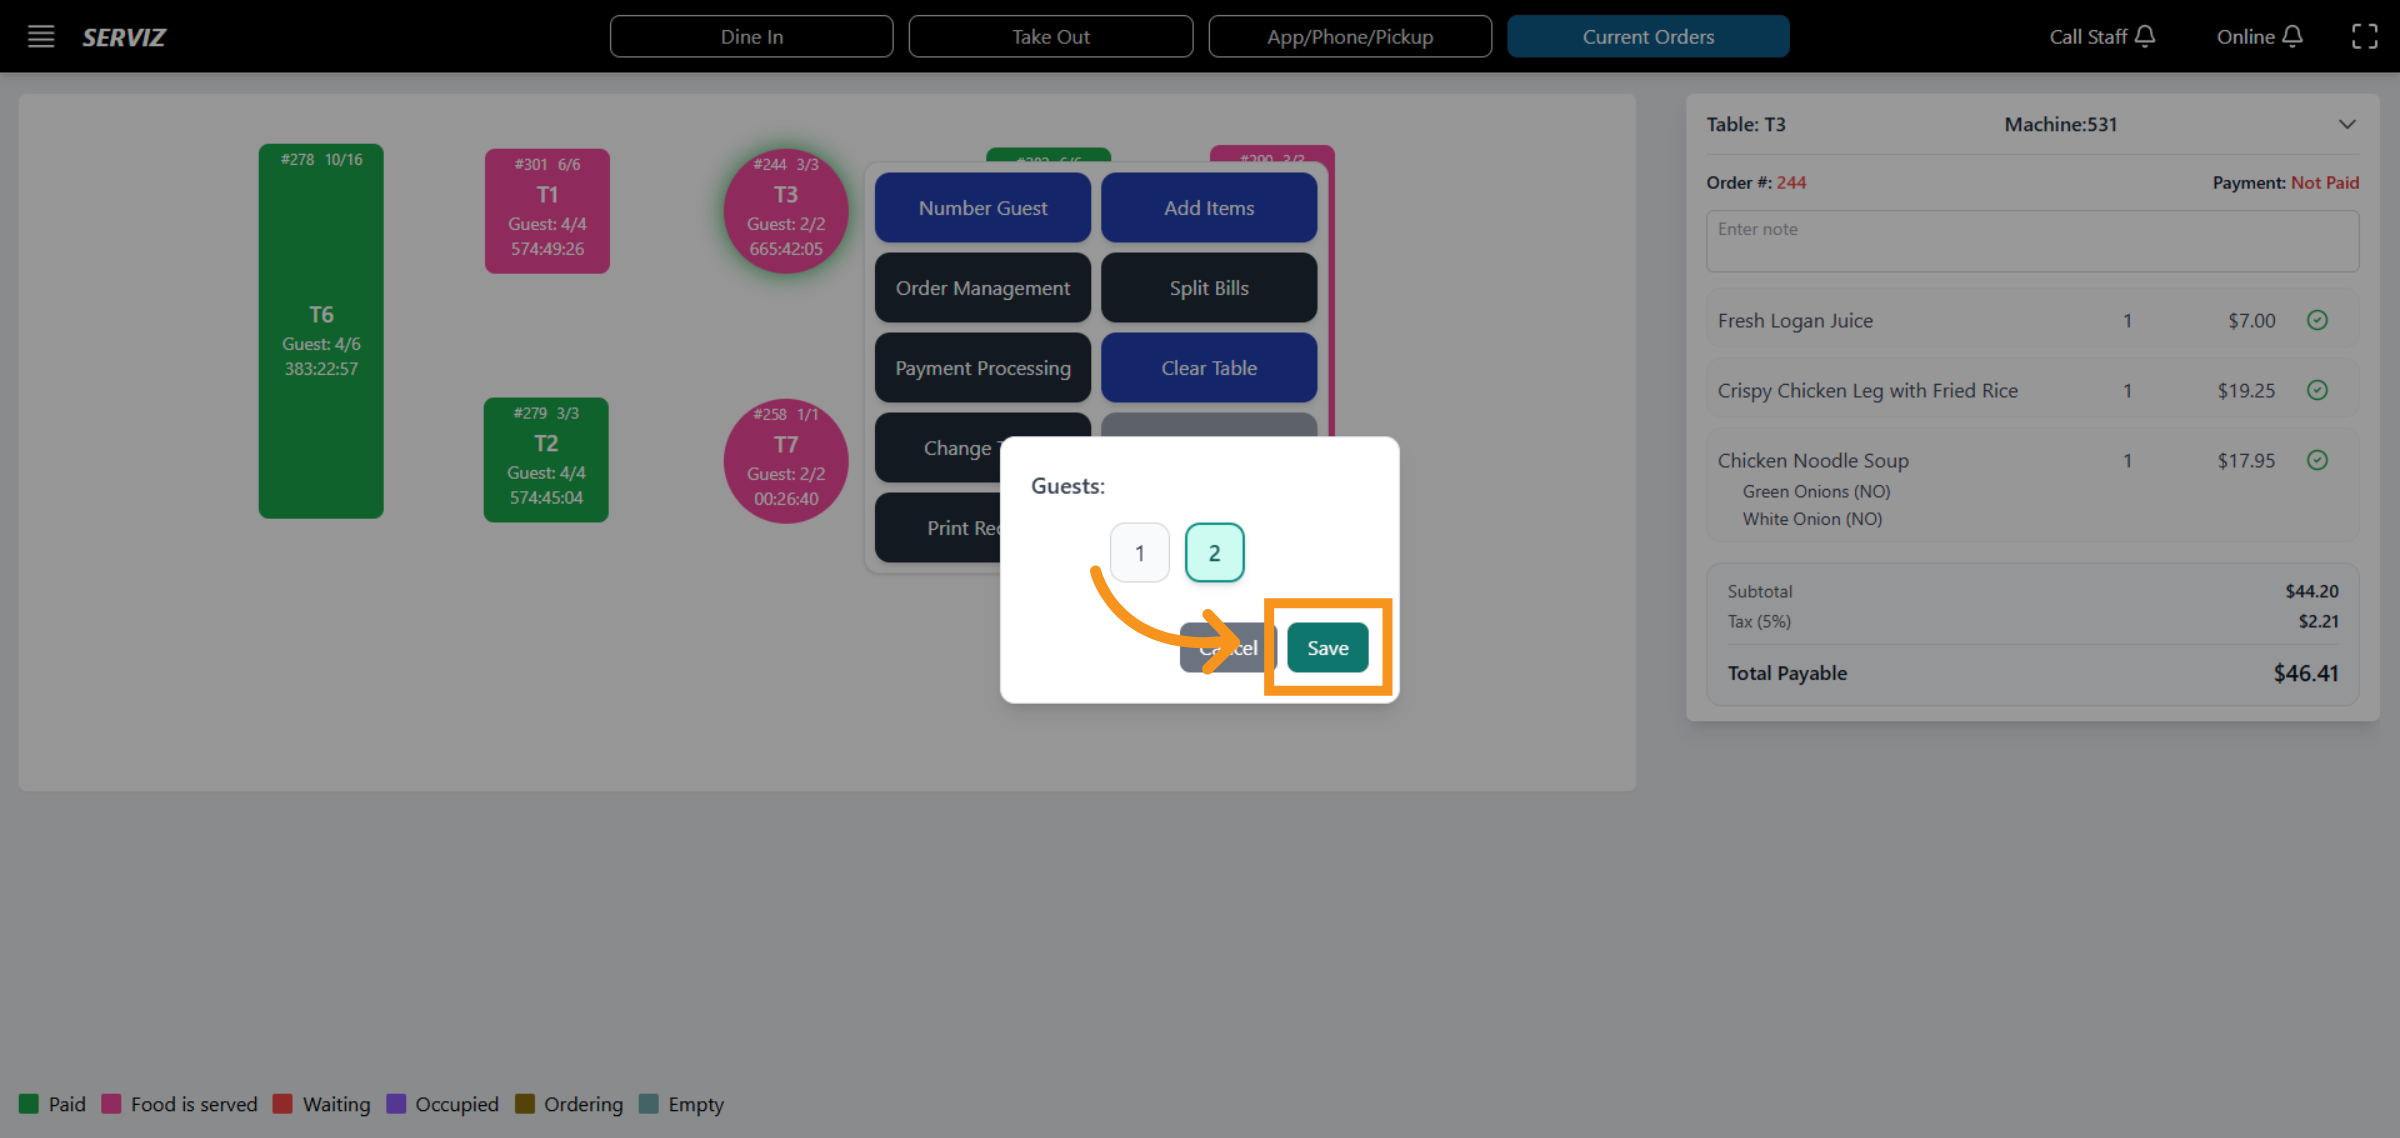
6. Number Guest
Allow you confirm the number of guest for the order
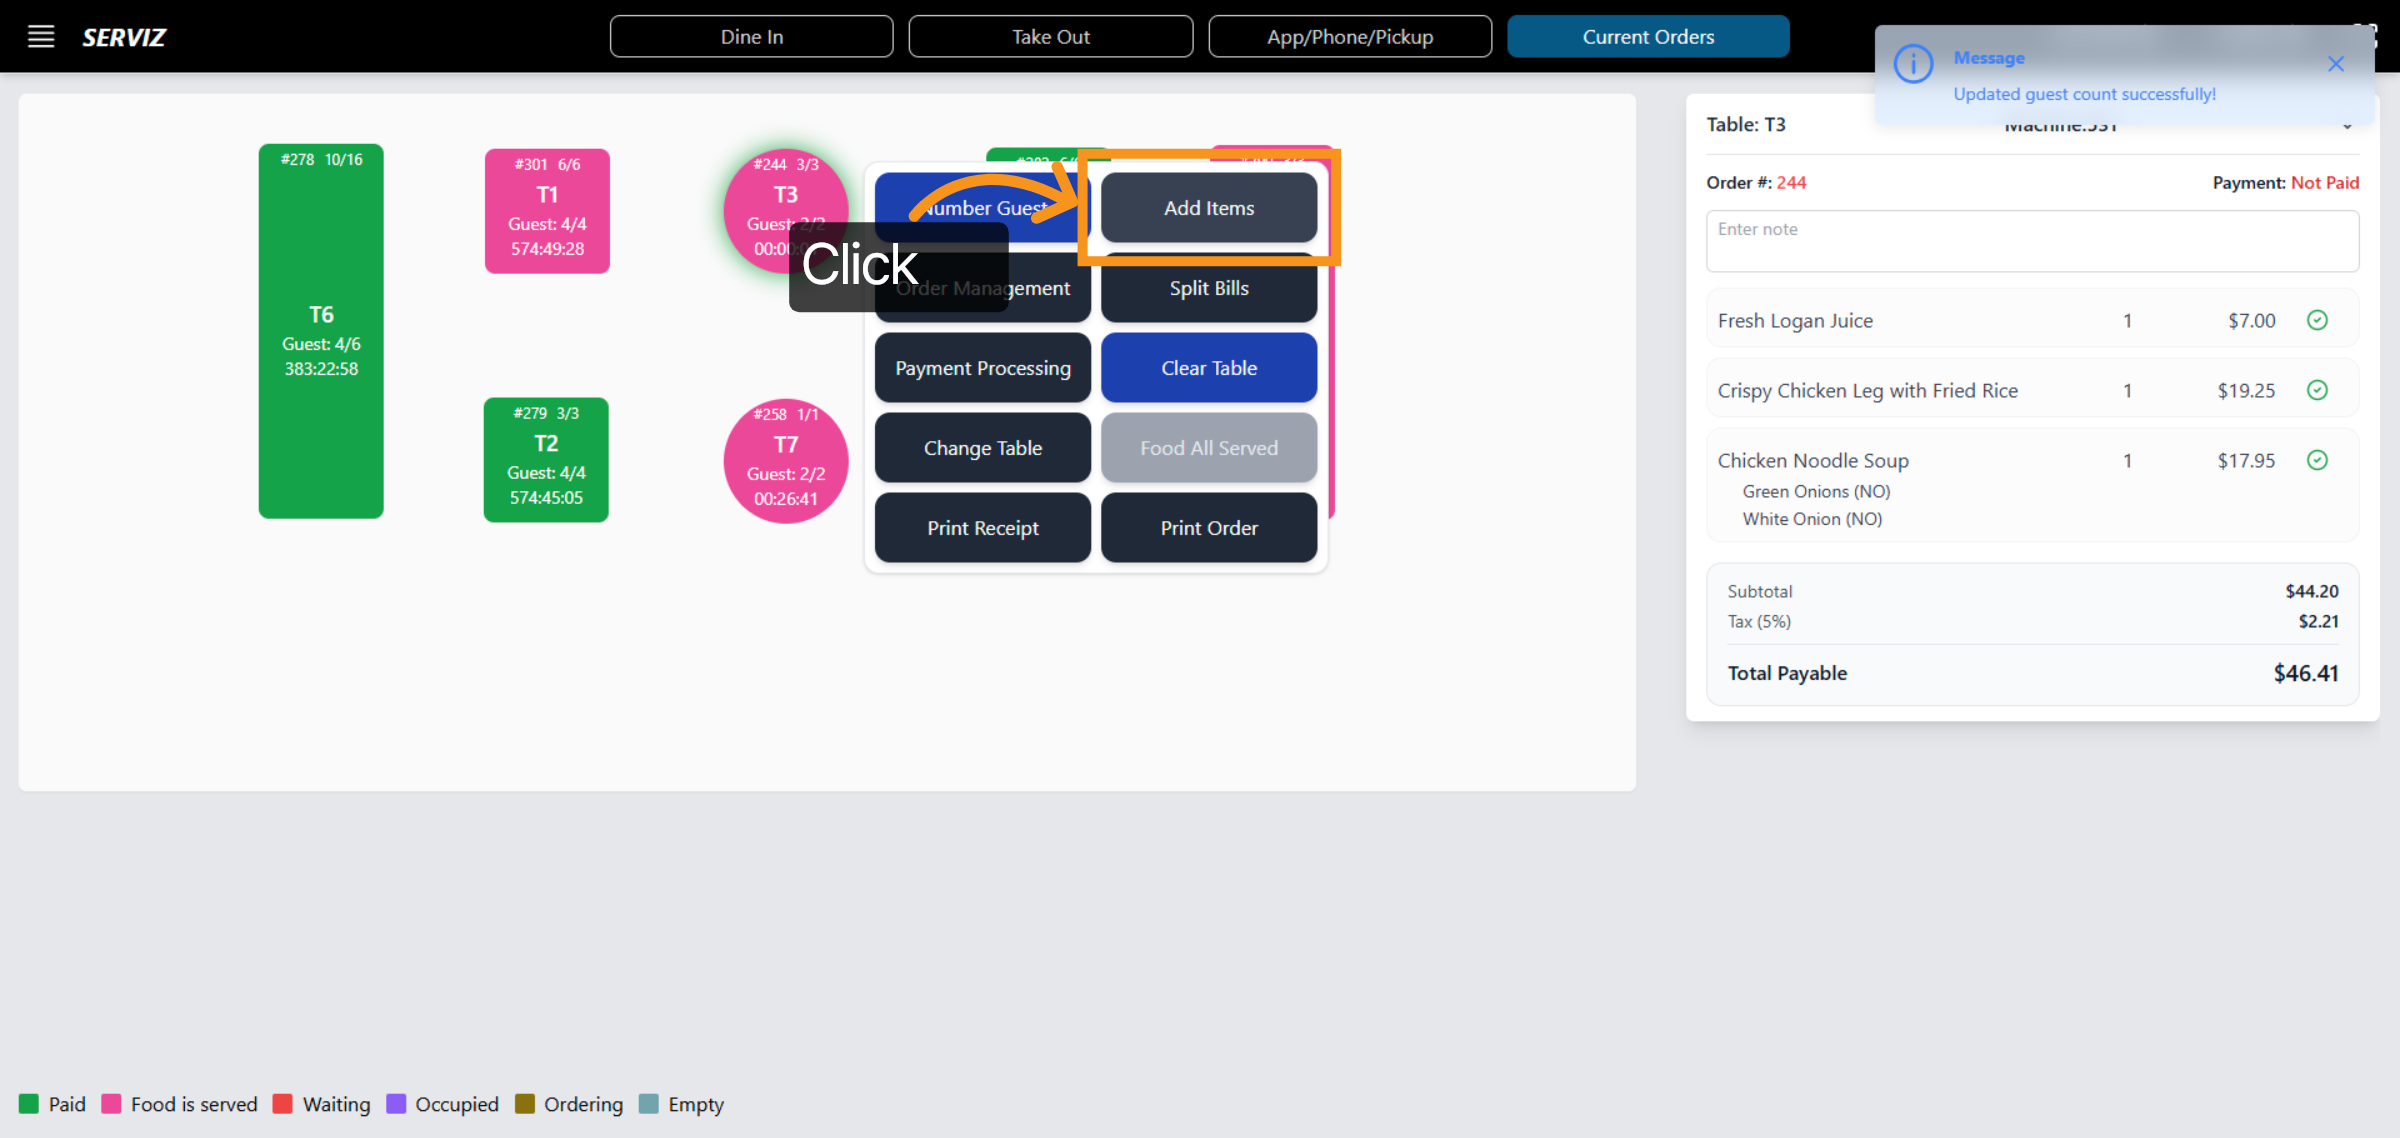
7. Add Items to Order
Control and add additional items
8. The overview Categories in add items
Click here to browse available item categories for selection.
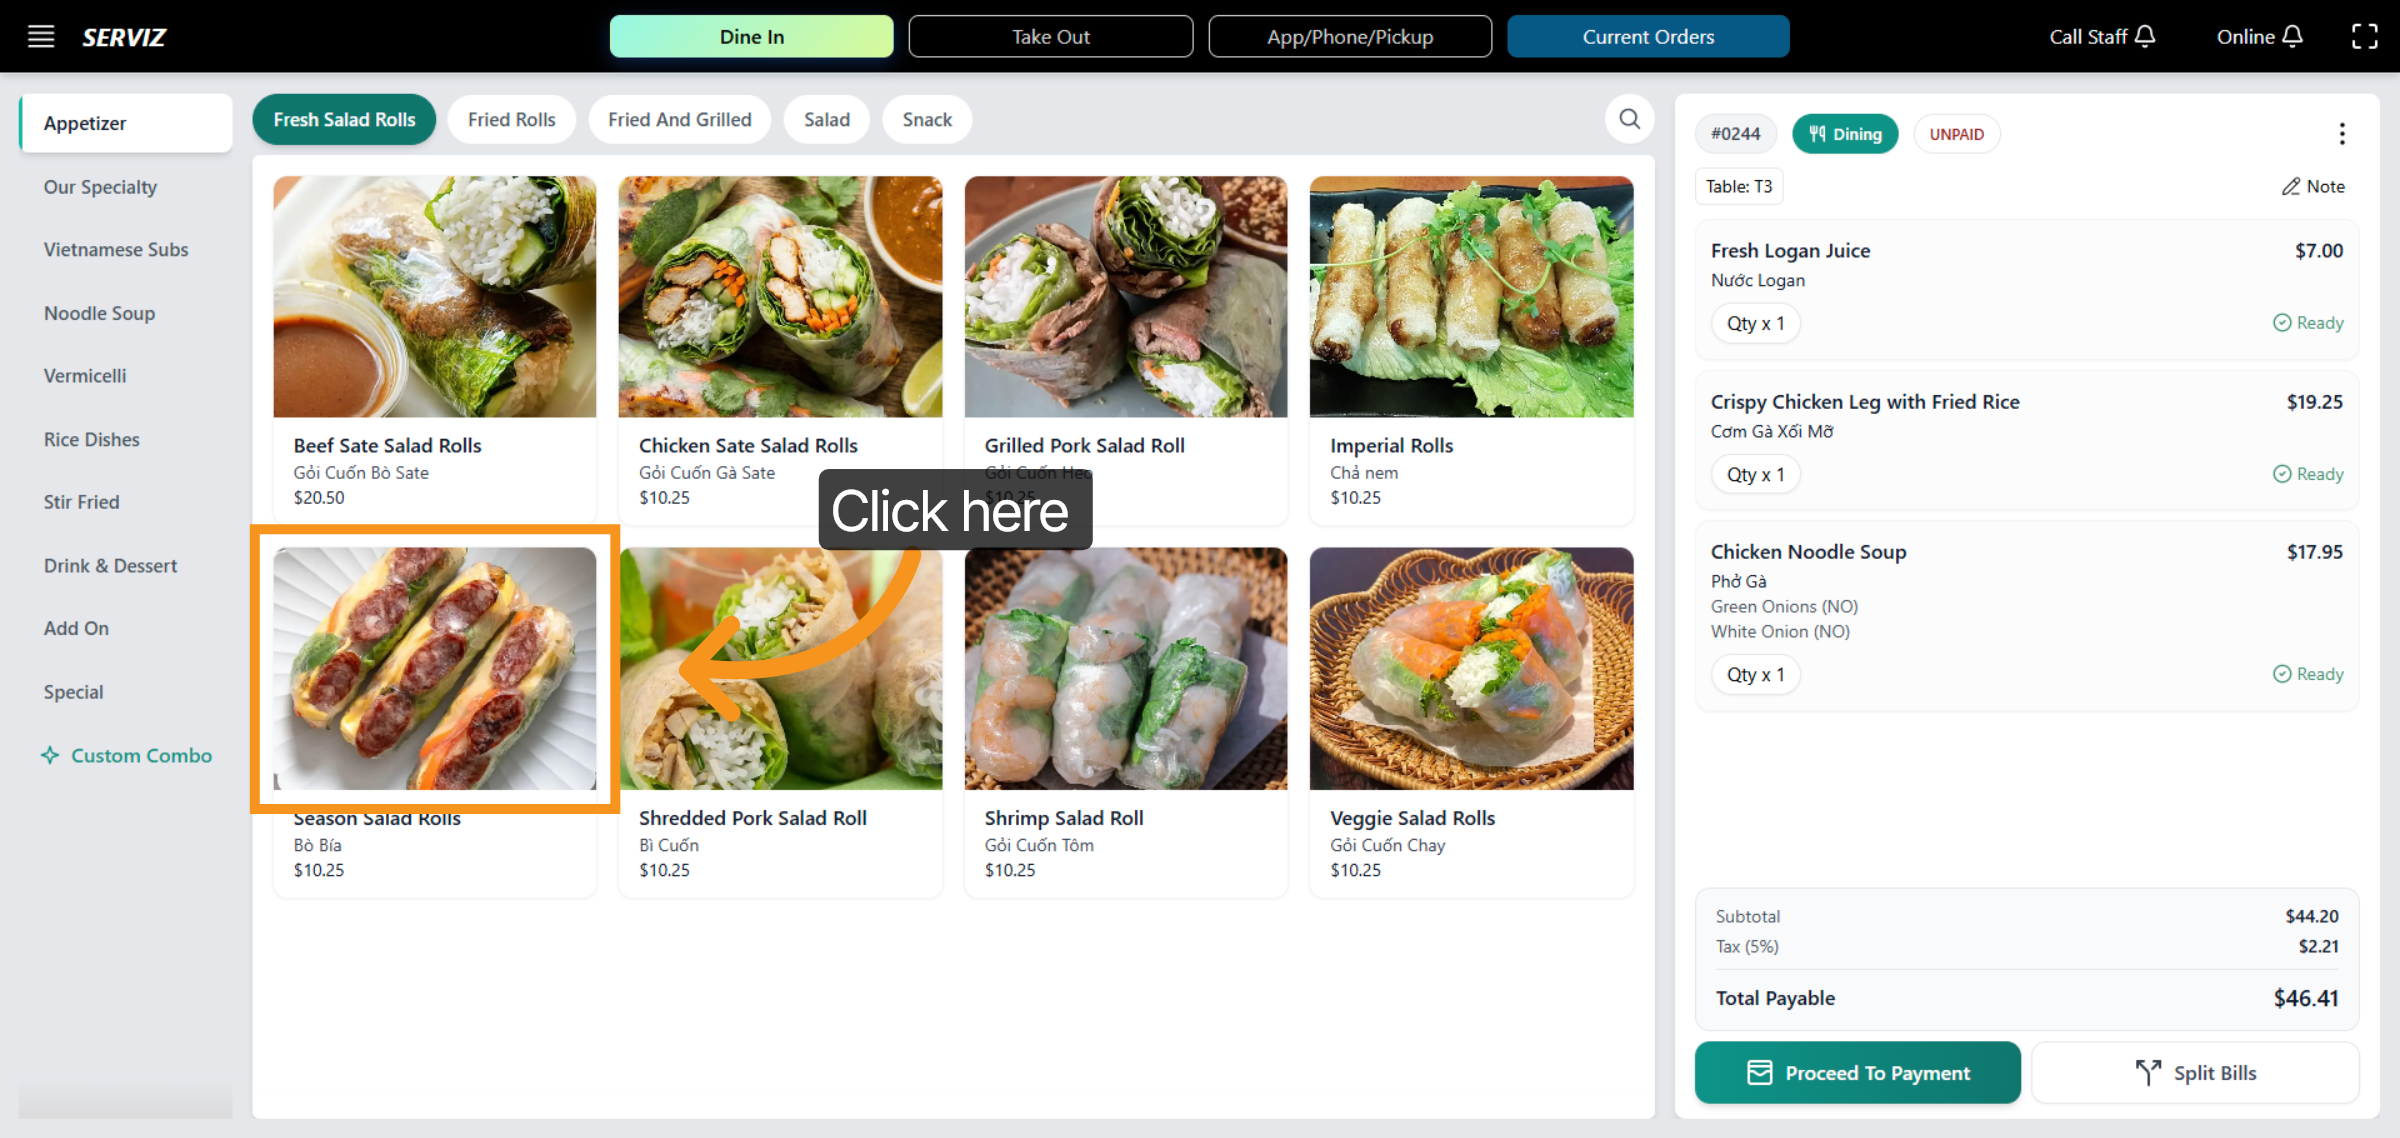
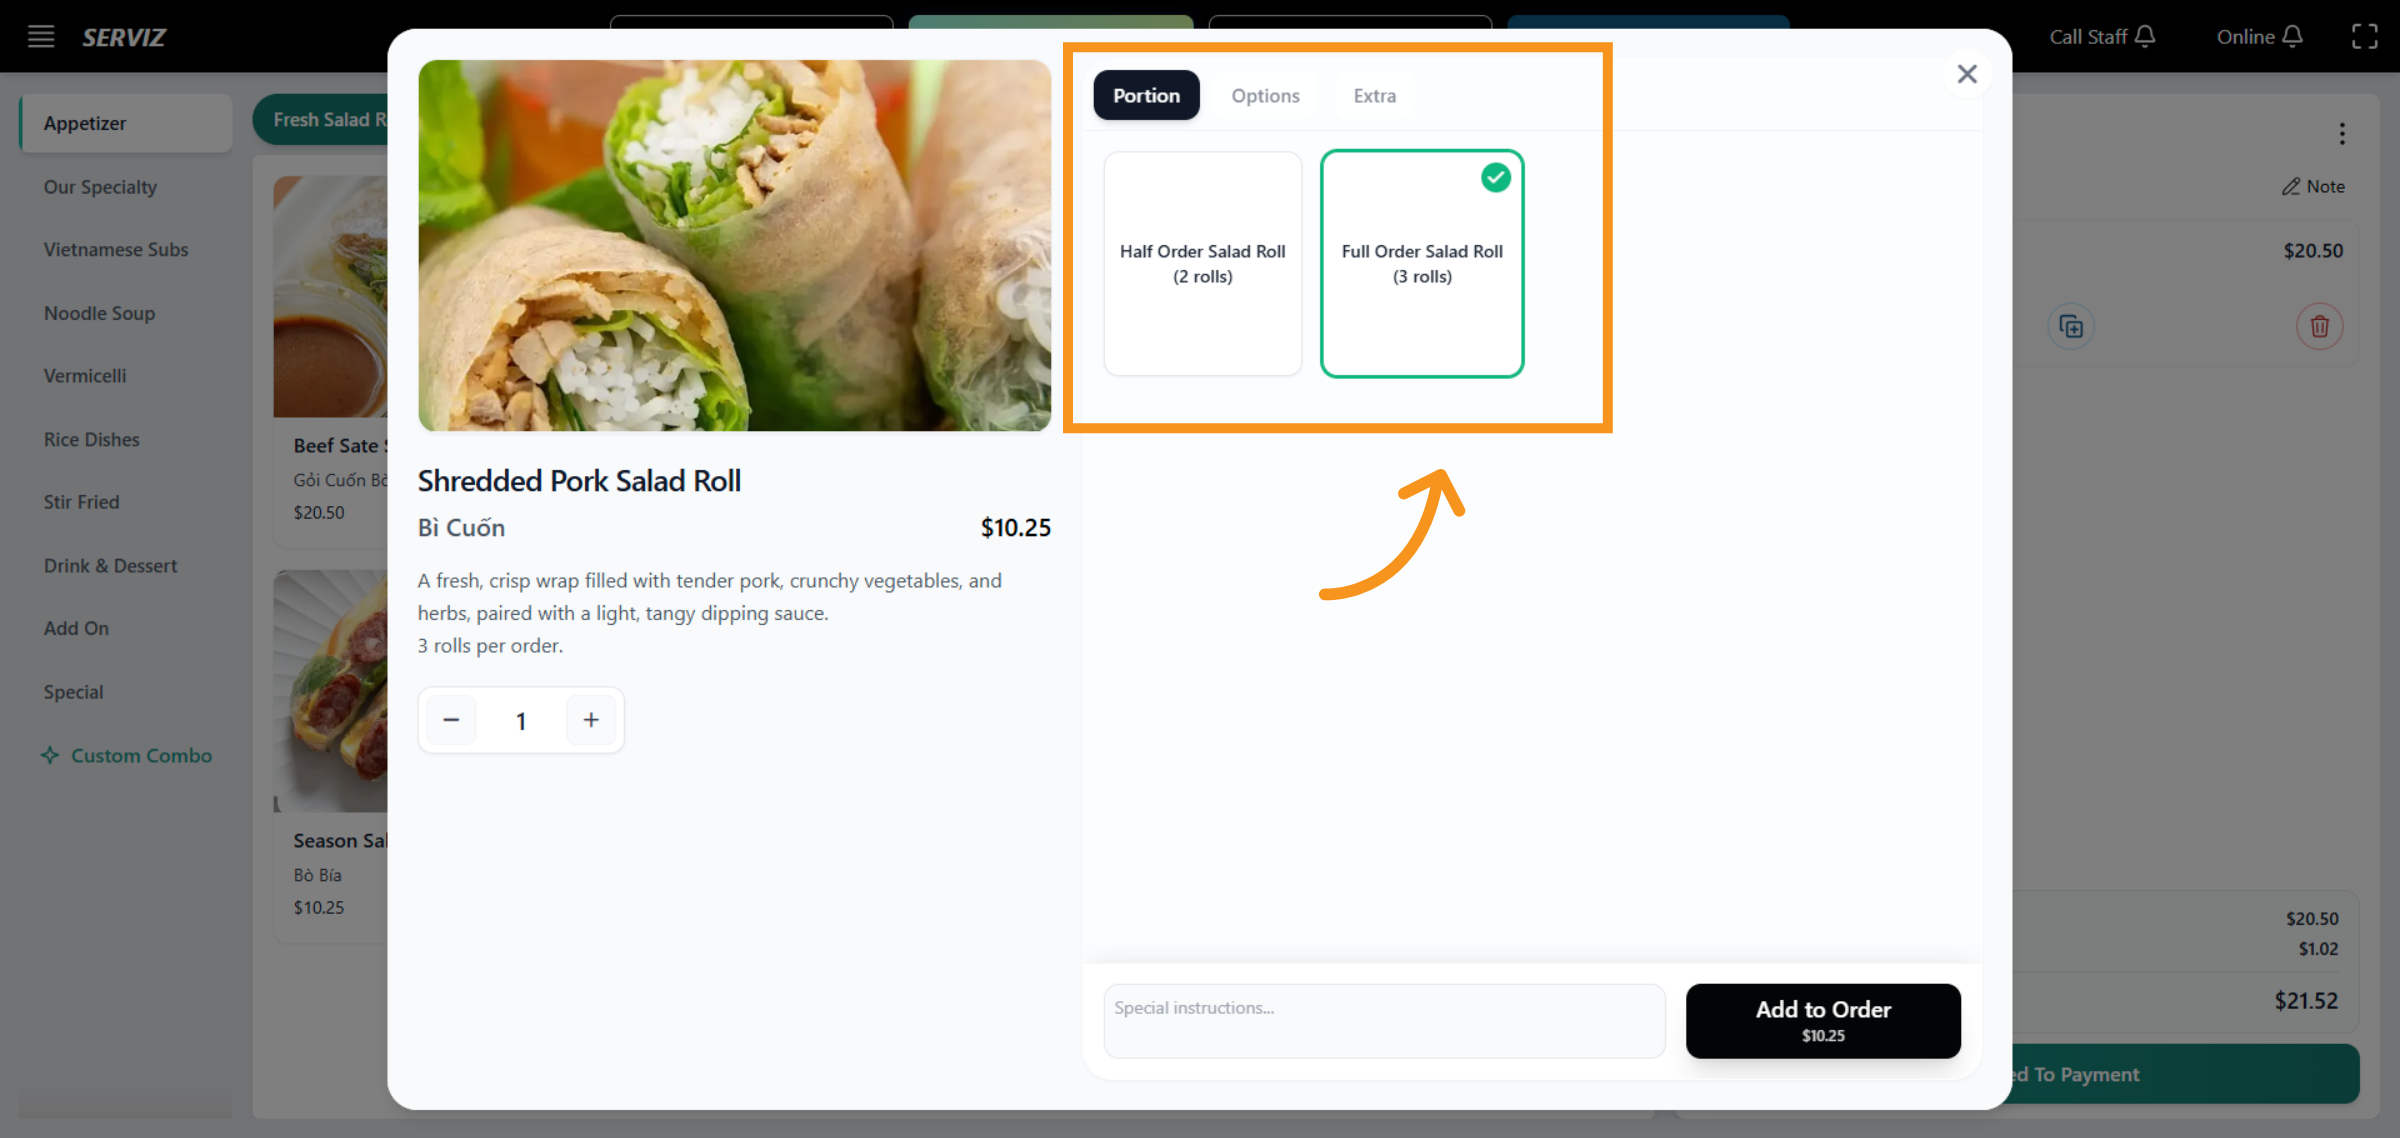
9. Add Selected Items
The optional toppings are included with each item in the customer order.
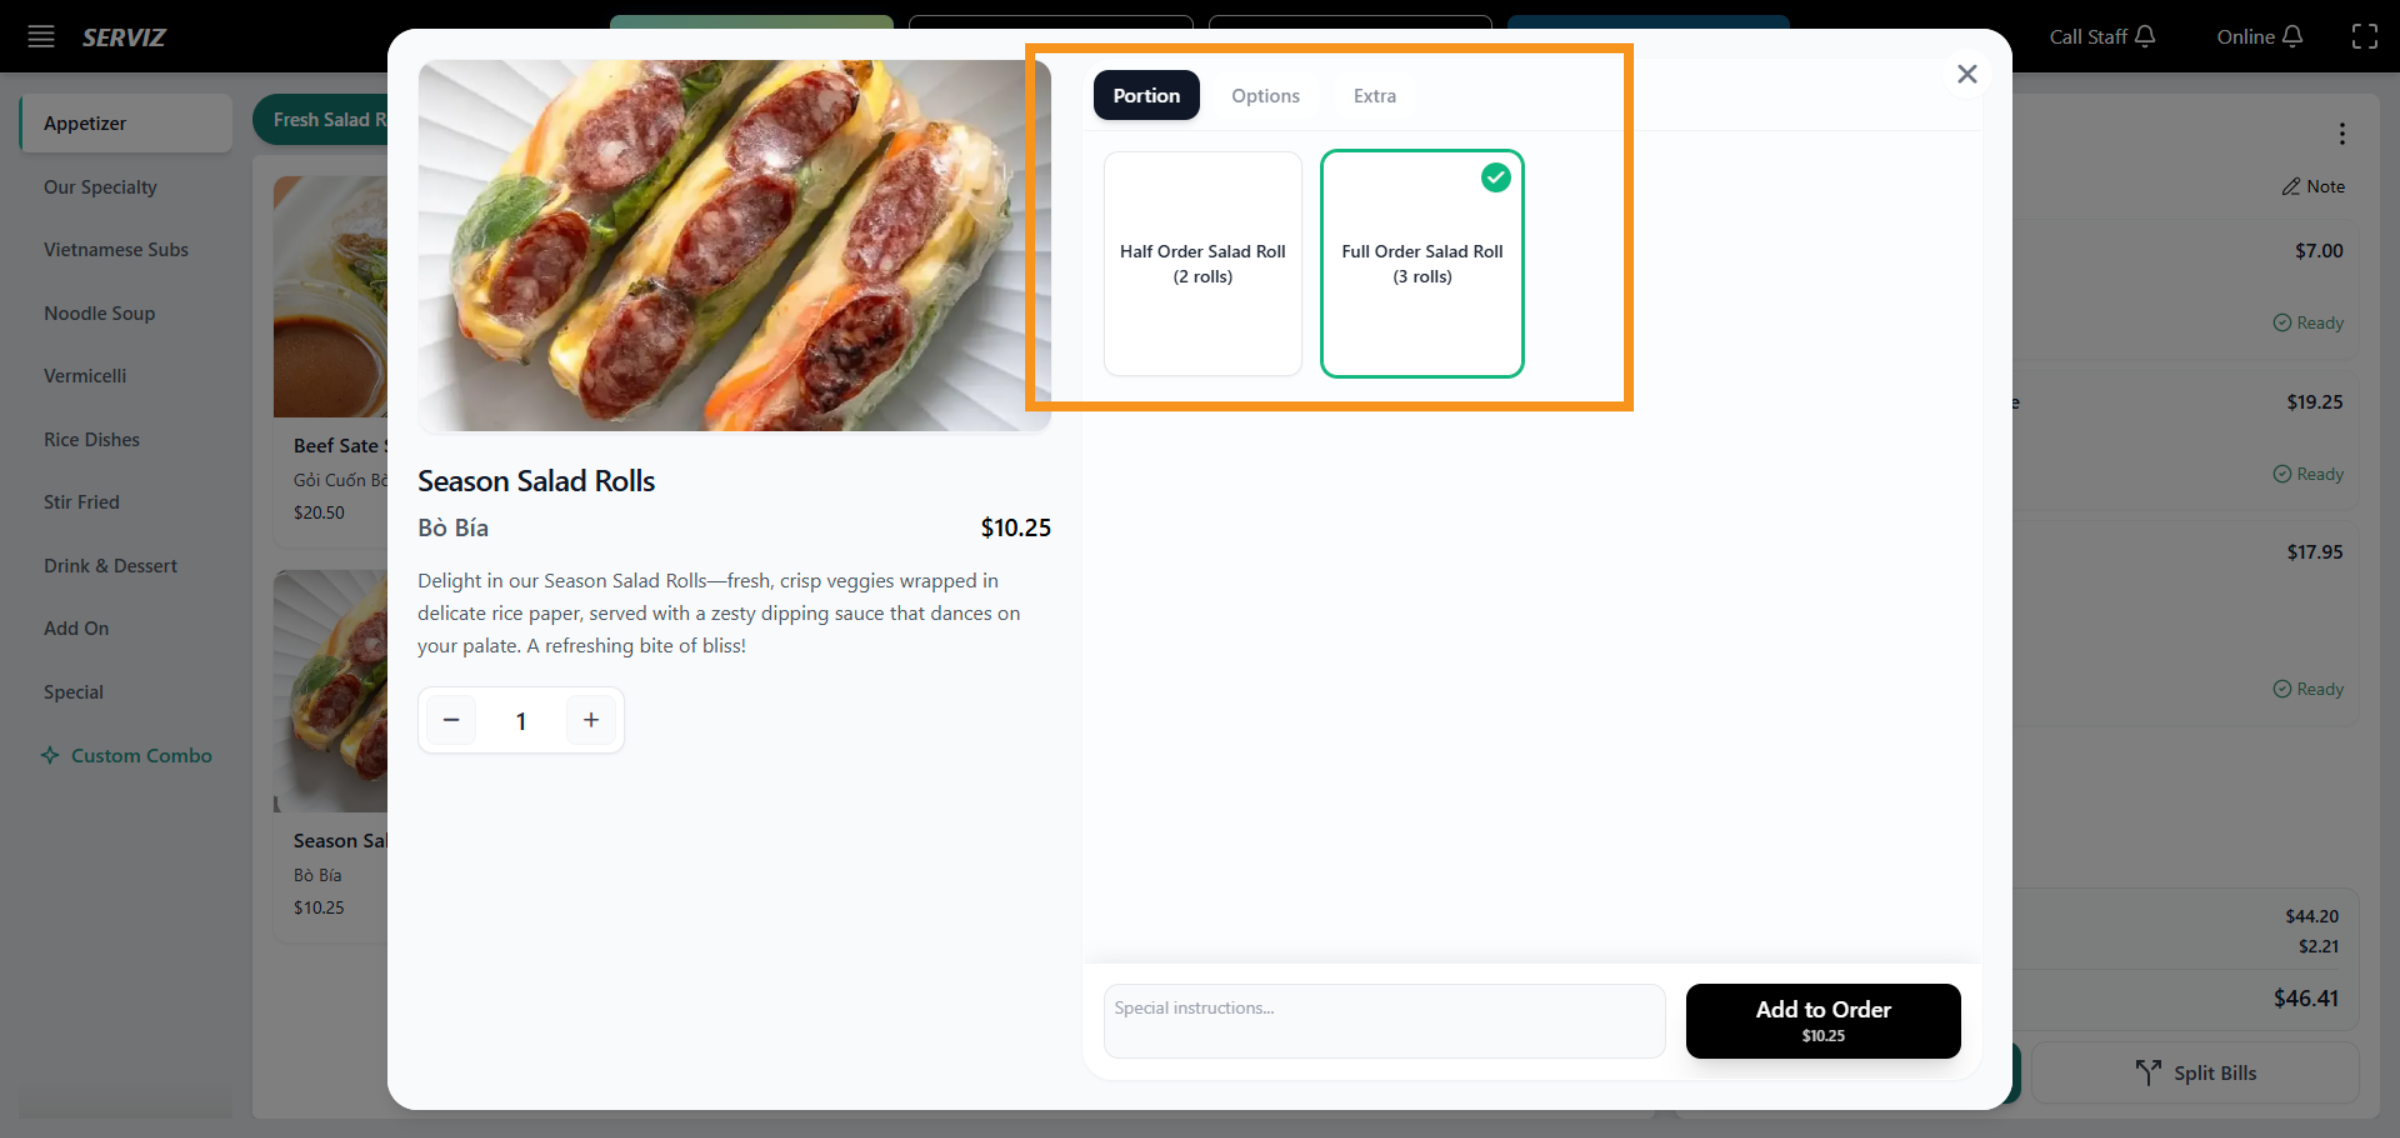
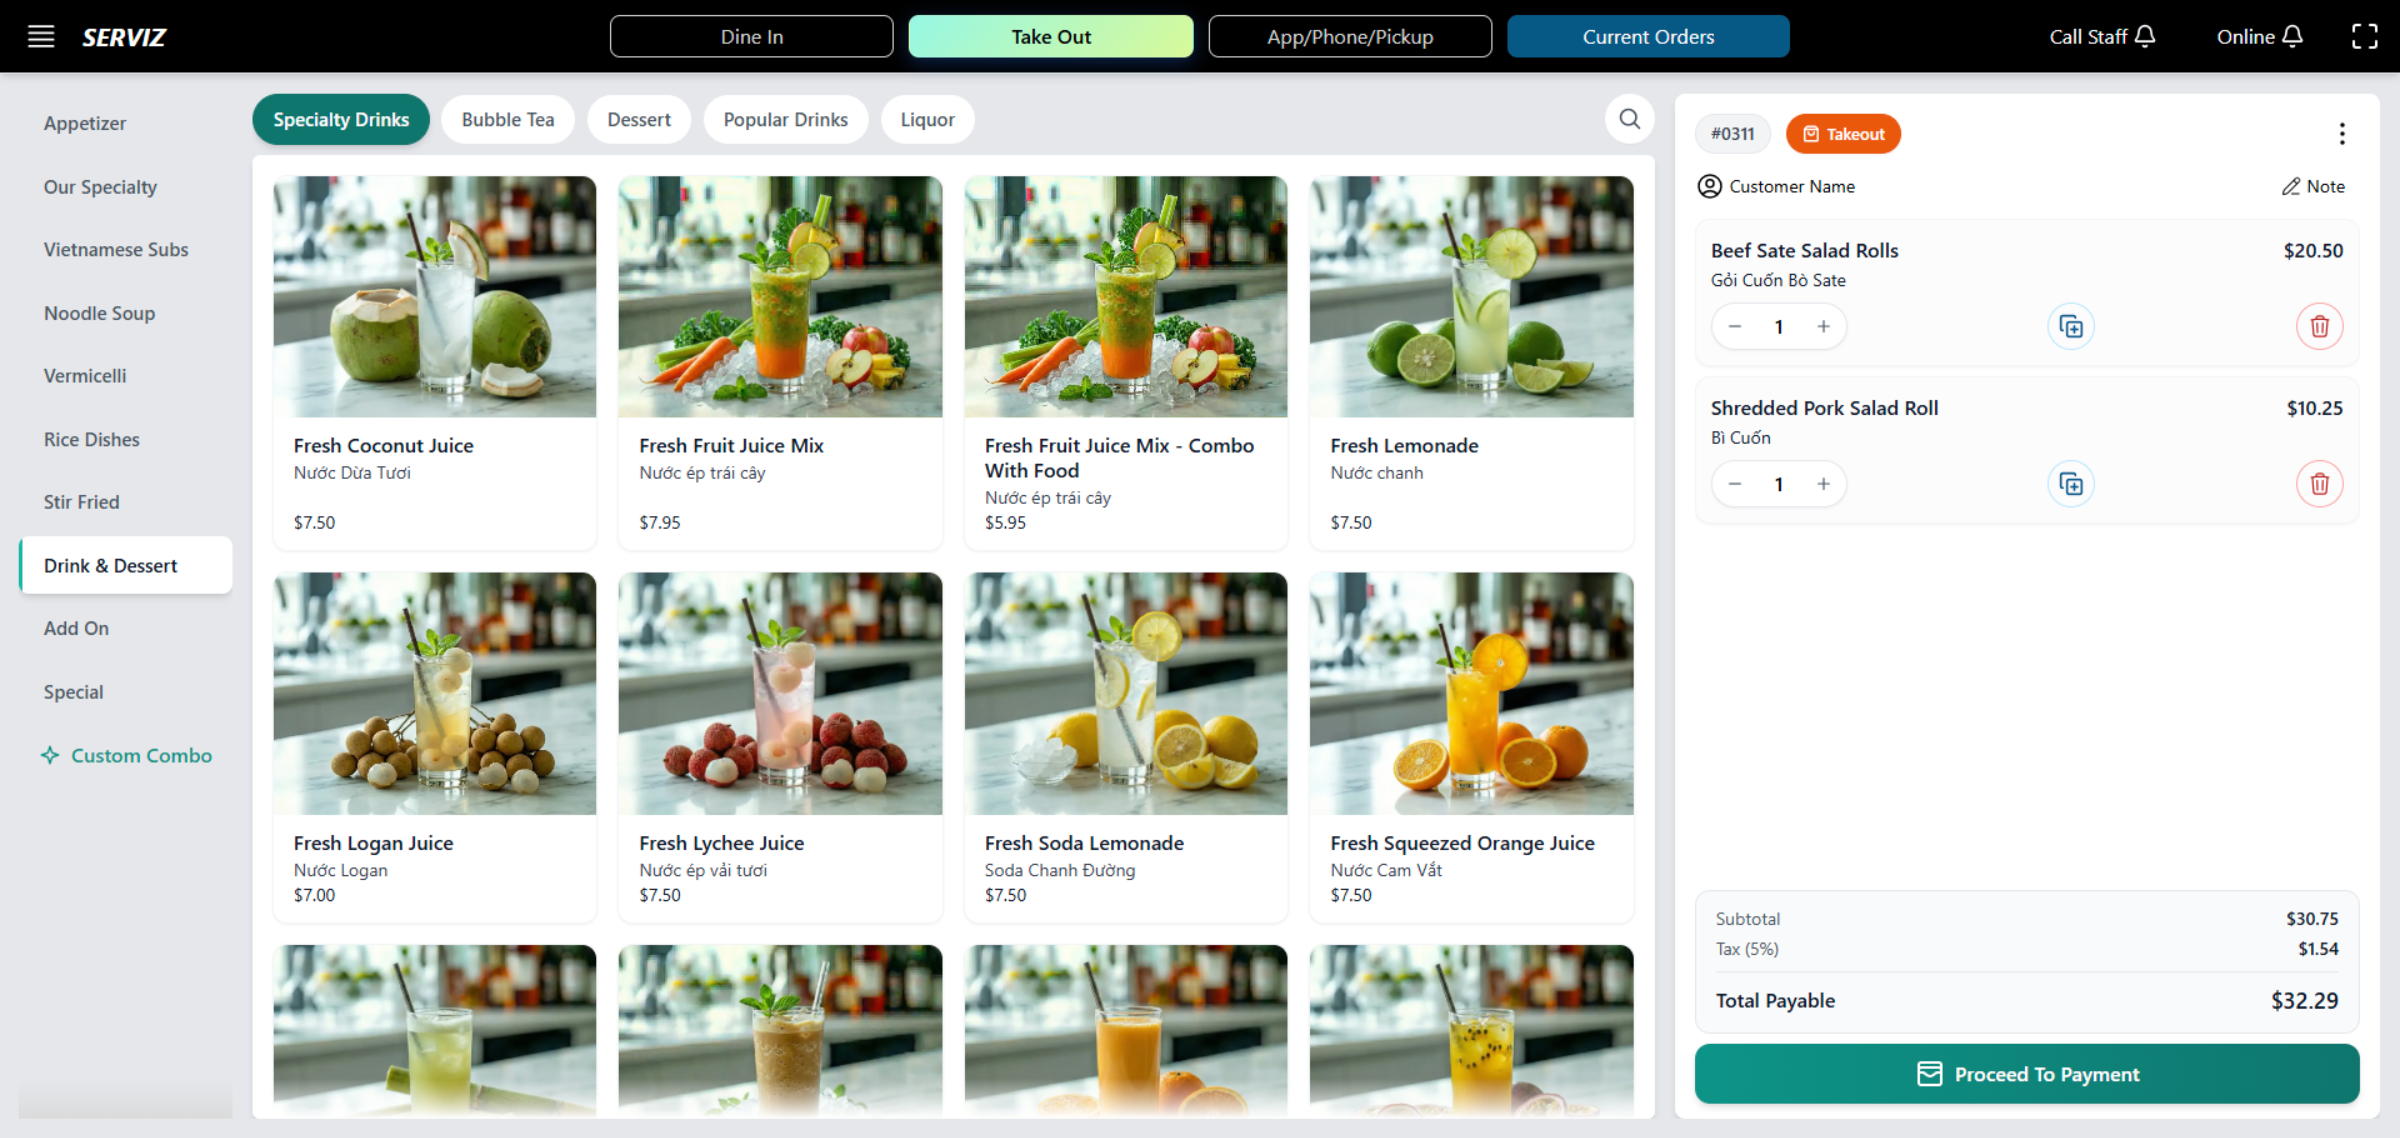
10. Select and review
Select the dishes and review your order beside the menu area.

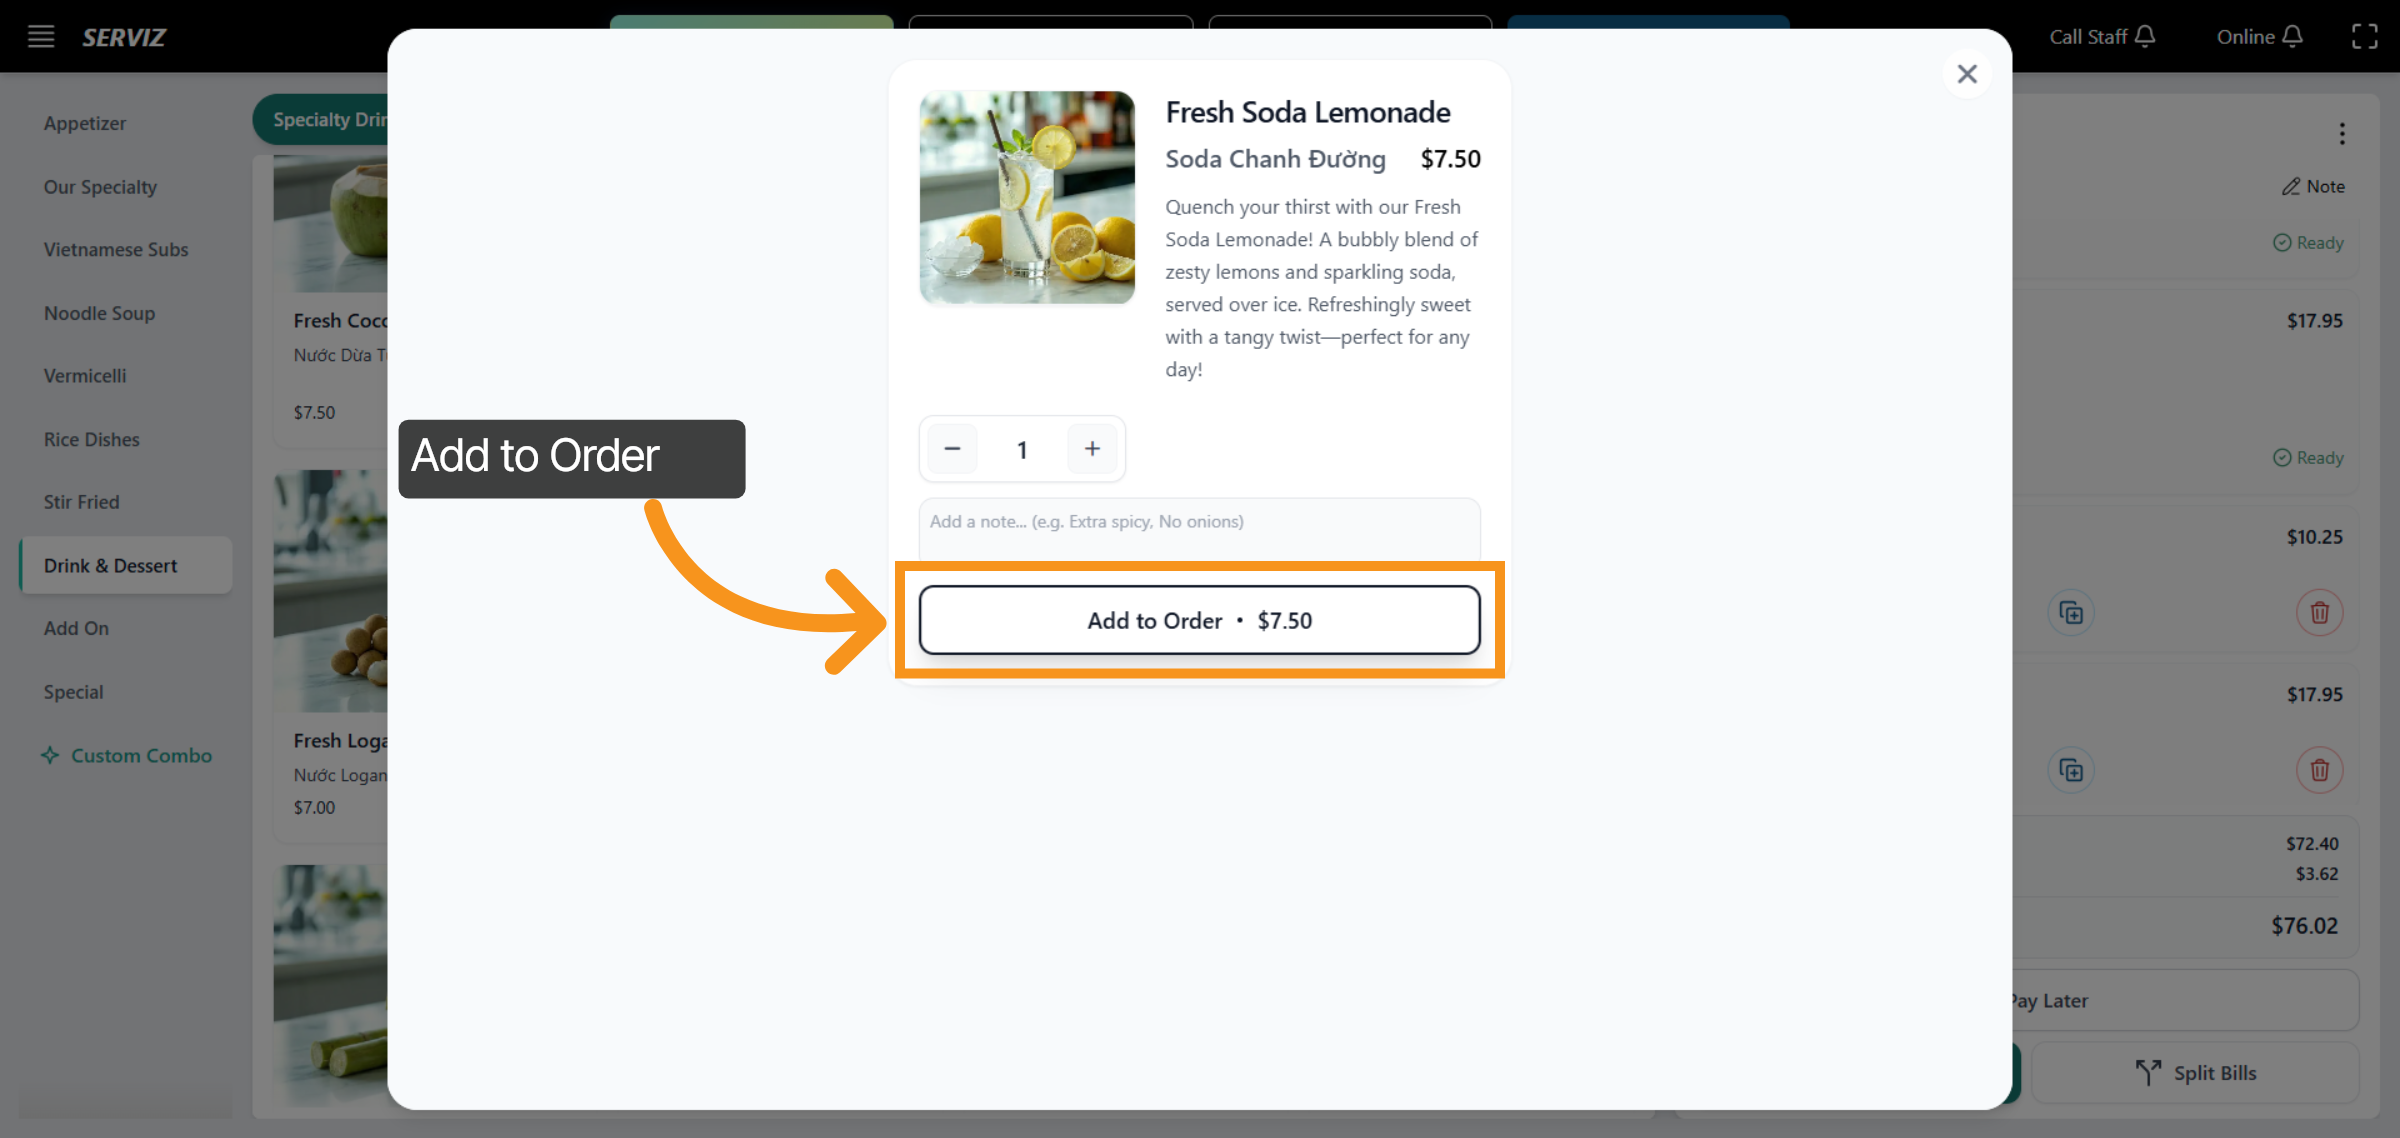
11. Add order
Click "Add to Order" to add the selected drink or dessert to the order.
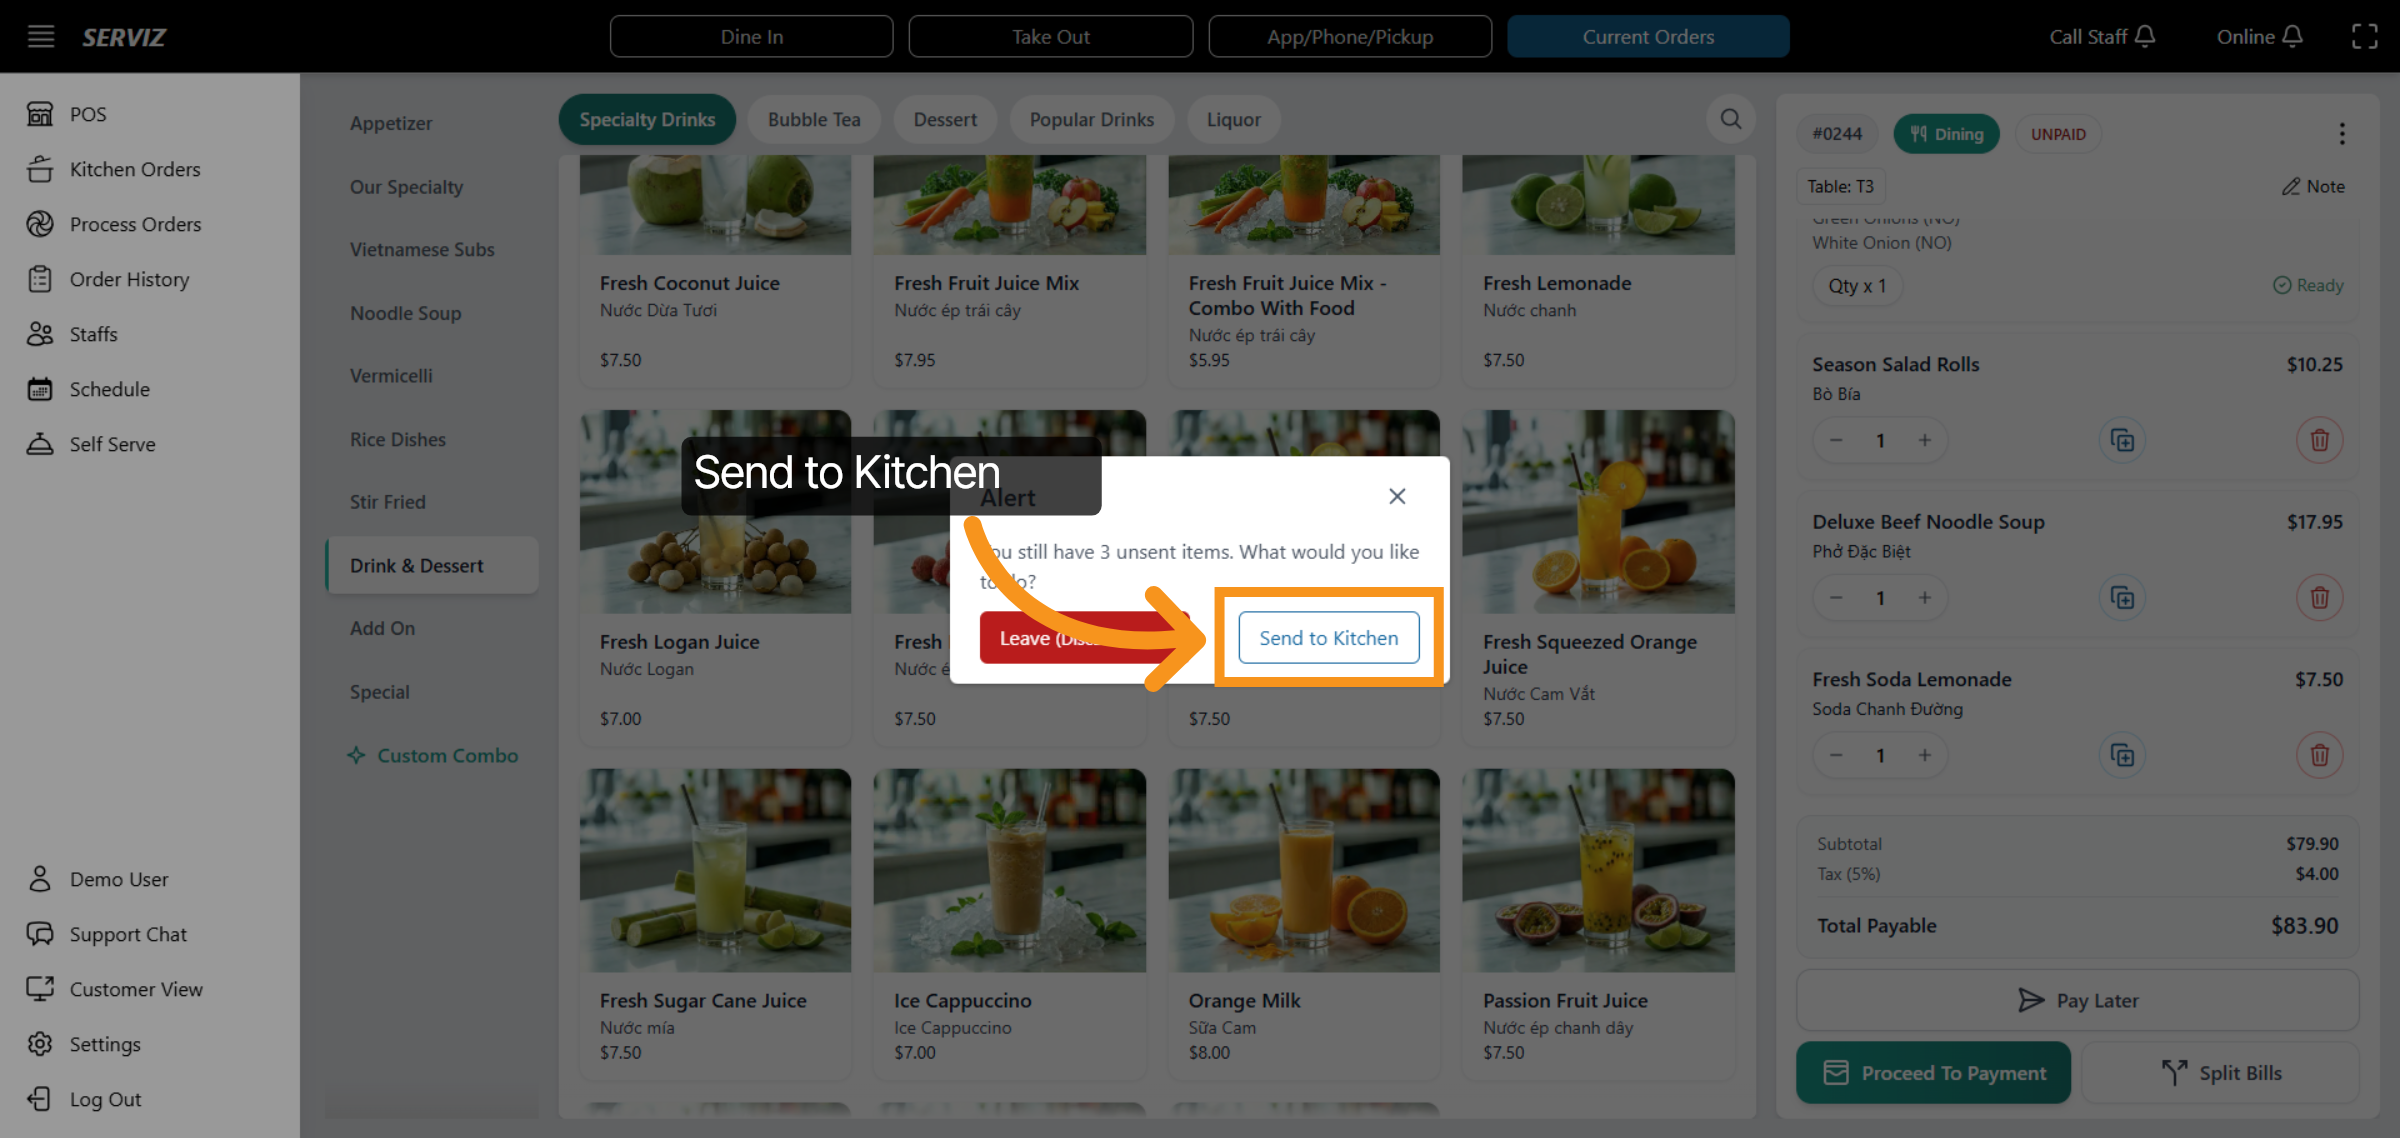
12. Send Order to Kitchen
Click "Send to Kitchen" to forward the current order to the kitchen for preparation.
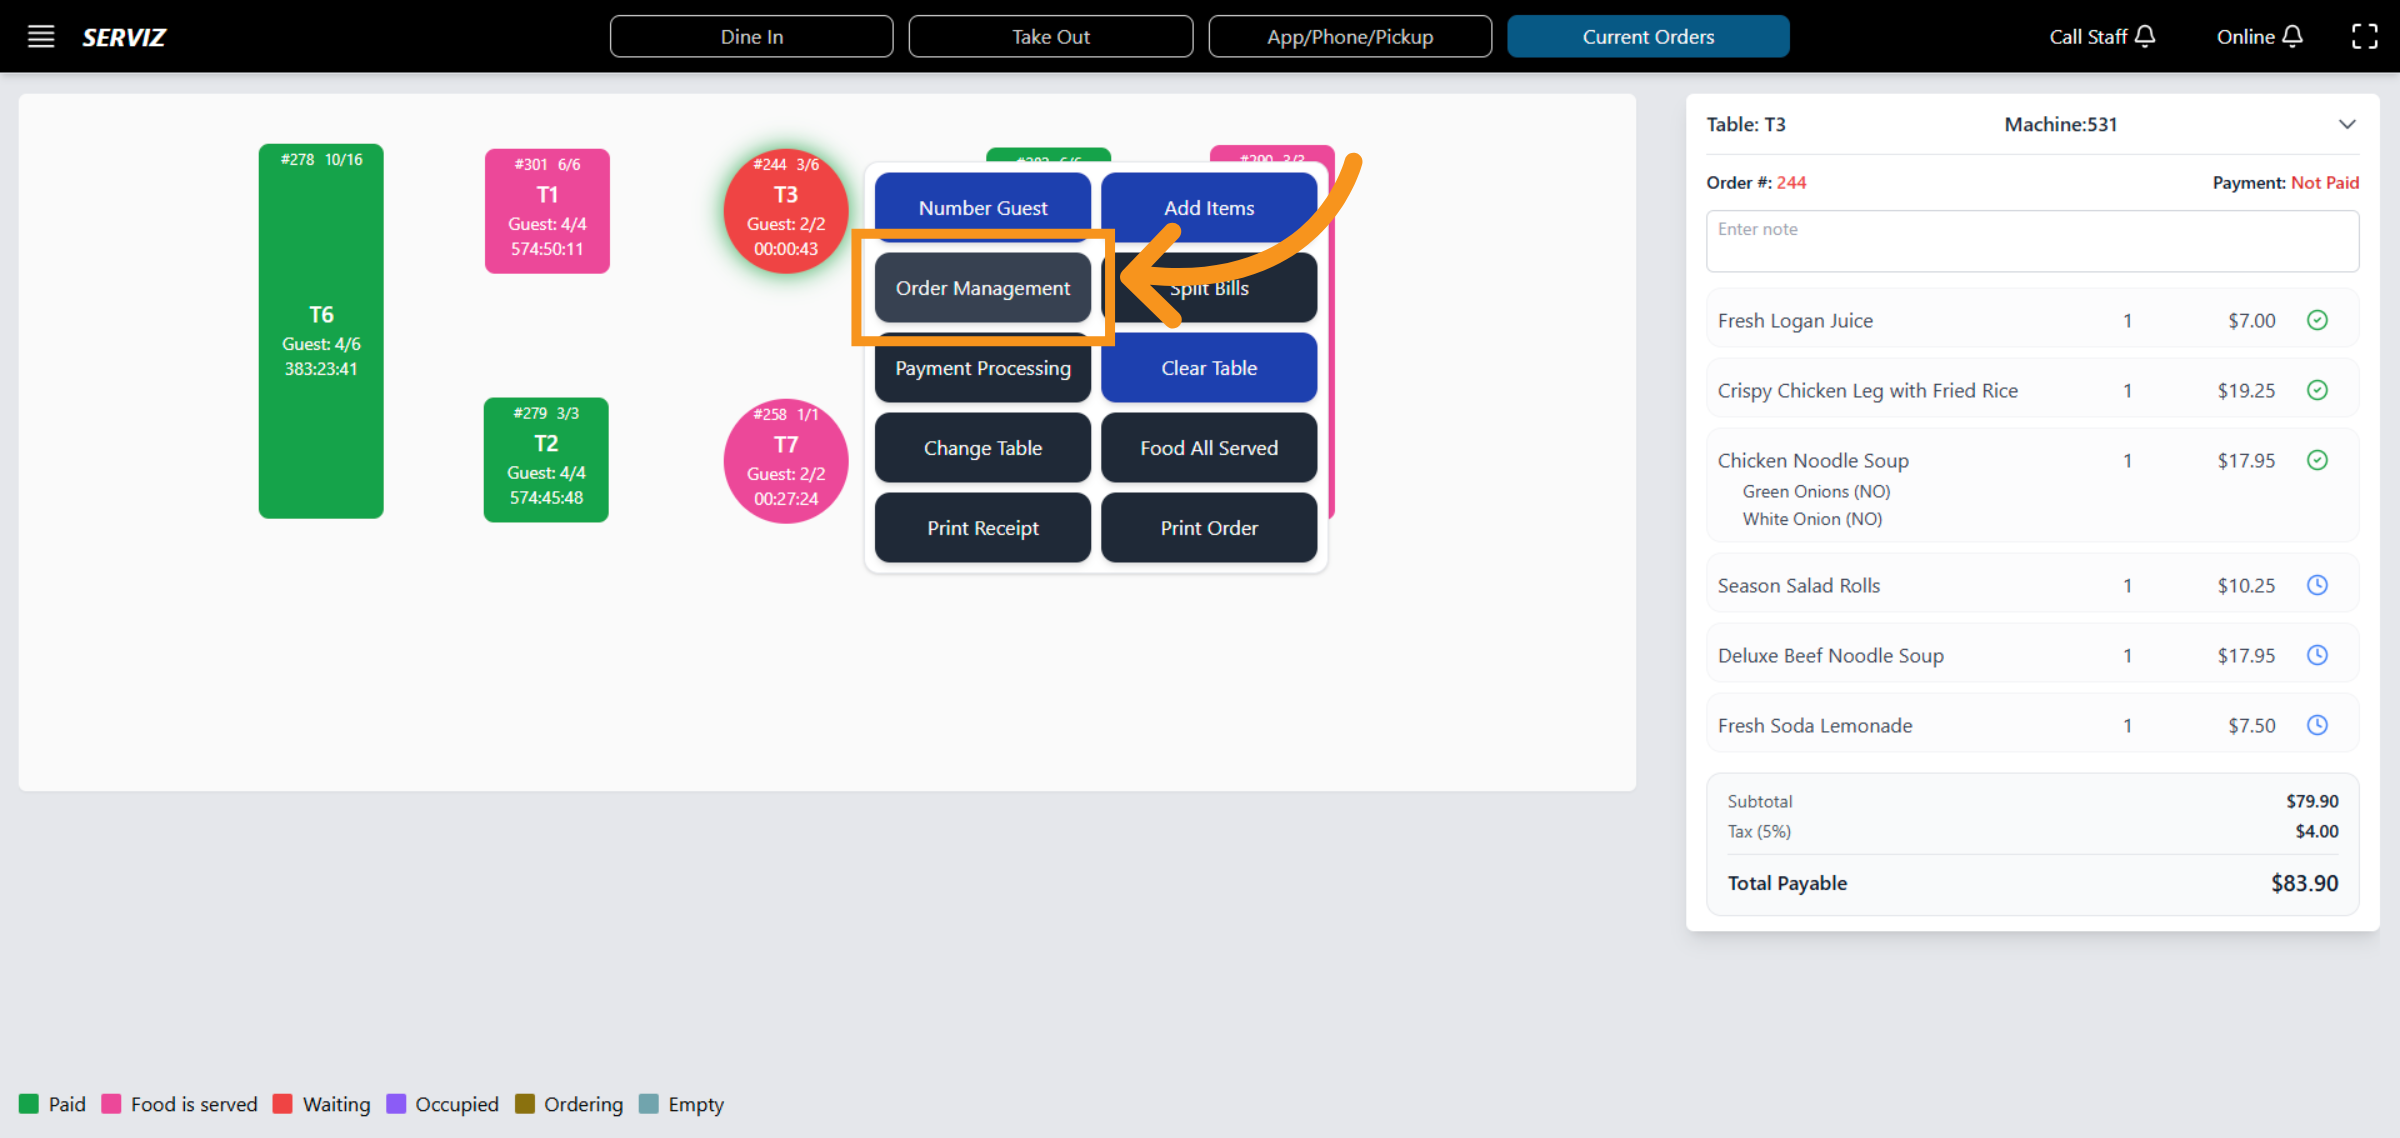
13. Order Management
Click "Order Management" to access the order management dashboard.
14. Order Management
This section you have to fill in the name of the user who is responsible for the order.

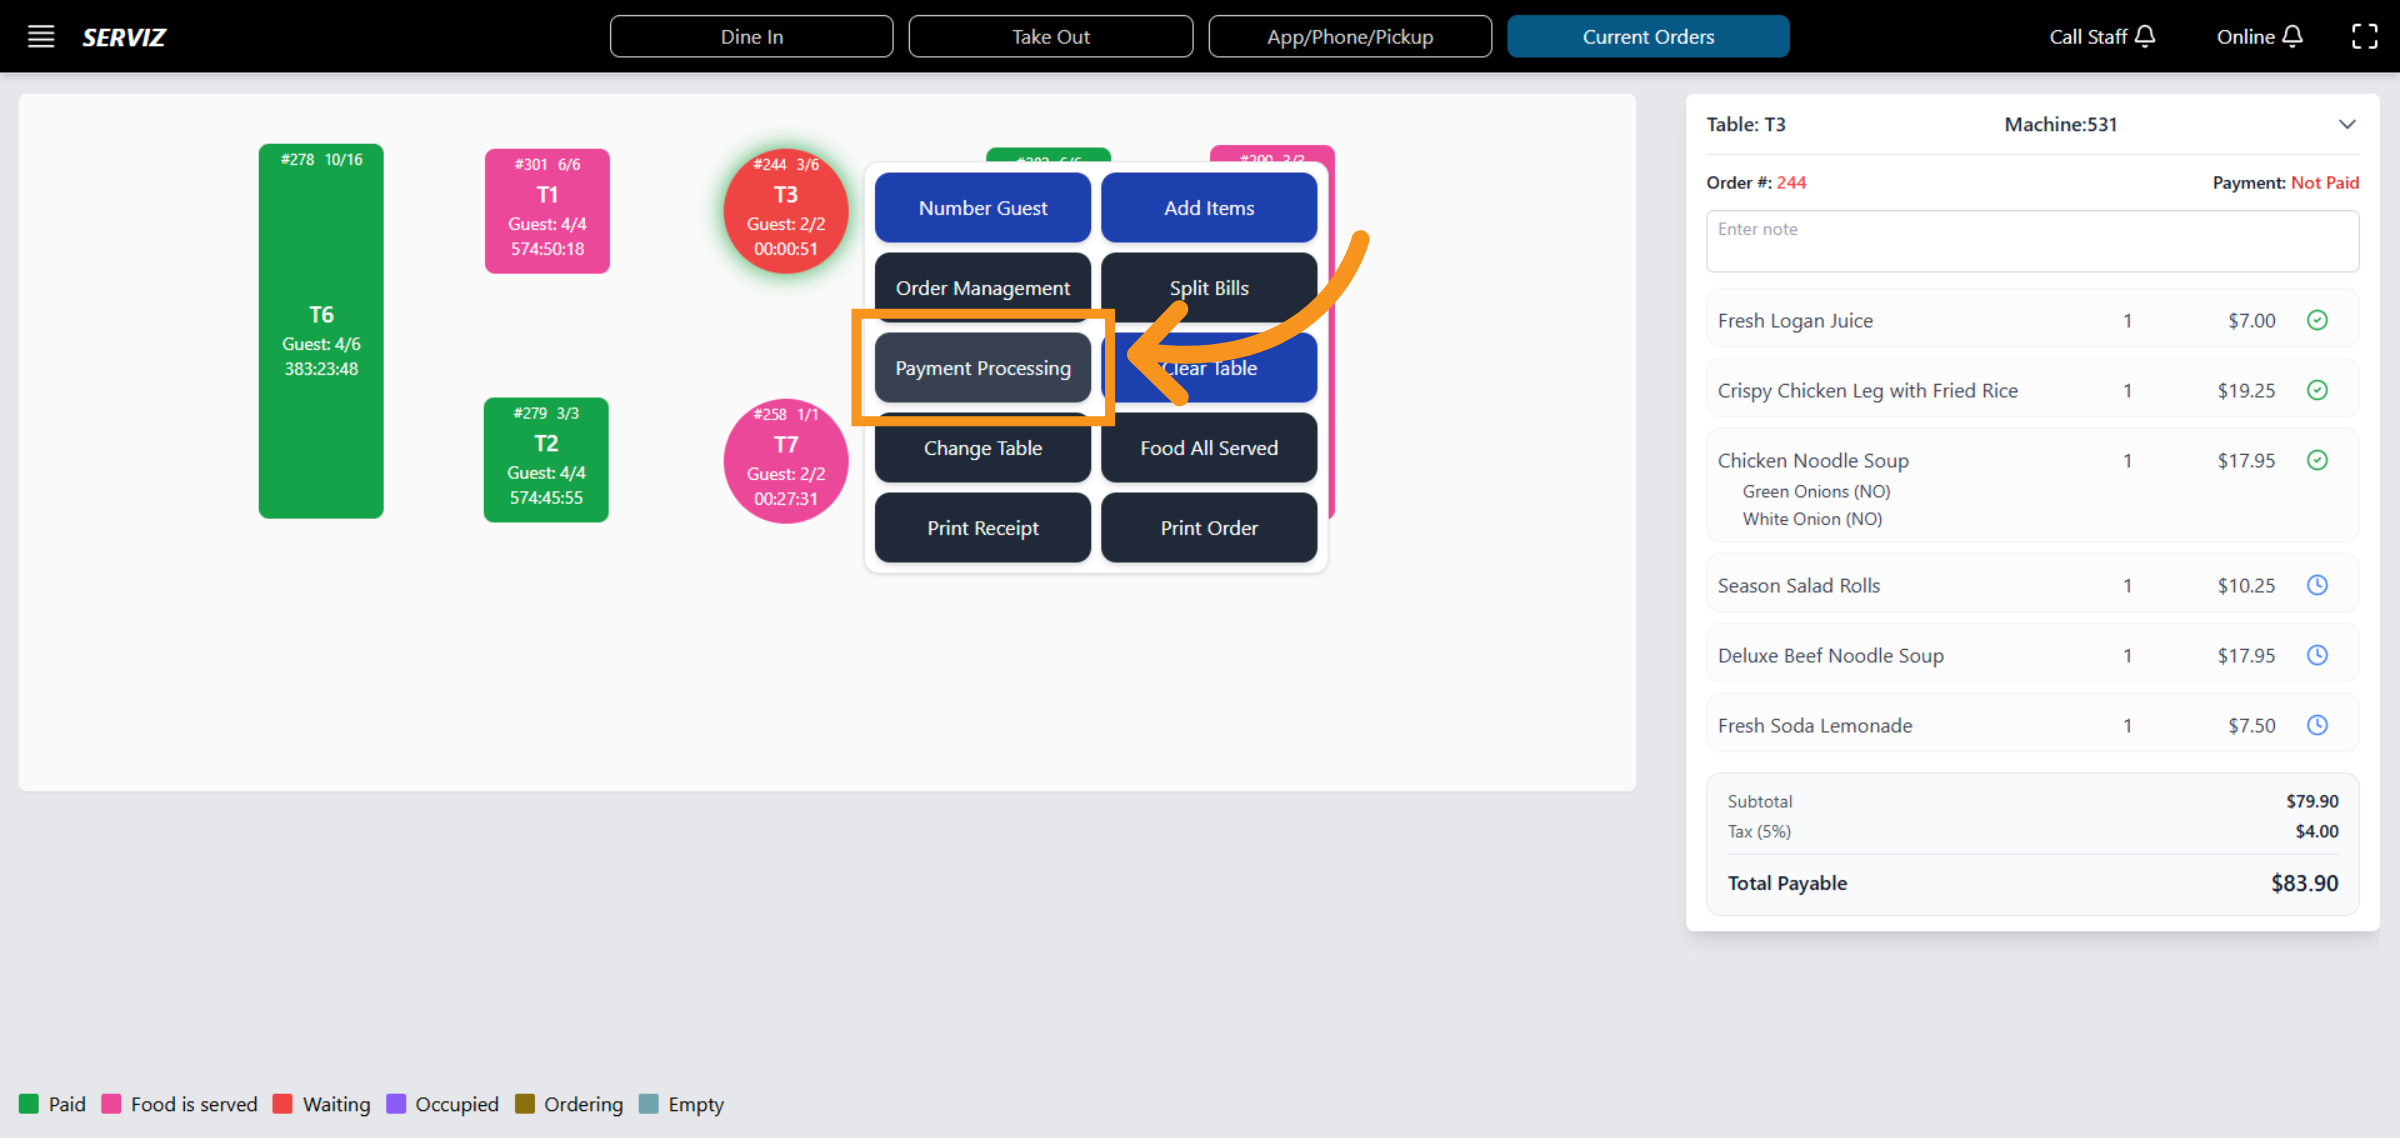
15. Open Payment Processing
Click "Payment Processing". to begin processing payments for orders.
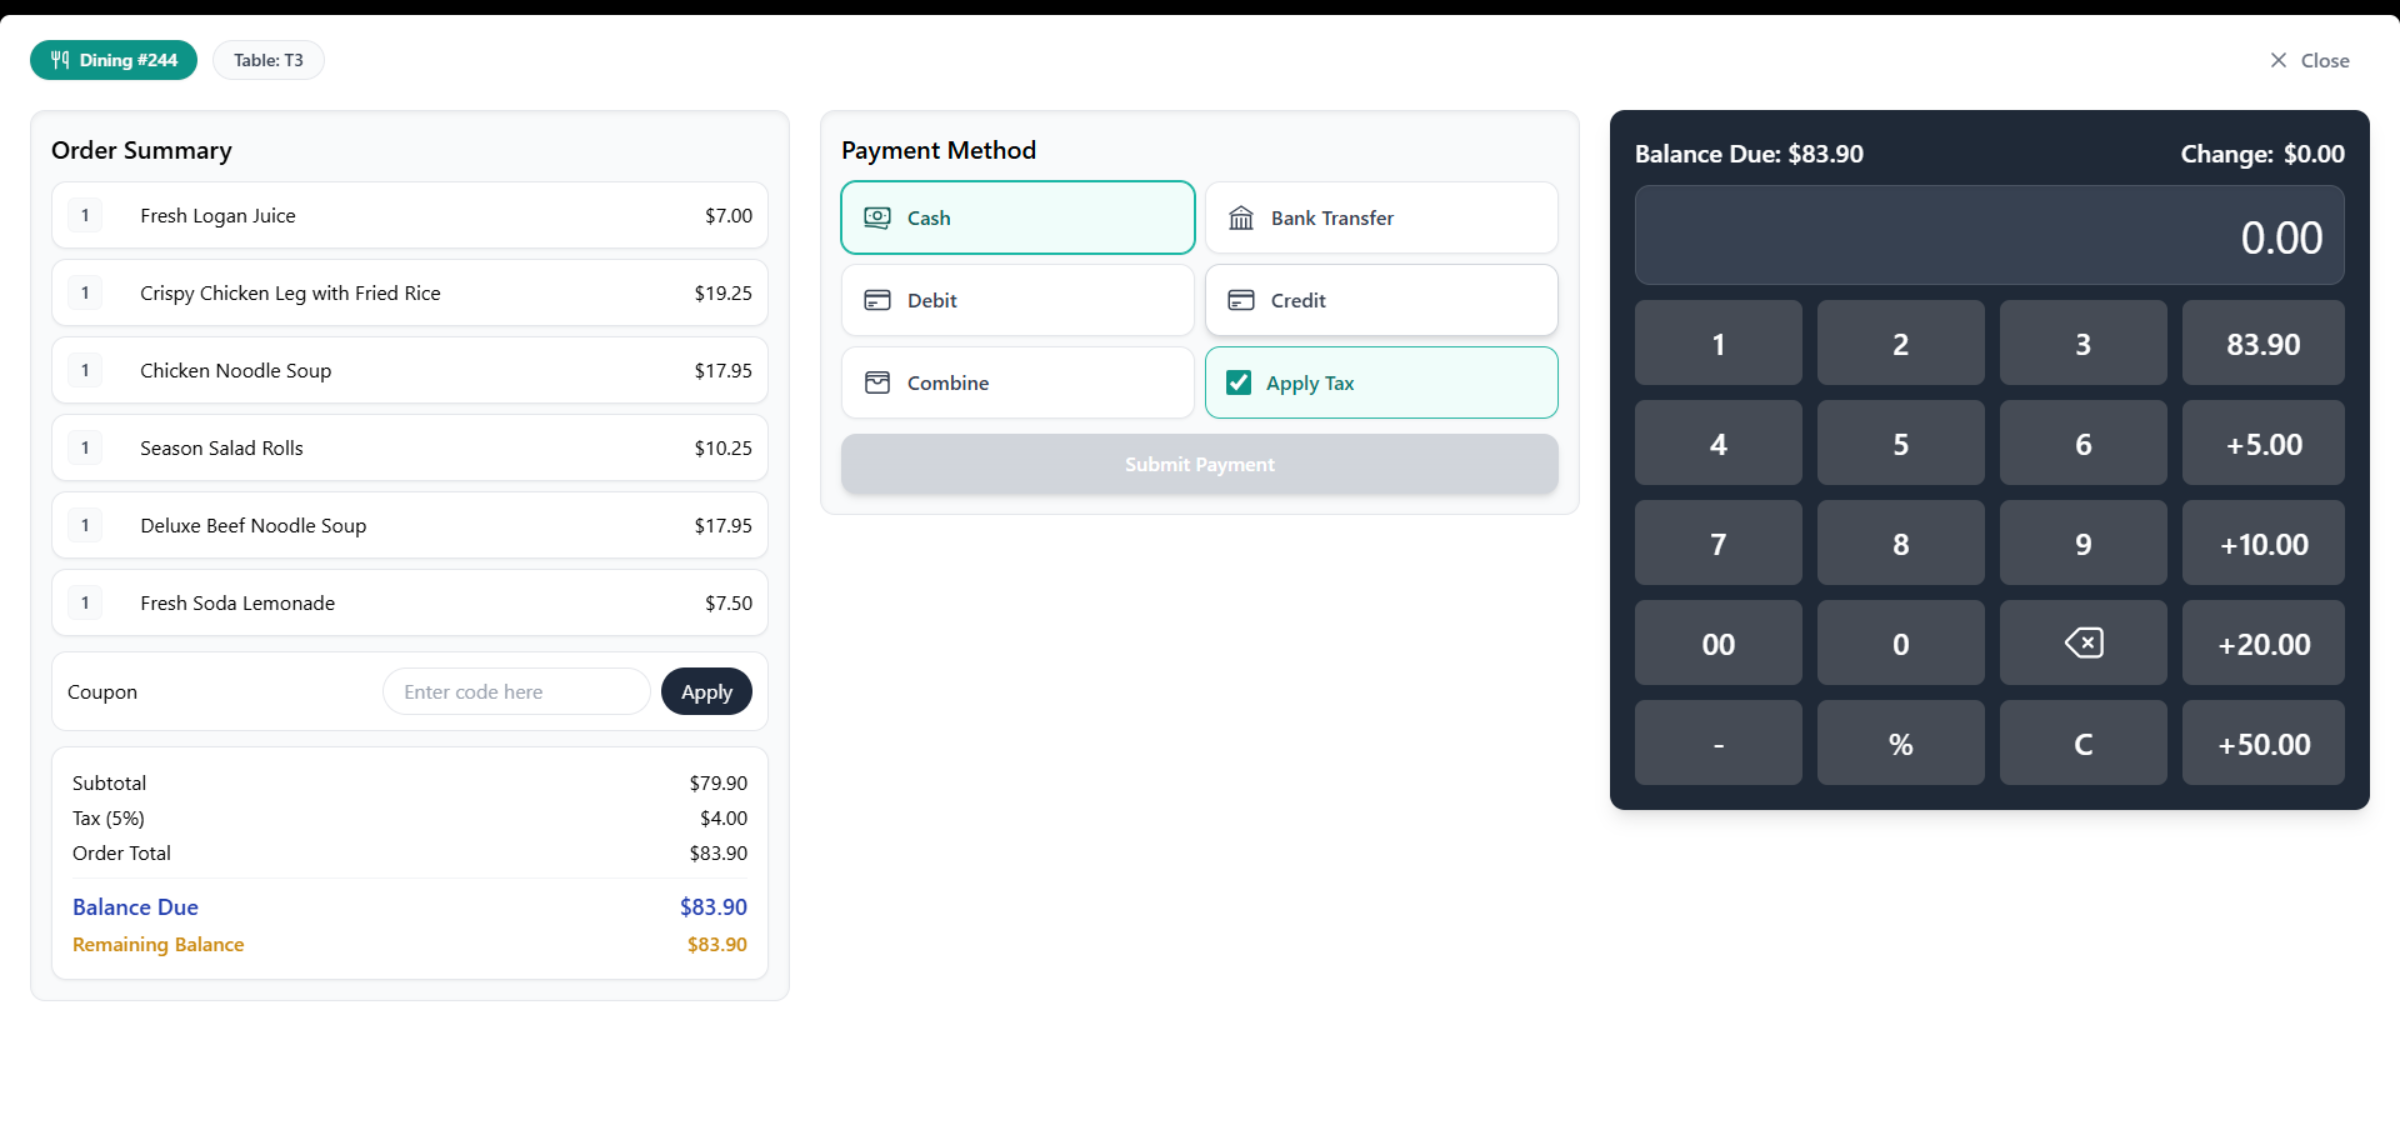
16. Payment method
The payment processing overview includes the Order Summary and Payment Method. Payment processing enables us to manage payment options and transactions for orders.
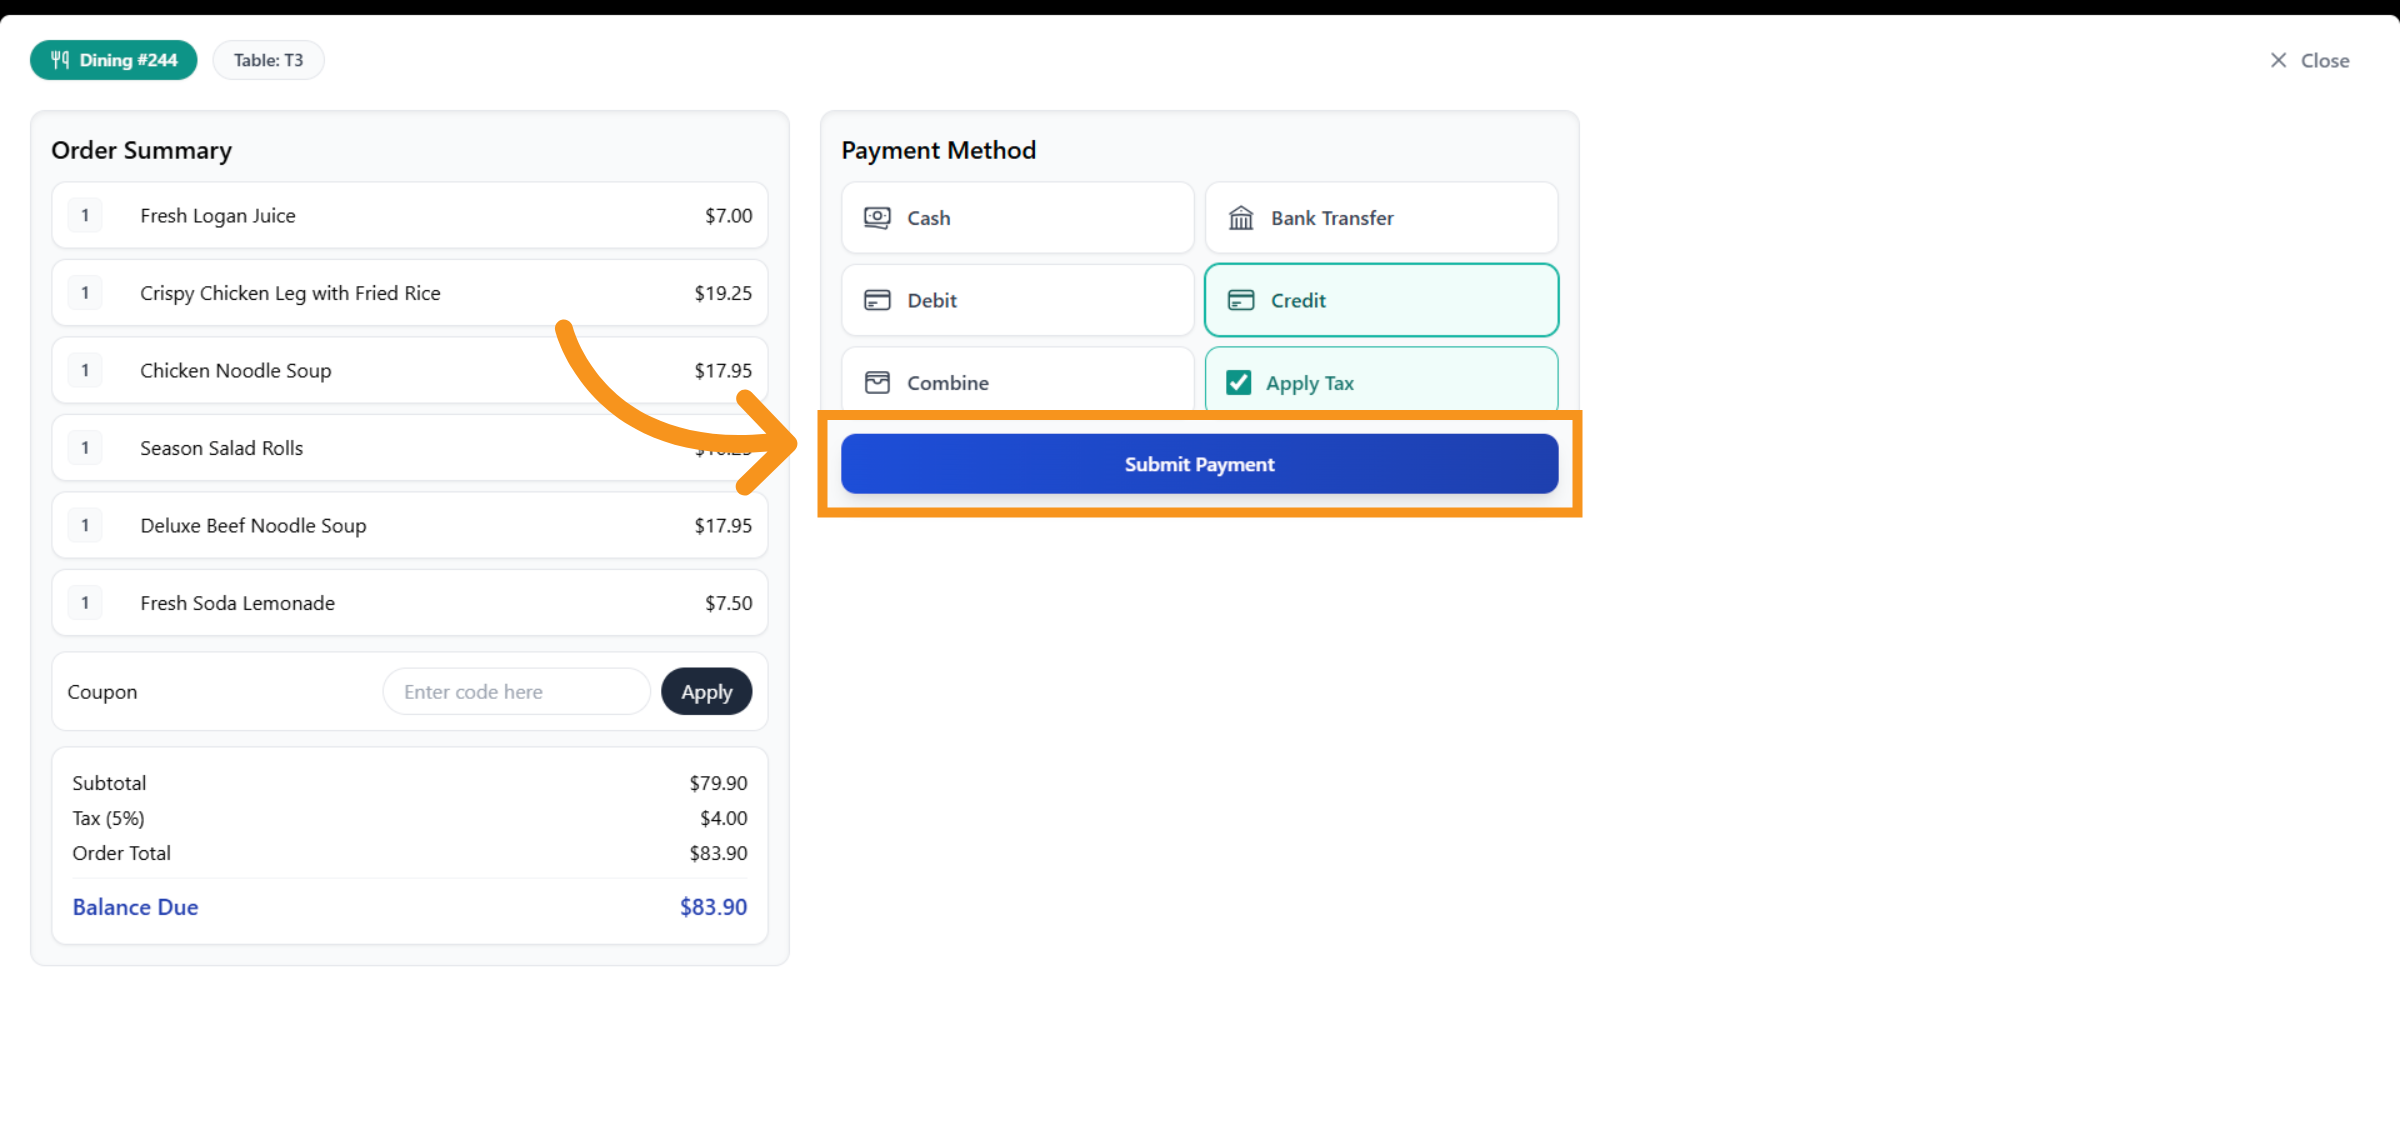
17. Submit Payment
After selecting the payment method, proceed to submit the payment.
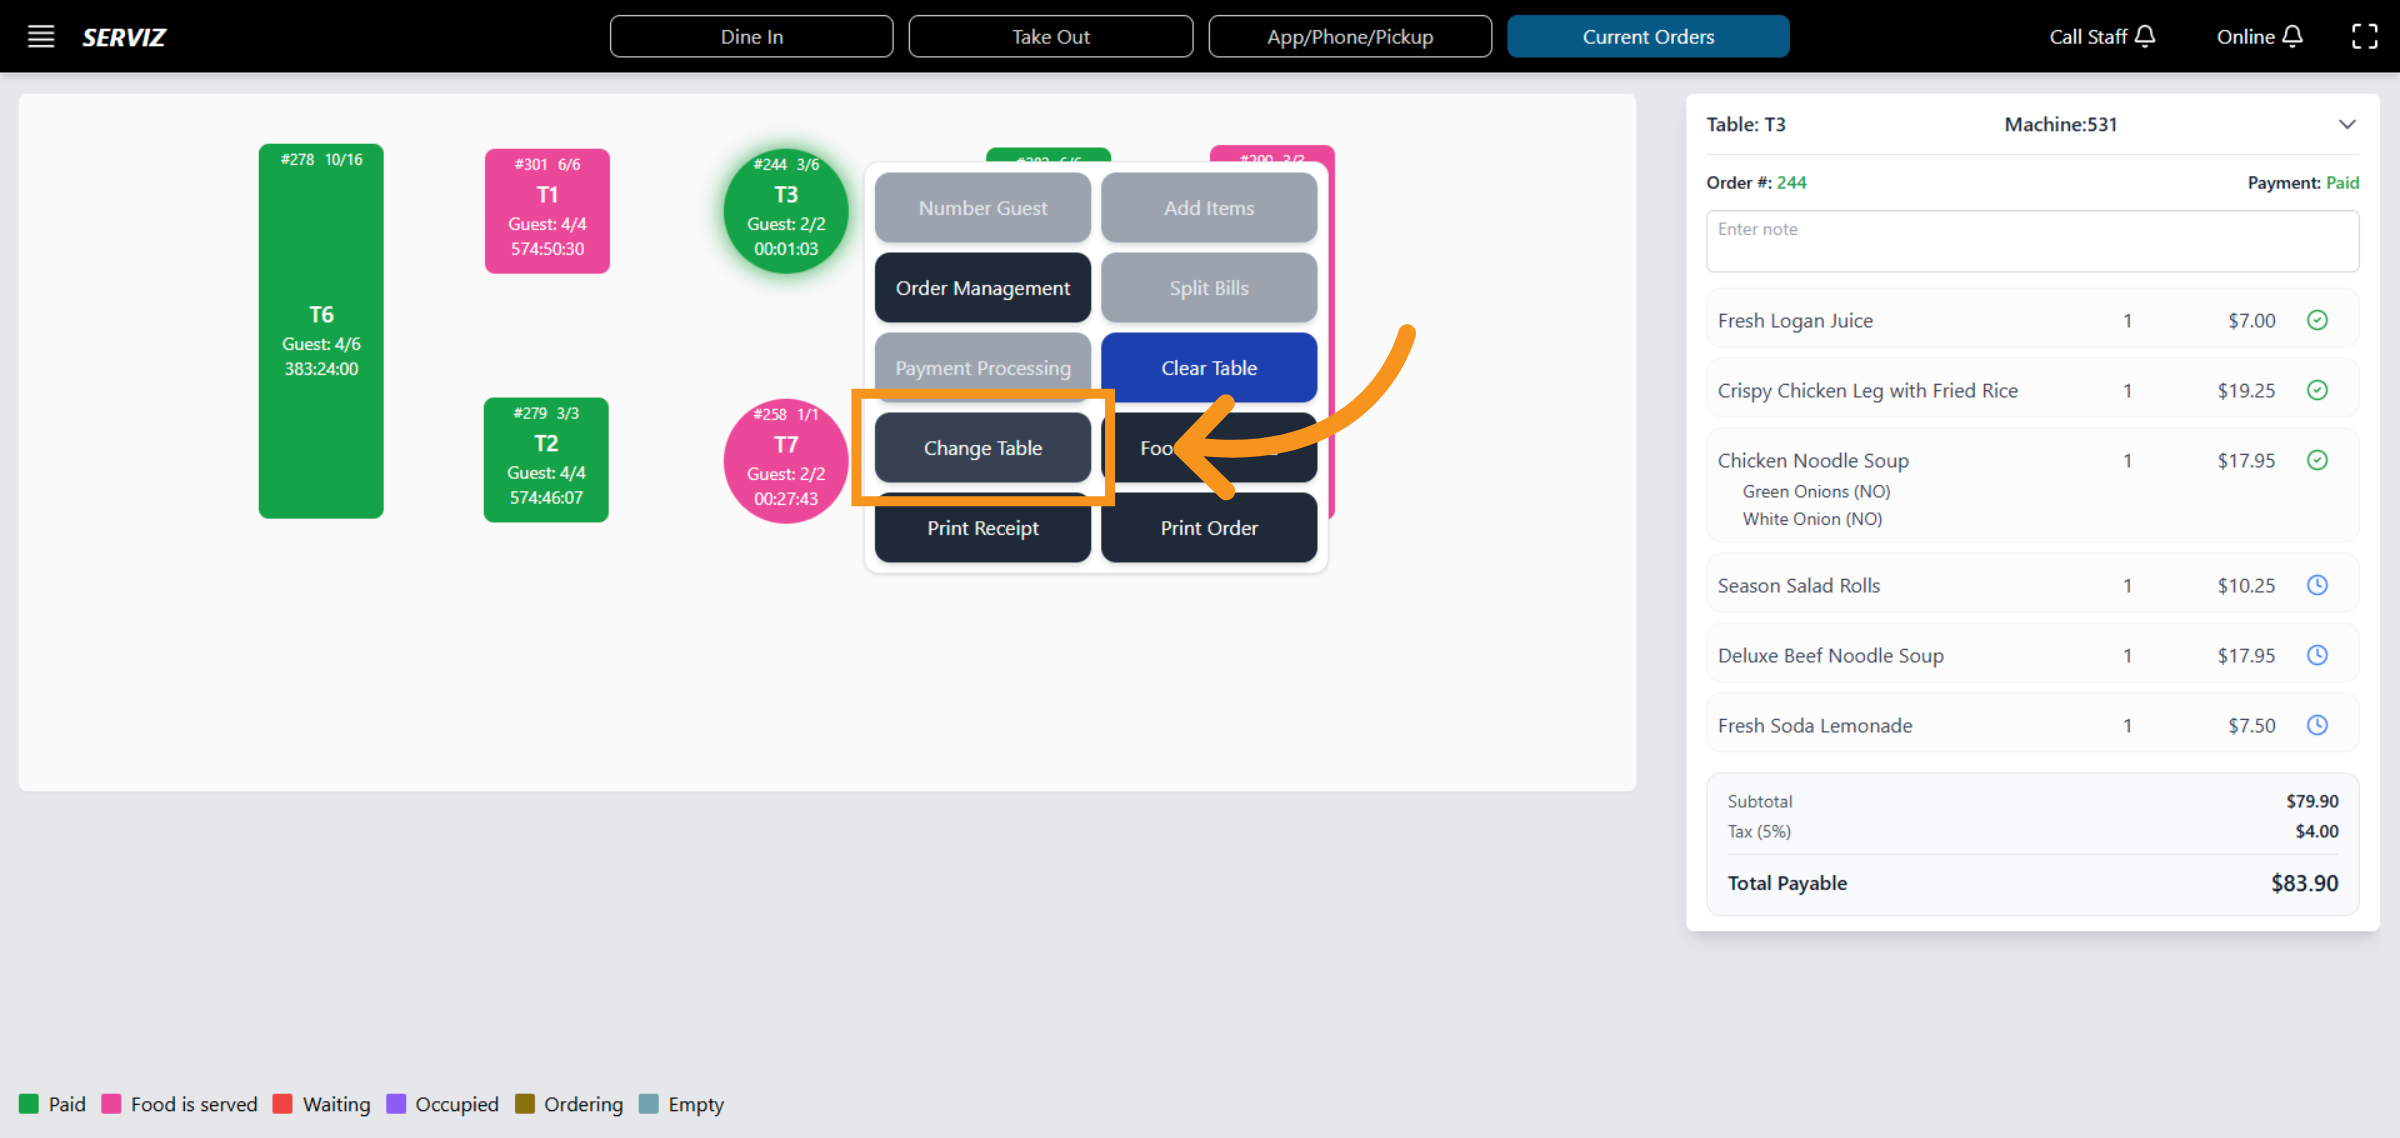
18. Table Change
This section to control -arranging tables for guests appropriately.
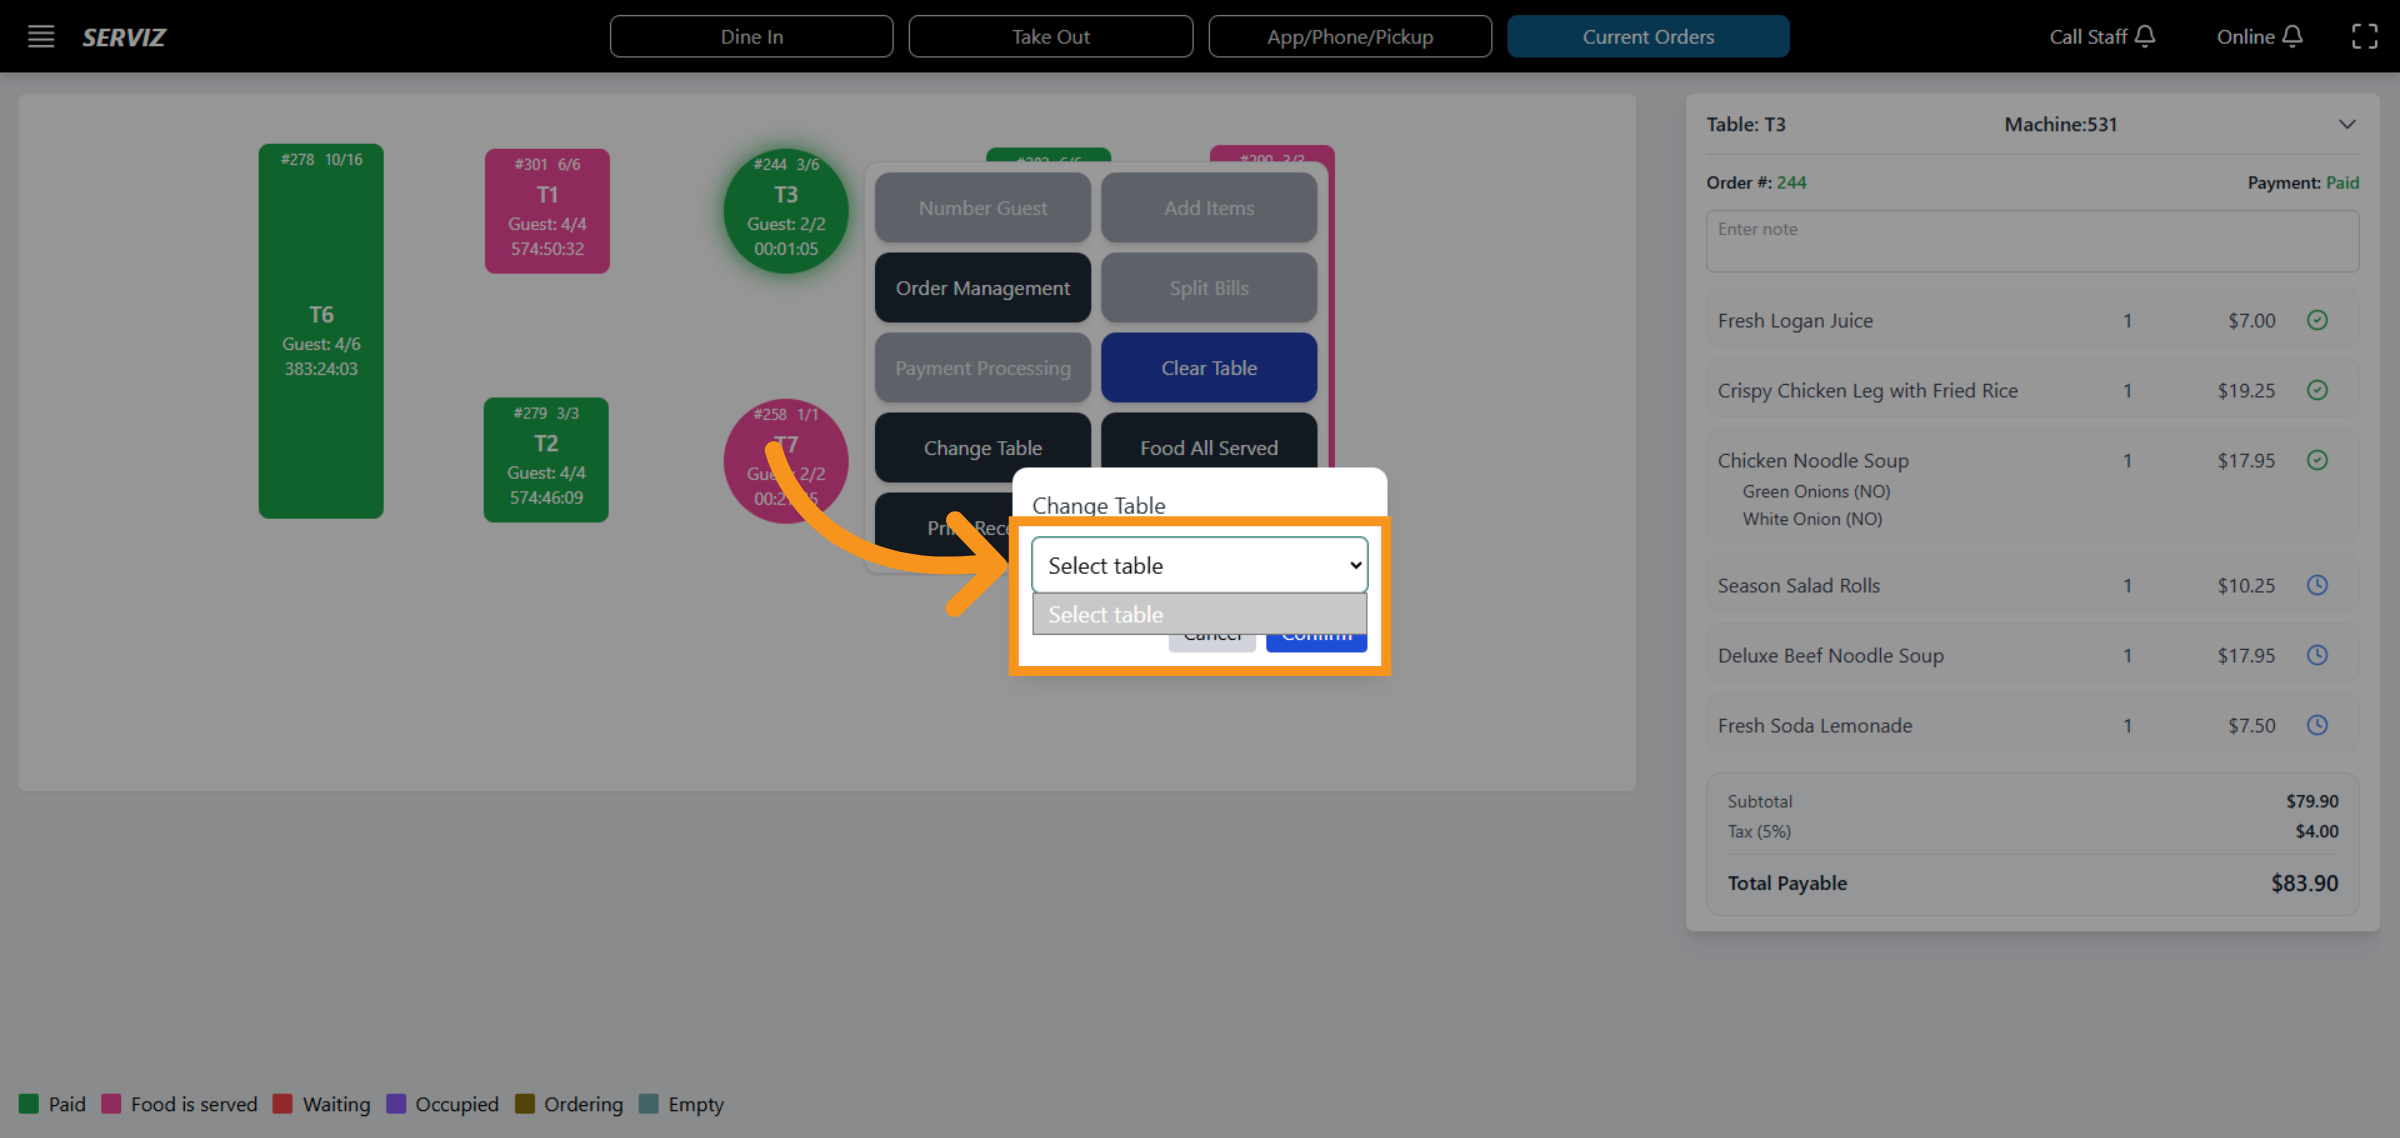
19. Select New Table
Click "Select table" to choose a new table for the order.
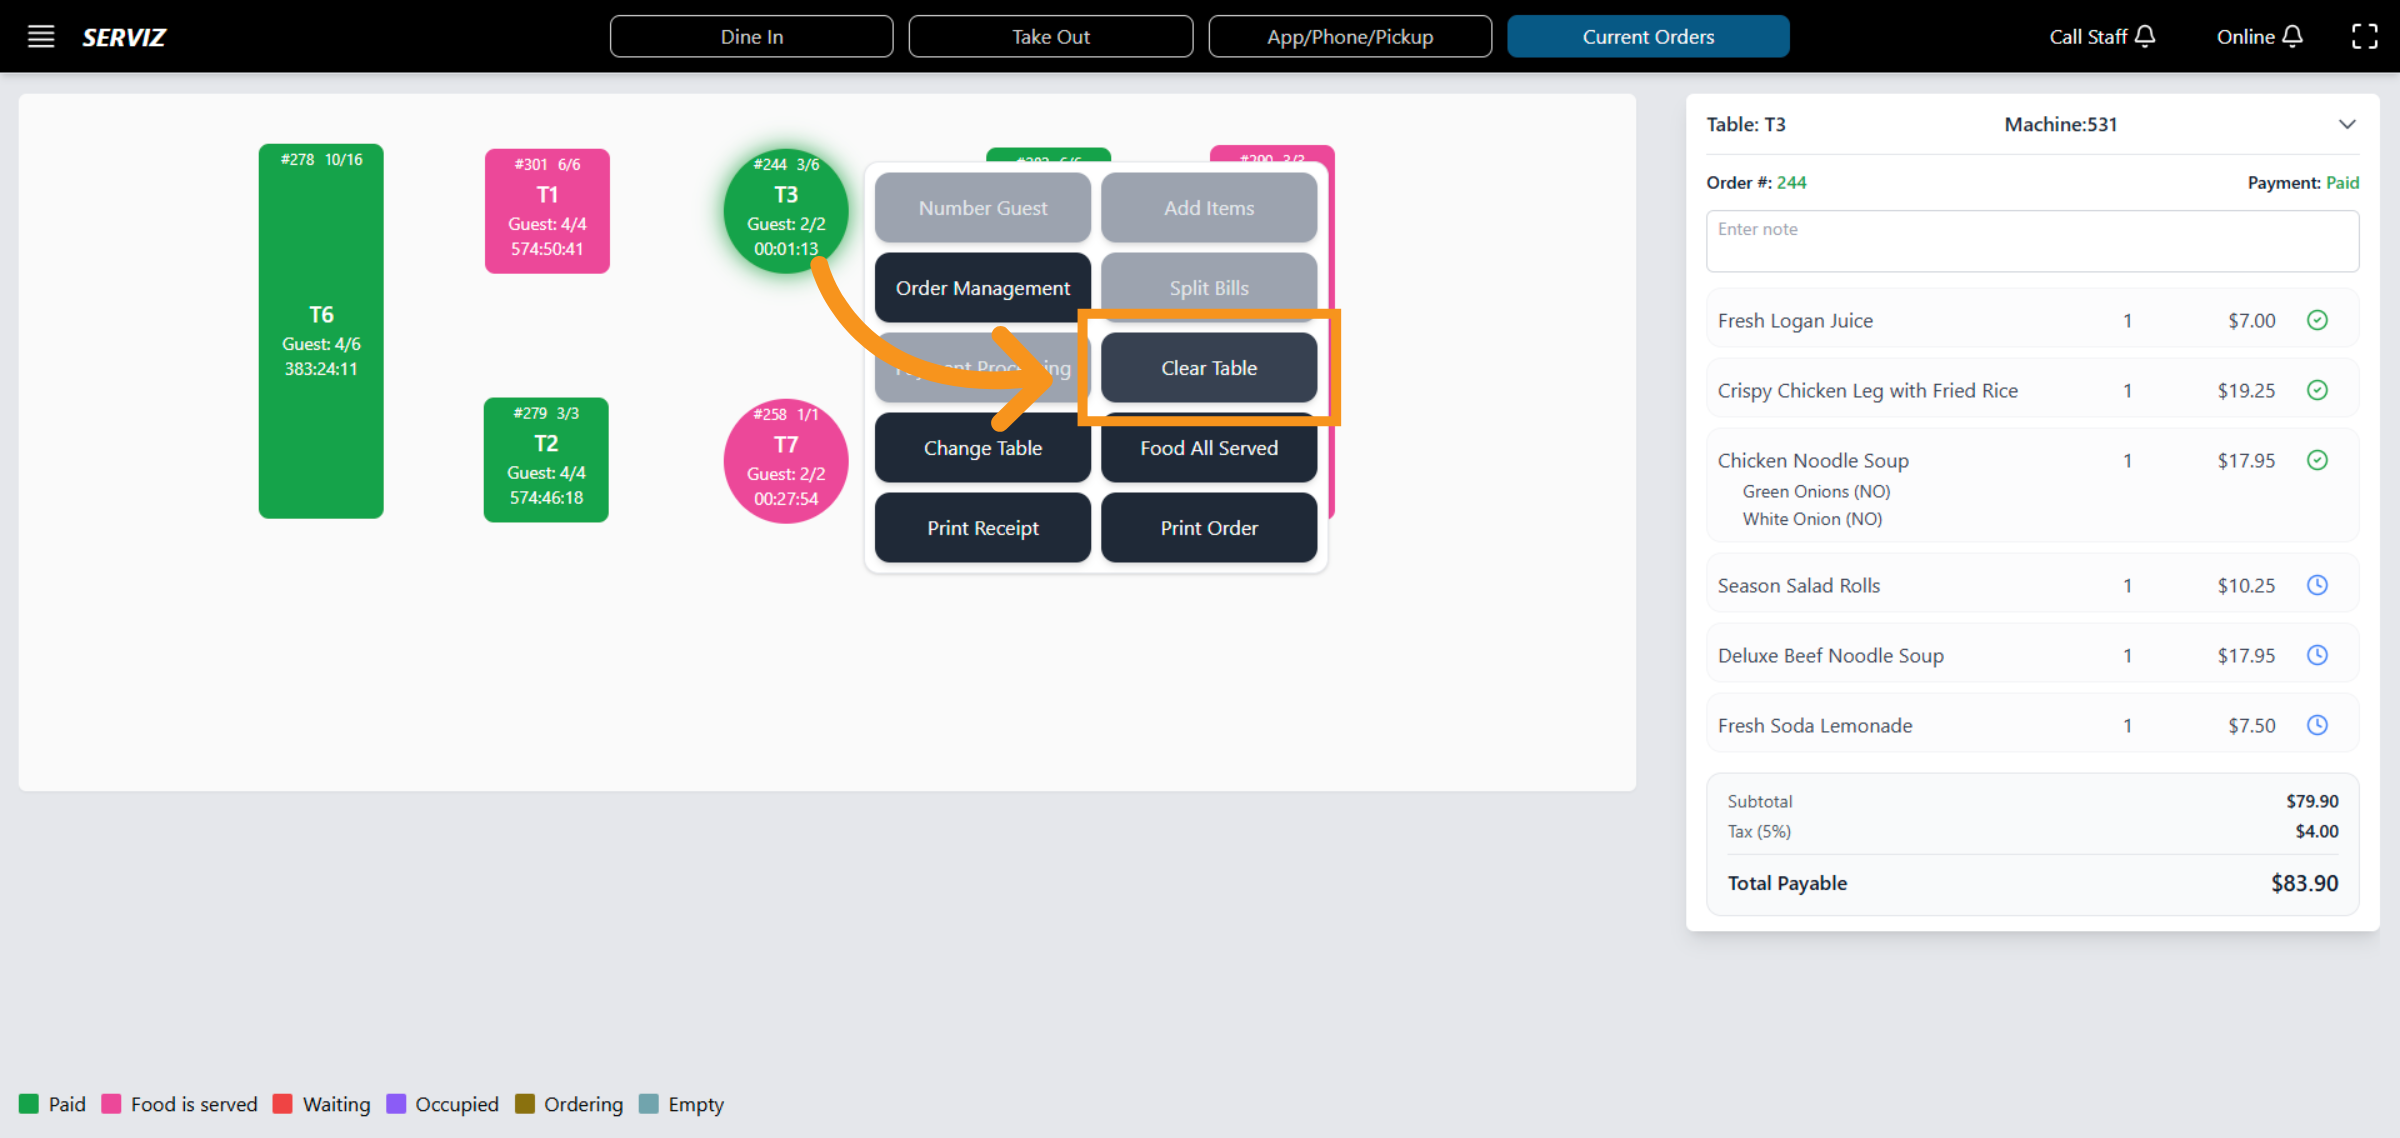
20. Clear Table Assignment
This section enable to control and move anytime .
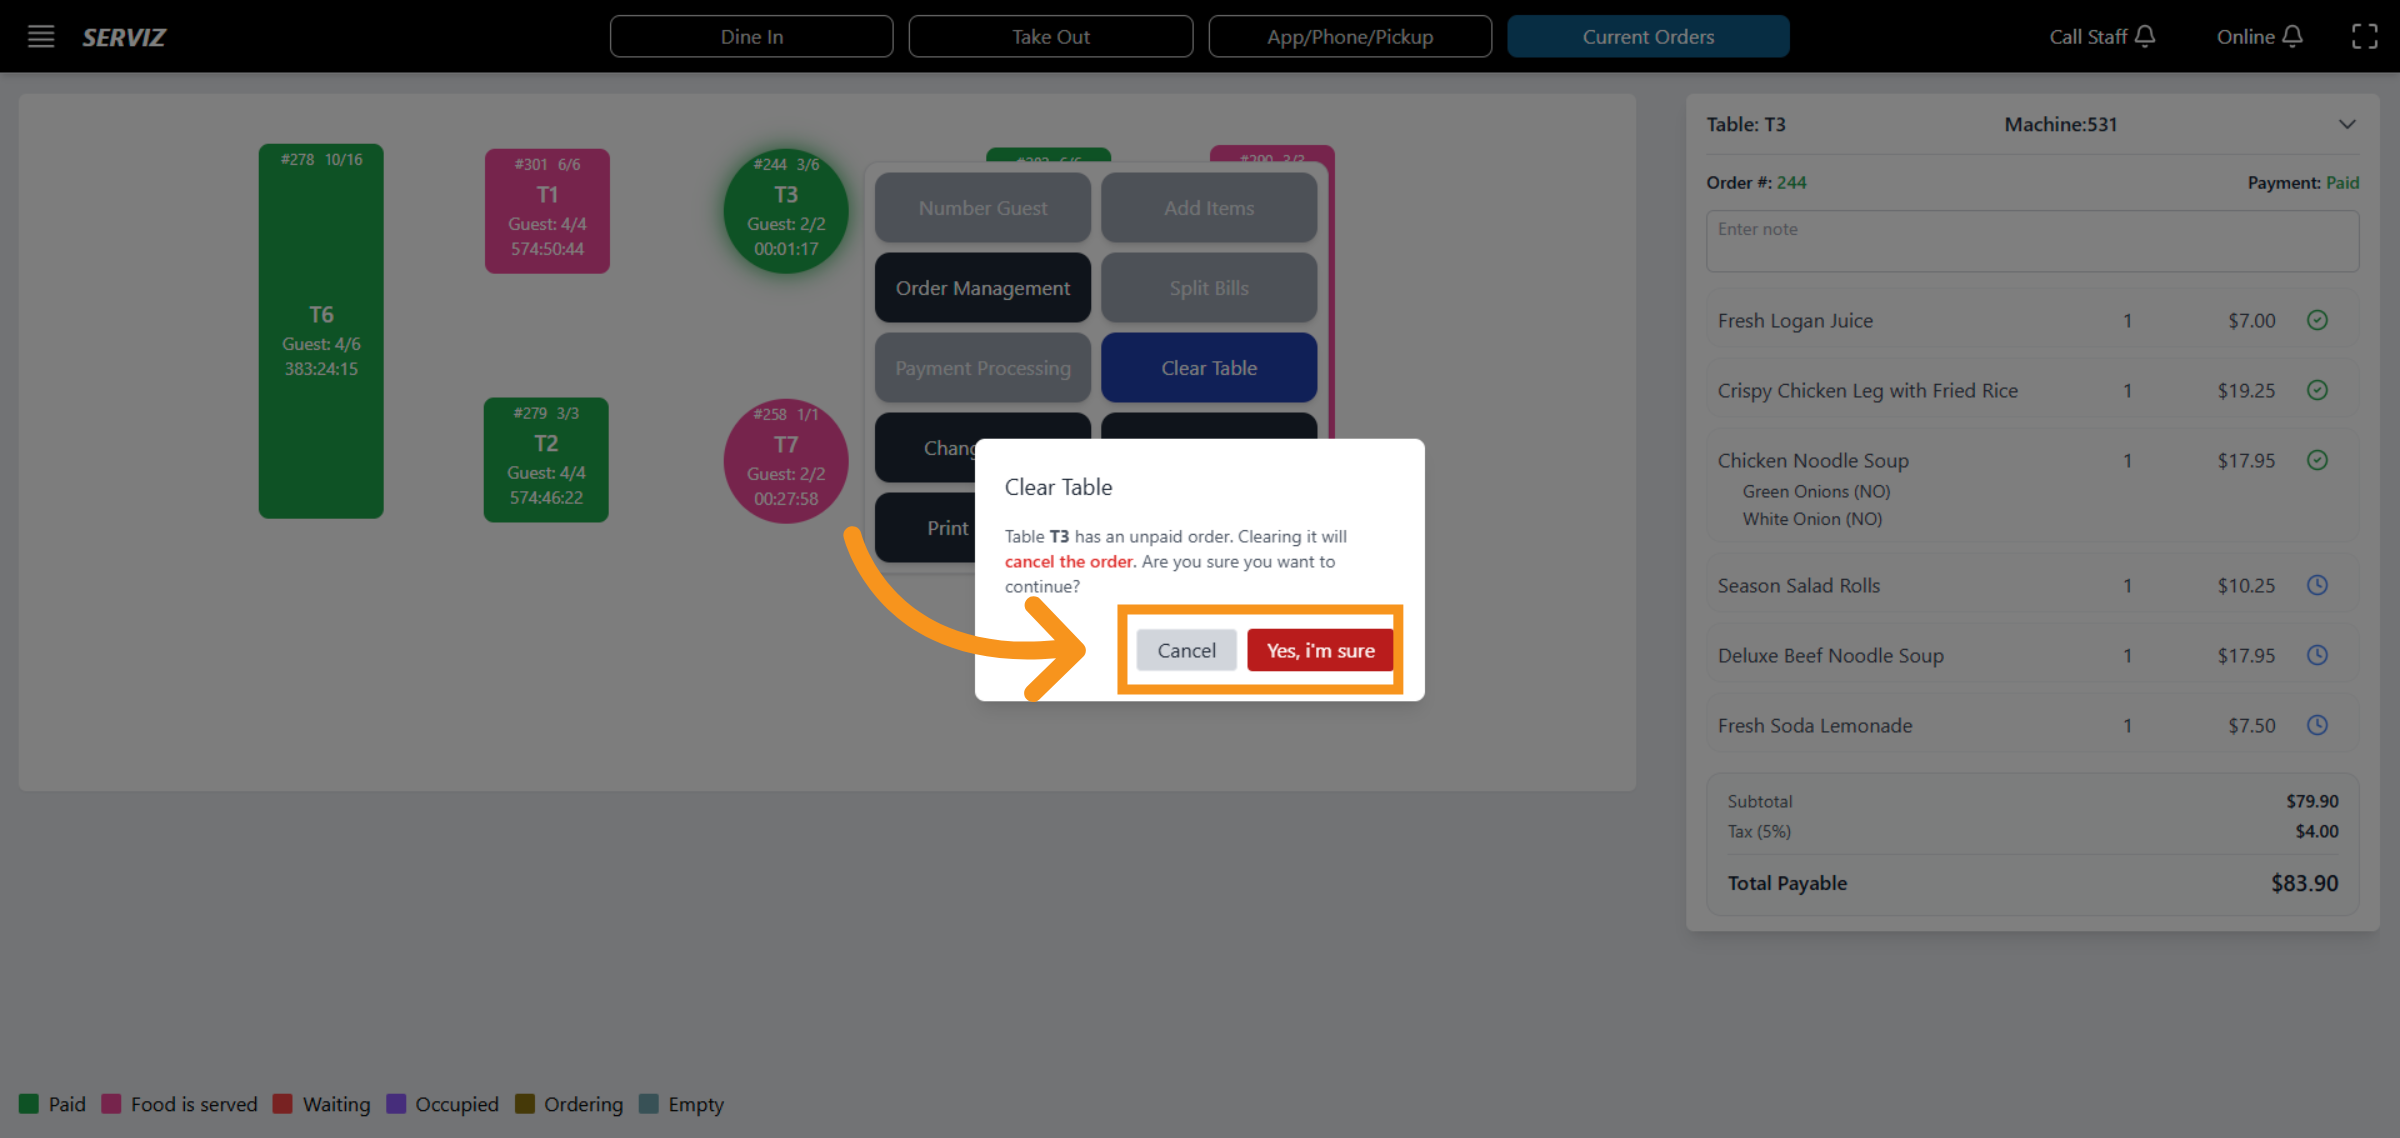
21. Clear Table
If you select "clear table" . A small bar will appear for confirmation with "Yes,I'm sure" or " Cancel"
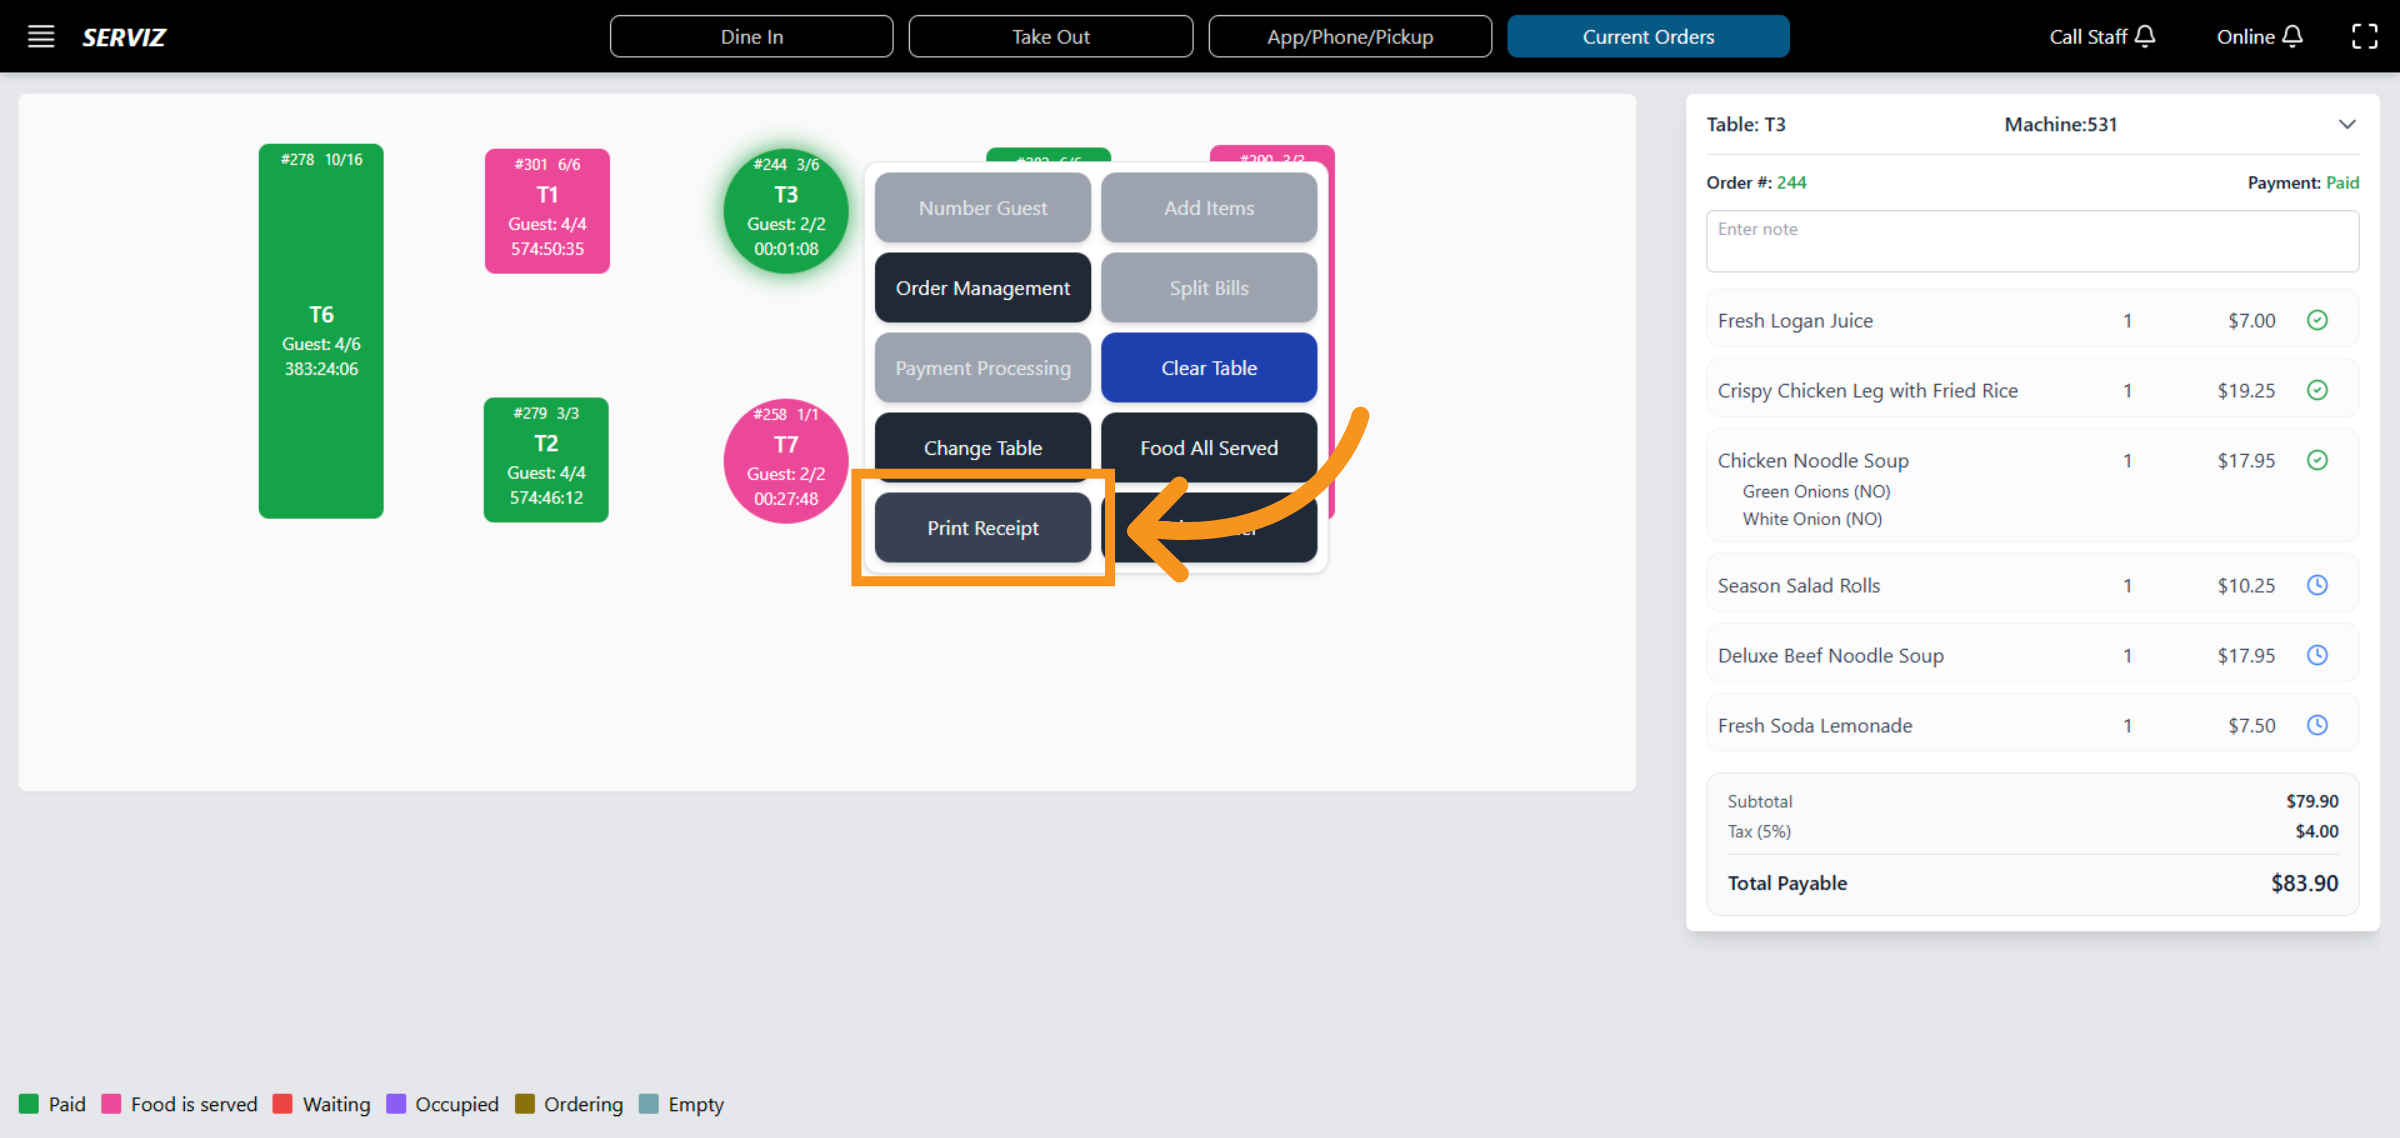
22. Print Receipt
Click "Print Receipt" to generate a physical or digital copy of the order receipt.
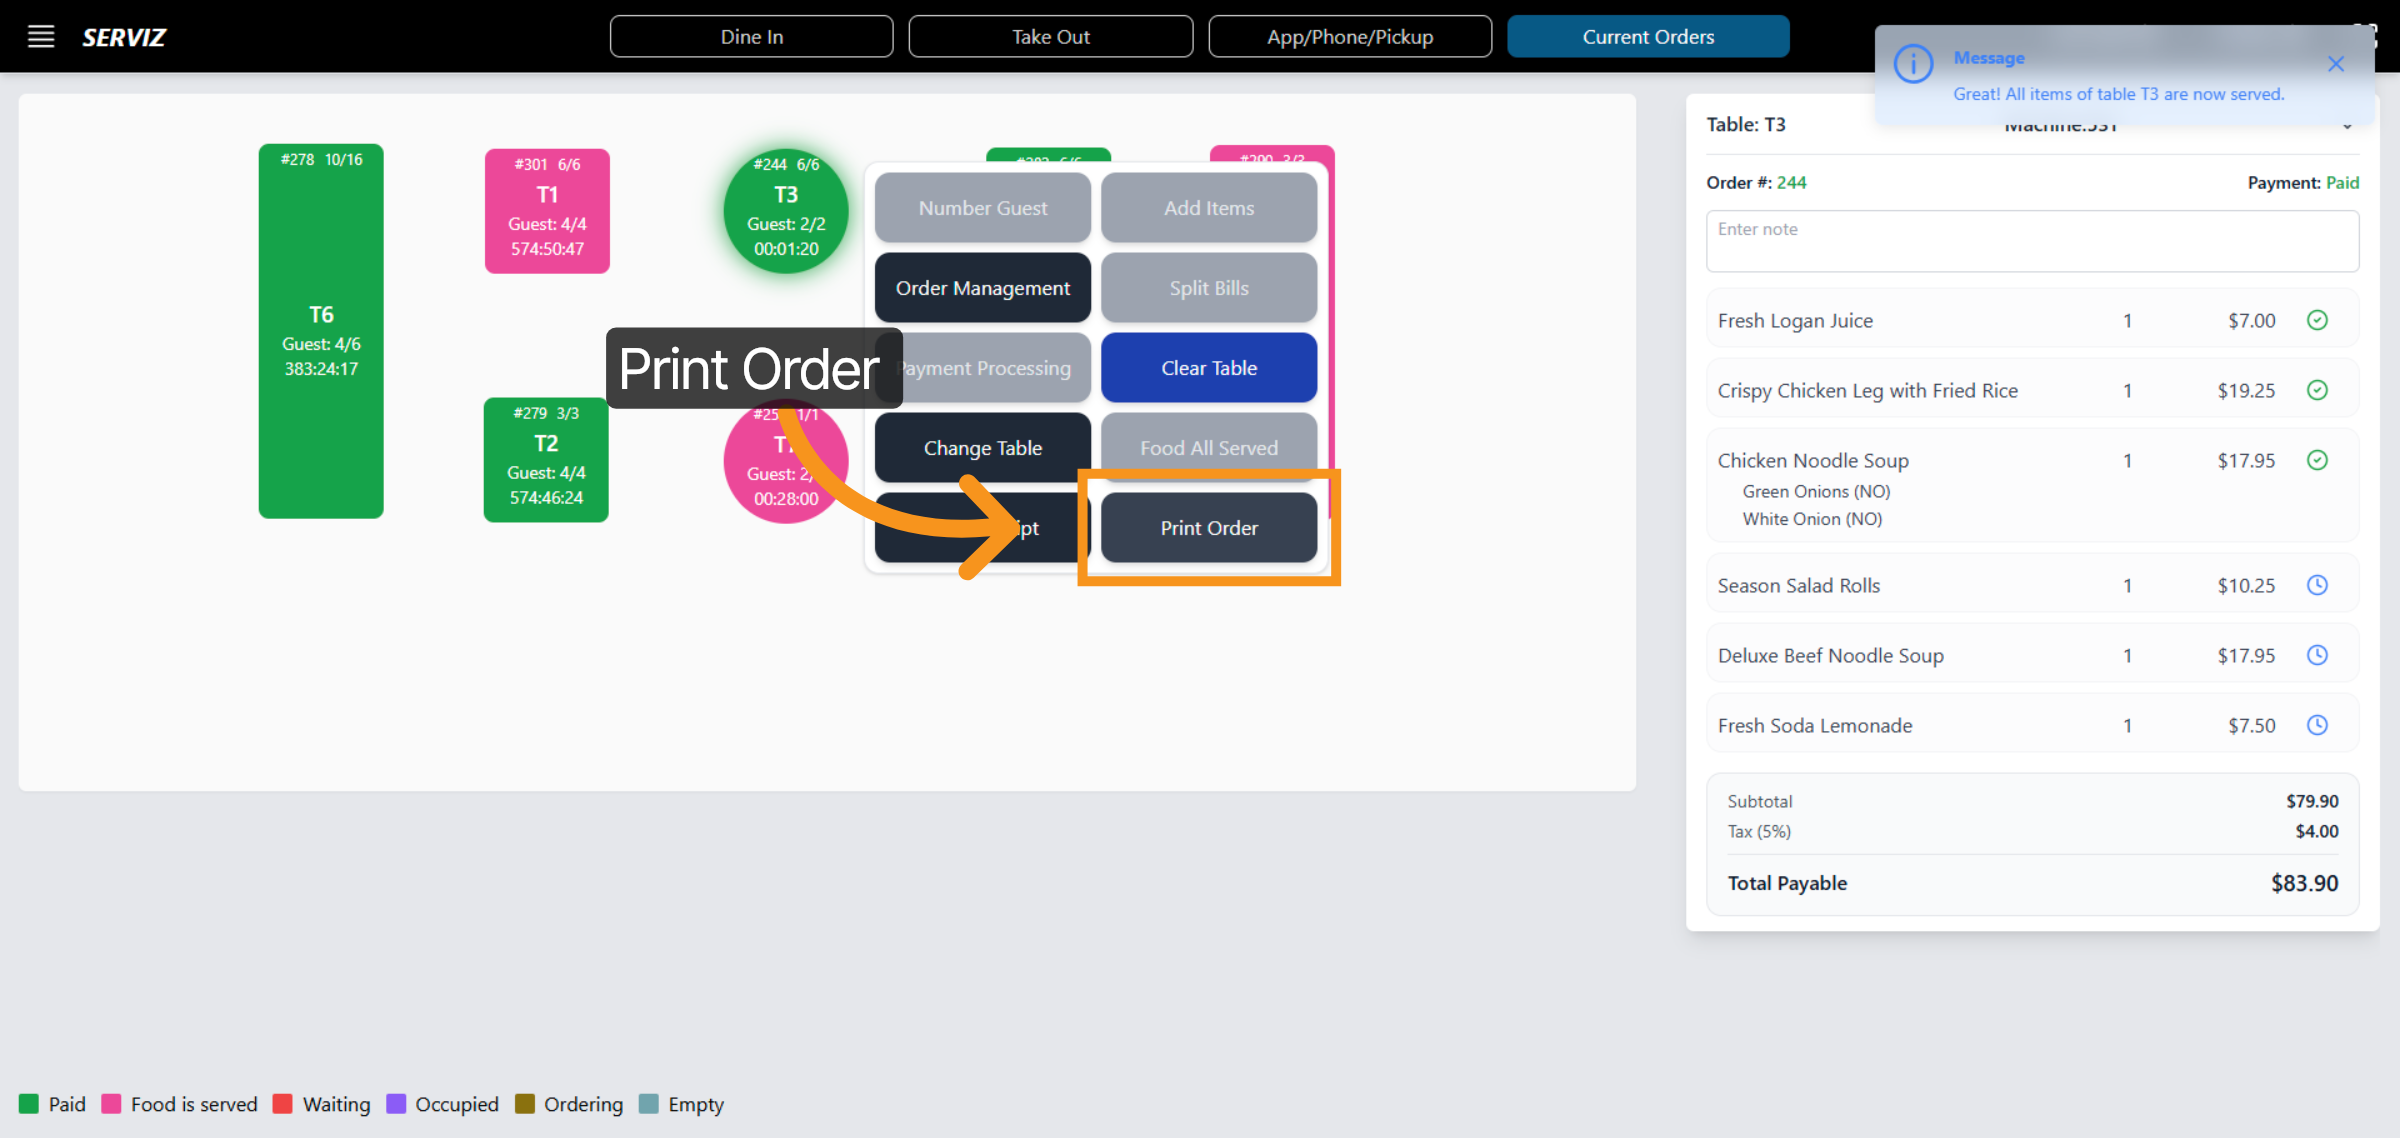
23. Print Order Details
"Print Order" to print the order details for kitchen or records.
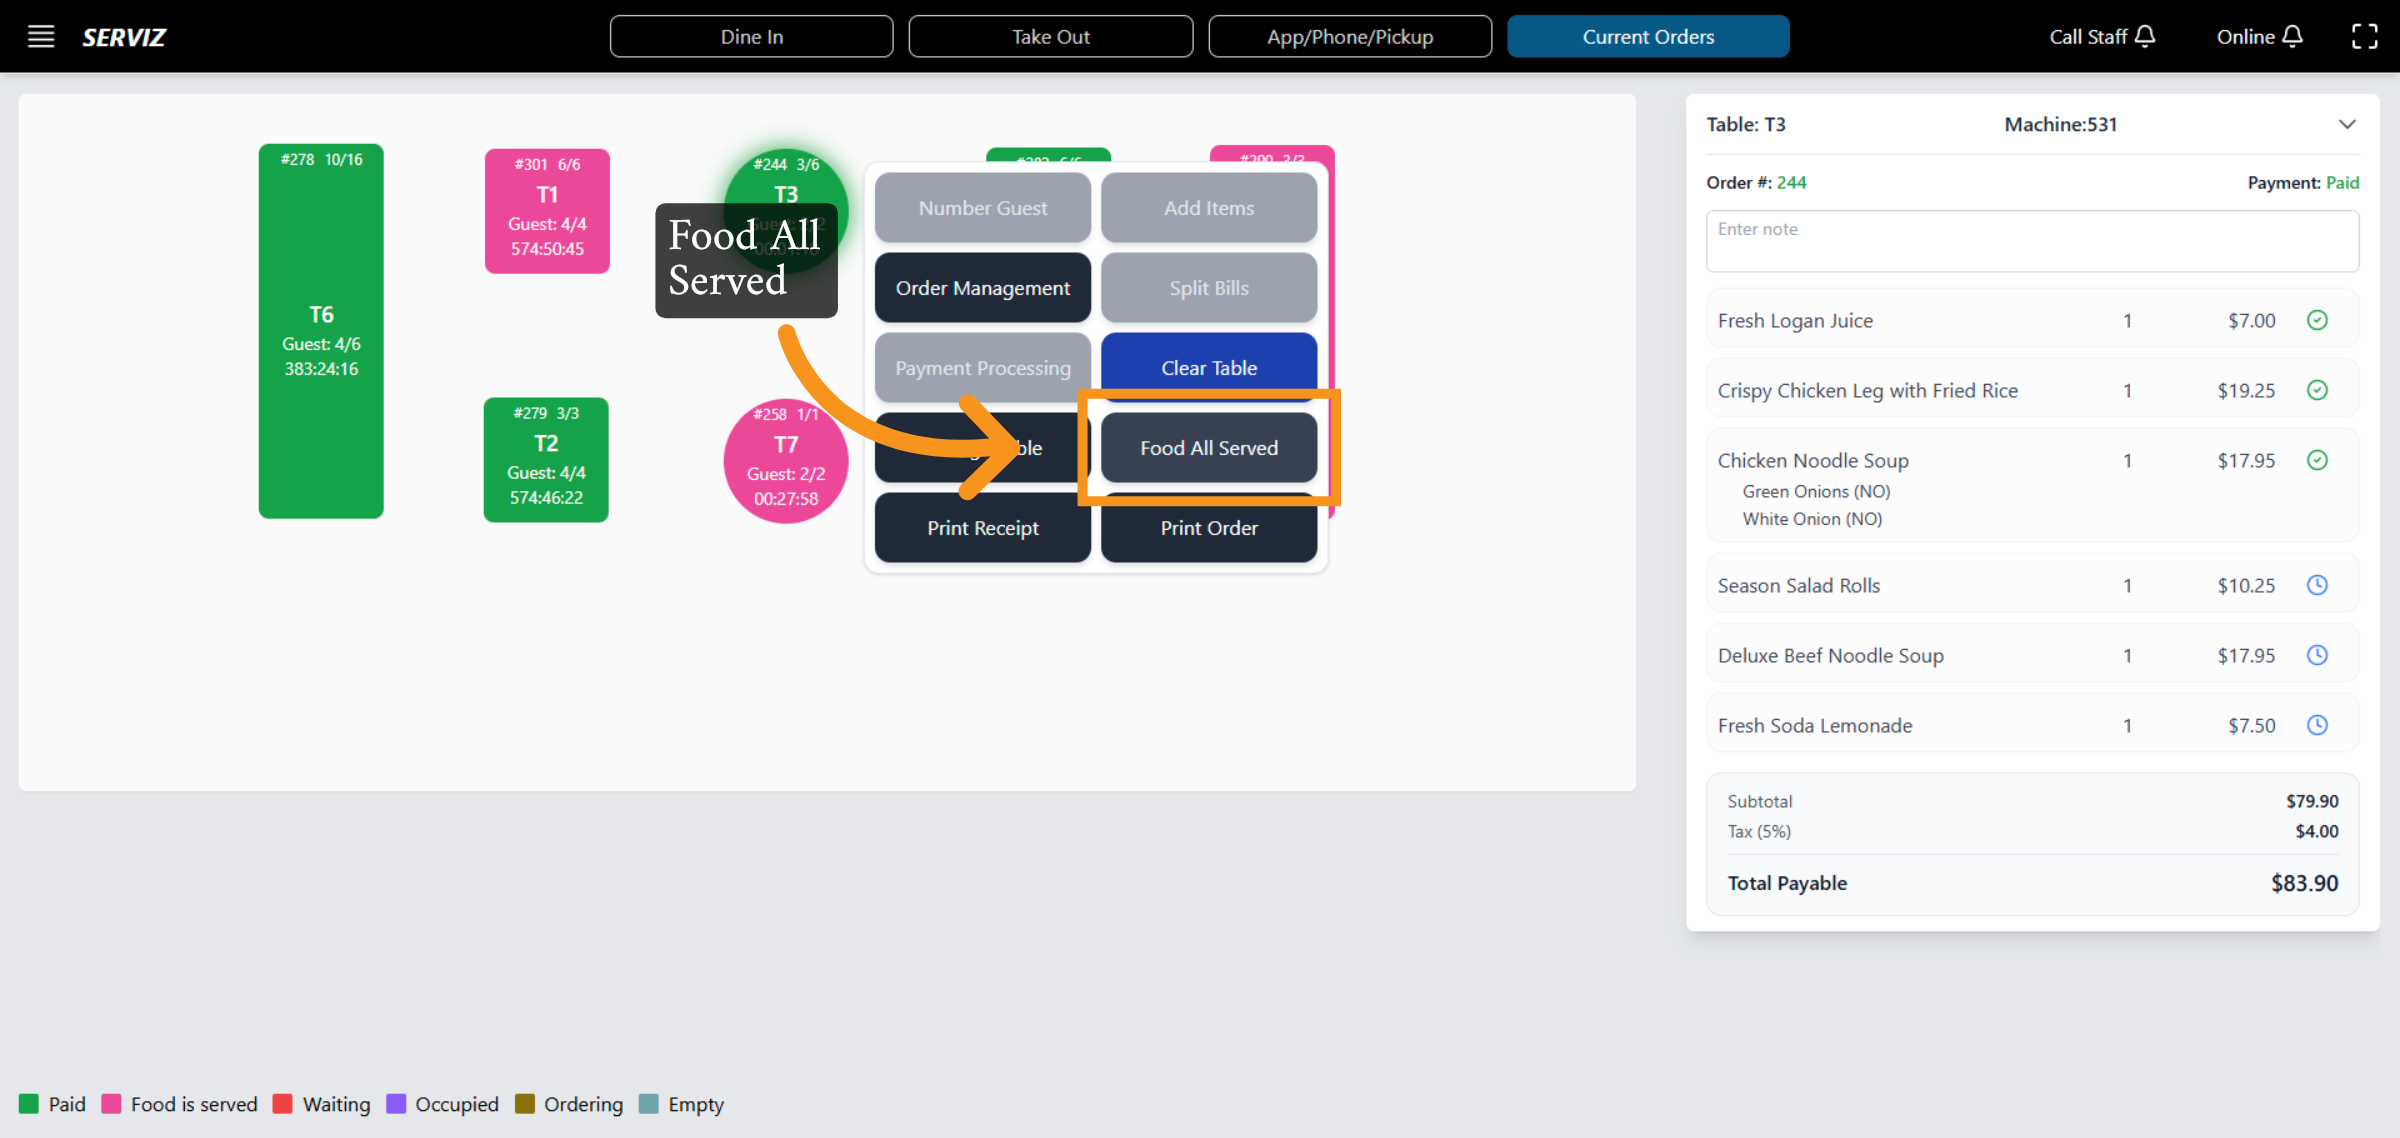
24. Mark Food Served
Click "Food All Served" to indicate that all food items have been served to the customer.
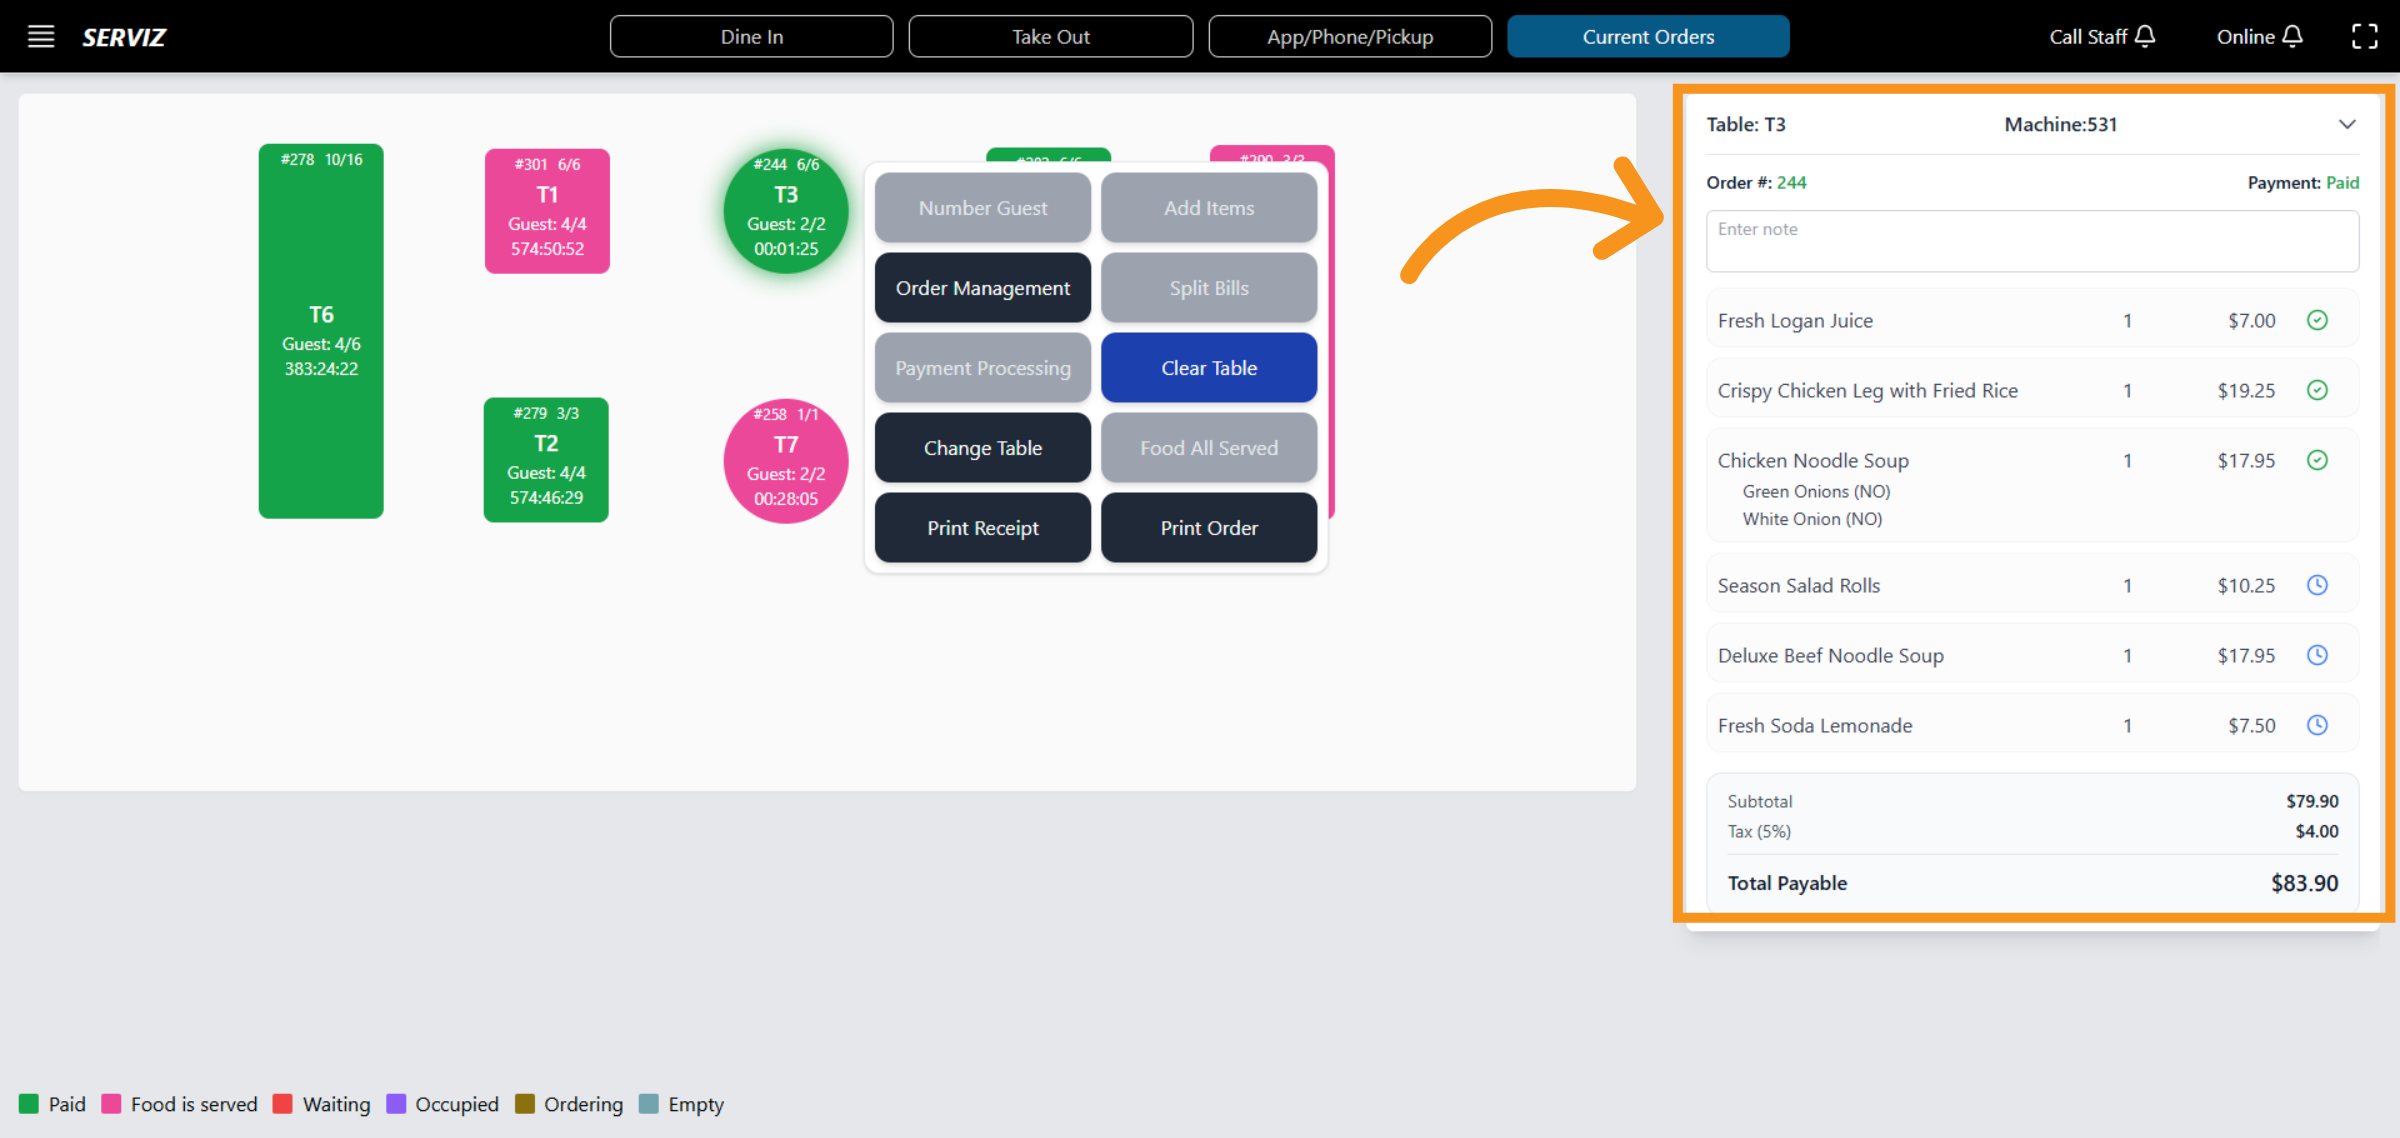
25. View Active Tables
Click the list of active tables to view current orders and statuses.
26. Open Split Bills
Click "Split Bills" to divide the bill among guests or payments as per customer requirements.
27. Split Bill detail
When you click "Split bill," the interface will display the following options: bill amount, reset to one bill, split bill evenly, collapse all, and show summary.
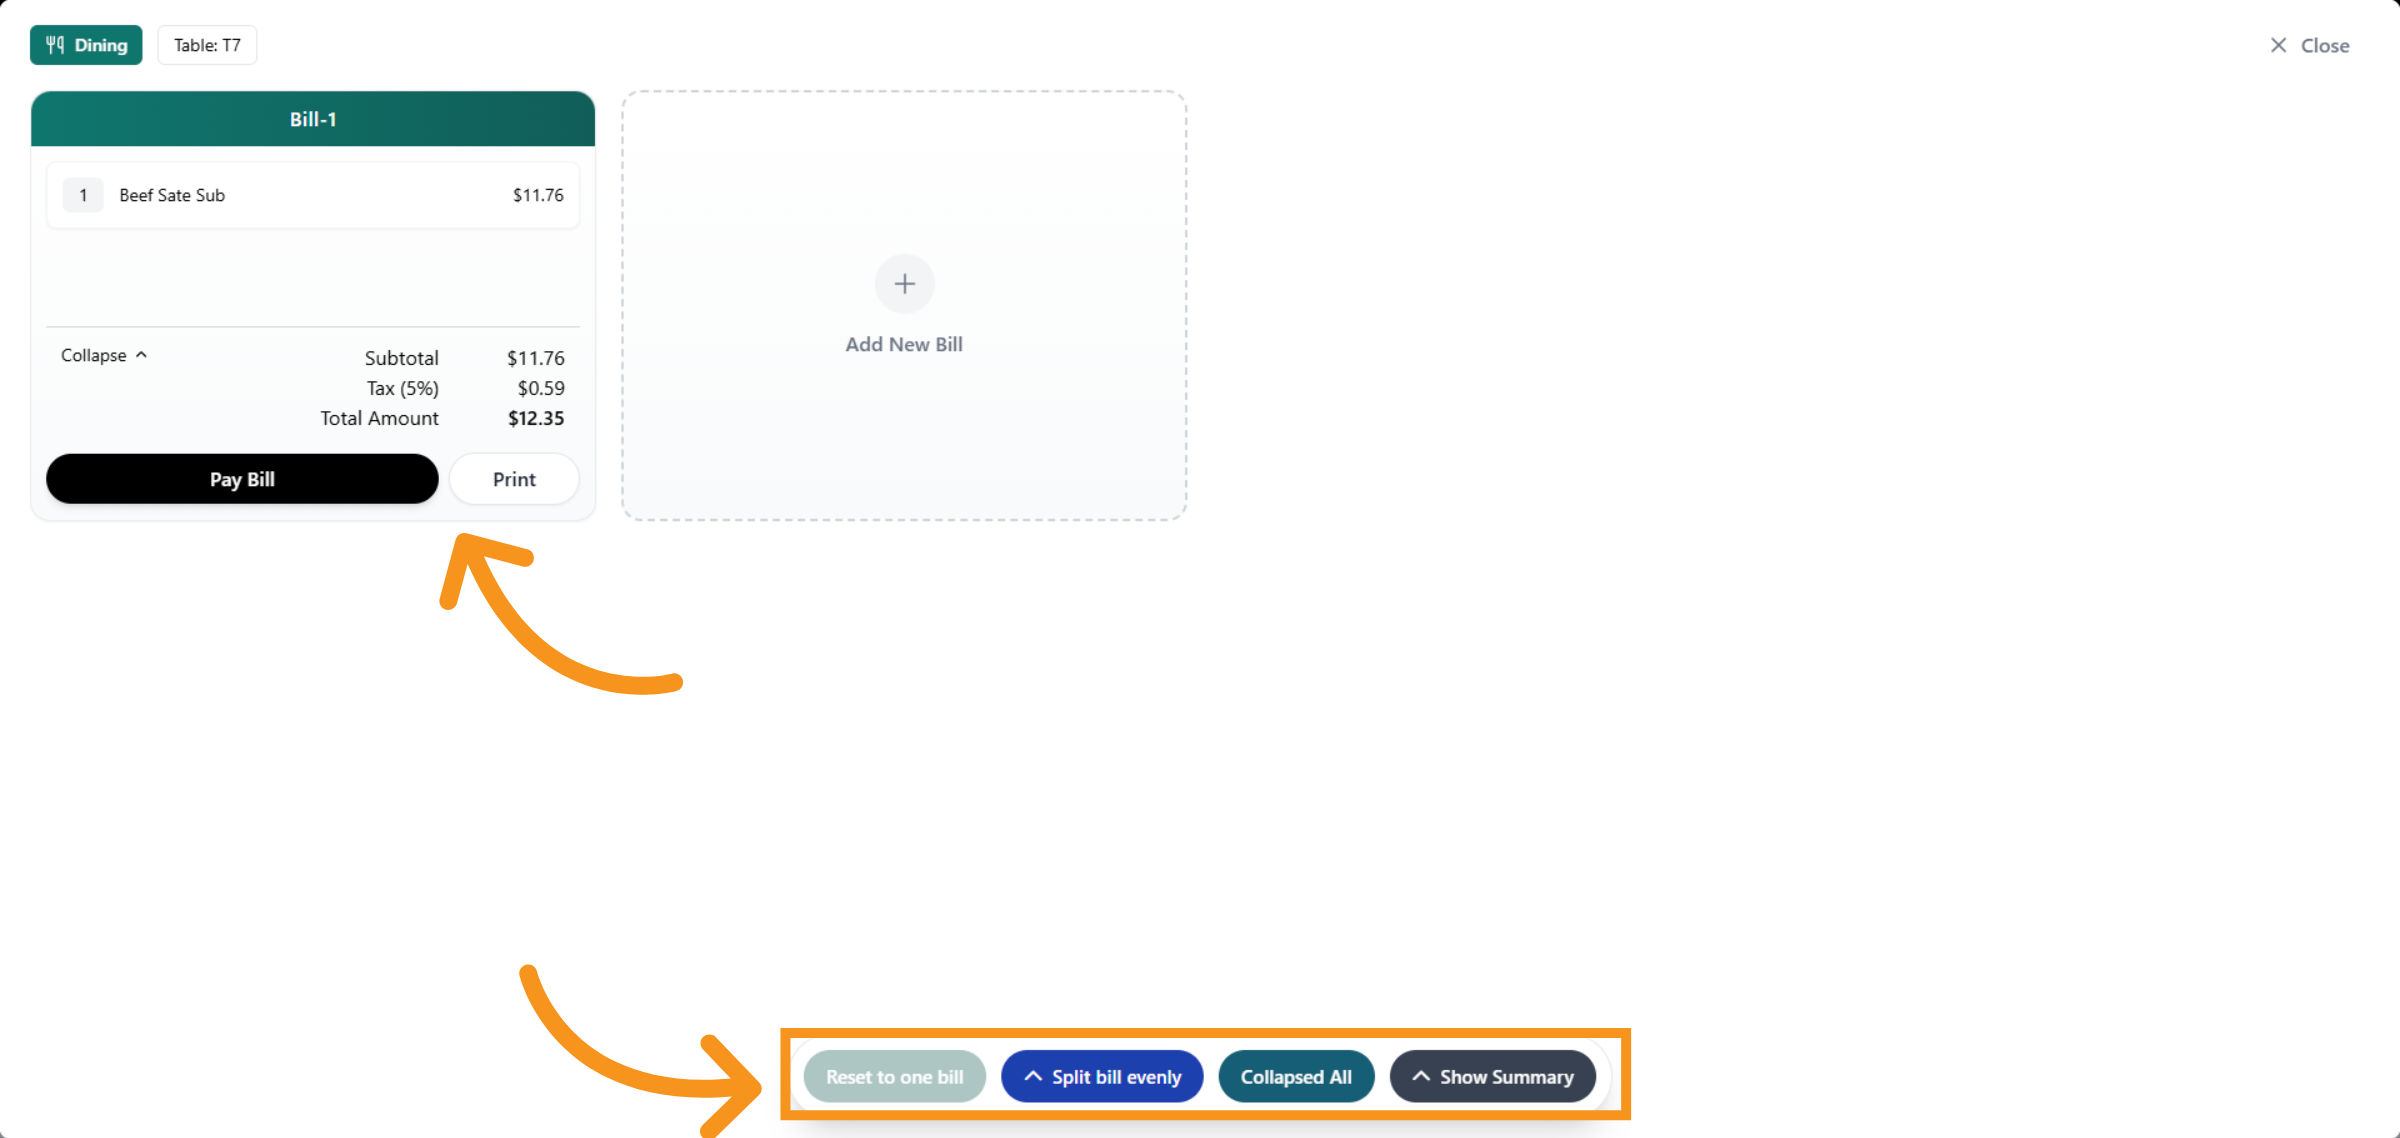
28. Split bill options
Depend as per customer requirements. You can select the options to split their bill accordingly.
*Add new bill: it means adding more bills to divide the amount based on the original bill.
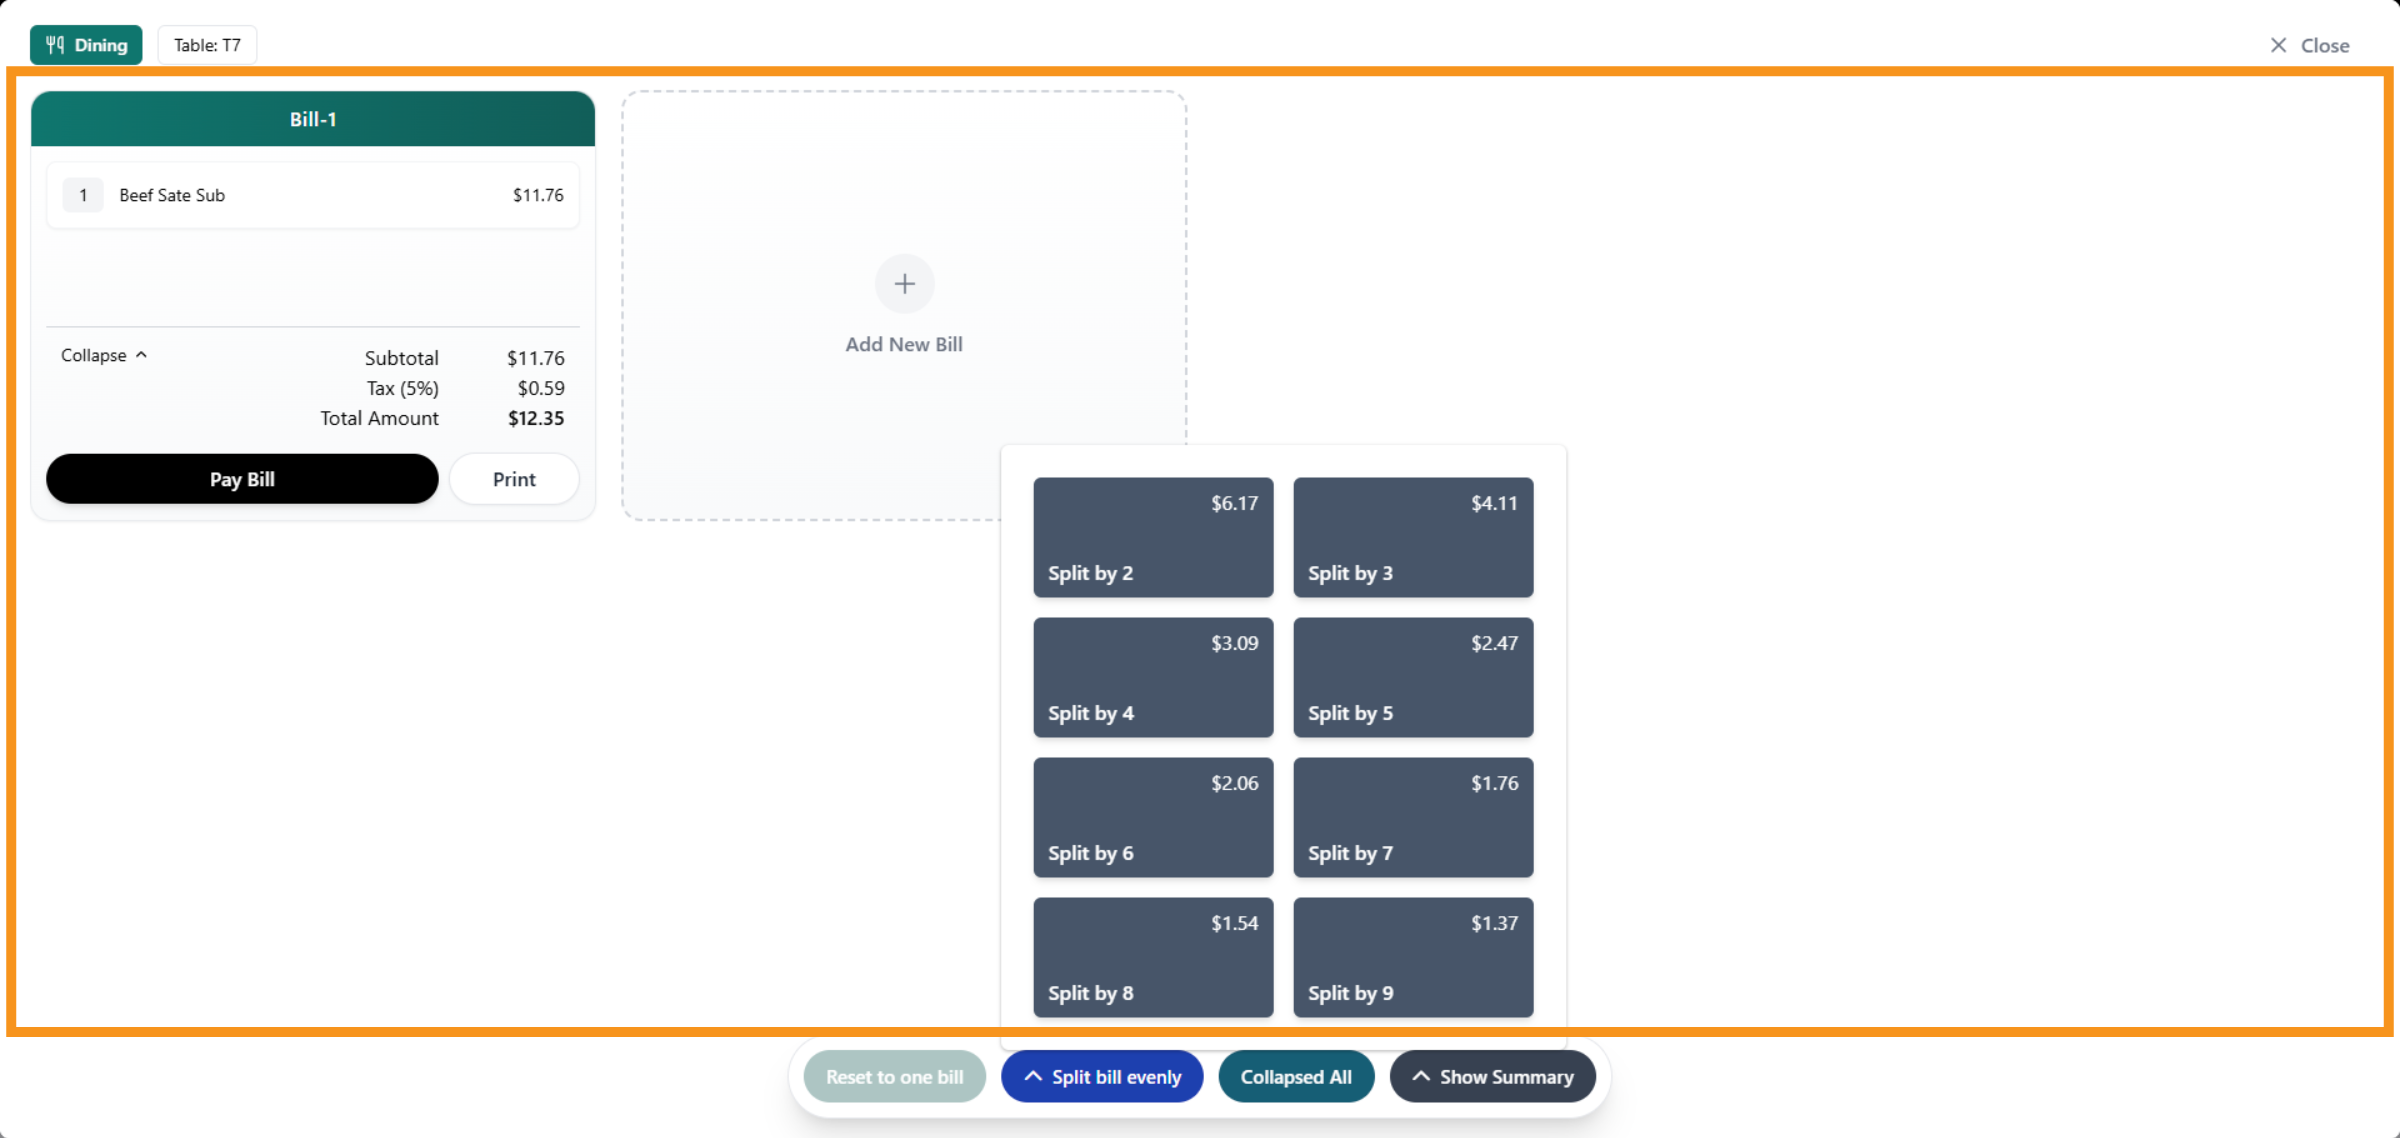
*Split Bill evenly :The amount will be divided based on split by 1, 2, 3, 4, ... bills
*Collapse All/Expand All: JustView the total amount or detail payment on the bill.
*Show Summary : view total amount on the bill .
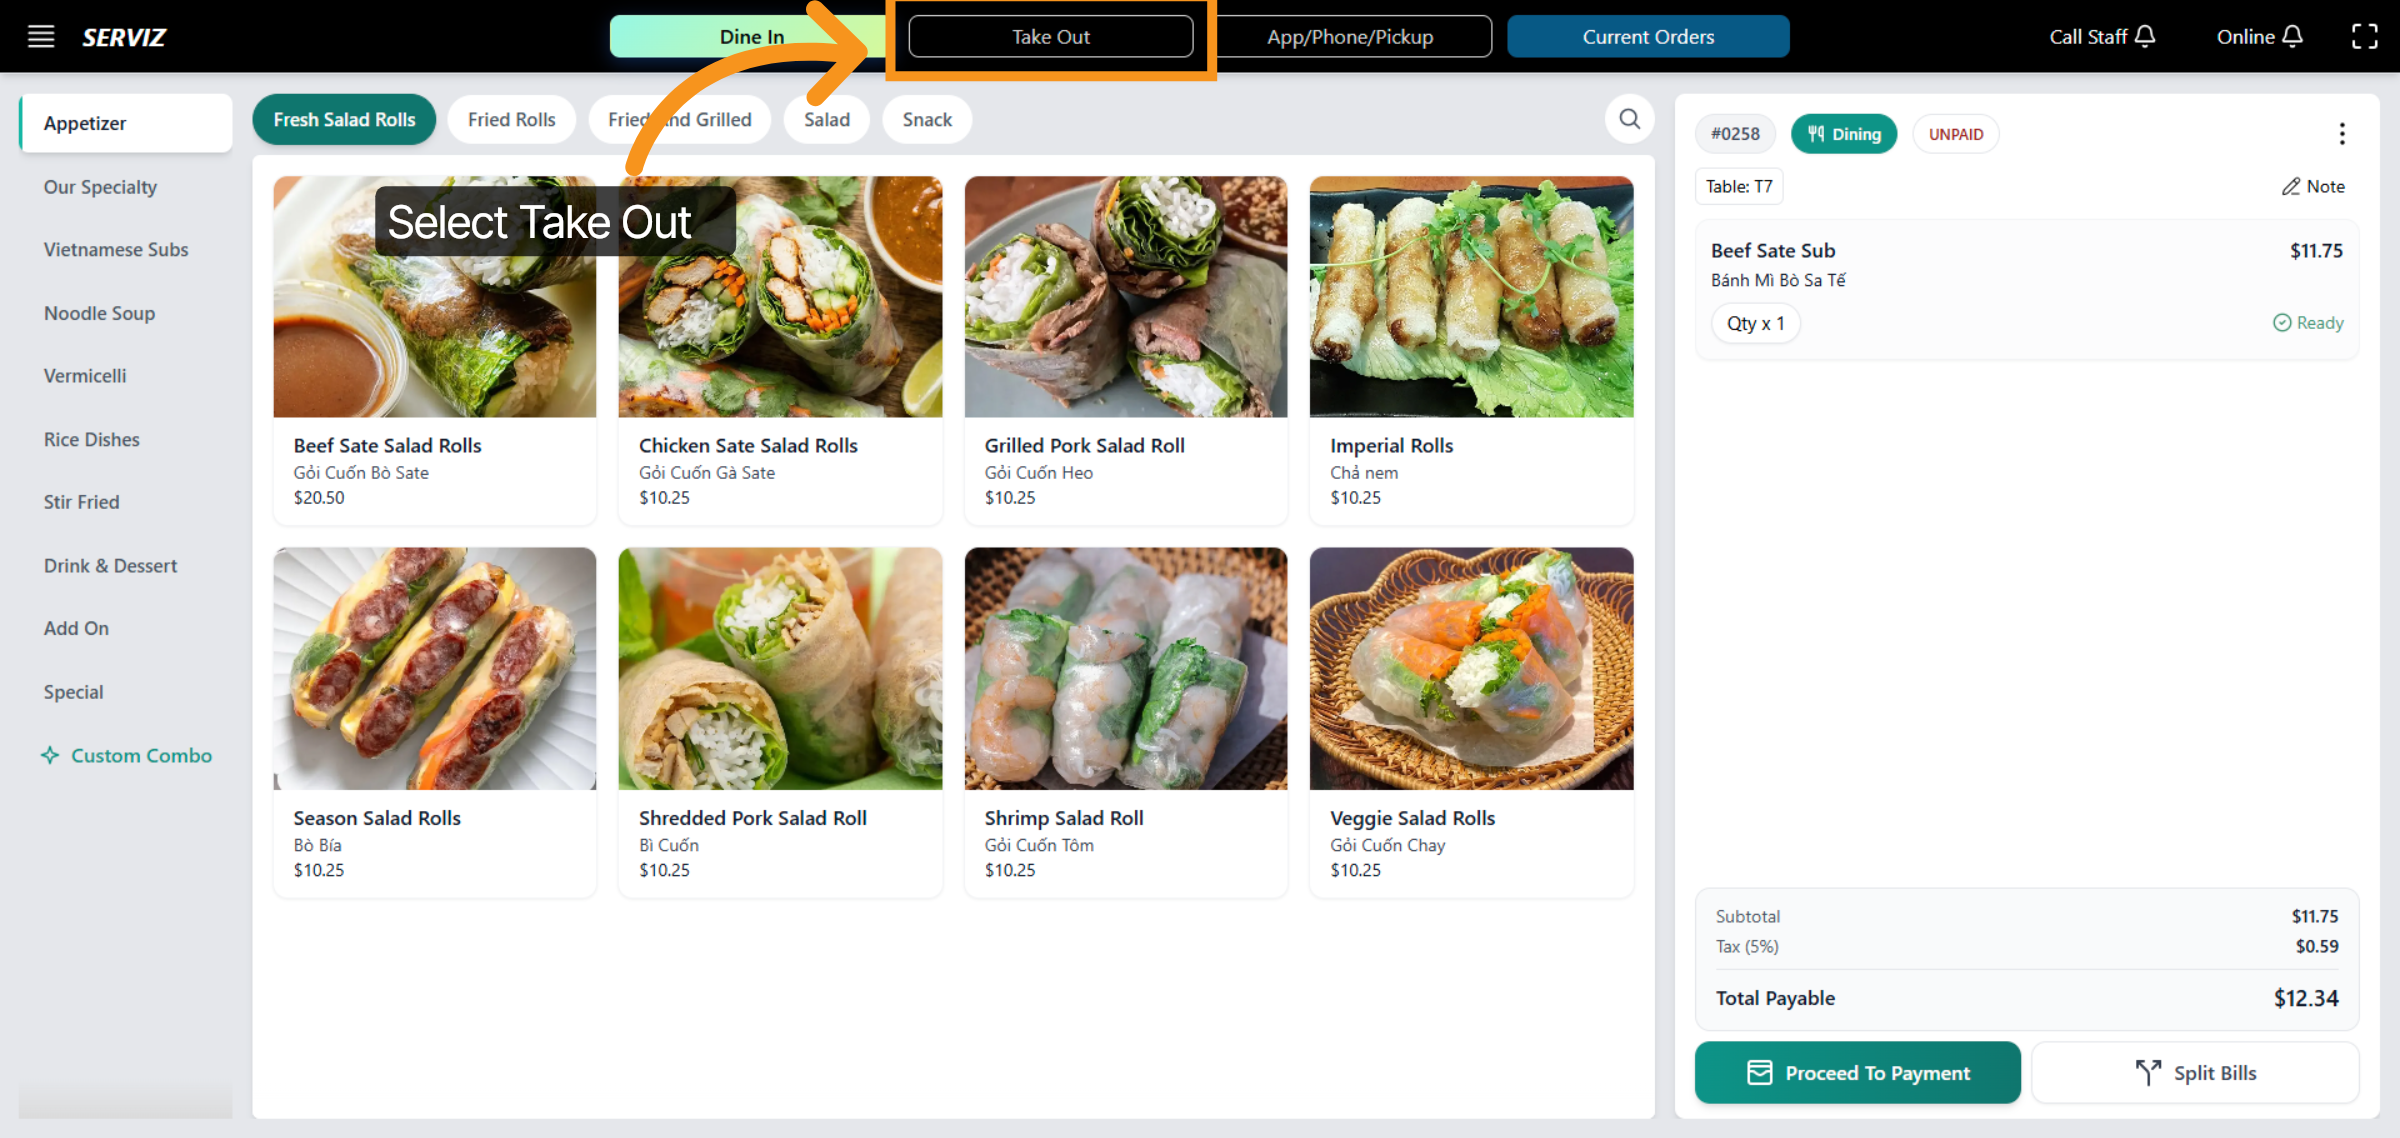
29. Select Take Out Option
Click "Take Out" to manage the Take Out order.
30. Add Item to Order
Add items to Order....
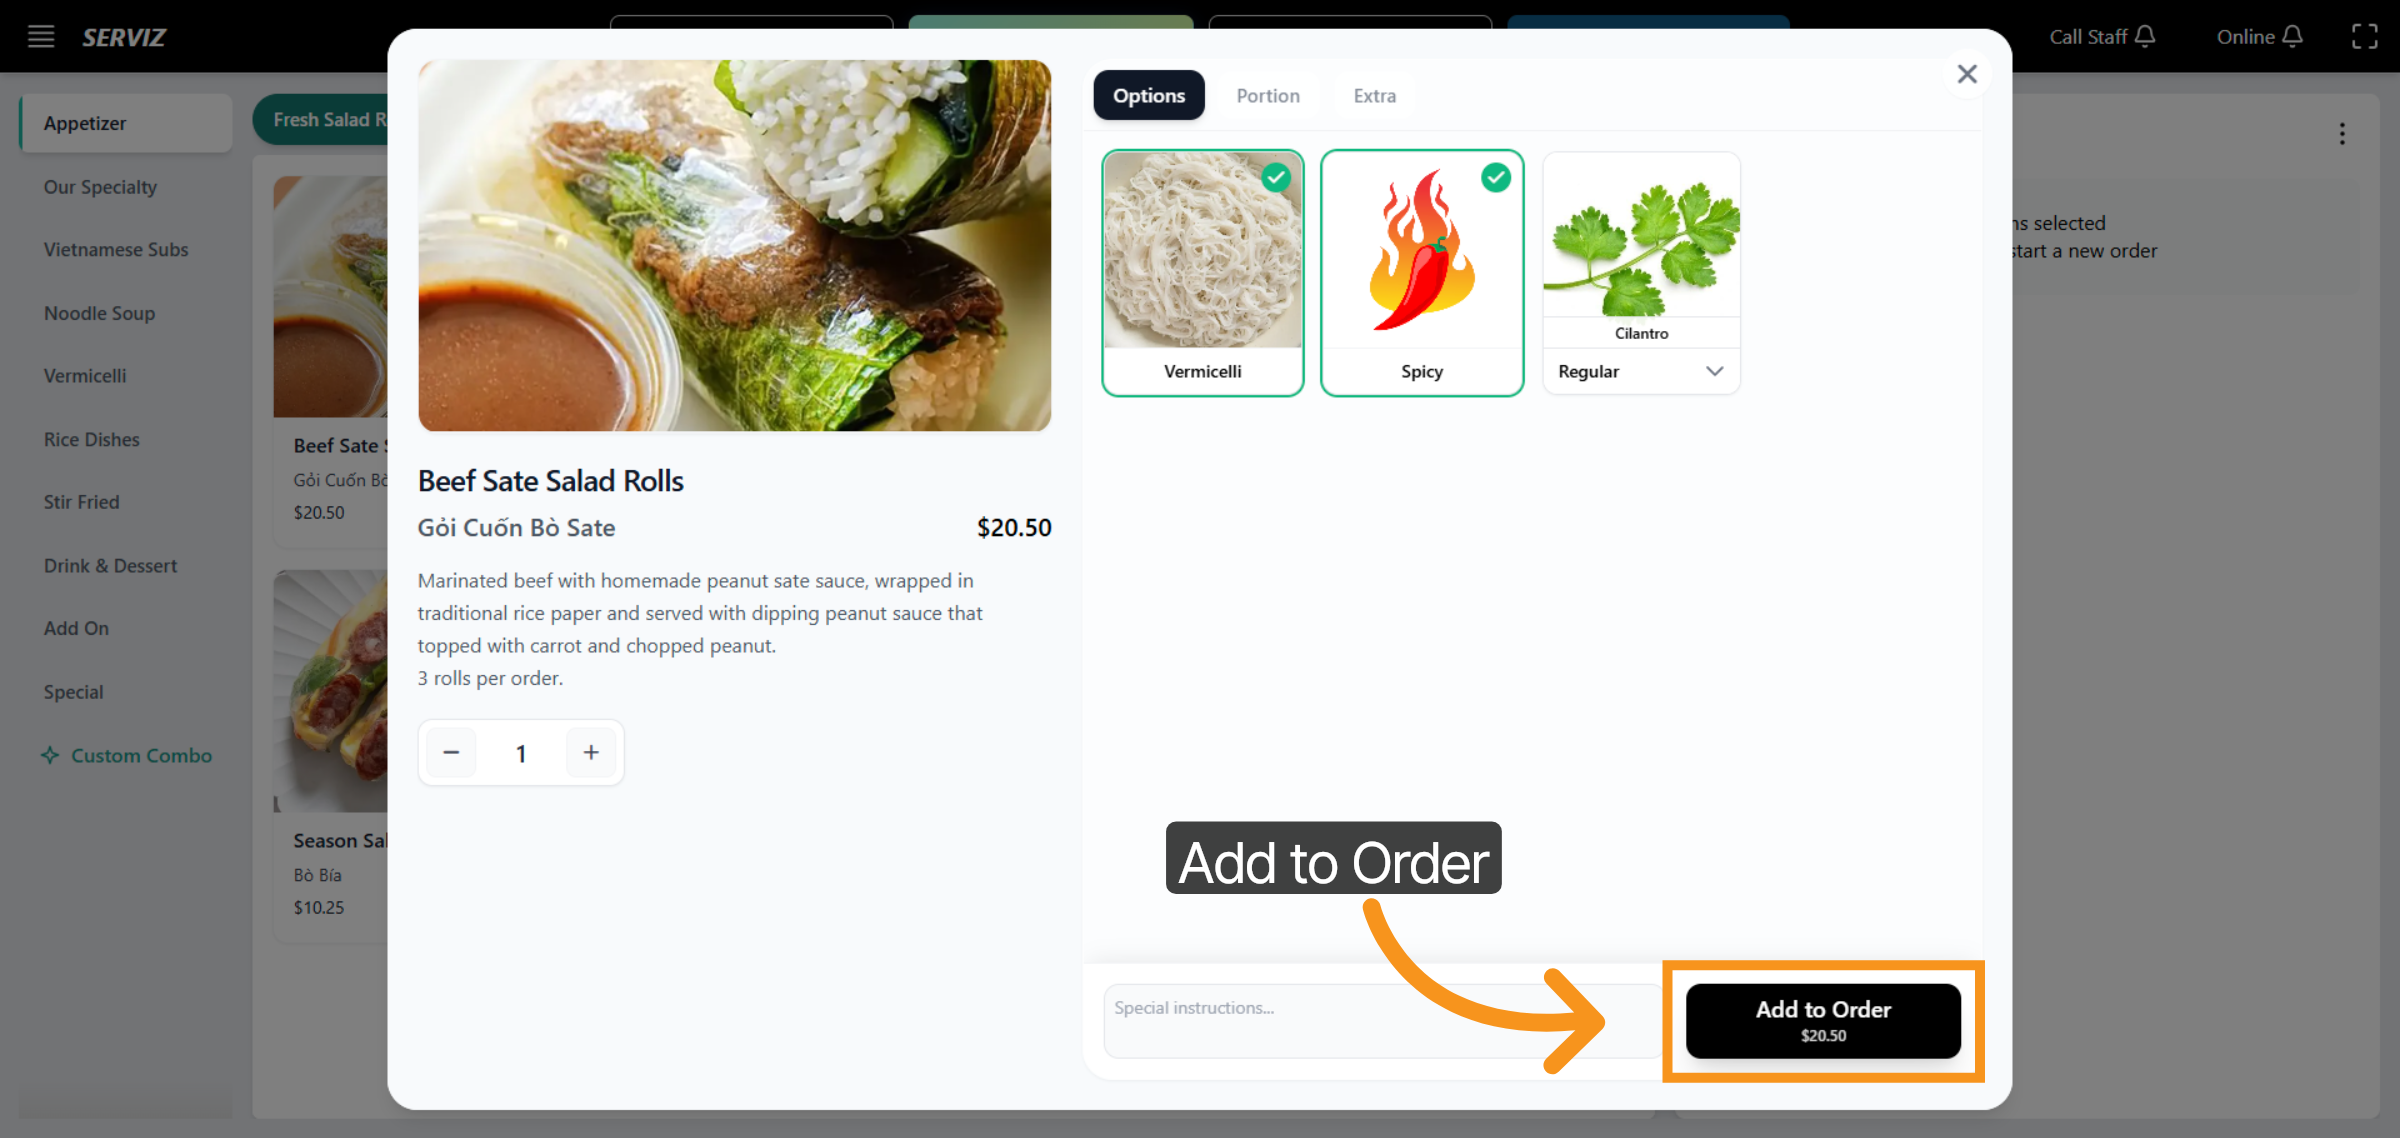
31. OPTIONS FOR TOPPING
Customers can select the toppings included with each product based on their preferences.
32. Menu
All of the restaurant's products are integrated into the menu. The user-friendly interface makes it easy to navigate.
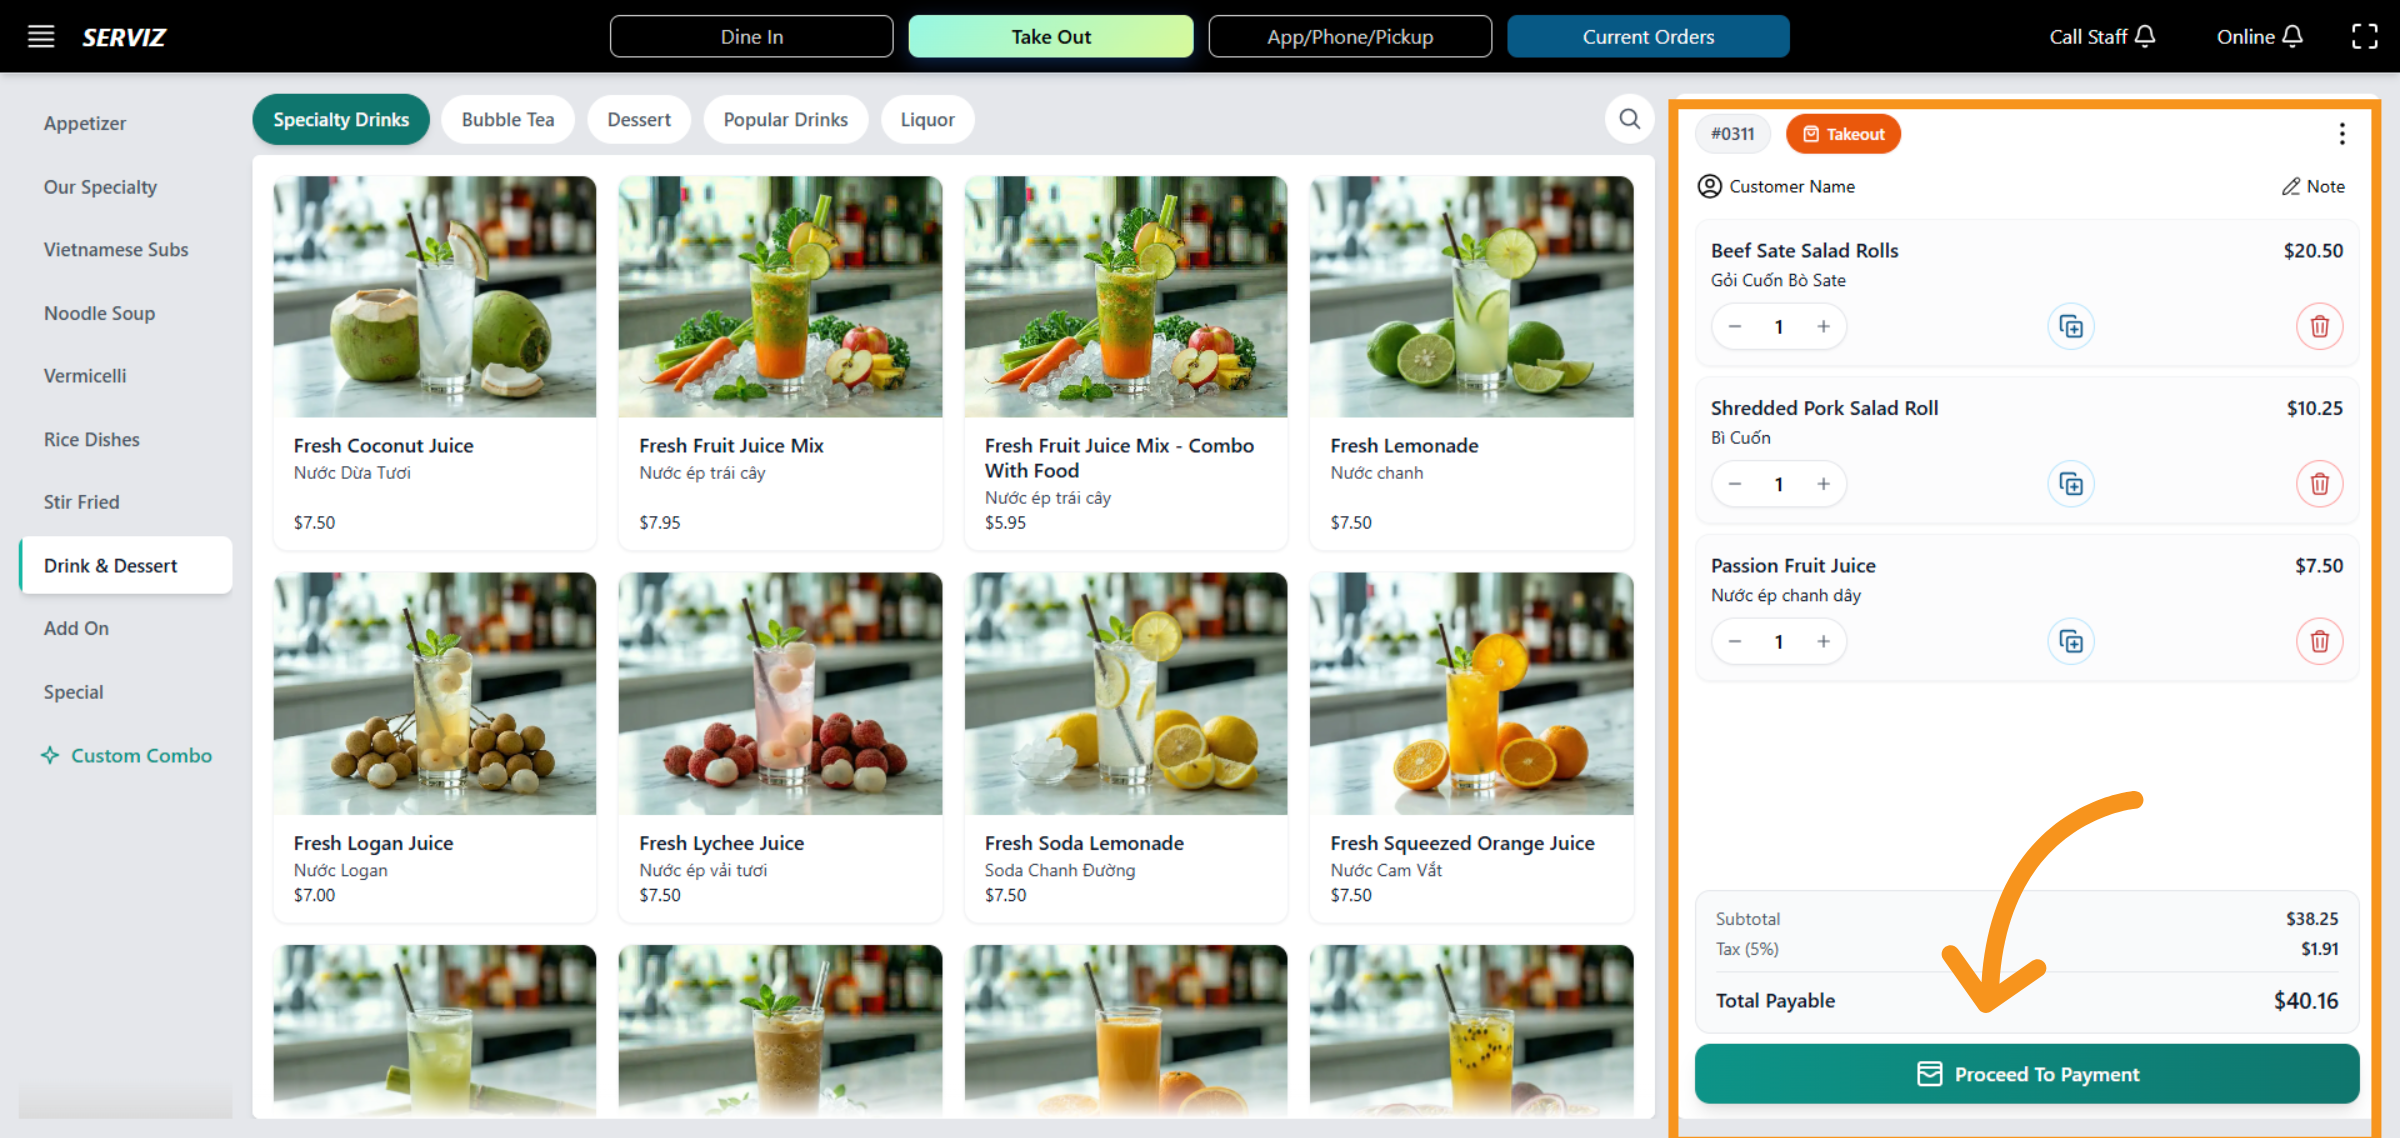
33. Proceed to Payment
"Proceed To Payment" to move forward with the payment process.
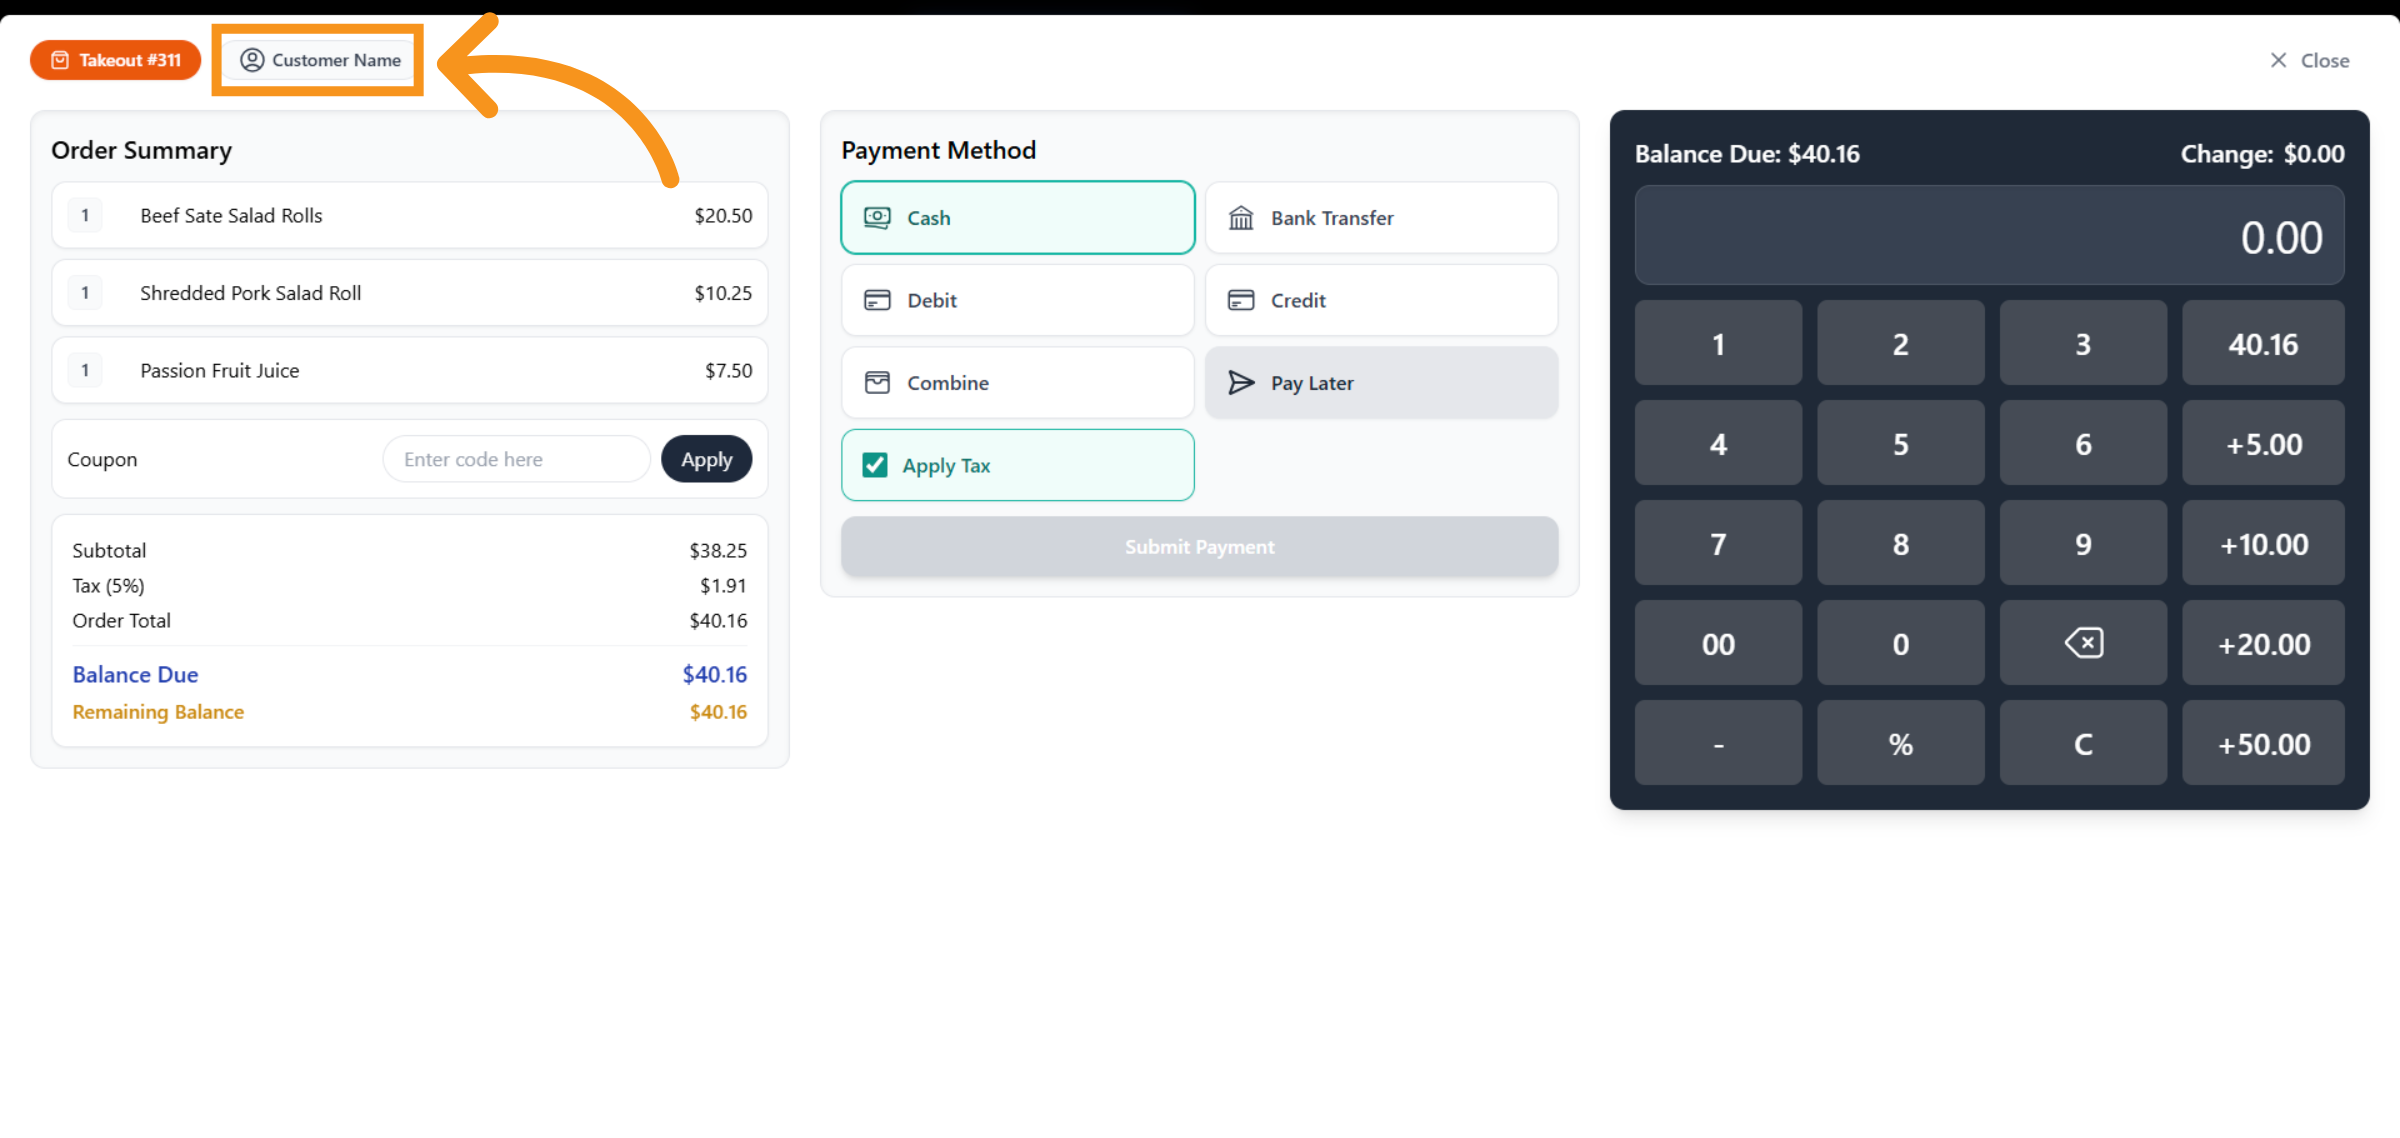
34. Select Customer Name Field
In this section, click on "Customer Name" to manage the order status and payment.
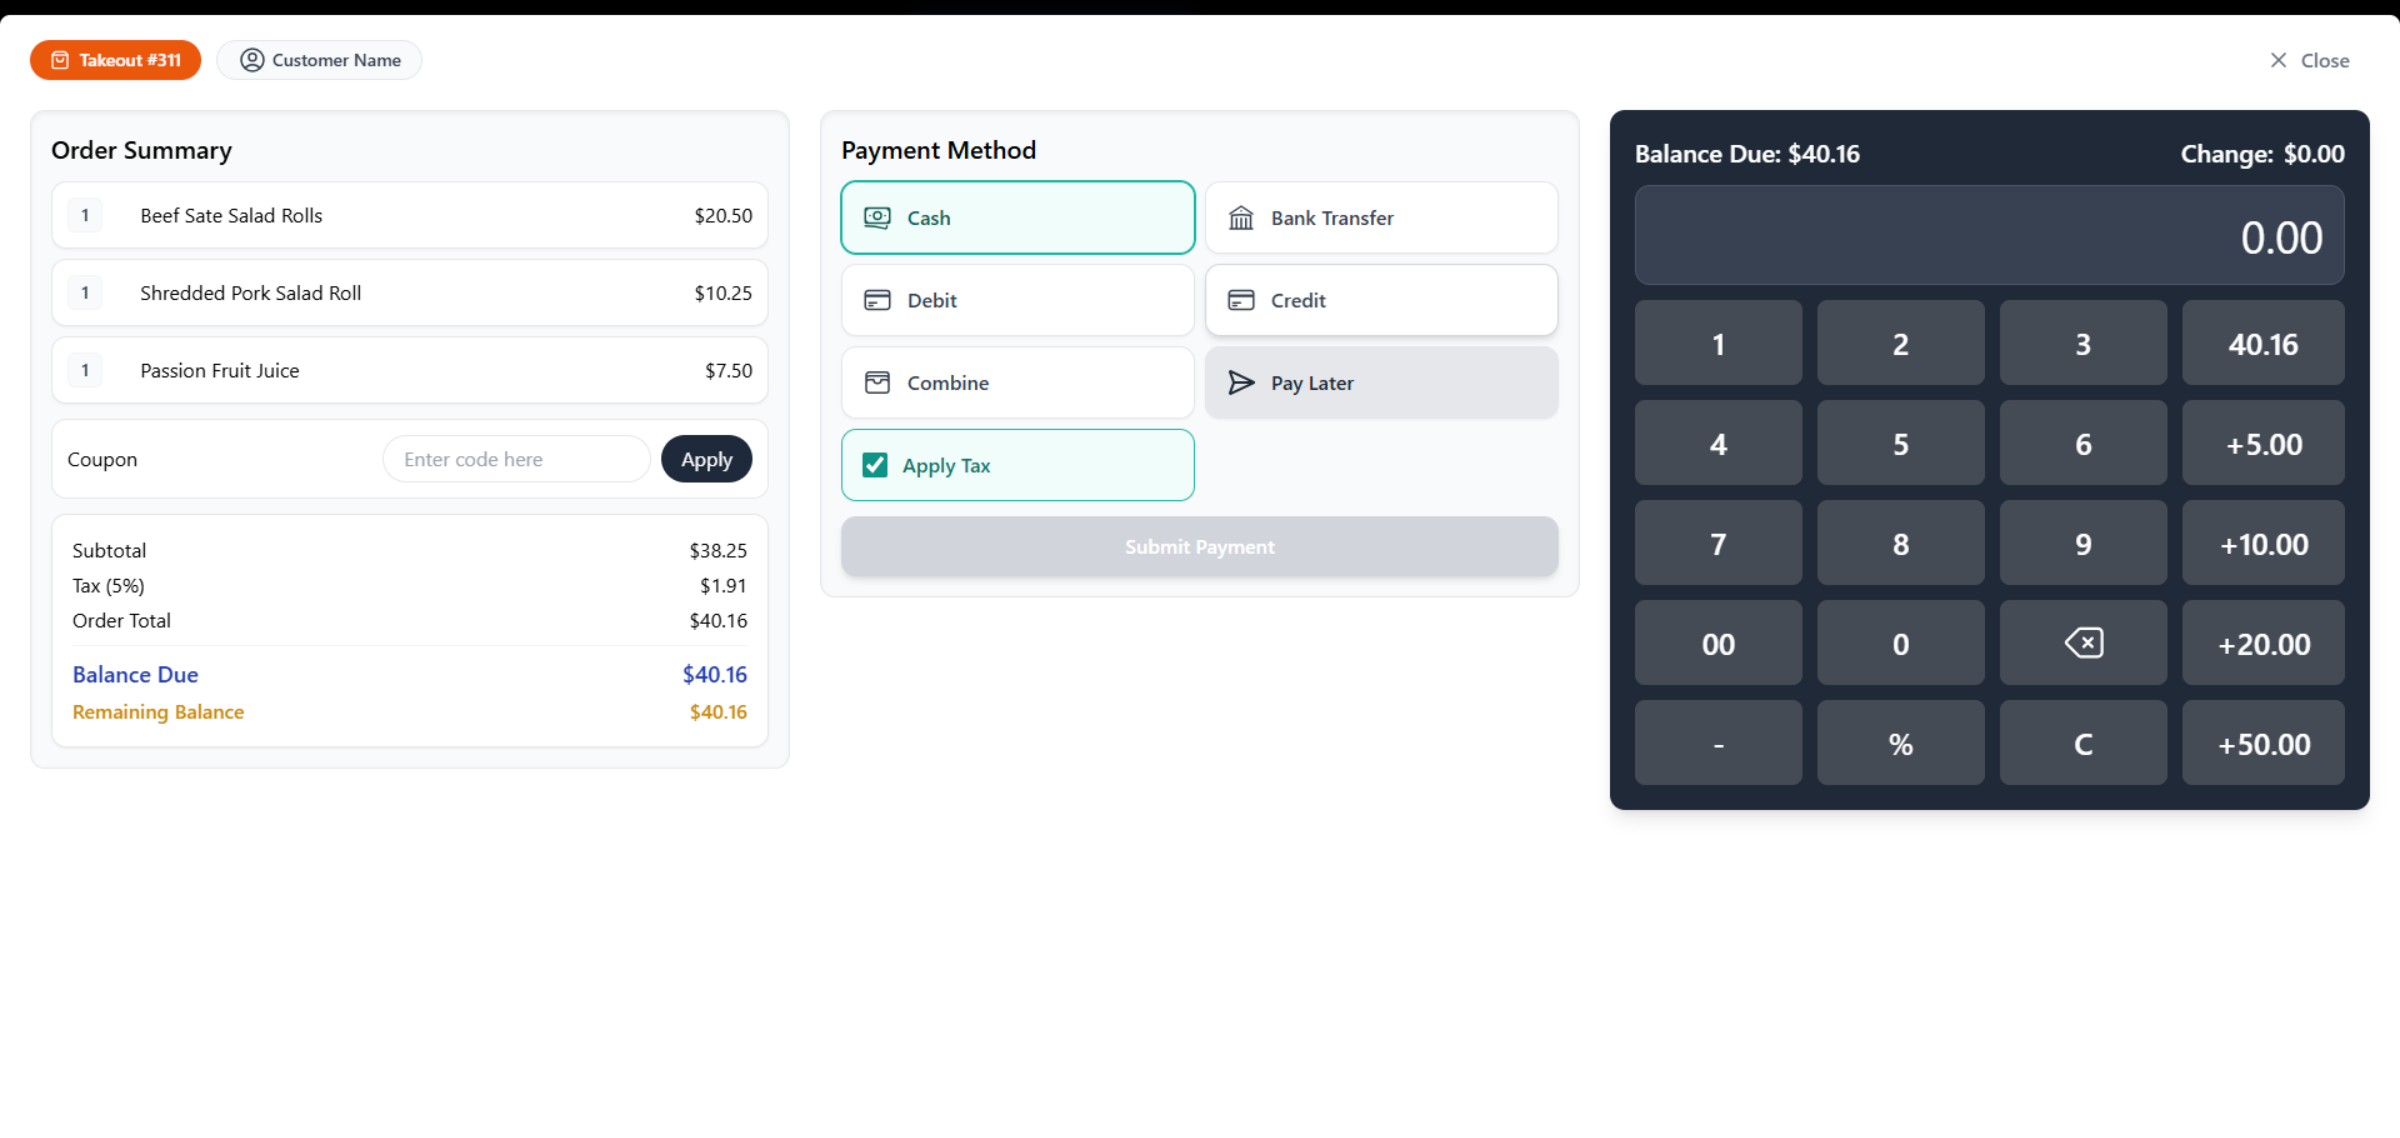
35. Process Payment
This section is almost the same as the Process Payment for Dine In.
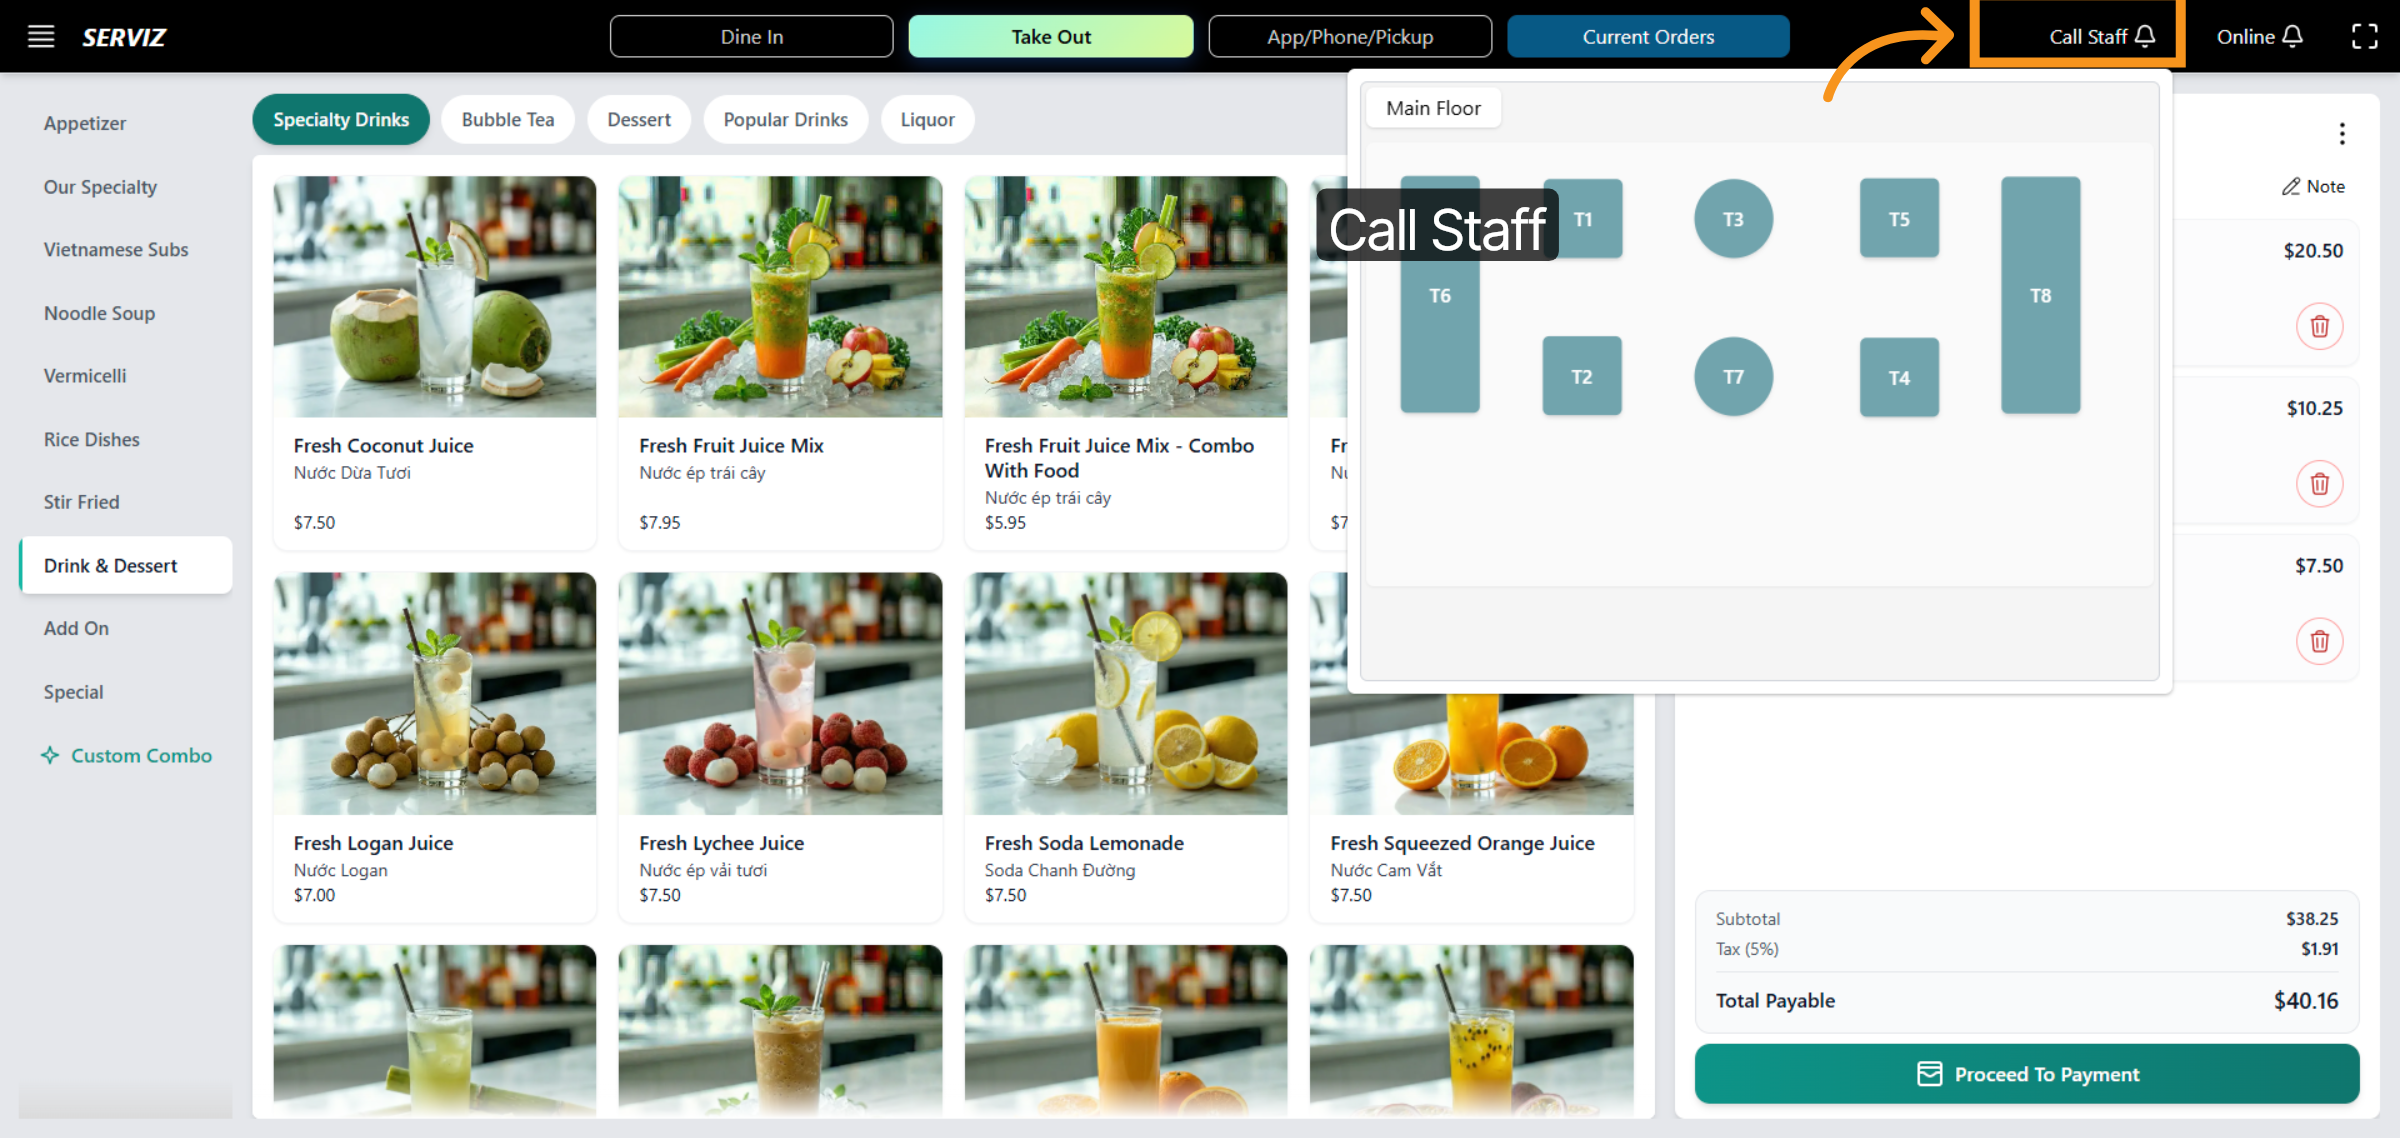
36. Call Staff
"Call Staff" to request assistance for Dine-In Self order.
37. Select App/Phone Pickup
Click "App/Phone/Pickup" to specify the pickup method for the order.

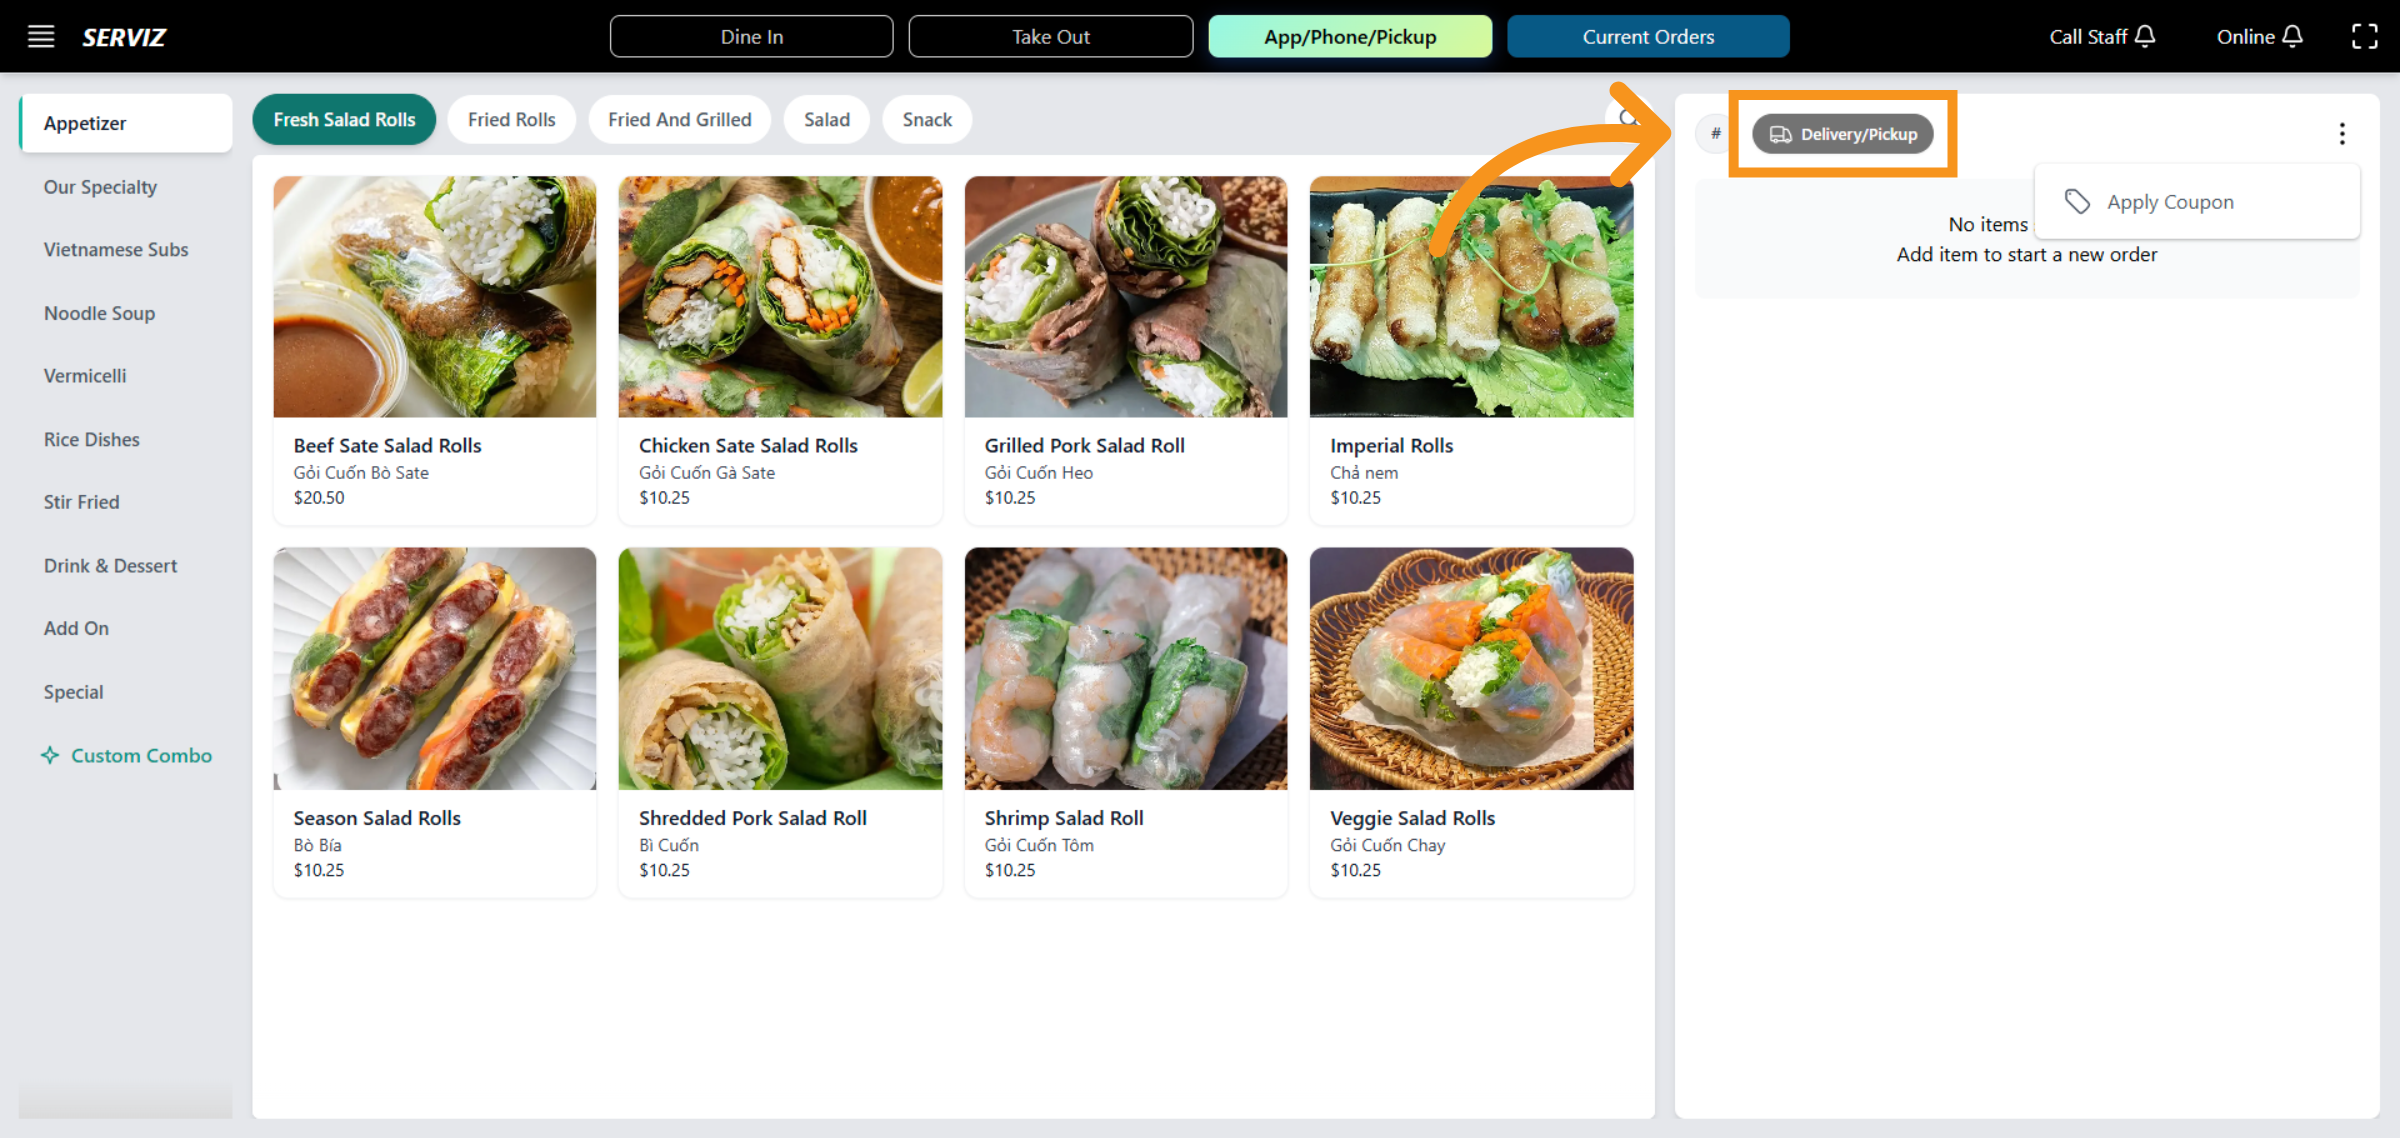
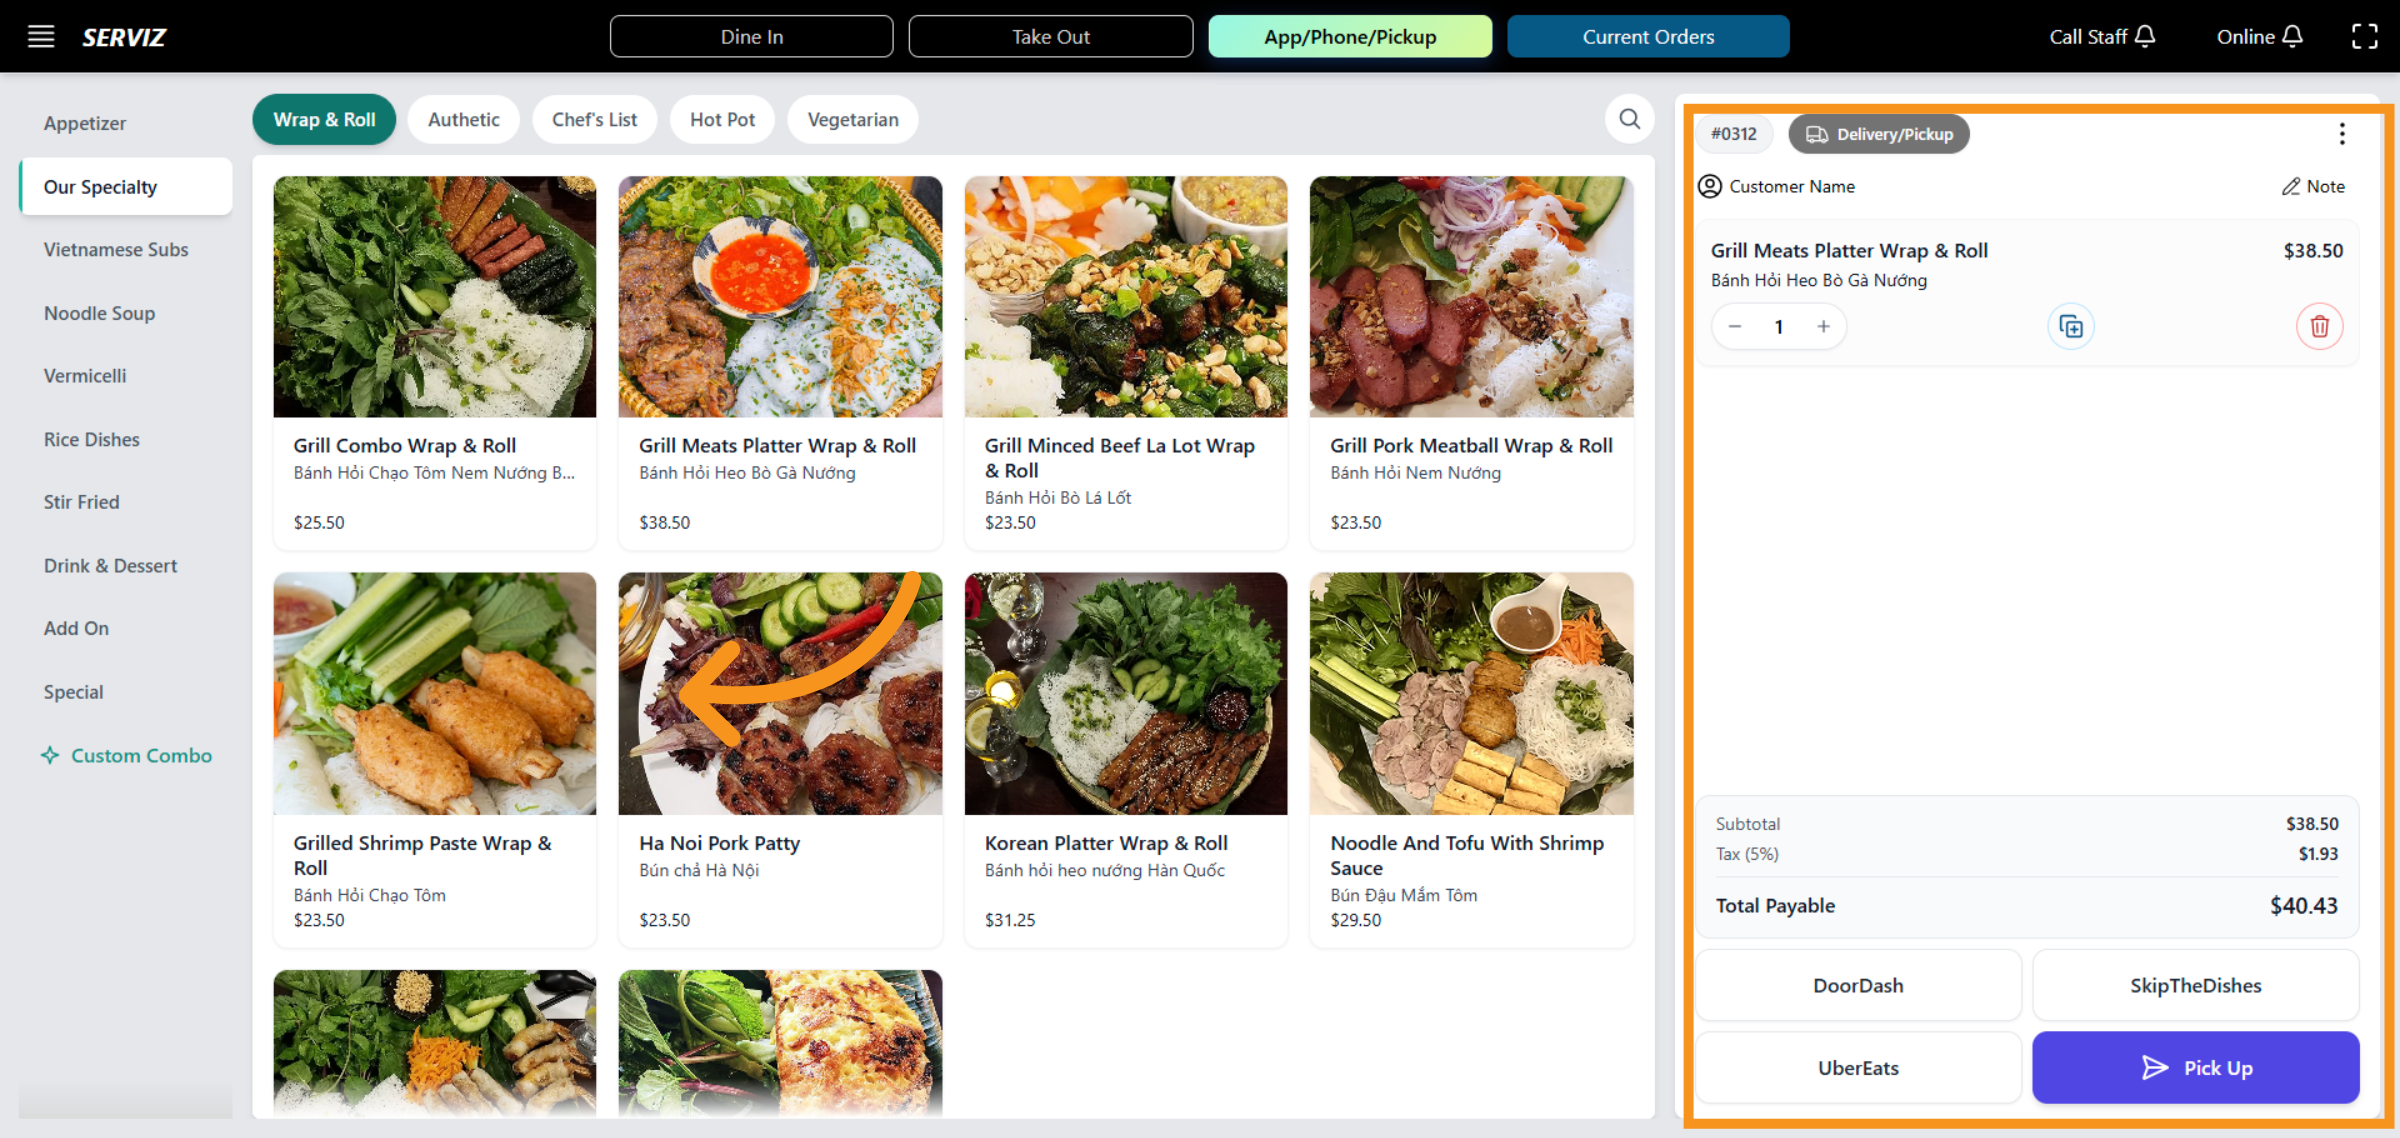
38. Choose Delivery/Pickup
Click "Delivery/Pickup" to select the delivery or pickup option for the order.
39. Check Delivery order Bill
The delivery order bill includes essential order information: order number, order type, customer name, Note and delivery partner.
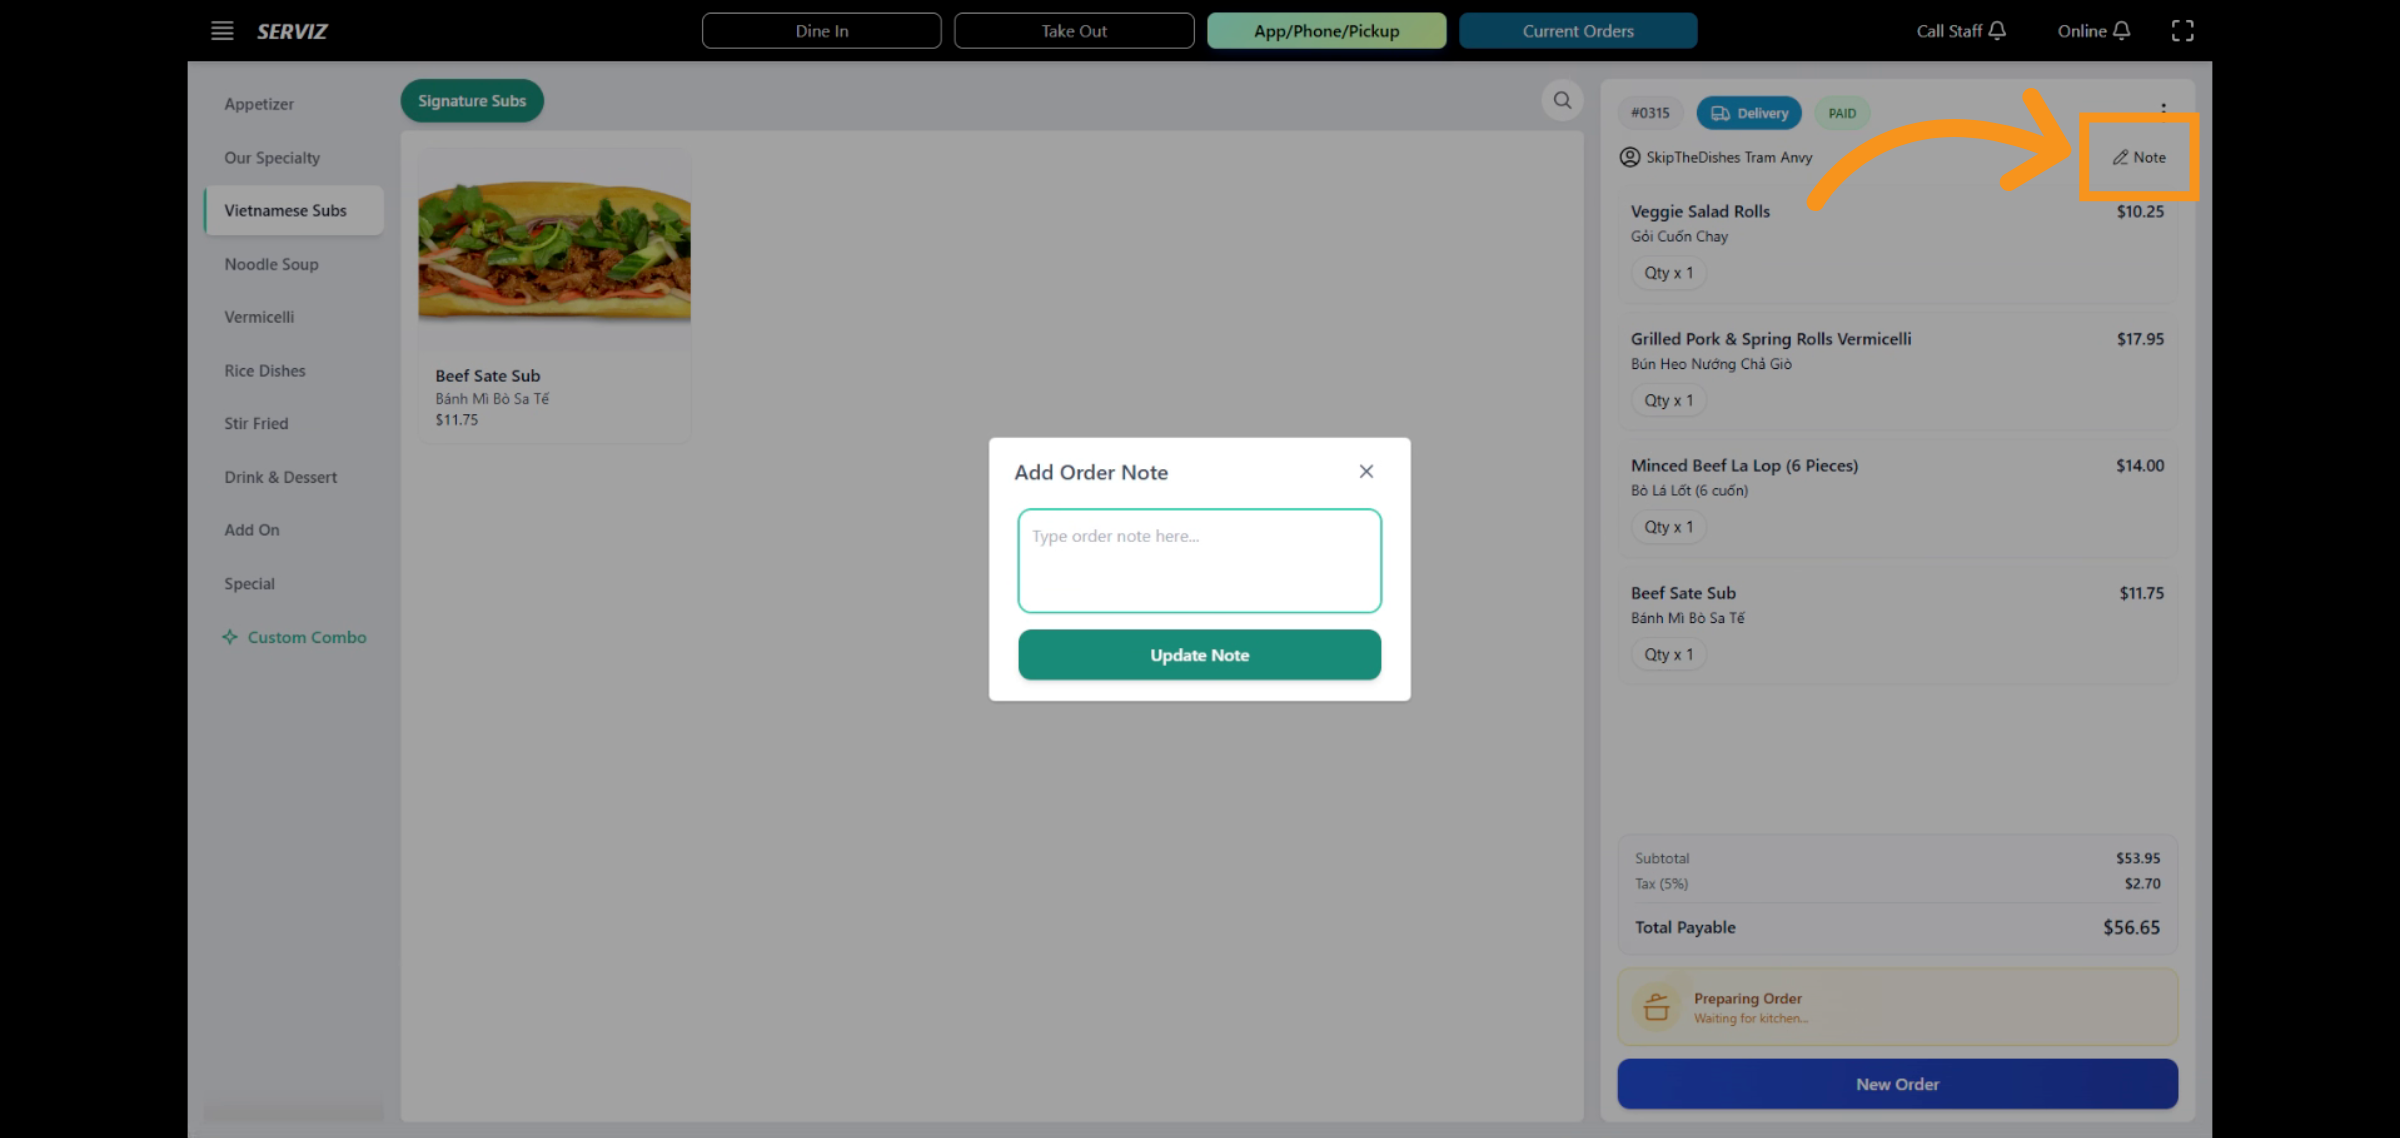
40. Enter Note Text
Please add your request in the note field to specify any instructions or preferences.
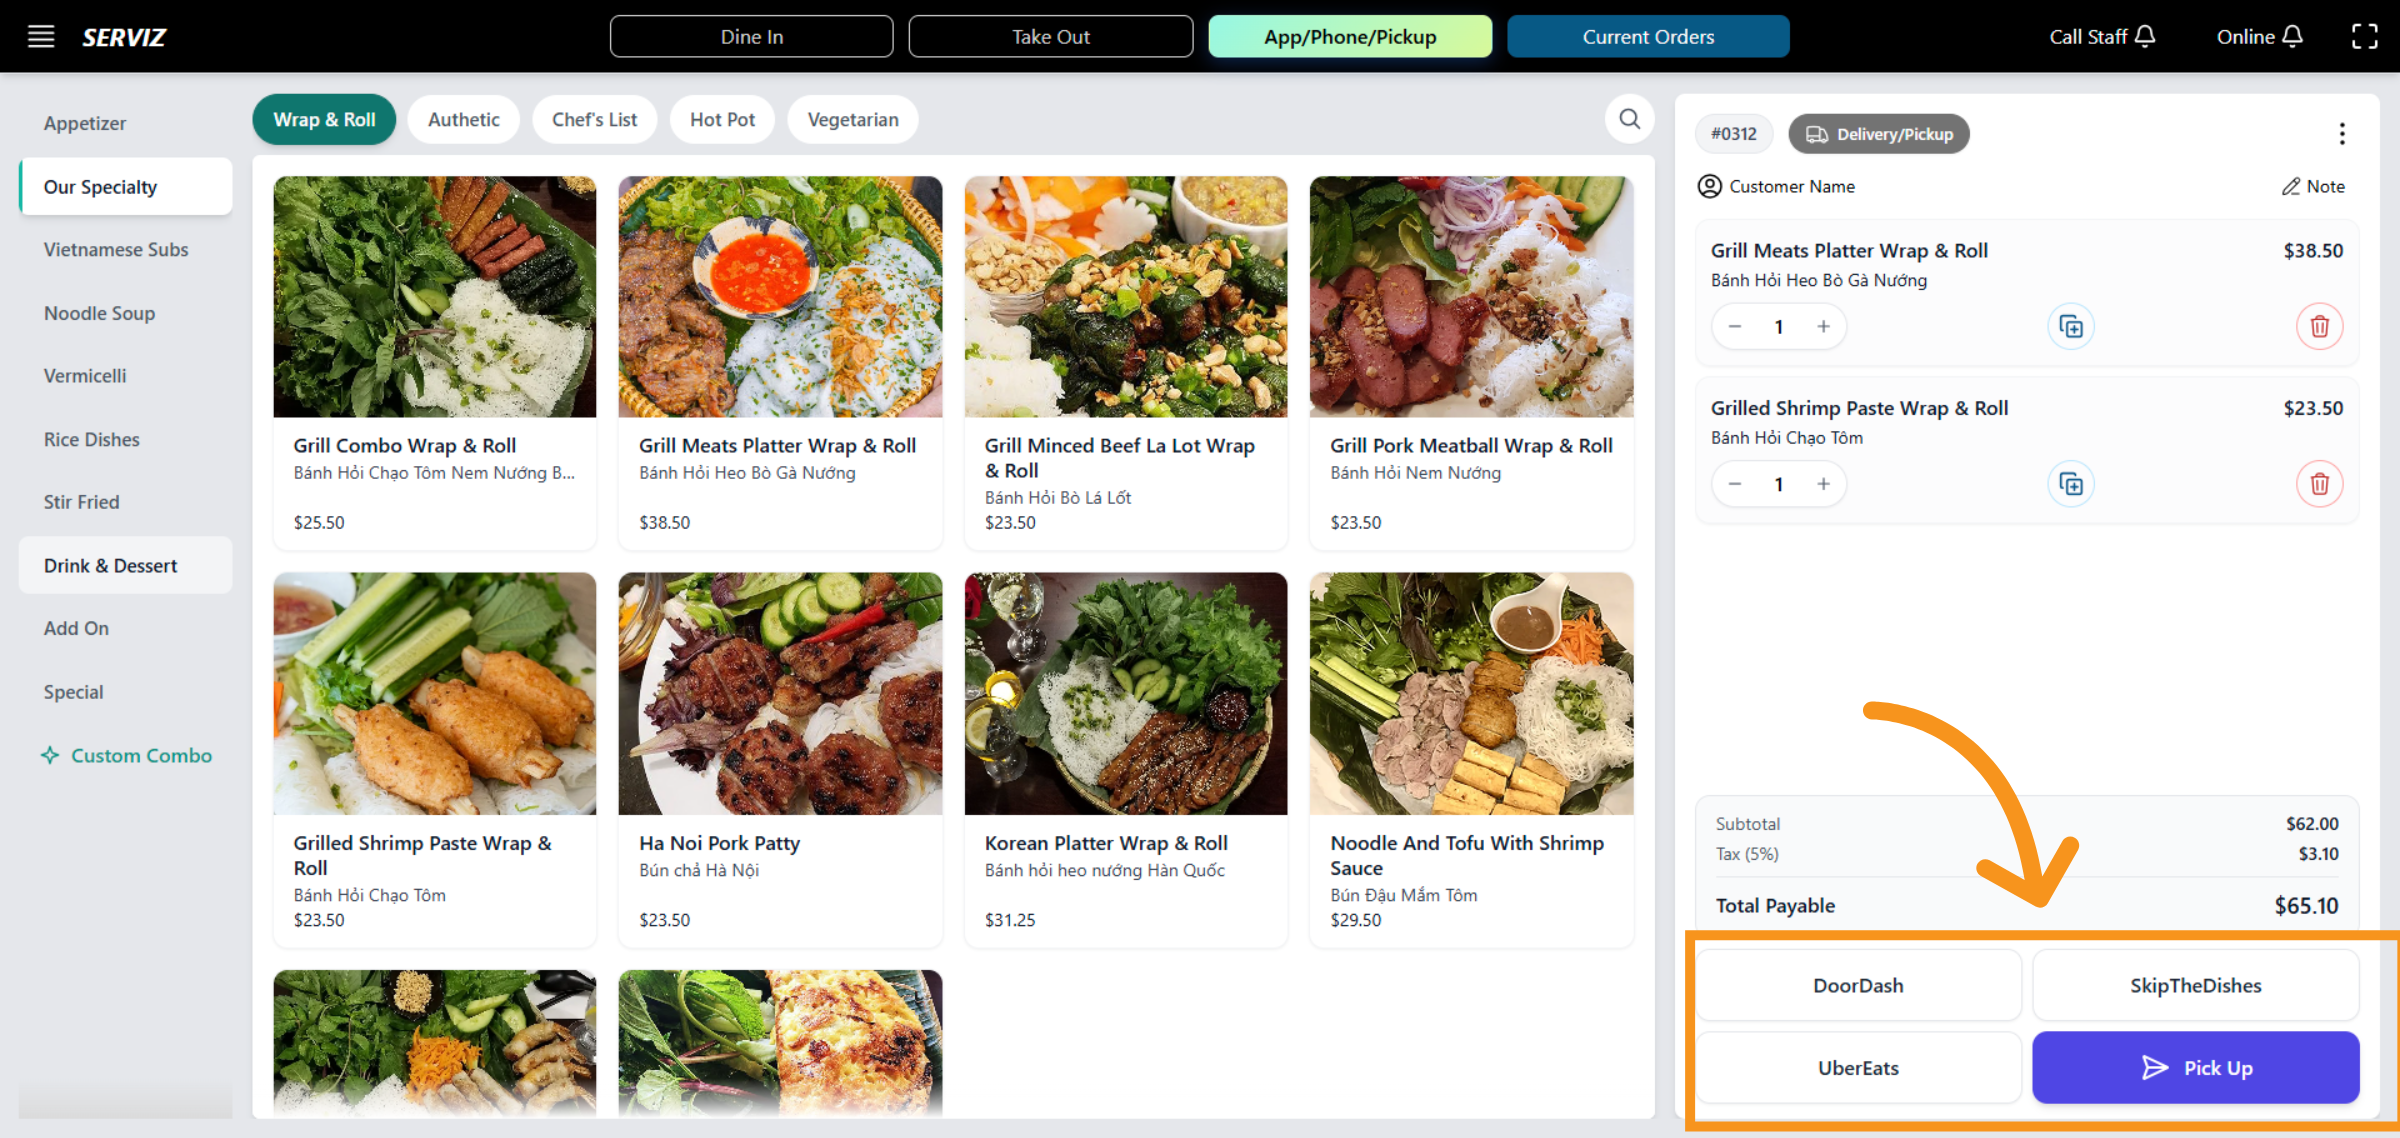
41. Delivery partner
After selecting the items, you can proceed to choose a delivery partner.
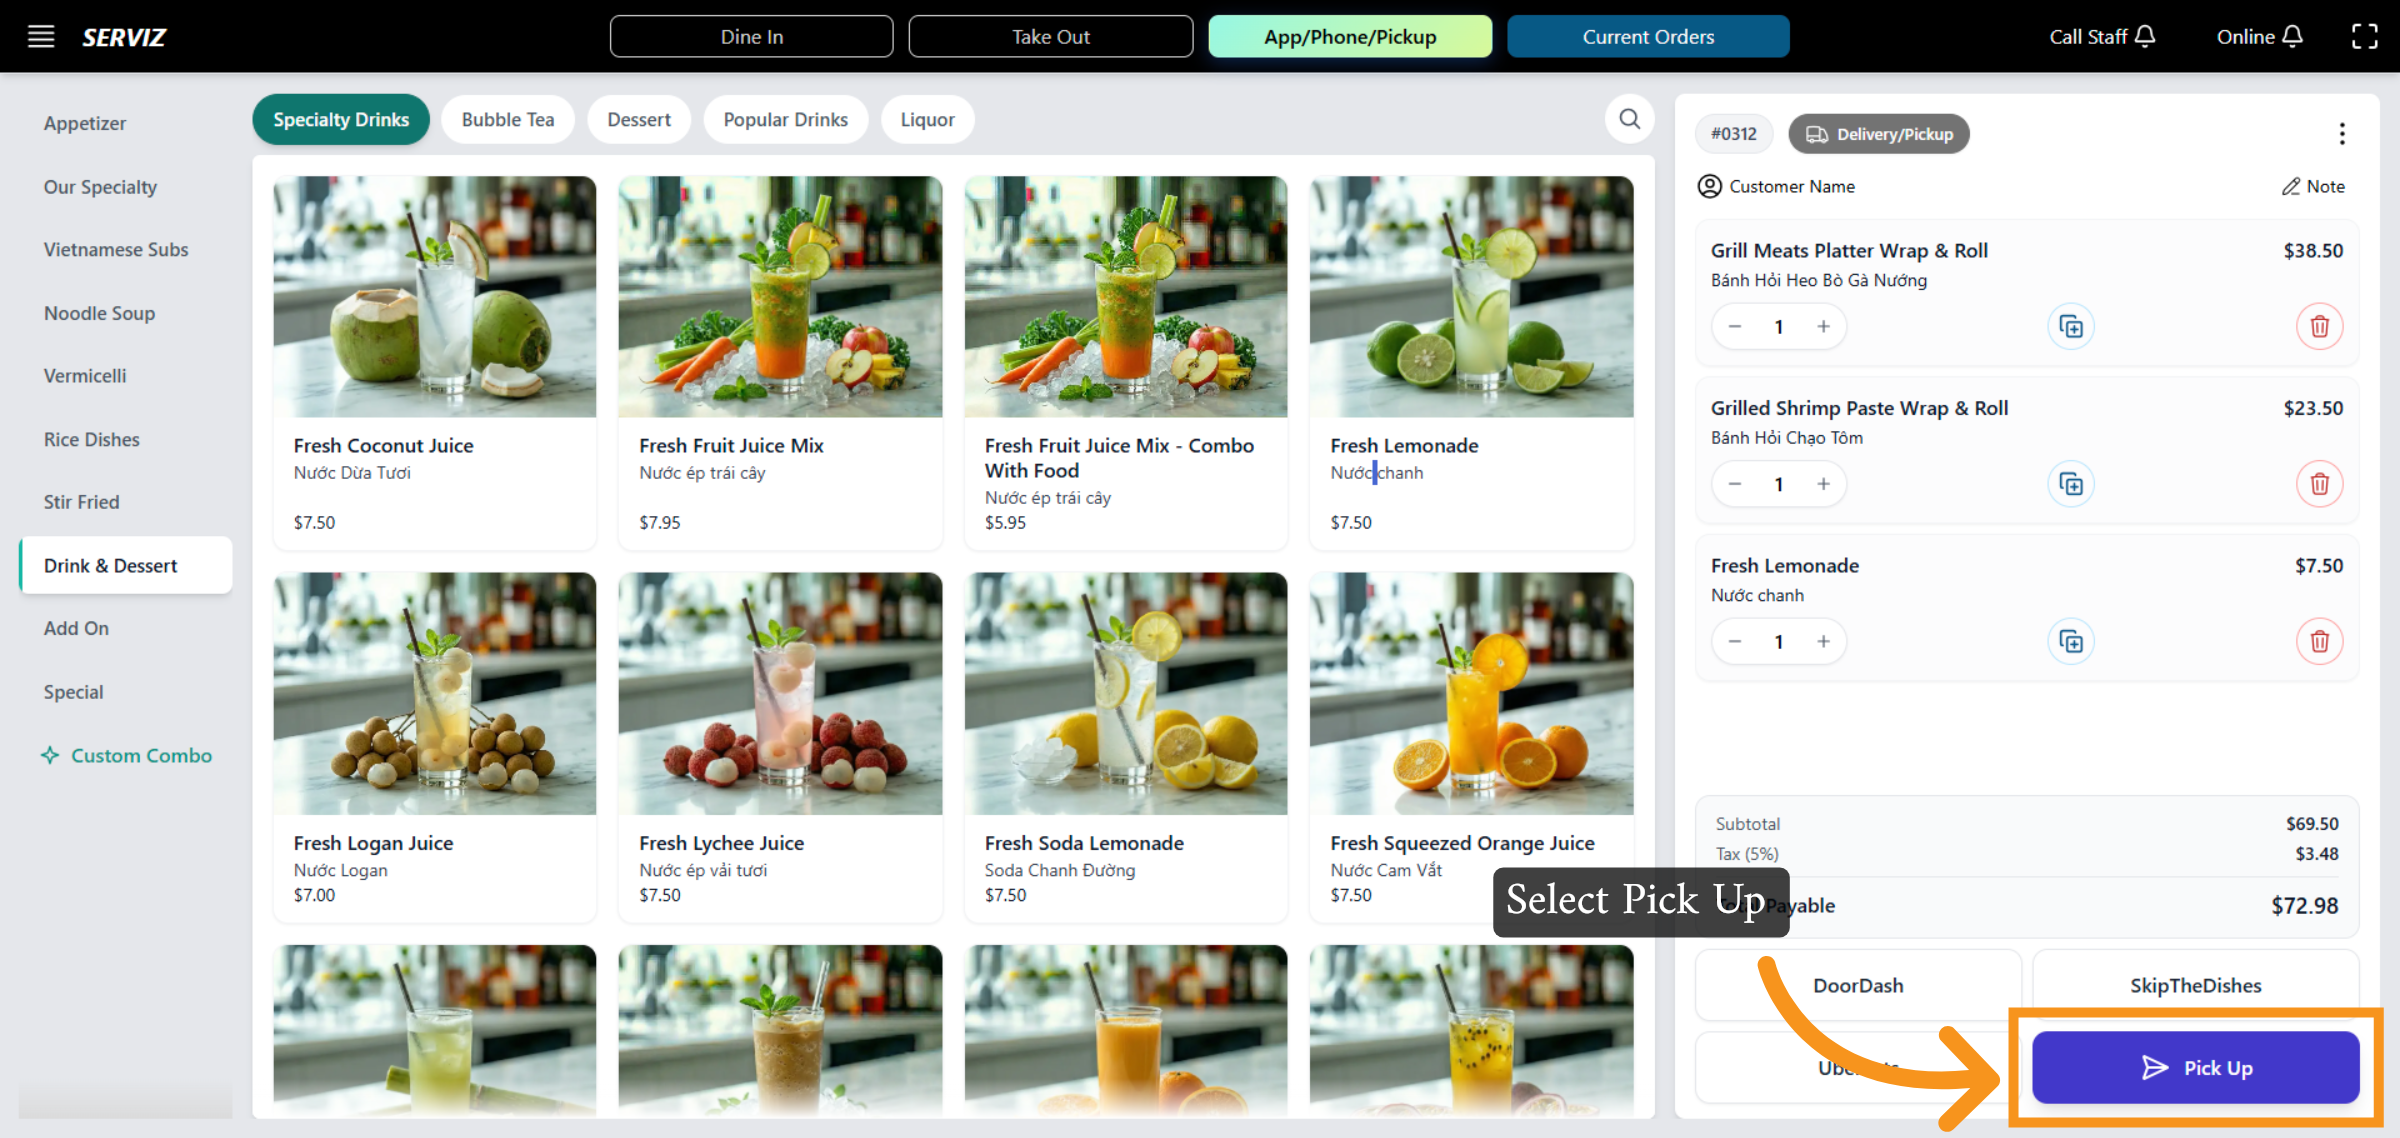
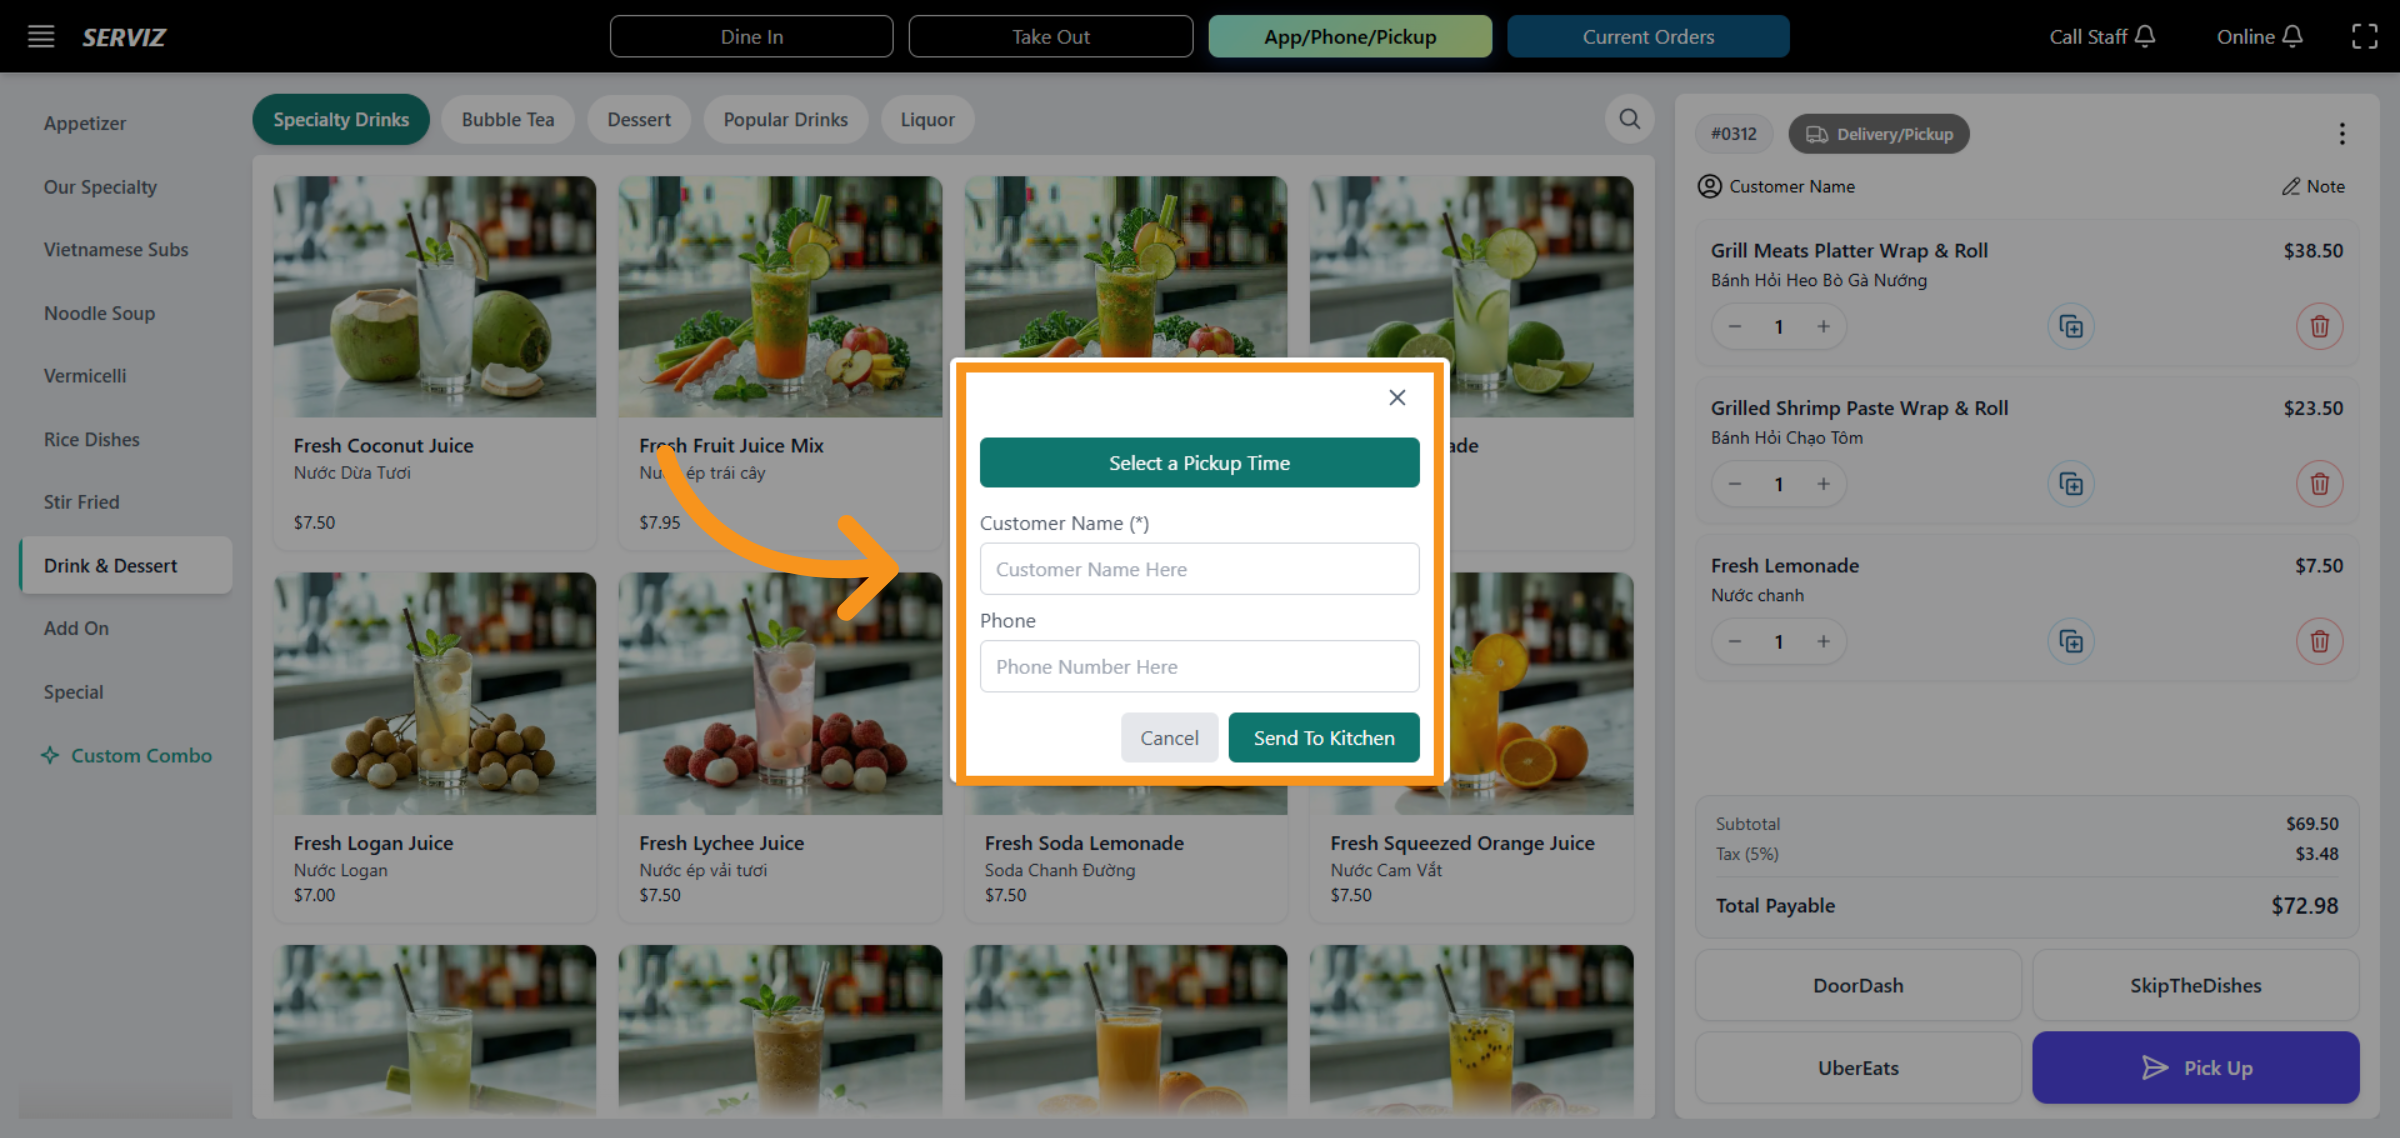
42. Choose Pick Up Option
Click "Pick Up" to specify the pickup method for the order.
43. Pick Up information
The information interface includes: Customer Name, Phone, and options to Cancel or Send to Kitchen.
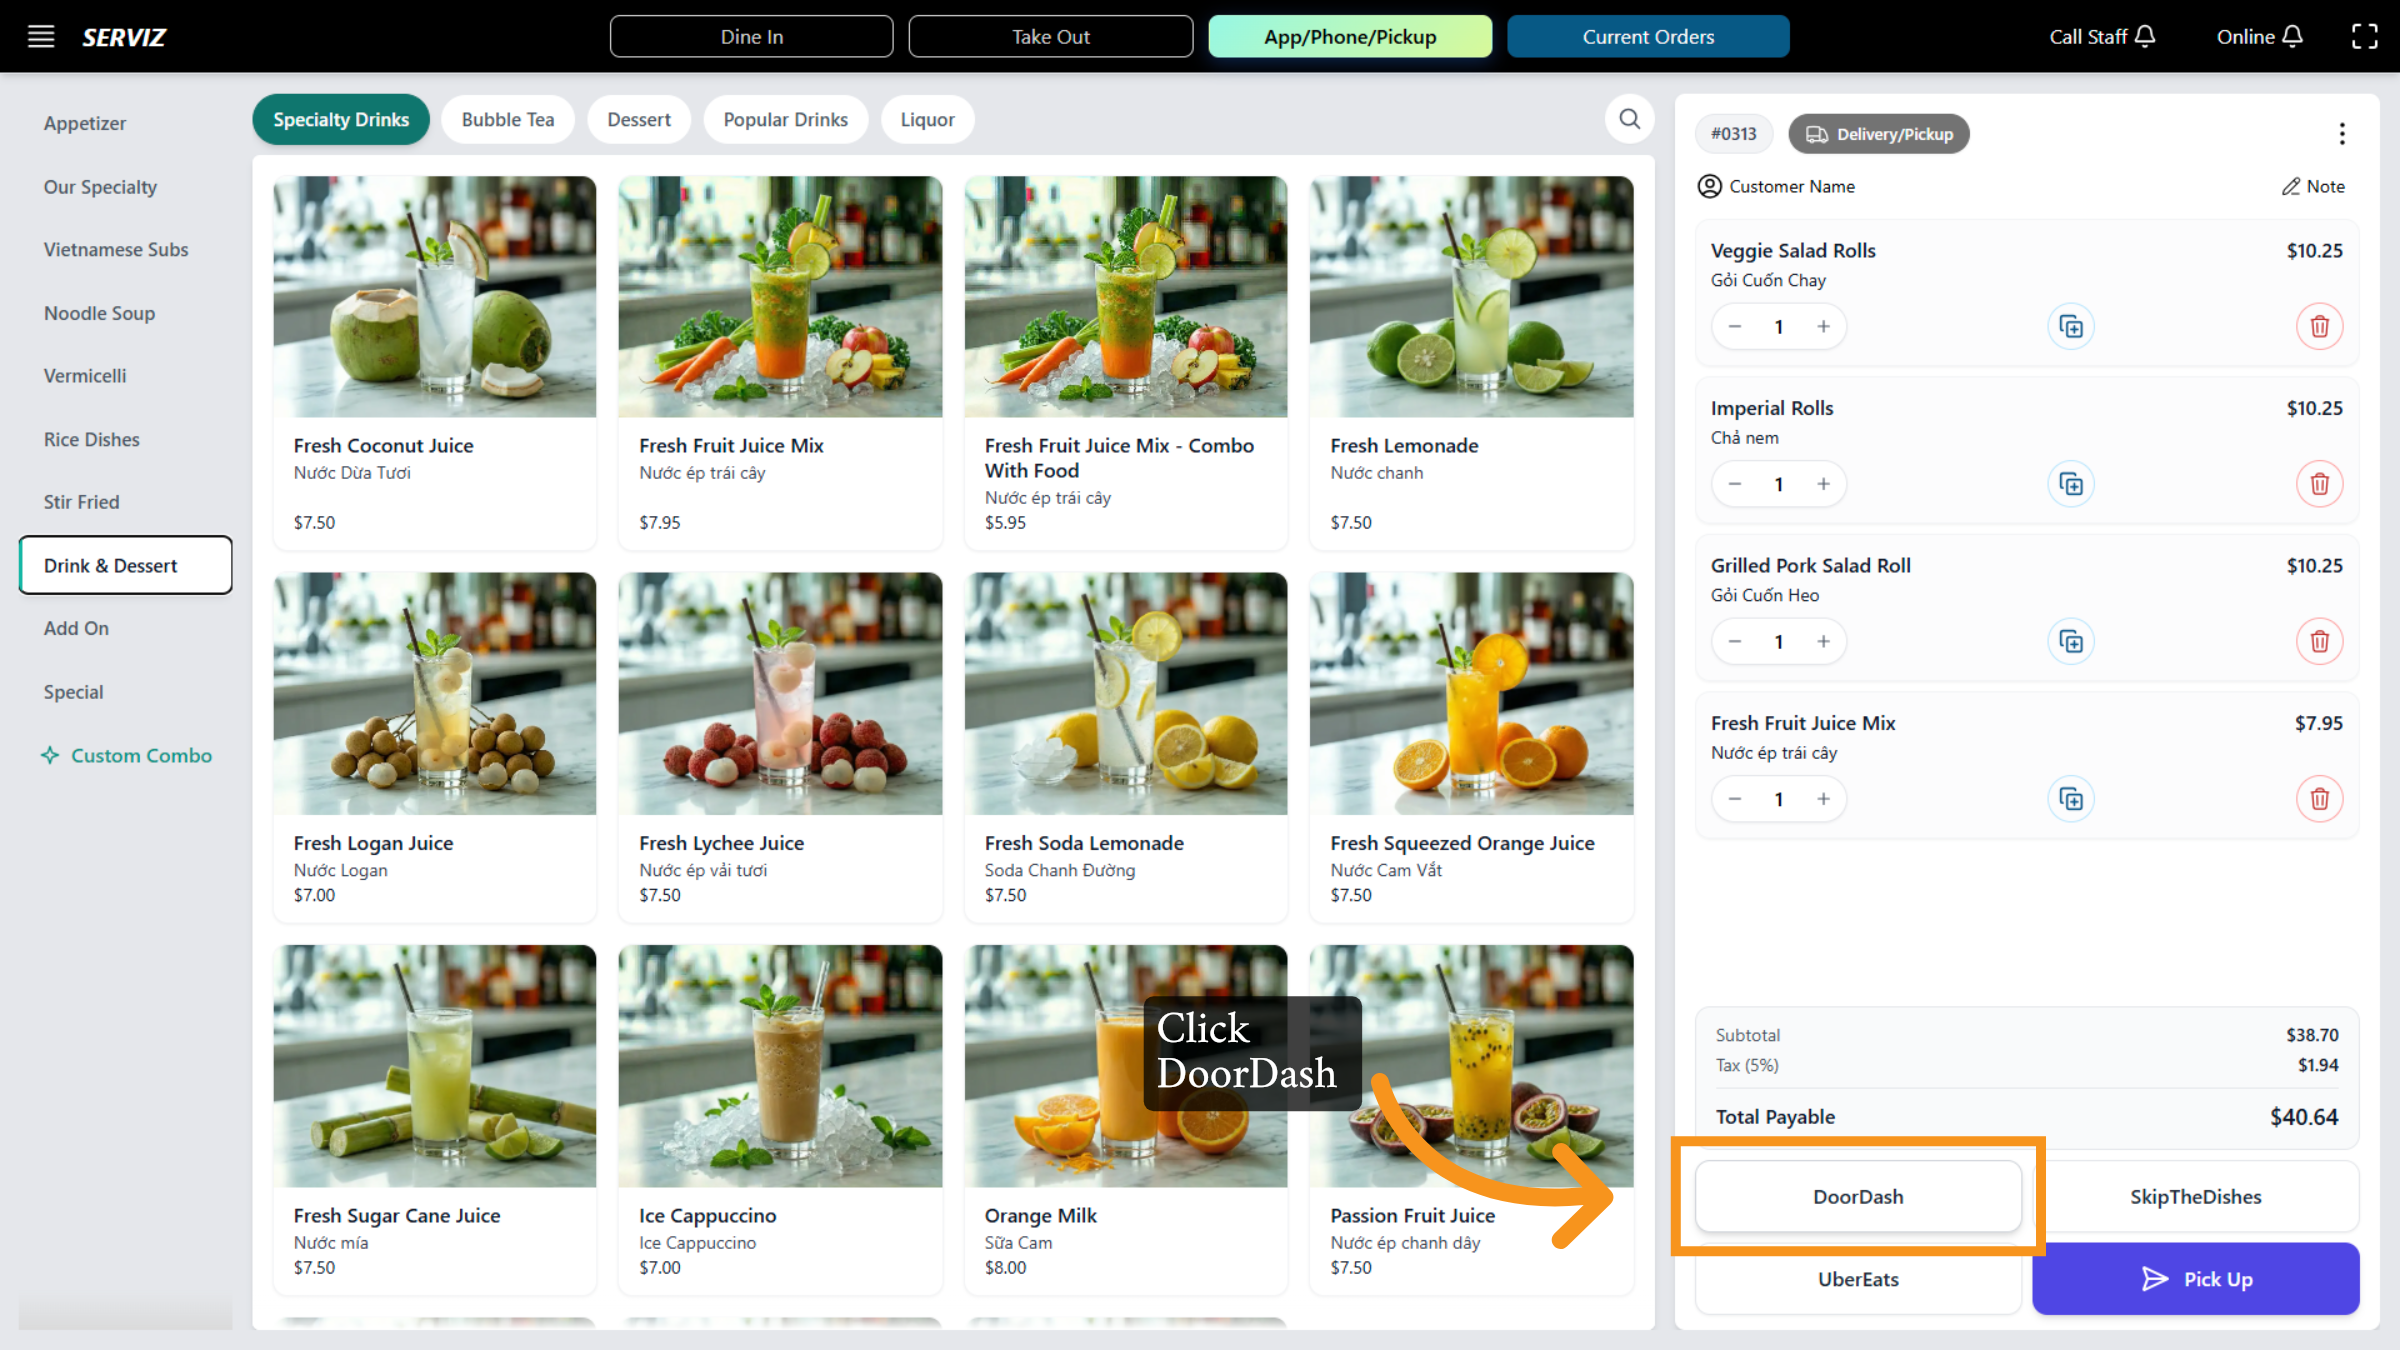
44. Access DoorDash Orders
Click the DoorDash option to view orders from this delivery platform.
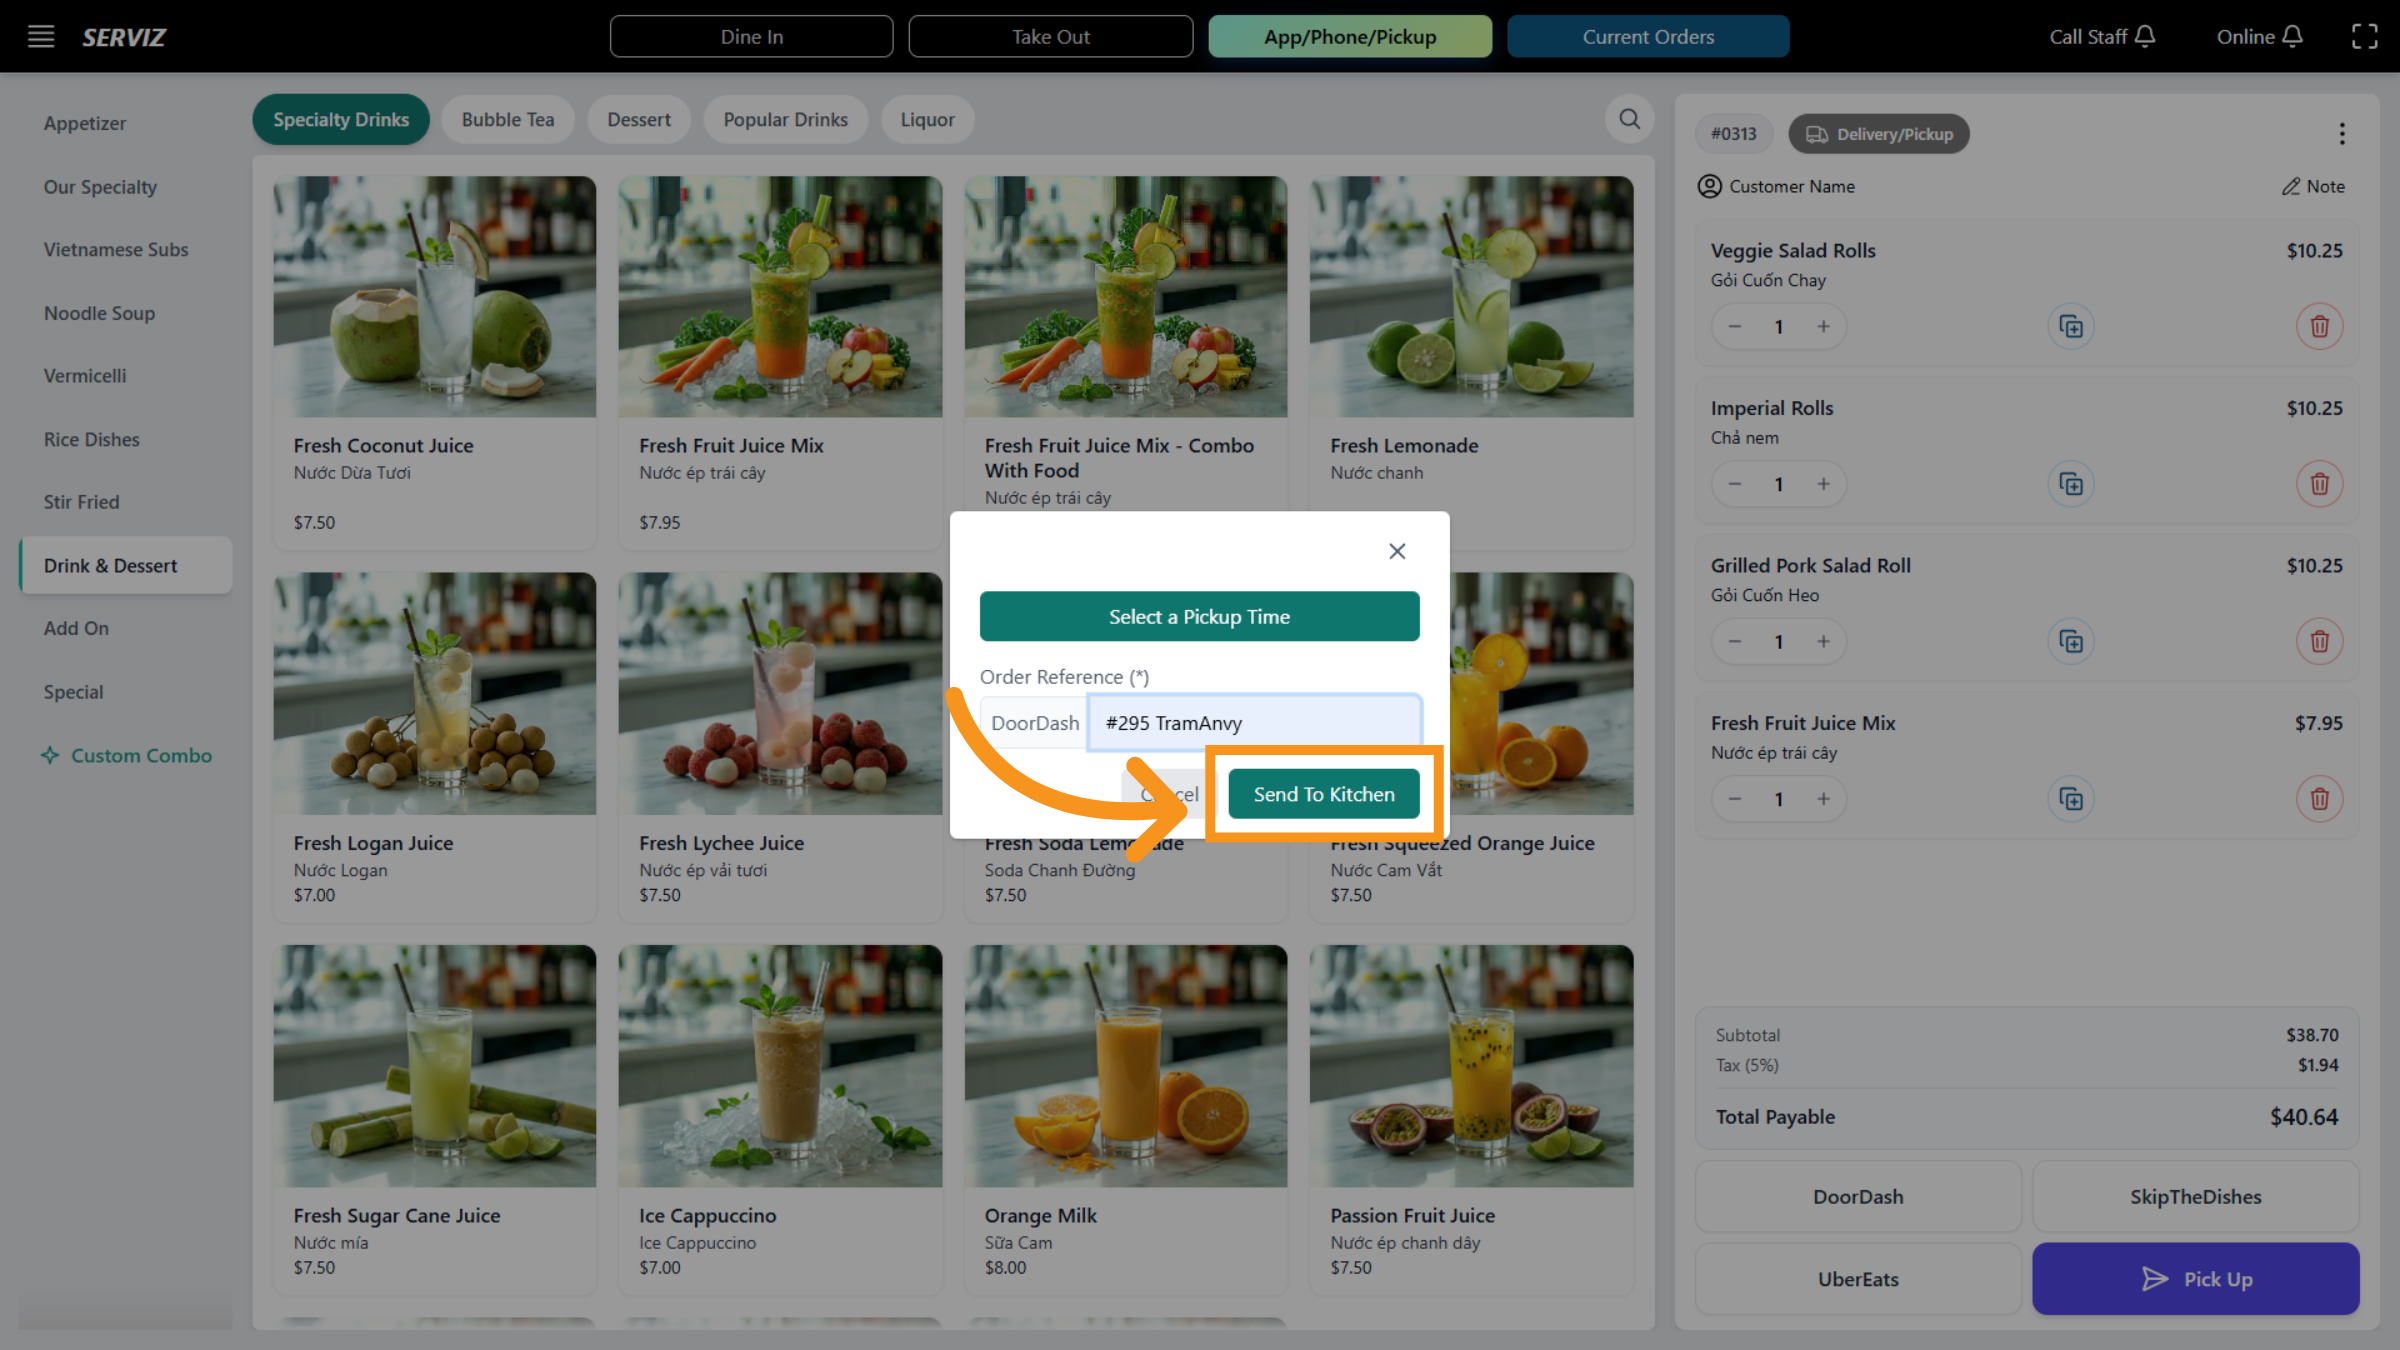
45. Send Order to Kitchen
After filling out the customer information, click the Send To Kitchen button to forward the order details to the kitchen for preparation.
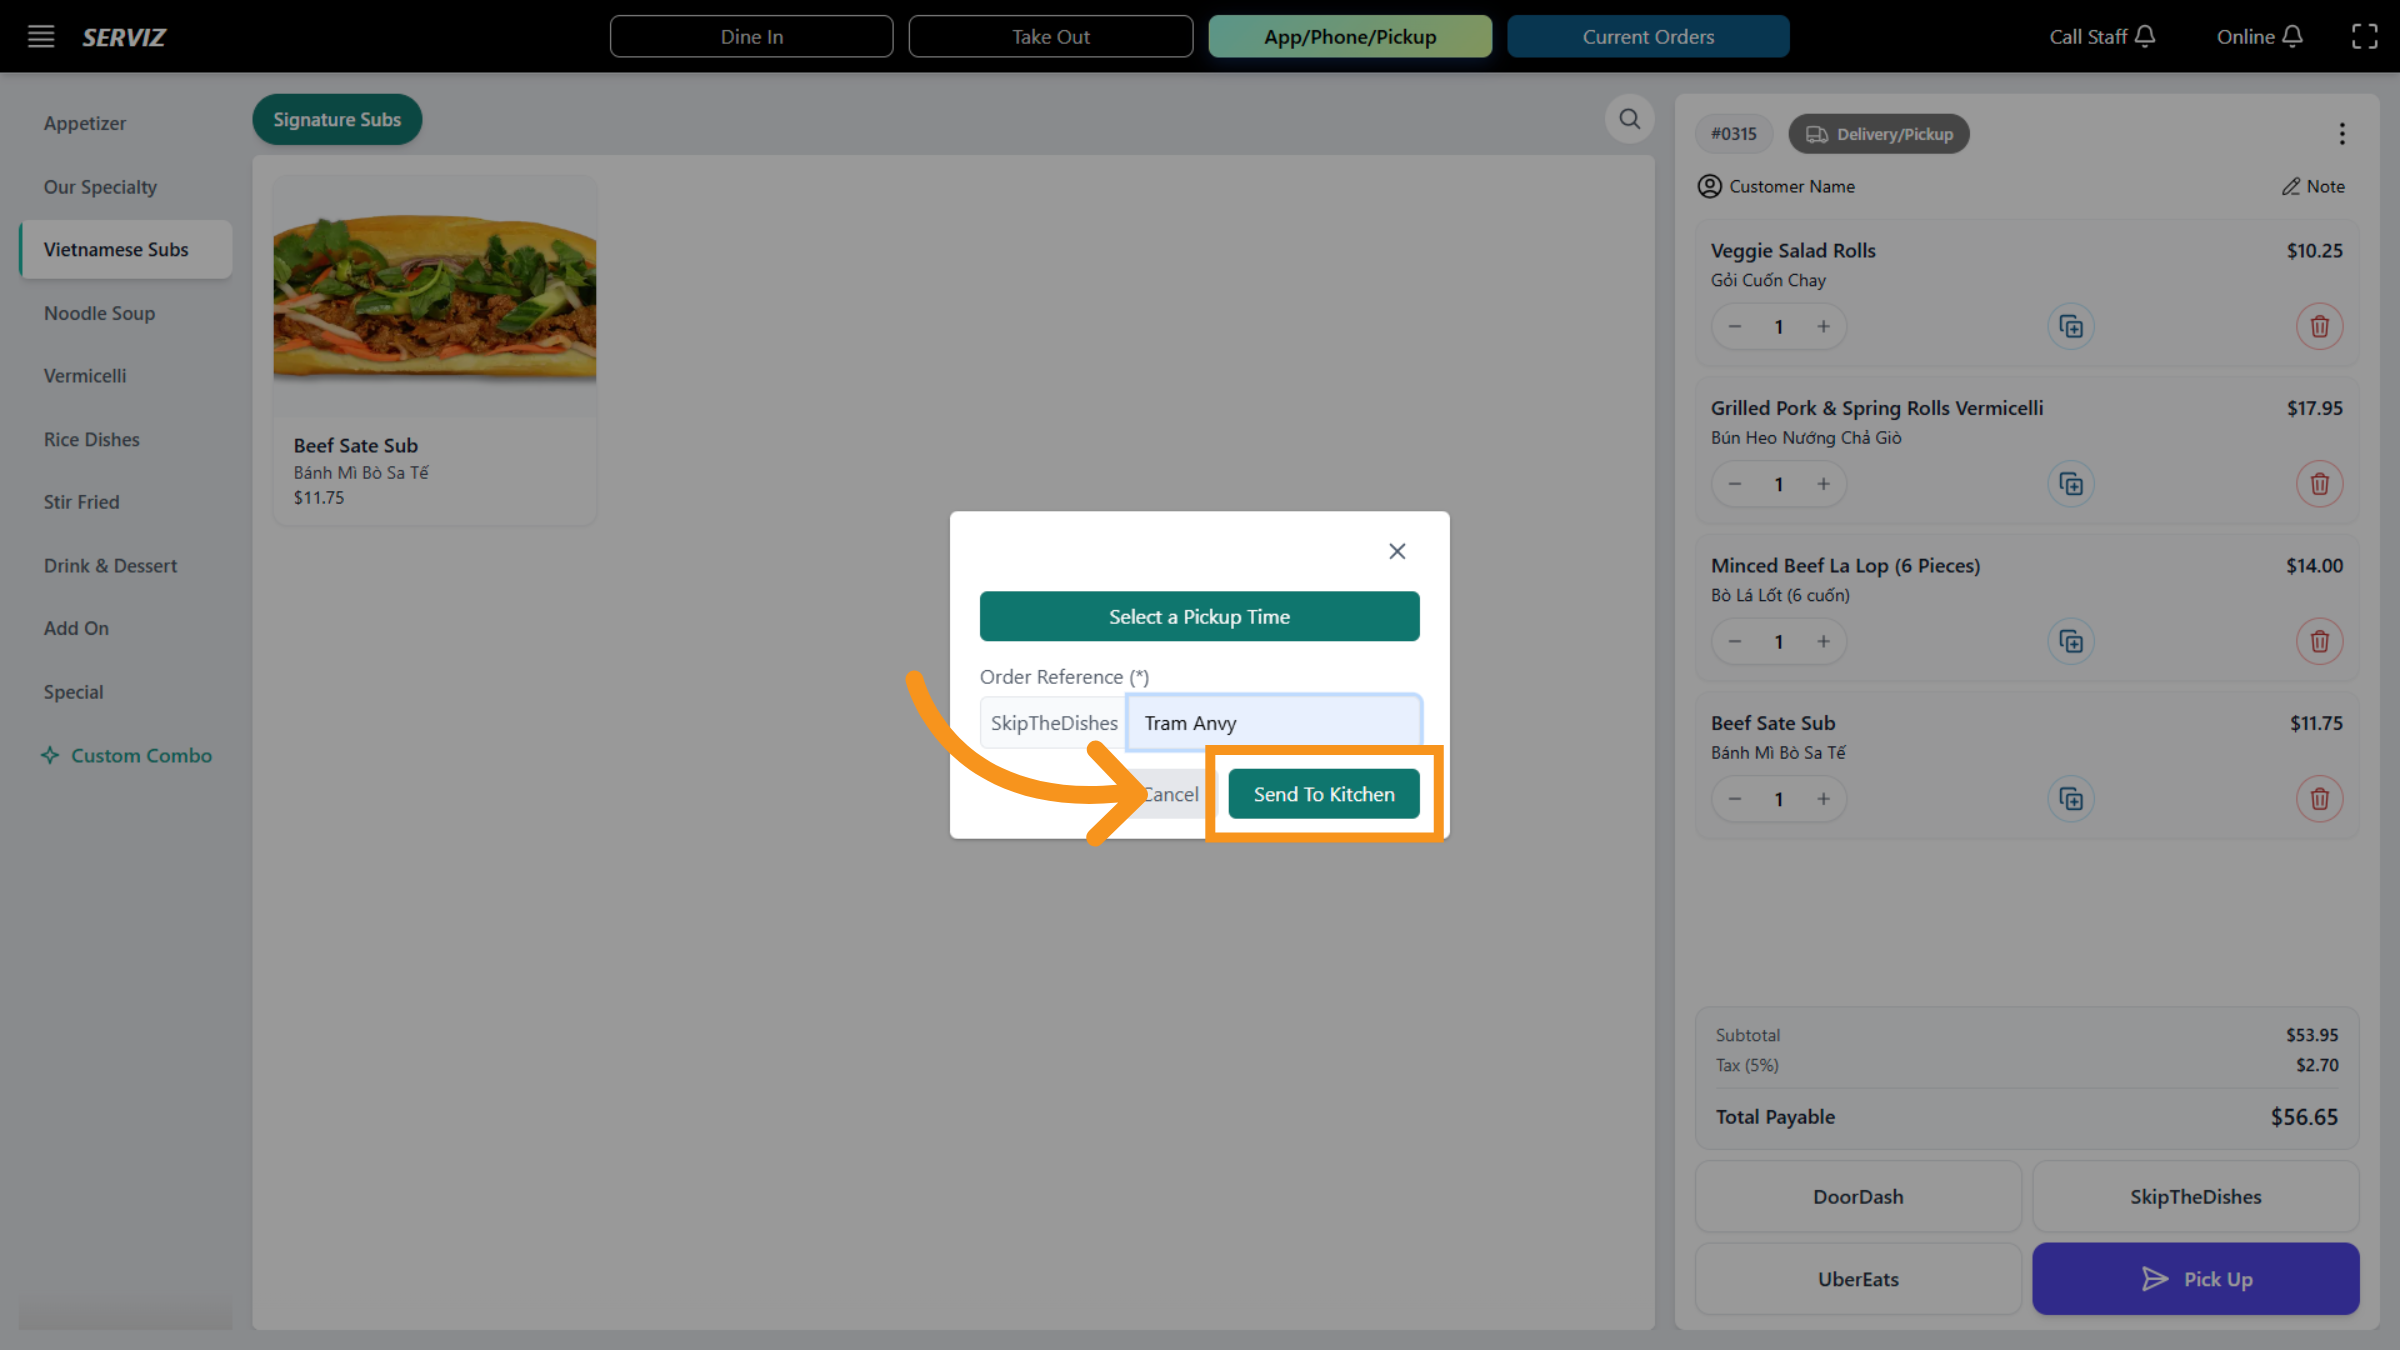
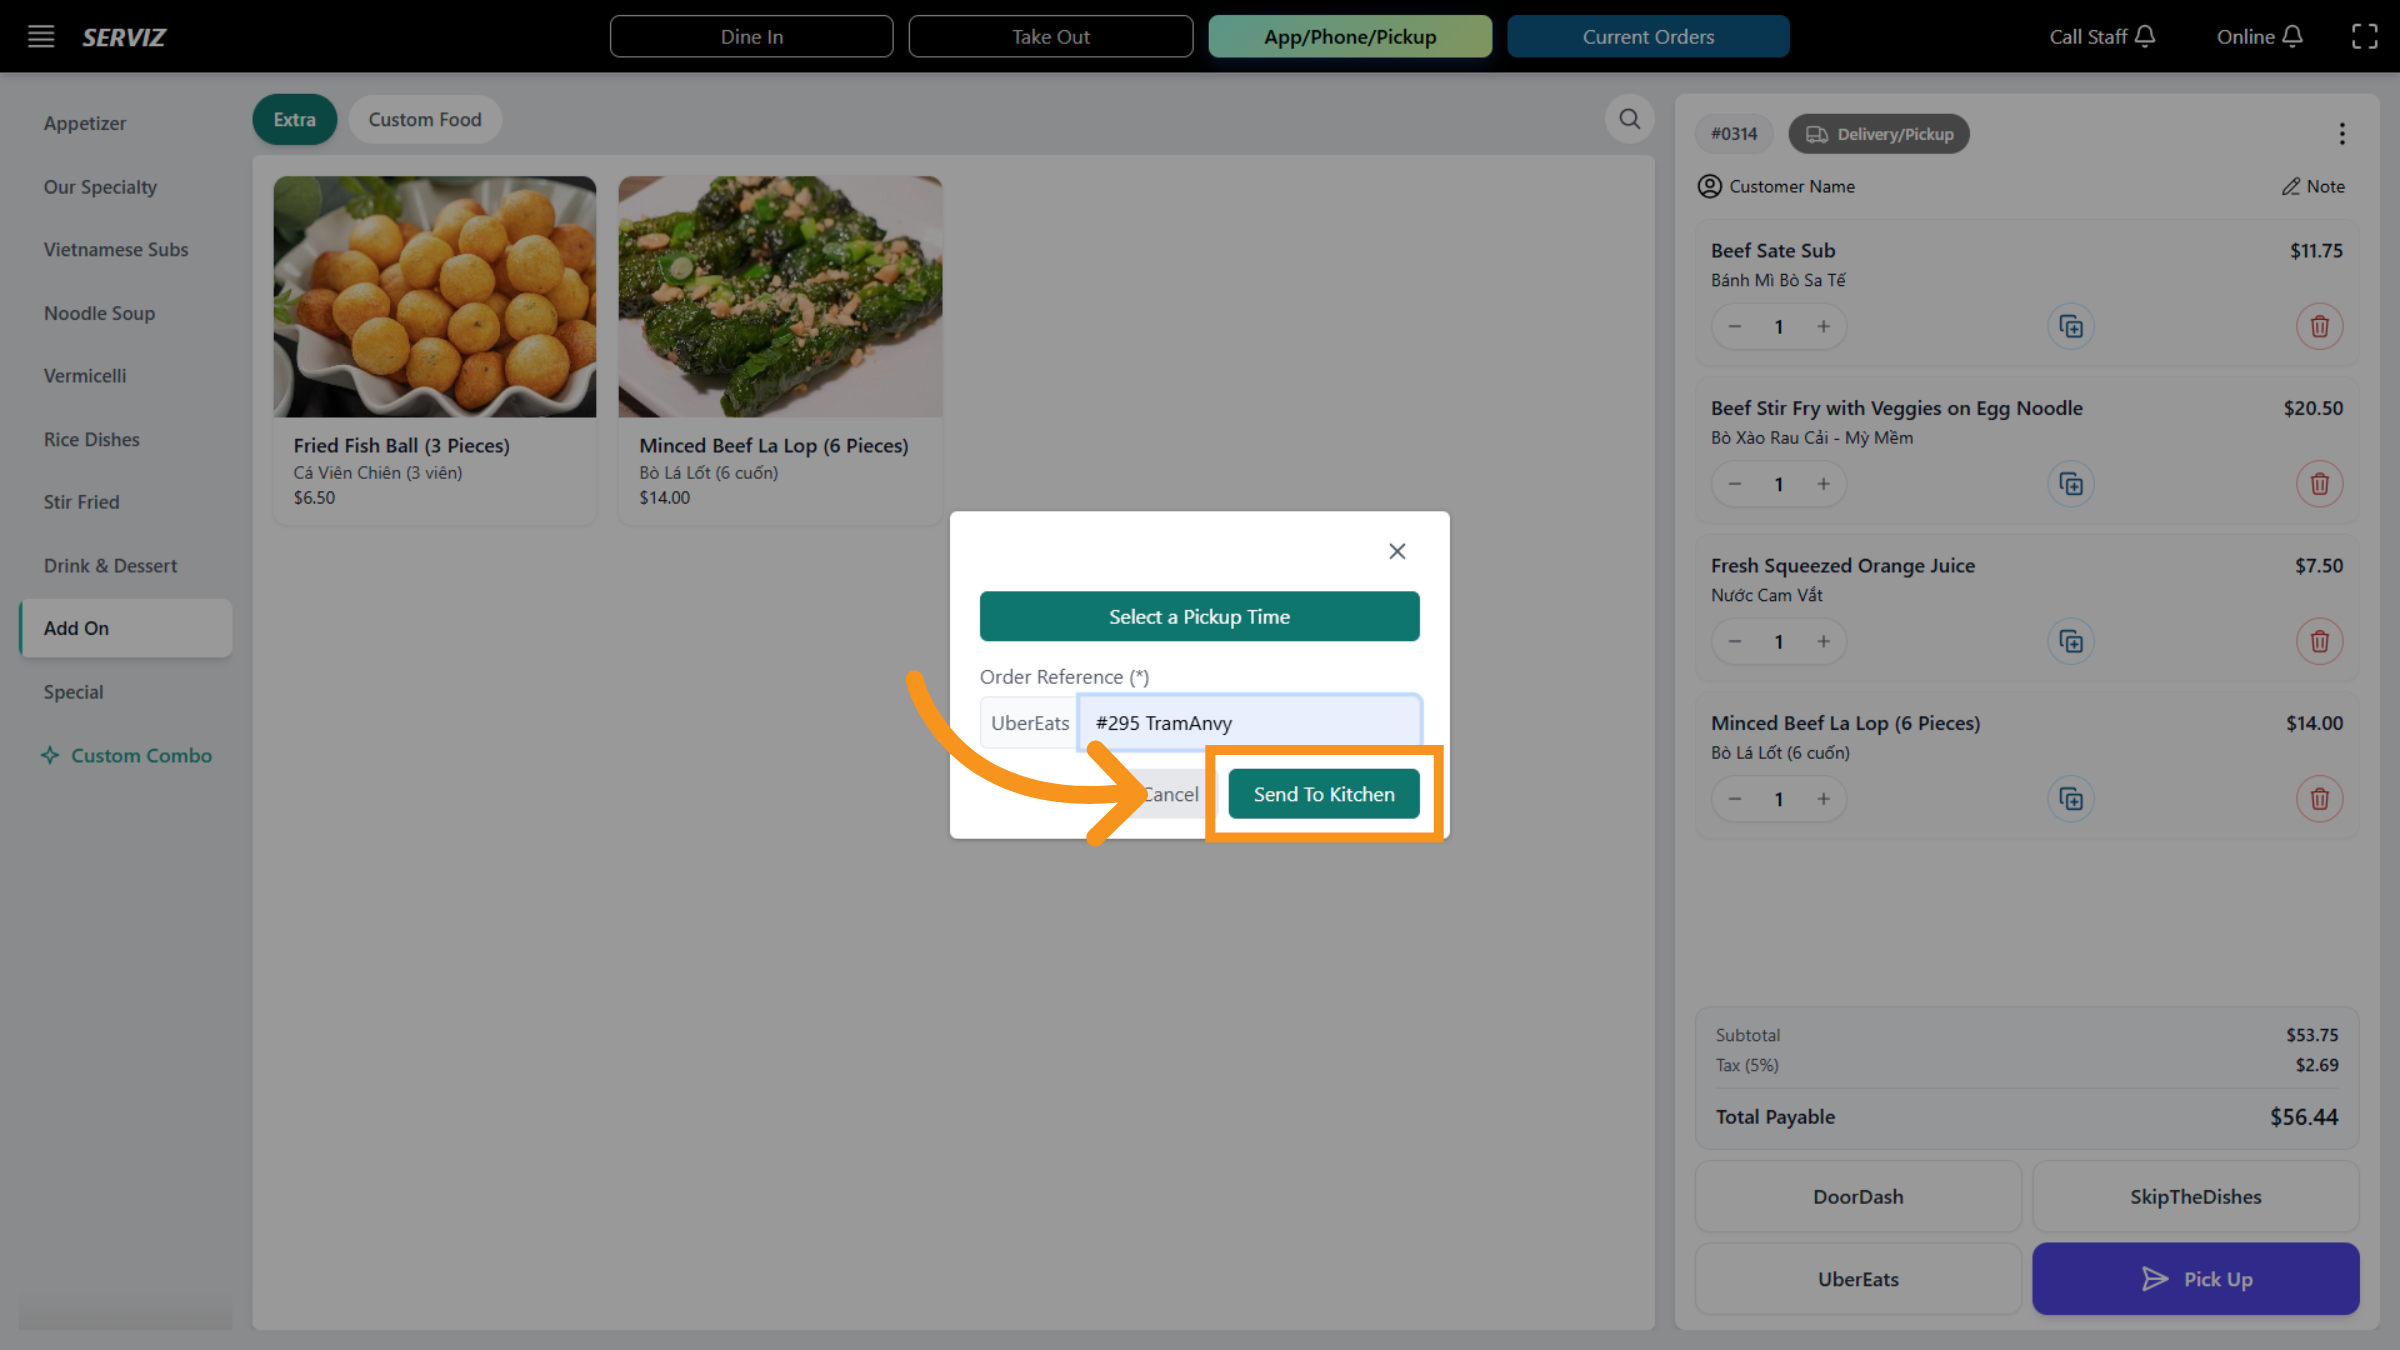
46. Select SkiptheDishes delivery
After filling out the ORDER REFERENCE click the Send To Kitchen button to forward the order details to the kitchen for preparation.
47. Cancel Current Action

48. Access Order Ubereats
filling out the ORDER REFERENCE click the Send To Kitchen button to forward the order details to the kitchen for preparation
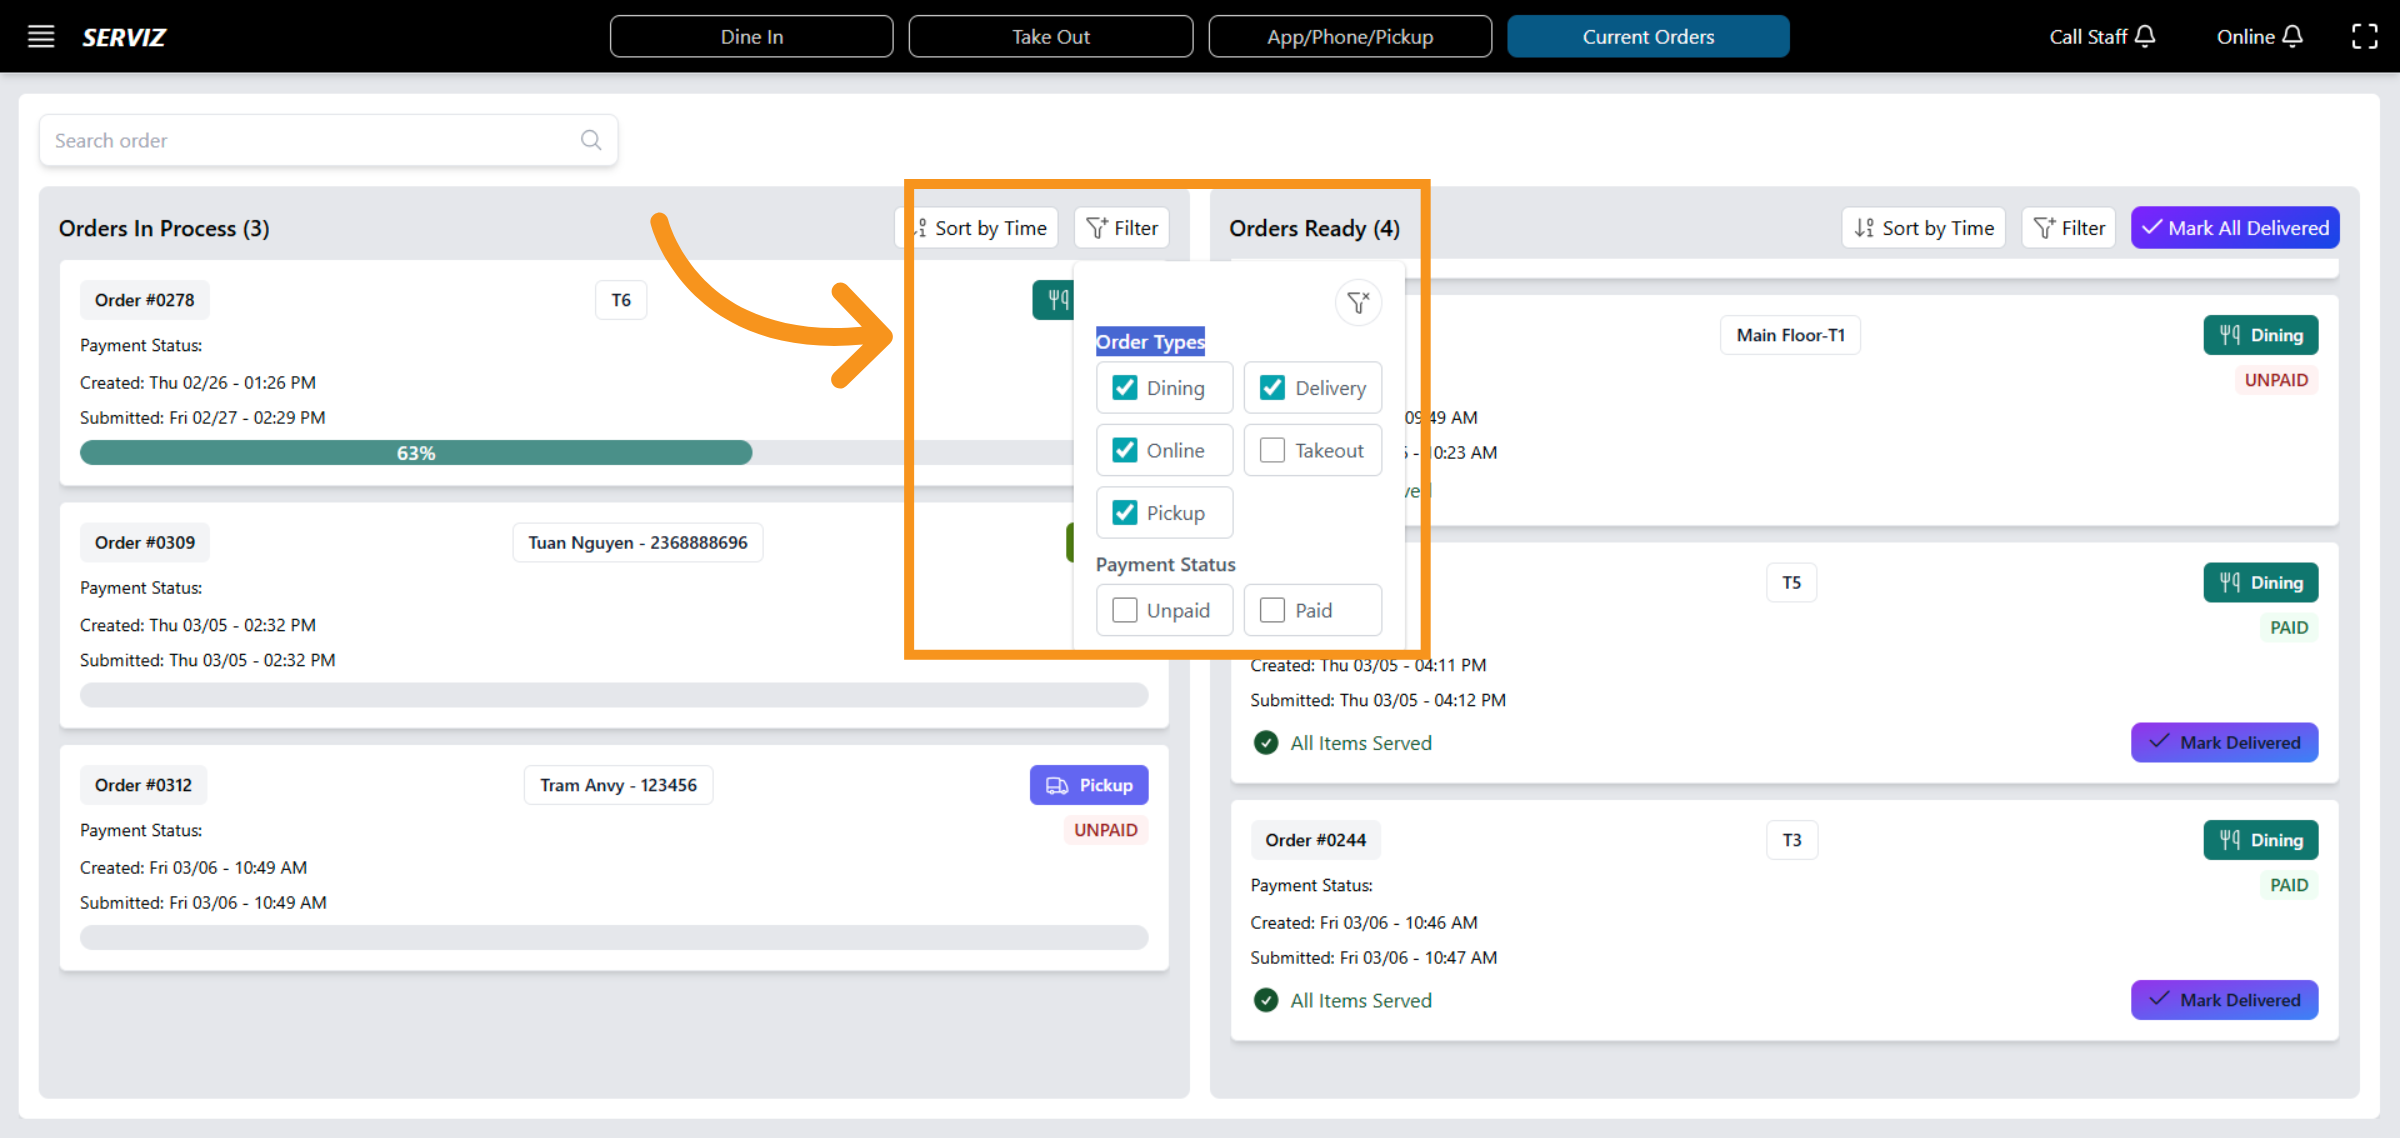
49. View Order Type Filters
Click "Order Types Dining Delivery Online Takeout Pickup Payment Status Unpaid Paid" to view available order type filters.
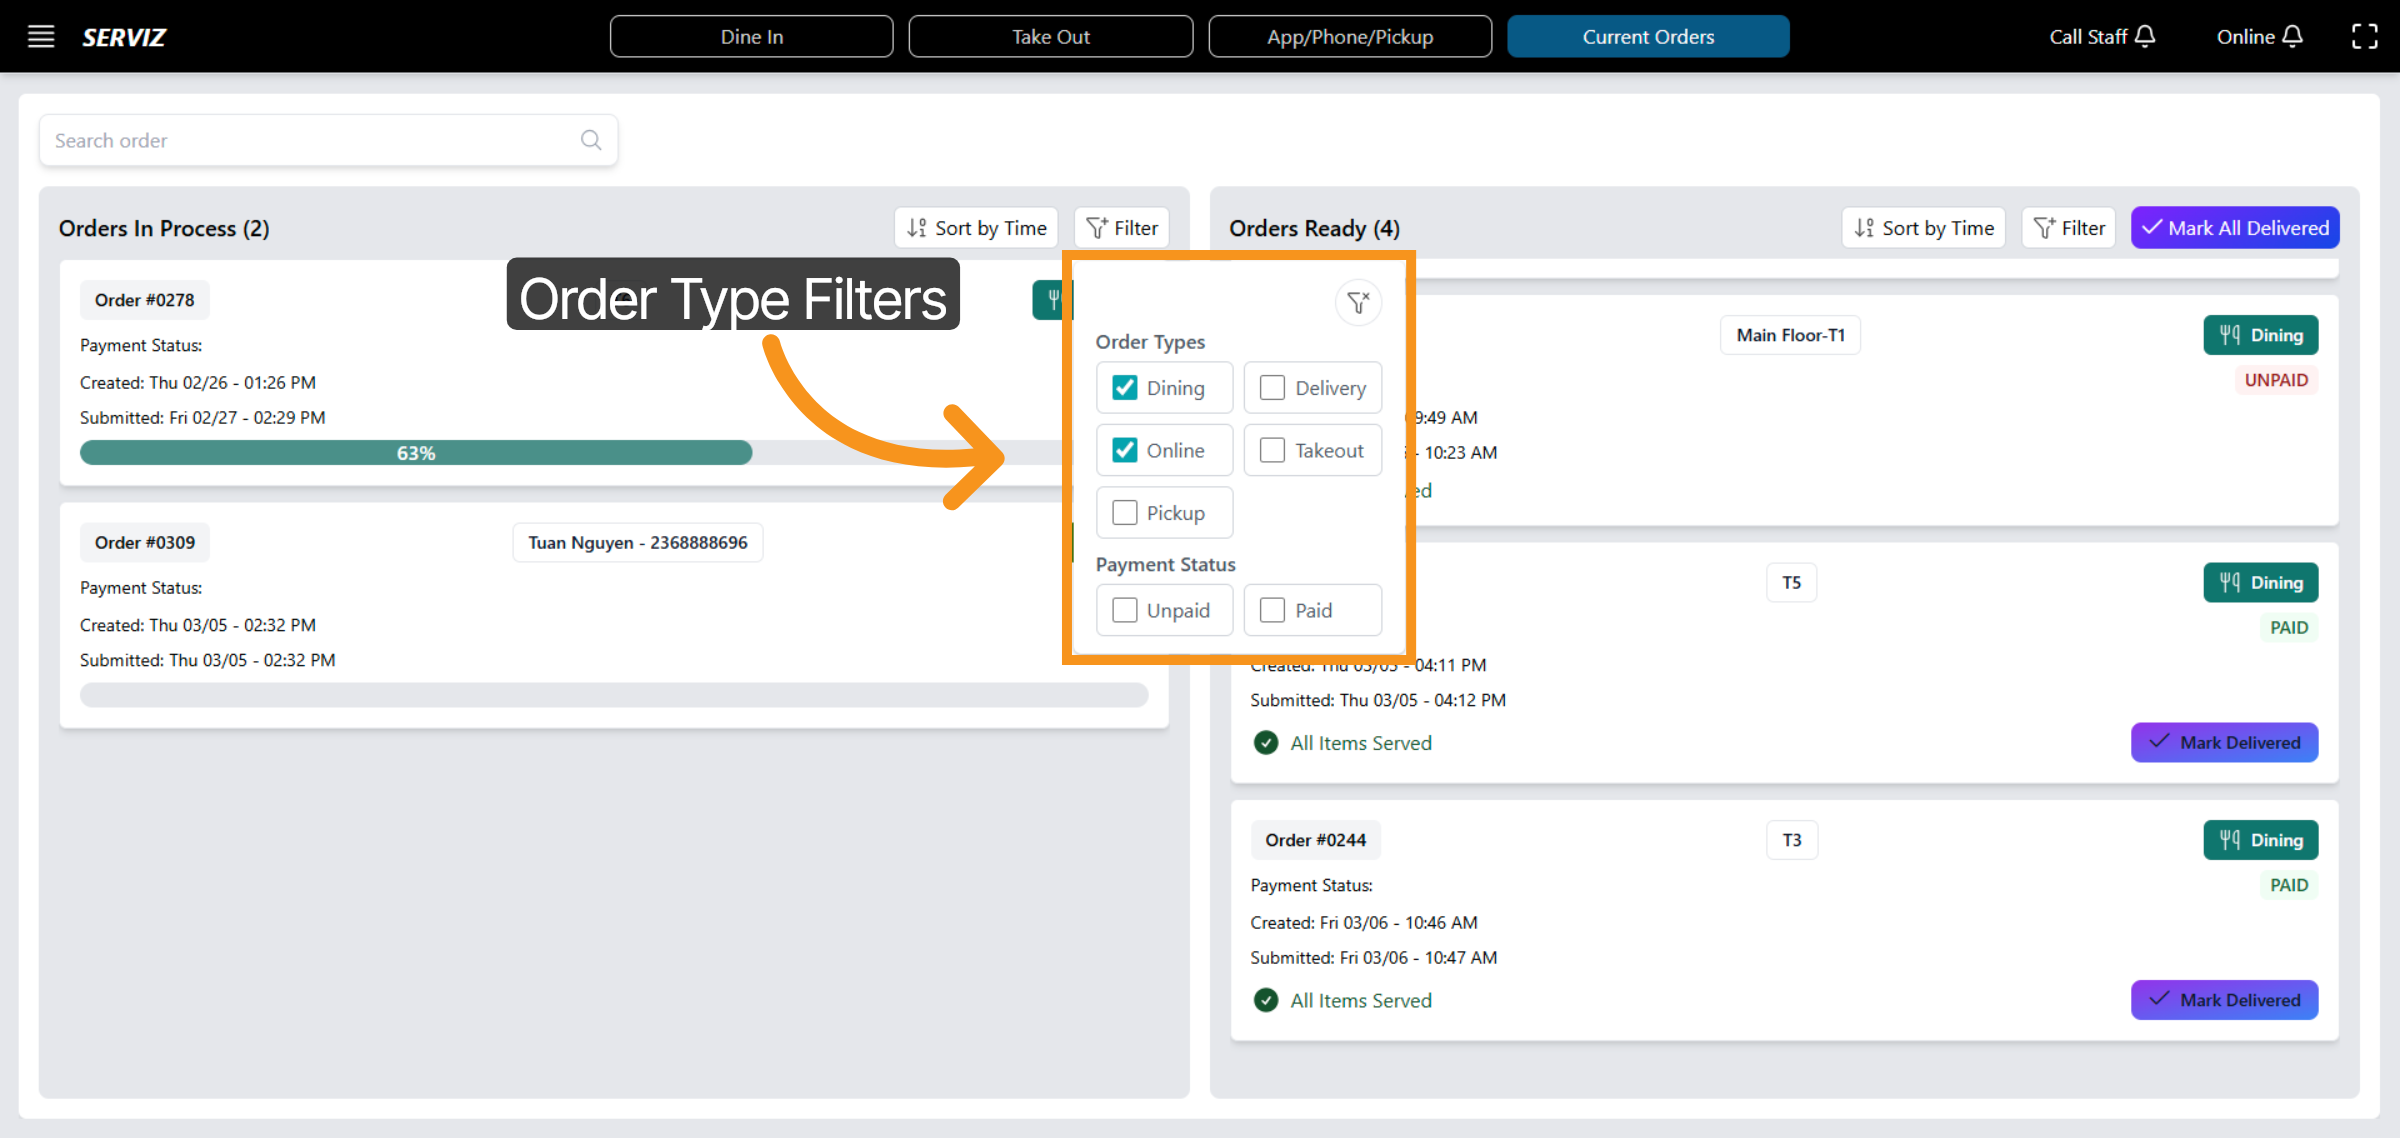
50. Enter Filter Criteria
Enter the filter criteria to refine order search results.
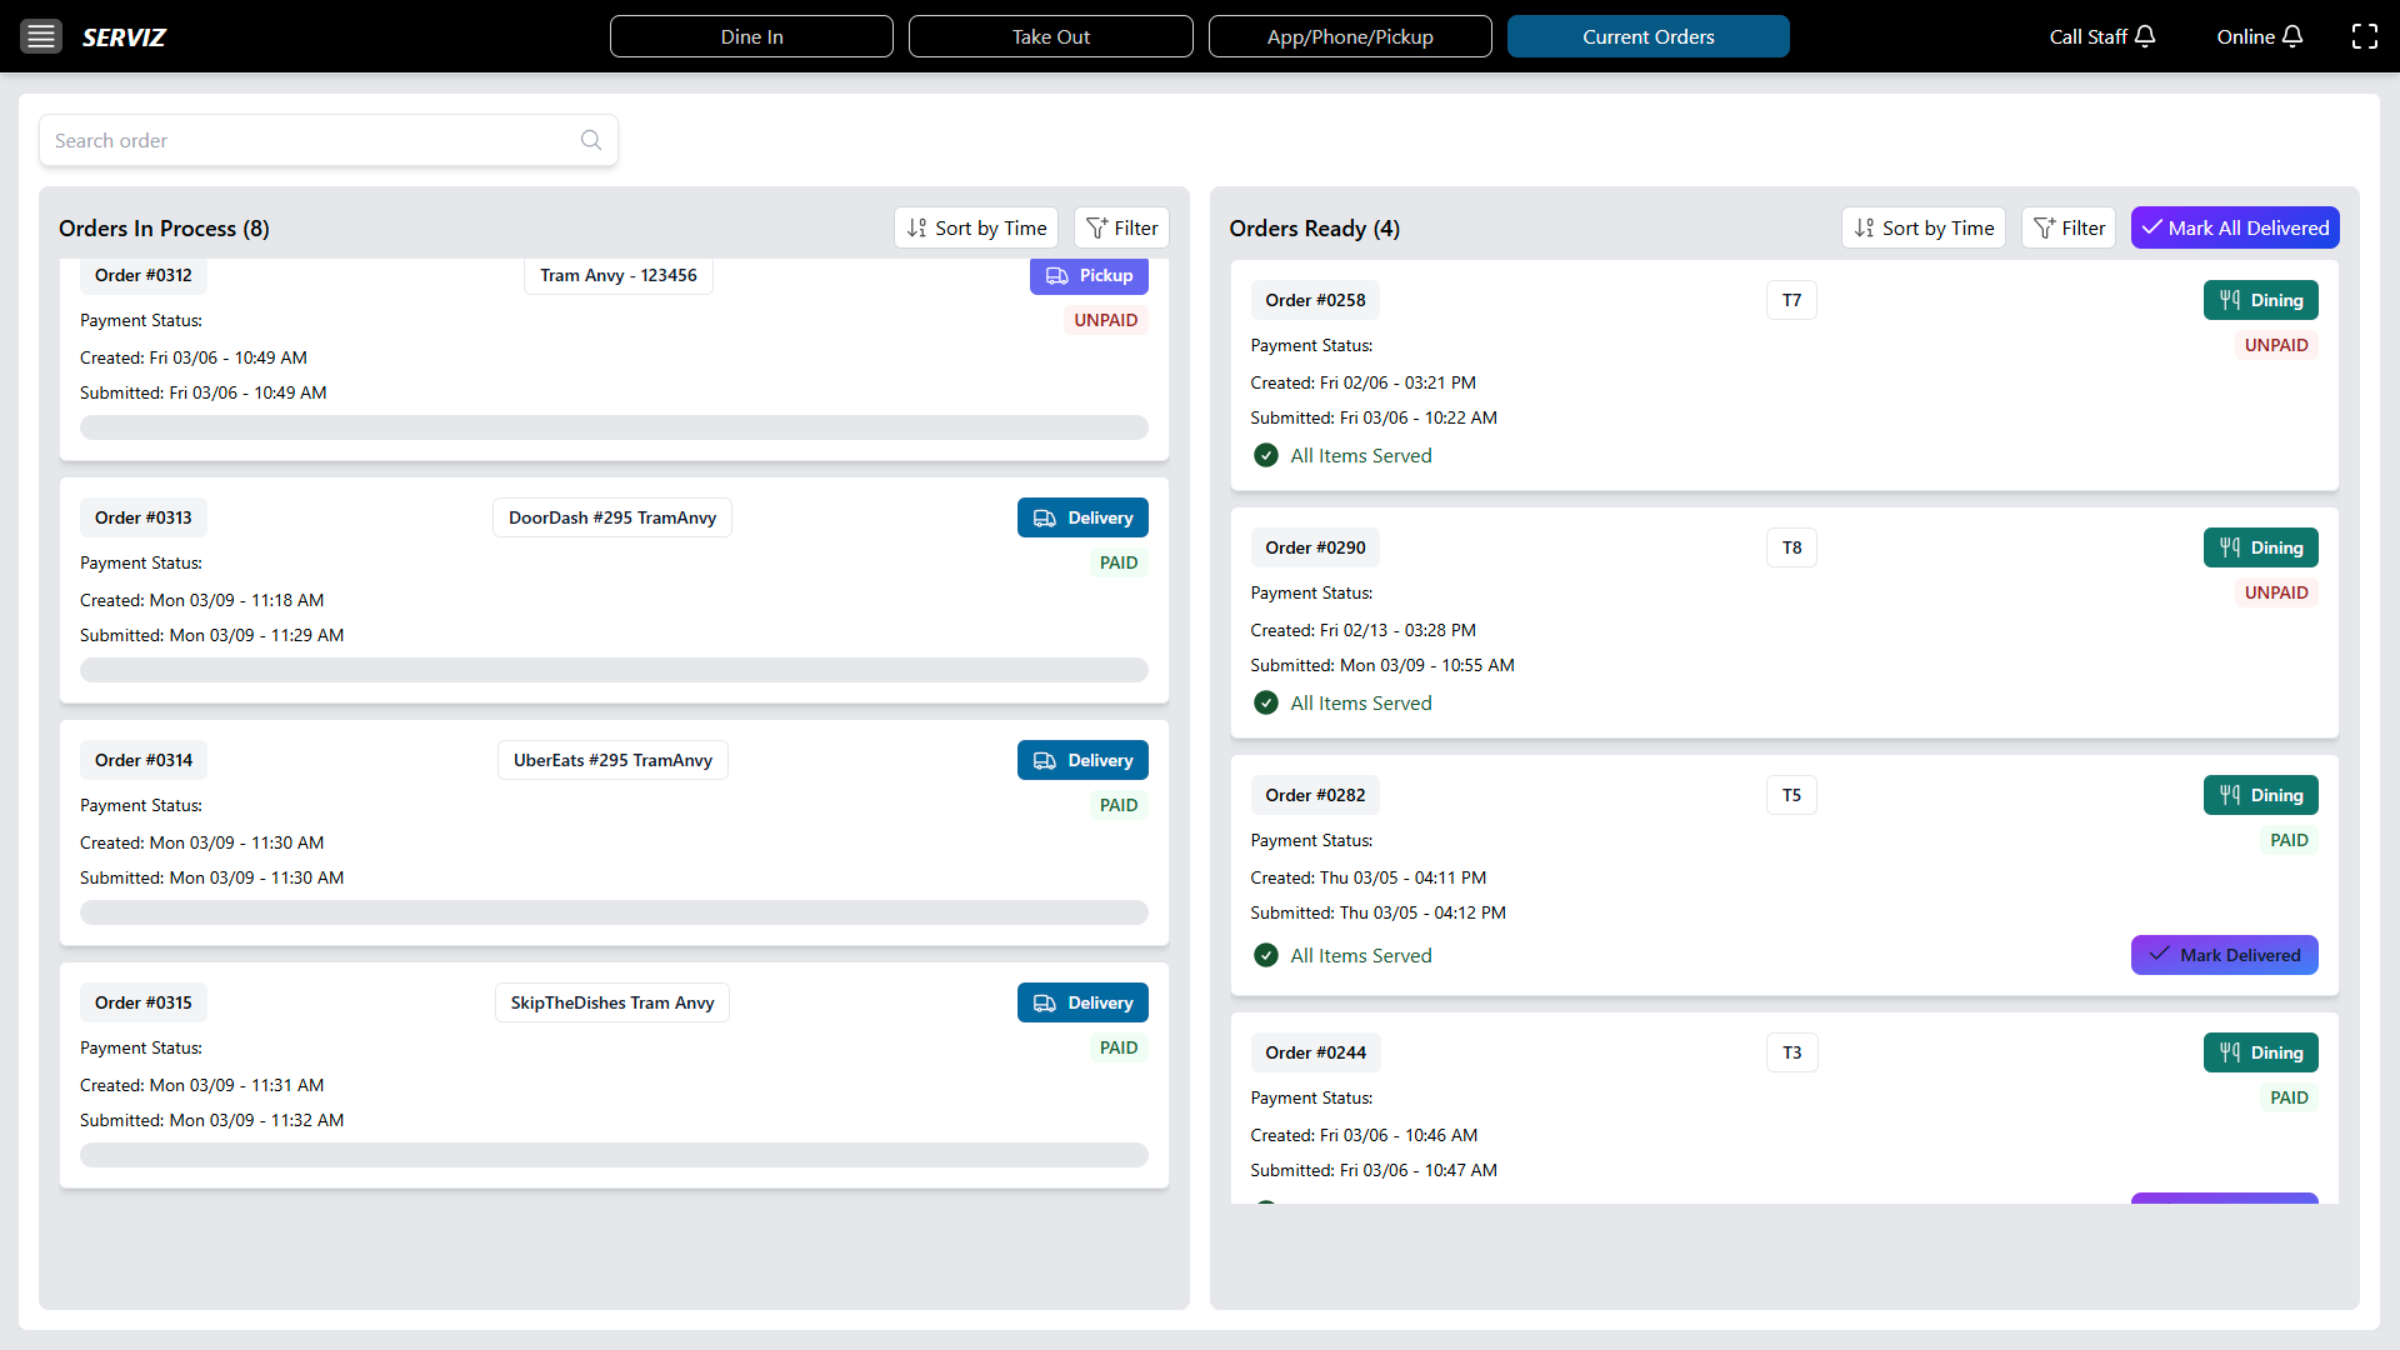
51. View Current Orders
Current Orders to see all active orders being processed
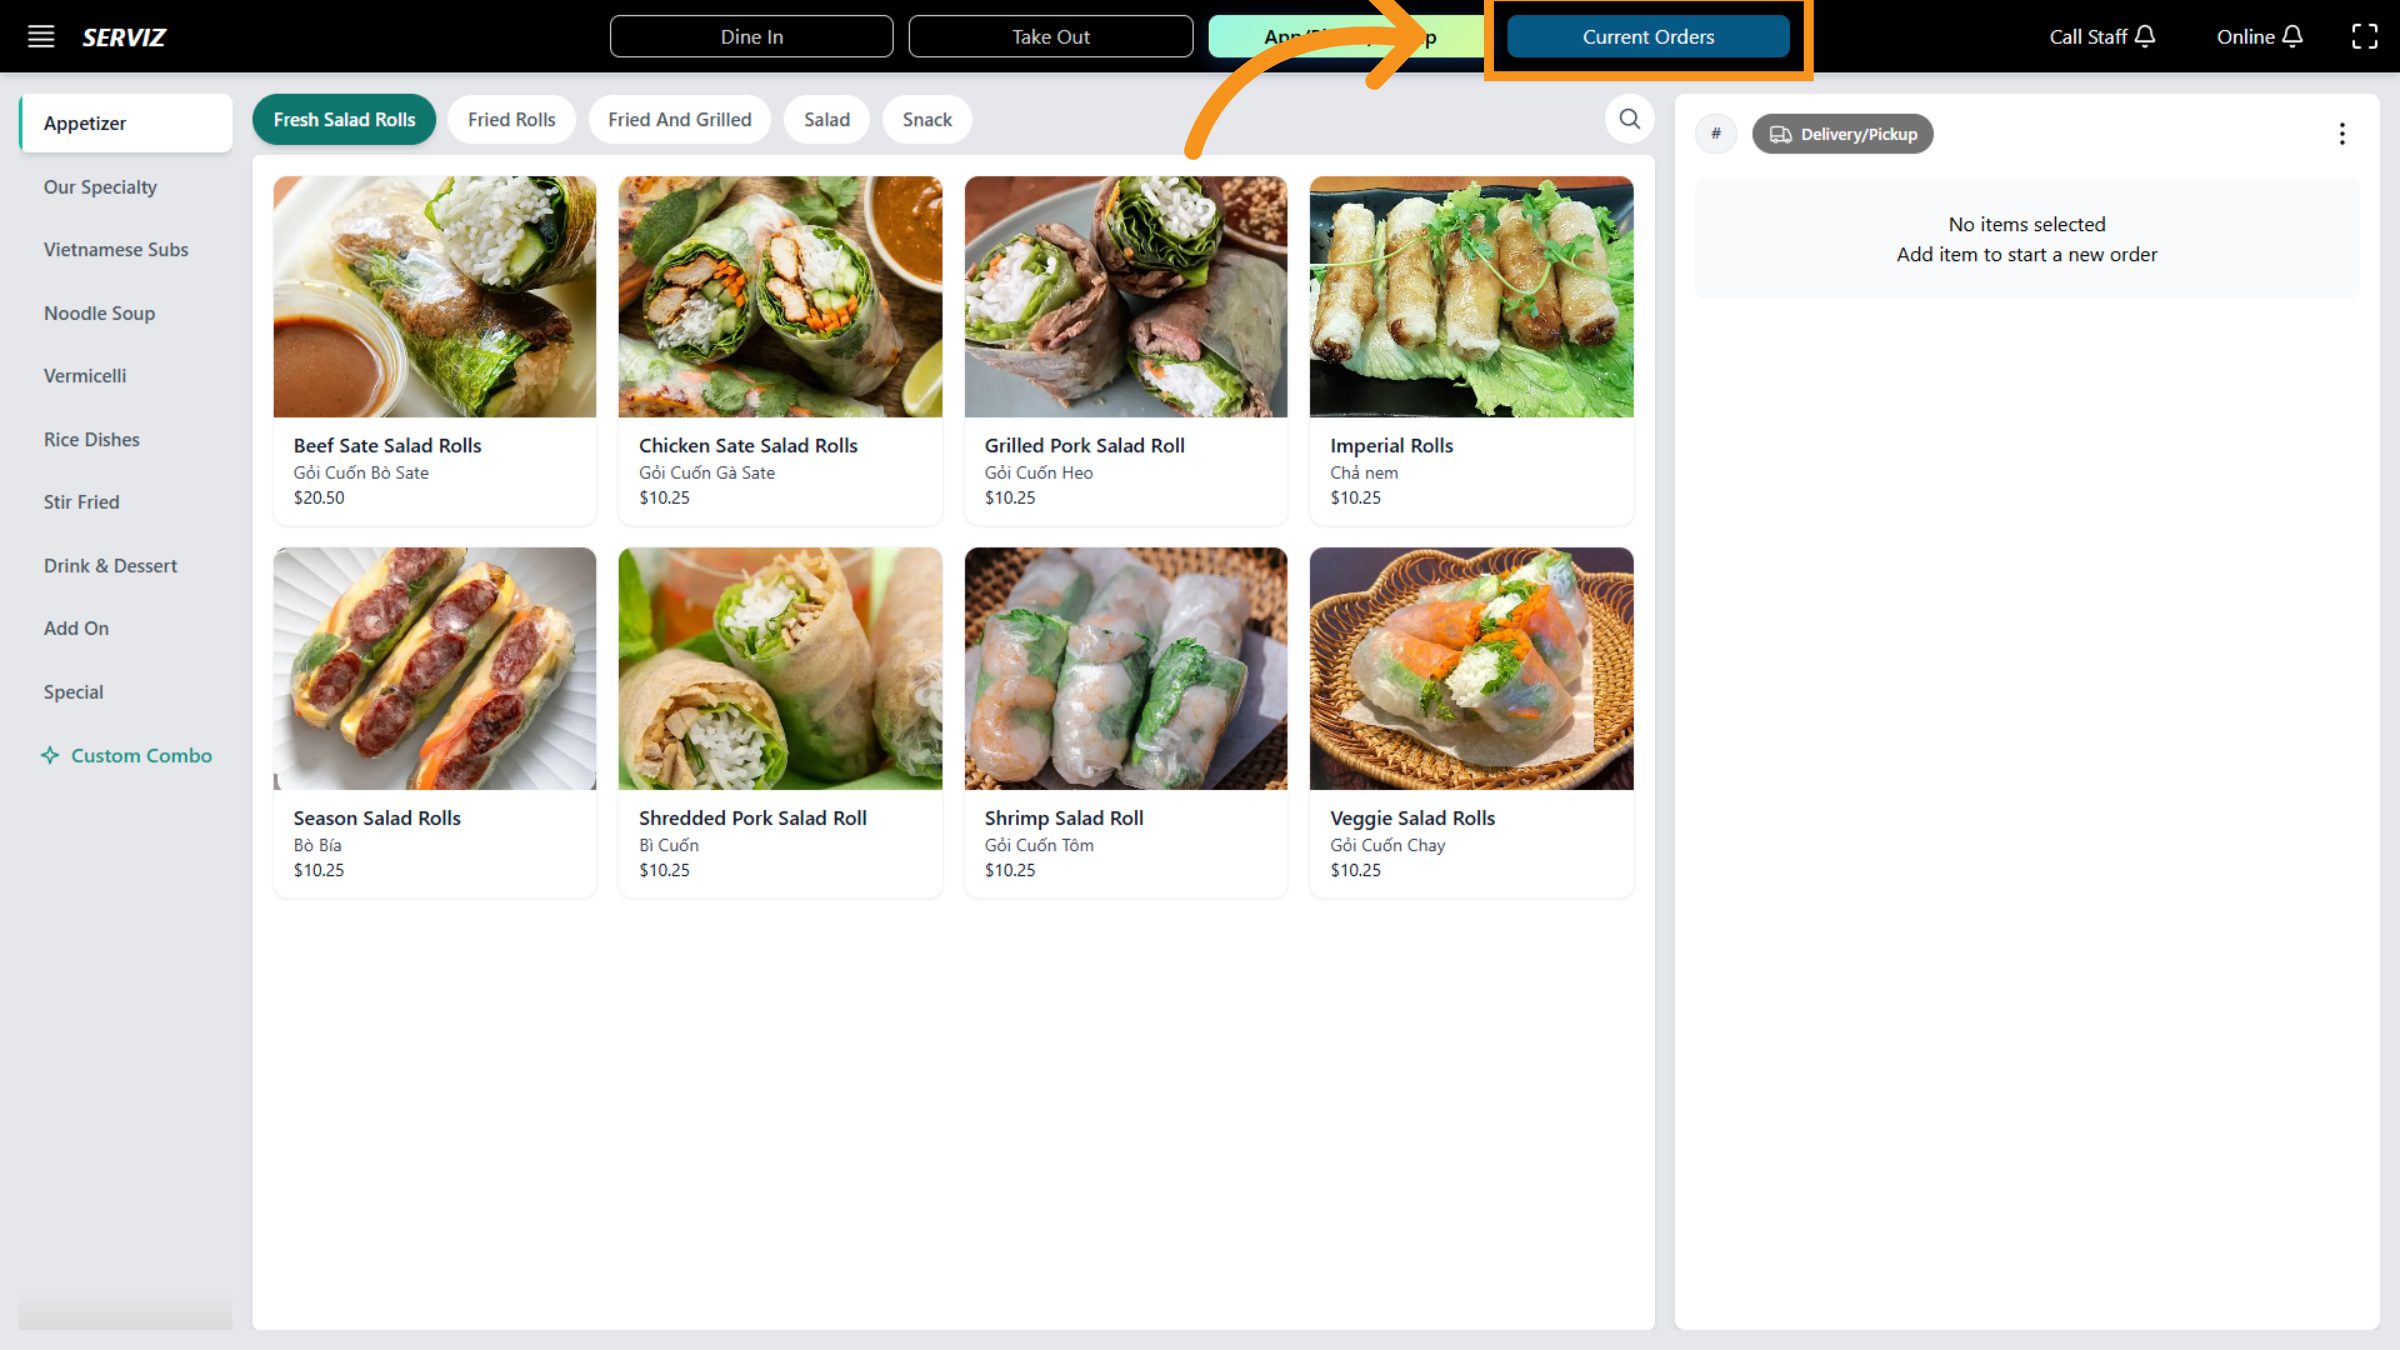
52. Current Order Navigation
In this section, you can view the interface for current orders, which includes all the orders.
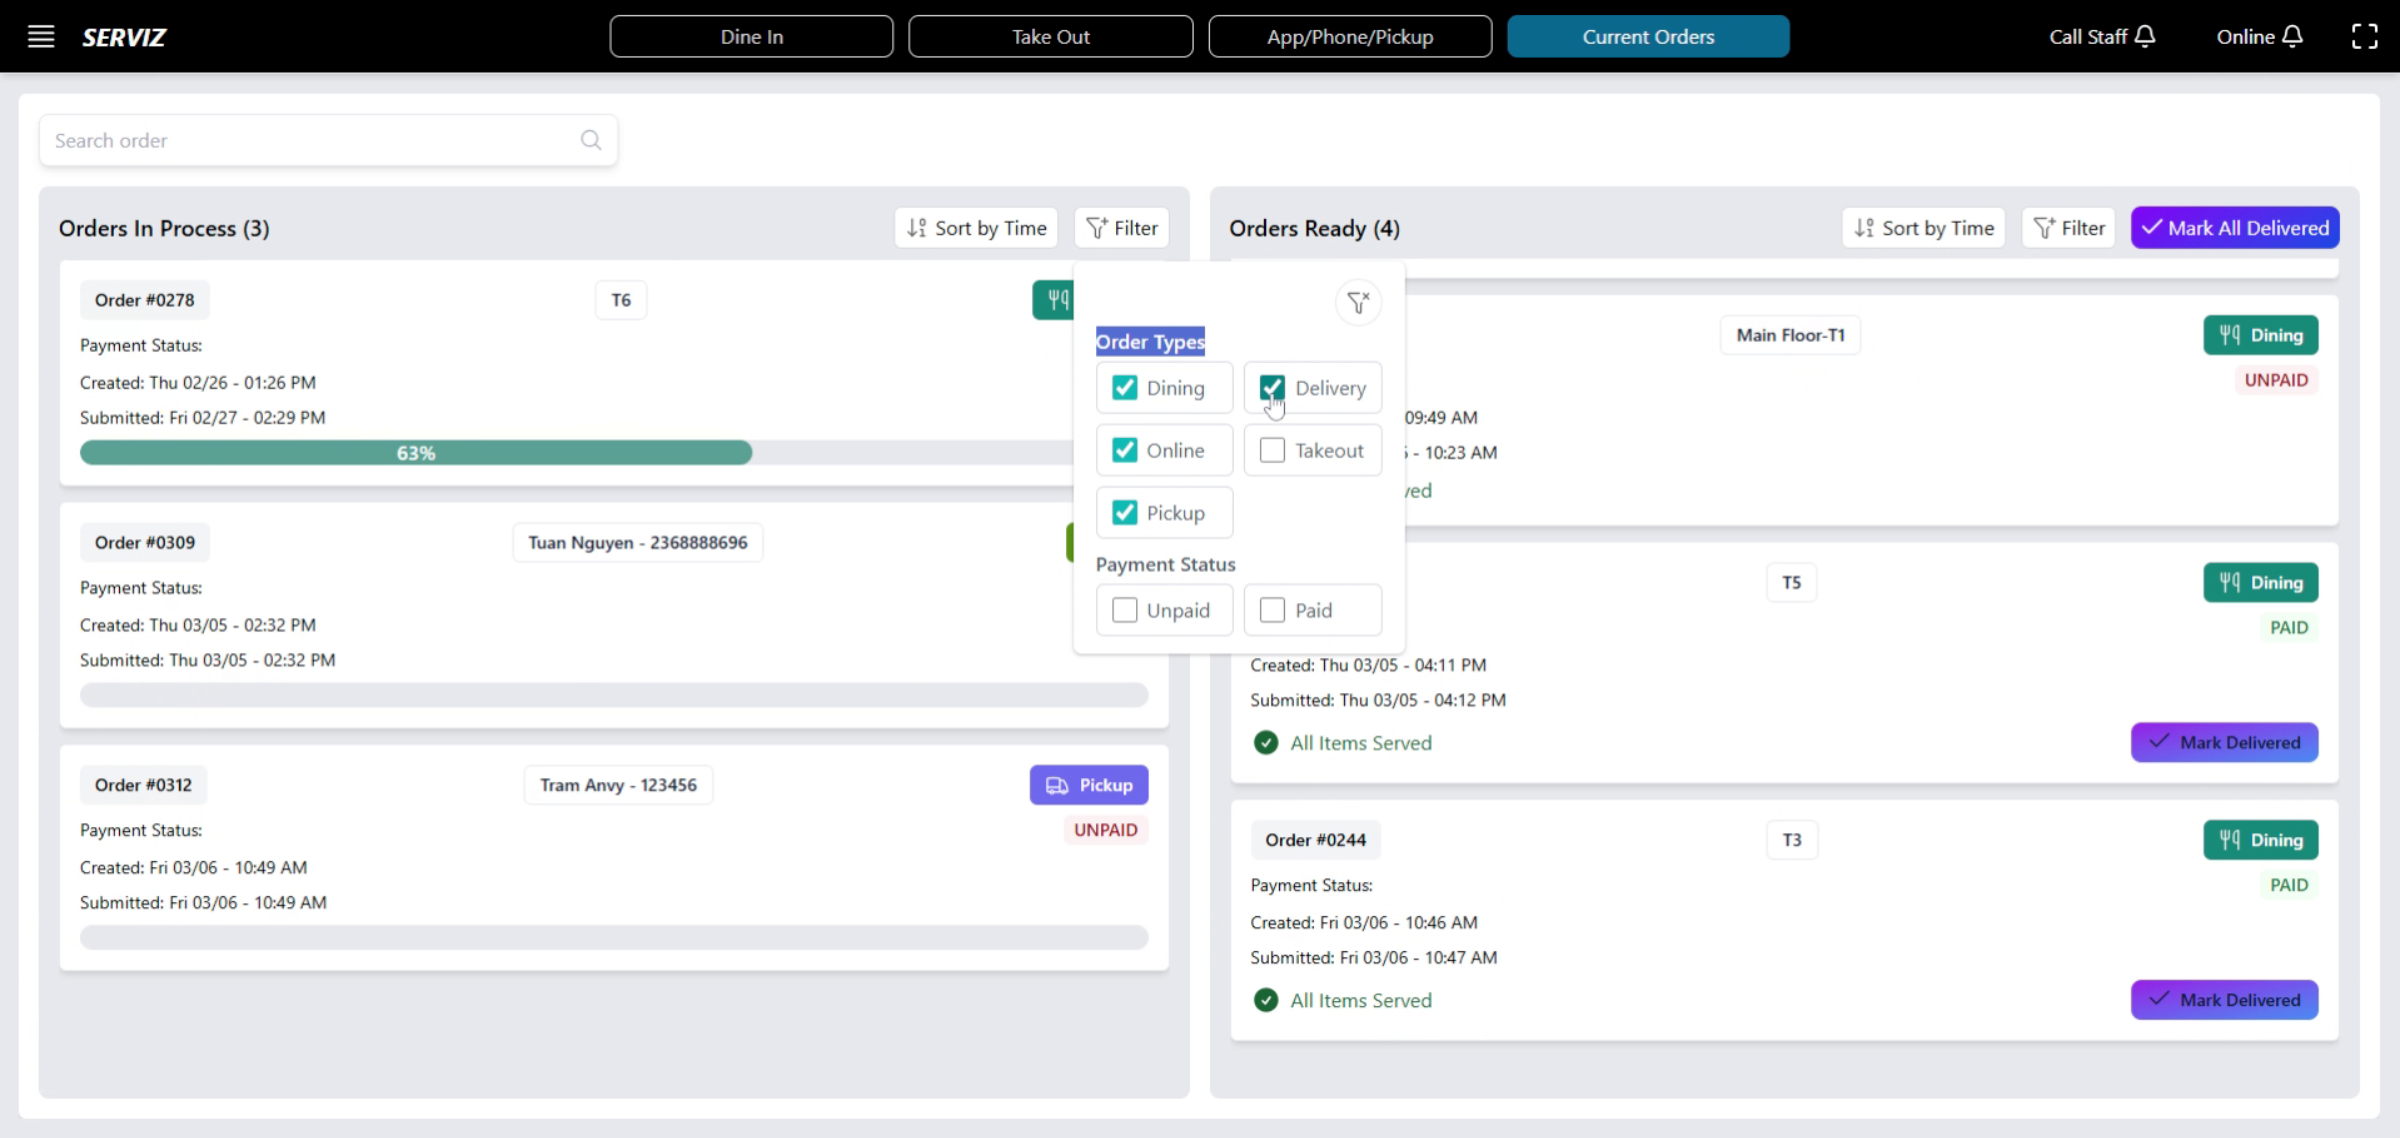
53. Activate Filter
Access the filter to verify the status of order type in the order management system.
You have successfully learned how to manage orders in the Vicdigitalworks POS system, including adding items, processing payments, and handling order management tasks. Next, explore advanced reporting or inventory management features to further optimize your restaurant operations.