Create and Configure Selectors in Worktraq
In the previous video, we covered how to create a required ingredient, such as a plain baguette. A baguette can also include different selections, like vegetables, proteins, sauces, and add-ons. In this video, we’ll focus on how to create a simple selector with a Yes or No option. Specifically, we’ll show you how to set up a Toast selector, which uses two choices: Yes or No.
Go to serviz.ca
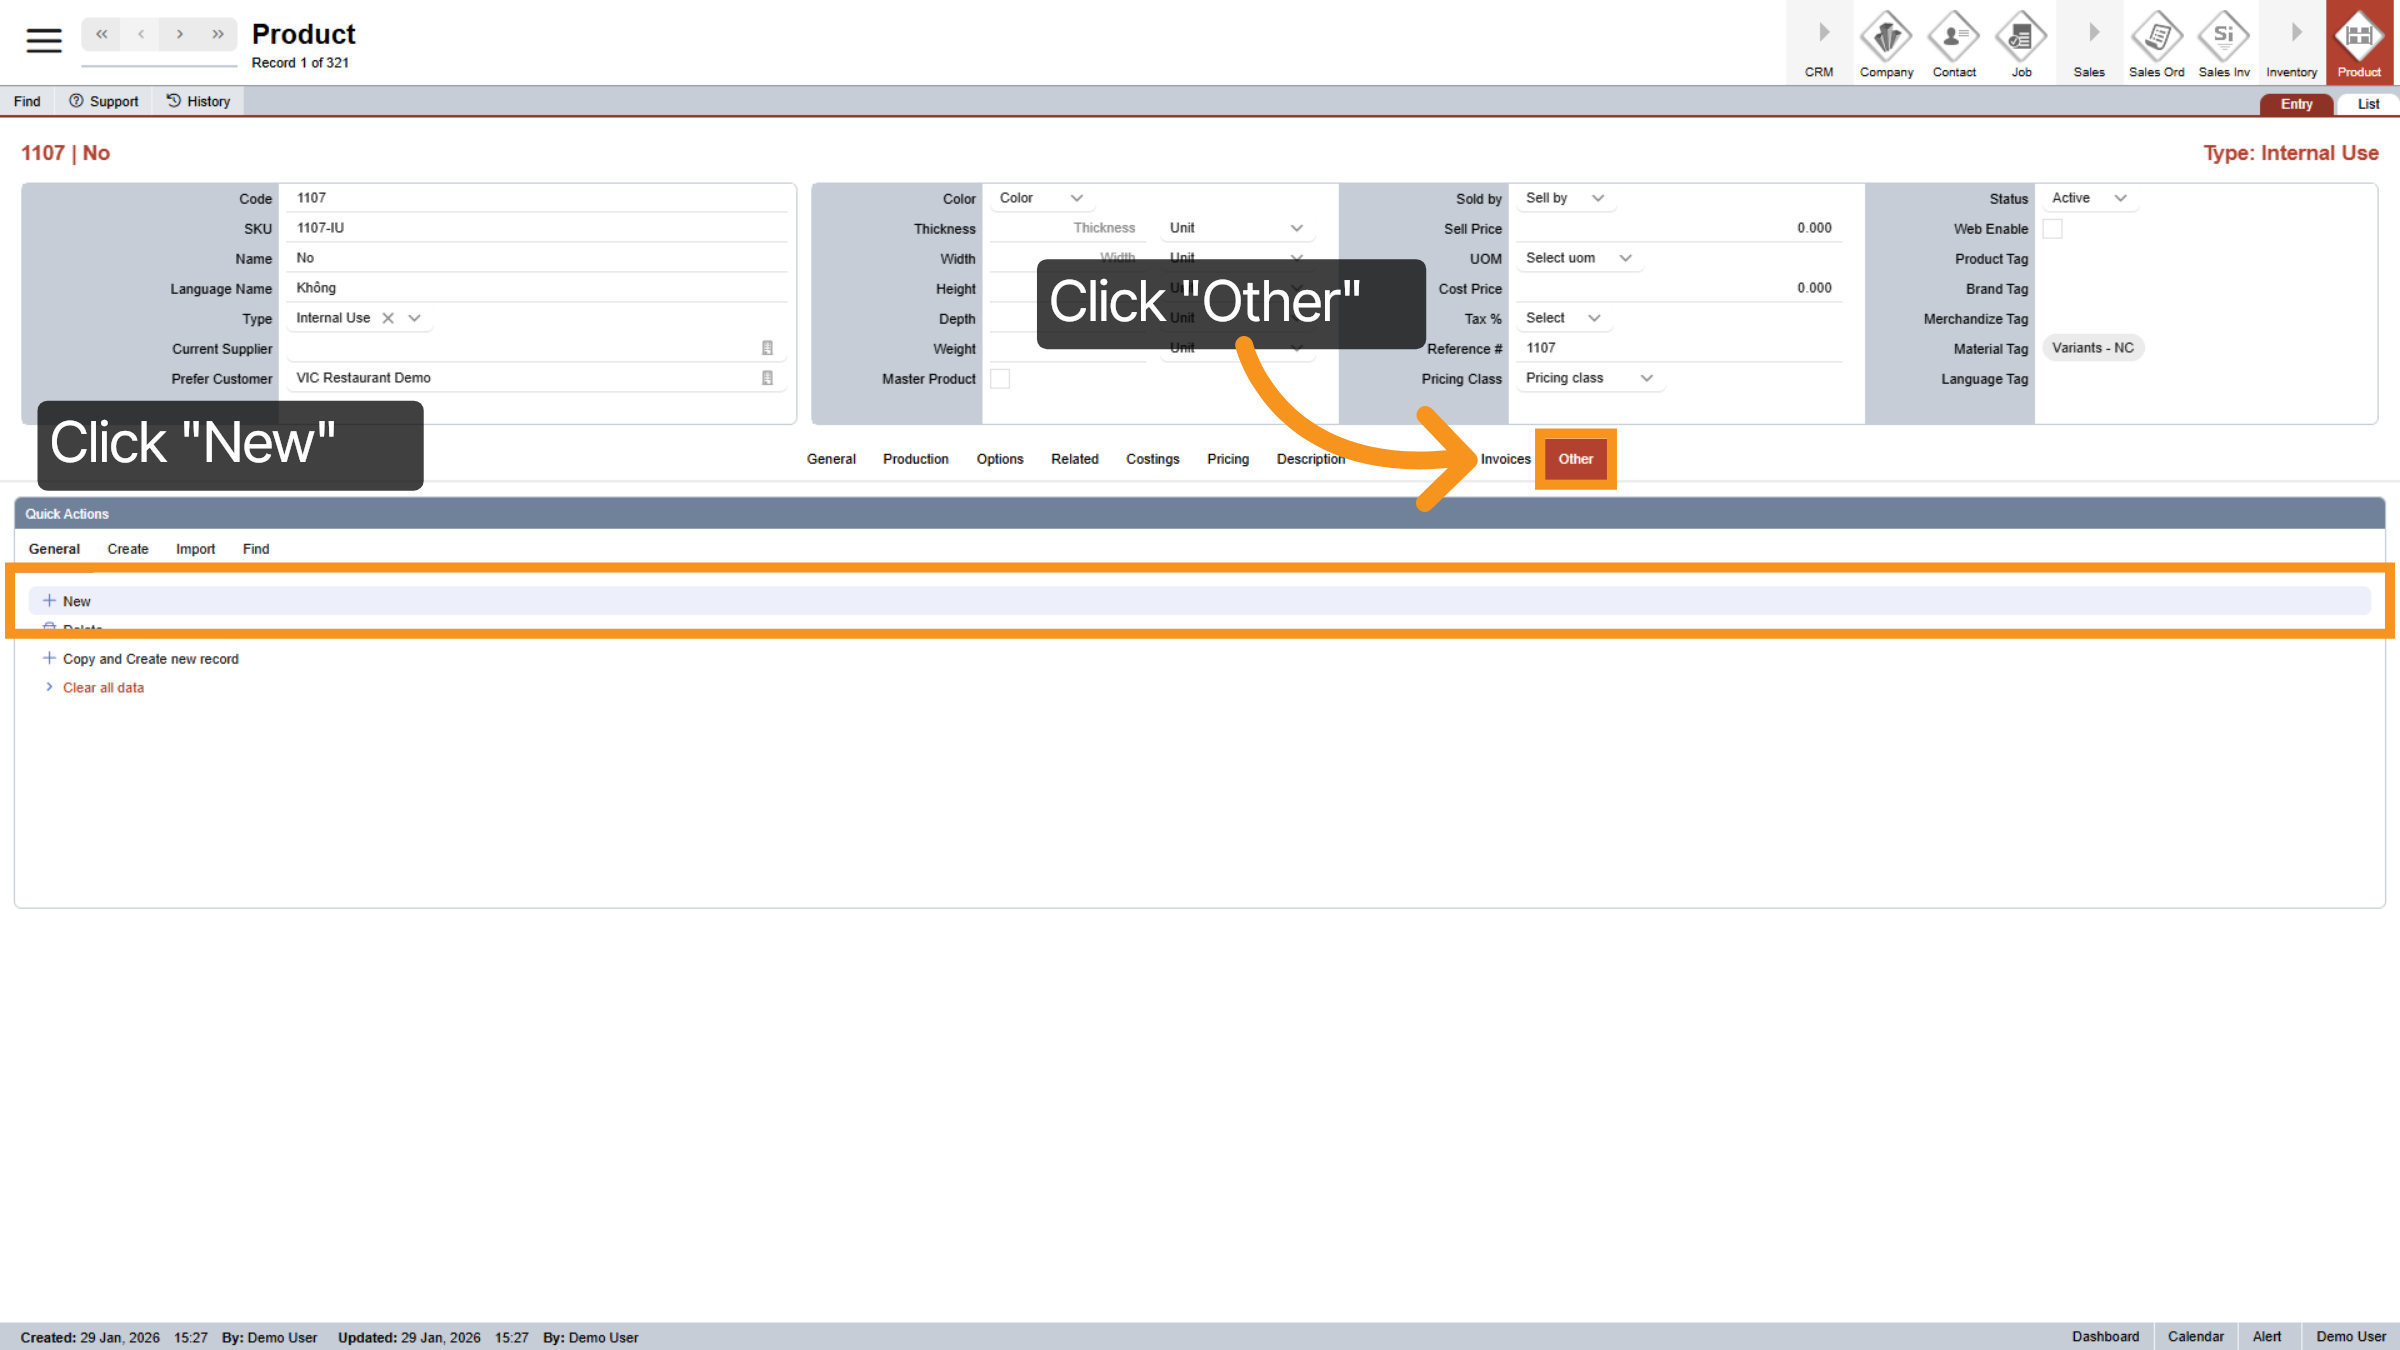
1. Navigate to Other Section
In your Product module in Worktraq, click the "Other" tab to access "Quick Actions options.

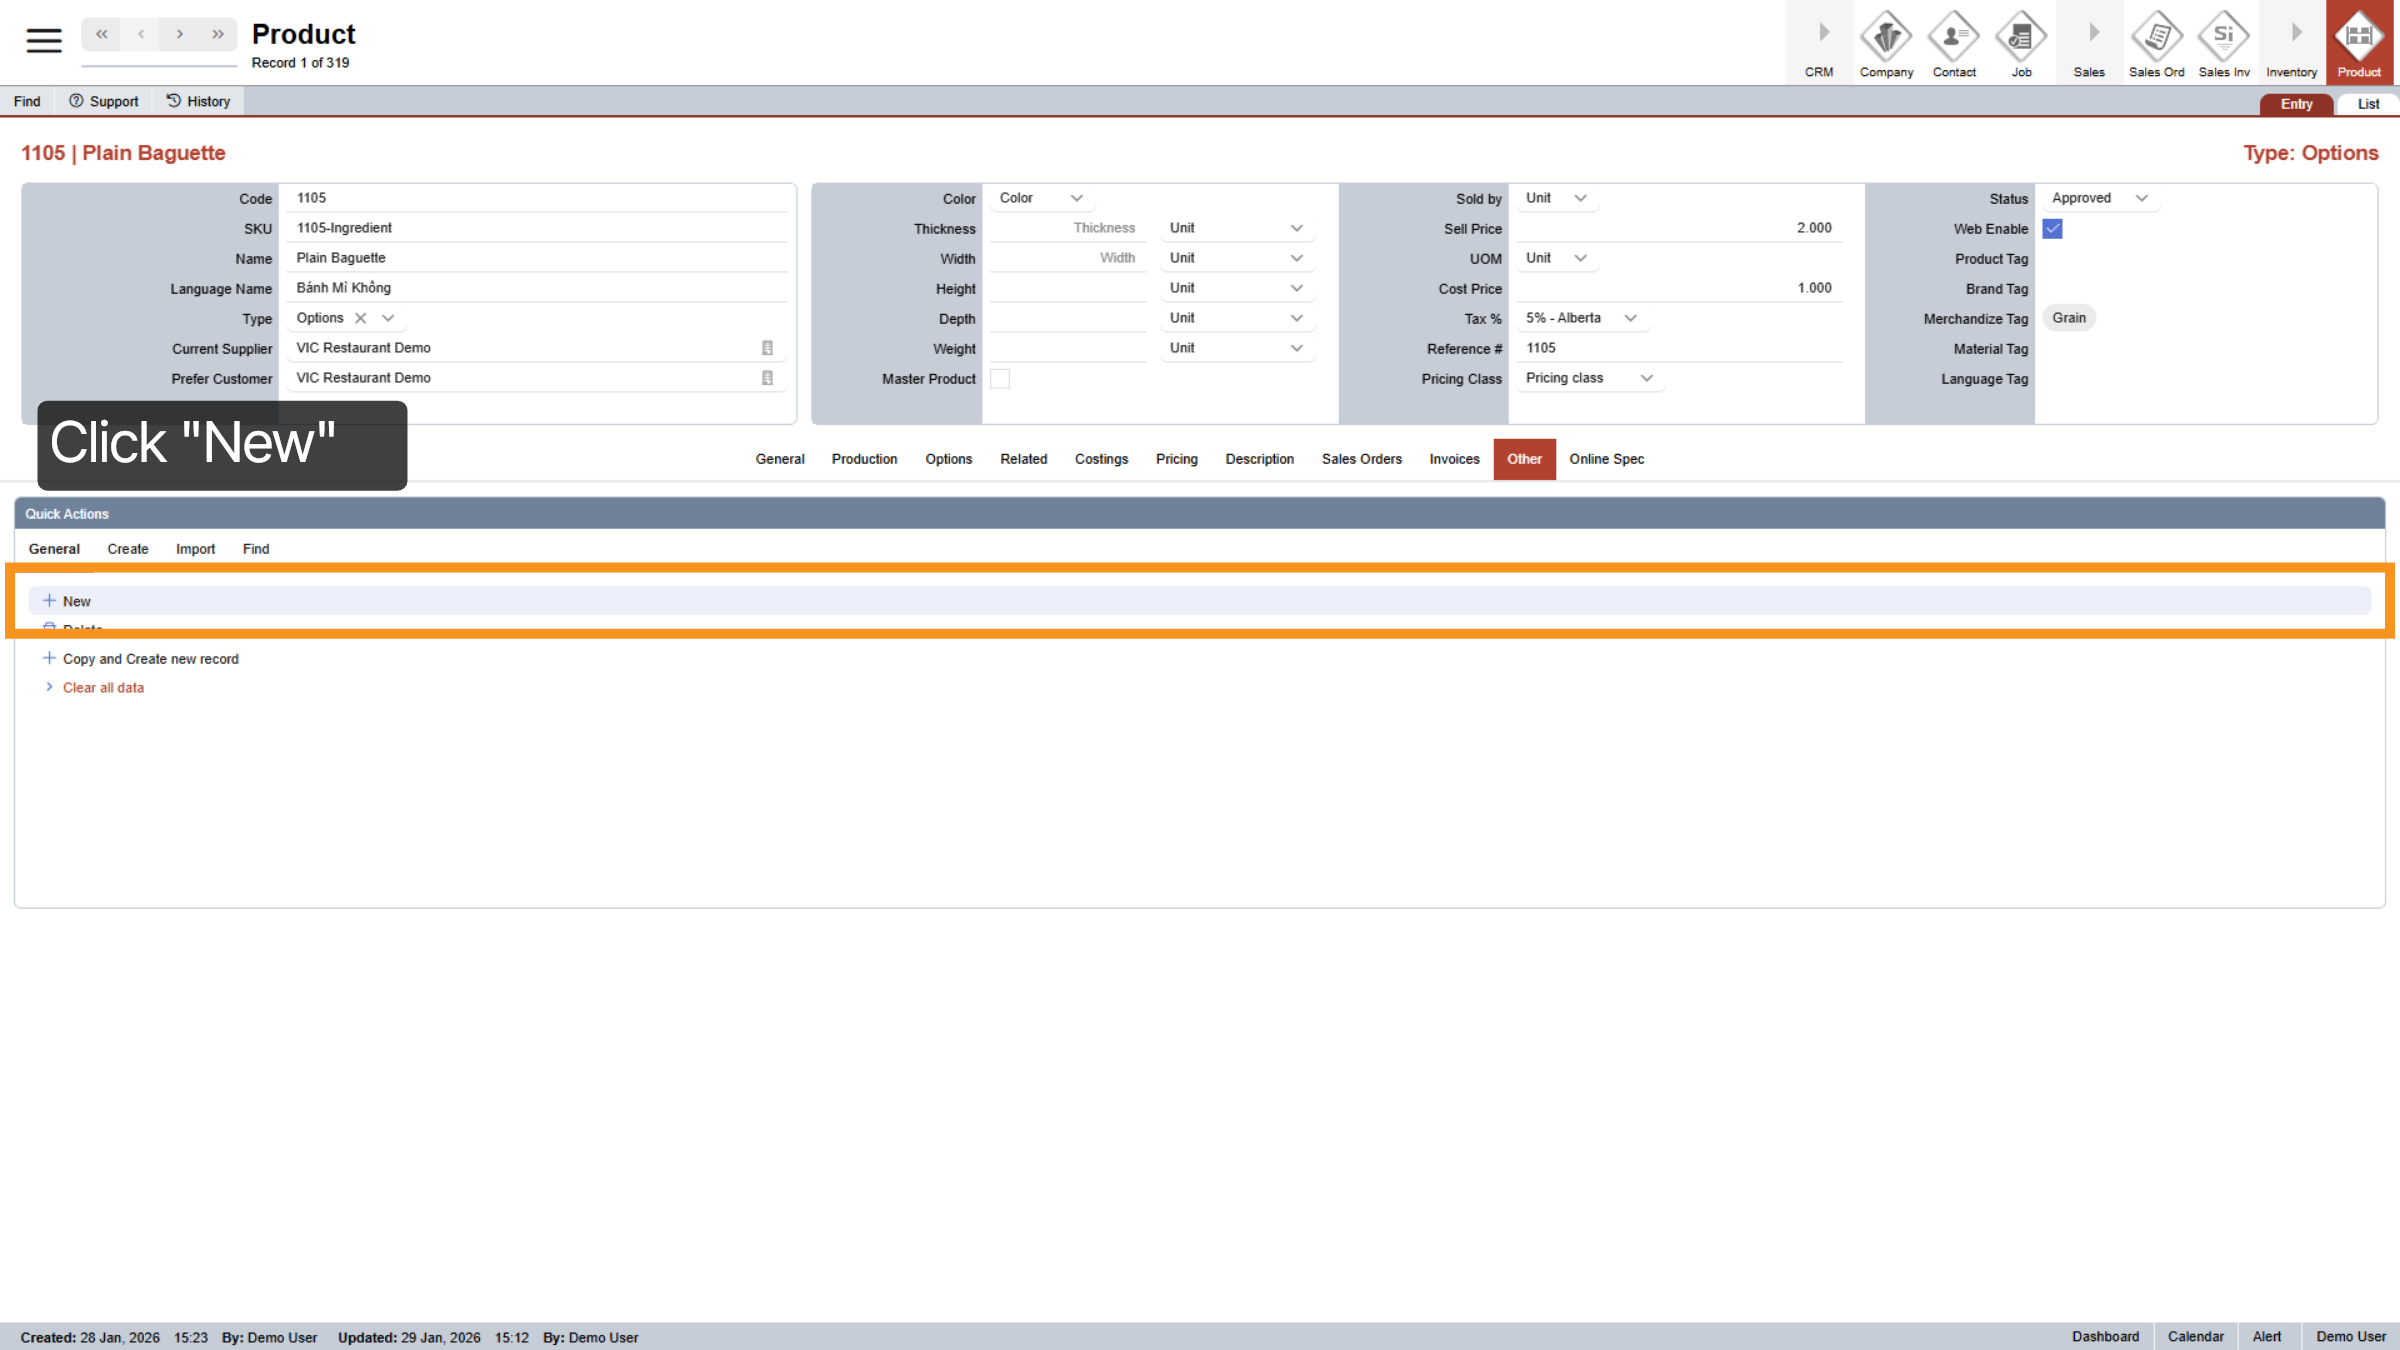
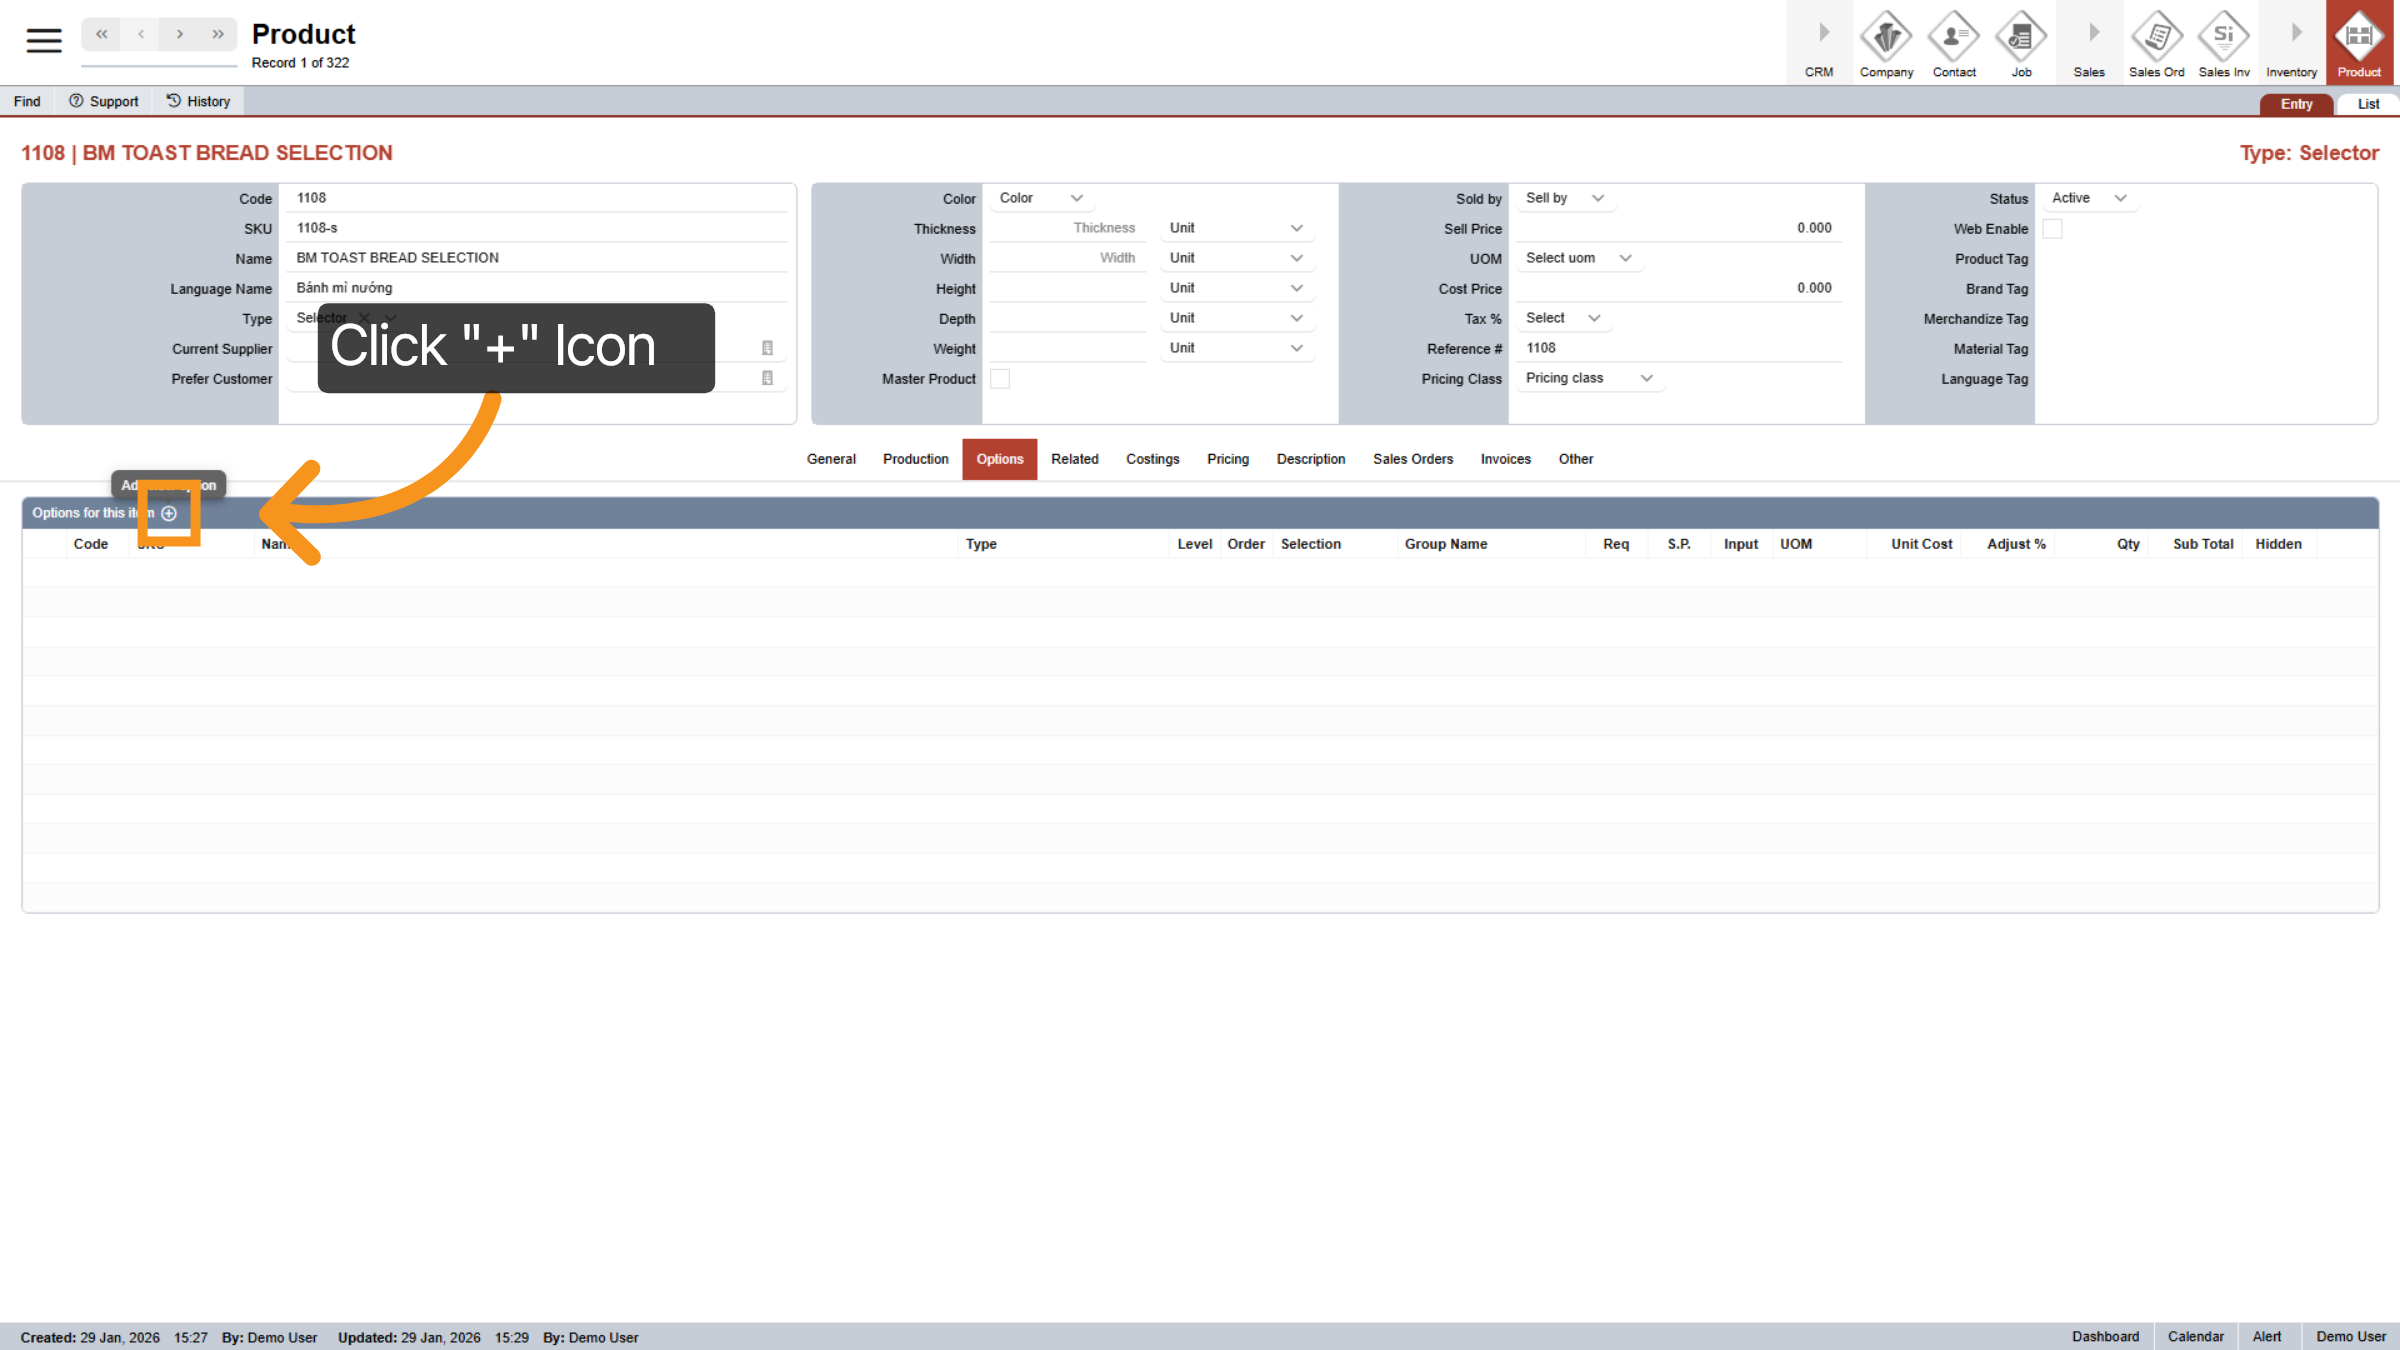
2. Initiate New Entry
Click New to start creating a new product or option entry.
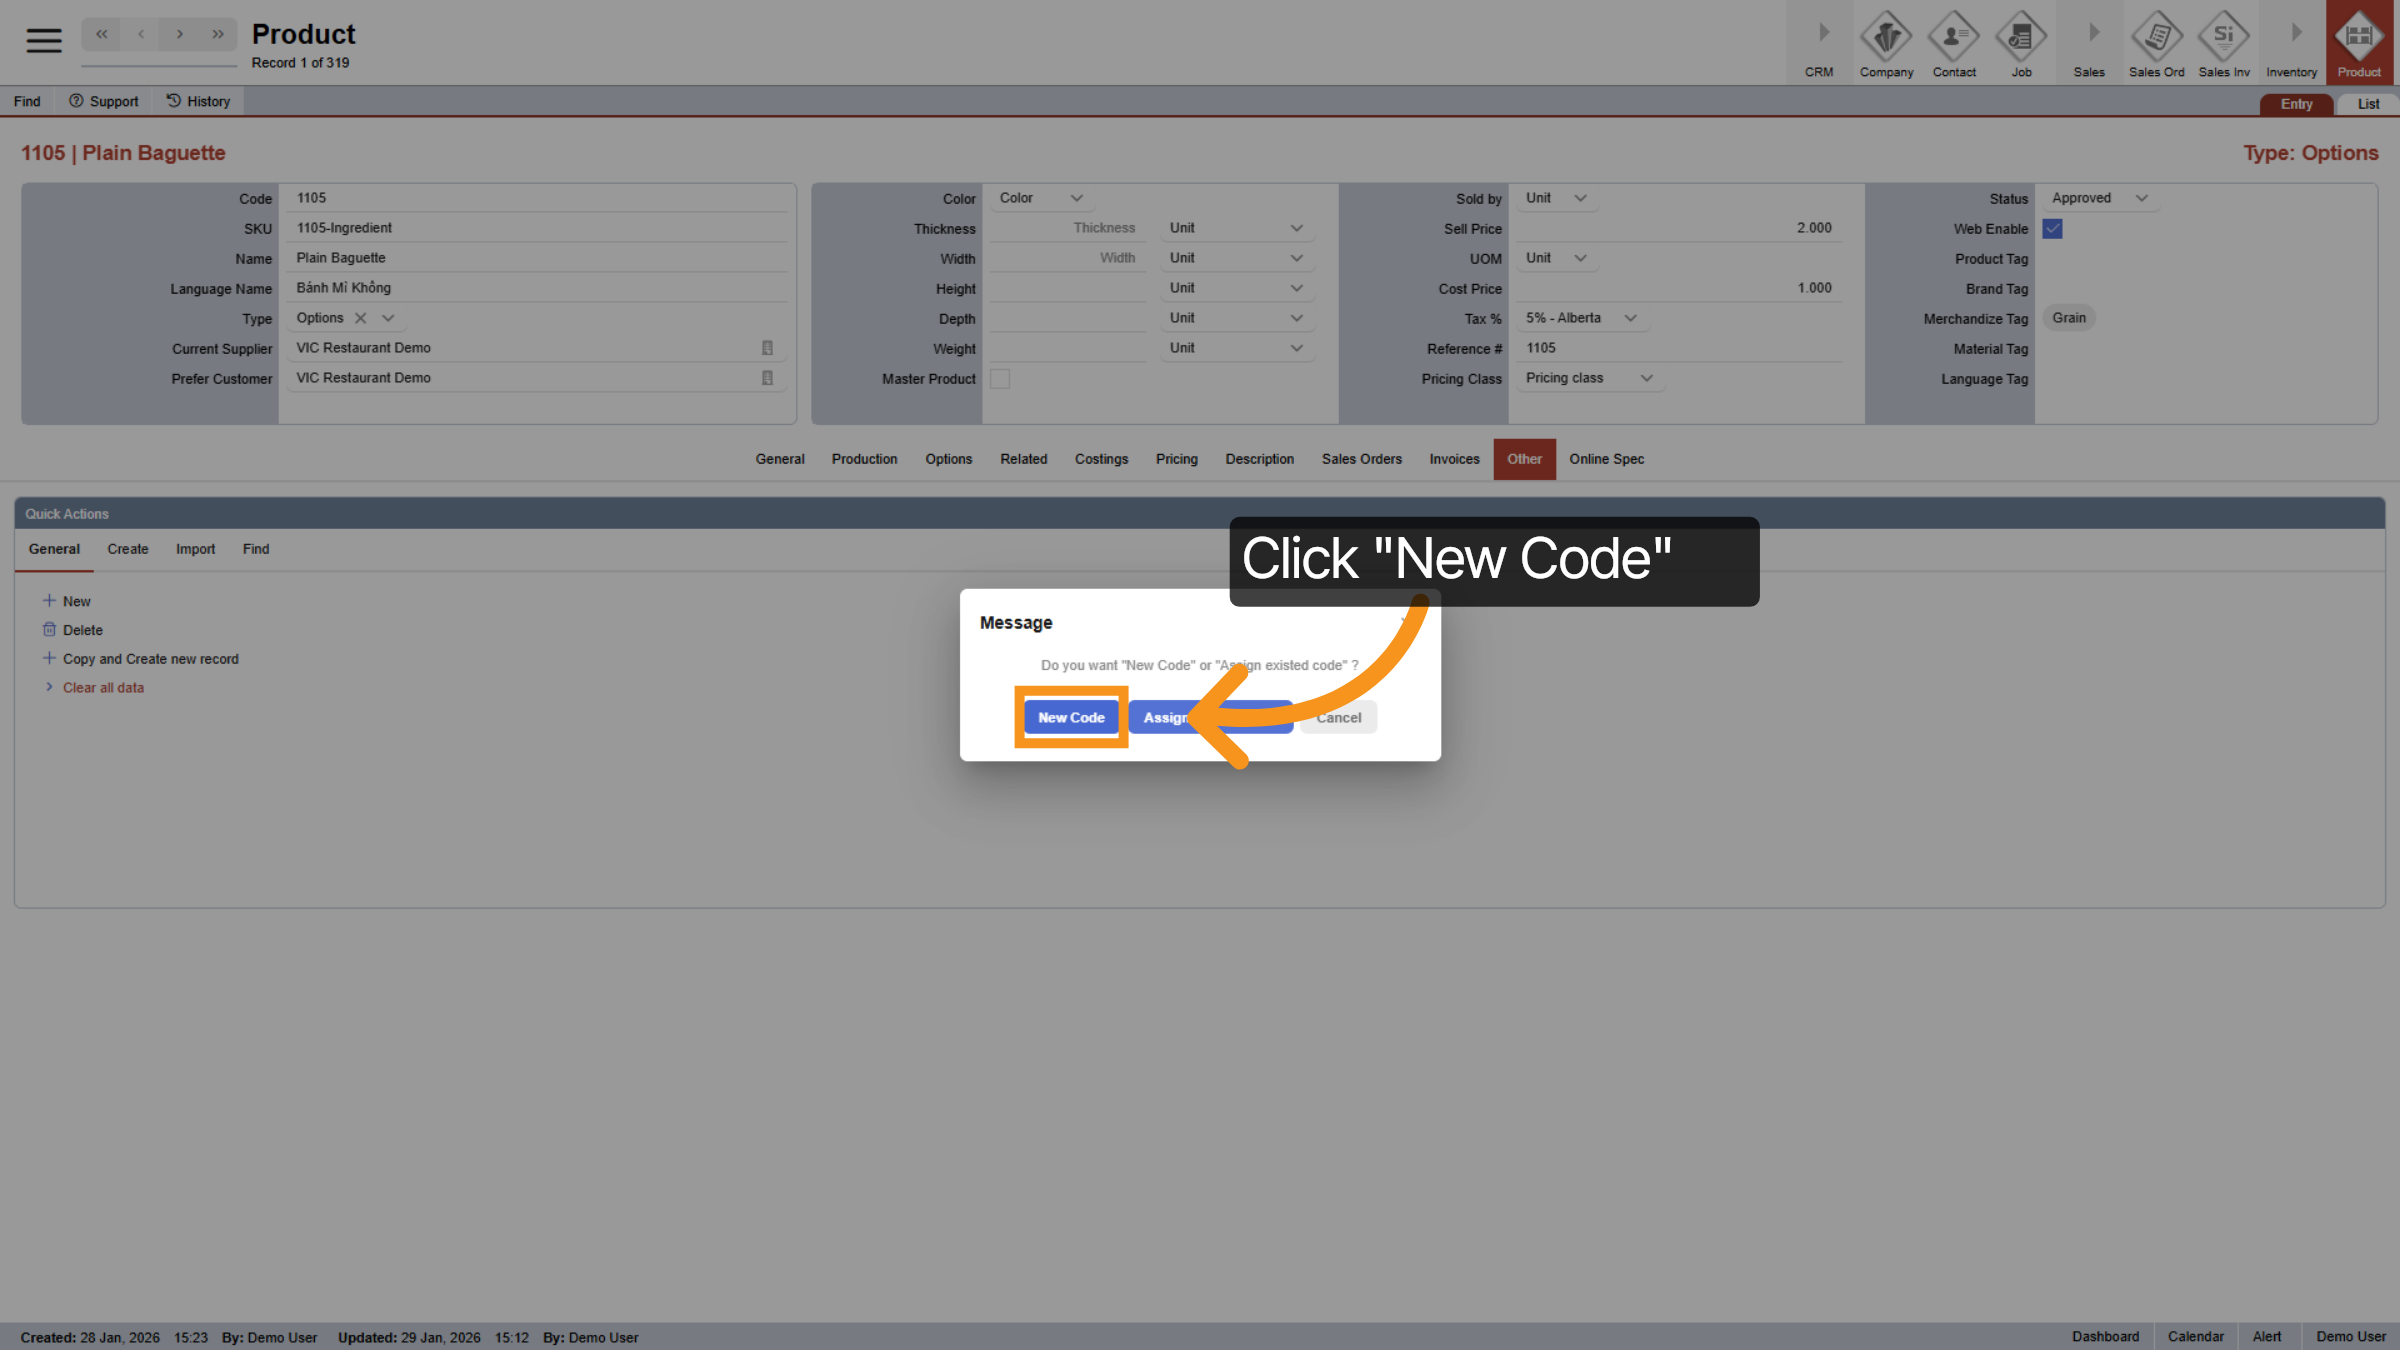
3. Select New Code Option
Click New Code to add a new product code.
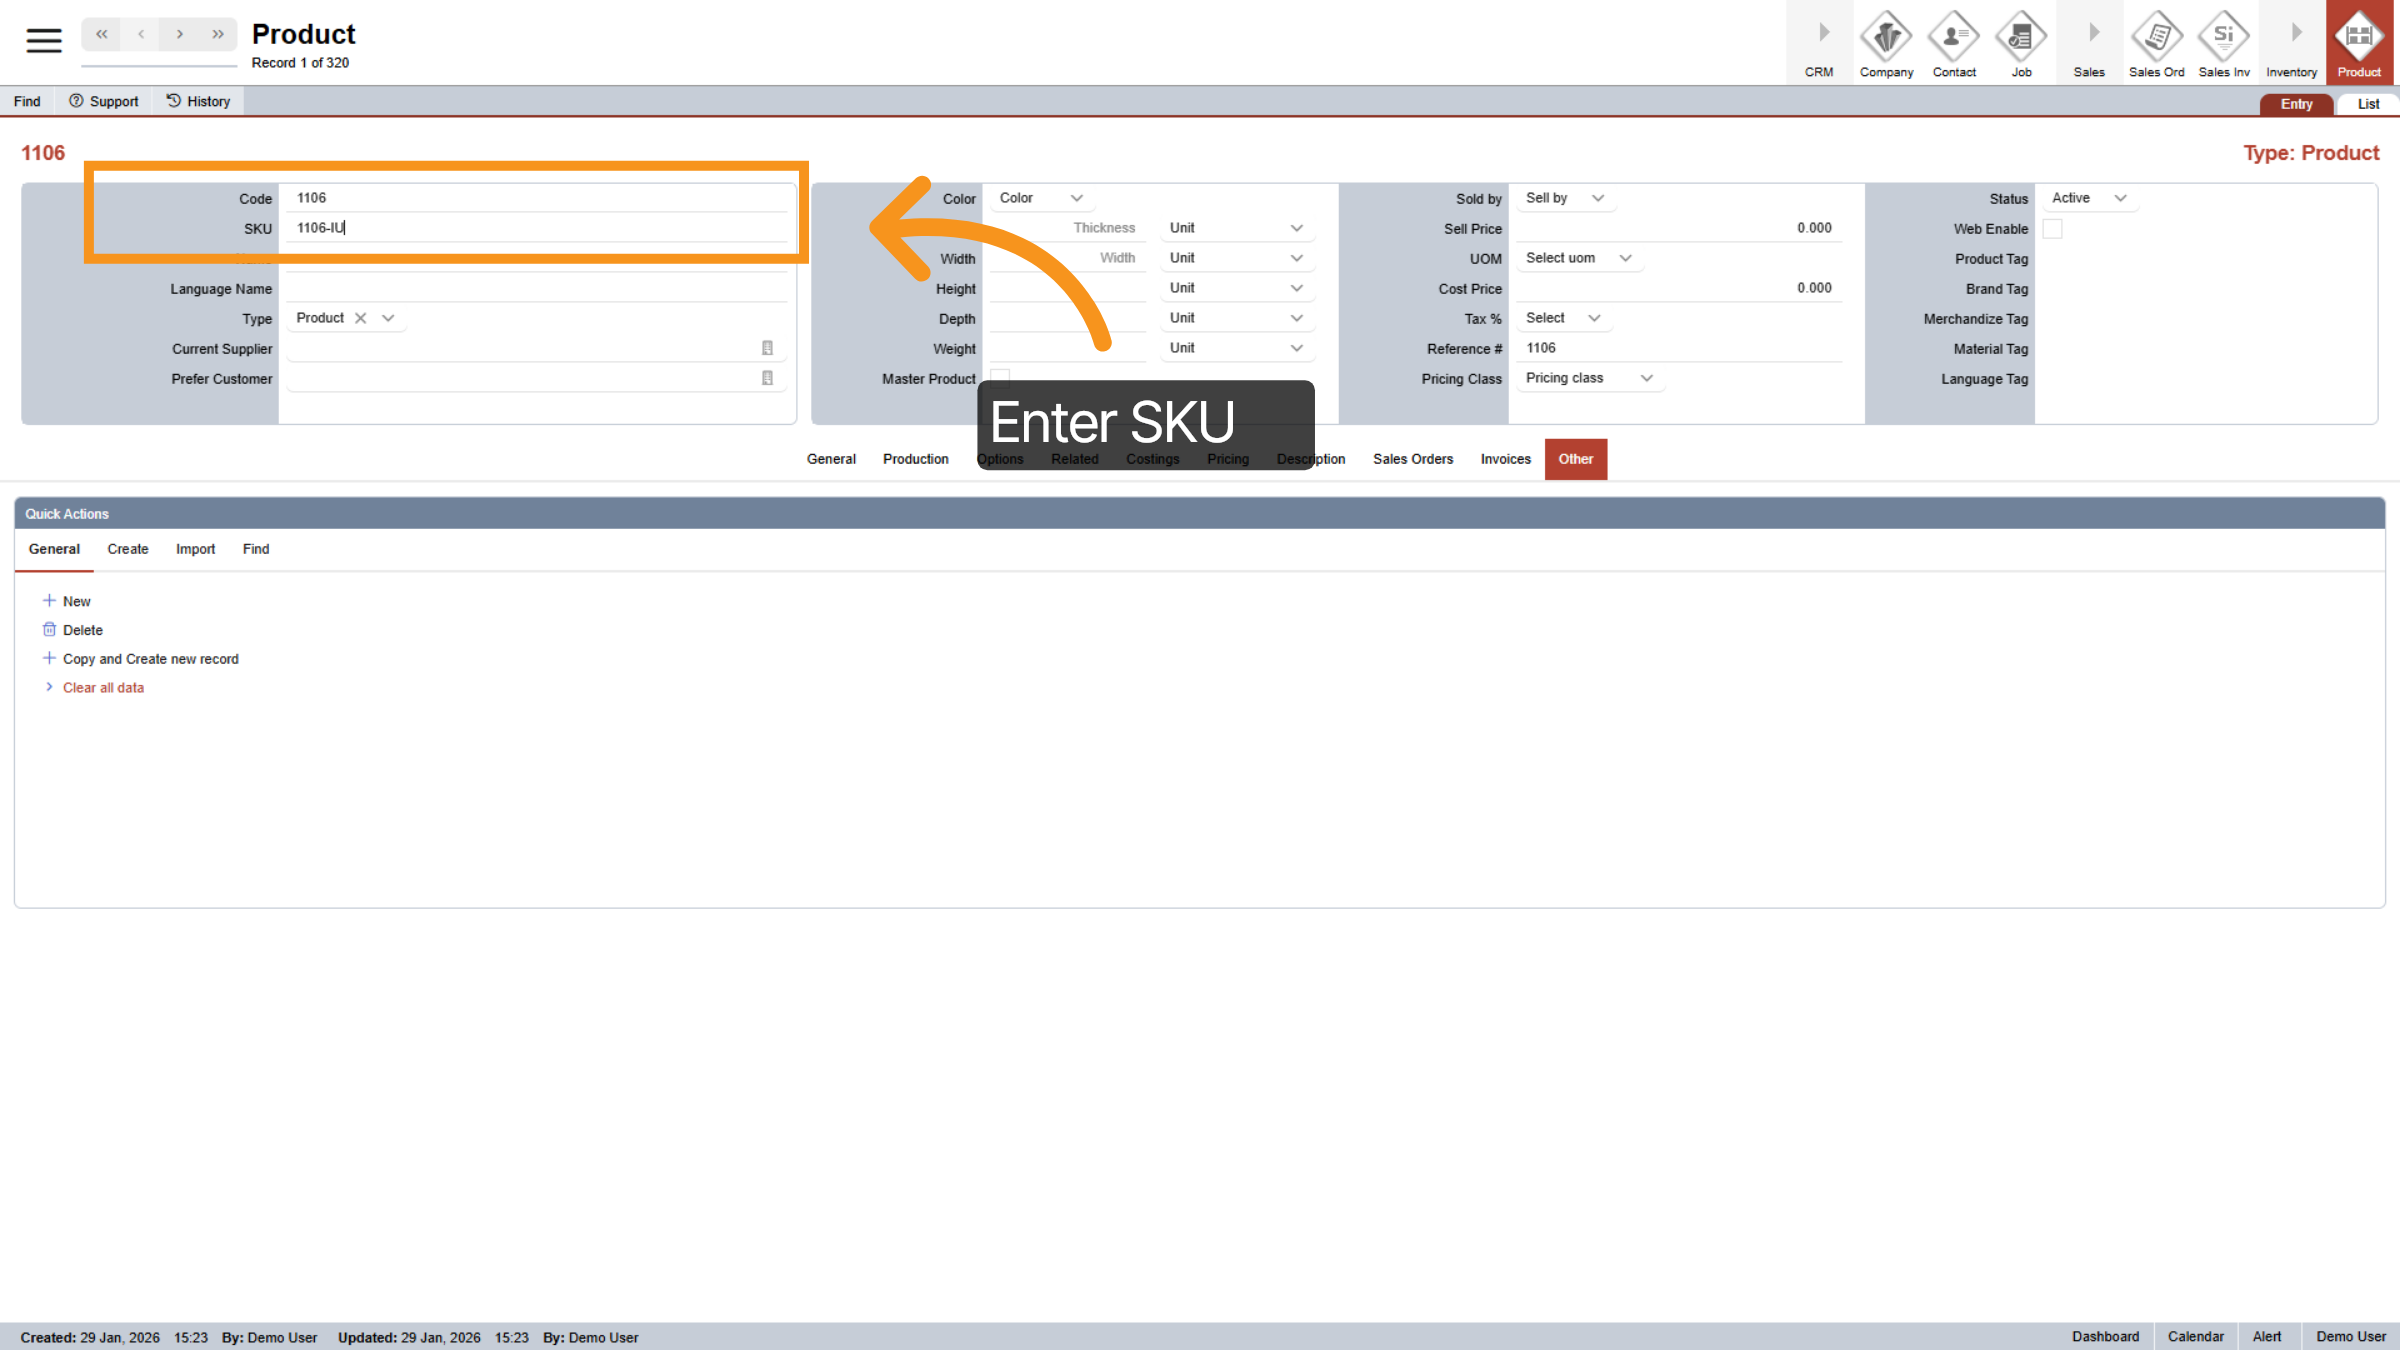
4. Enter Product Code
Click on the SKU field and enter your product SKU code. To keep things organized, I recommend using the product code, followed by a hyphen and the initials of the product type. For example, if I’m creating a “Yes” option for internal use, I would use a code like 1106-IU.
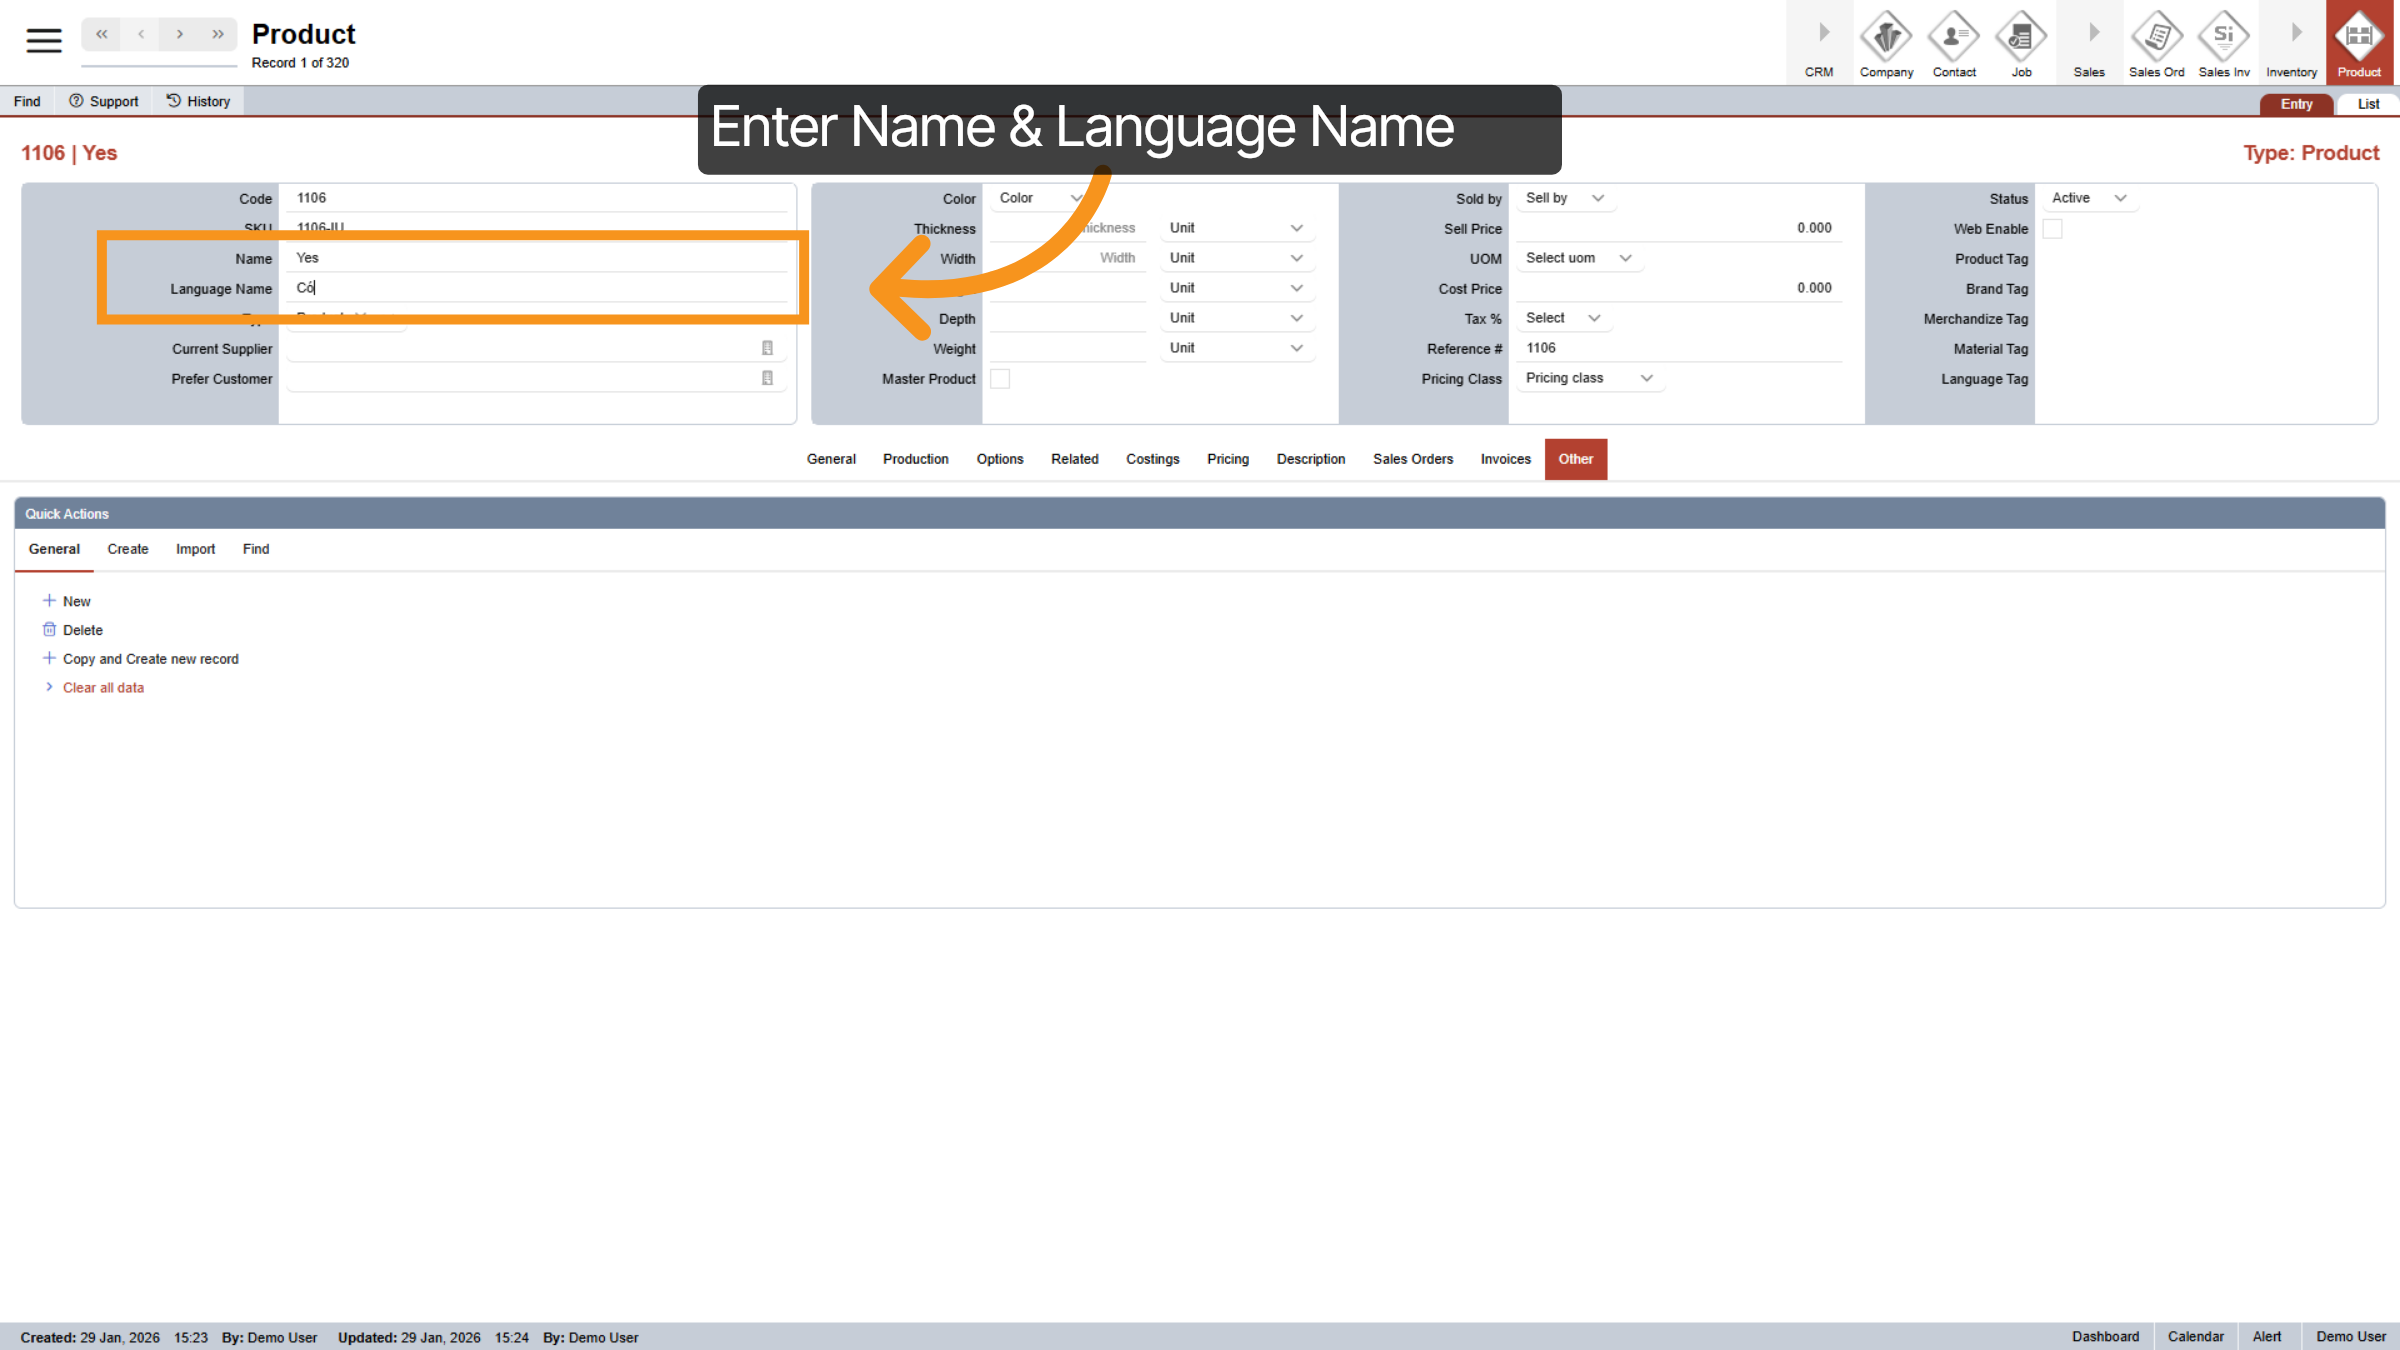
5. Enter Name and Language
Enter Name and Language Name of the selector
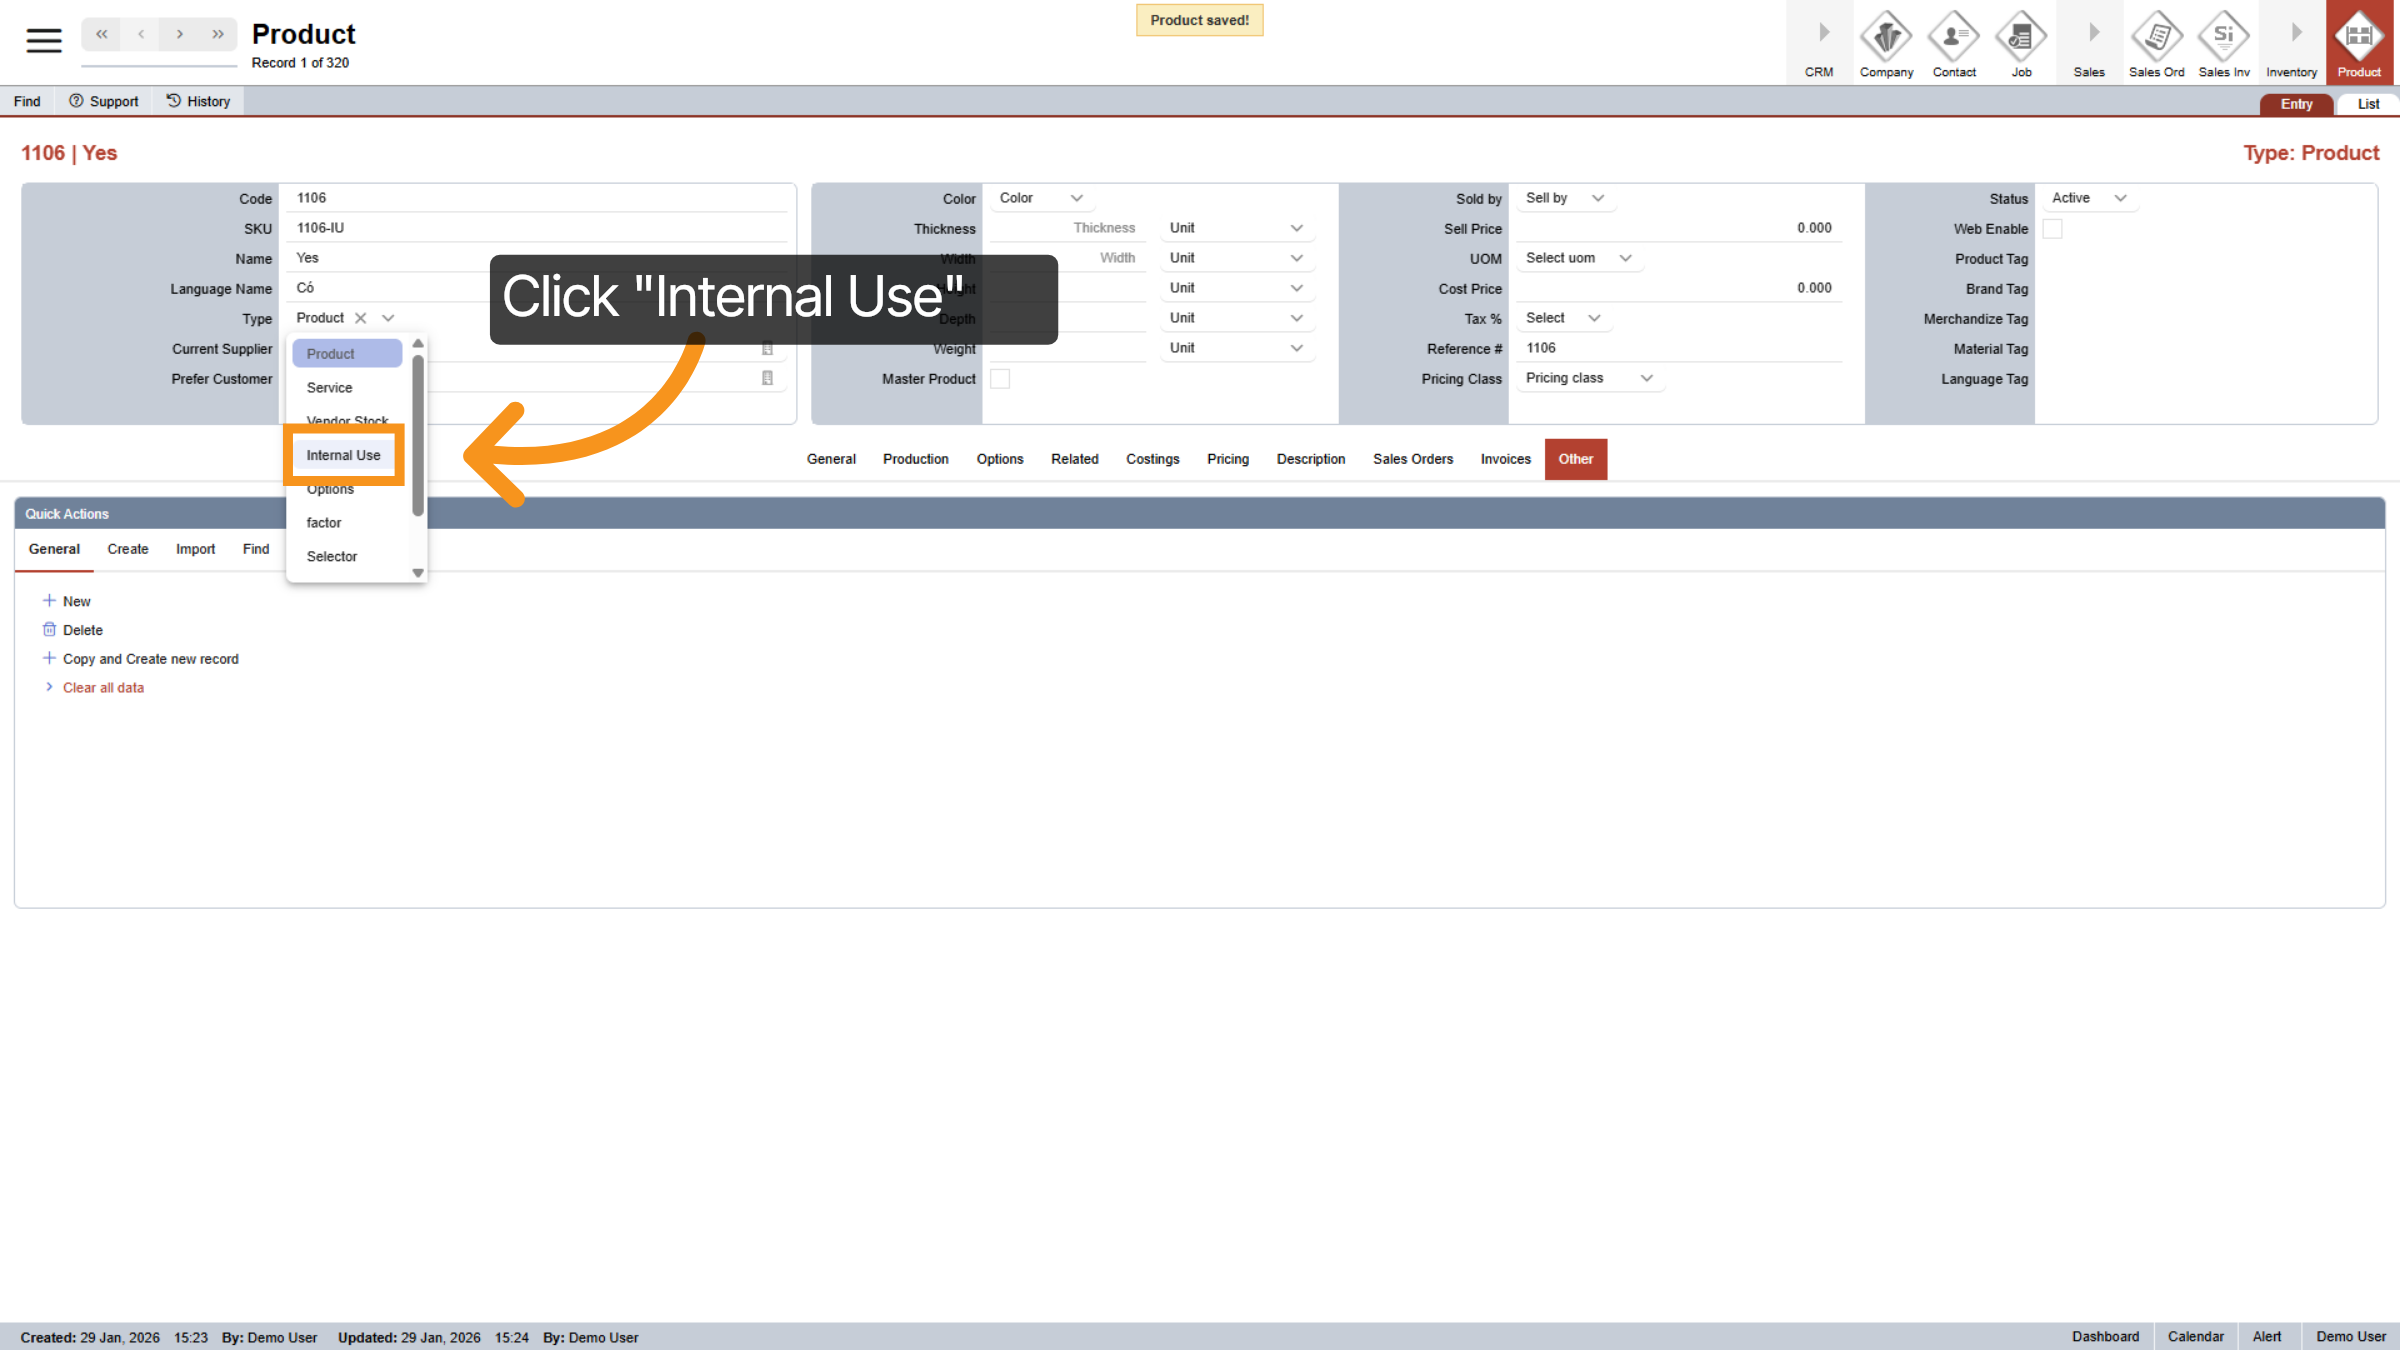
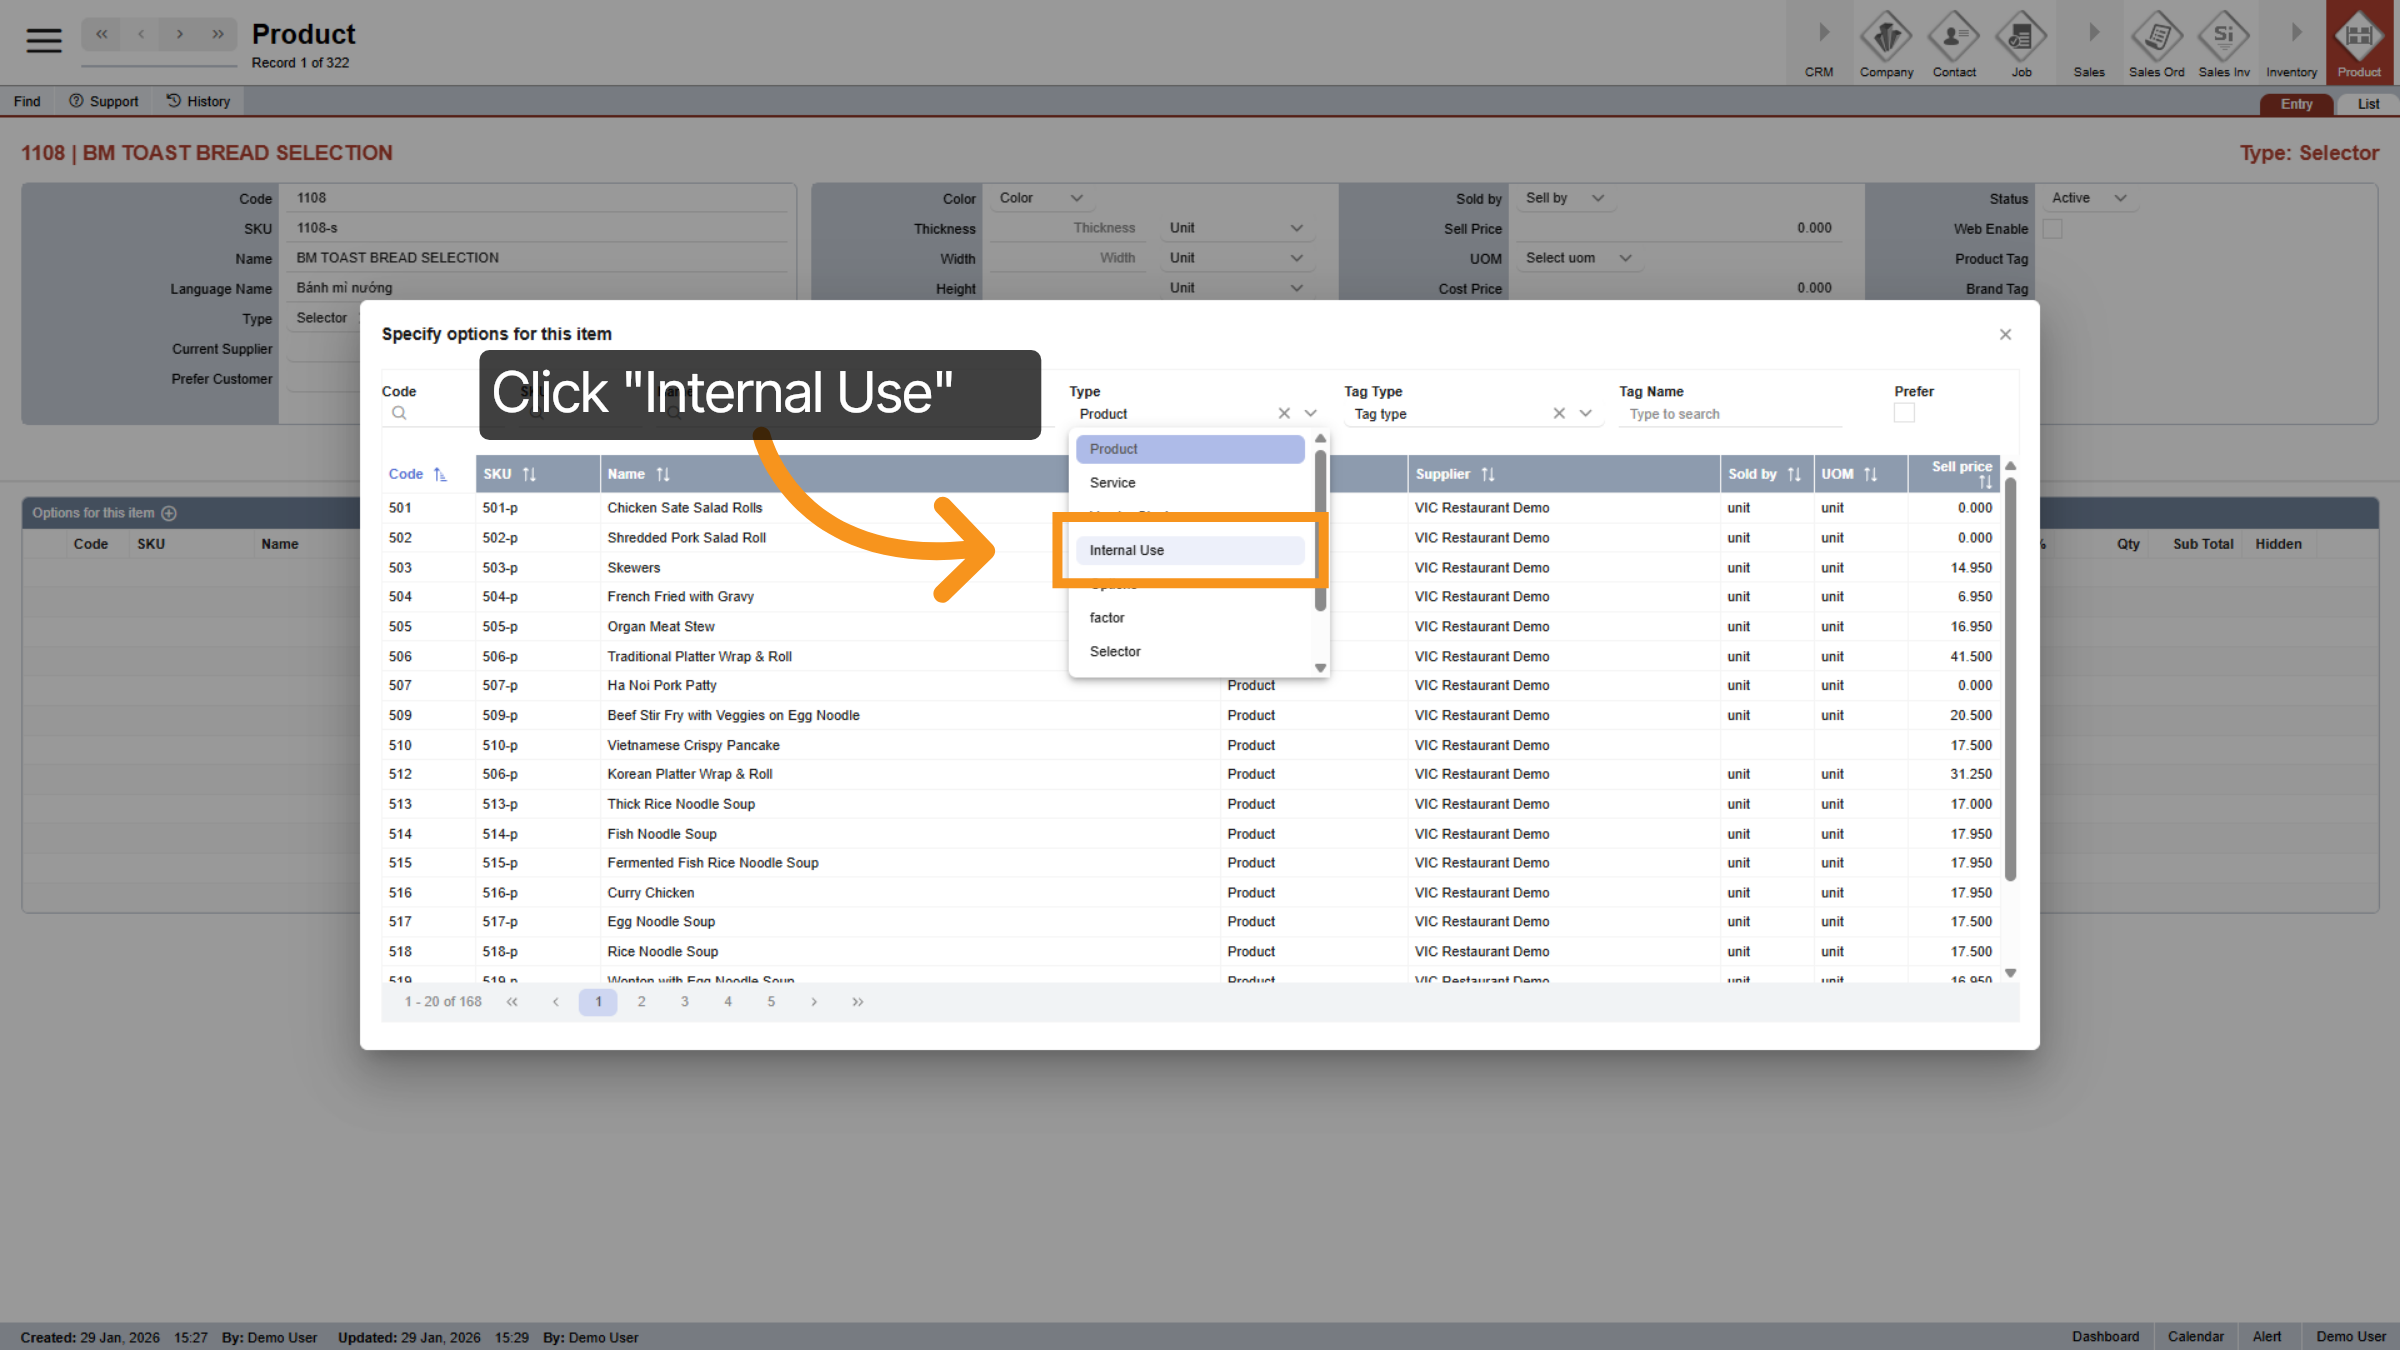
6. Select "Internal Use"
Set the Product Type to “Internal Use.” You can choose a different option if you’d like, but make sure you stay consistent and organized. This will help you remember your setup later and avoid confusion in the system.
7. Go to General Tab
Now, let's open the "General Tab."

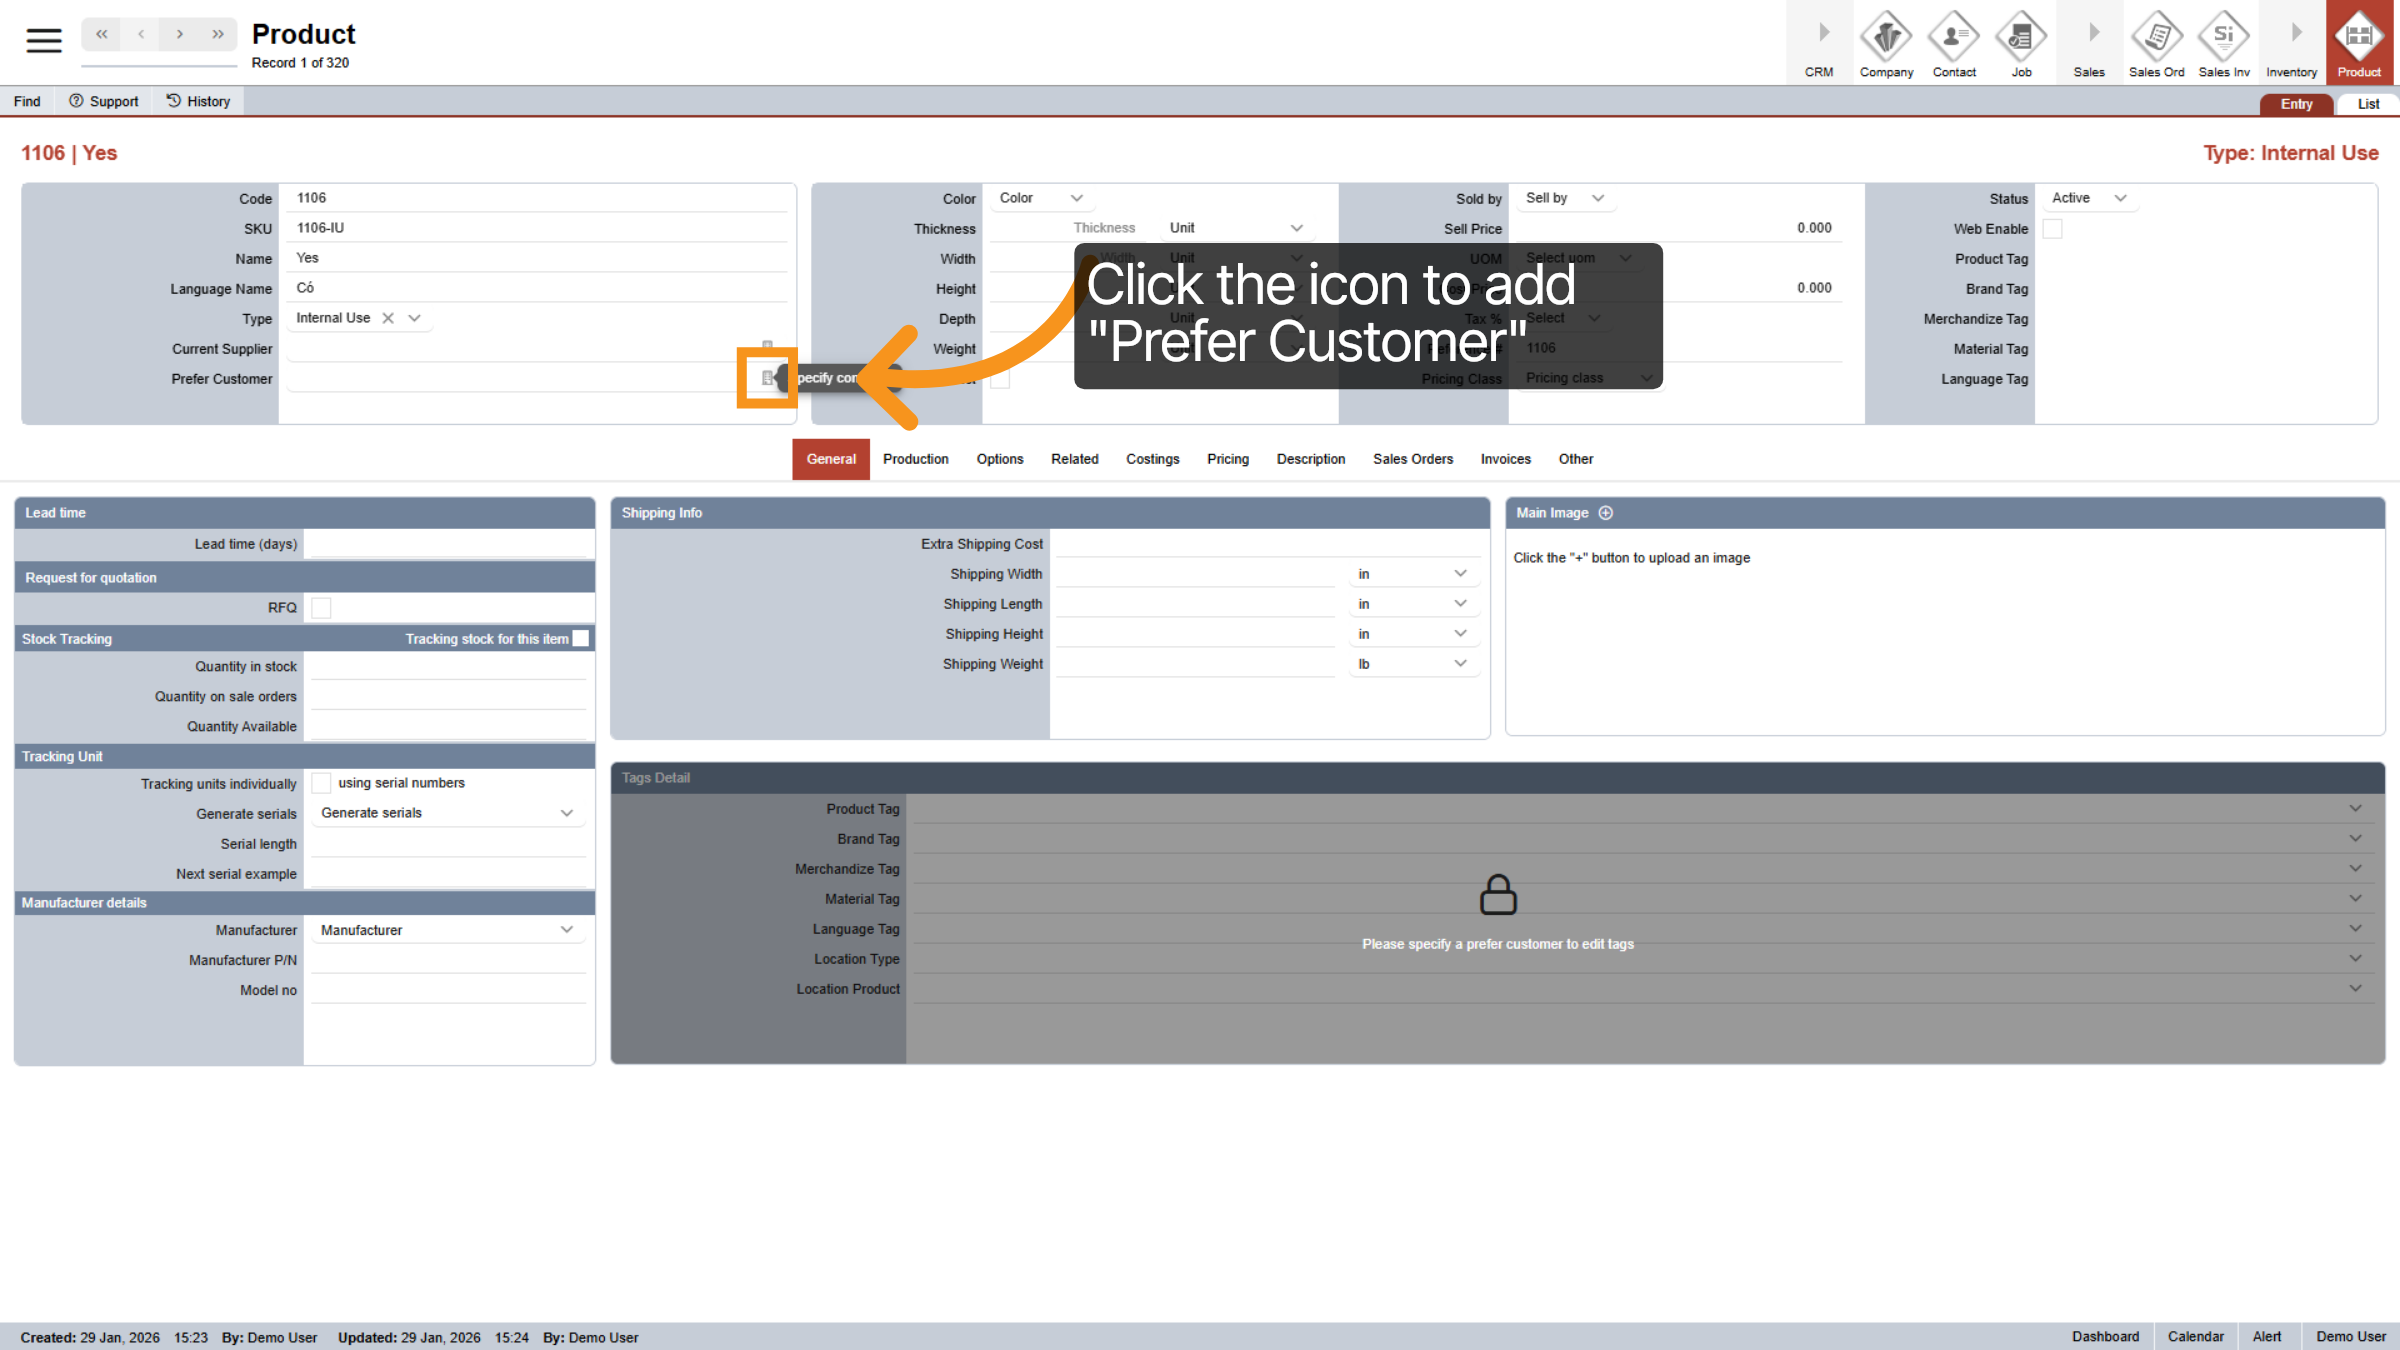
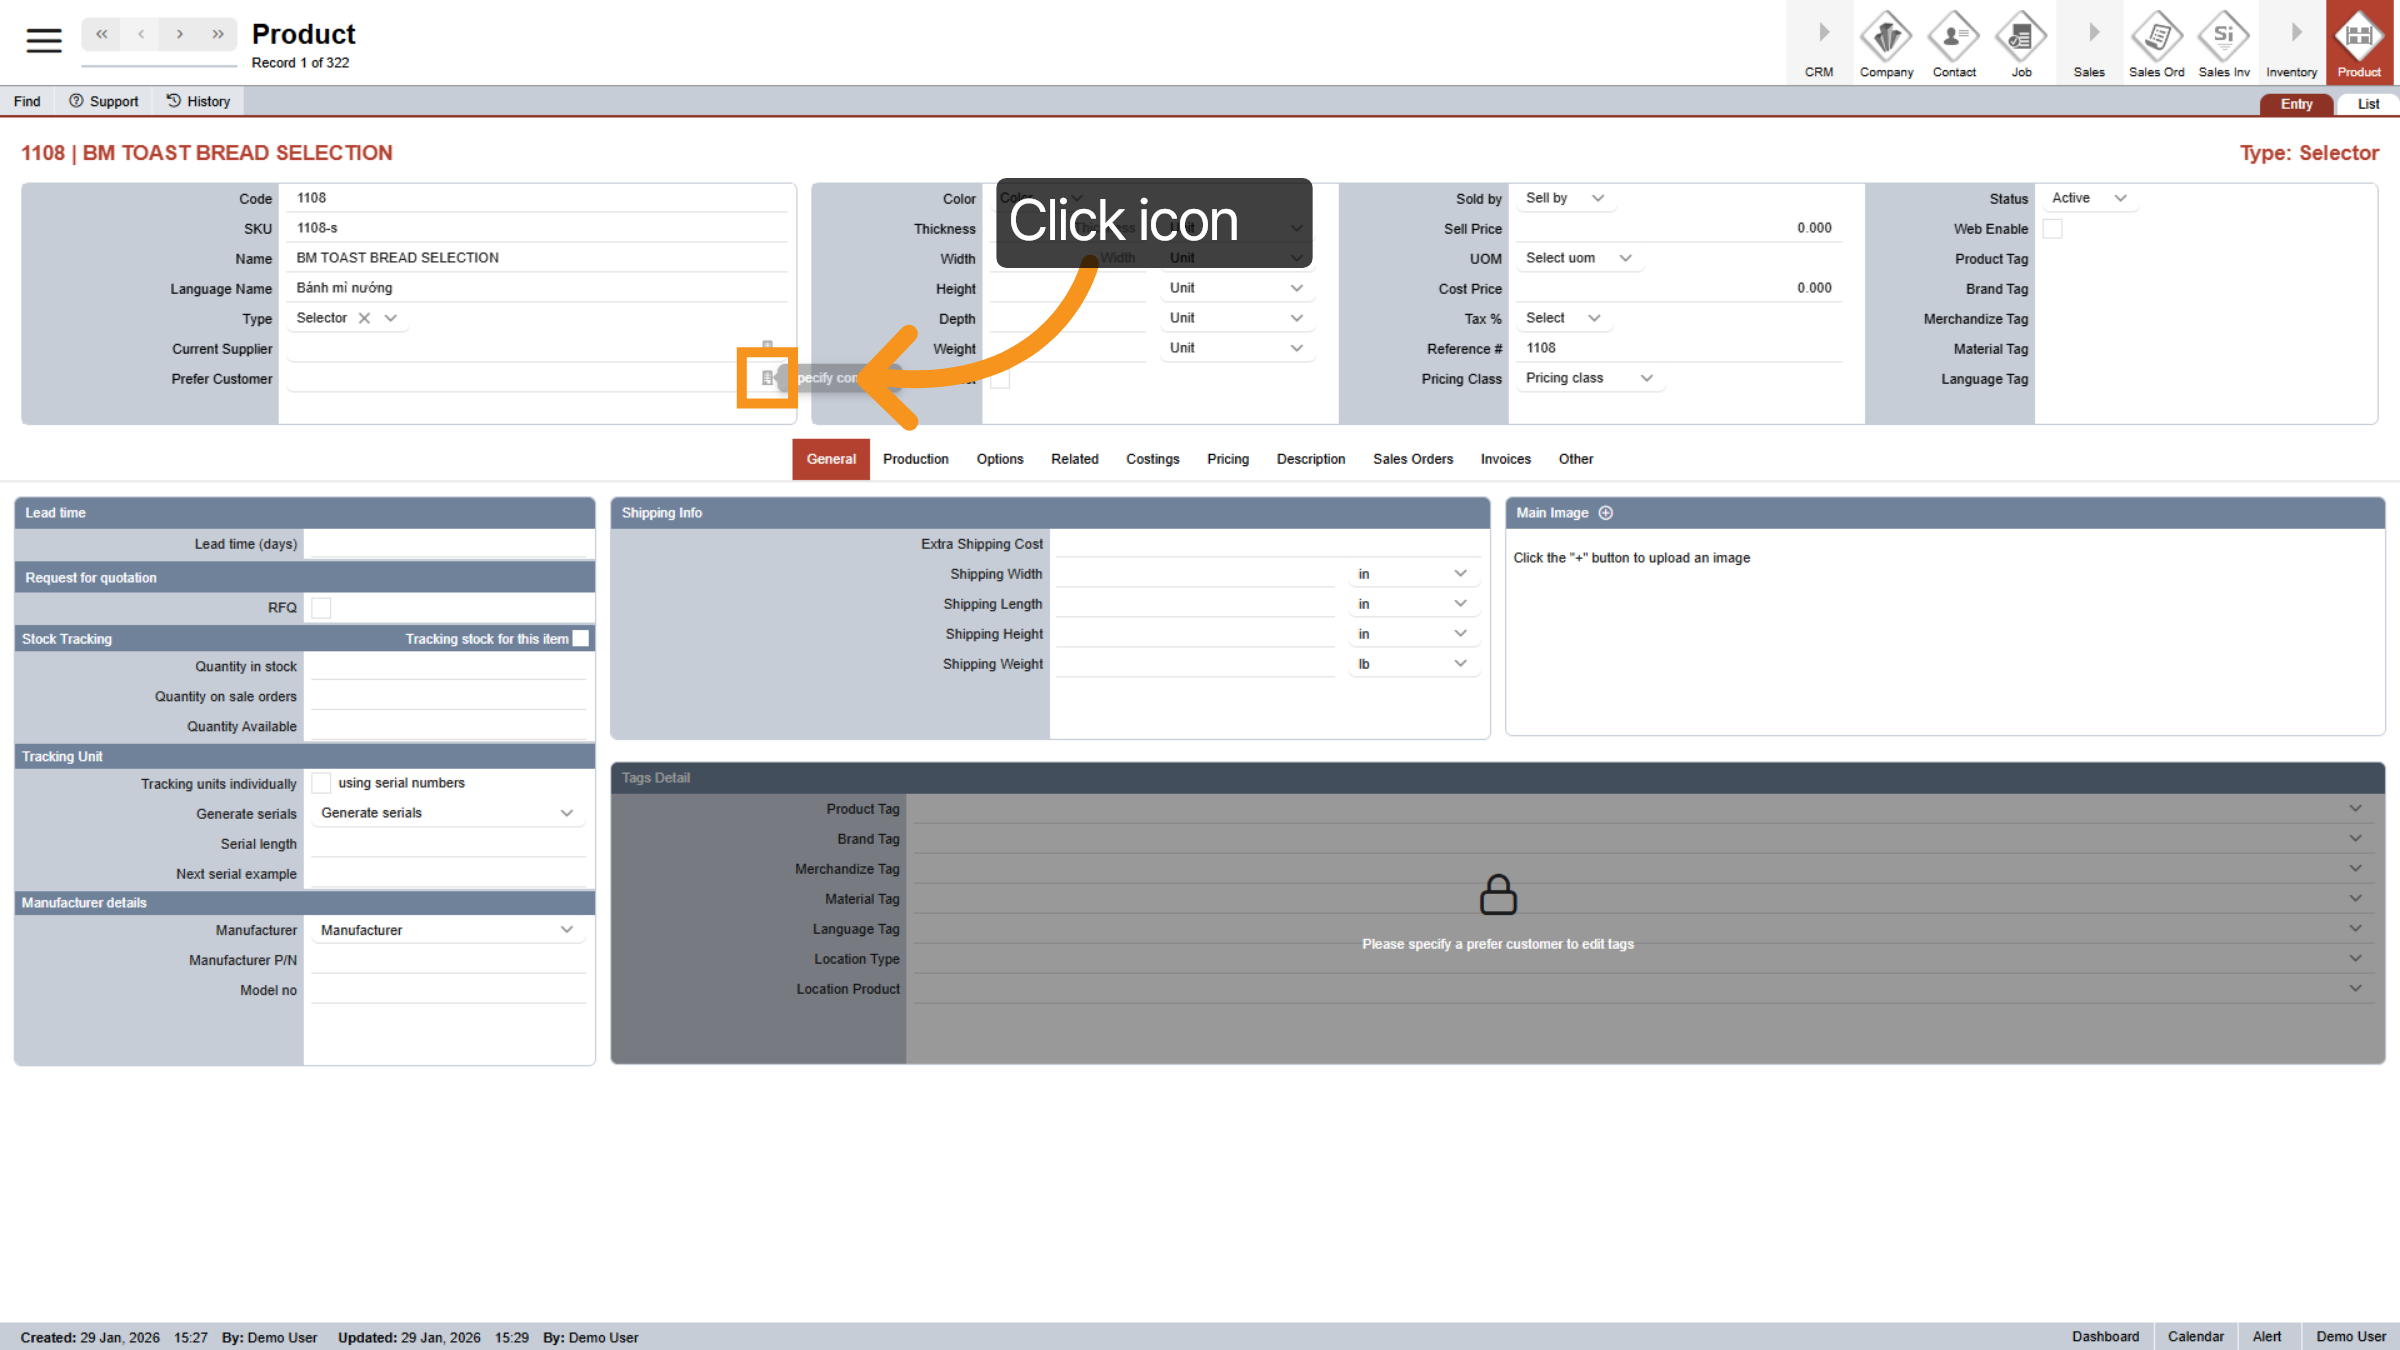
8. Add "Prefer Customer"
Click the icon to begin adding "Prefer Customer".
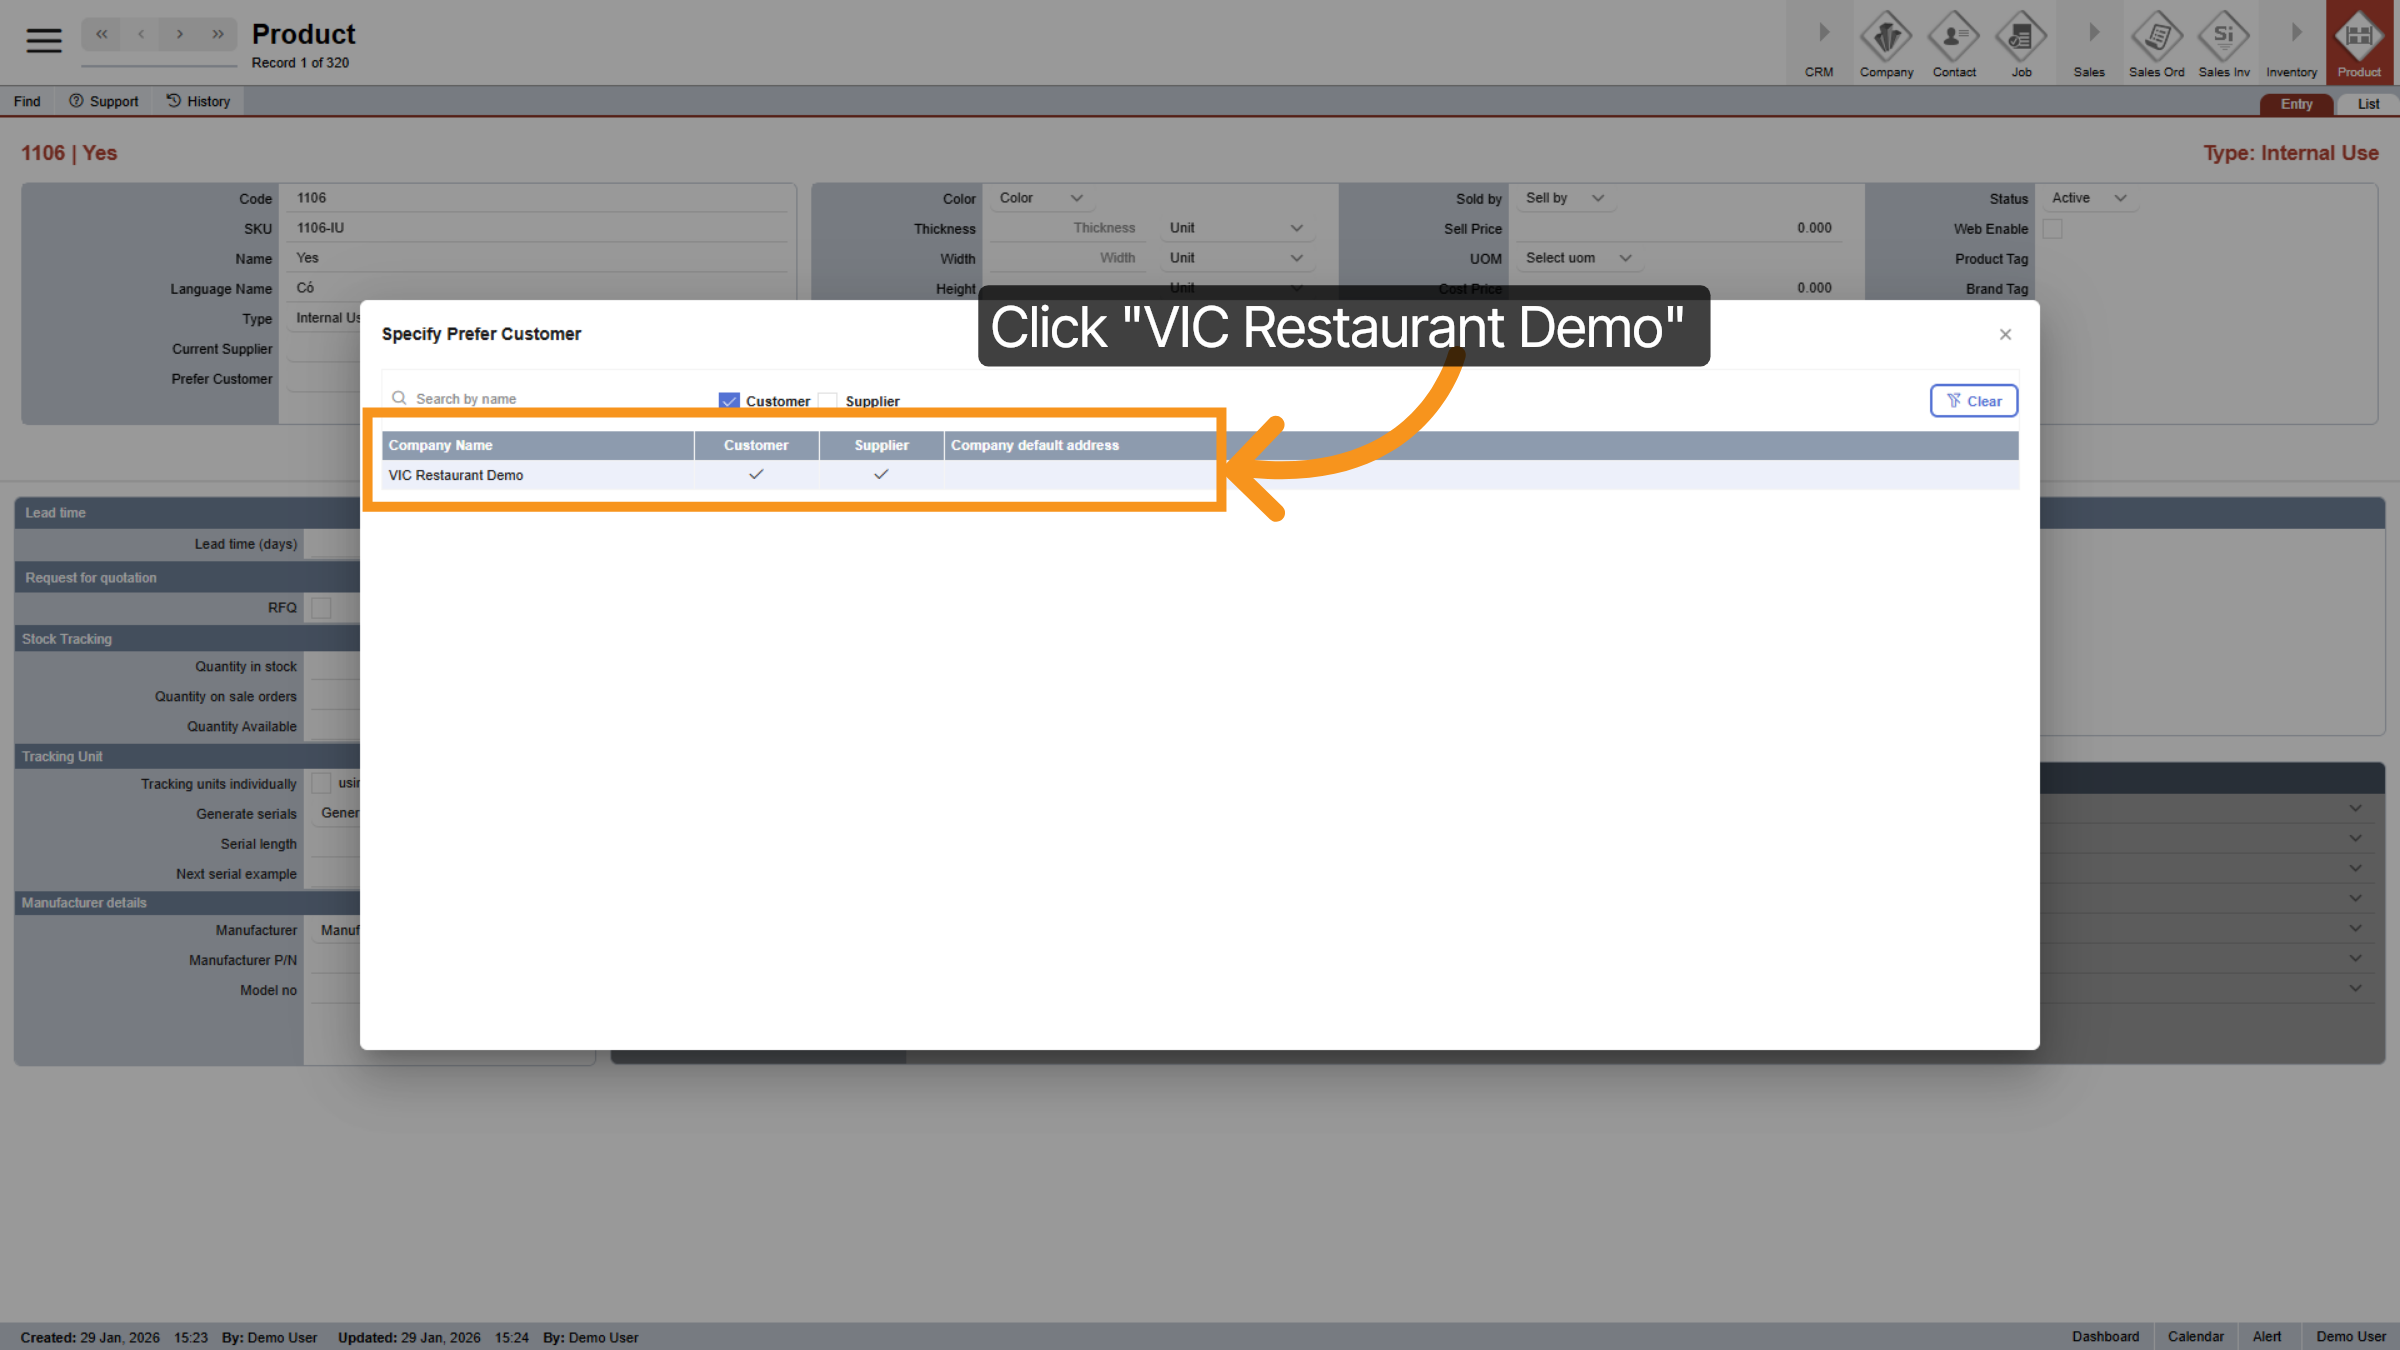
9. Select "Prefer Customer"
Click on the preferred restaurant that you want to grant access to this product.
10. Tags Section Unlock
Once, you selected at least one preferred customer, the "Tag Section" will be unlock.
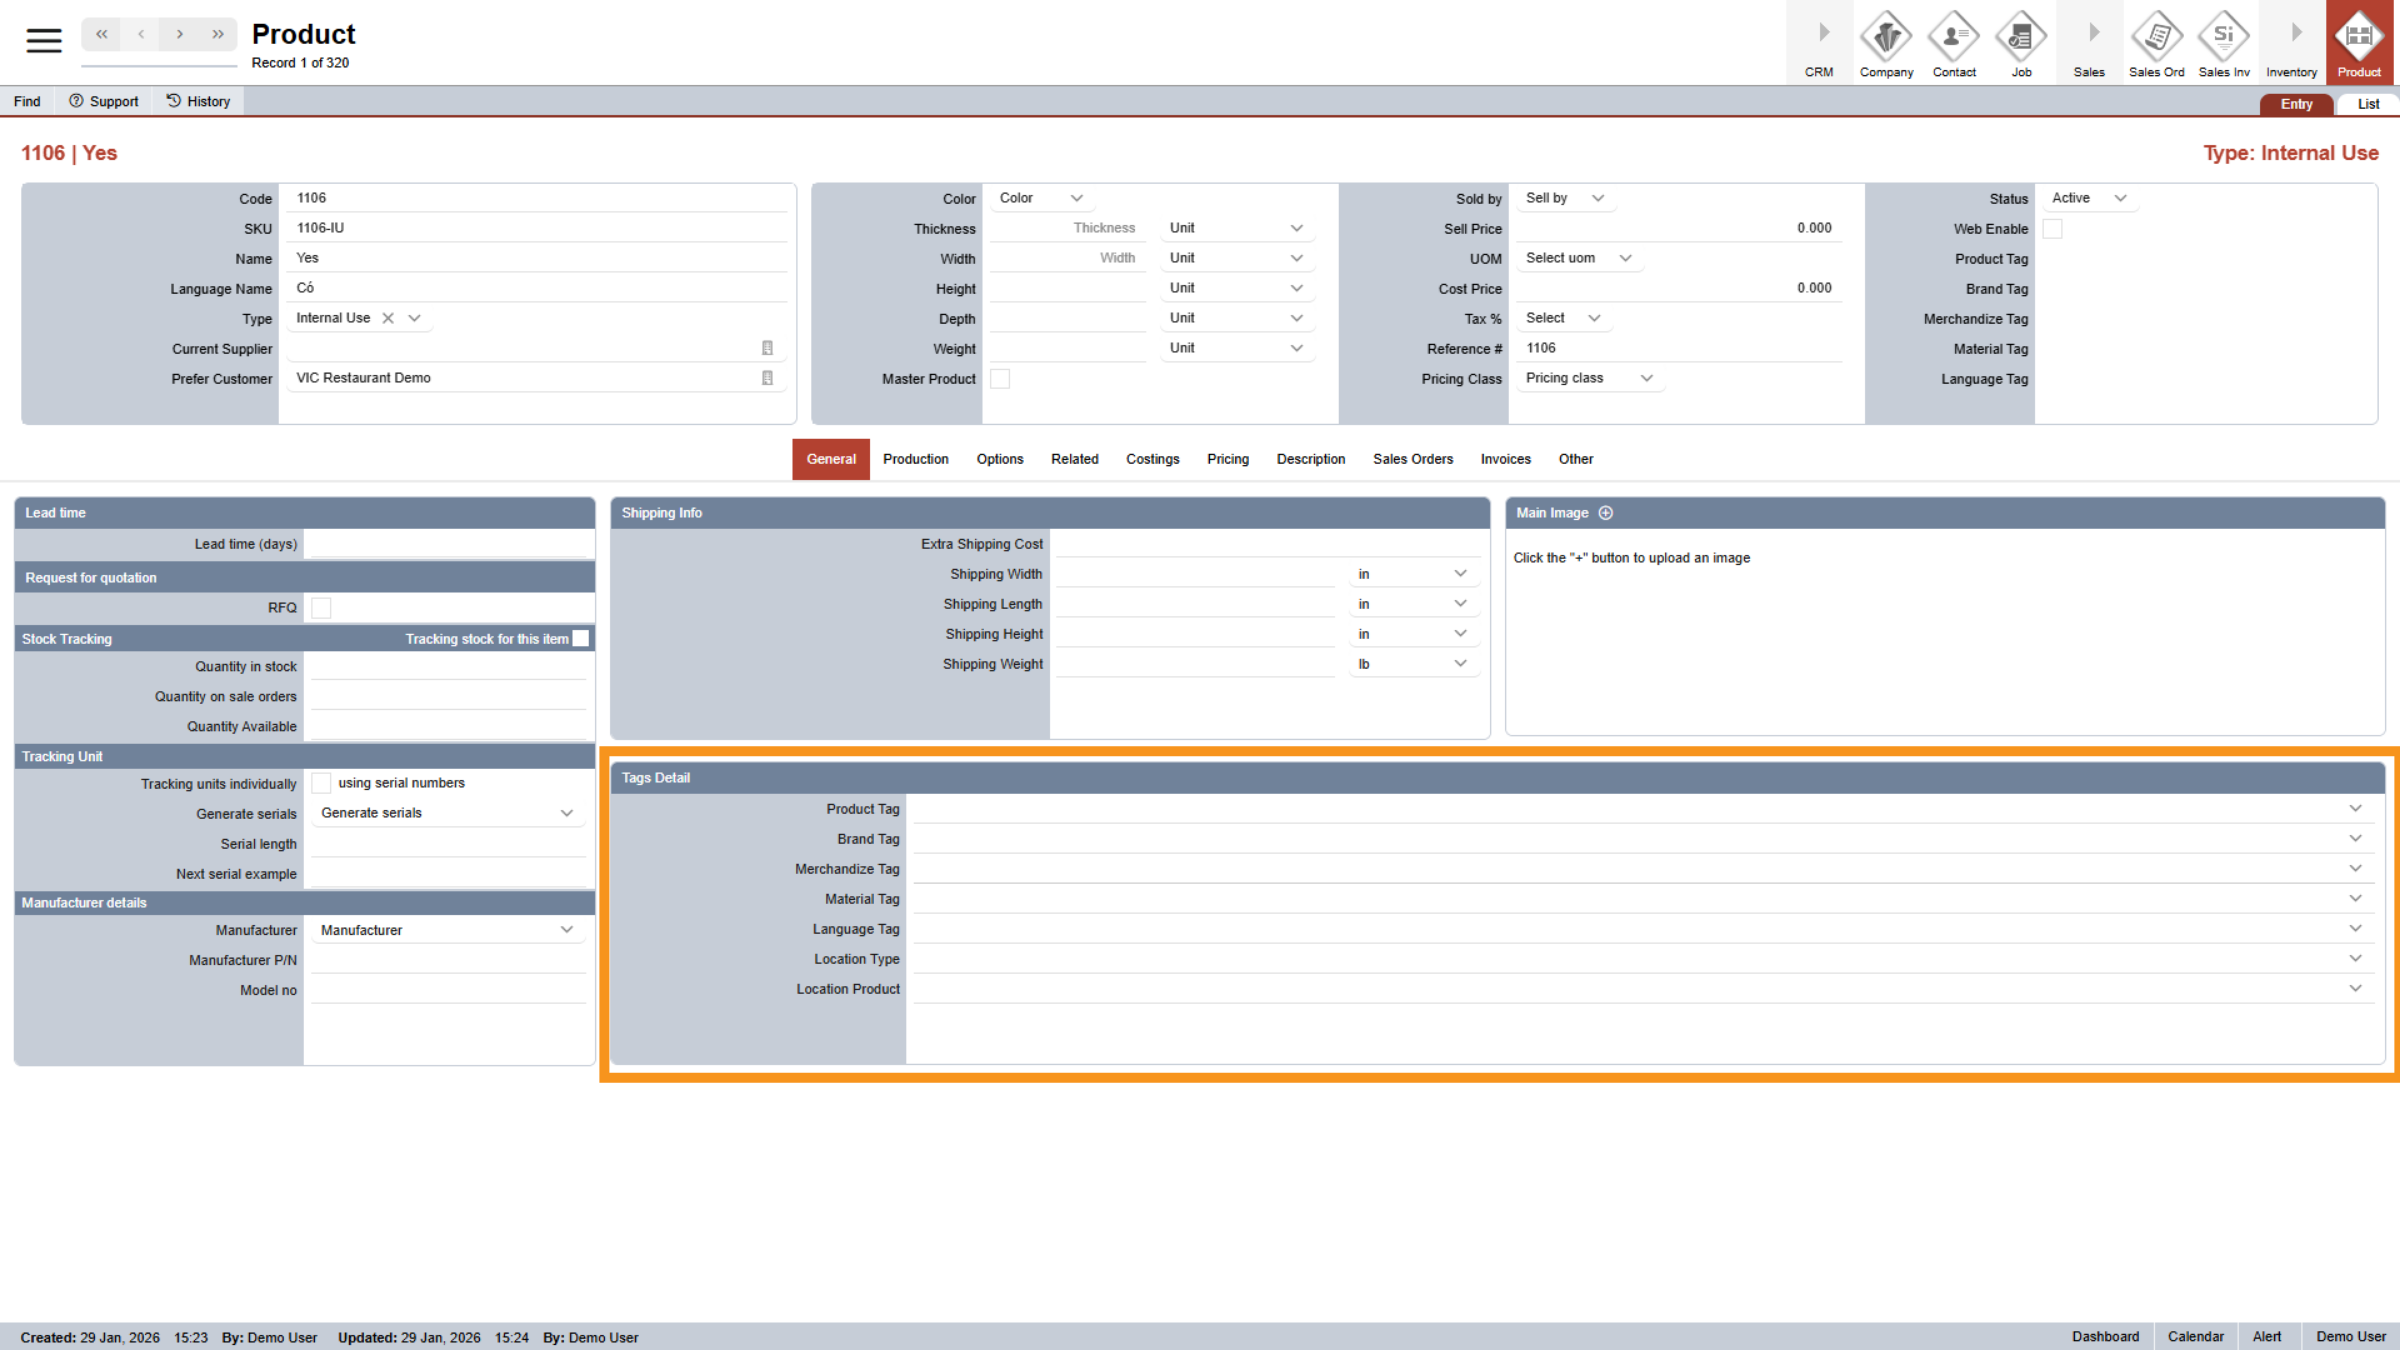
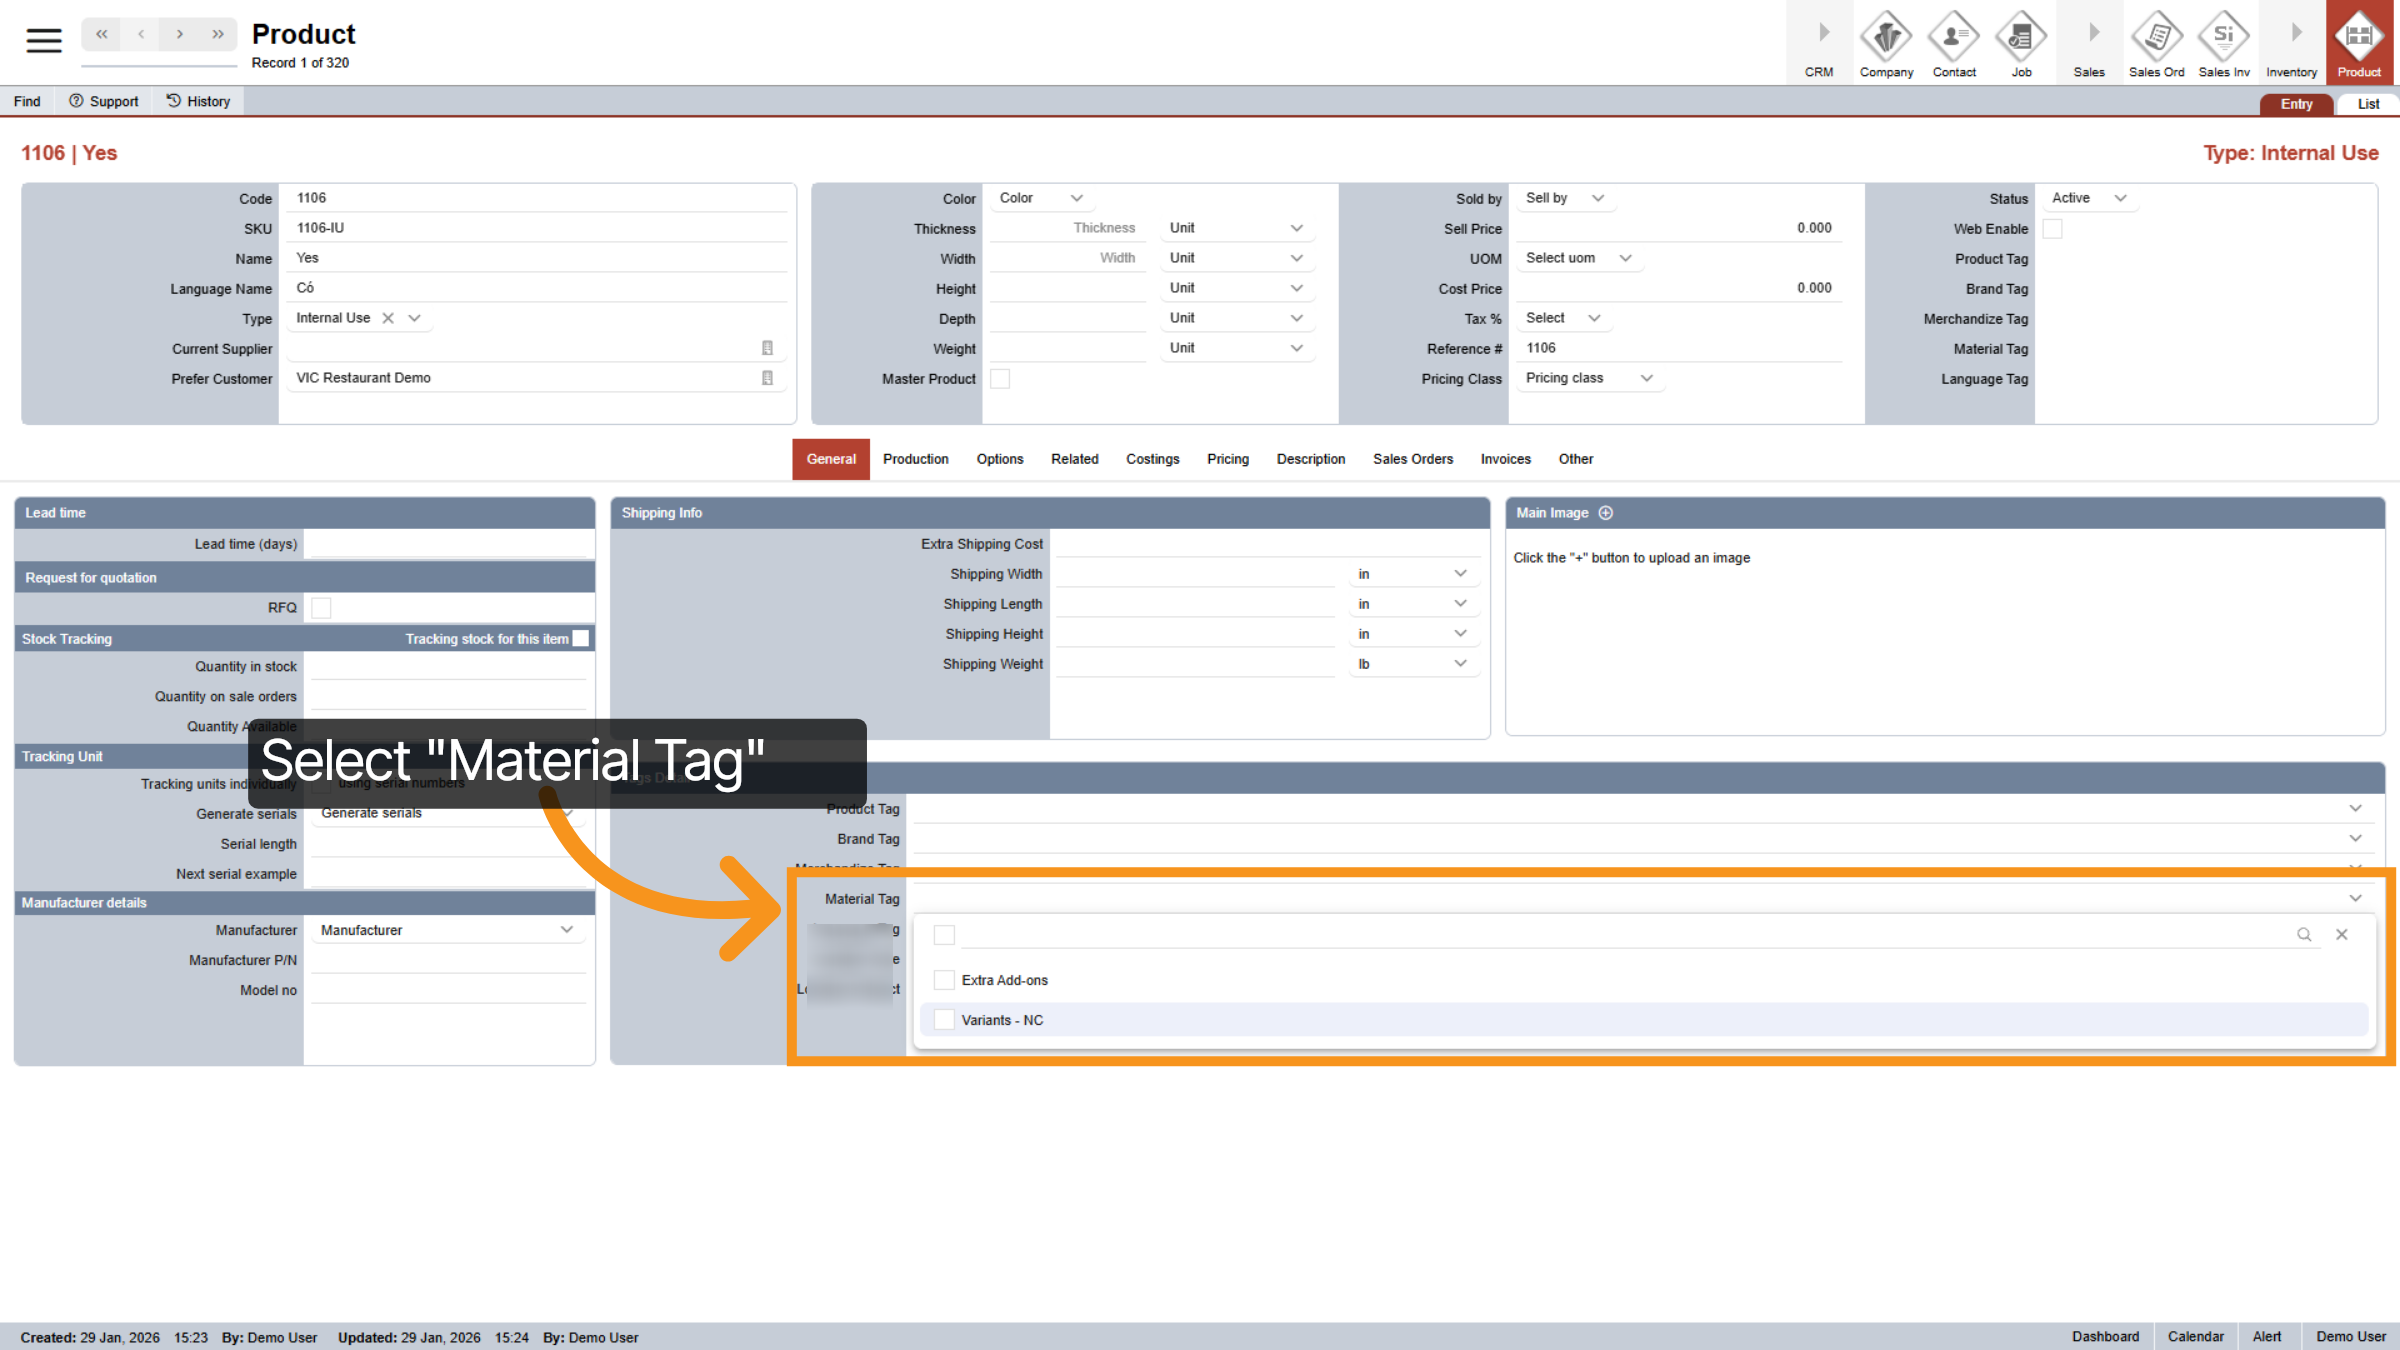
11. Select Material Tag
Since this is not a food or beverage product, we will select the "Material Tag" as Variants and leave the other tags blank.
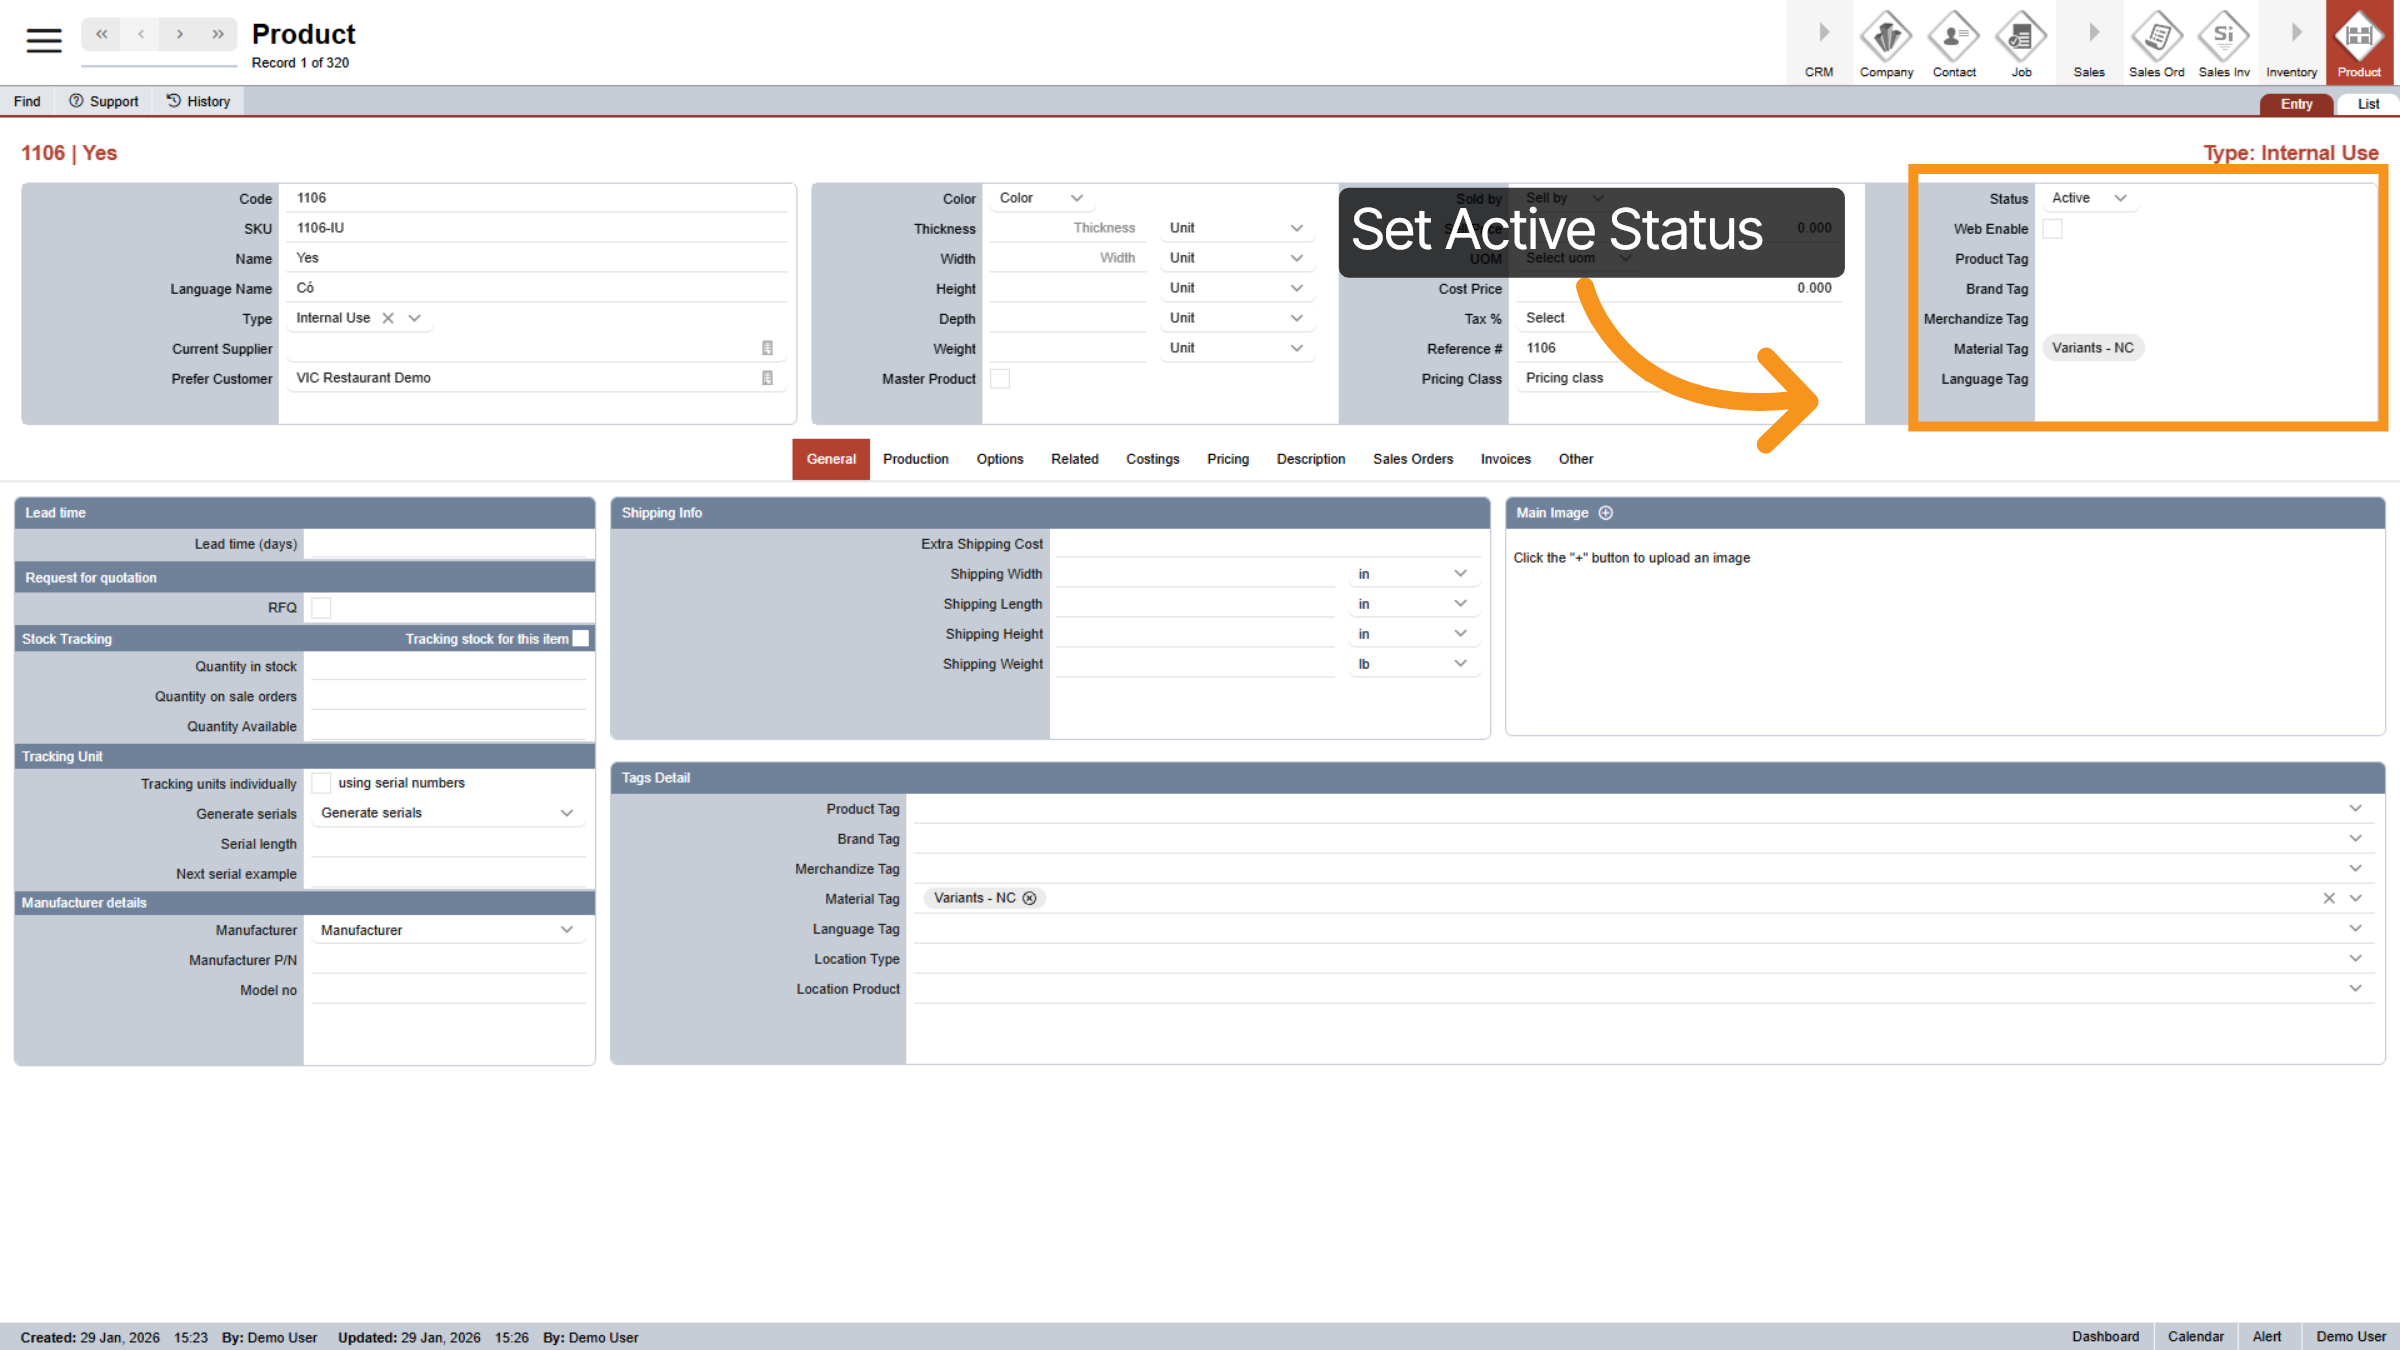
12. Set Active Status
Set the status of this selector to "Active" and do not check "Web Enable" since you do not wish to sell this product online.
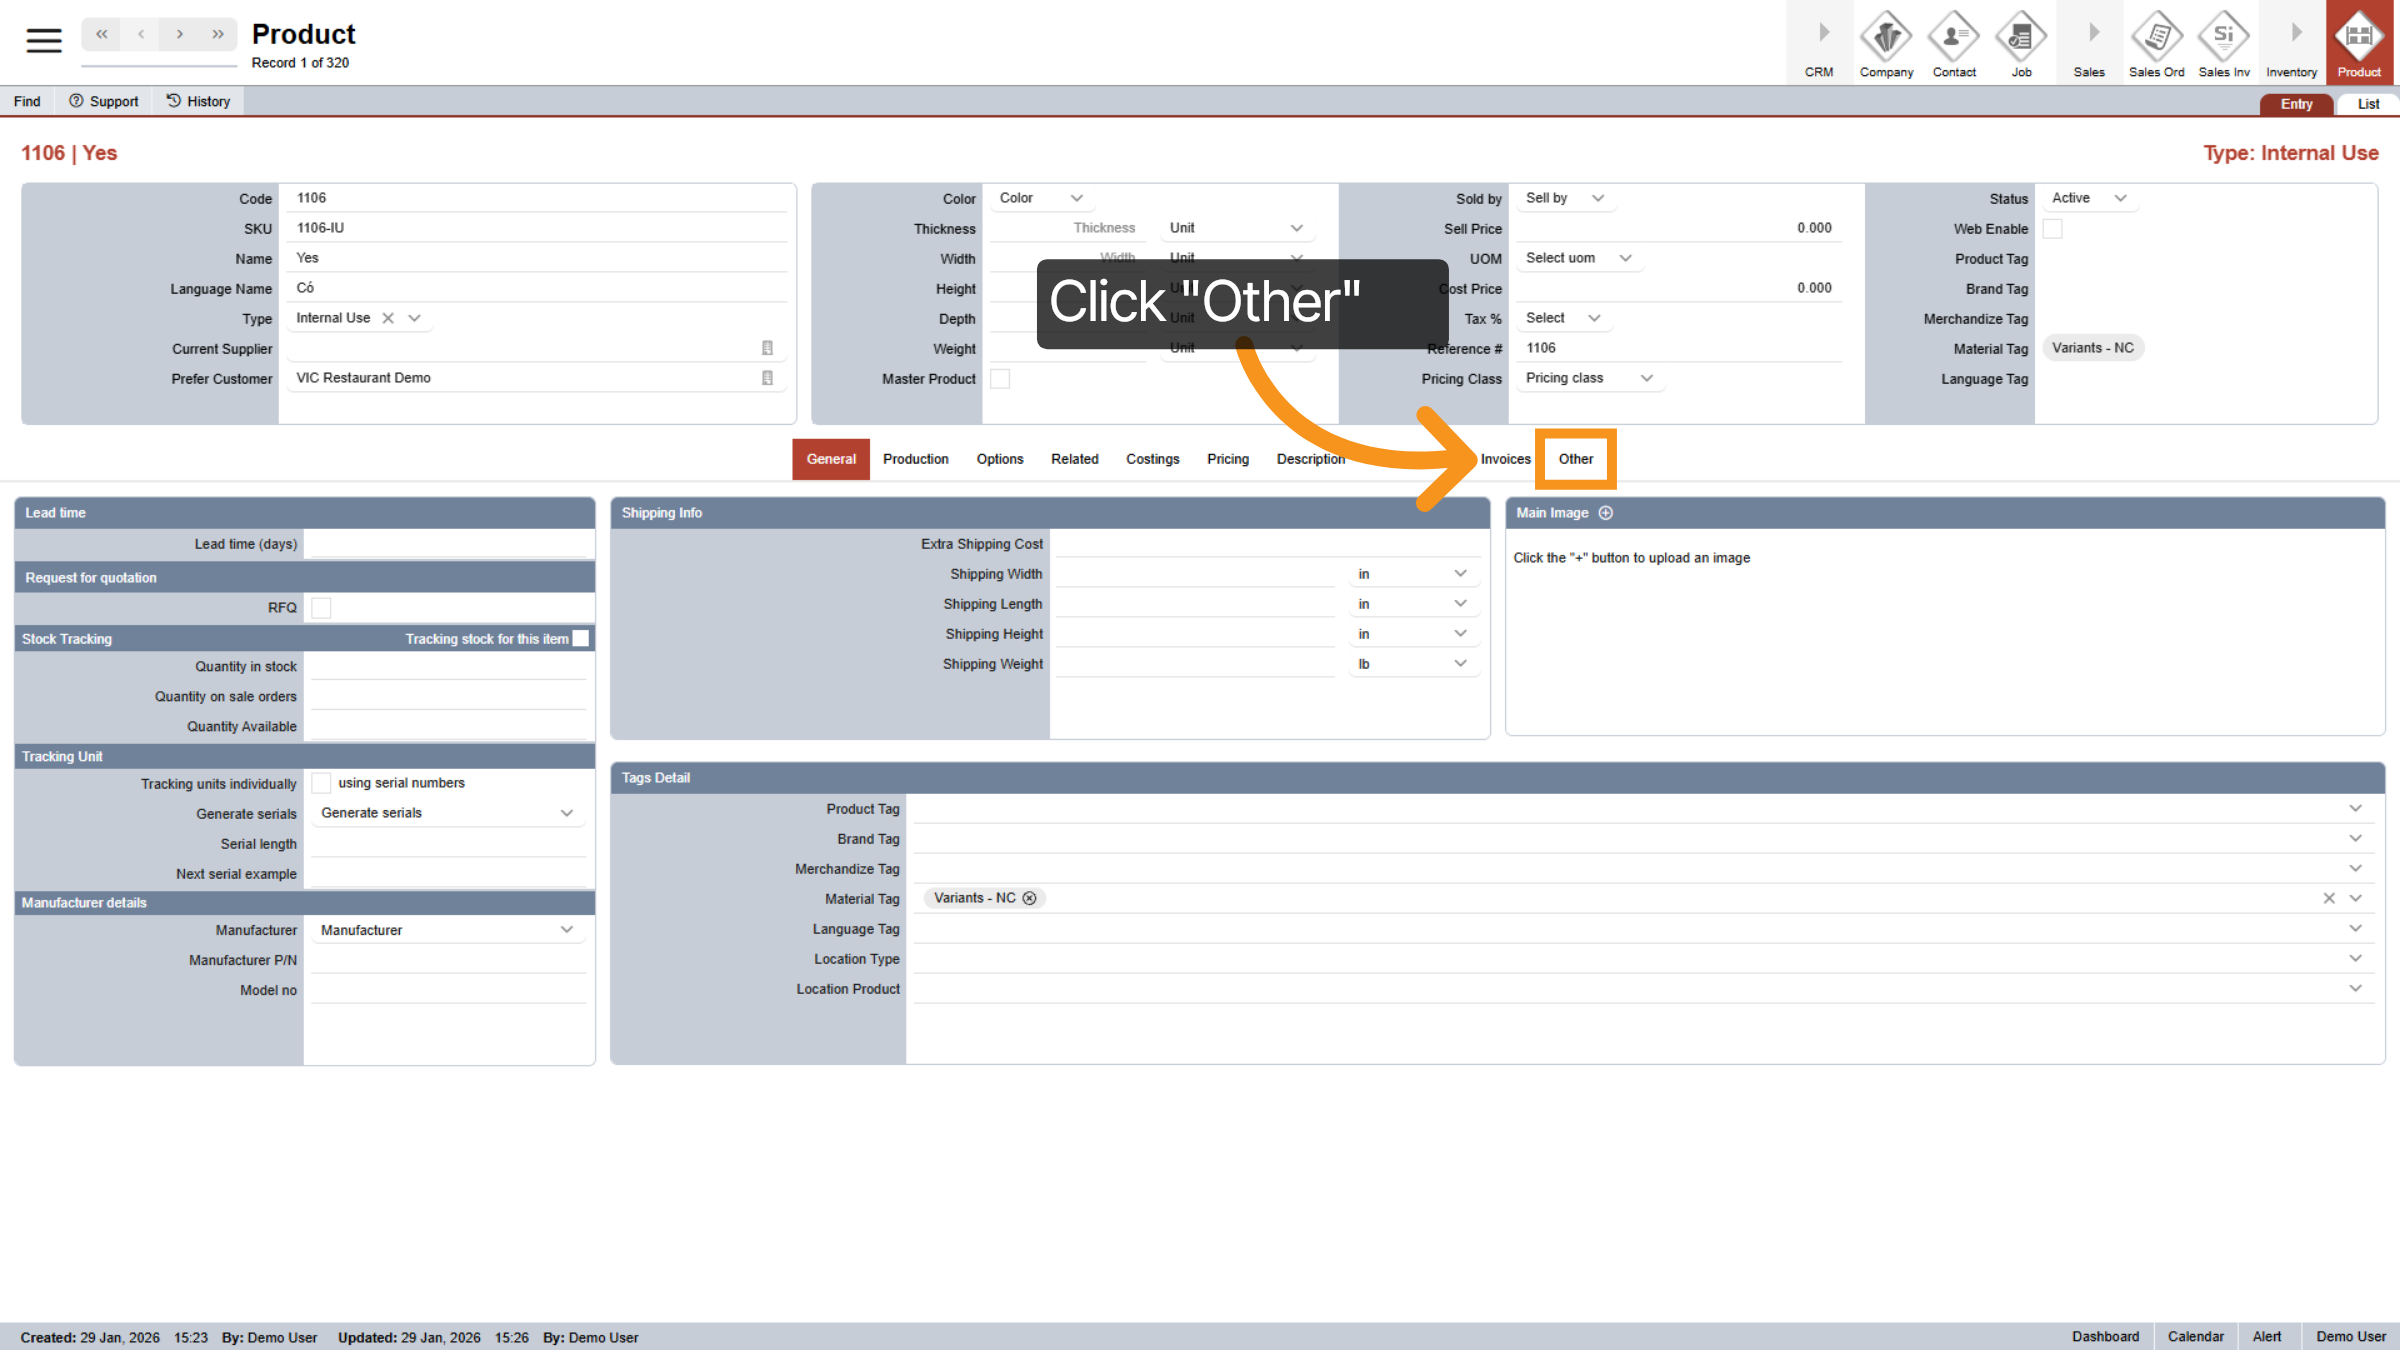
13. Click "Other" Tab
Next, click on the Other tab and follow the same steps to create another selector called “No.”
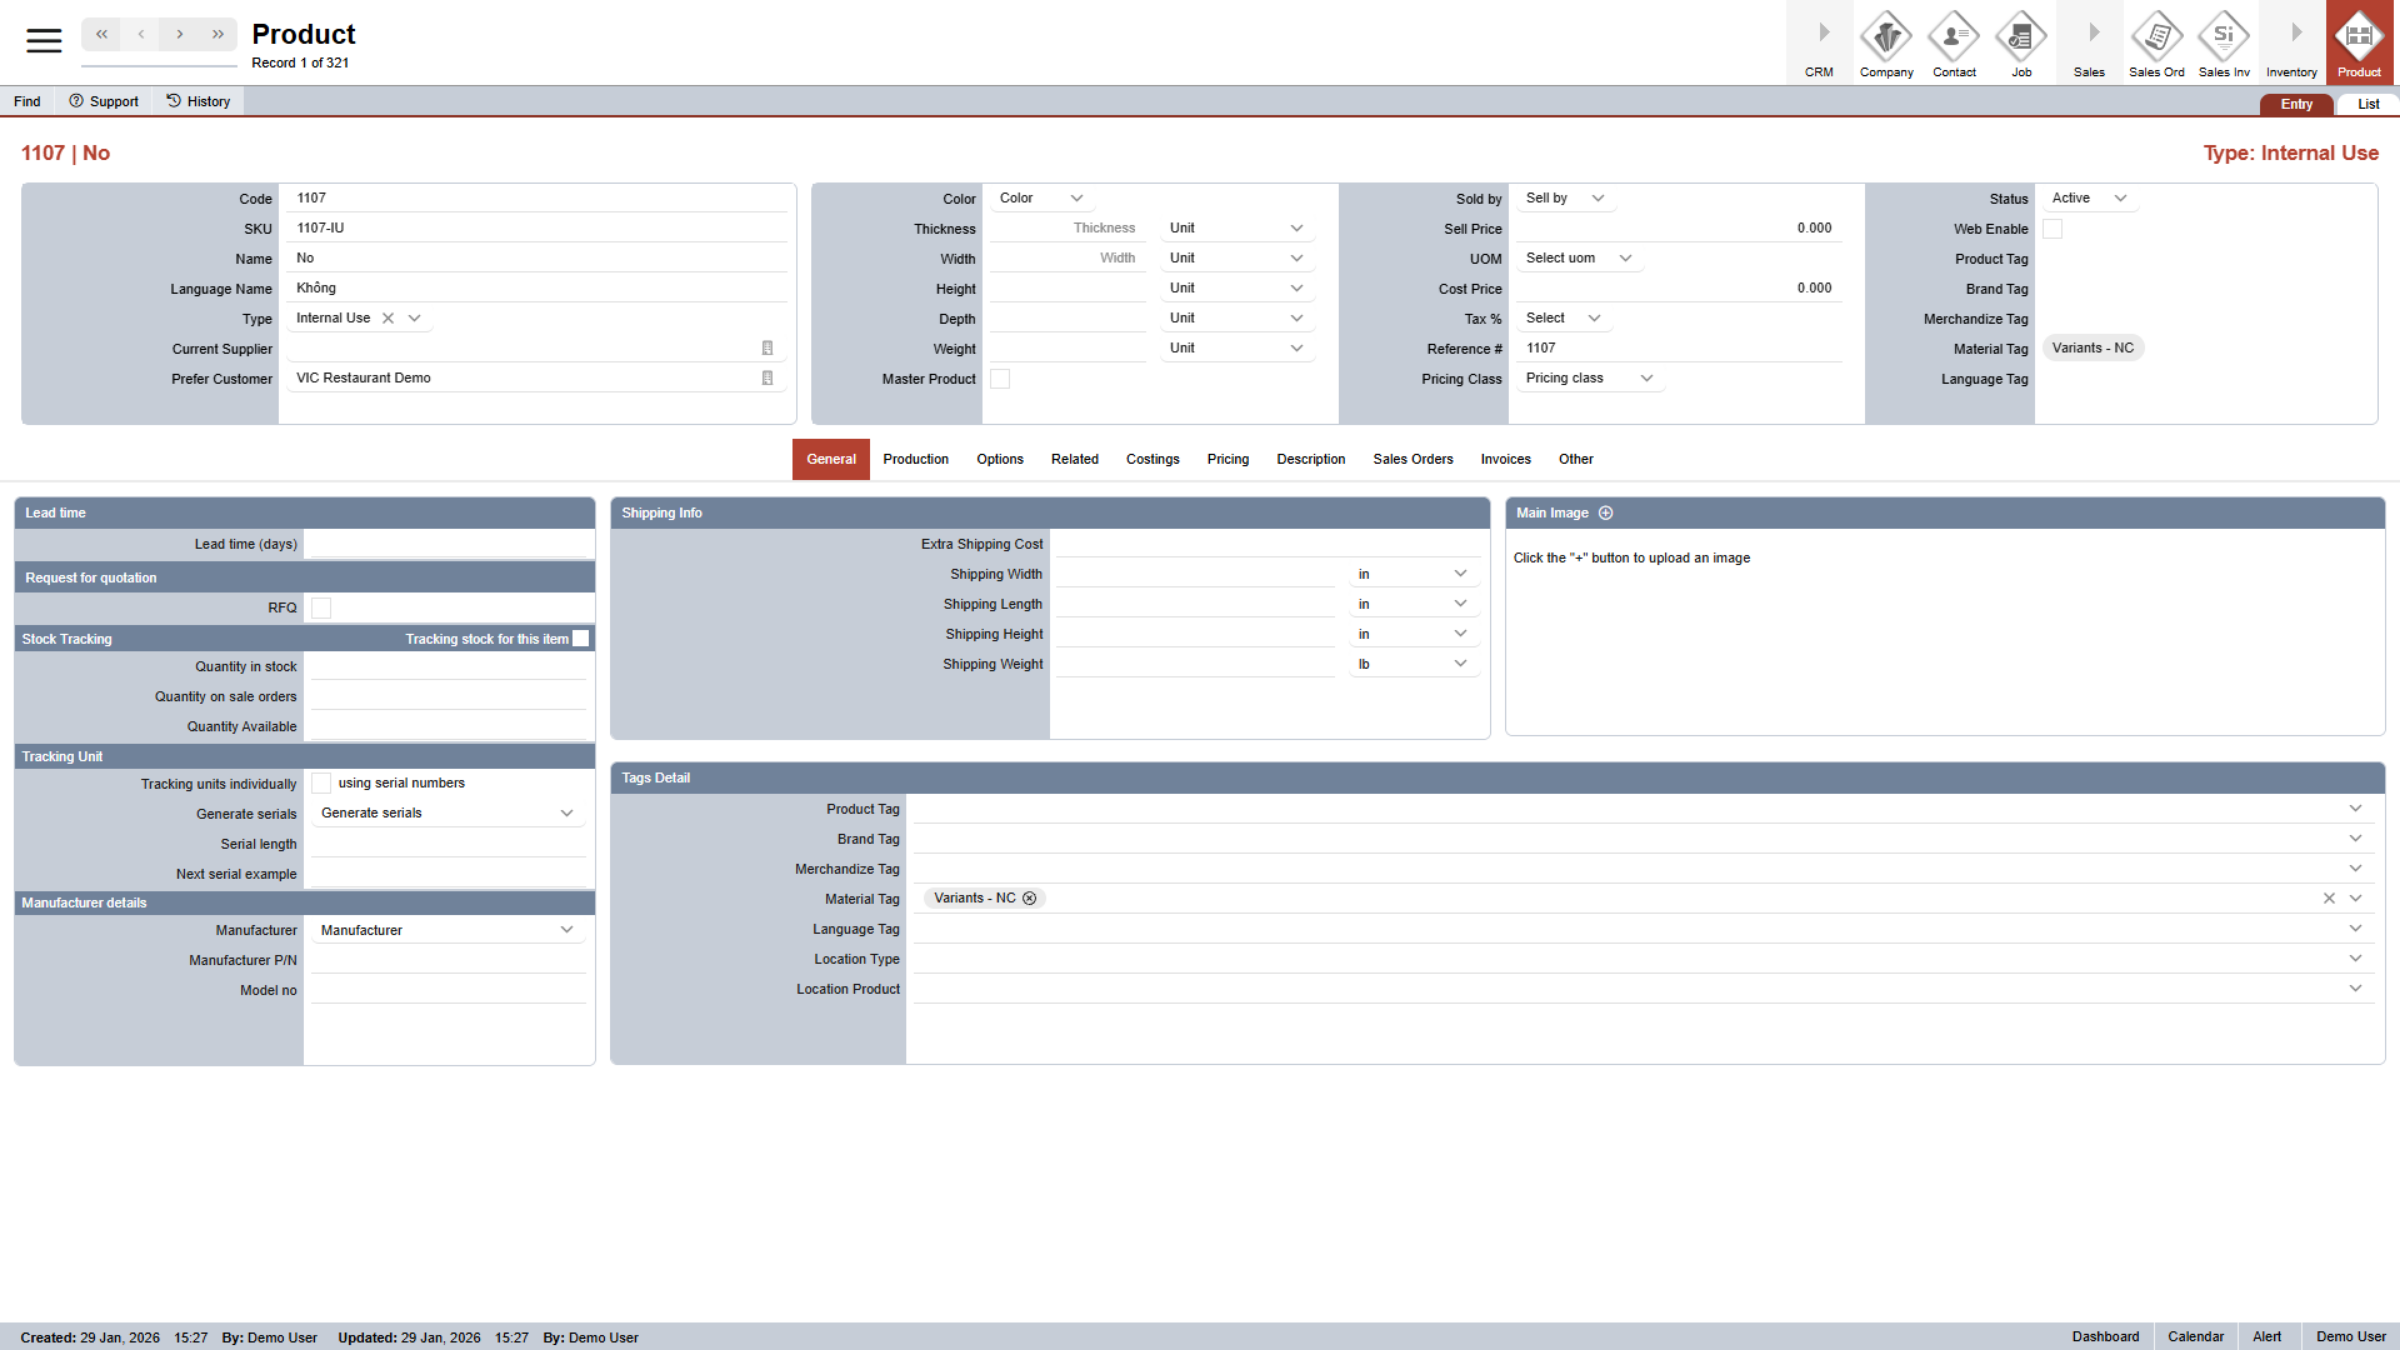
14. Create "No" Selector
15. Create Parent Selector
Now that the Yes and No options are ready, I’ll create a new main selector called “BM Toast Bread Selection.”
16. Select New Code
Click New Code to create a new product code.

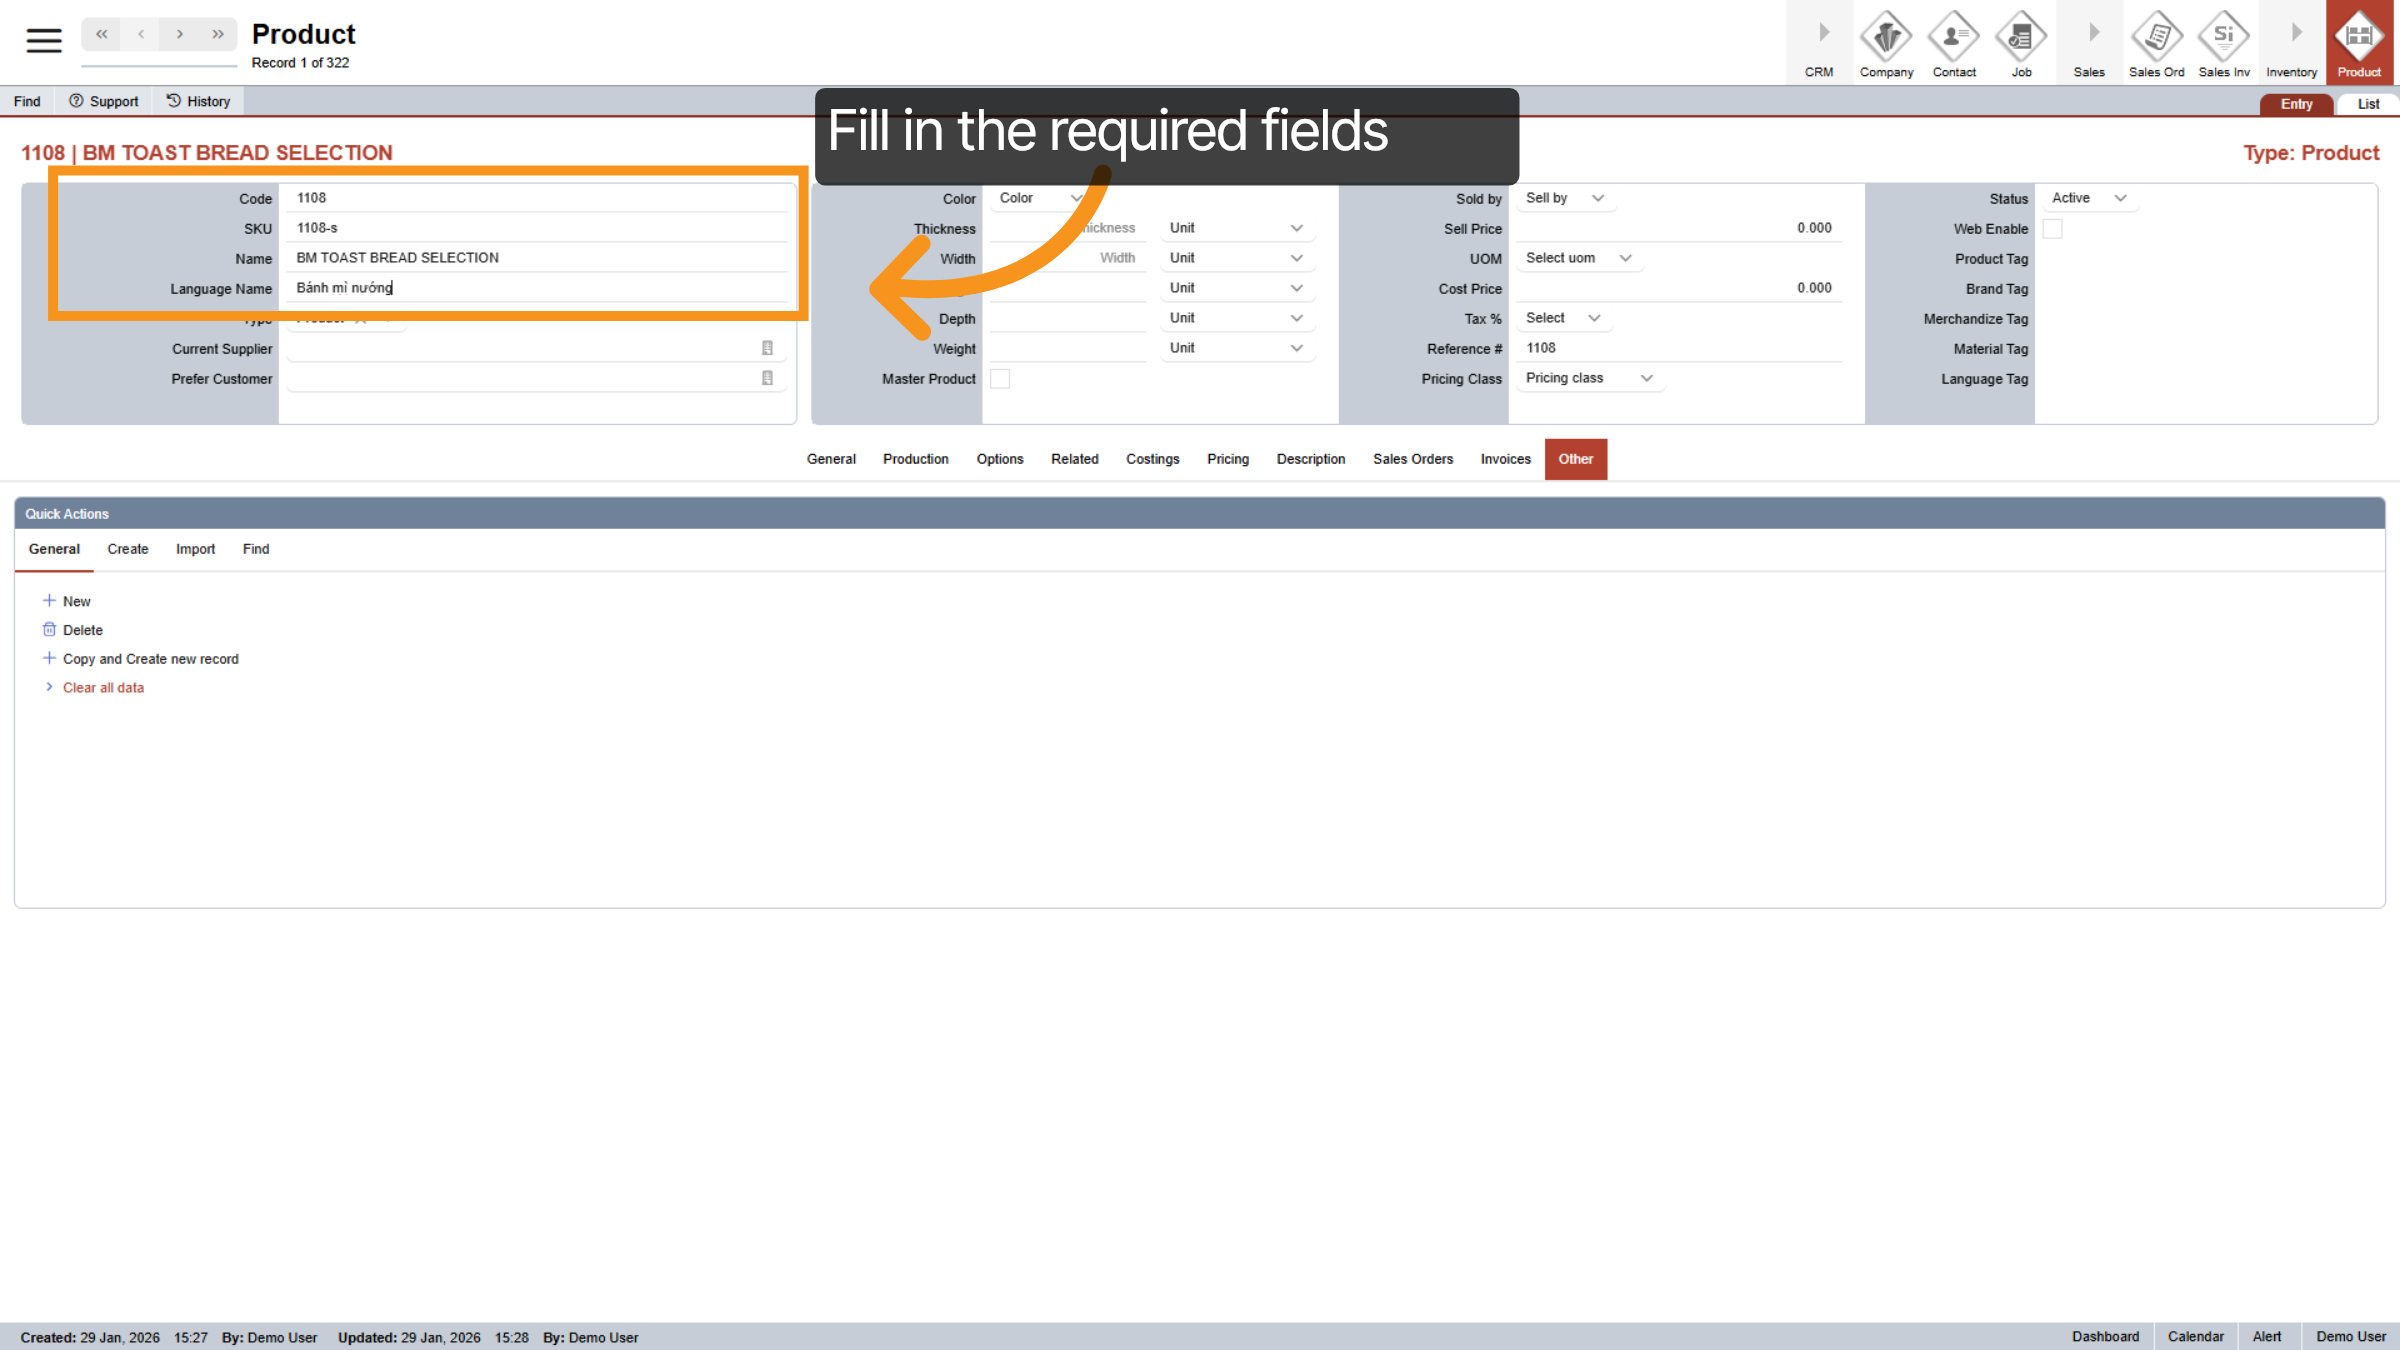
17. Fill in required fields
Next, fill in the required fields.
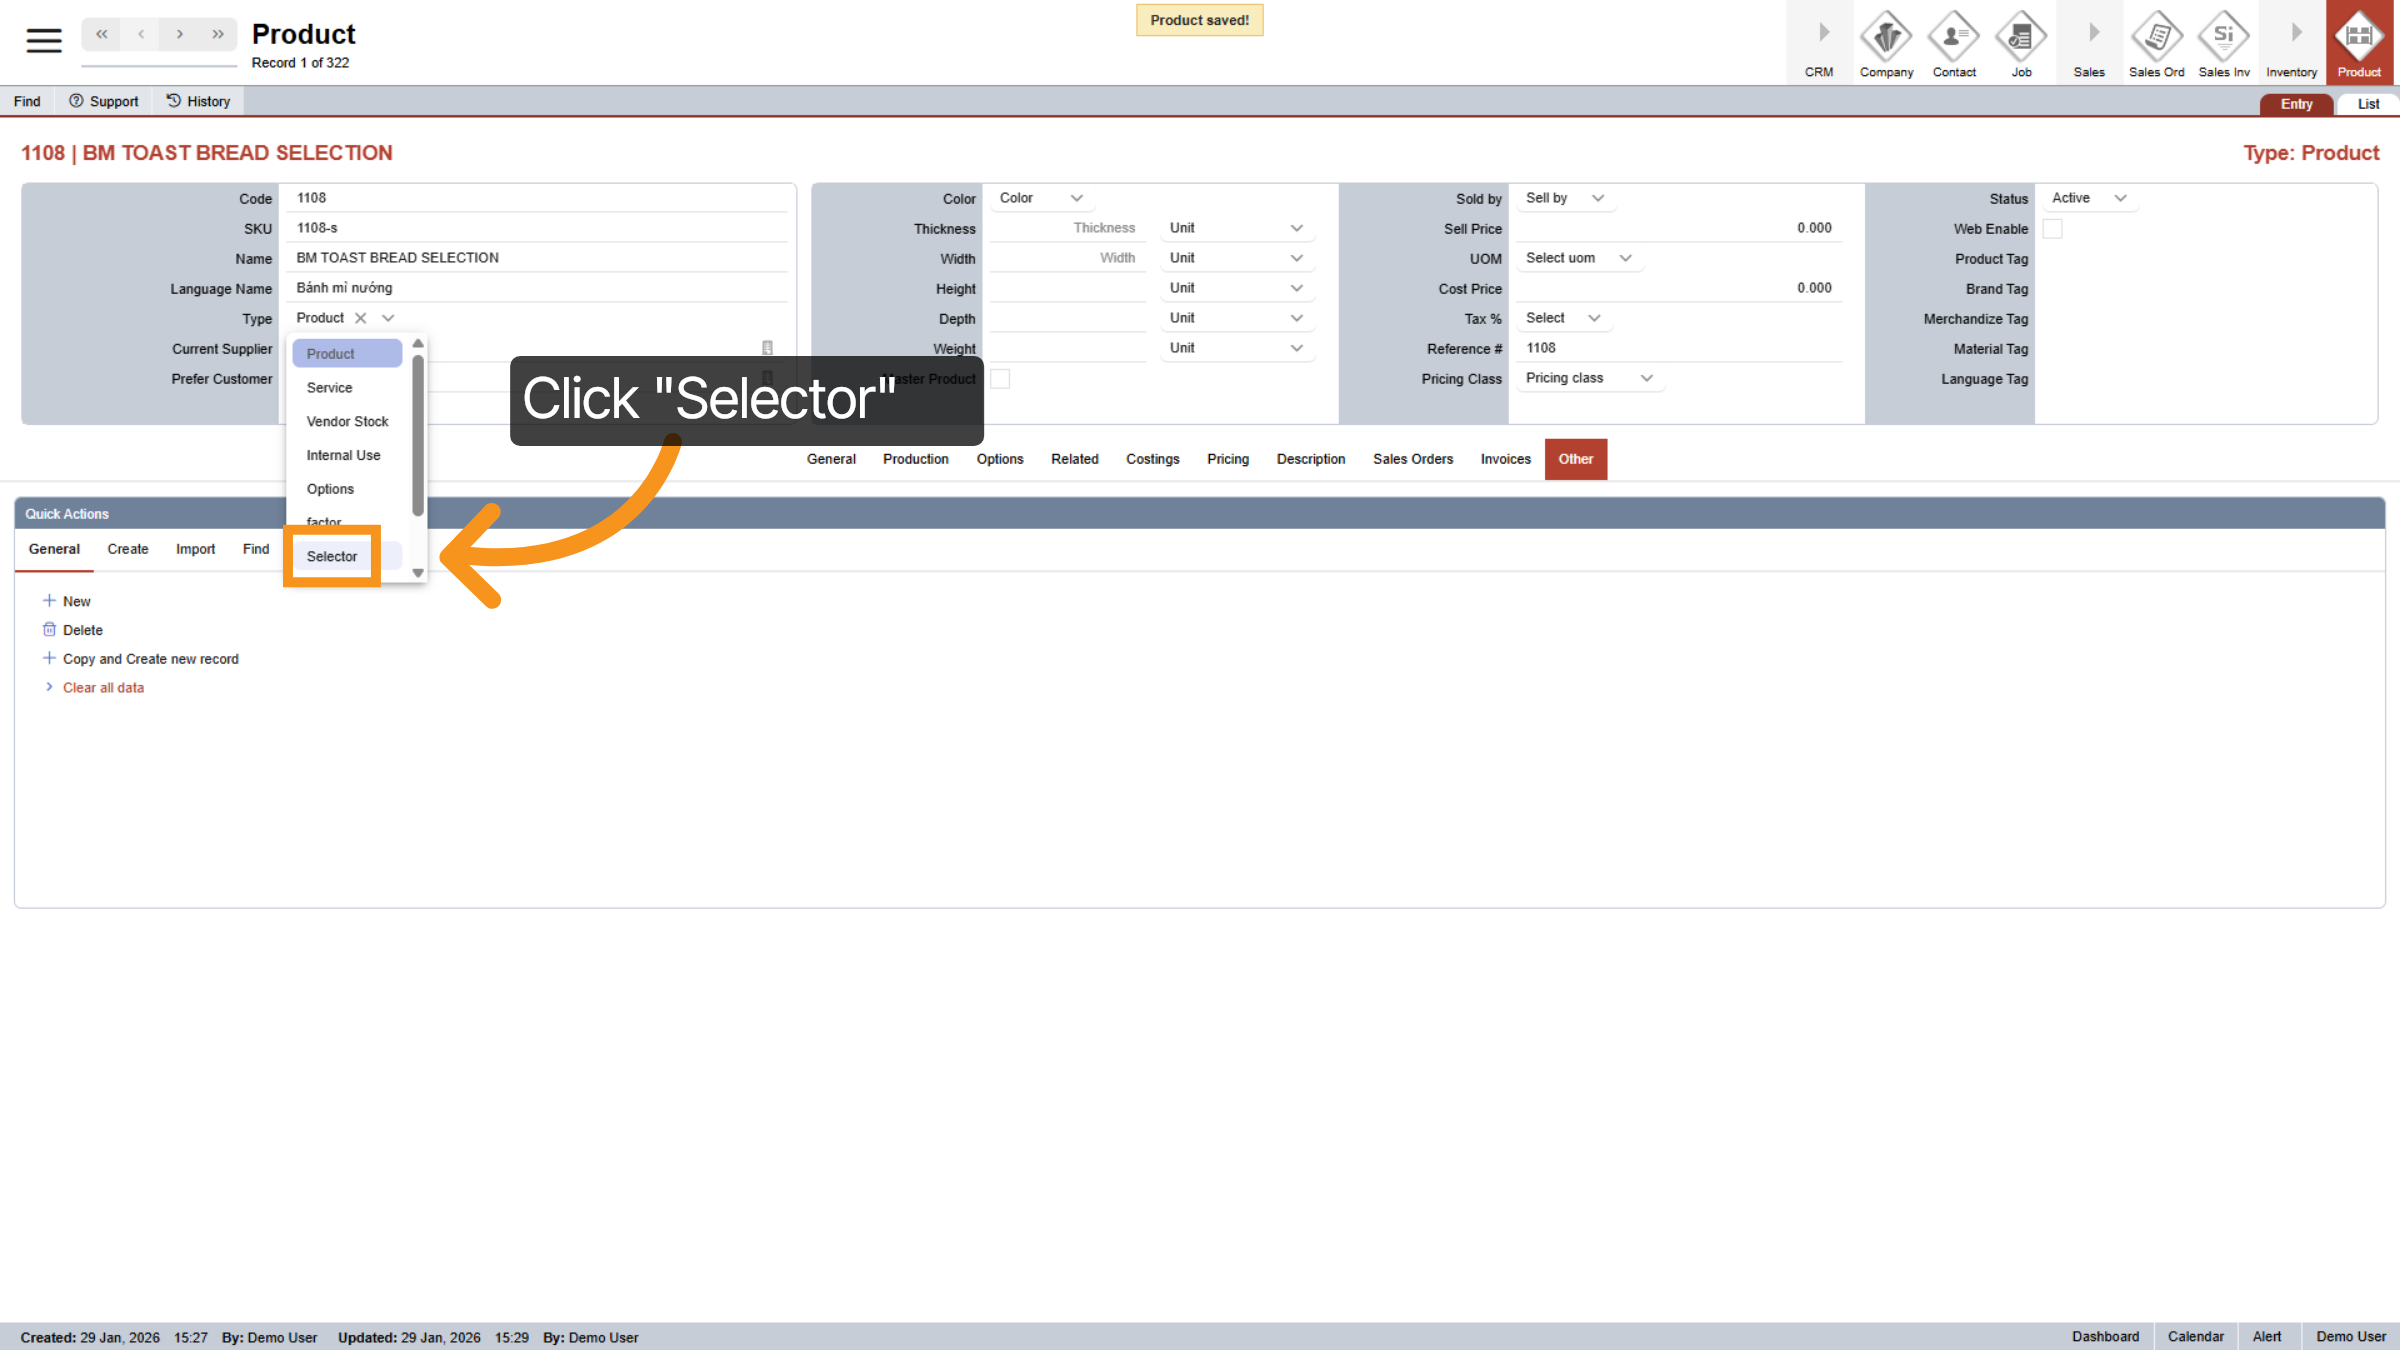
18. Select Selector Option
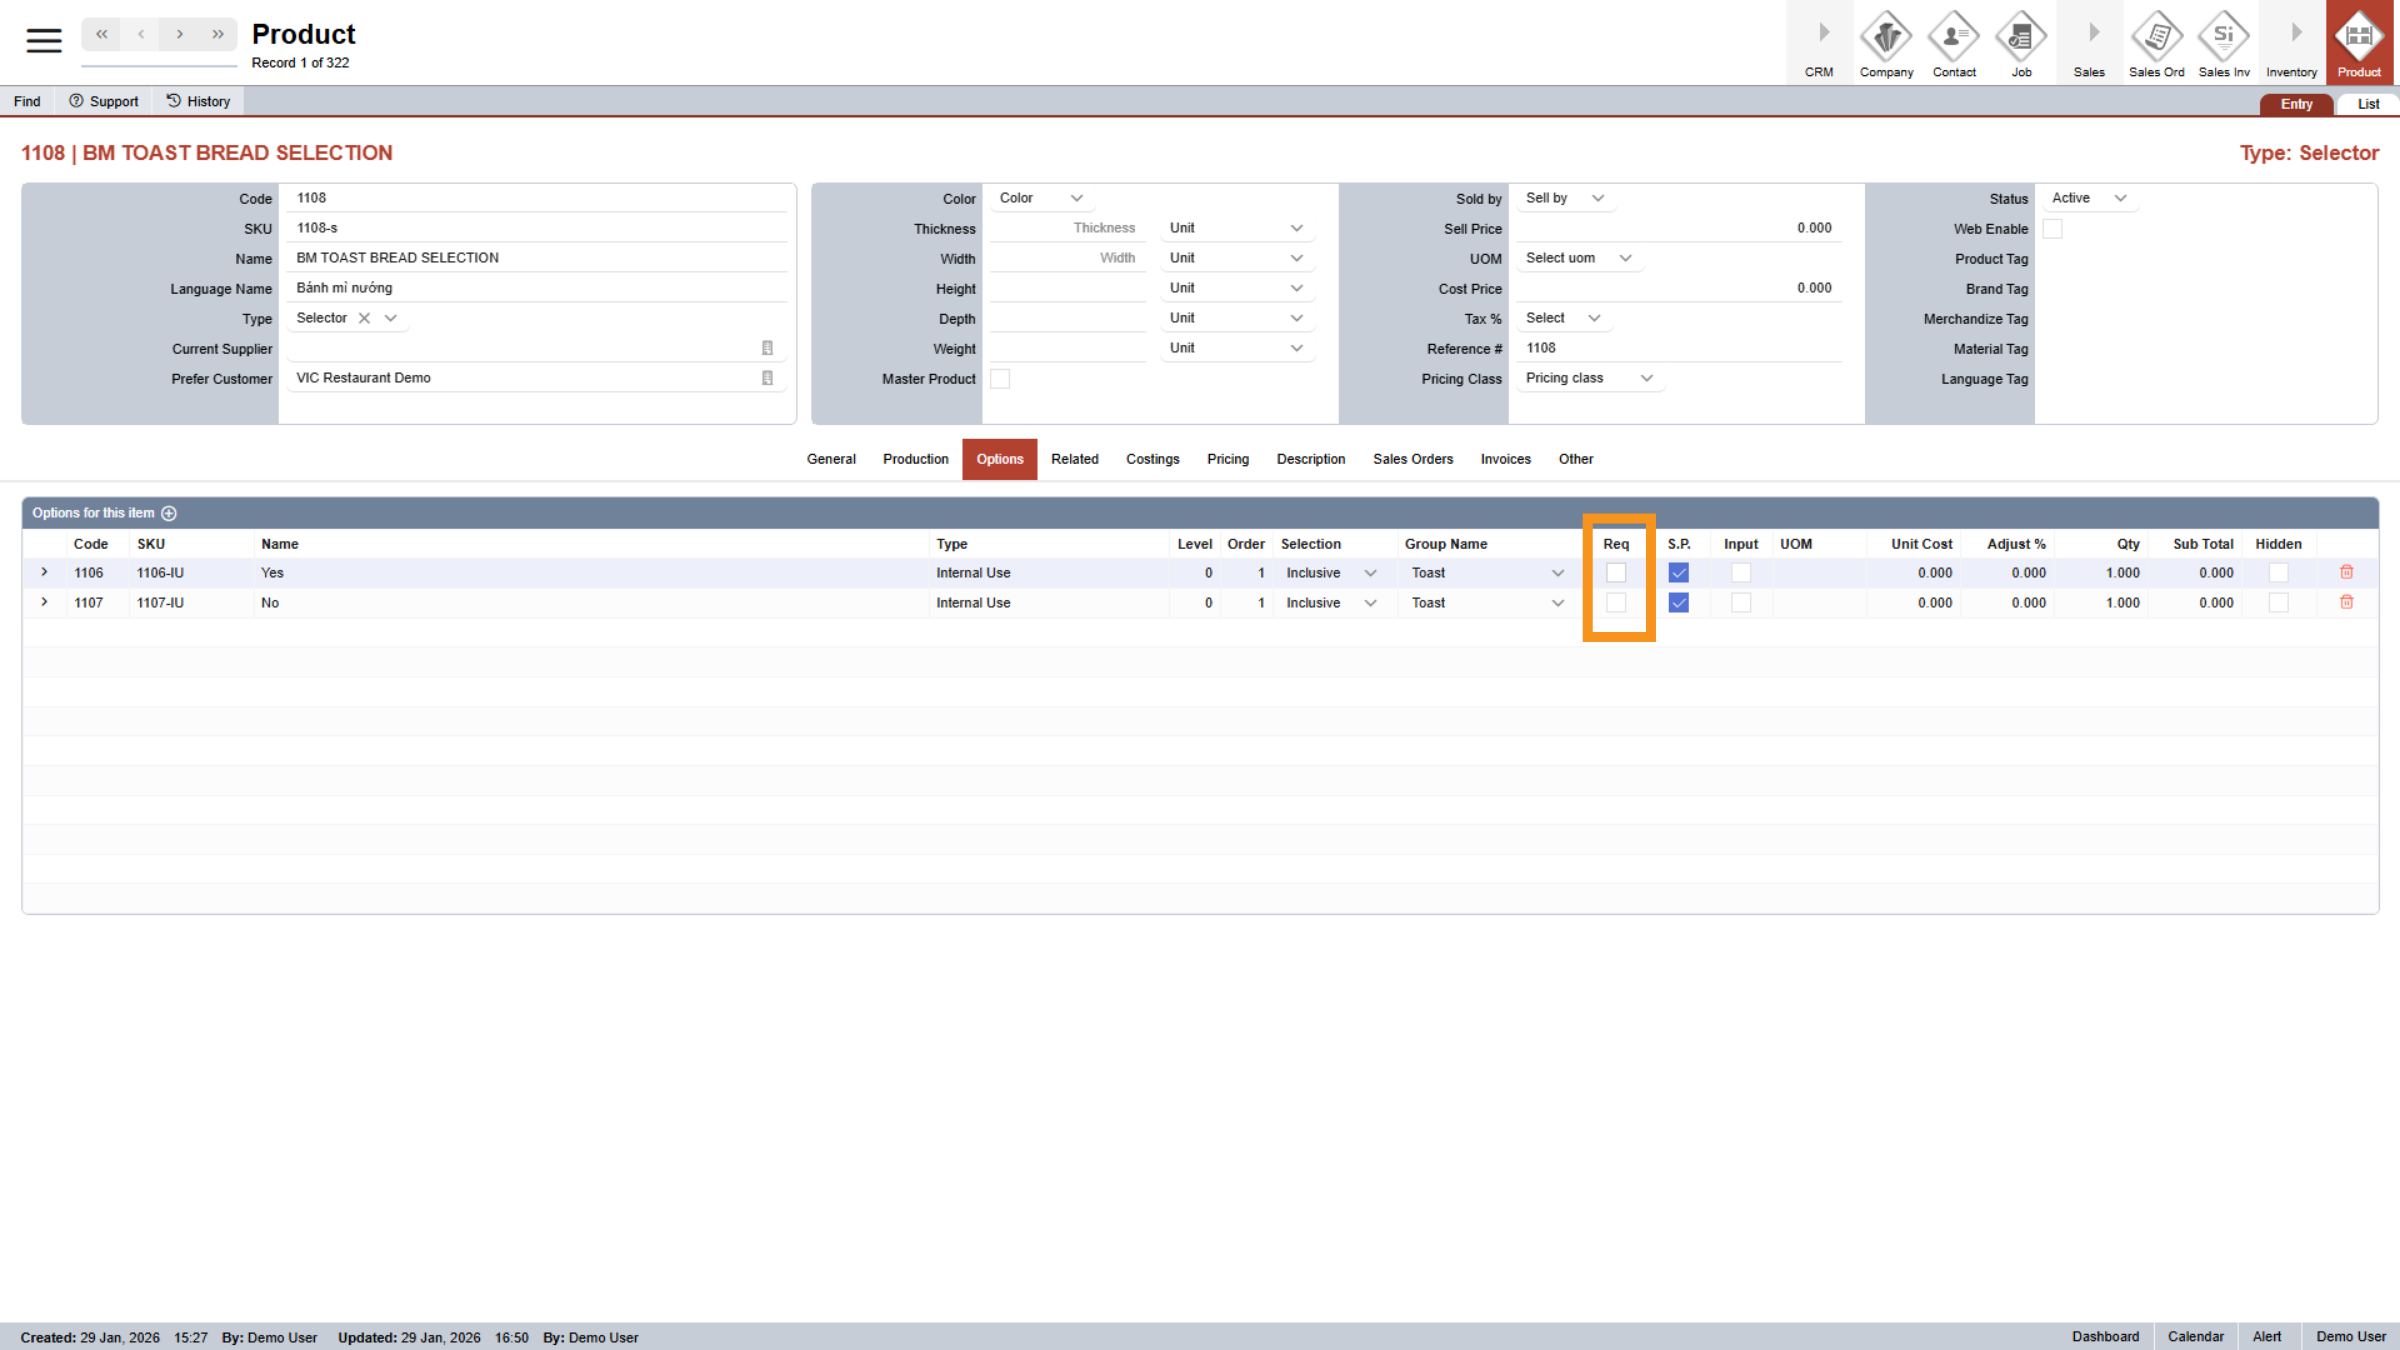
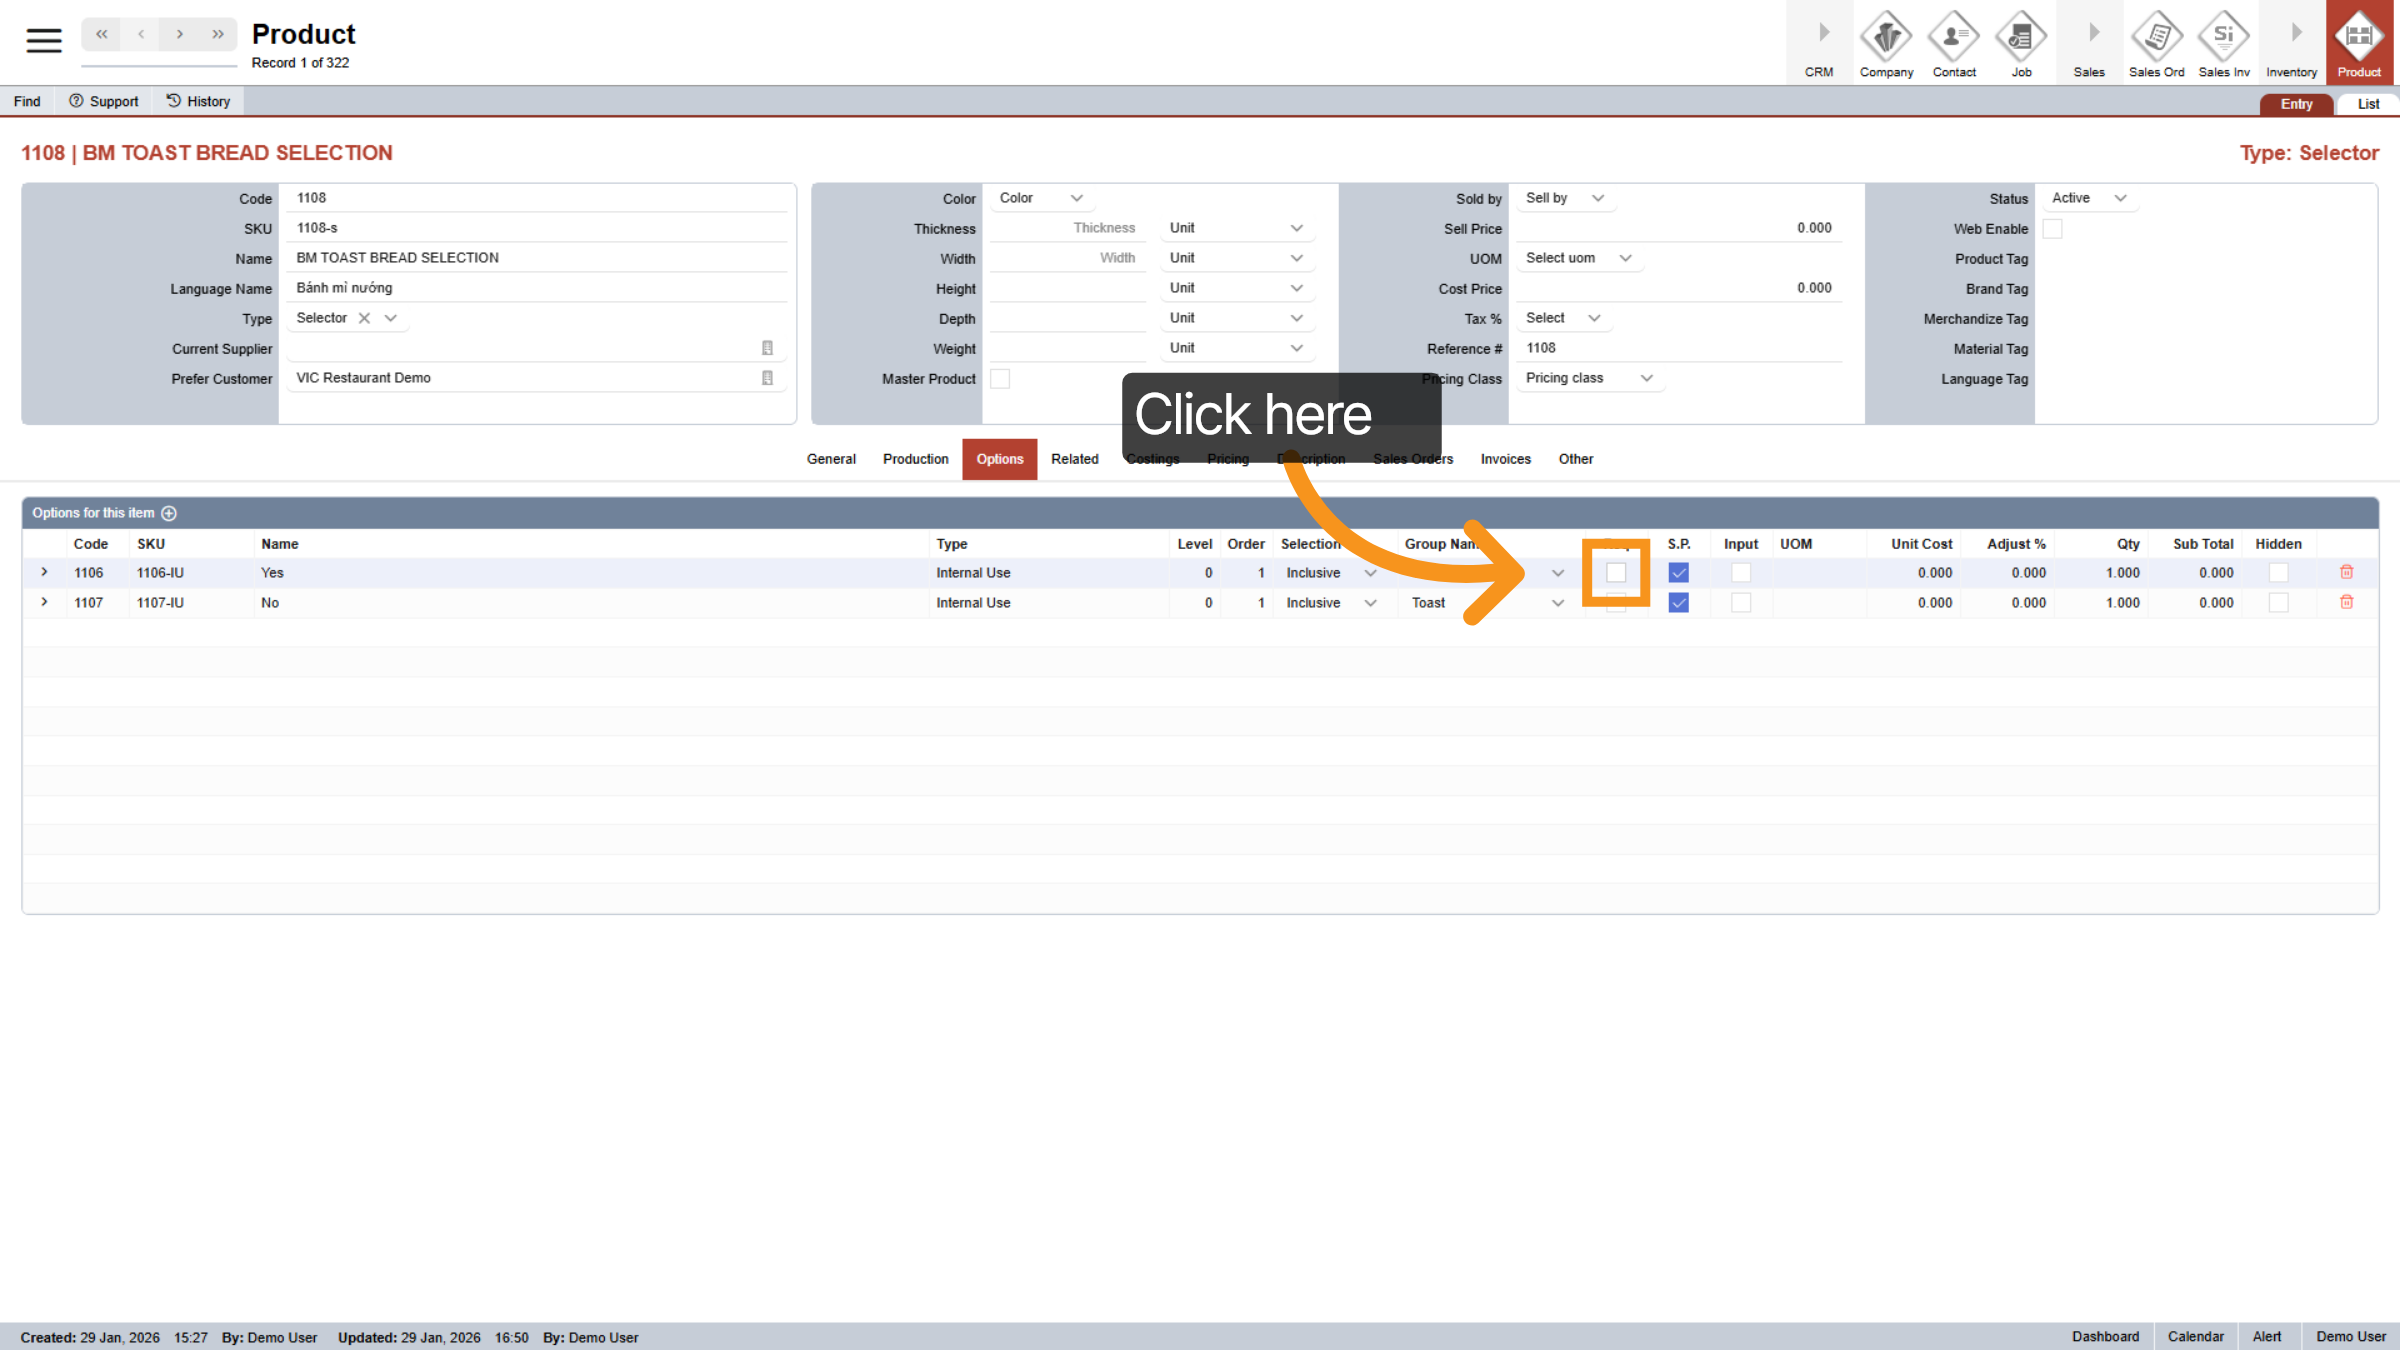
Click "Product Type" dropdown and select "Selector"
19. Select Prefer Customer
Click on the preferred restaurant that you want to grant access to this product.
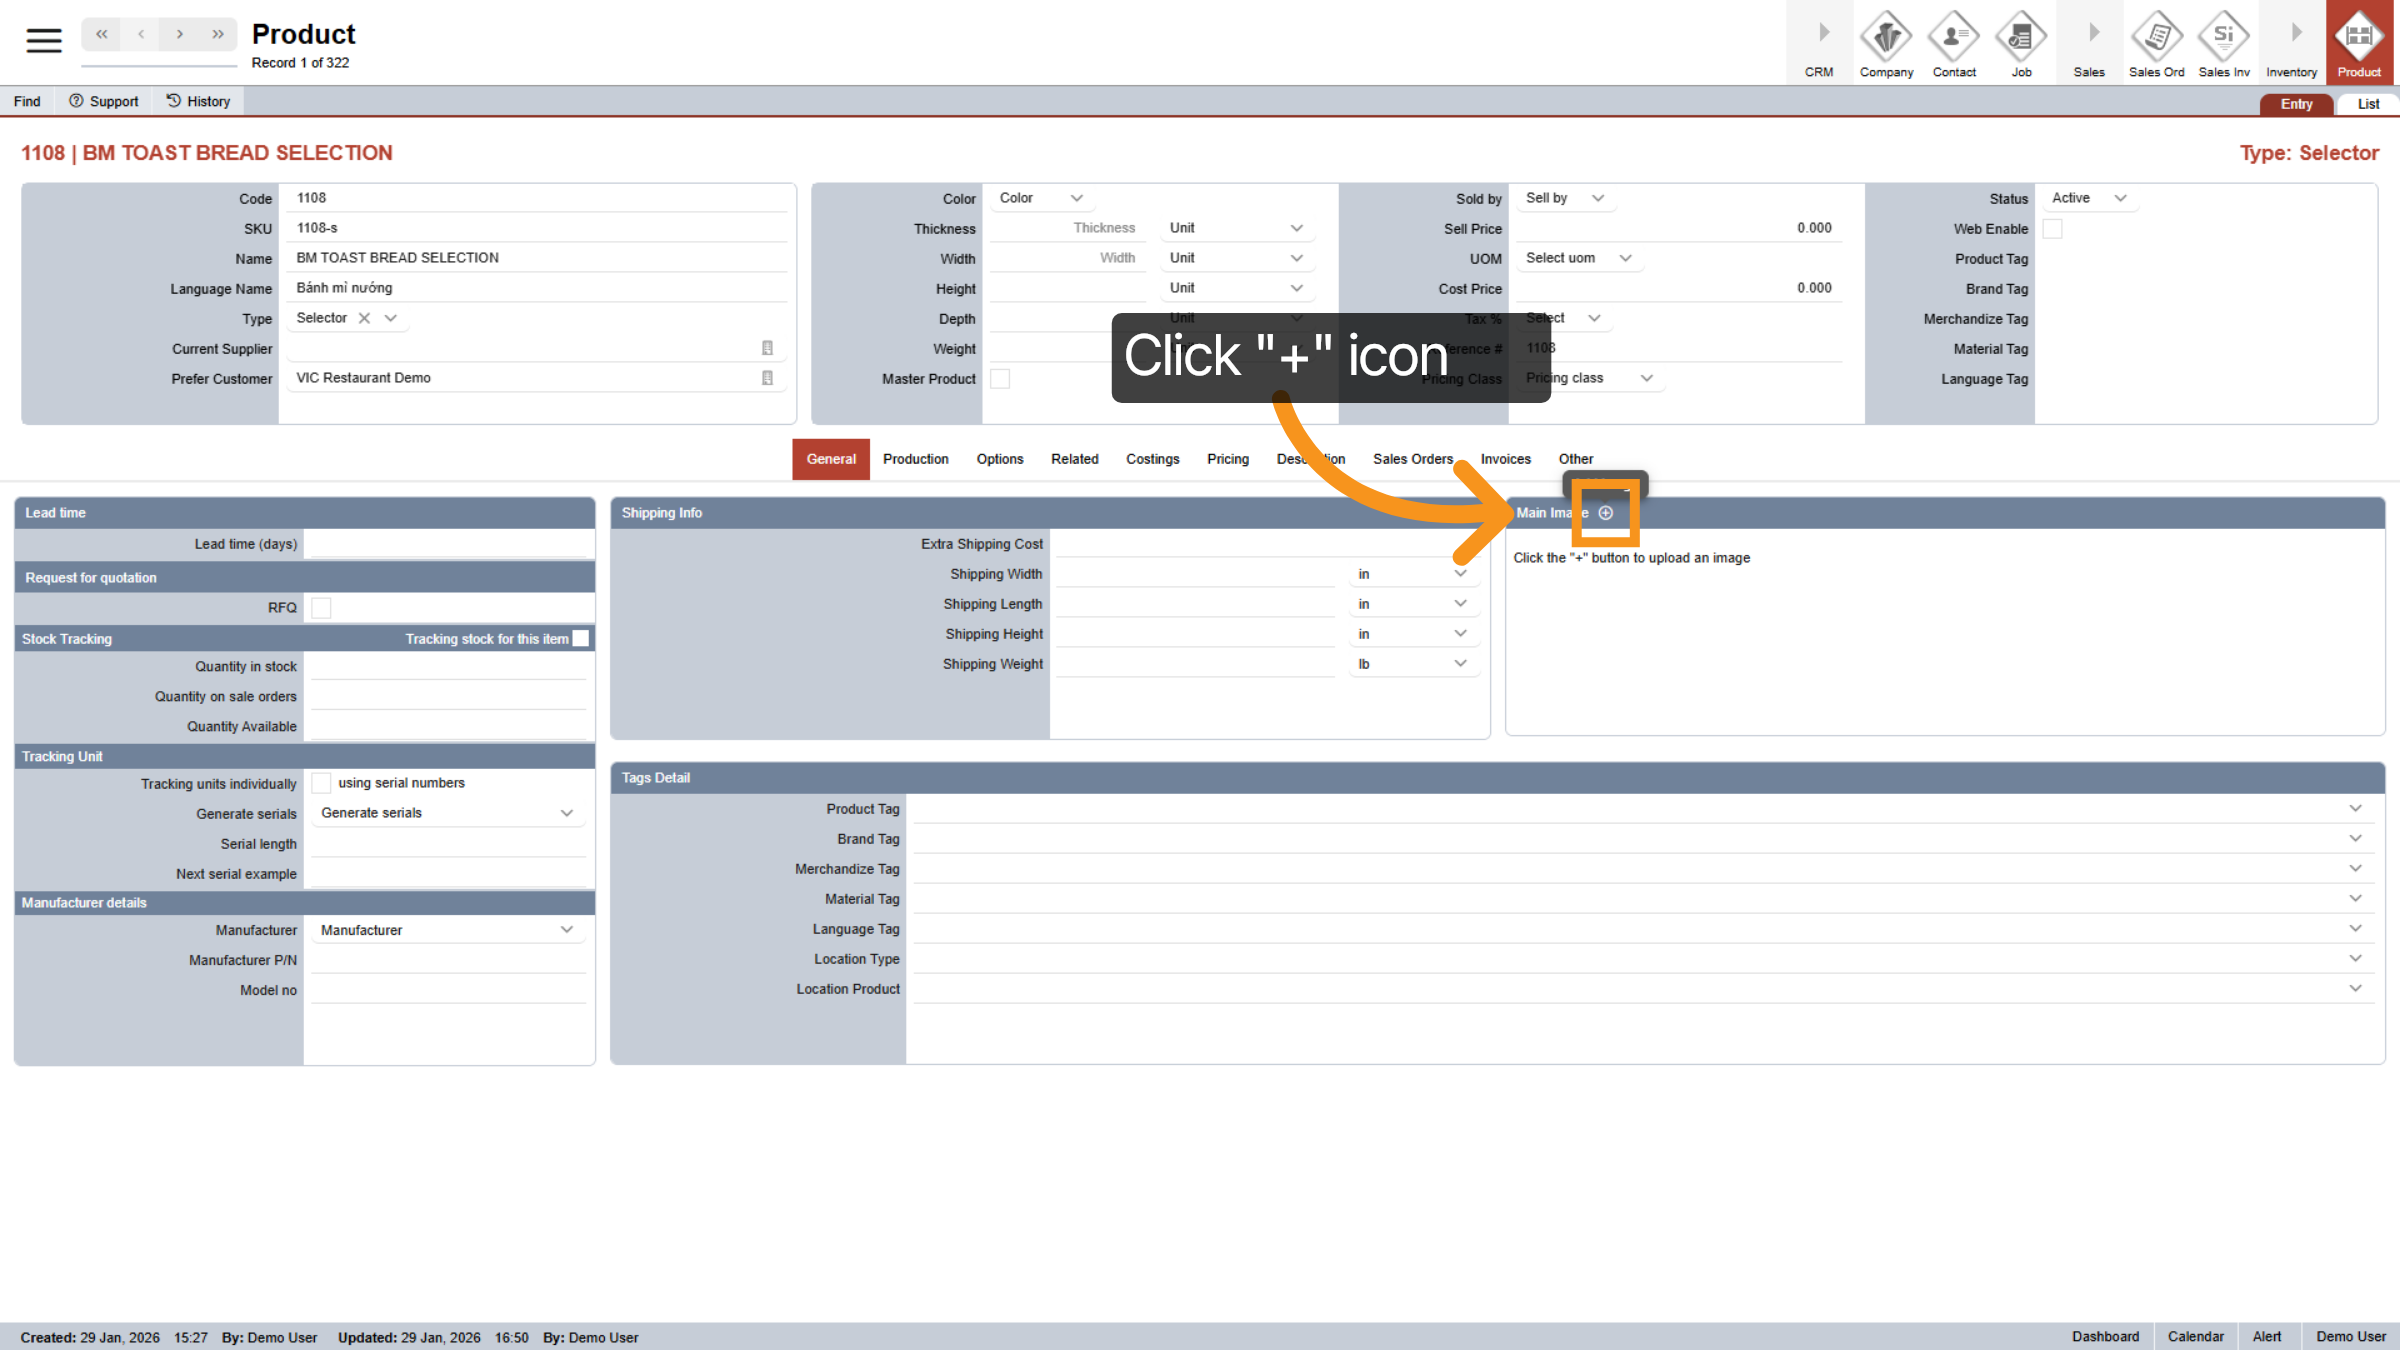
20. Add Image
Add image for this selector.
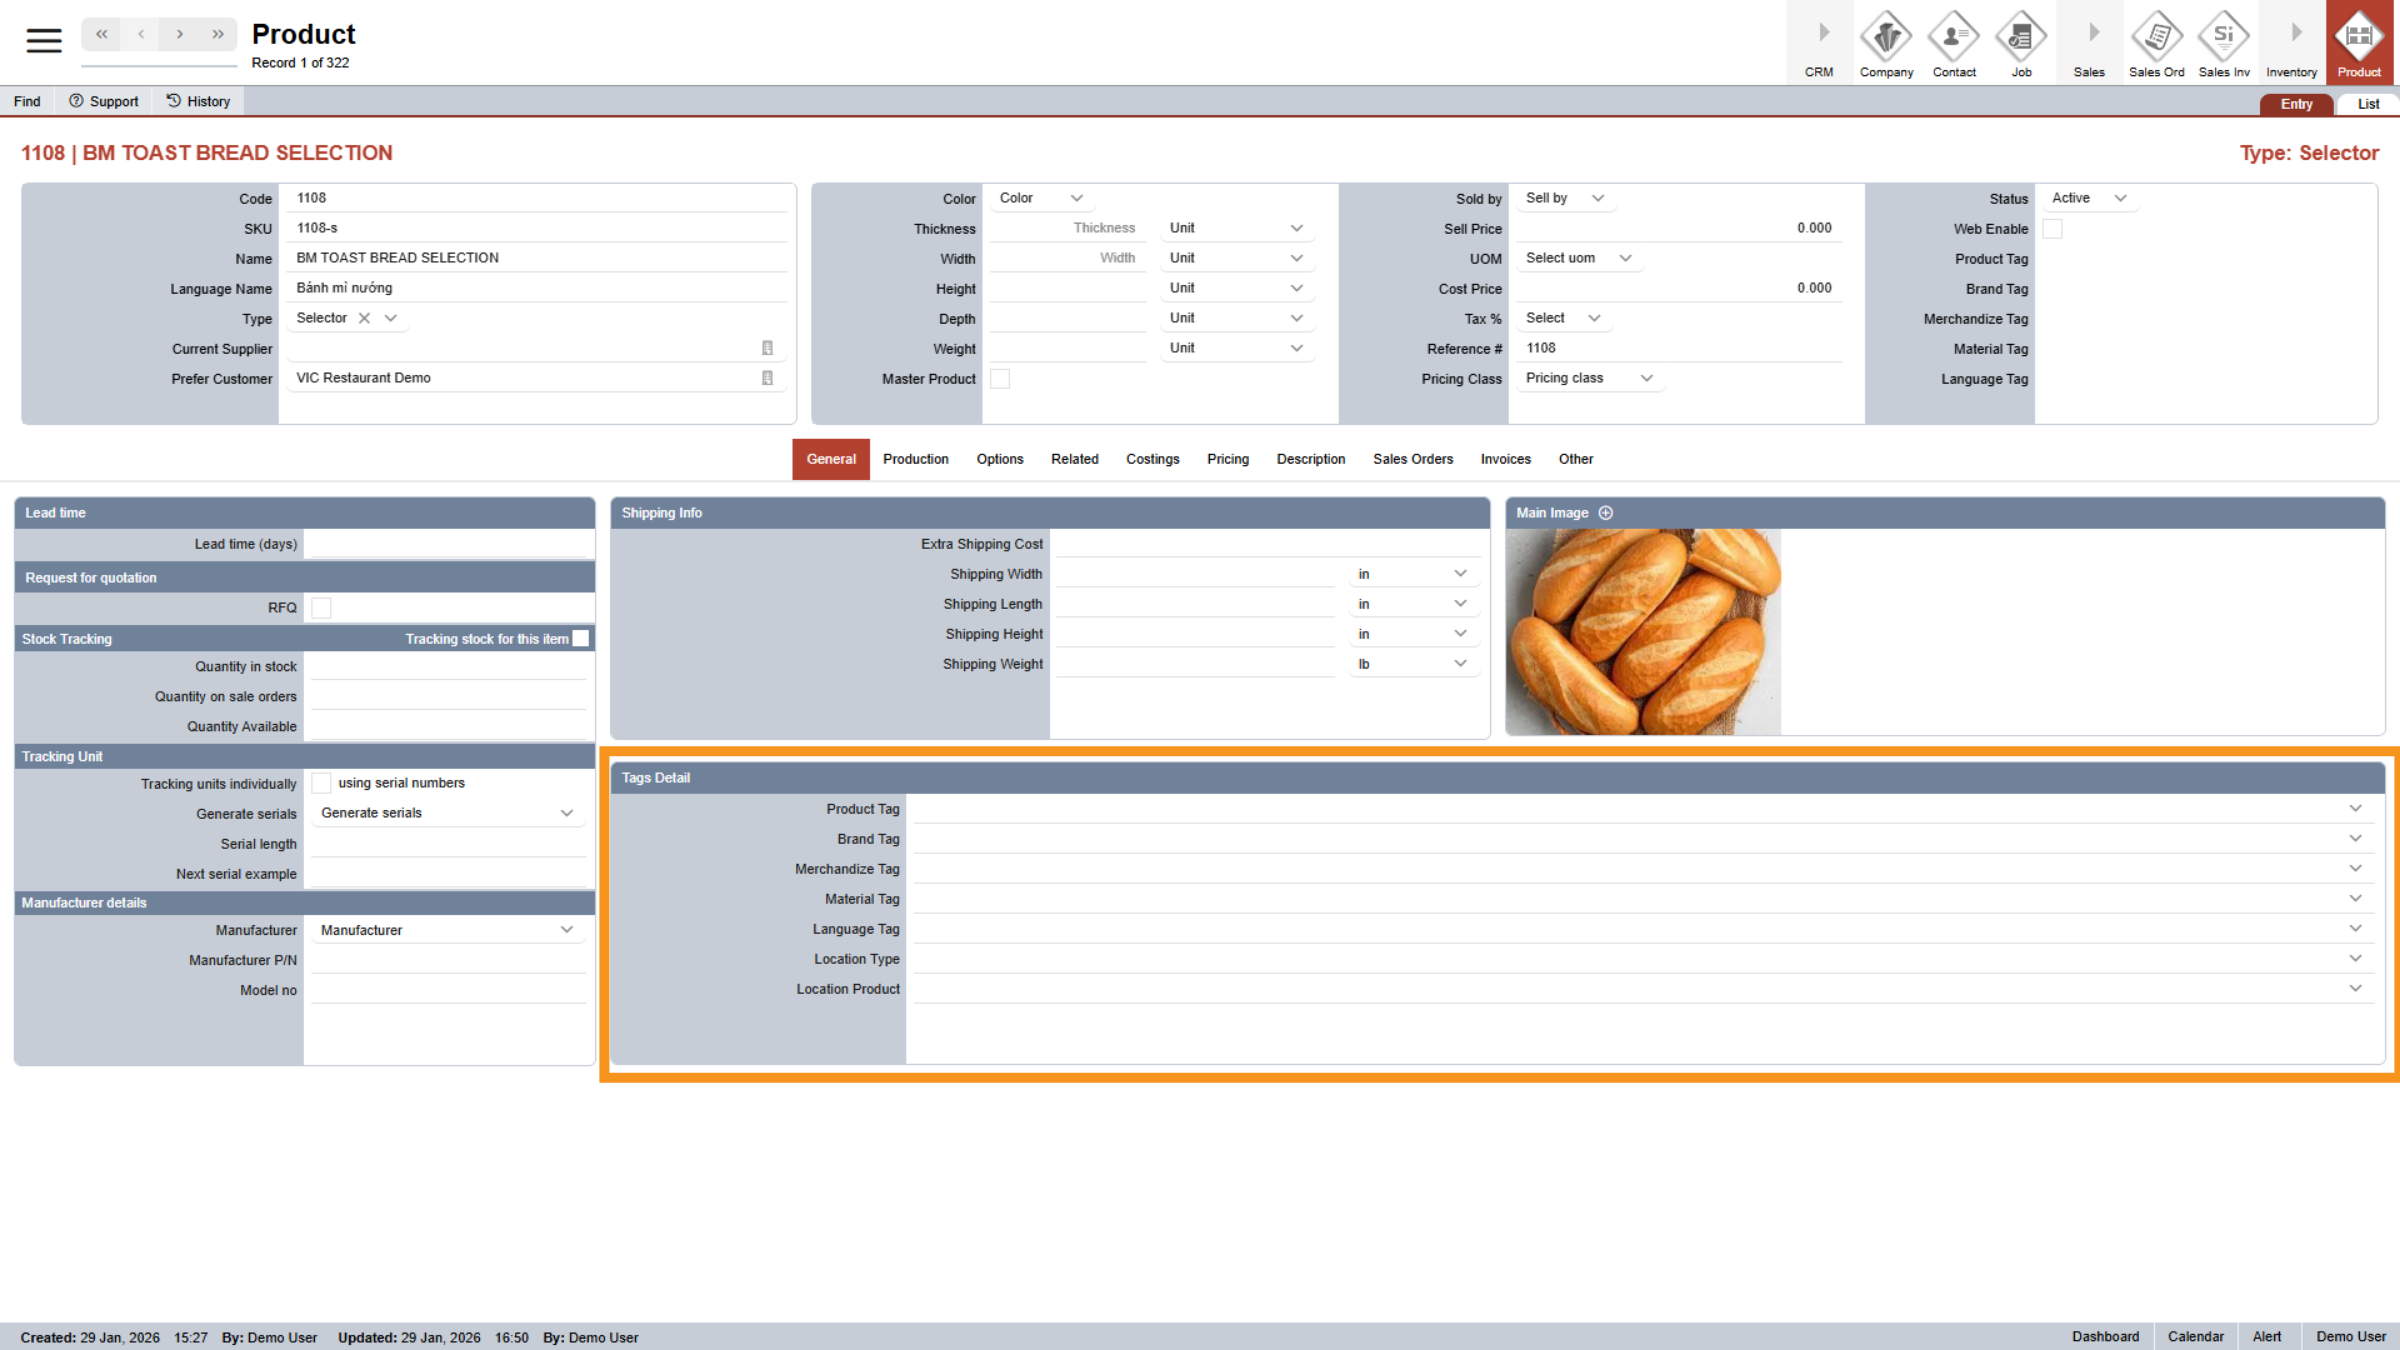
21. Leave Tags Detail Blank
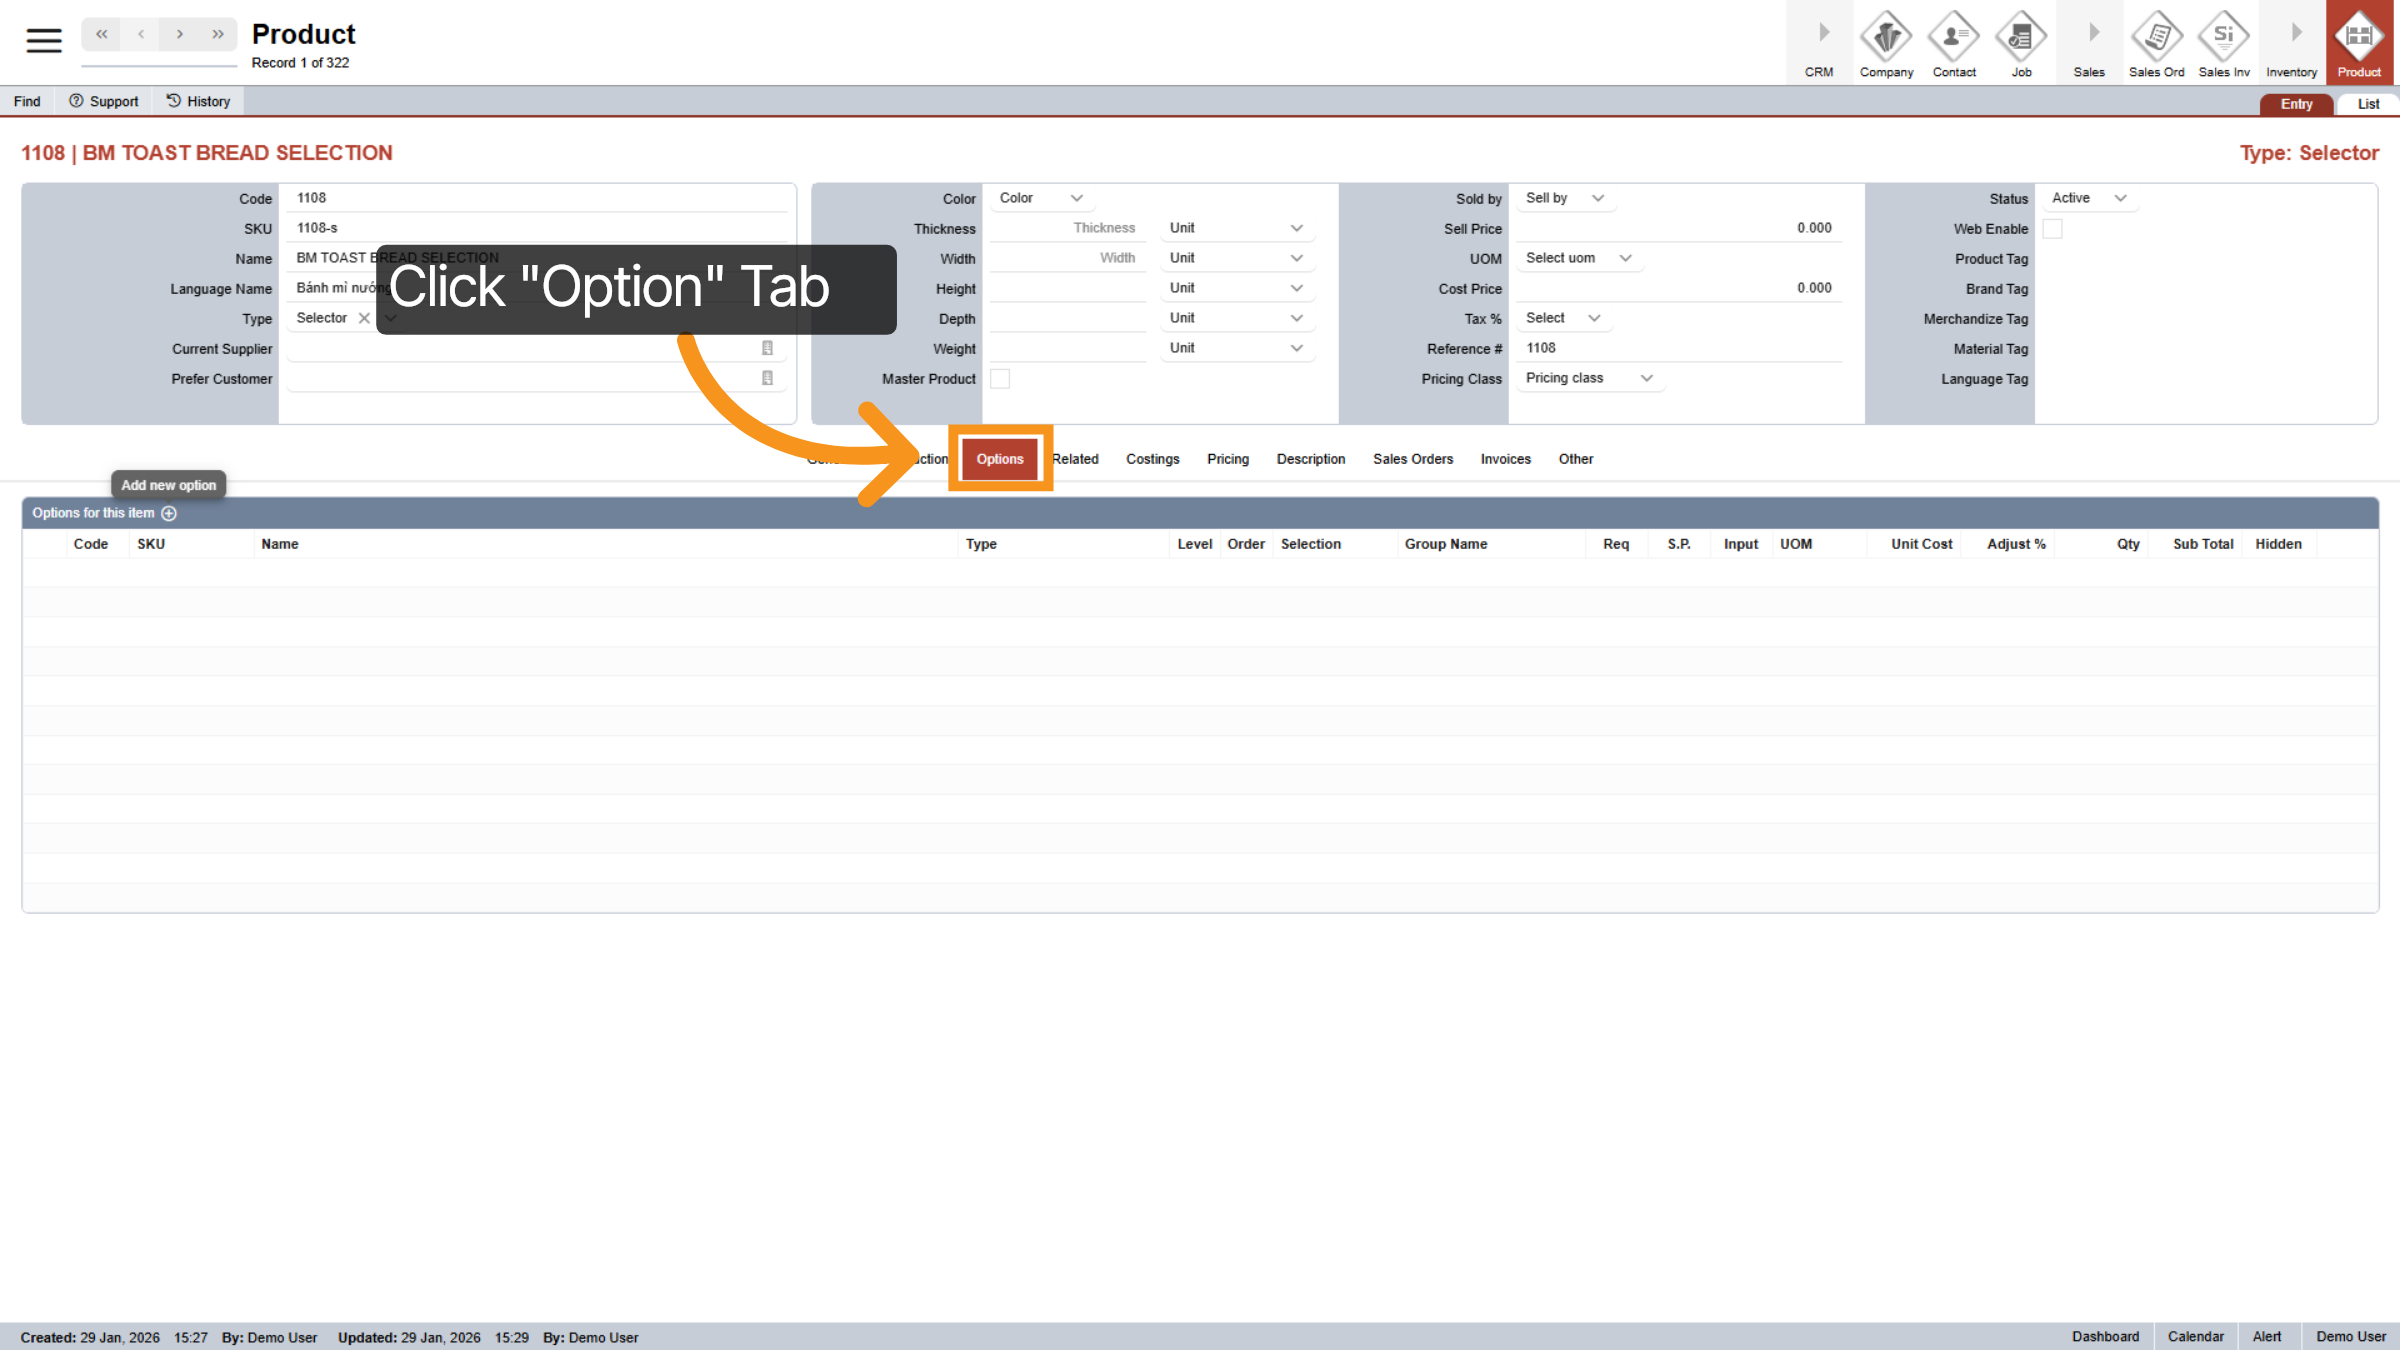
22. Select Options Tab
Click the "Options" tab to configure the options section.
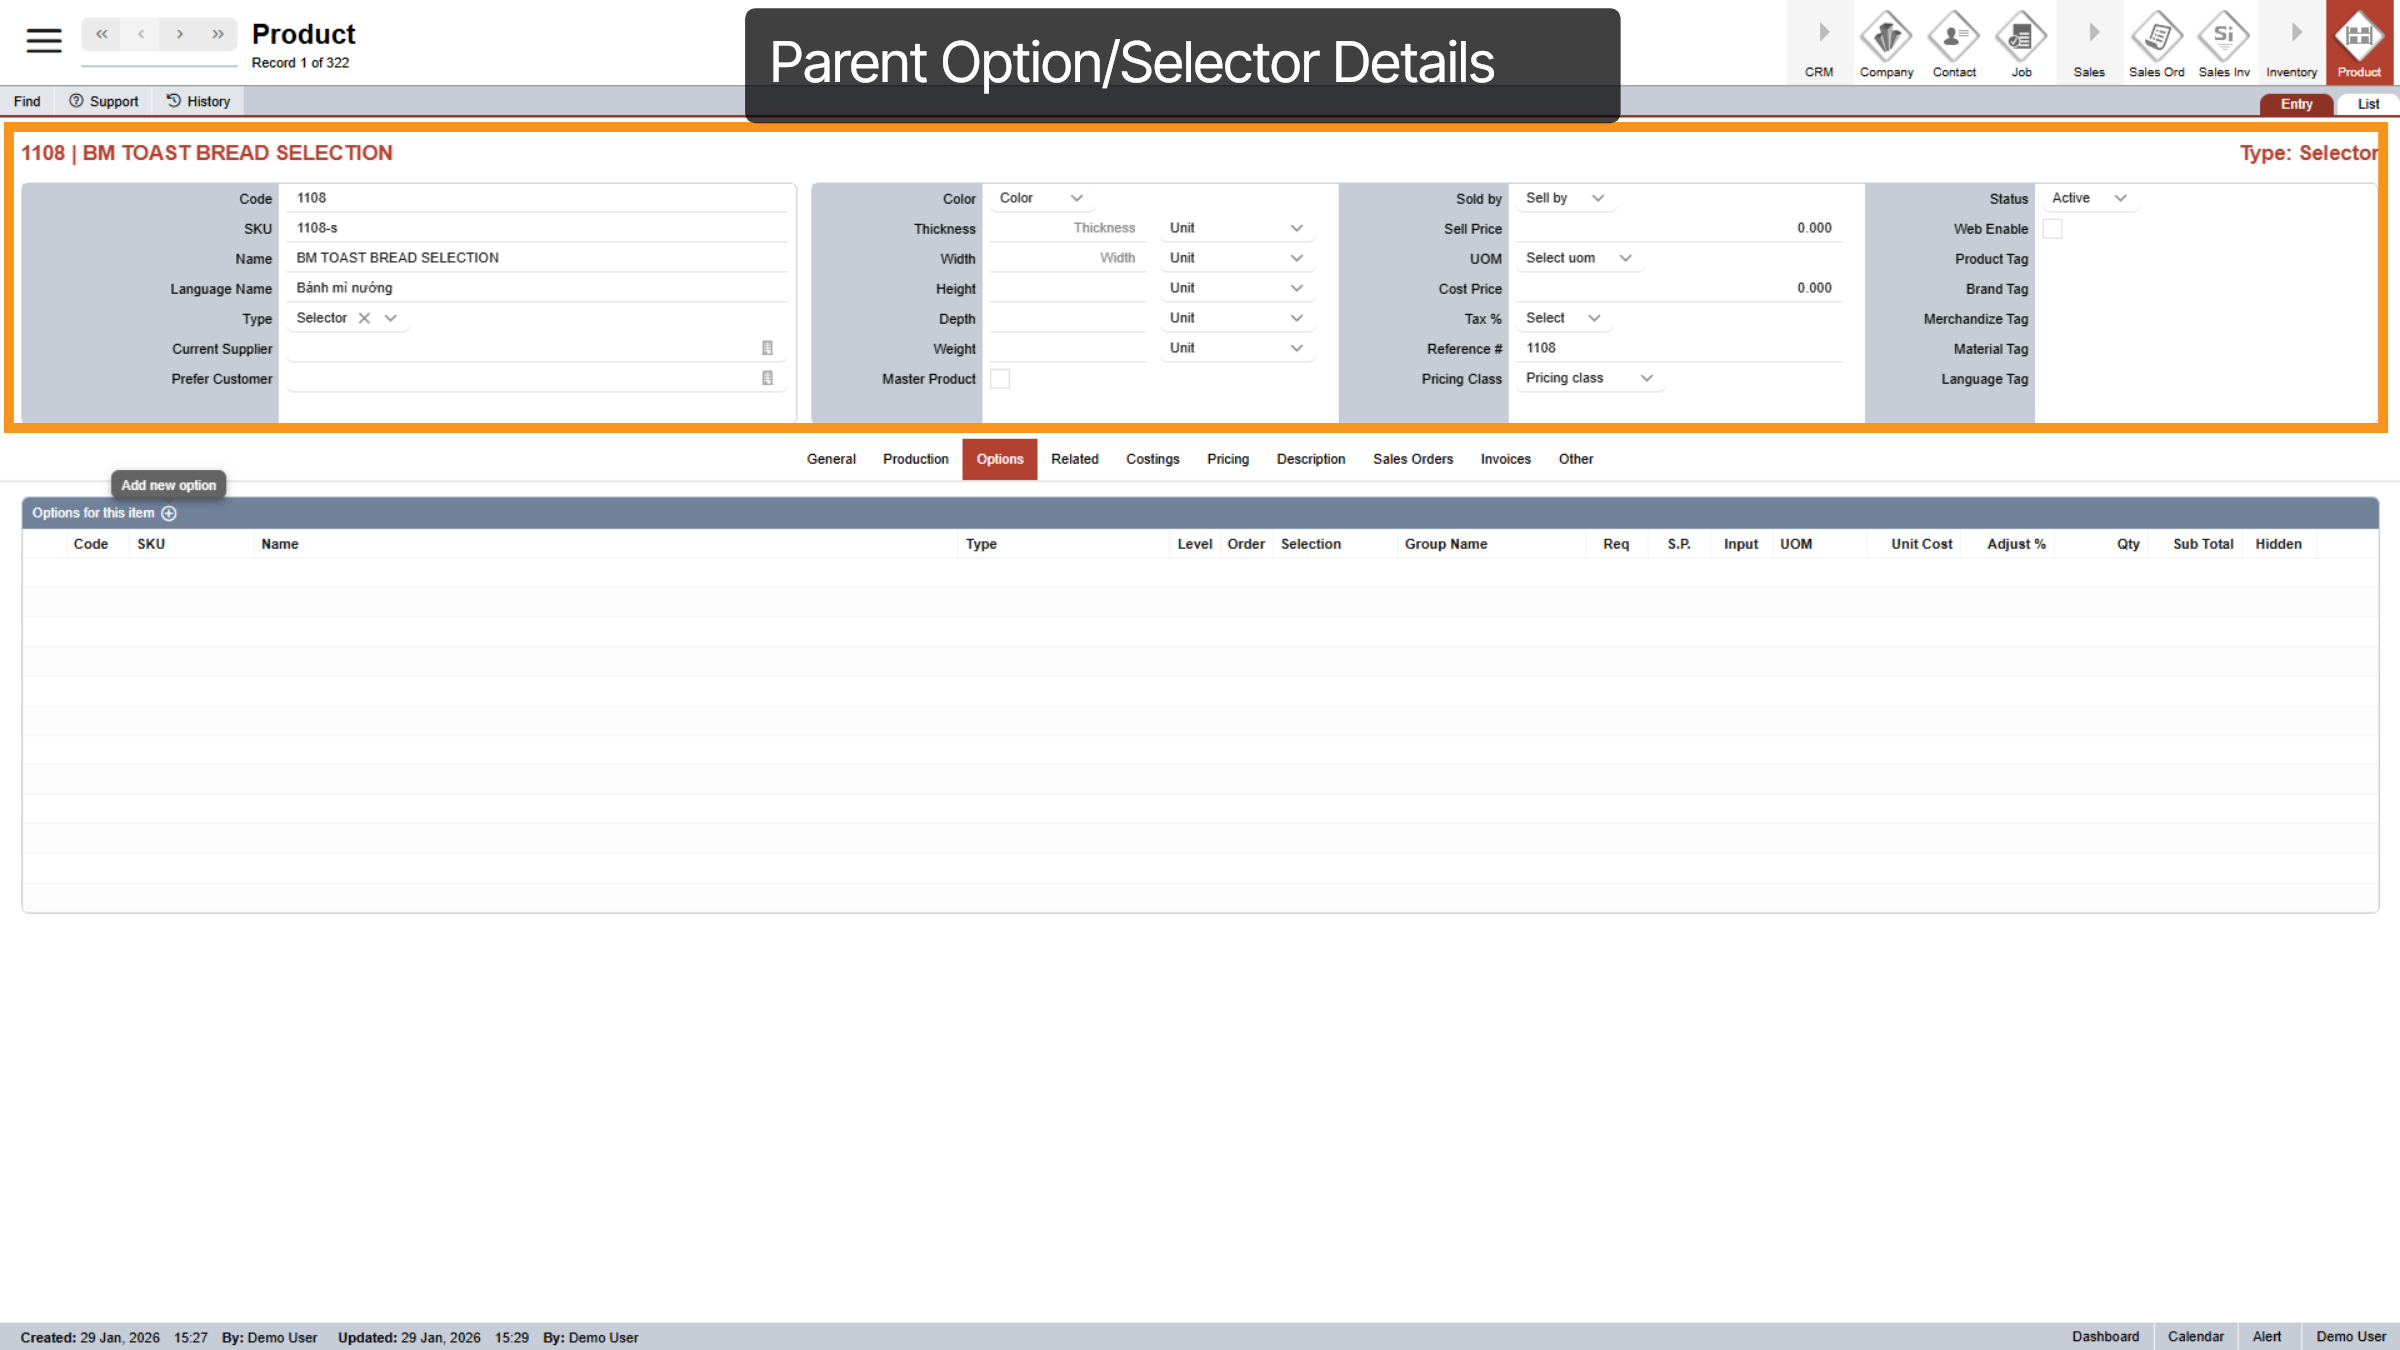
23. Parent & Child Option/Selector
Think of the item at the top as the main option, and the items listed underneath as the choices for that option. In this example, “BM Toast Bread Selection” is the main selector, and “Yes” and “No” are the two choices inside it.
24. Add Options
To add a new option, click the plus icon at the top of the options table. You can add multiple options for one product.
25. Select Options
After you click the plus icon, a pop-up will appear. Here you can quickly search for the options you want to add. Then simply click on the option you want to include in the options table.
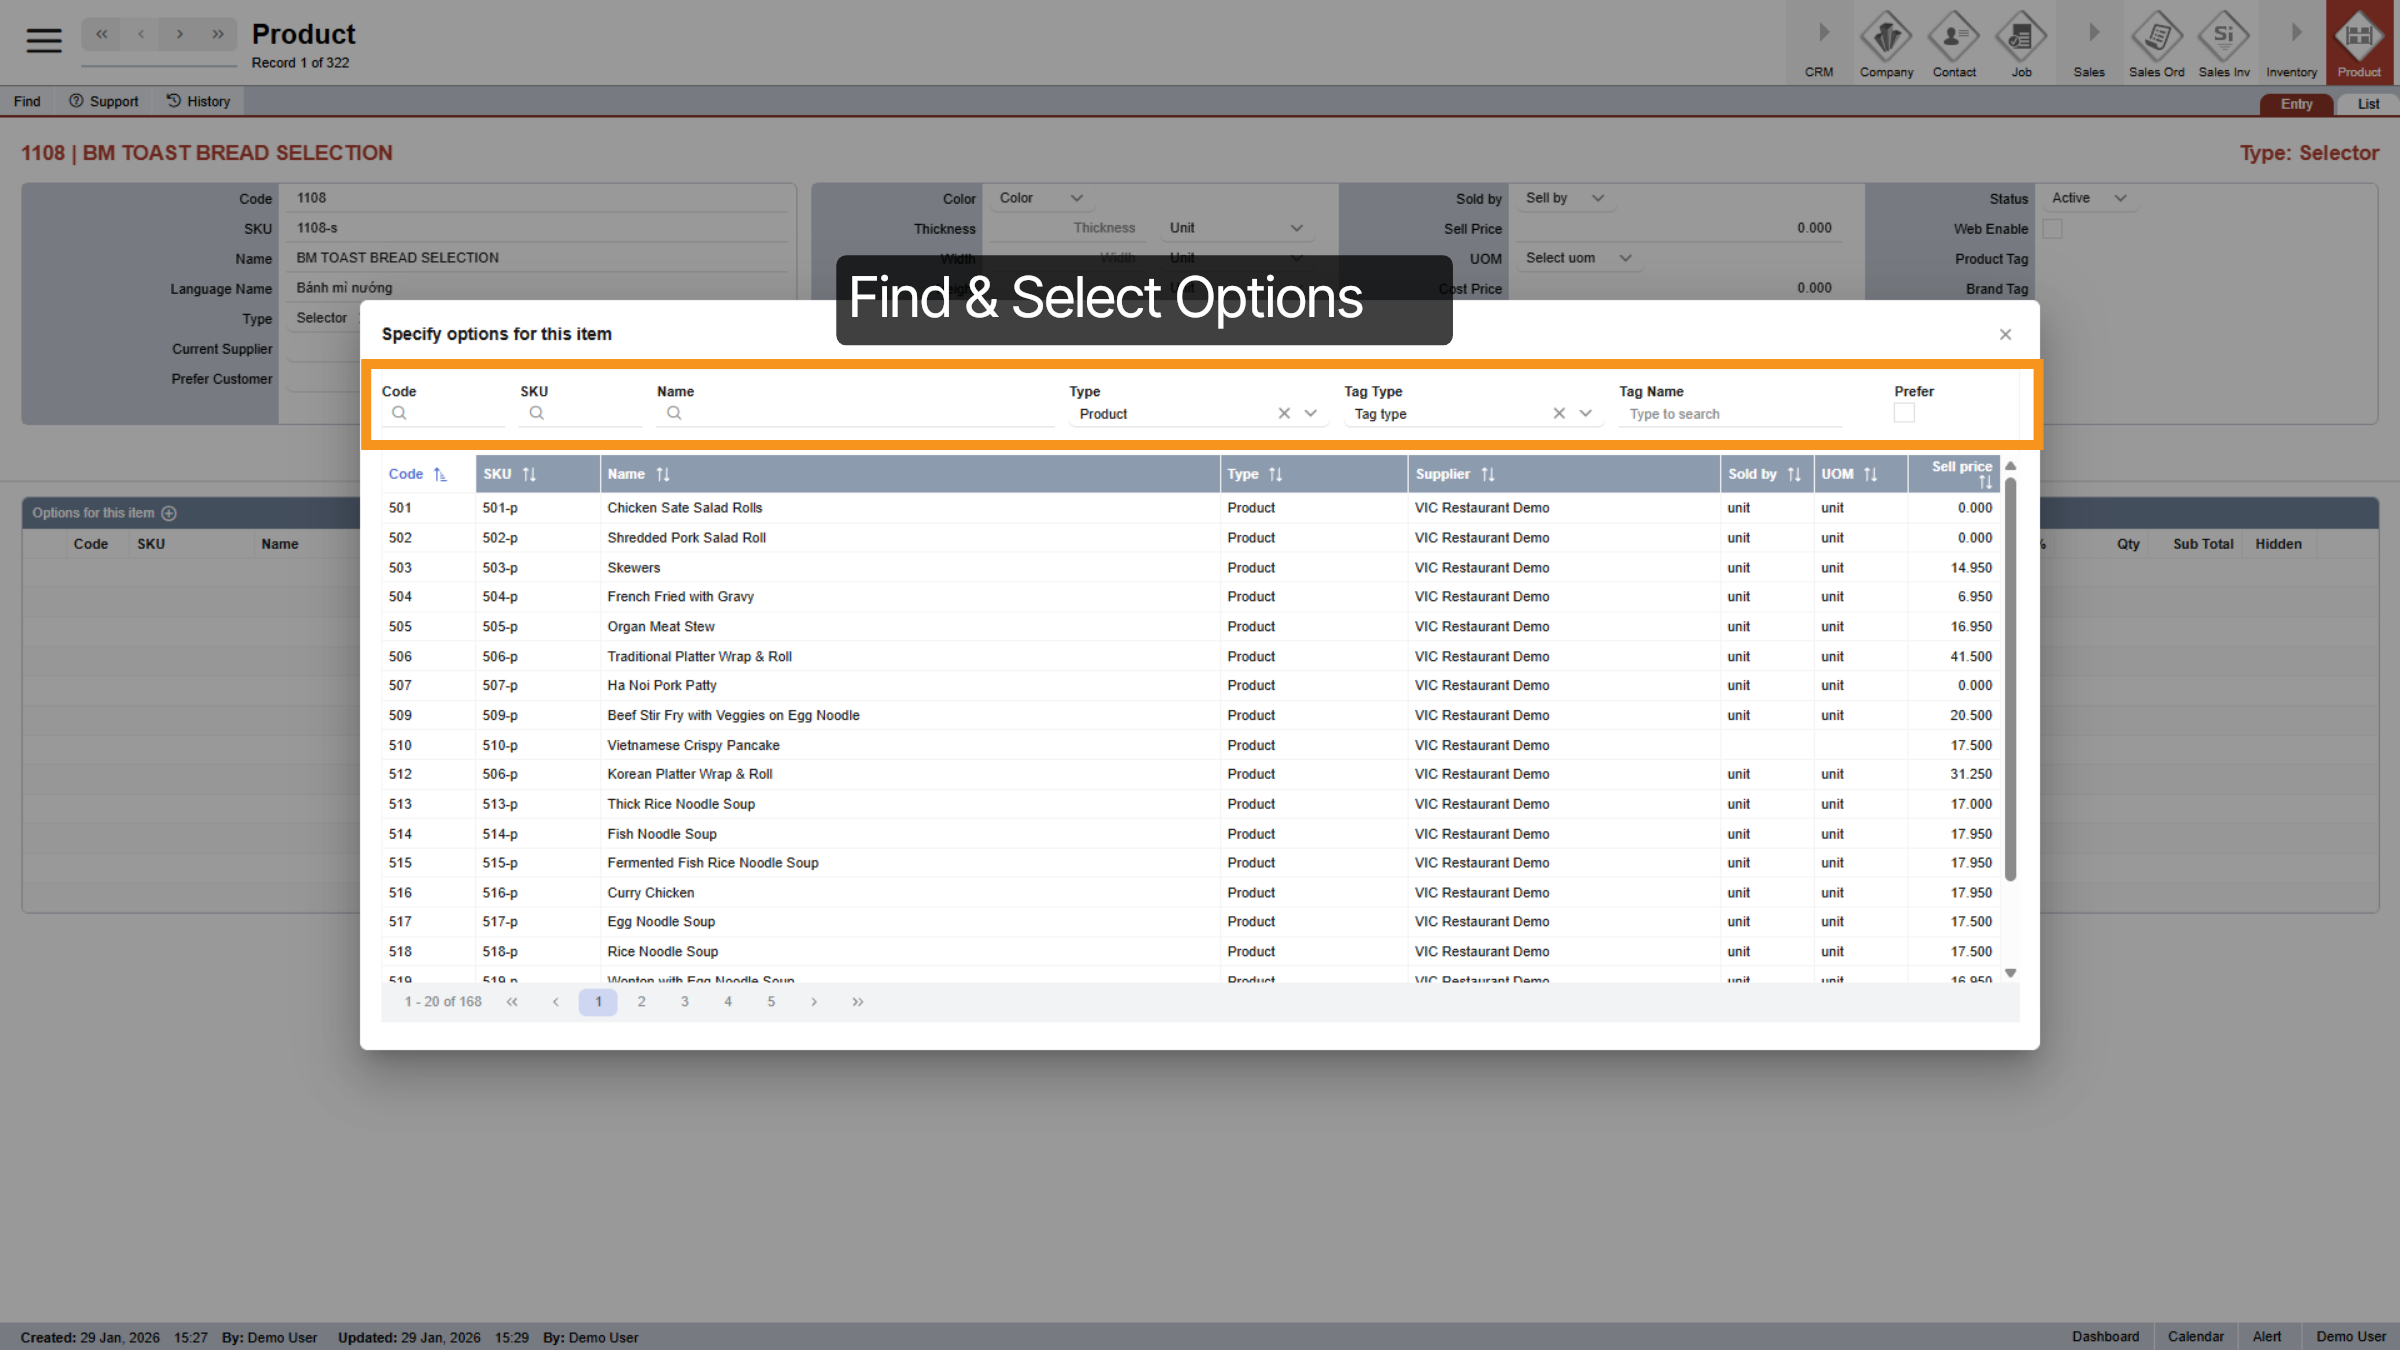
26. Select Internal Use Category
Since I save the "Product Type" of "Yes" and "No" as "Internal Use," I utilize the "Type" filter to locate them.
27. Enable Option
Click on the name of the option you wish to select to add it to your product's options.

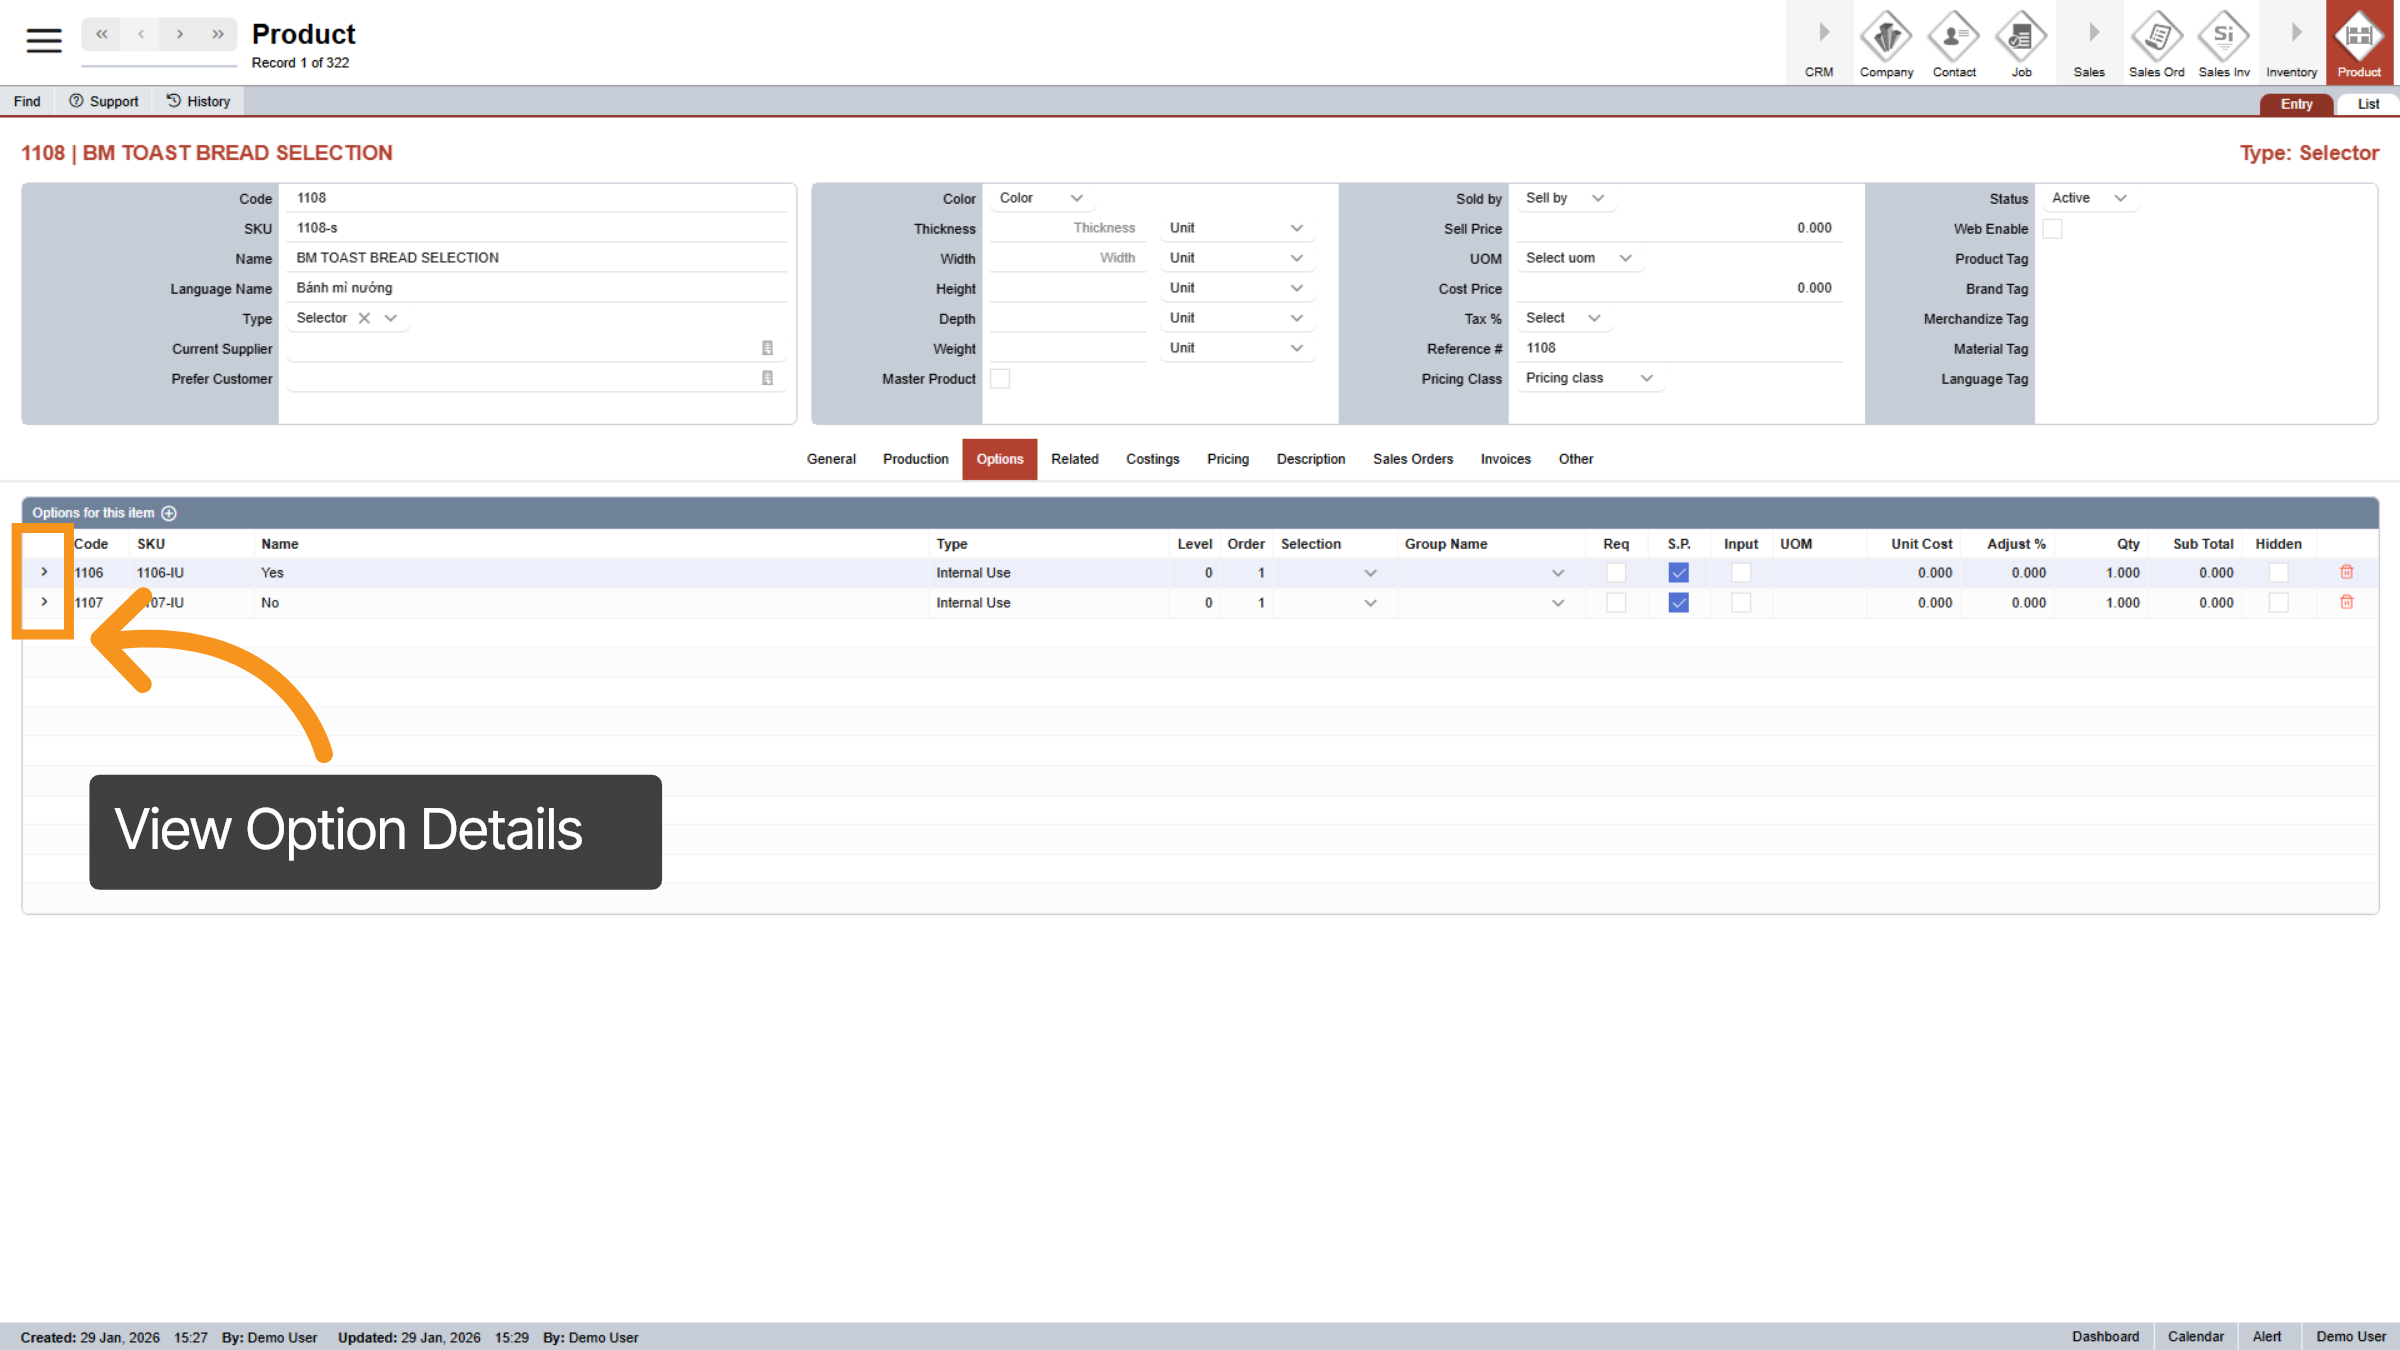
28. View Option Details
Click the arrow icon next to an option to quickly view its full details.
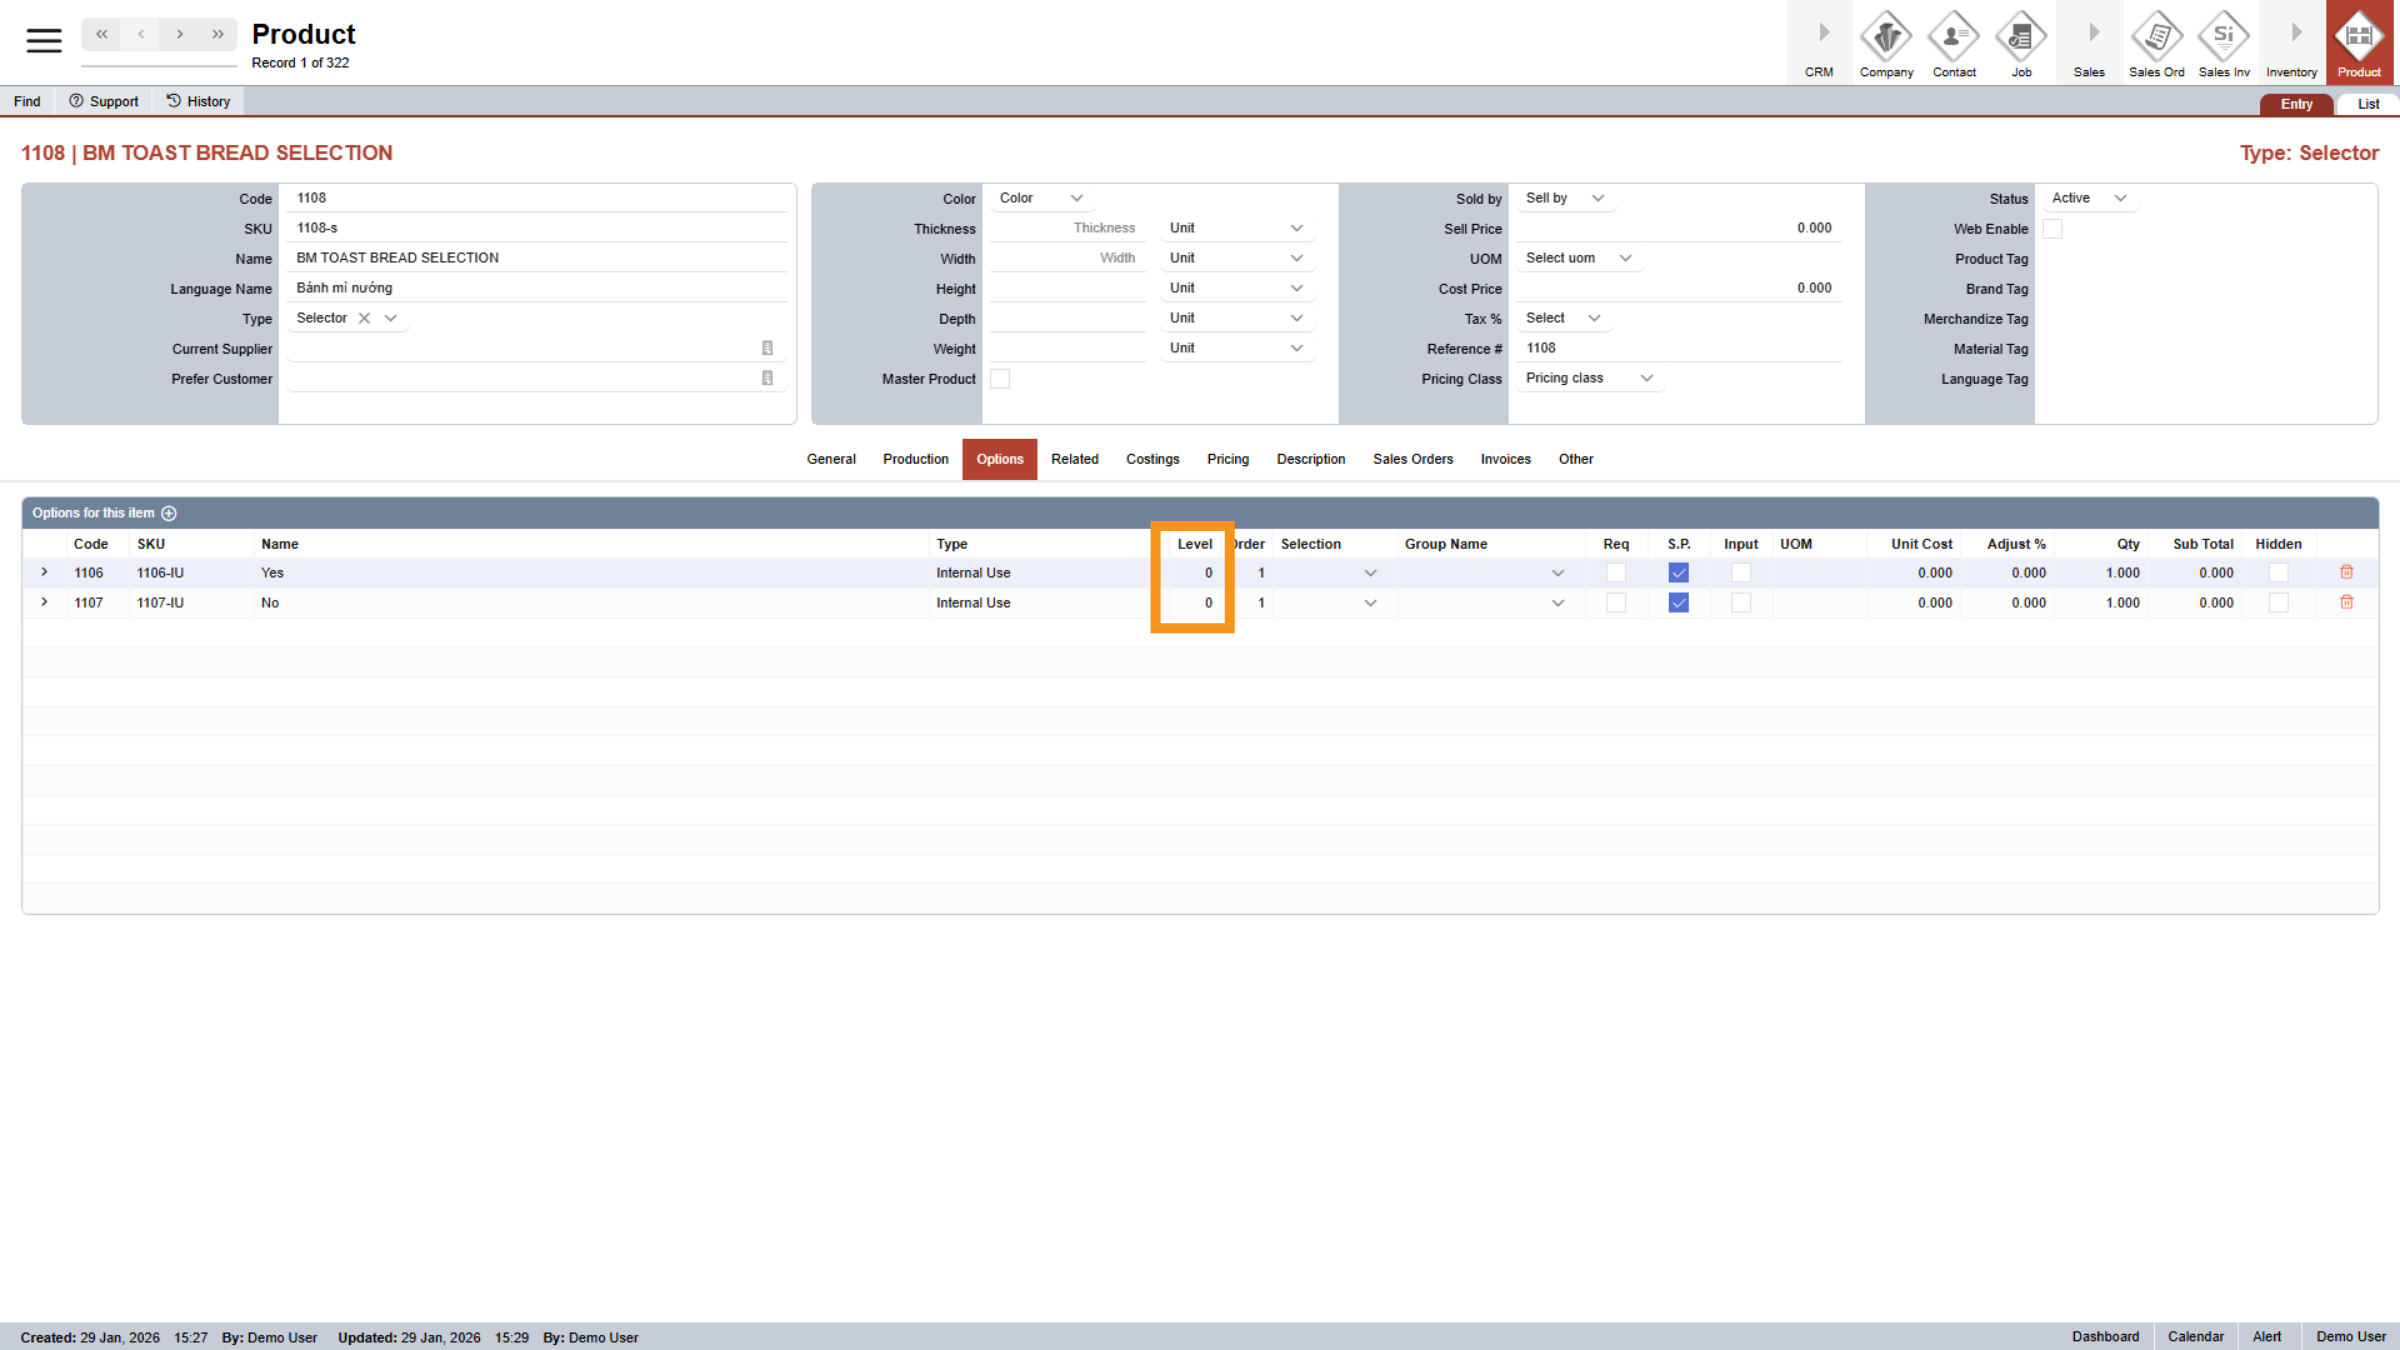
29. Options Level
To keep your pricing organized, our system uses independent levels. Think of these as layers: each is calculated separately starting from Level 1, and you can add as many as you need. Since they are independent, changes made to one level won’t affect the others. Your Final Price is simply the Base Price plus the total of all levels. We’ll show you more examples later, but for now, we’ll leave these options at "0" by default since there is no extra charge.
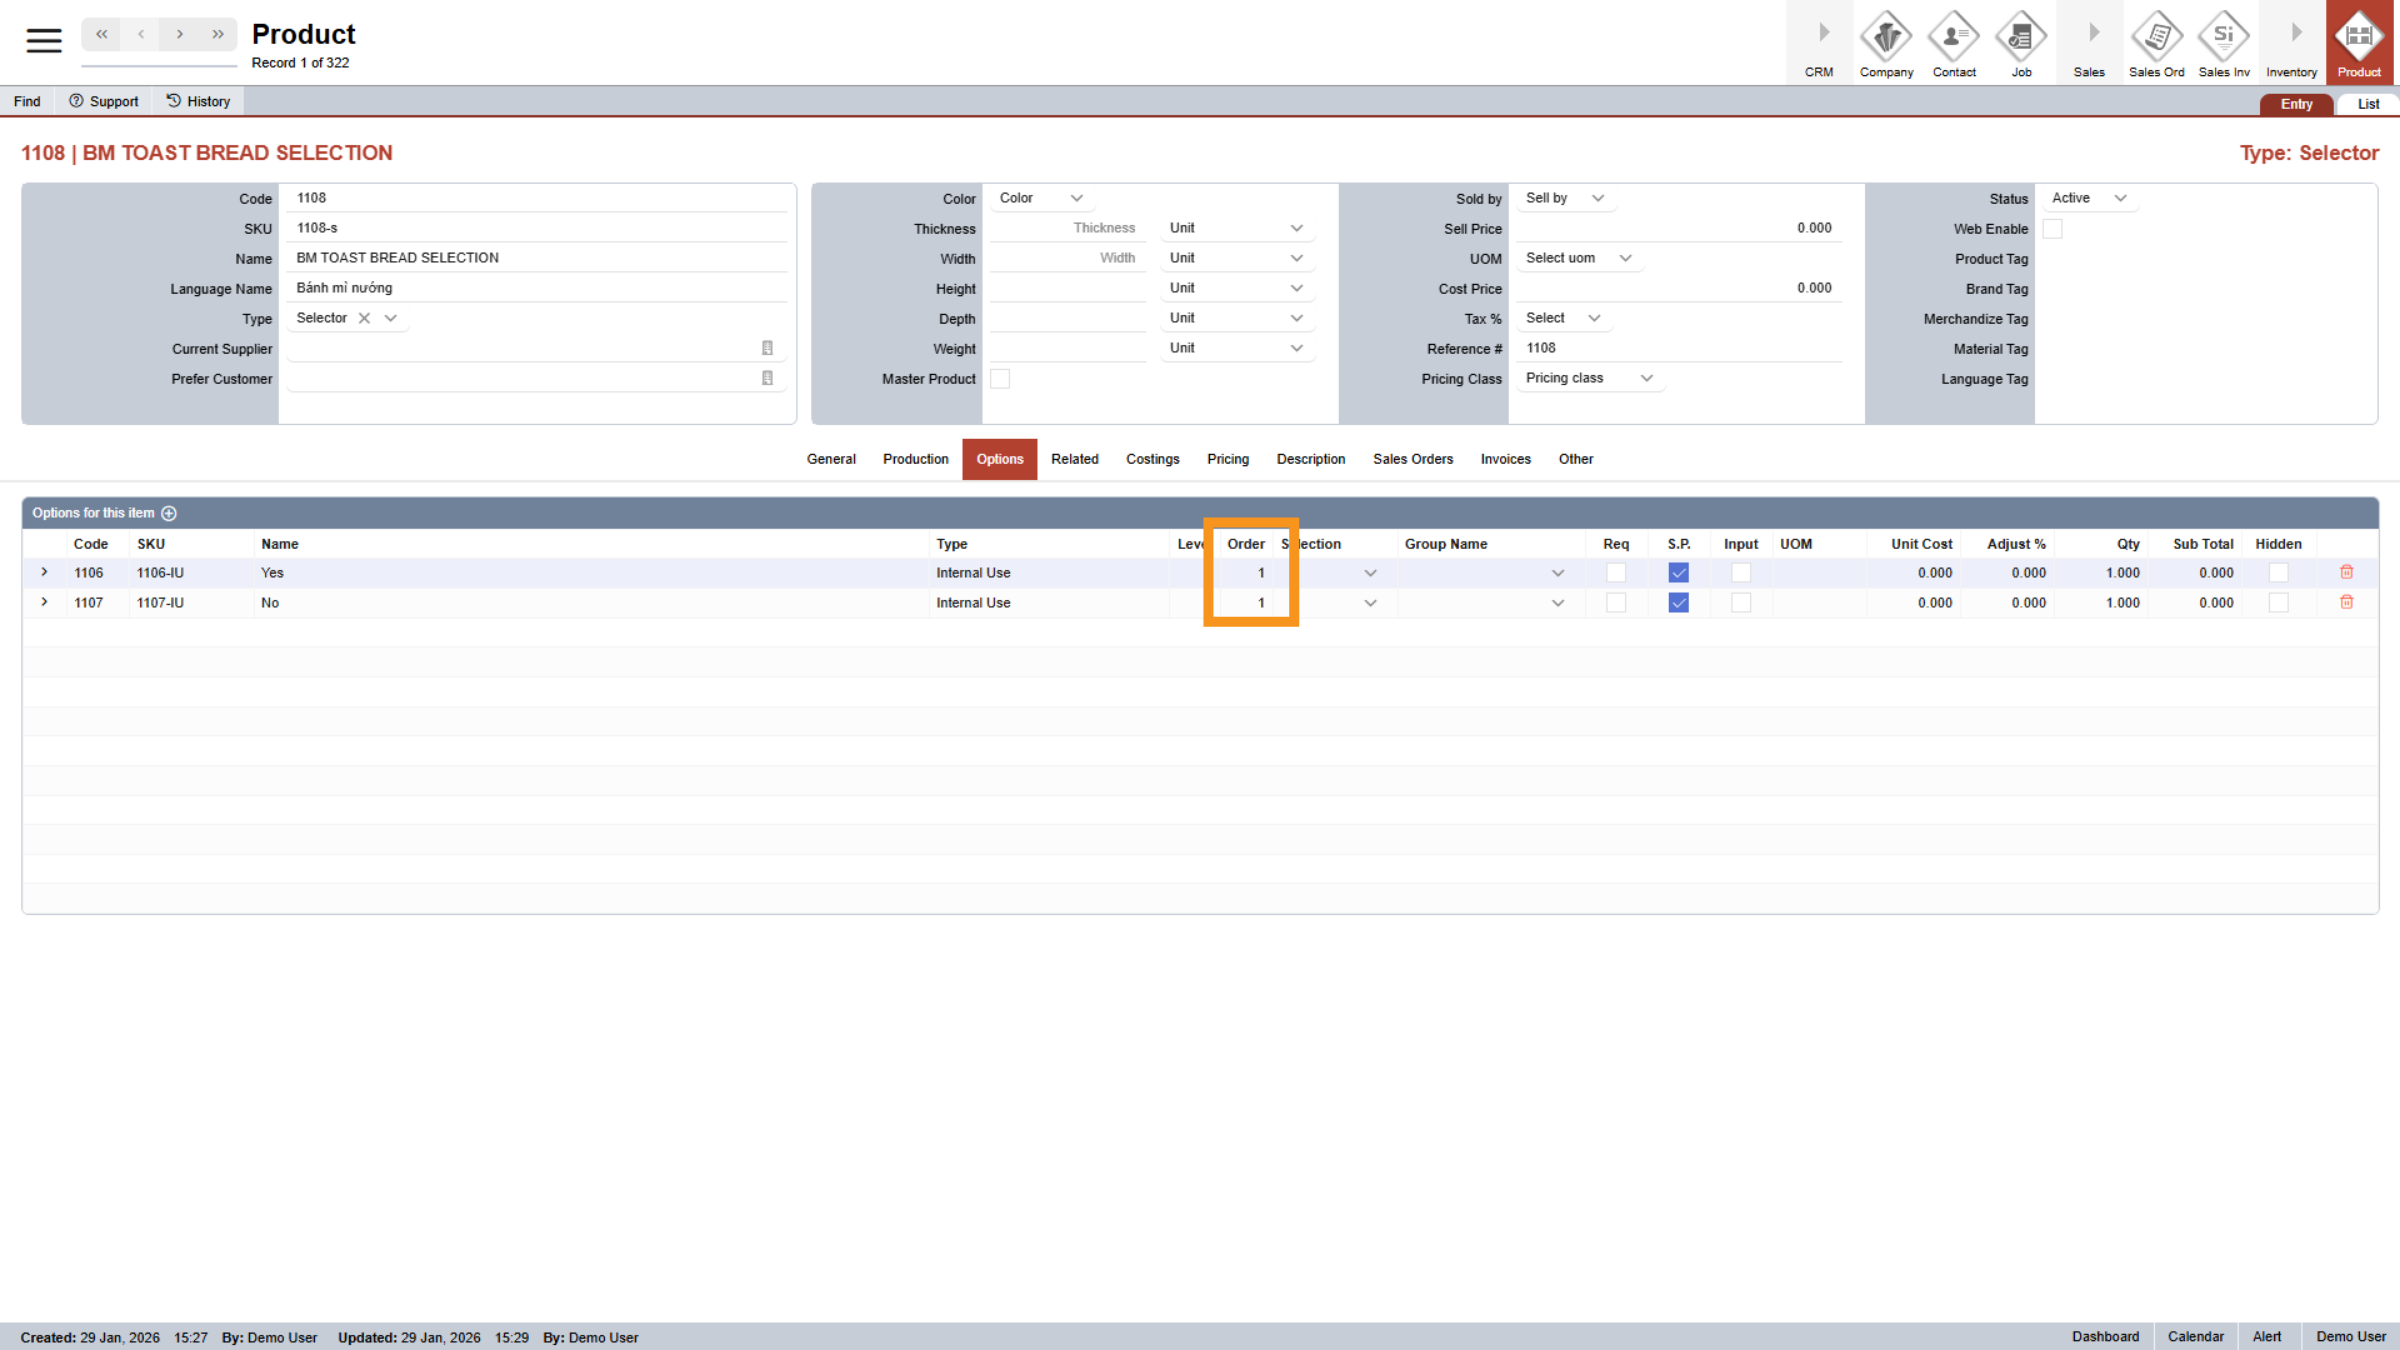
30. Options Order
The Option Order determines the sequence in which items appear on your website and P O S.
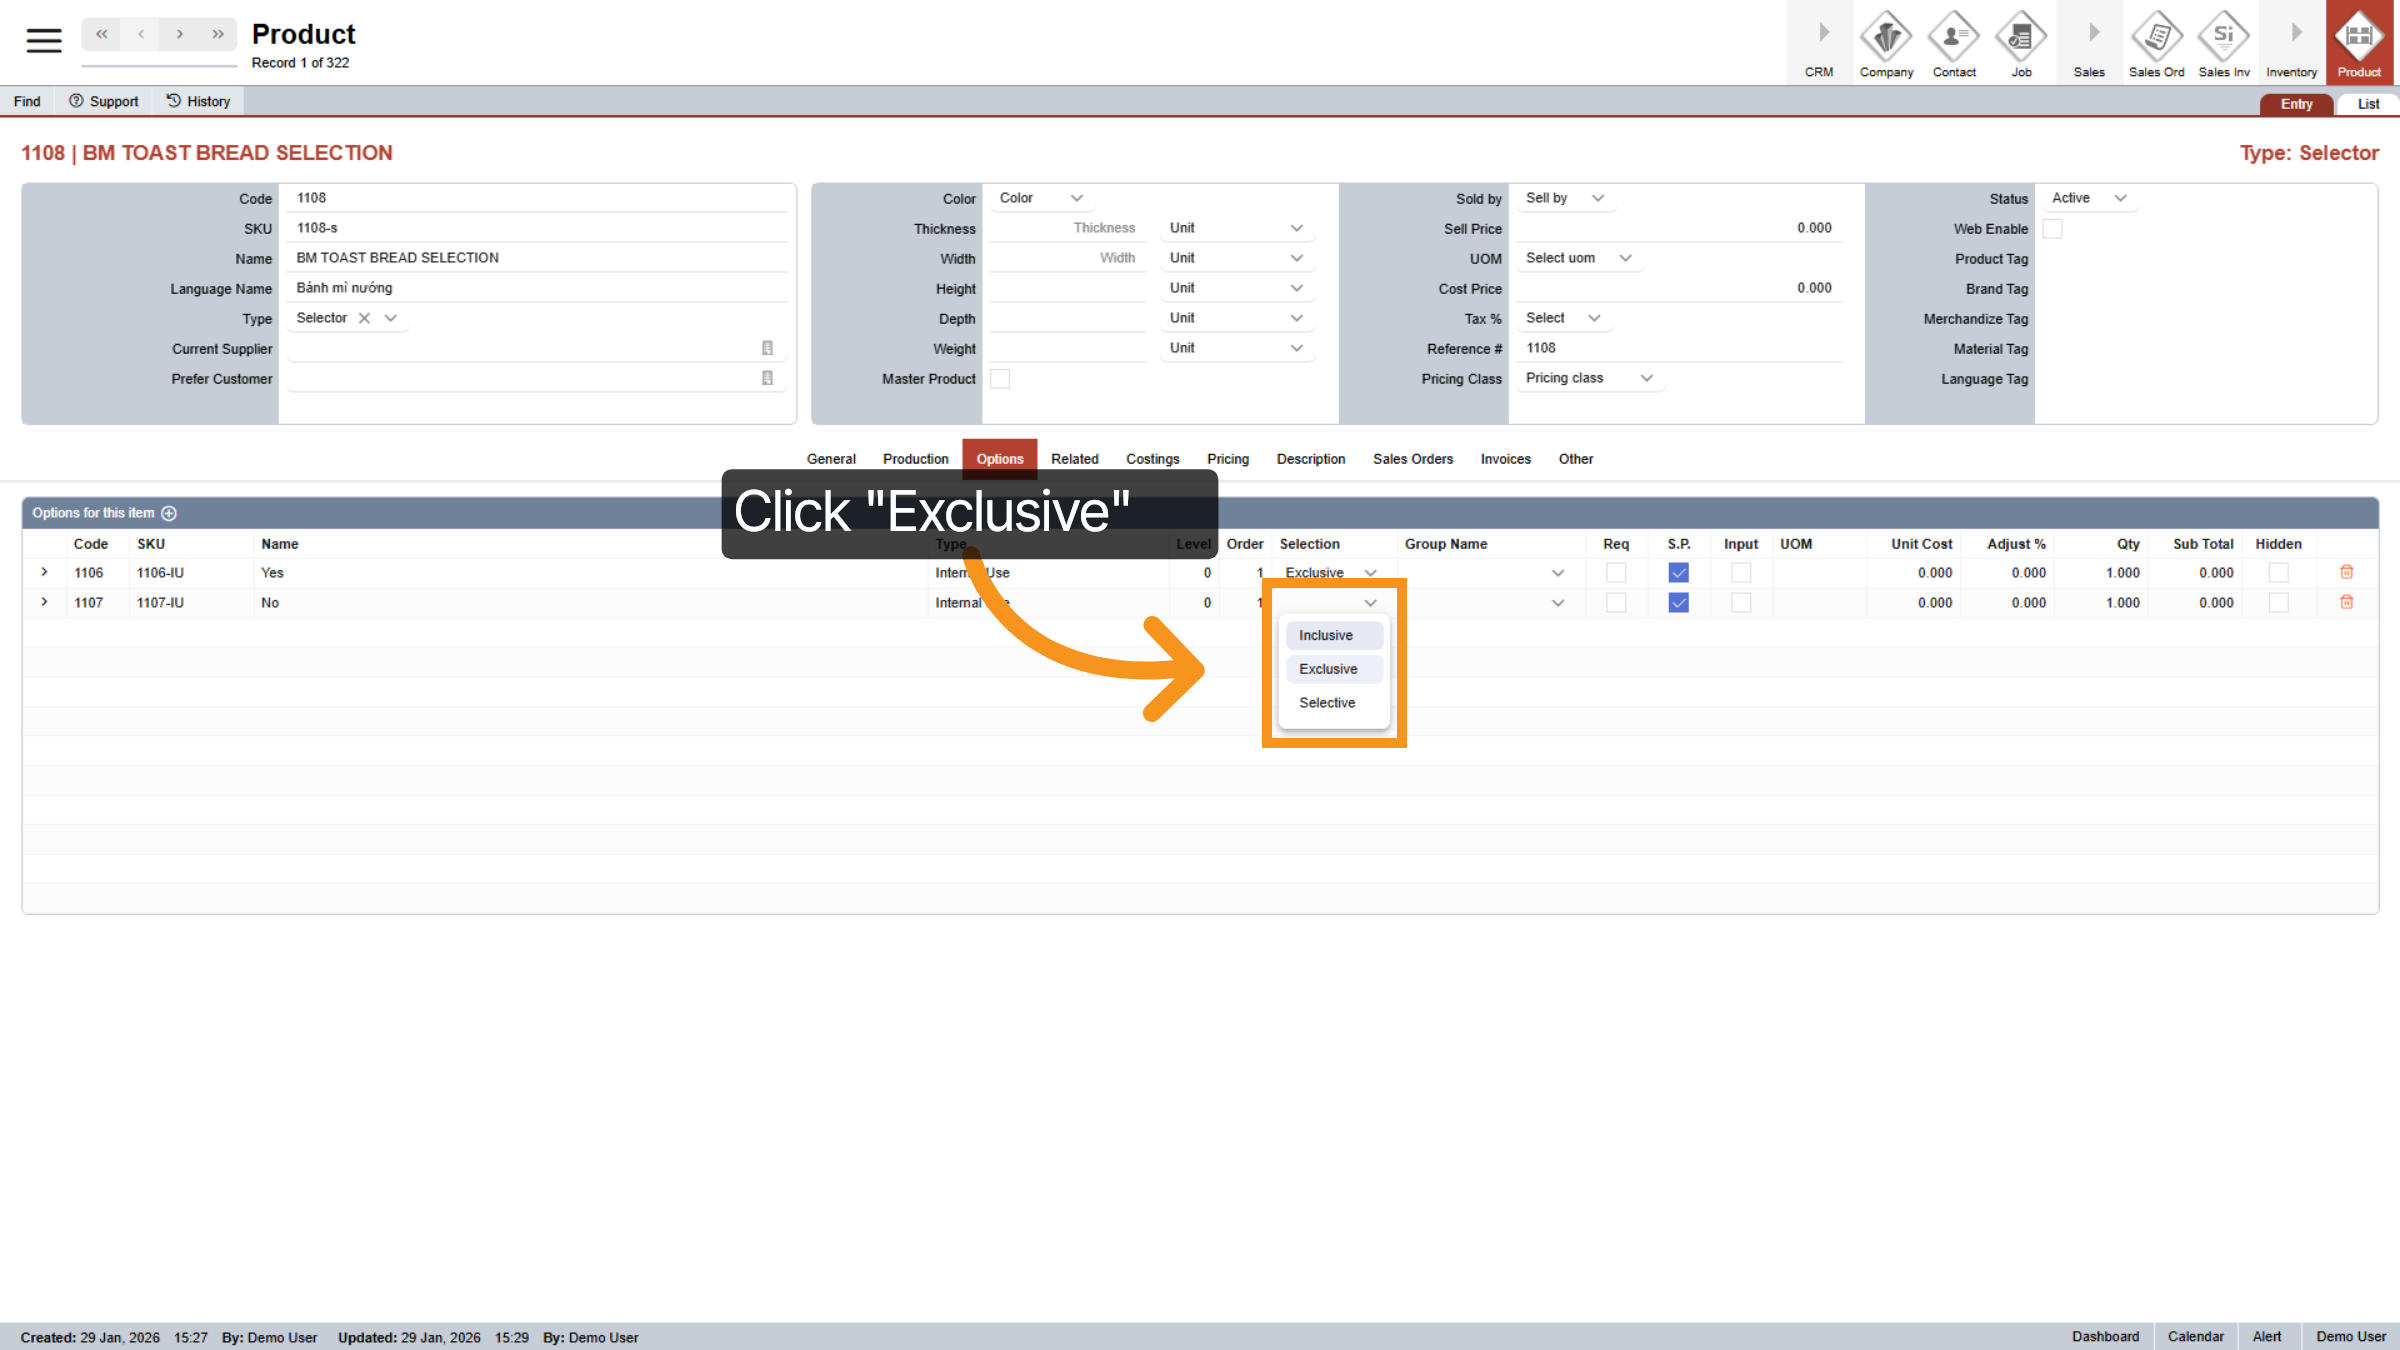
31. Selection Type
We offer three selection types: Inclusive, Exclusive, and Selective. Selective is mainly used in the printing industry, so for F&B, we’ll focus on the two you'll use most. Inclusive allows for multiple choices, like a customer adding both cucumbers and pickled carrots to their sub. Exclusive limits the selection to just one; for instance, a sub is either toasted or not toasted. Picking a new option in this group will simply replace the previous one.
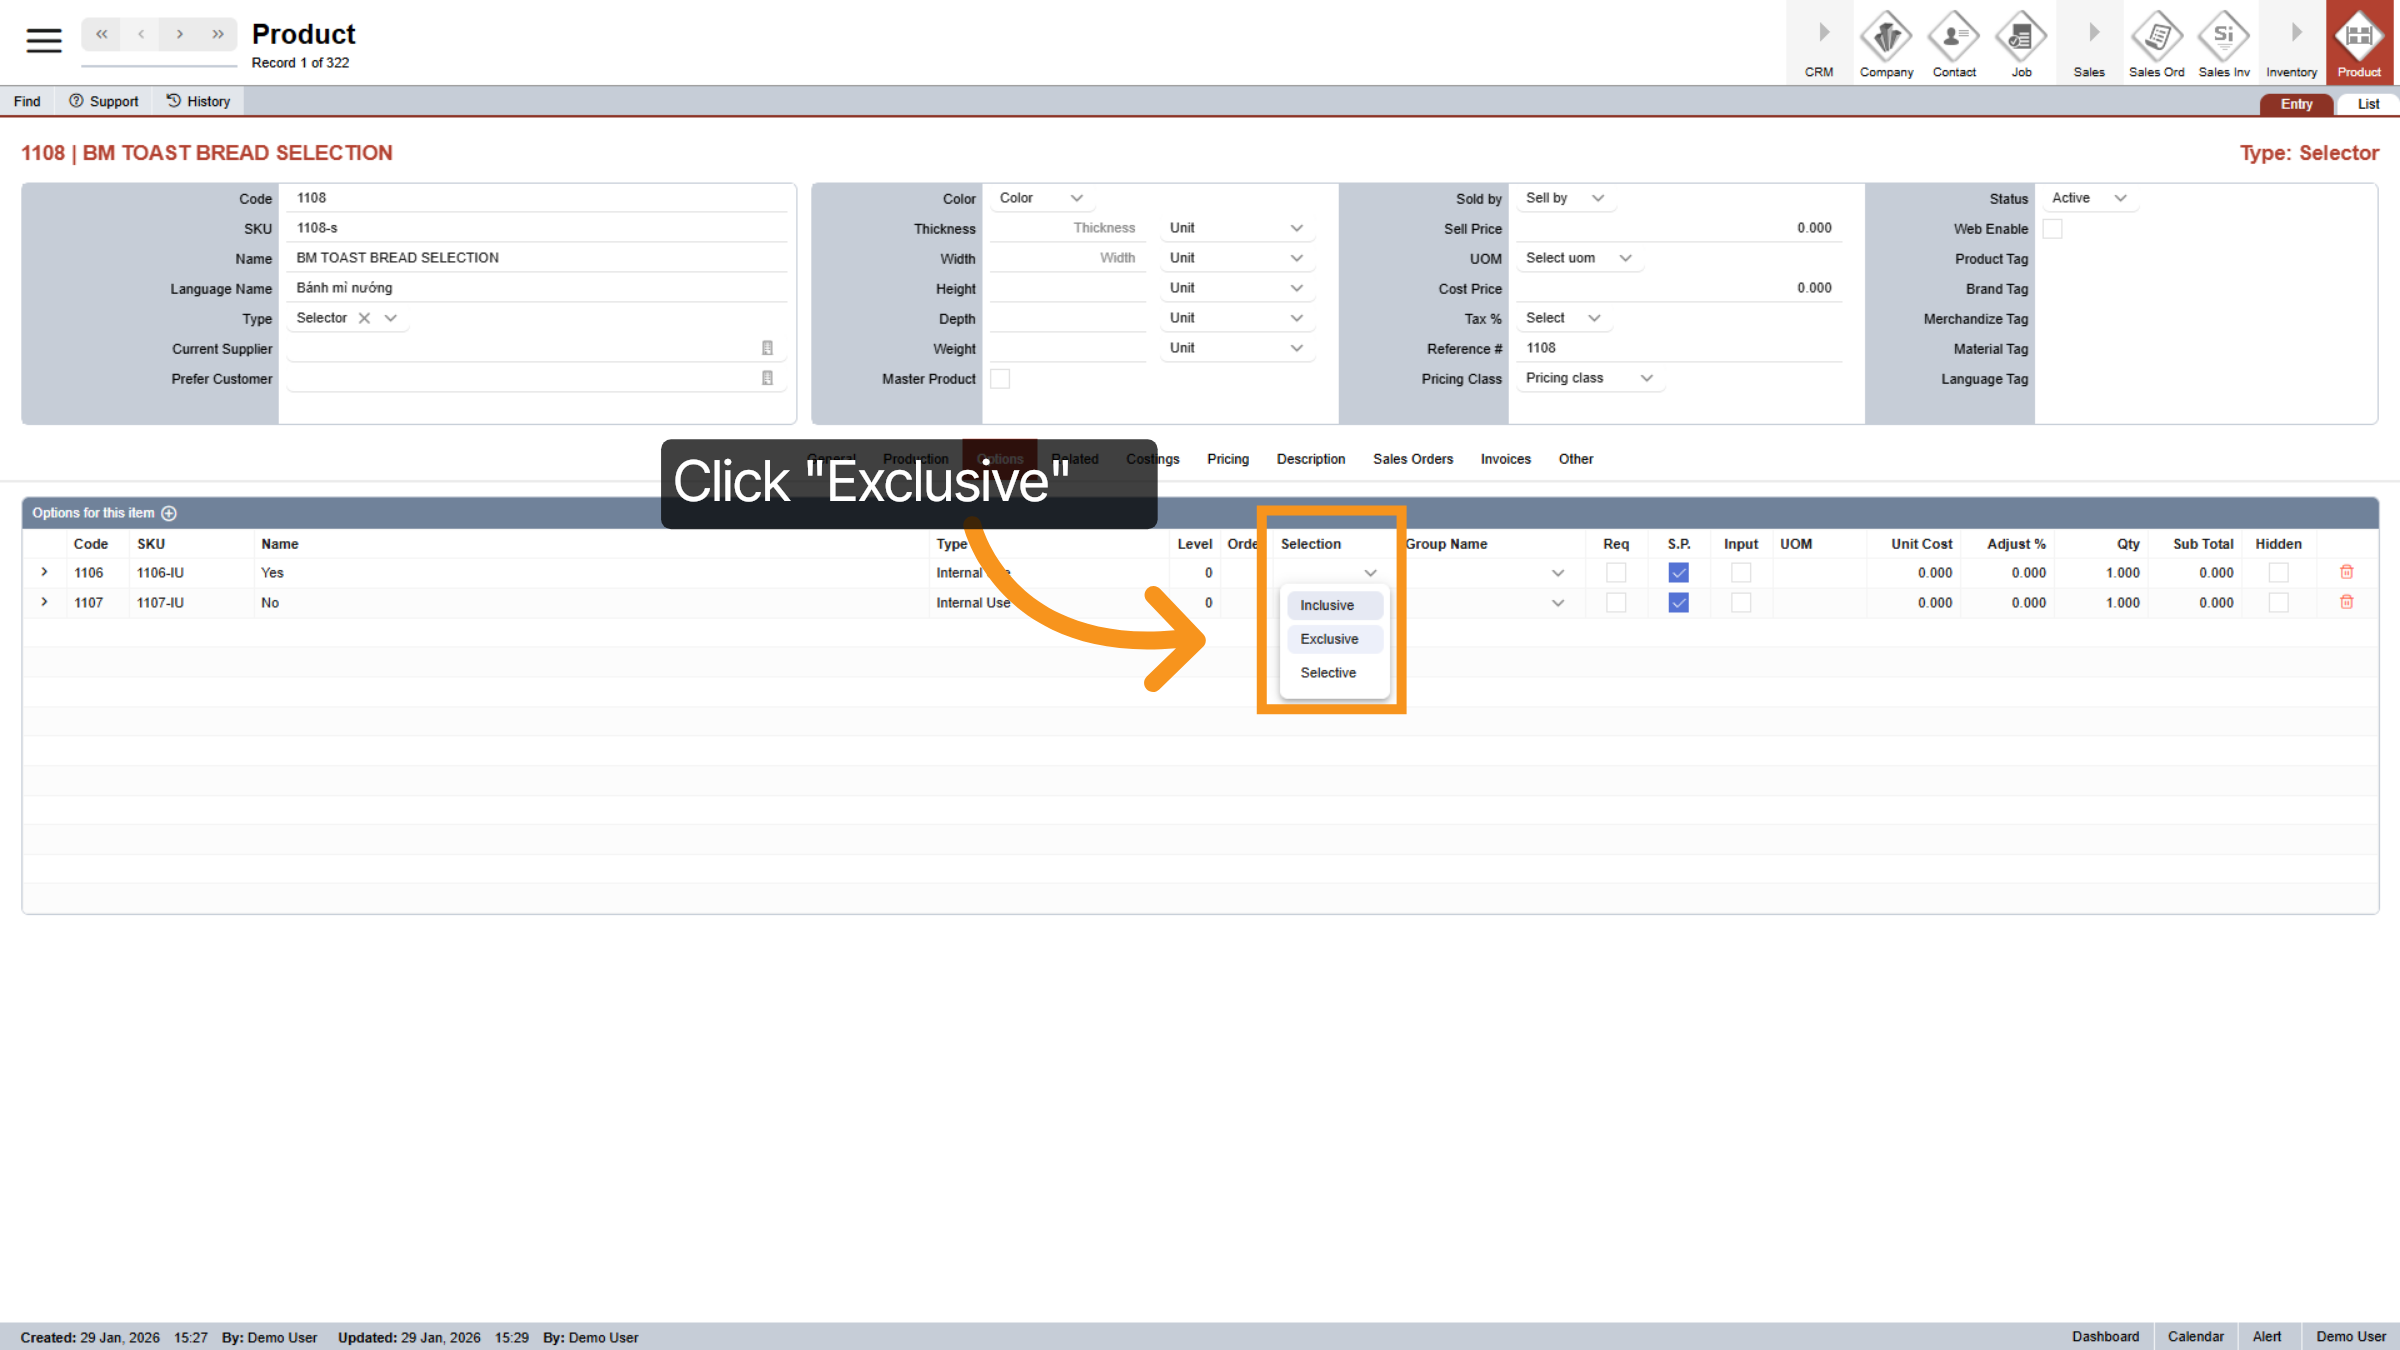
32. Exclusive Selection
In this example, we select "exclusive" because you can choose either "Yes" or "No," but not both.
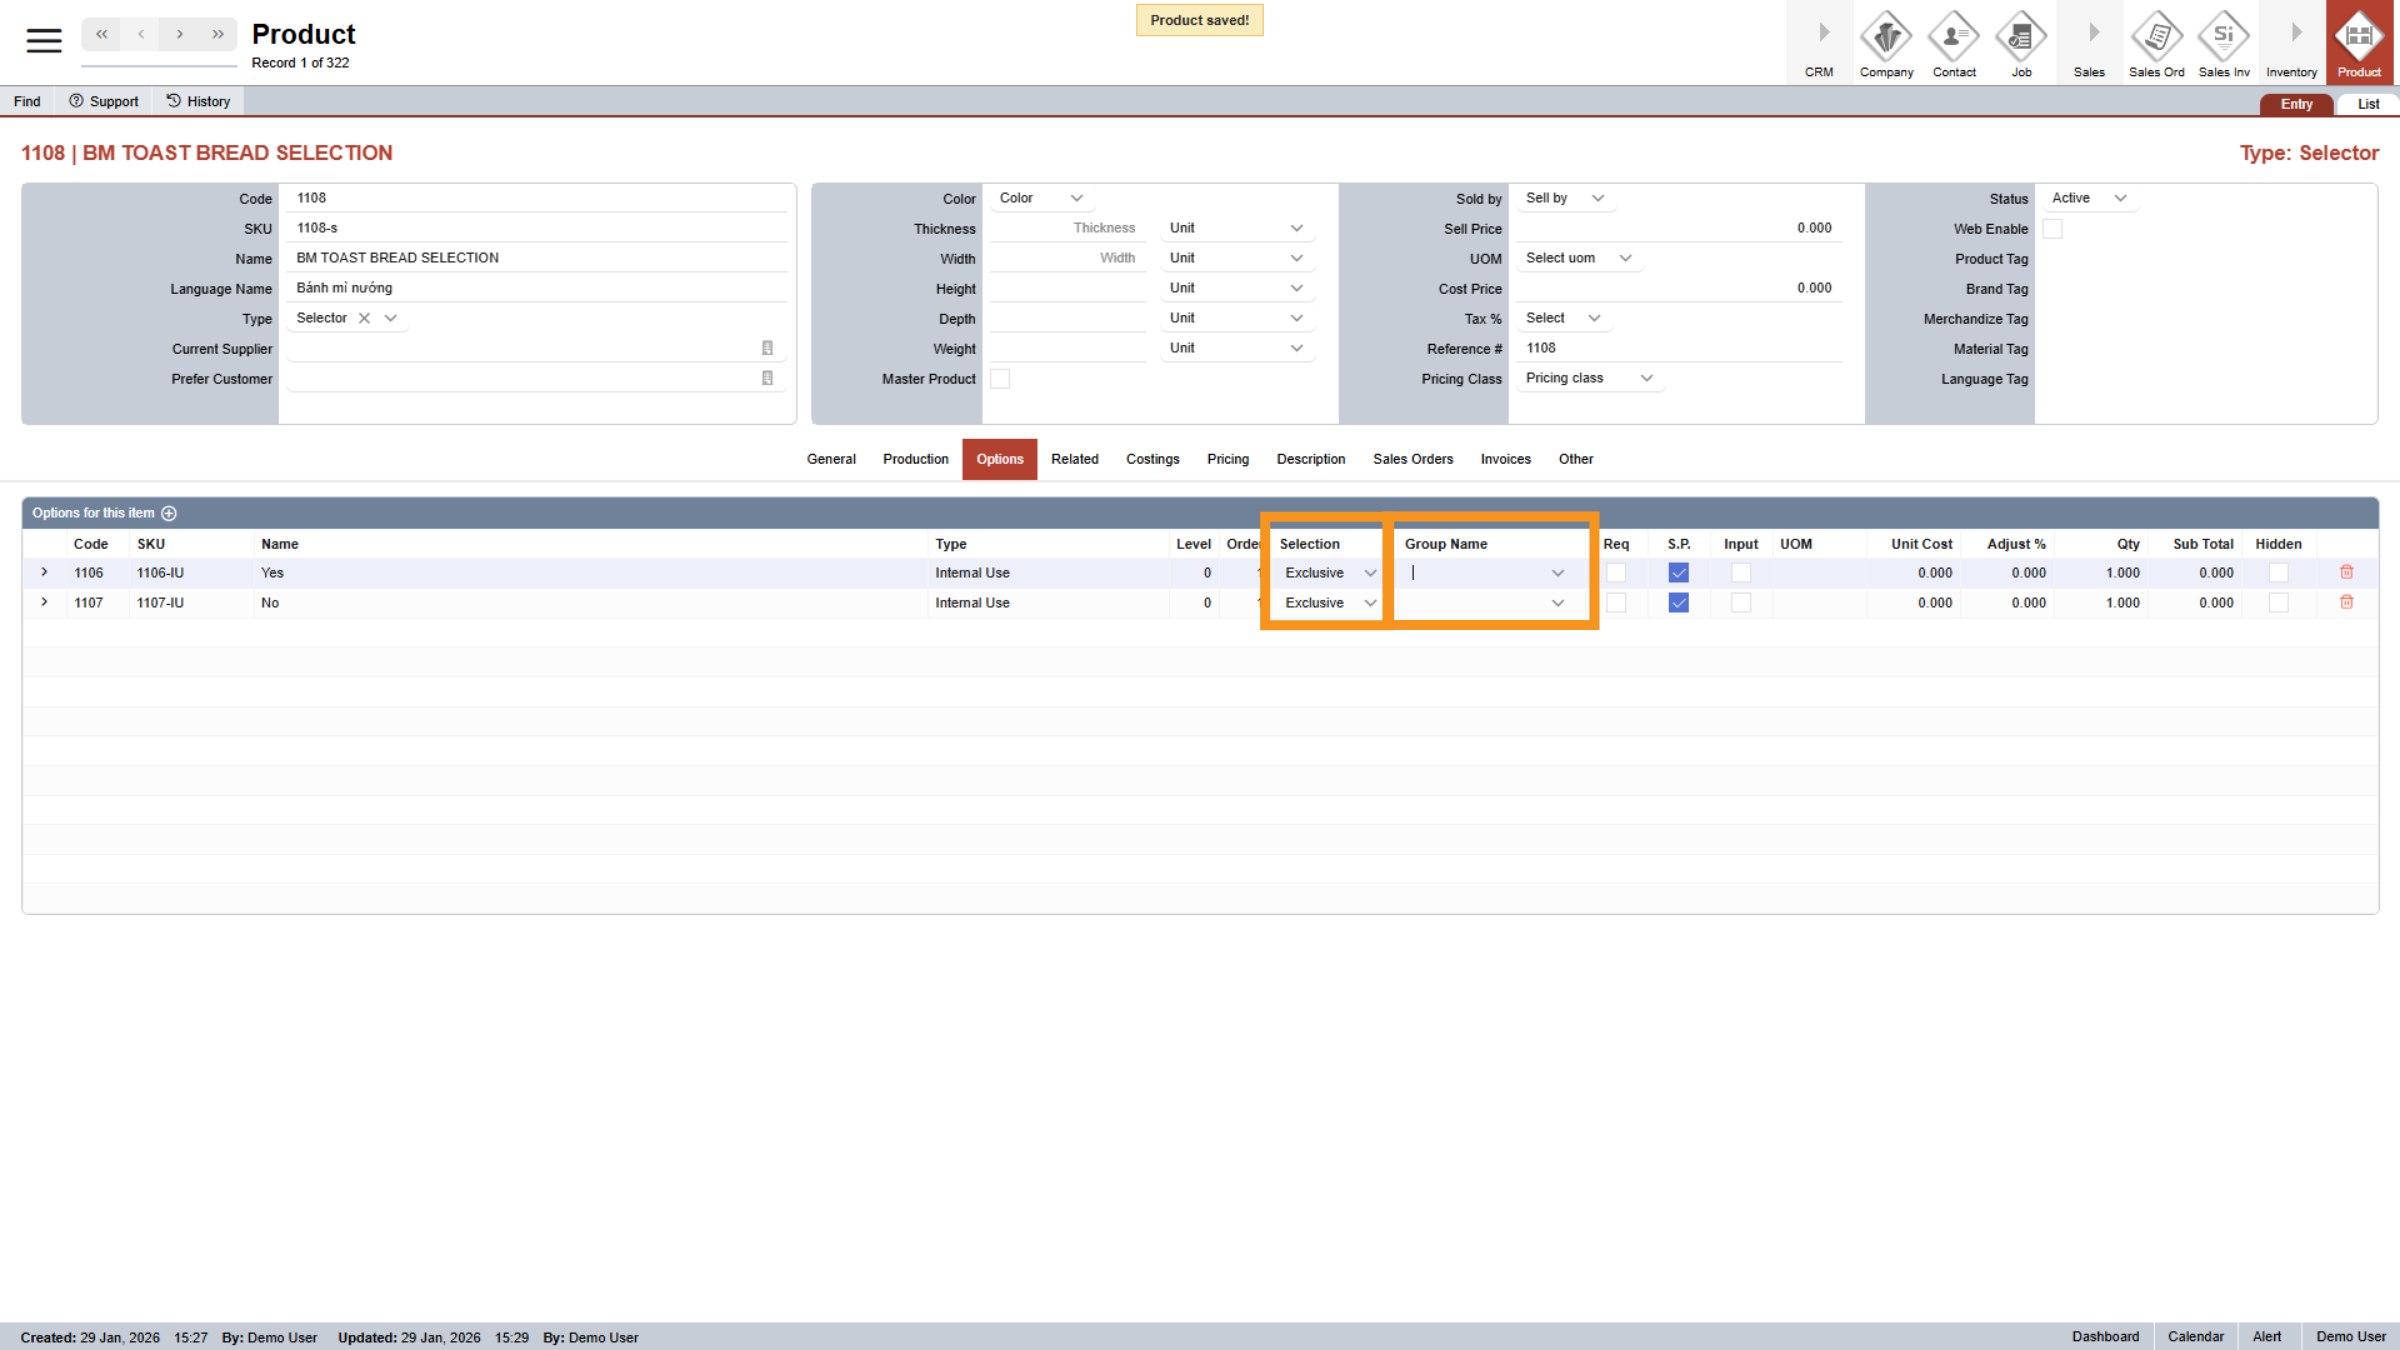
33. Group Name
Group Names help you organize your options and keep your products easy to manage. They are directly linked to the Selection Type you choose. This means all options in a group always share the same Selection Type. Changing the setting for one option instantly updates the entire group.
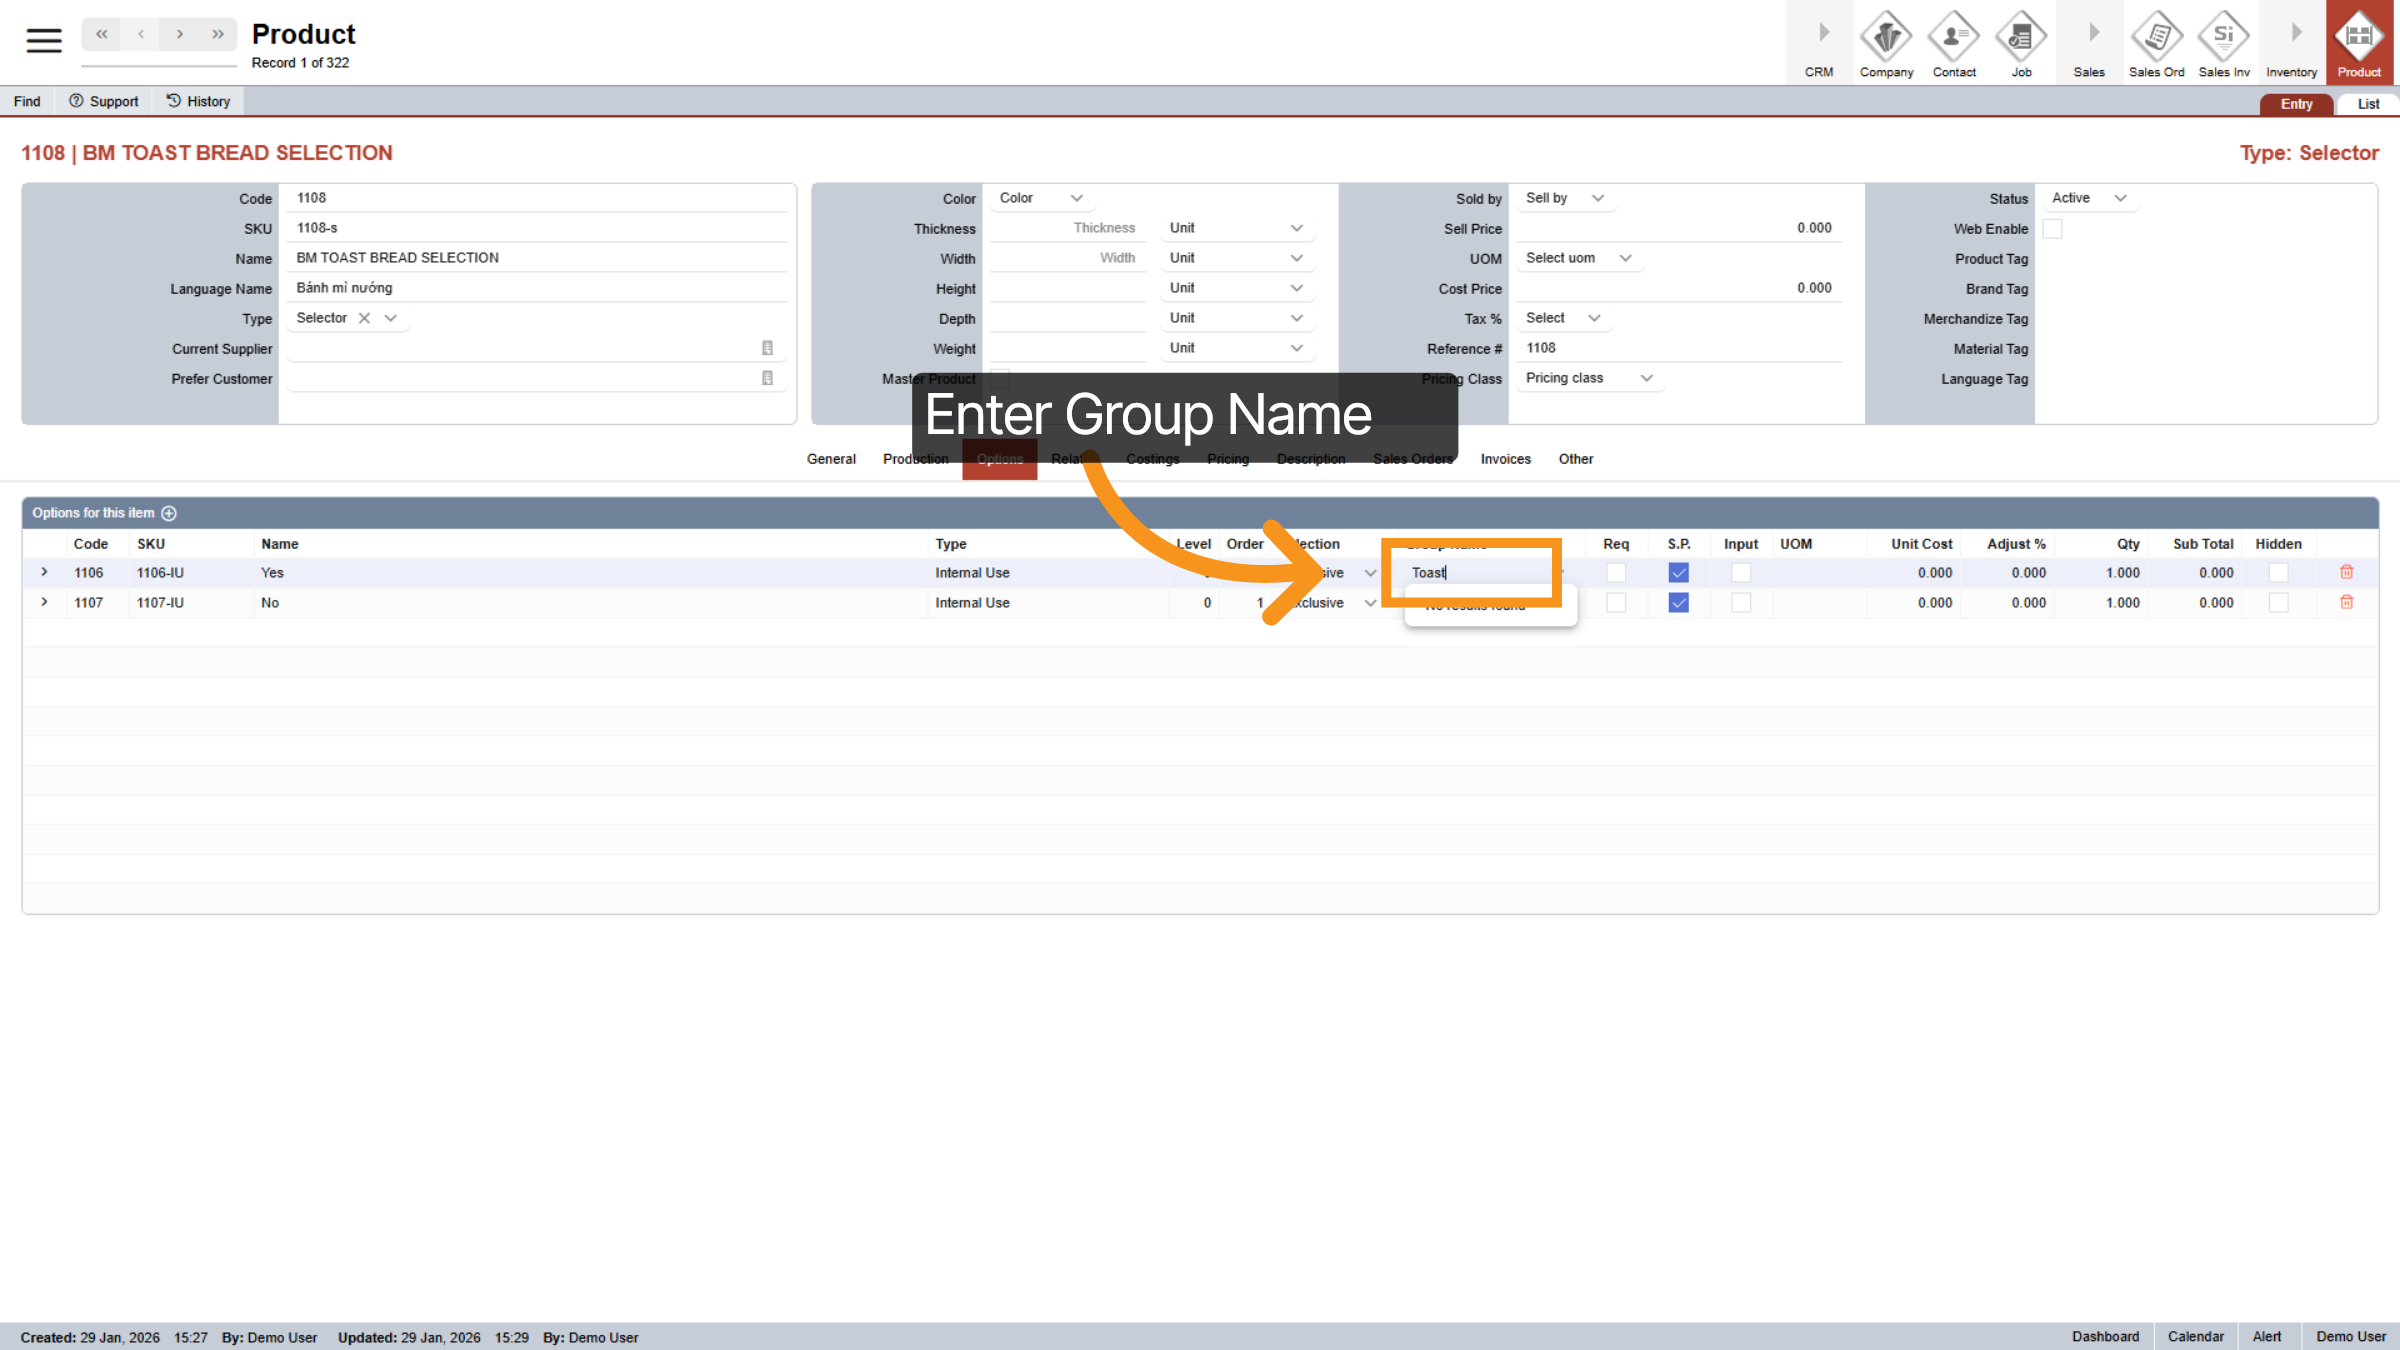
34. Enter Group Name
To create one, just type the name into the field and press Enter.
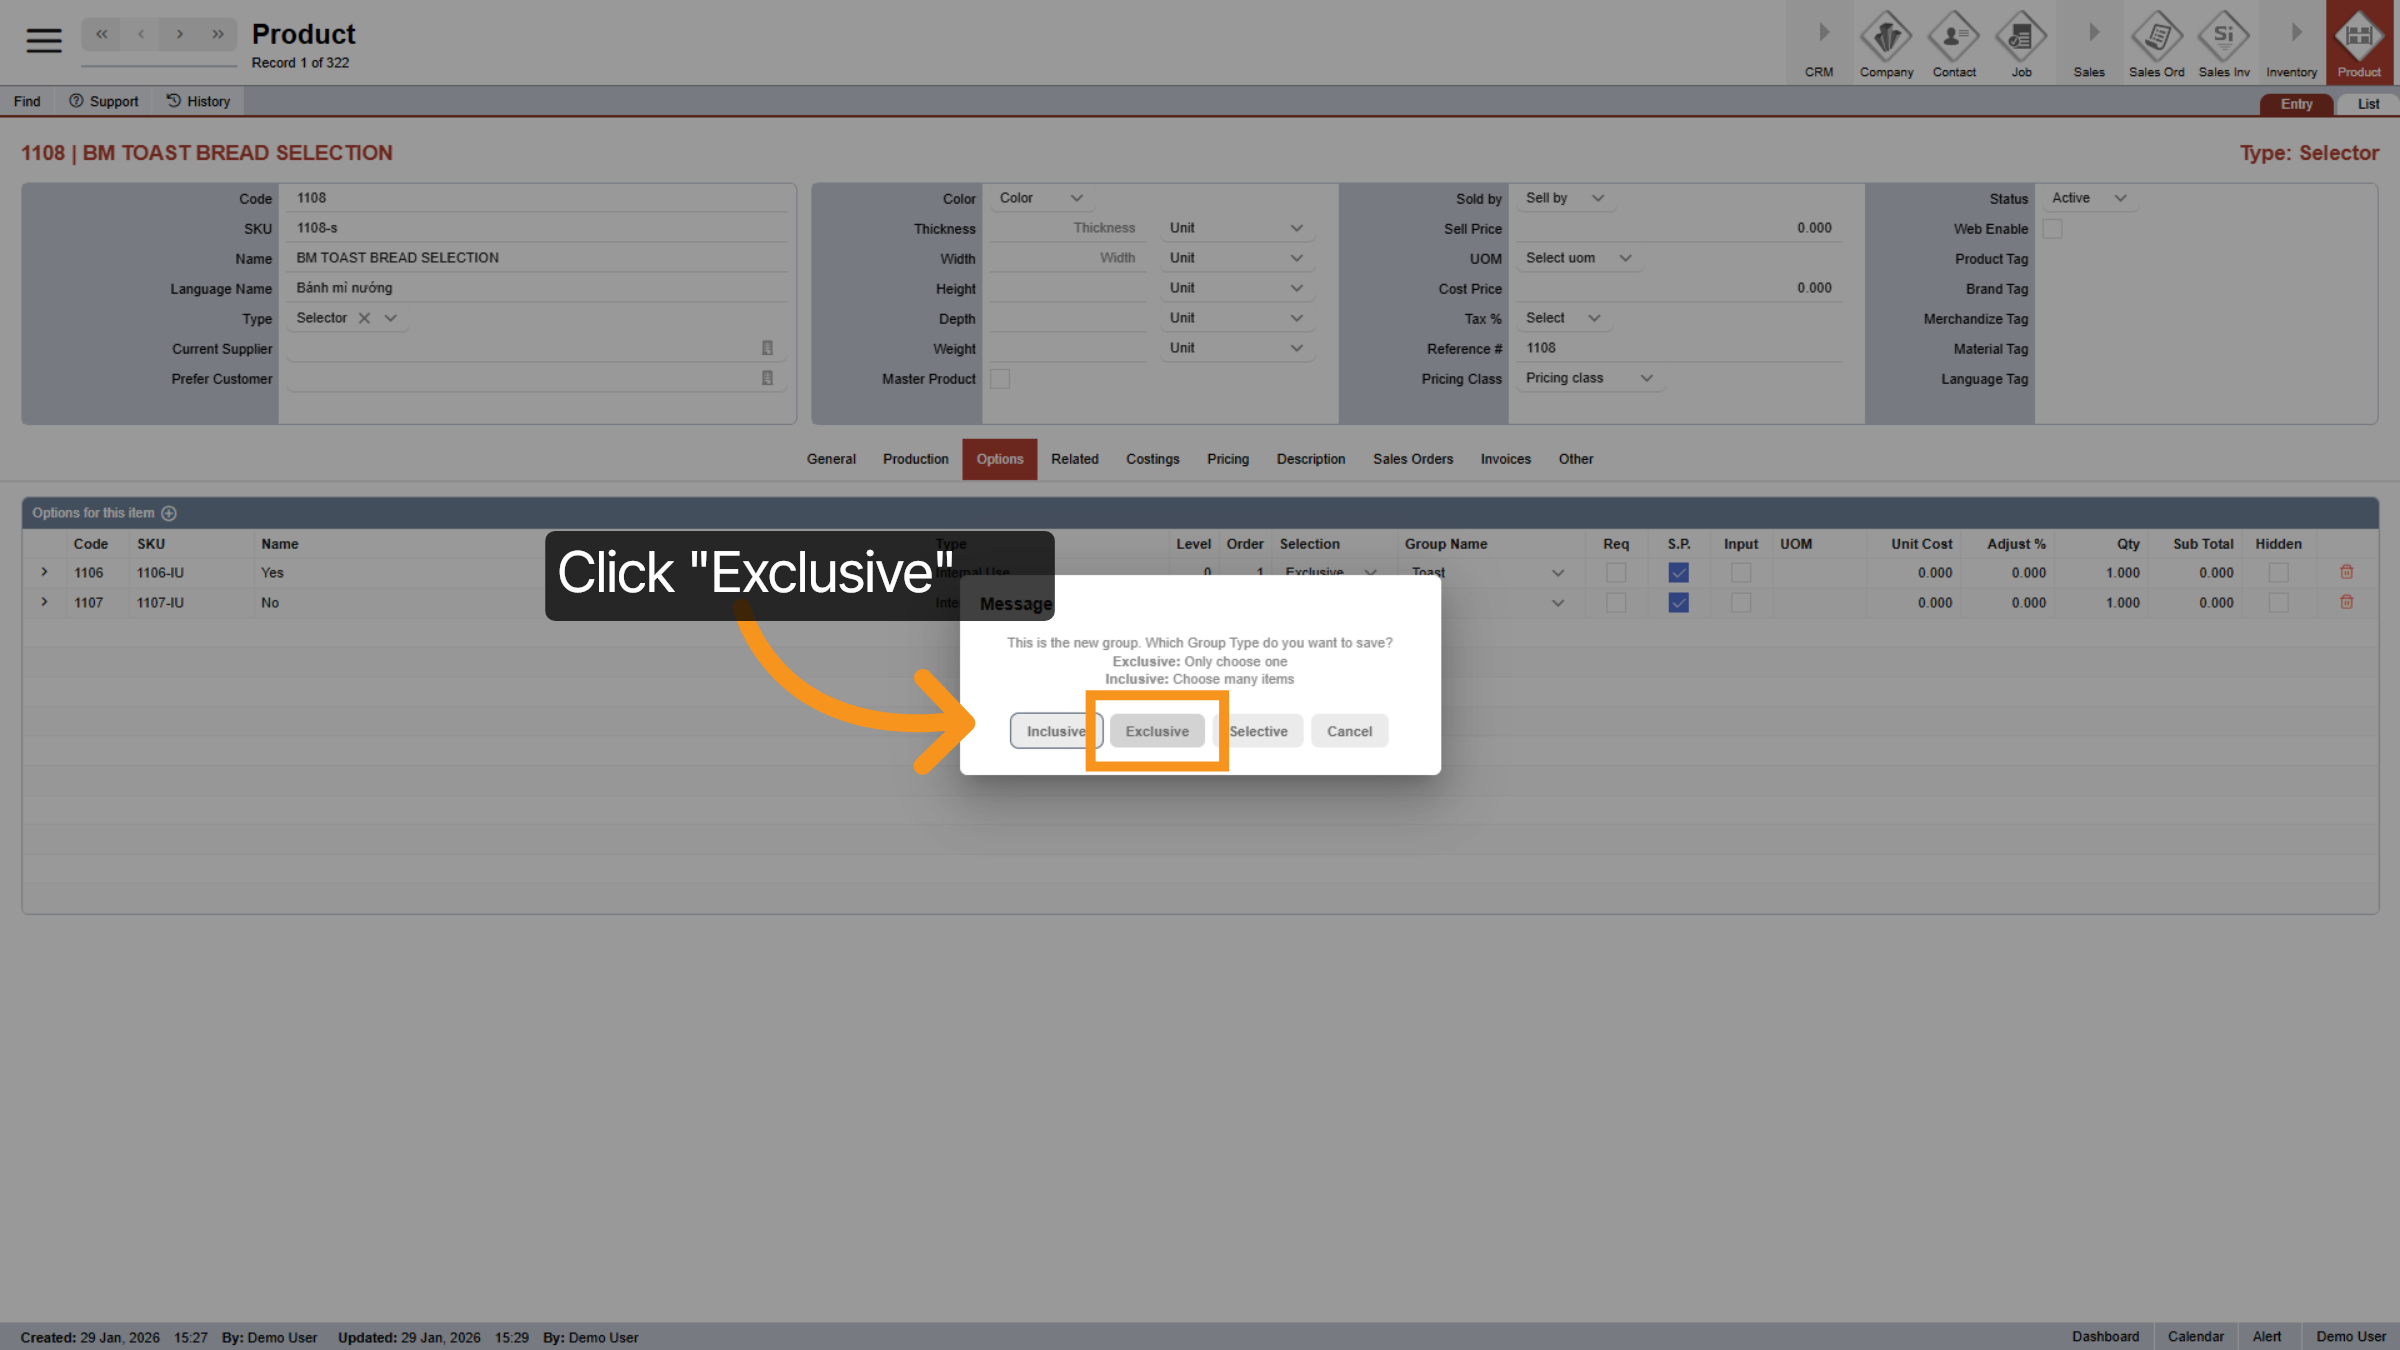
35. Select Selection Type for the Entire Group
The system will then ask you to pick a selection type for the entire grou—like Inclusive or Exclusive—to finish the setup.
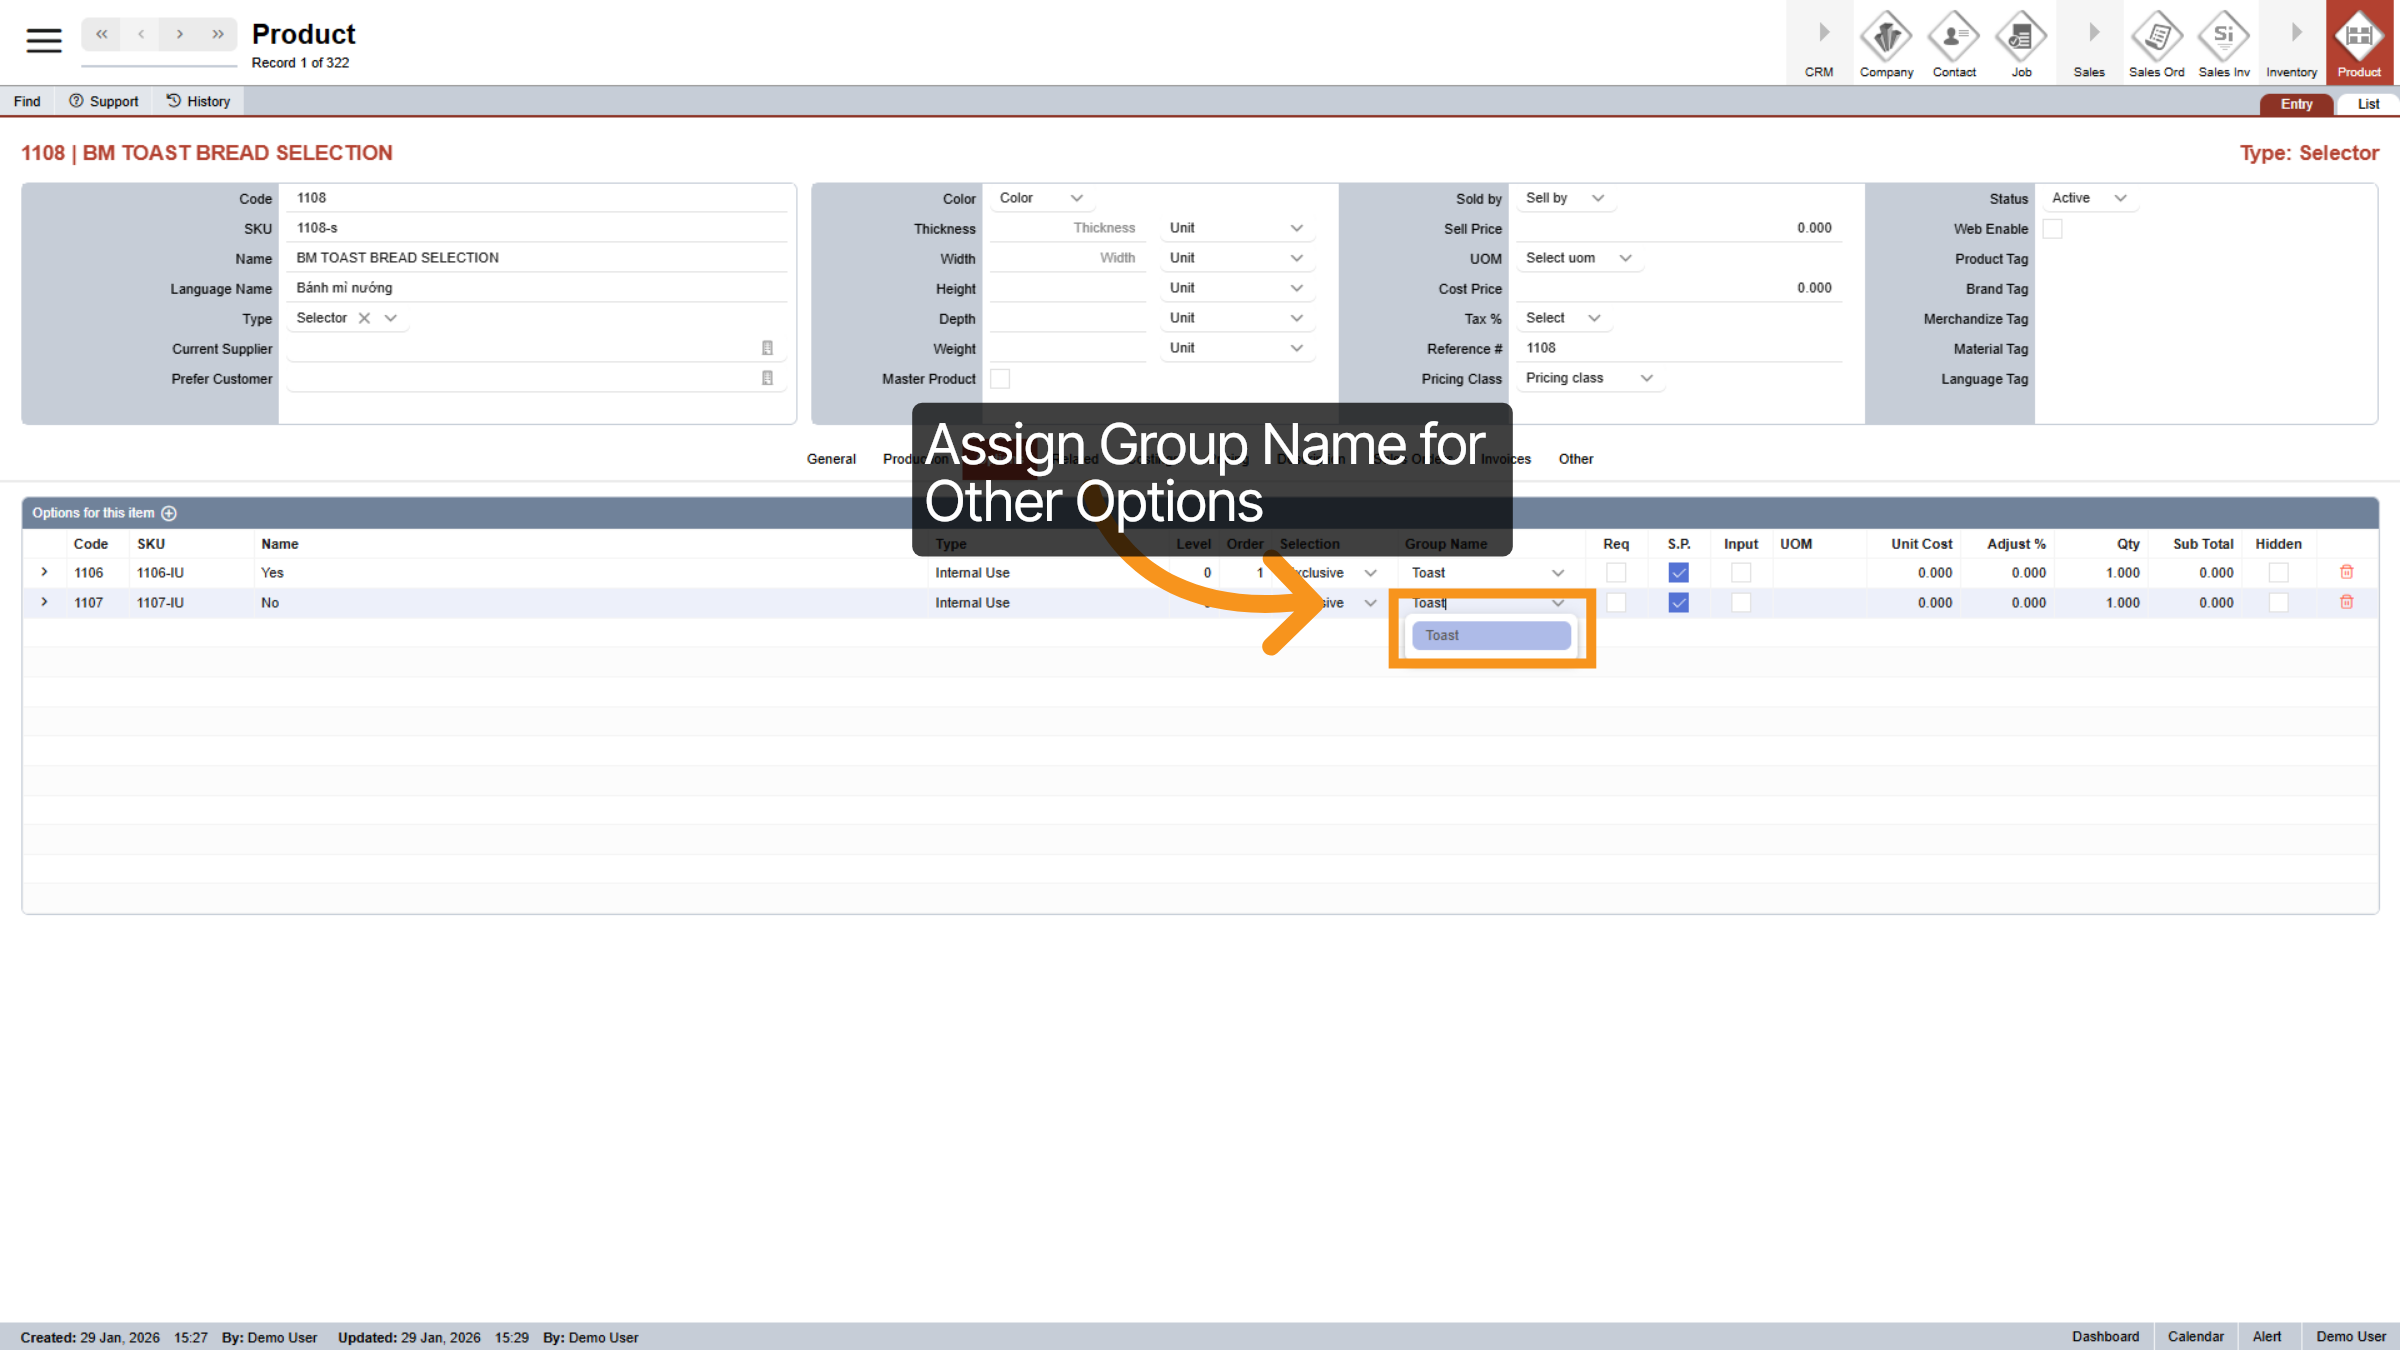
36. Assign Group Name for Other Options
Enter new group name or select the same Group Name for another options.
37. Required Options
Checking 'Required' ensures an option is automatically included and priced when added to a quote or sales order. For Inclusive groups, you can make multiple options mandatory, and they cannot be unselected. For Exclusive and Selective groups, only one option can be 'Required' at a time. This acts as your default choice, though it can still be swapped for a different option if needed.
38. Required Options Continue
"For example, if you want your subs to be Toasted by default, simply mark 'Toasted' as Required in an Exclusive group. The system will automatically select it, but the customer can still switch it to 'Not Toasted' if they prefer. This ensures that one—and only one—of these options is always selected.
39. Same Parent Options
Enable the Same Parent option to use the parent product’s size and quantity for pricing. When selected, all linked options will calculate pricing based on the parent product, and the option’s own size or related details will be ignored. This ensures consistent pricing across the product.
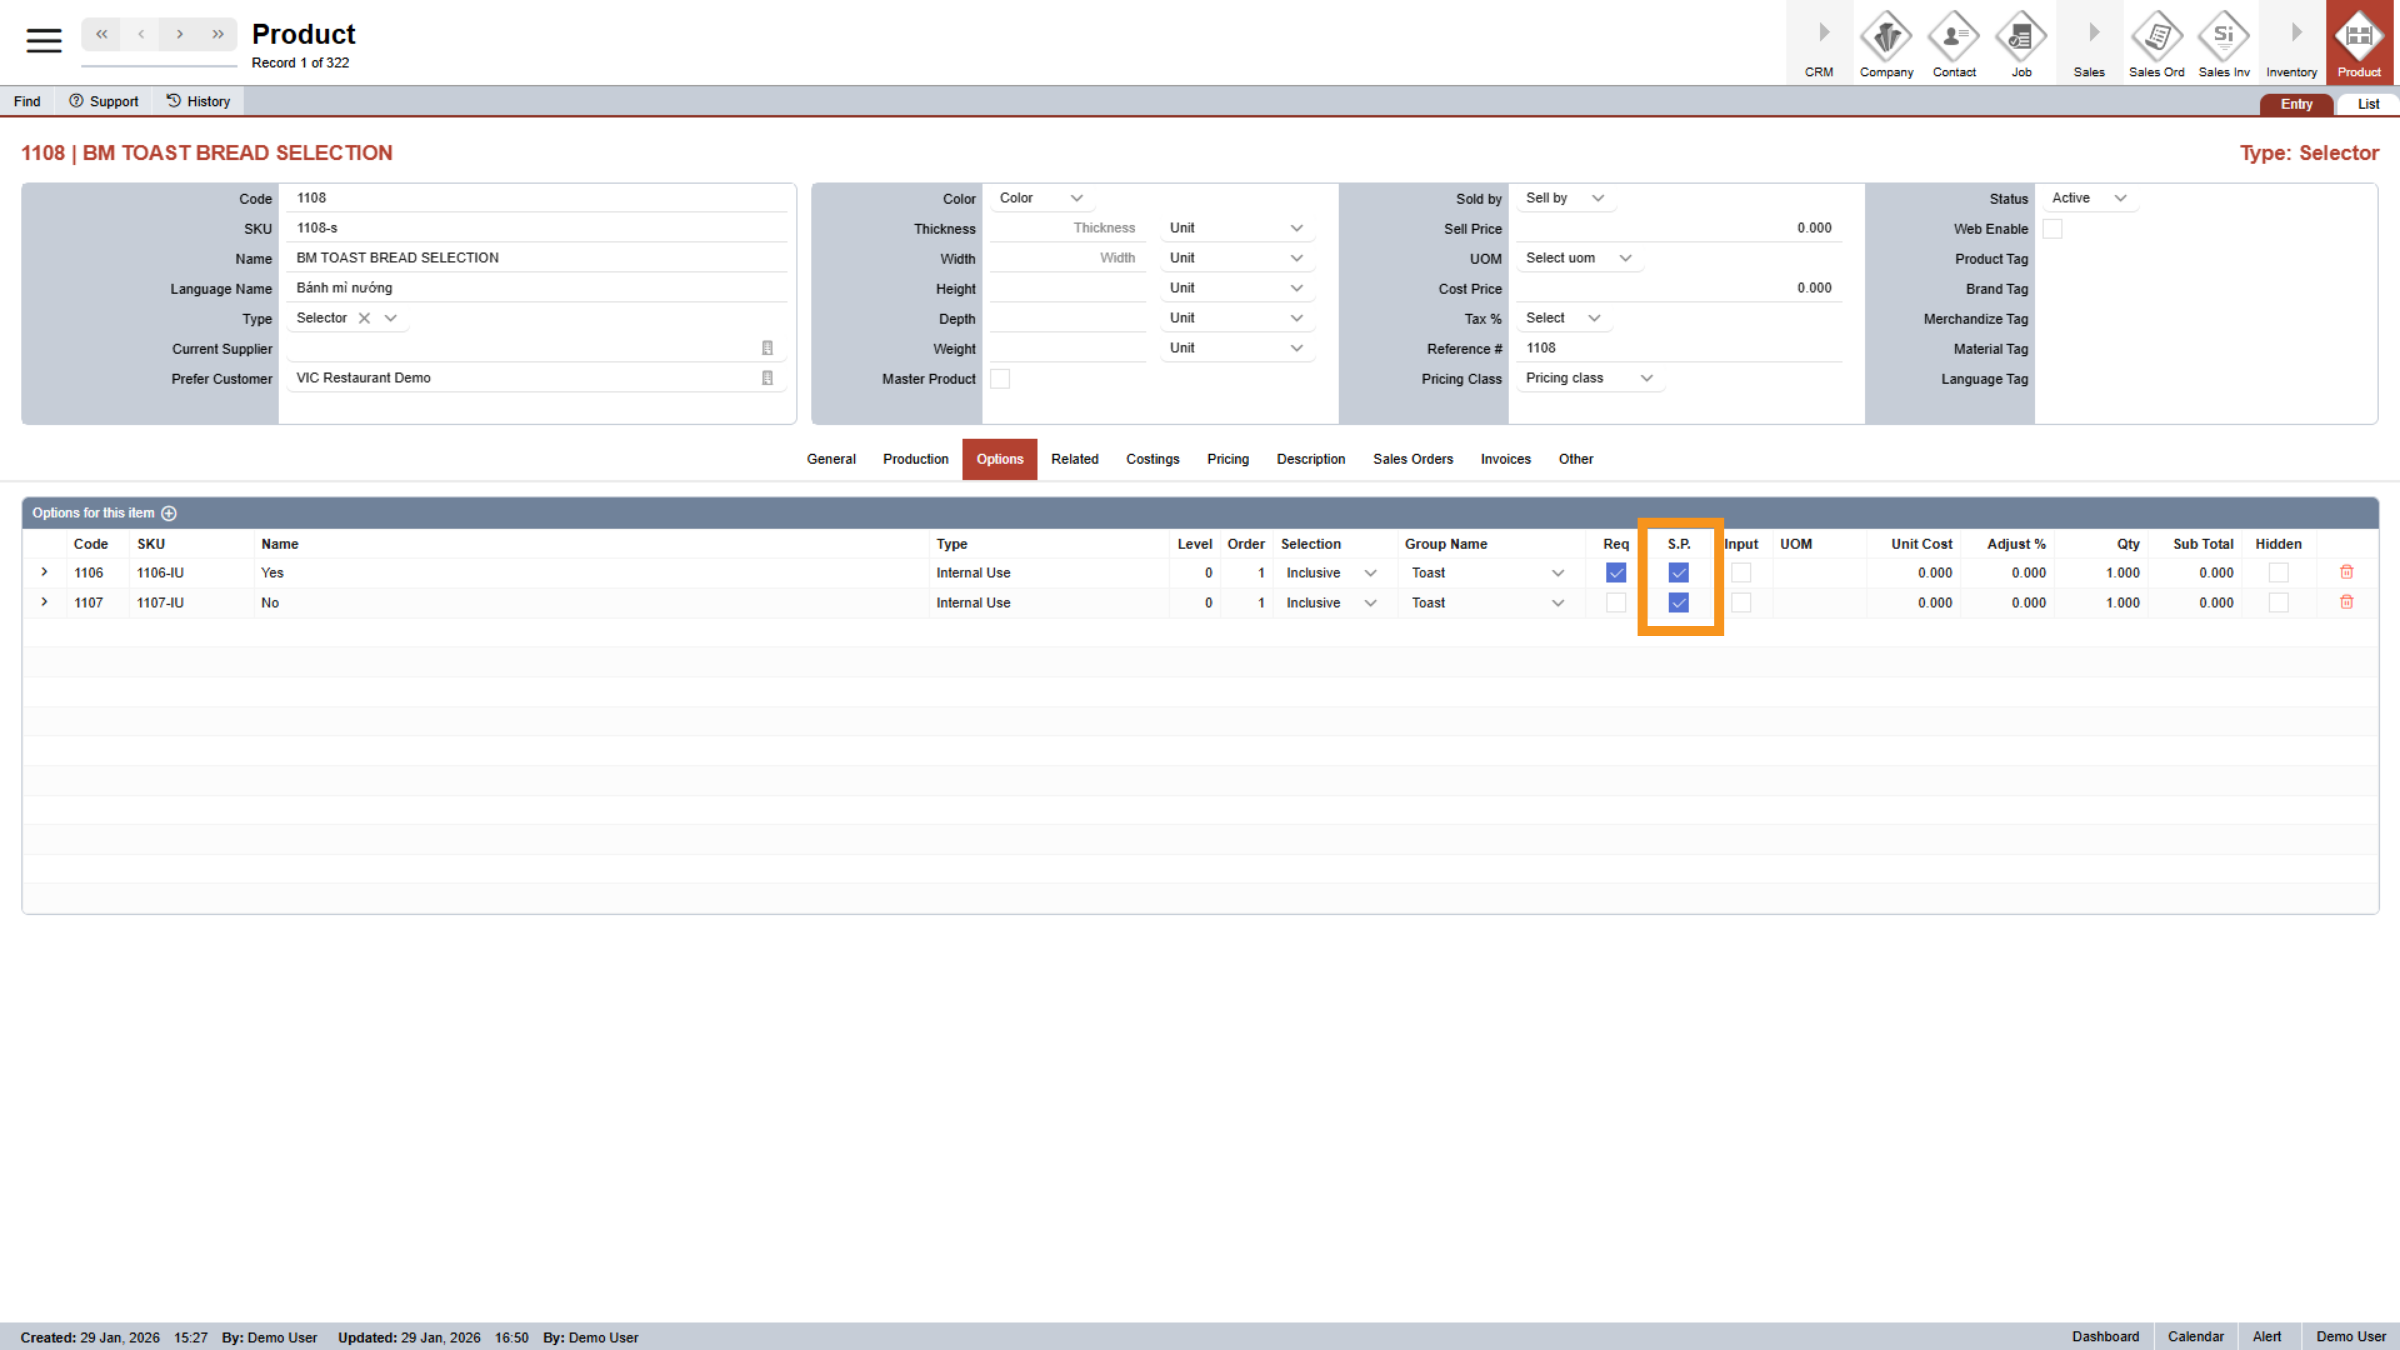
40. Adjust % and Quantity
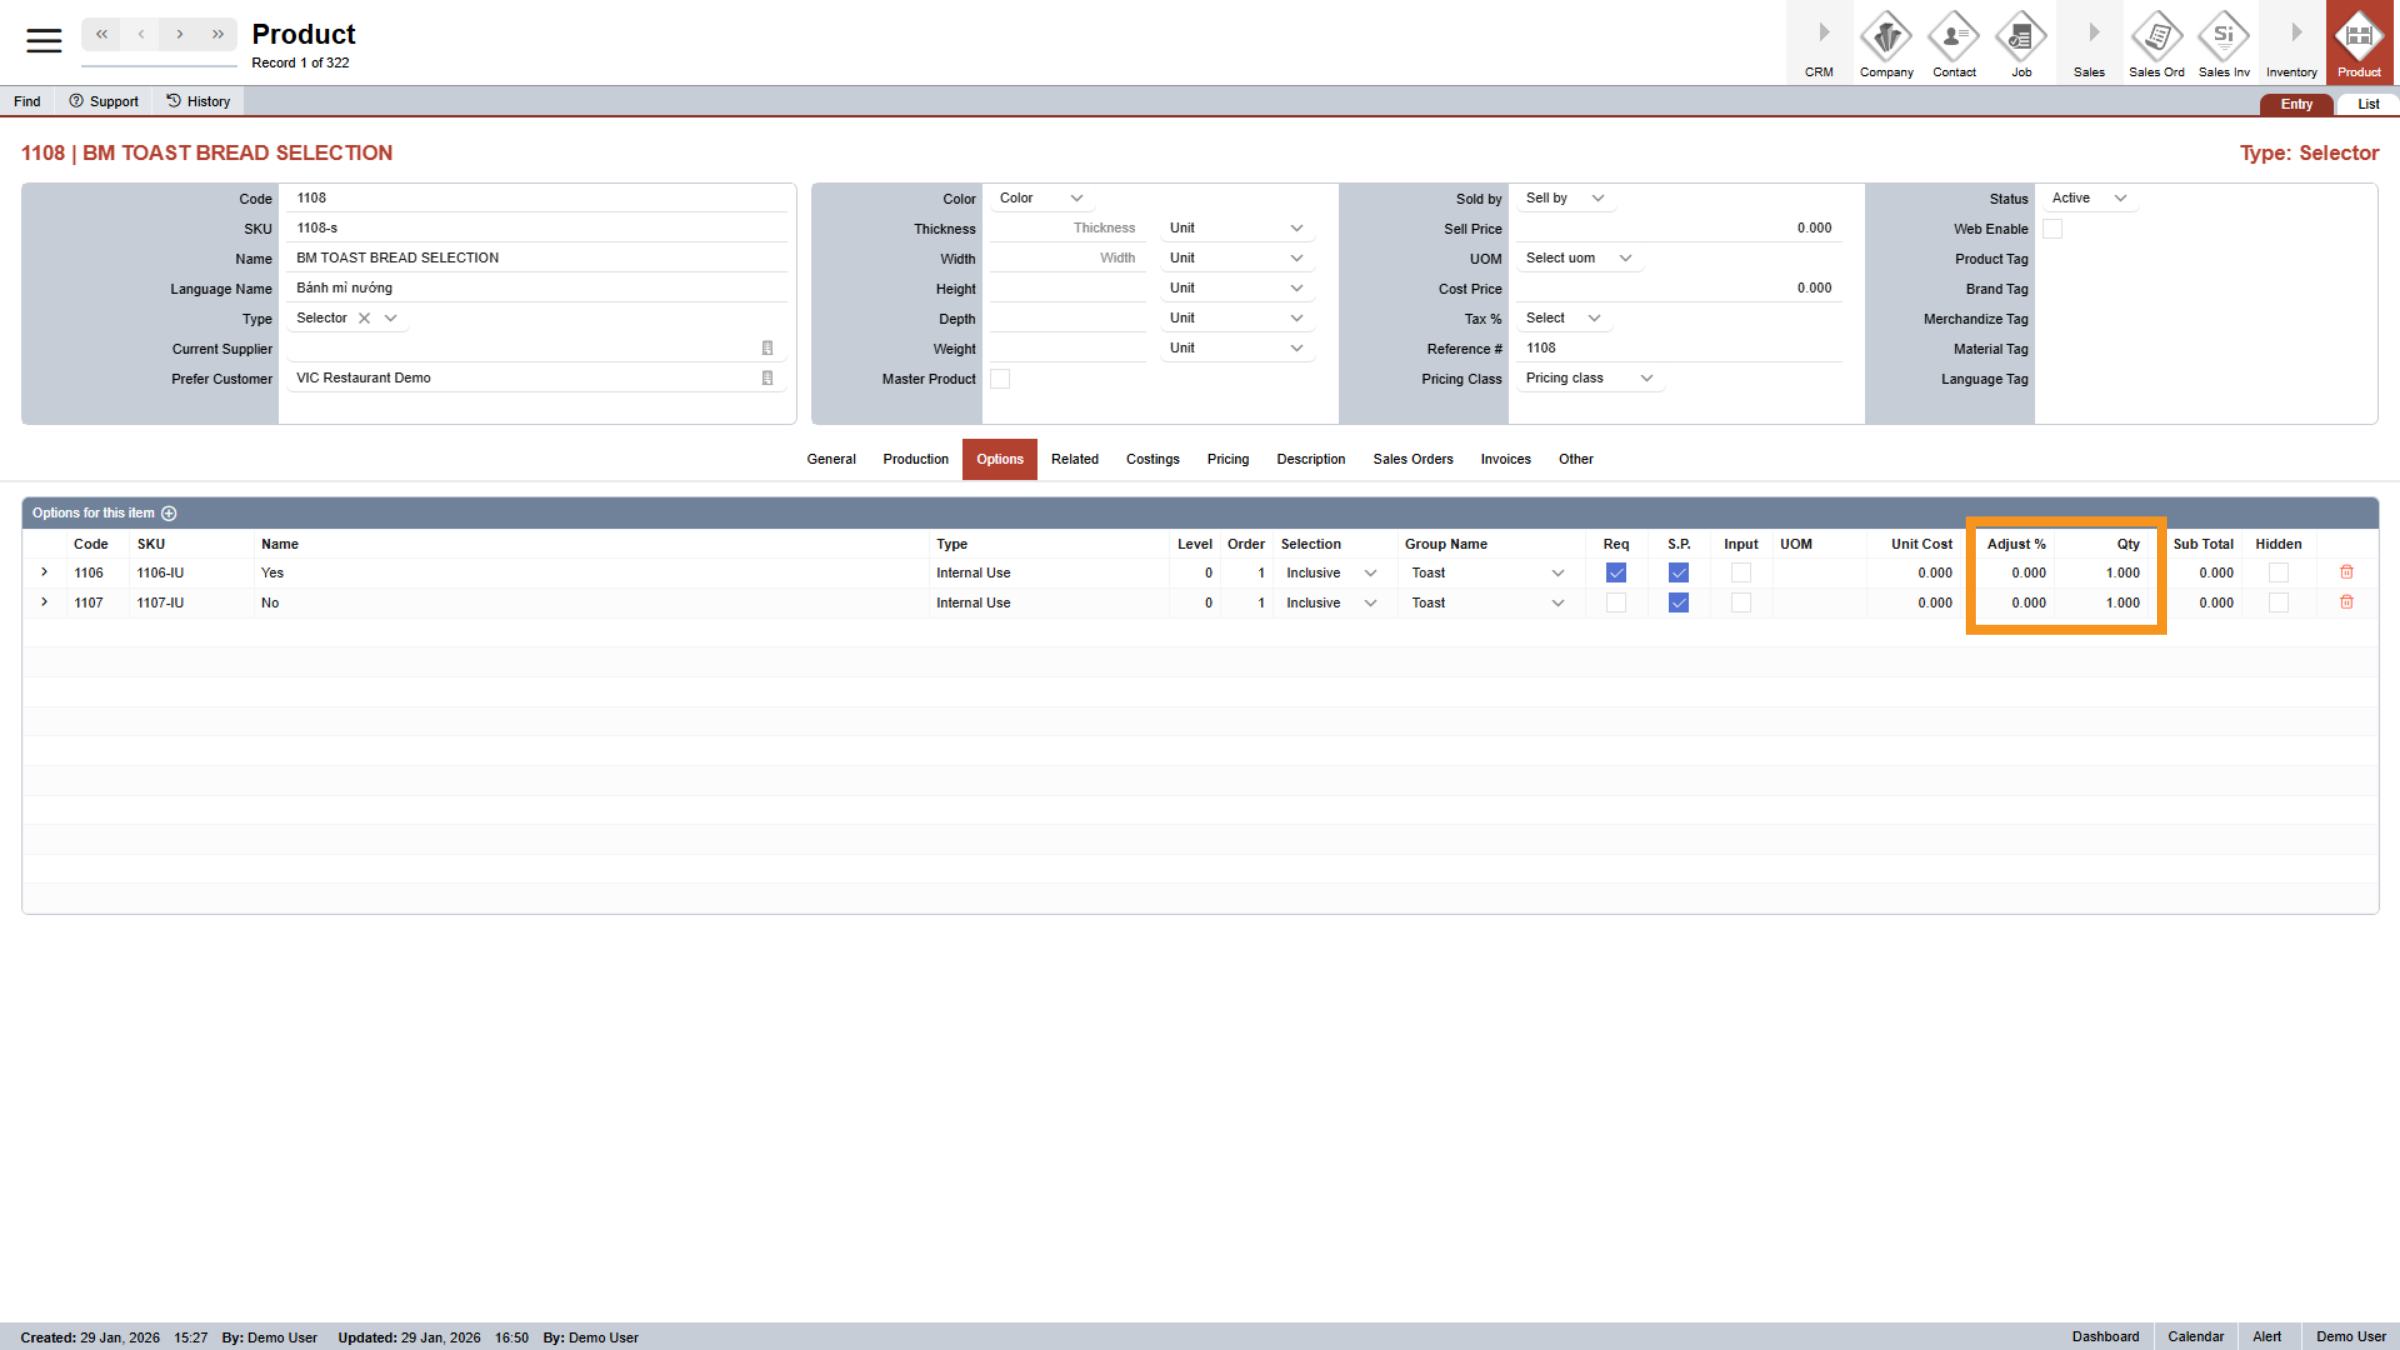
For each product, the Adjust % and Quantity settings allow you to customize how option pricing is calculated. This gives you greater flexibility and confidence when setting the final selling price.
41. Hidden Options
In some cases, you may want to hide certain options from customers in both the online store and quotation documents while still including their pricing. This is known as hidden pricing. When the Hidden is checked, the option will not be visible to customers, but its cost will still be included in the final product price.

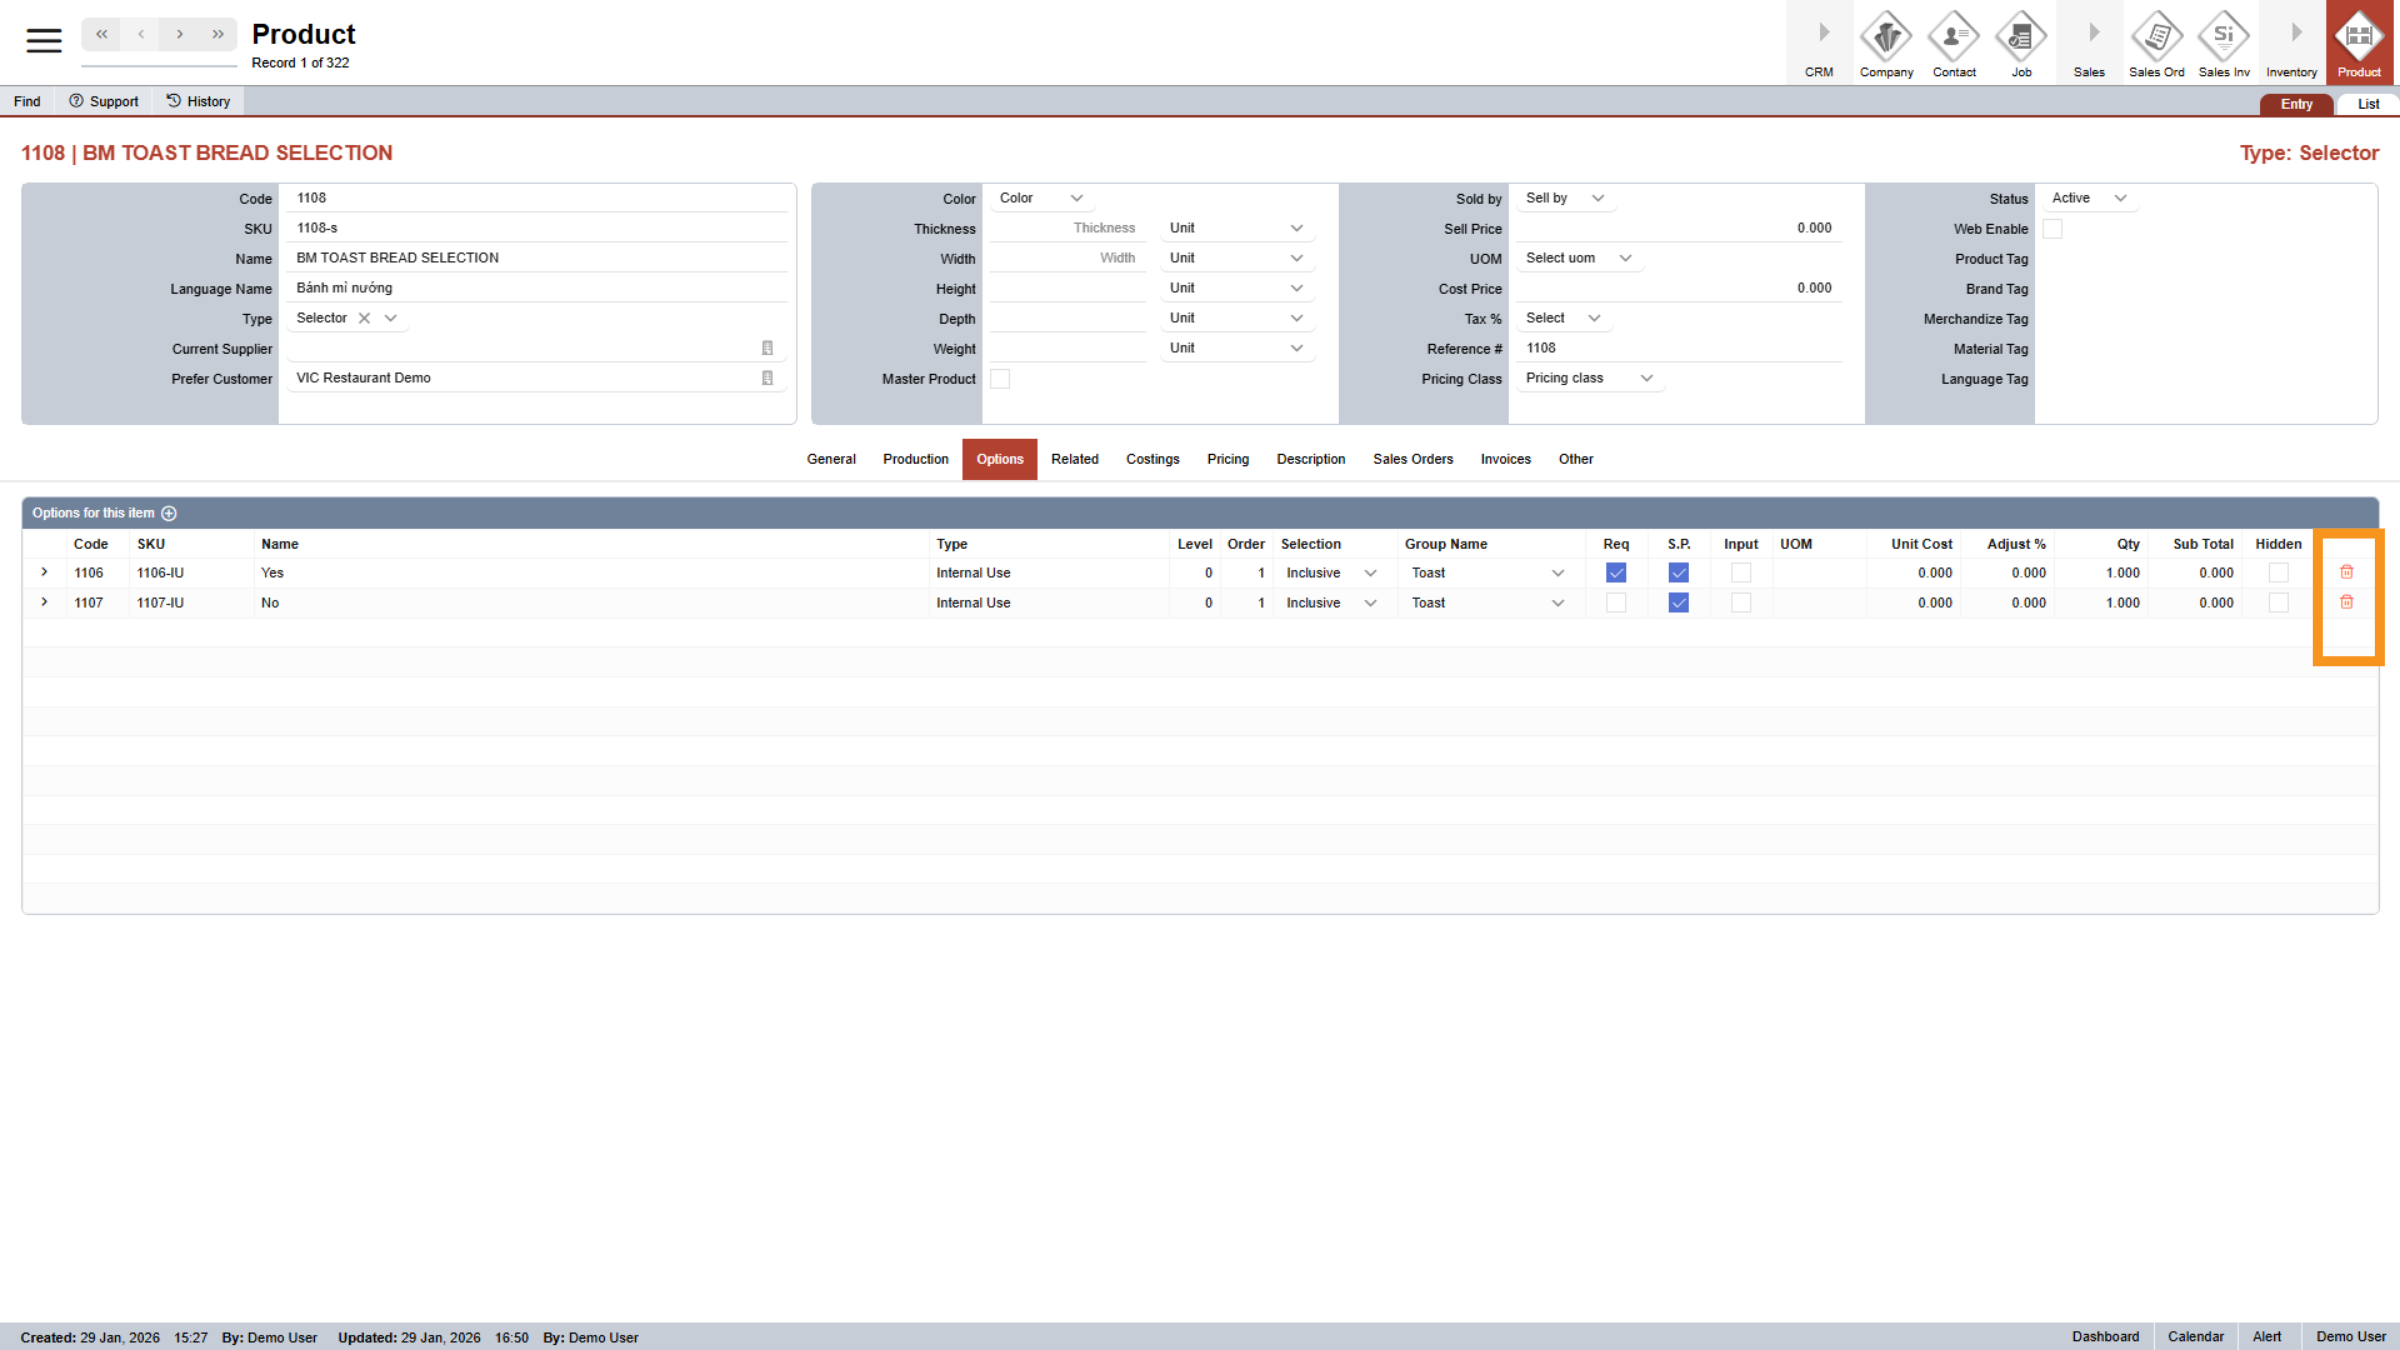
42. Delete Options
Click the Delete icon at the end of an option to remove it from the product.
You have successfully configured internal use products in the Serviz application by creating and managing product codes, options, and categories. Review your entries to ensure accuracy and proceed with related product management tasks as needed.