Add Company Locations
This guide walks you through how to manage company locations and their contacts in the Worktraq App.
Video Tutorial
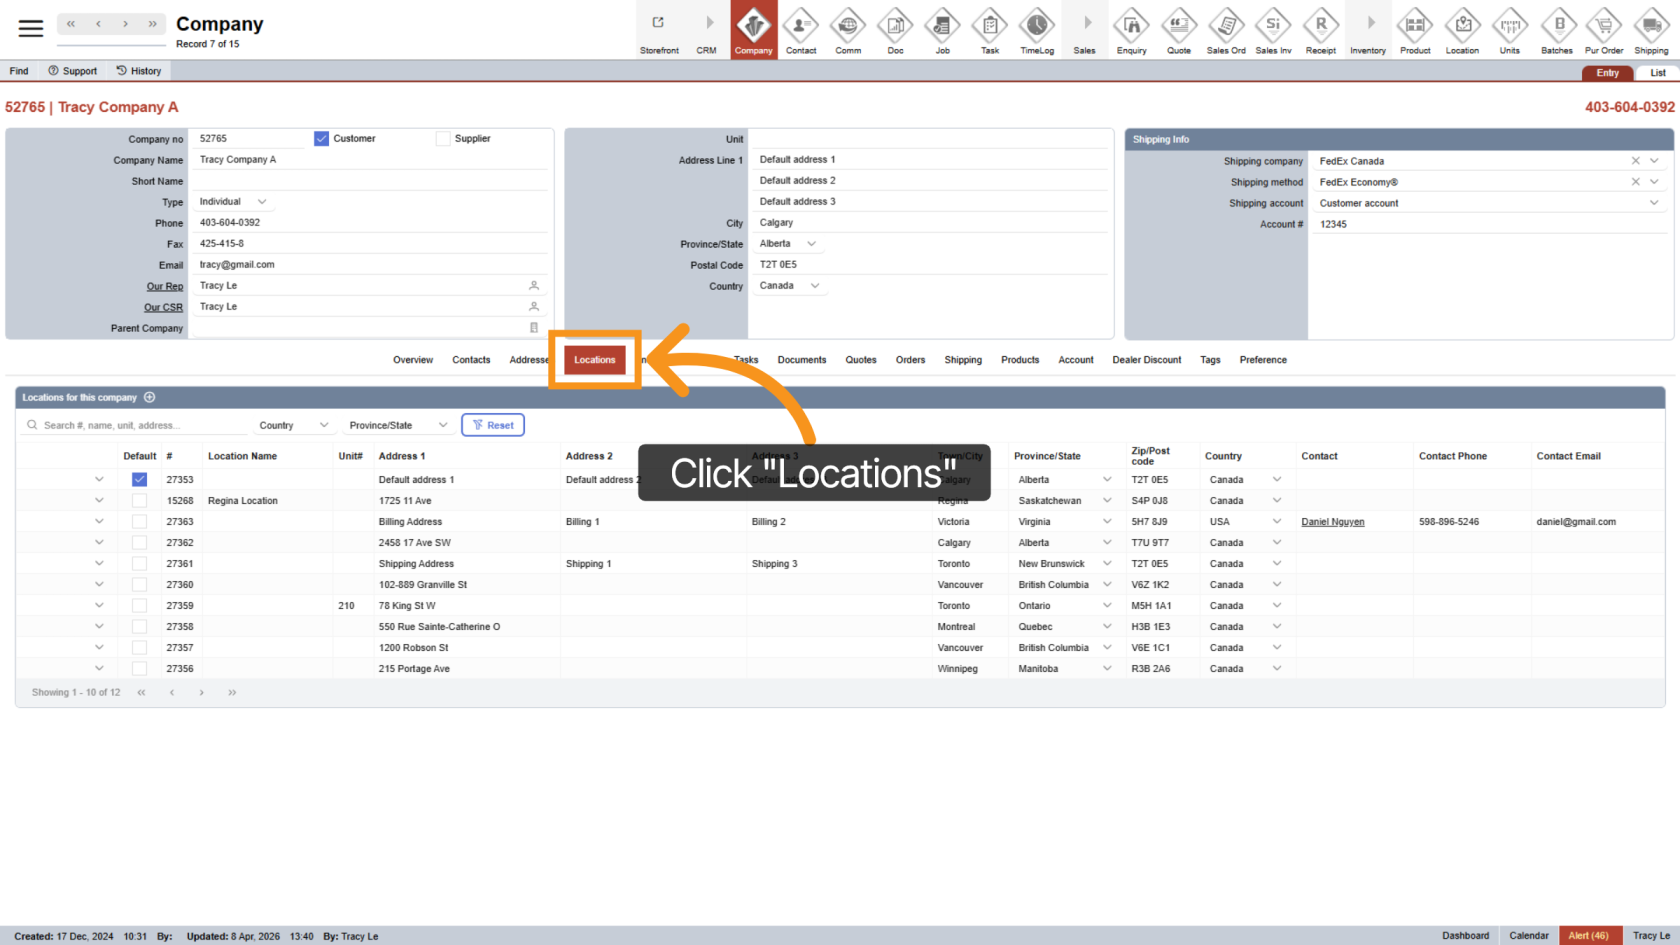
1. Open Locations
Click "Location" from the middle menu to view all company locations.
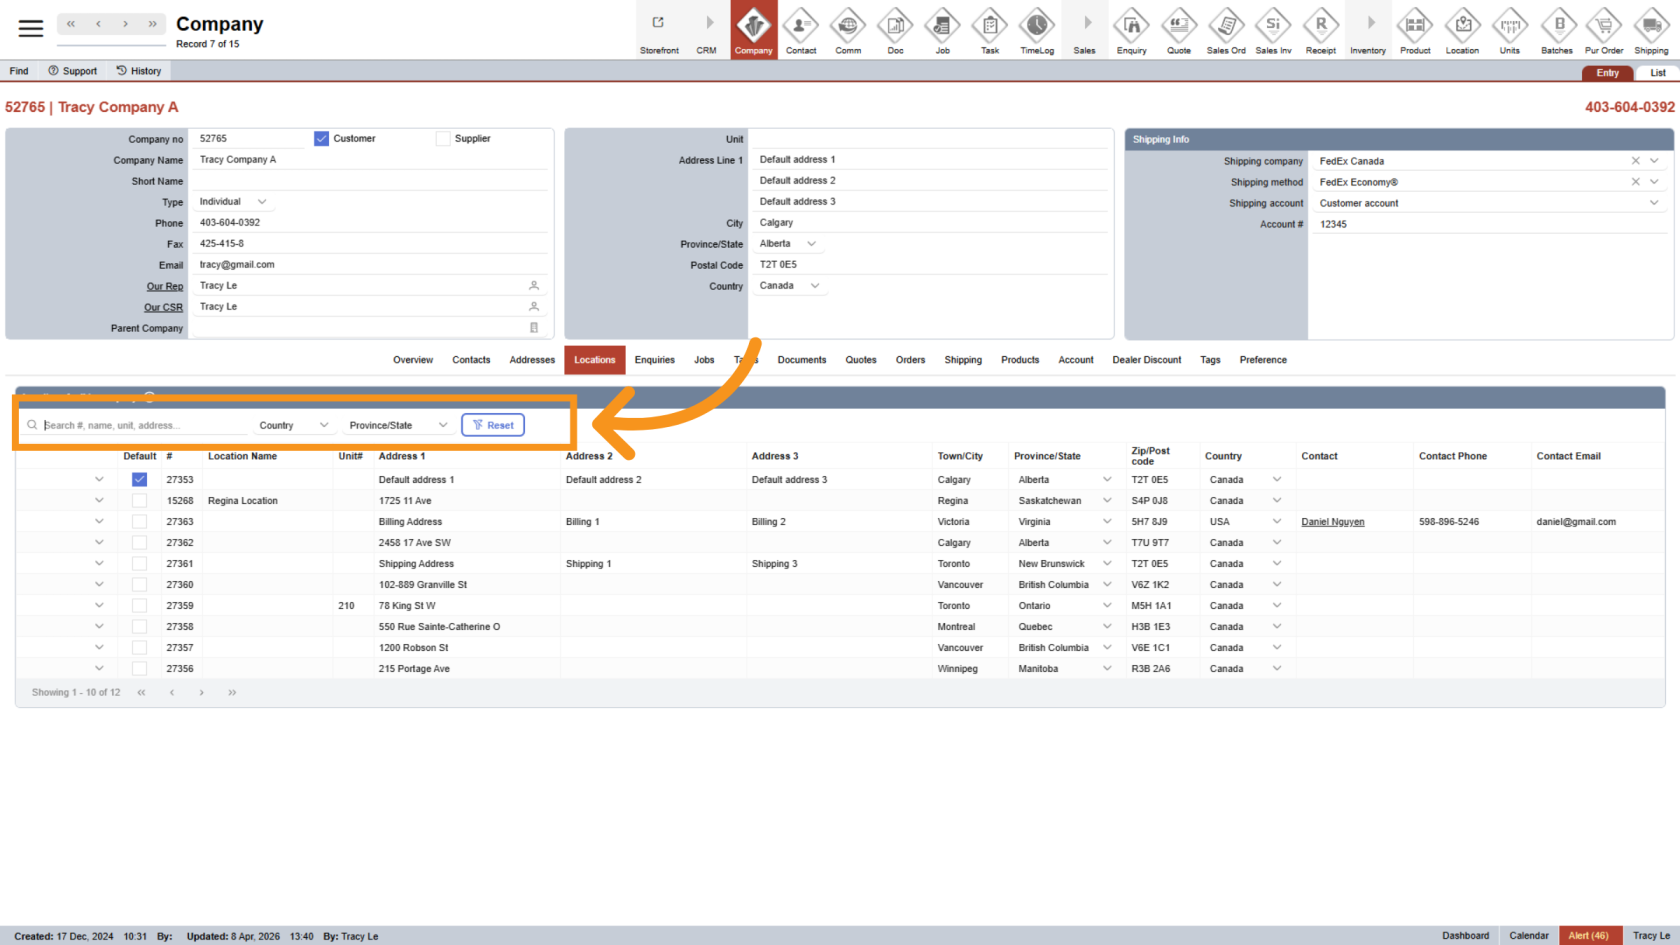
2. Use the Search Bar
At the top of the table, use the search bar to quickly find locations.
You can combine multiple filters to narrow down your results.
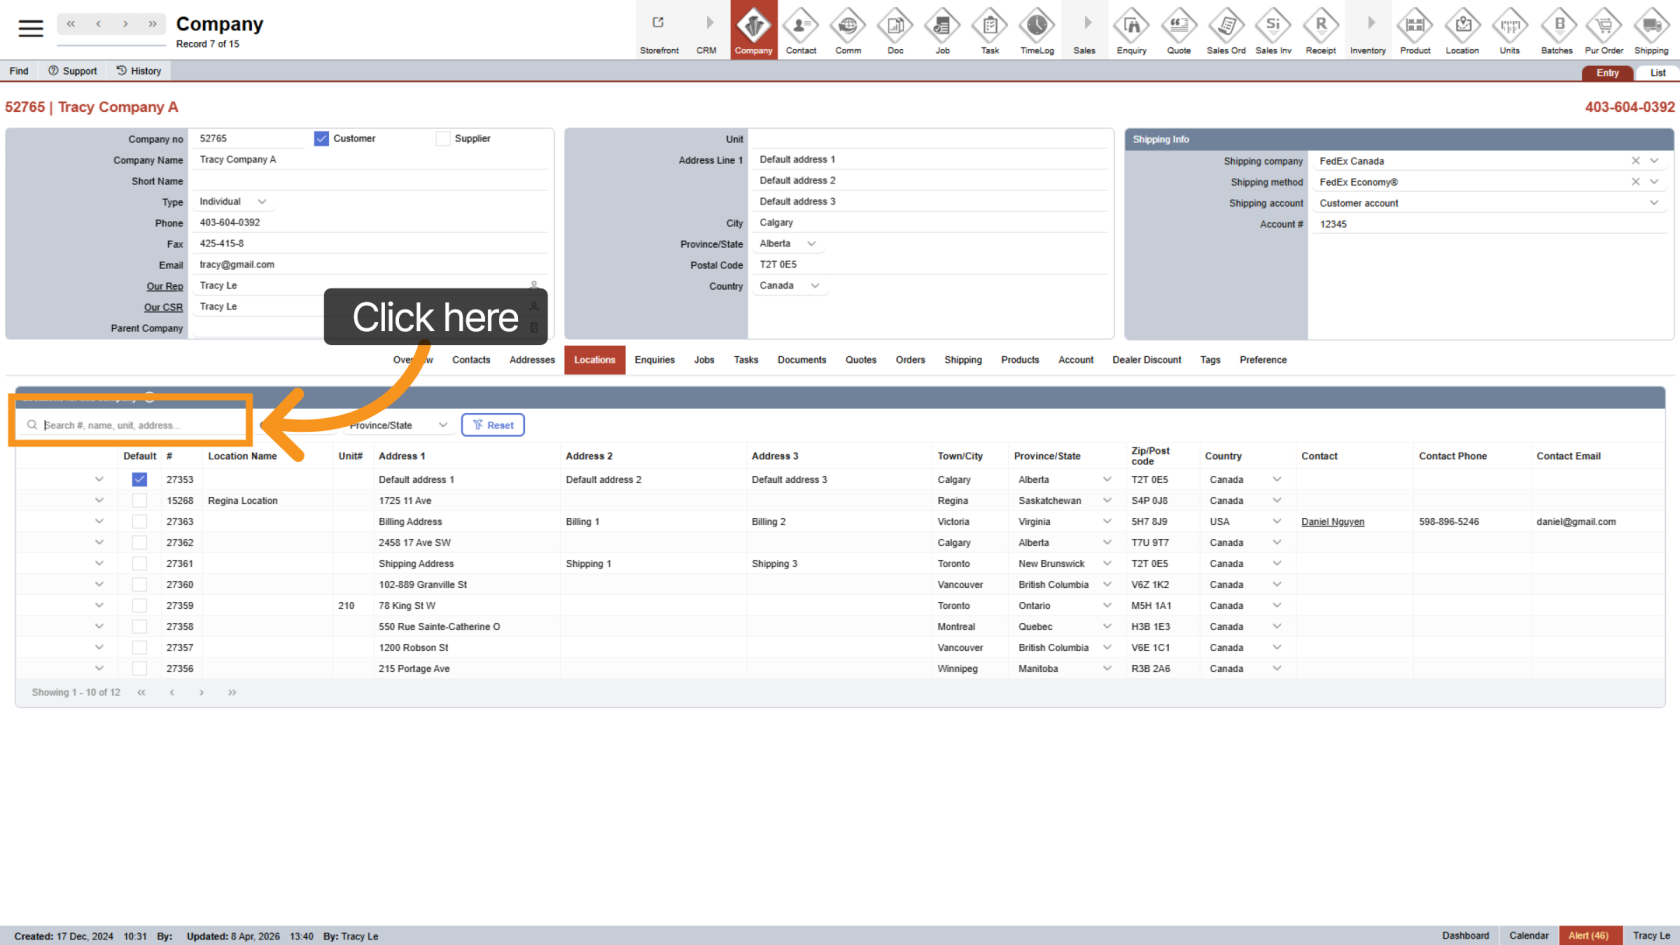
3. Enter Search Details
Type in any of the following to search:
- Location number
- Location name
- Unit number
- Address
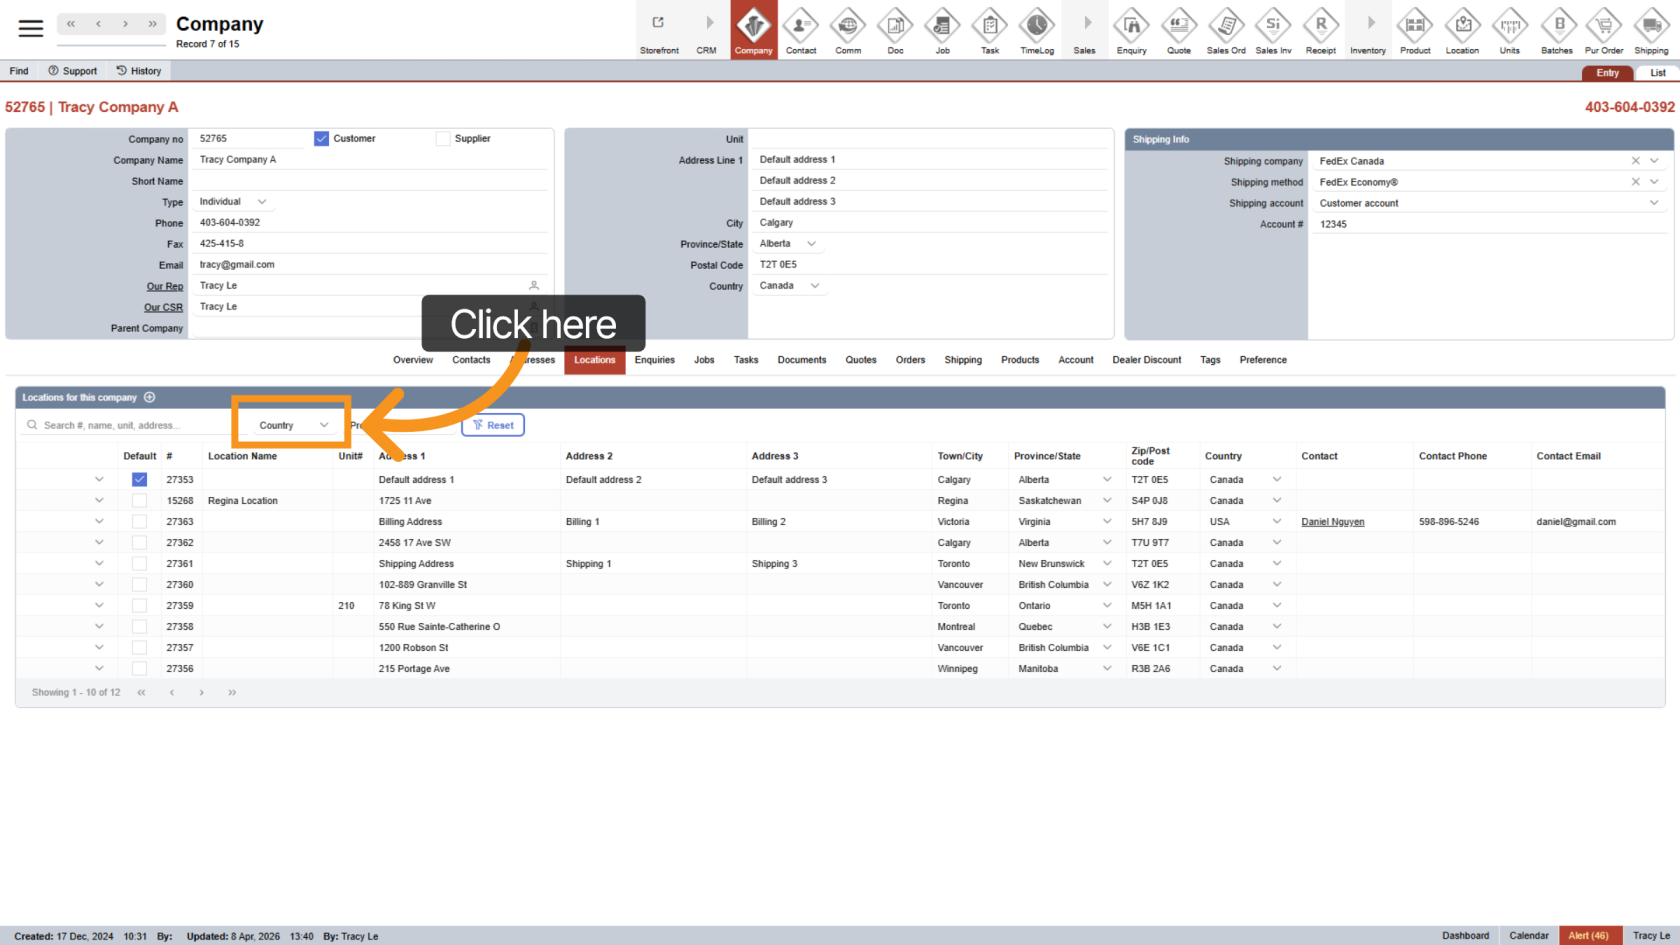
4. Filter by Country
Select a country to show locations within that region.
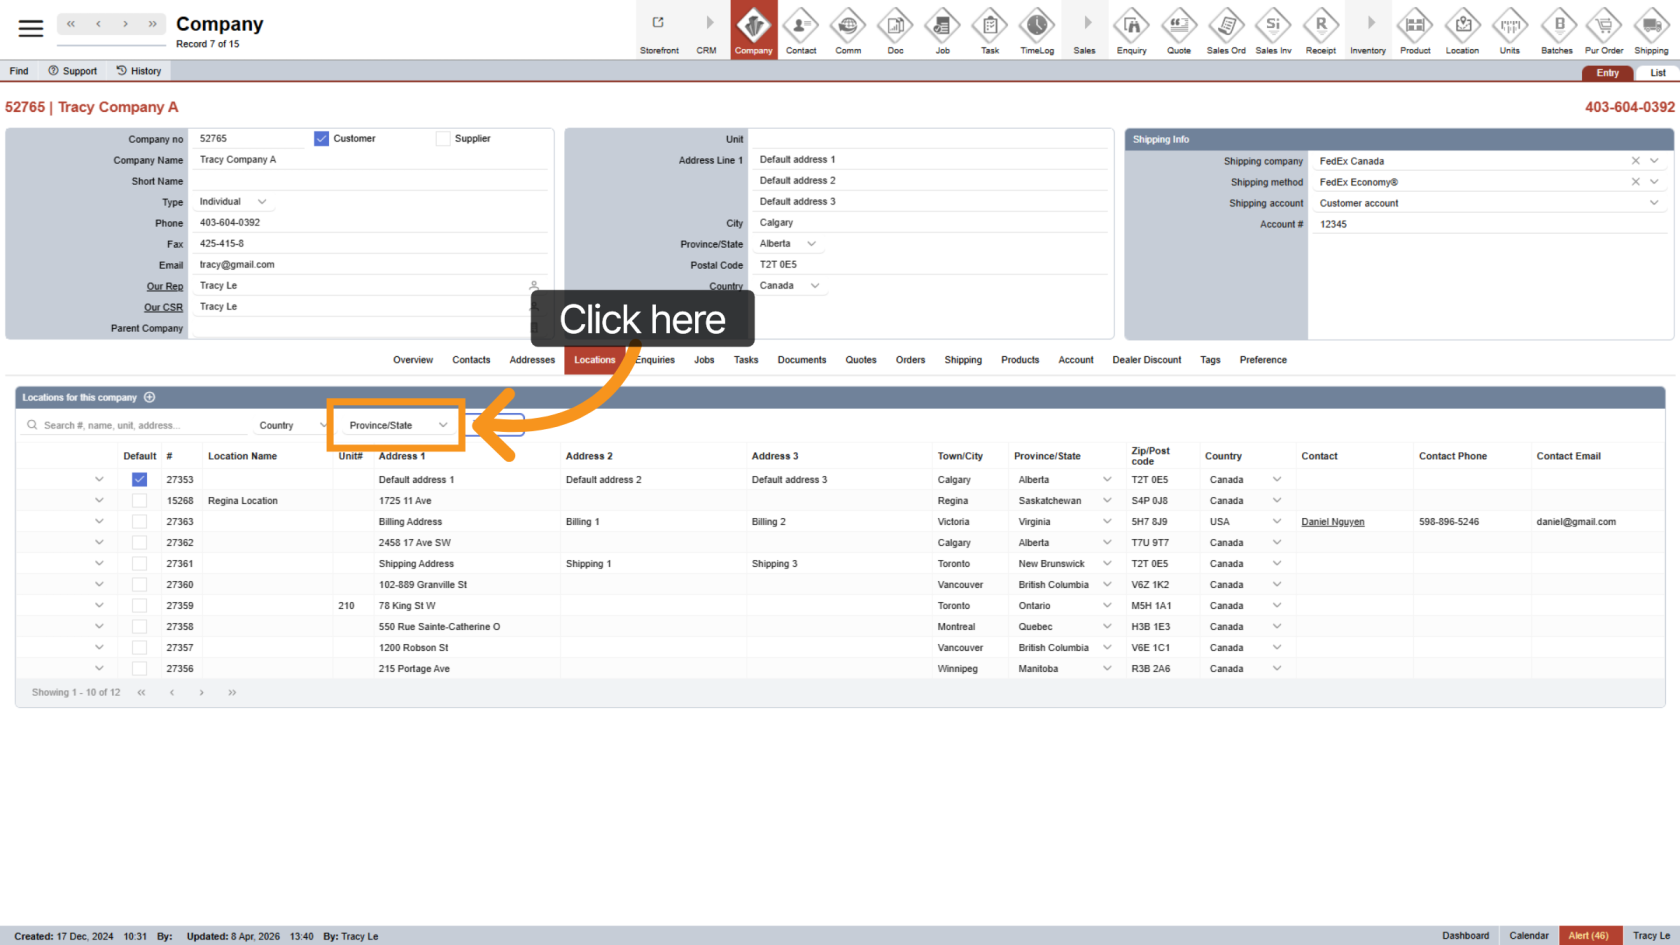
5. Filter by Province
Select a province to narrow results further.
Note: You must choose a country first.
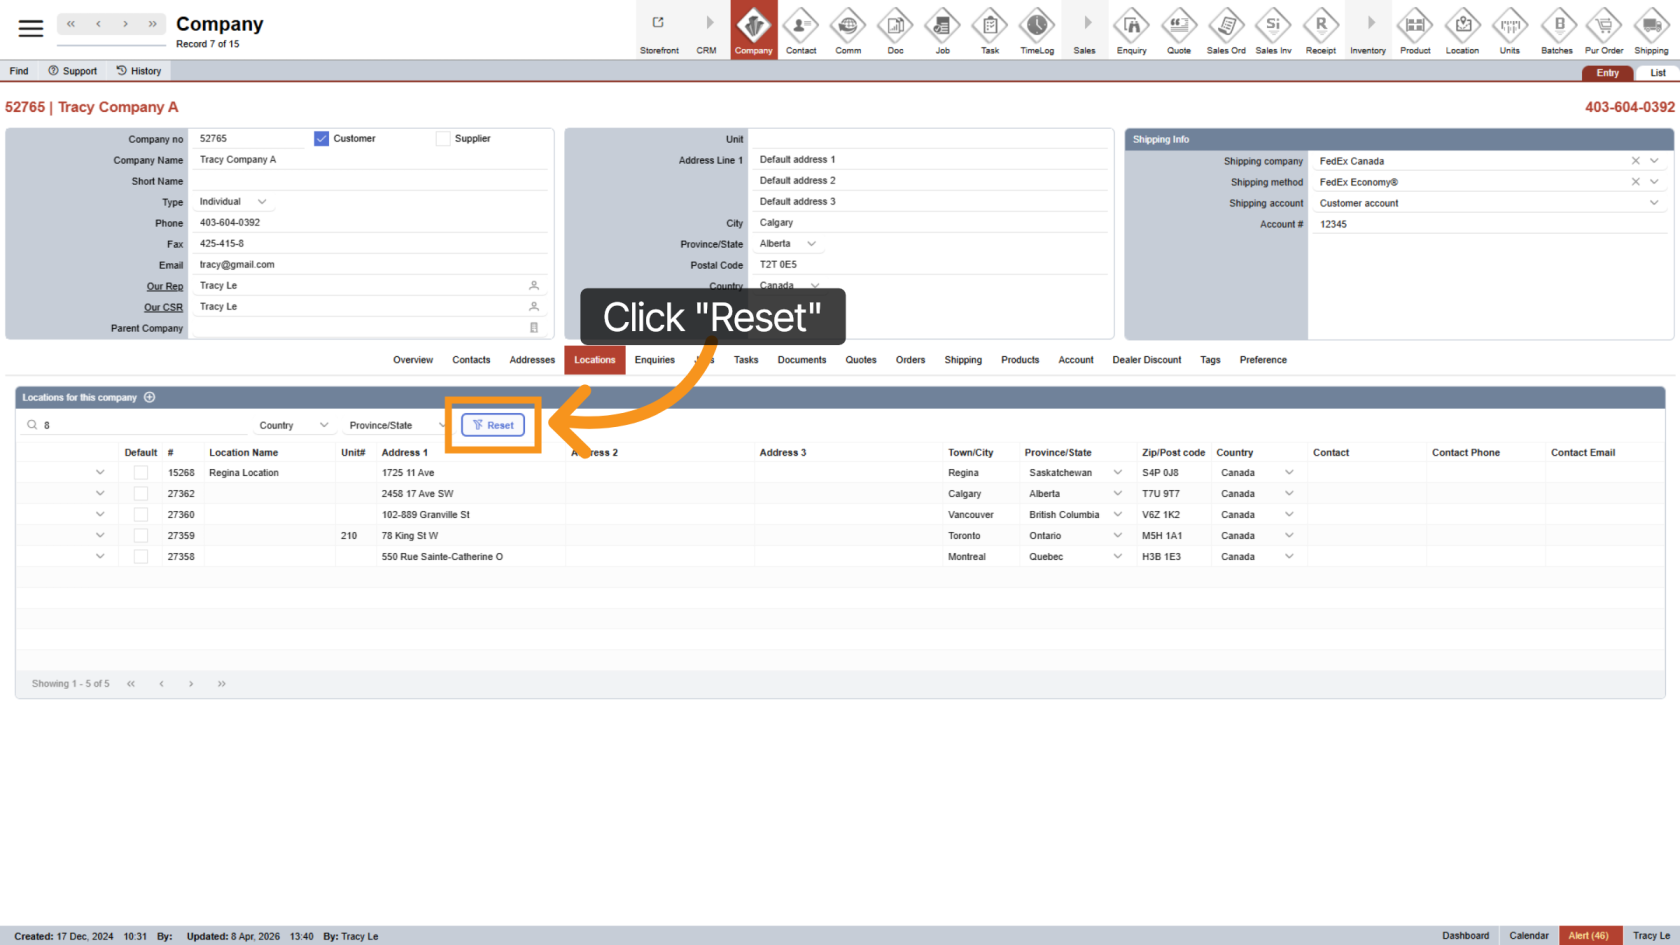
6. Reset Filters
Click "Reset" to clear all filters and return to the full list.
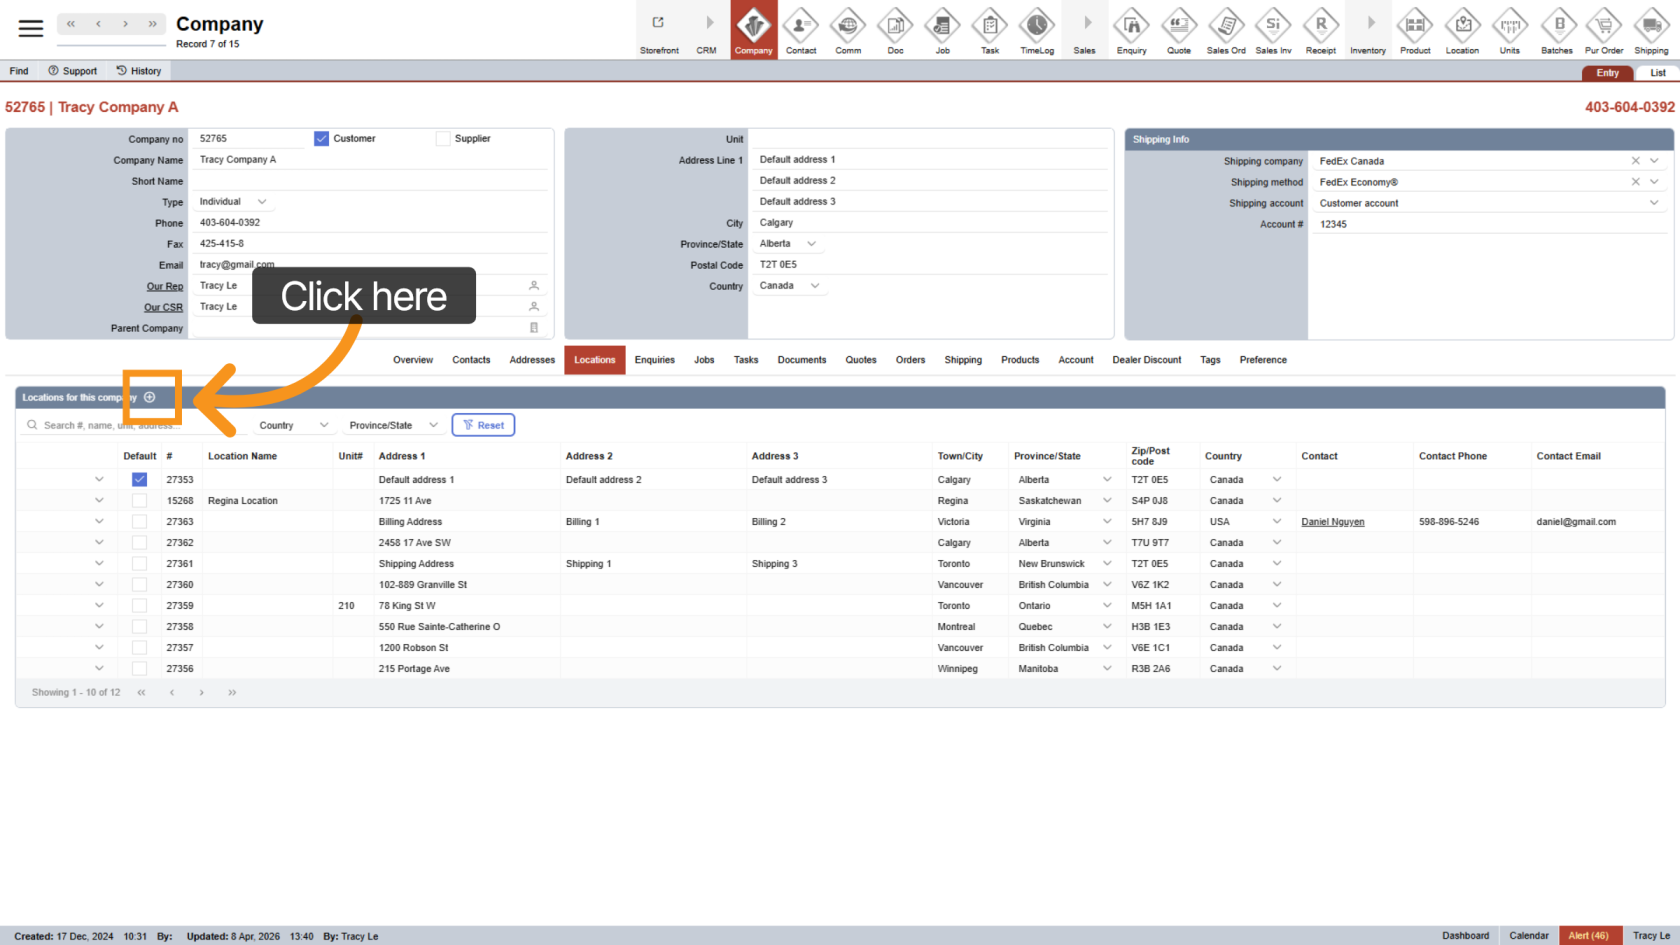
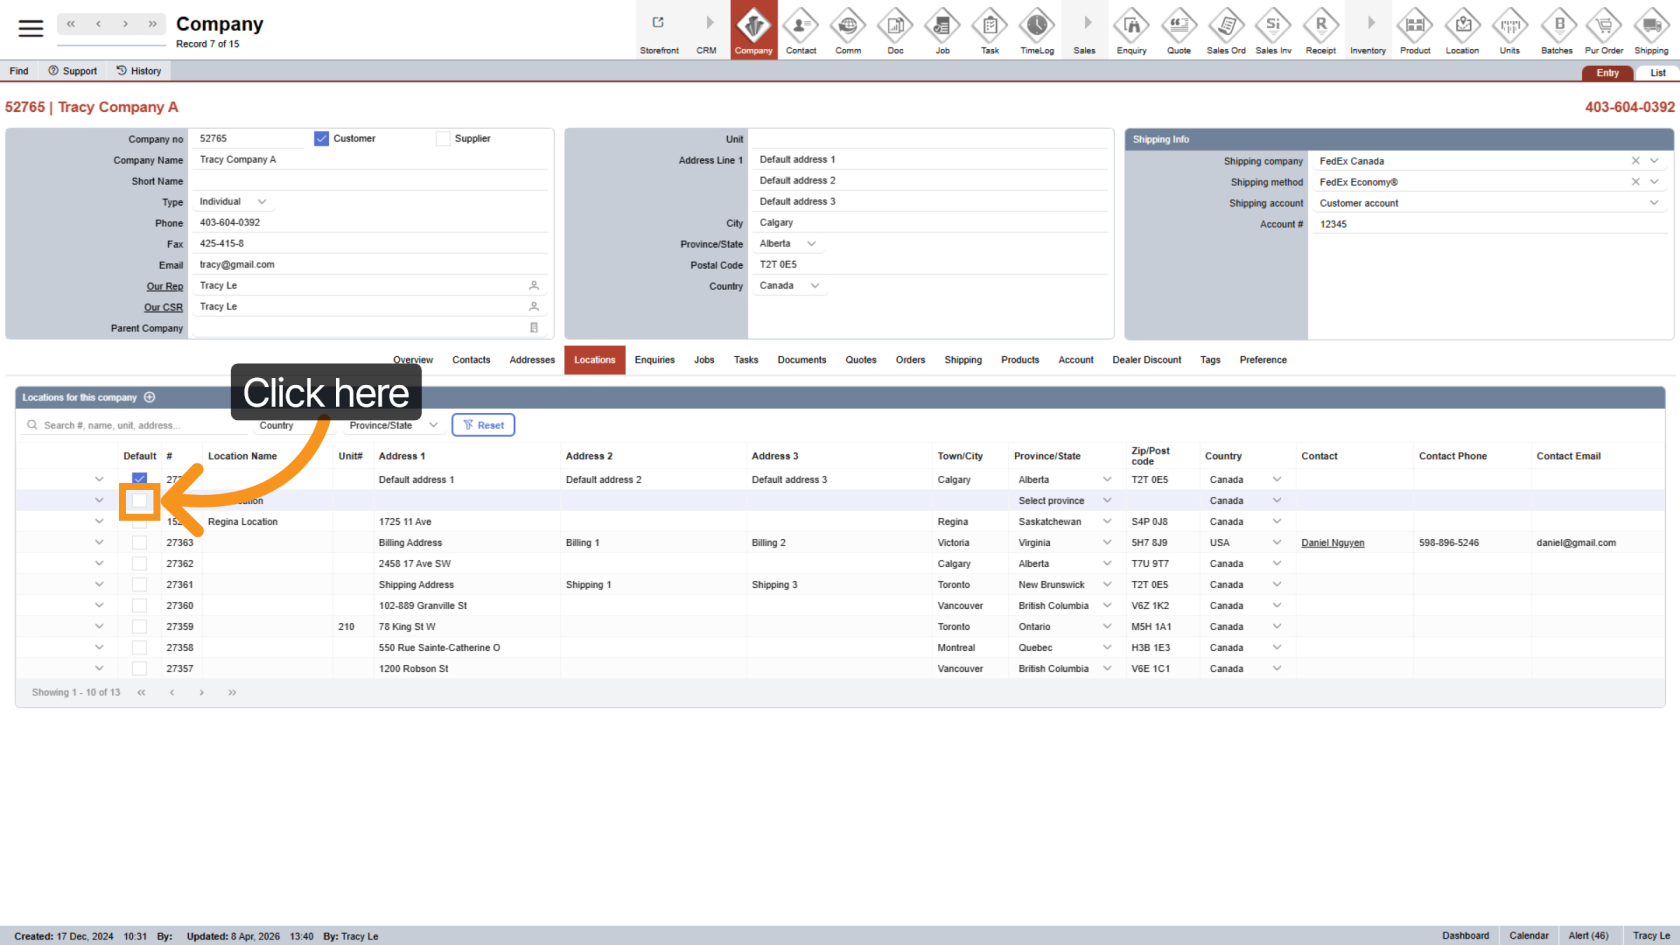
7. Add a New Location
Click the ![]() plus icon to create a new location. A new row will appear in the table.
plus icon to create a new location. A new row will appear in the table.
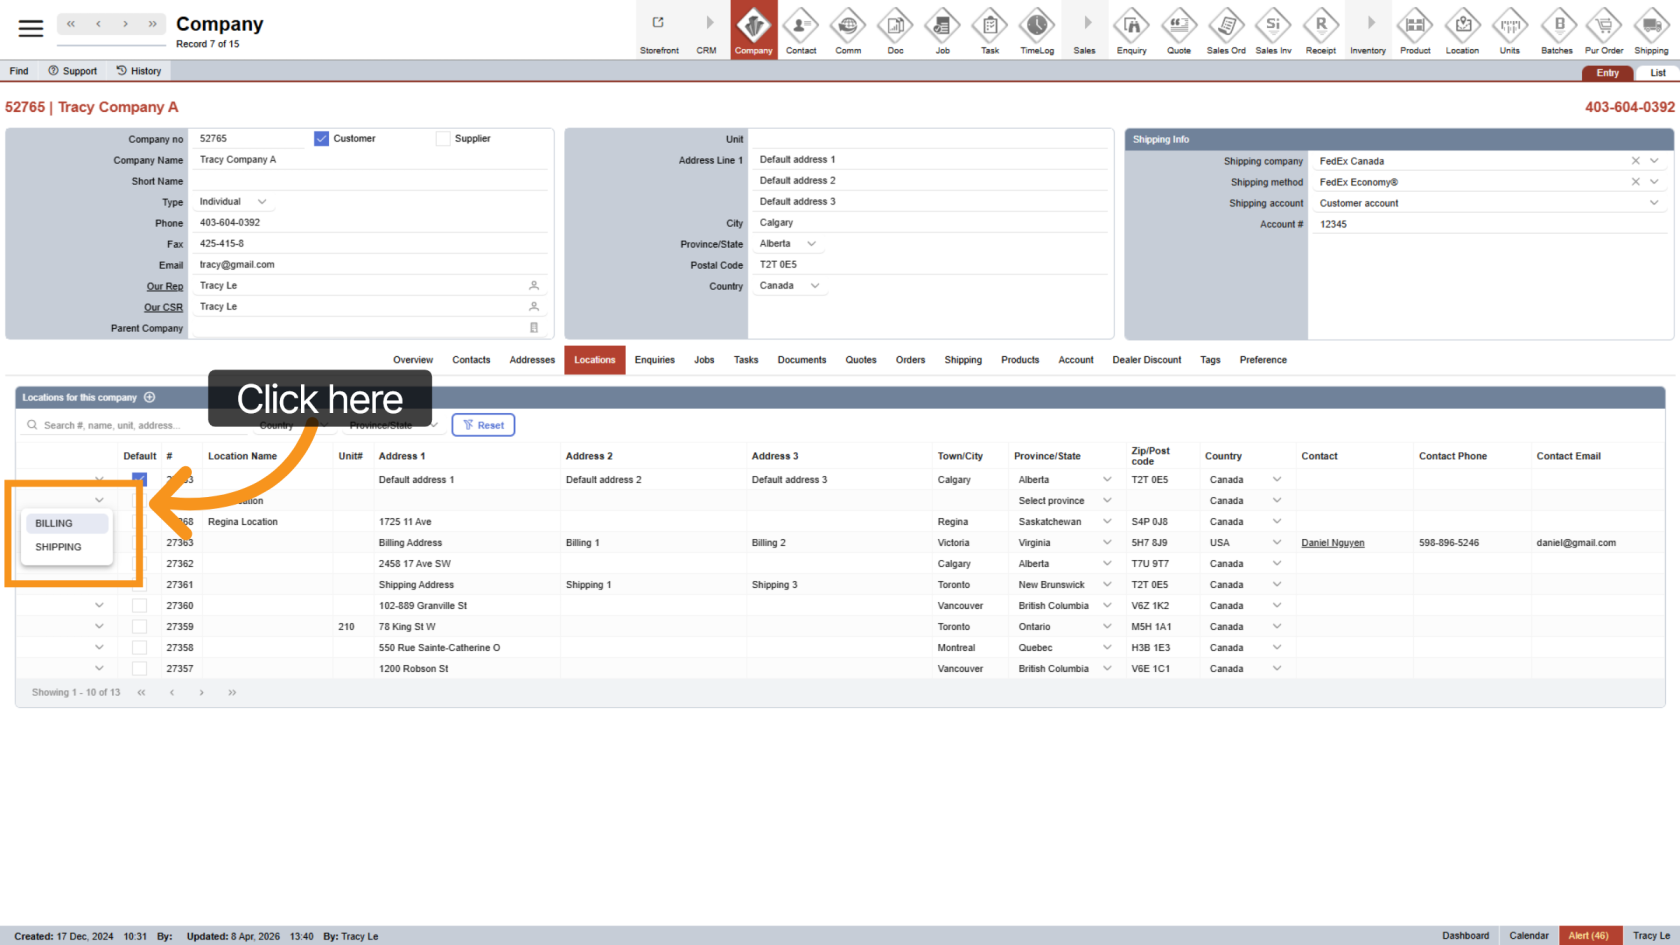
8. Set Location Type
Choose a label for the location:
- Billing – use if the billing address is different from the default location
- Shipping – use if the shipping address is different from the default location
- Leave blank if billing and shipping are the same as the default location, if unsure, or if multiple shipping locations exist
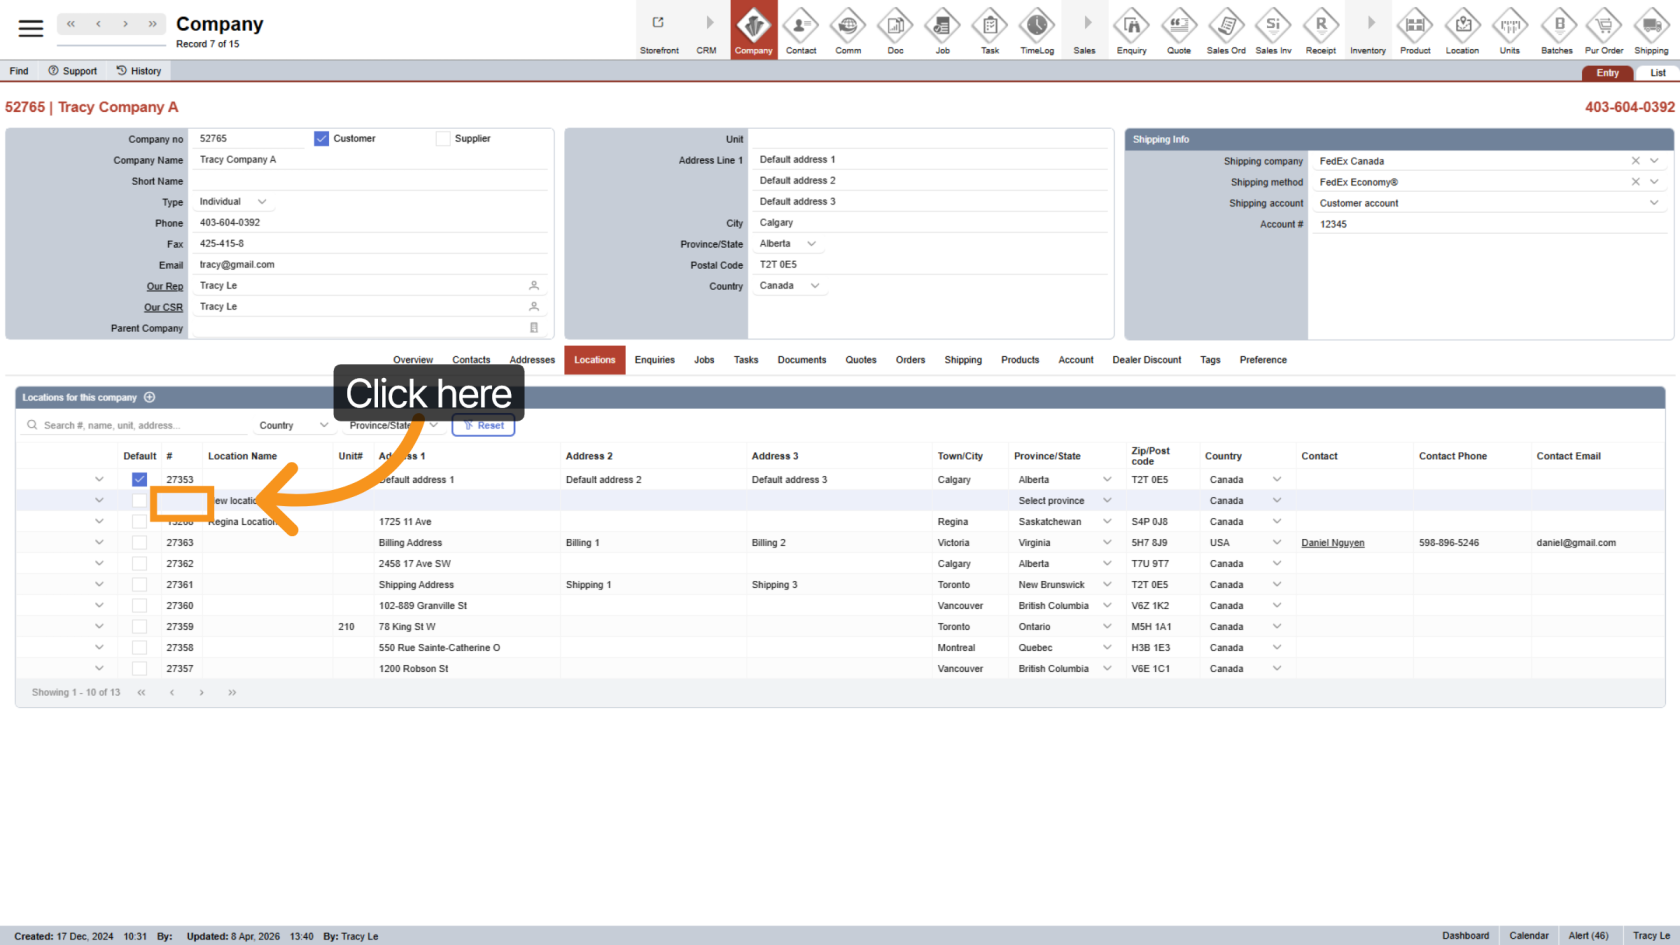
9. Set as Default Location
Check the box if this is the company’s default location.
Each company must have one default location.
10. Enter Location Number (Optional)
Enter a location number if available. You can leave this blank if not needed.
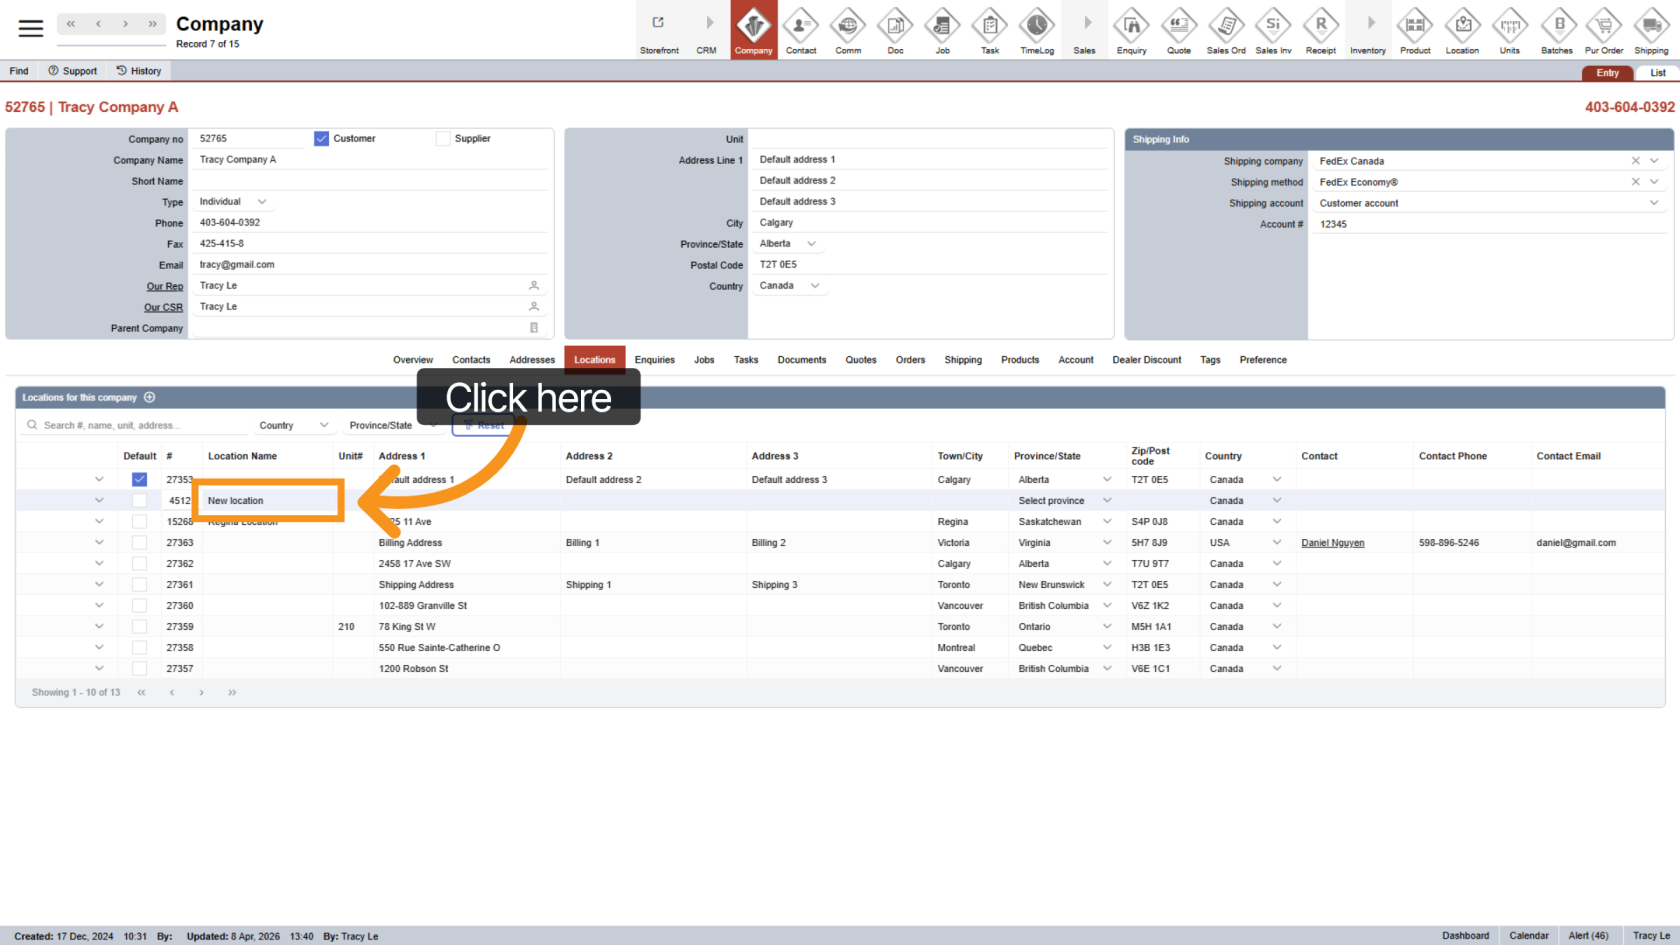
11. Enter Location Name (Optional)
Enter a location name to help identify it more easily. You can leave this blank if not needed.
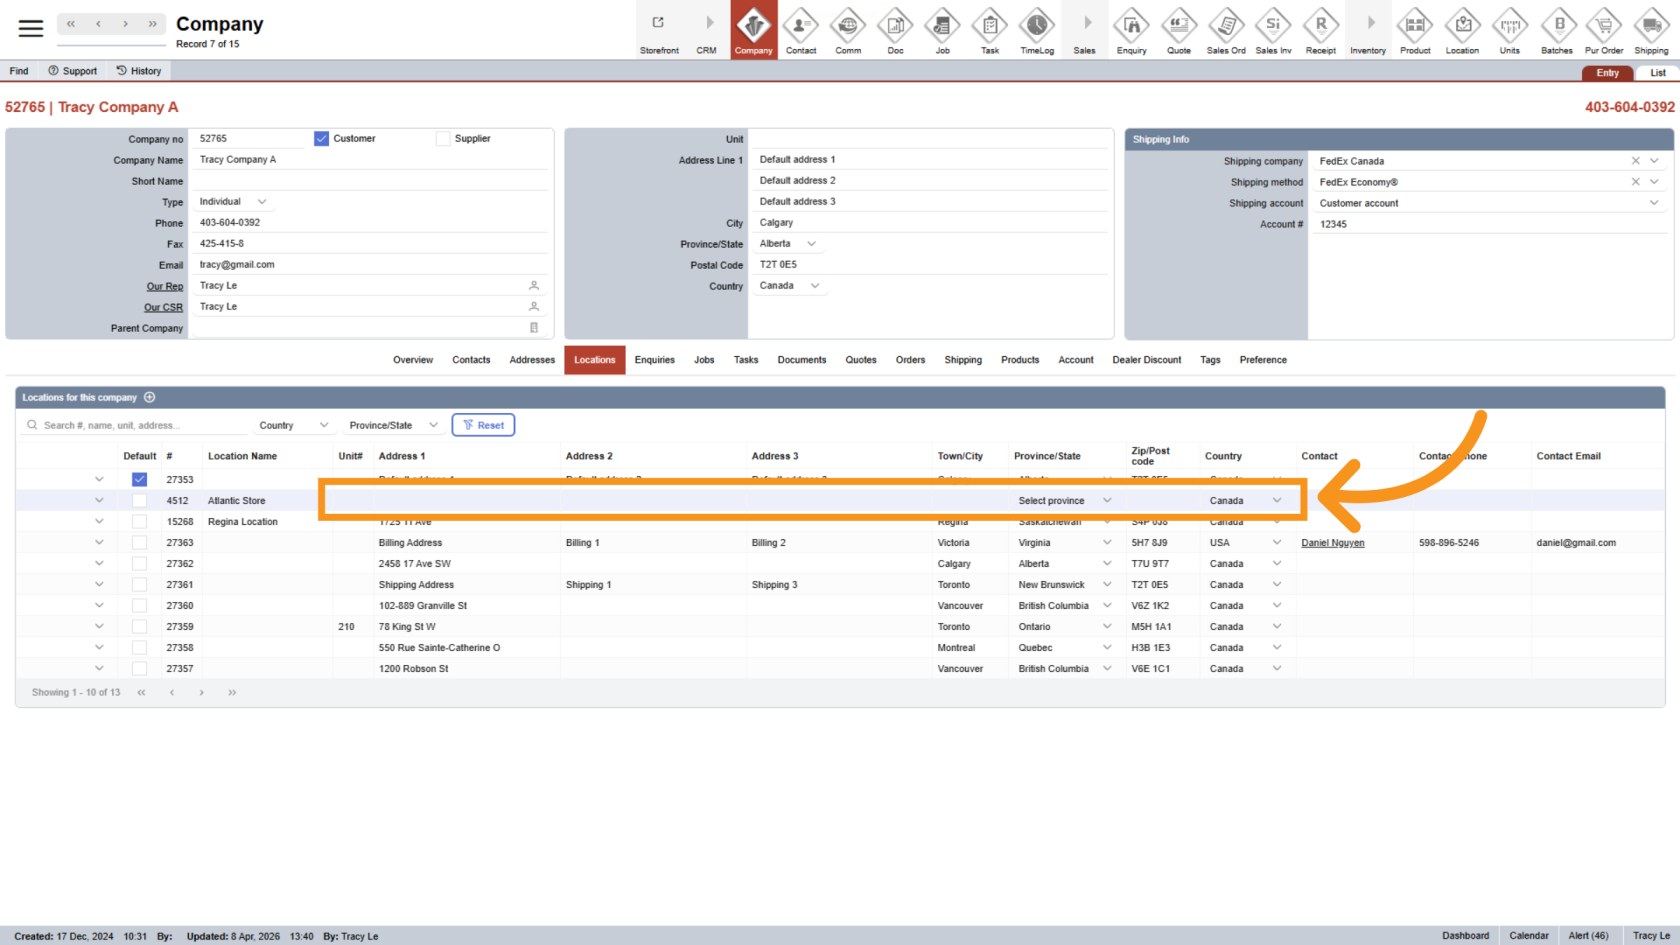
12. Enter Address
Fill in the full address, including the unit number if applicable.
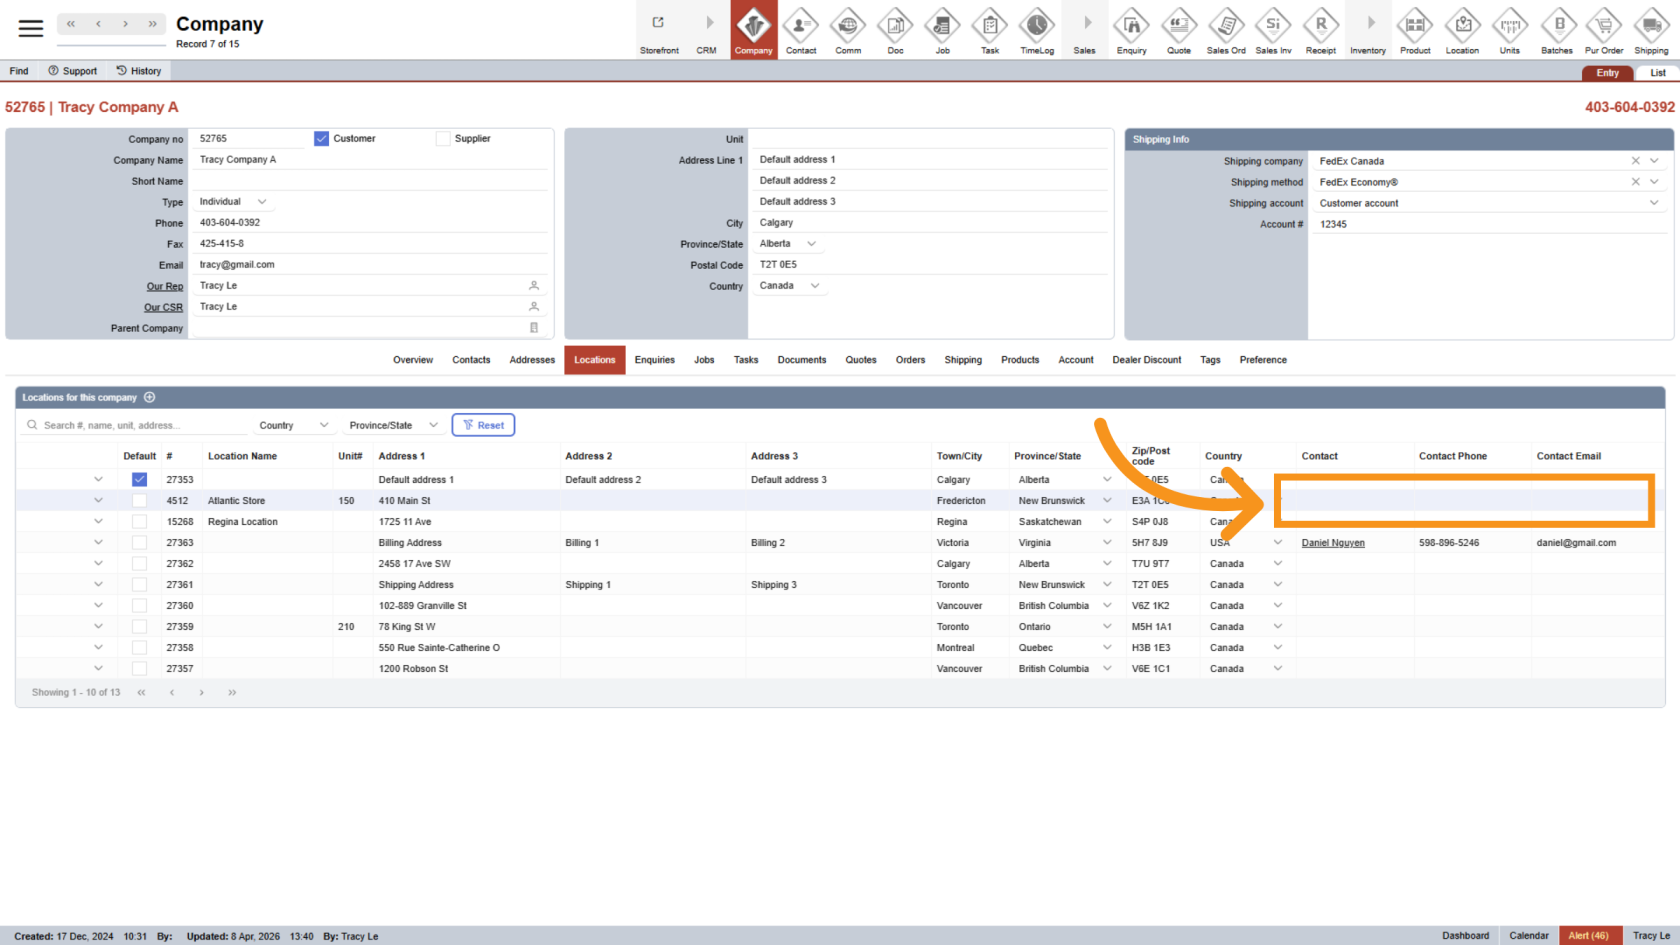
13. Add Location Contact
Assign a contact for this location.
This contact will be used for billing, shipping recipient, or general communication, depending on the location type.
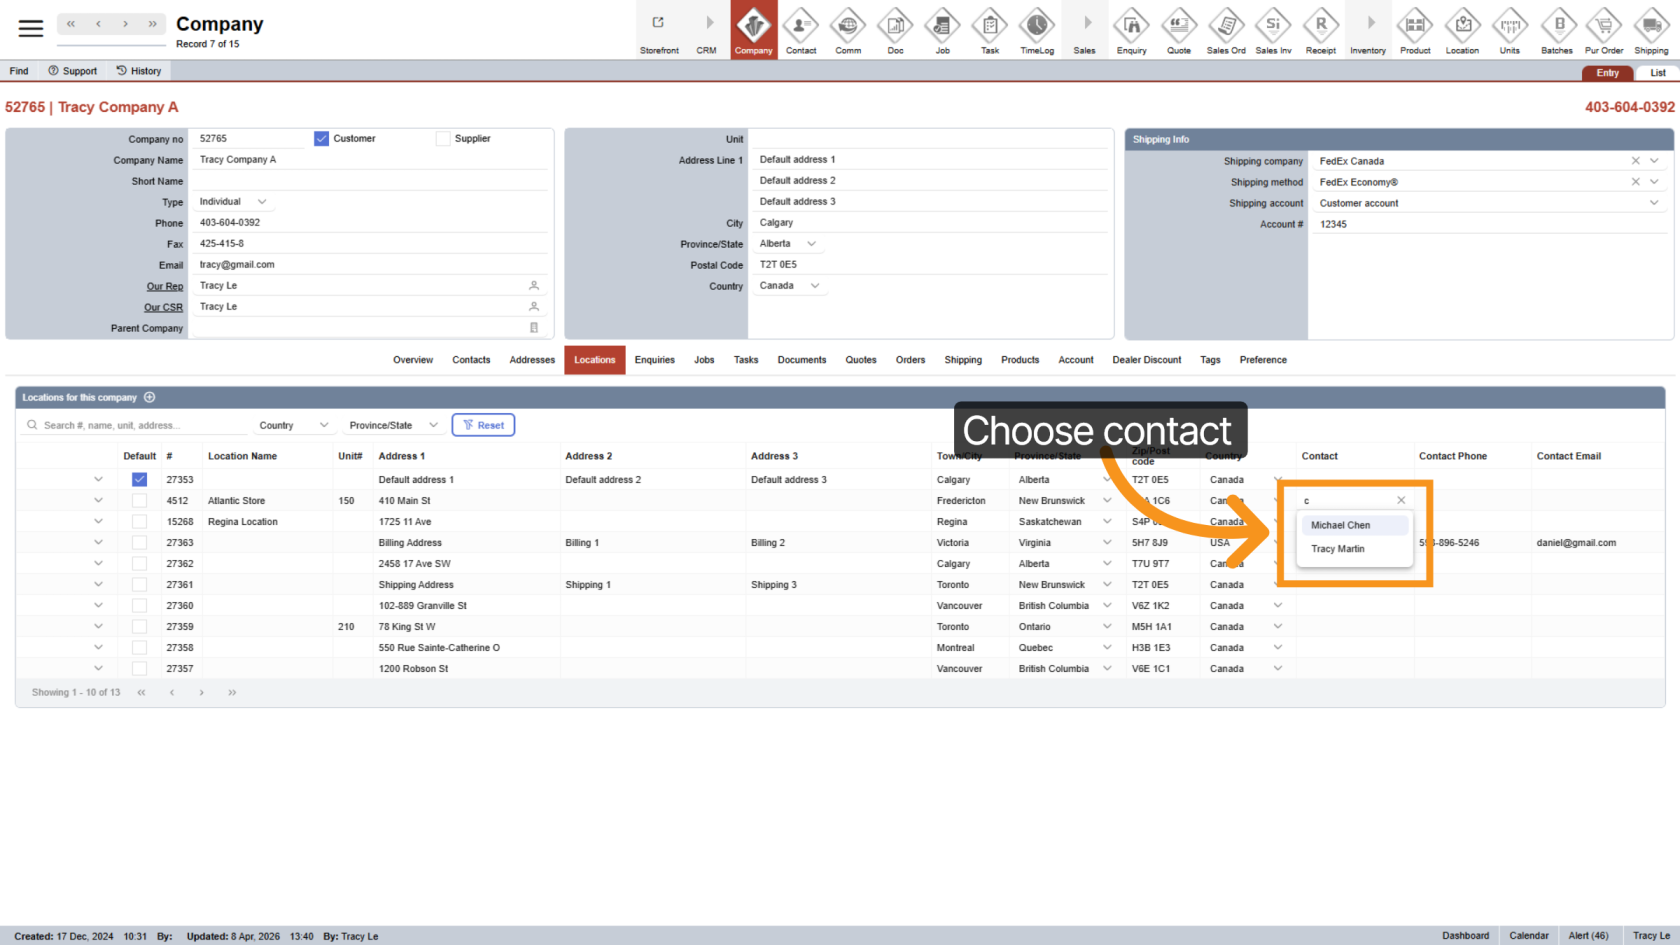
14. Select Contact
Start typing a contact name.
The system will suggest existing contacts from the company.
Click a name to assign it.
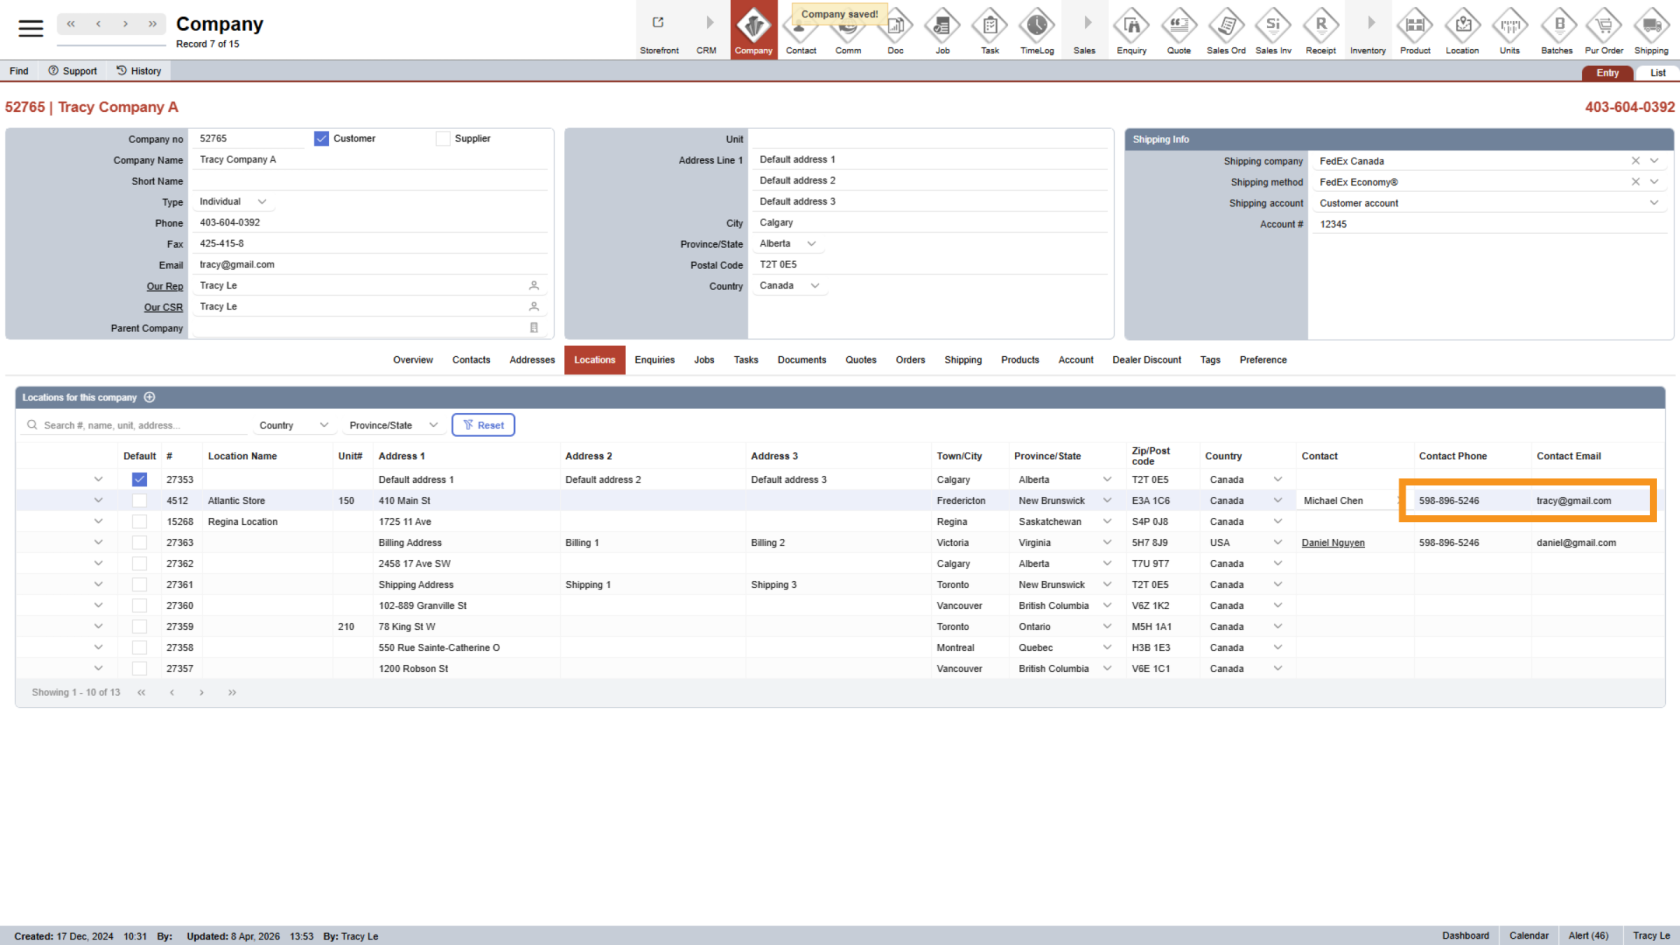
15. Auto-Filled Contact Info
Once selected, the contact’s phone and email will be filled automatically.
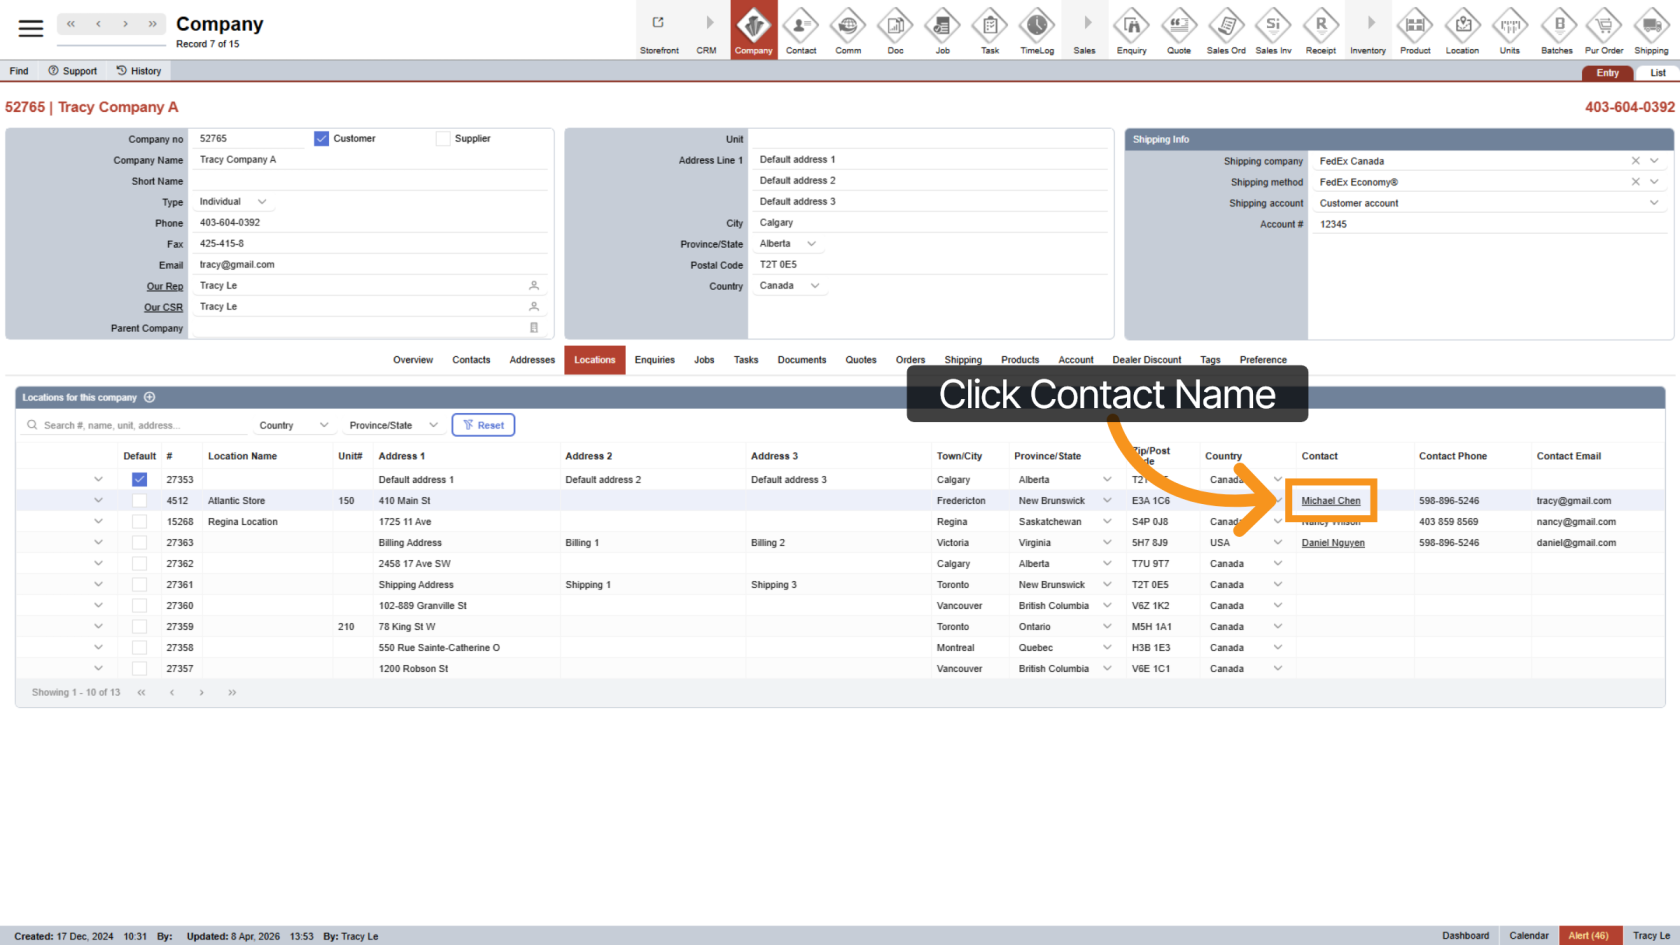
16. Edit Existing Contact
To update contact details, click the contact name.
You’ll be taken to the contact profile to edit it.
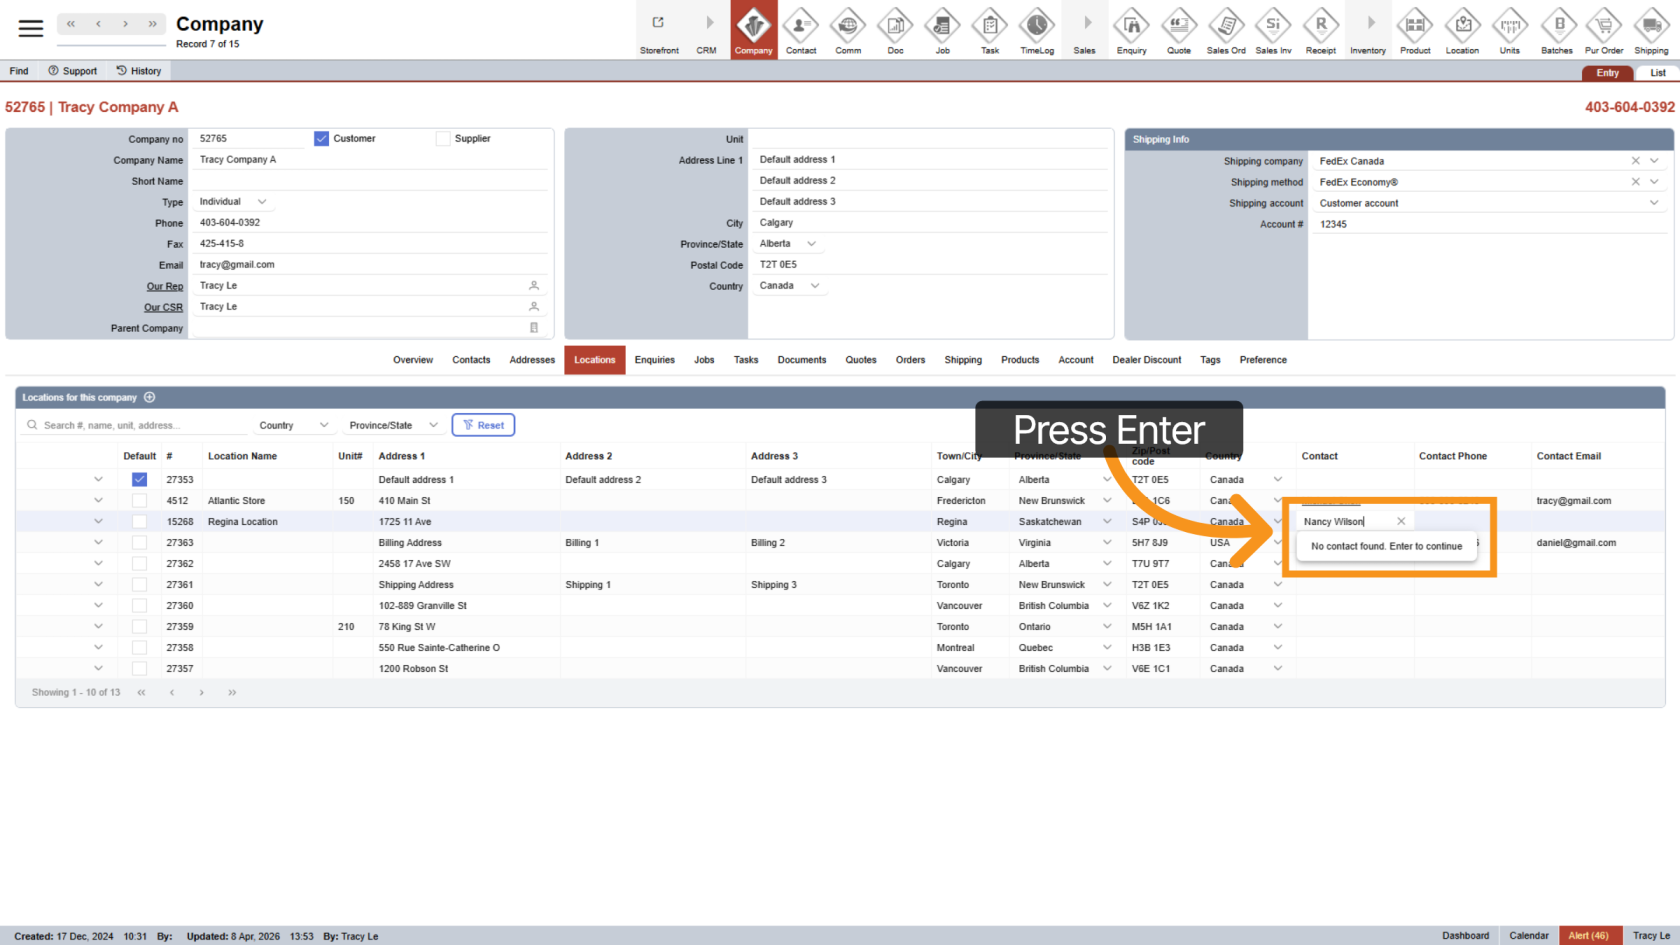
17. Add a Custom Contact
If no matching contact appears:
- Press Enter to create a custom contact.
- The custom contact is only for this location and won’t be saved for reuse.
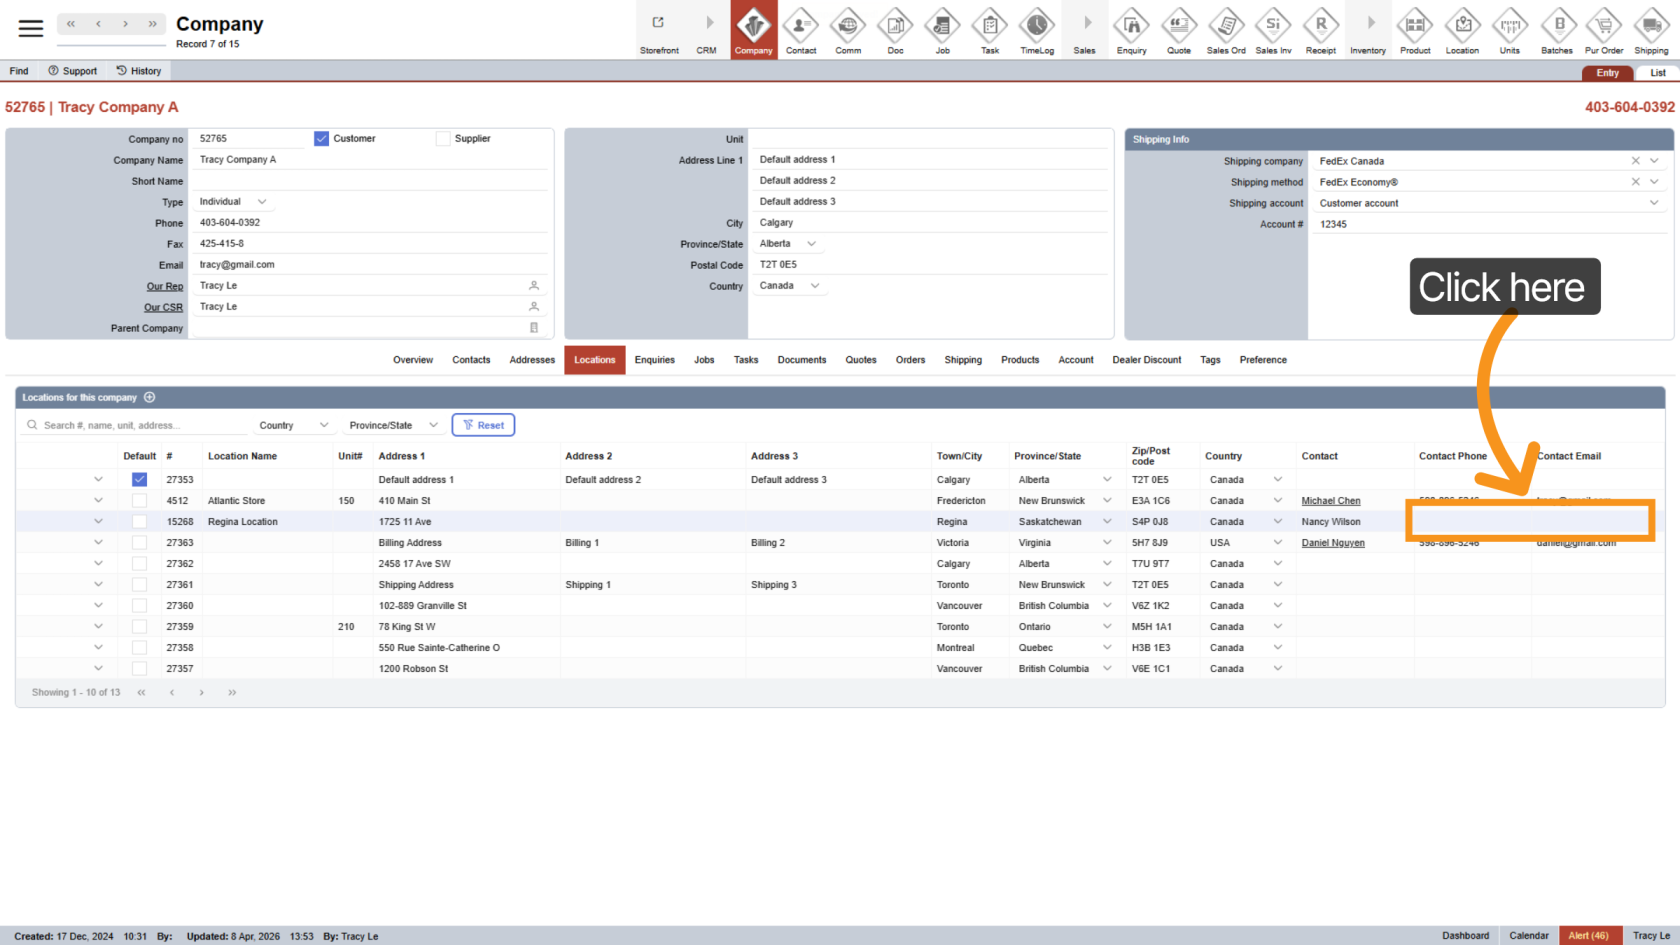
18. Enter Custom Contact Details
Manually enter the phone number and email for the custom contact.
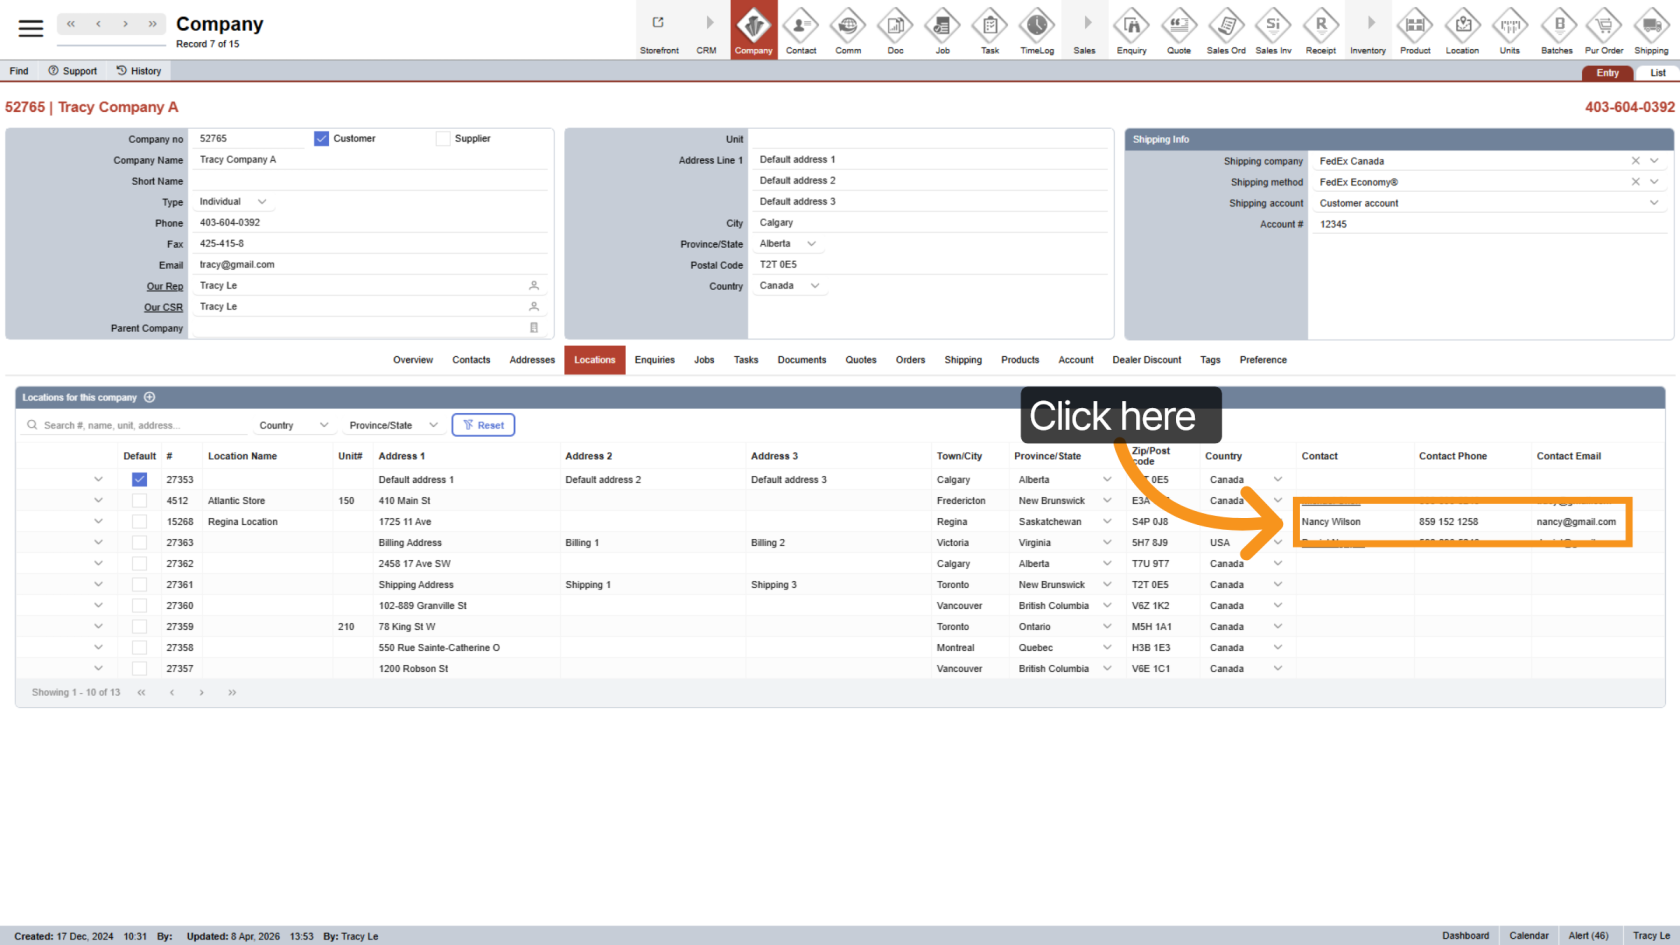
19. Edit Custom Contact
You can edit custom contact details directly within the location.
You can now manage locations, keep addresses organized, and ensure the right contact details are used for shipping and communication.