Sales Order Allocation (Distribution List)
This tutorial guides you through configuring workflow allocation using shipping distribution lists for multiple locations in the WorkTraq application.
Video Tutorial
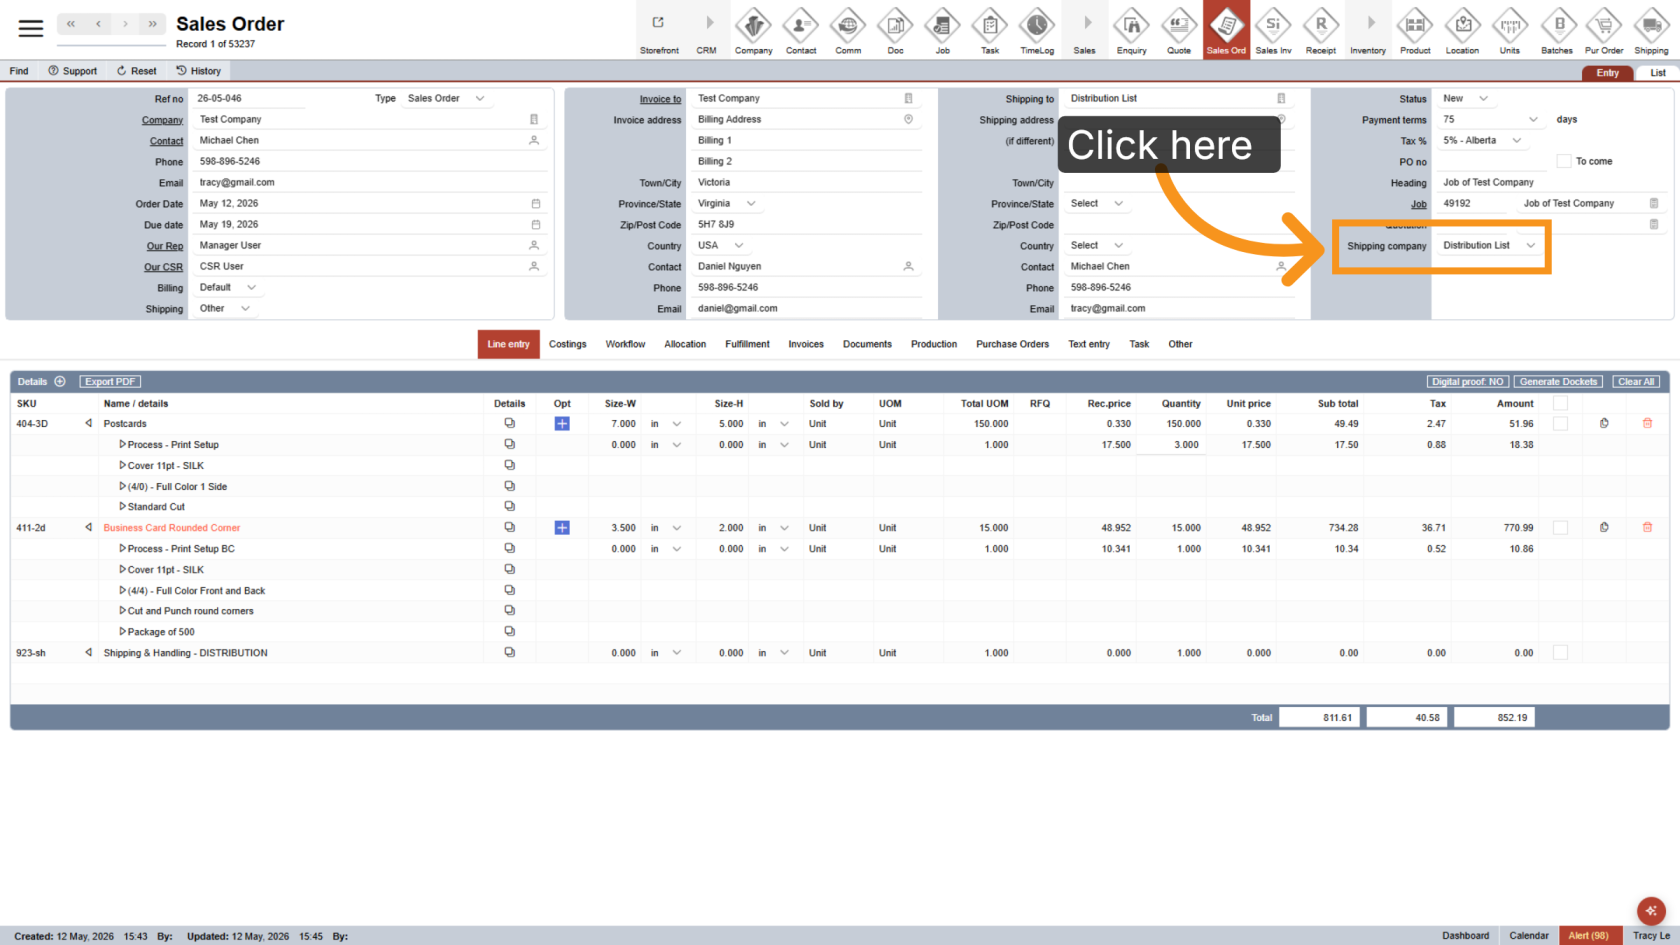
1. Select Distribution List
Select Shipping Company as the distribution list to begin the allocation process.
2. Complete the Line Entry
Add and complete the line entry as usual.
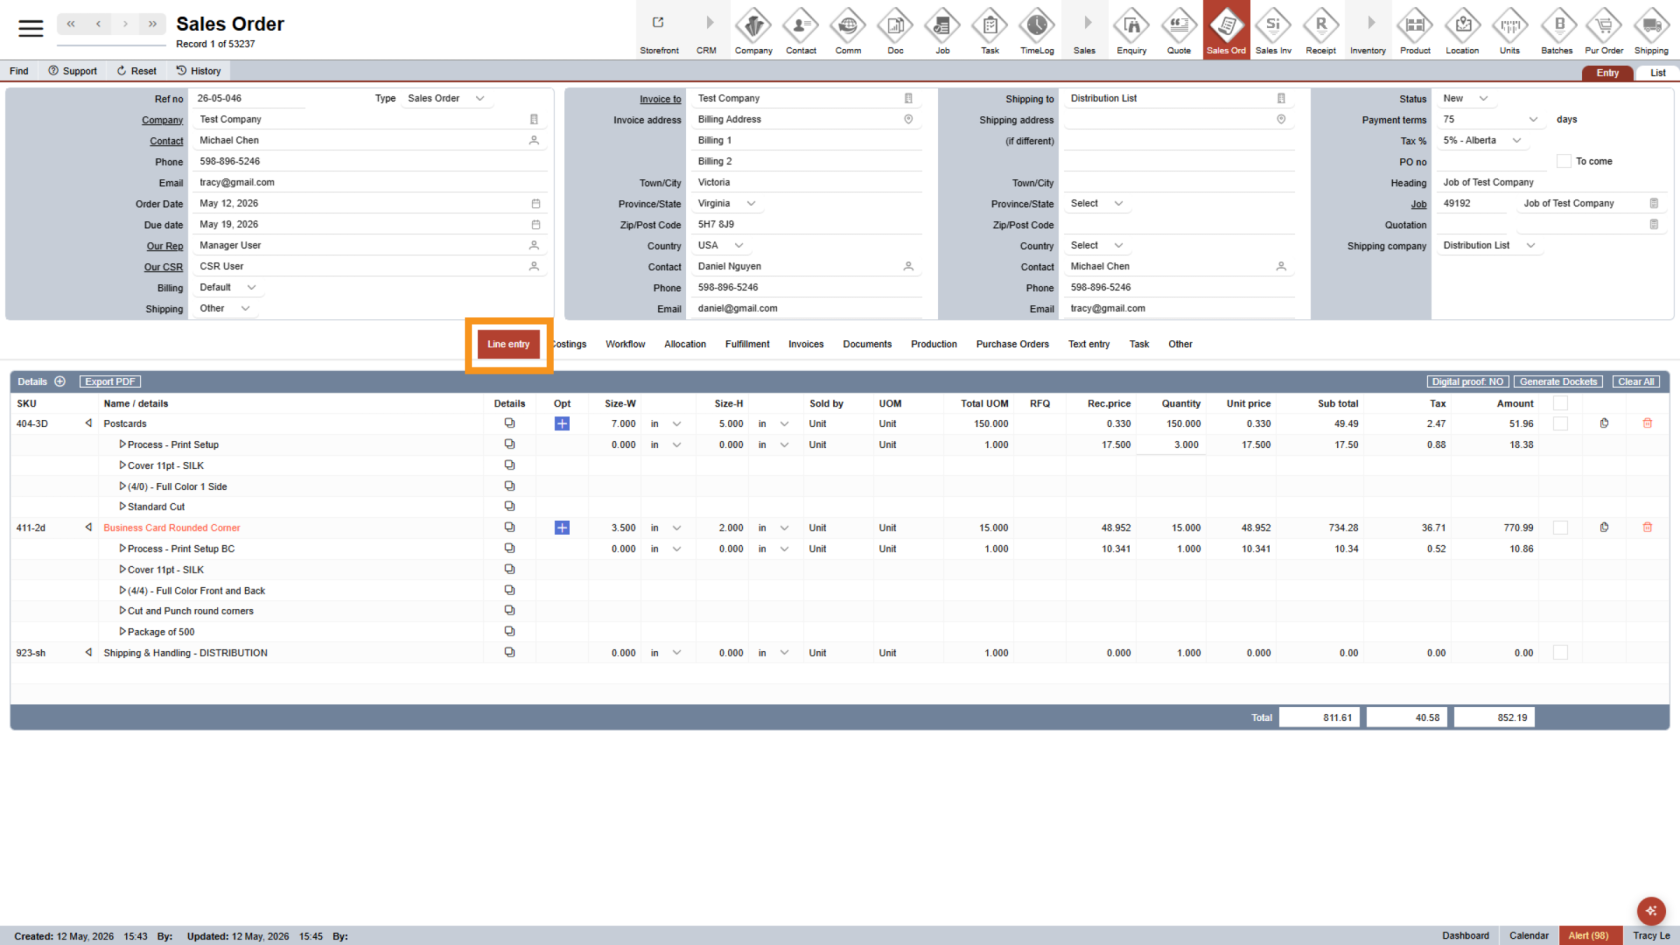
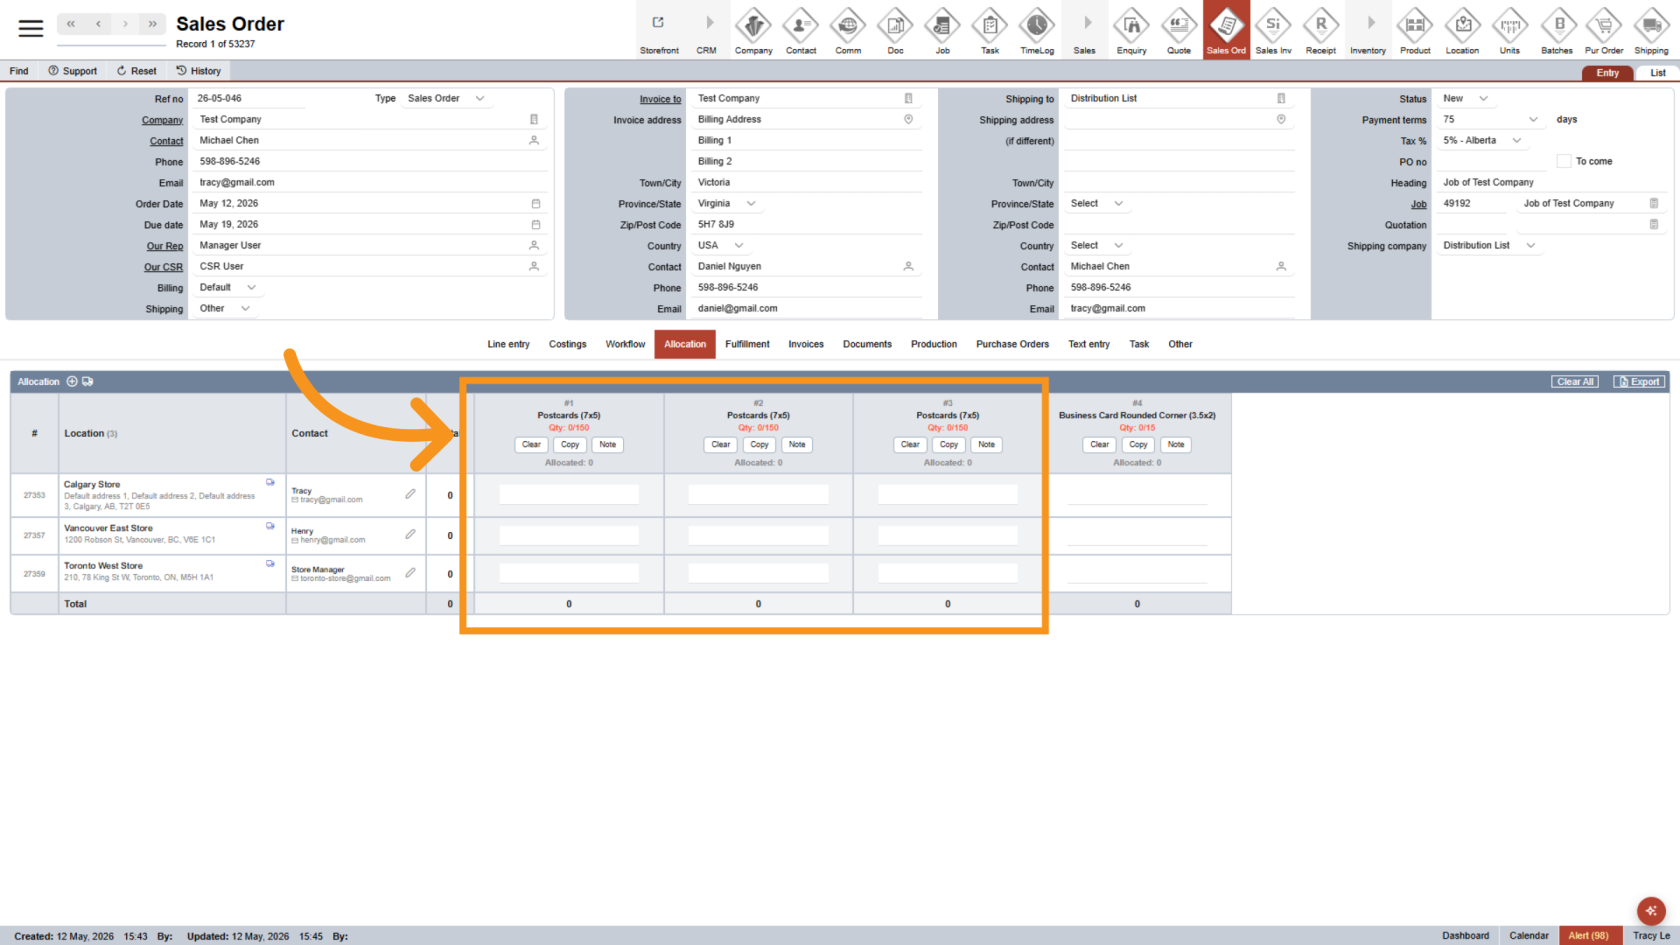
3. Open the Allocation Tab
Click Allocation to open the allocation section and manage item distribution.

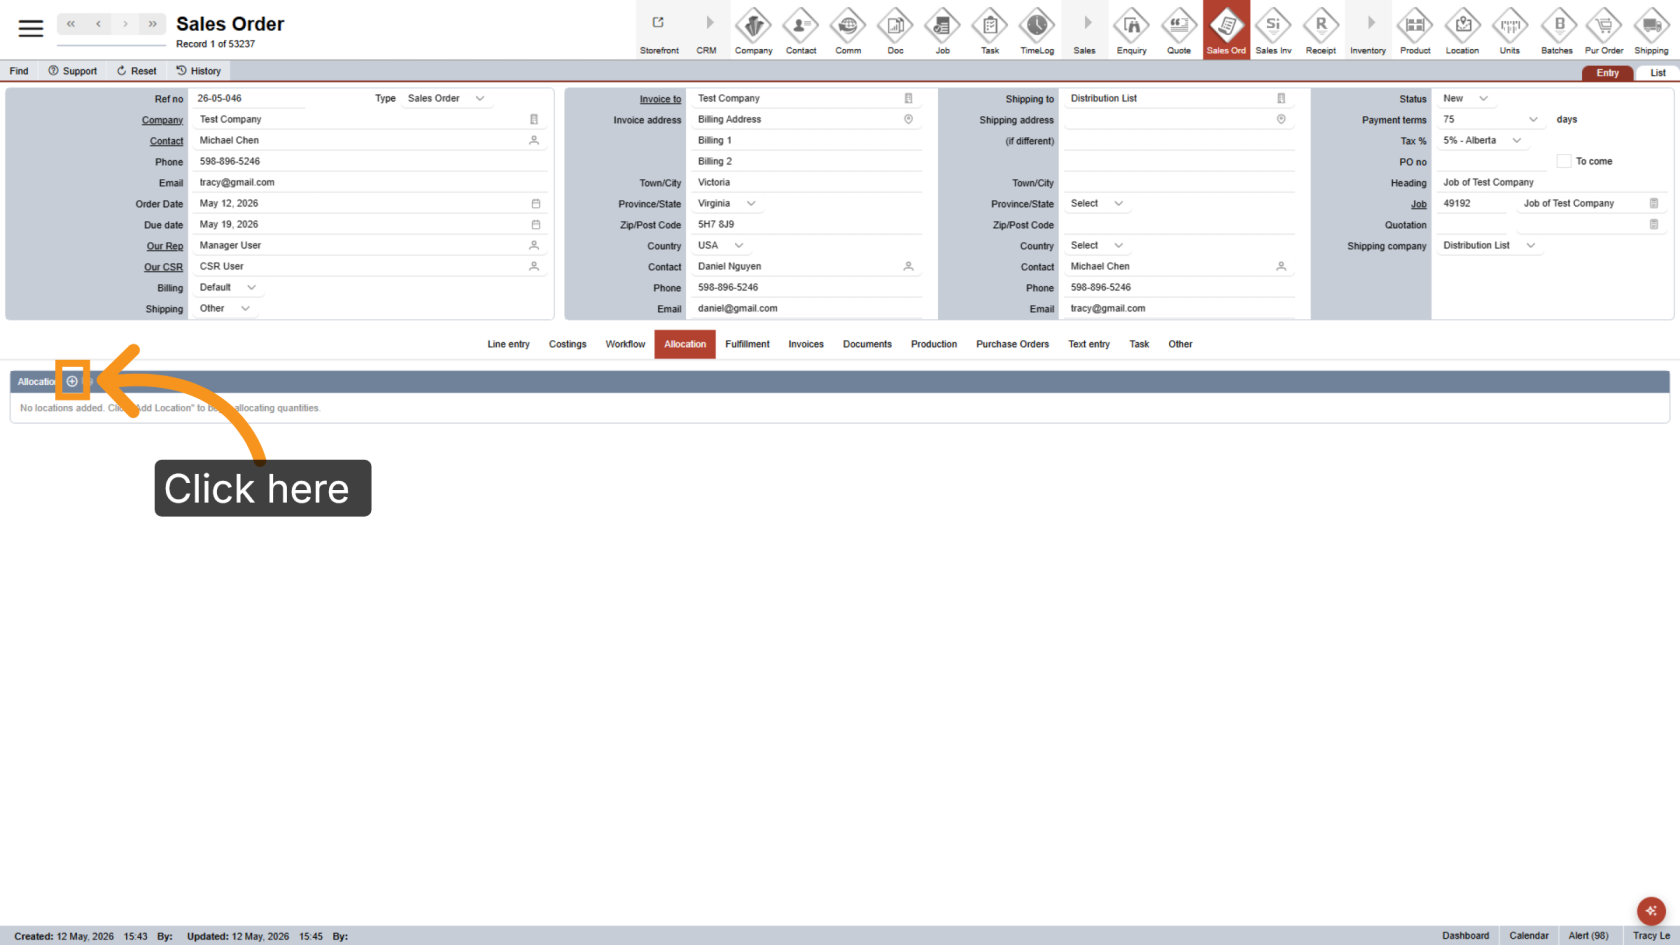
4. Add Locations
Click the ![]() plus icon to add shipping locations.
plus icon to add shipping locations.
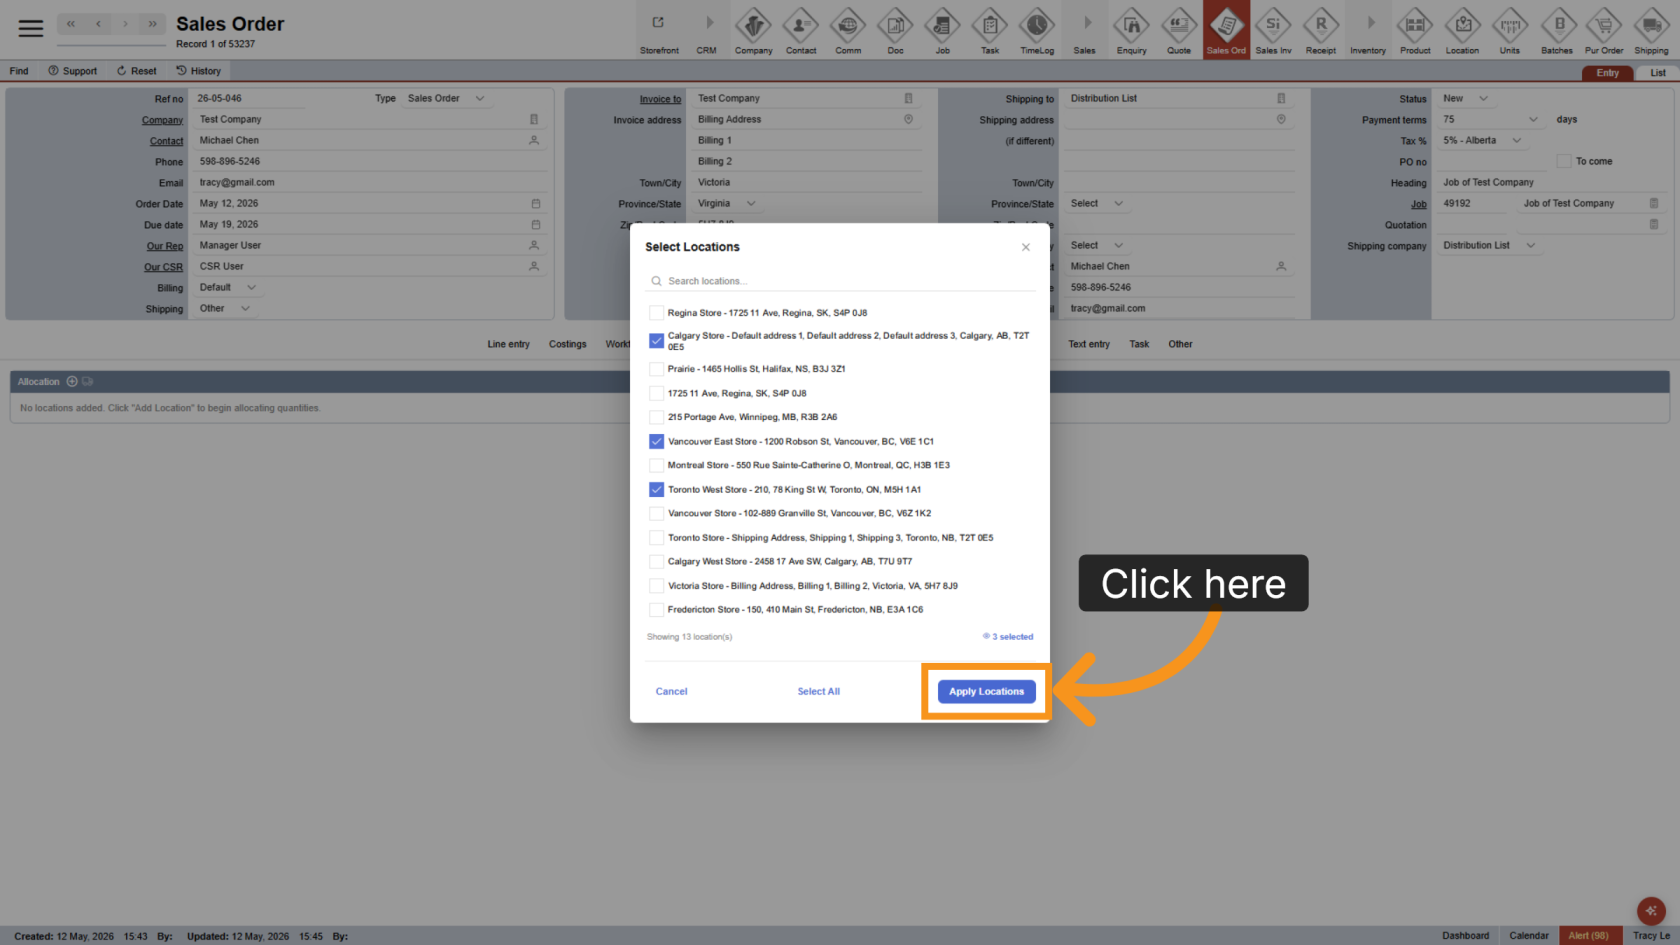
5. Select Locations
Select the locations you want to ship to by checking the boxes, or click Select All to choose all locations at once.
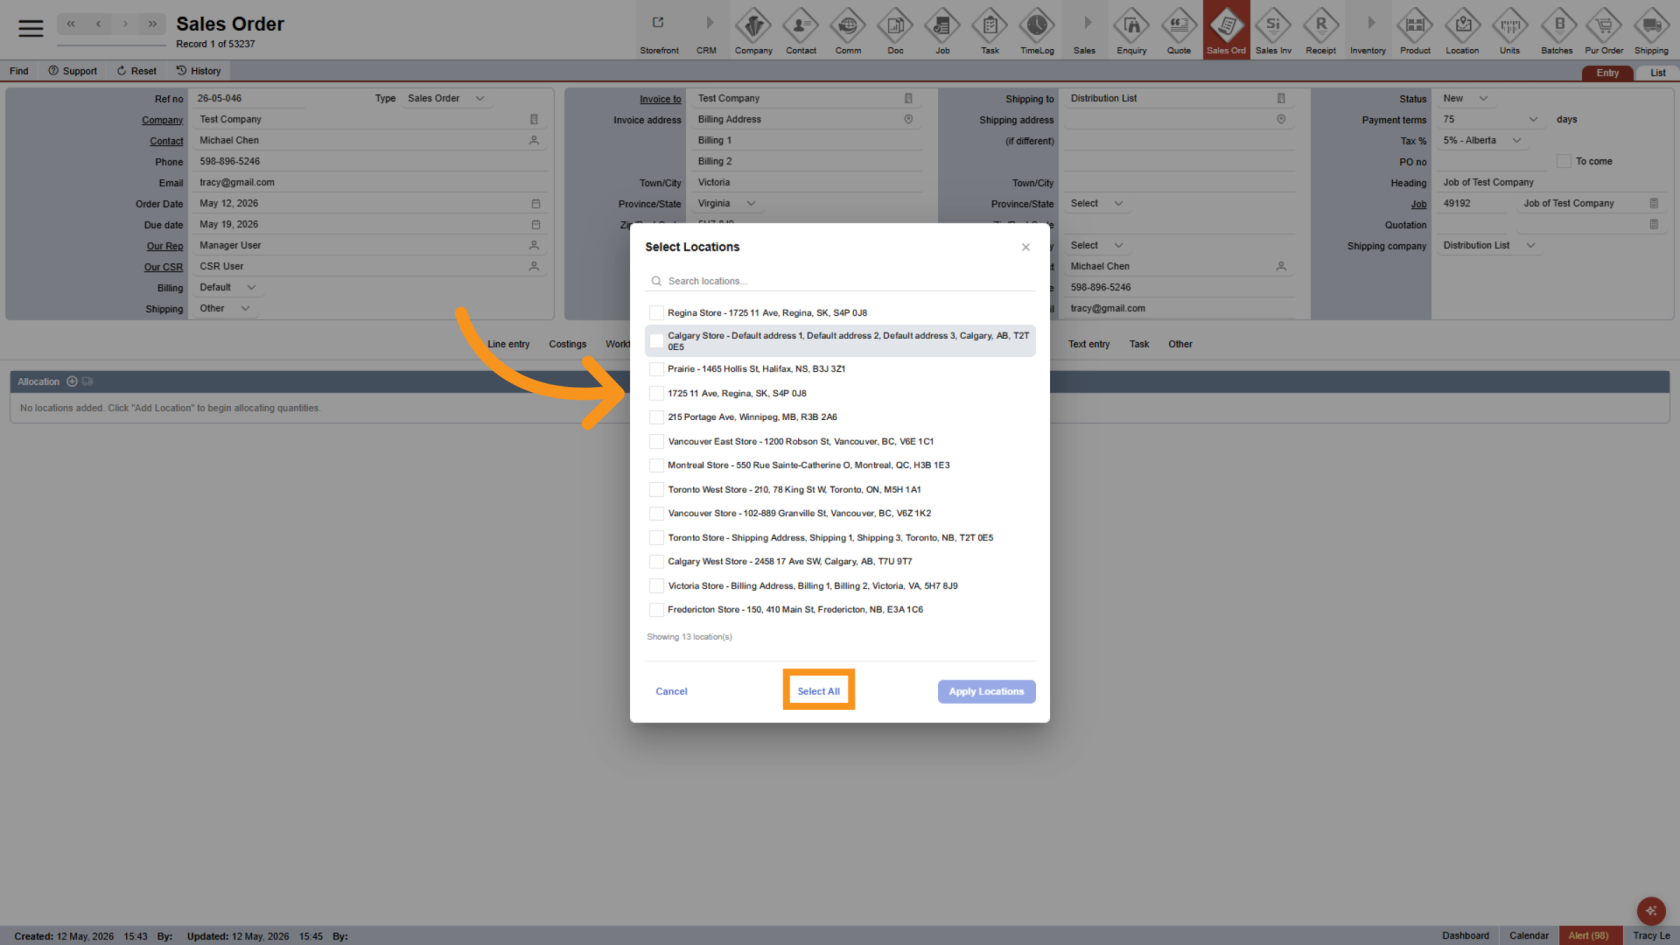
6. Apply Selected Locations
Click Apply Locations to confirm and assign the selected locations to the workflow.
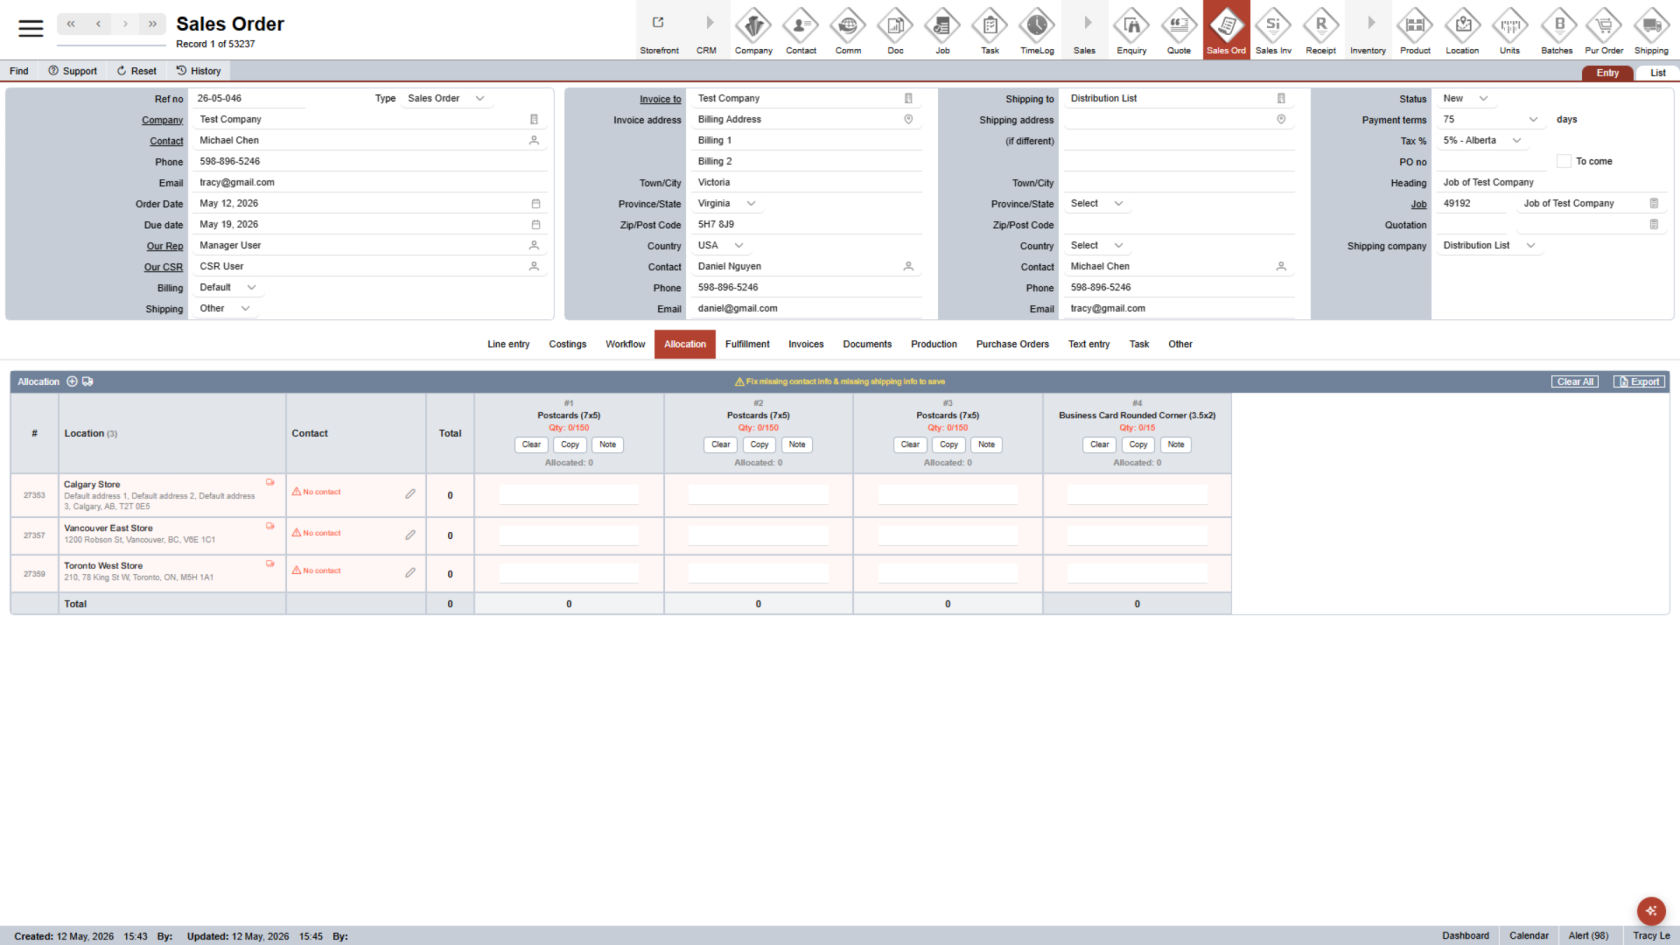
7. Review Location Details
Rows highlighted in red indicate missing shipping or contact information.
All products from the line entry are automatically transferred into the allocation list.
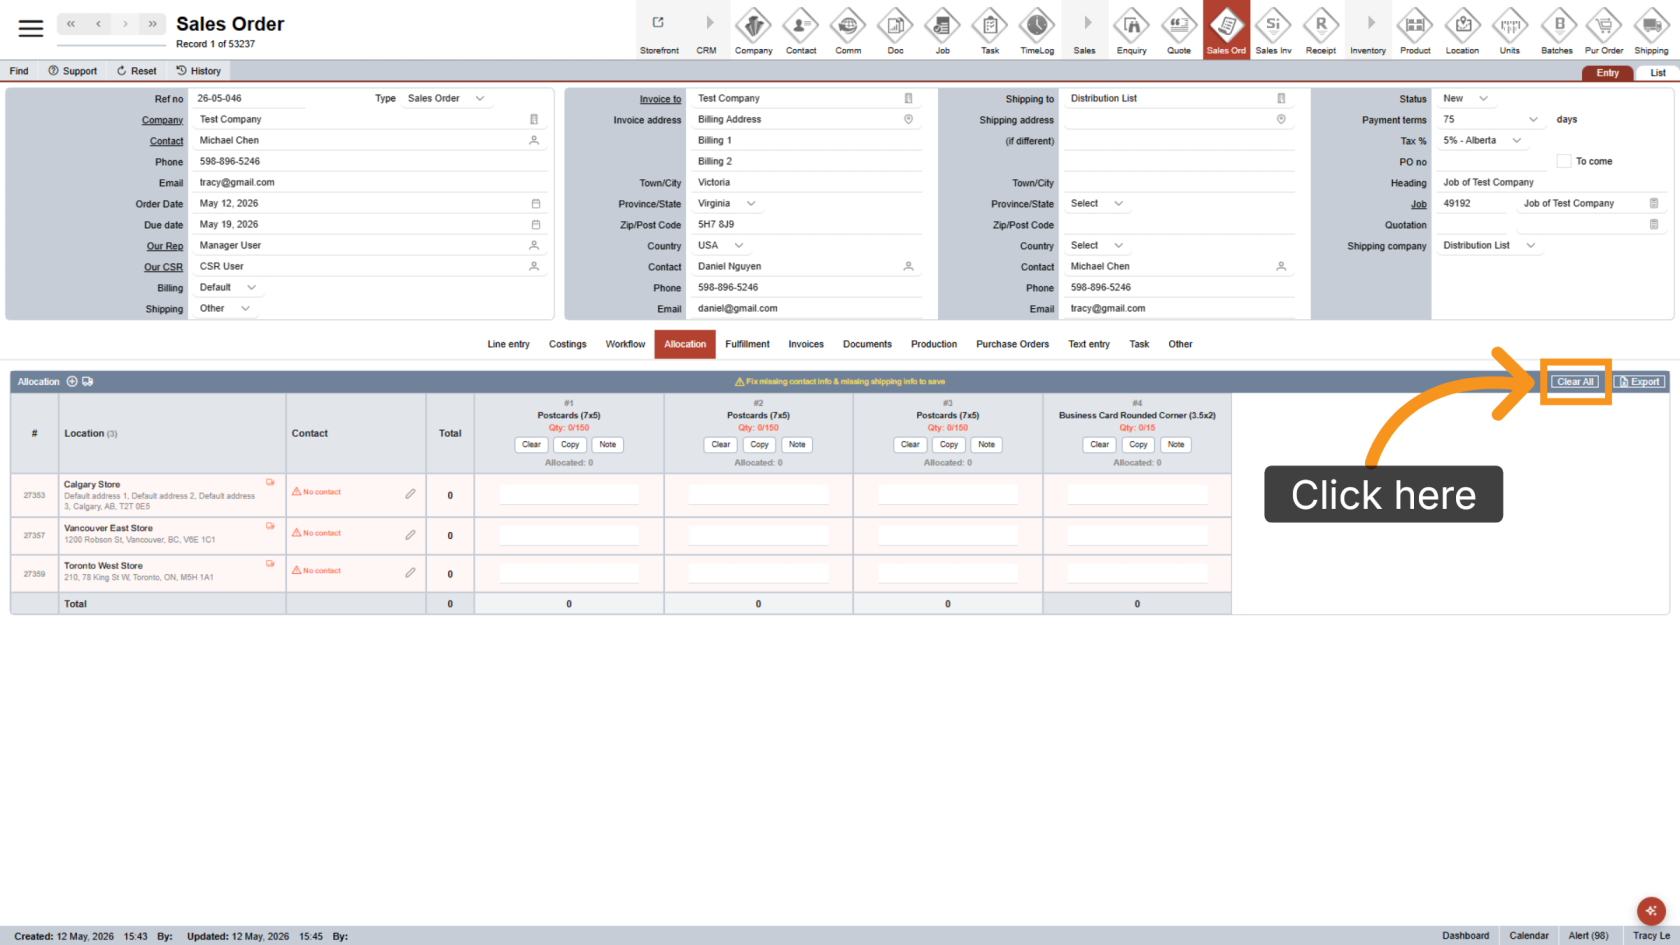
8. Clear All Allocation Data
Click Clear All to quickly remove all allocation information from the selected section.
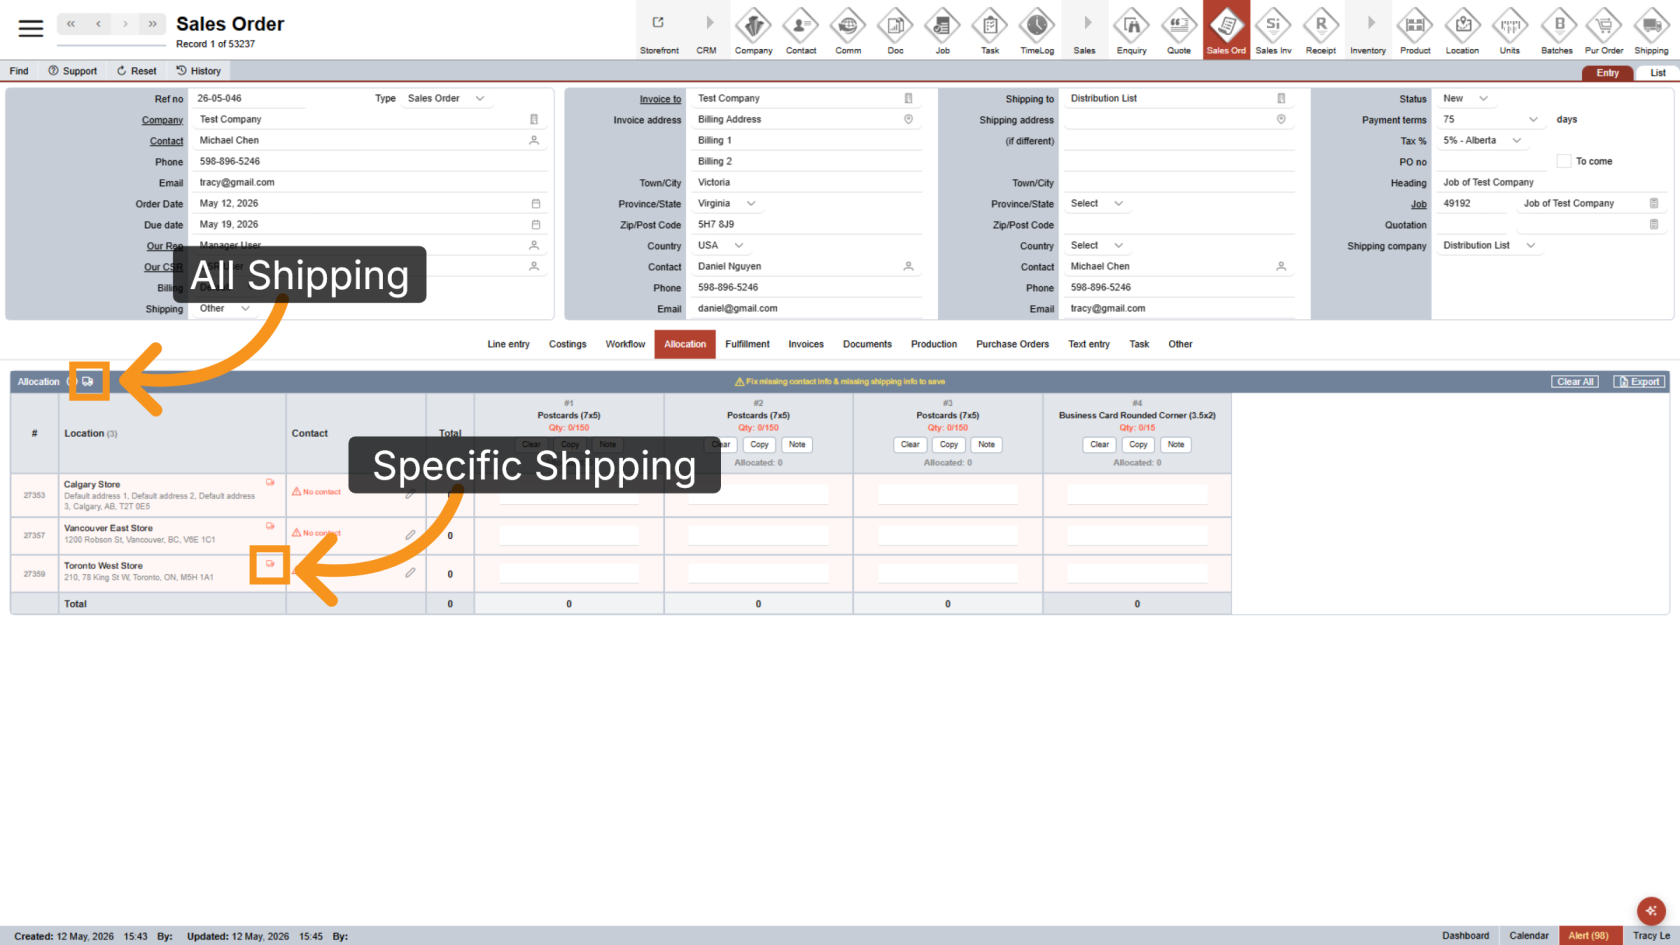
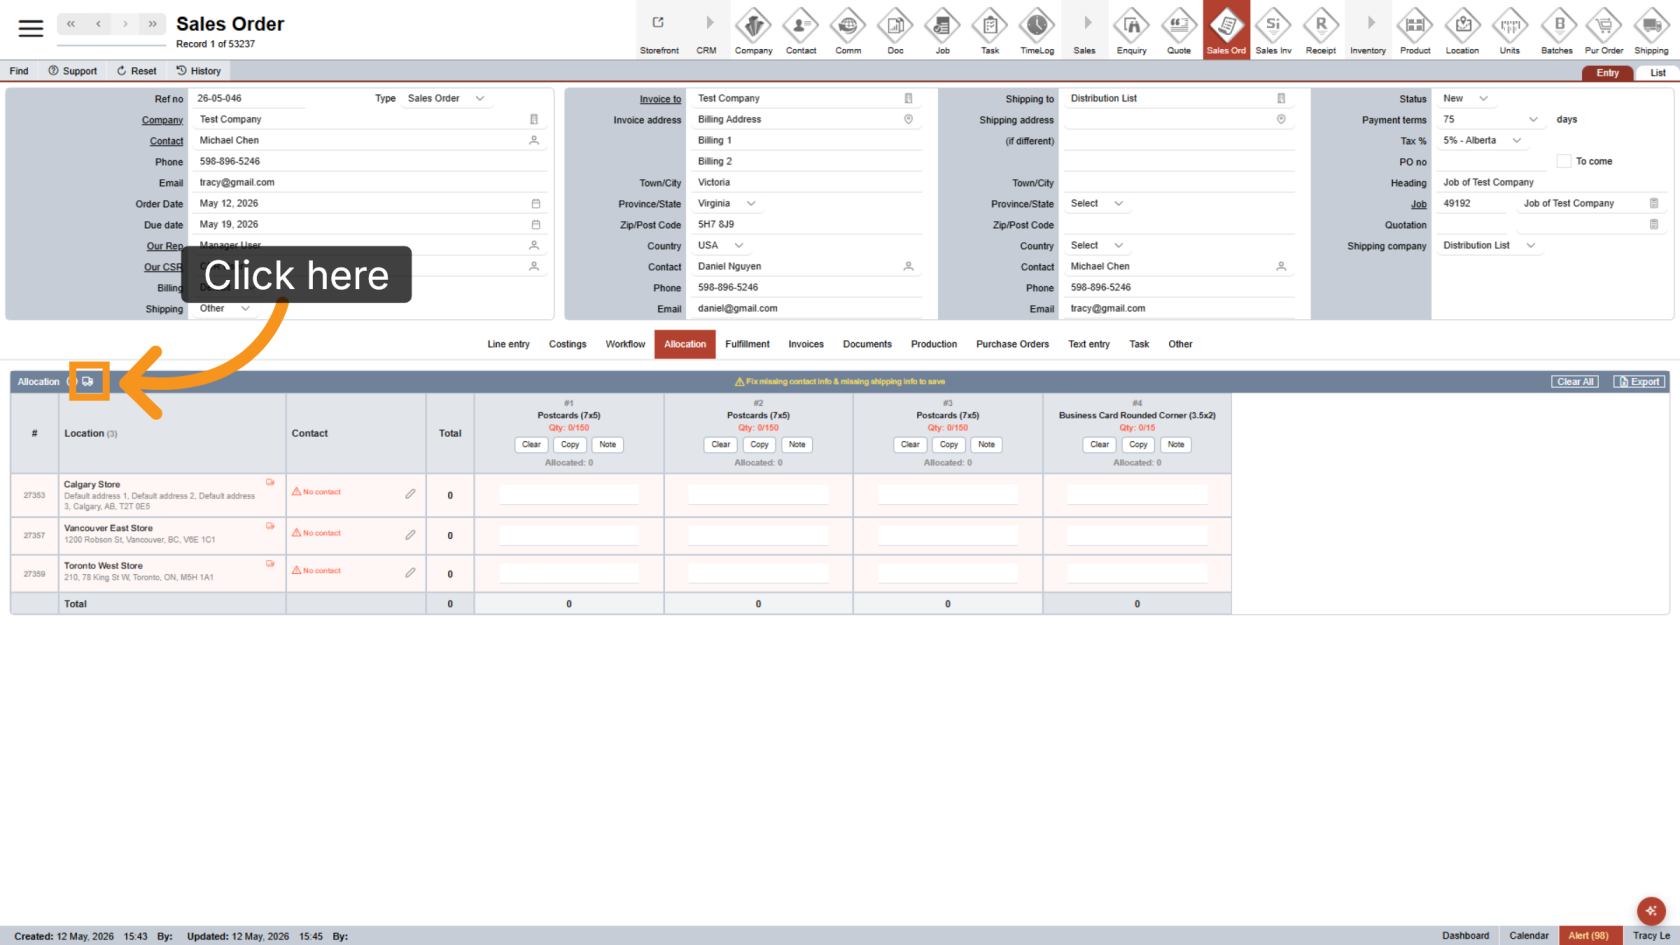
9. Review Shipping Settings
The shipping icon in the header allows you to review shipping information for all locations, while the shipping icon for each location displays details specific to that location.
10. Configure Shipping Settings
Click the ![]() shipping icon to configure shipping details for all locations.
shipping icon to configure shipping details for all locations.
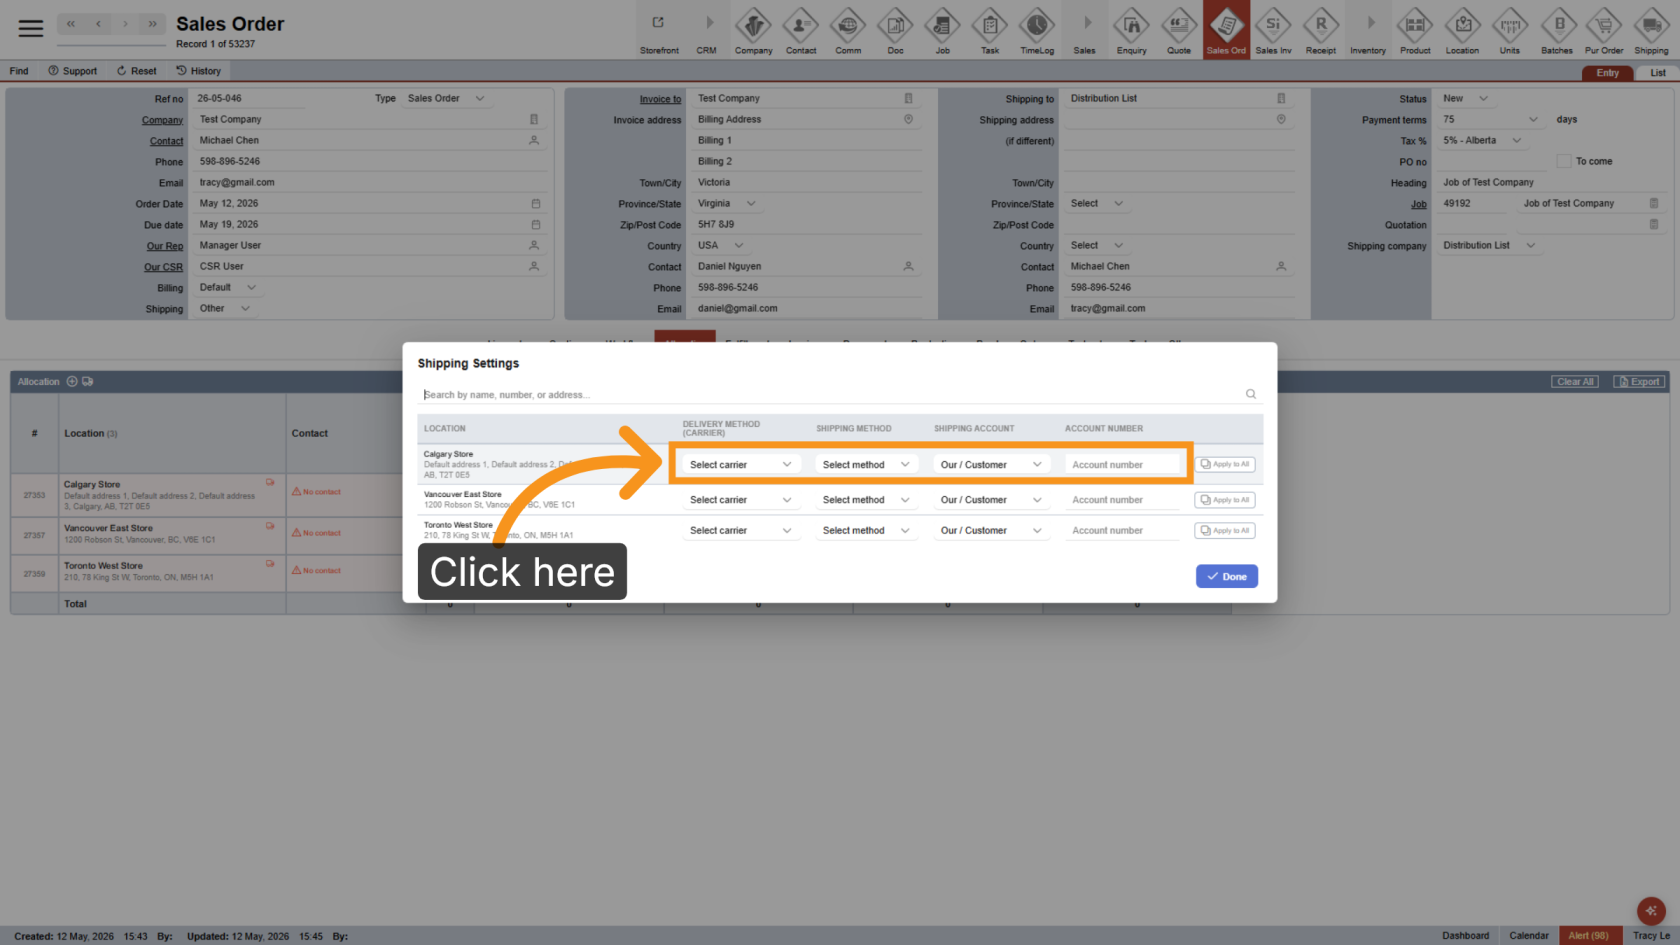
11. Select Shipping Methods
For each location, select the appropriate shipping method and shipping account.
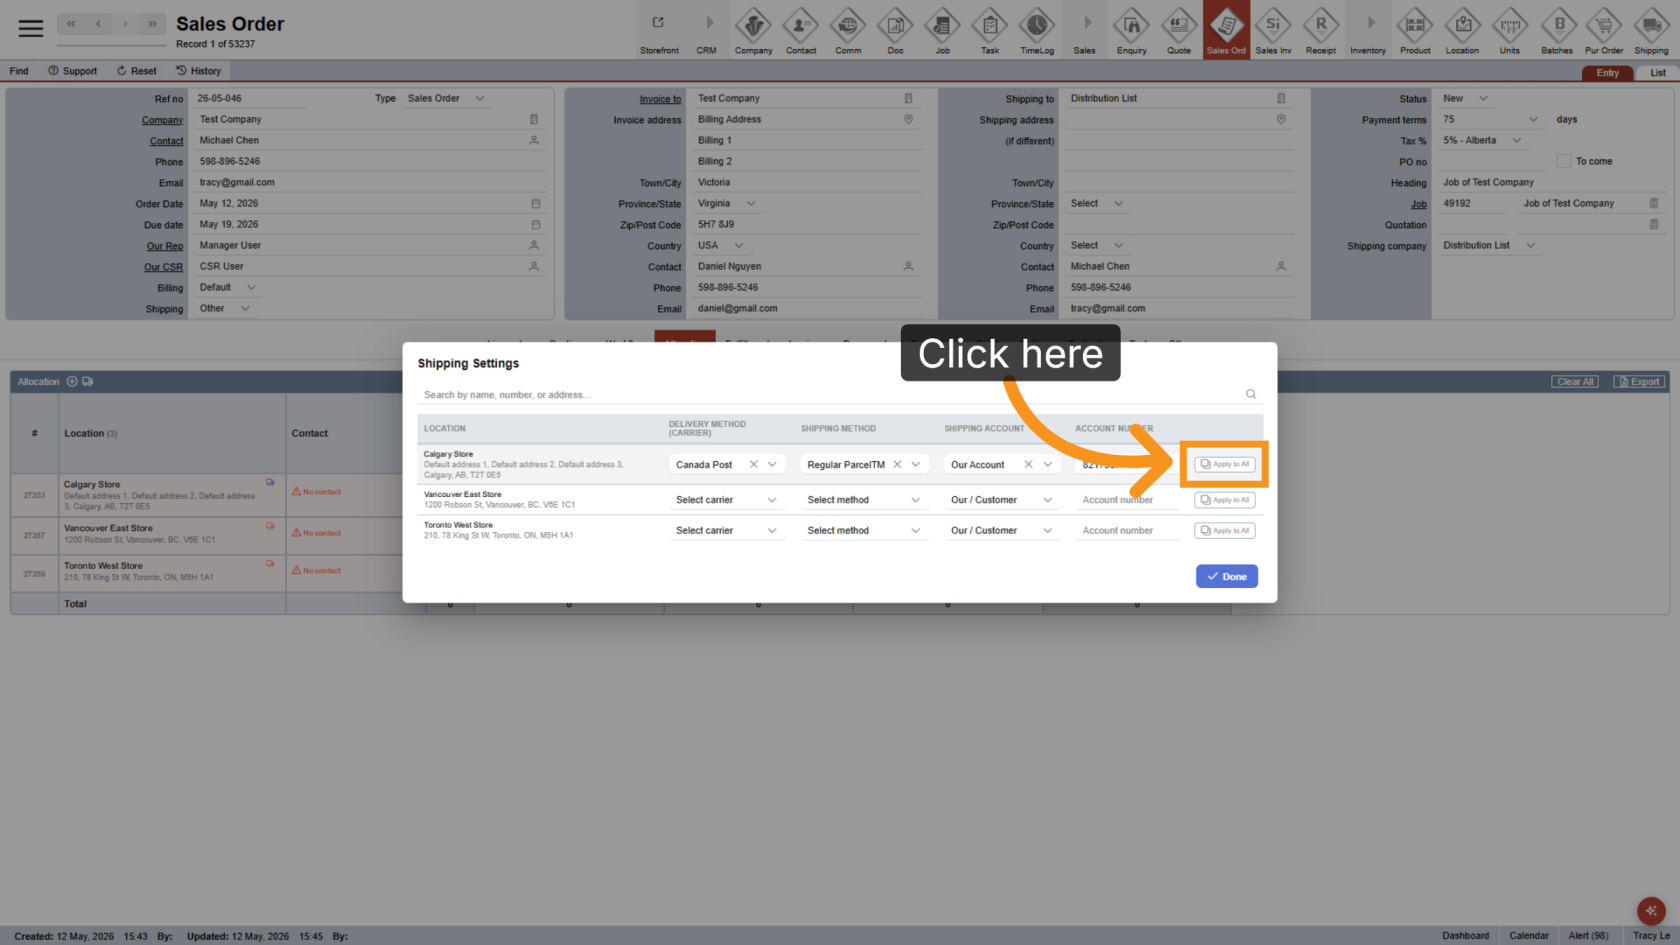
12. Apply Shipping Settings
Click Apply to All to use the same shipping settings for all locations in the workflow.
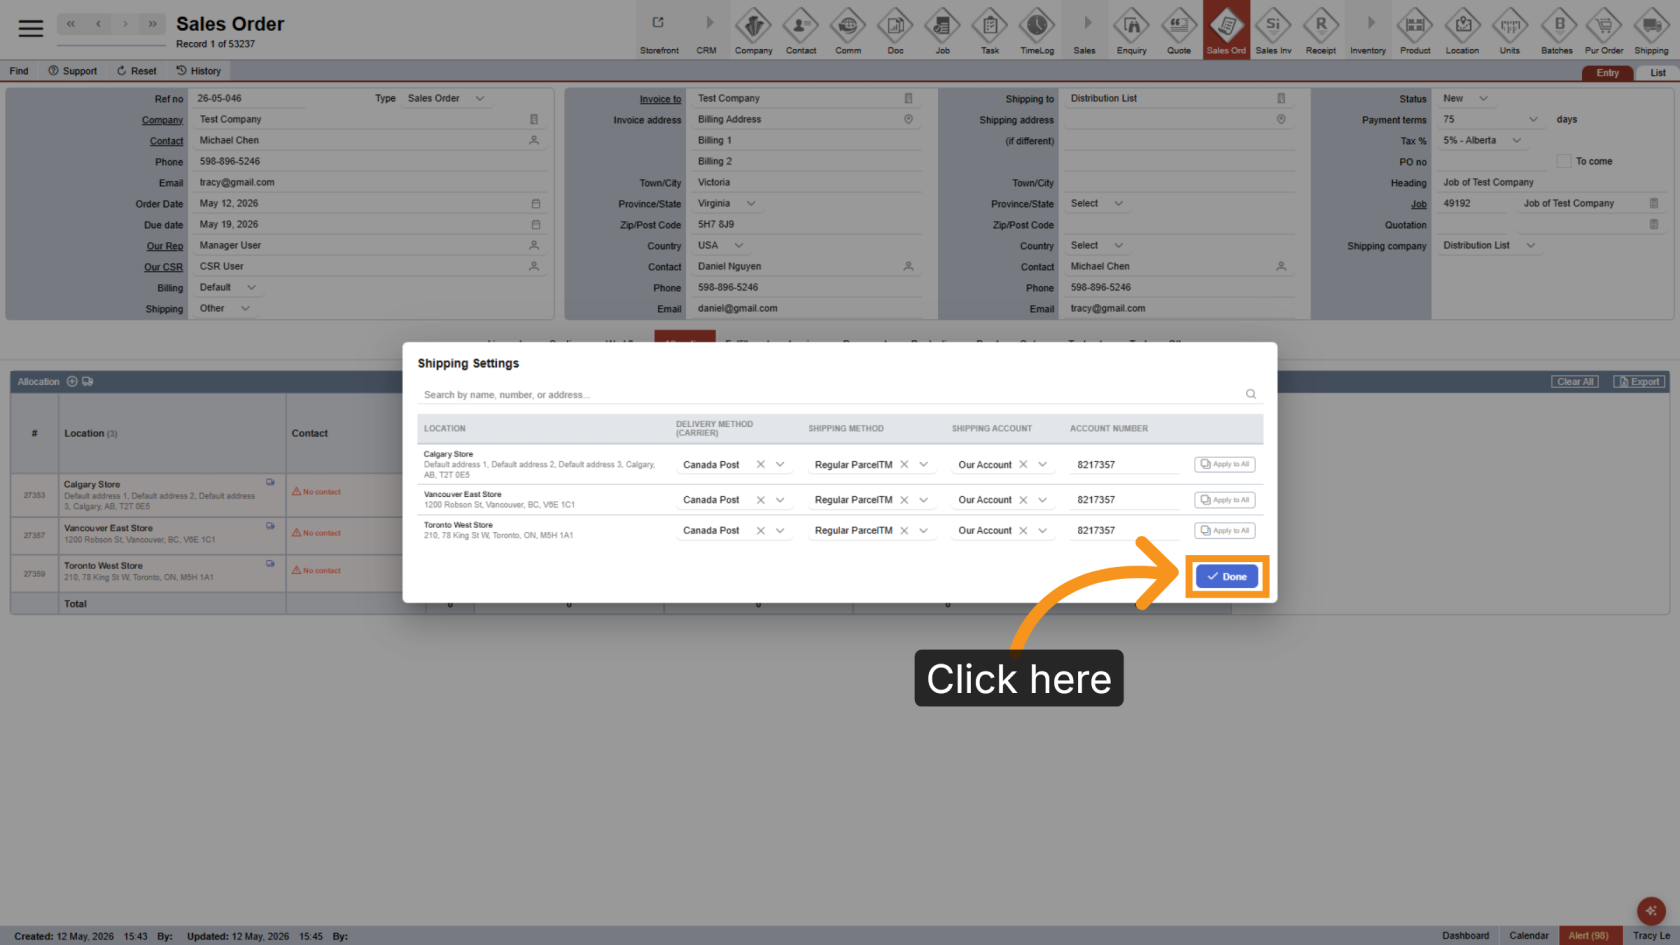
13. Confirm Shipping Setting
Click Done to save the shipping configuration and continue.
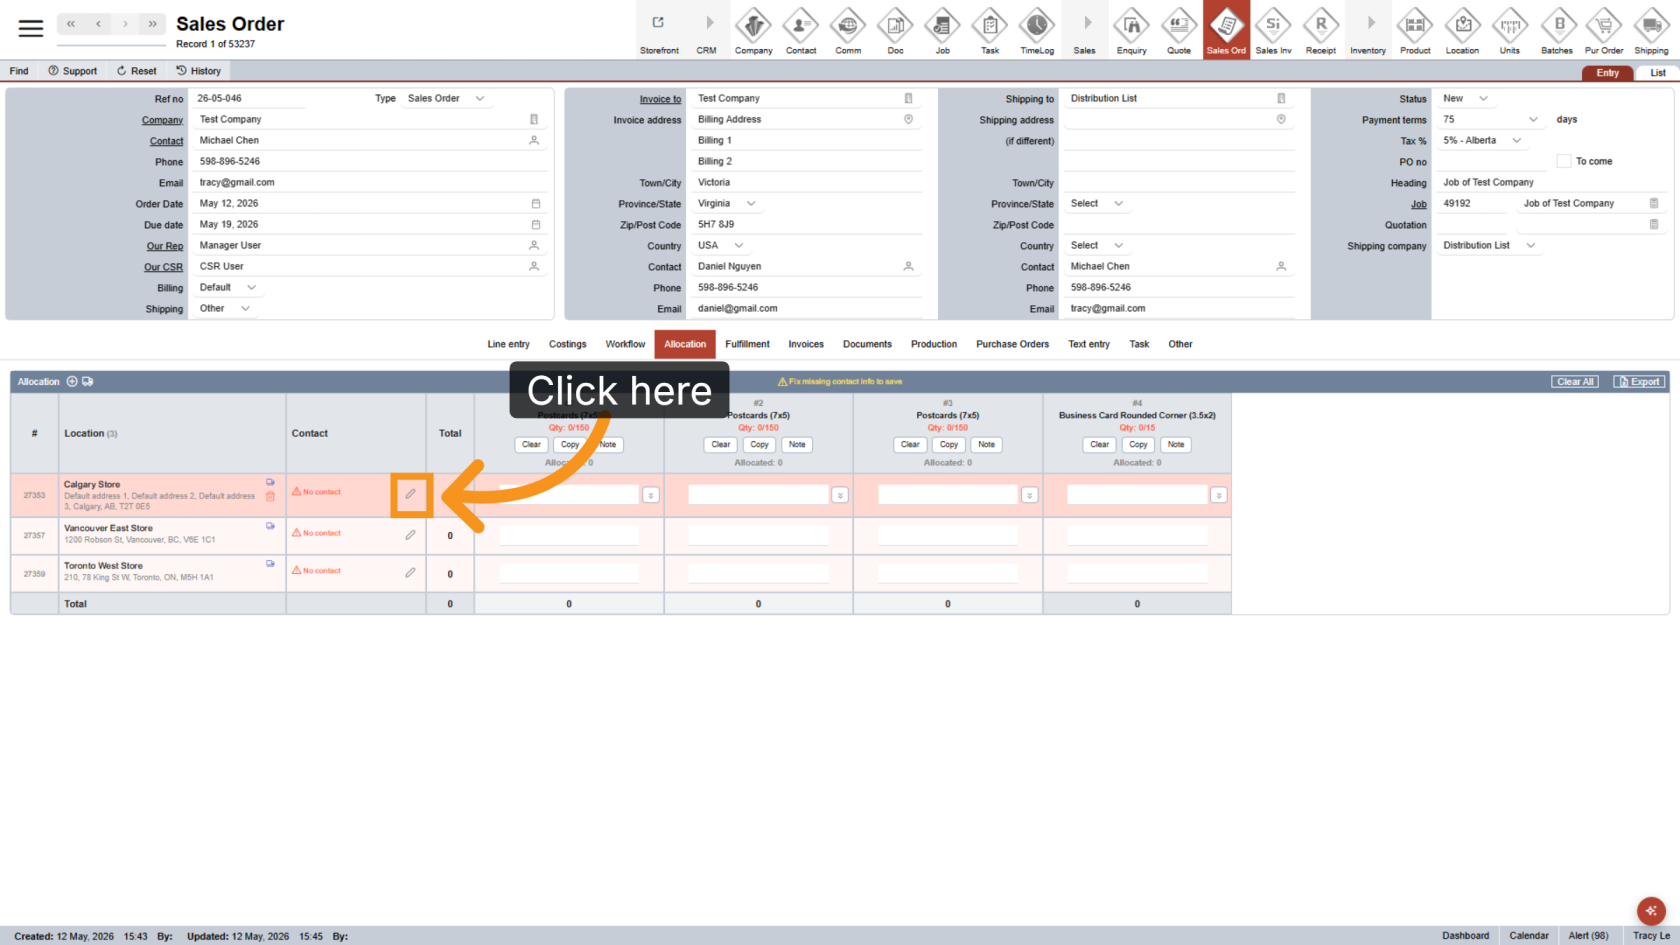
14. Edit Contact Information
Click the Edit icon to update the contact details for each location.
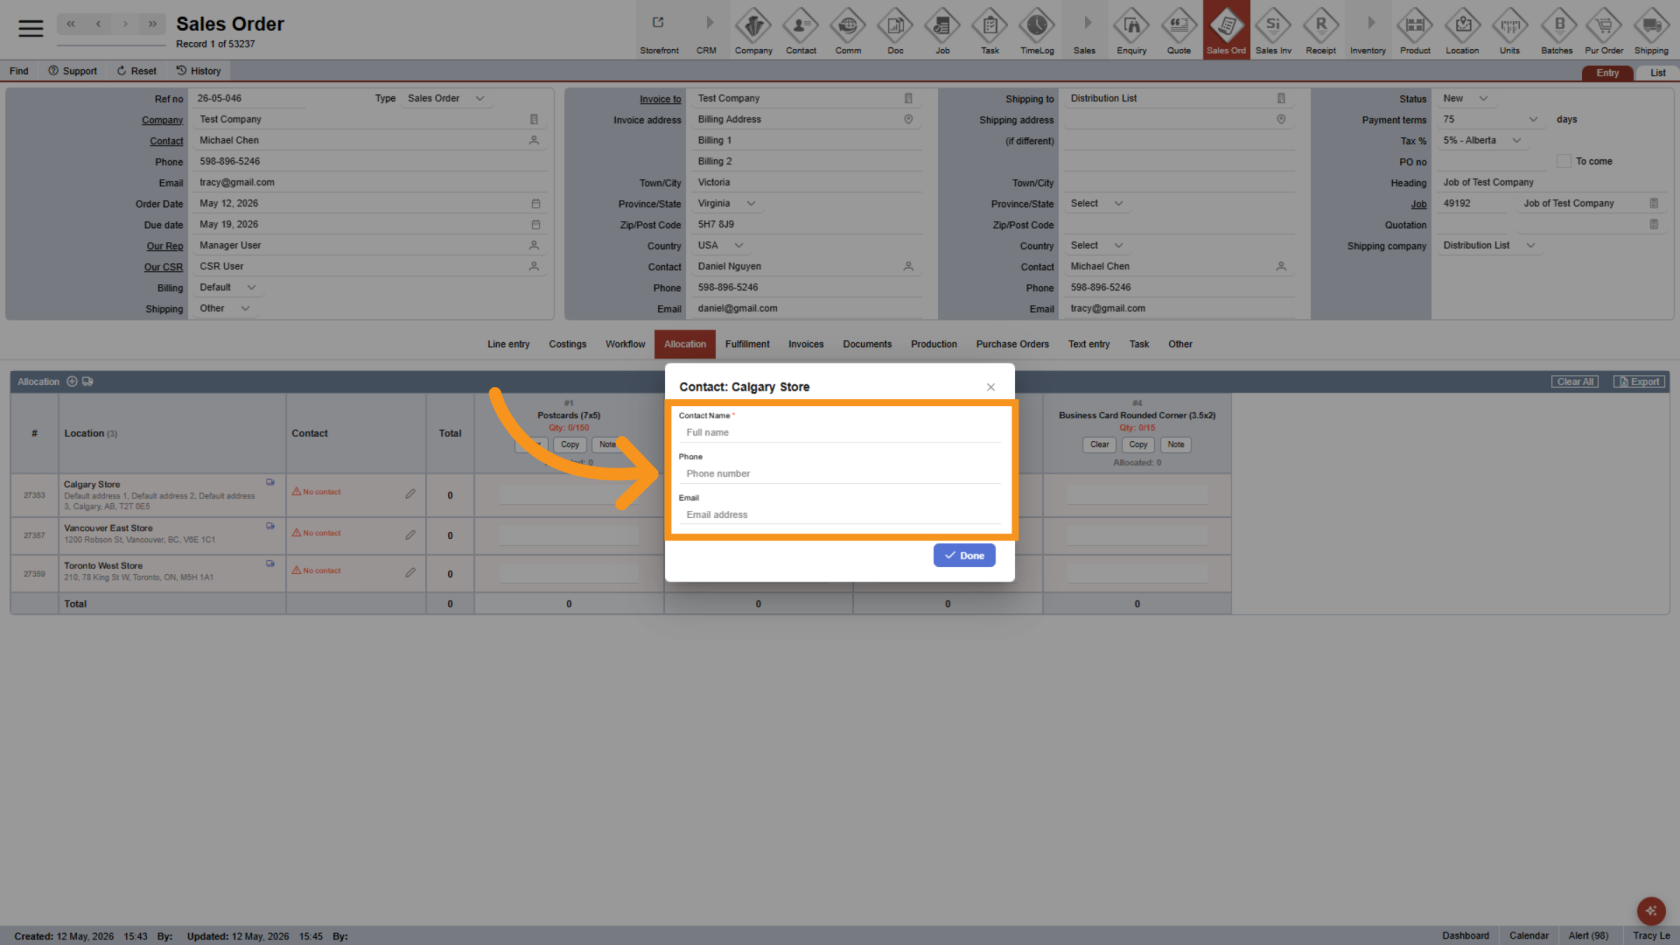
15. Add Contact Details
Enter the receiver’s Name, Phone Number, and Email Address.
Note: Name required fields.
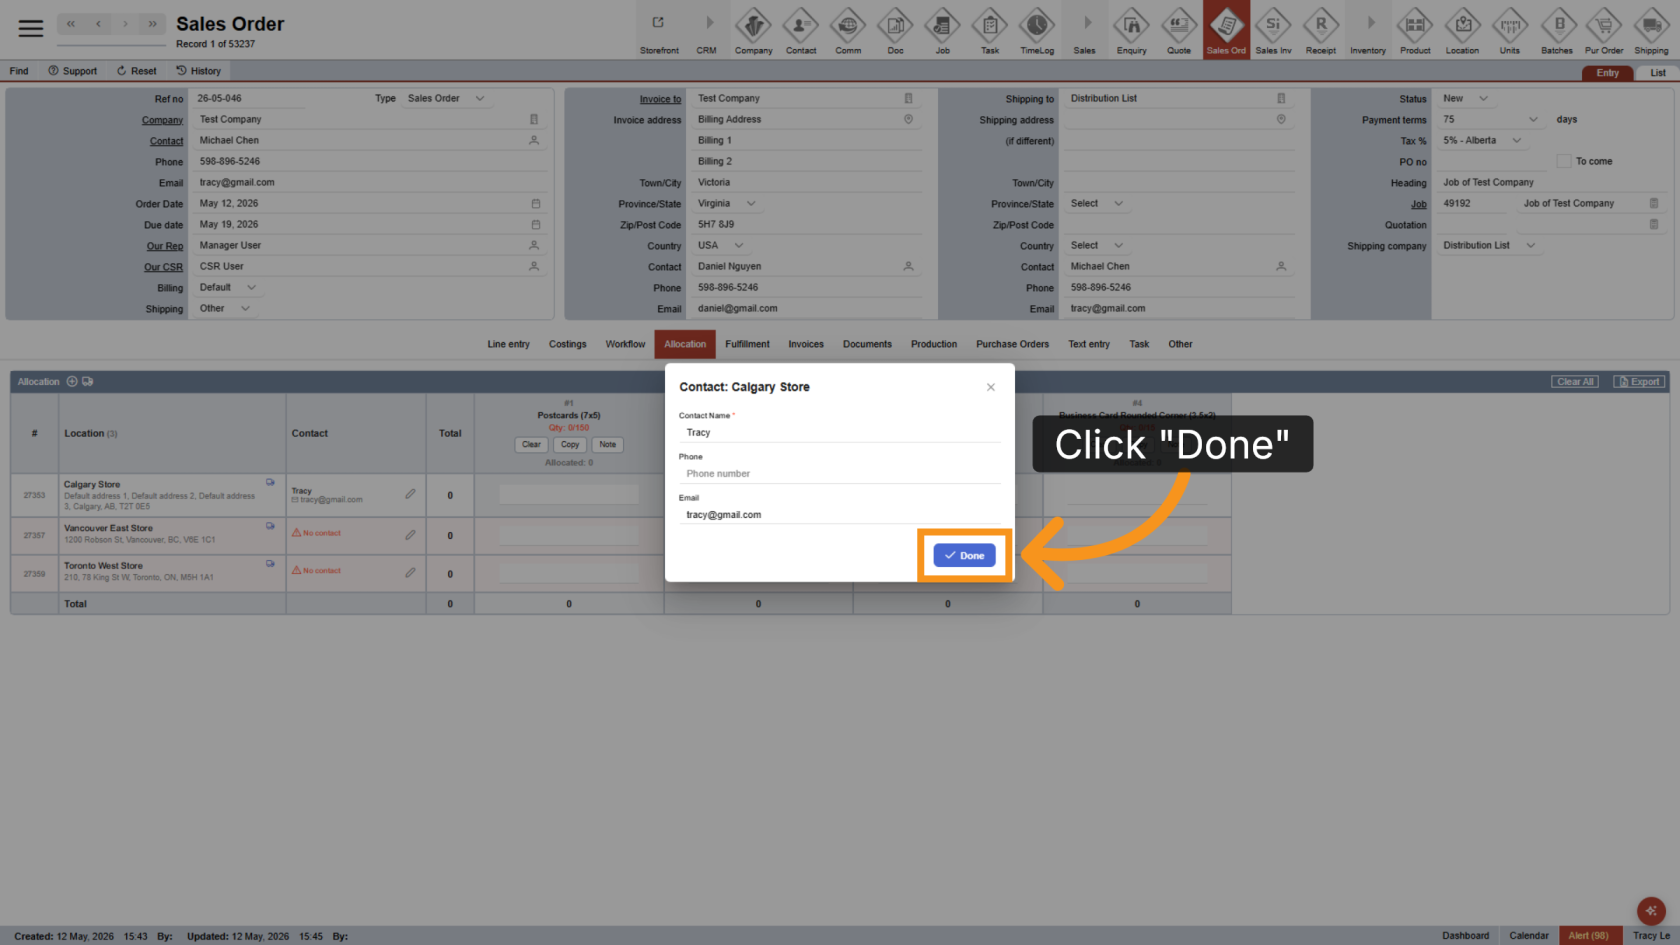
16. Save Contact Information
Click Done to save the contact information.
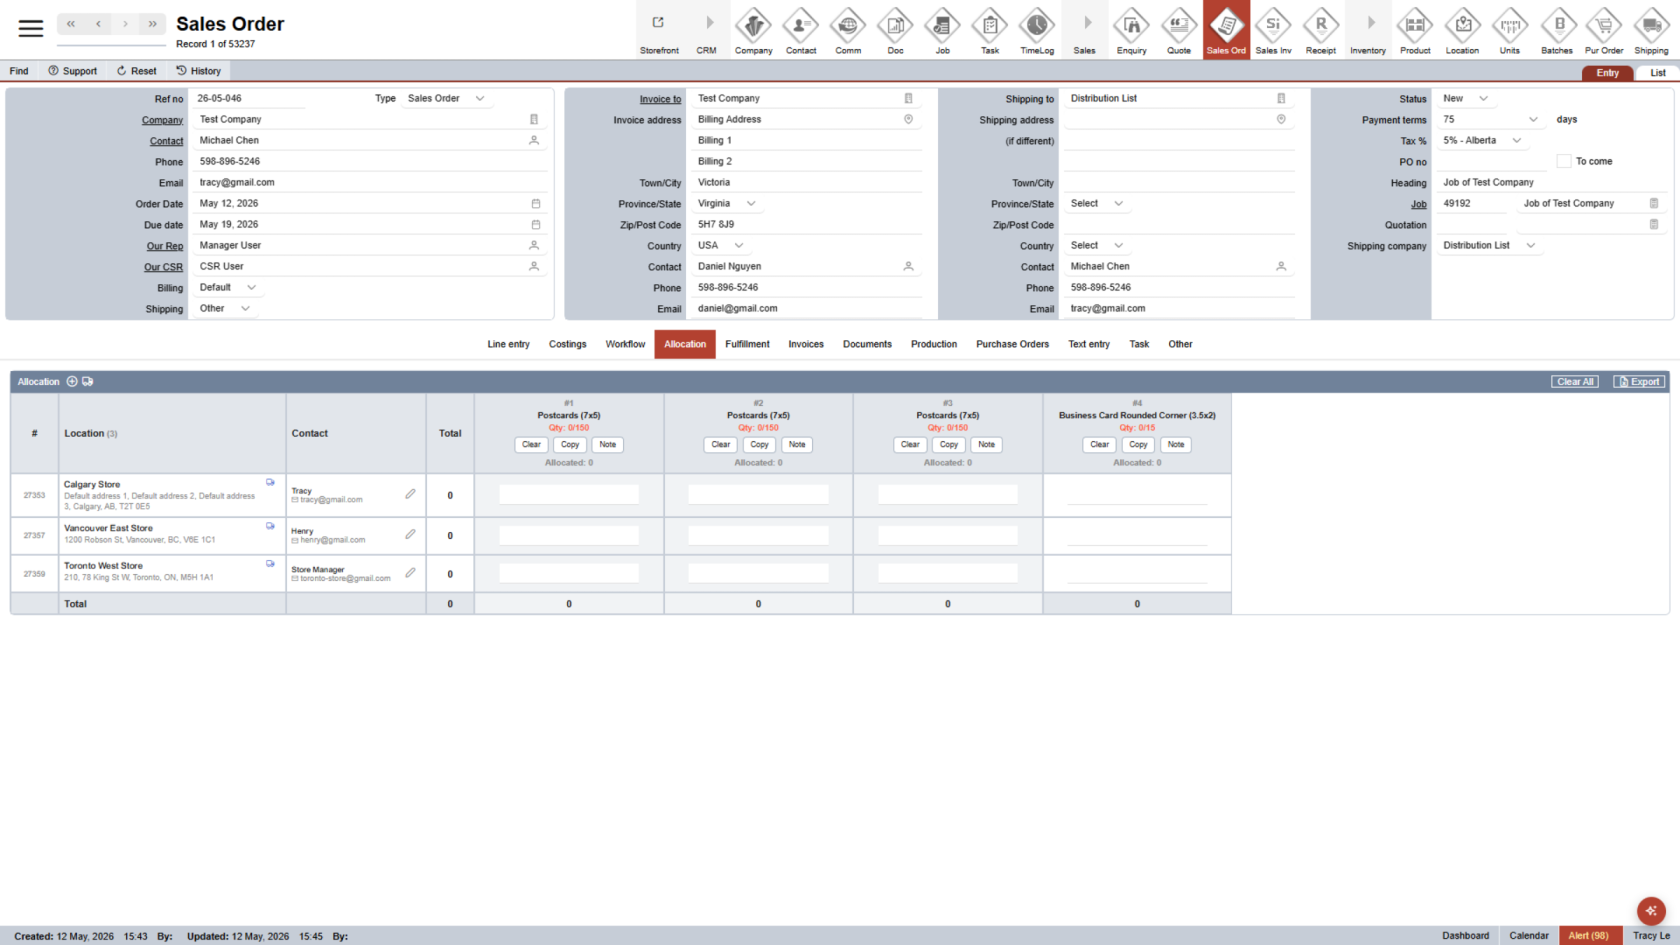
17. Review Information
Once all required information is completed, the red highlight will disappear.
18. Review Product Groups
Columns displayed in different colors represent the same product with multiple versions.
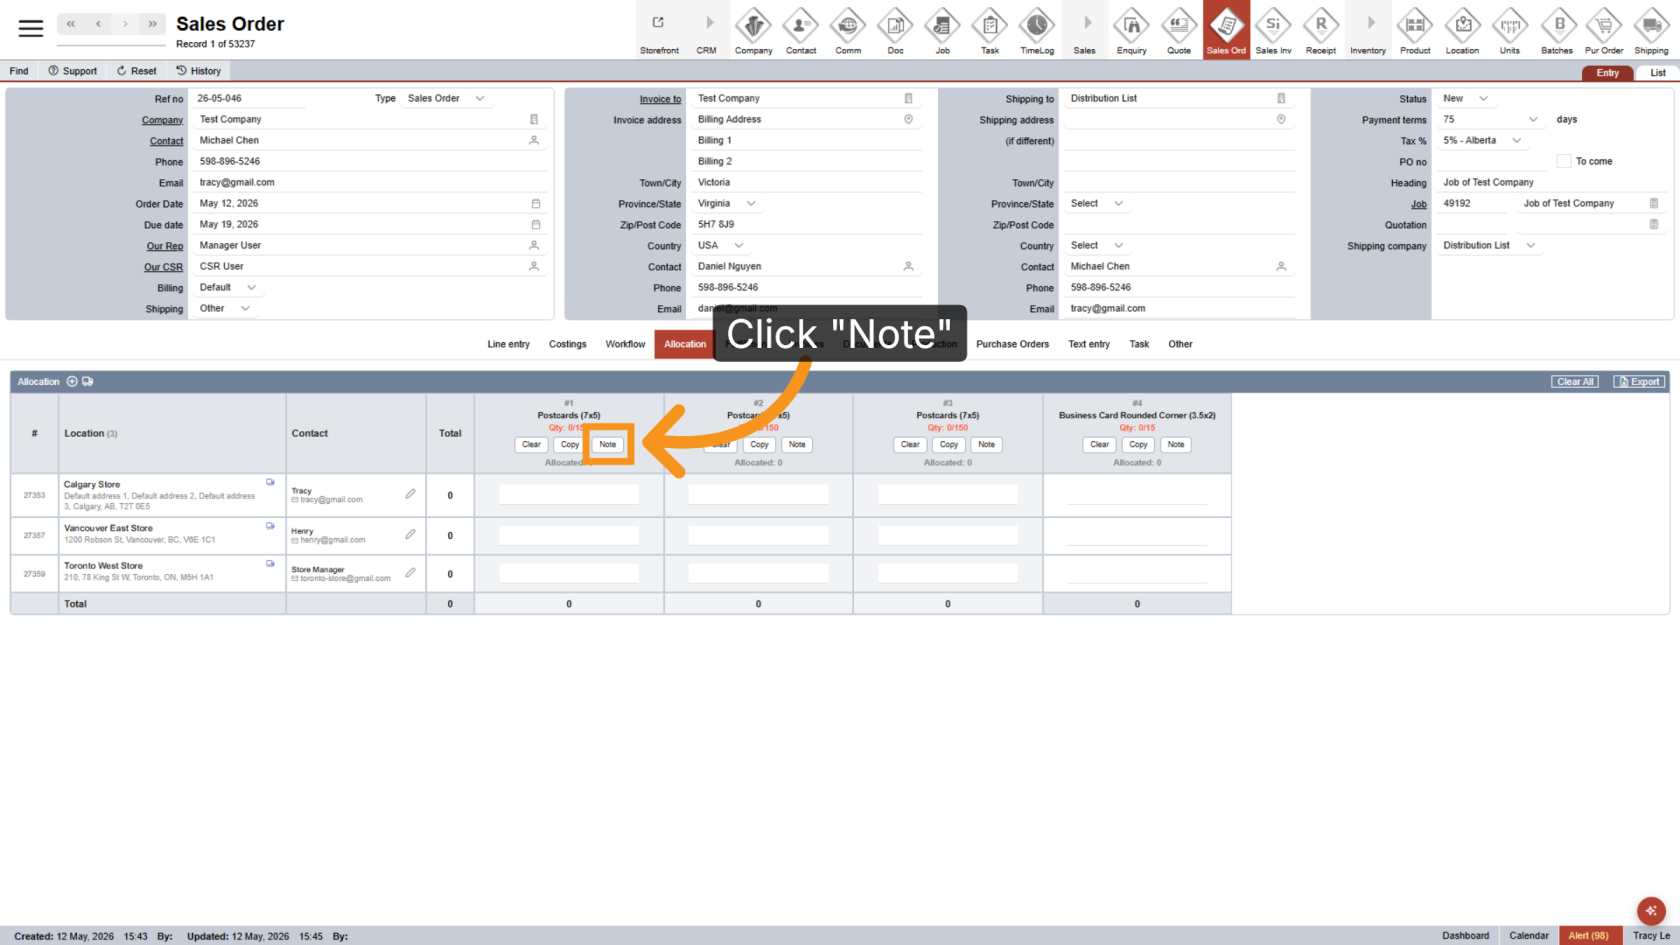
19. Add Print File Names
Click Note to enter the print file name for easier allocation tracking.
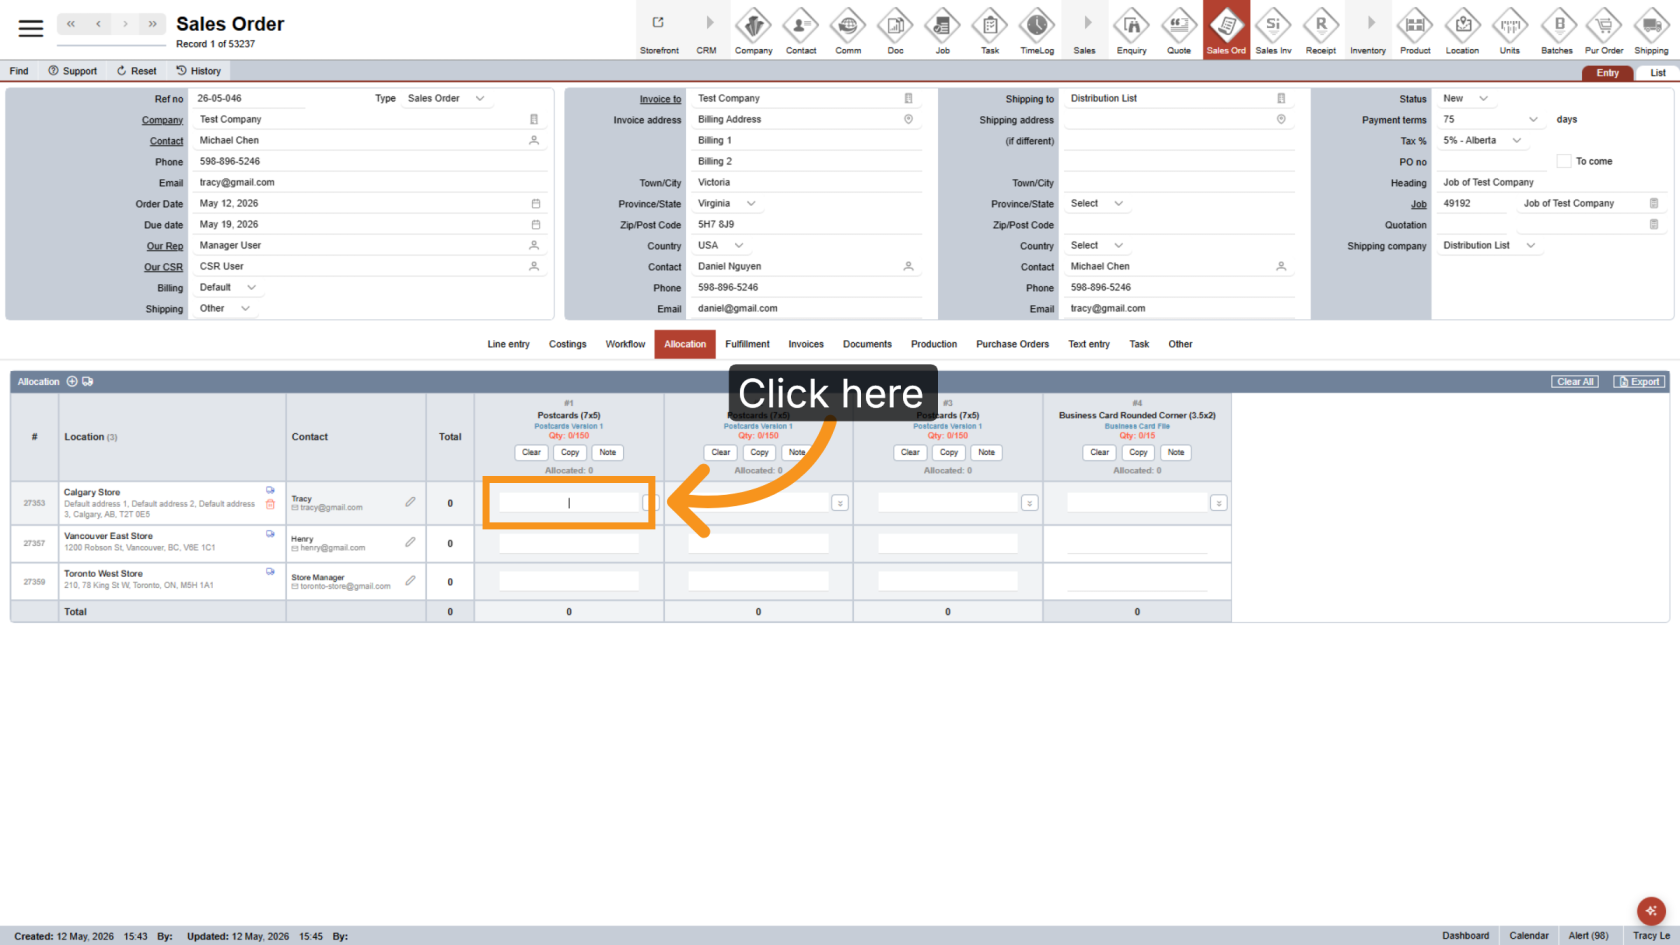
20. Enter Product Quantities
Enter the appropriate quantity for each product and shipping location.
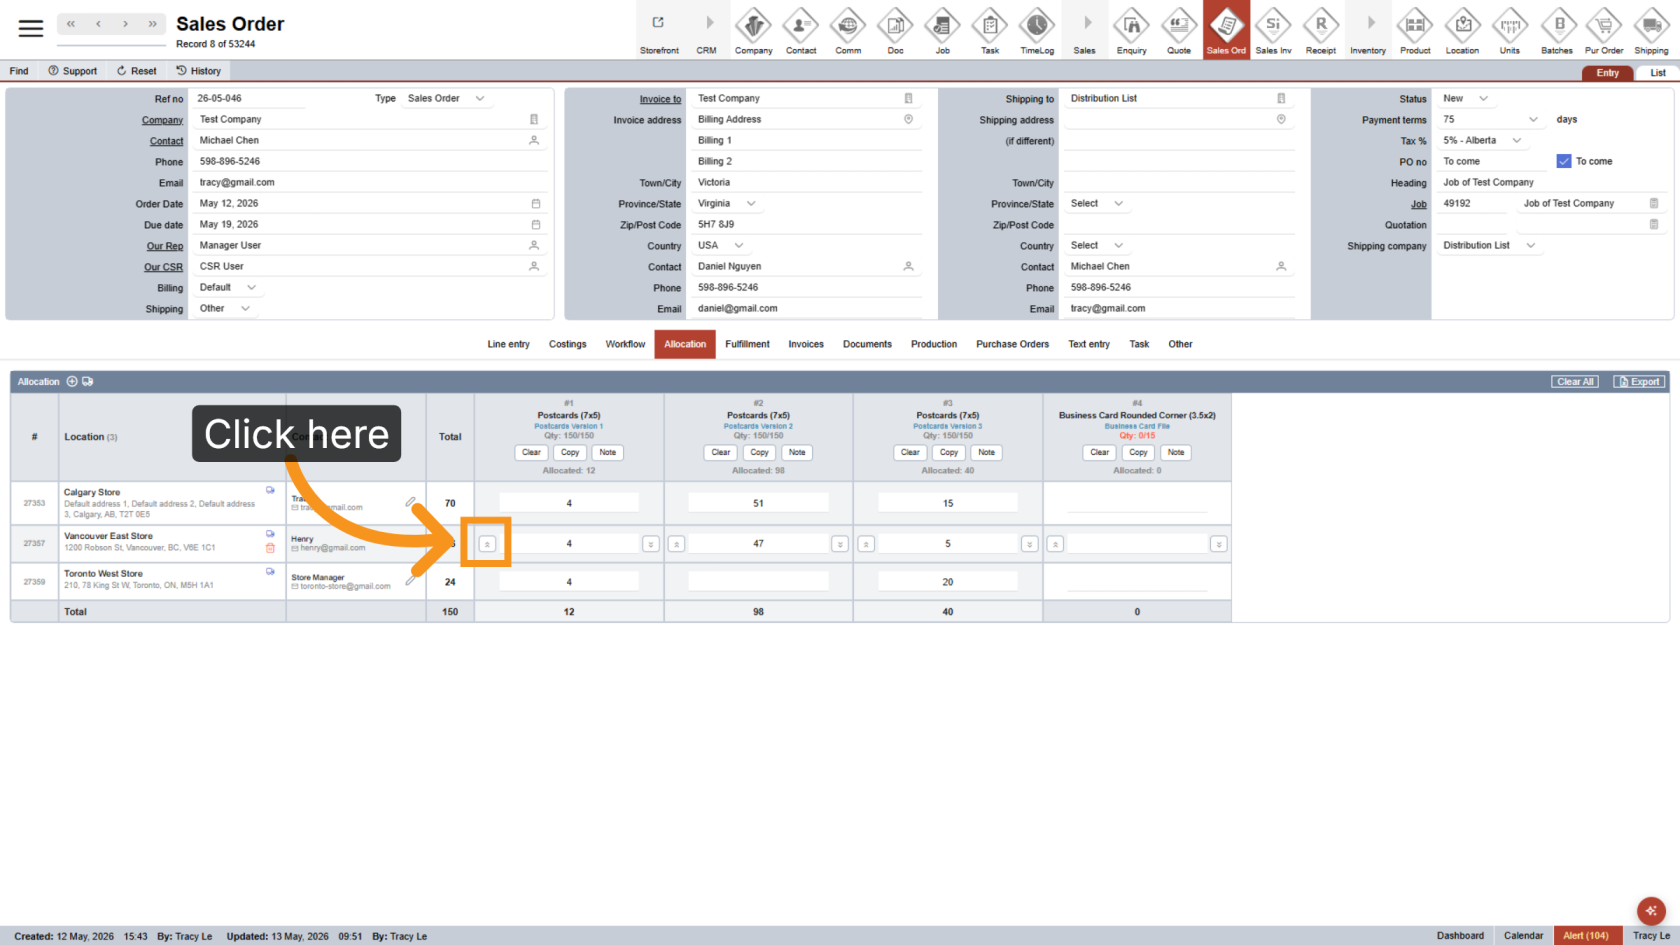
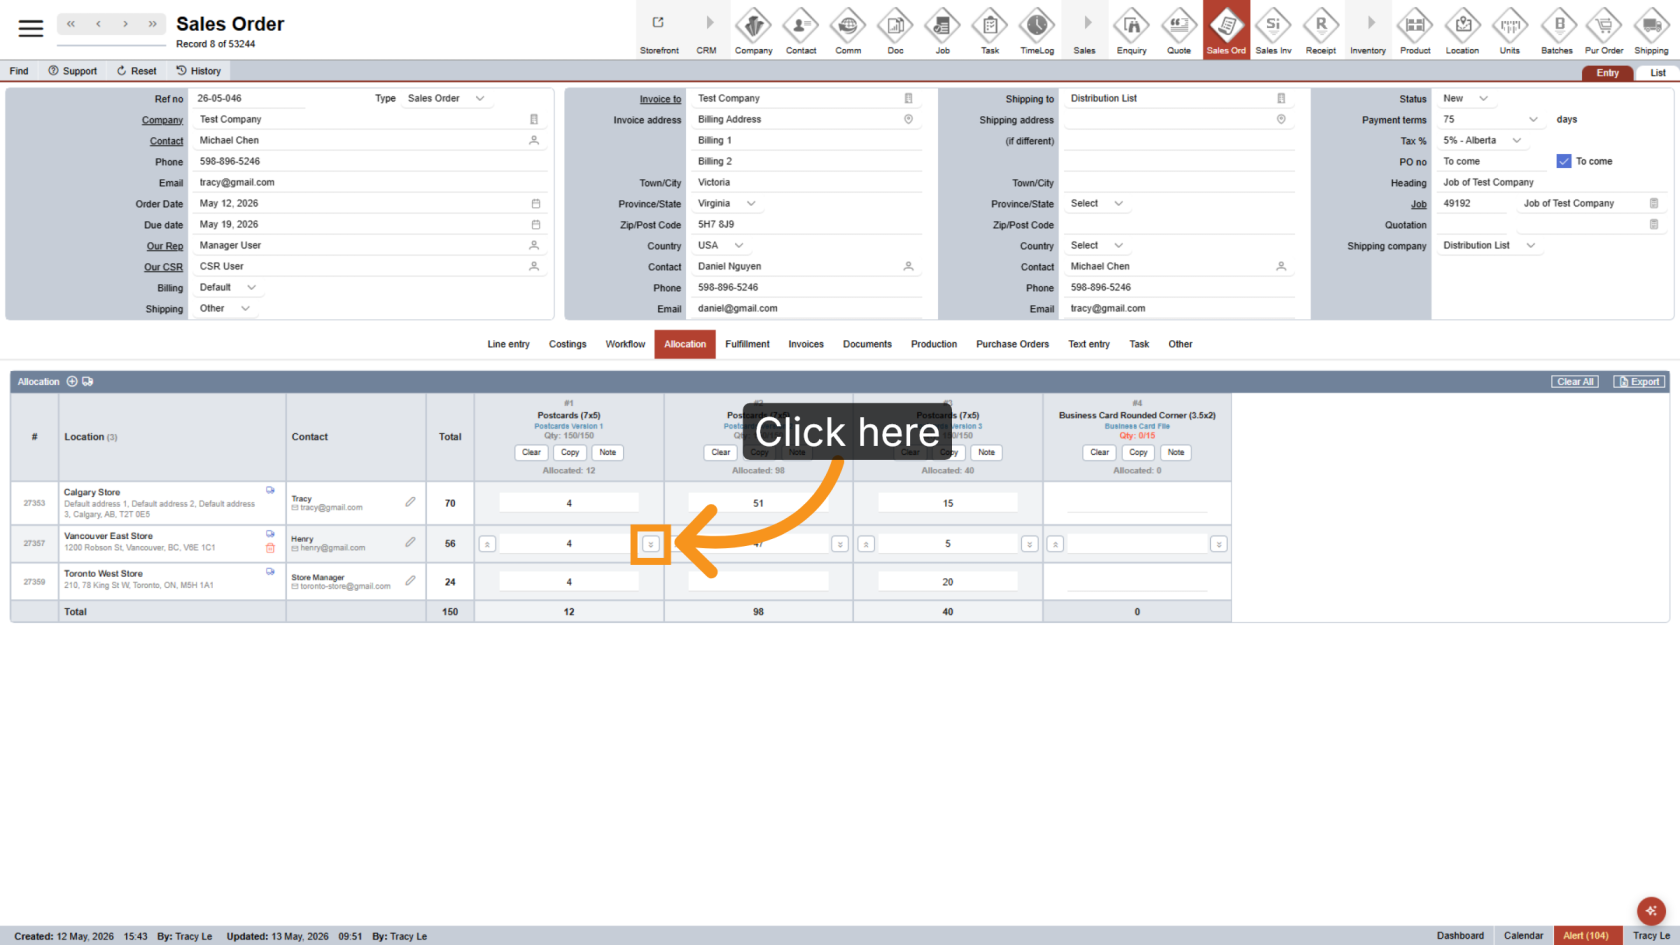
21. Apply Quantity to Rows Above
Click the ![]() left arrow beside the quantity field to apply the same quantity to all rows above.
left arrow beside the quantity field to apply the same quantity to all rows above.
22. Apply Quantity to Rows Below
Click the ![]() right arrow beside the quantity field to apply the same quantity to all rows below.
right arrow beside the quantity field to apply the same quantity to all rows below.
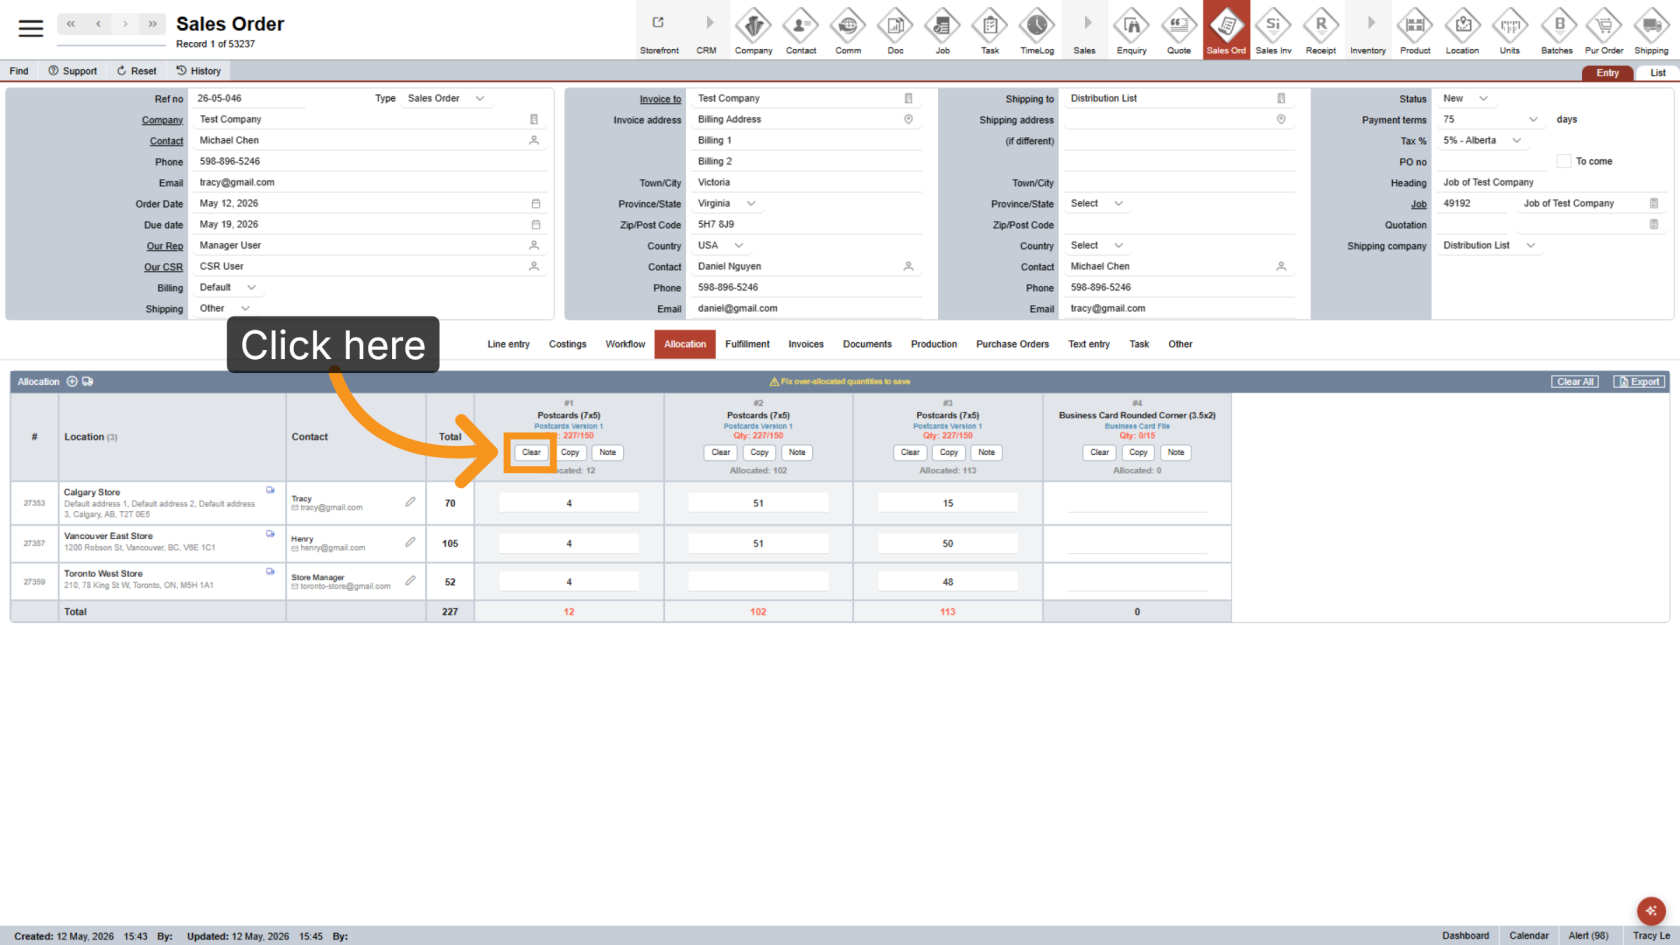
23. Clear Column Values
Click Clear to remove all values from the selected column.
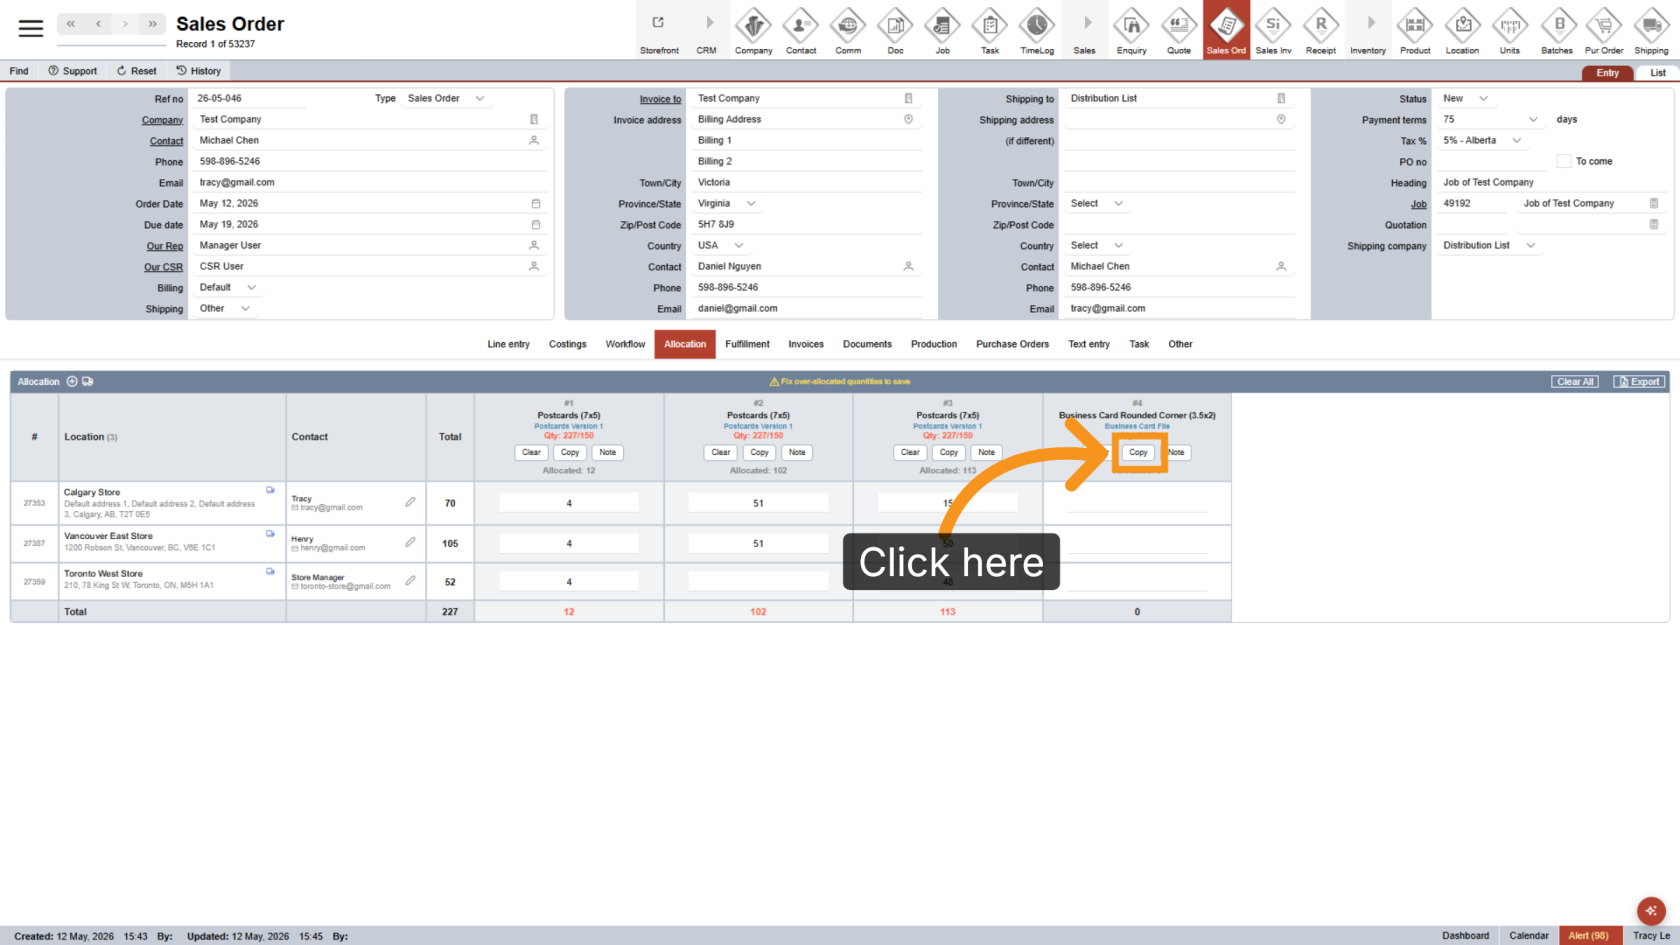
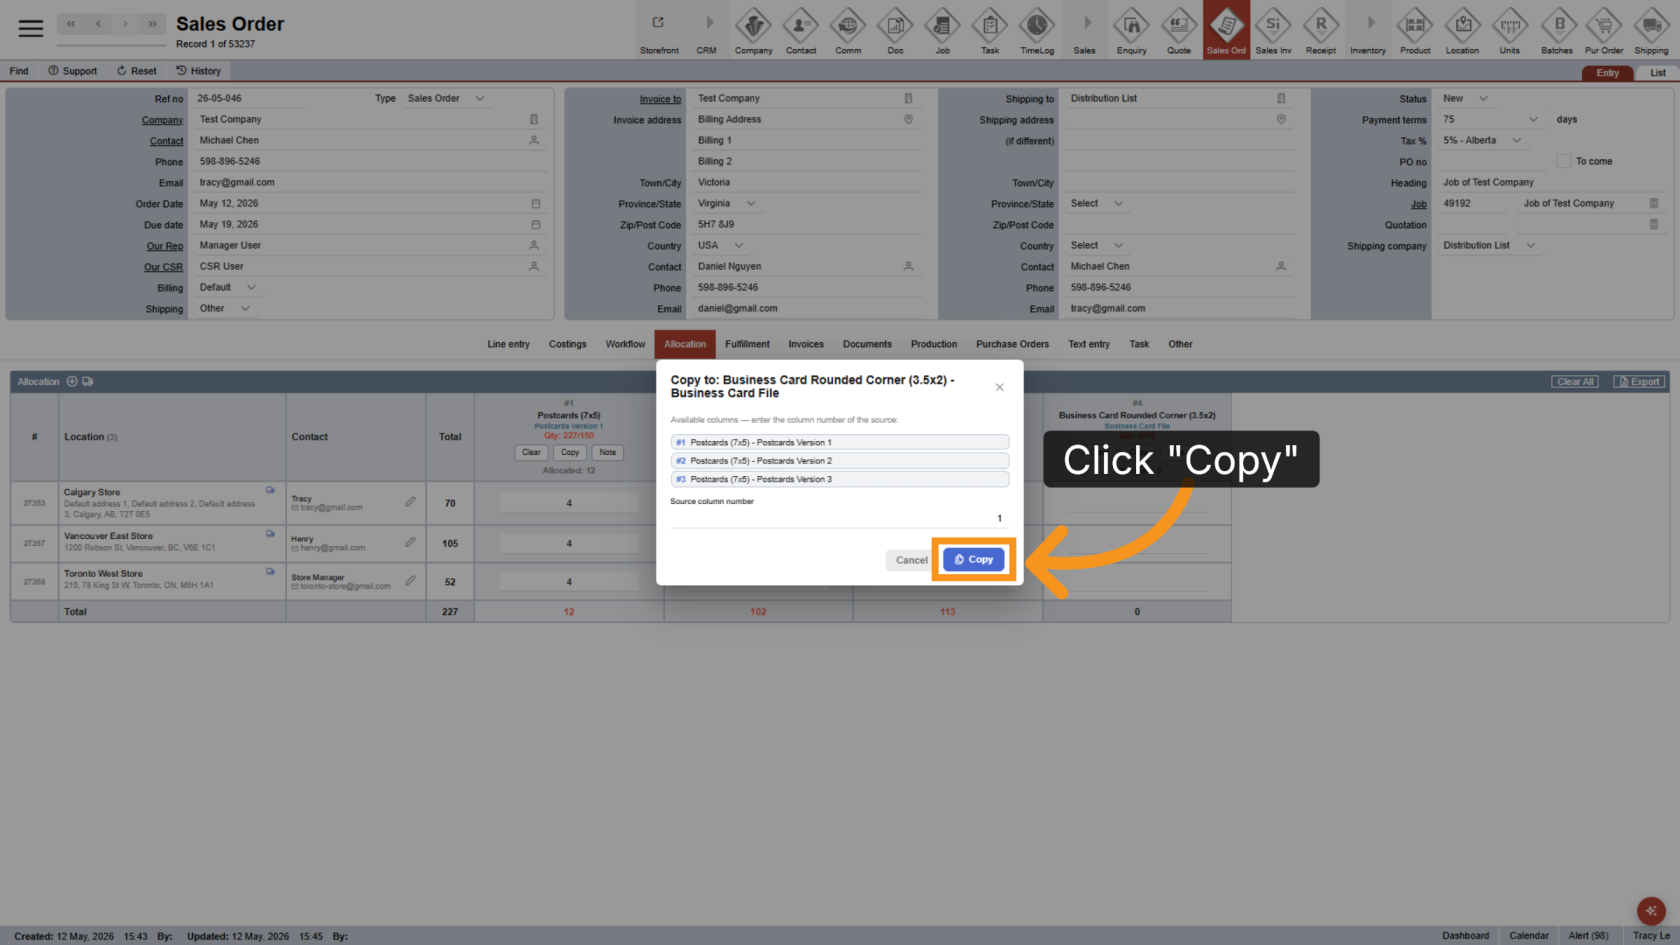
24. Copy Column Values
Click Copy to duplicate allocation values from another column.
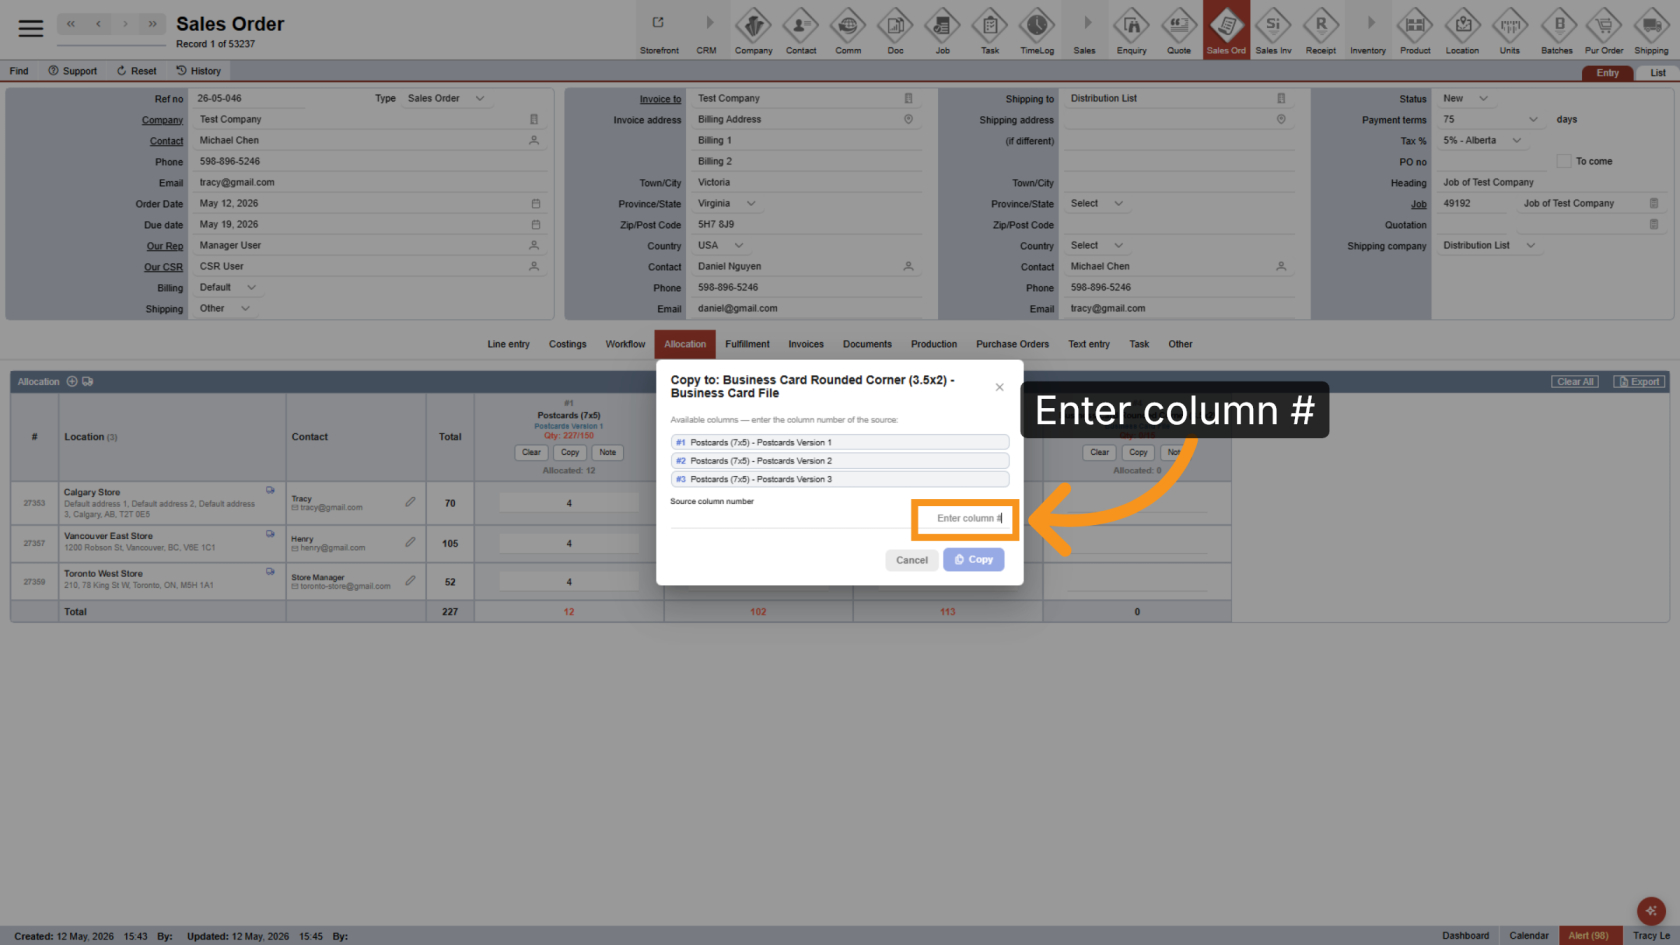
25. Select the Source Column
Enter the source column number to identify which allocation data should be copied.
26. Copy Allocation Data
Click Copy to apply the selected column’s allocation data.
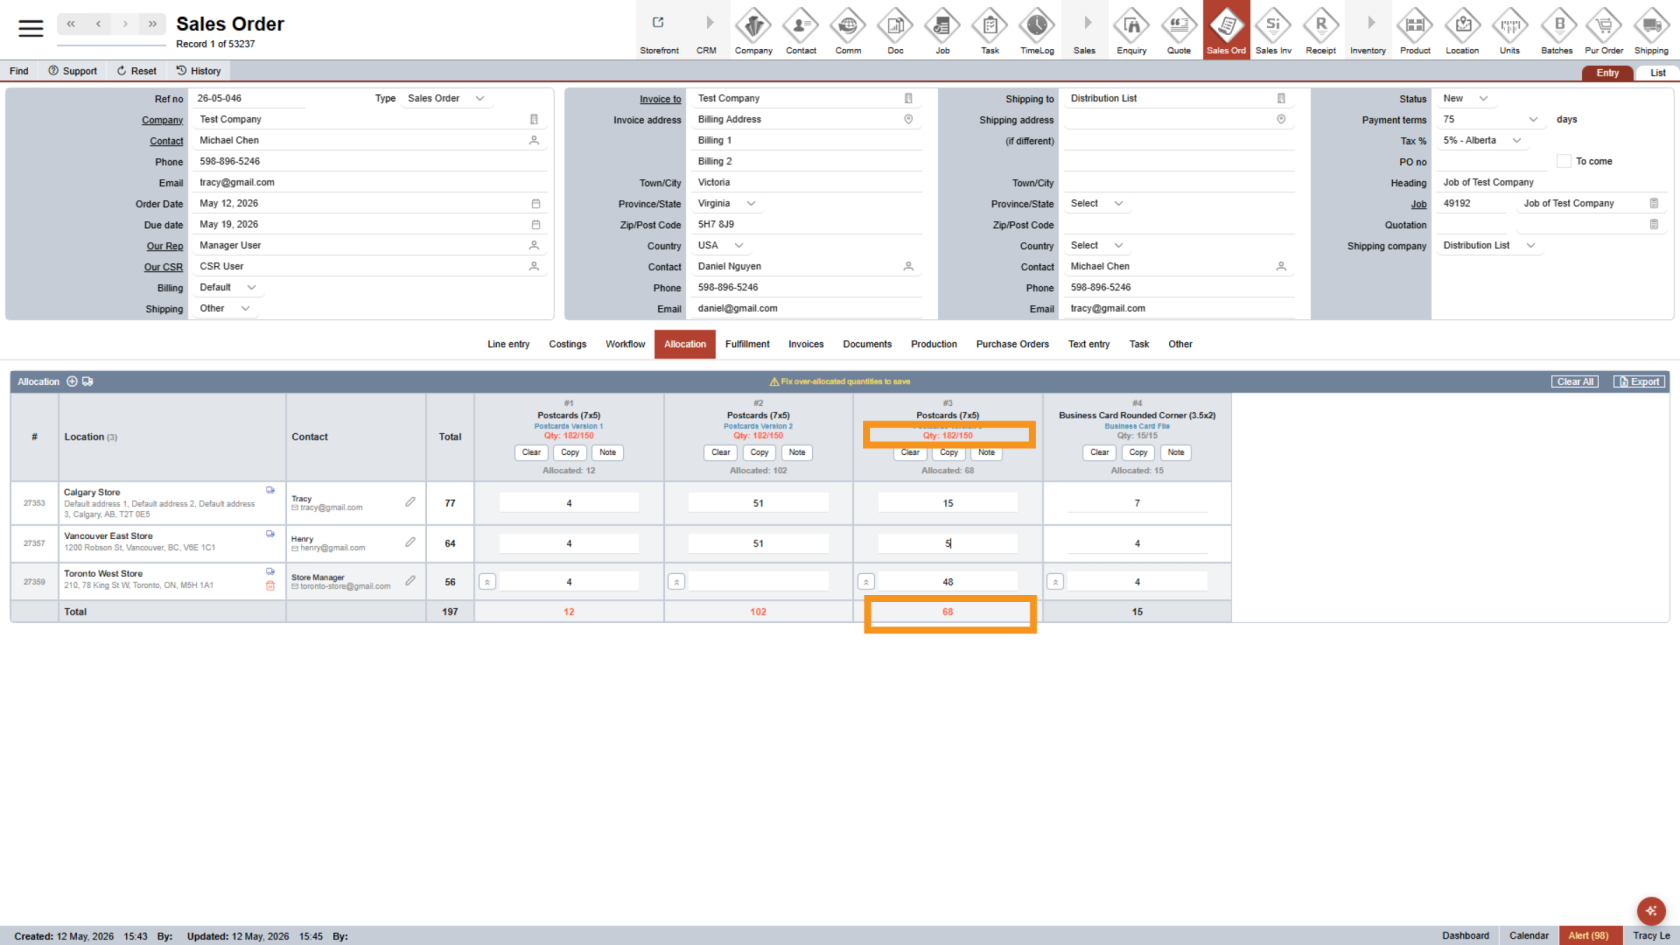
27. Correct Quantity Errors
Quantities highlighted in red indicate incorrect or incomplete values that need to be corrected.
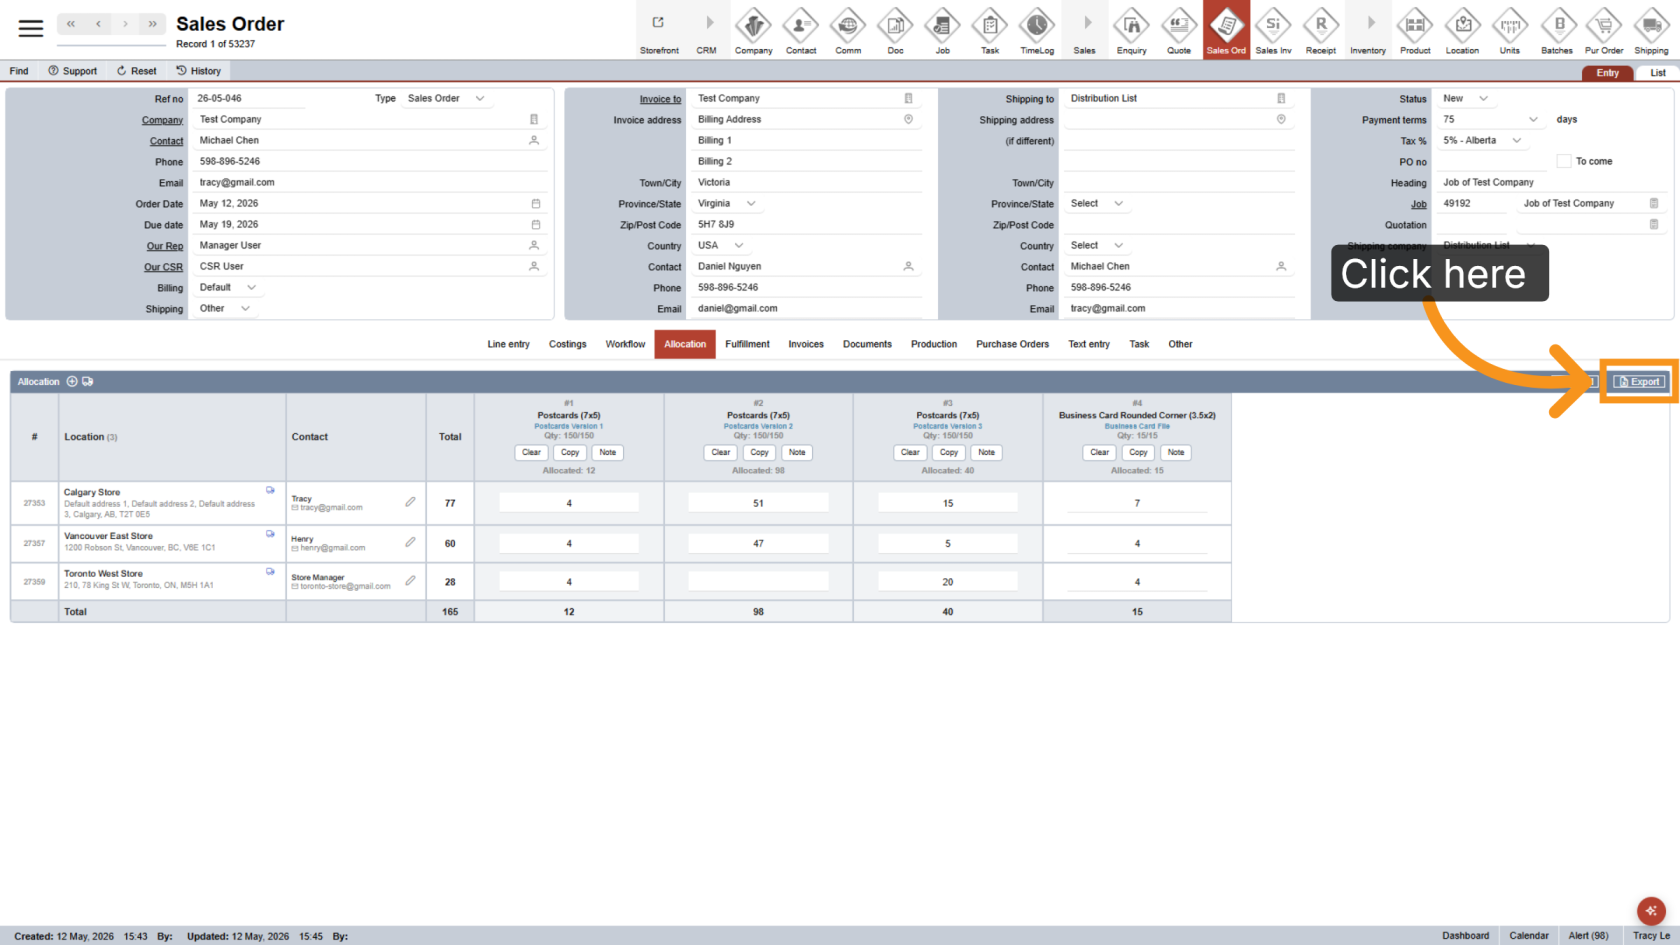
28. Export to Excel
After completing the allocation, click Export to export the data to Excel for attachment to your docket.
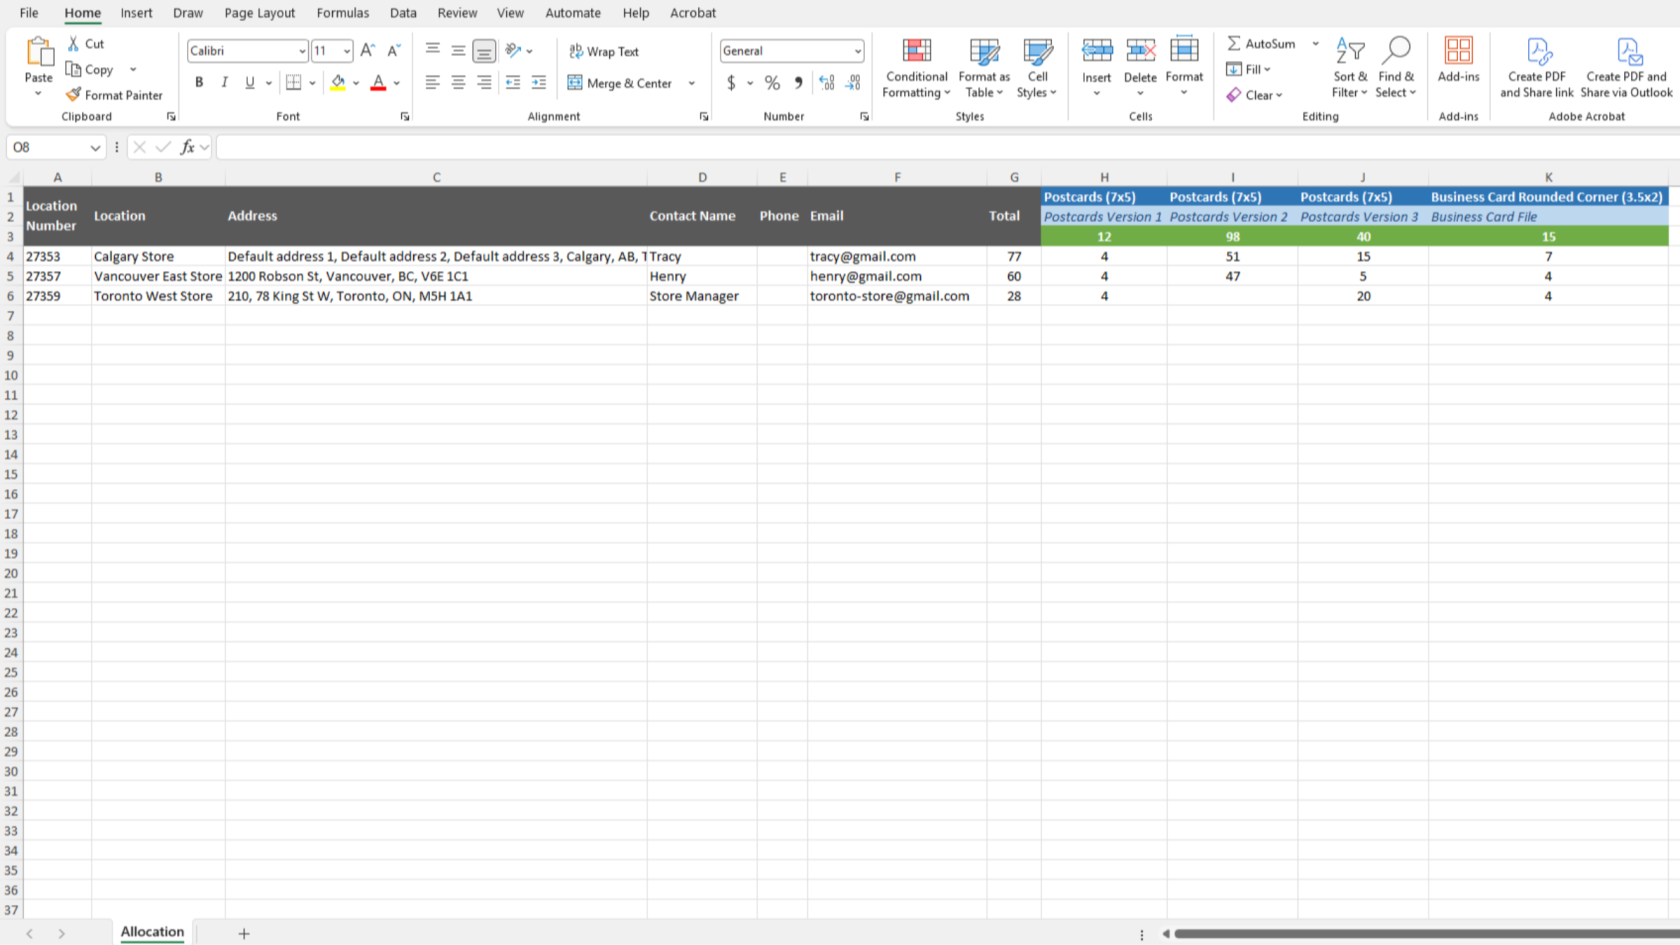
29. Review the Excel File
The exported Excel file includes product names in the first row, print file names in the second row, and total quantities for each product in the third row.
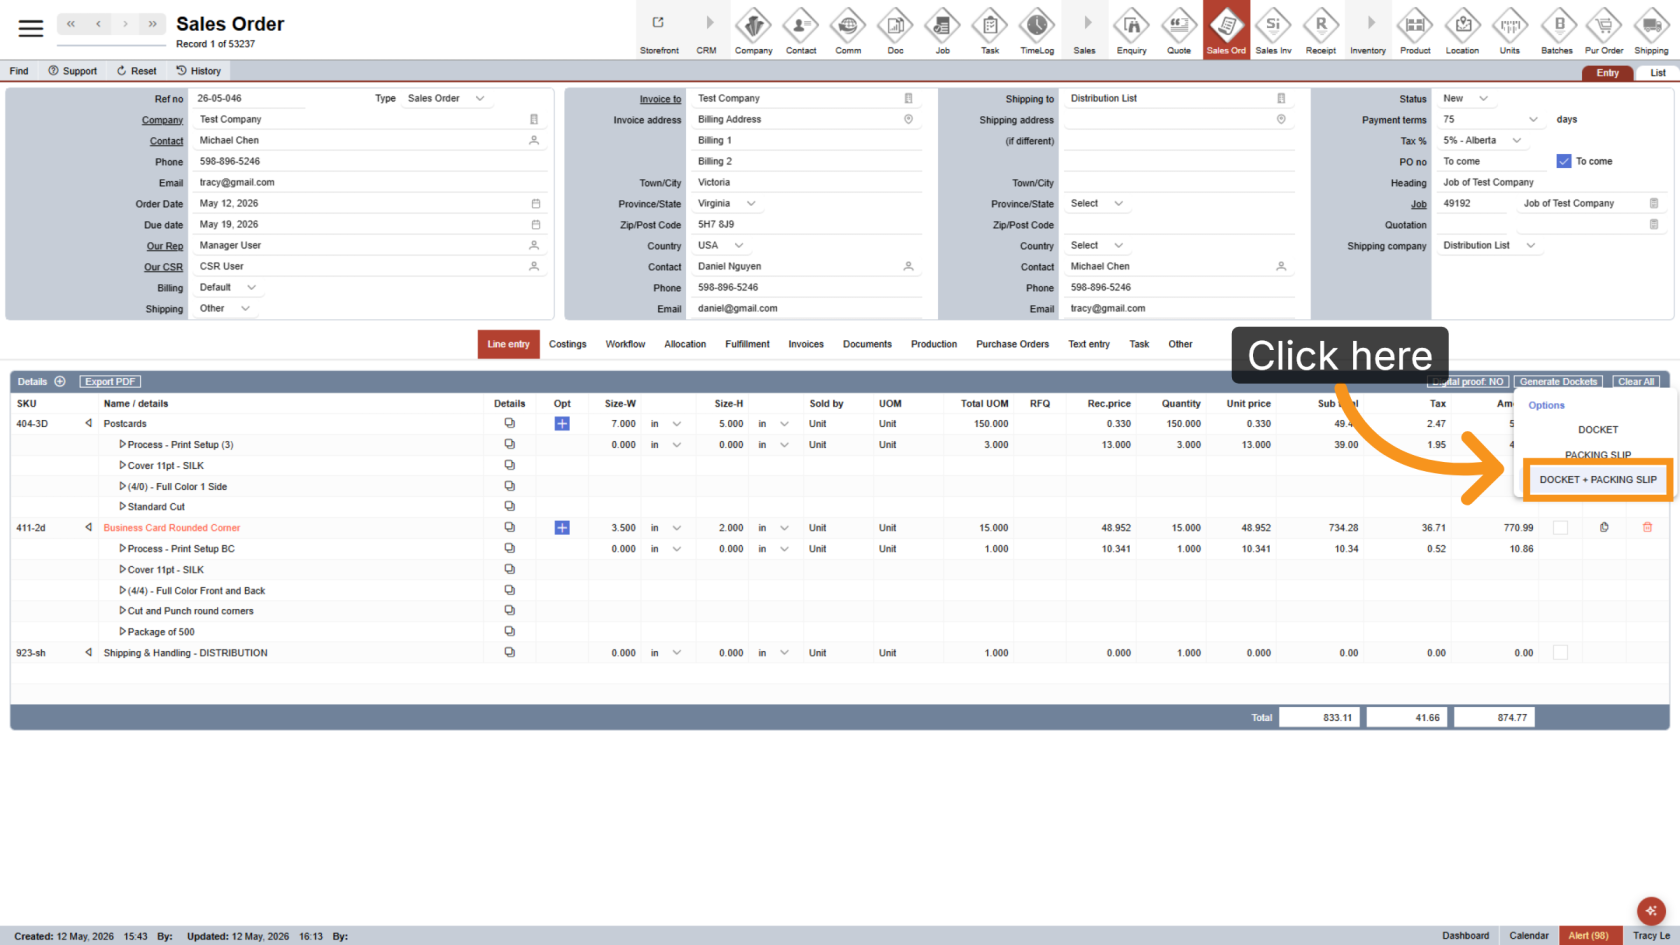
30. Generate the Docket
Generating the docket will automatically create shipments based on the allocation information provided.
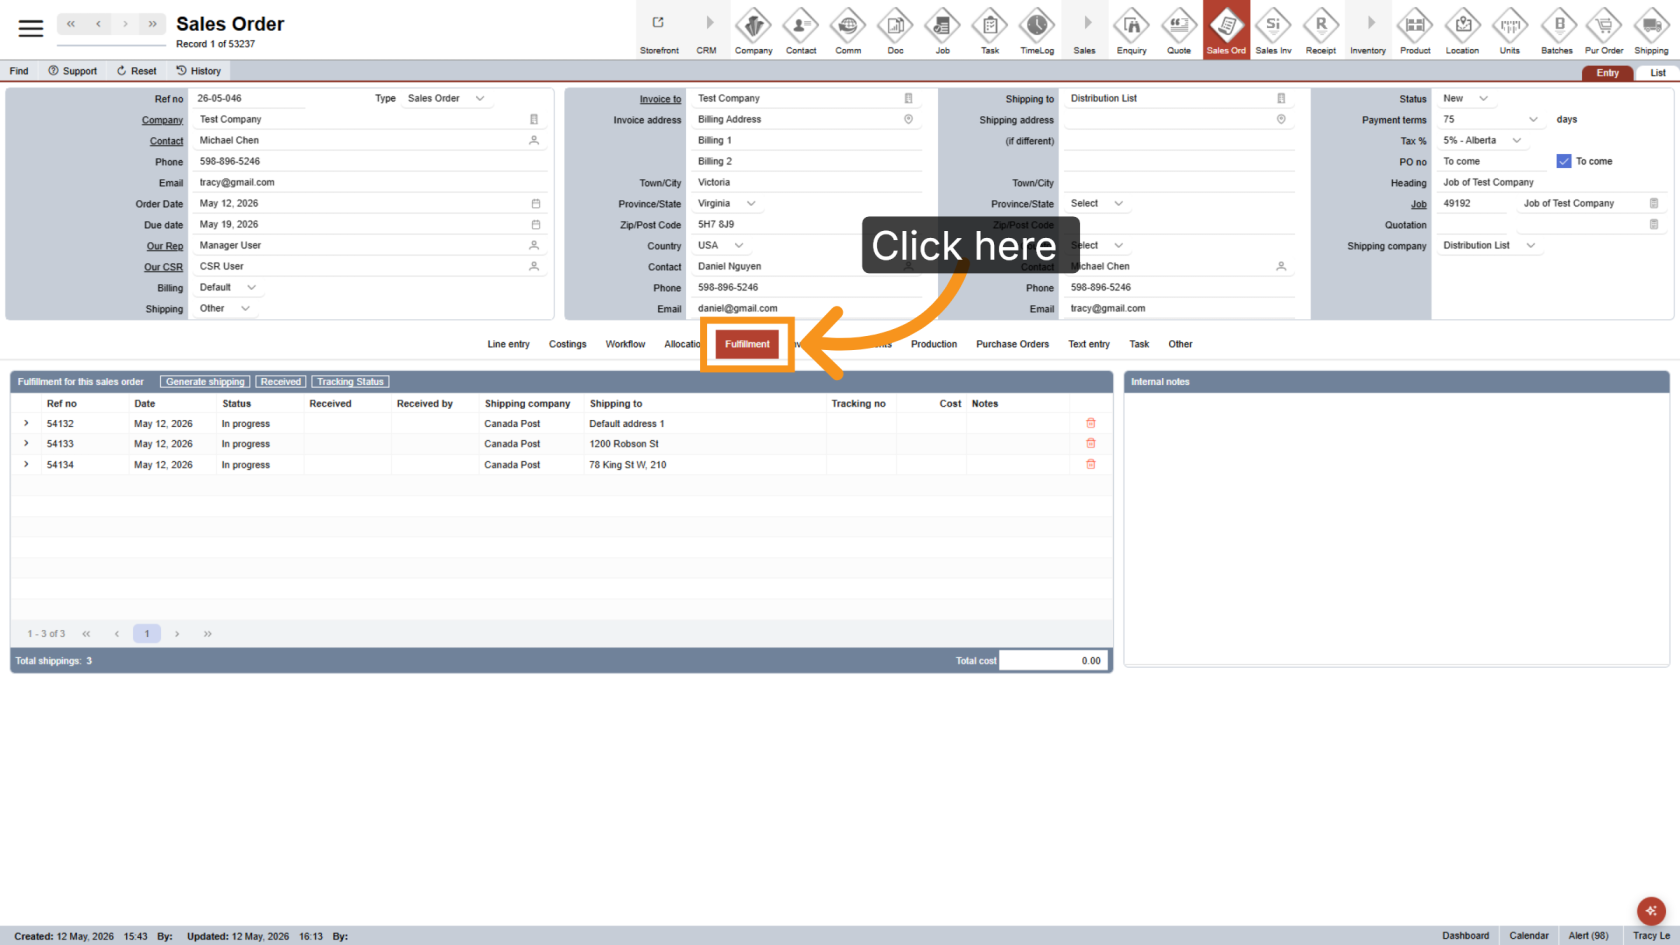
31. Verify Shipment Information
Click Fulfillment to review and confirm the generated shipment details. For orders using distribution allocation, shipping completion notifications are sent only to the Sales Representative and CSR to prevent customers from receiving multiple email notifications.
You have successfully configured workflow allocation, updated contact information, and applied shipping methods in the WorkTraq application. Review all quantities and shipping details carefully to ensure accurate order processing.