LEO-BOOKING / REPORT
Configure Business Insights And Financial Overview In Leo-Booking

This tutorial guides you through configuring business insights and managing financial data within the Leo-booking Salon Dashboard.
Go to leo-booking.com
1. Introduction
You will learn how to analyze business data, review financial summaries, and manage expenses effectively.
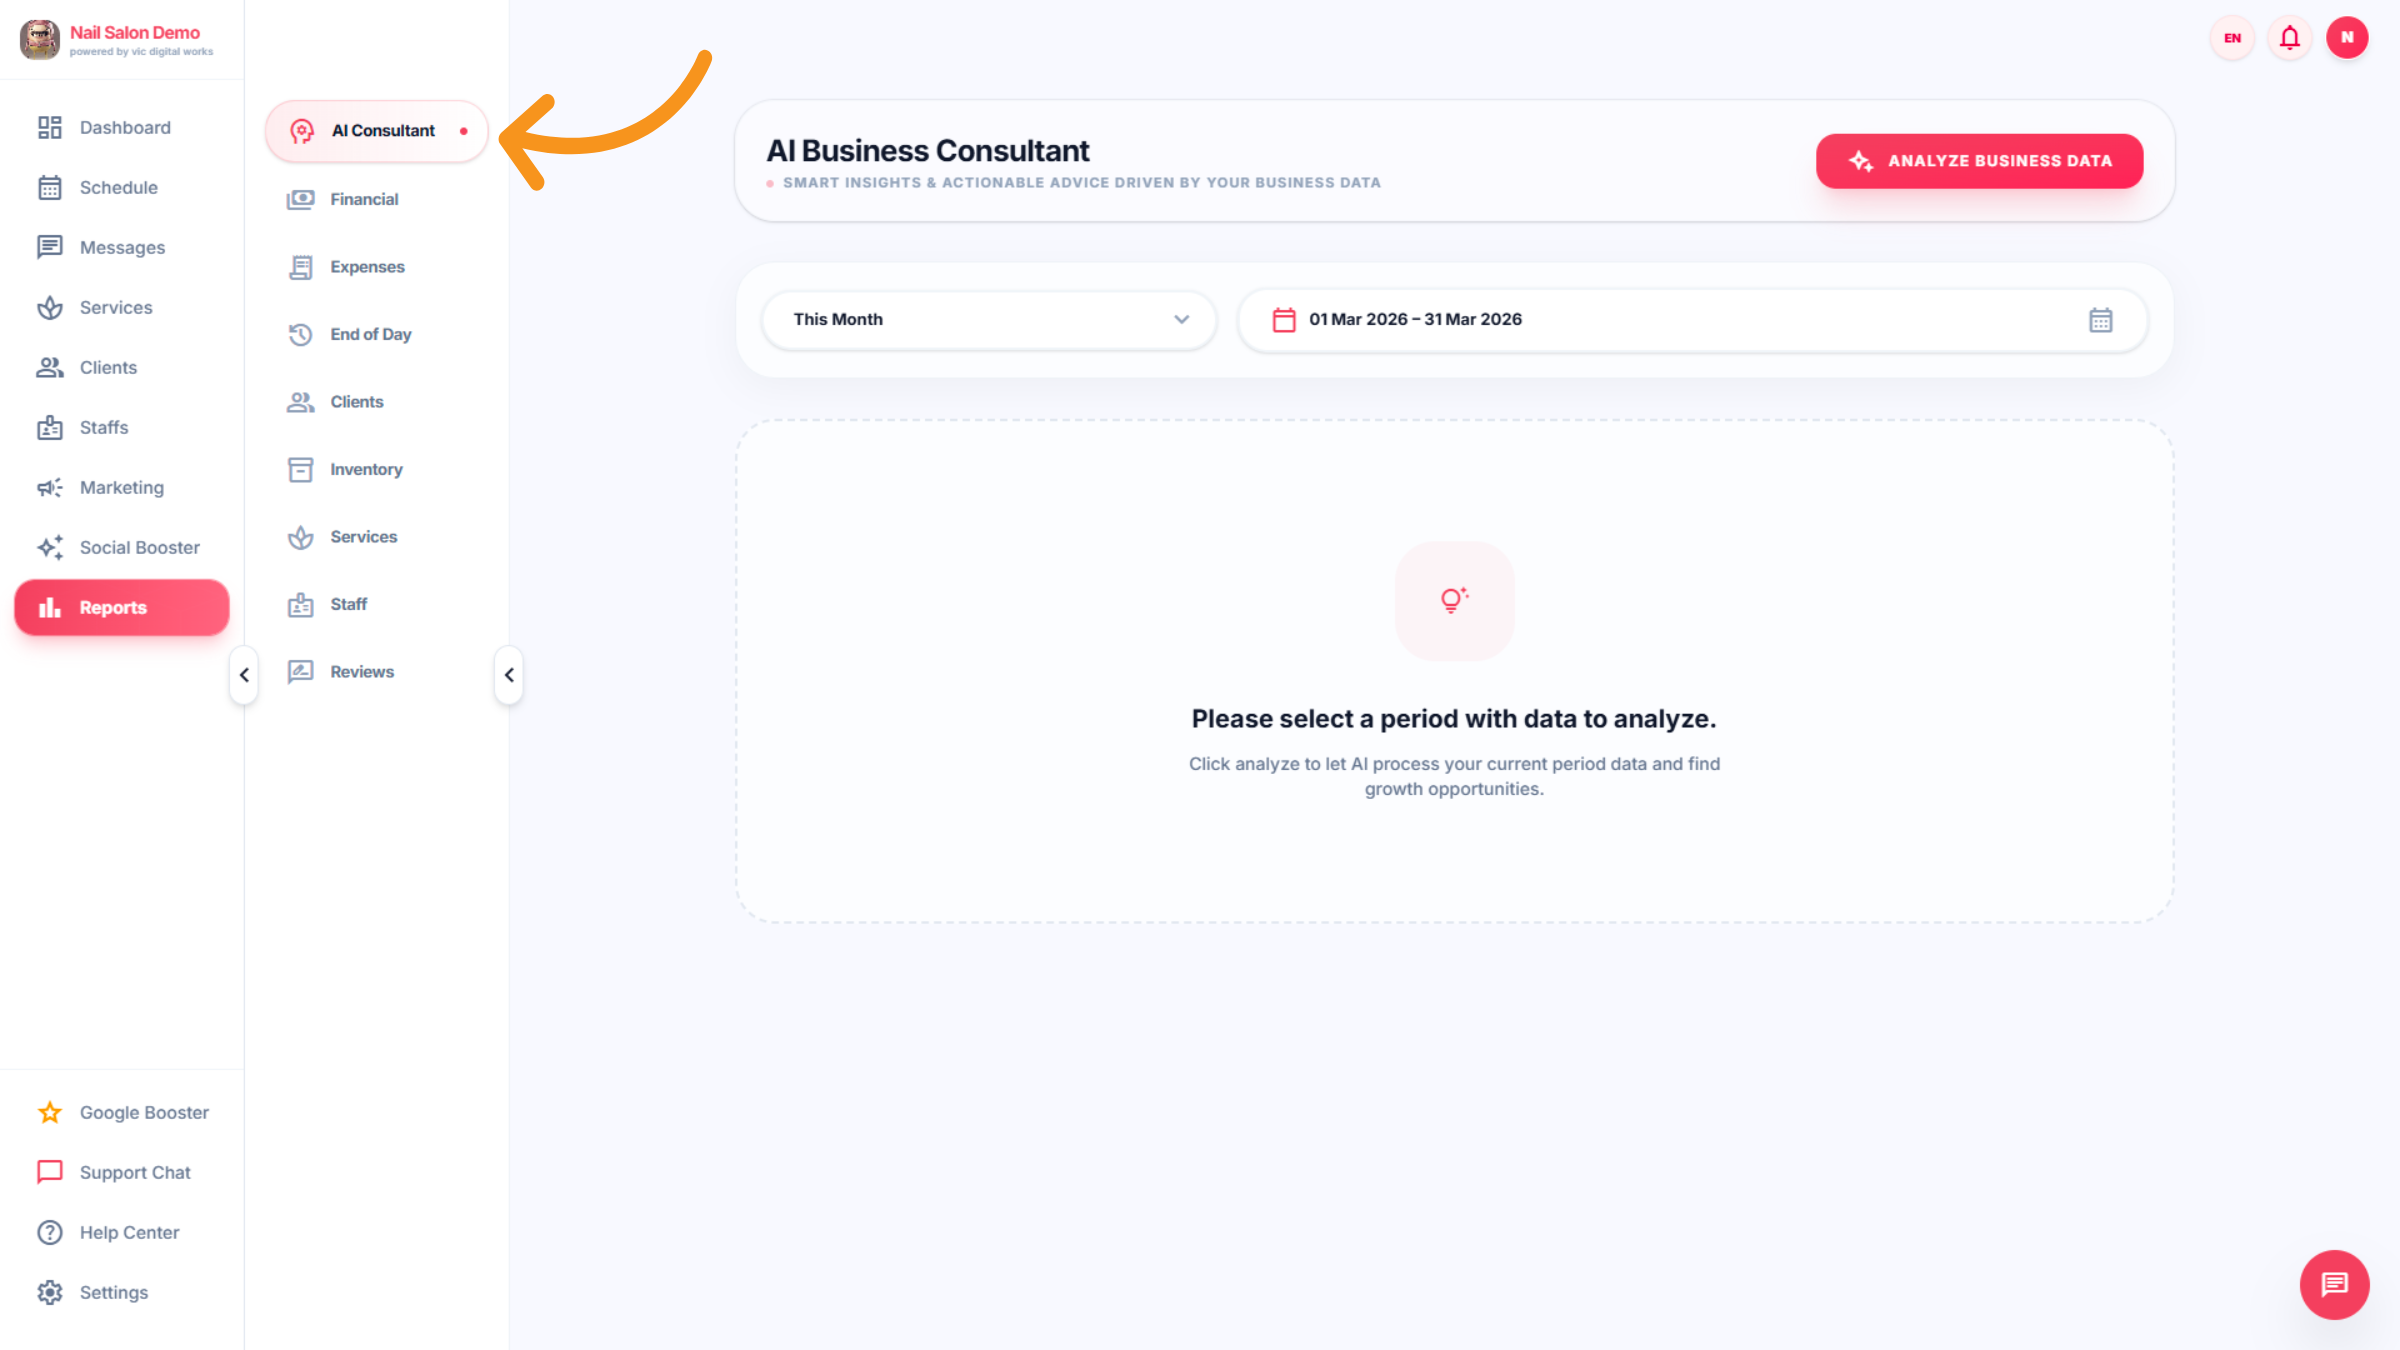
2. AI Consultant
Leo-booking AI Consultant analyzes your salon’s booking data, revenue, customer behavior, and staff performance to provide smart insights and actionable recommendations that help you grow your business. Make better decisions with real-time data-driven advice.
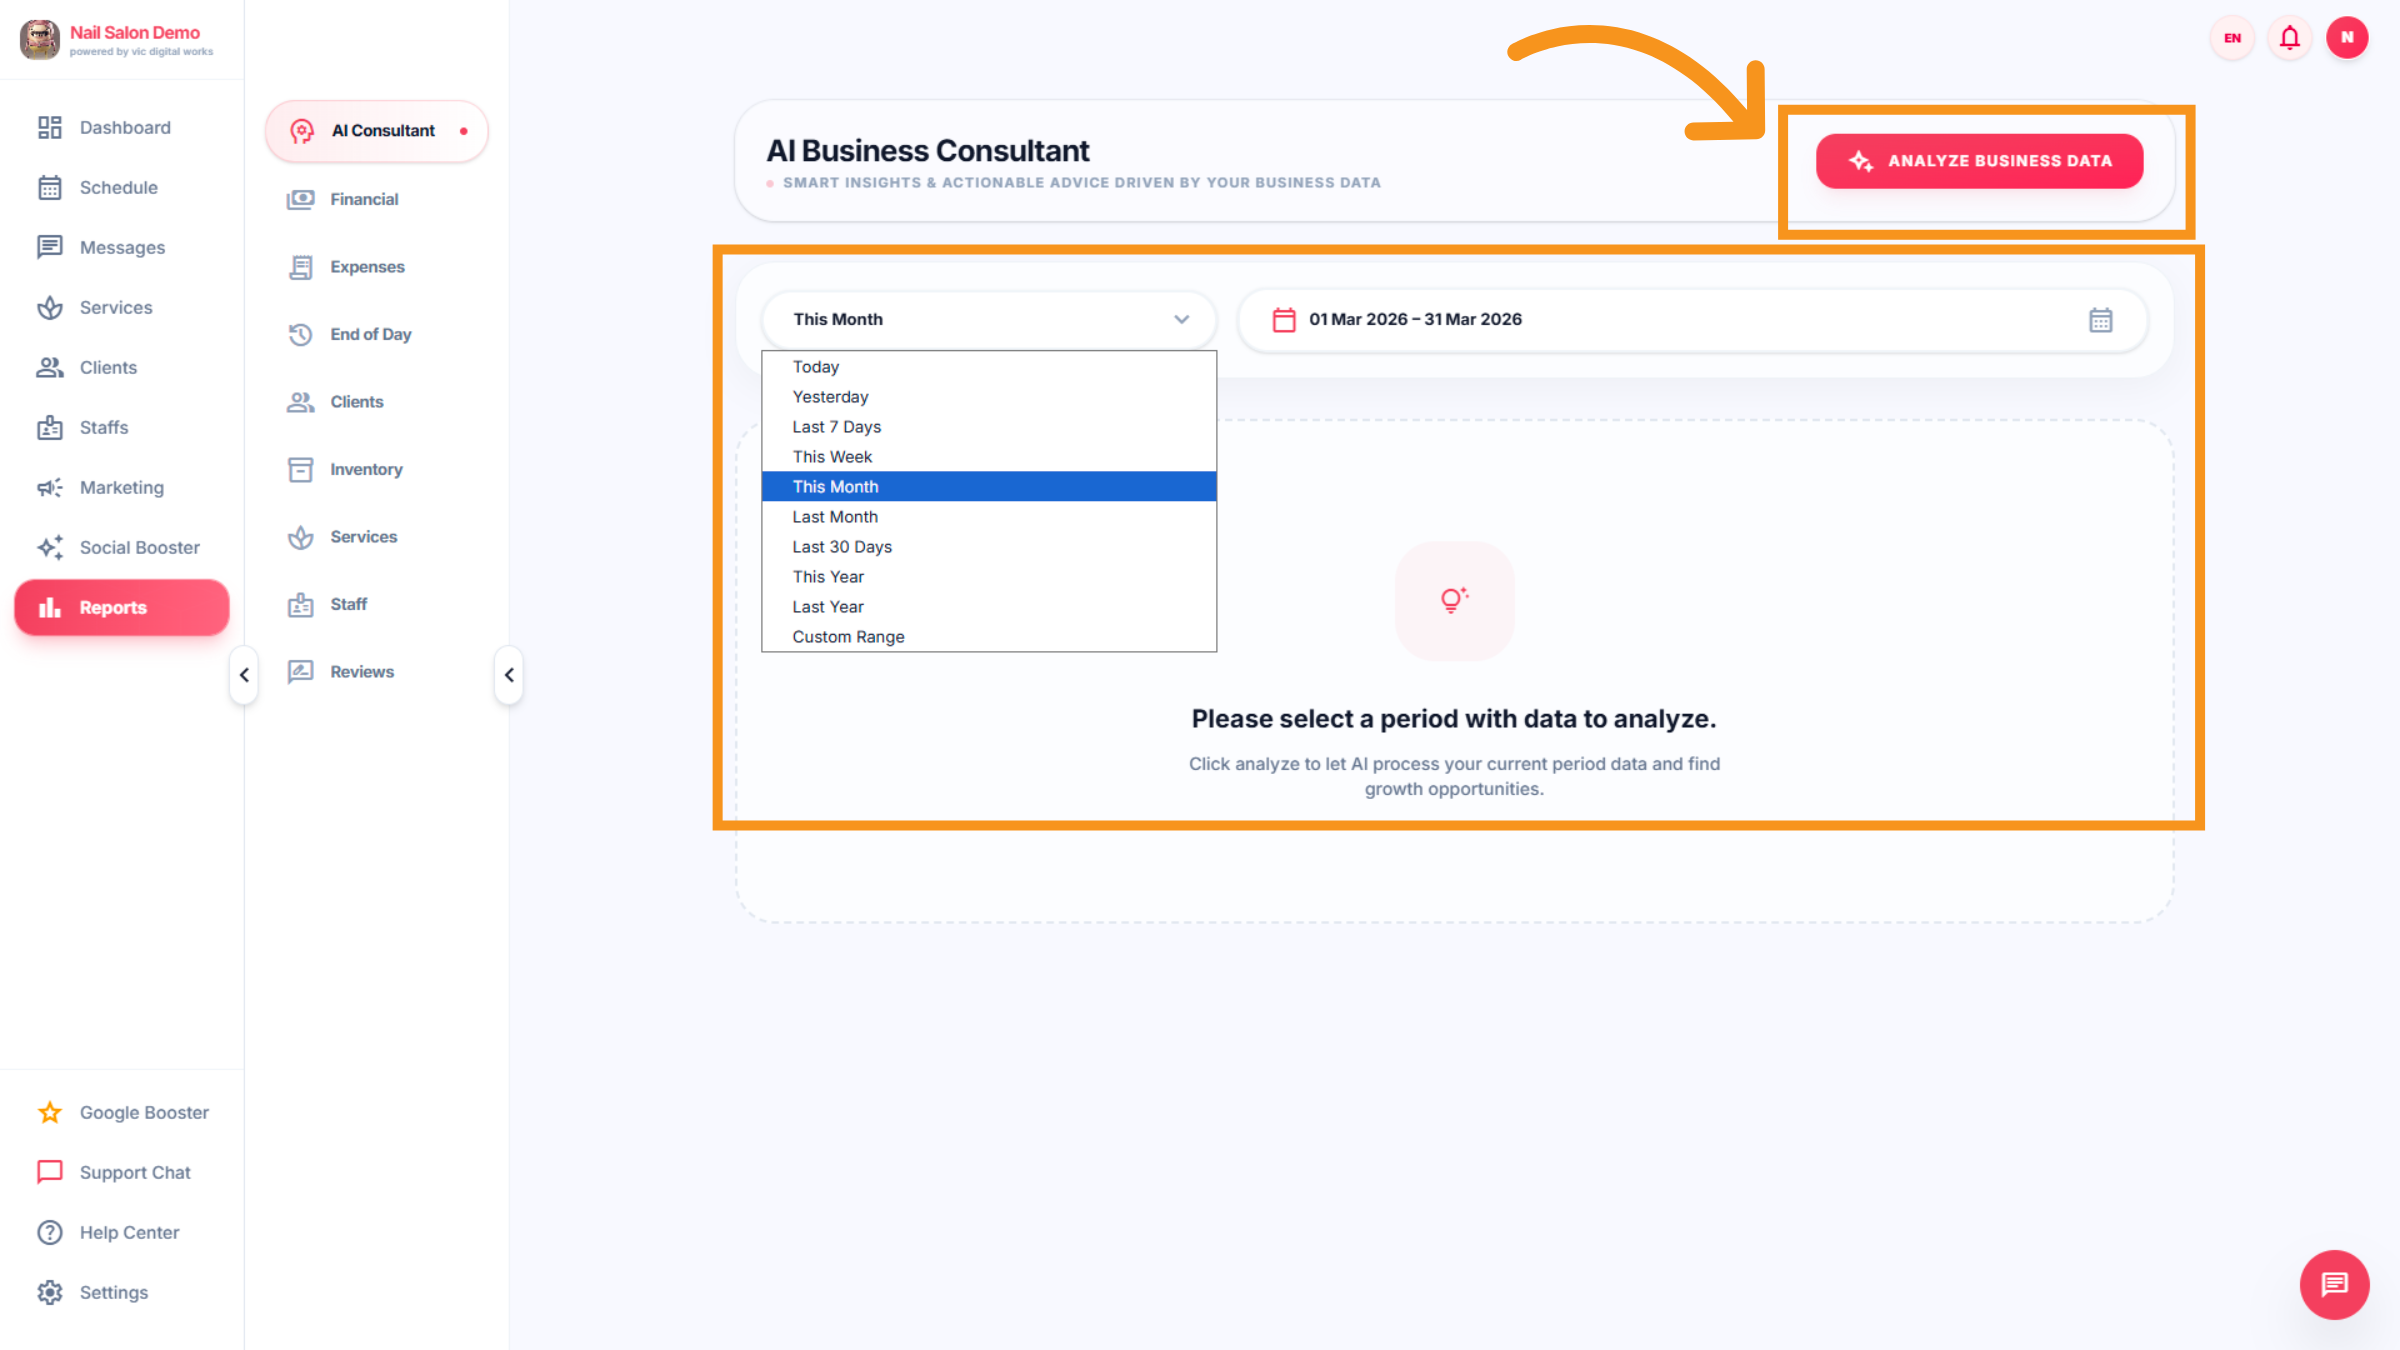
3. AI CONSULTANT -Date/time
You have the flexibility to select the time you wish to view. And "Click on Analyze Business Data"
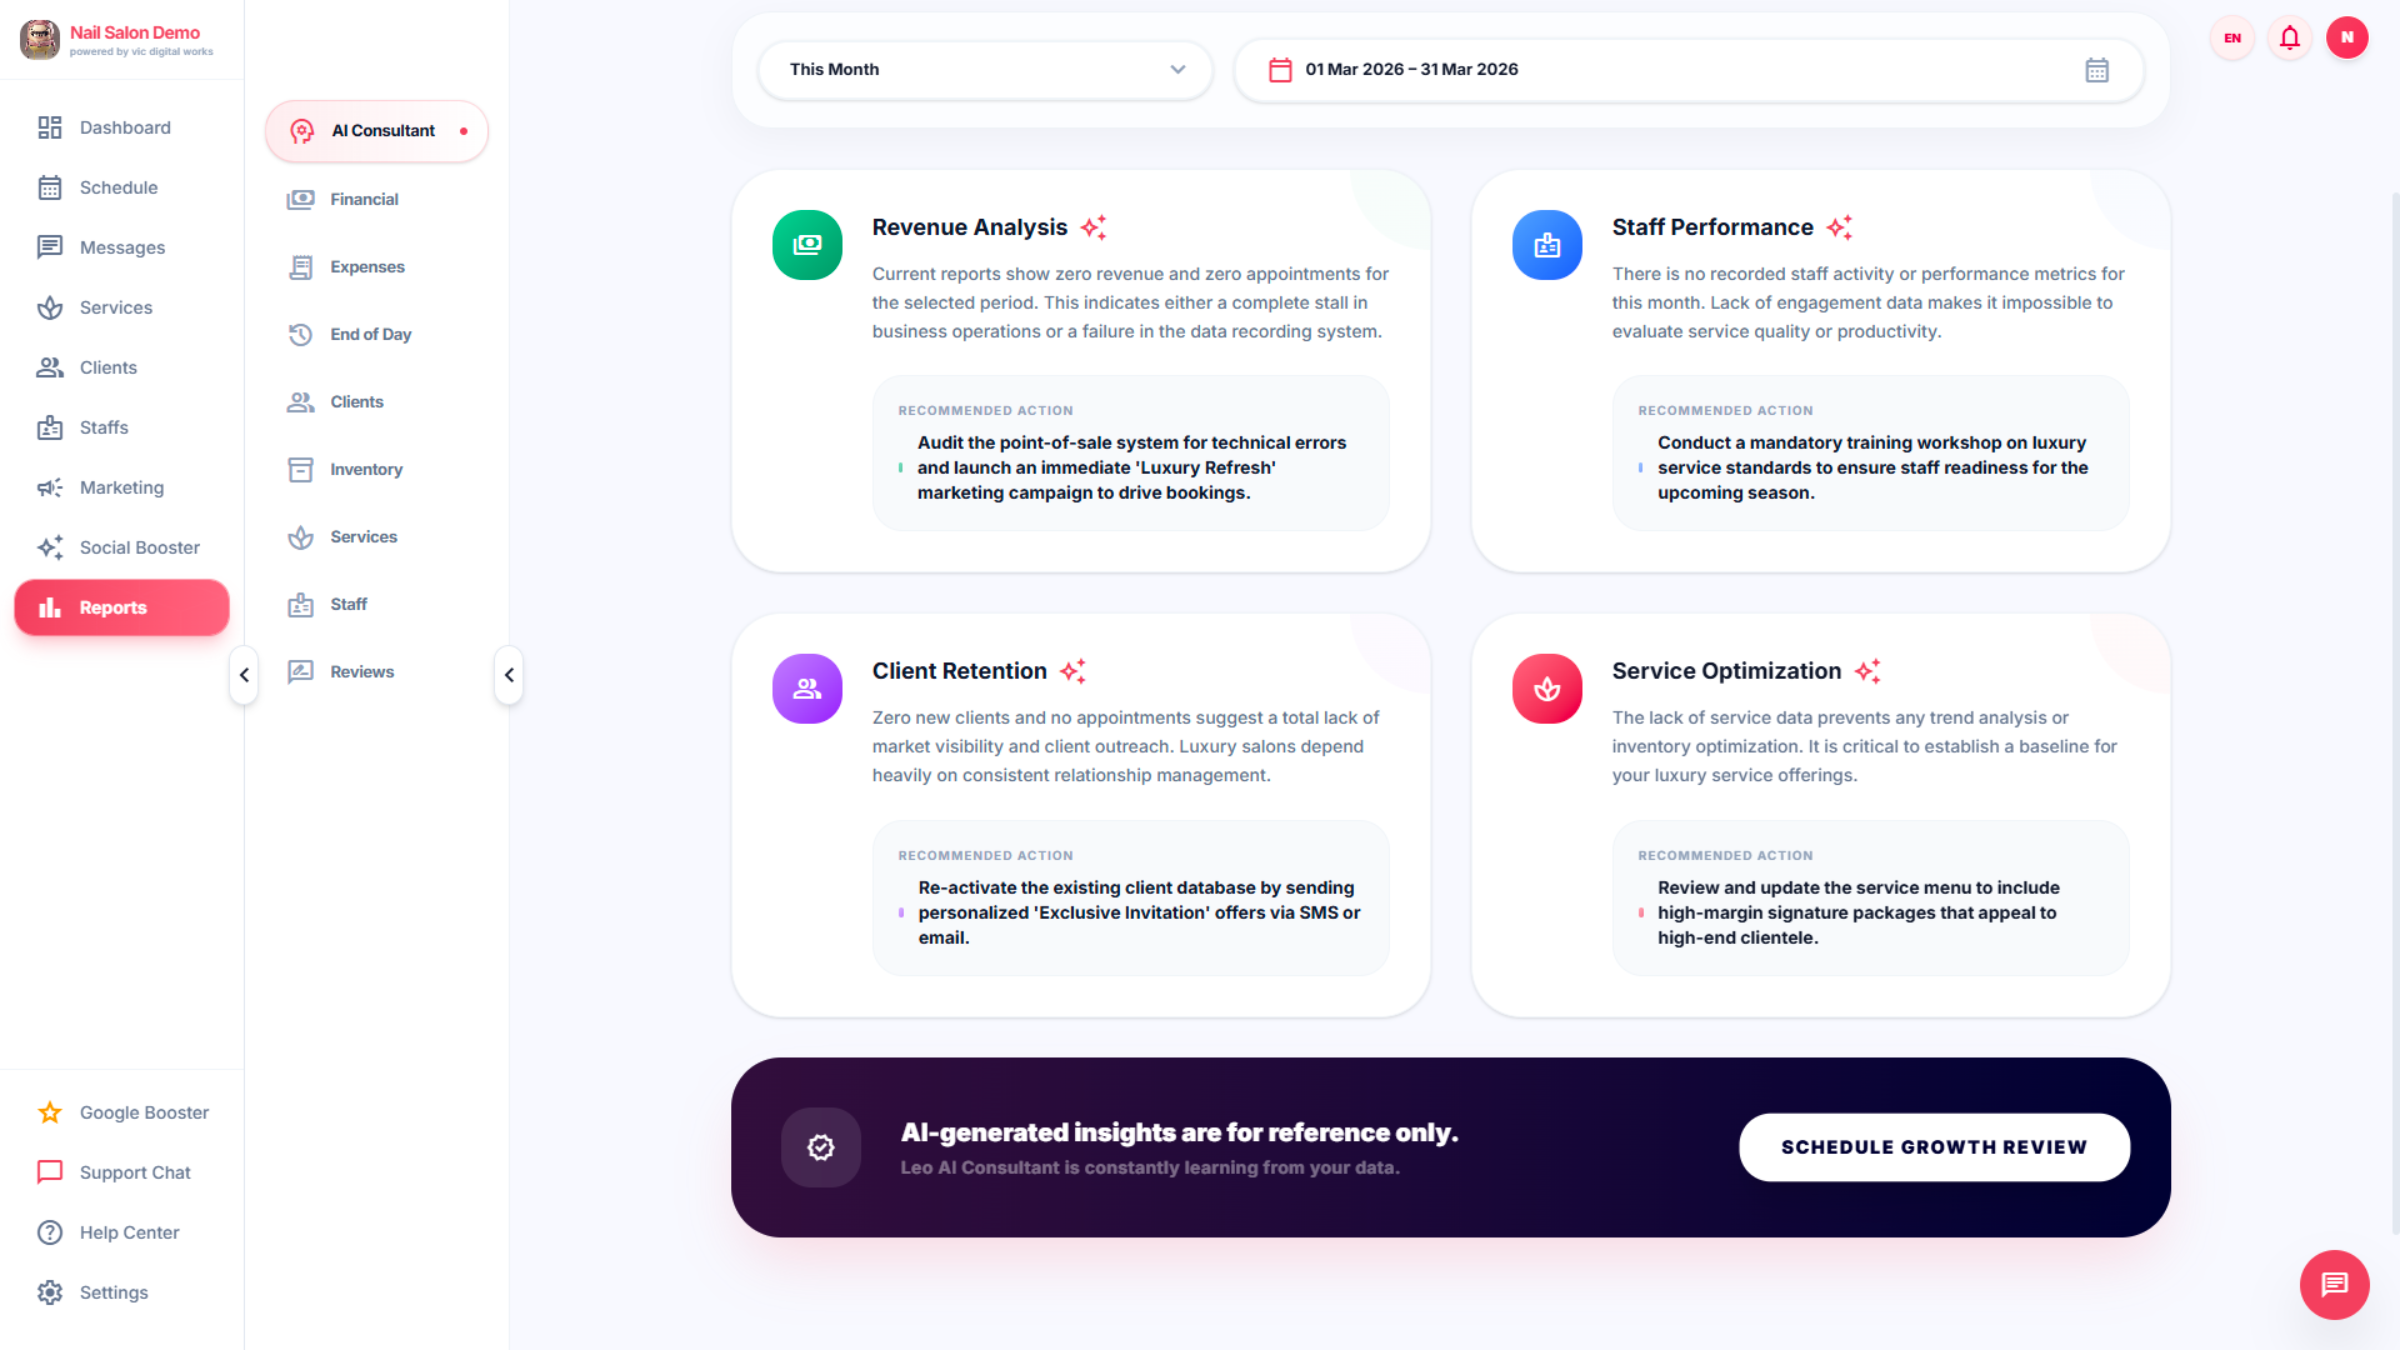
4. AI consultant Analyzes
The interface displays Revenue, Staff Performance, Client Strategy, and Service Portfolio Optimization . And AI will propose ideas based on the salon's data.
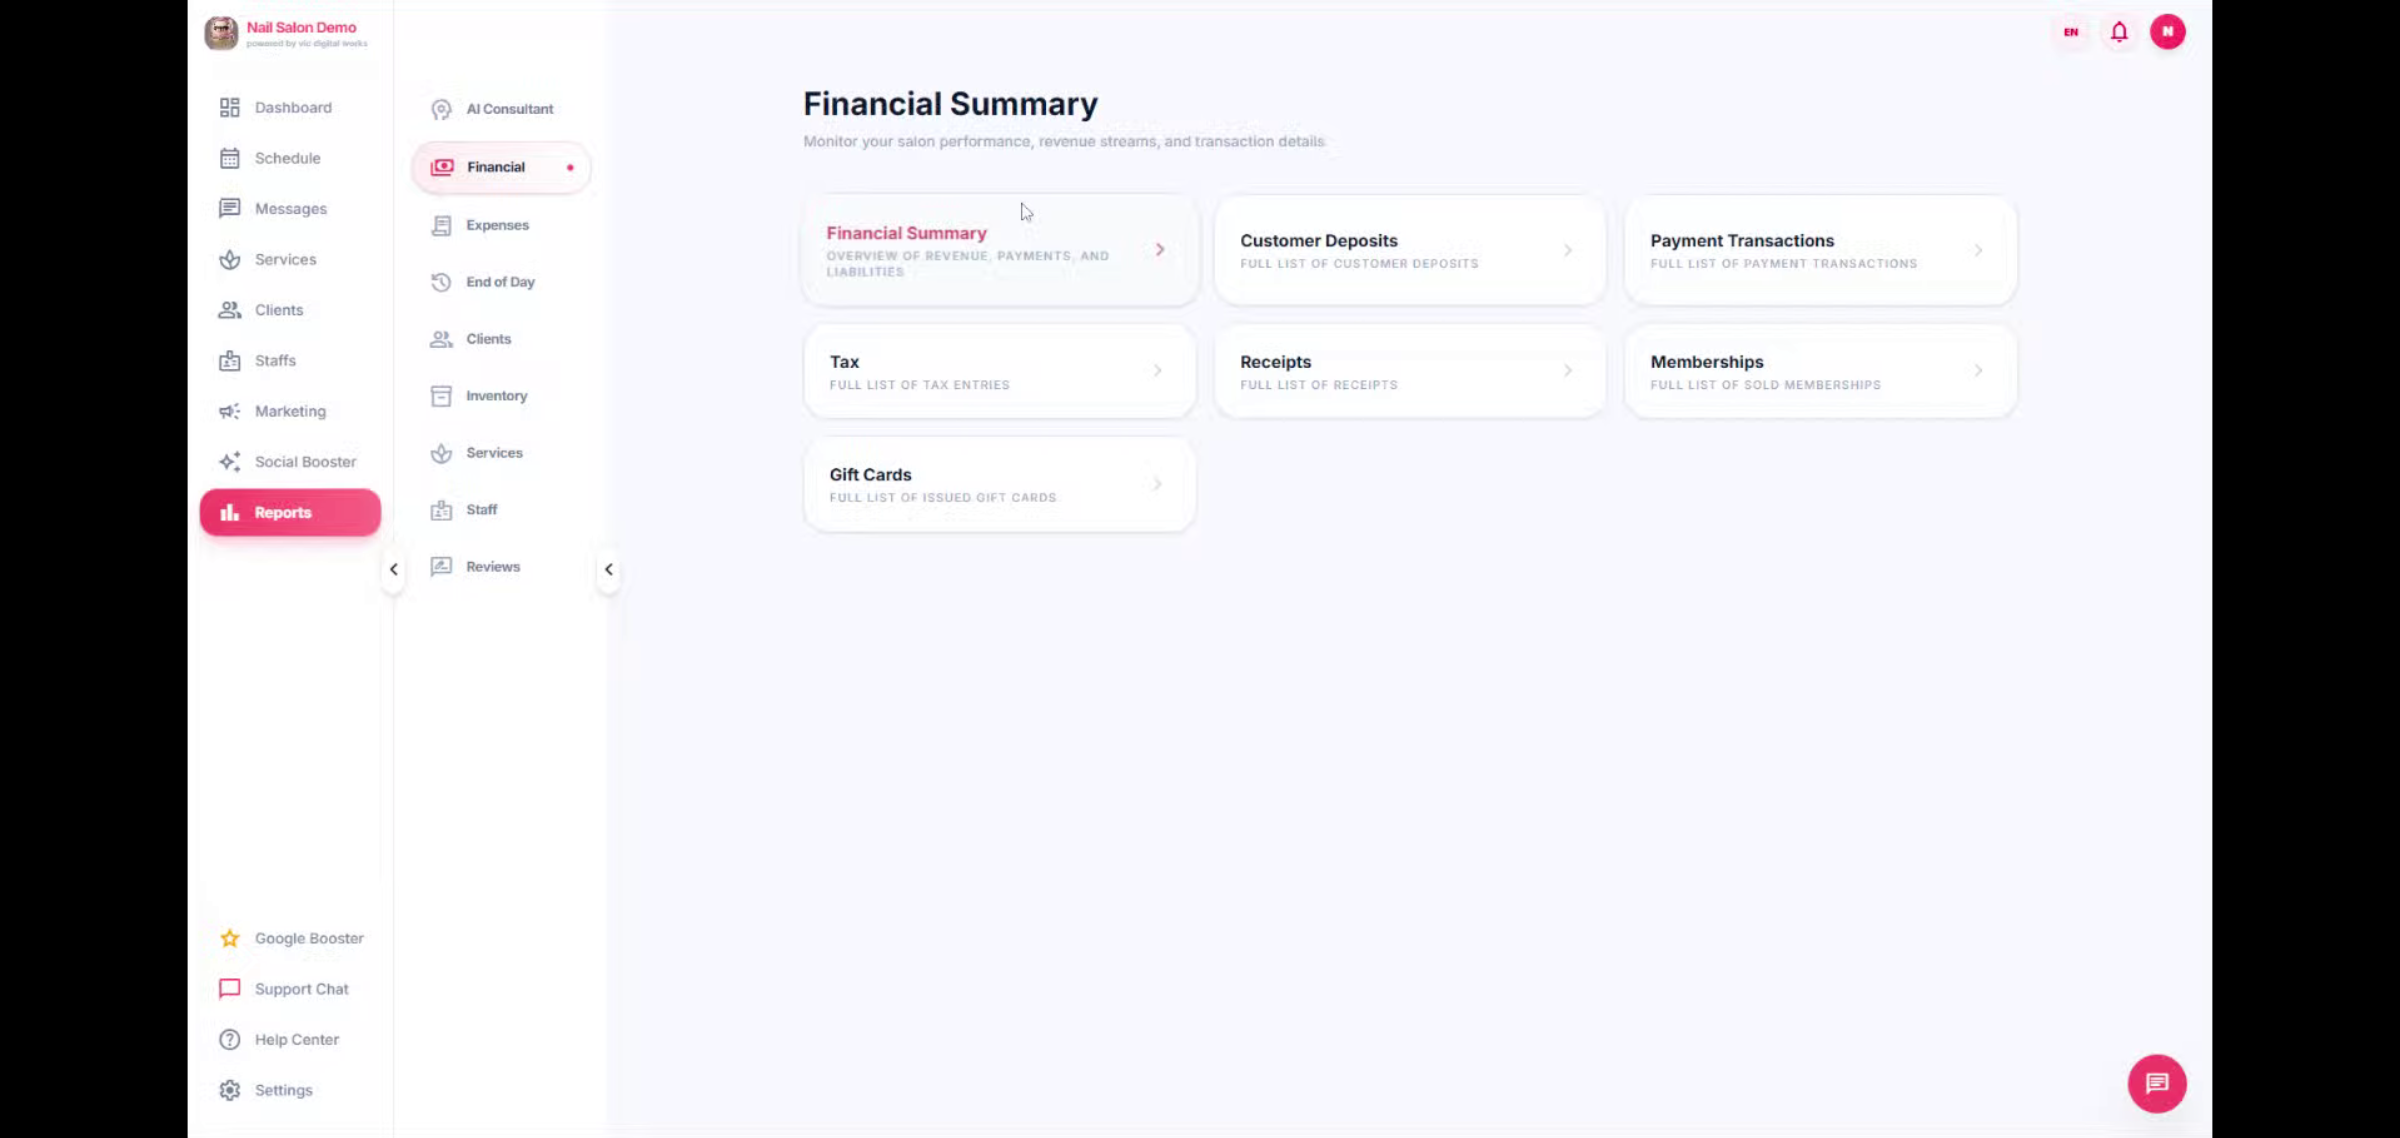
5. Financial
The Financial Features of Nail Booking Software focus on helping salon owners manage revenue, payments, expenses, and profitability in one system.
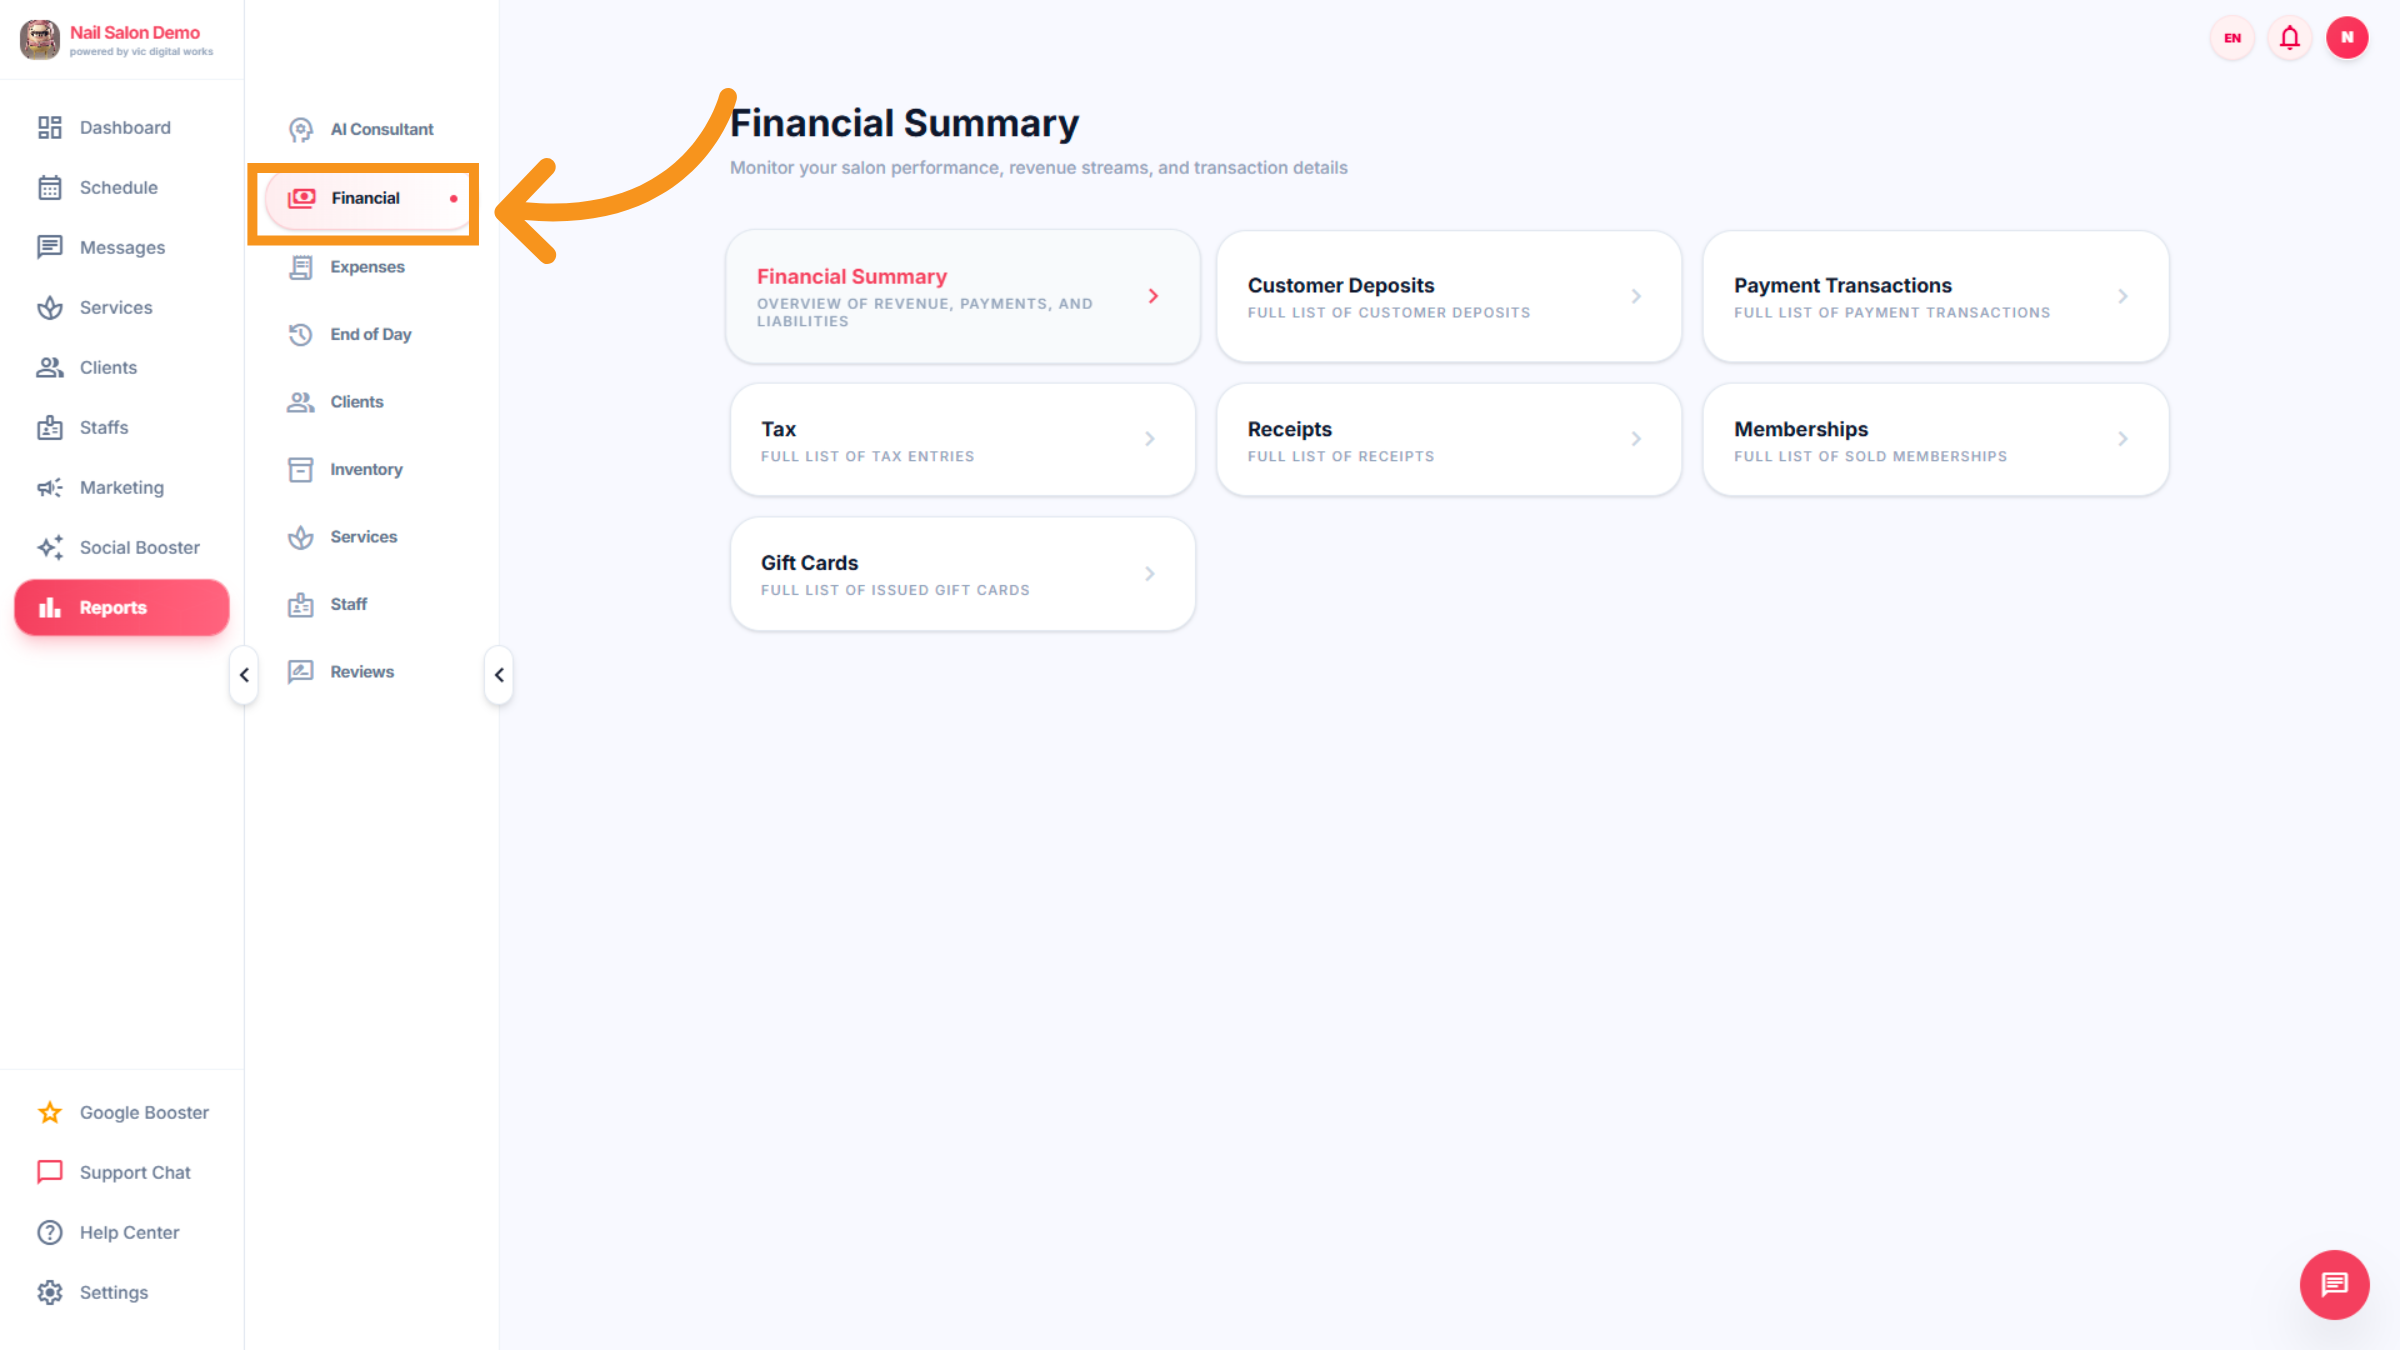
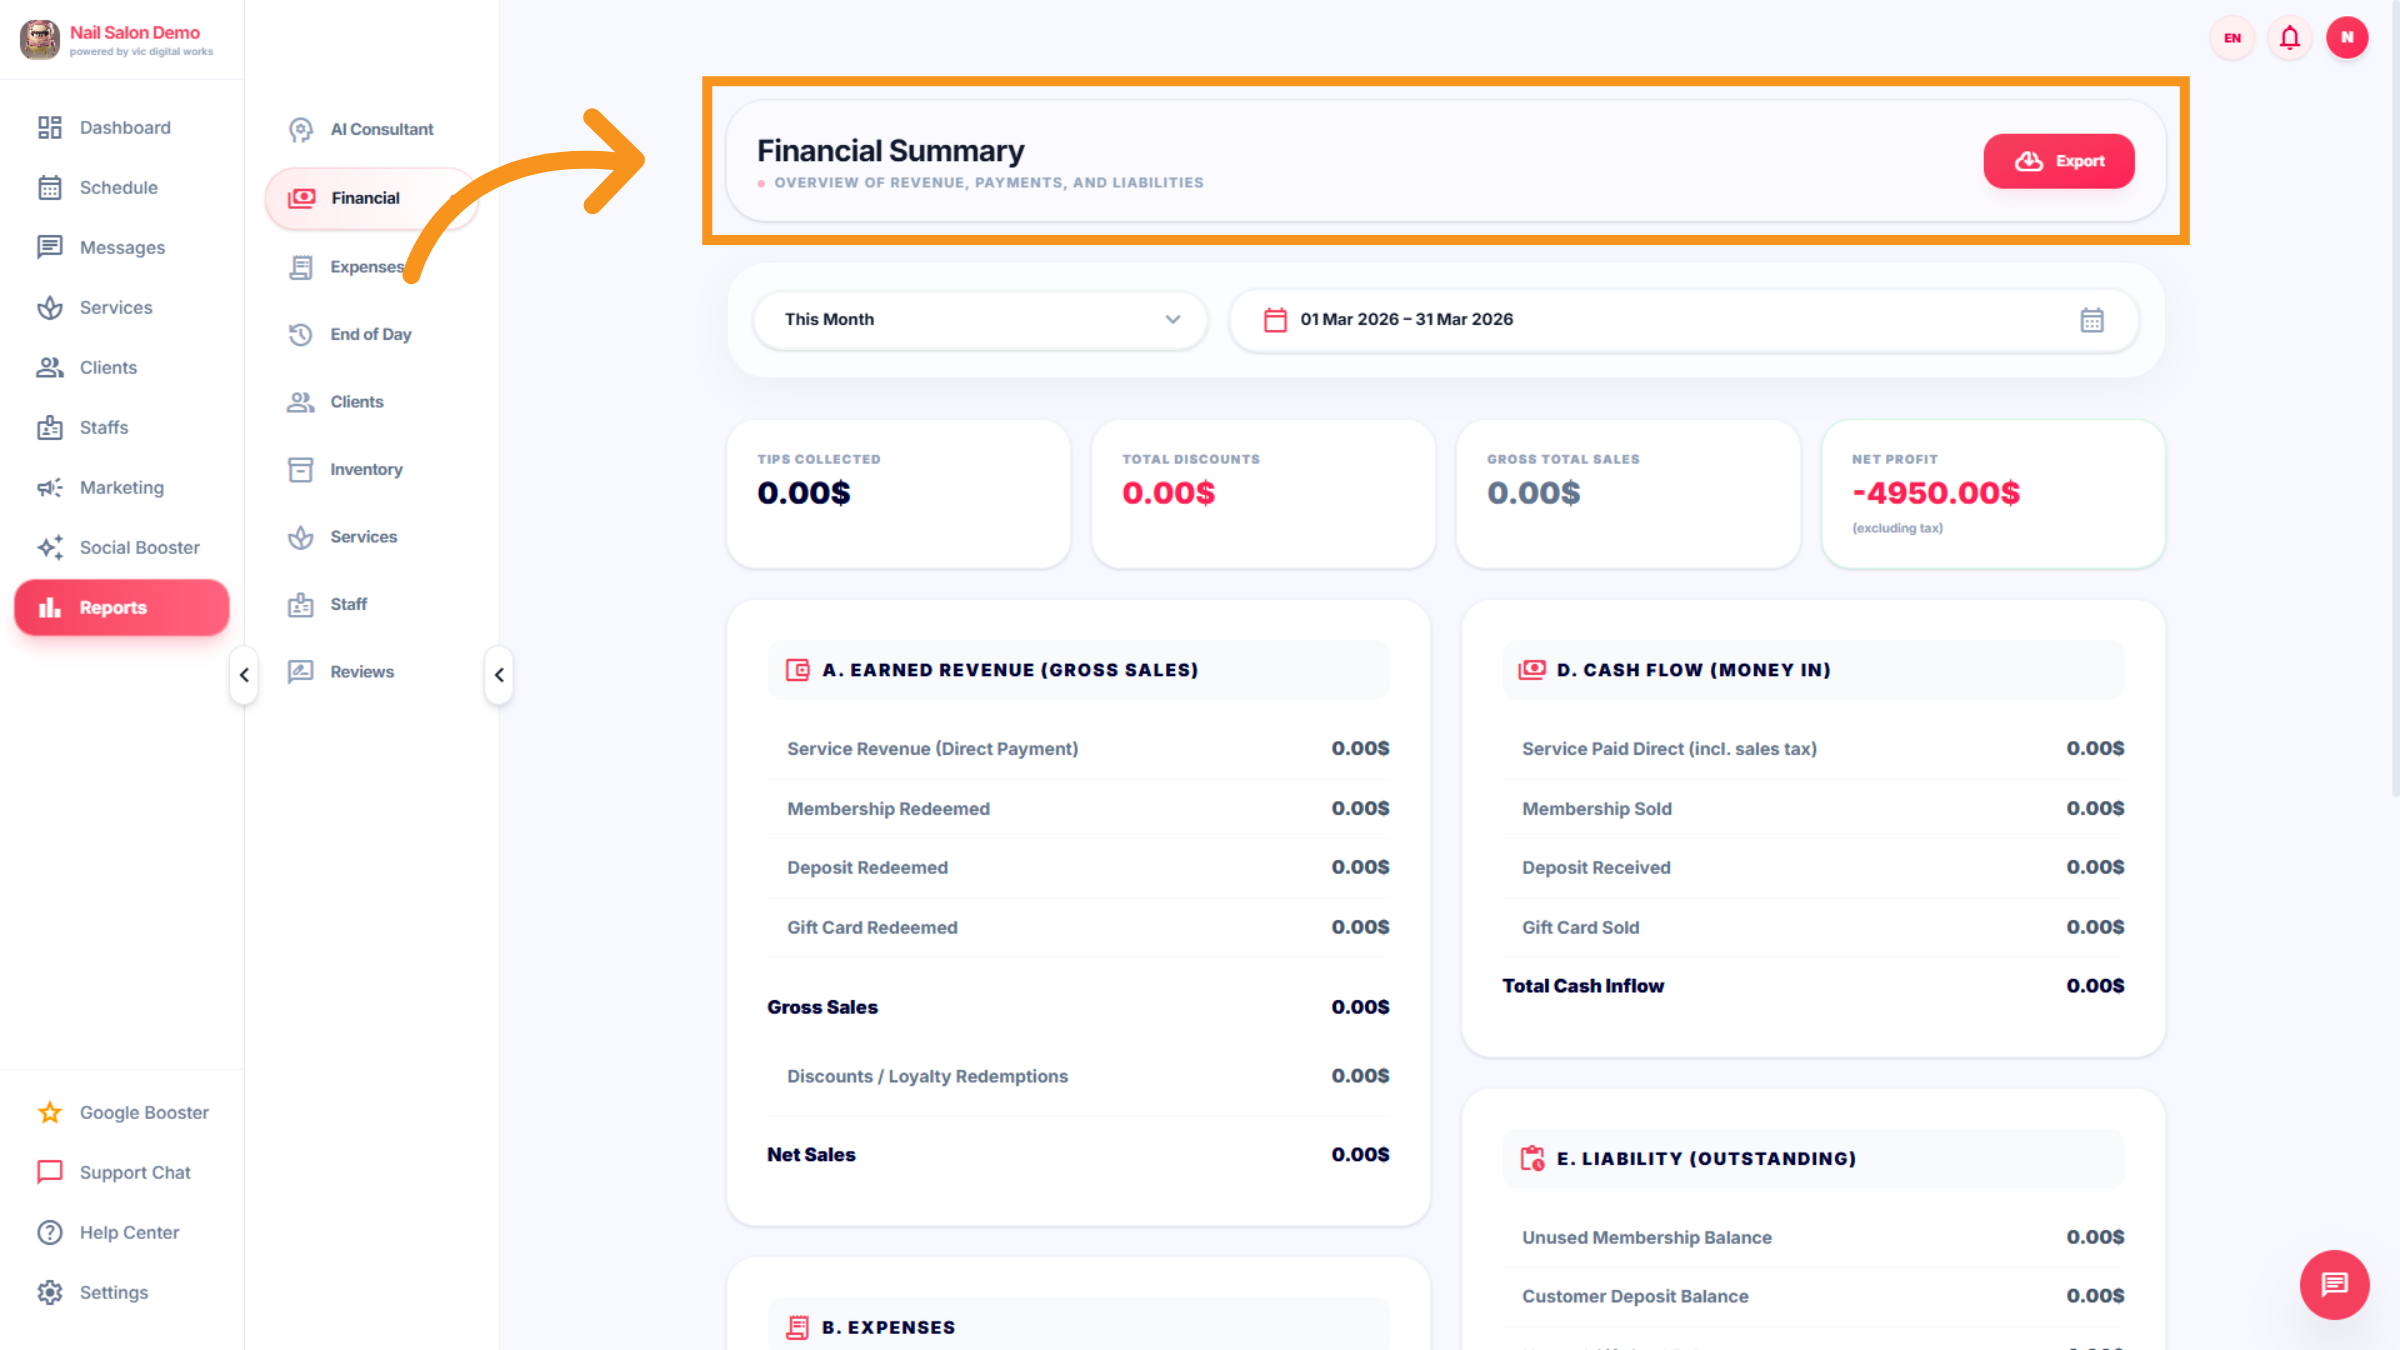
6. Financial Summary
Click Financial Summary to view overview with Custom range (time), Tips collected, Total discounts,Gross total sales,Nest Profit, Salon revenue (Gross sales),cashflow(money in) payments, and liabilities
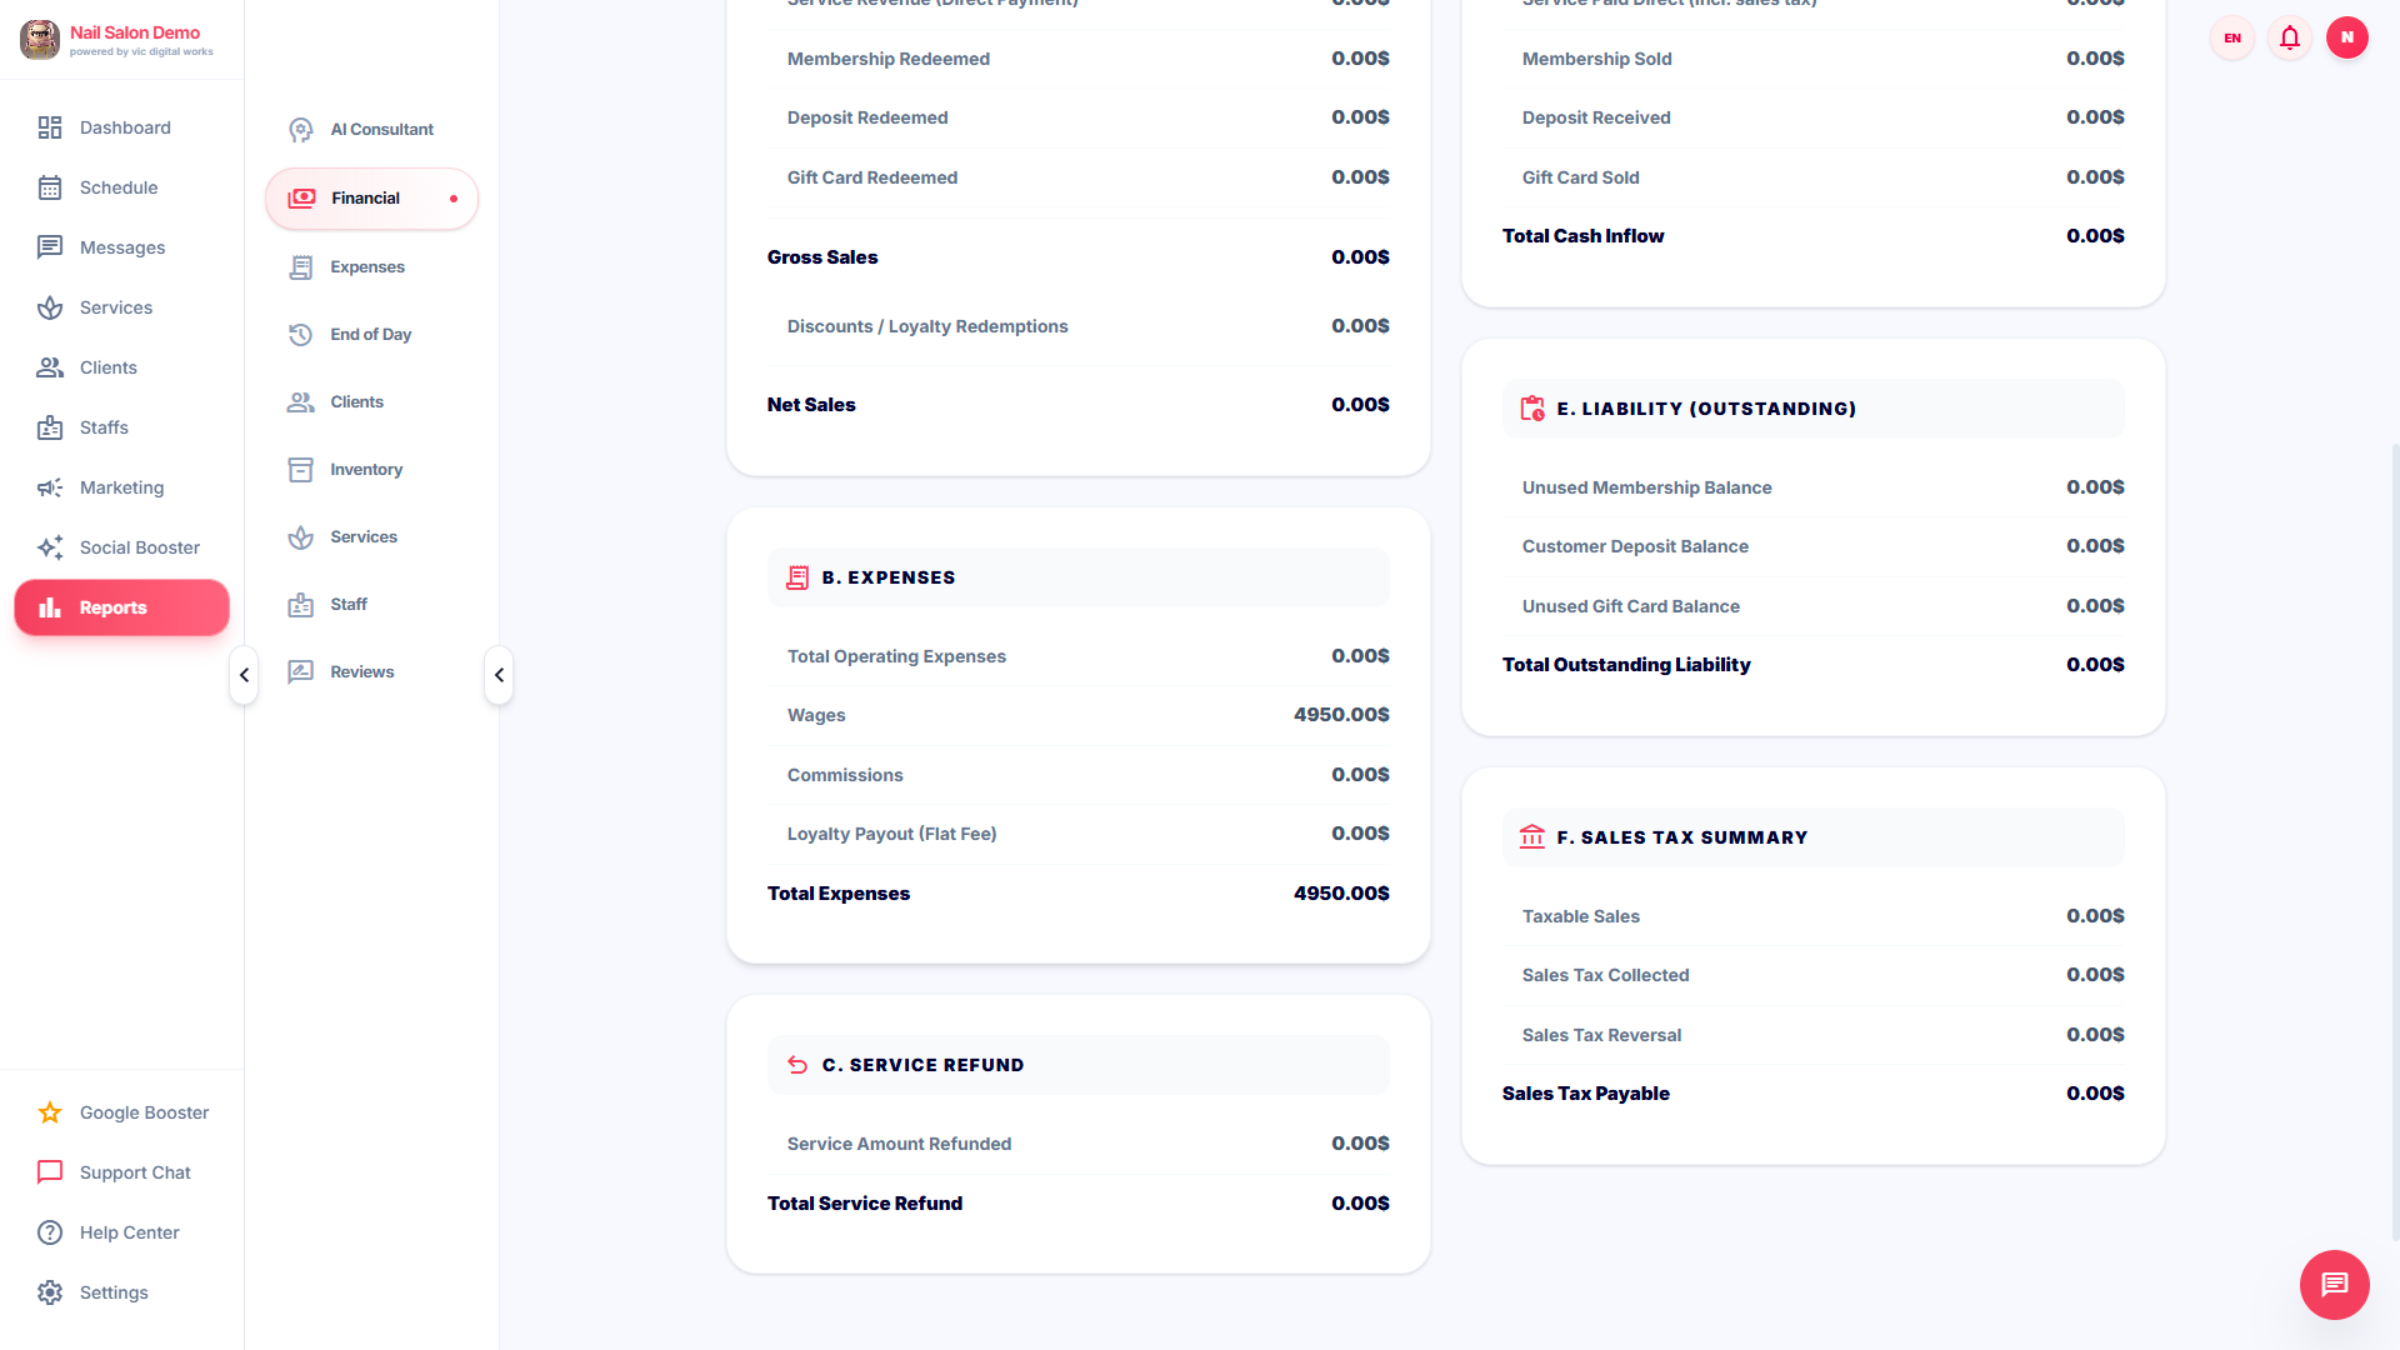
7. Financail Summary
B.Expenses, Service refund, sales Tax Summary. All statistics are compiled here in one place for easy tracking and analysis.
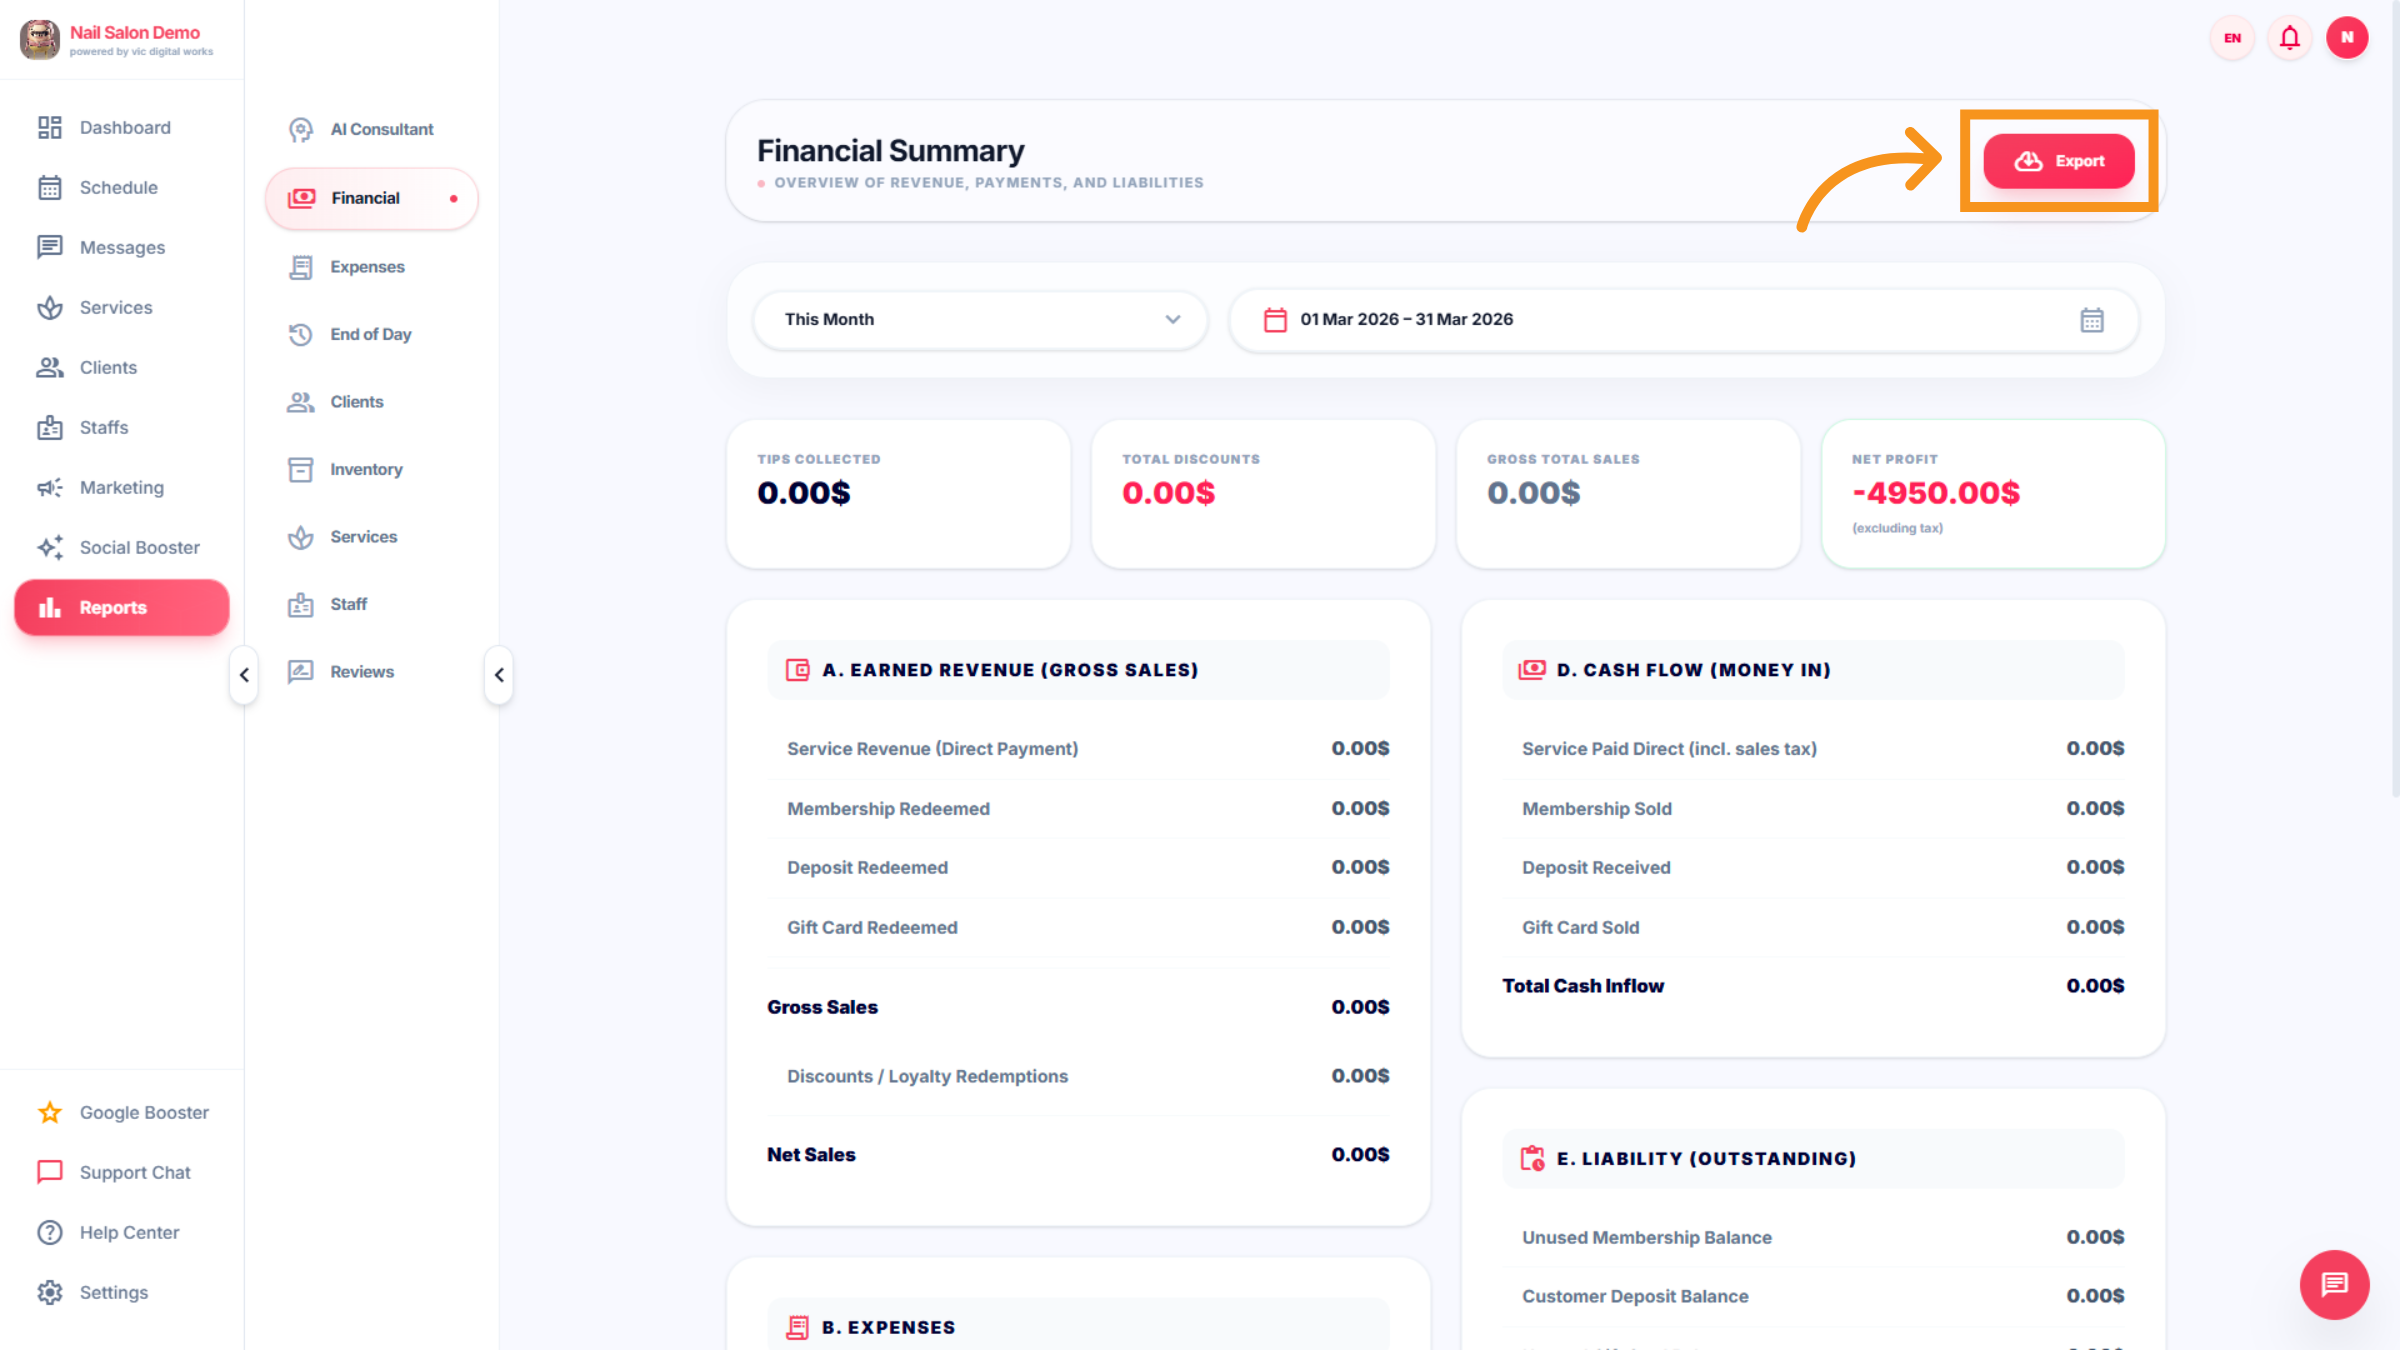
8. Export Financial Data
Click the Export button if you to download your financial data for external use or record keeping.
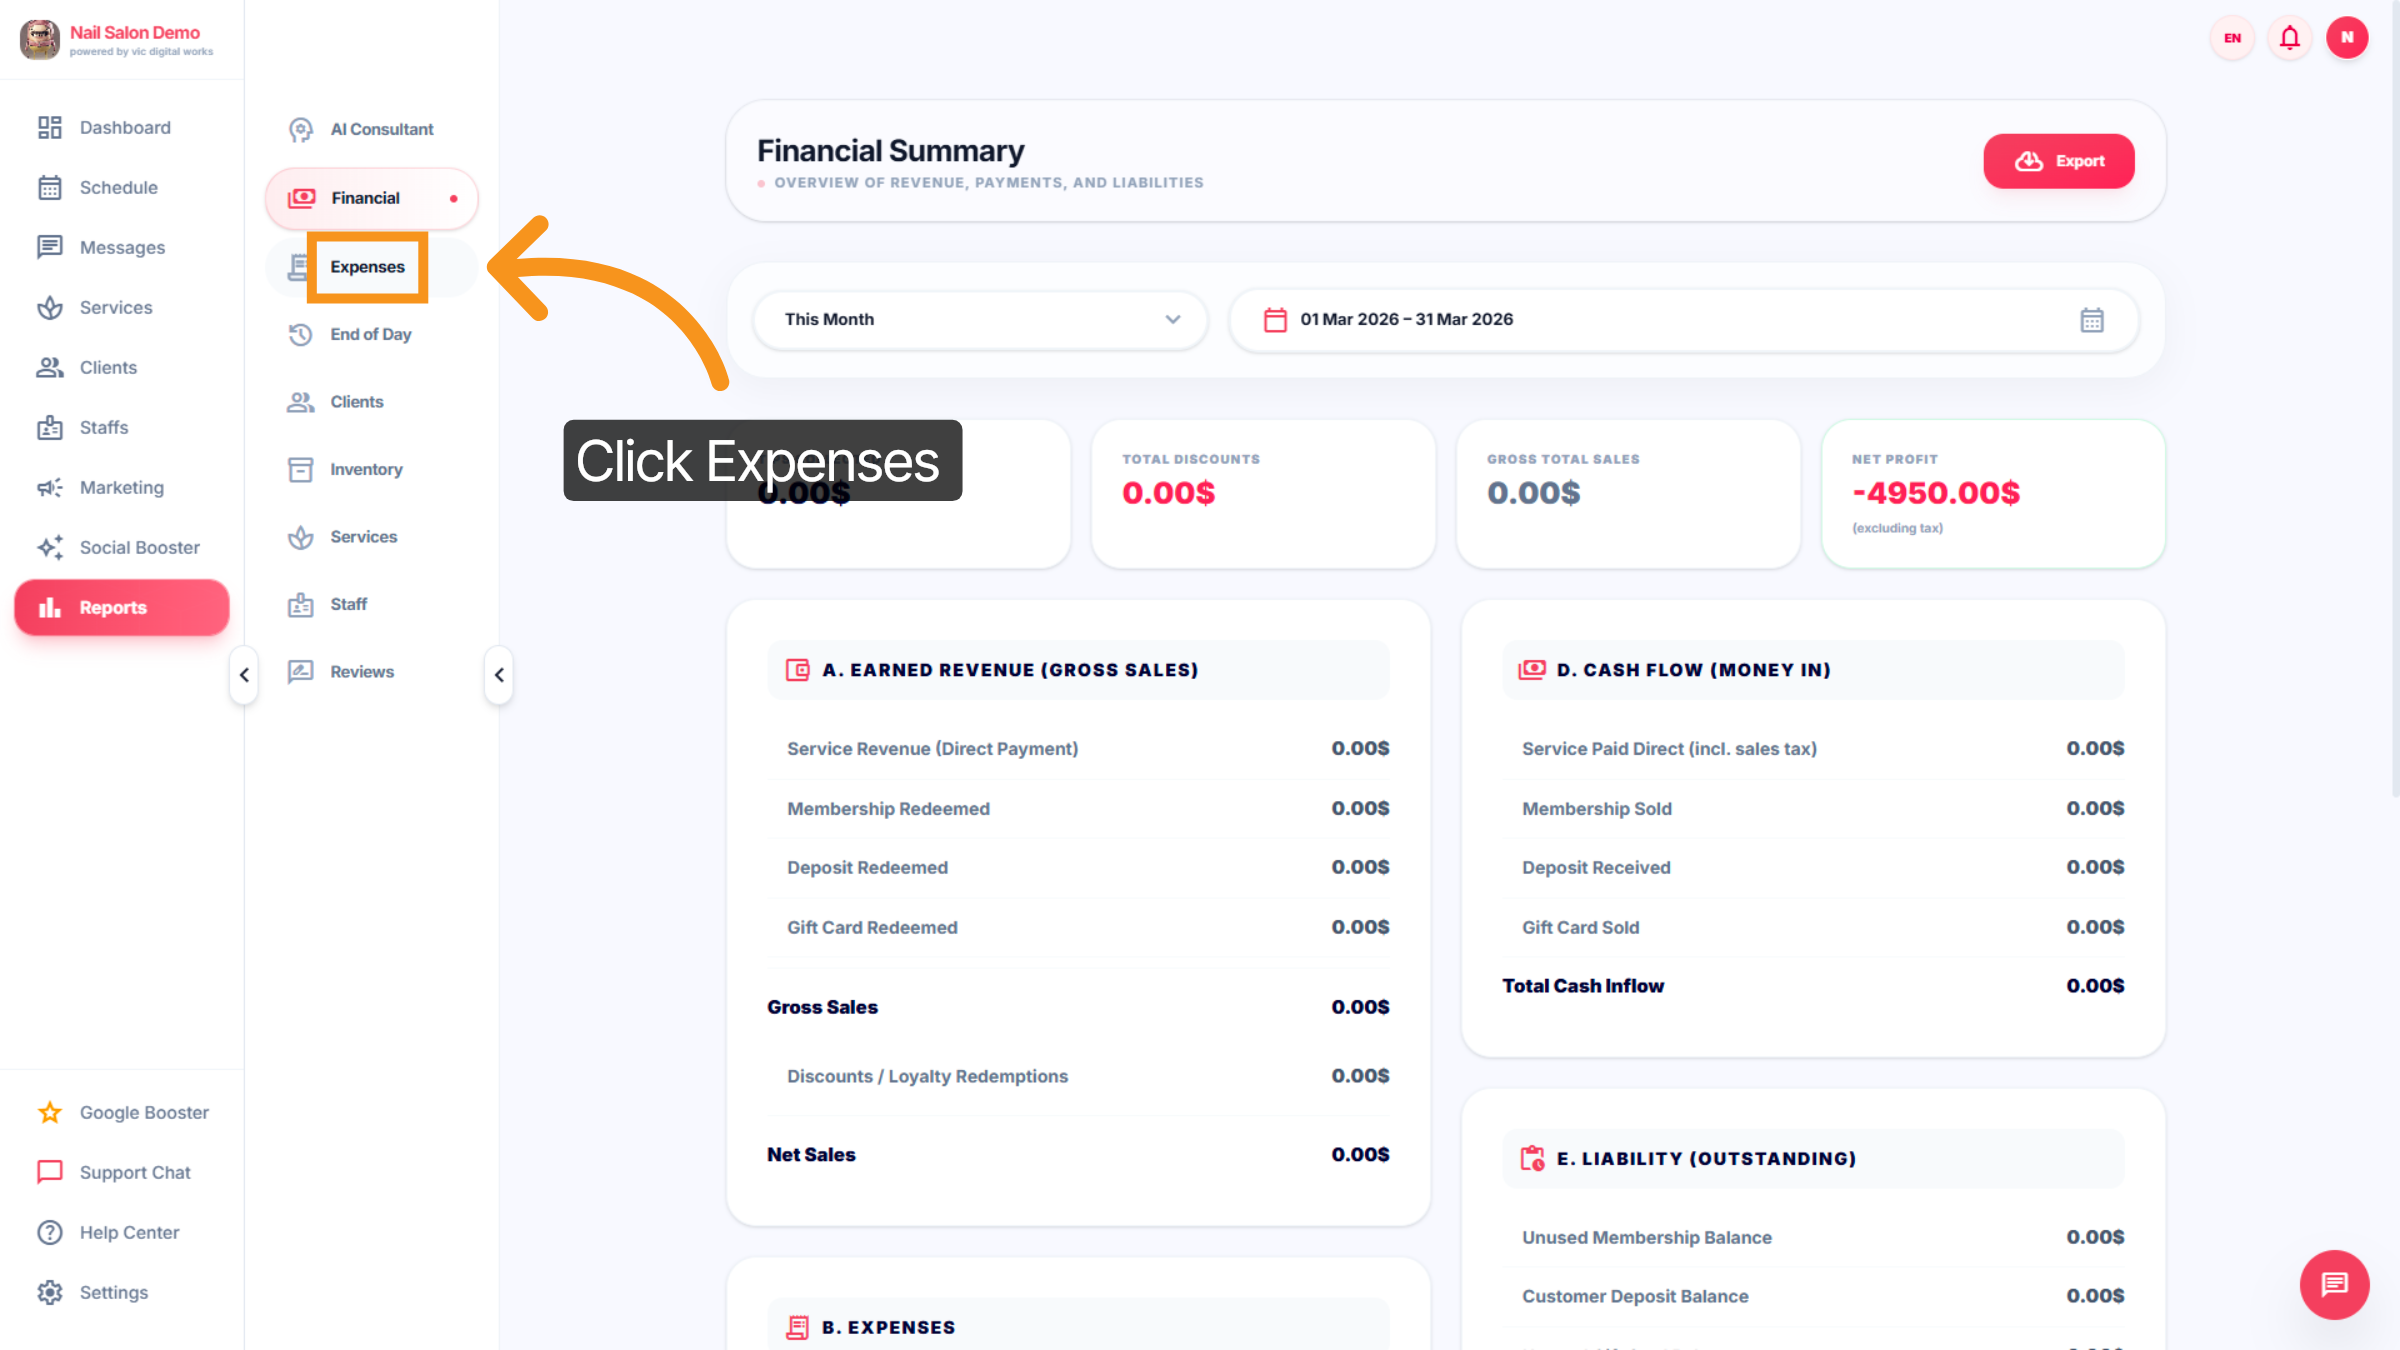
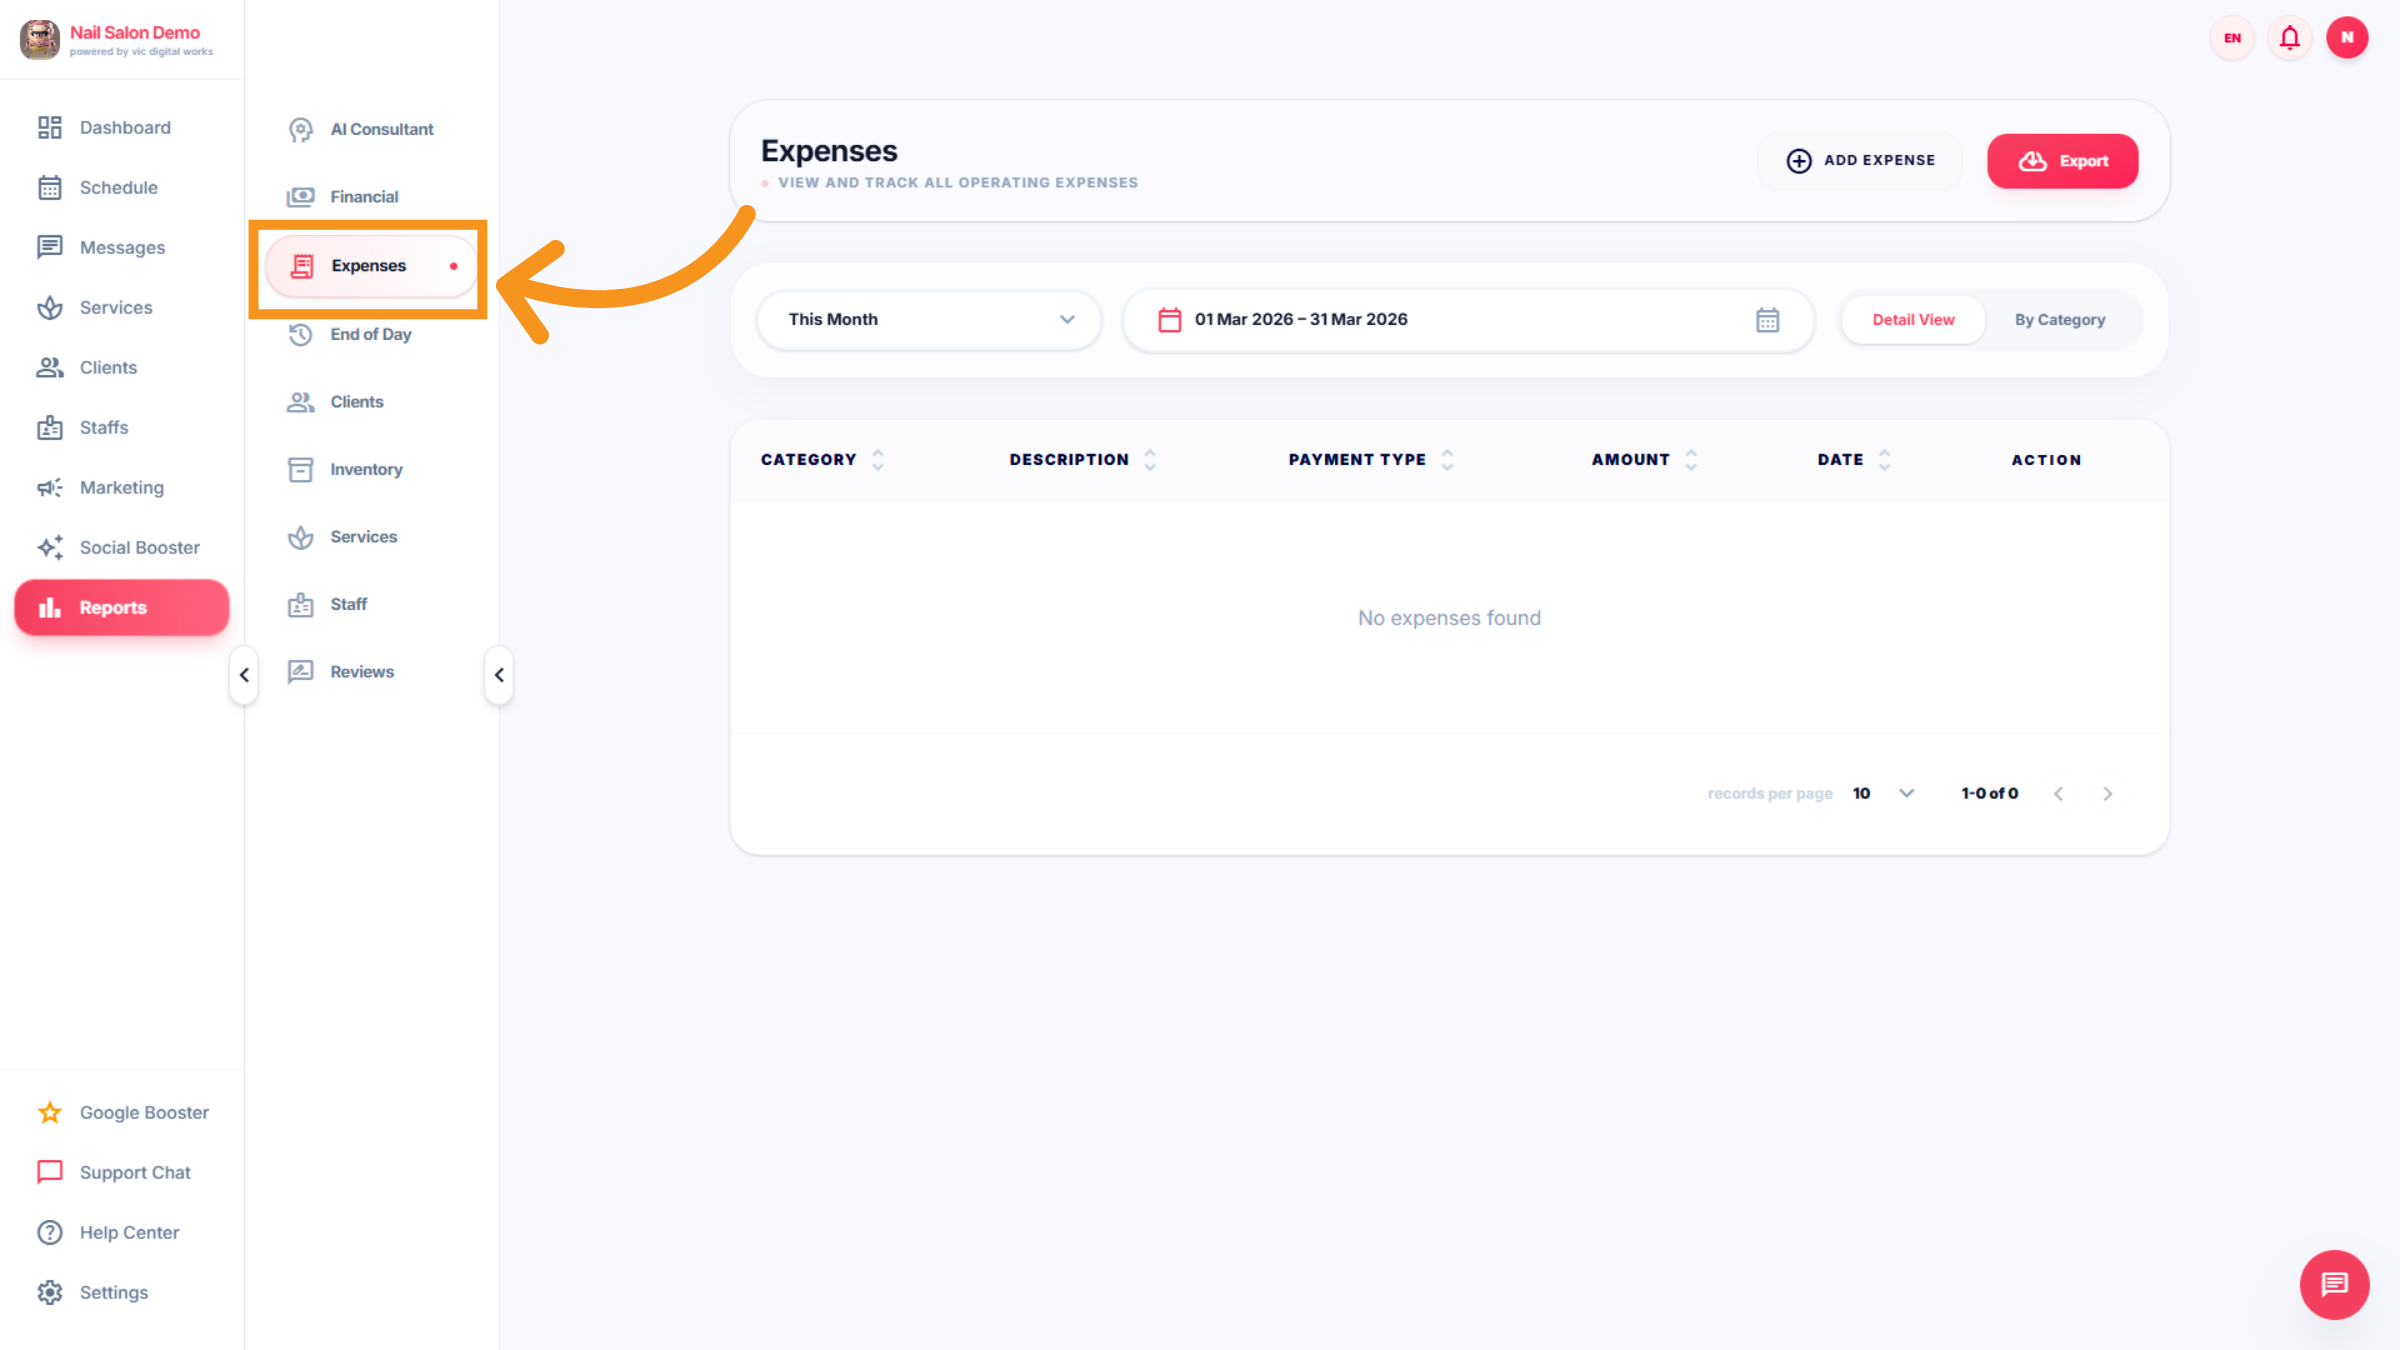
9. Expenses
Click the Expenses tab to manage and add new expense records.
10. Add New Expense
Click Add Expense to input a new cost related to your salon operations.
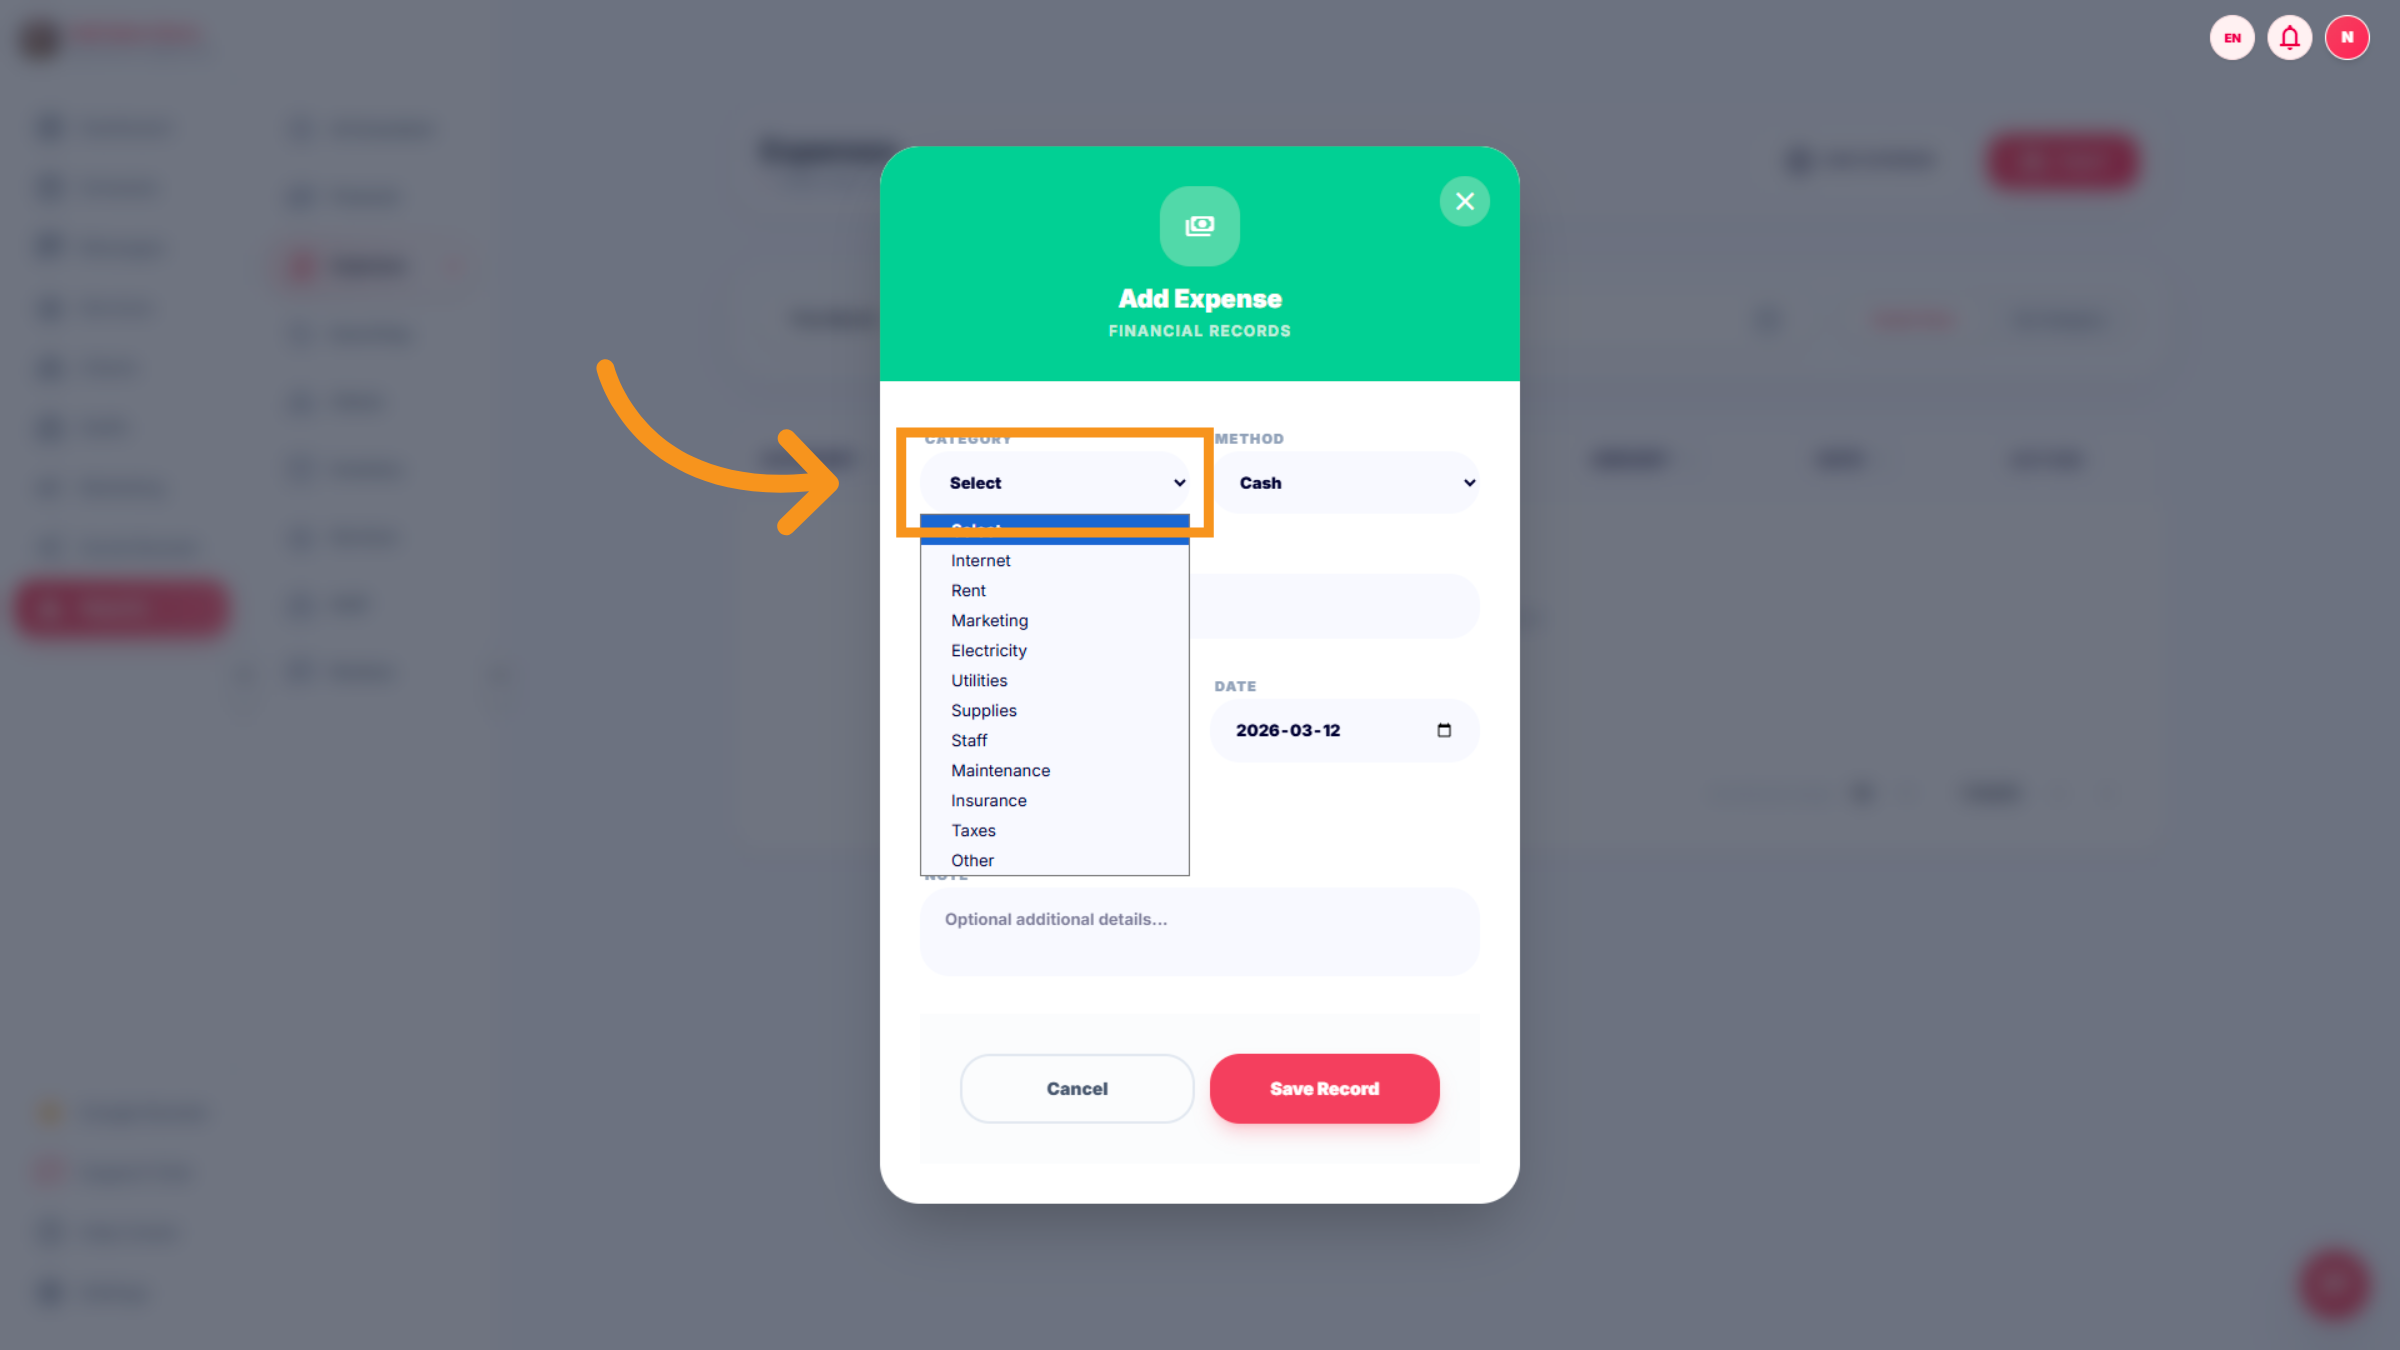
11. Select Expense Category
Click the category selector to choose the type of expense such as Internet, Rent, Marketing, or Utilities.
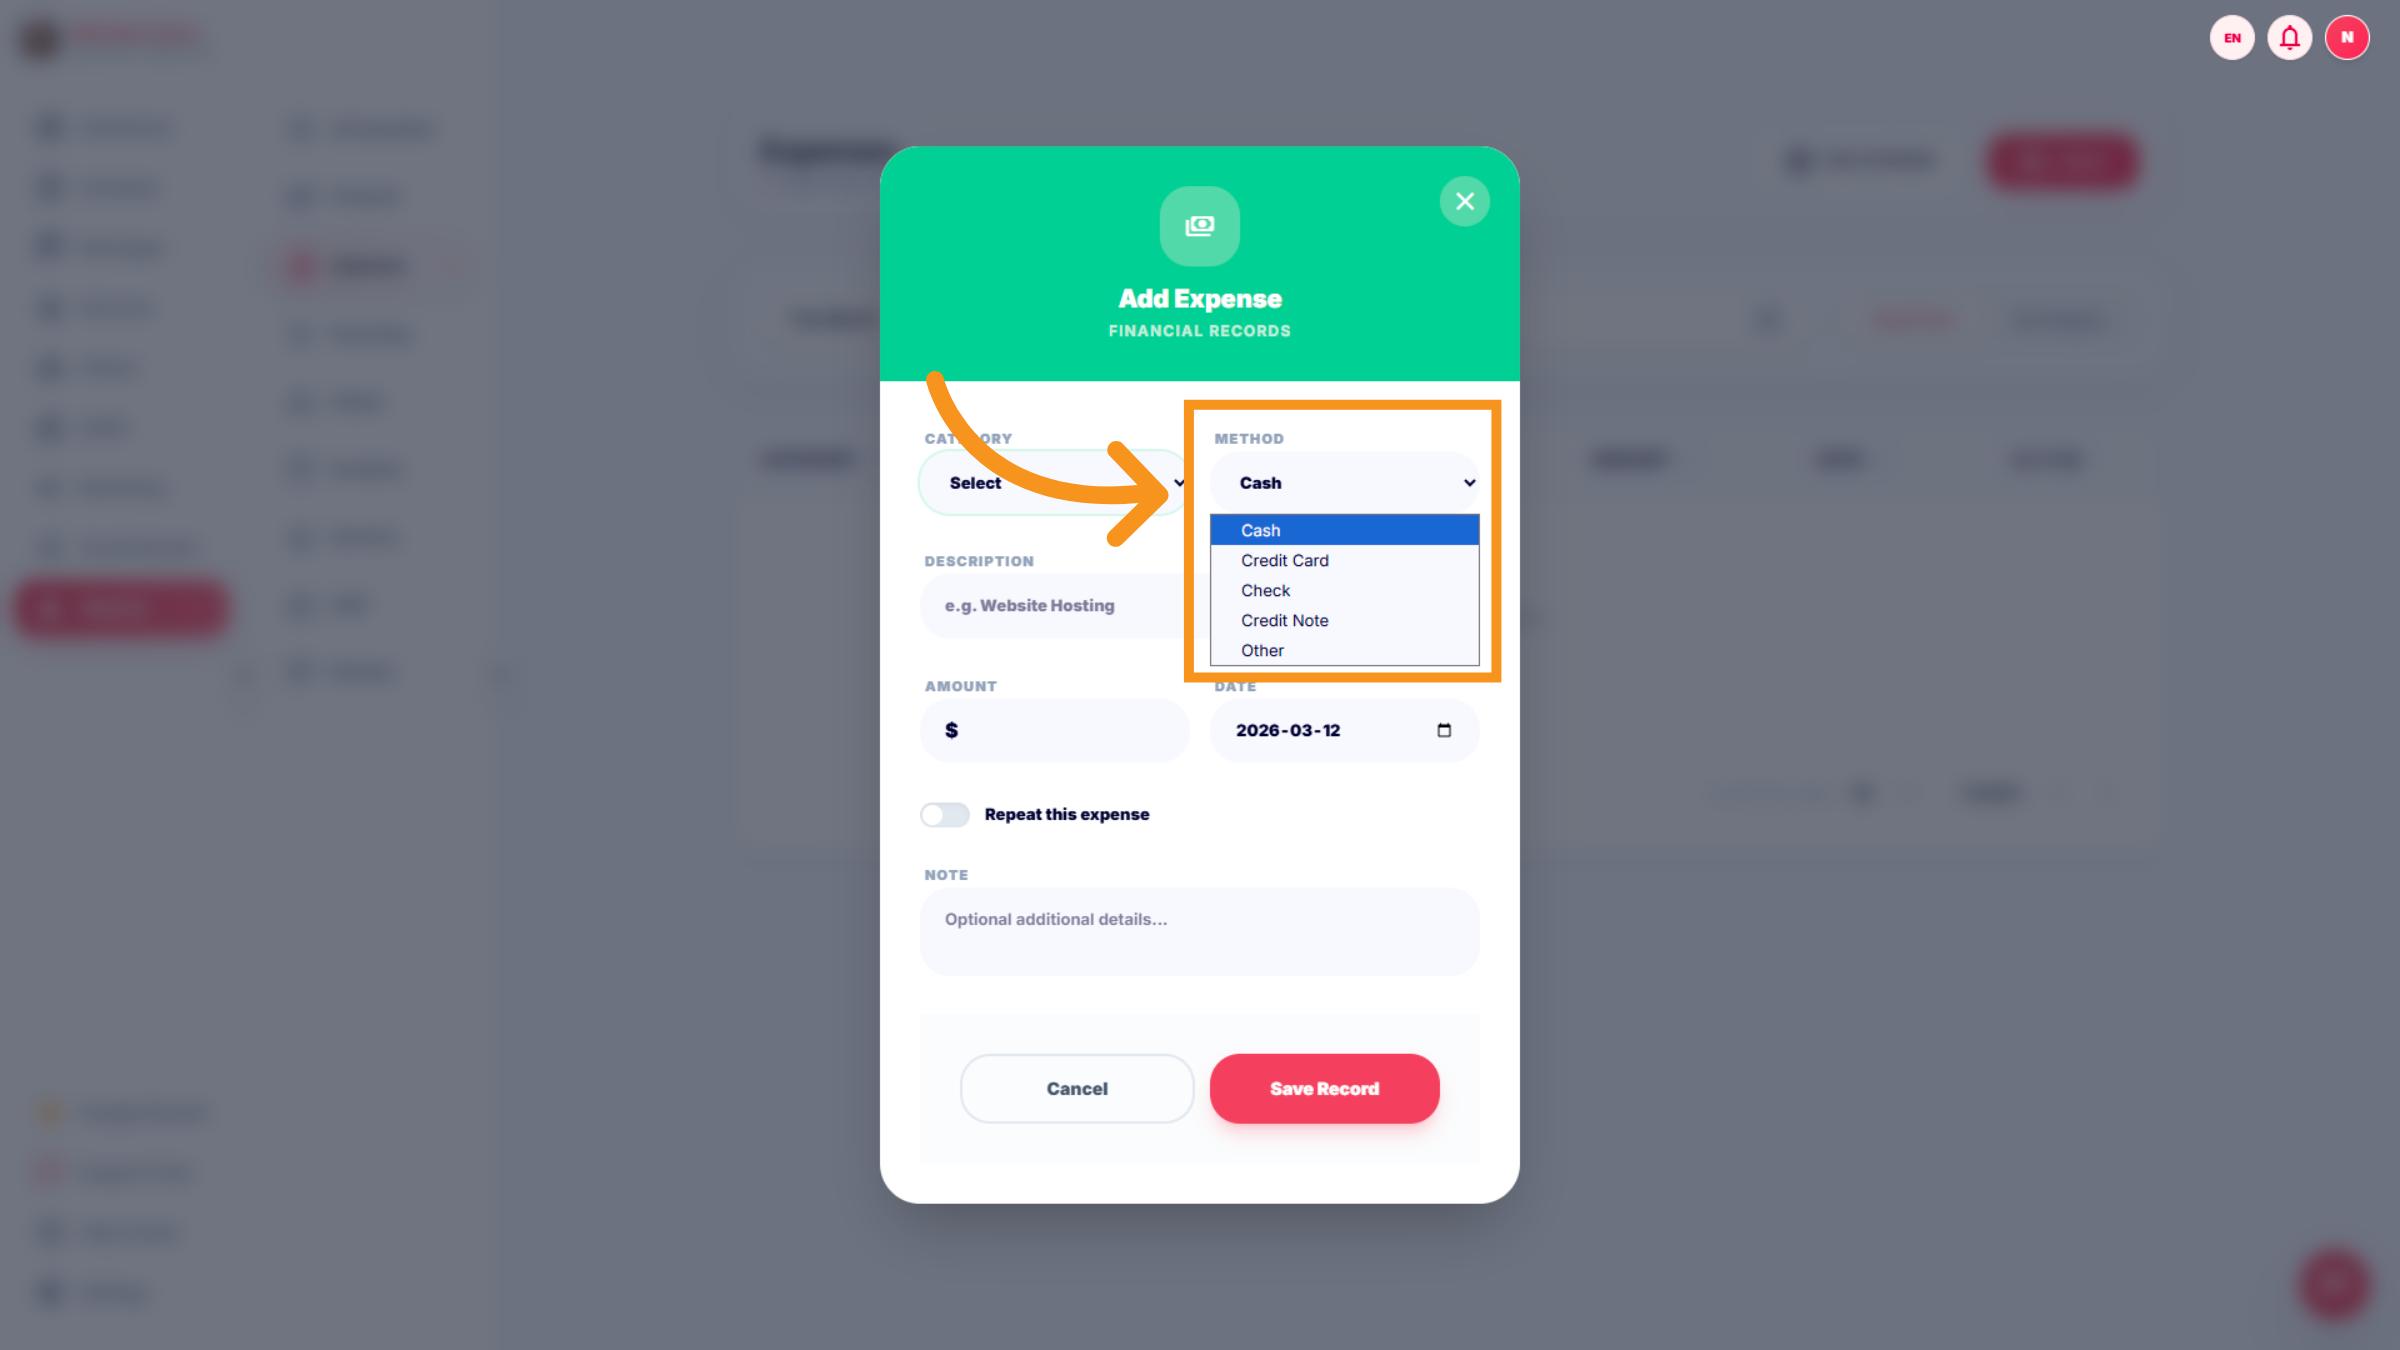
12. Choose Payment Method
Click the payment method options to specify how the expense was paid, such as Cash, Credit Card, or Check.
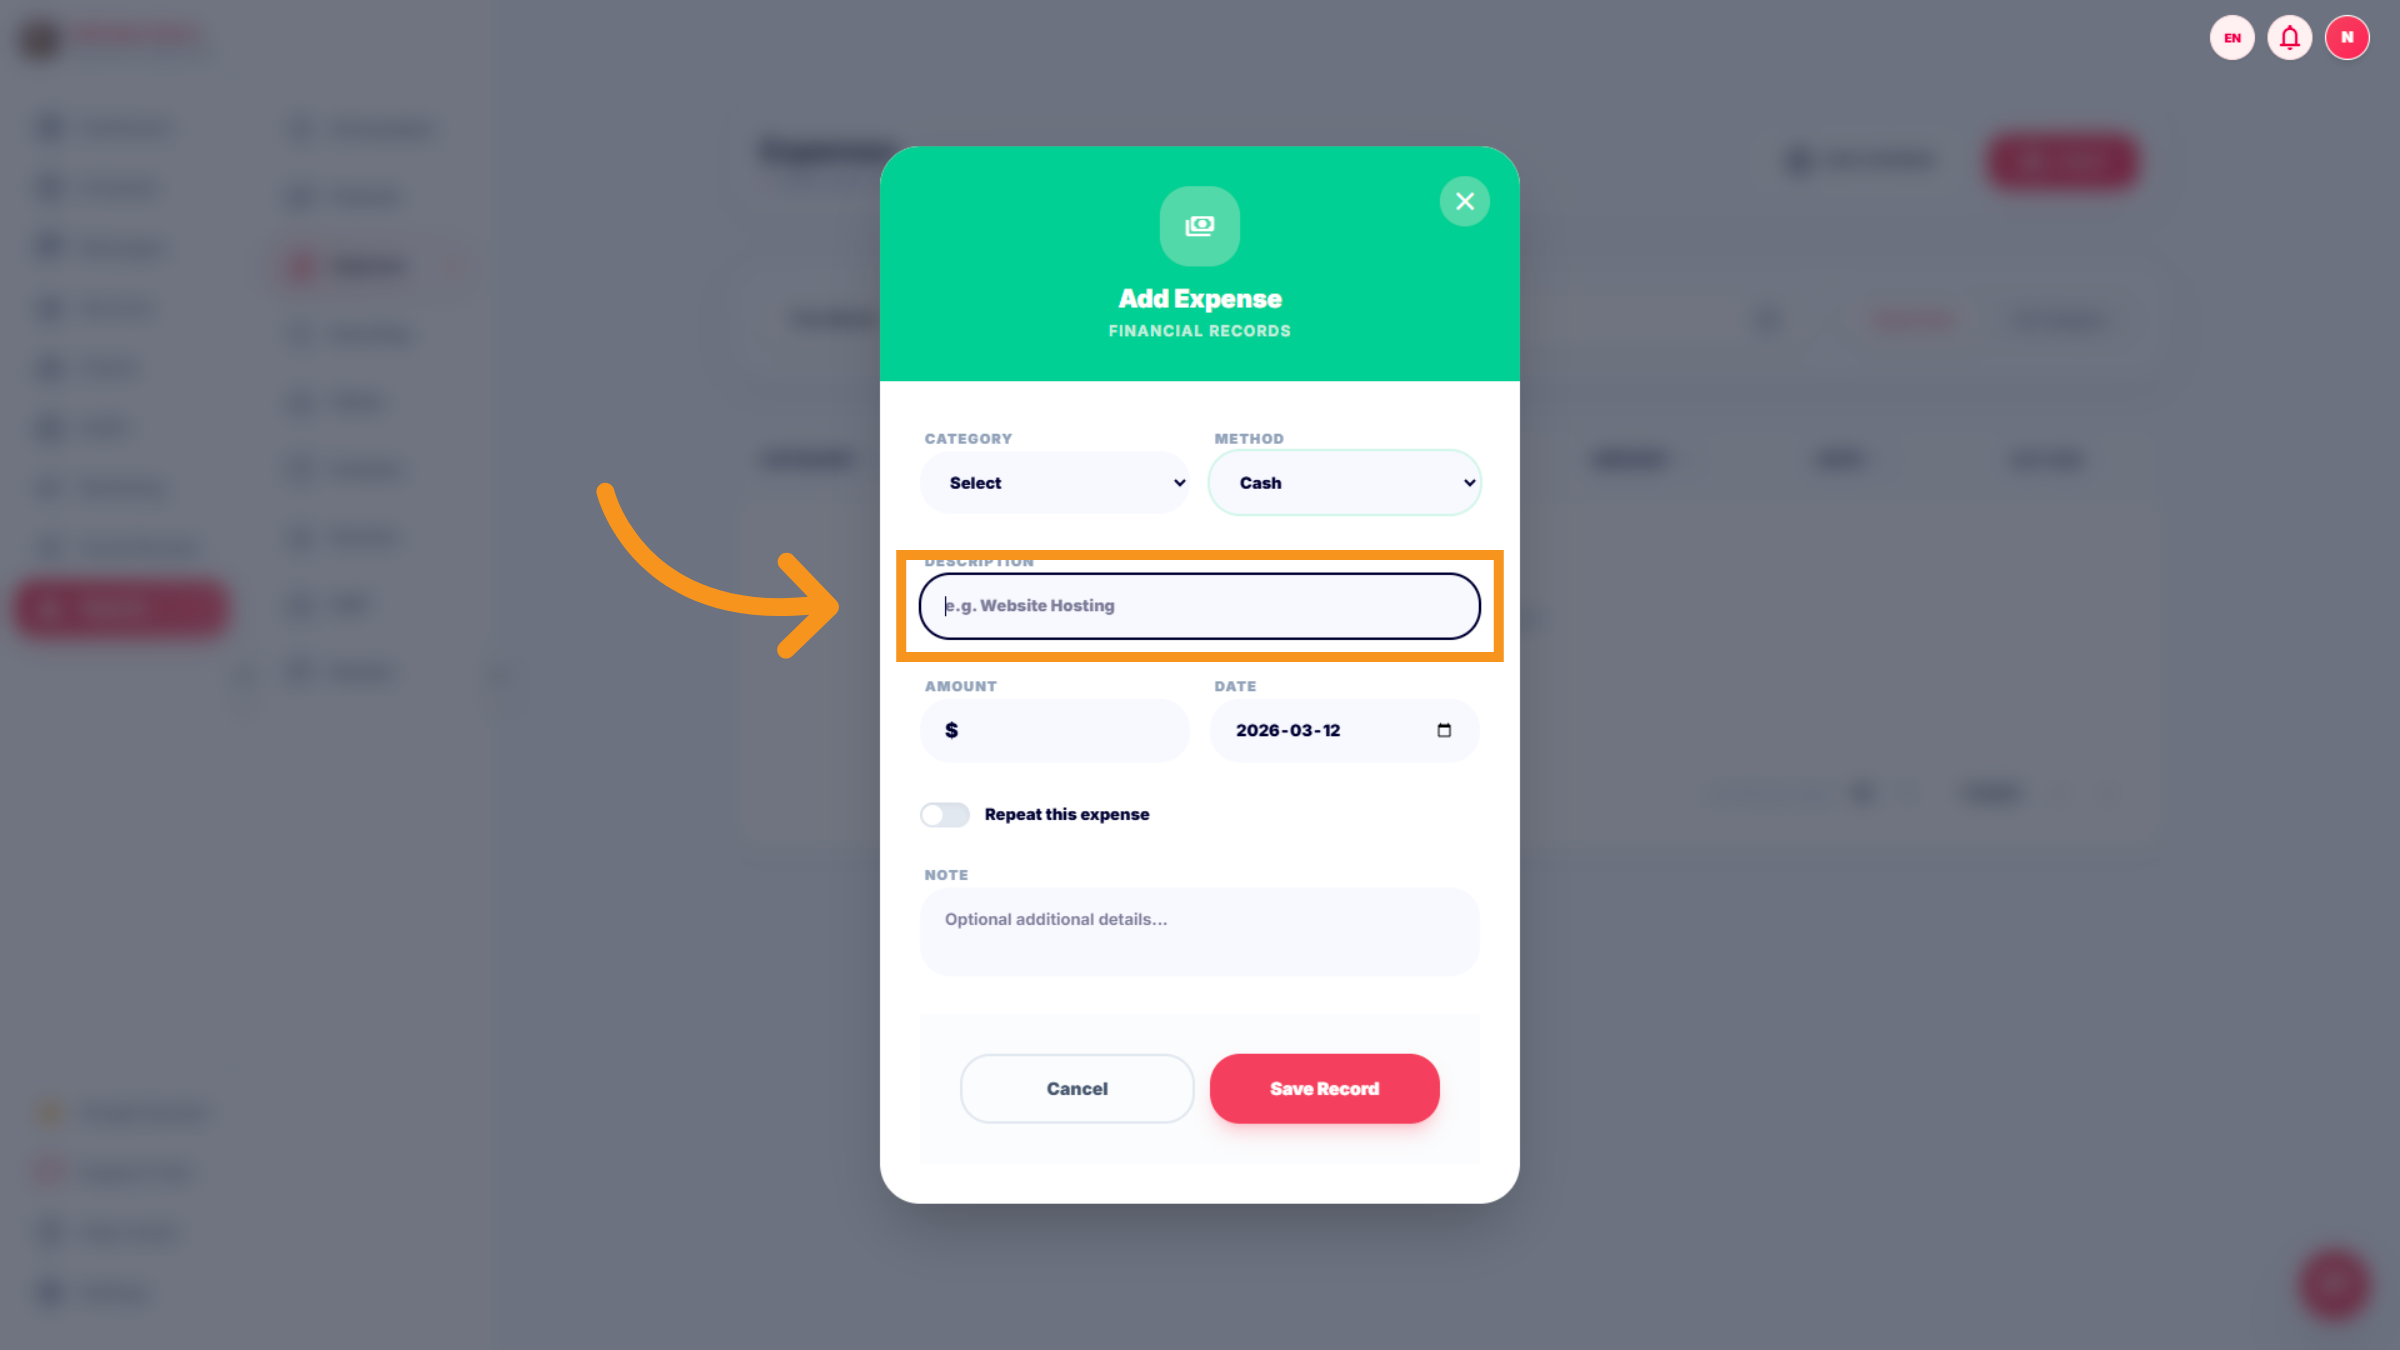
13. Enter Expense Description
Click the description field and enter details like Website Hosting to specify the expense purpose.
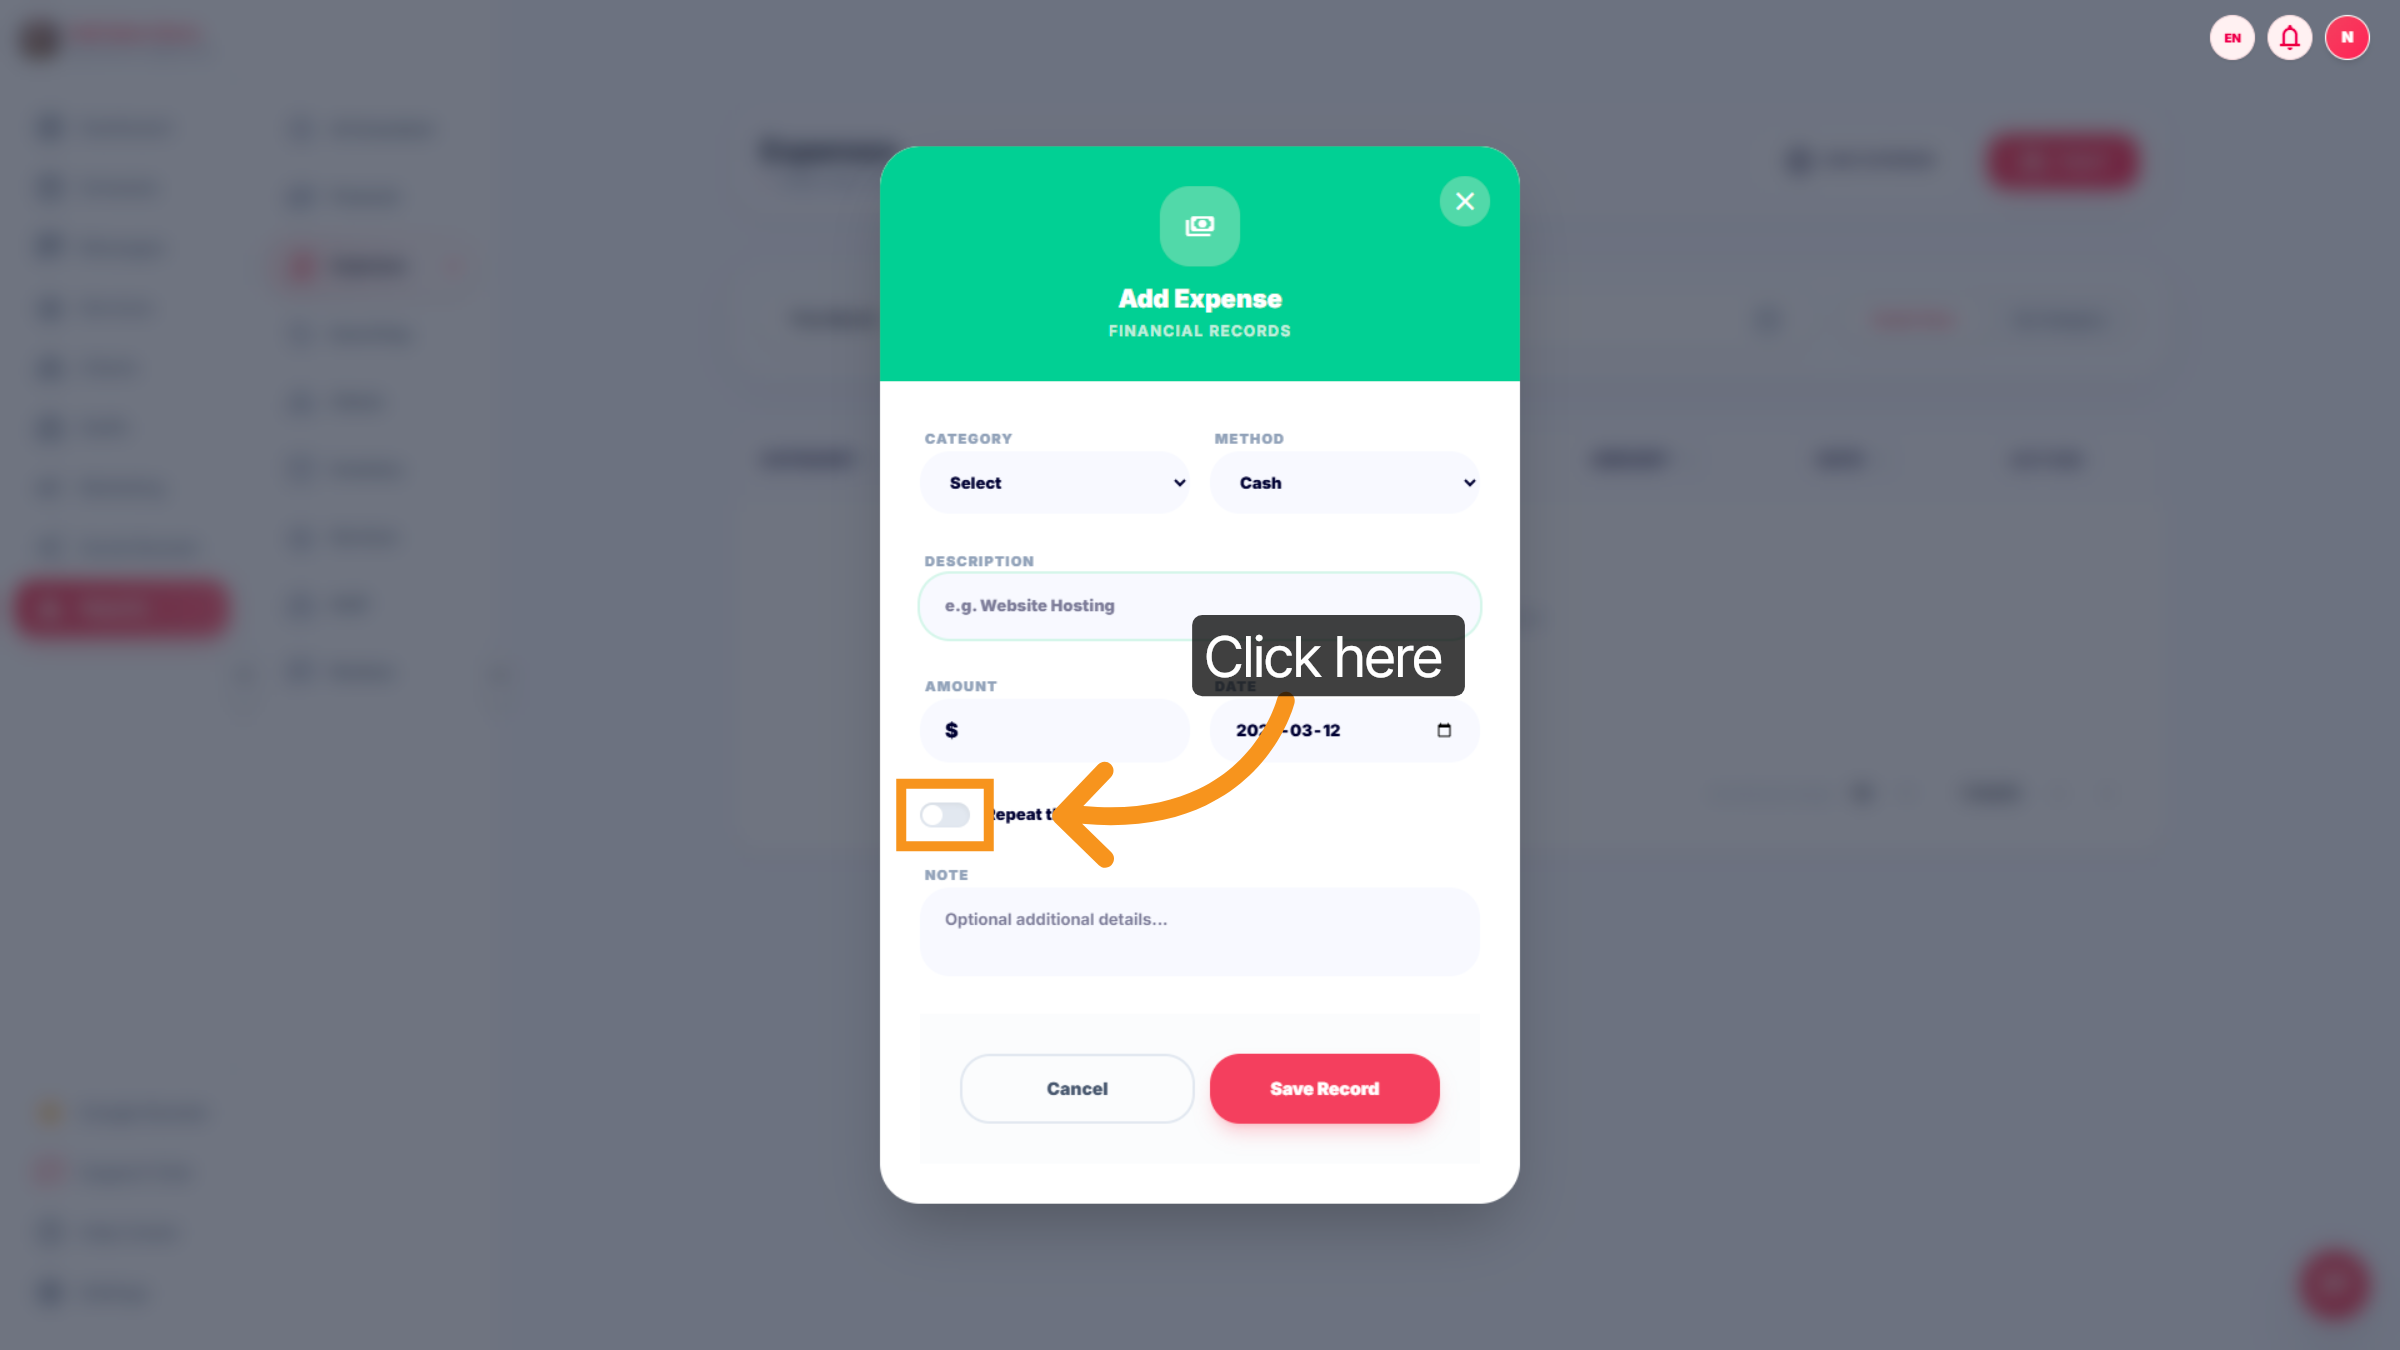
14. Access Additional Expense Options
Click here to reveal more settings related to the expense entry.
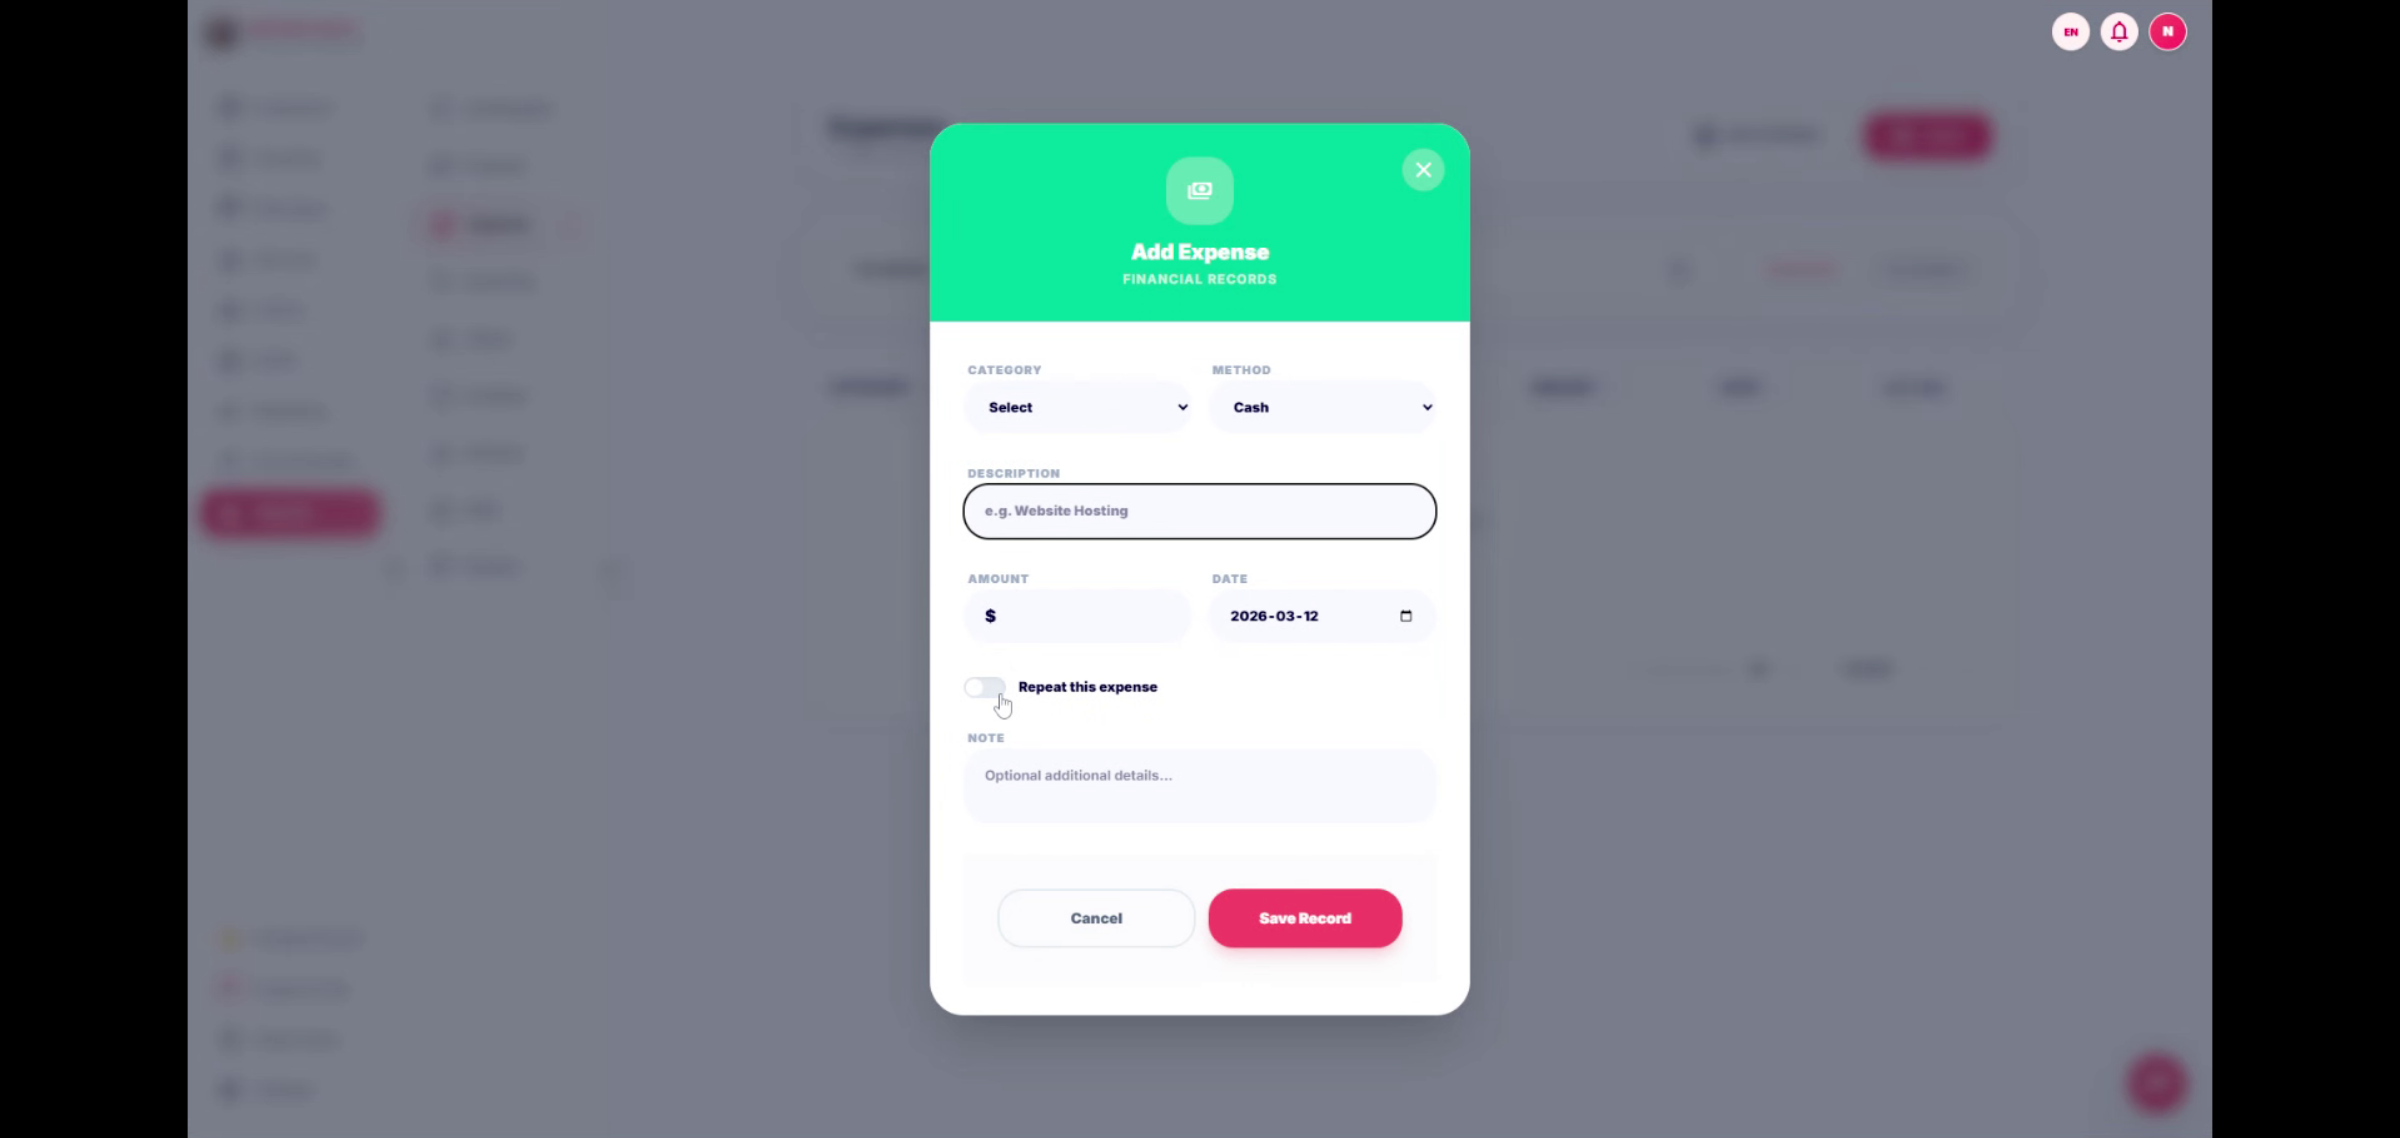
15. Enable Expense Option
Fill the field to turn on the specified expense option.
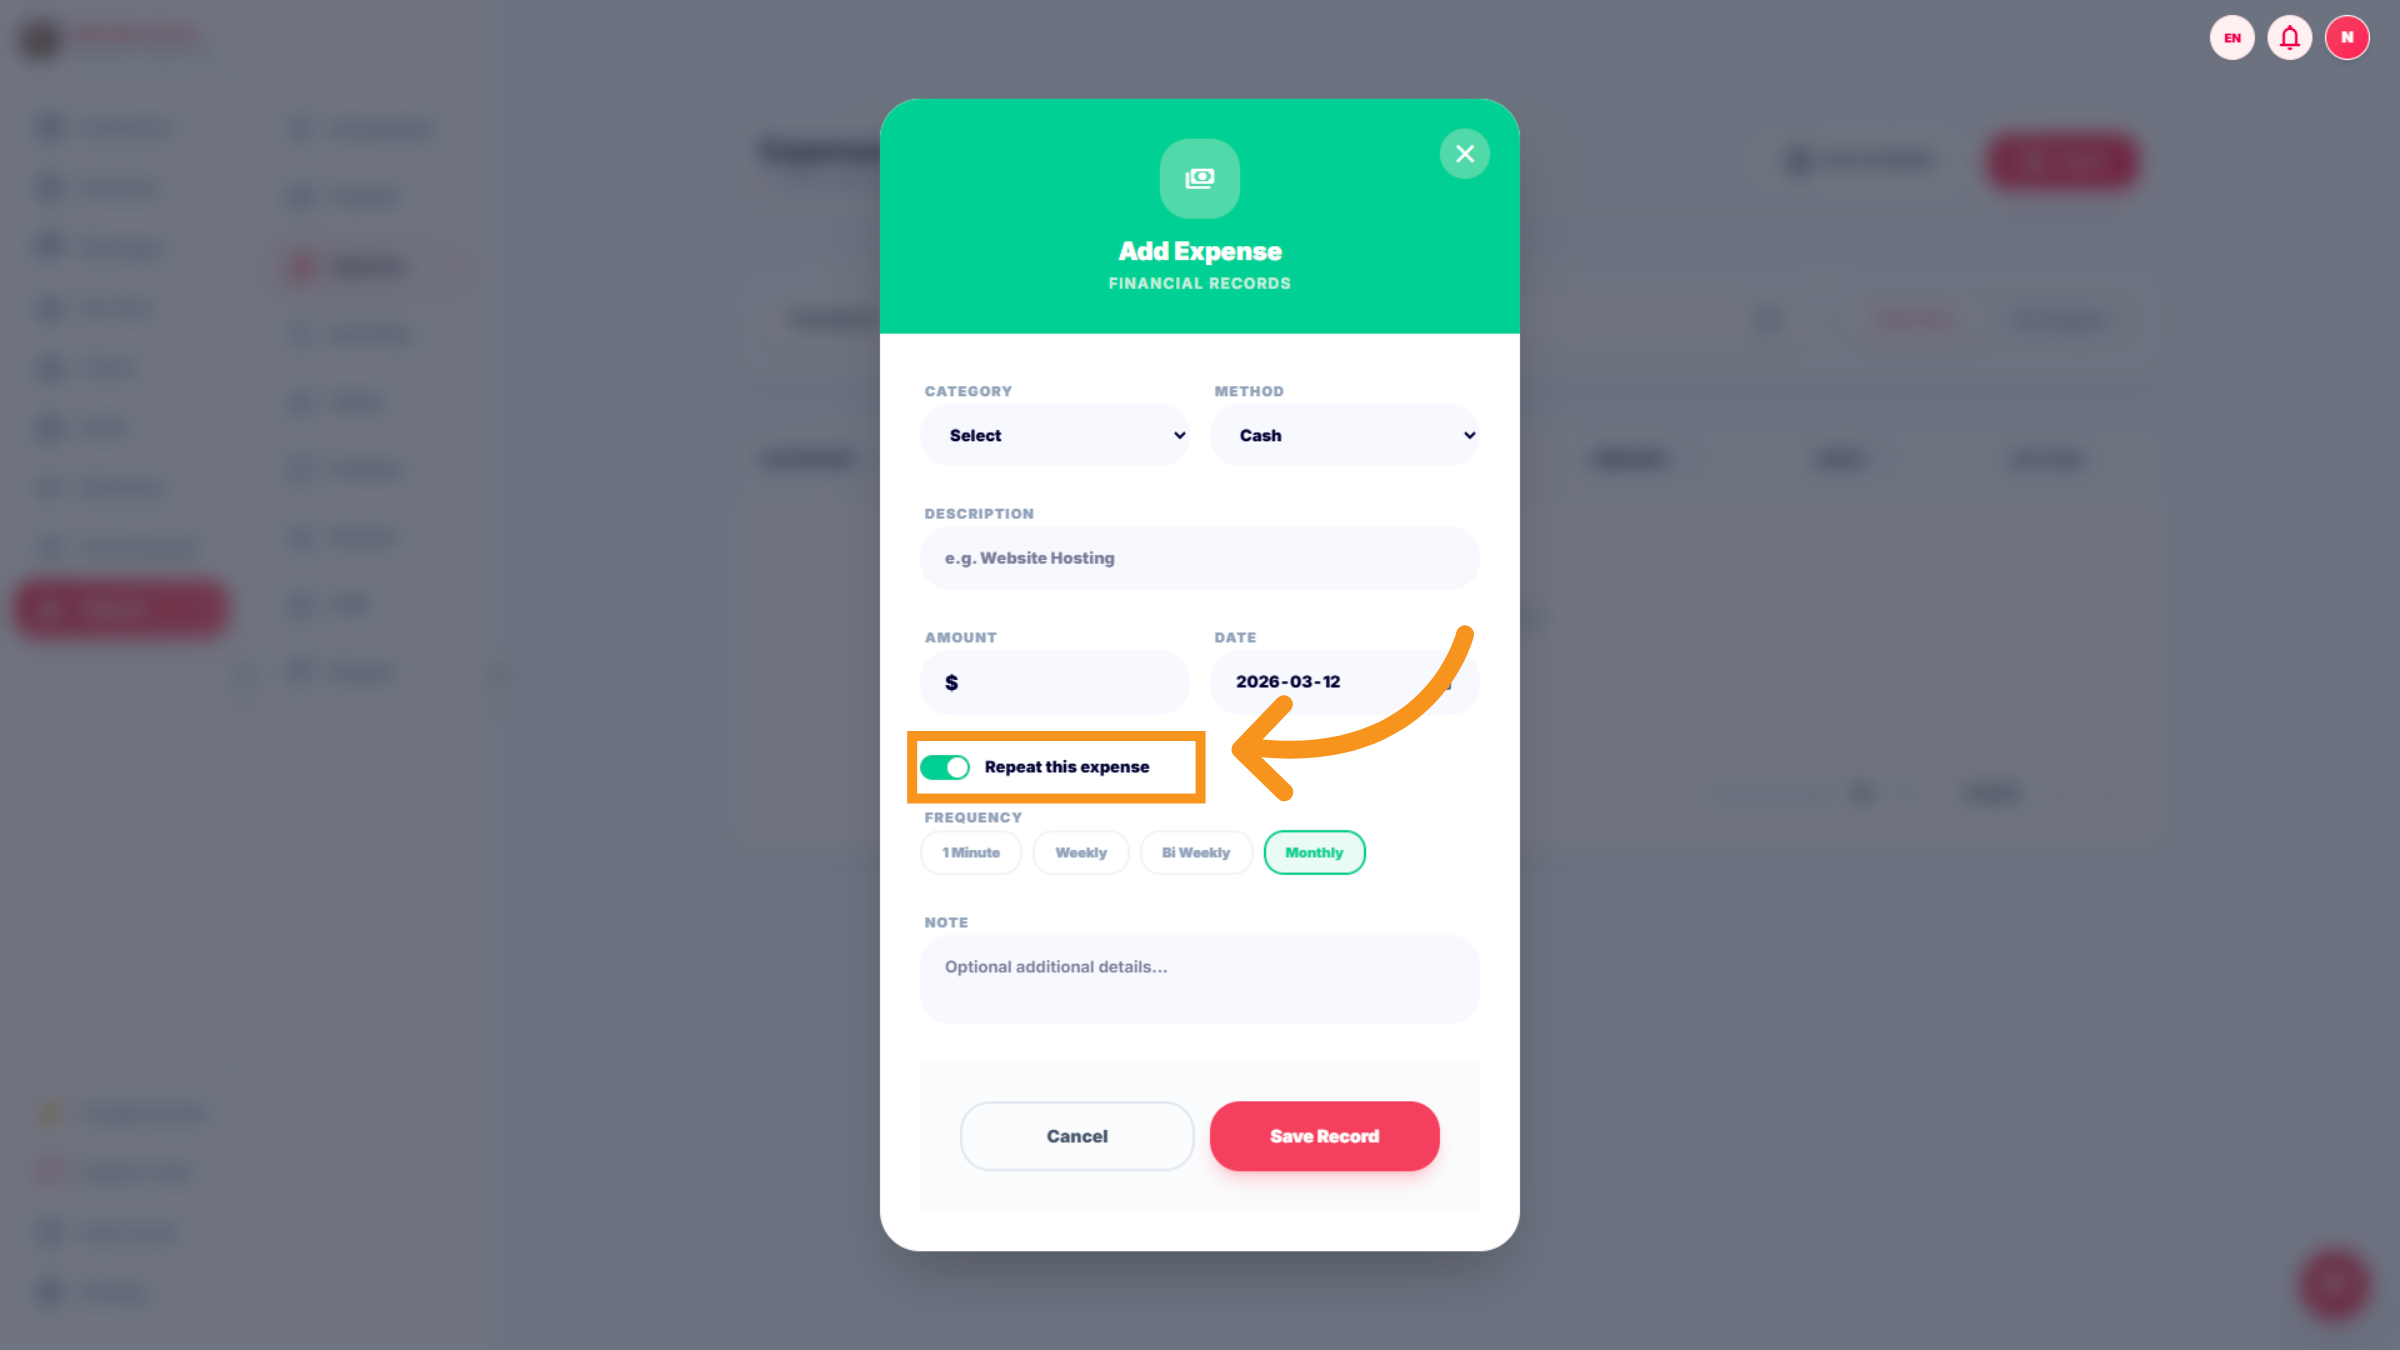
16. Set Expense Frequency
Click Repeat this expense to configure how often this expense recurs, such as weekly or monthly.

17. Access More Expense Settings
Click here to access additional expense configuration options.
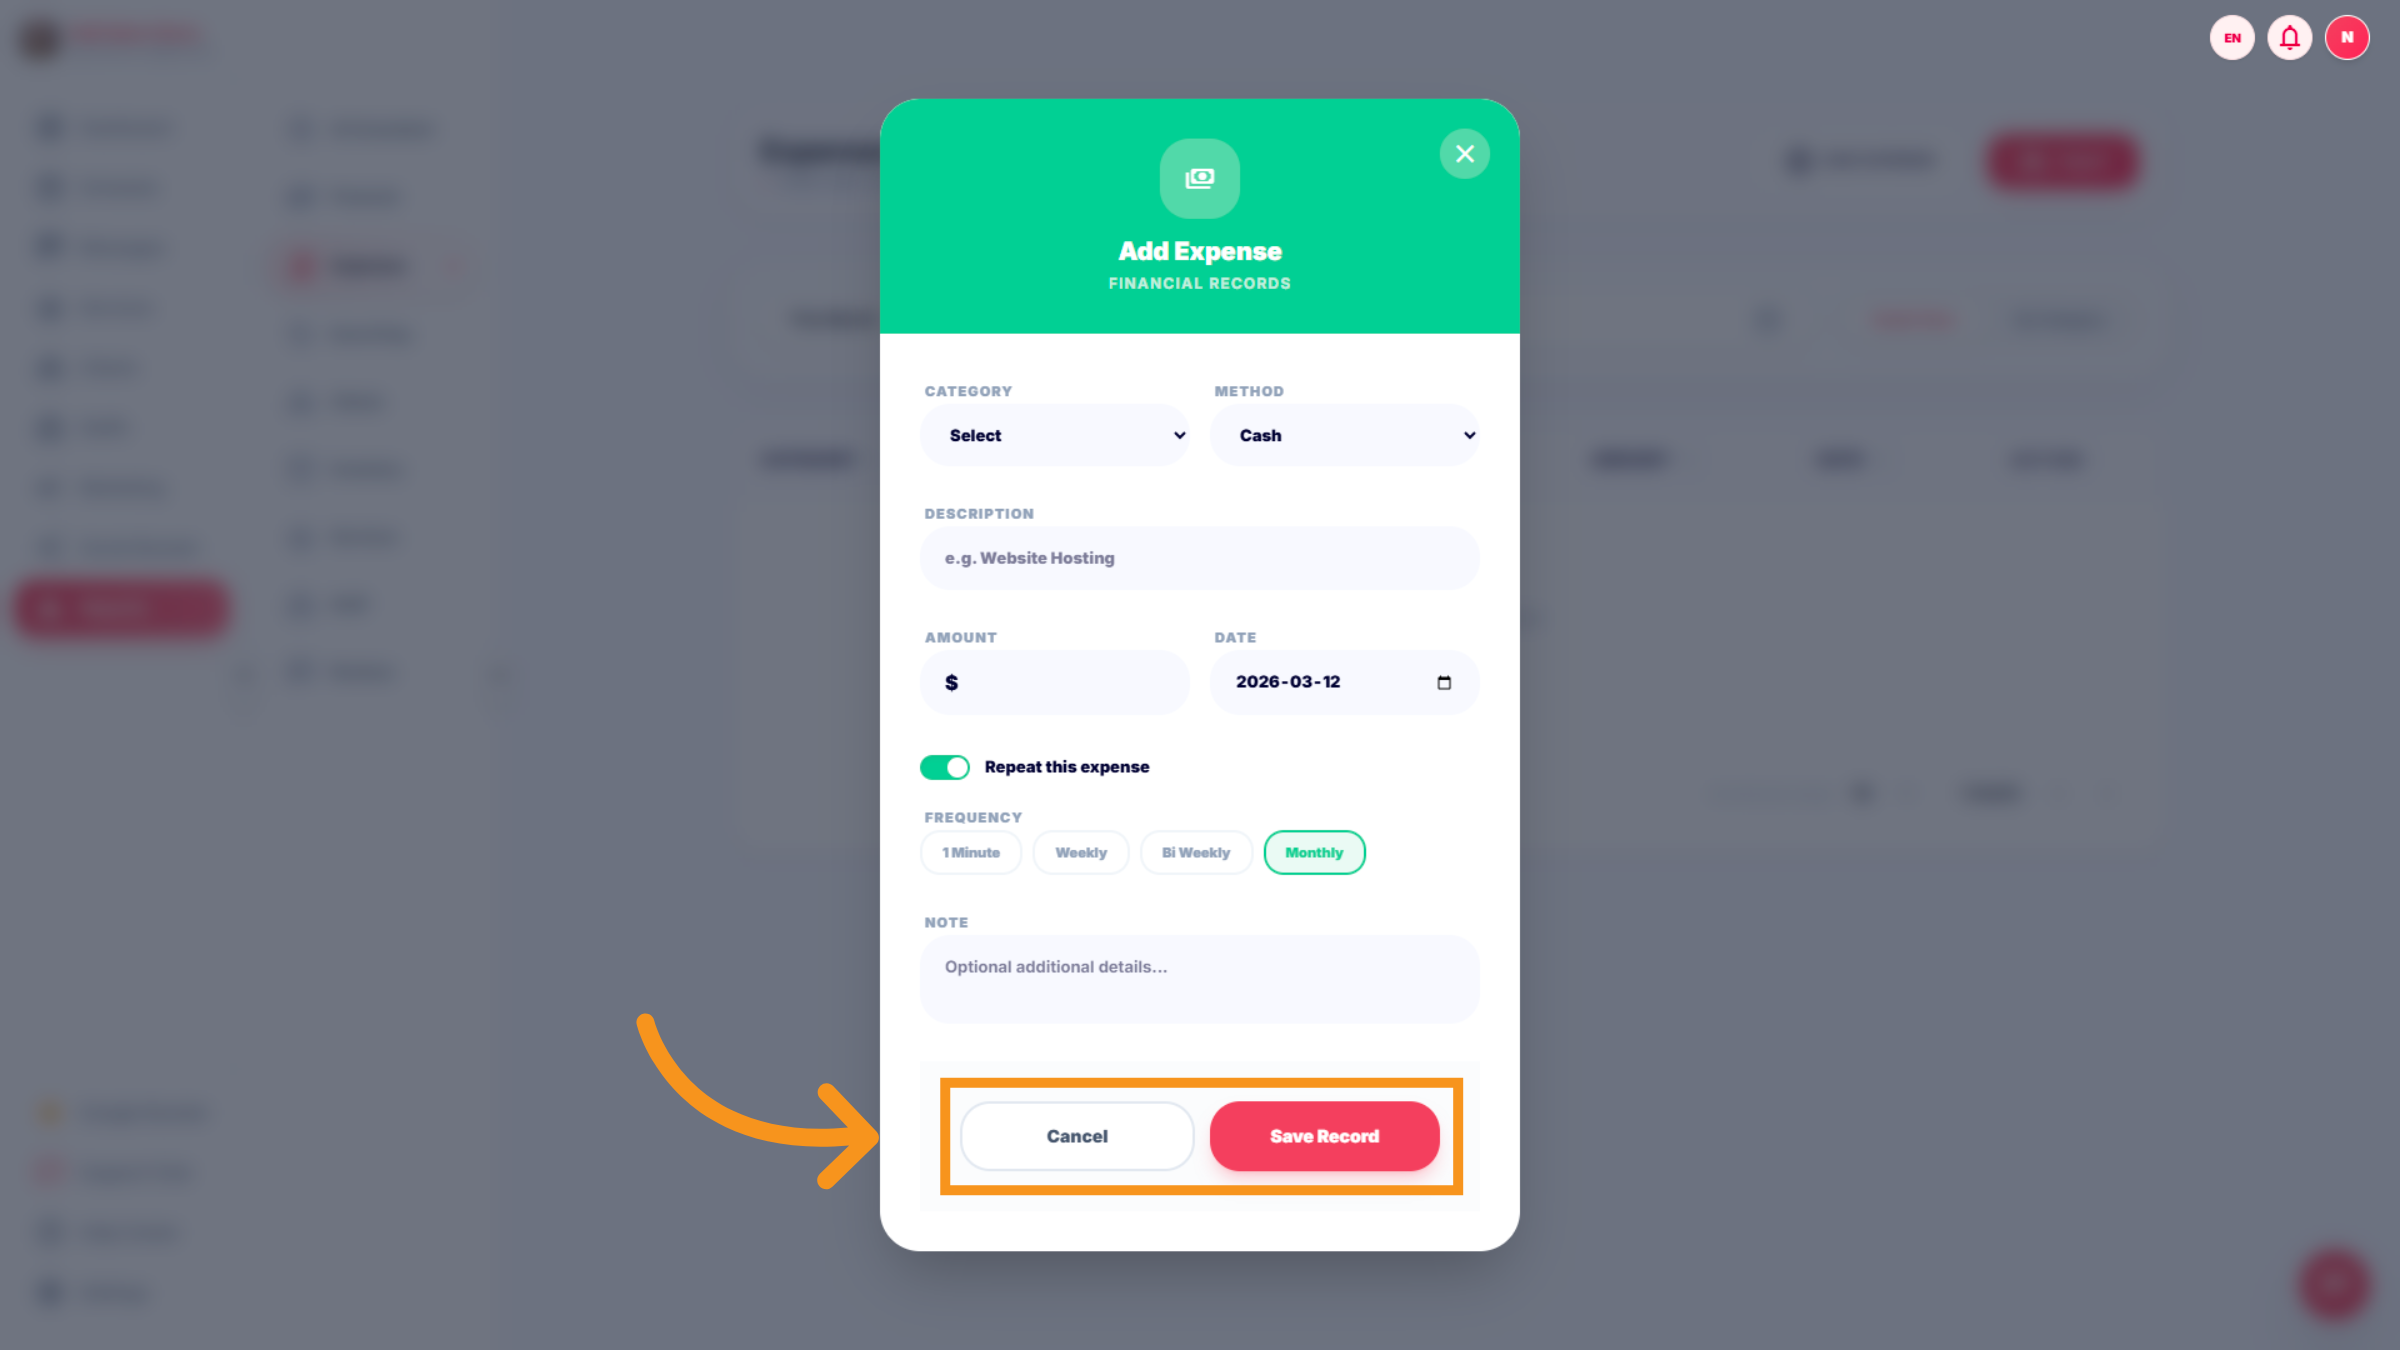
18. Cancel / Save record Expense Entry
Click "Cancel" or "Save" to complete the process.
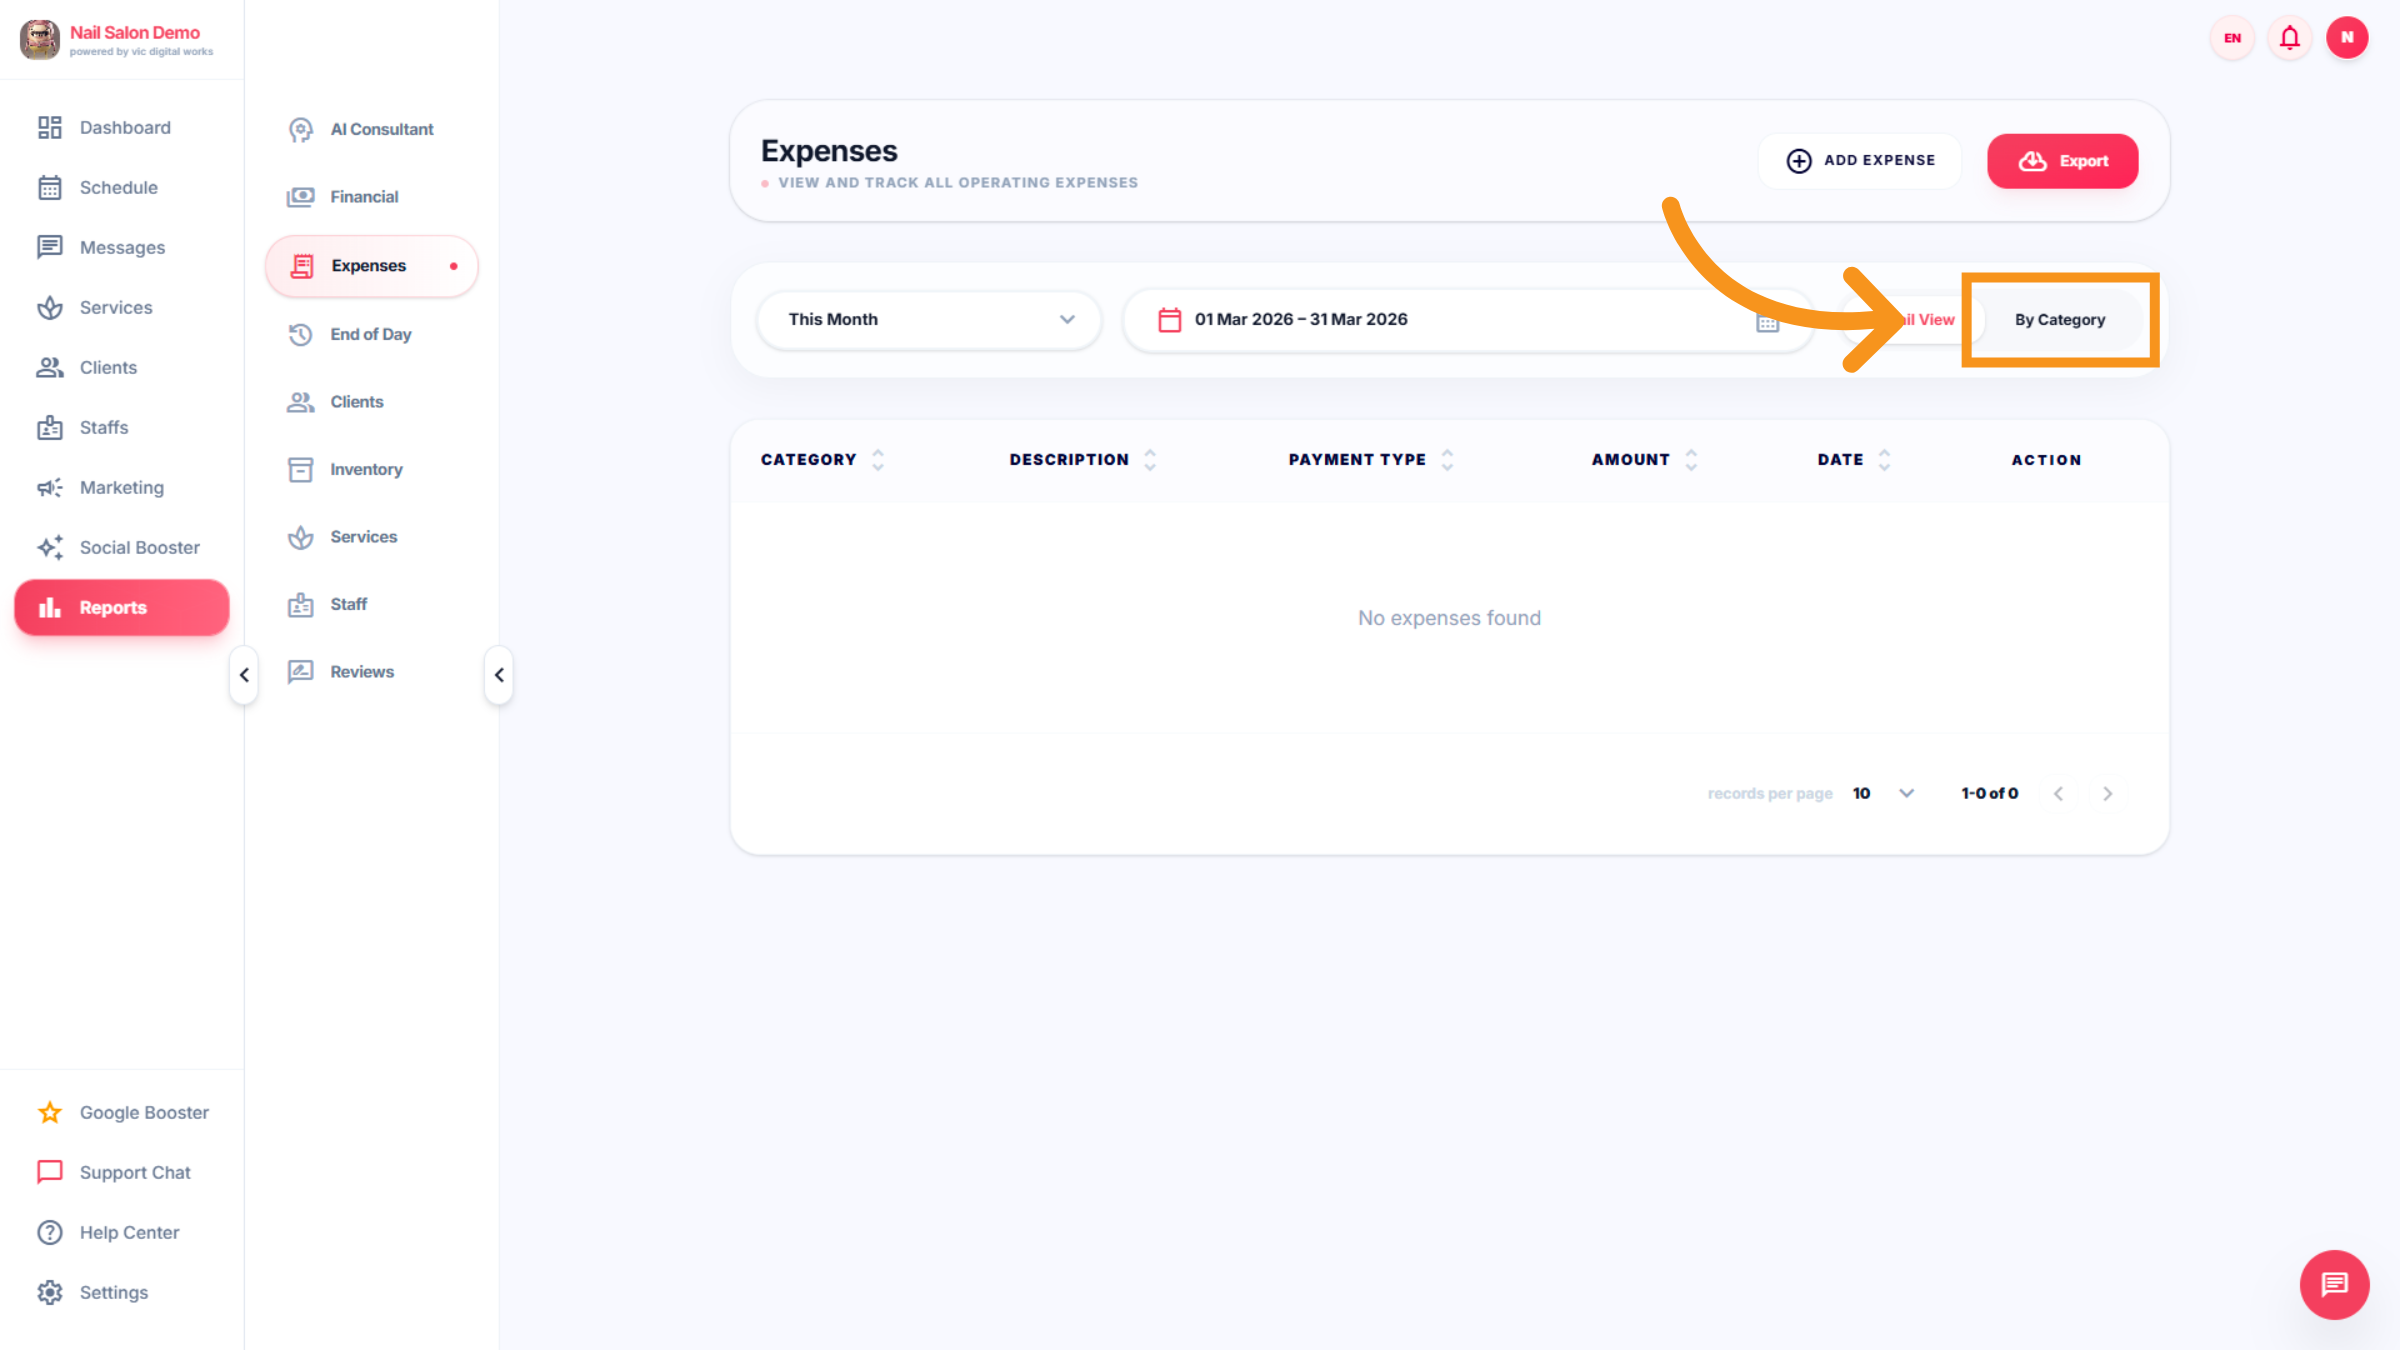
19. View Expenses By Category
Click By Category to organize your expenses according to their types for easier analysis.
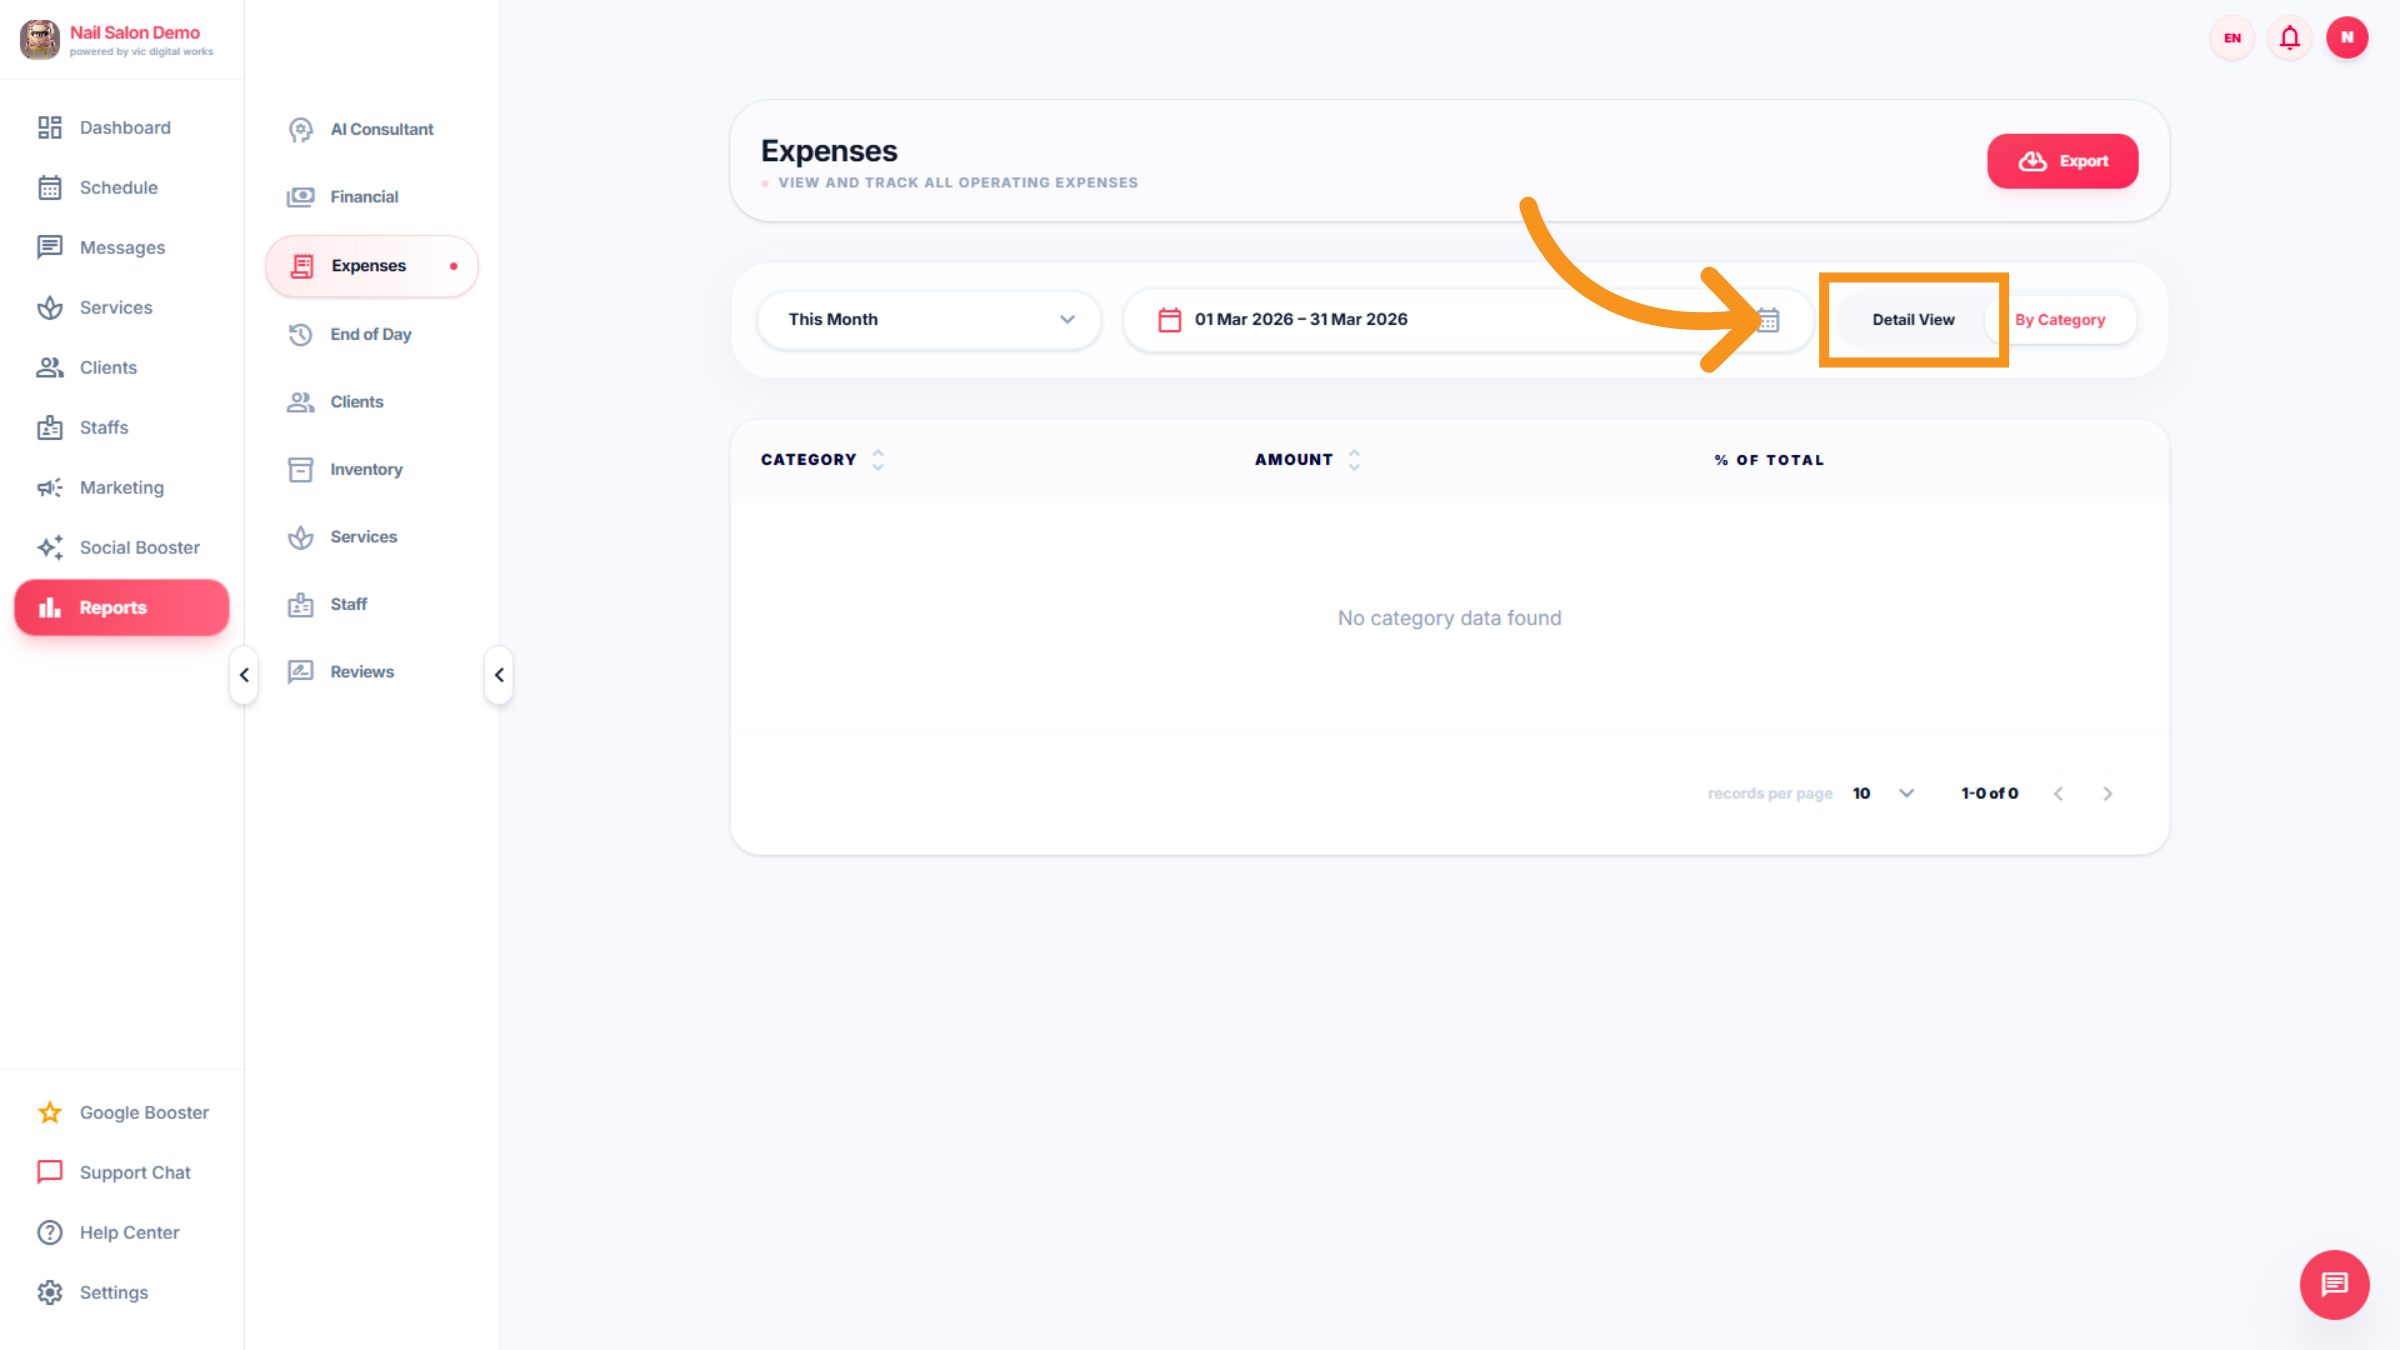
20. Switch To Detail View
Click Detail View to see a more comprehensive breakdown of your financial data.
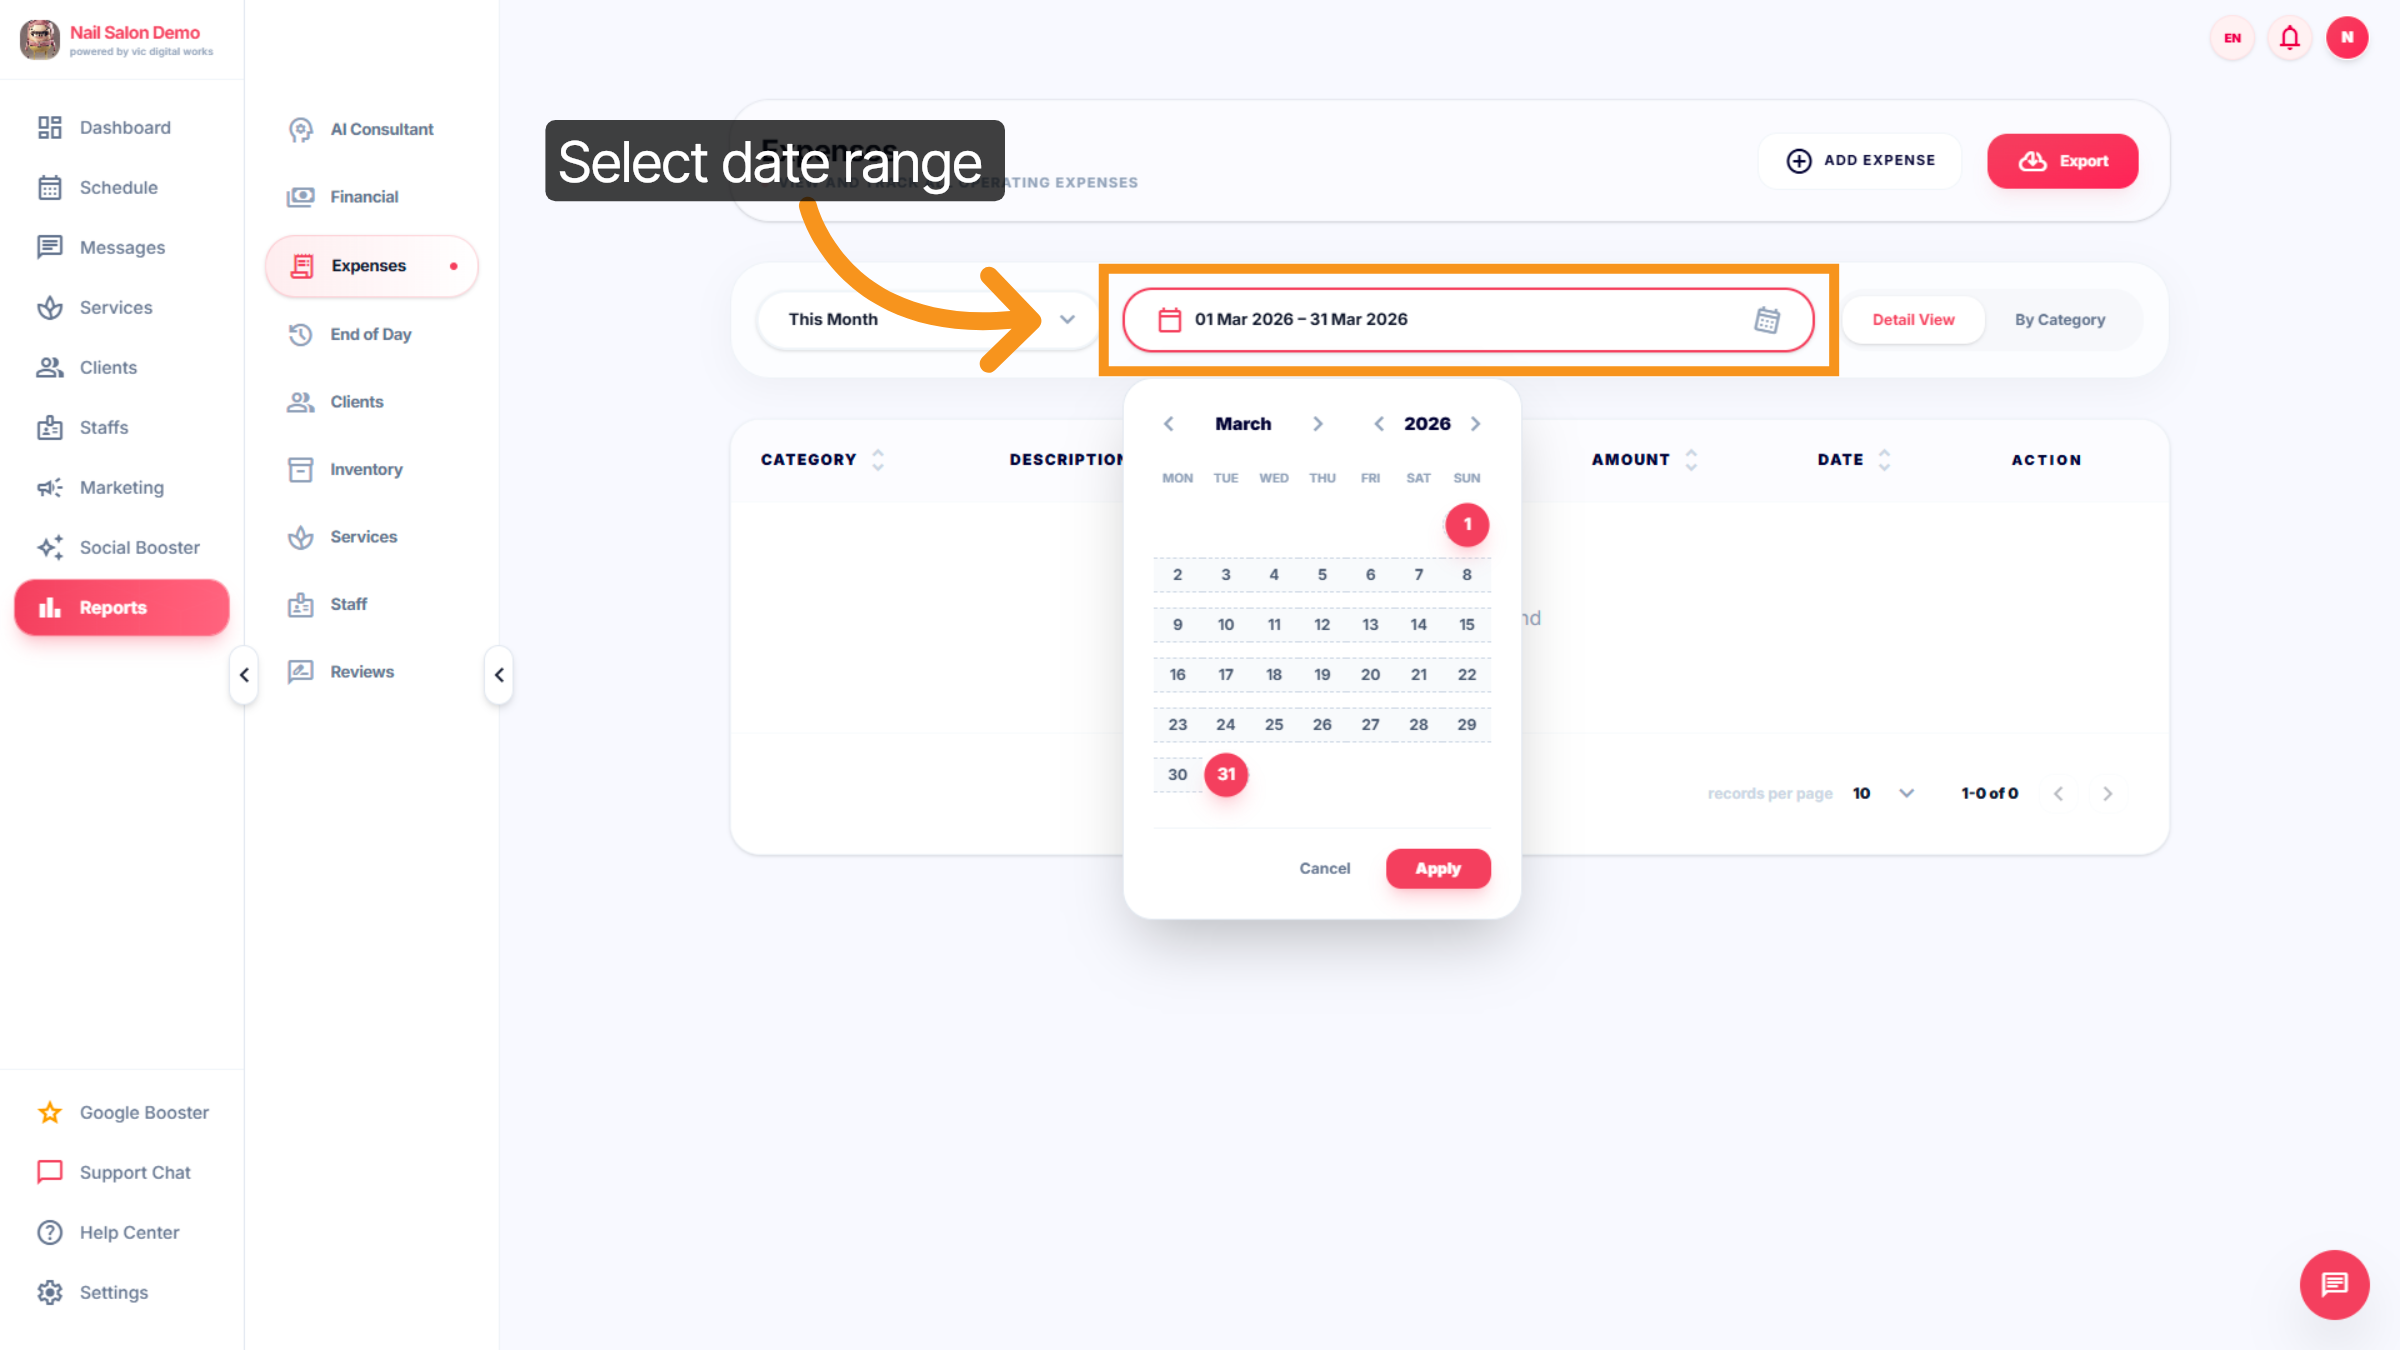
21. Select Date Range
Click the date range selector to specify the period from March 1 to March 31, 2026, for your financial reports.
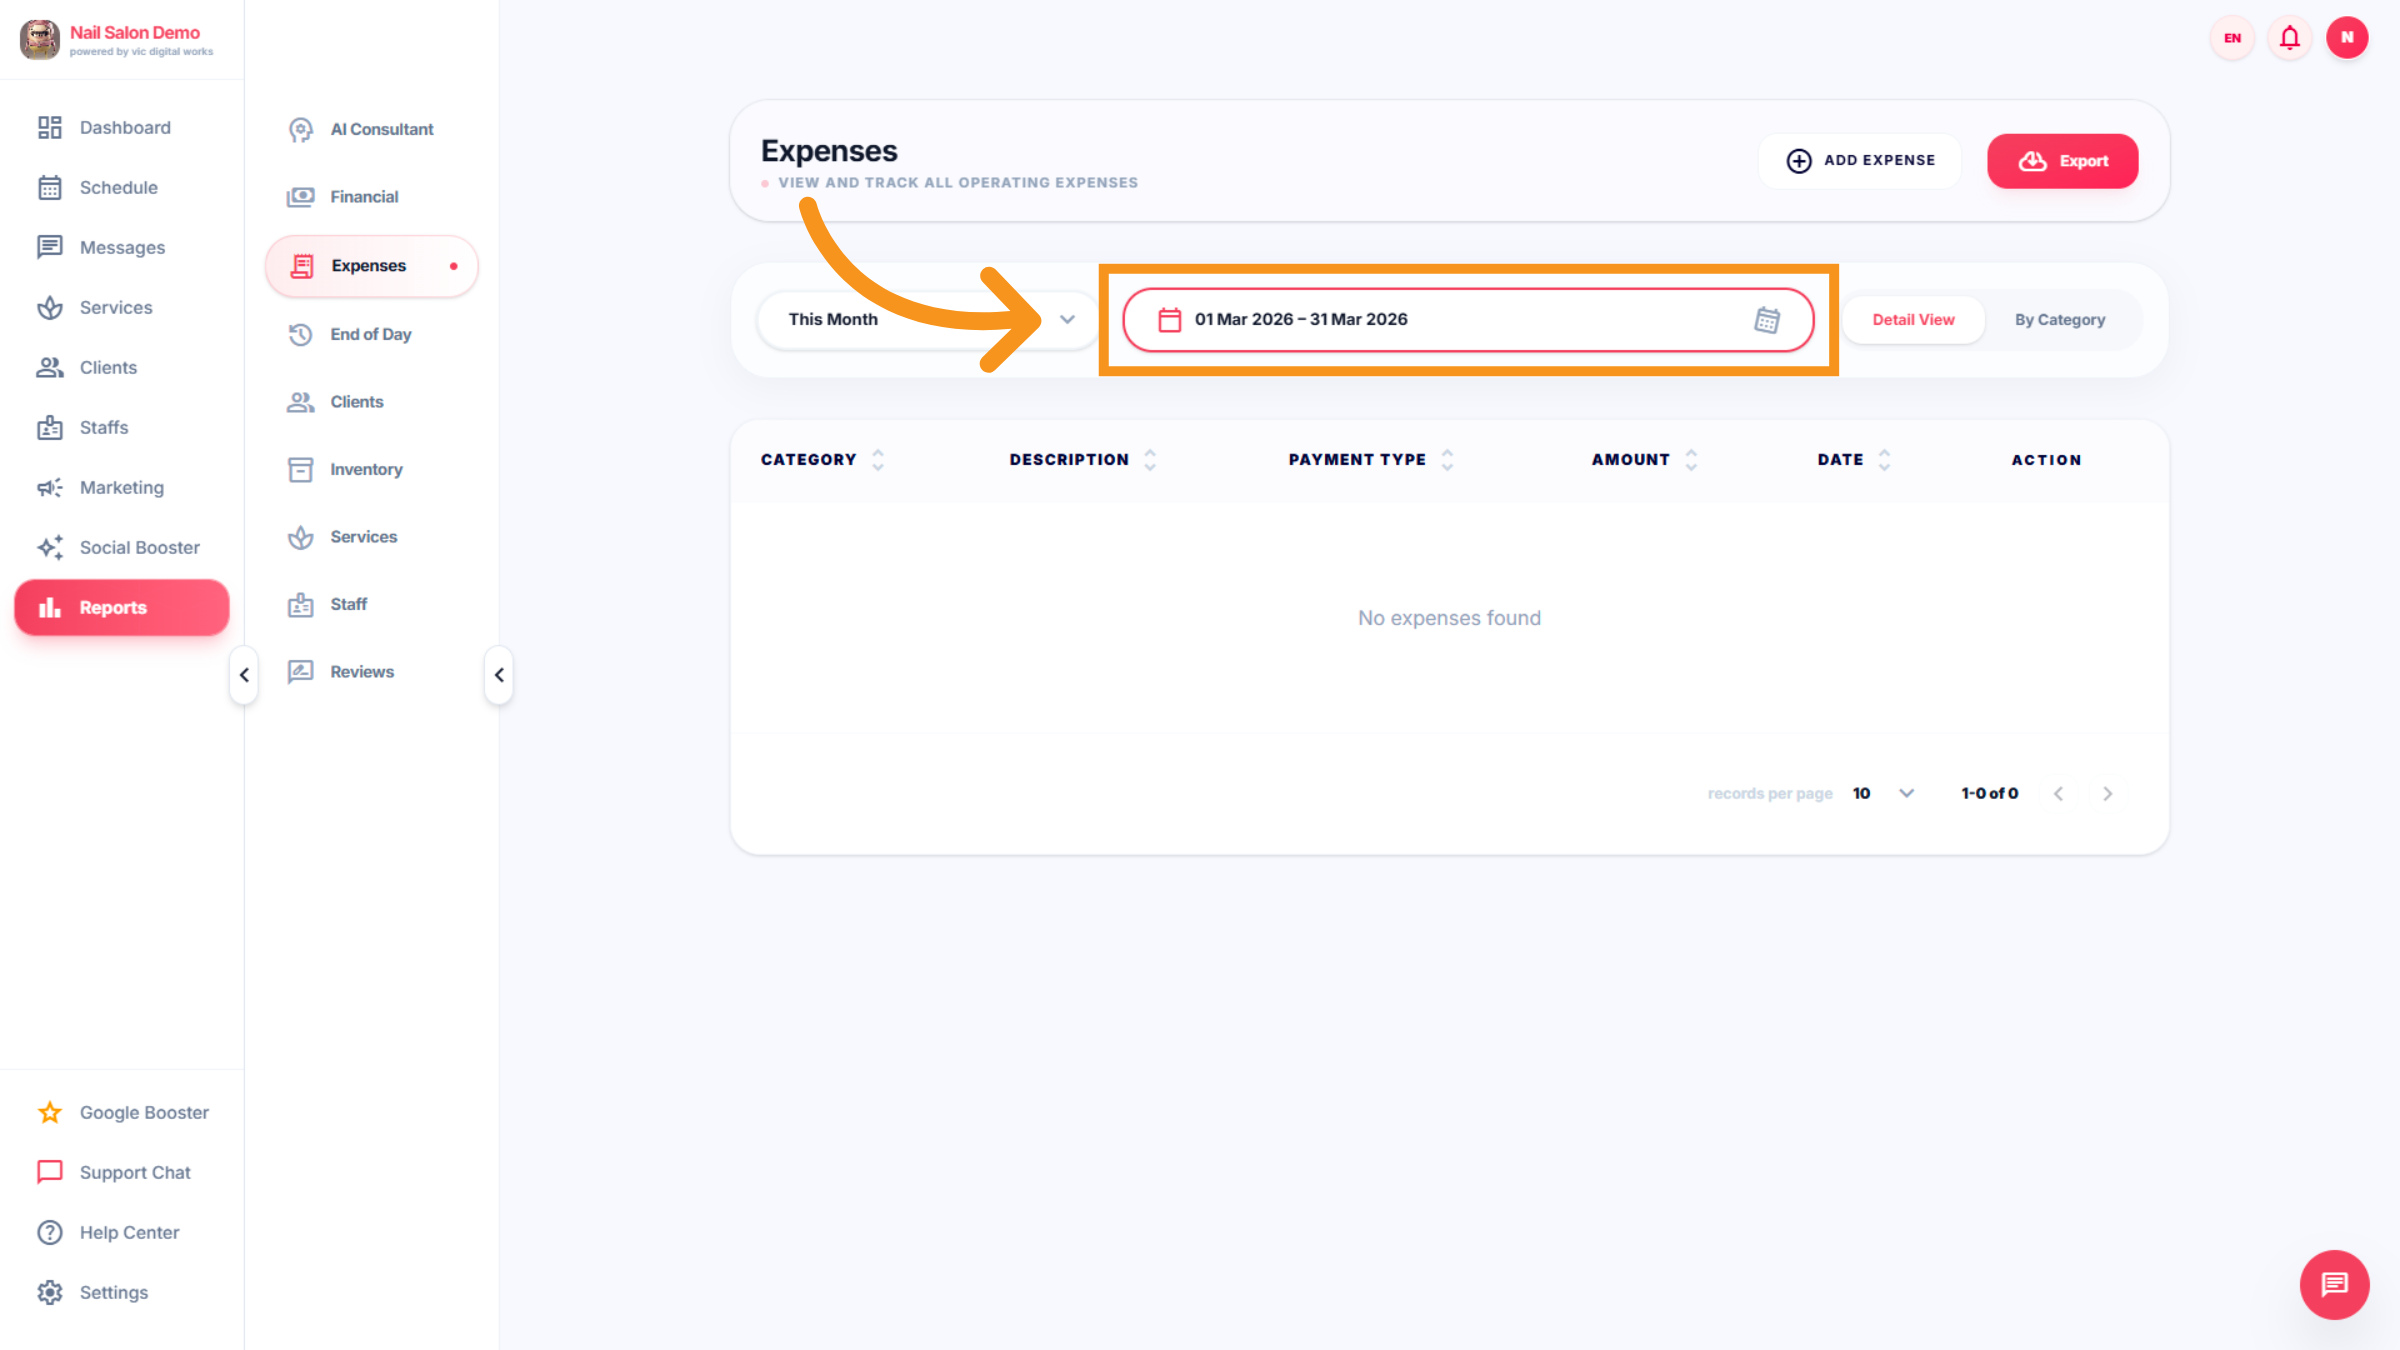
22. Confirm Date Range Selection
Click the date range selector again to confirm your chosen dates for the report.
23. Open Date Range Options
Click the date range selector to explore preset periods like Today, Last 7 Days, or Custom Range.
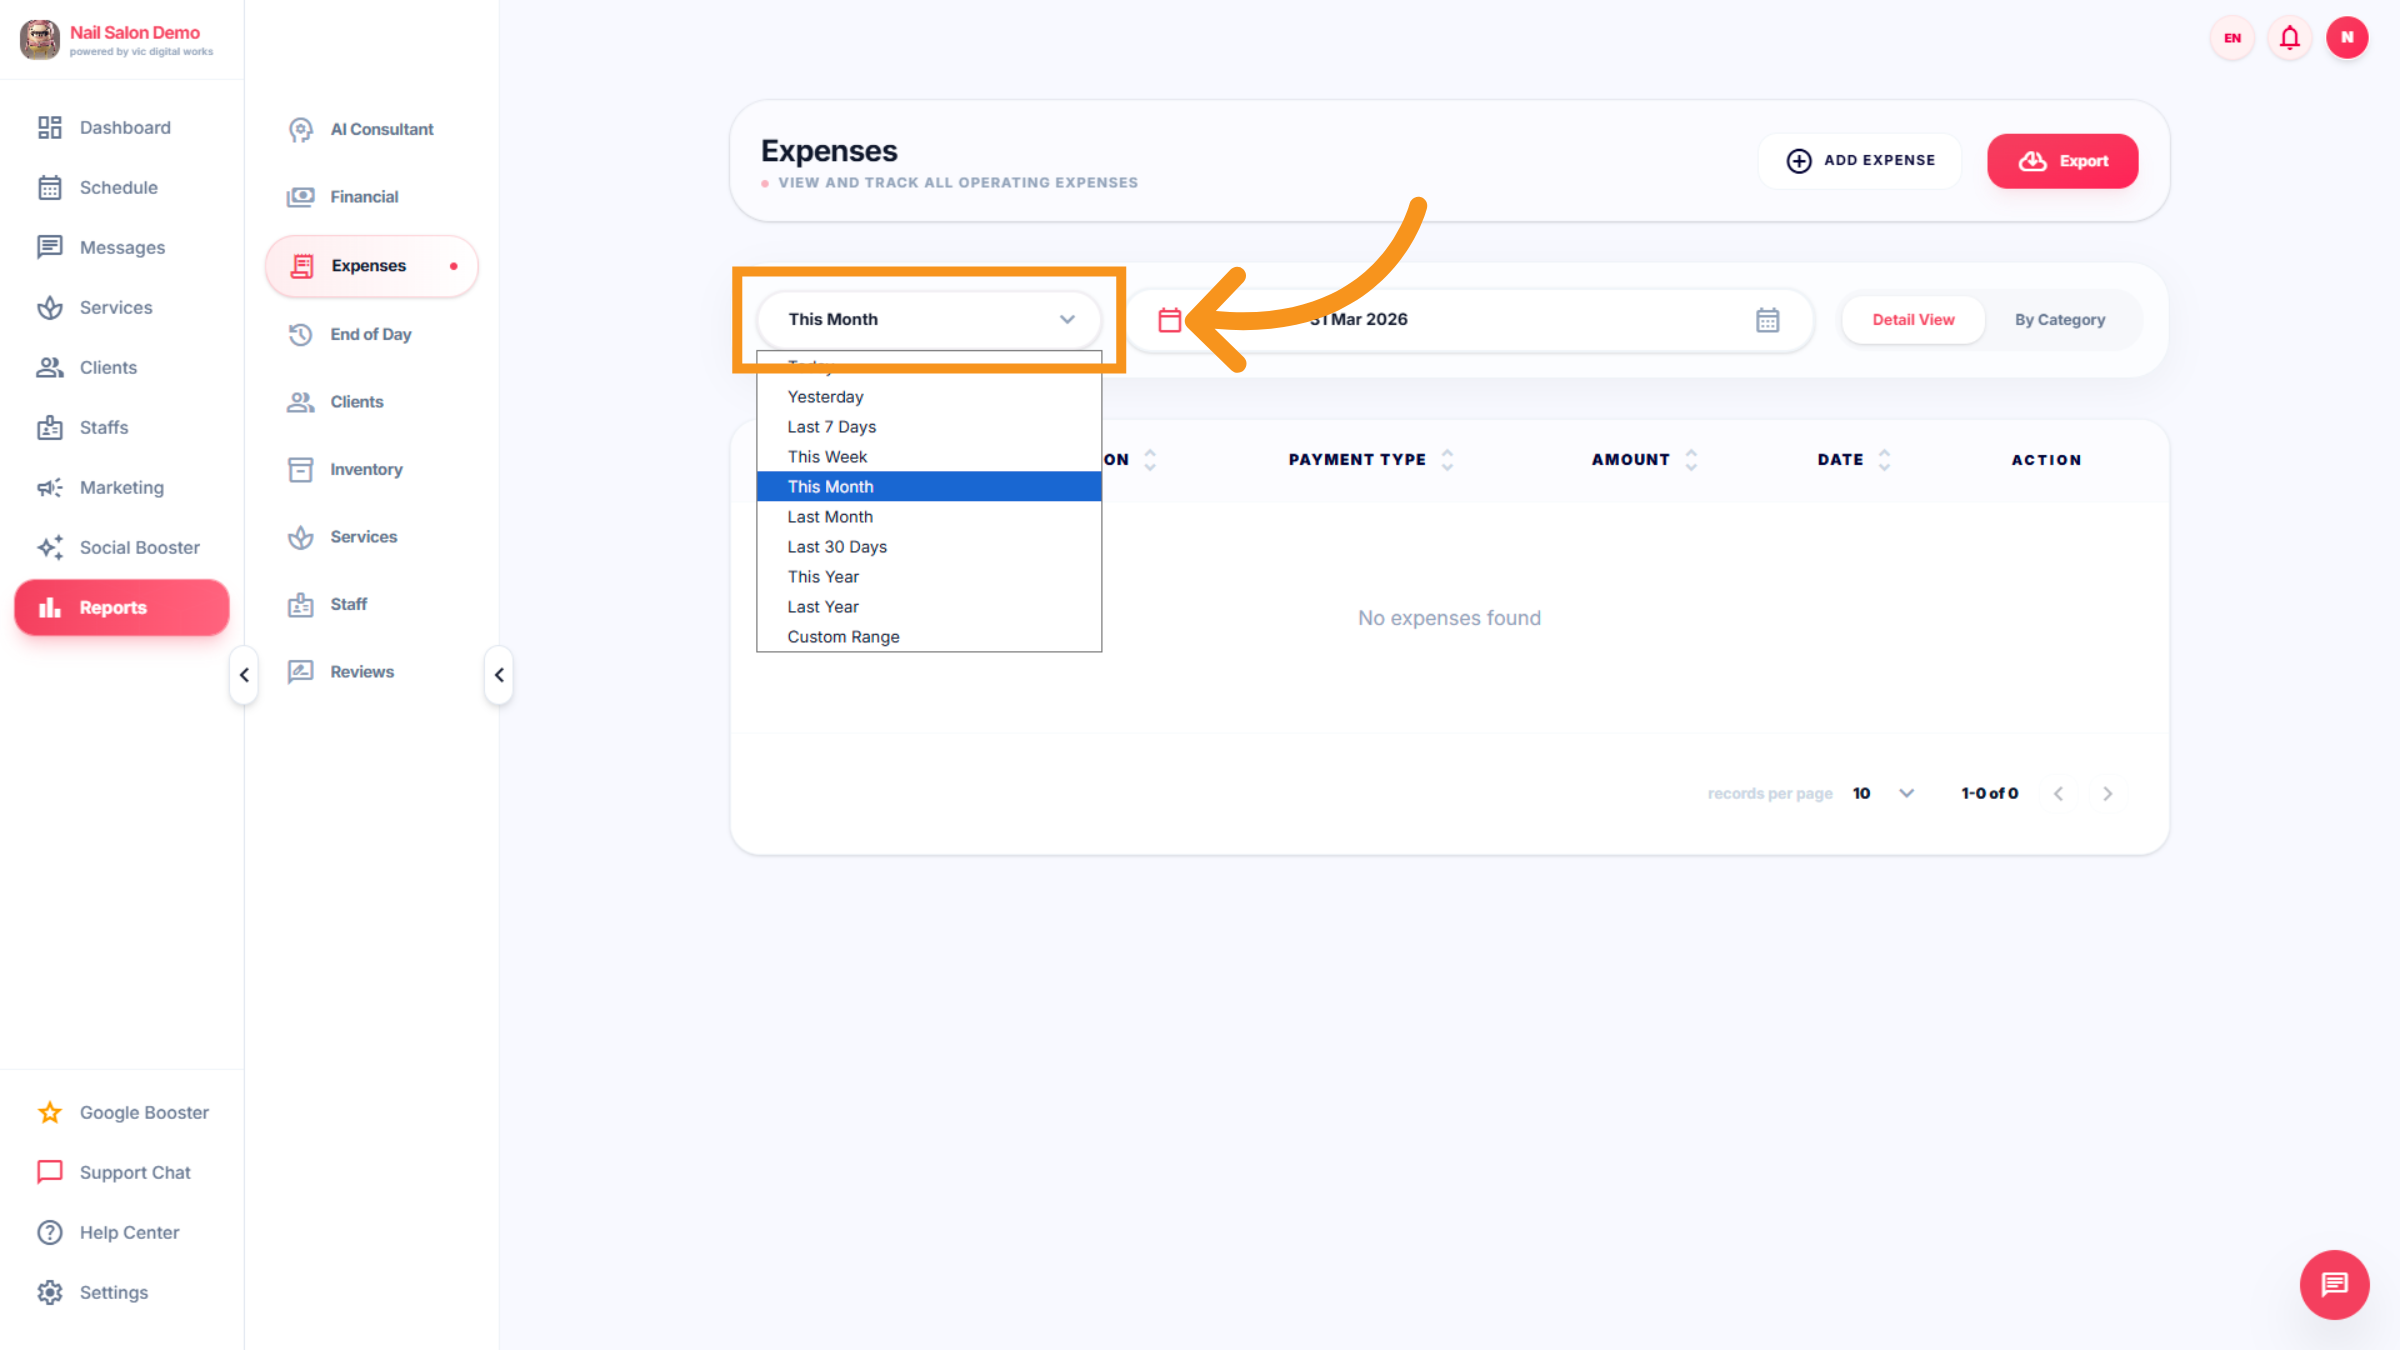
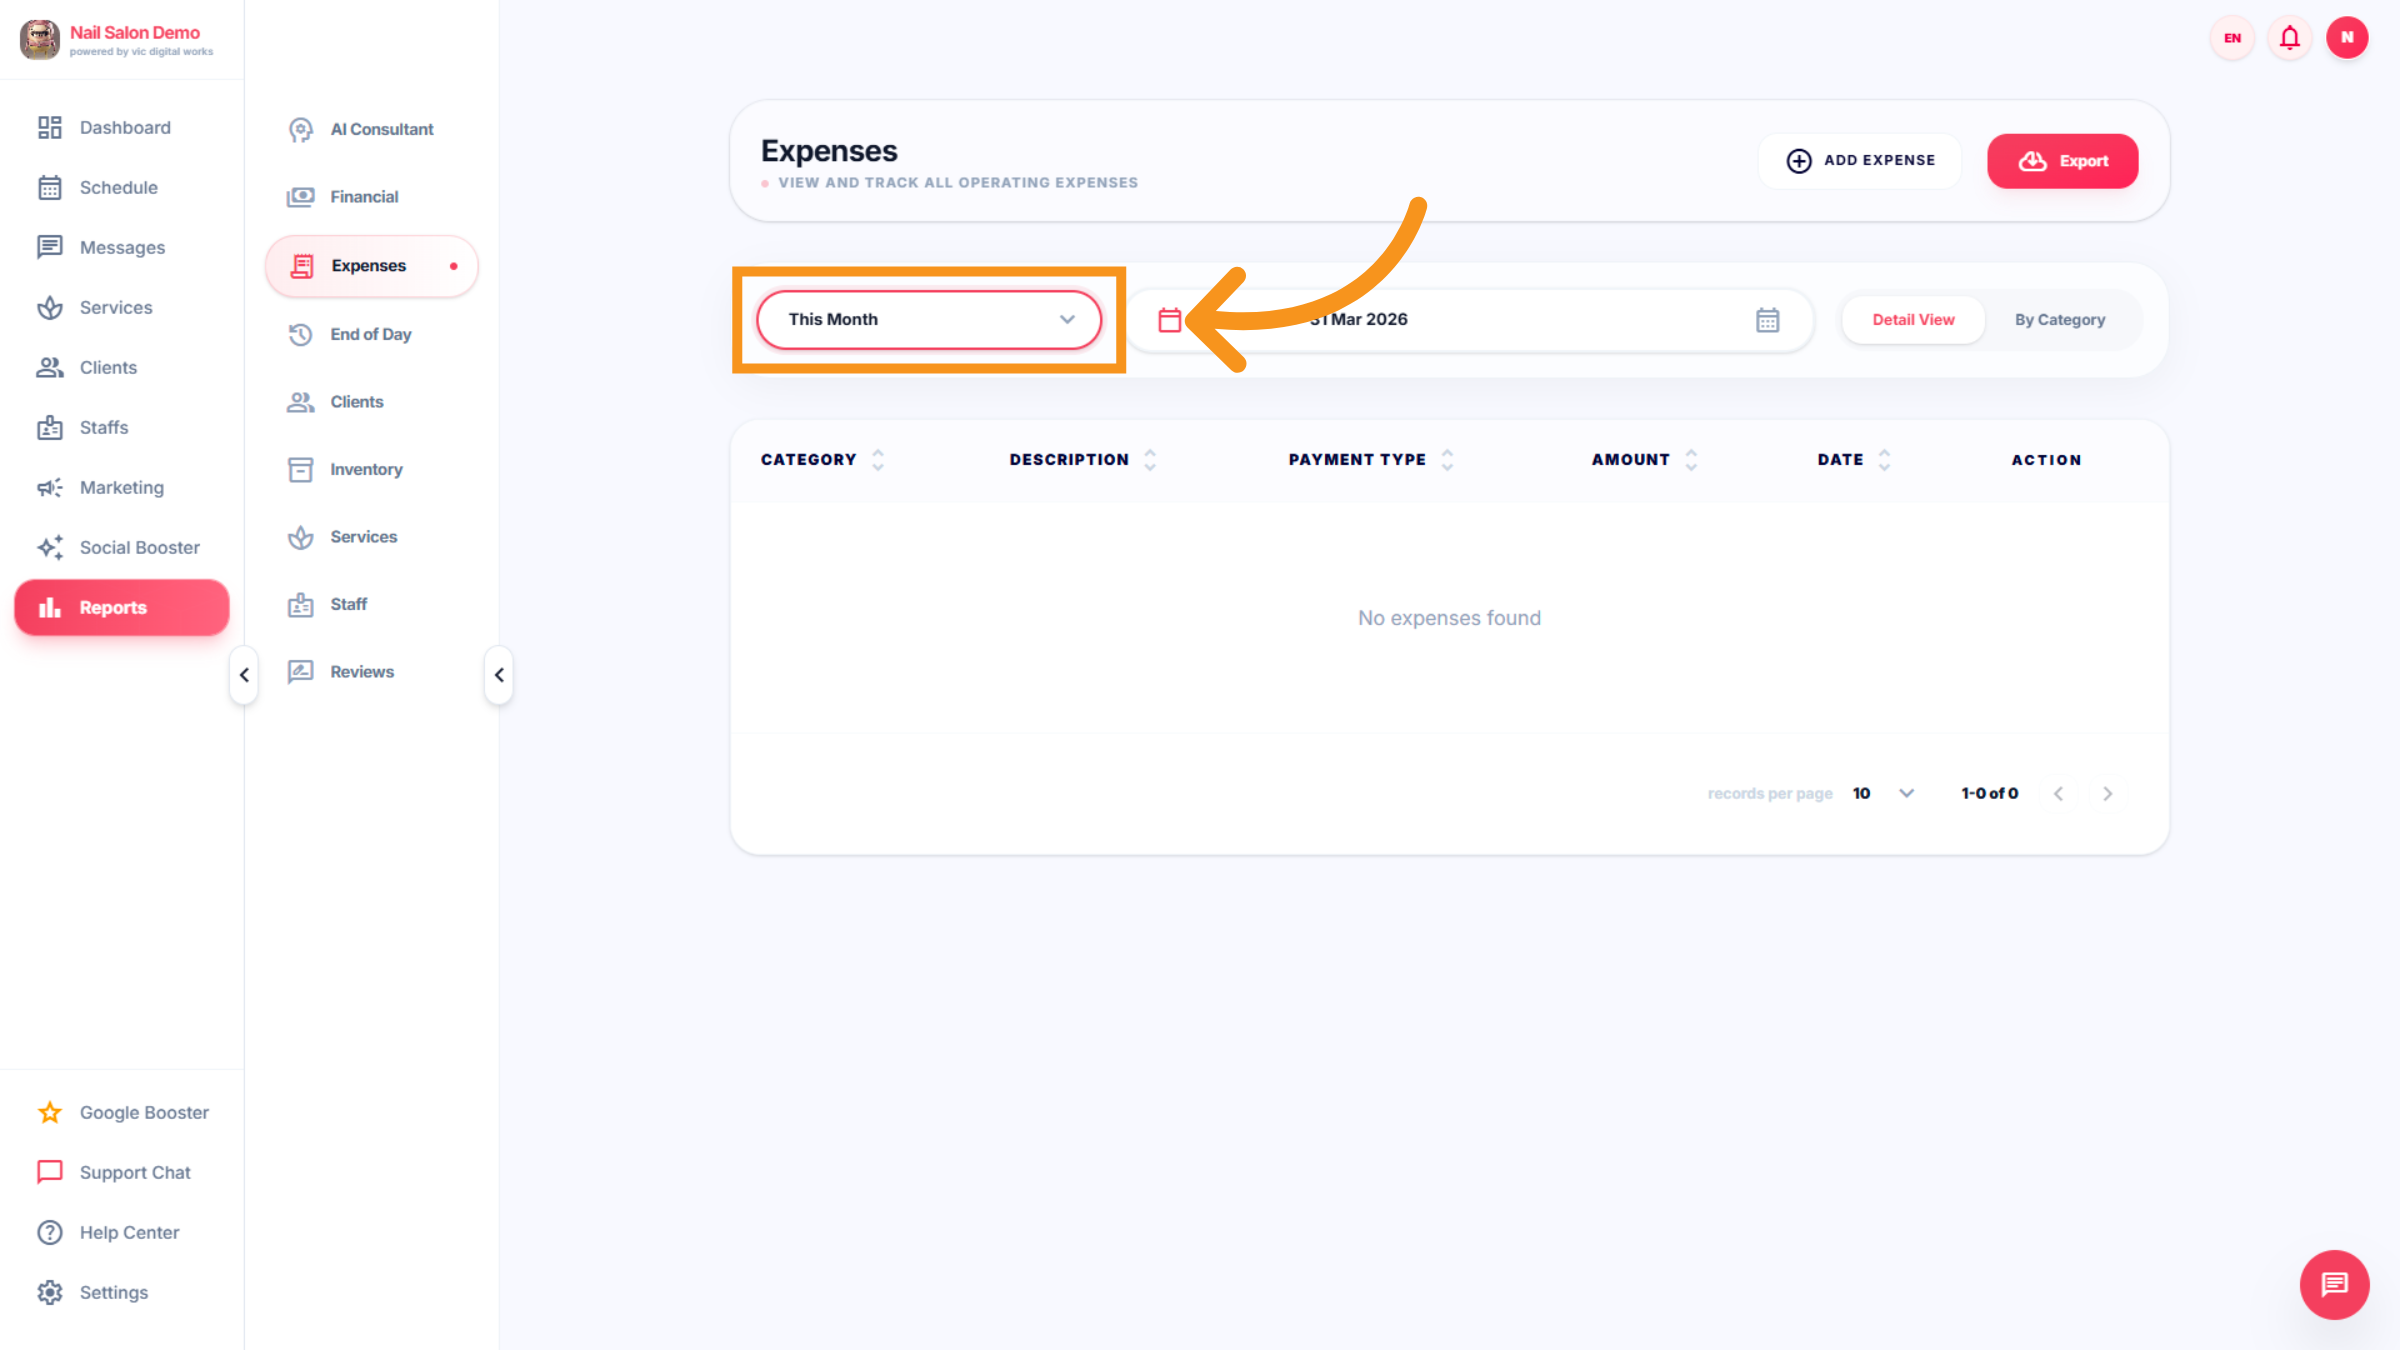
24. Access Date Range Options
Click the date range selector to adjust the reporting period as needed.
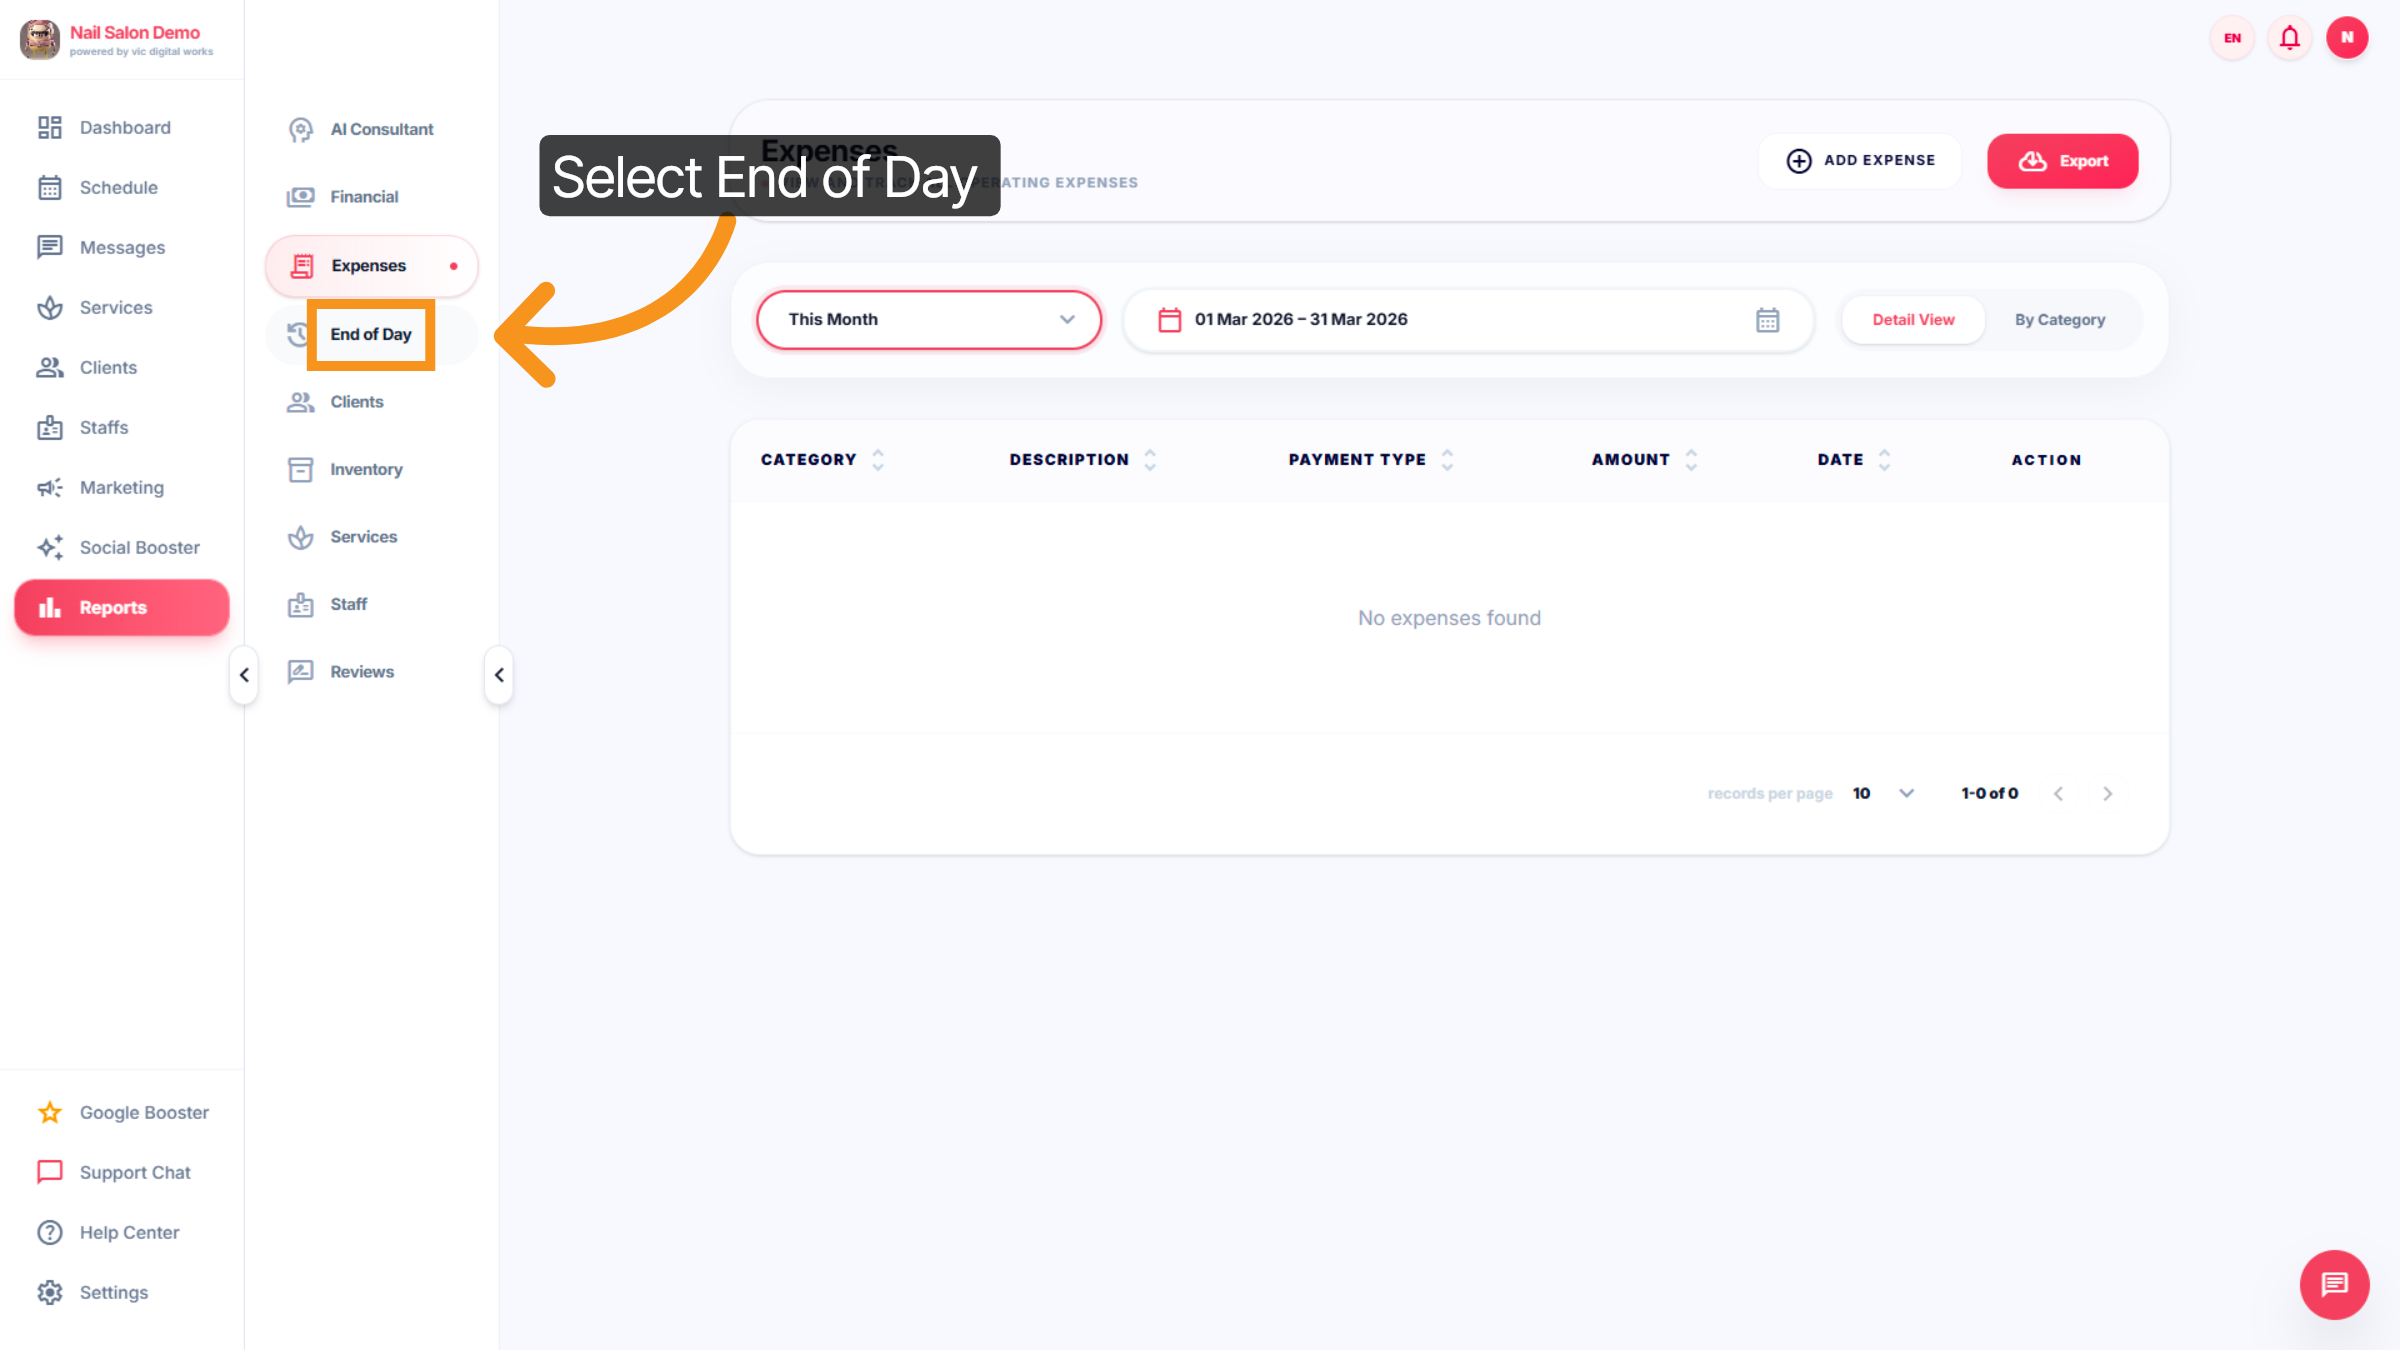
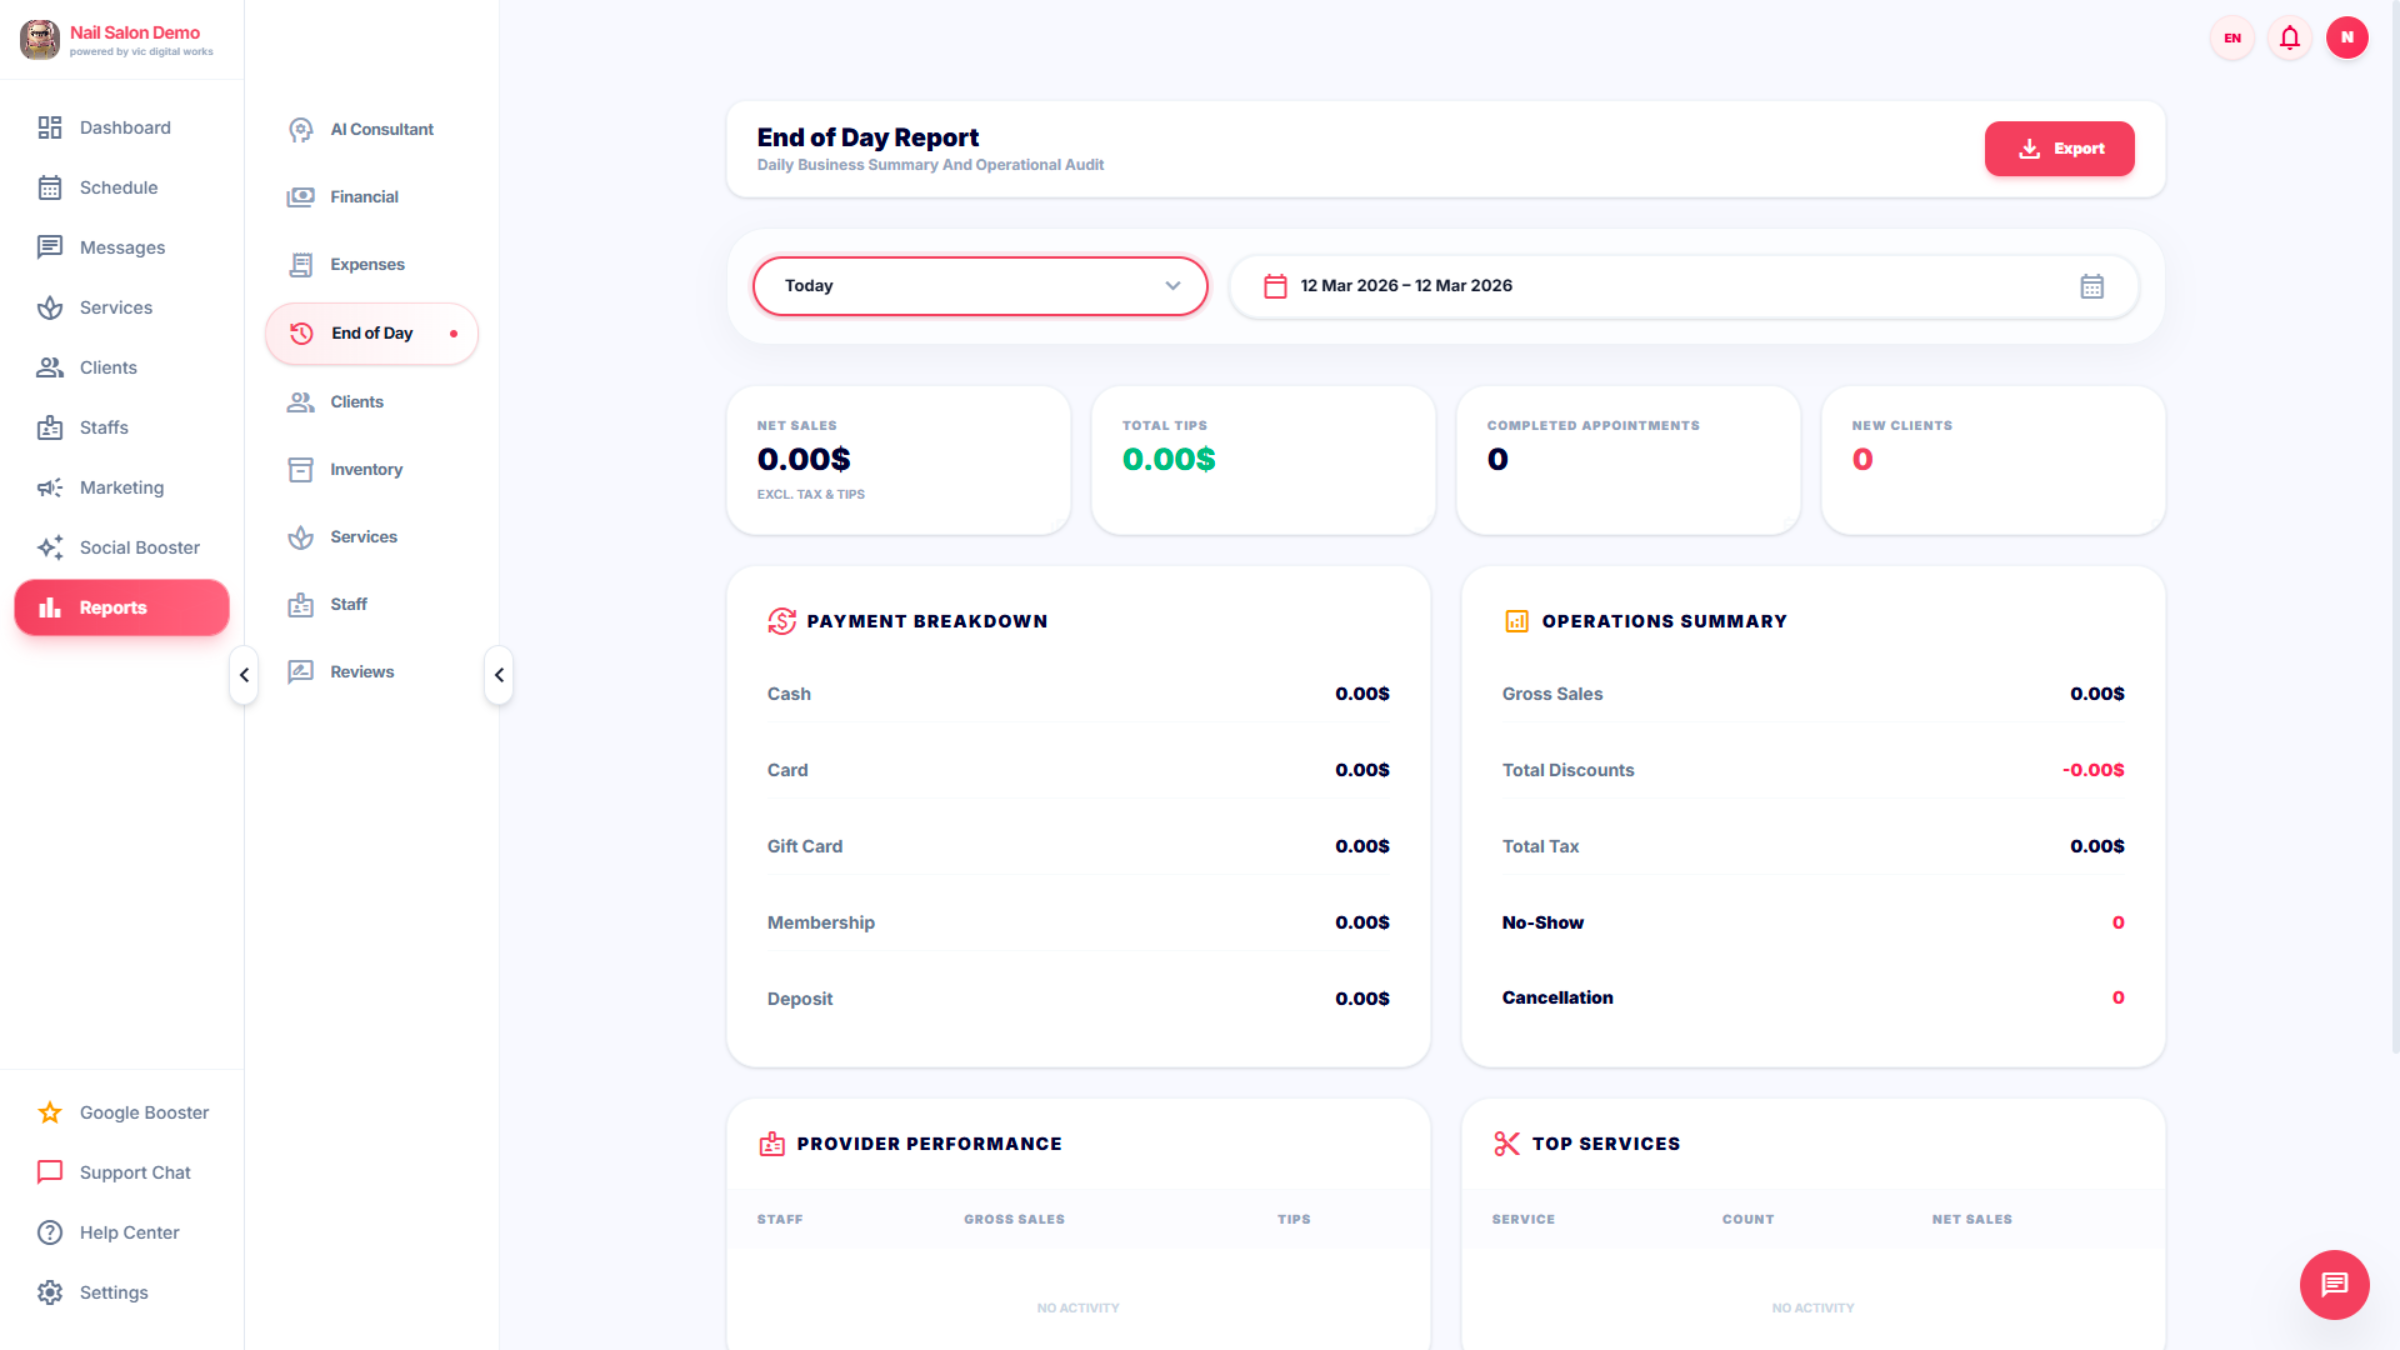
25. Select End Of Day
The End of Day feature is a summary report your nail salon software generates automatically at the end of each business day. It gives salon owners and managers a snapshot of everything that happened that day.
26. View Financial Amount
Click the displayed amount to review detailed financial figures.
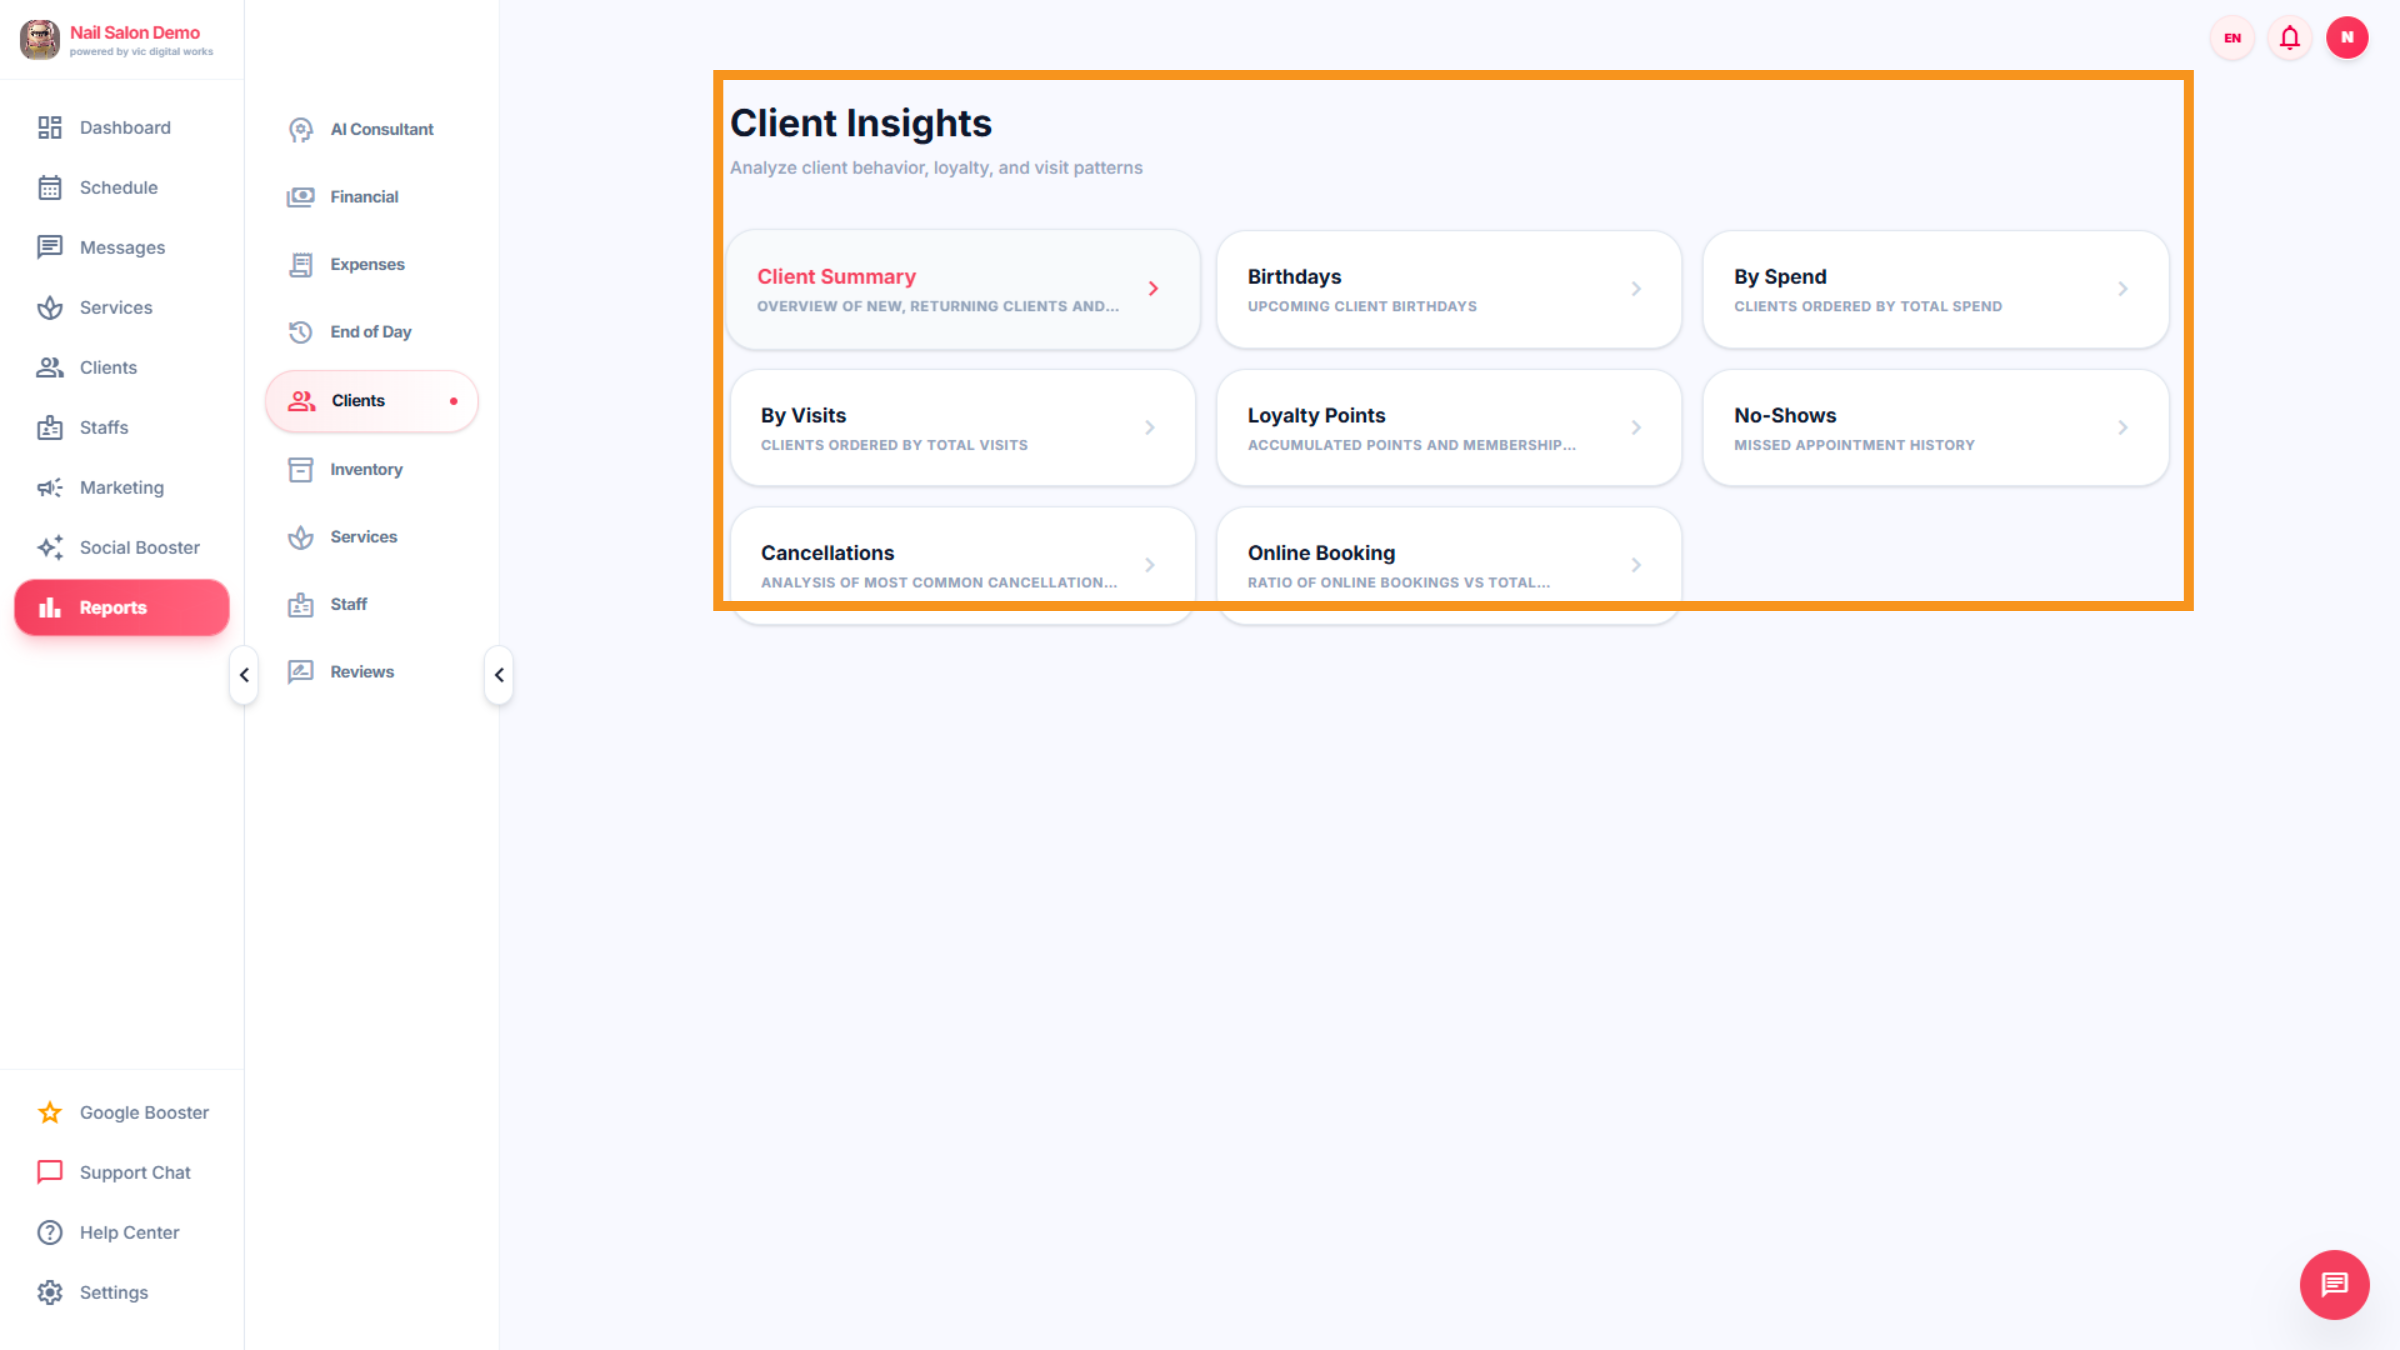
27. Client
Click on Client View to analyze client activity.includes : Client summary, Birthdays,By spend, By visits,Loyalty Points,No-shows,Cancellations, Online Booki
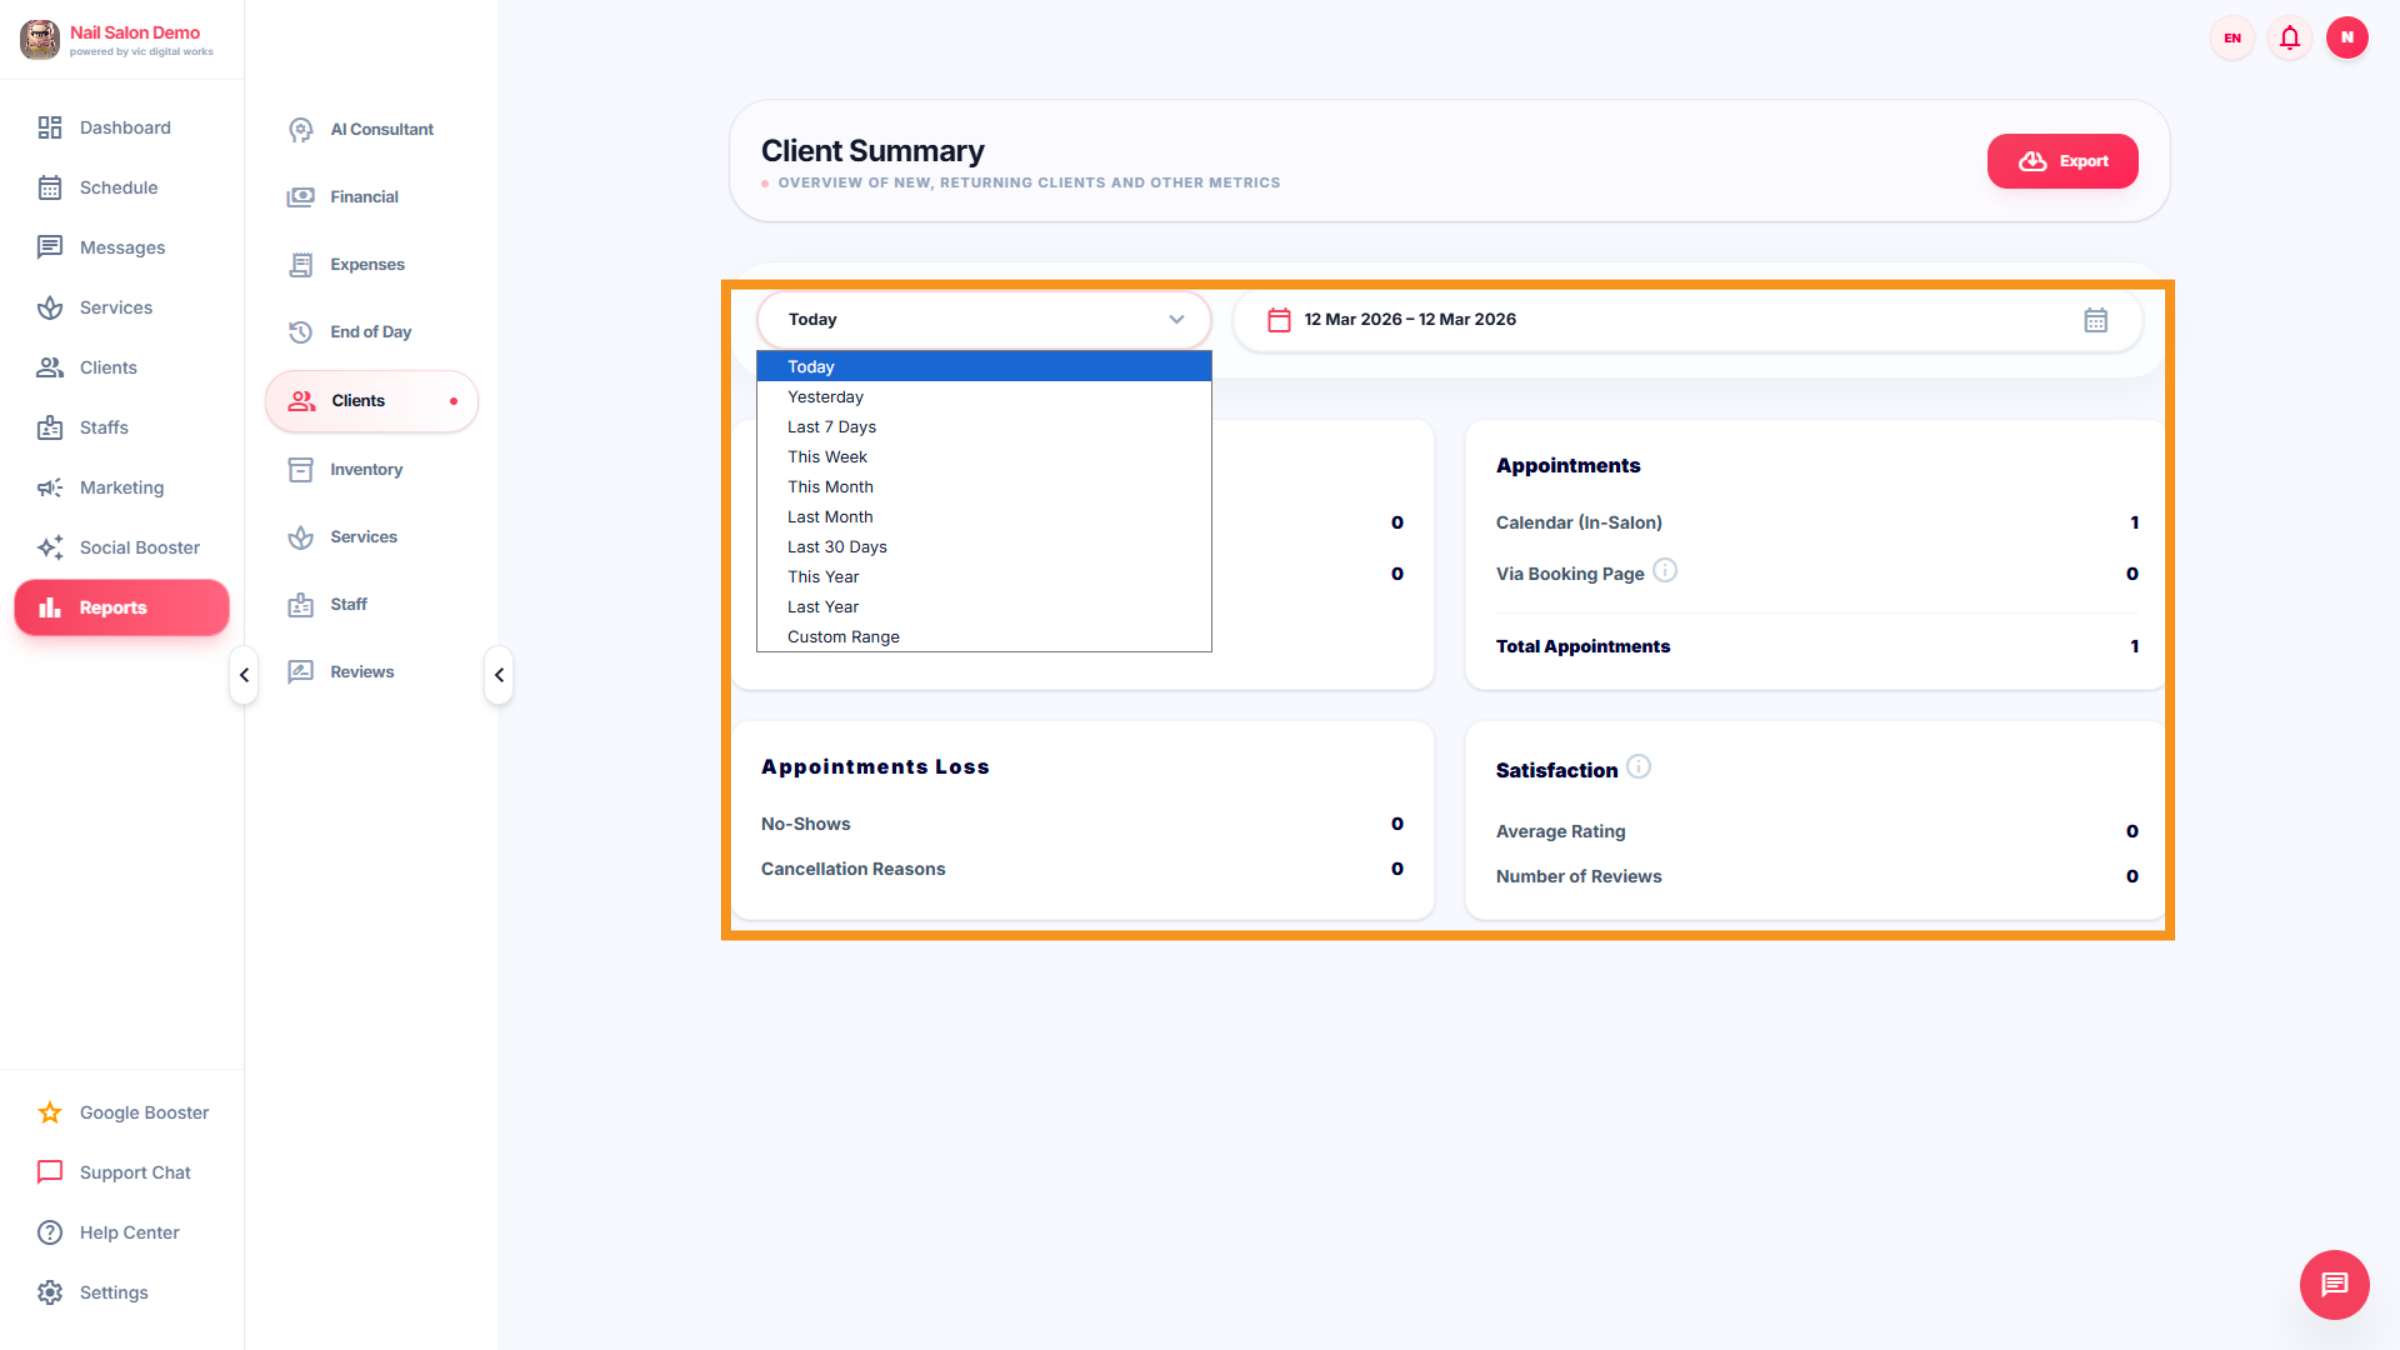
28. client Summary
Click on "Client Summary" to view the client status report. You also have the option to export and download client activity reports for the selected period.
29. Inventory
Click Inventory to manage your salon's stock of supplies and equipment.
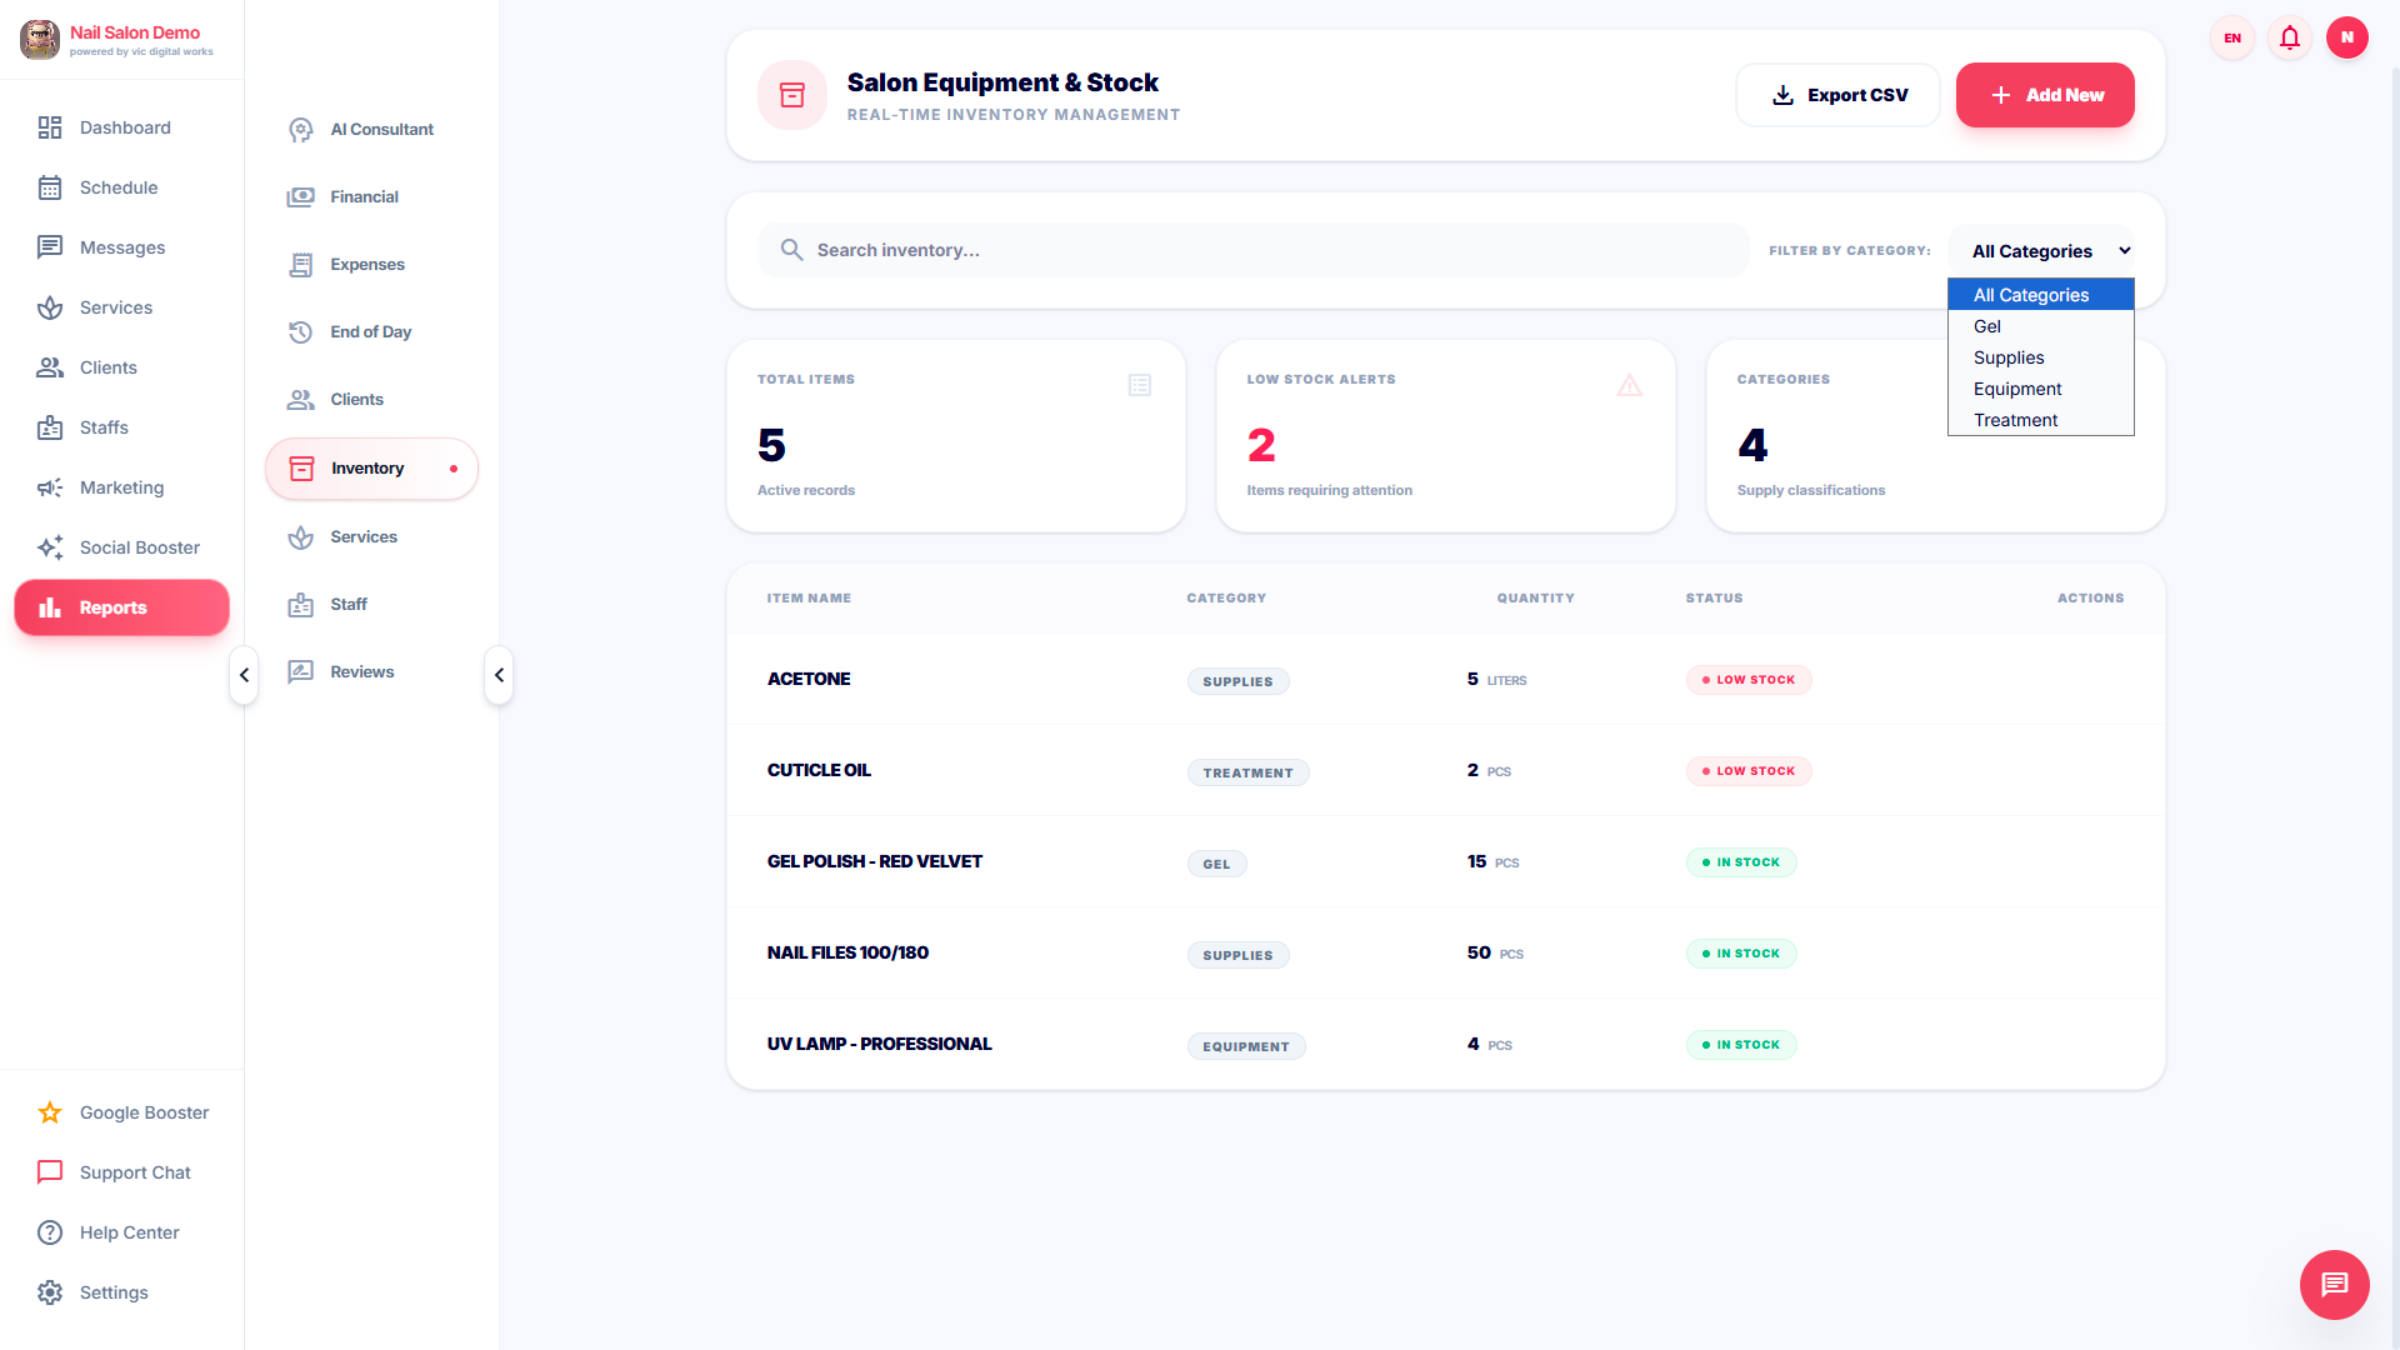
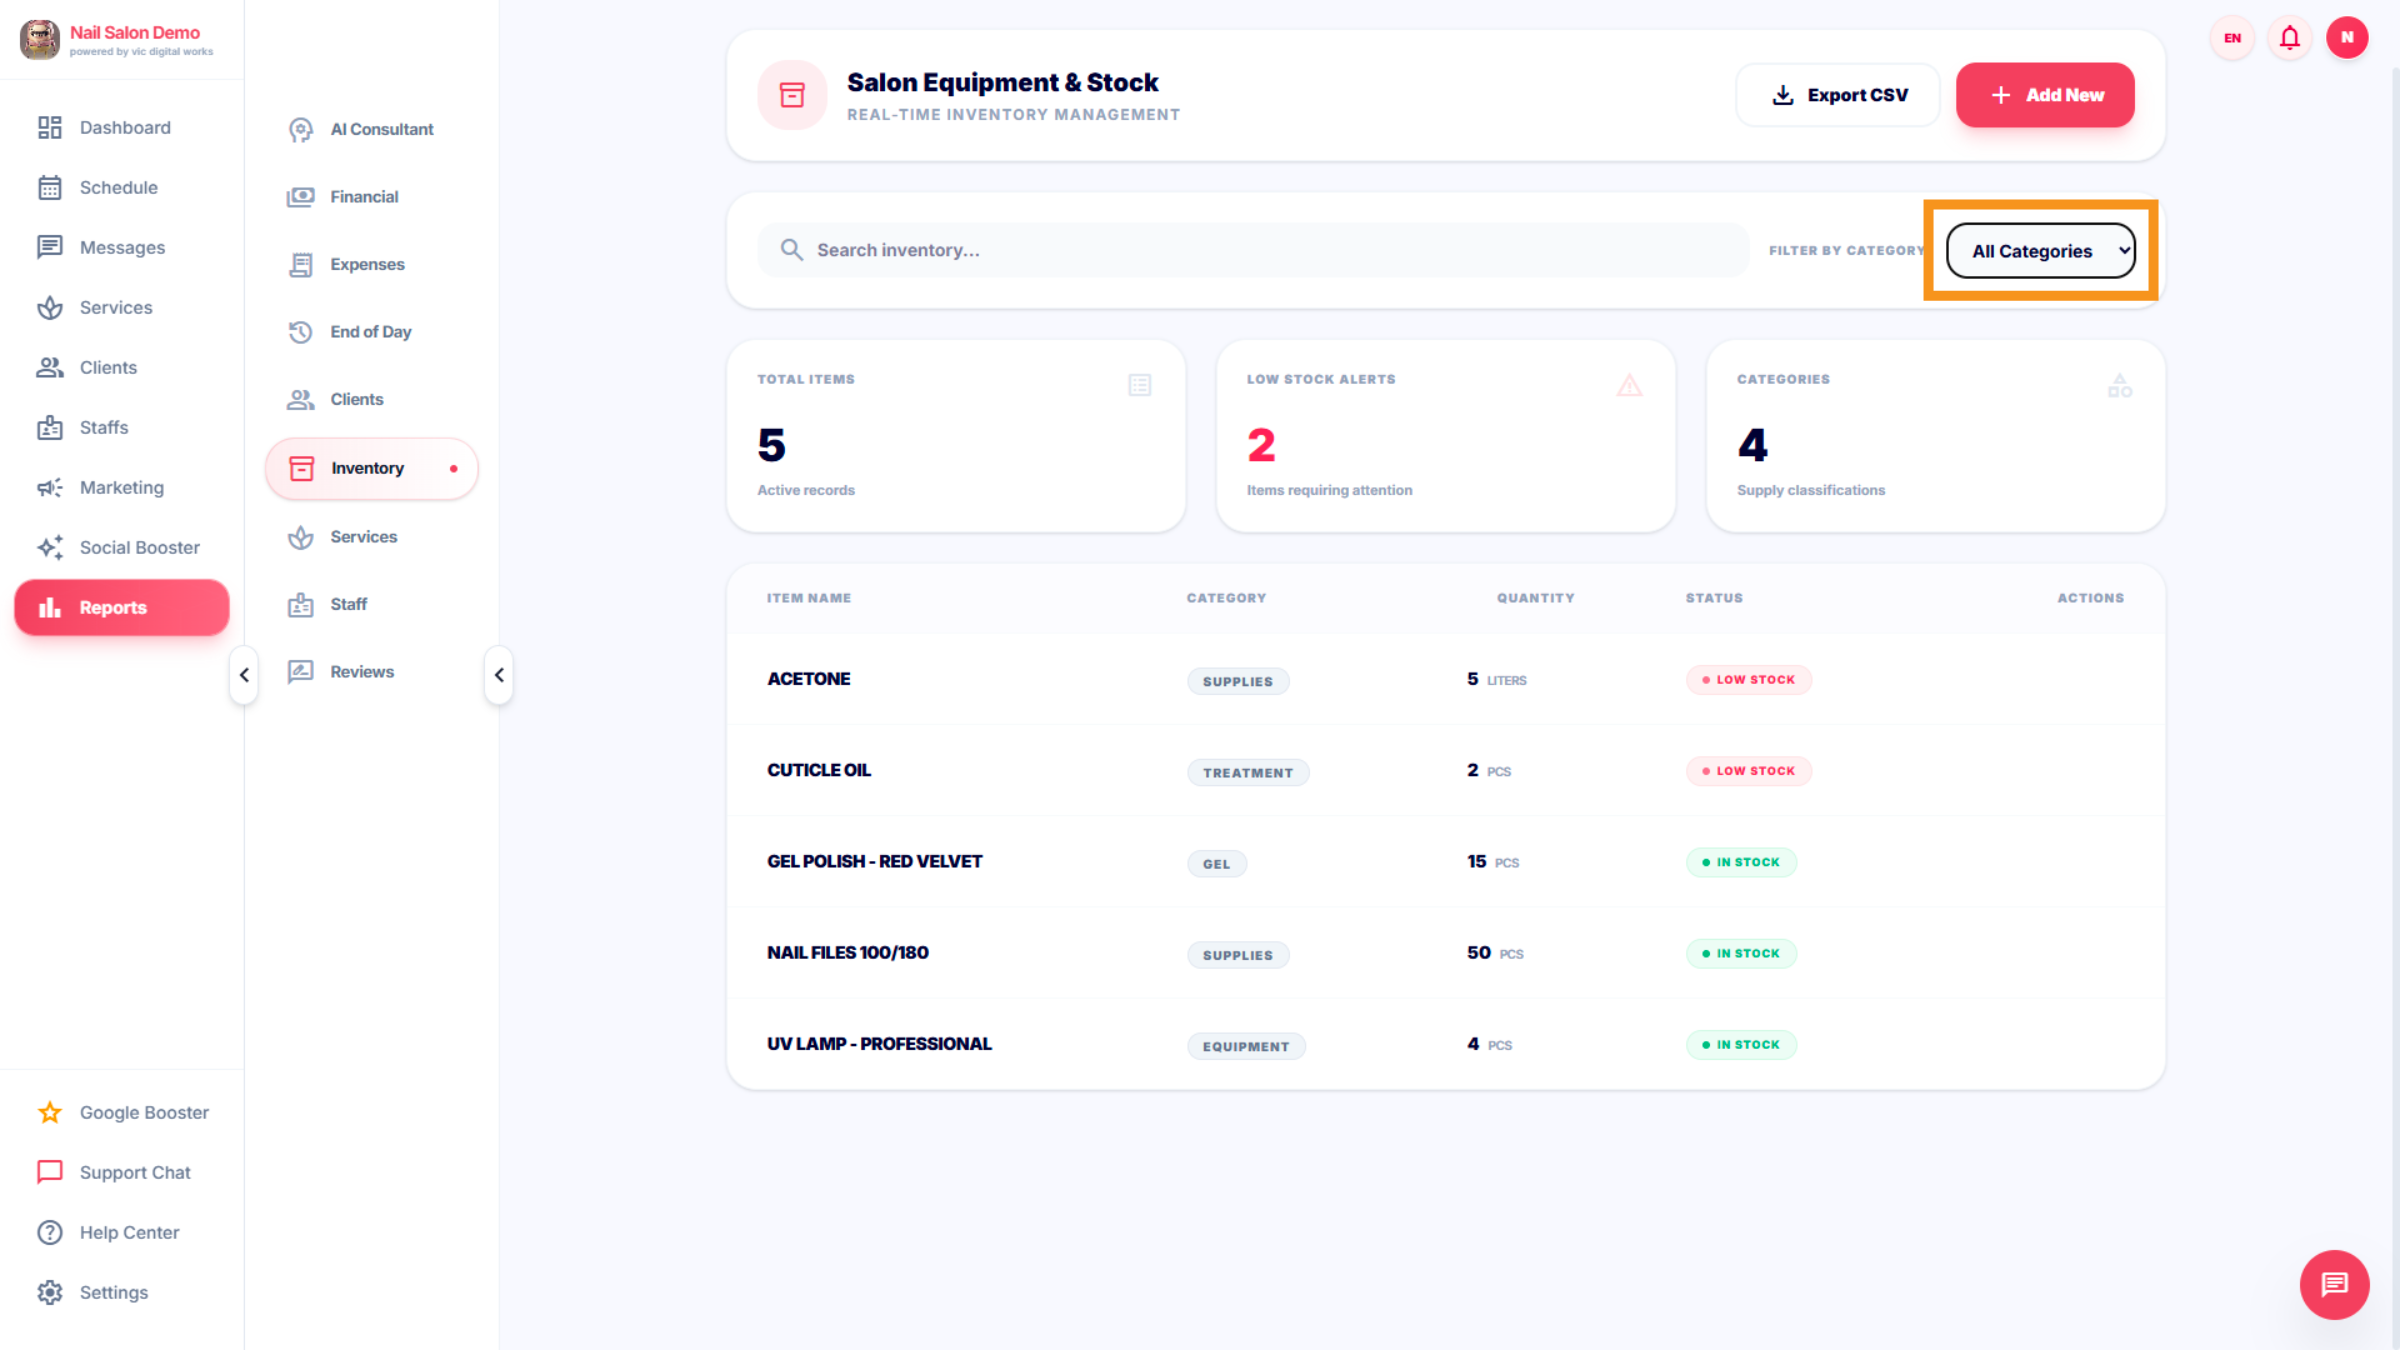
30. Inventory Categories
Click All Categories to navigate through different inventory sections.
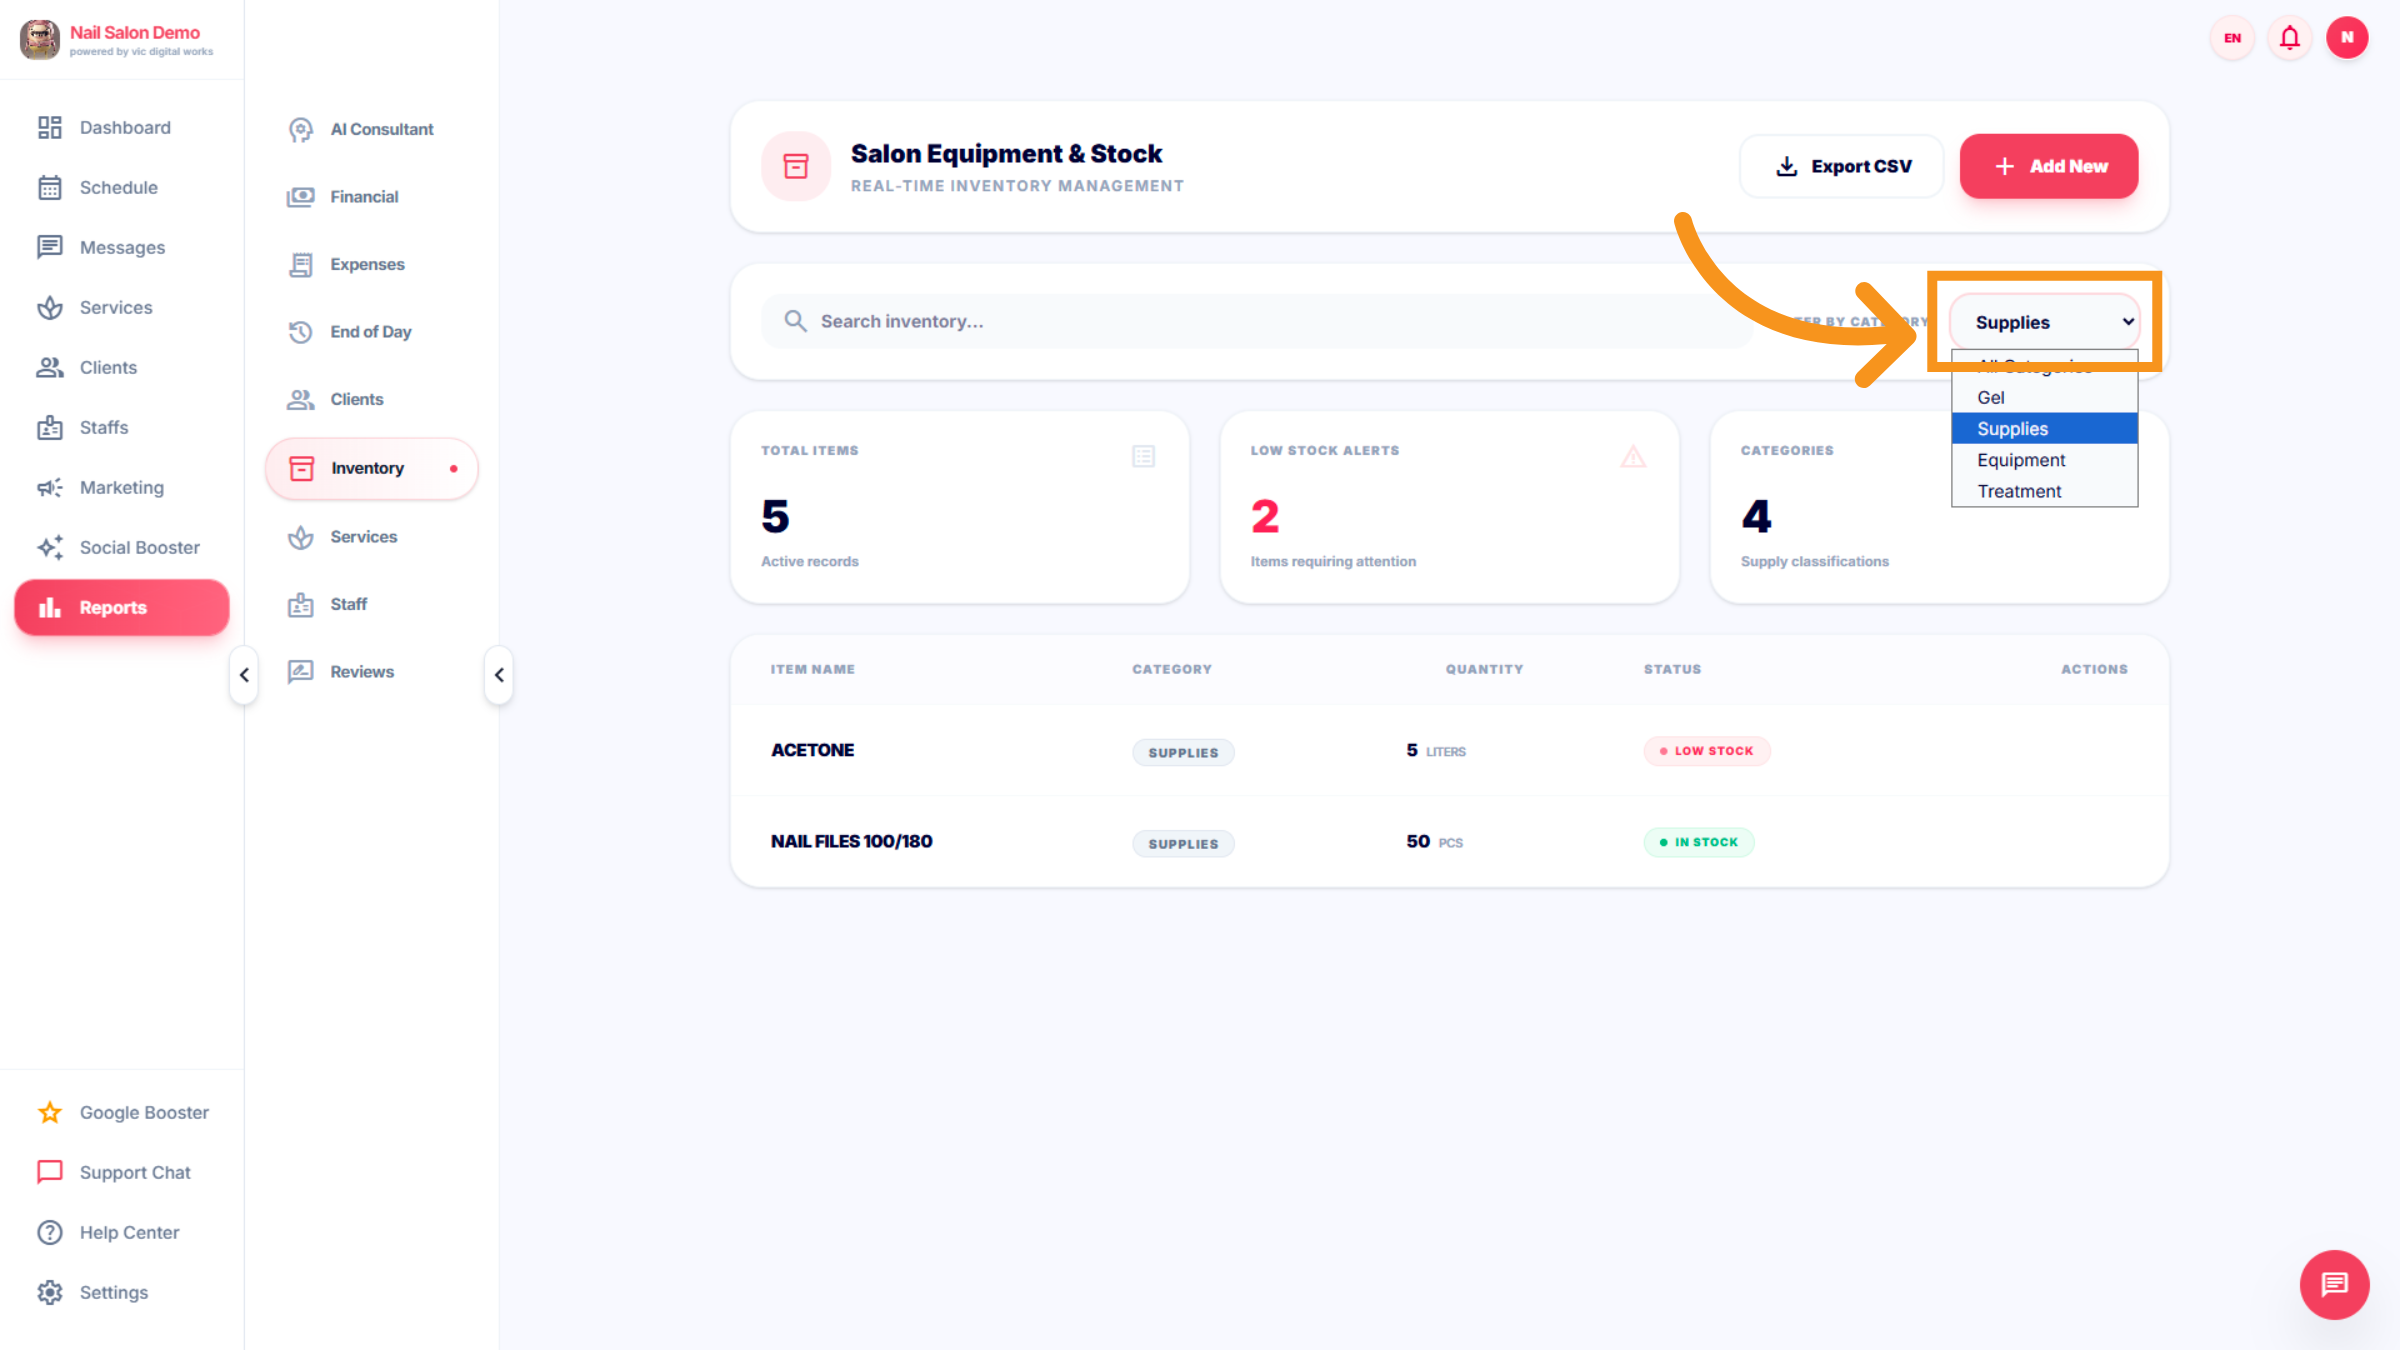
31. Navigate Inventory Categories
Click All Categories to switch between different inventory types.
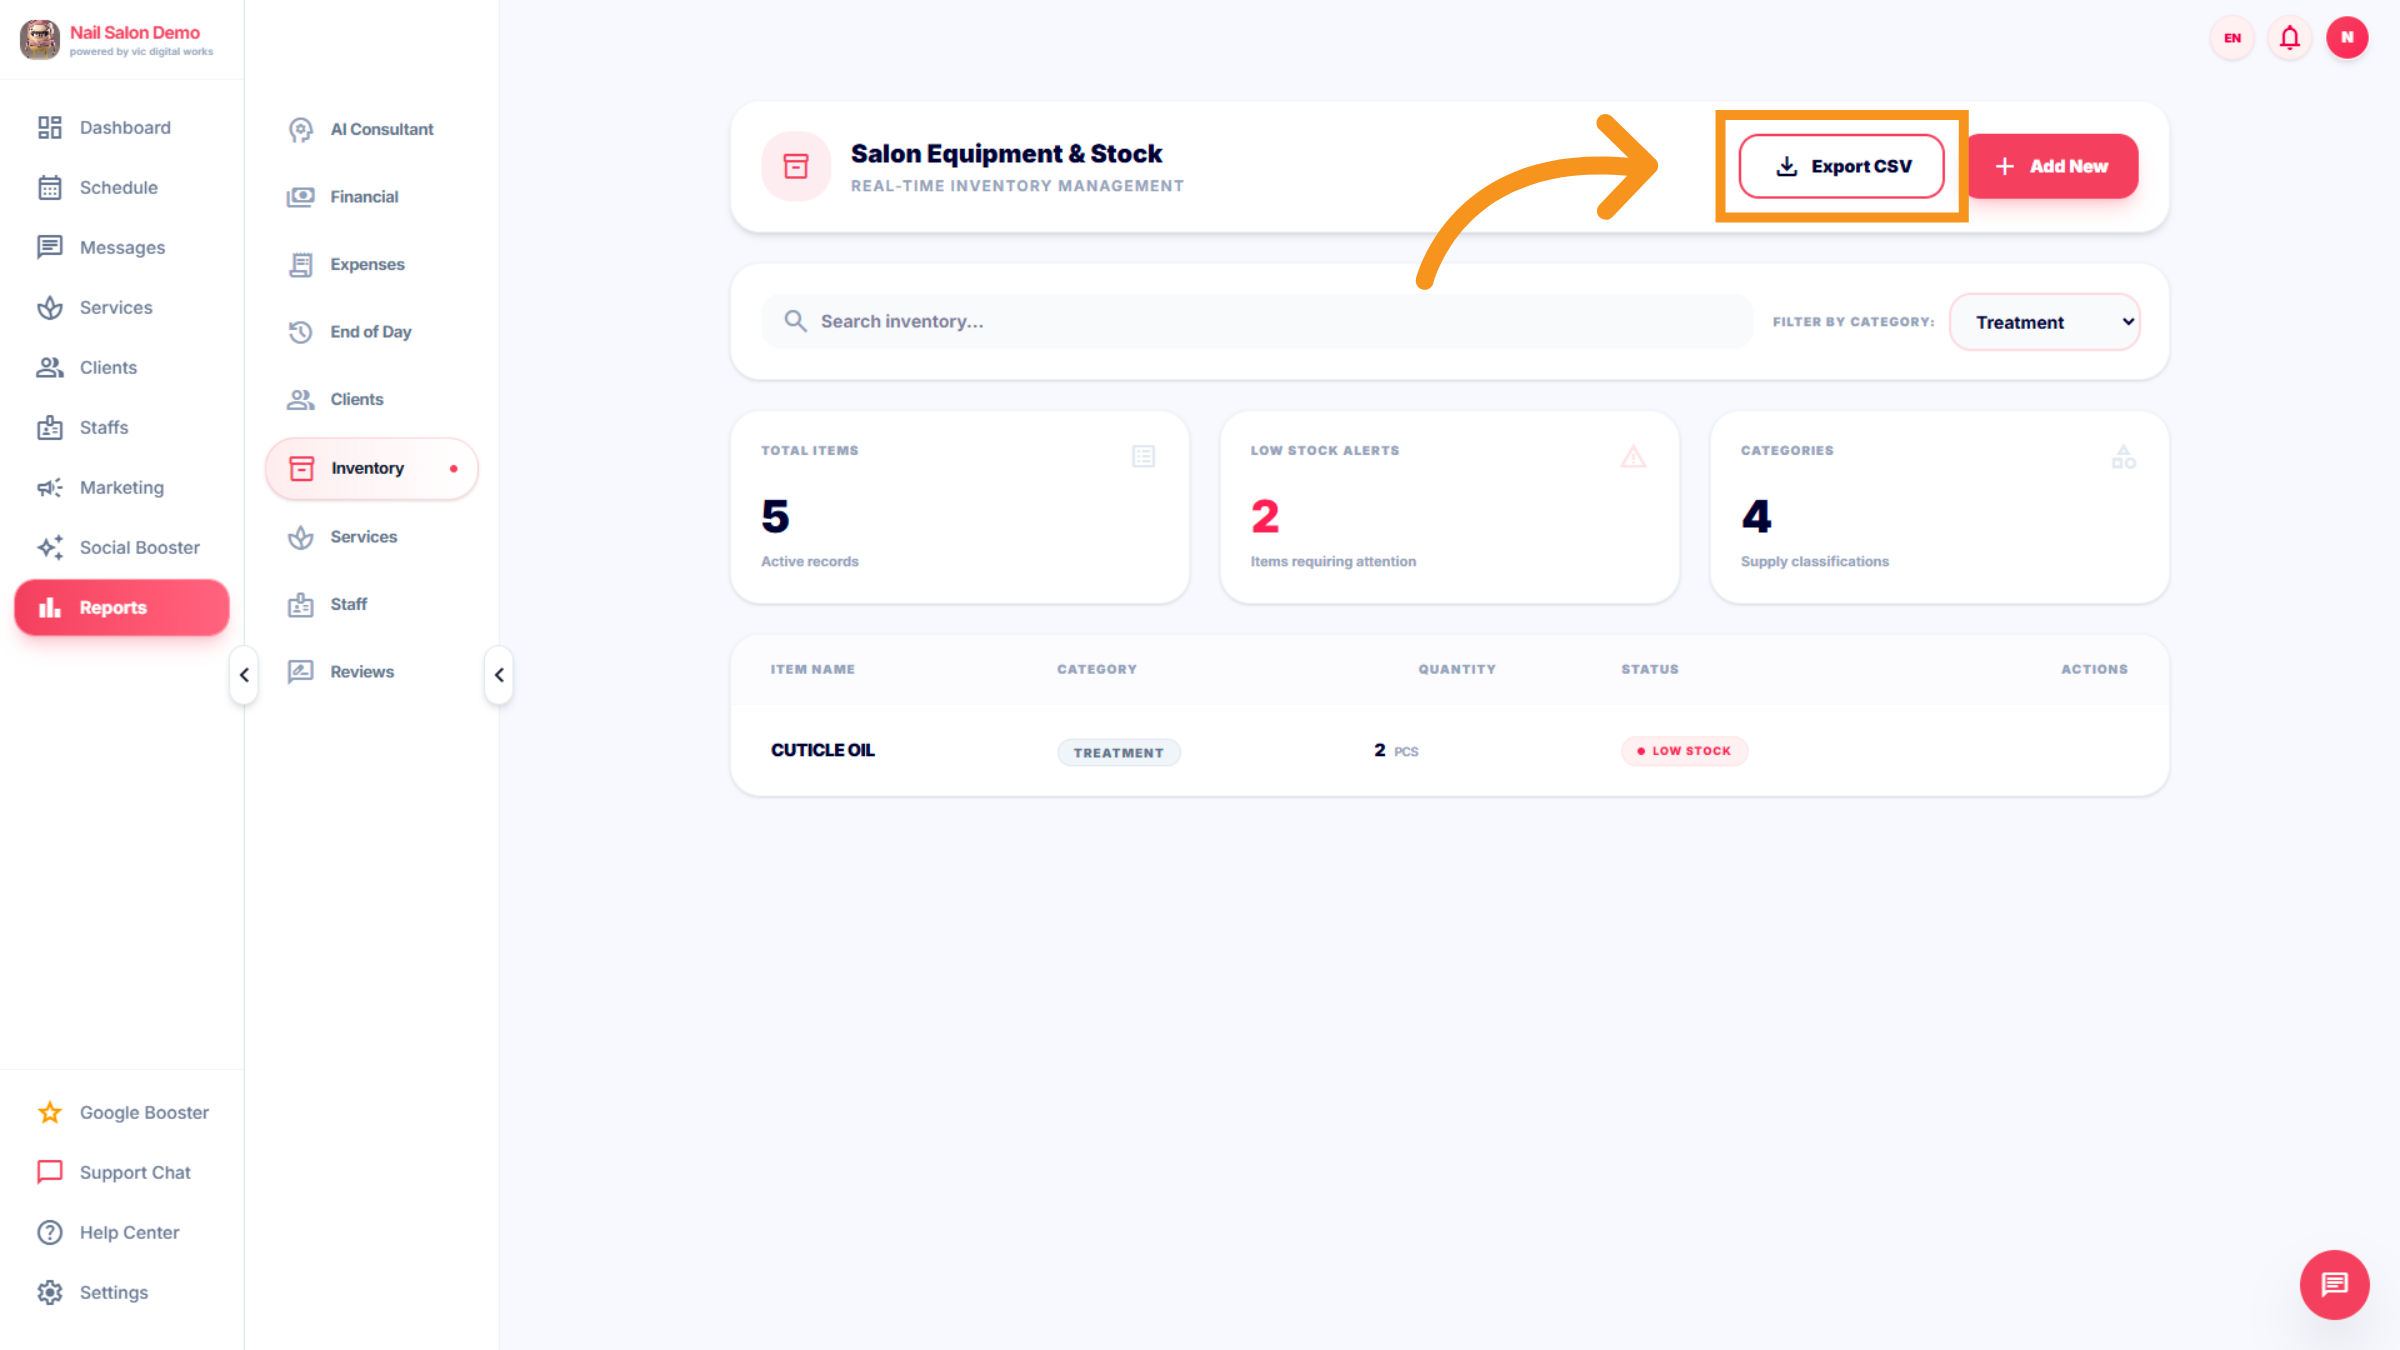
32. Export Inventory Data
Click Export CSV to download your inventory data for external analysis or record keeping.
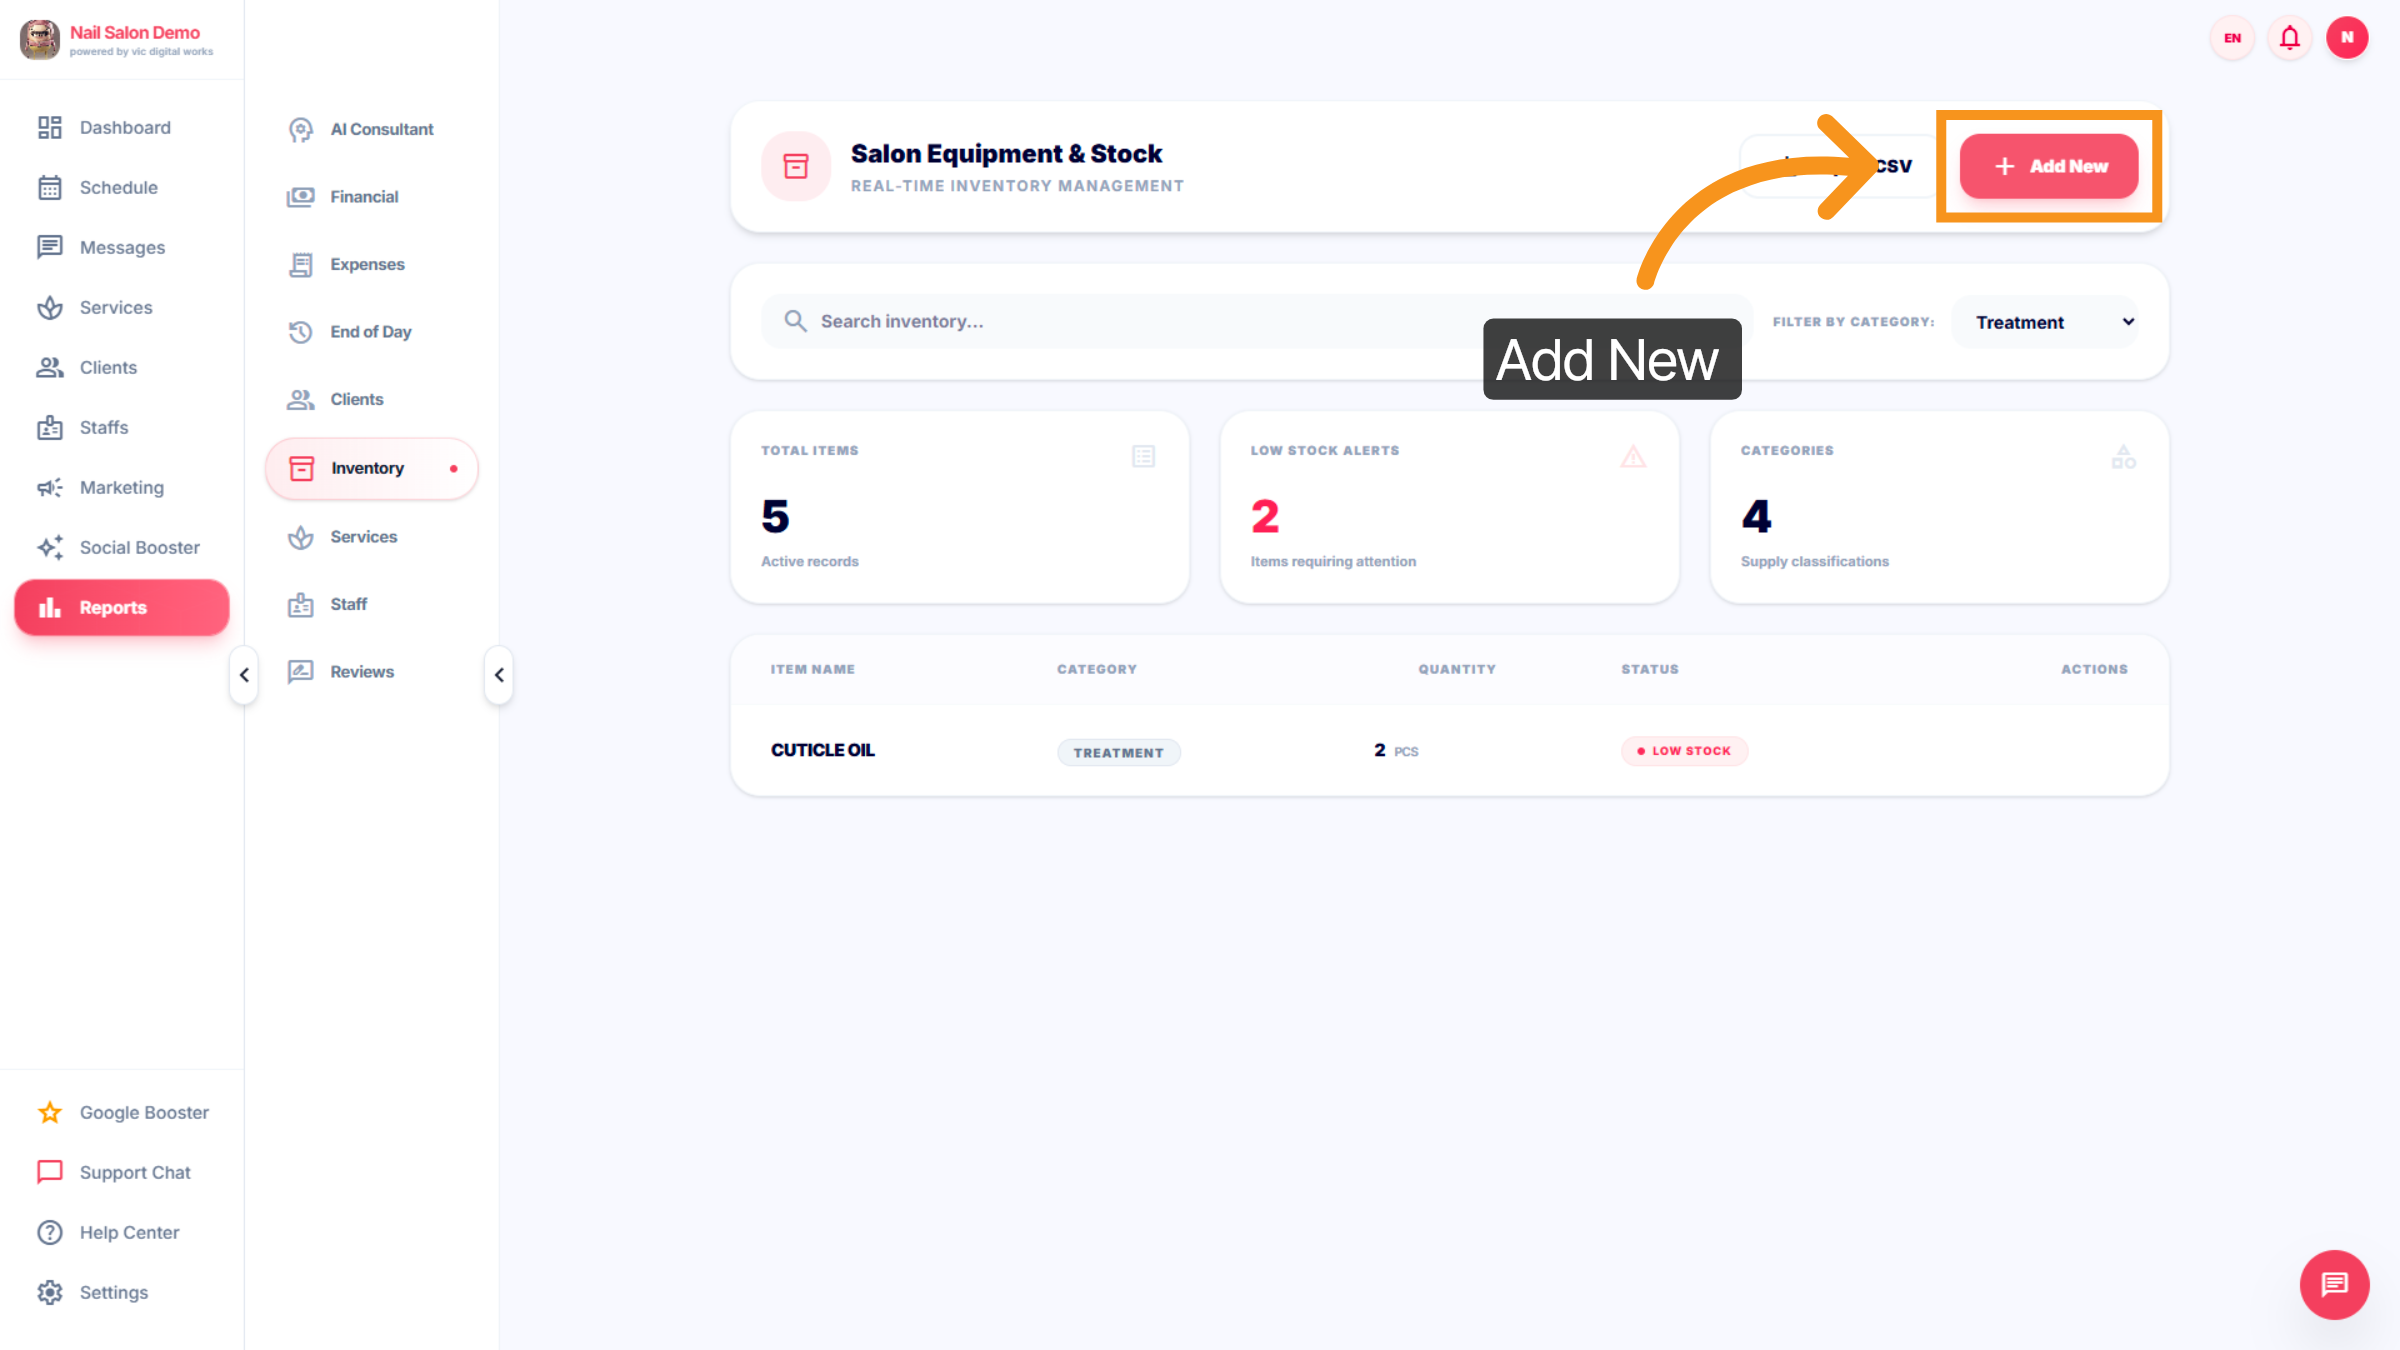
33. Add New Inventory Item
Click Add New to input a new item into your salon's inventory list.
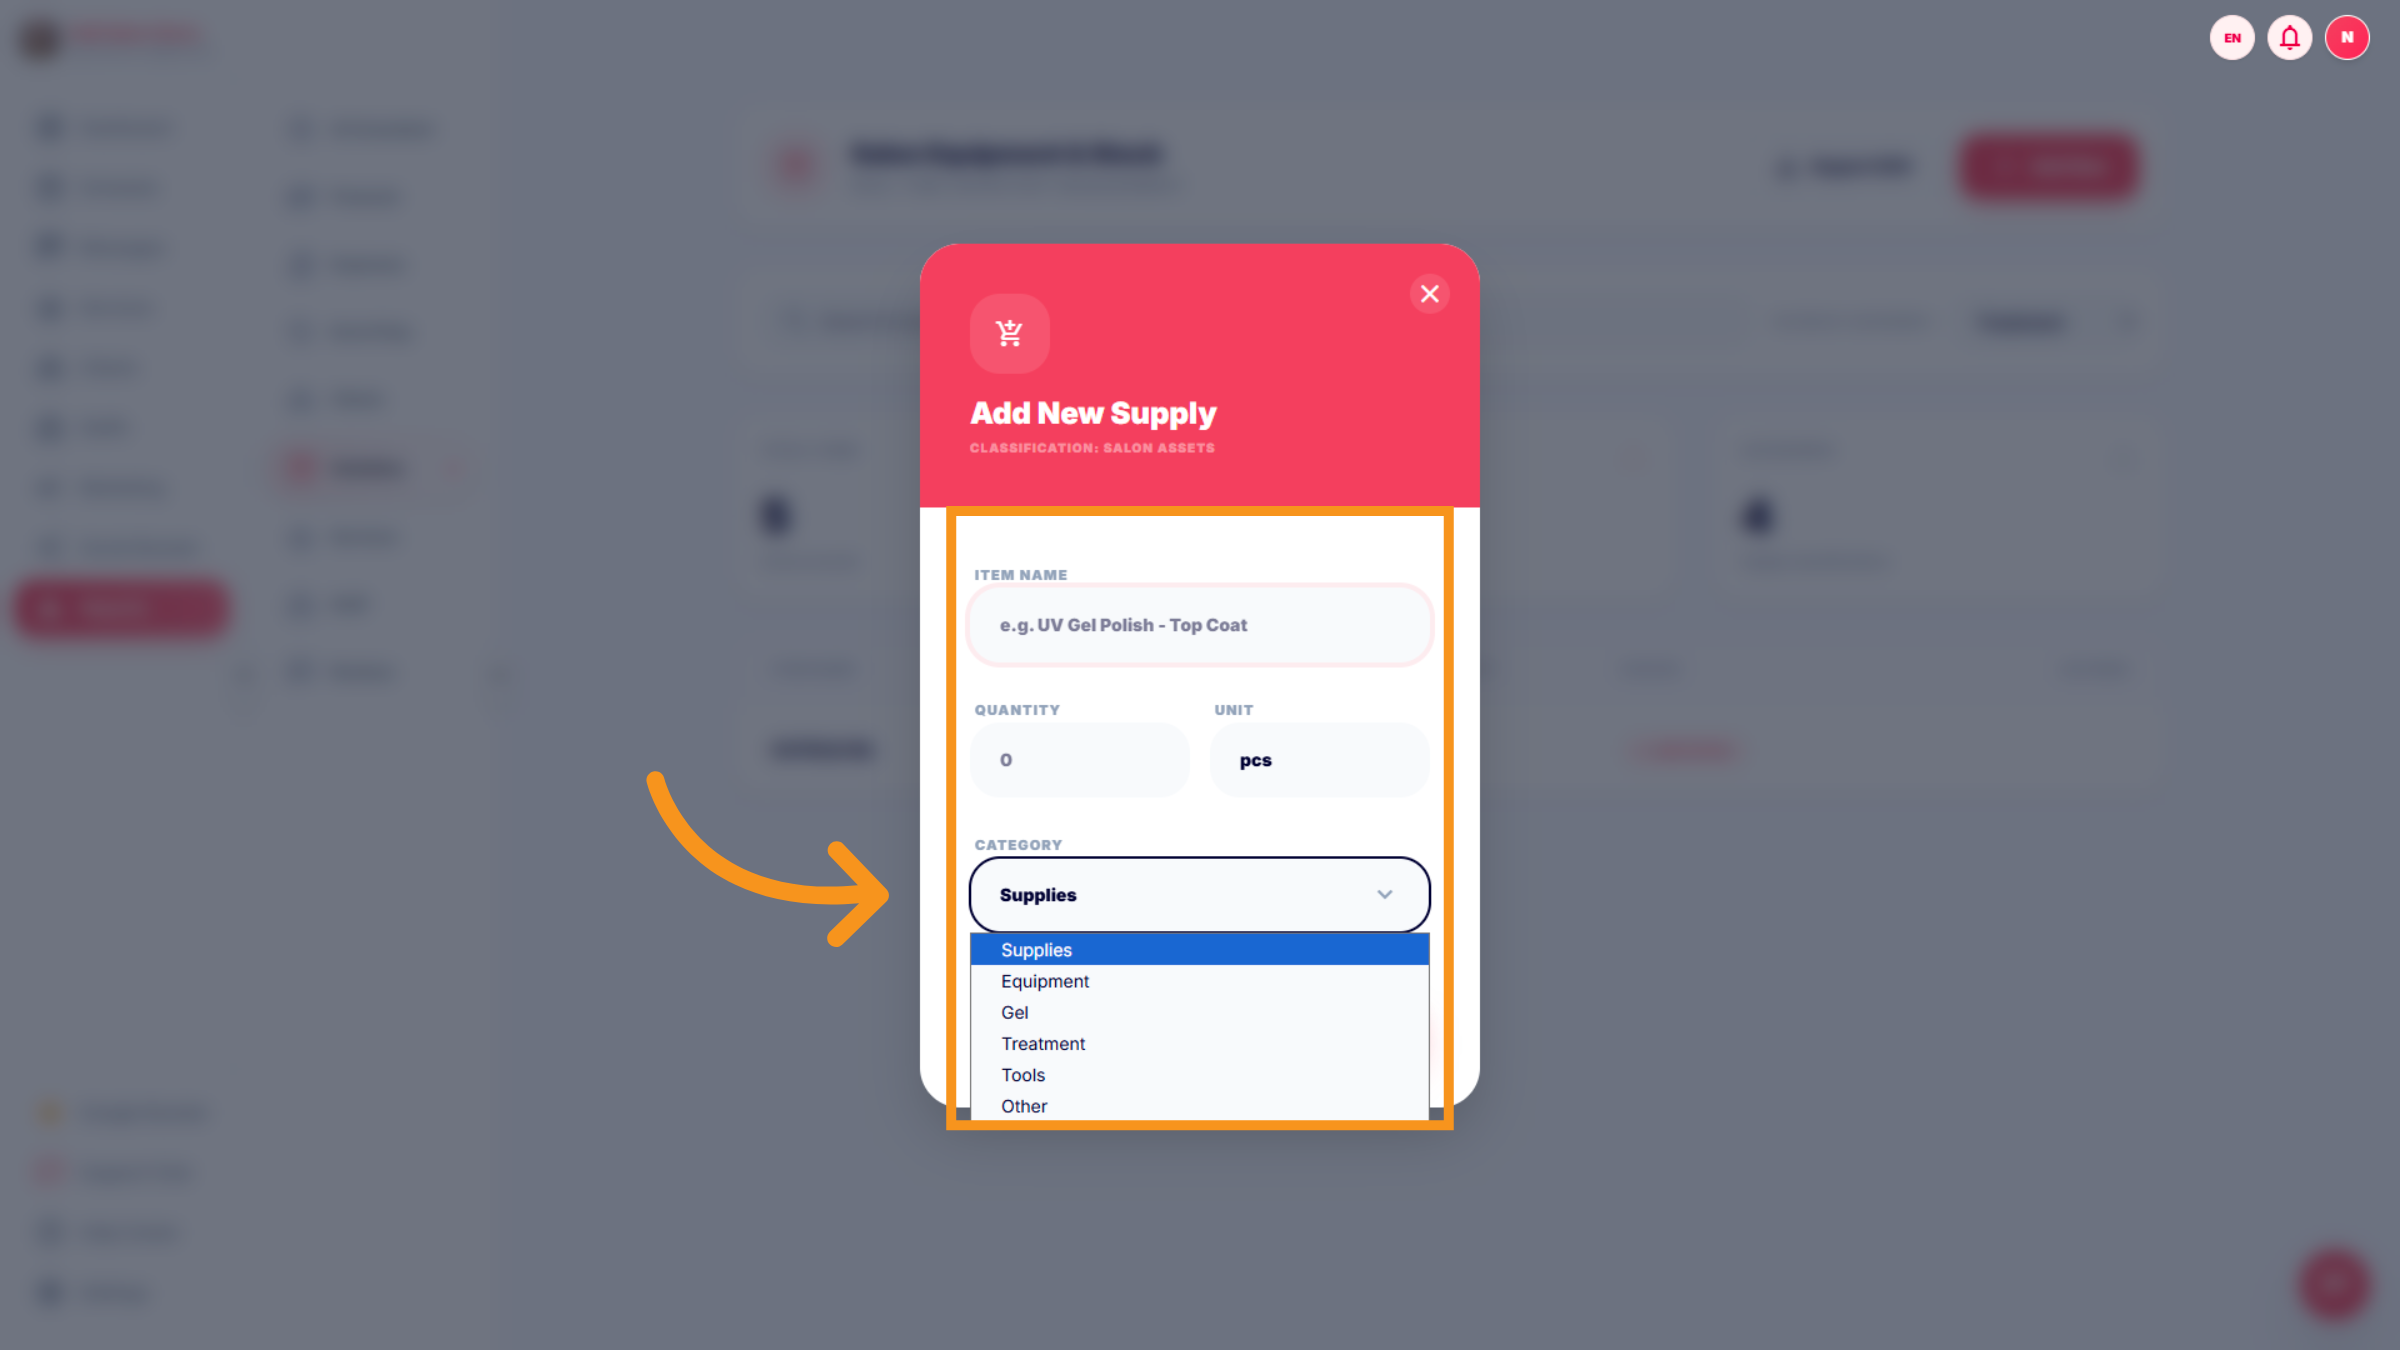
34. Select Inventory Category
Click to view fields like Item Name, Quantity, Unit, and Category selector to choose the type of inventory item such as Supplies, Equipment, or Gel.
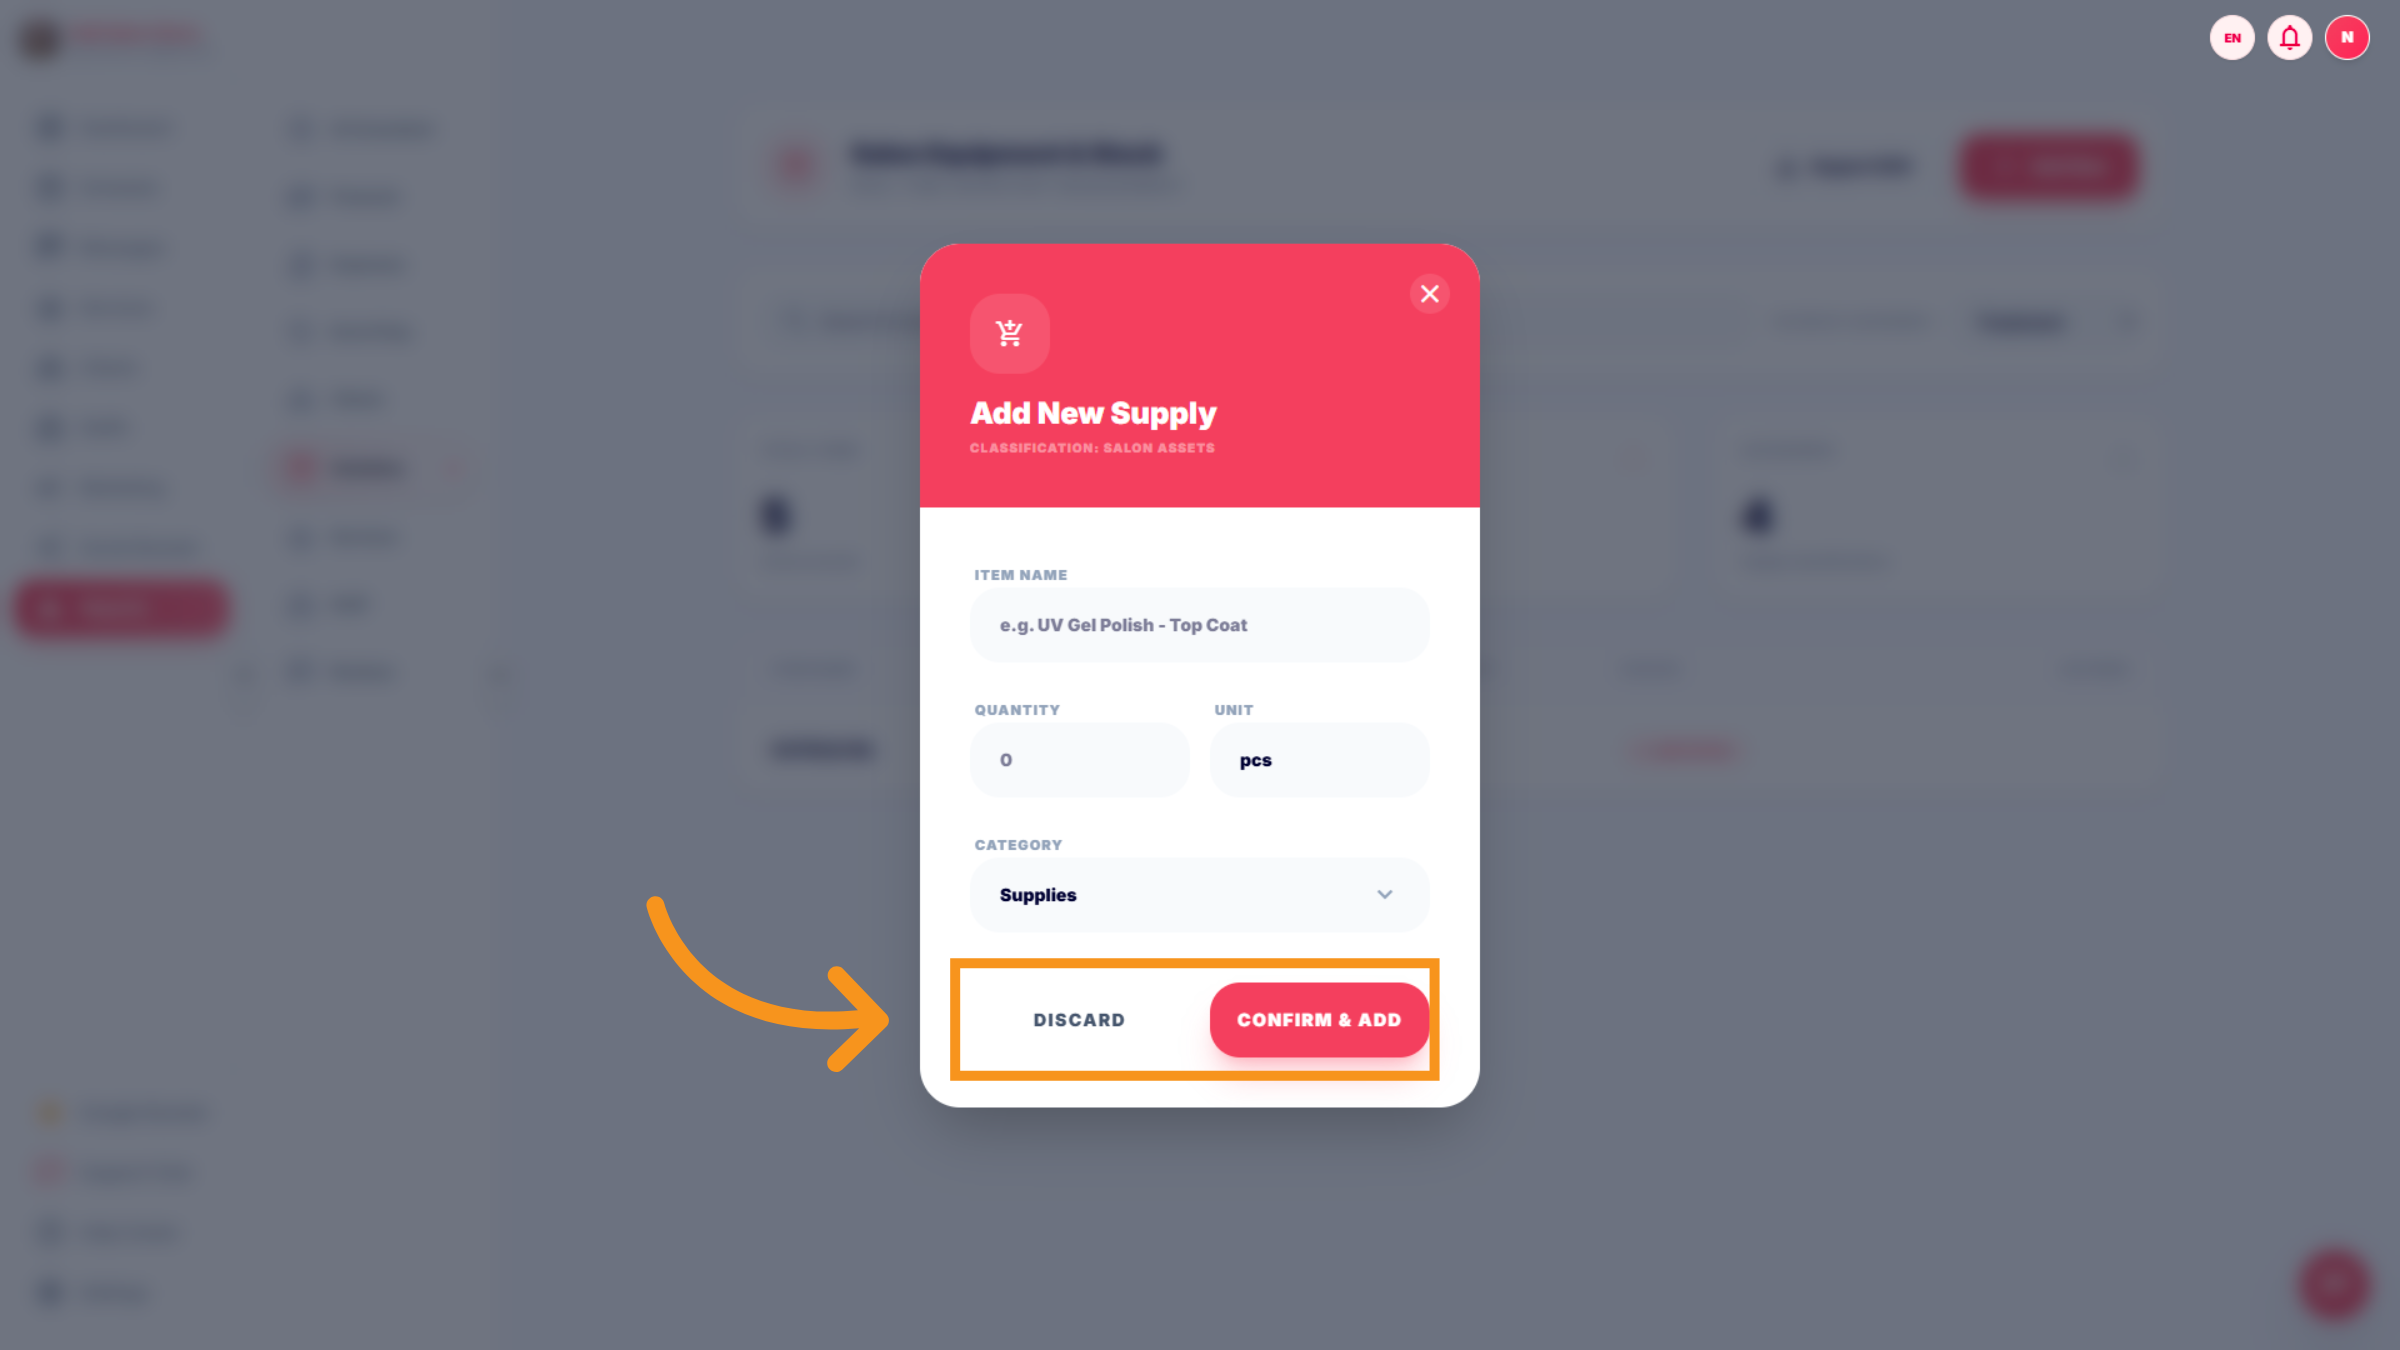
35. Select to complete
Click "Confirm&add" to save or Discard to cancel any unsaved changes made to inventory items.
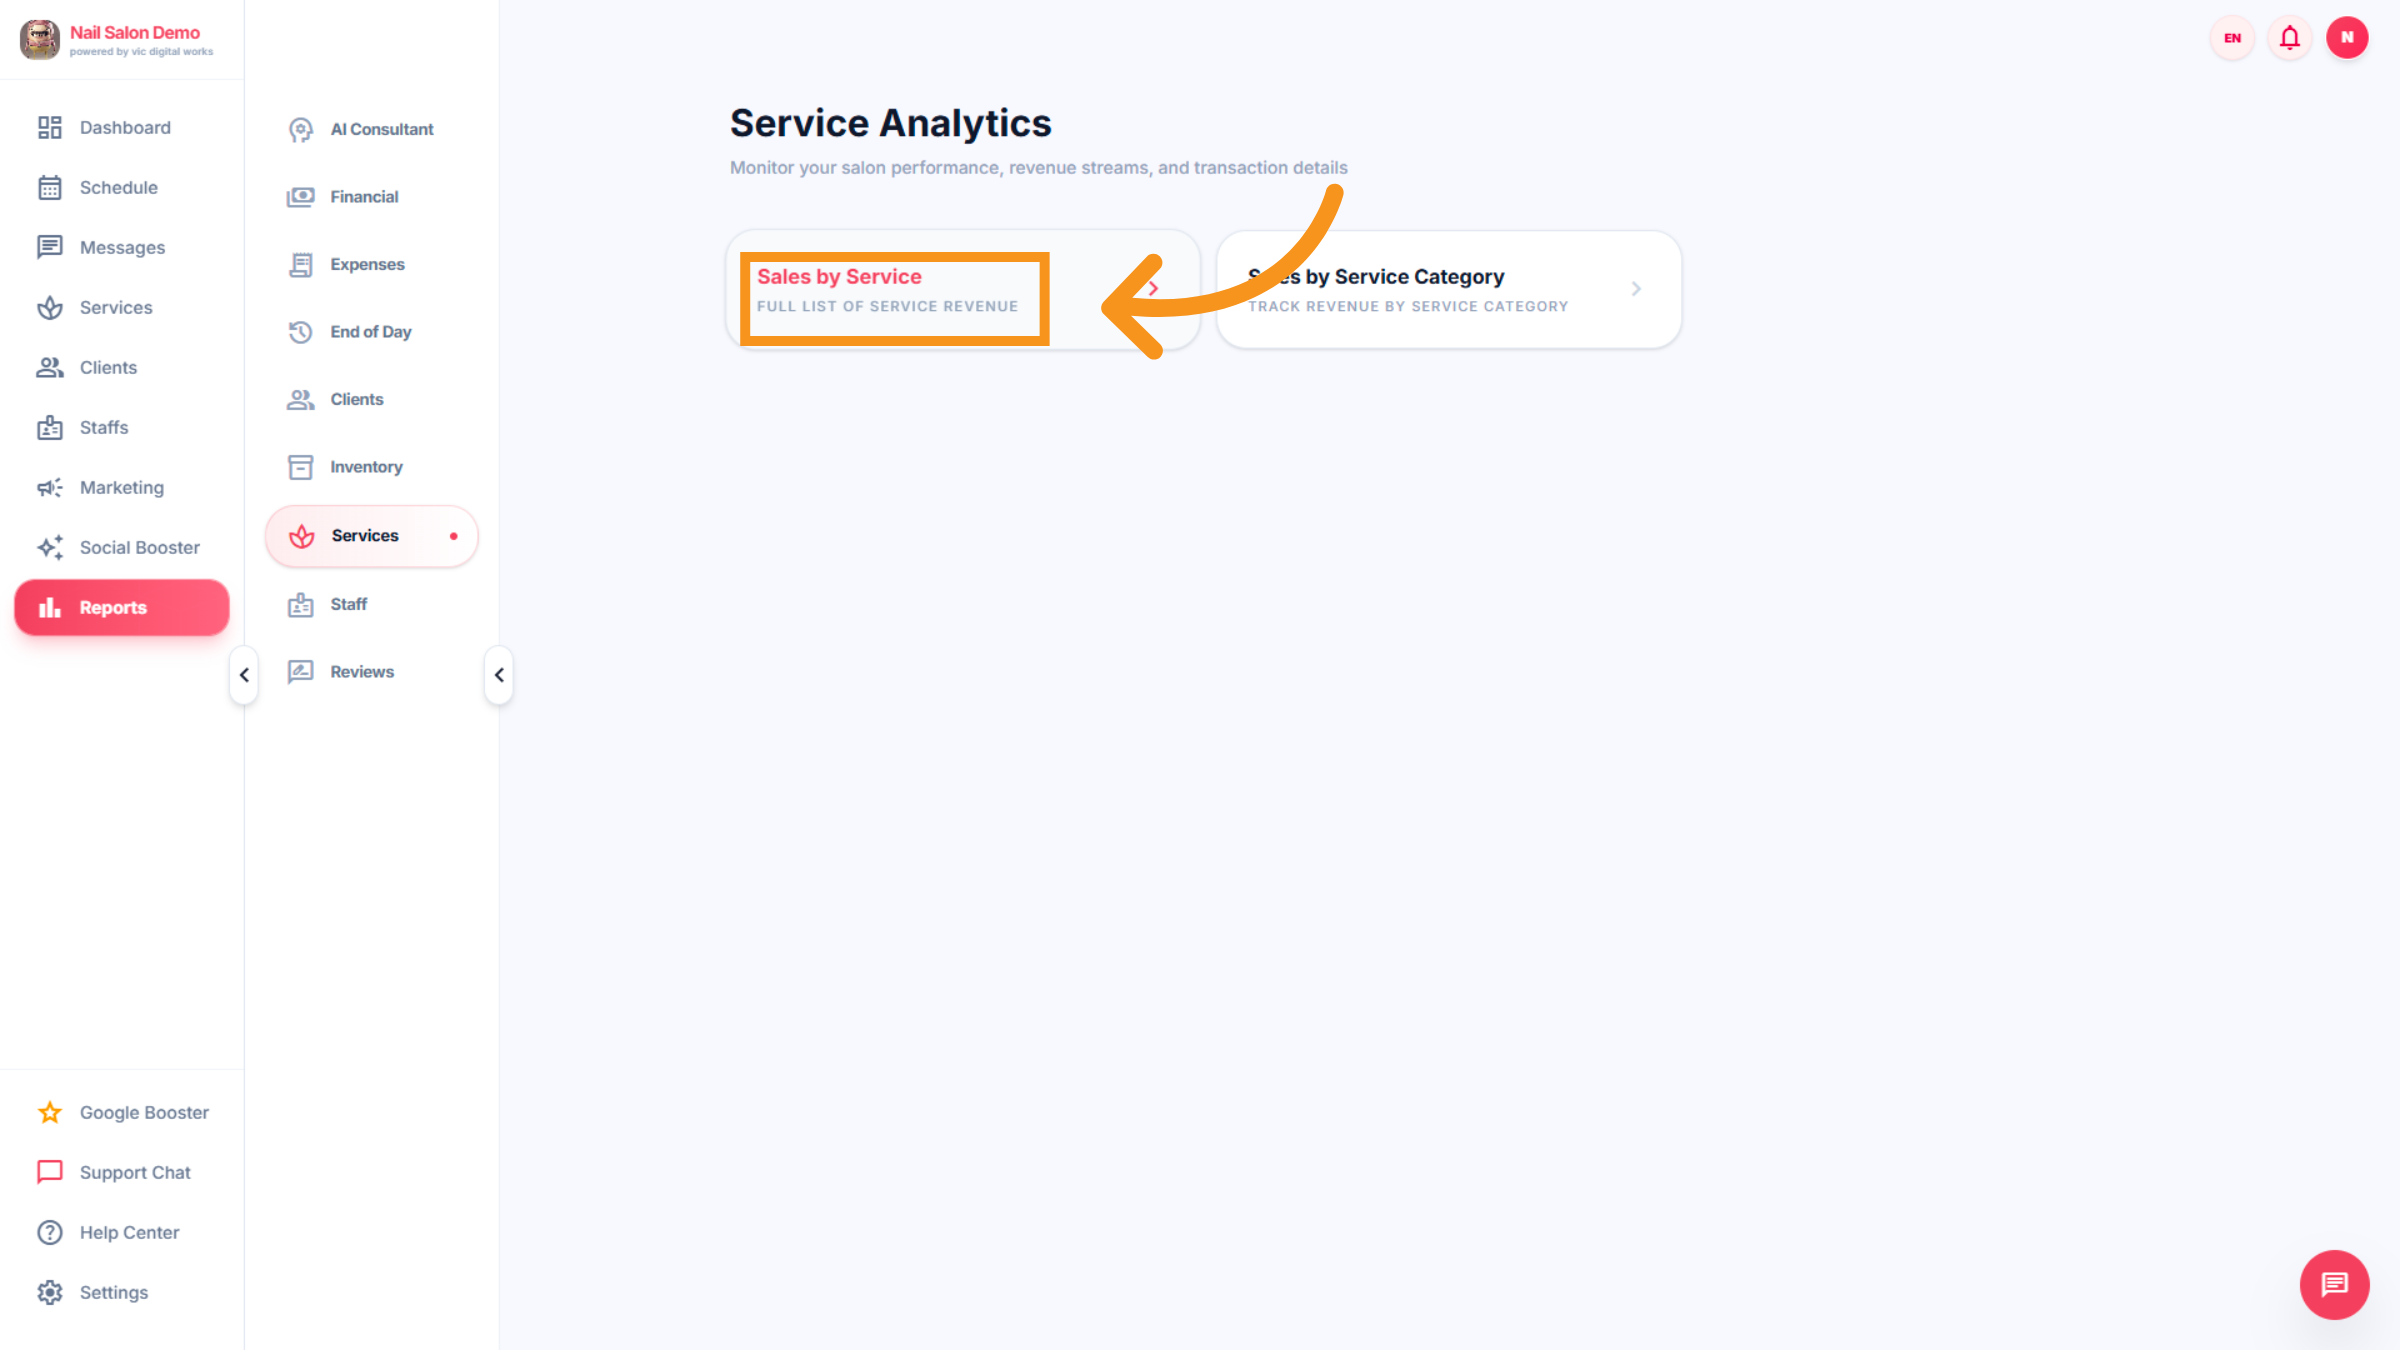
36. SERVICE
Click to reveal more information about service costs and performance.
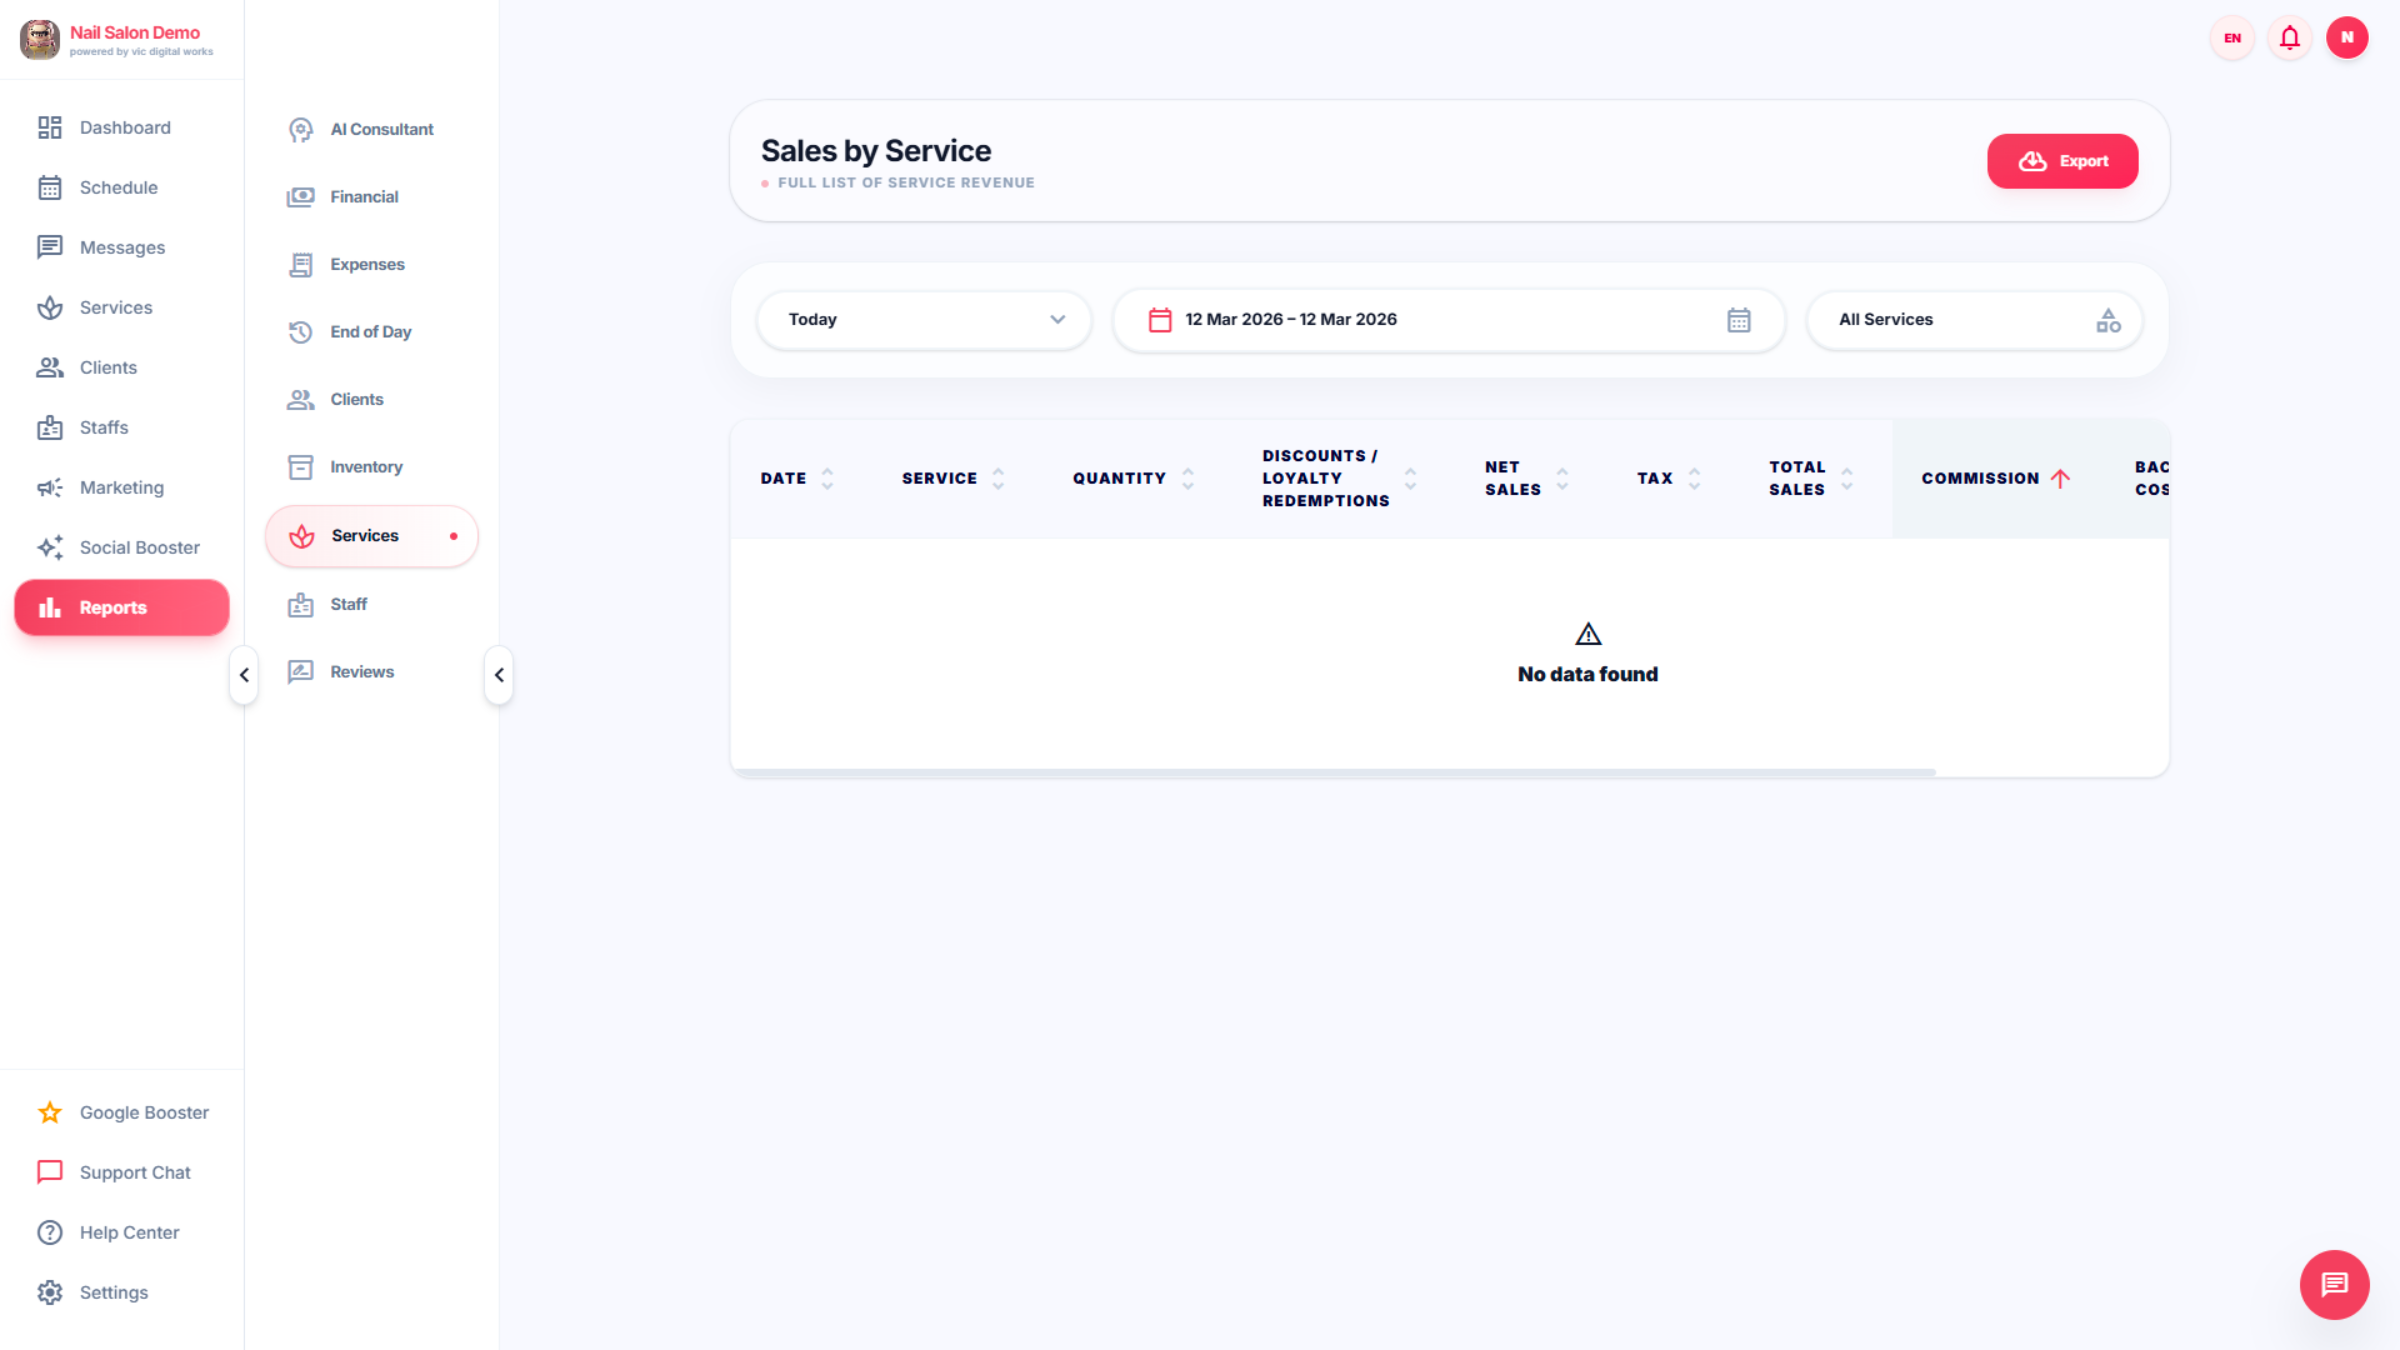
37. View Service Revenue
Click Full list of service revenue to see detailed earnings from each service.
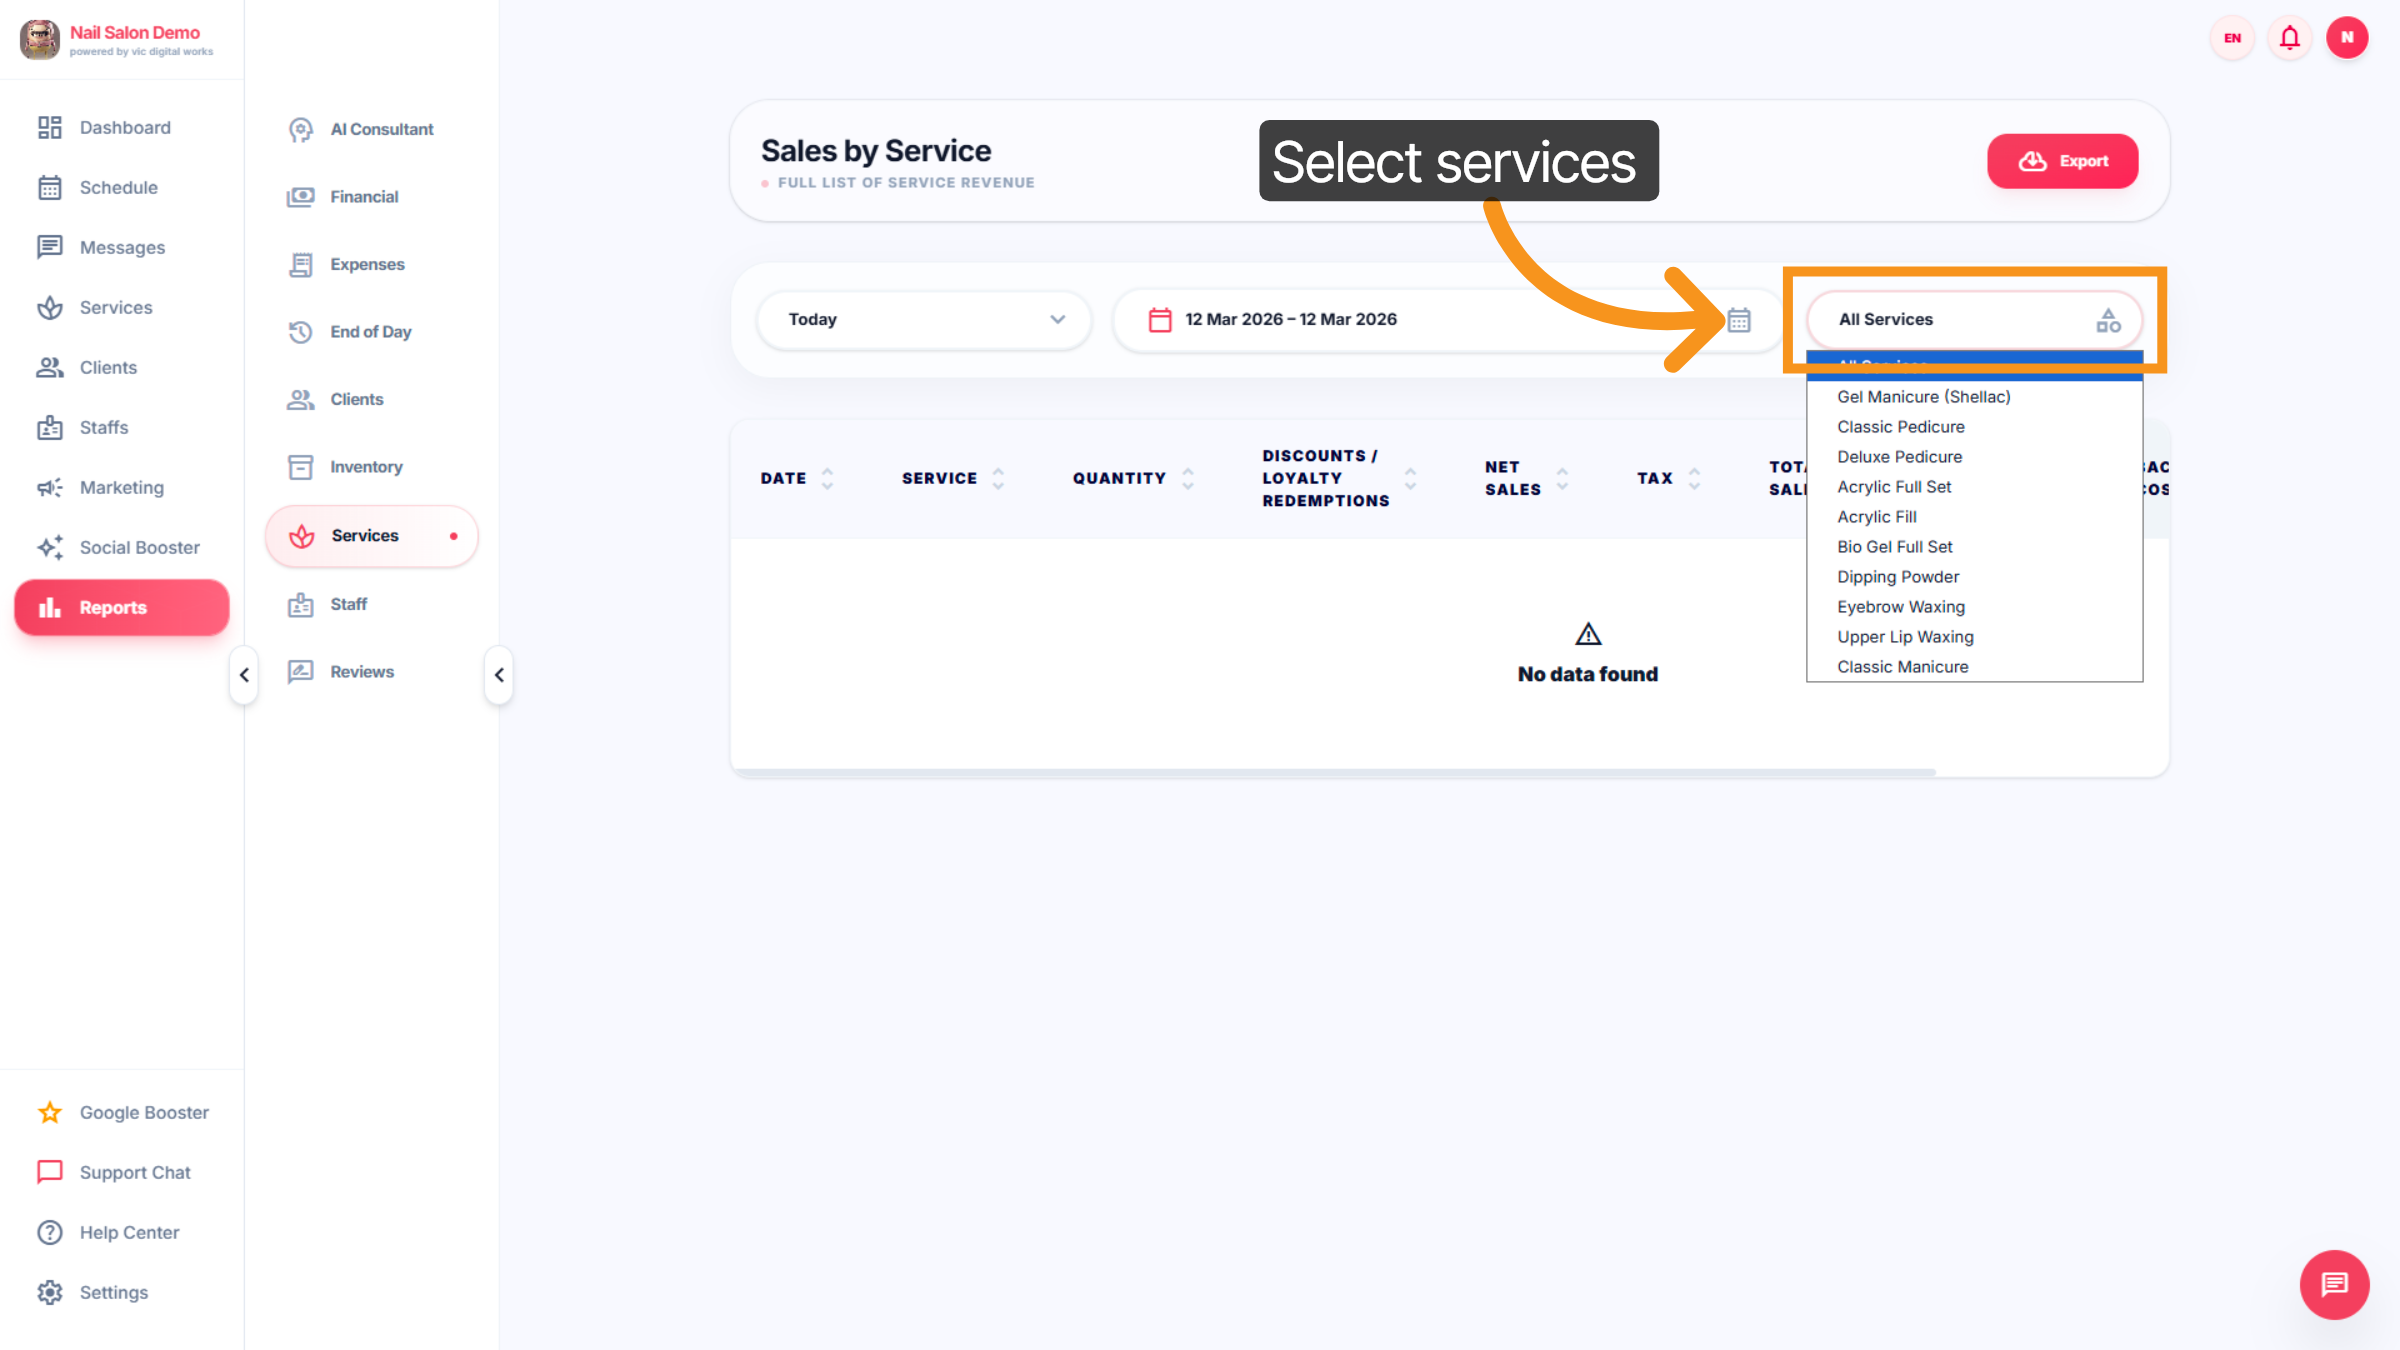
38. Select Service Category
Click All Services to browse through different service types like Gel Manicure, Pedicure, and Waxing....
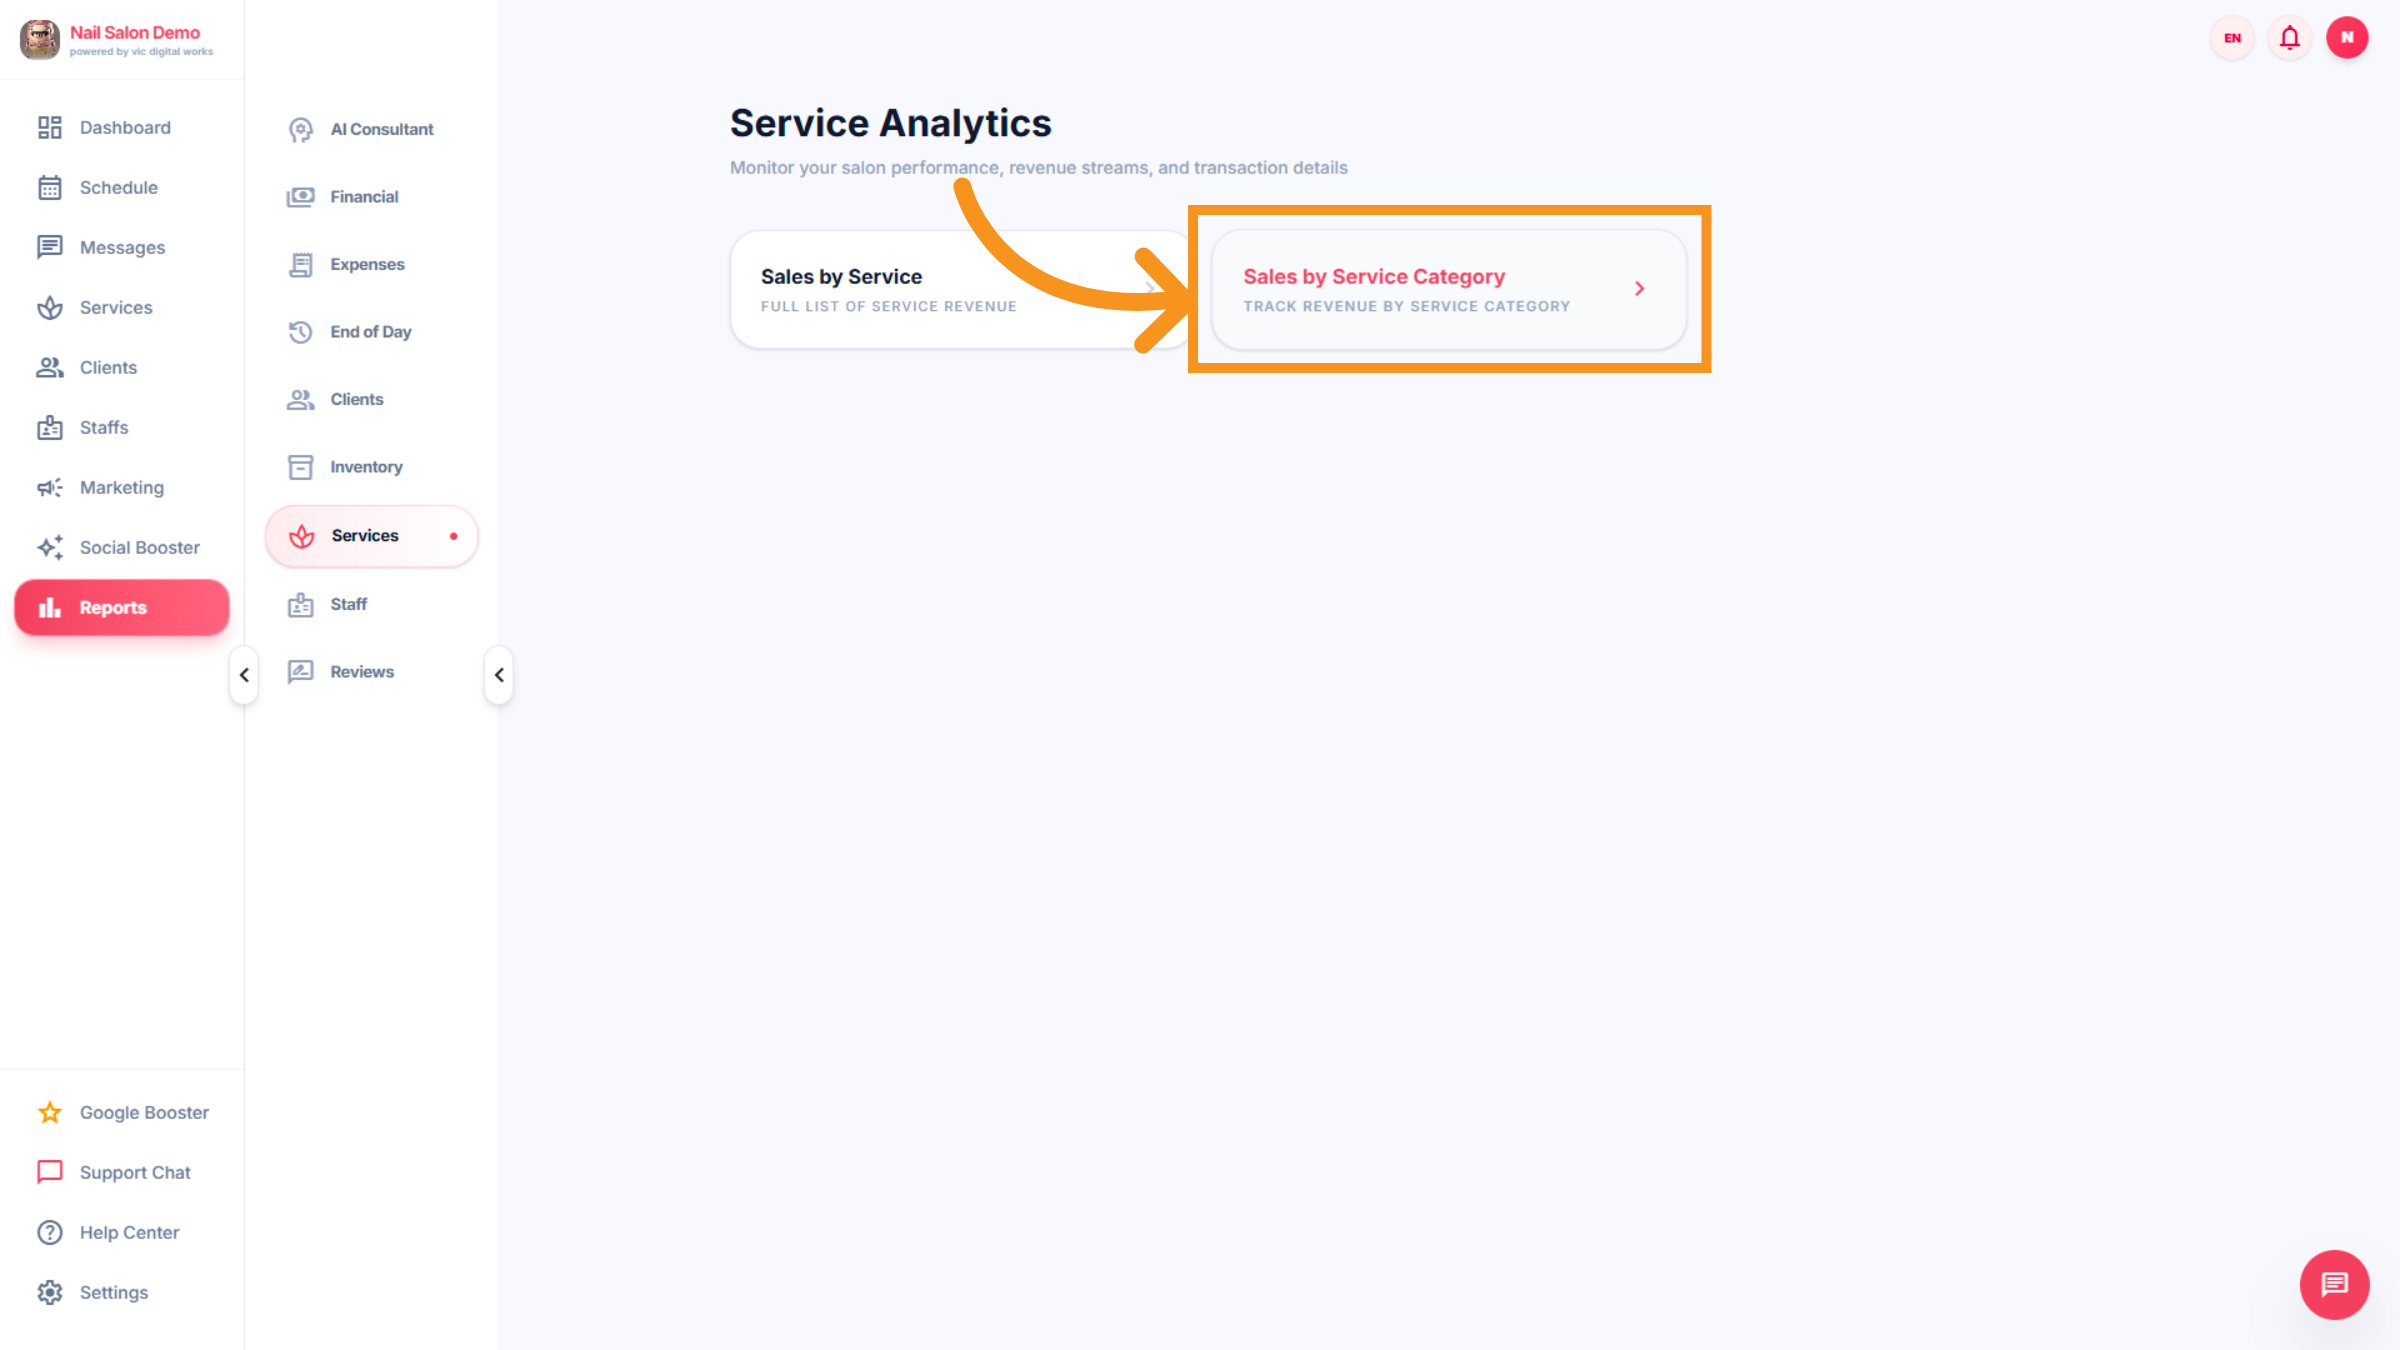
39. View Sales By Service Category
Click Sales by Service Category to track revenue generated by each service type.
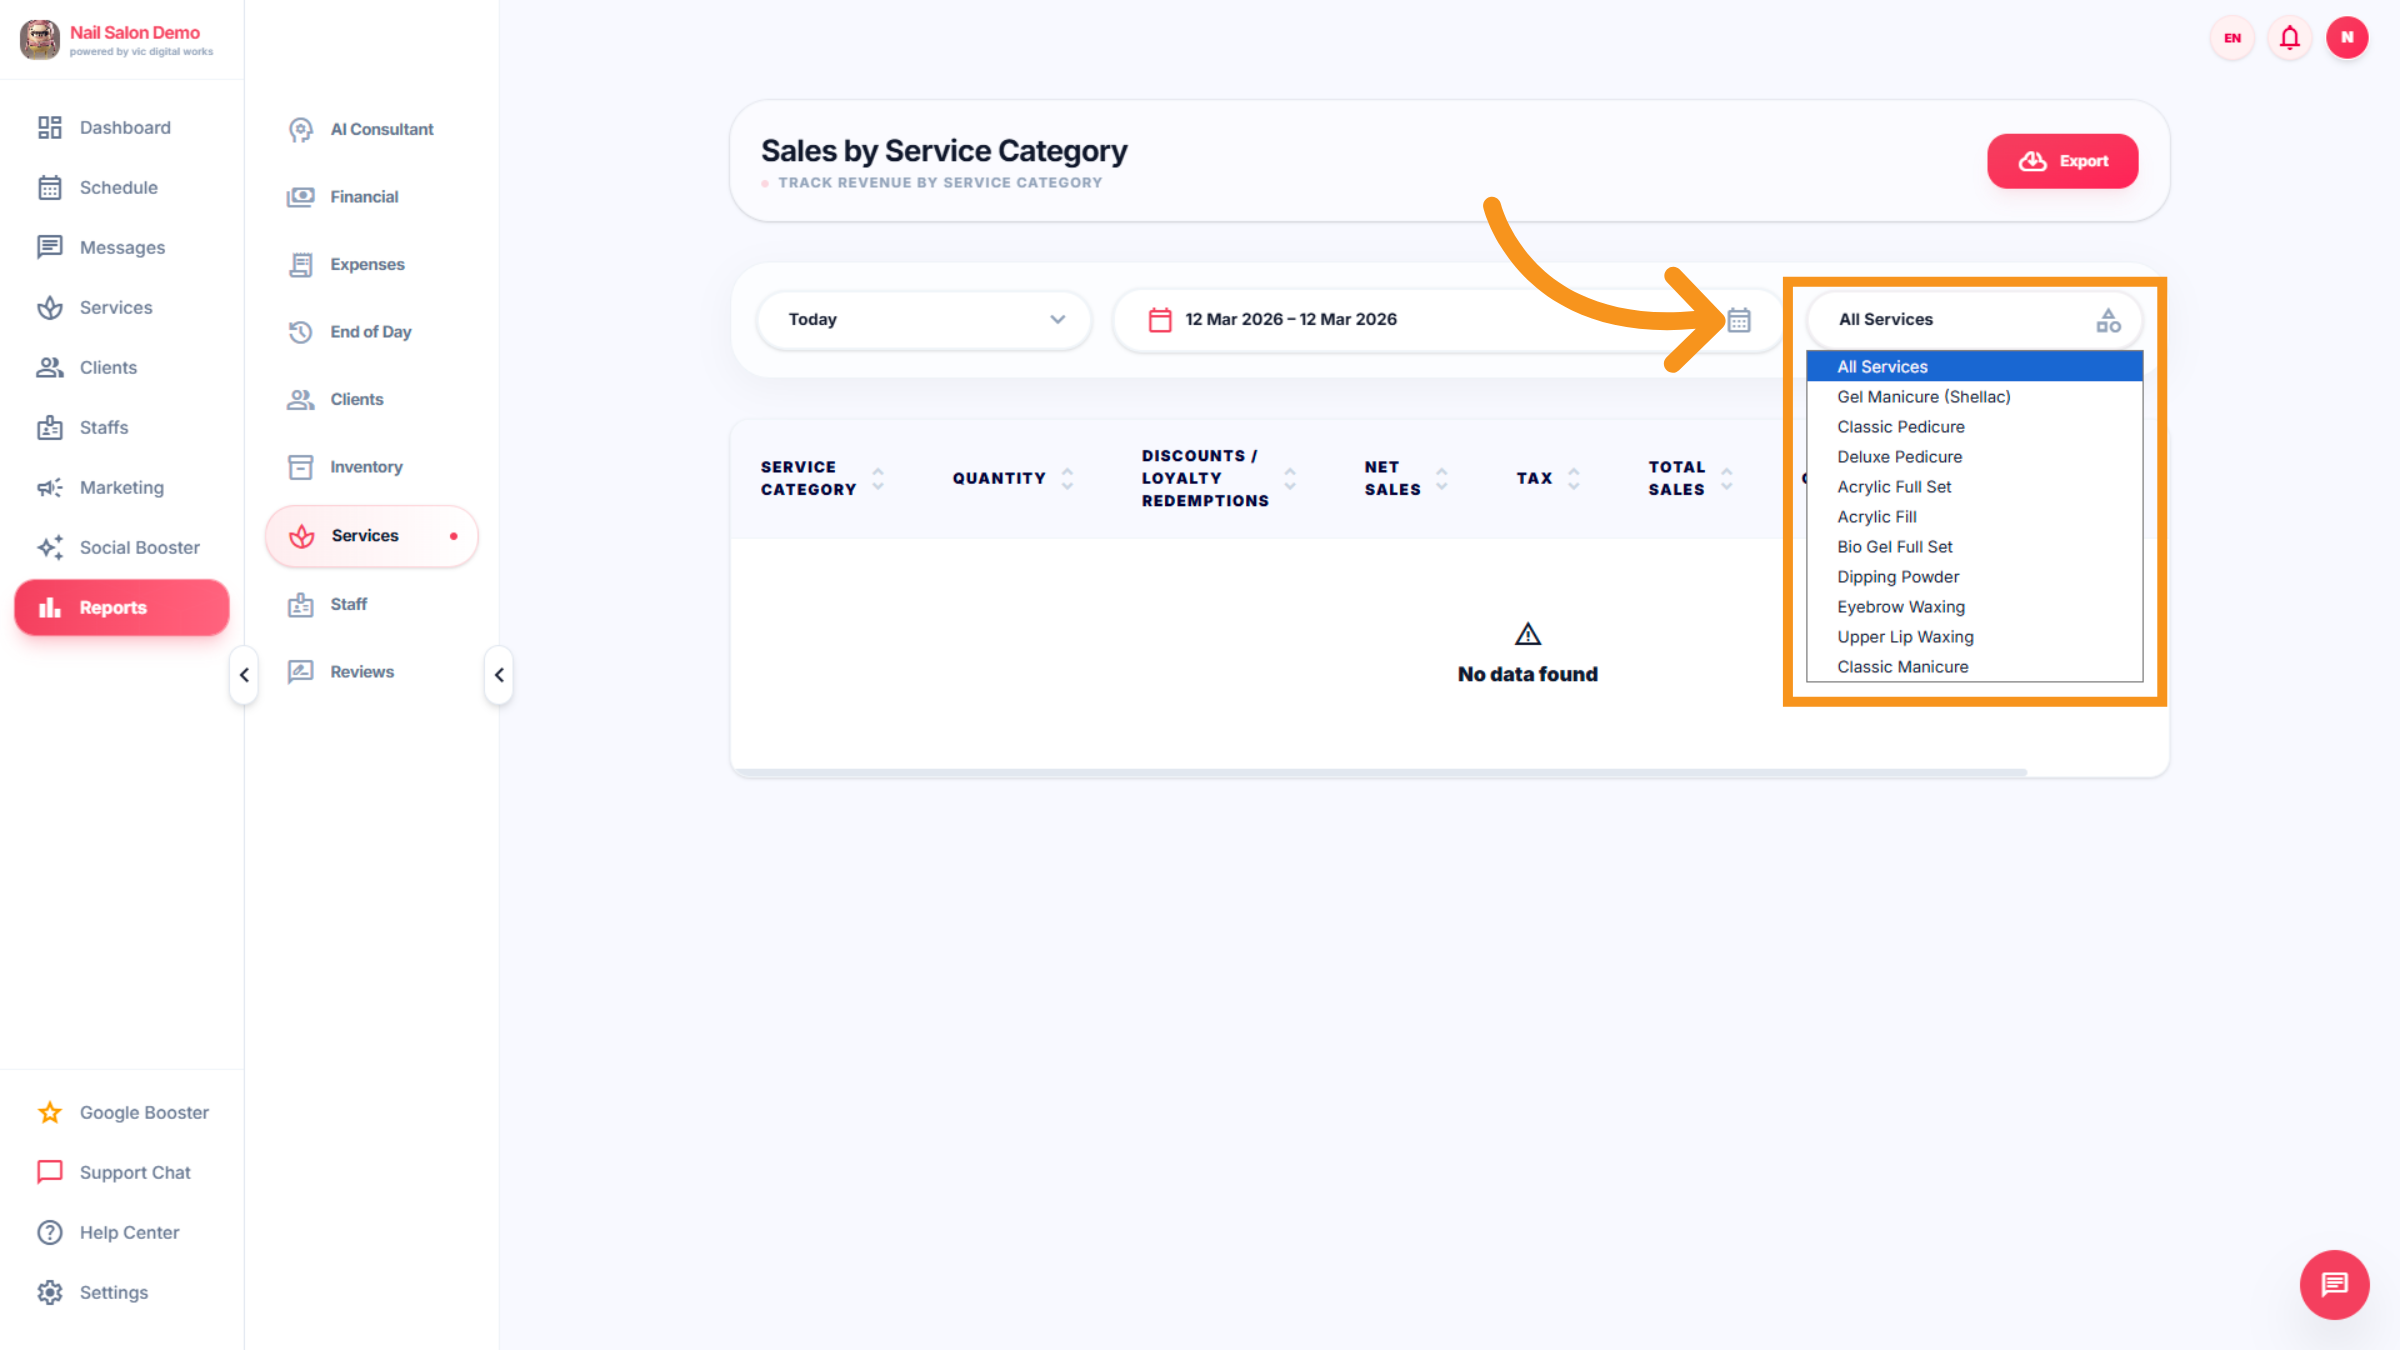
40. Browse Service Categories
Click All Services to explore detailed service categories and their performance.
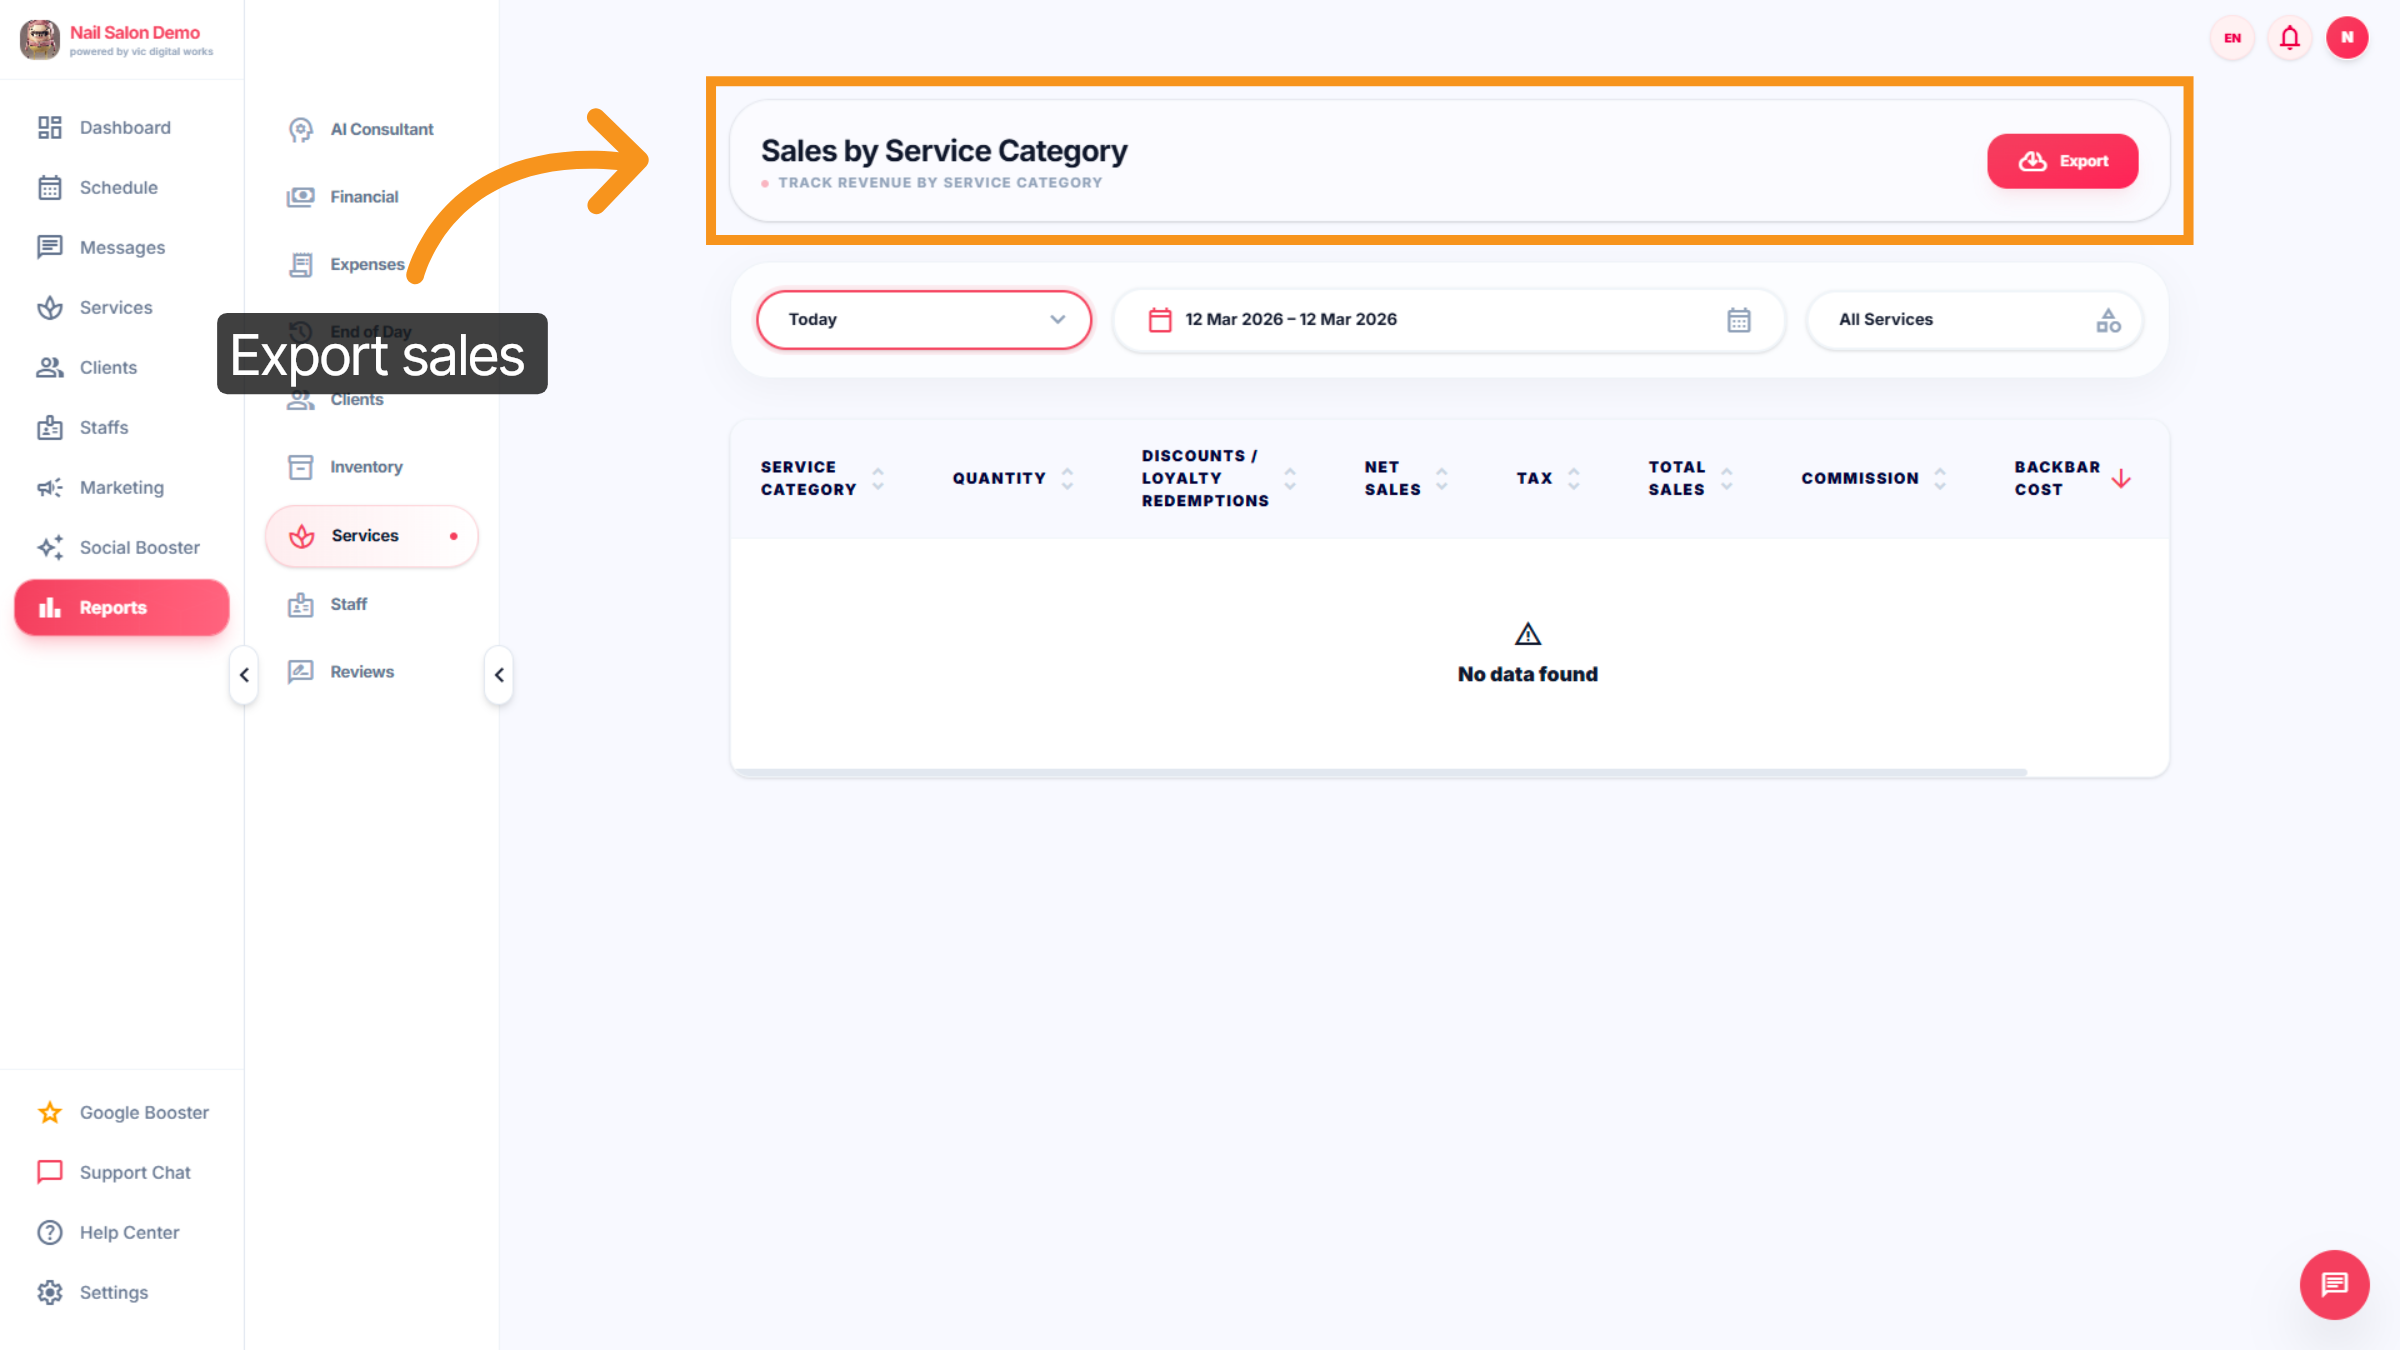
41. Export Sales Data
Click Export to download sales data by service category for reporting purposes.
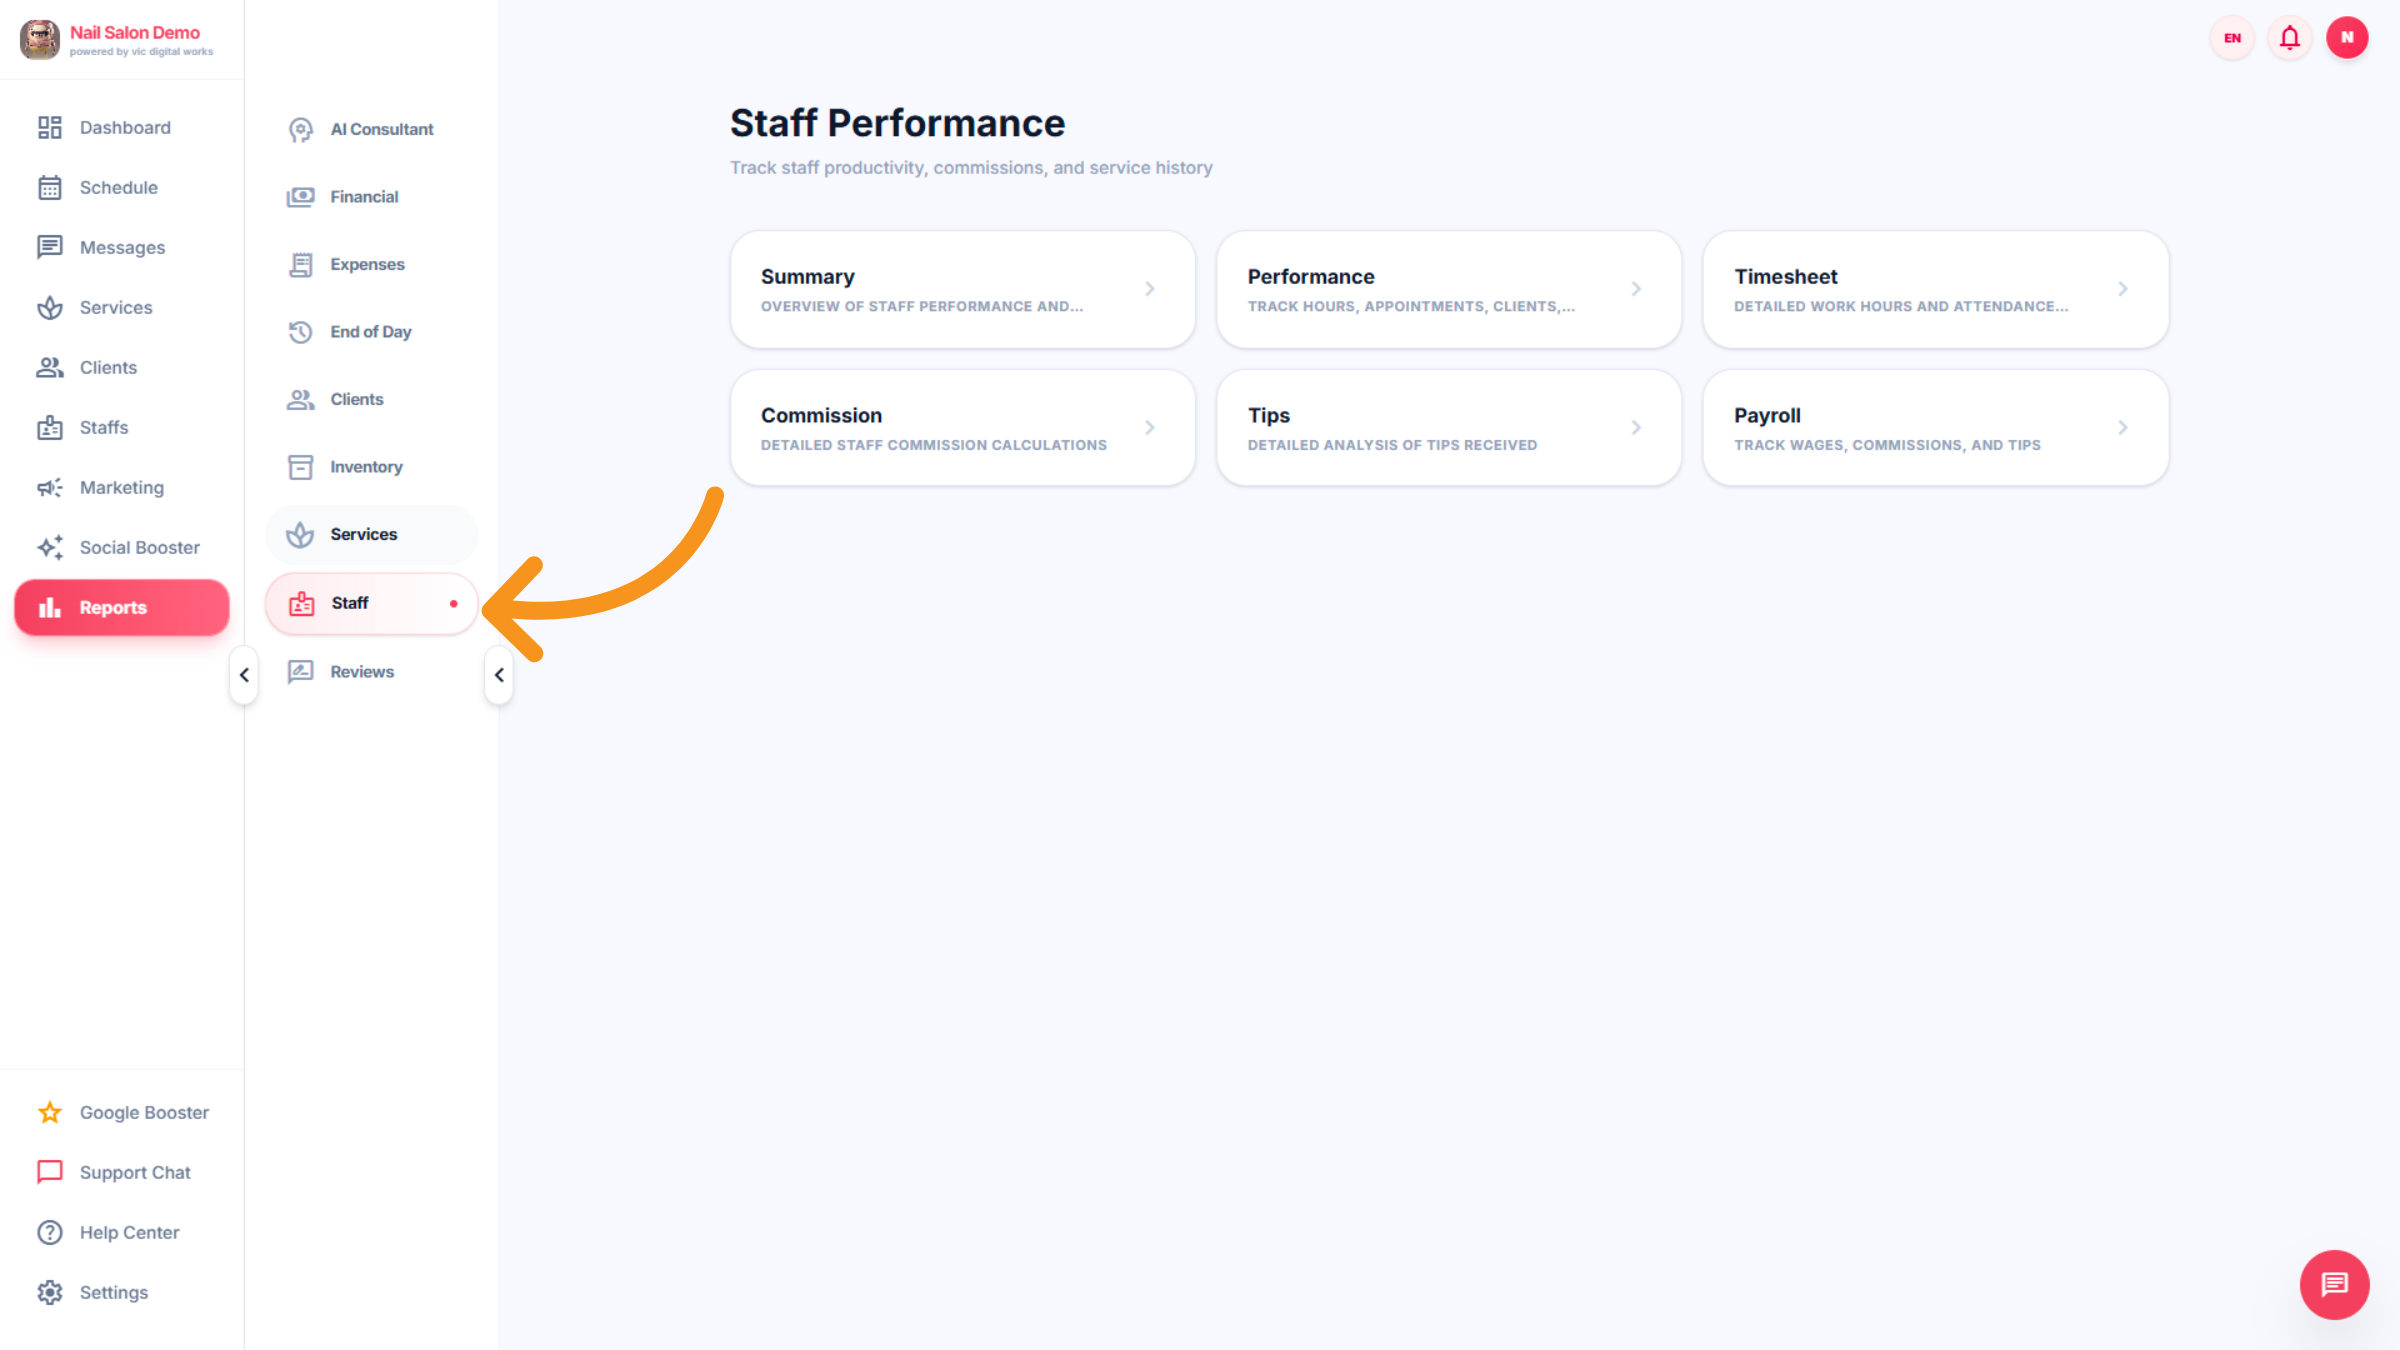
42. STAFF
Click Staff to view performance and earnings of your salon team members.
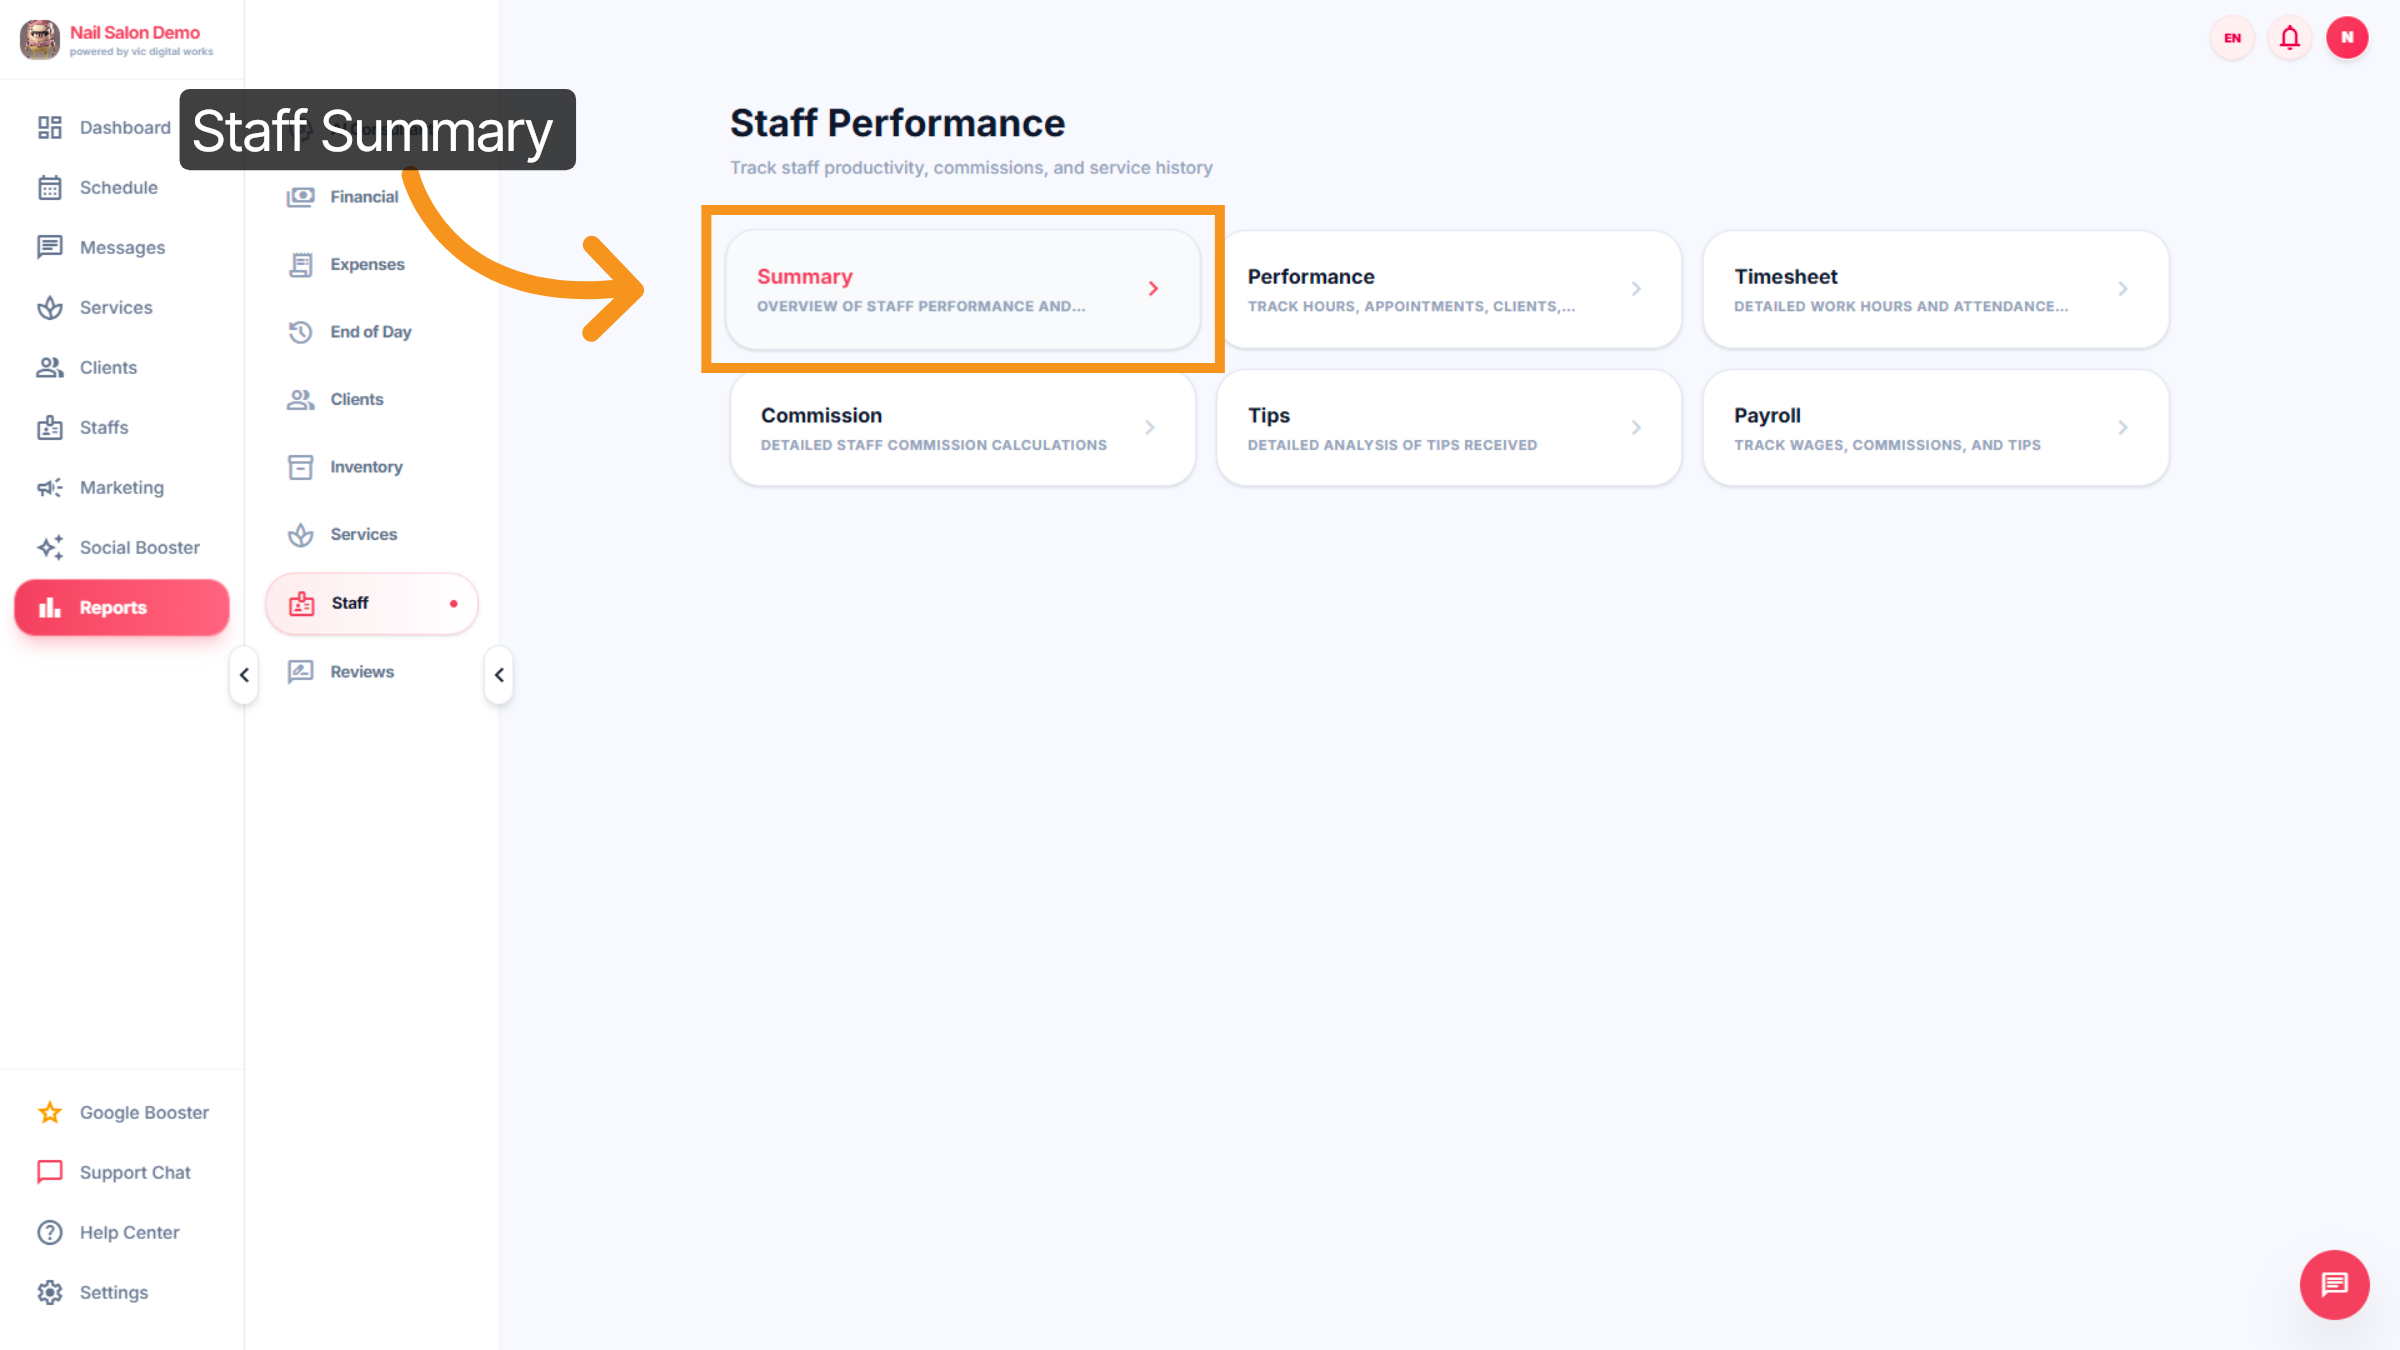
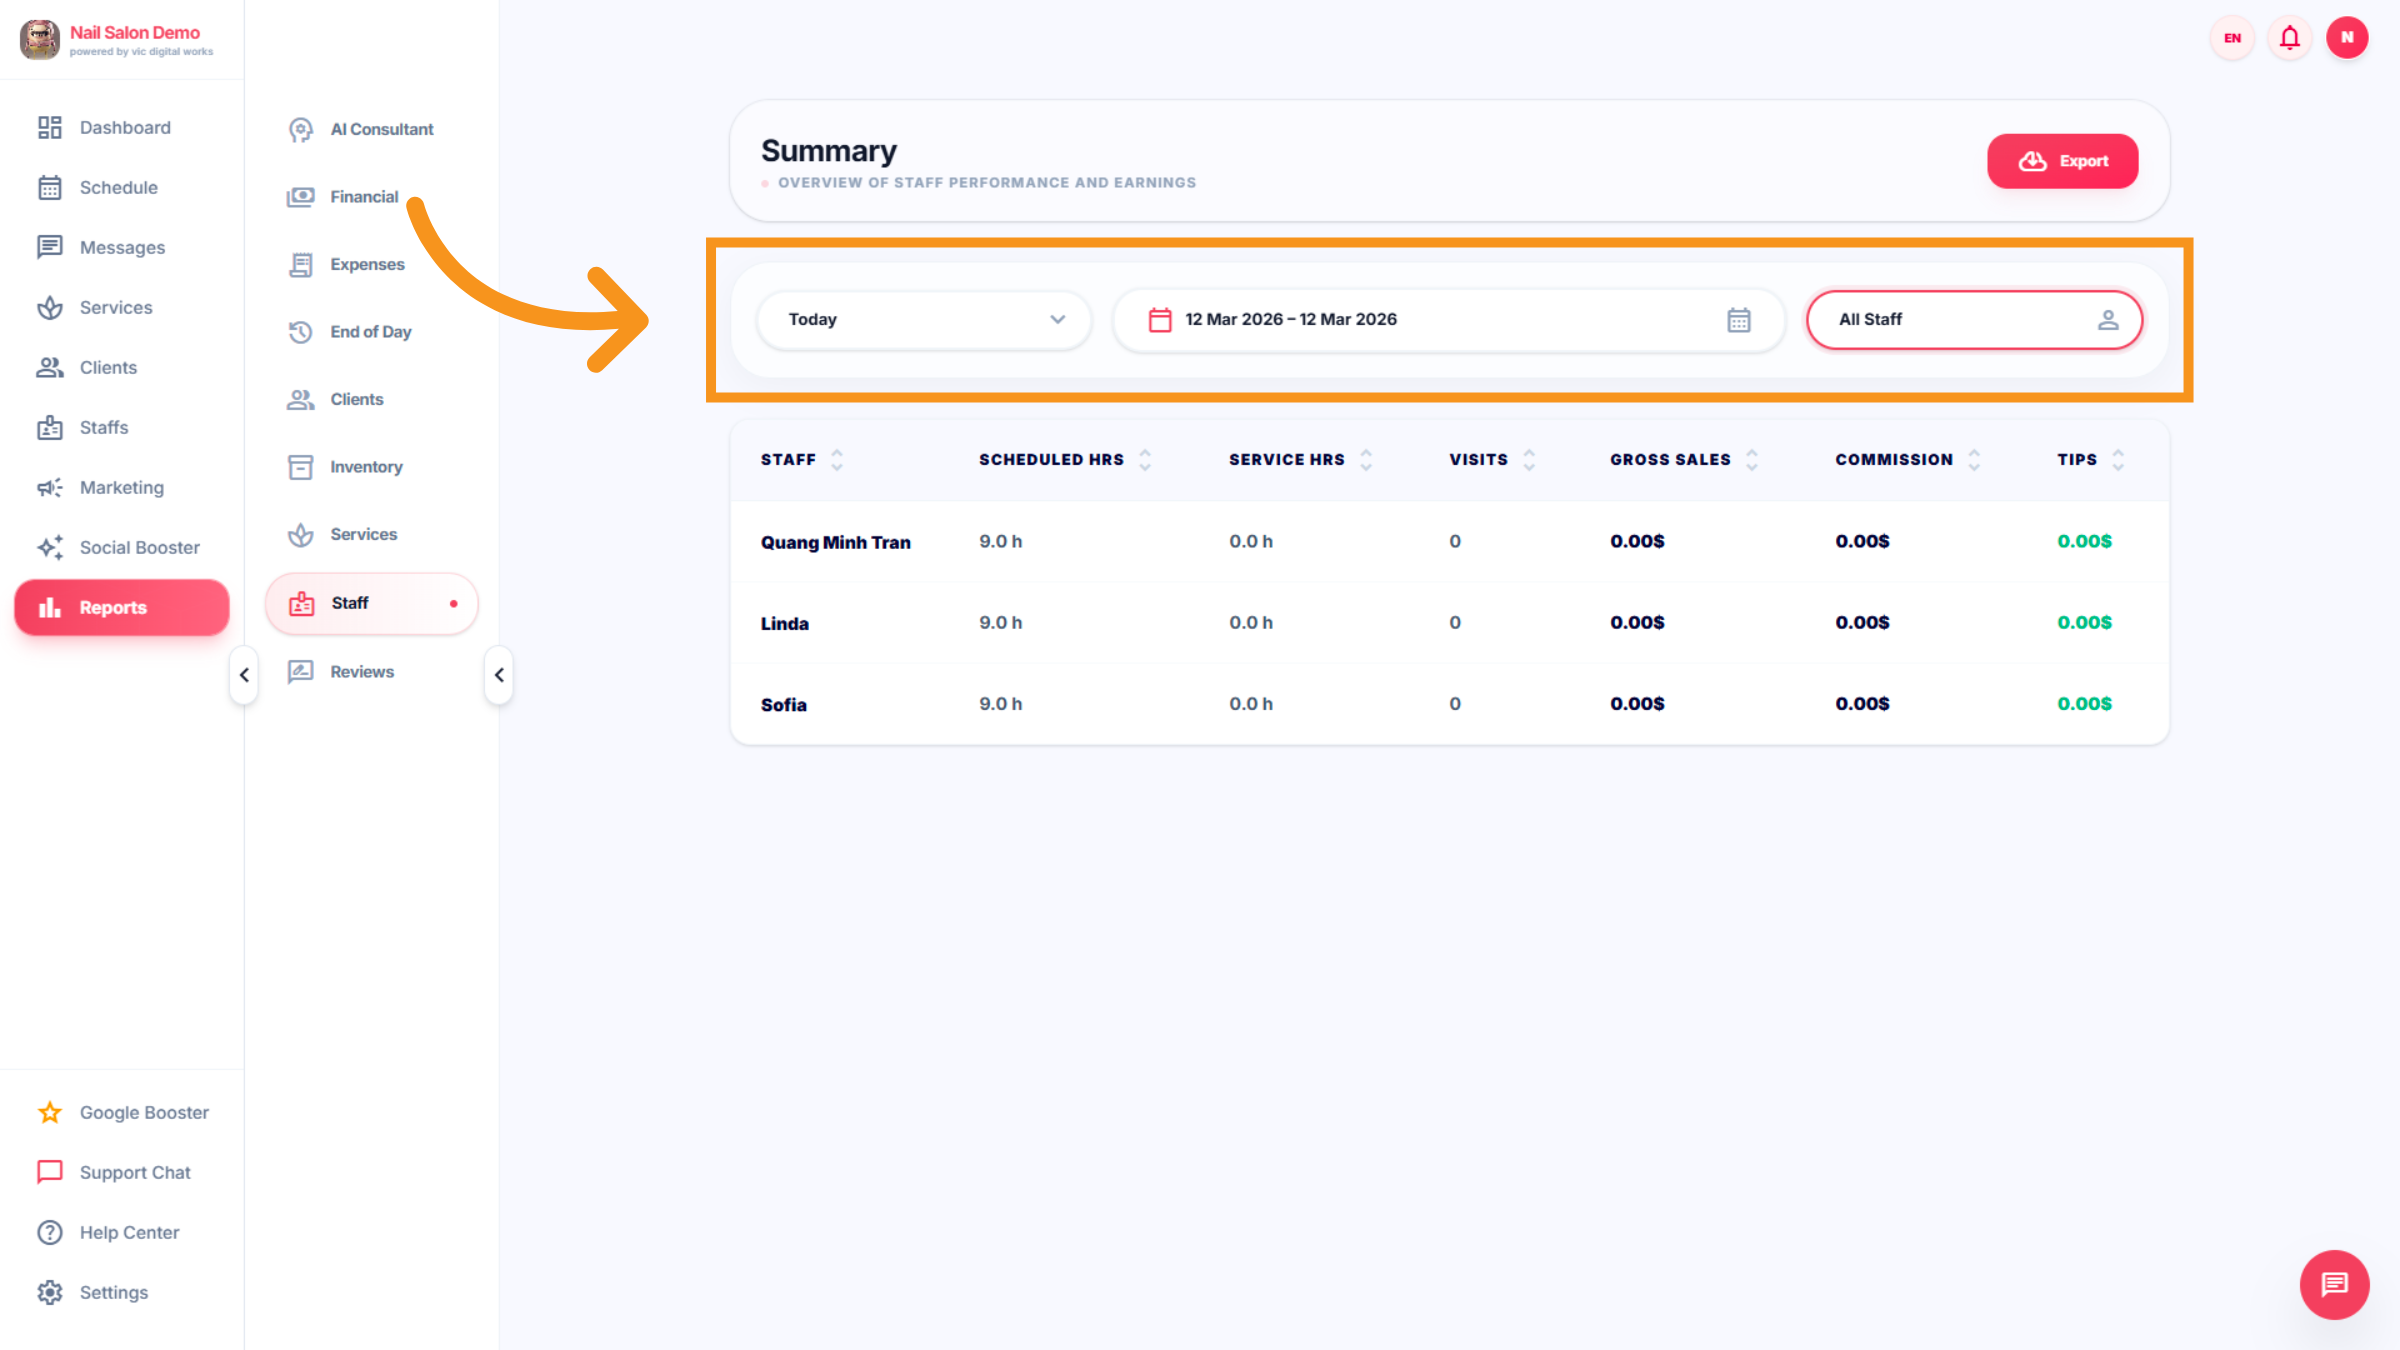
43. View Staff Summary
Click Summary to see an overview of staff performance and earnings.
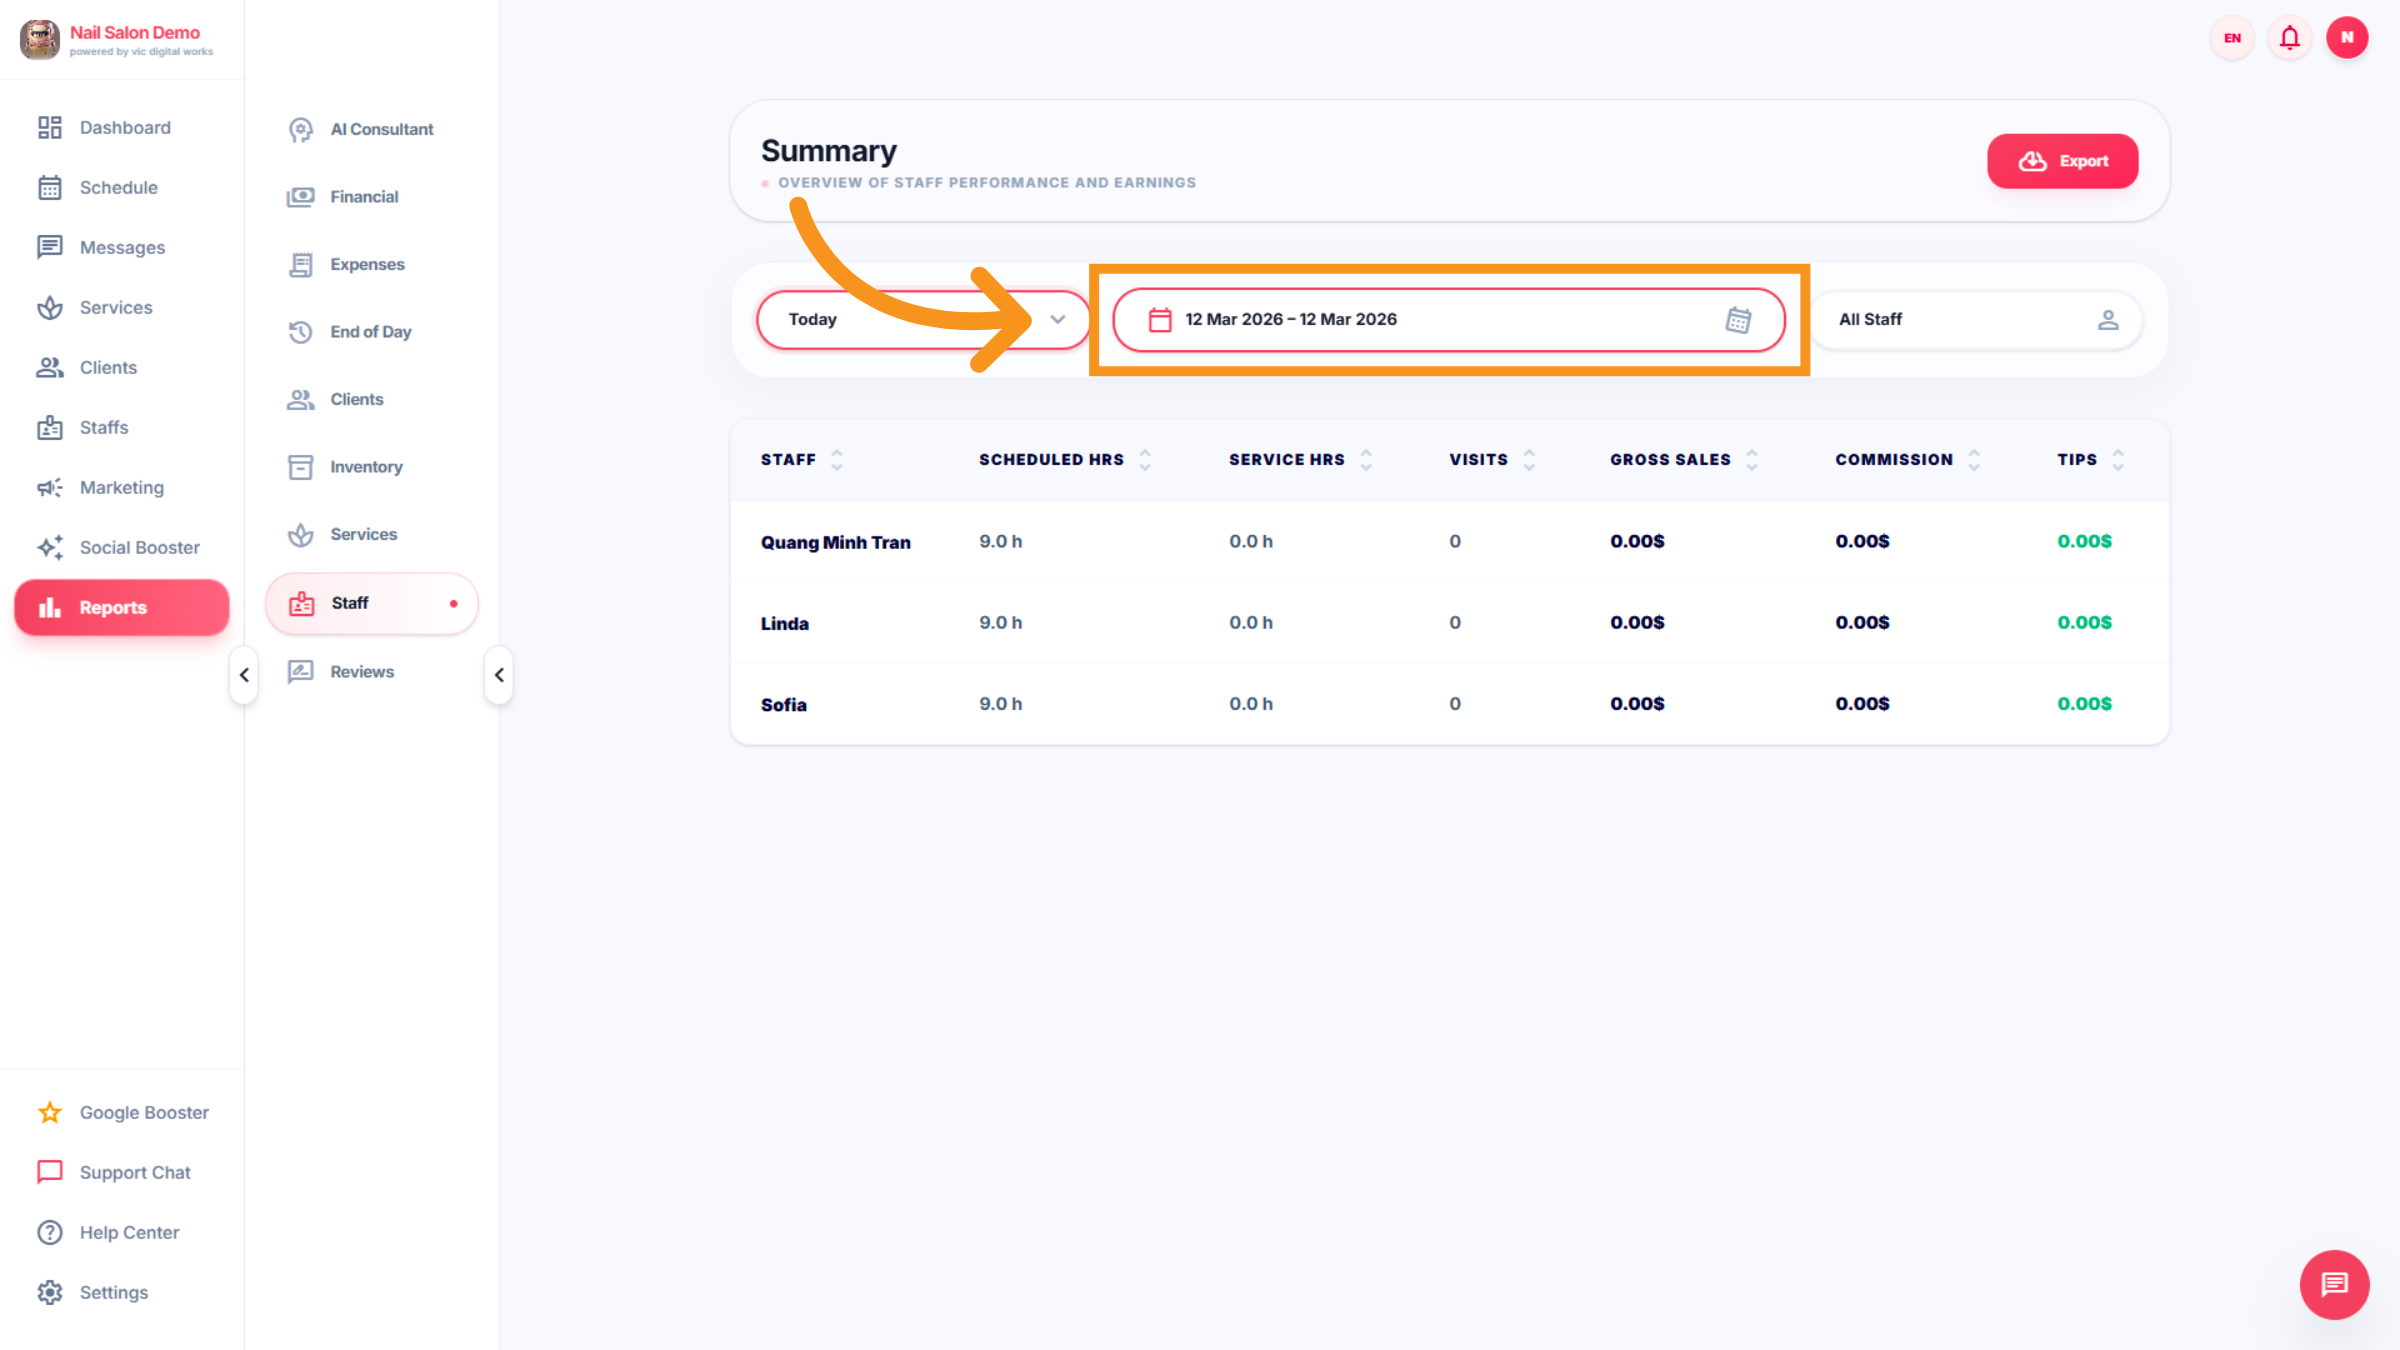
44. Select Staff Date Range
Click the date range selector to adjust the reporting period for staff performance.
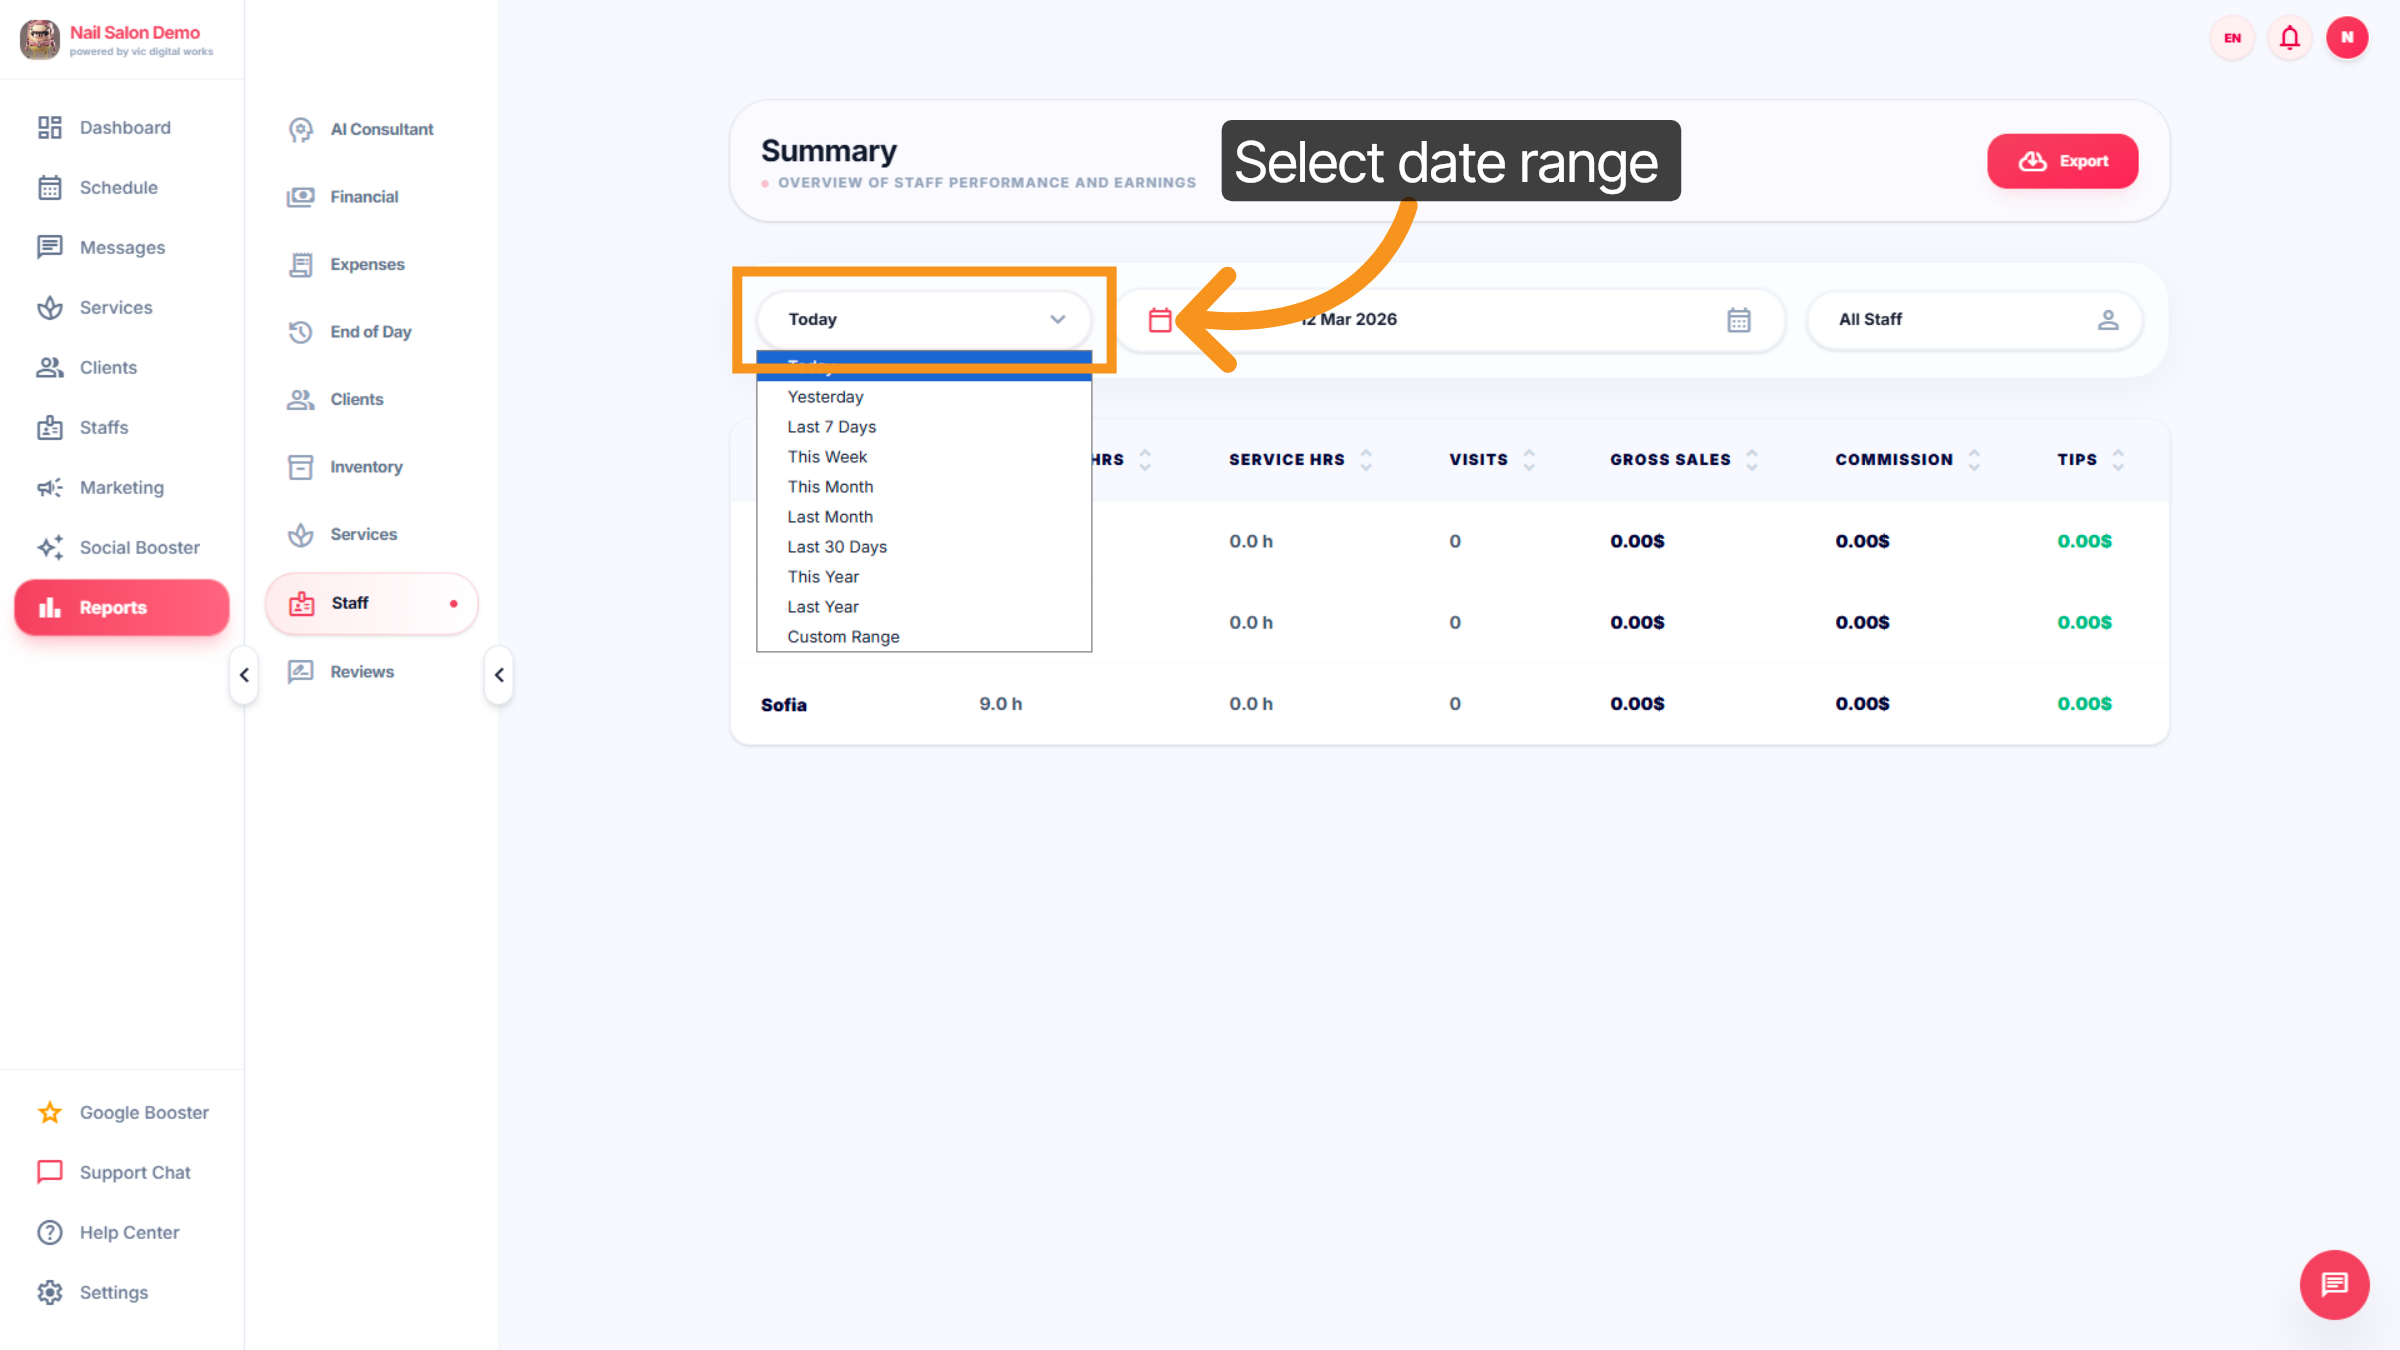
45. Adjust Staff Date Range
Click the date range selector again to refine the staff data period.
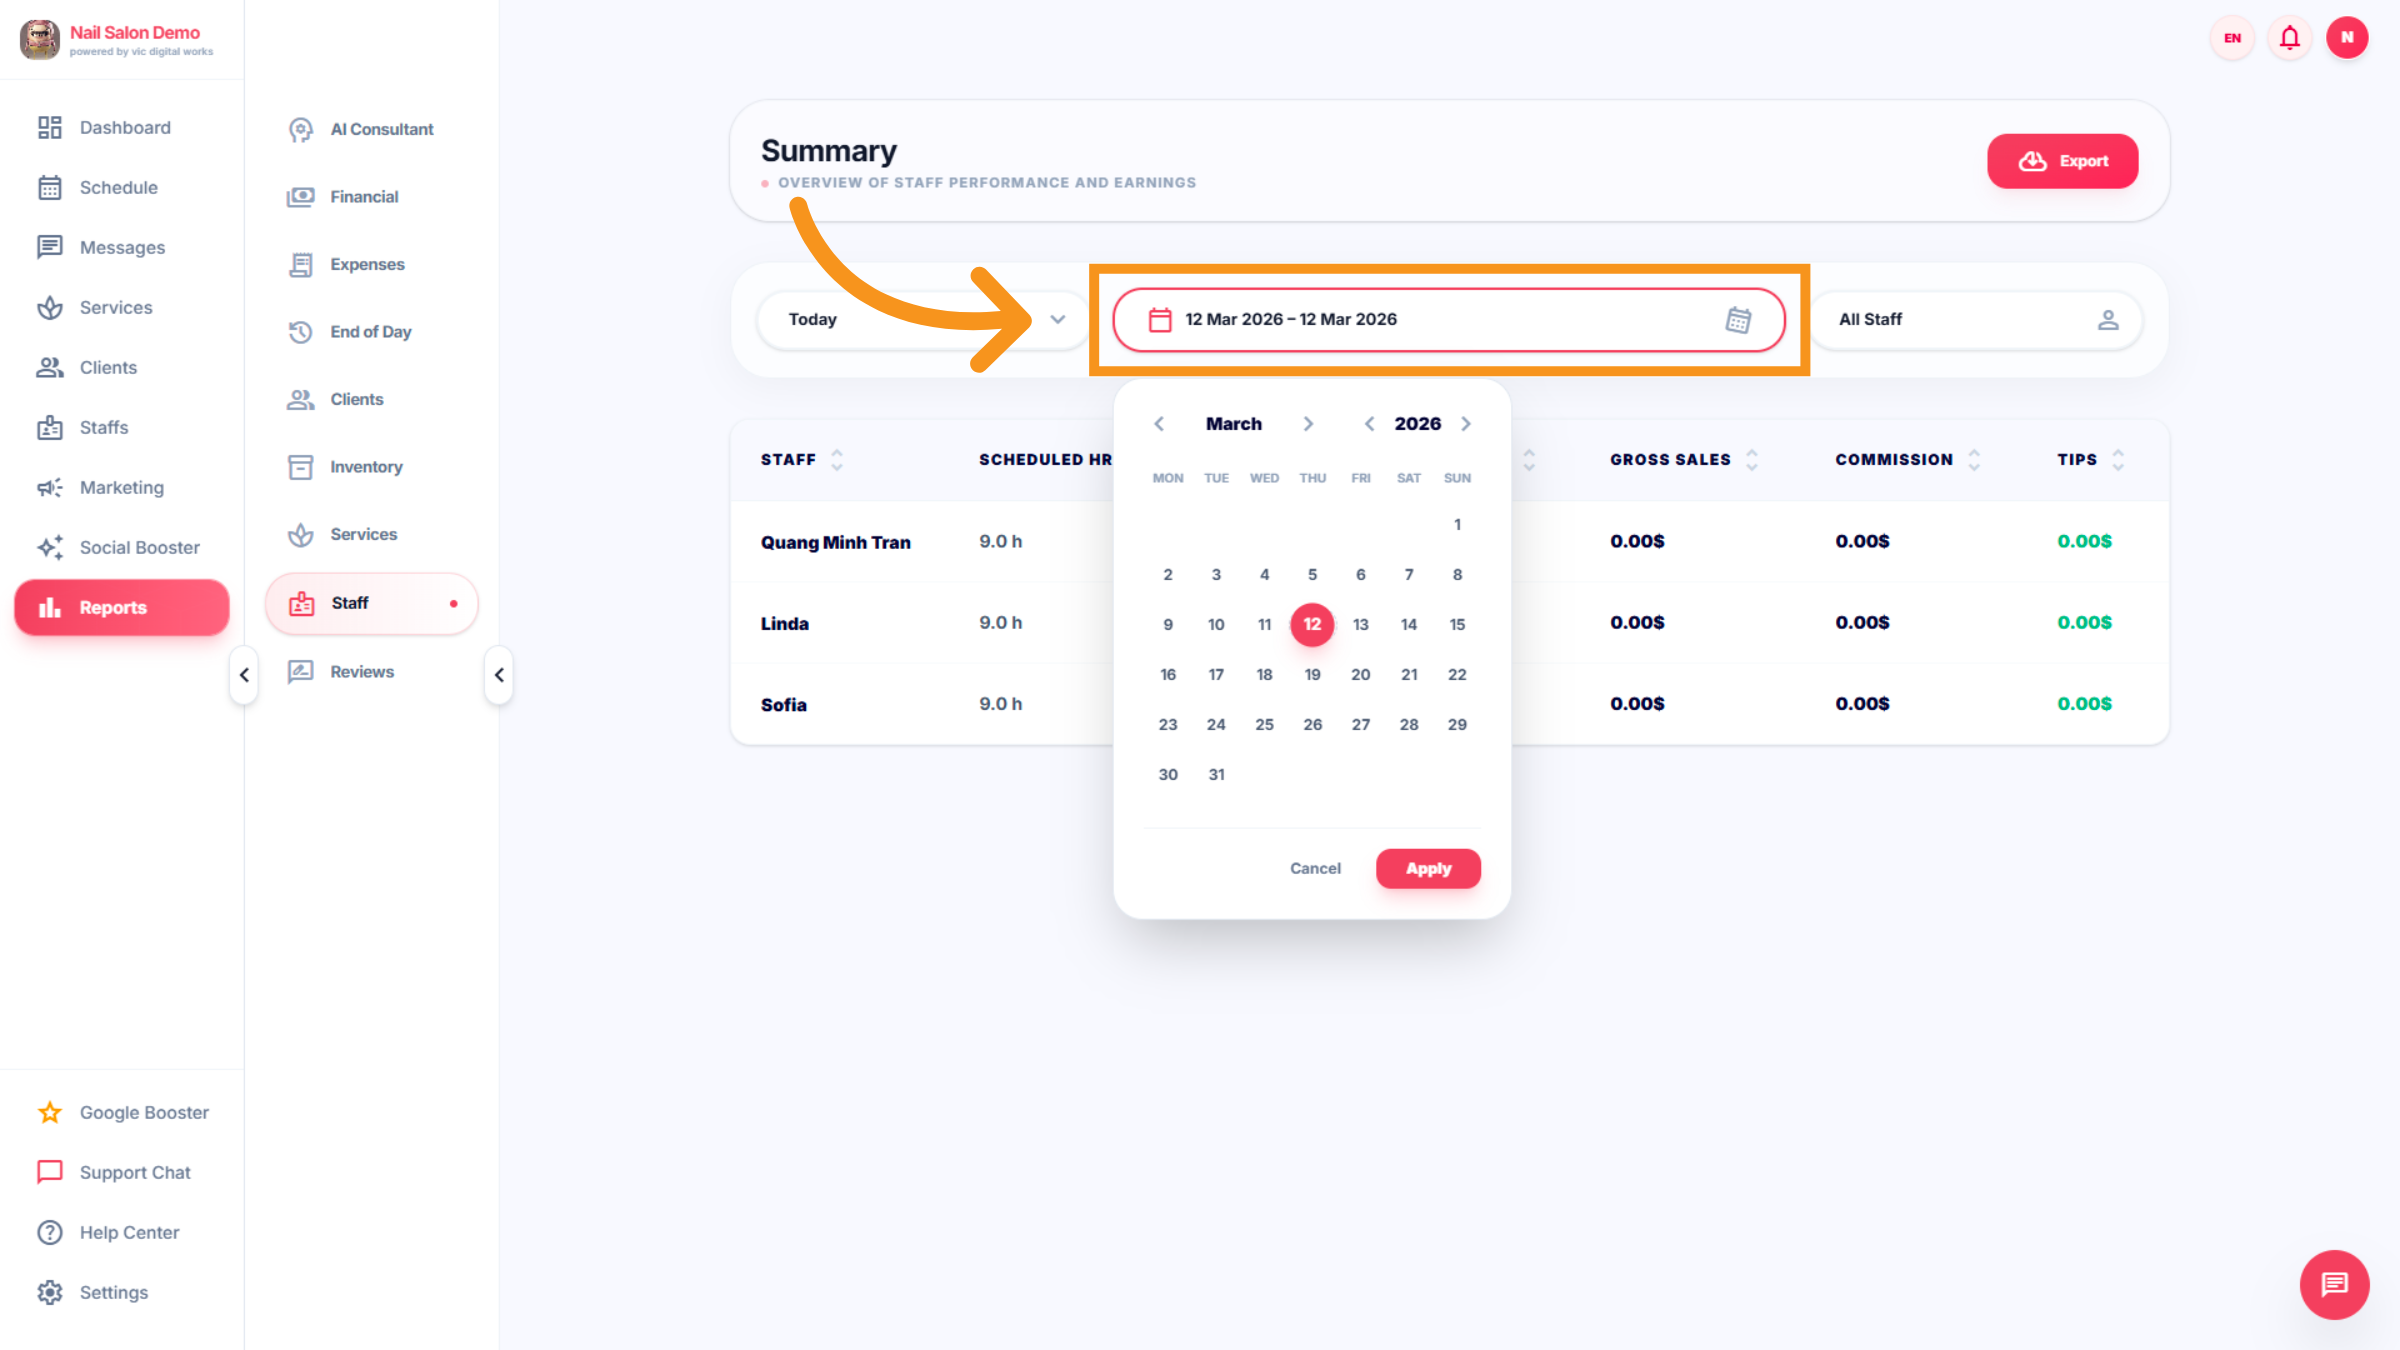
46. Choose Specific Date
Click the calendar to access detailed staff performance data.
47. Confirm Date Selection
Click the calendar again to confirm the selected date for staff reports.
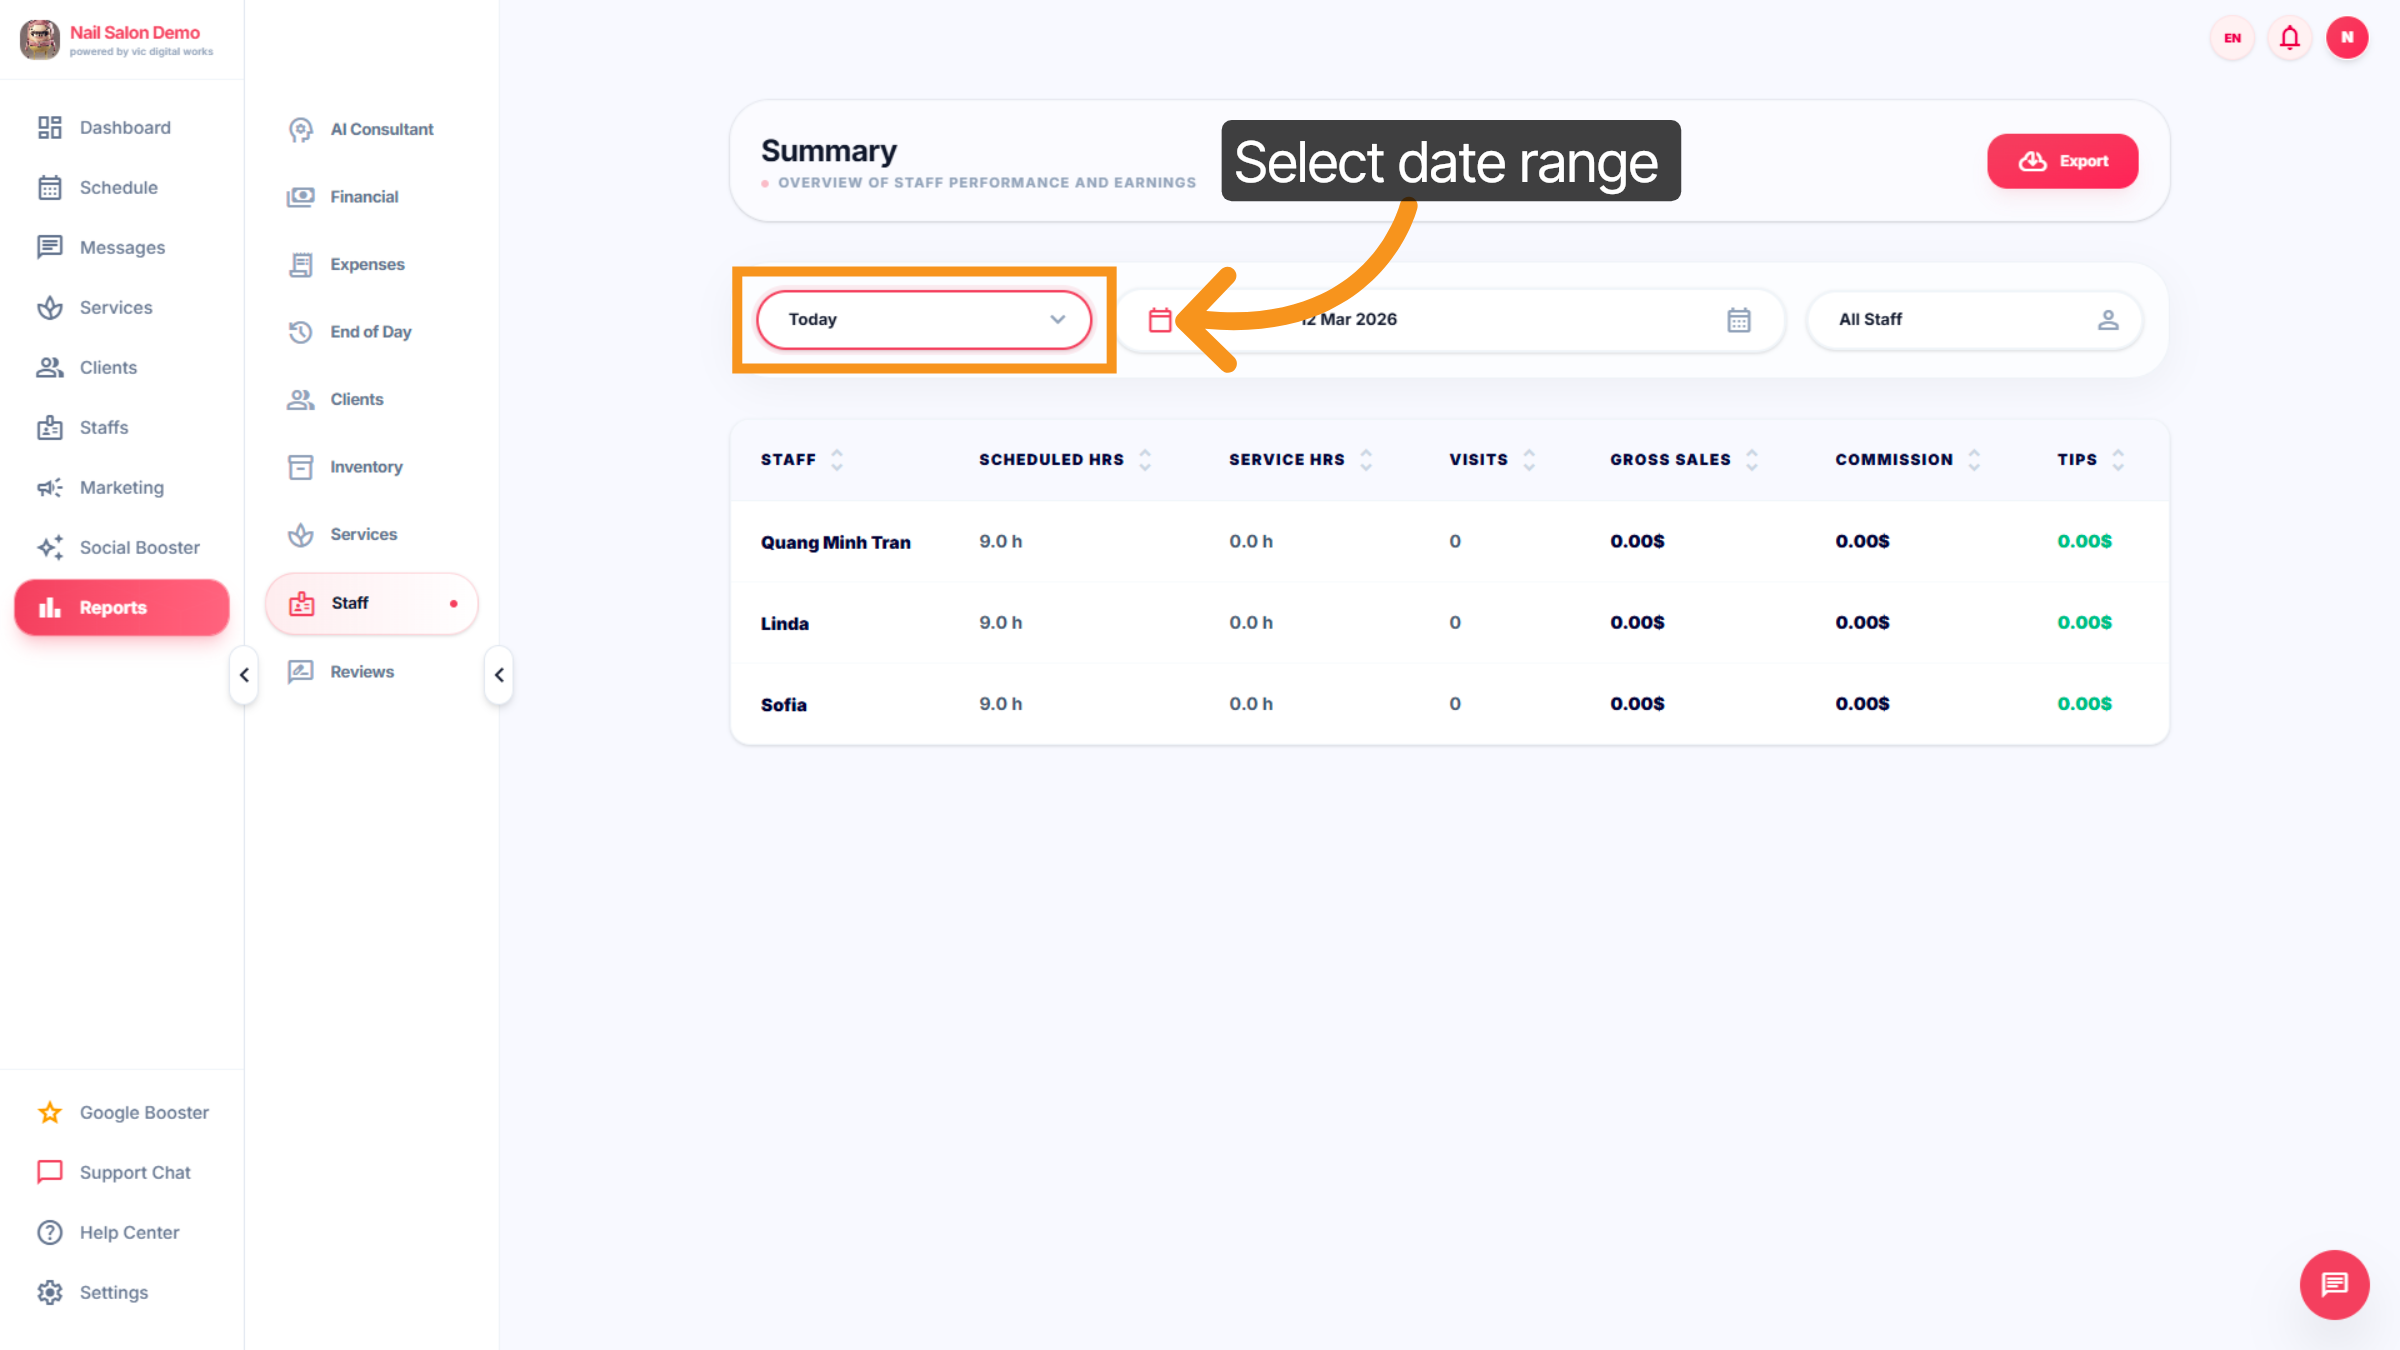
48. Select Staff Member
Click a staff member's name such as Quang Minh Tran, Linda, or Sofia to view individual metrics.
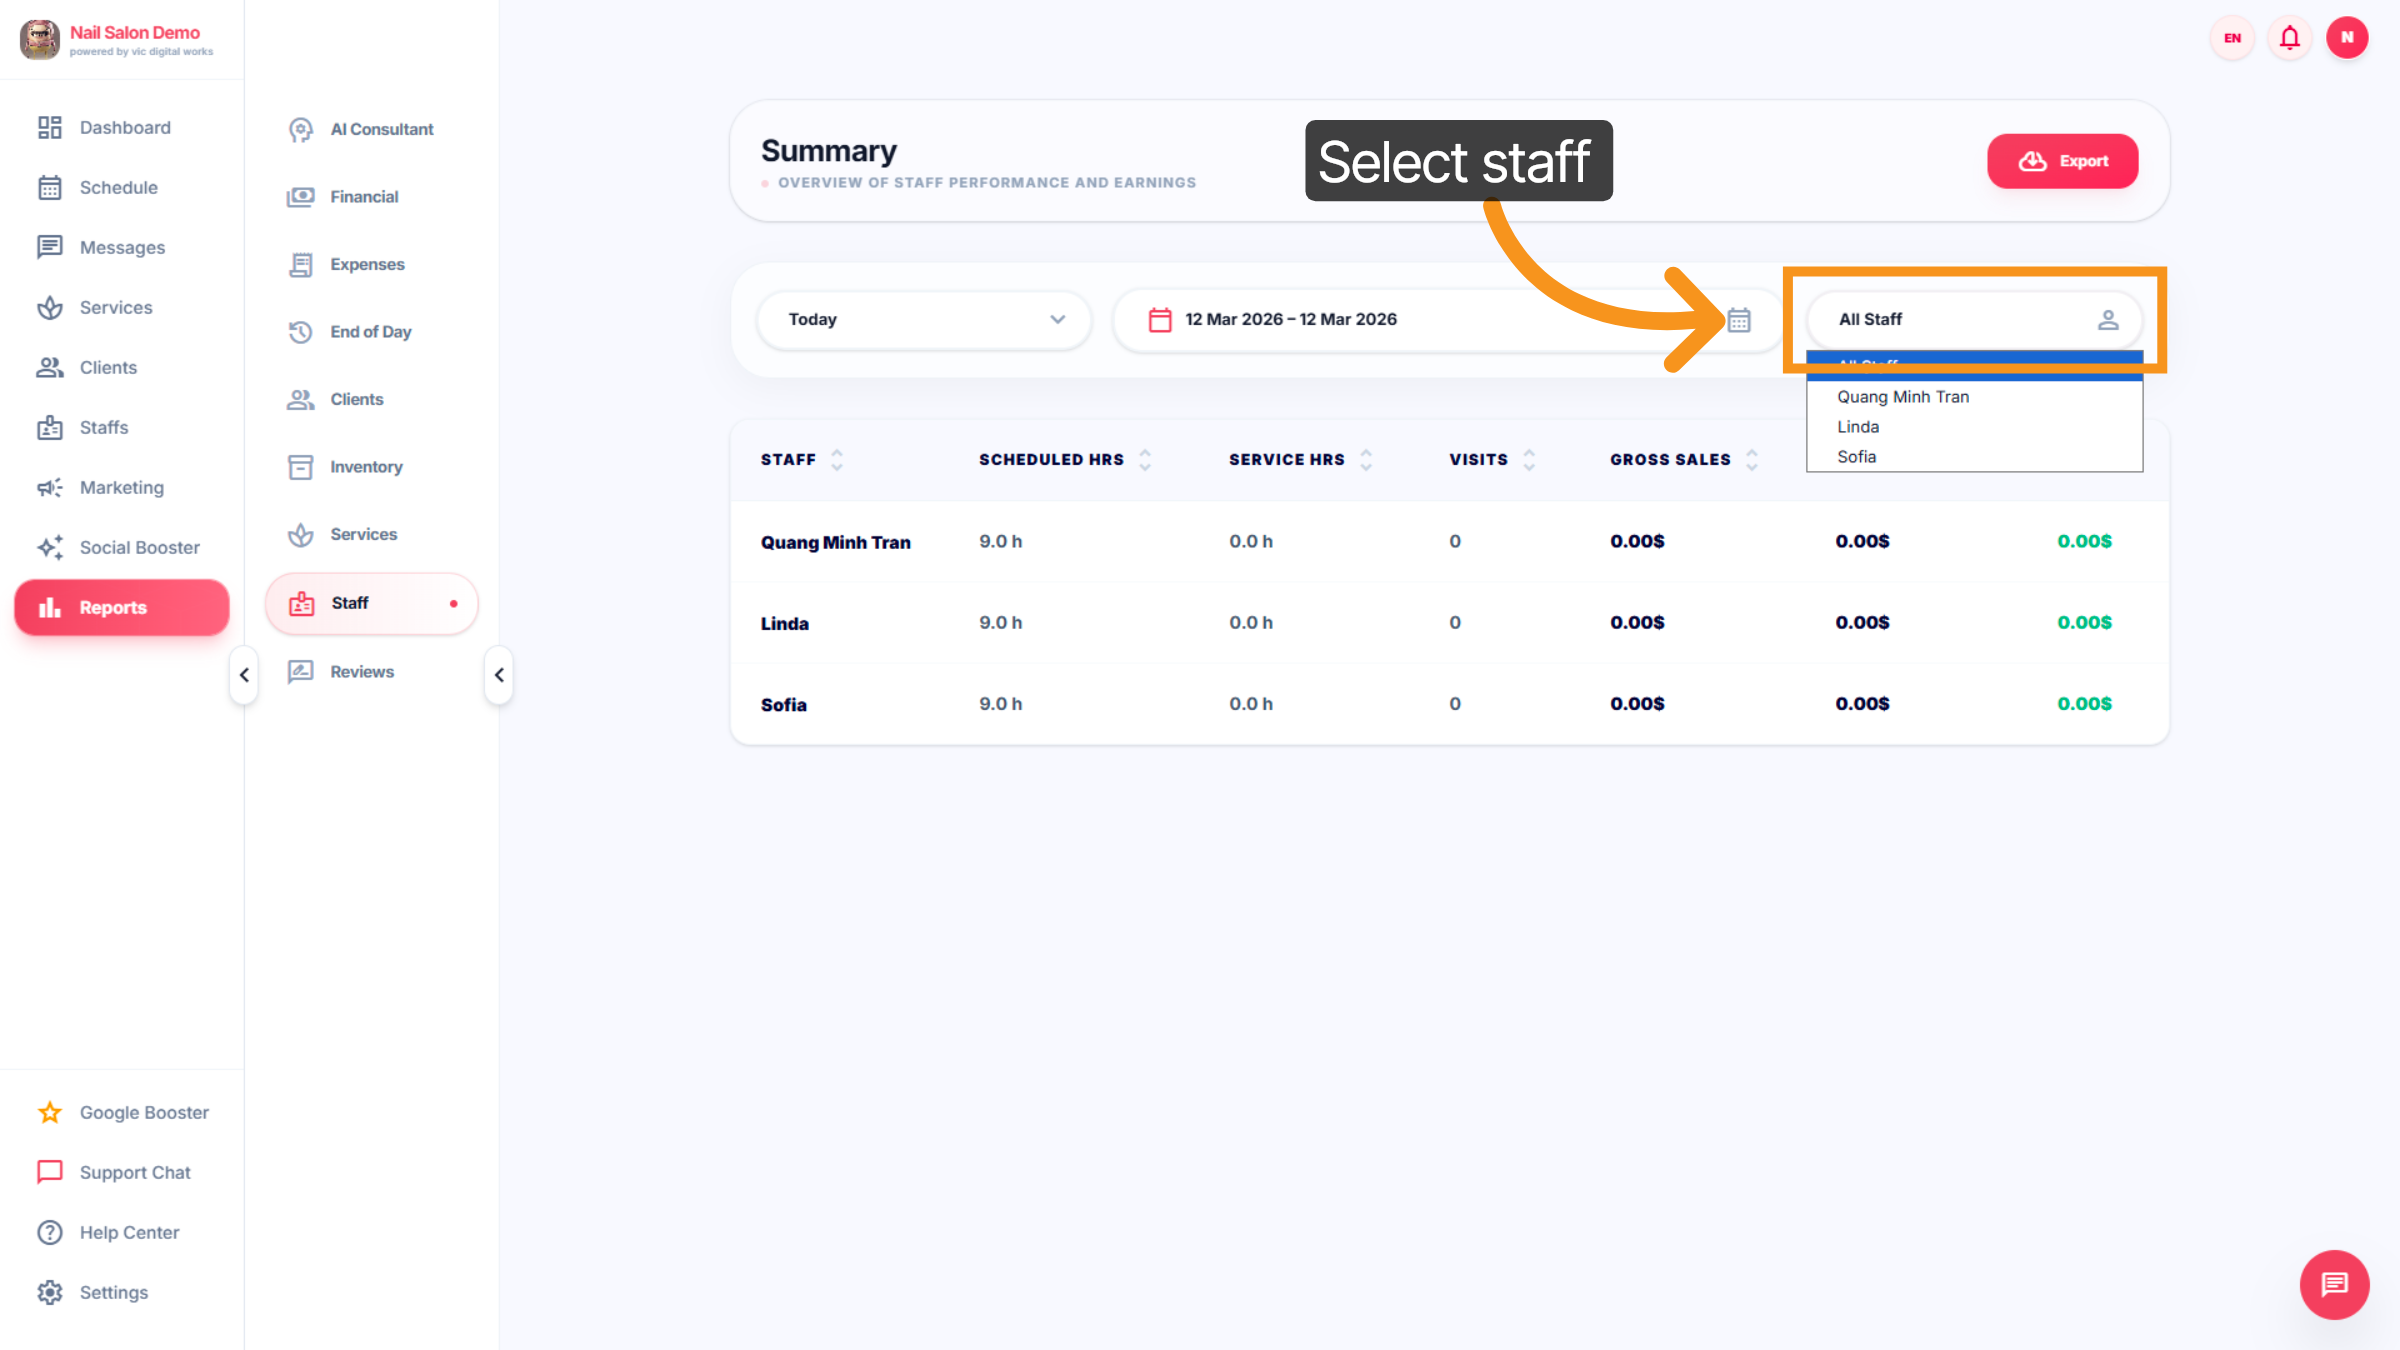
49. Staff Data
Click the filter to choose between All Staff or specific individuals for performance review.
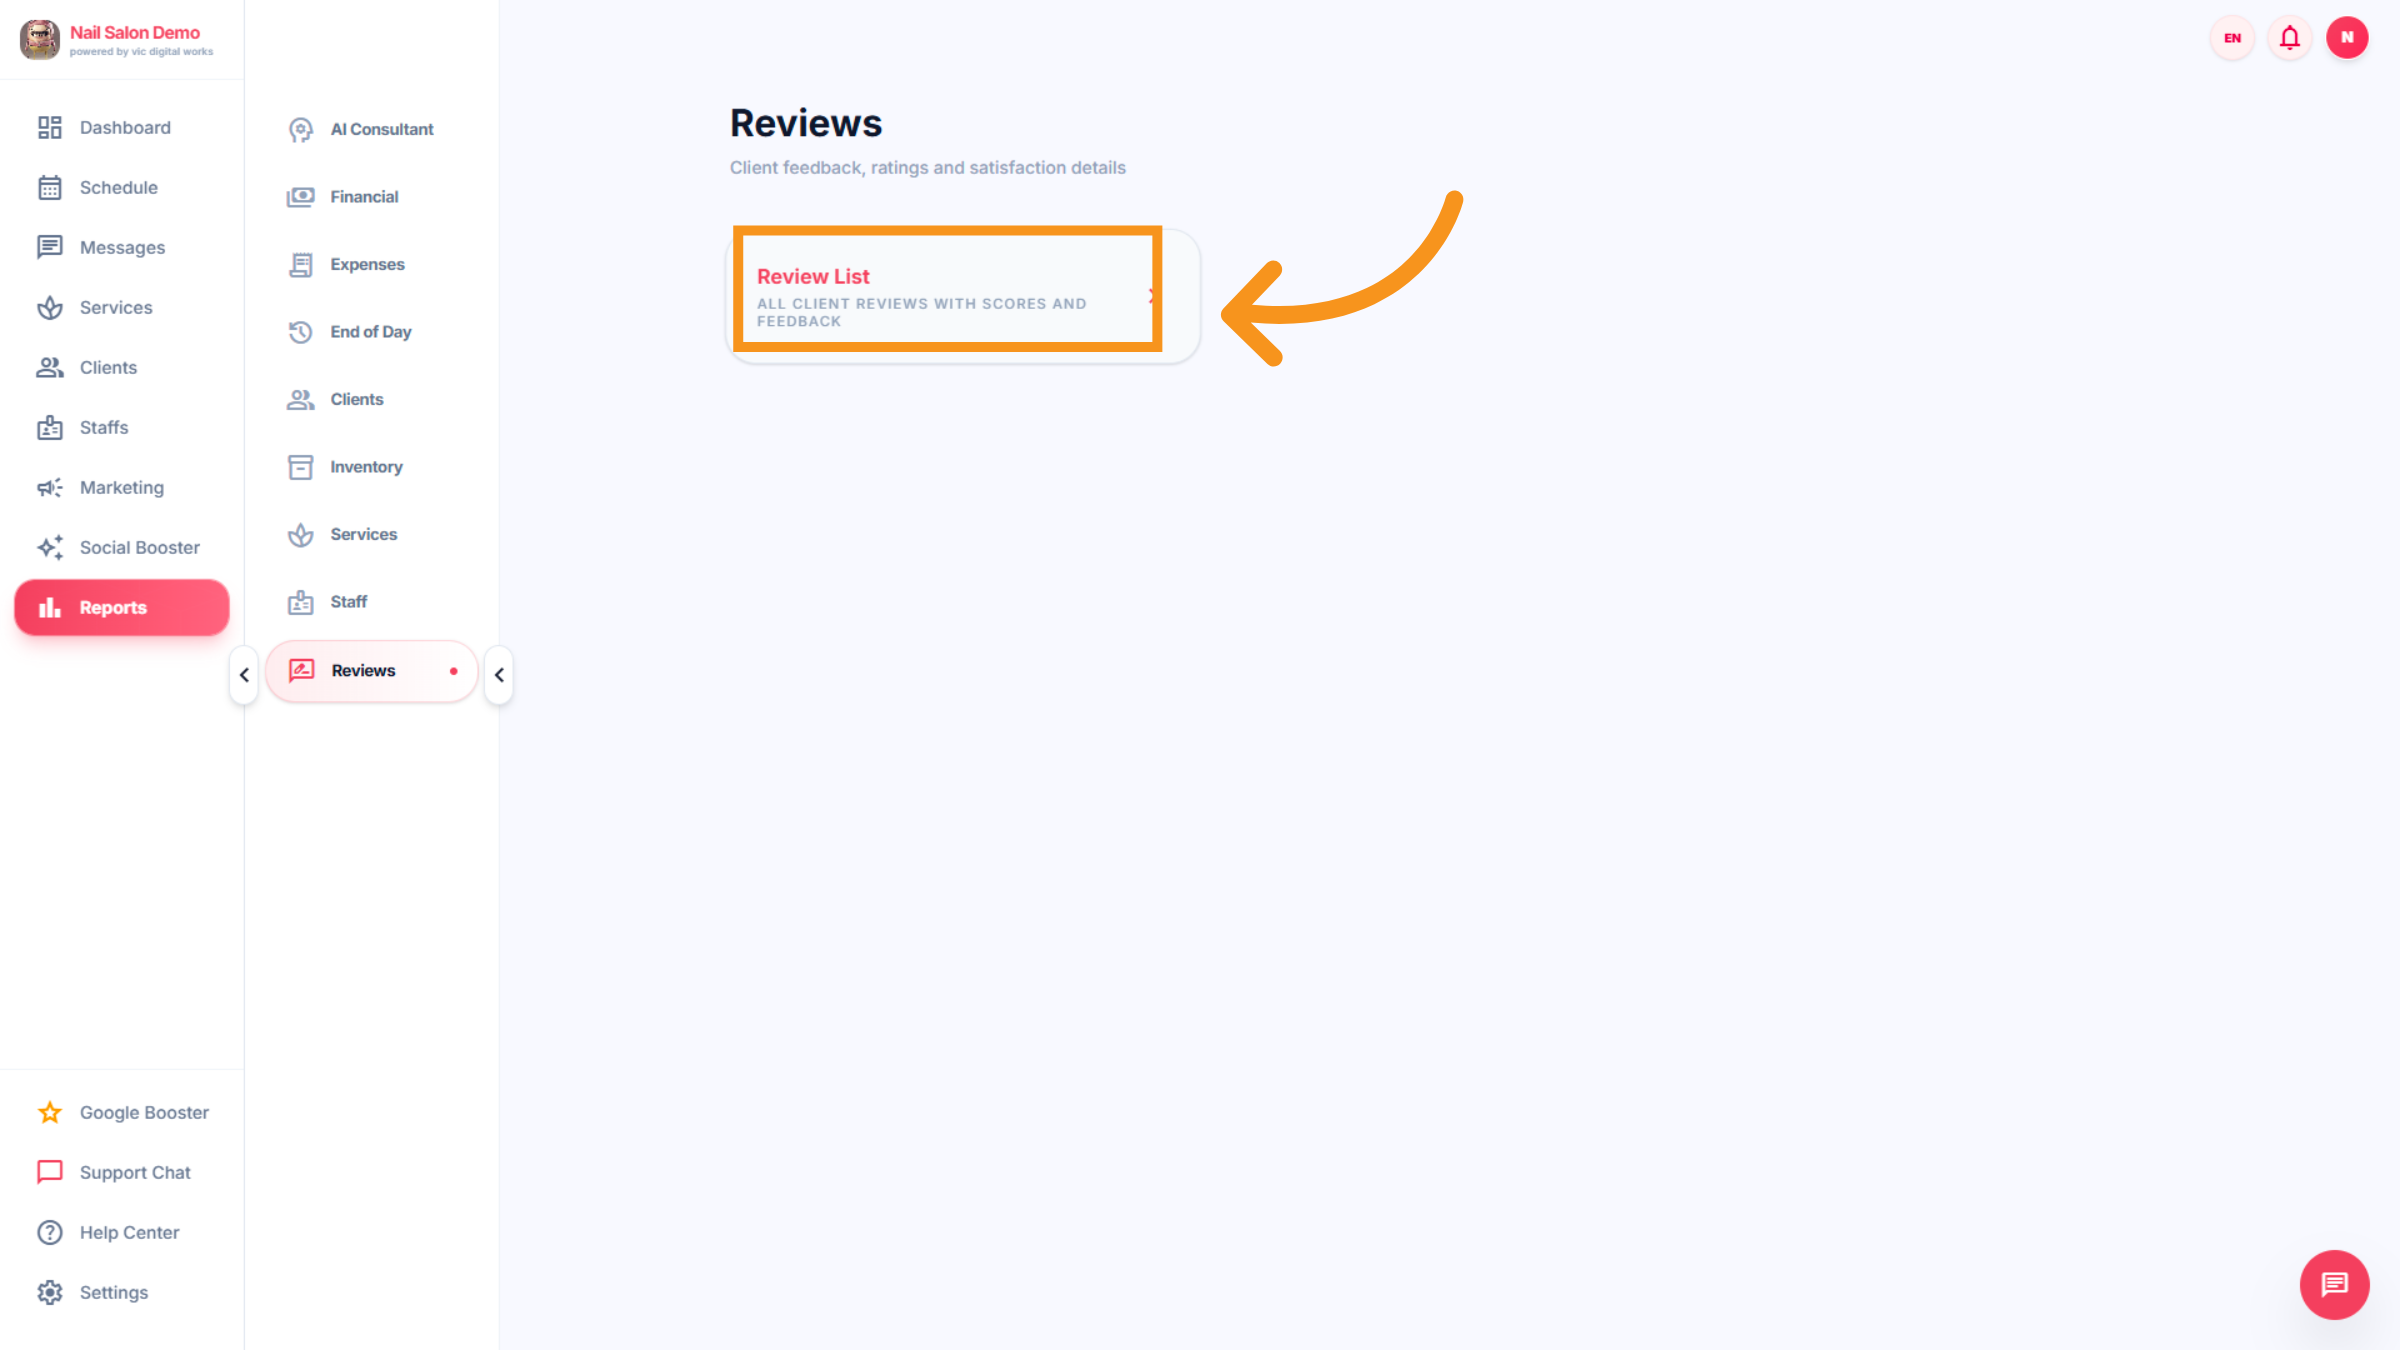
50. View Client Reviews
Click All client reviews with scores and feedback to analyze customer satisfaction Click All client reviews with scores and feedback to analyze customer satisfaction.
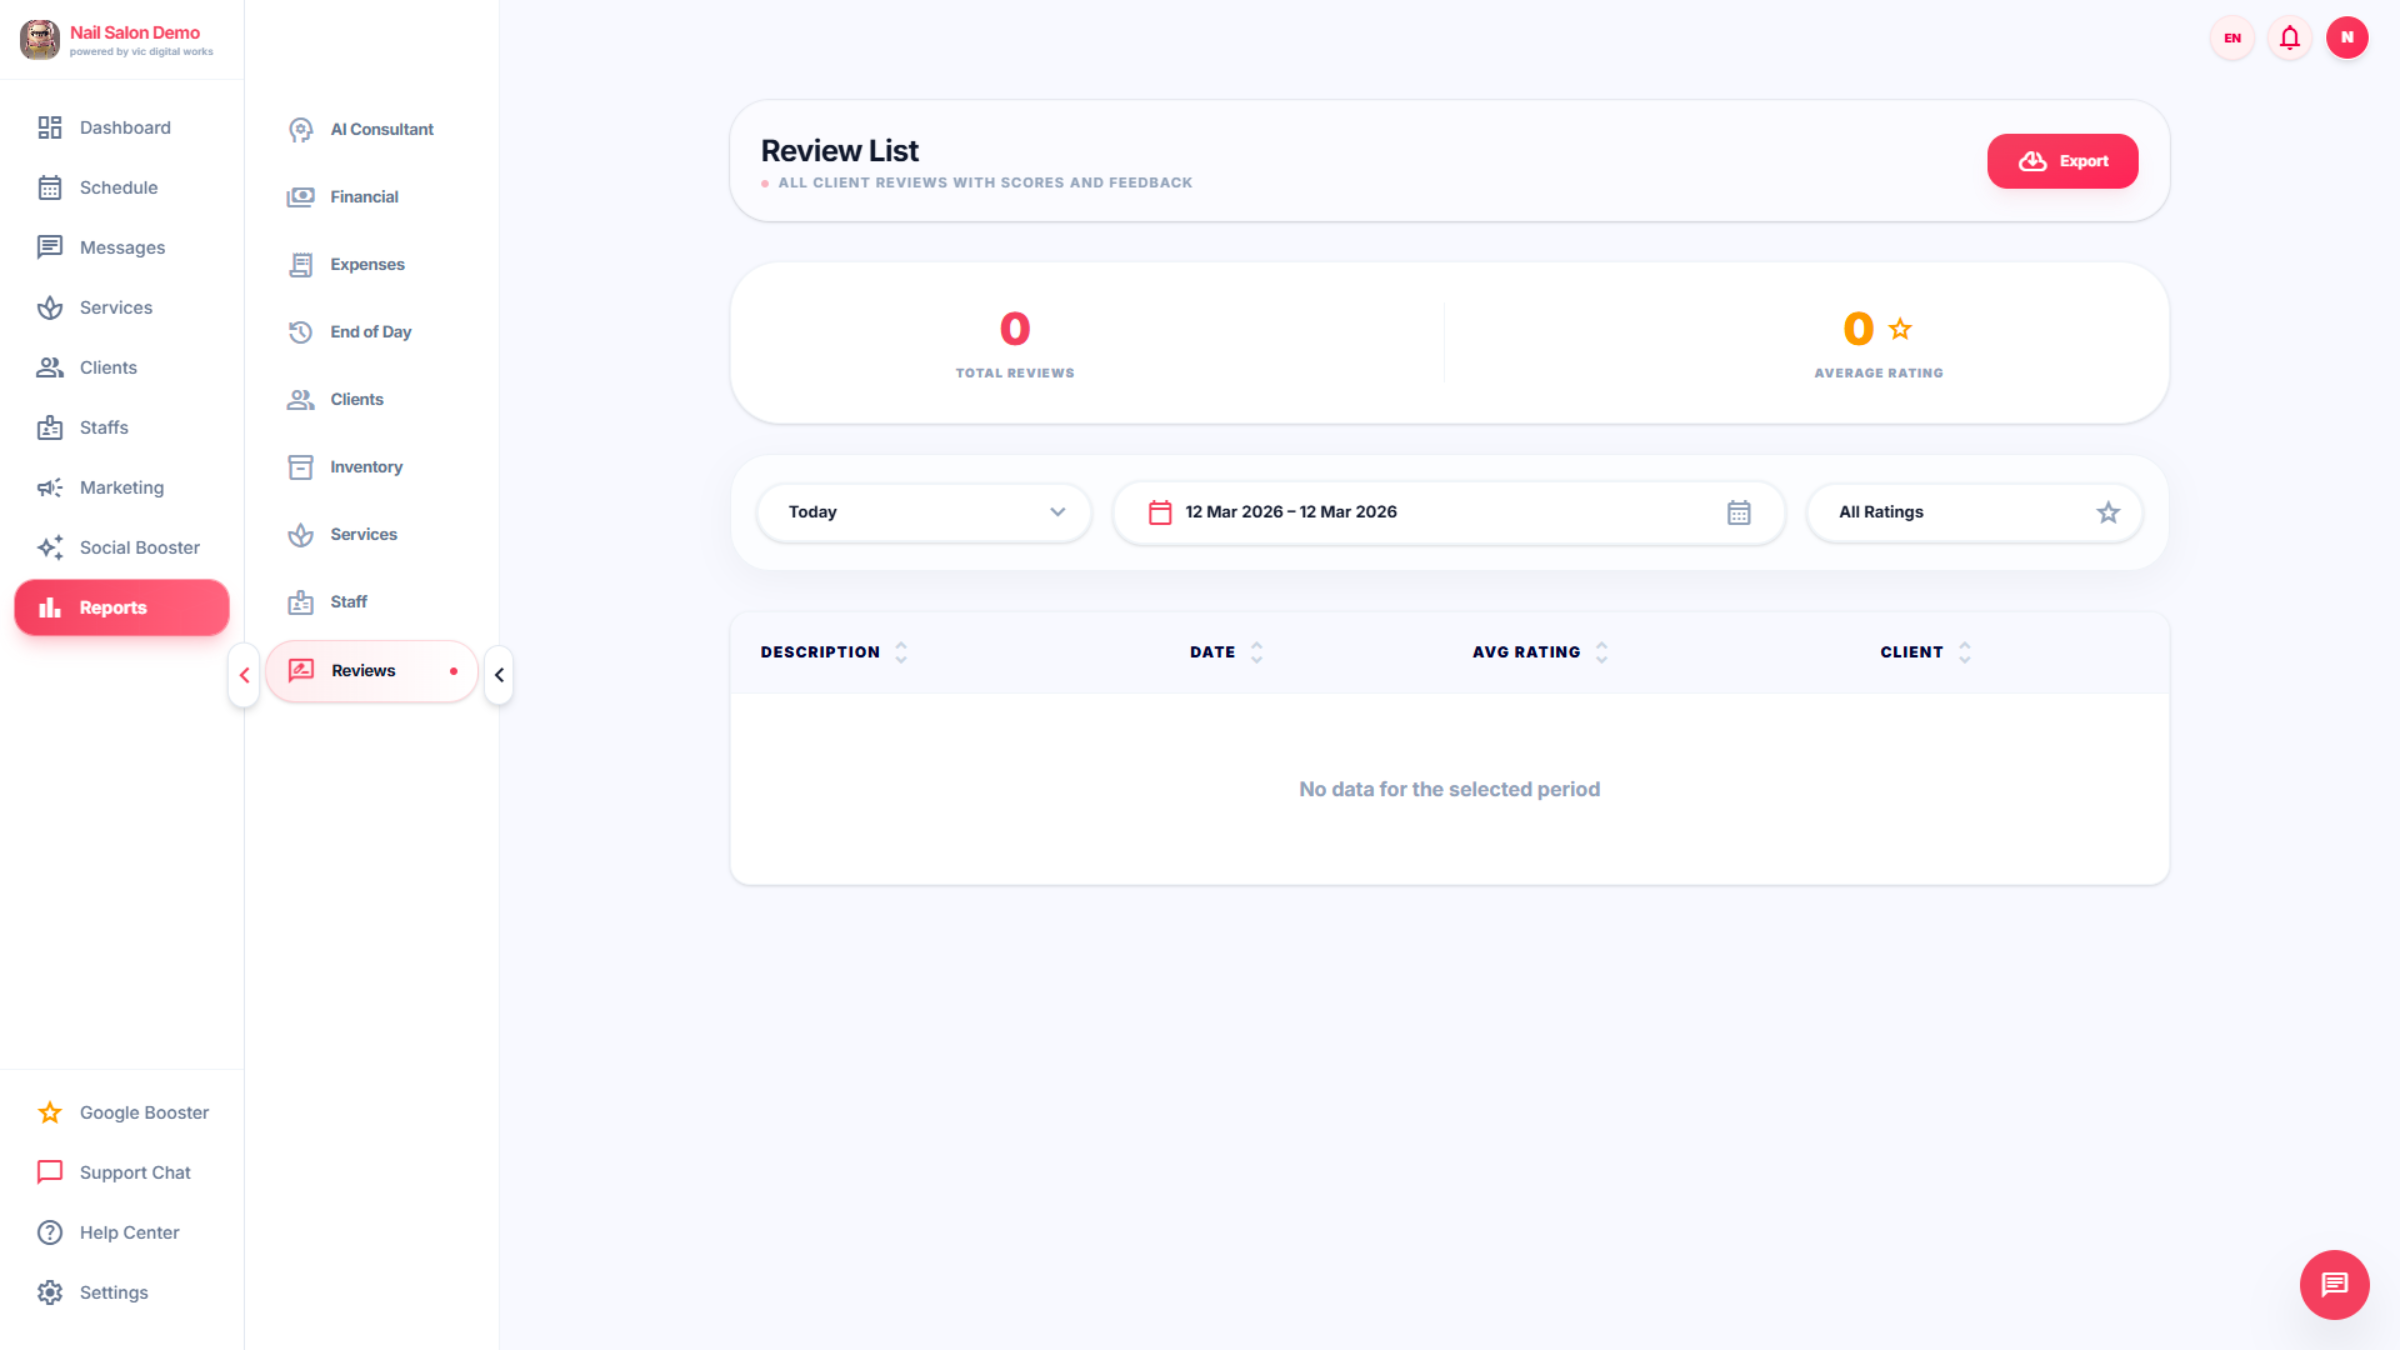
51. Review list
Review the list to check client feedback by date/time, description, average rating, and client information.
You have successfully configured business insights, reviewed financial summaries, managed expenses, and analyzed staff and client data within the Leo-booking Salon Dashboard. Next, explore advanced reporting features or customize your dashboard for enhanced business management.