LEO-BOOKING/Marketing
Configure Automated Campaigns And Manage Templates In Leo-booking
This tutorial provides a step-by-step guide for setting up related Marketing.
Go to leo-booking.com
1. Introduction
You will learn how to configure campaign settings, create client lists, and customize SMS and email templates for effective marketing. **This Marketing feature will be included in the salon’s subscription plan
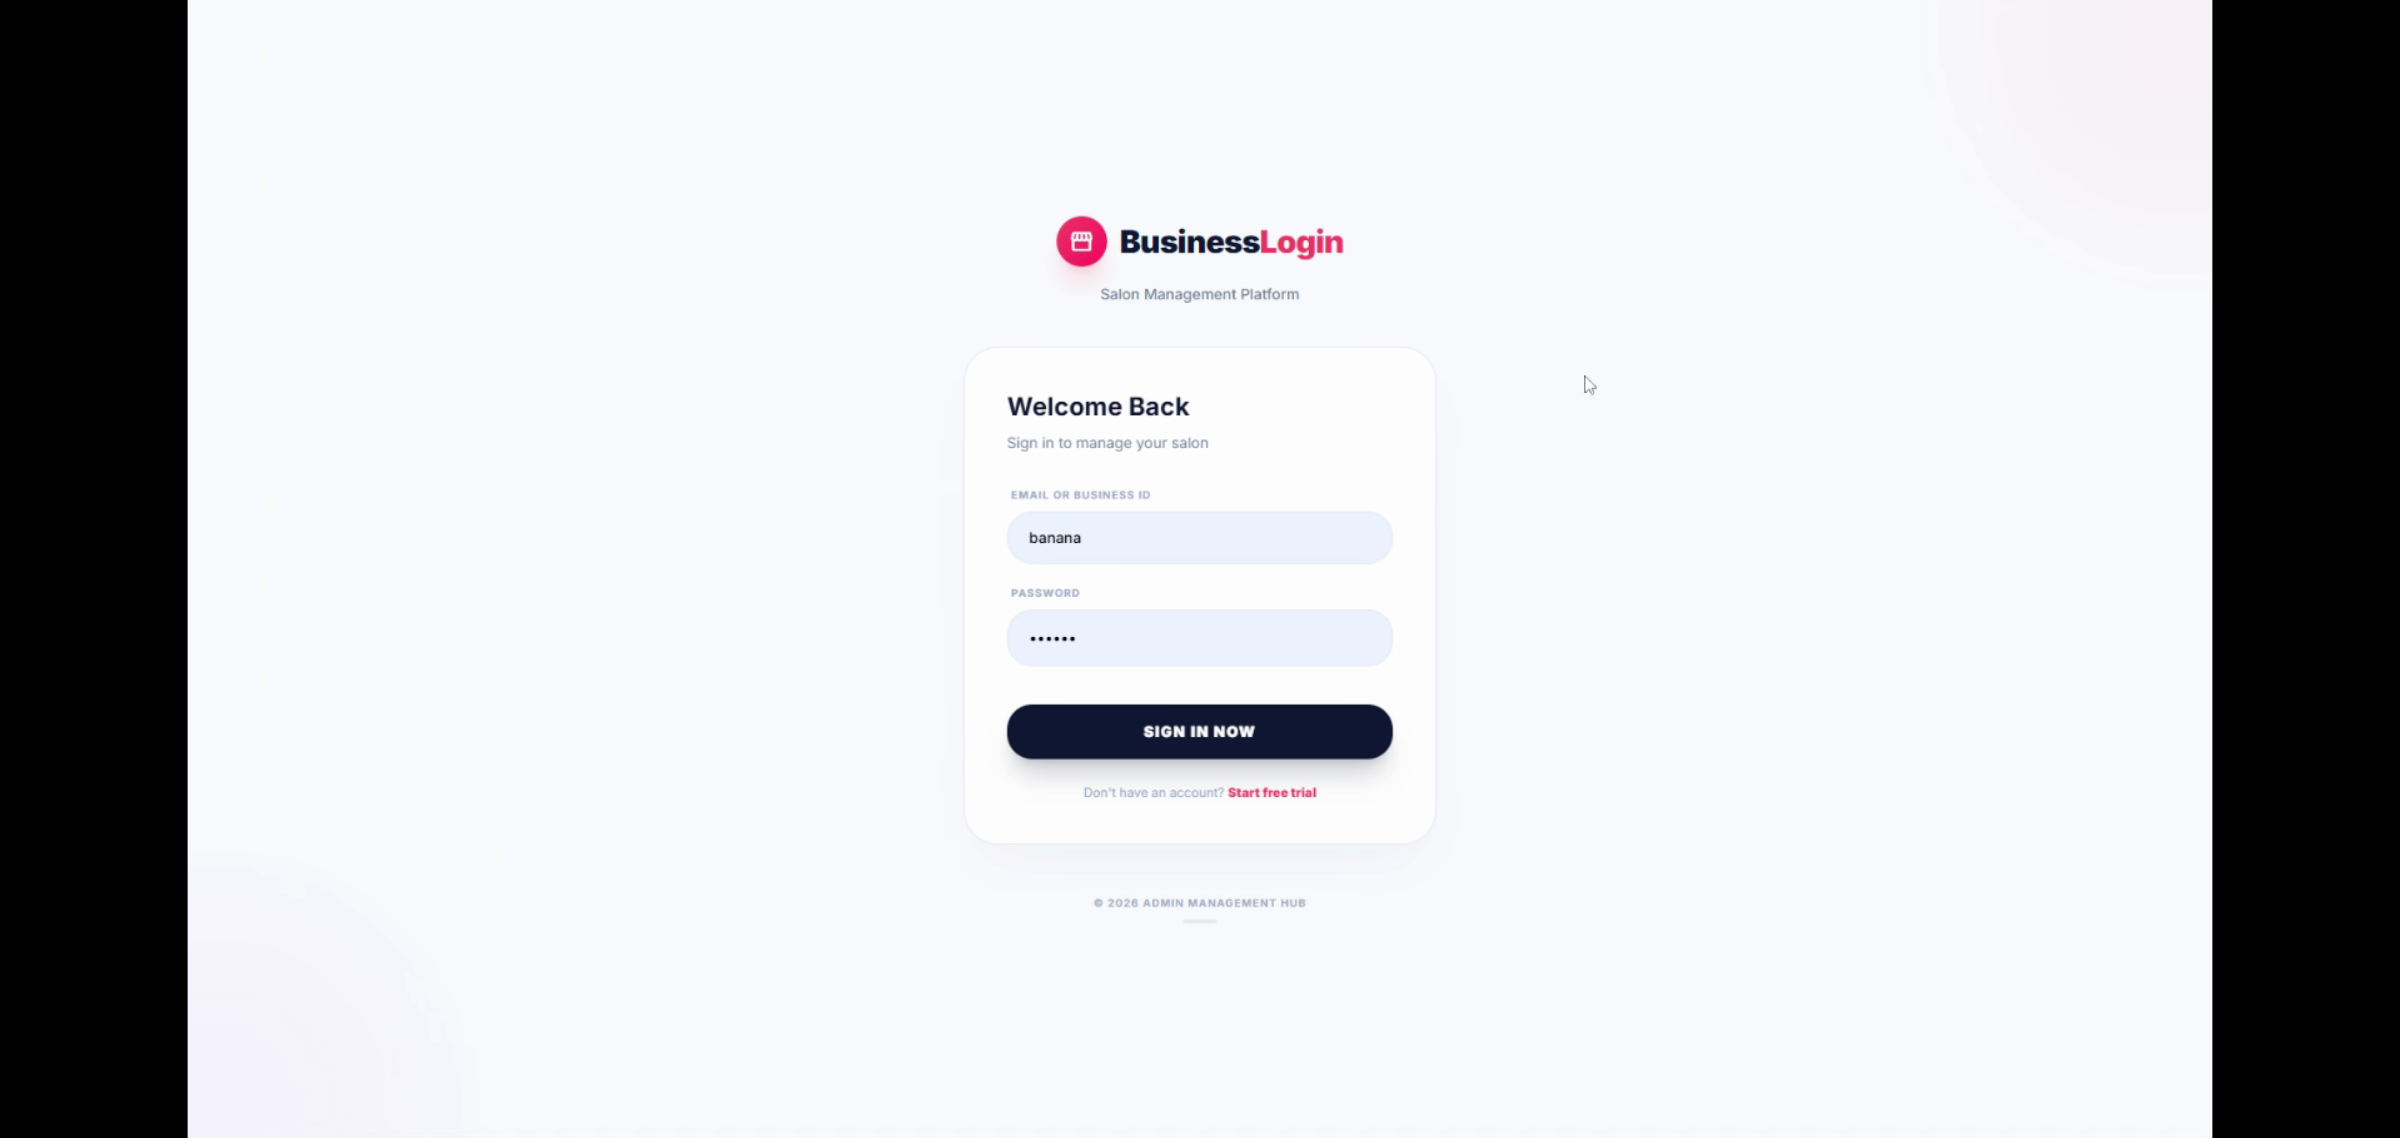
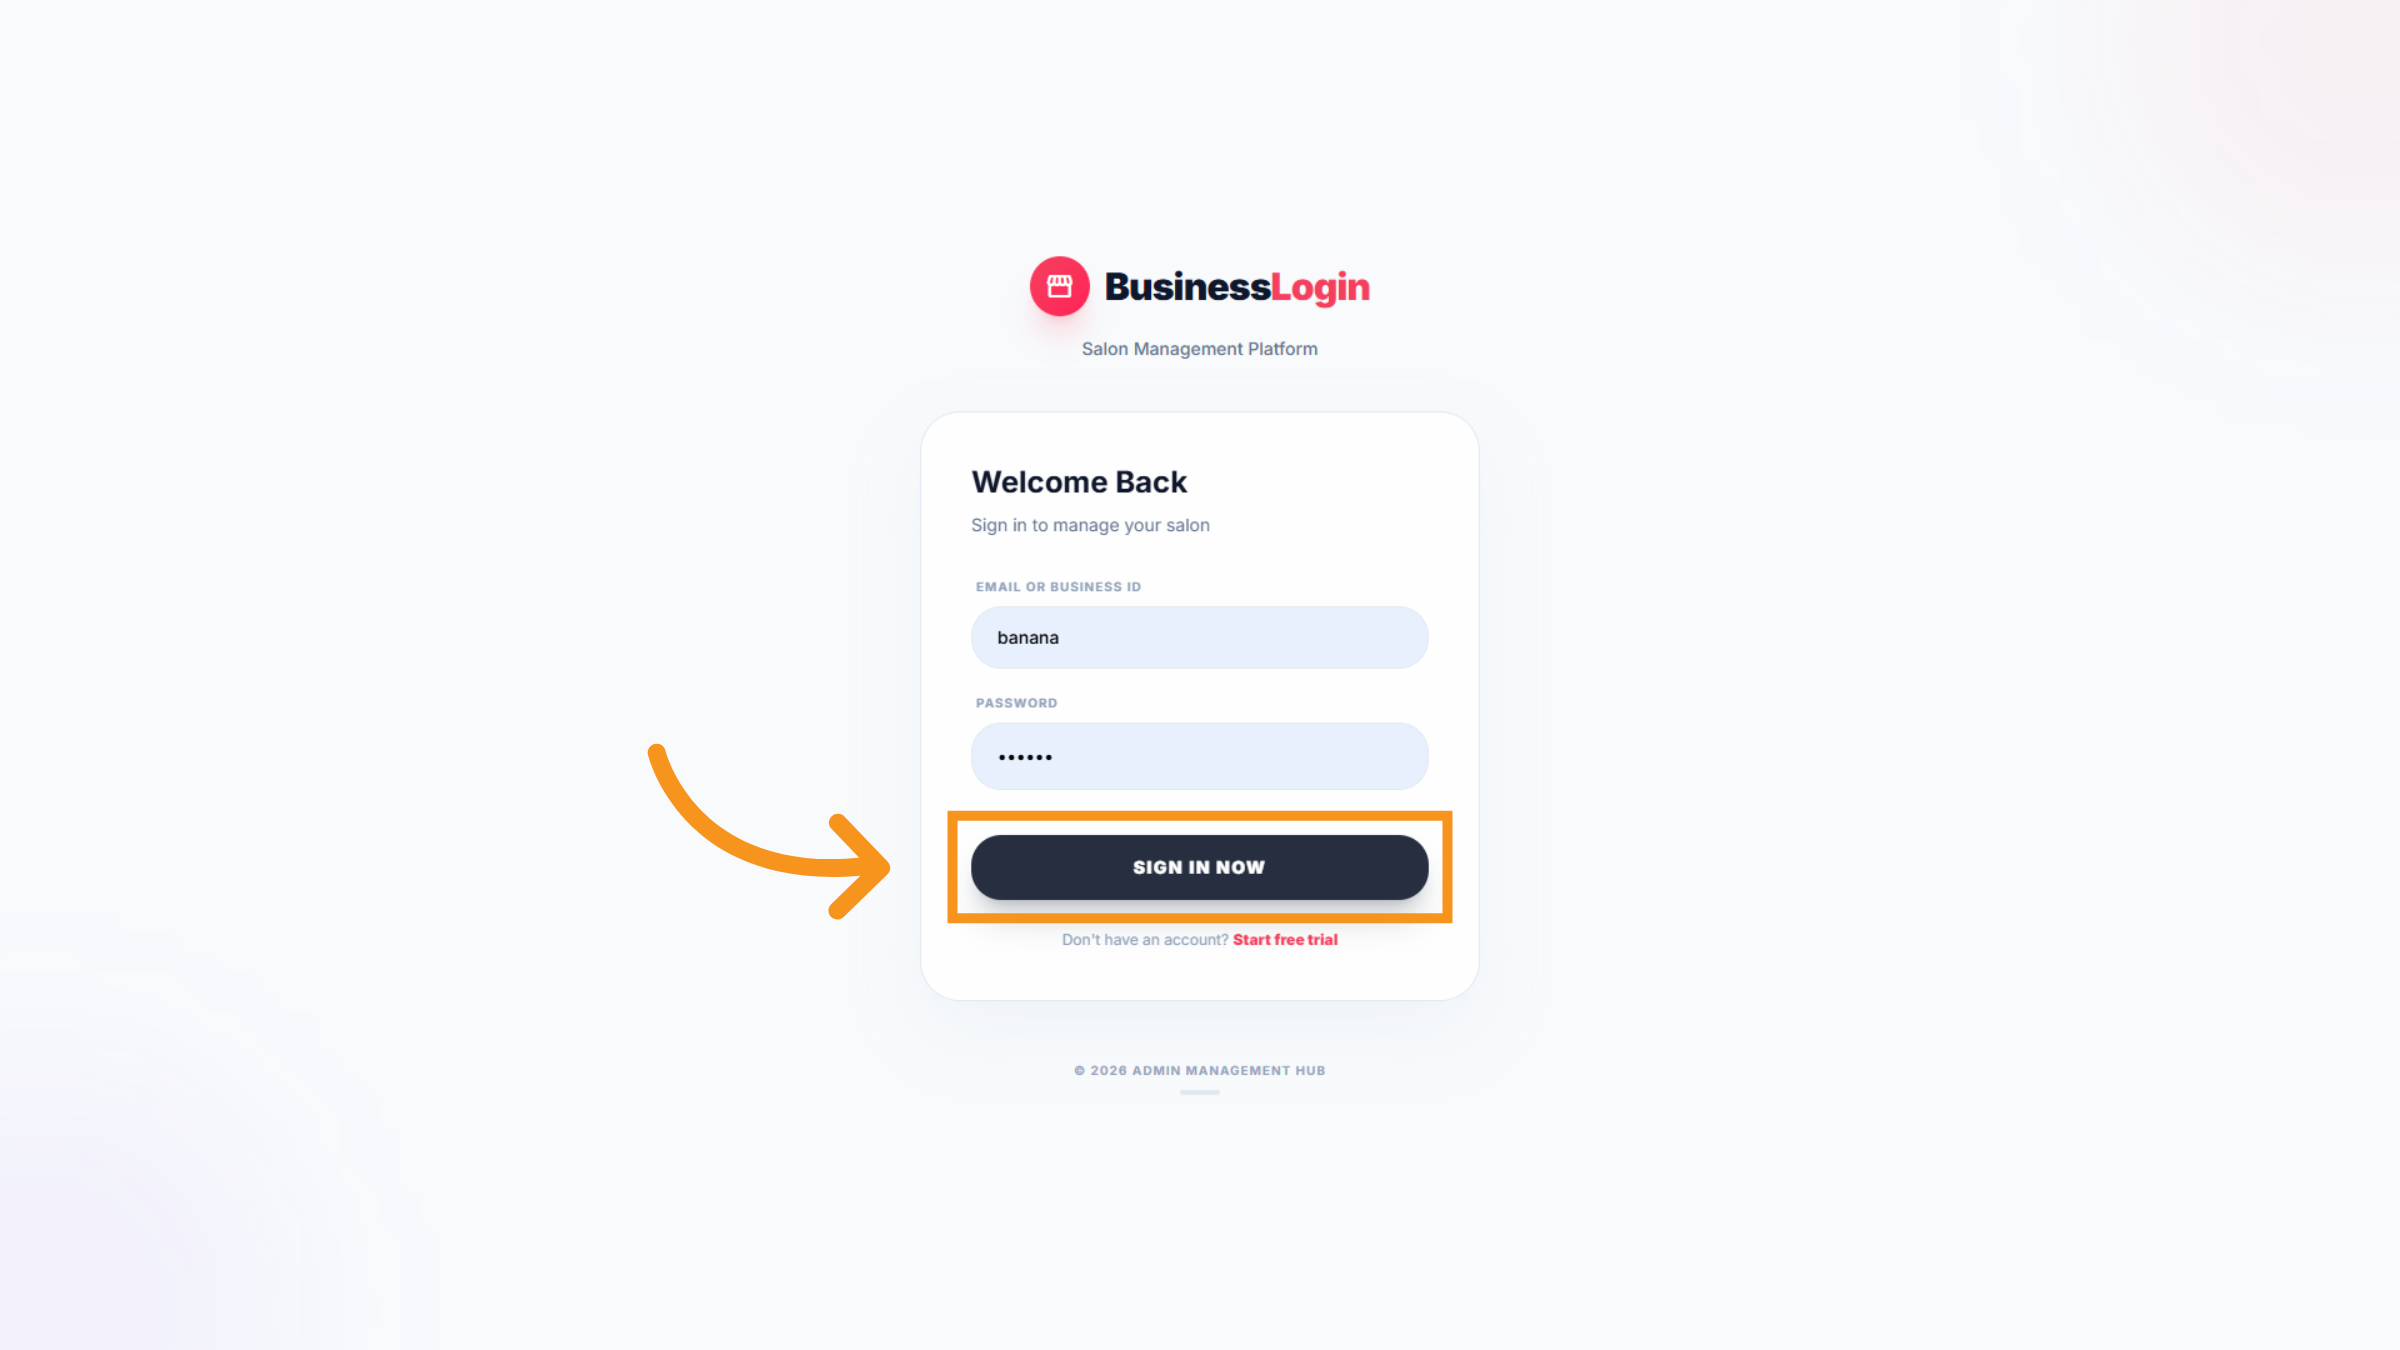
2. Access Sign-In Page
Click the "Sign In Now" button to begin logging into your Leo-booking account.
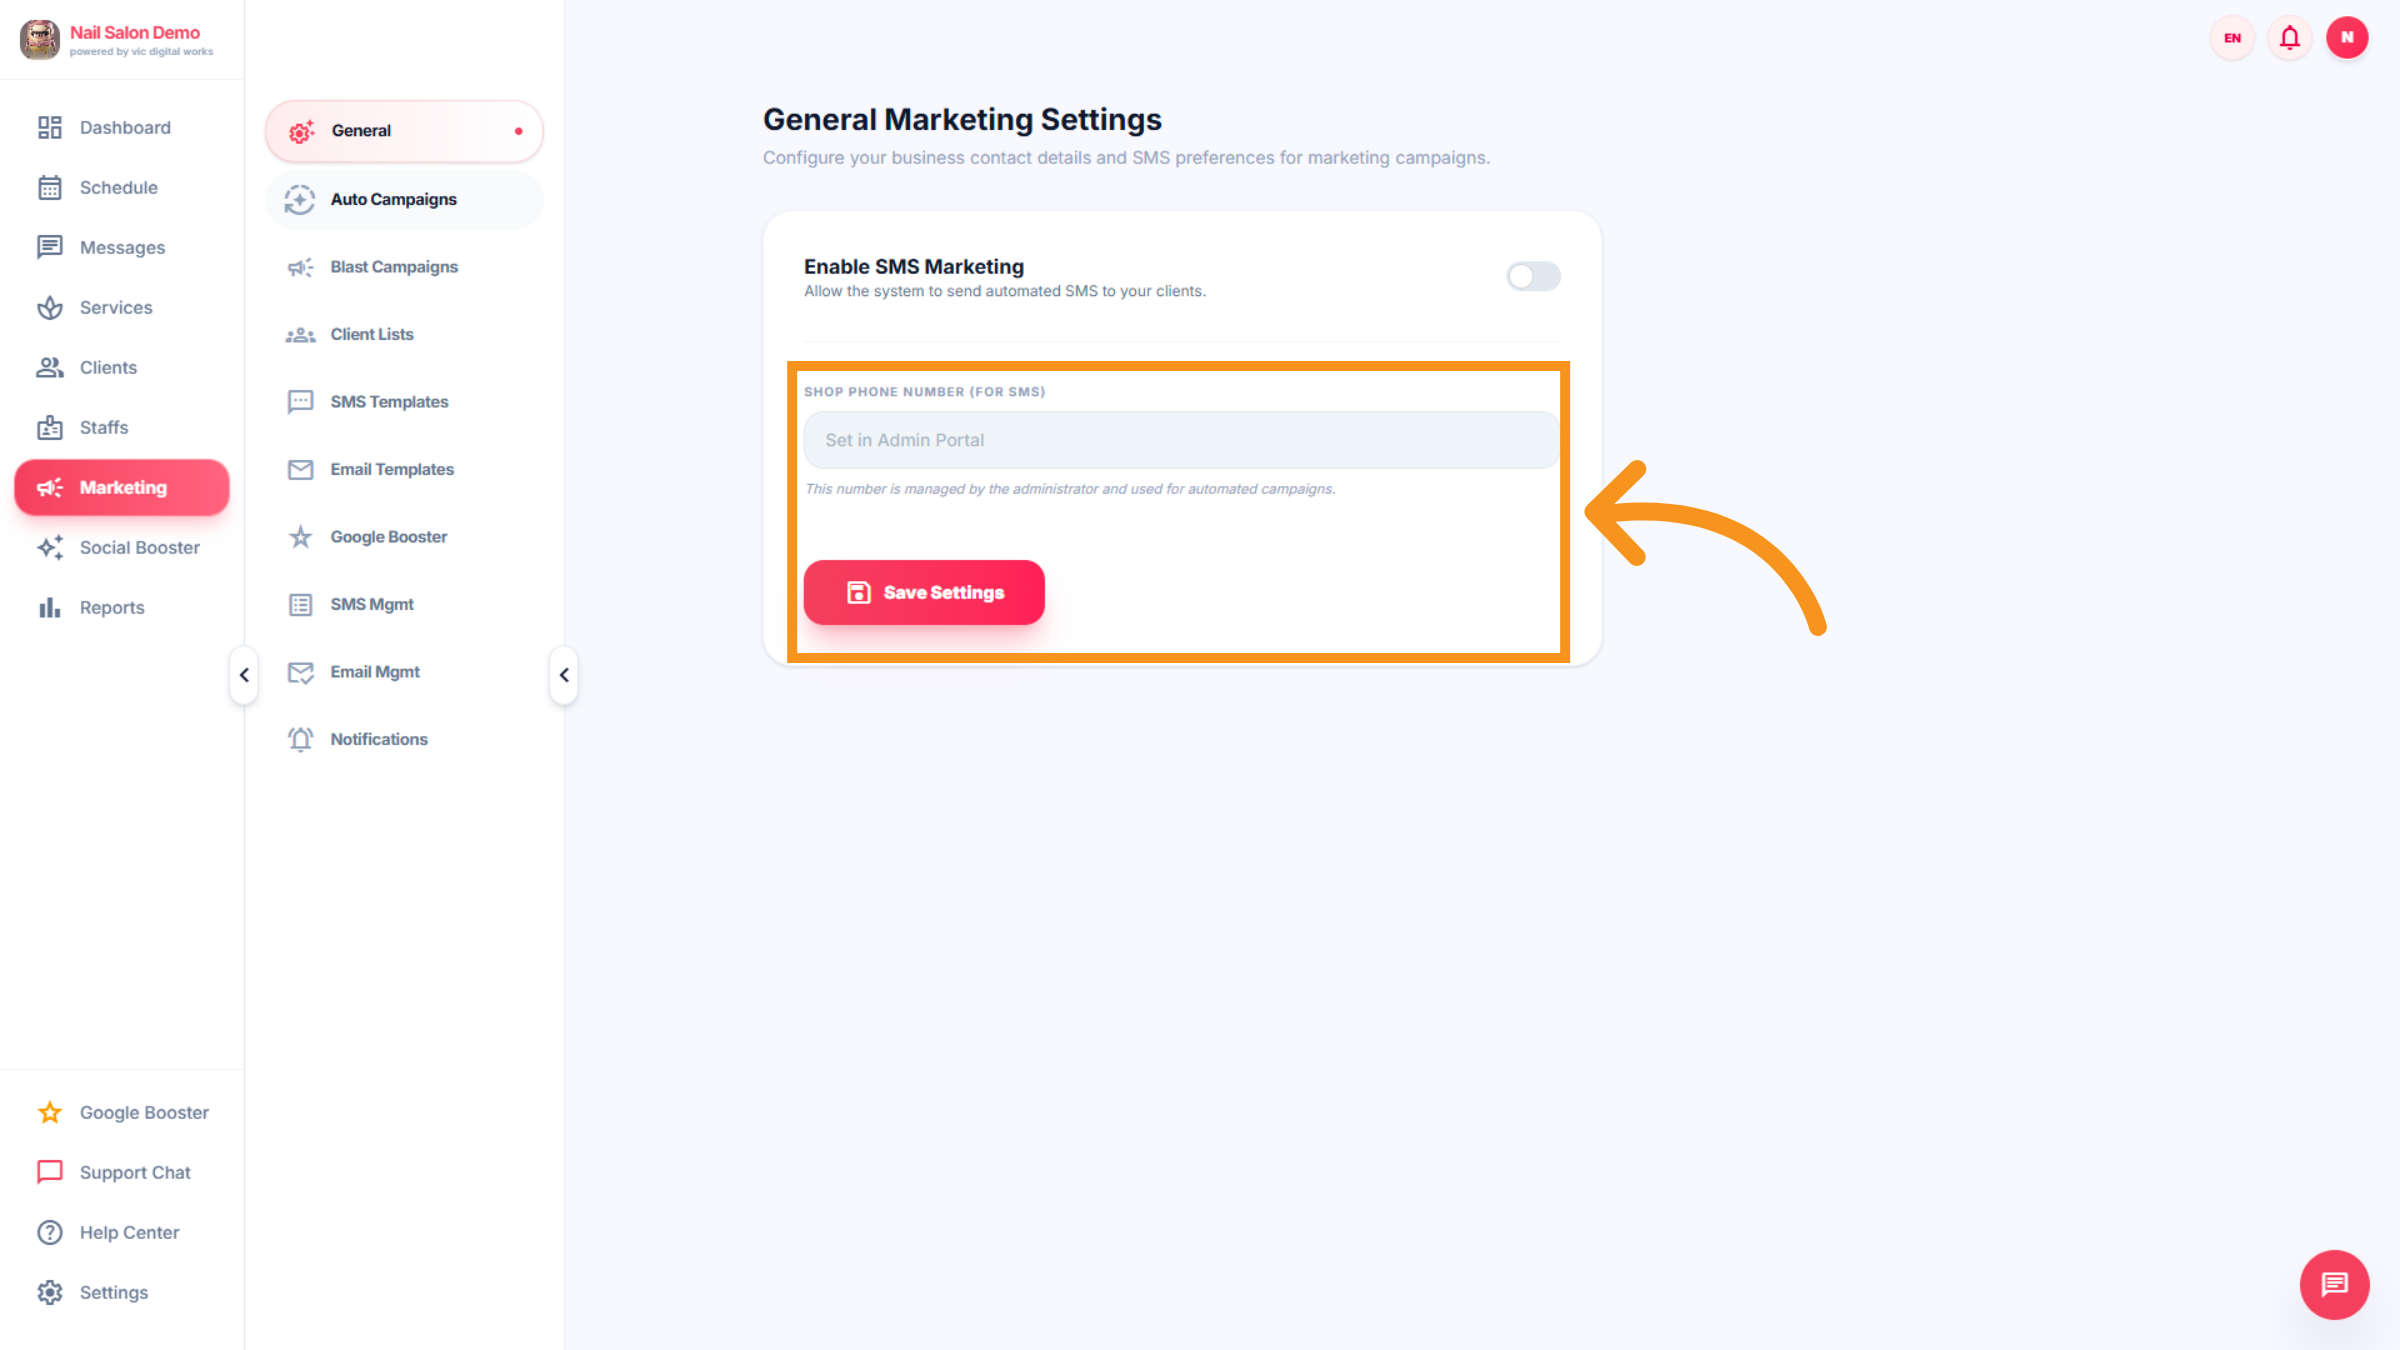
3. Marketing - General
This Marketing feature will be included in the salon’s subscription plan . And This feature can be enabled or disabled at any time, allowing the salon to easily adjust and manage its marketing activities based on business needs.
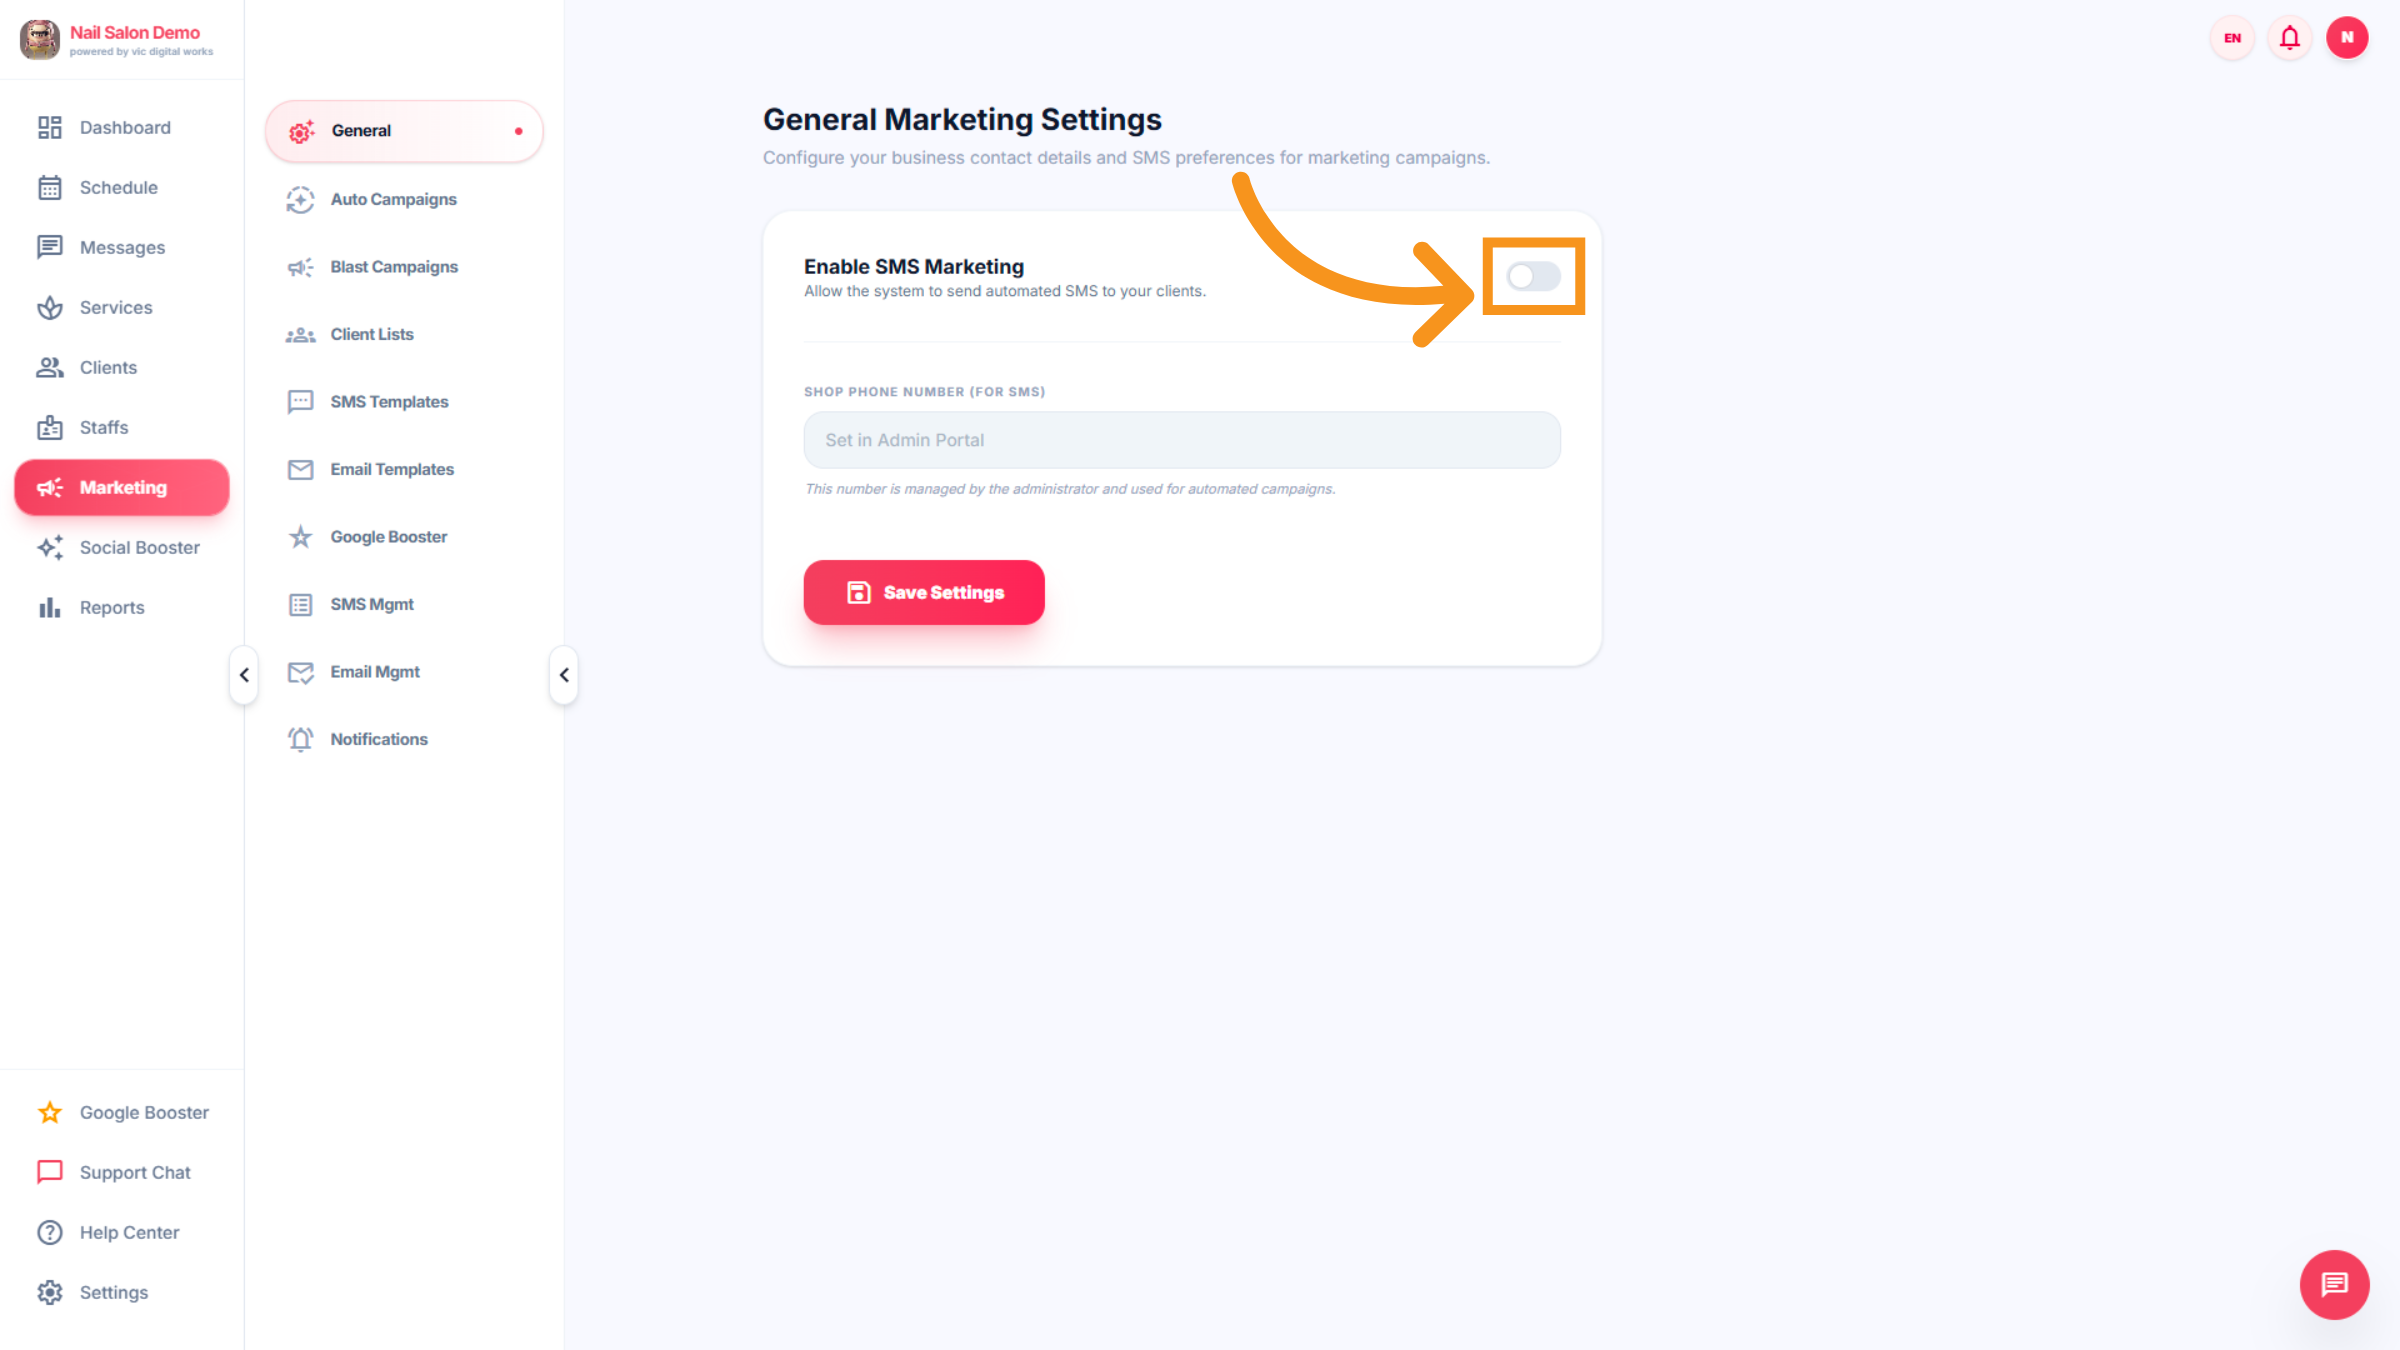
4. Add Marketing phone Number
Users can log in using the shop’s phone number or a number provided by Leo Booking. The shop will be billed a monthly SMS fee according to the selected package.
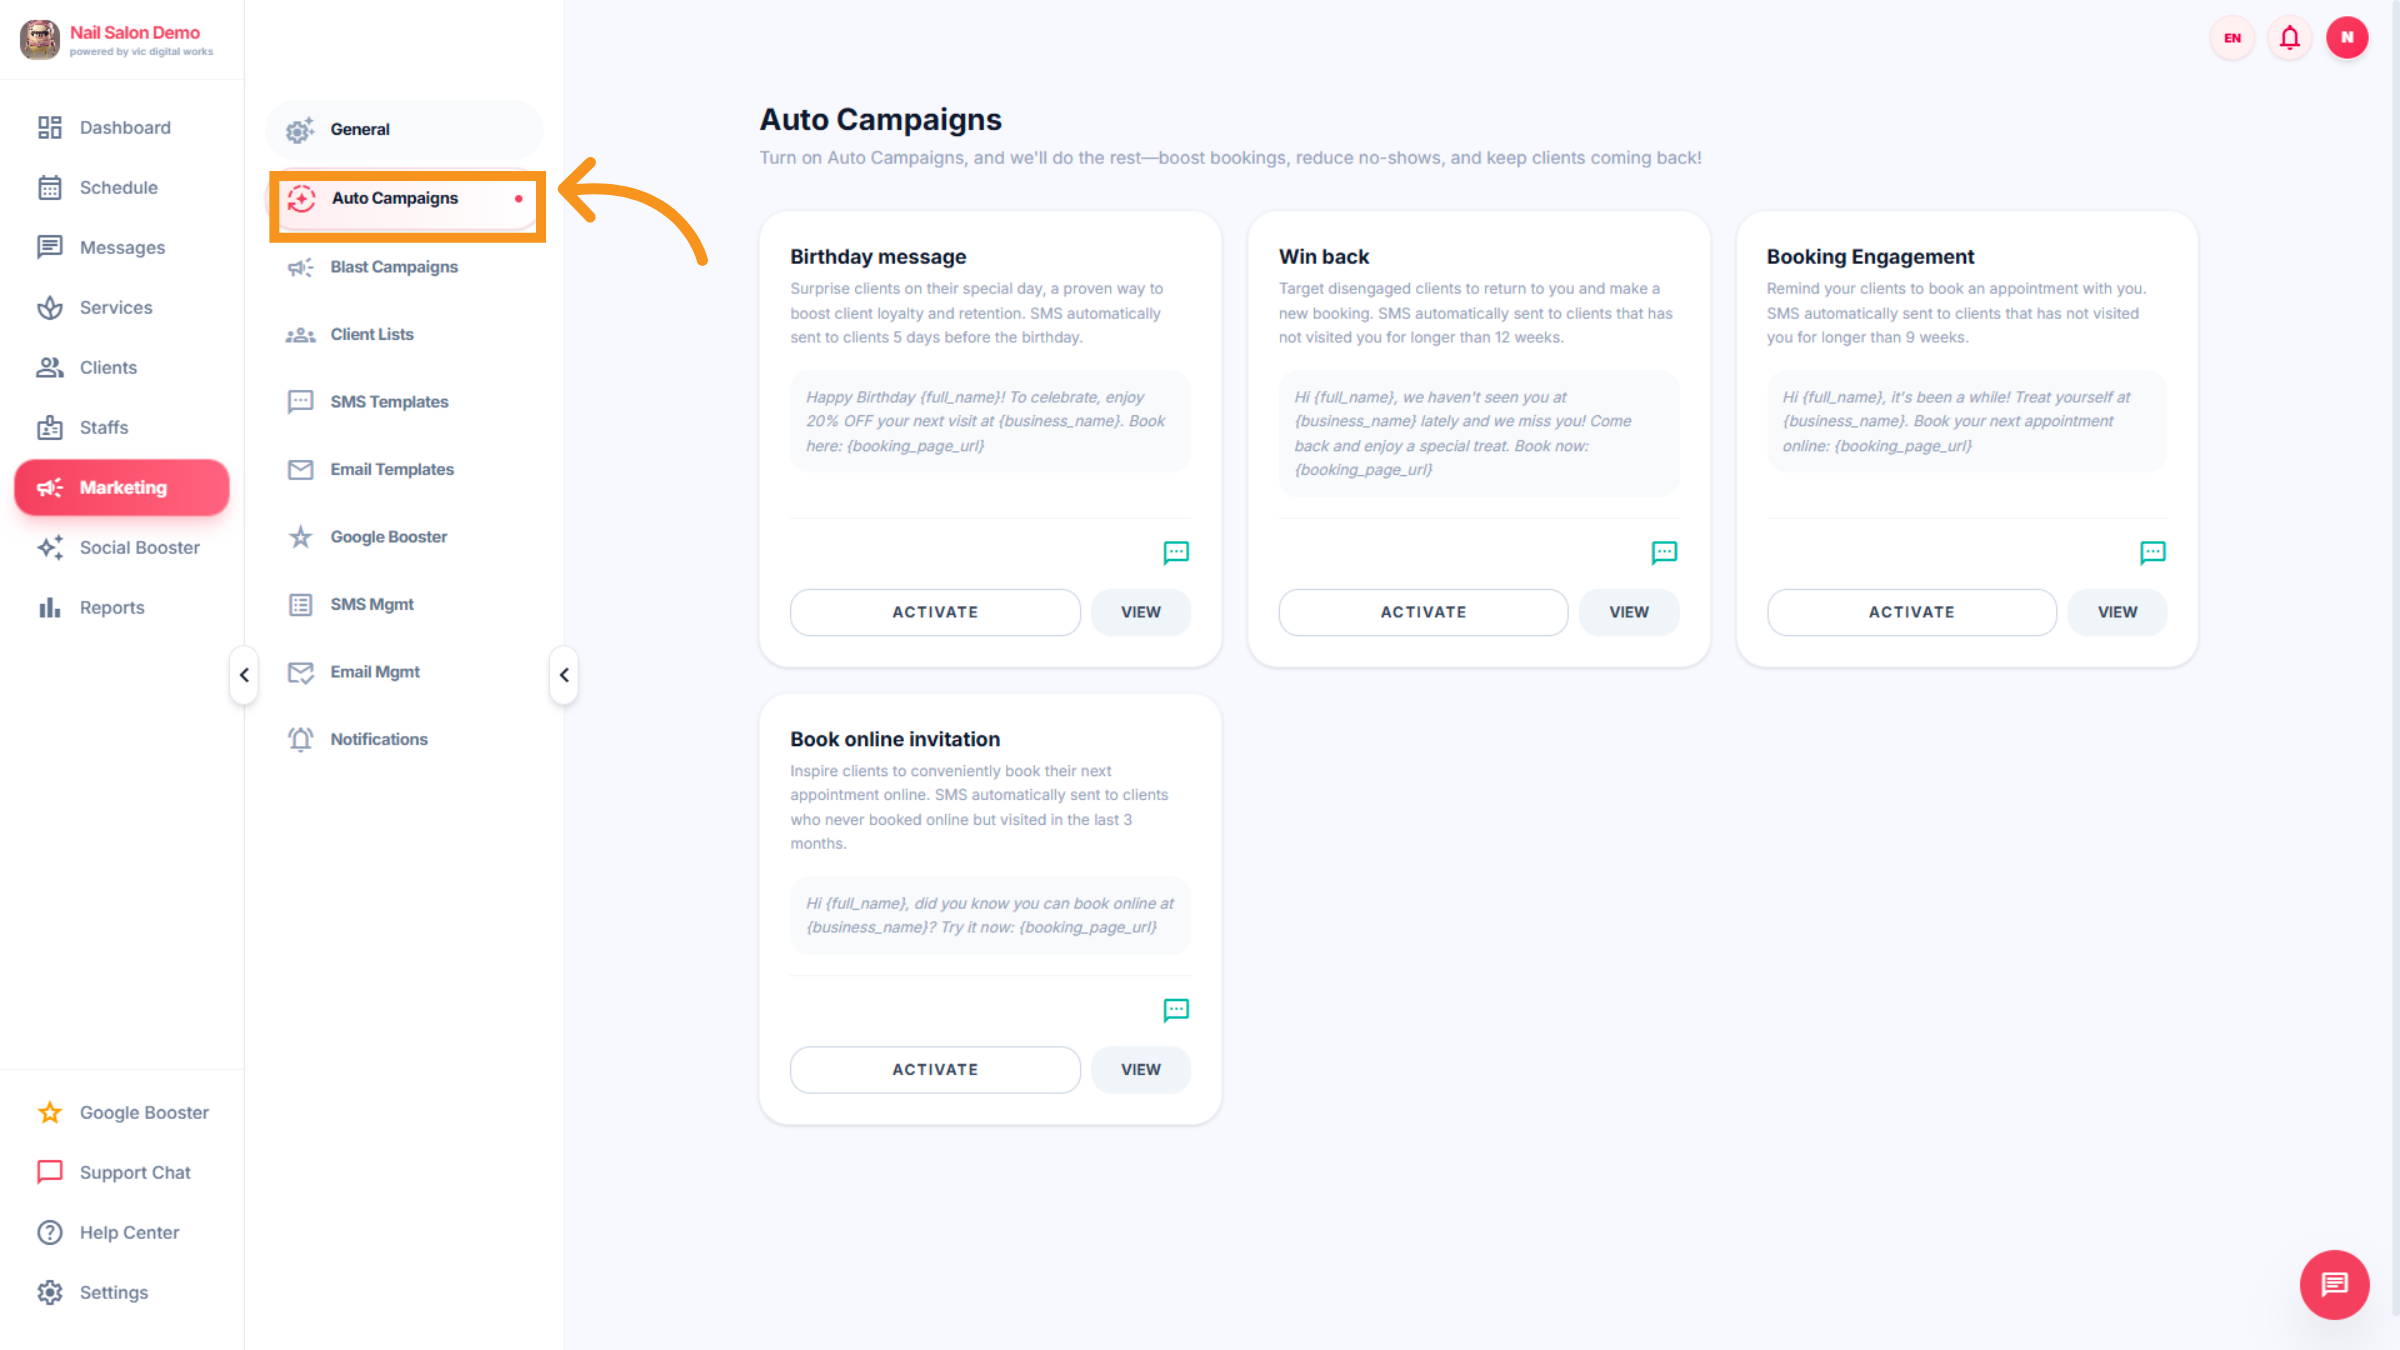
5. AUTO Campaigns
Automatically engage with your customers through smart marketing campaigns. Send personalized messages such as Birthday greetings, Win-Back offers, Booking engagement reminders, and Online booking invitations to keep clients coming back and increase appointments.
6. Activate / Deactivate/view Campaign
-Activate → Turn the campaign ON so messages are sent automatically. -Deactivate → Turn the campaign OFF so messages stop sending. -View: See campaign information, message templates, and performance.
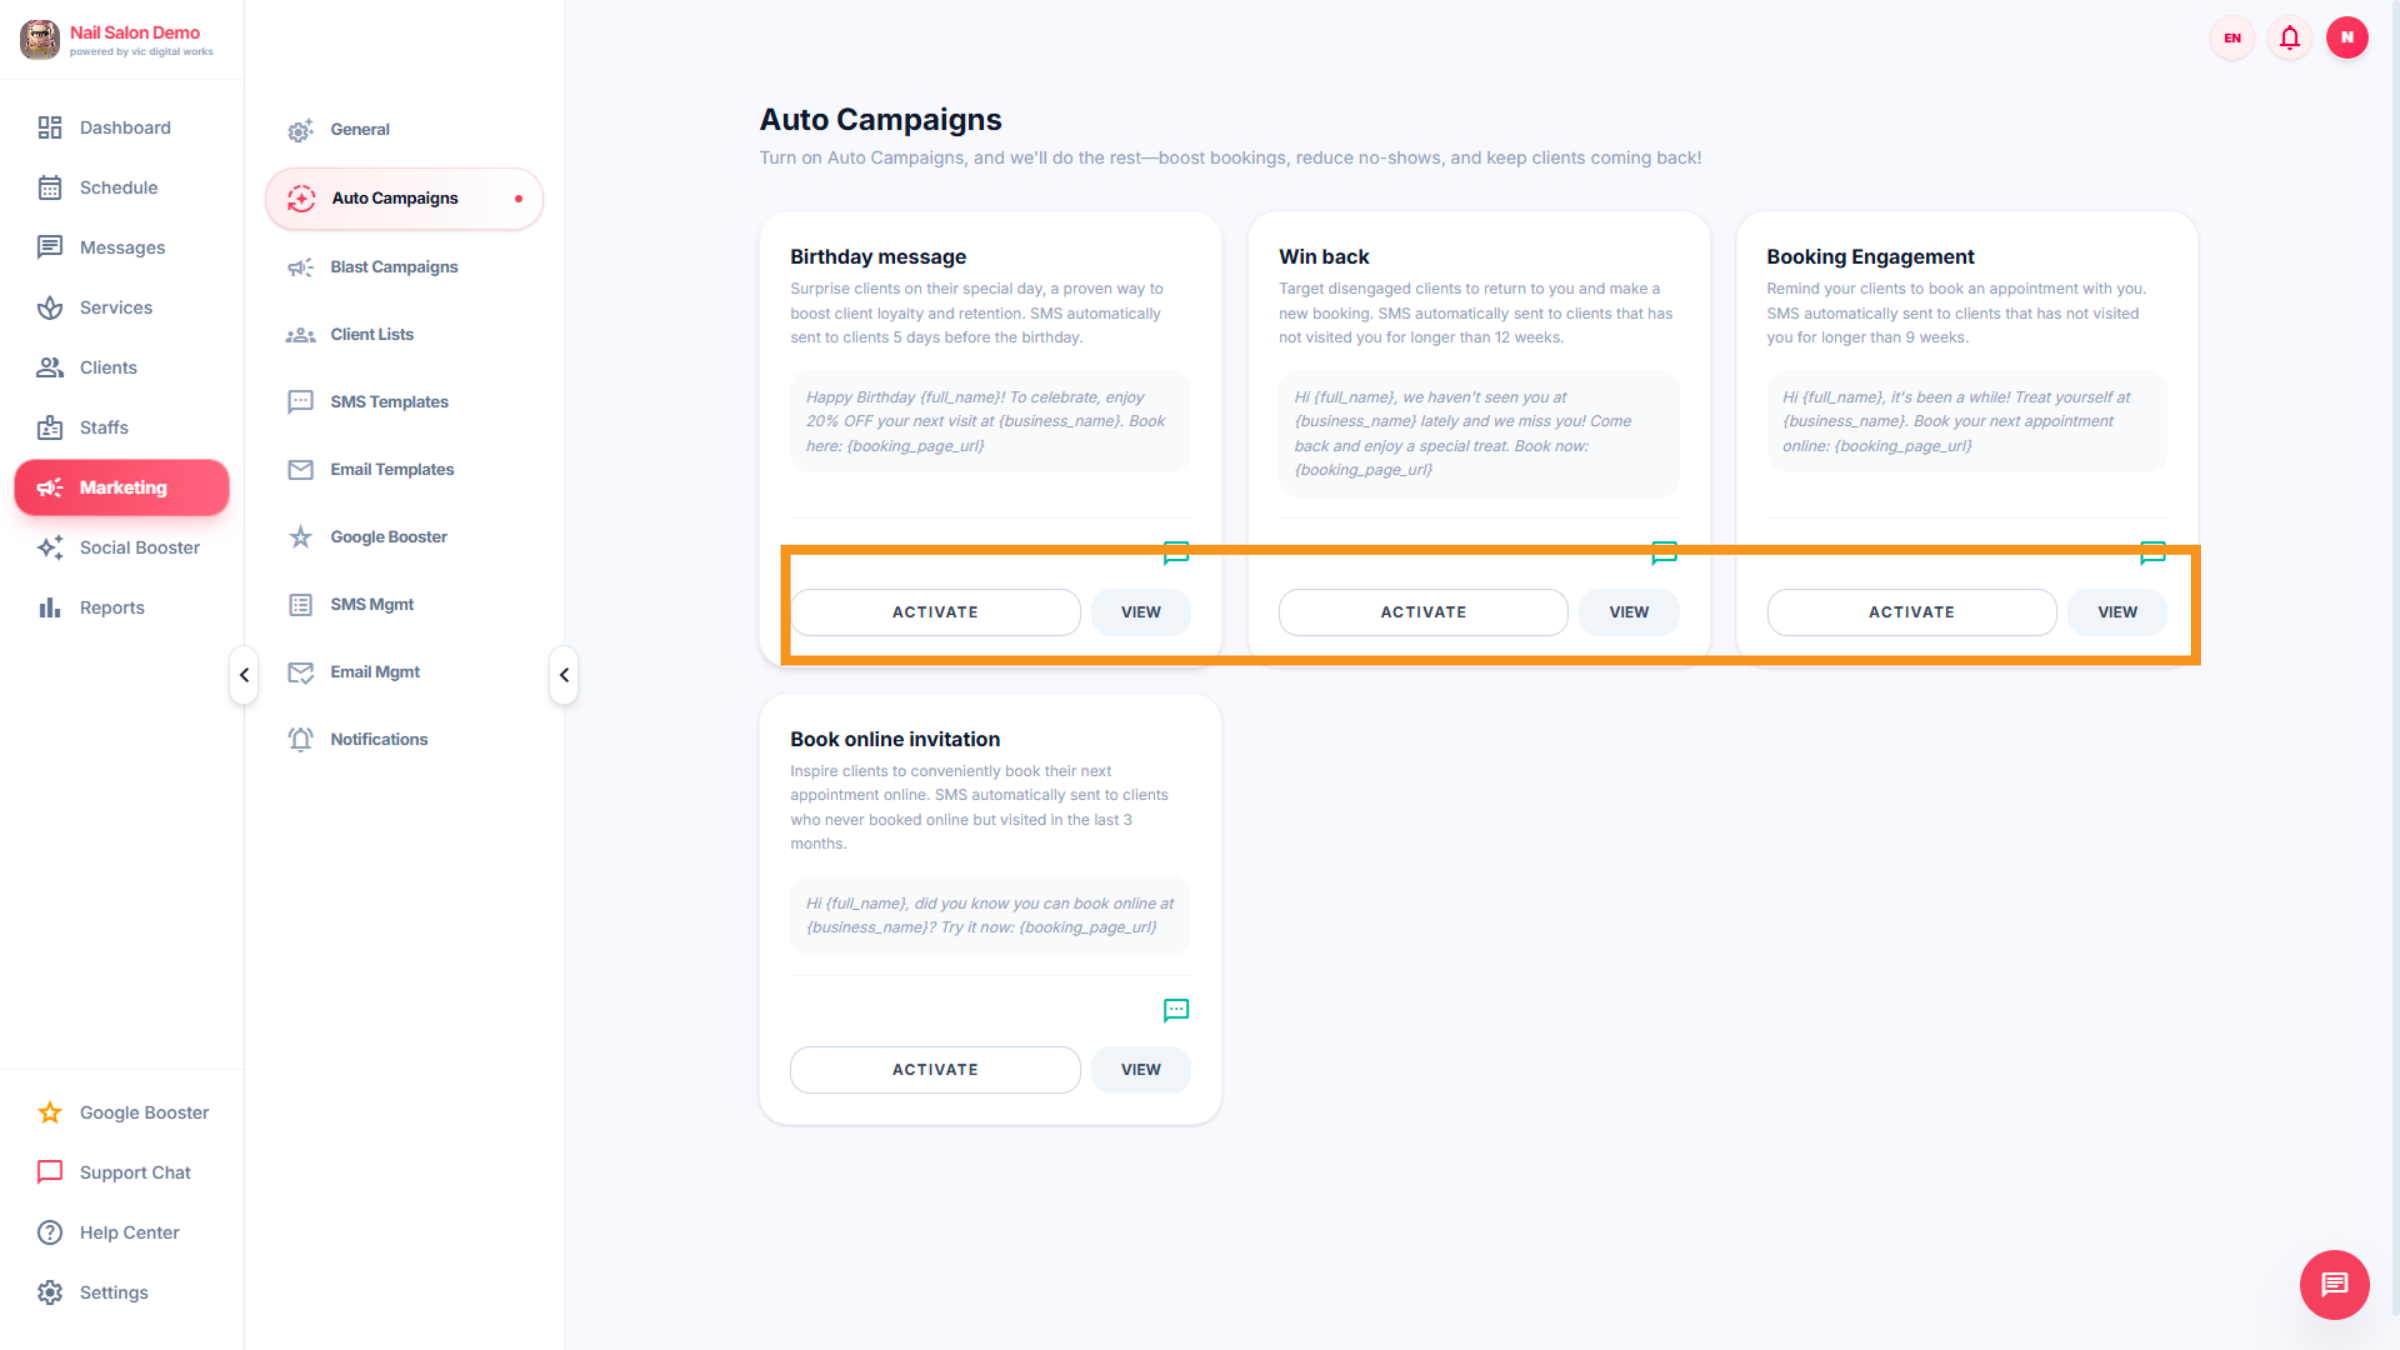
7. Campaign
Click "DEACTIVATE/ACTIVATE" to confirm and finalize the campaign content.

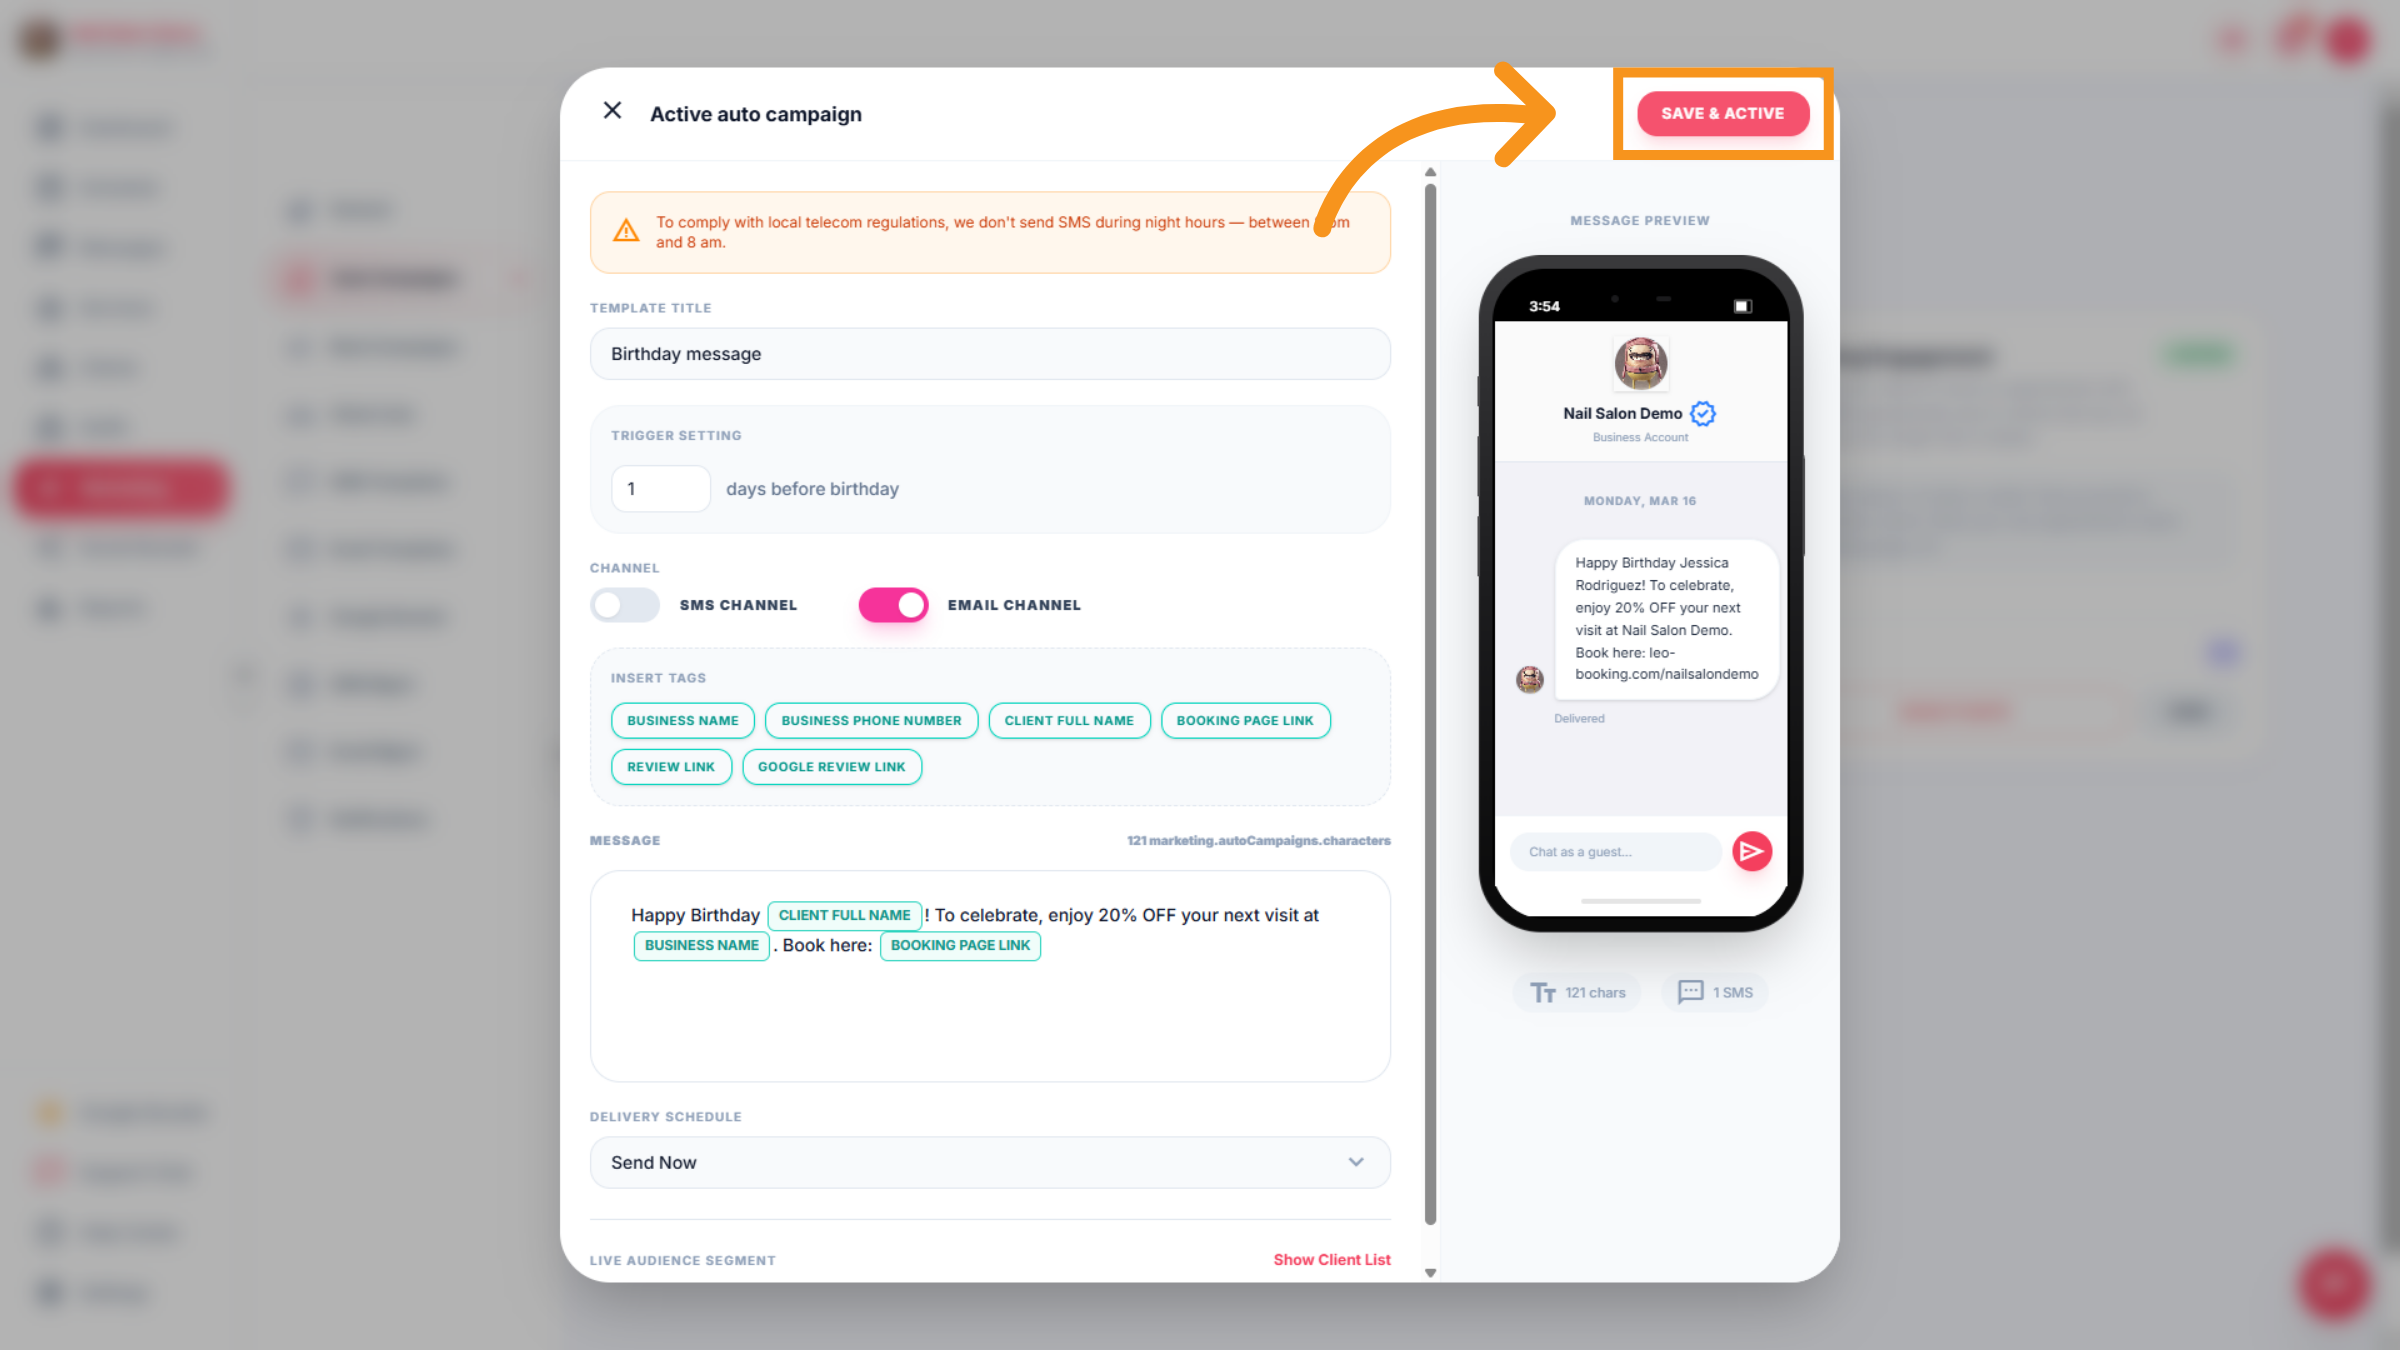
8. Save and Activate Campaign
Click "SAVE & ACTIVE" to save changes and activate the campaign.
9. BLAST Campaign
blast campaign can Send updates, promotions, and special offers to encourage clients to book
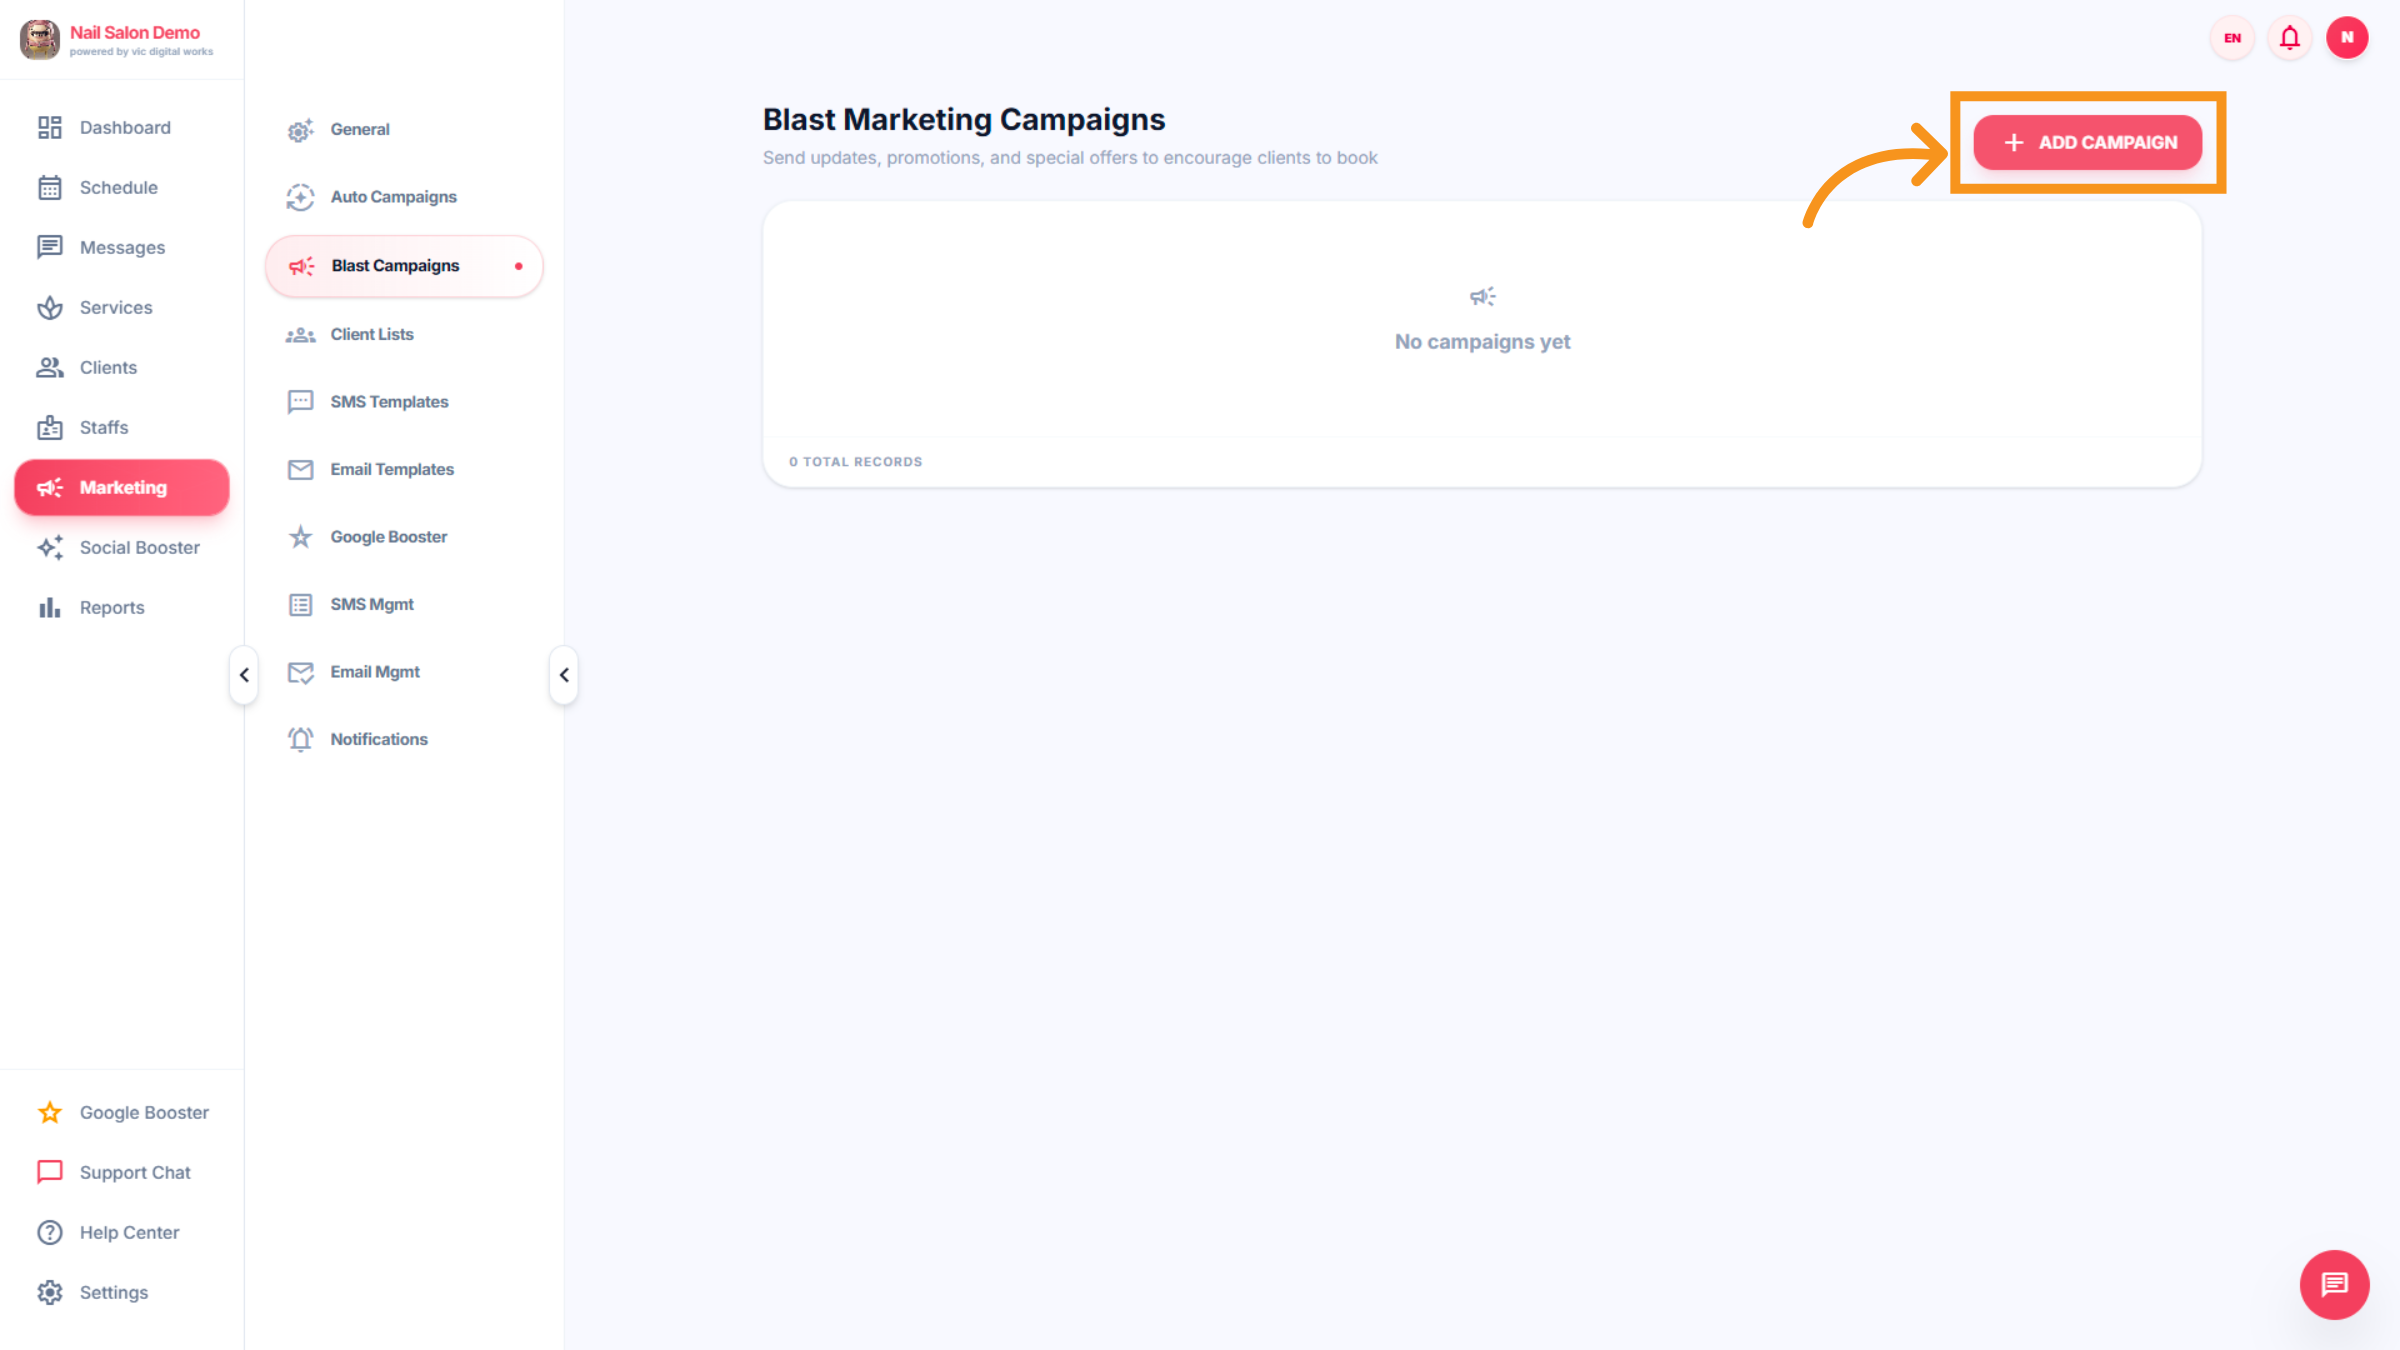
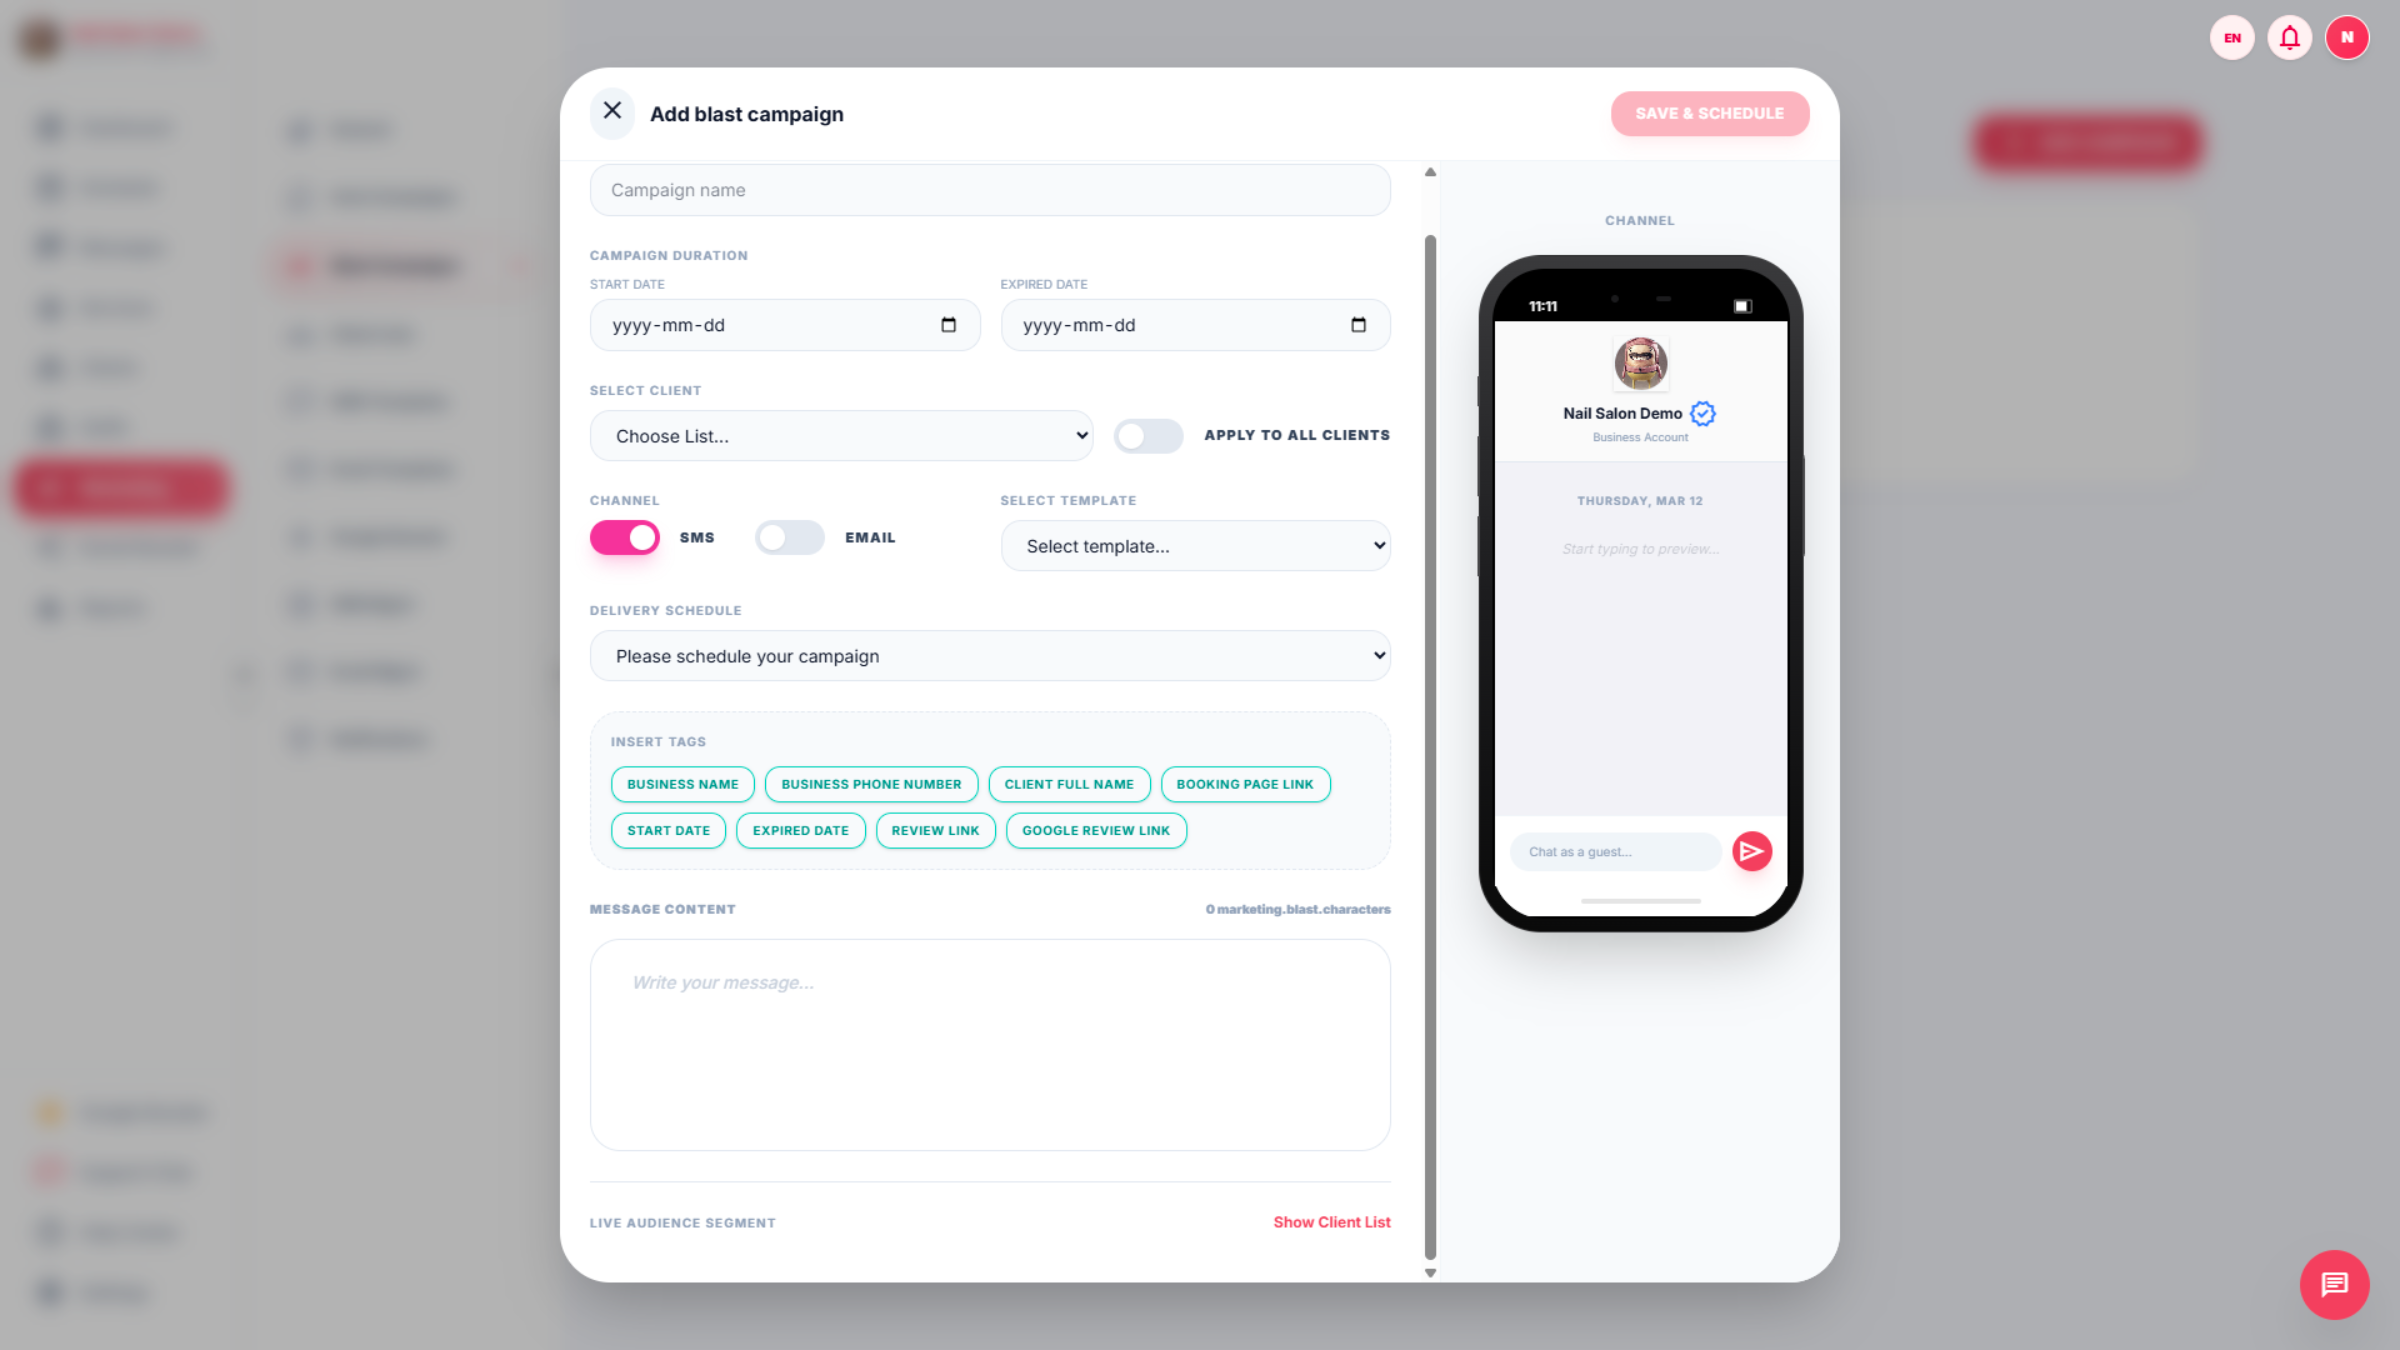
10. Add new campaign
This section is the interface for adding a new campaign . You can set up a new campaign by selecting the communication channel (SMS or Email), the desired date, and the campaign name.
11. Client List
In this section, you can store customer information, including important dates, enabling the salon to create personalized campaigns for each customer.
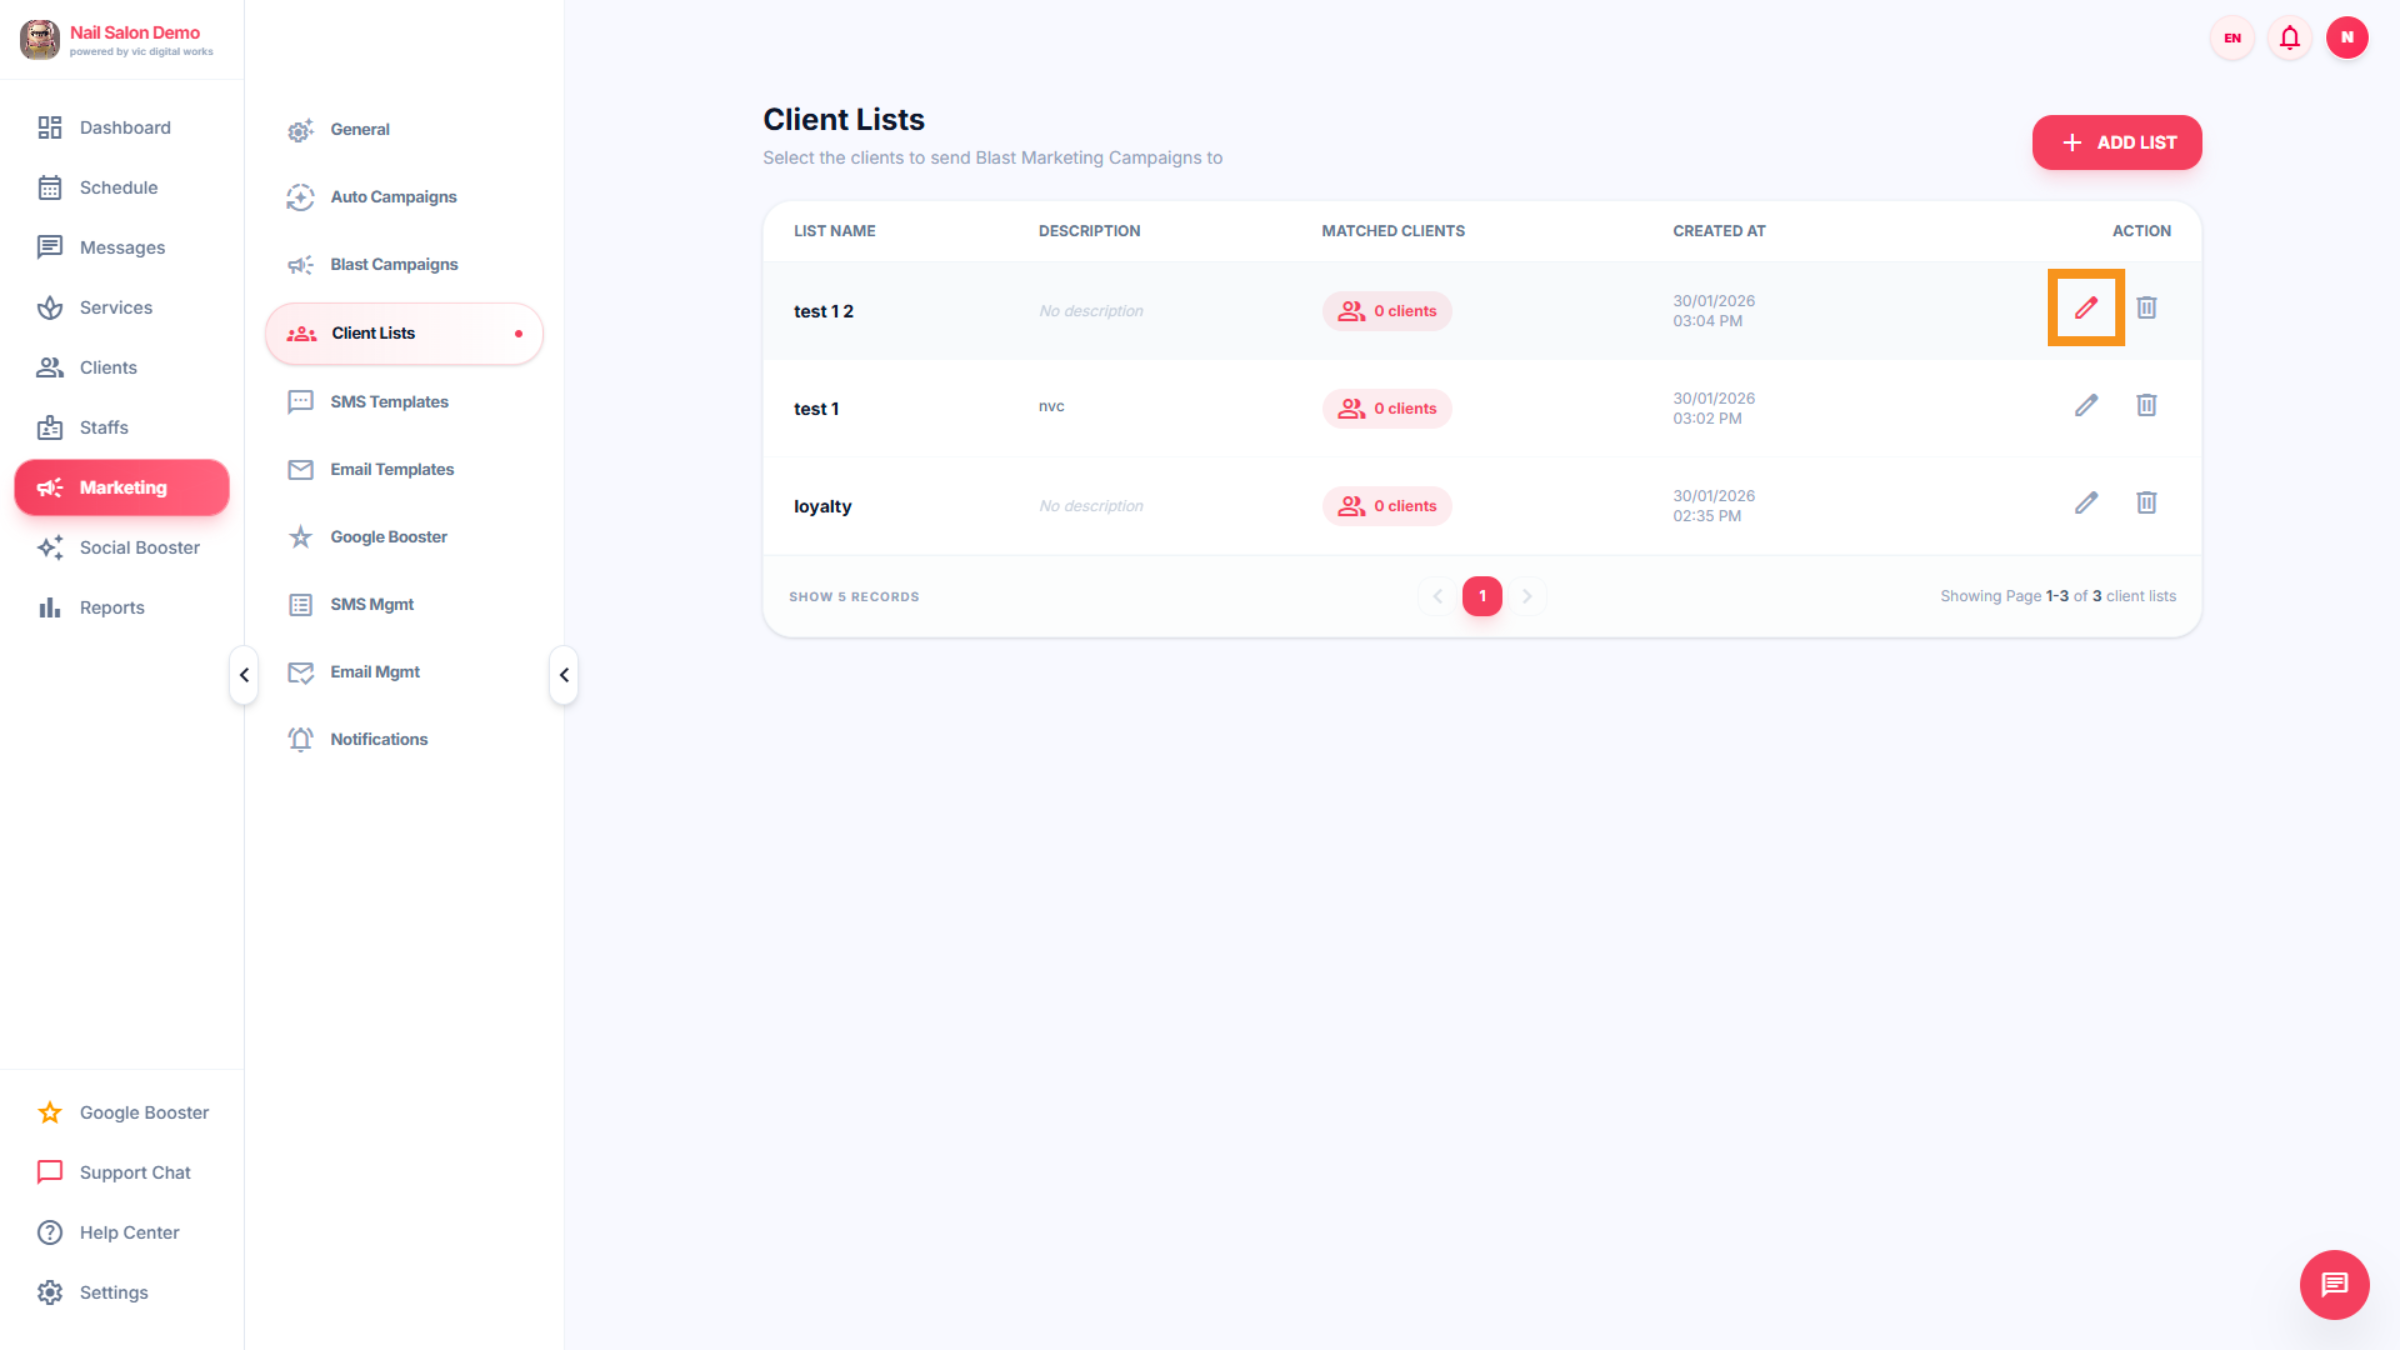
12. Client -ADD LIST
Click "Add List" to enter the list name, select the method, and add filter conditions from the salon database.
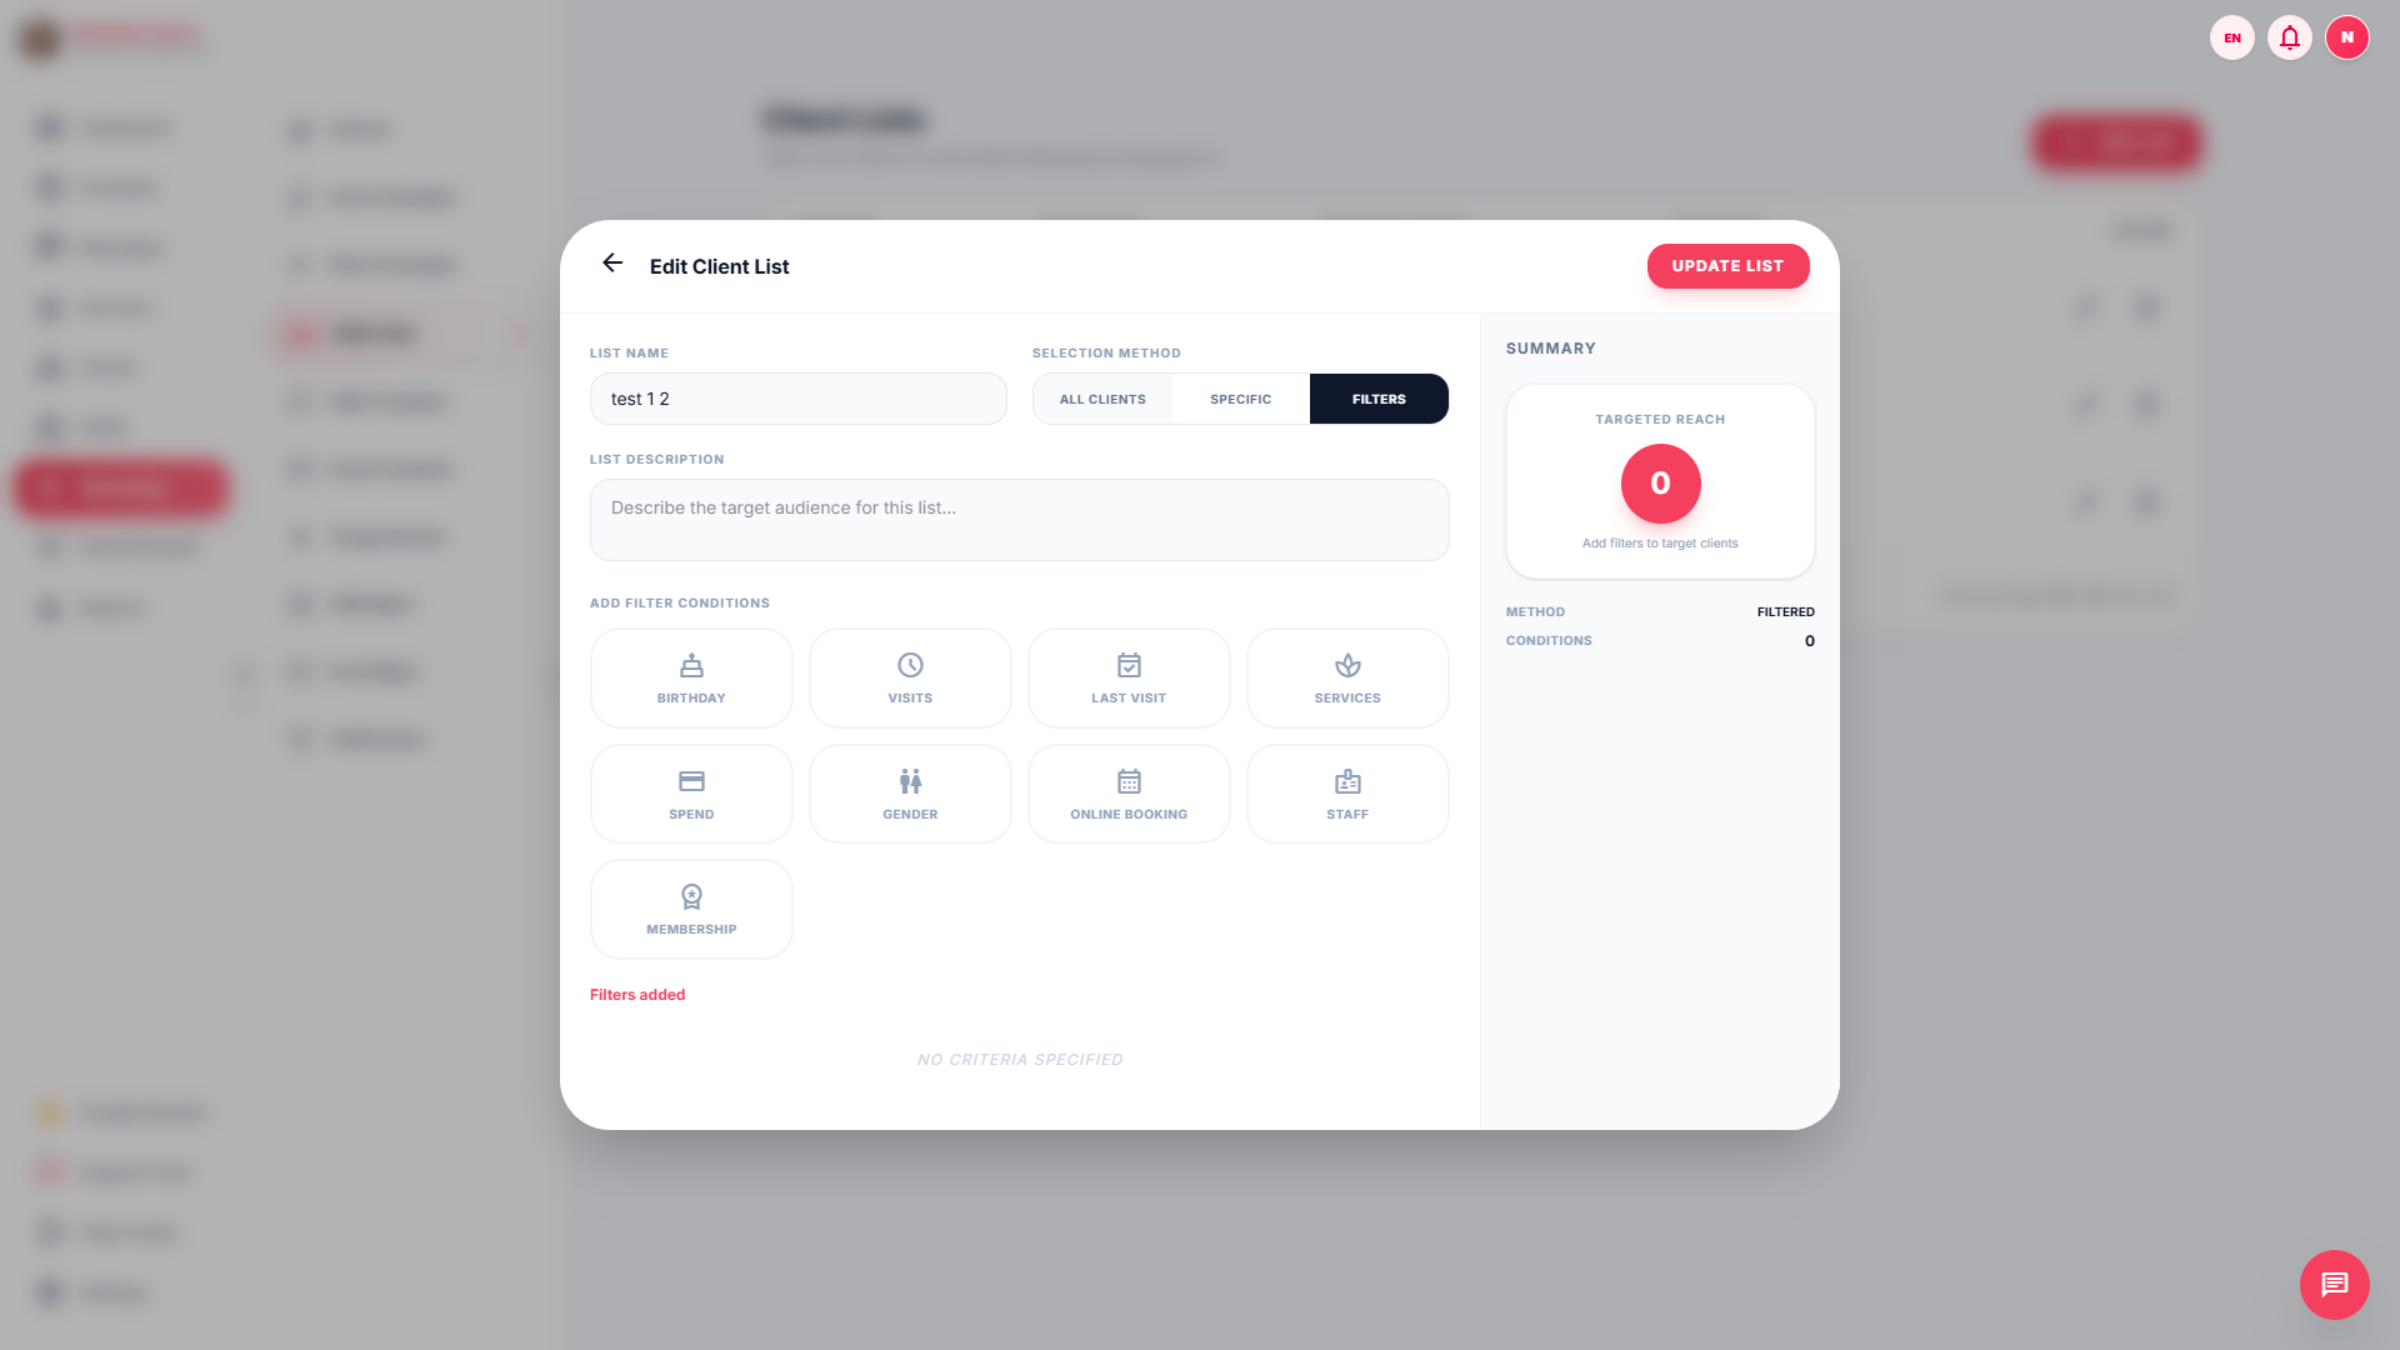
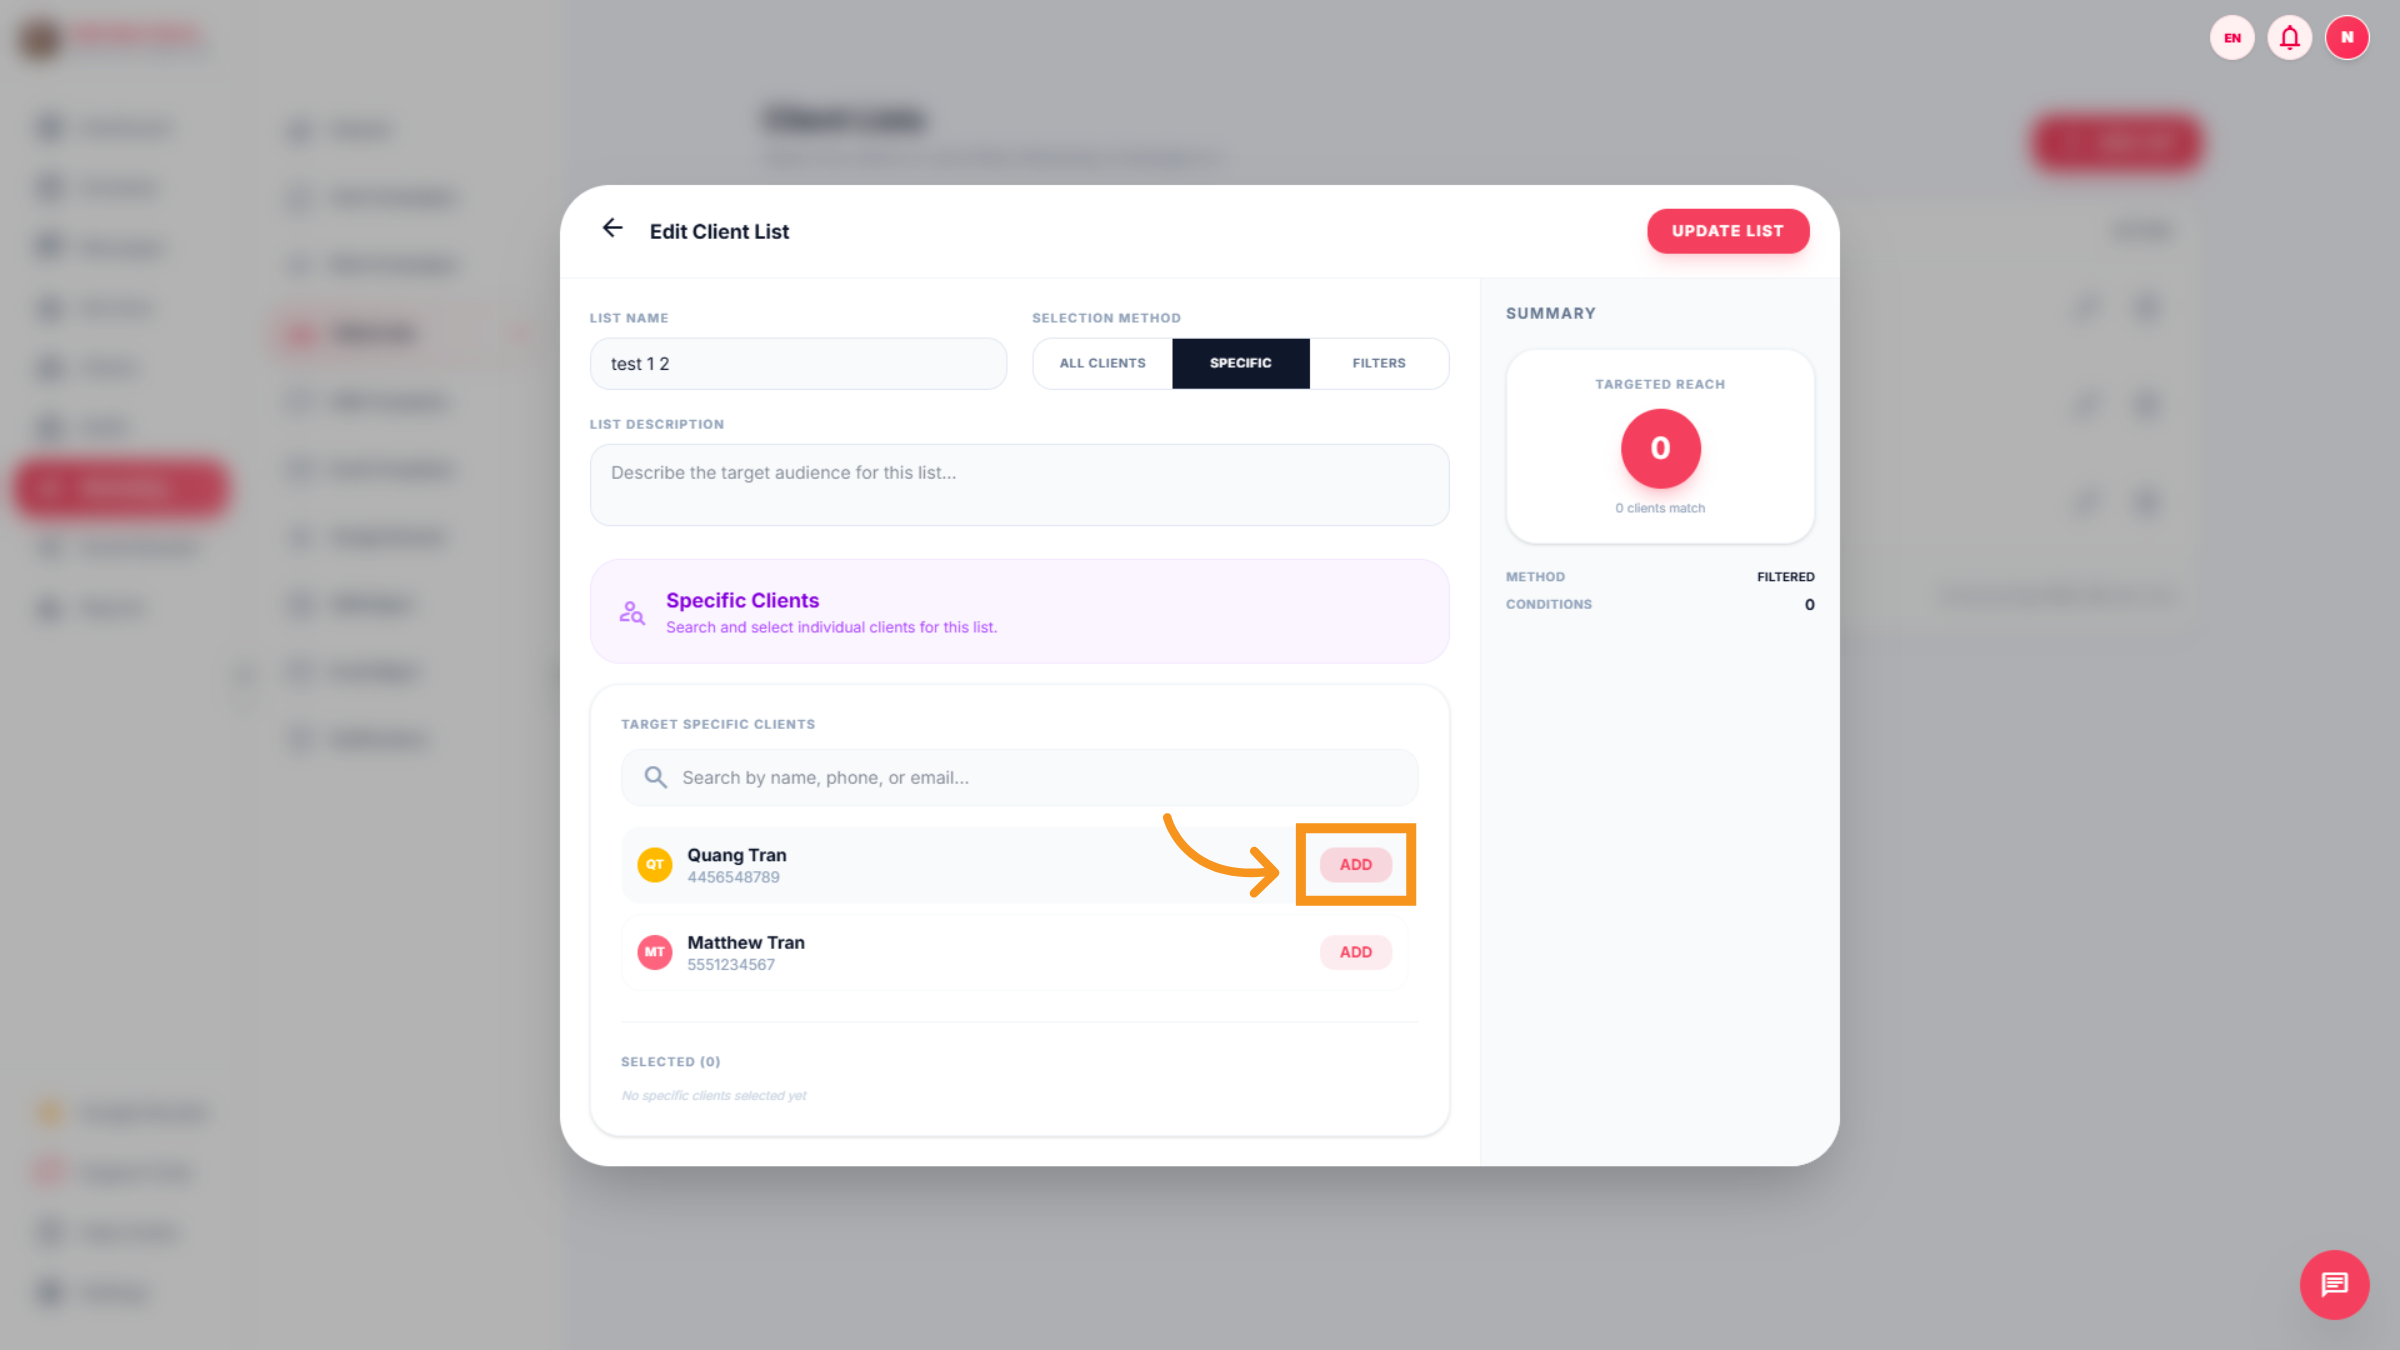
13. Add Clients to List
Click the "ADD" button to include clients in the selected list.
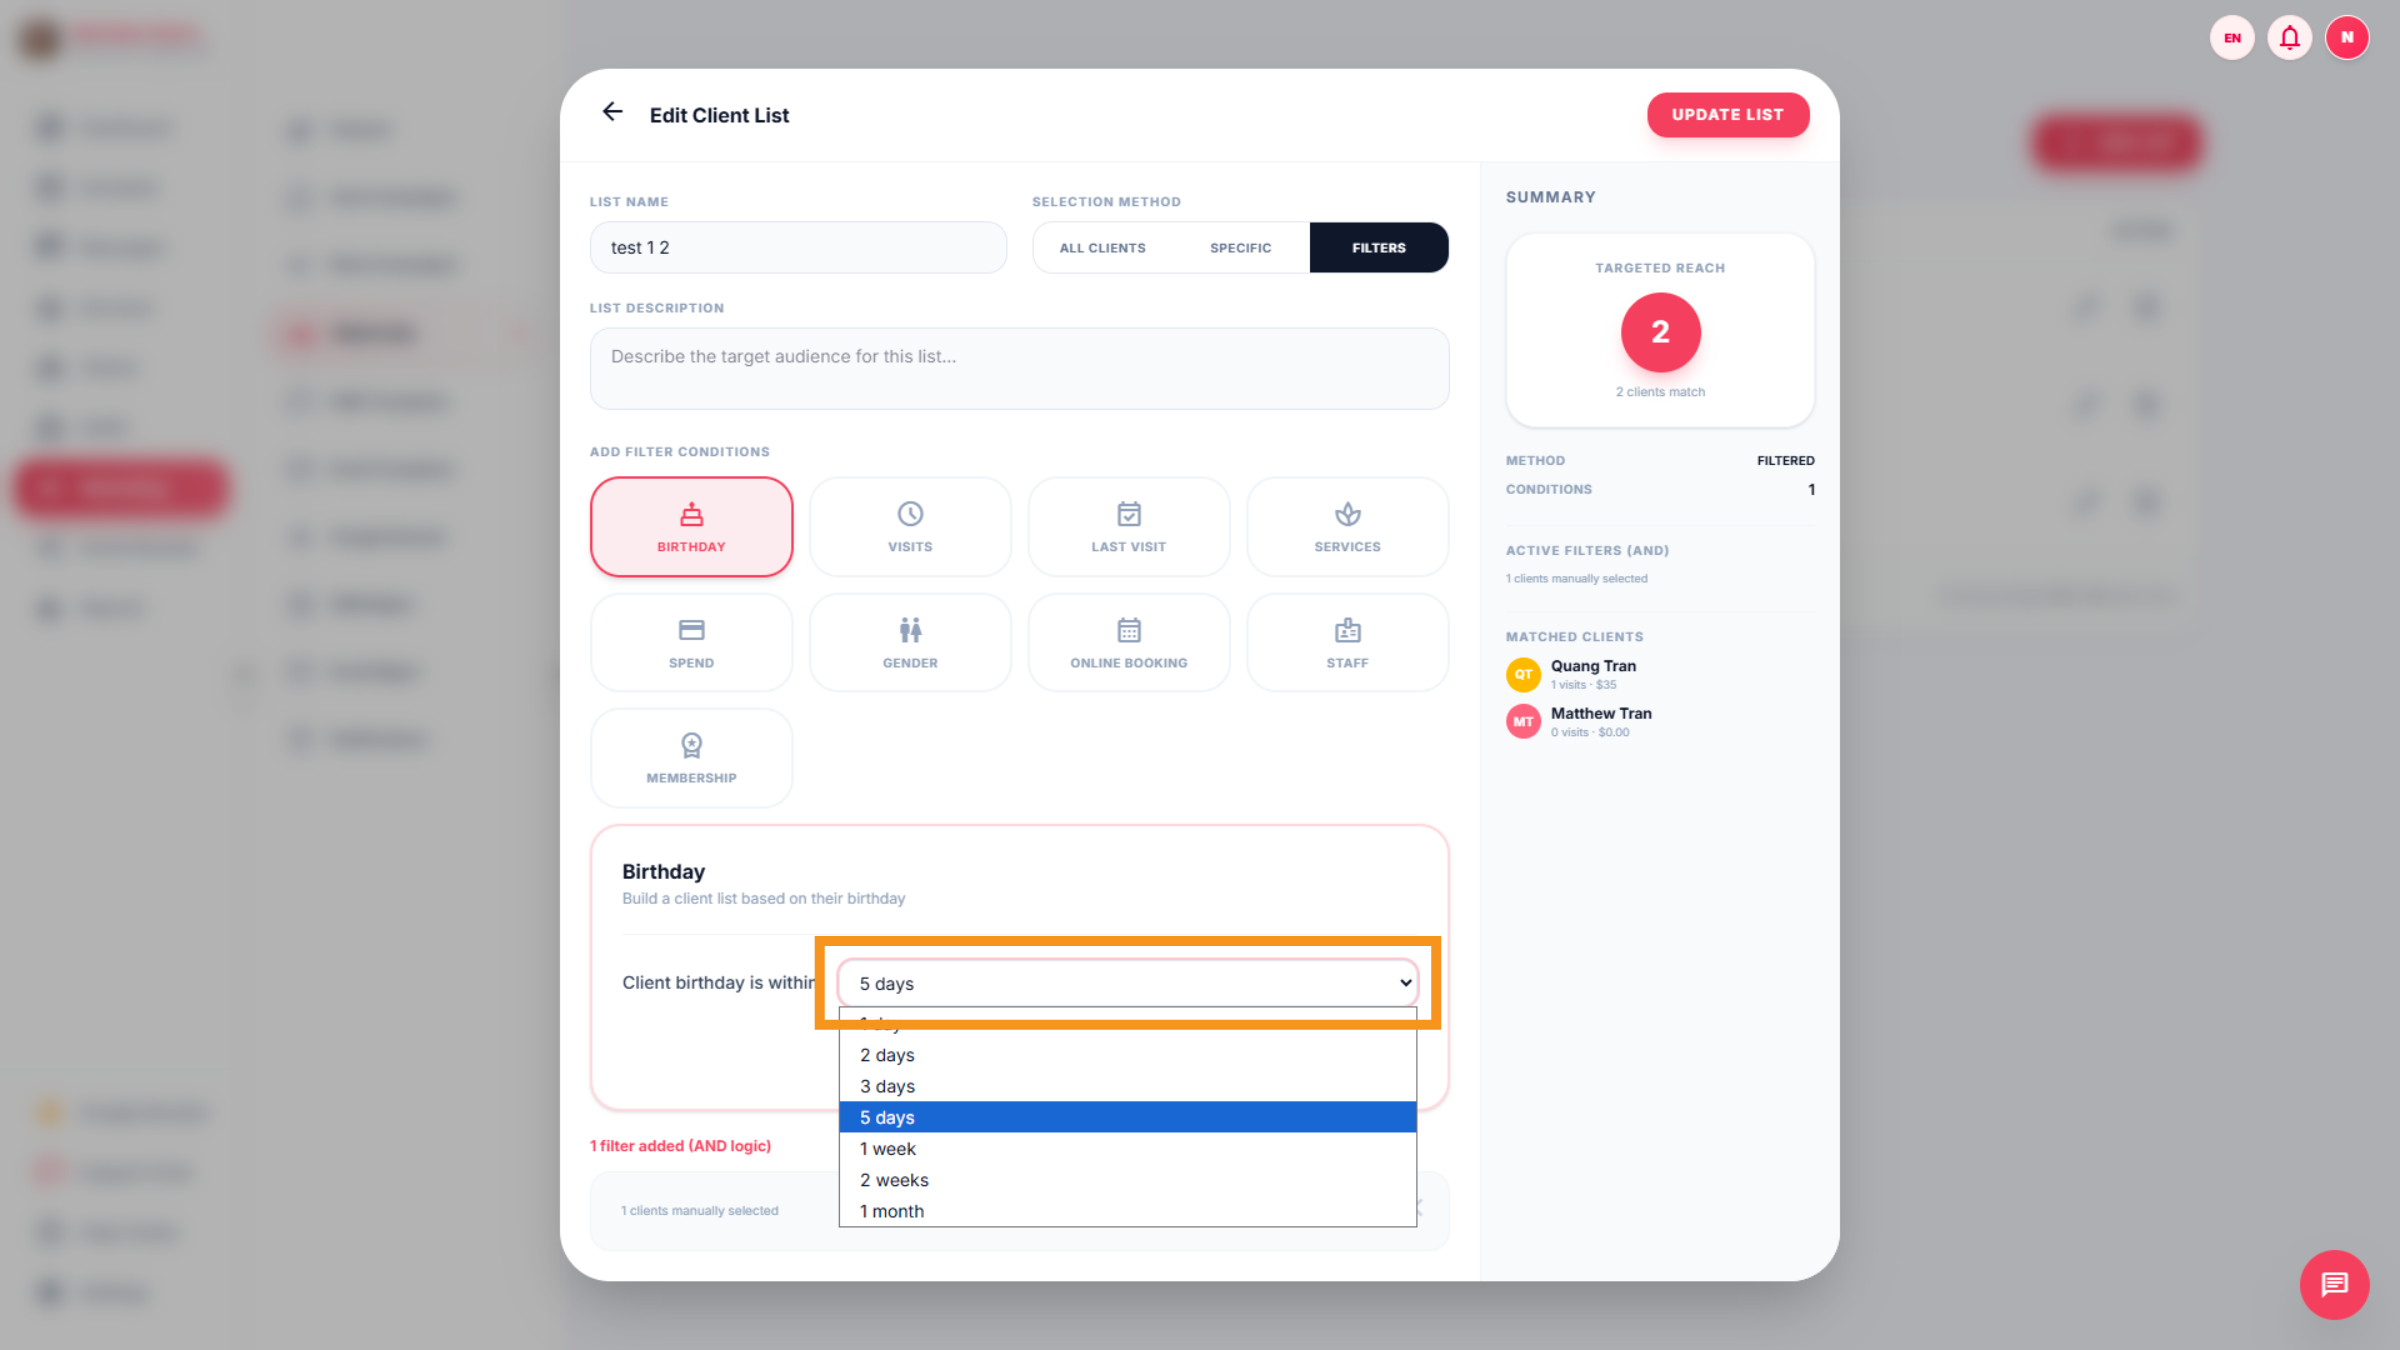
14. Add any special day
Add the following conditions: day (birthday, visit, last visit), services, spend, gender, online booking, staff, and membership. Then, select the day/time to send campaigns.
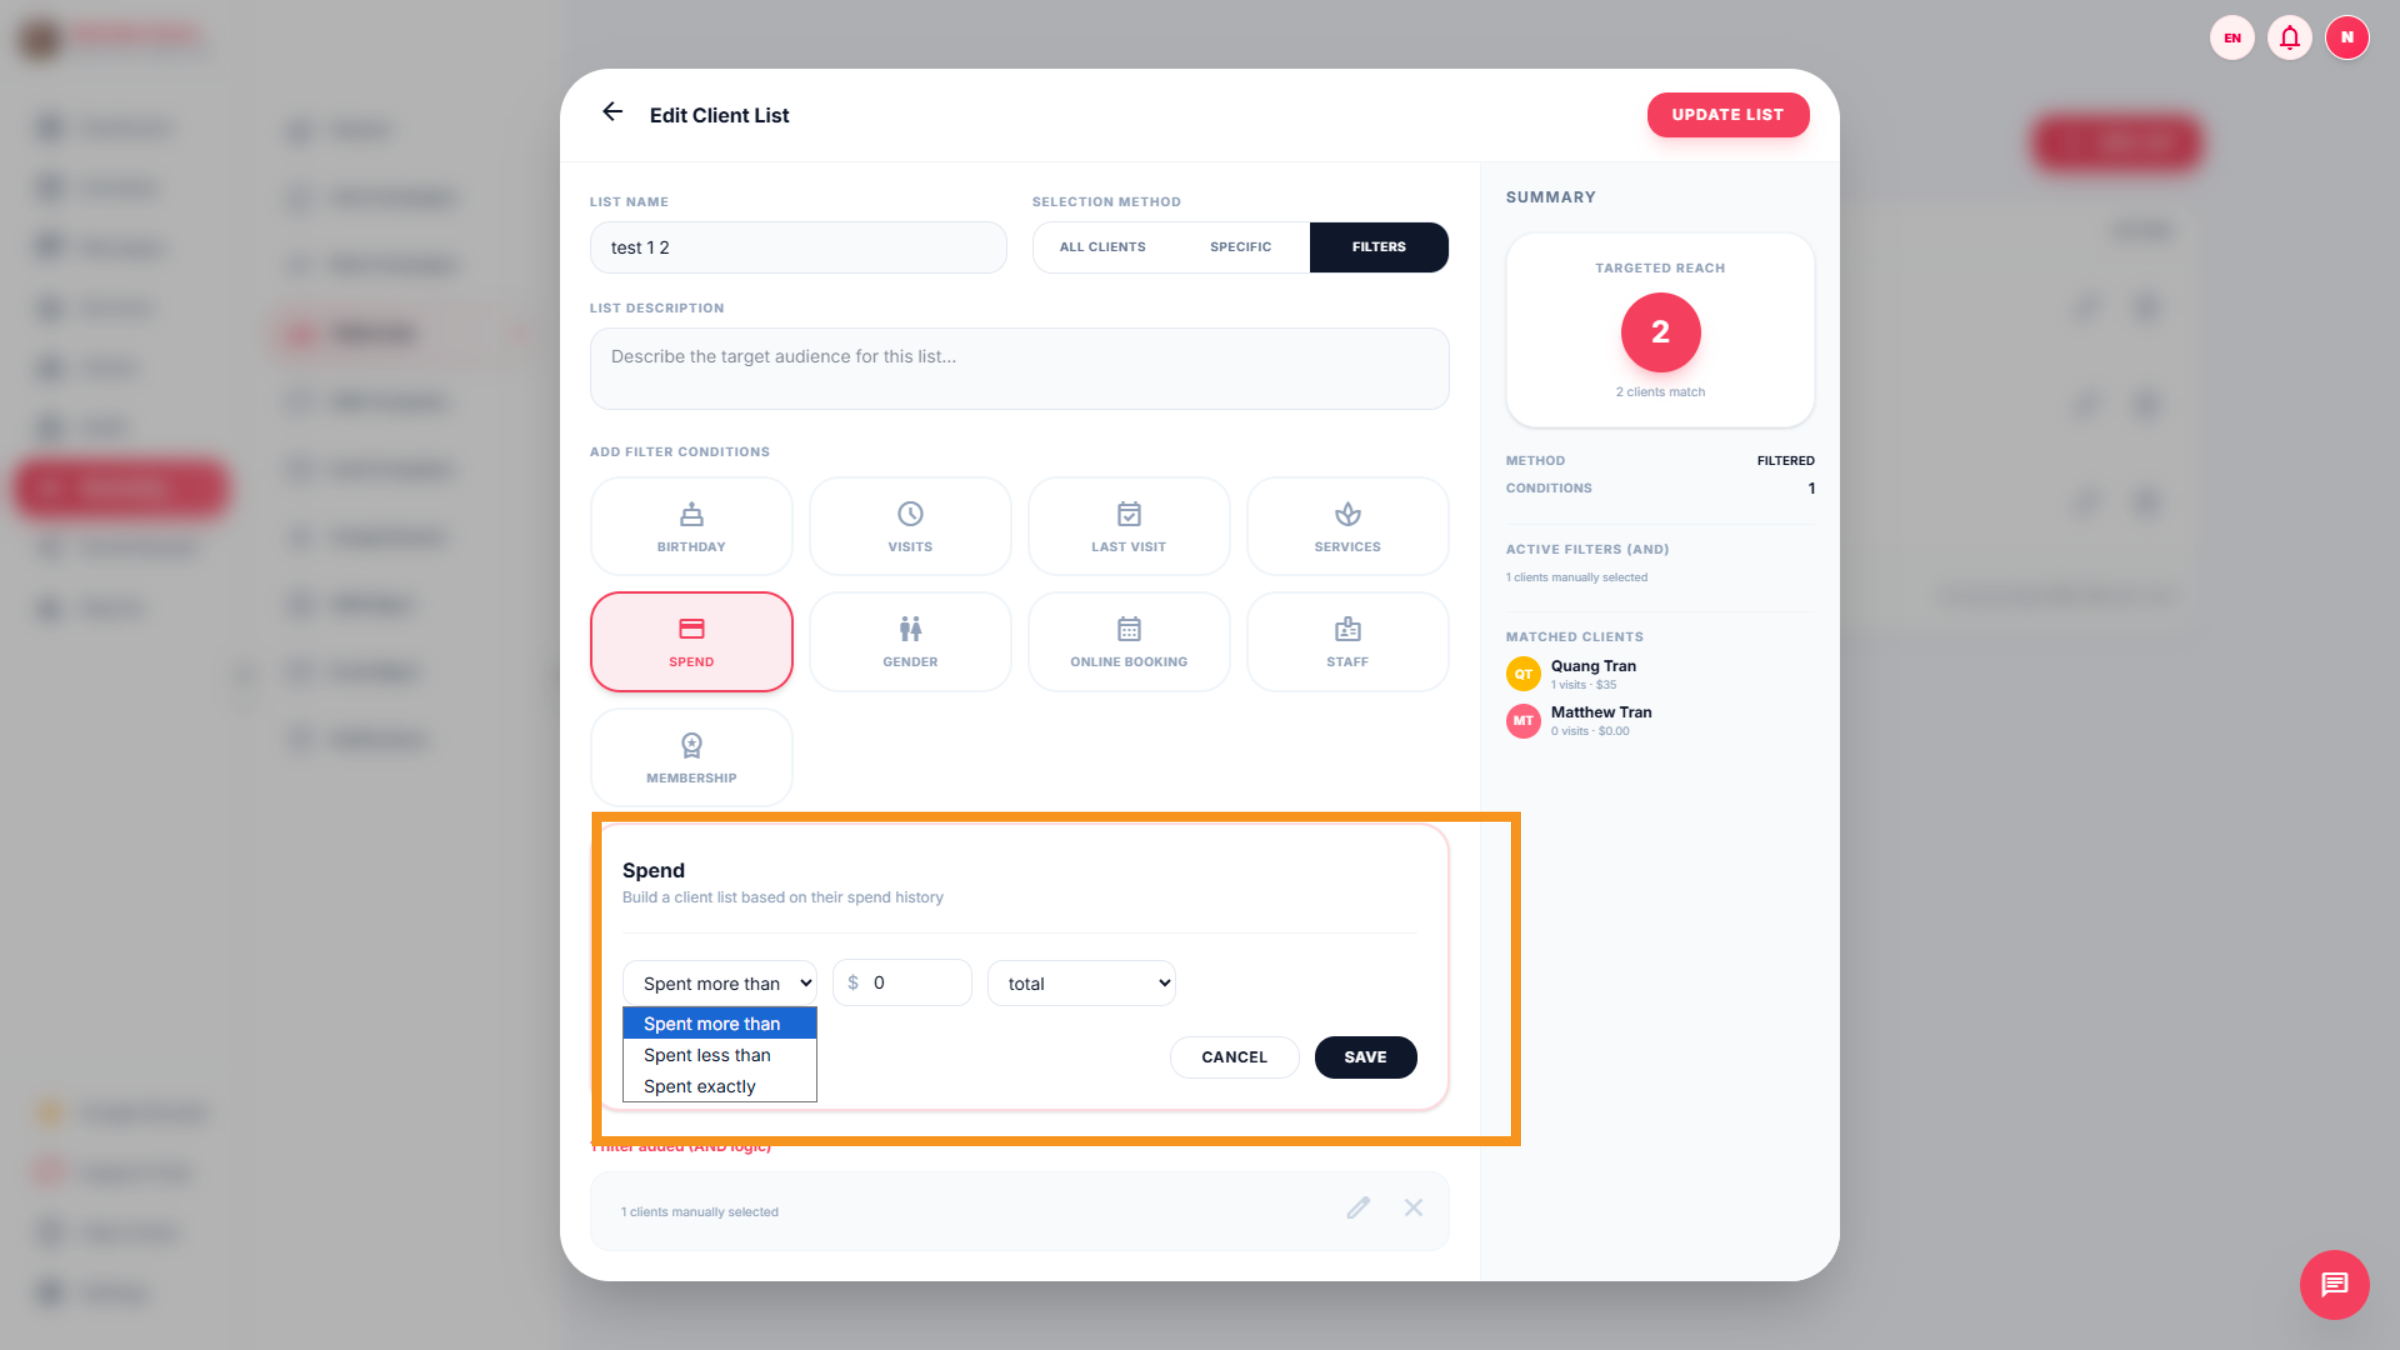
15. Choose Spending Criteria
Click on the "Spend" option to configure the campaign for customers.
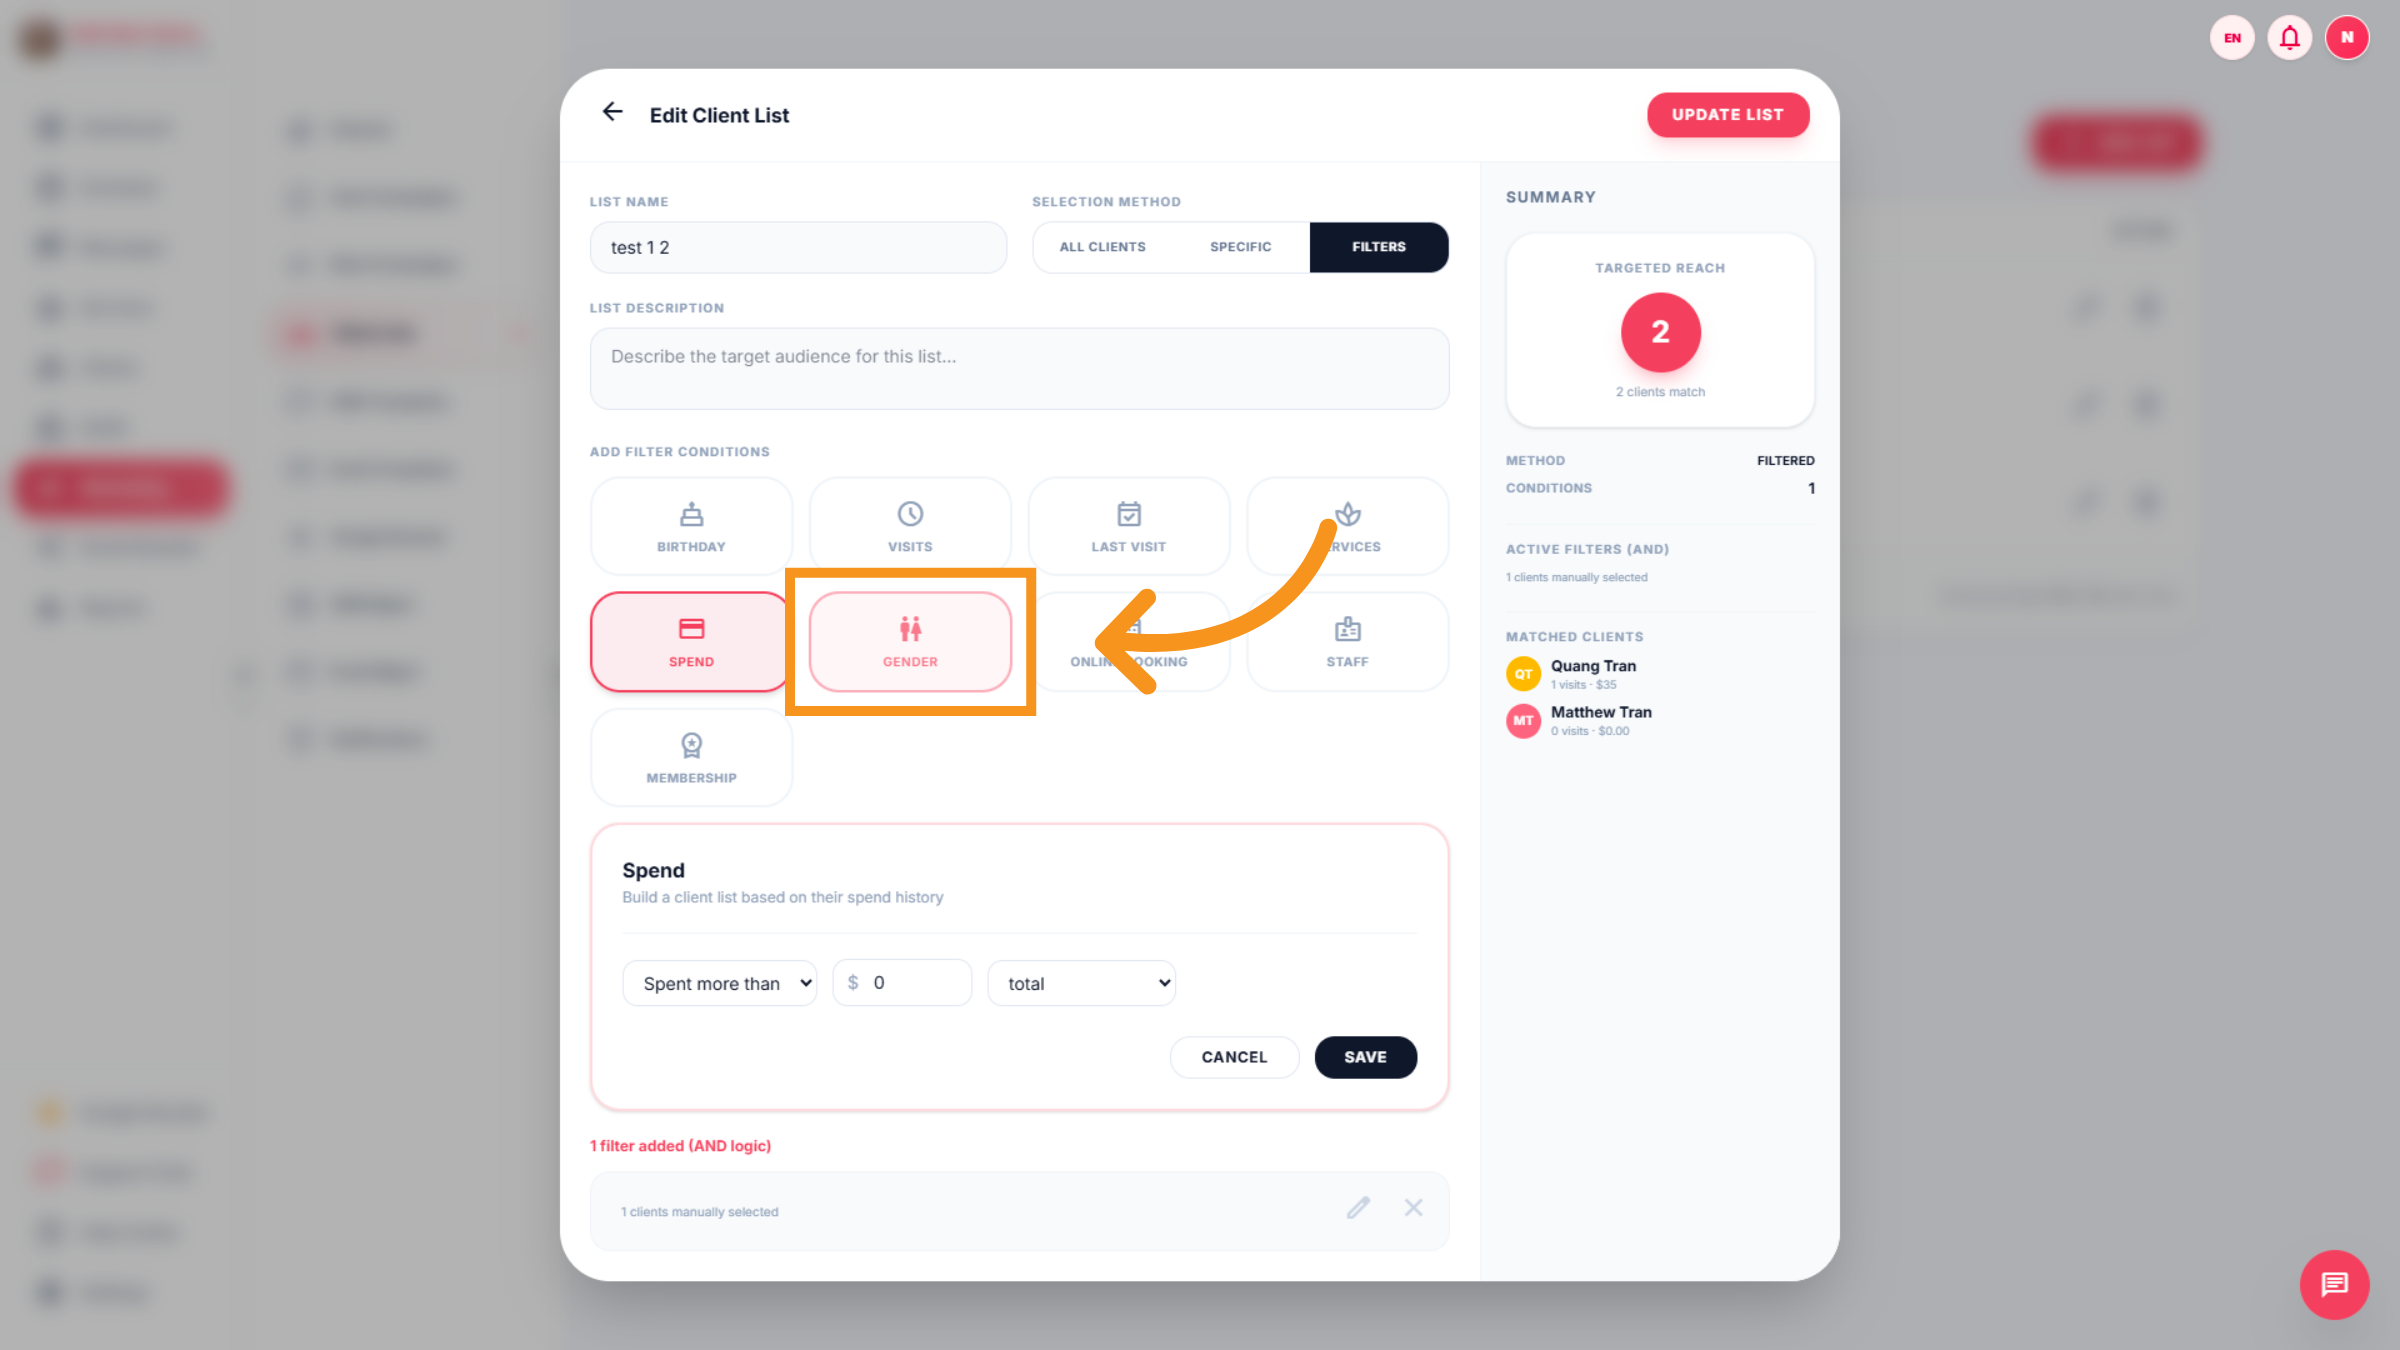
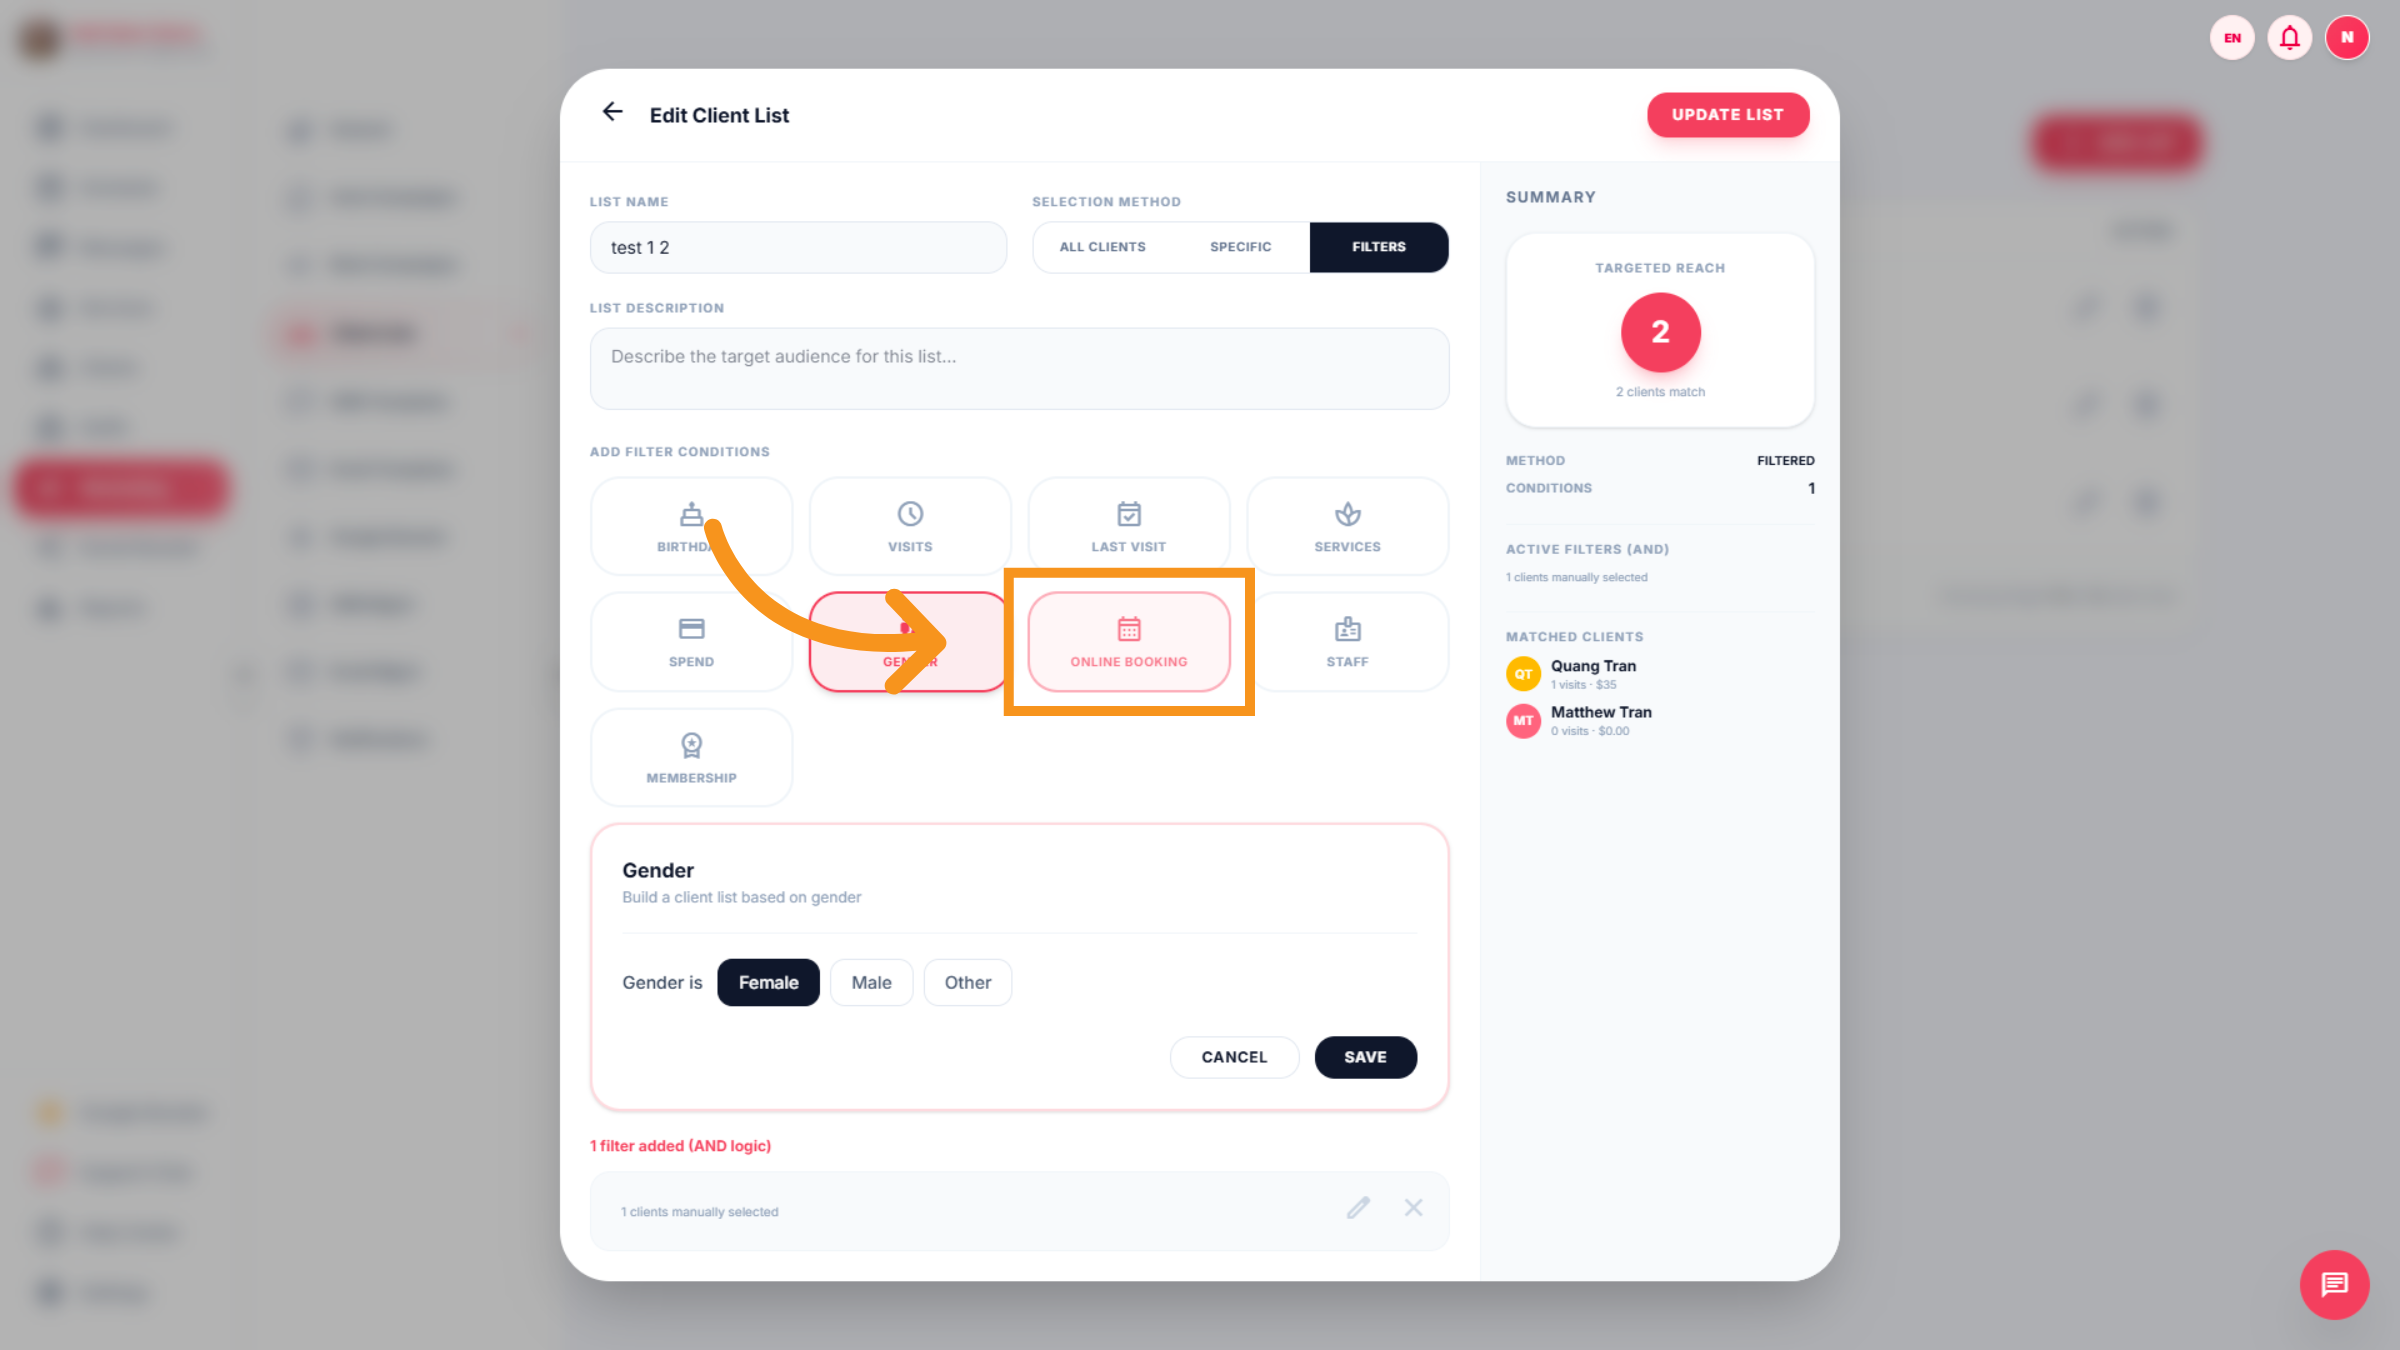
16. Apply Gender Filter
Click the "Gender" filter to segment clients by gender.
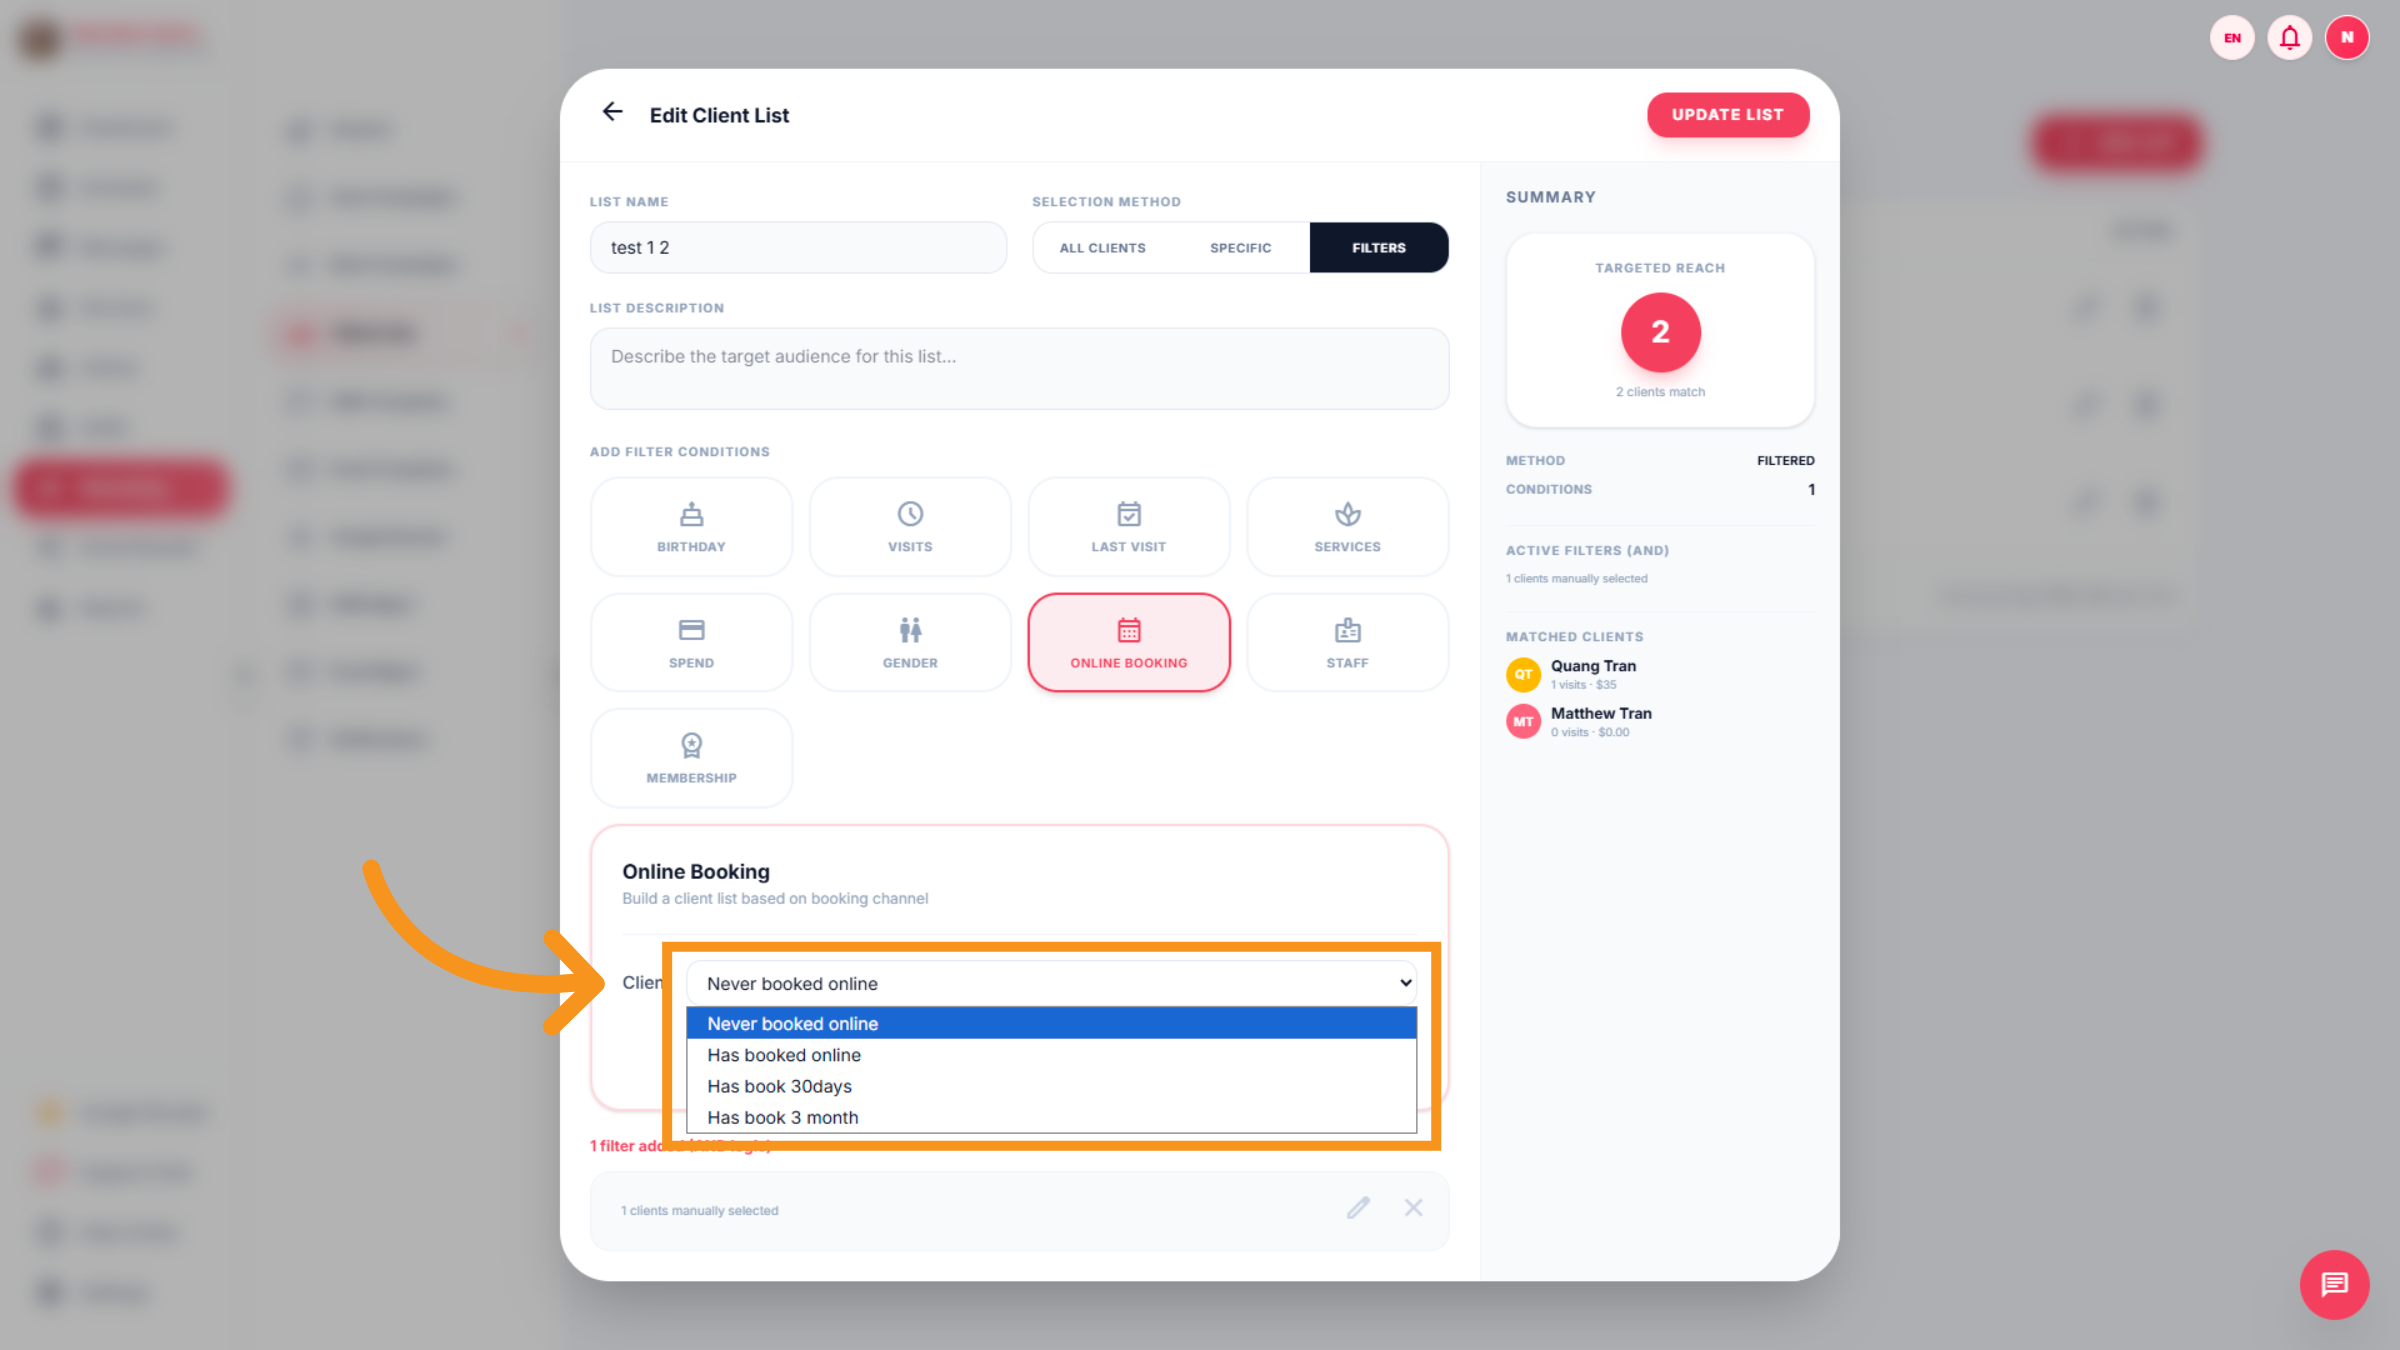
17. Access Online Booking Filter
Click the "Online Booking" filter to target clients based on online booking activity.
18. Select Booking History
Click options such as "Never booked online", "Has booked online", or "Has book 30days" to filter clients by booking history.
19. Apply Badge Filter
Click the "badge" filter to include clients with specific badges or statuses.
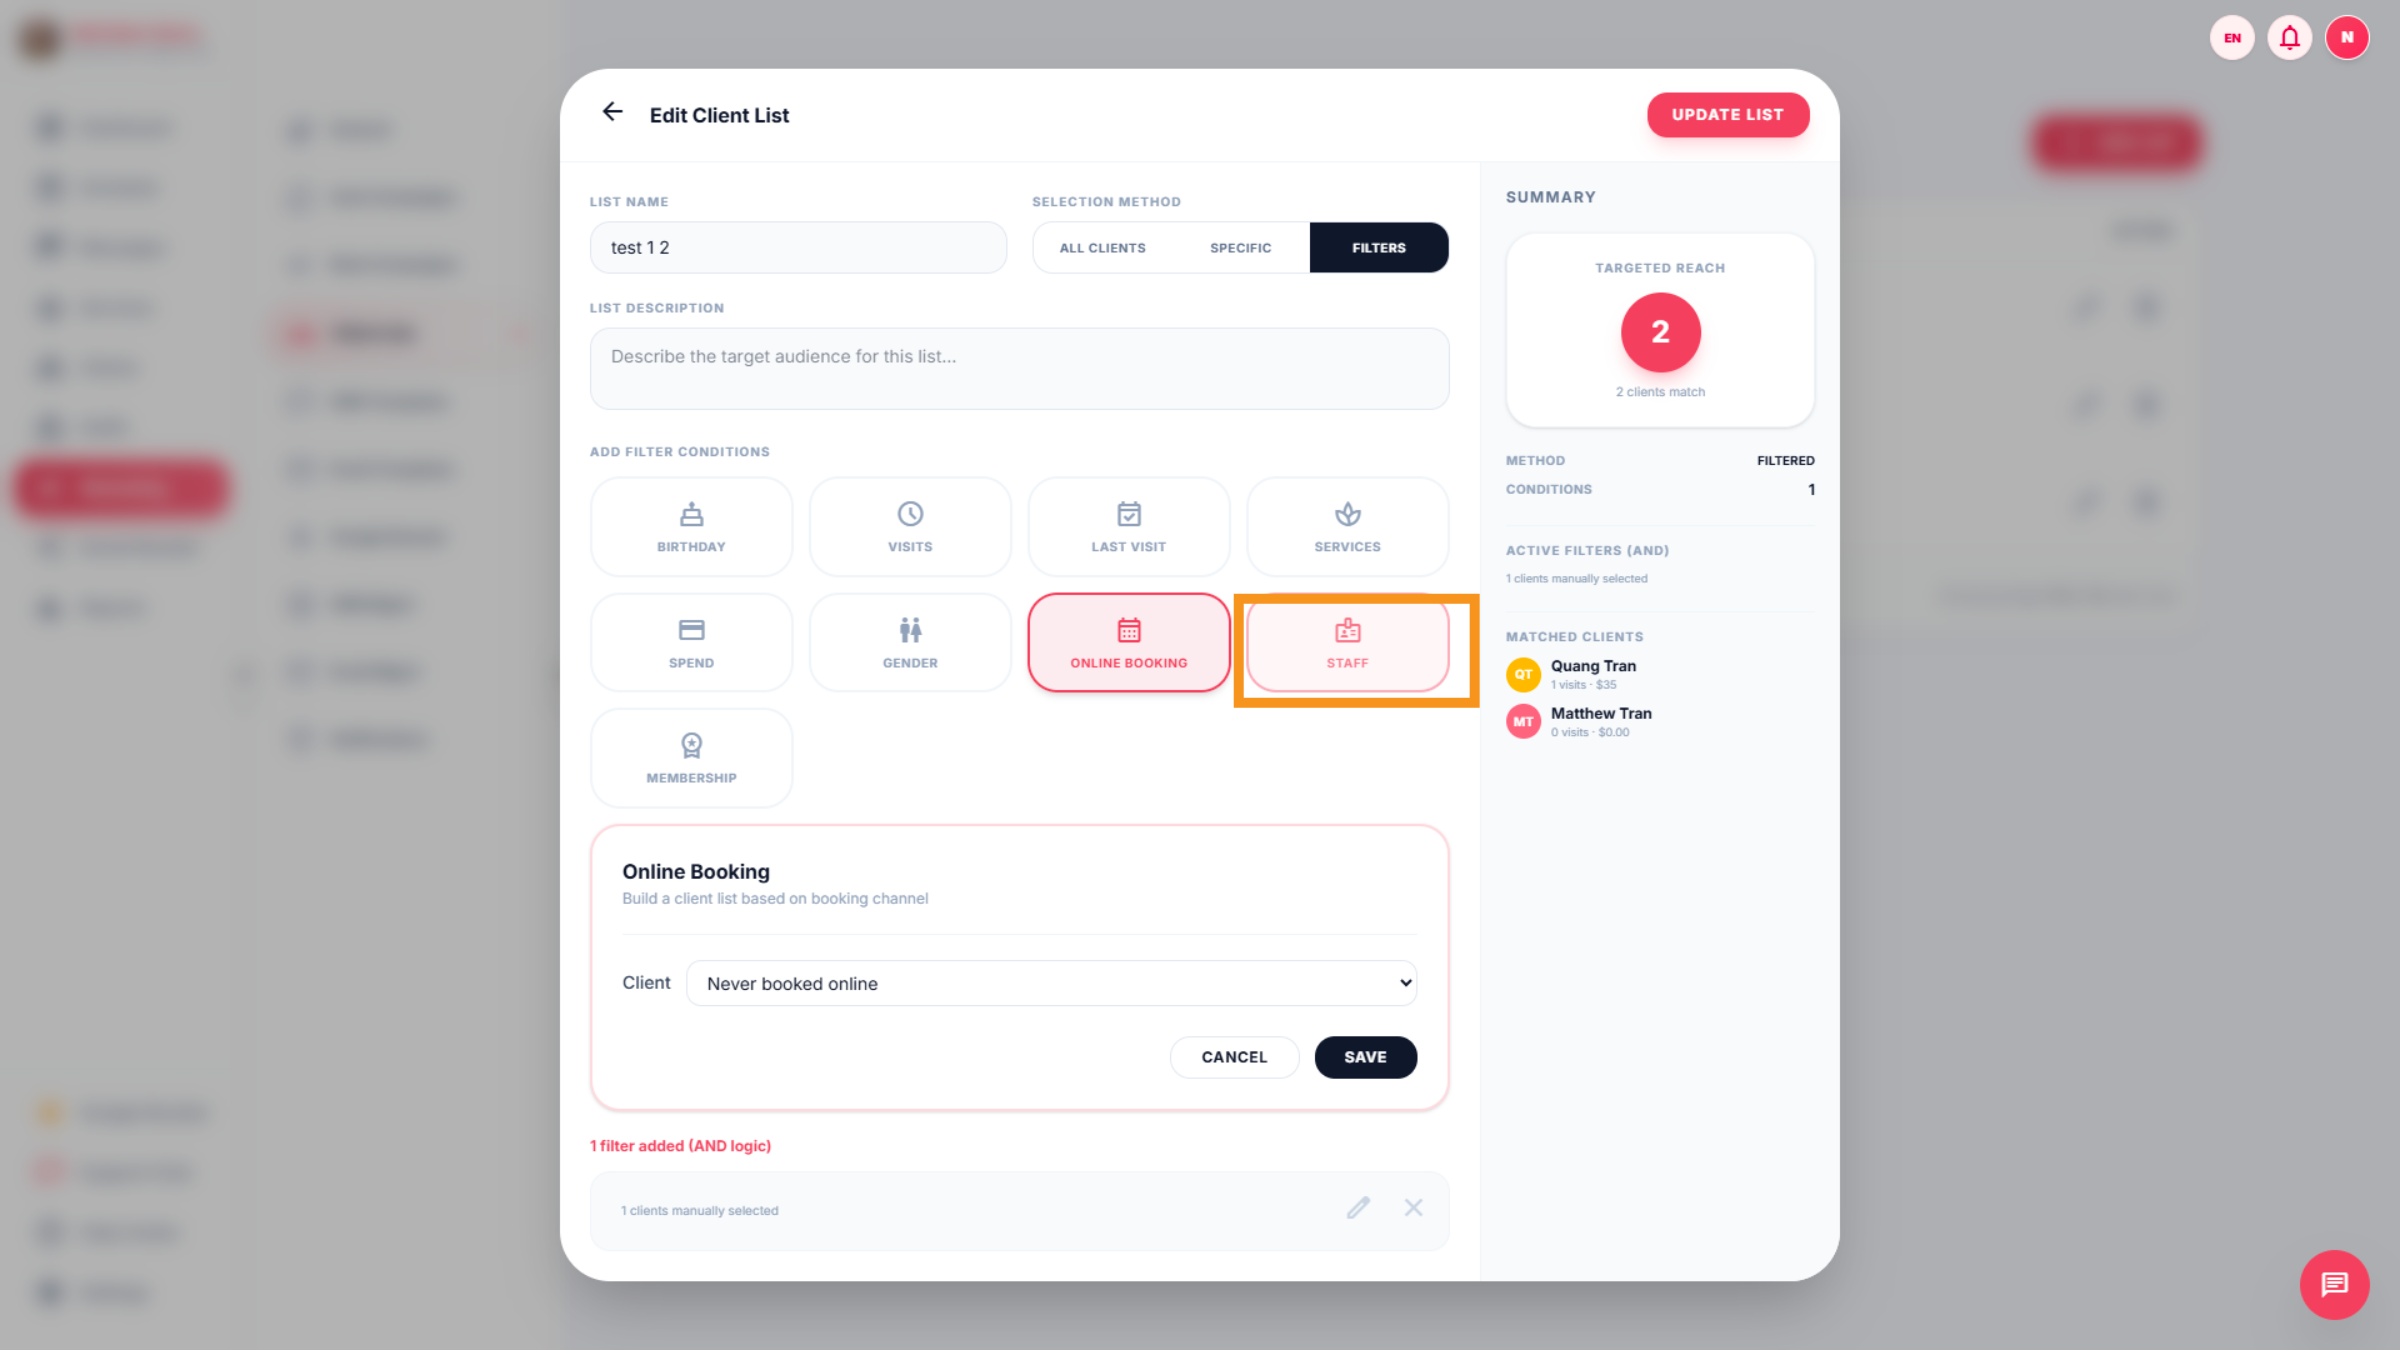
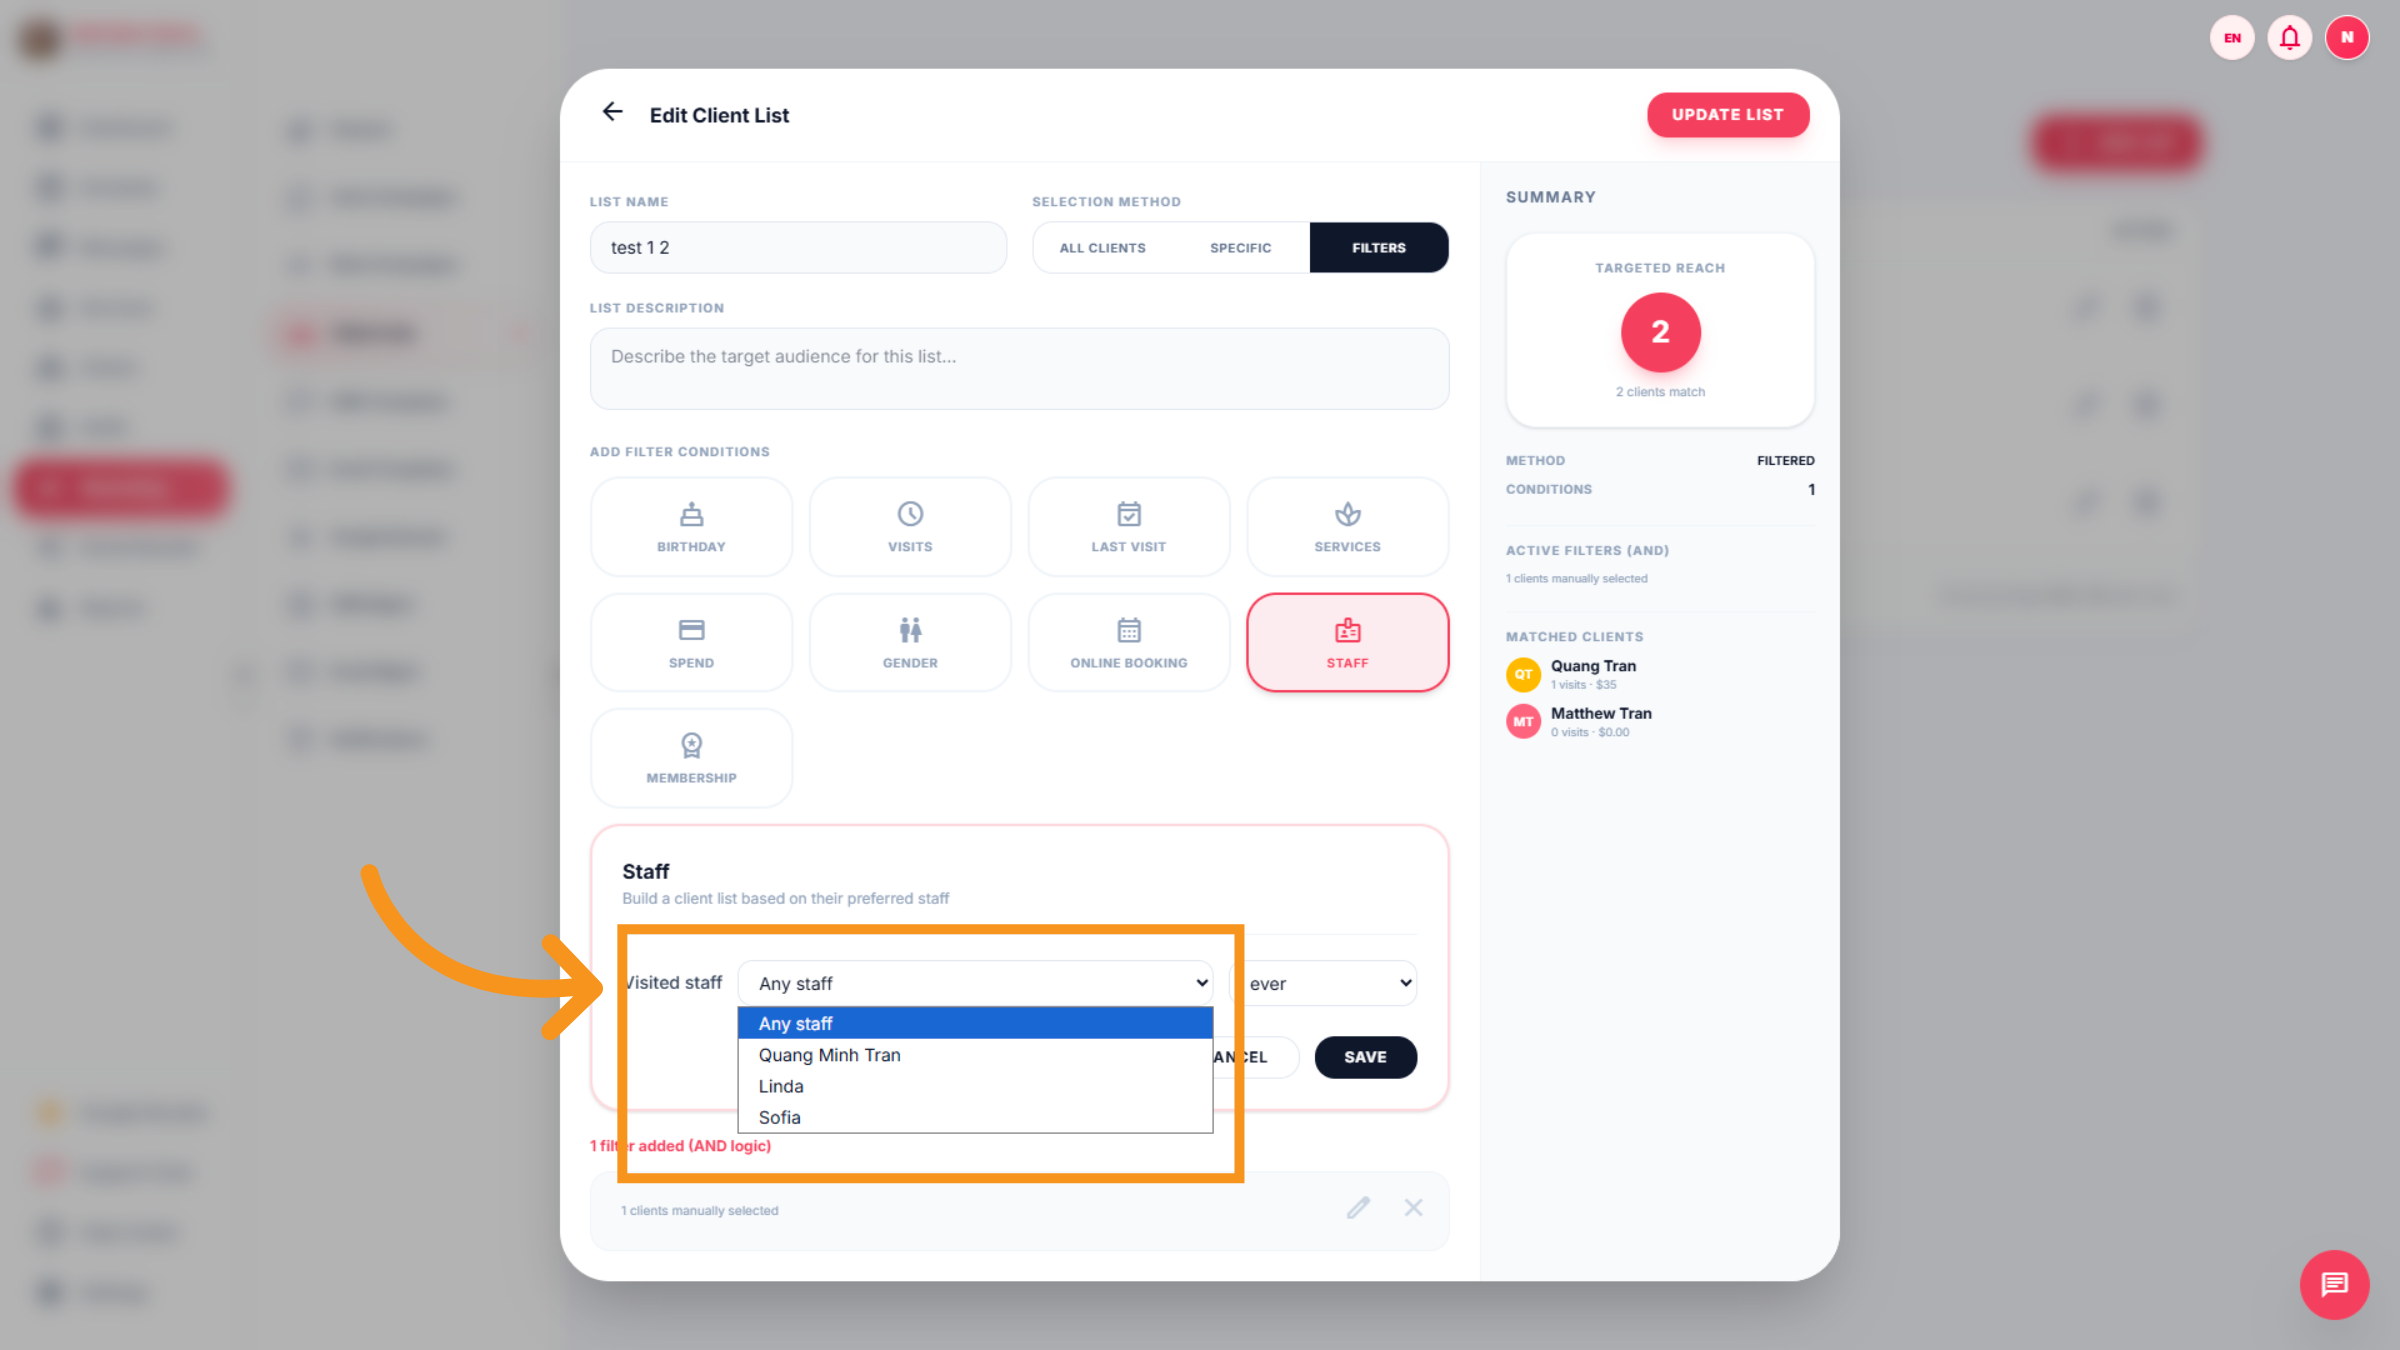
20. Choose Staff Filter
Click options "Any staff", "Quang Minh Tran", "Linda", or "Sofia" to filter clients by assigned staff
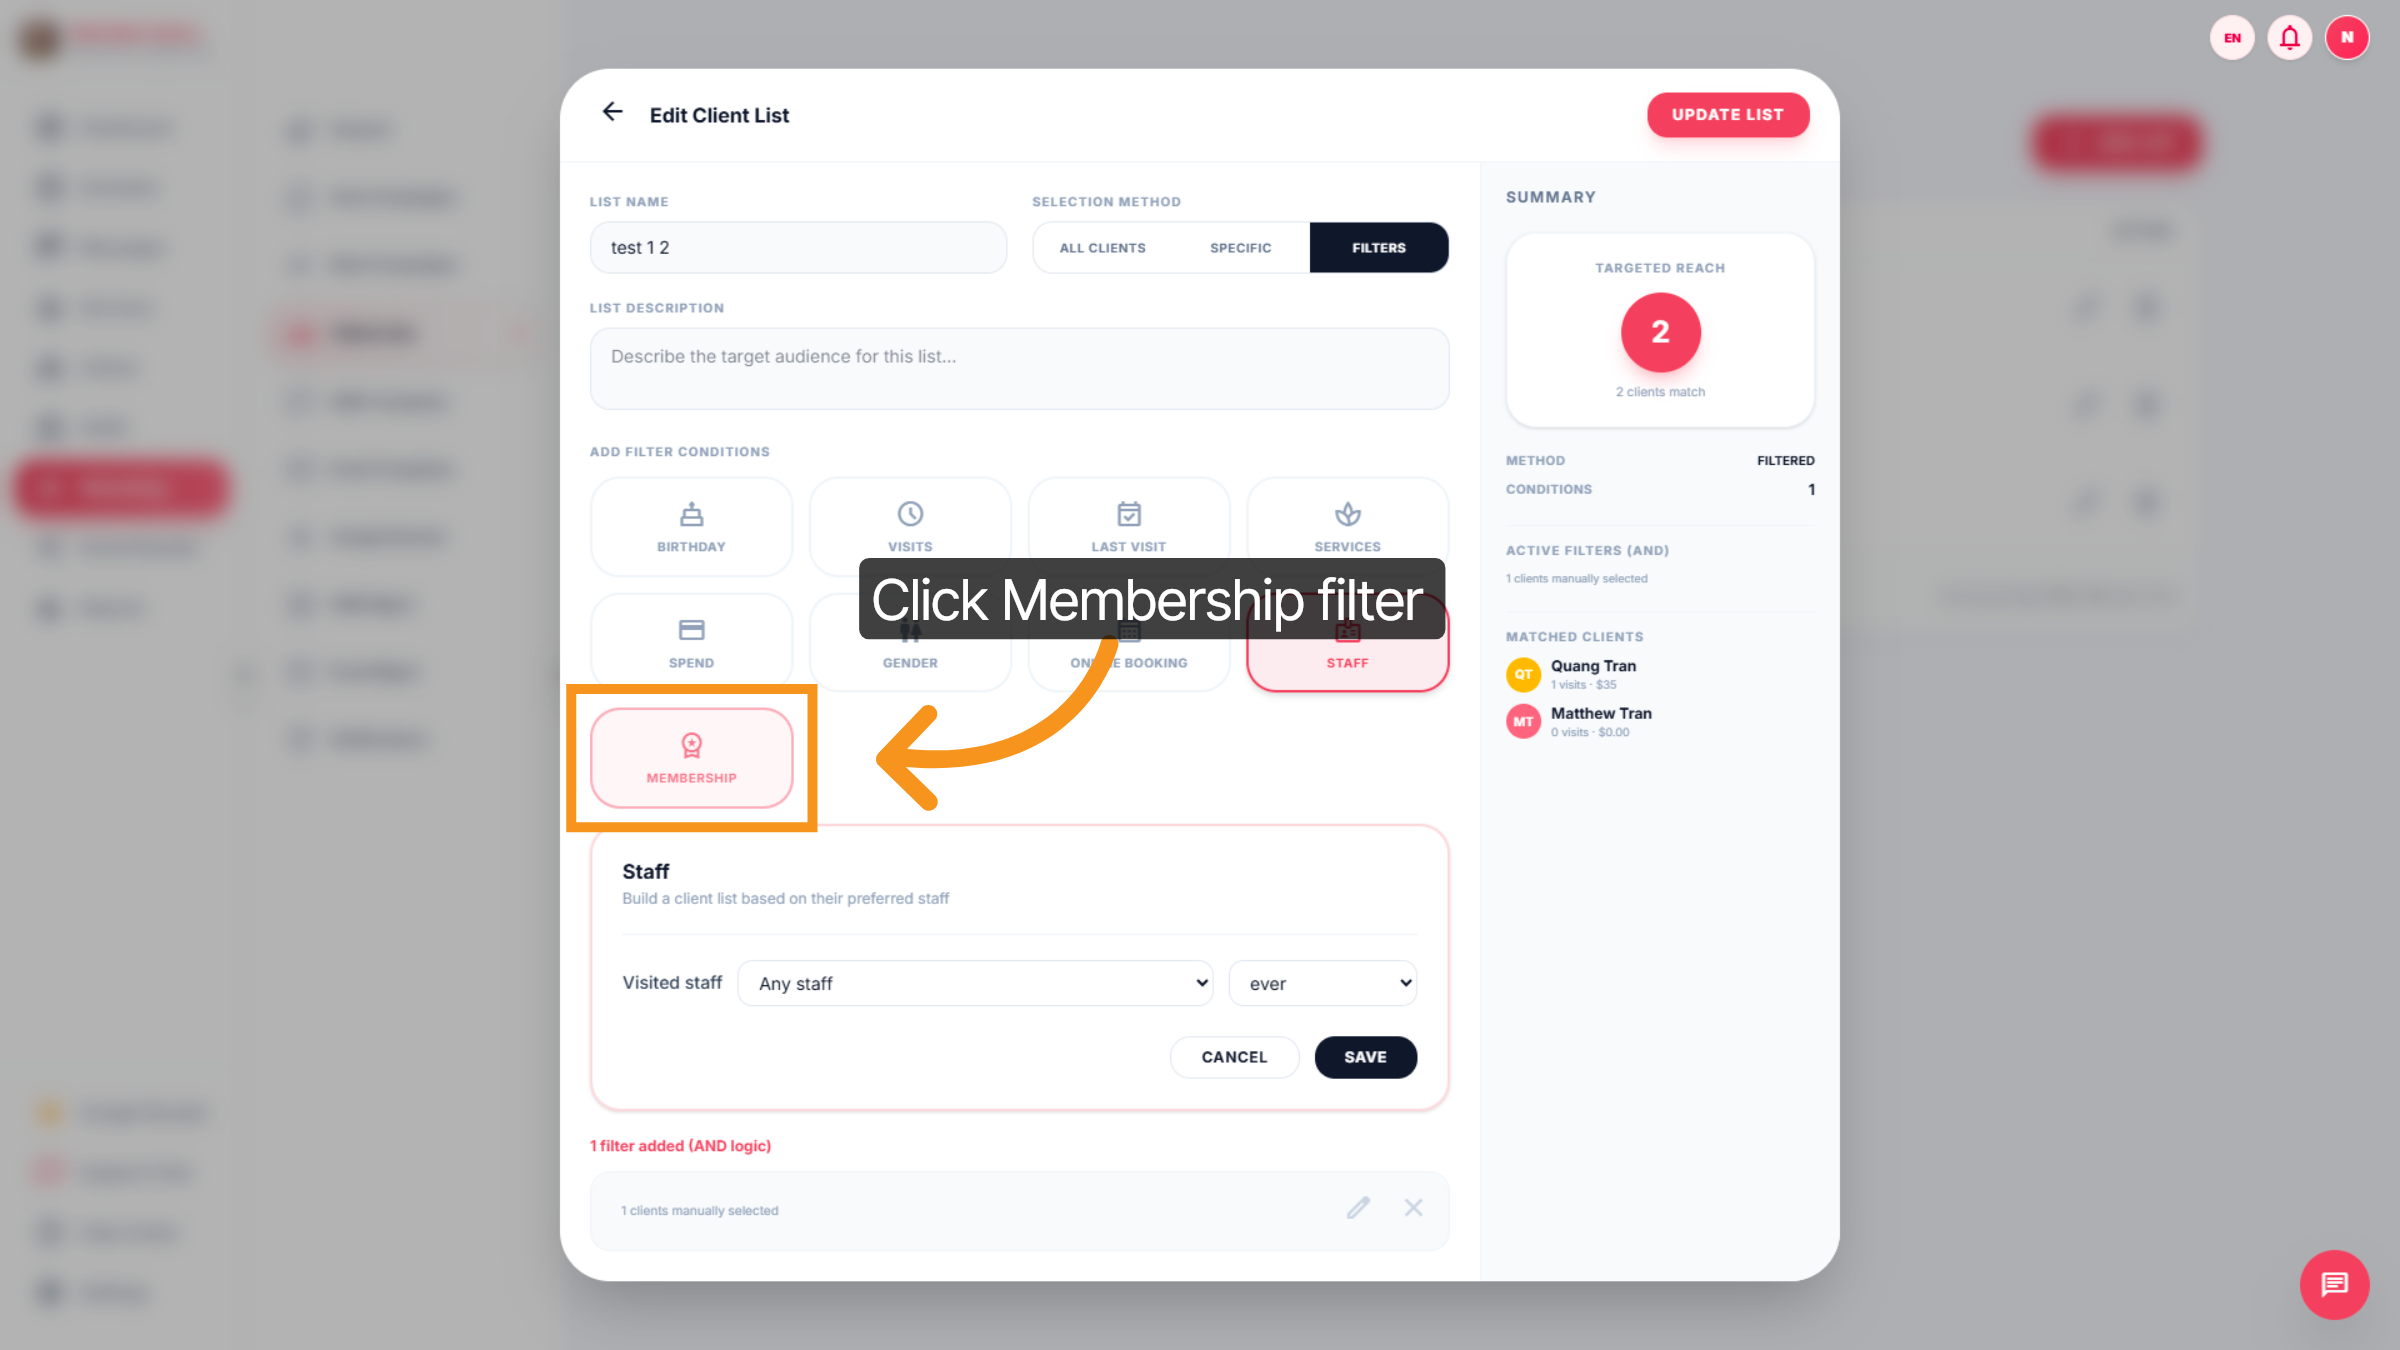
21. Select Membership Filter
Click the "Membership" filter to target clients with premium memberships.
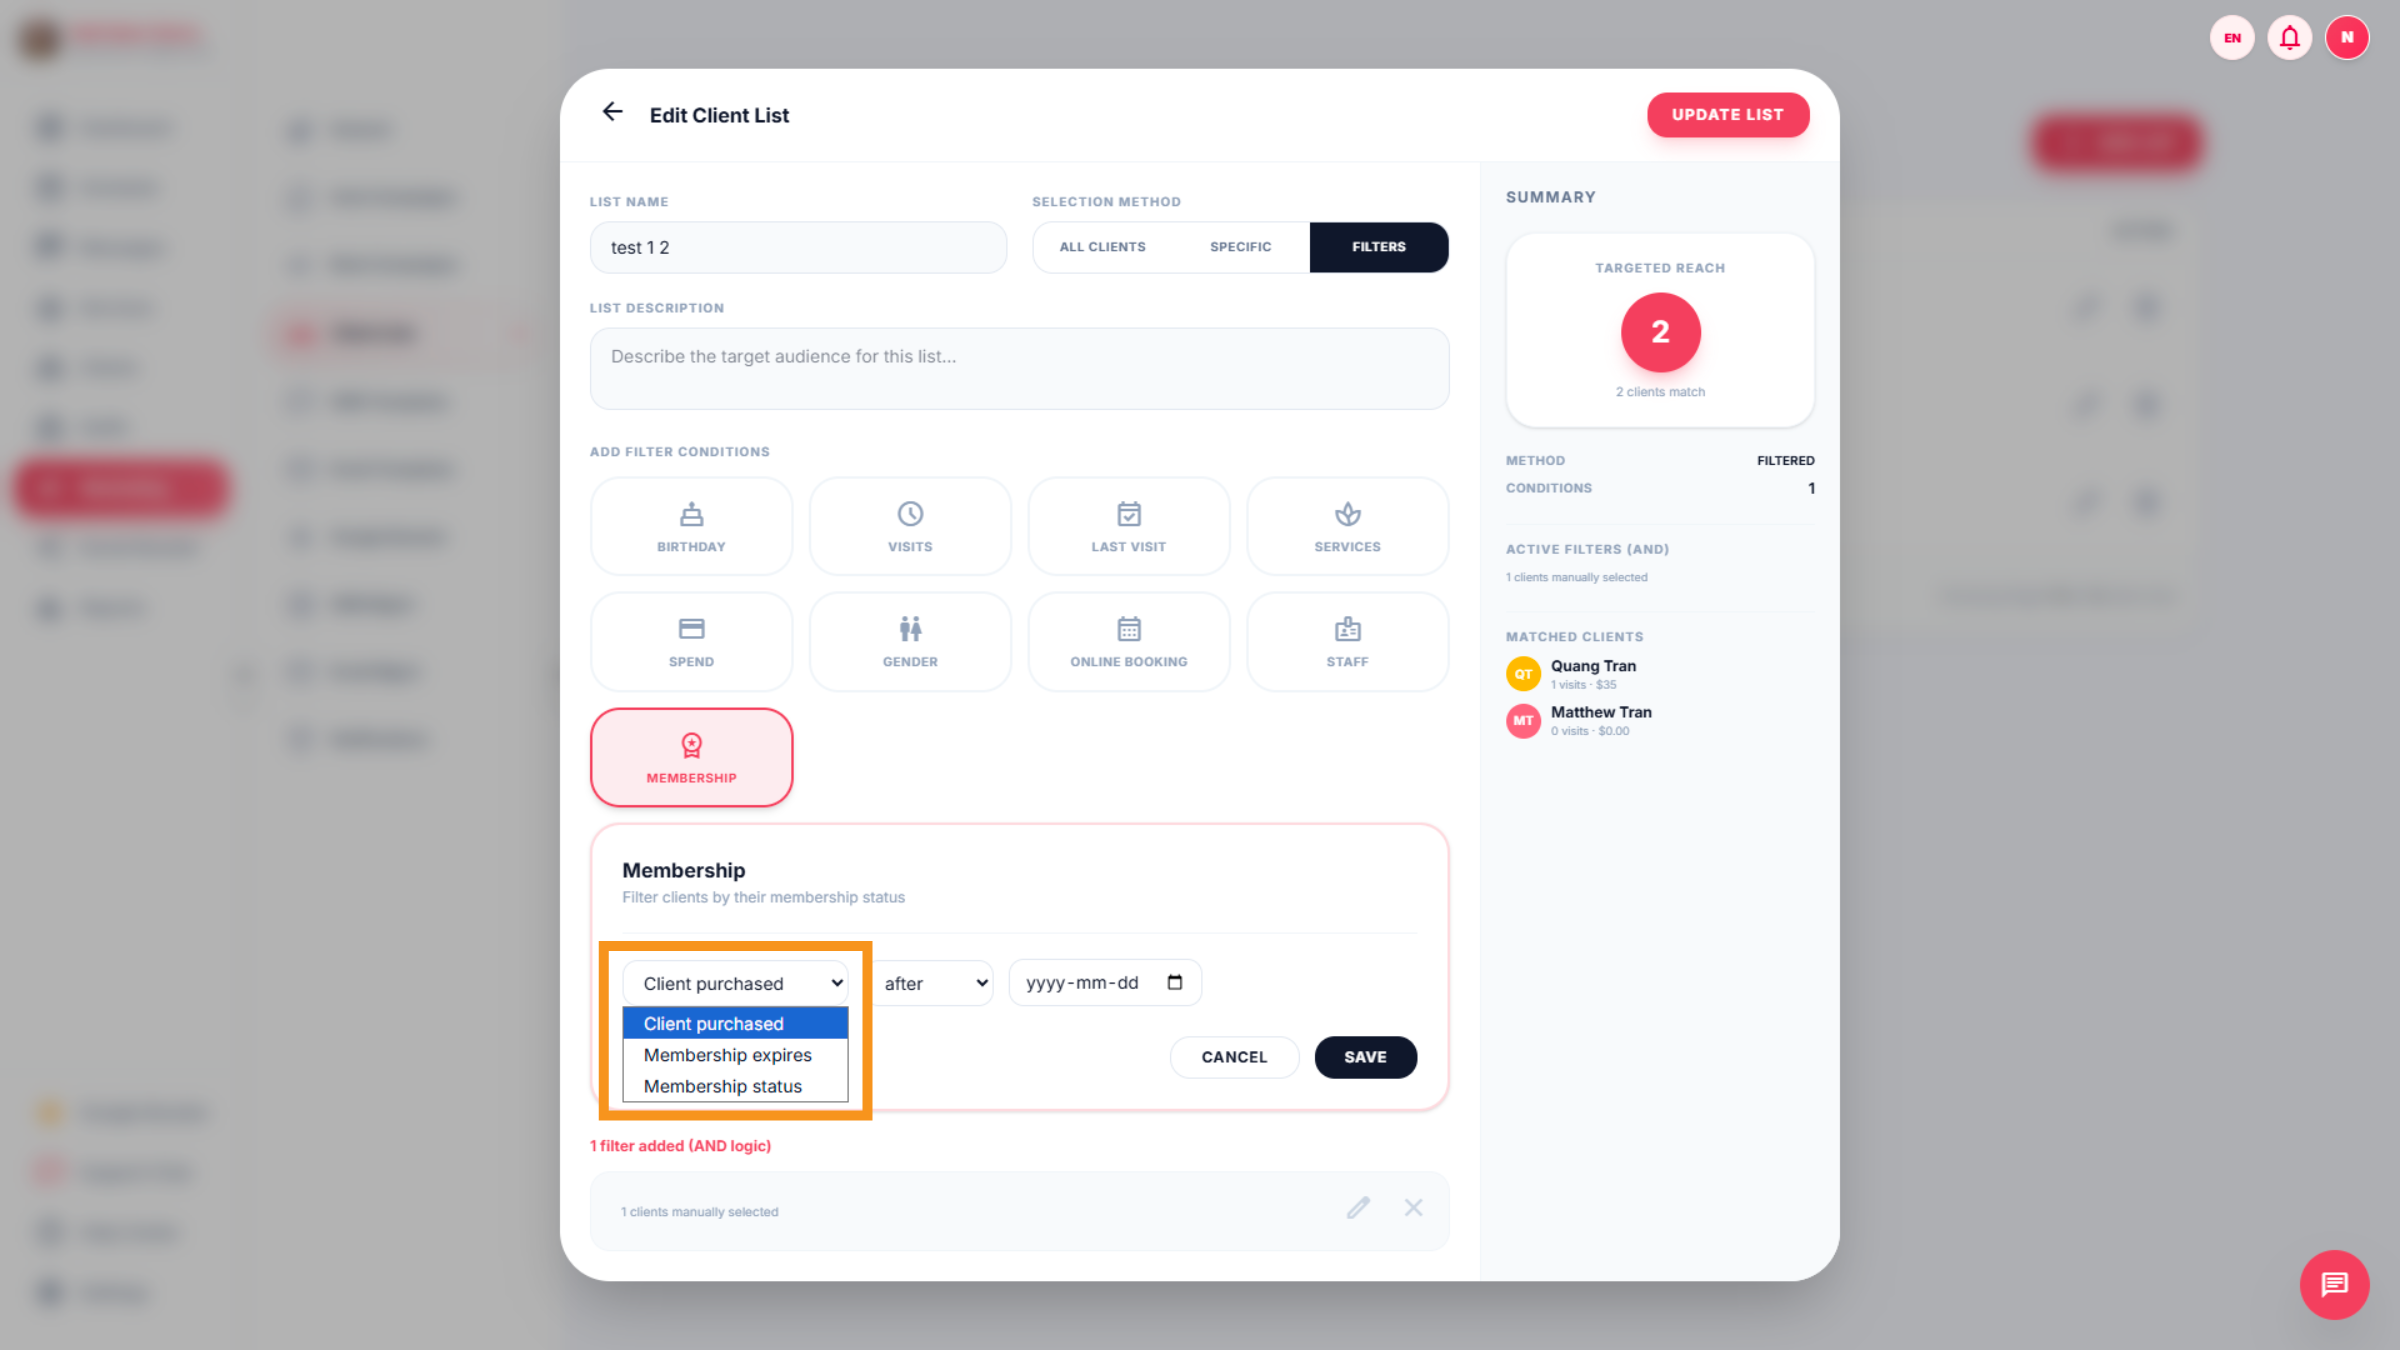
22. Apply Membership Status
Click options such as "Client purchased", "Membership expires", or "Membership status" to refine membership filters.
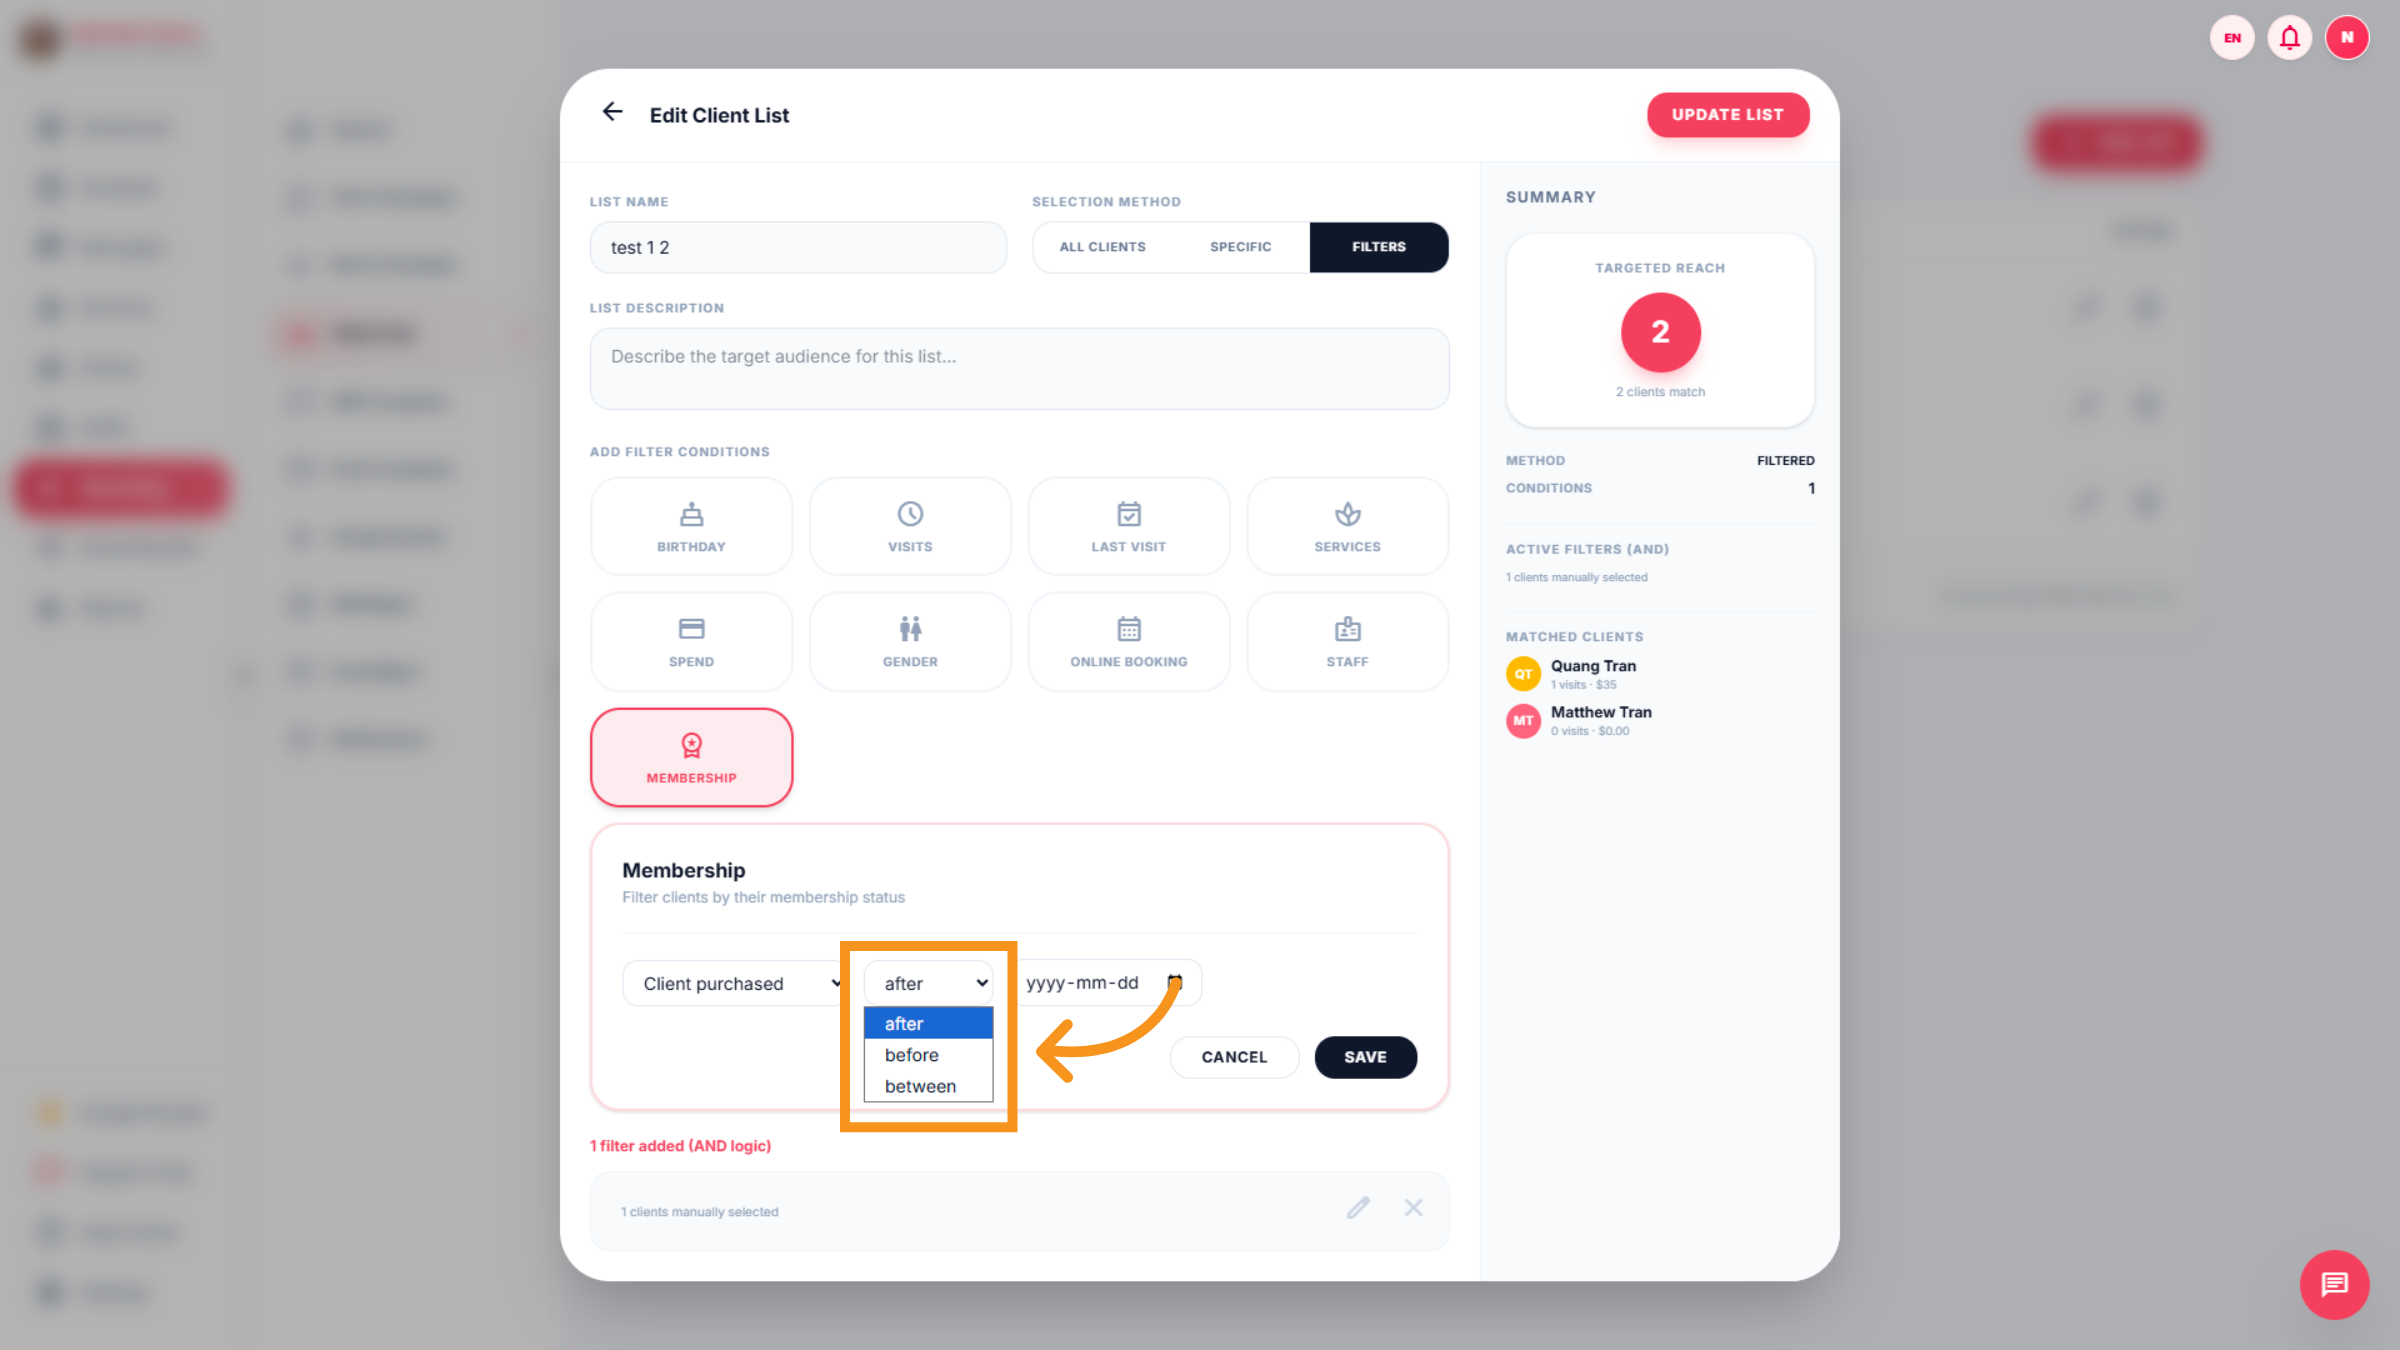
23. Choose Date Range Filter
Click options like "after", "before", or "between" to specify date ranges for filters.
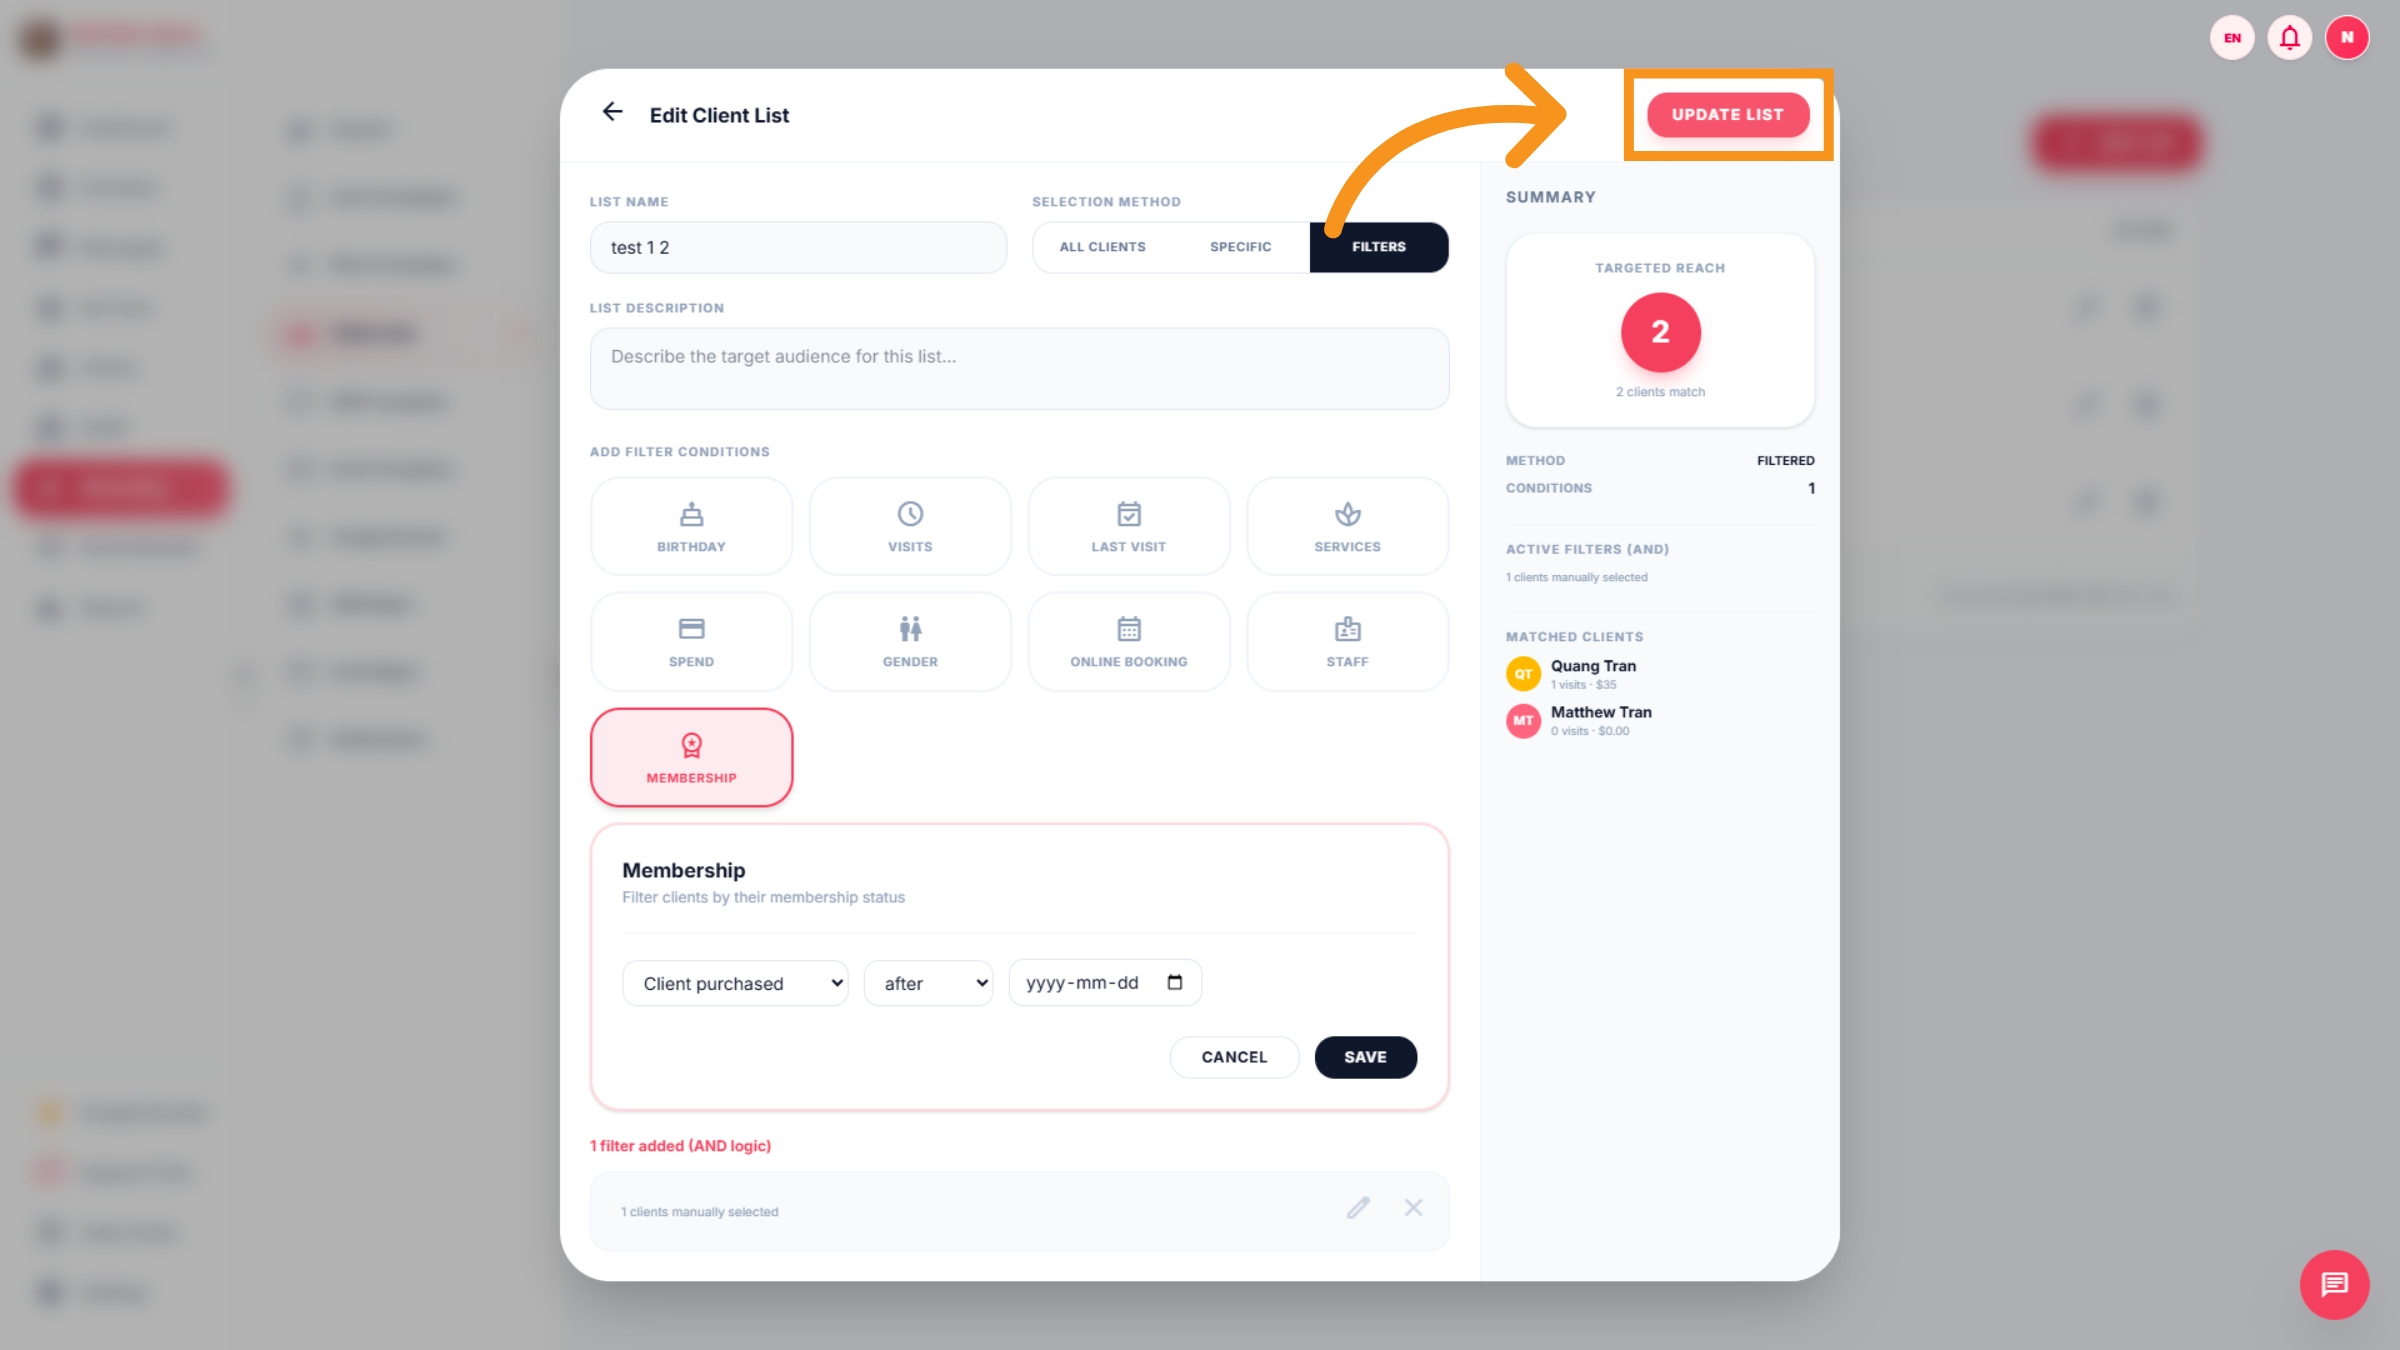
24. Update Client List
Click the "UPDATE LIST" button to apply your filter selections and refresh the client list.
25. SMS Template
The SMS feature allows users to edit existing templates or create new SMS message templates
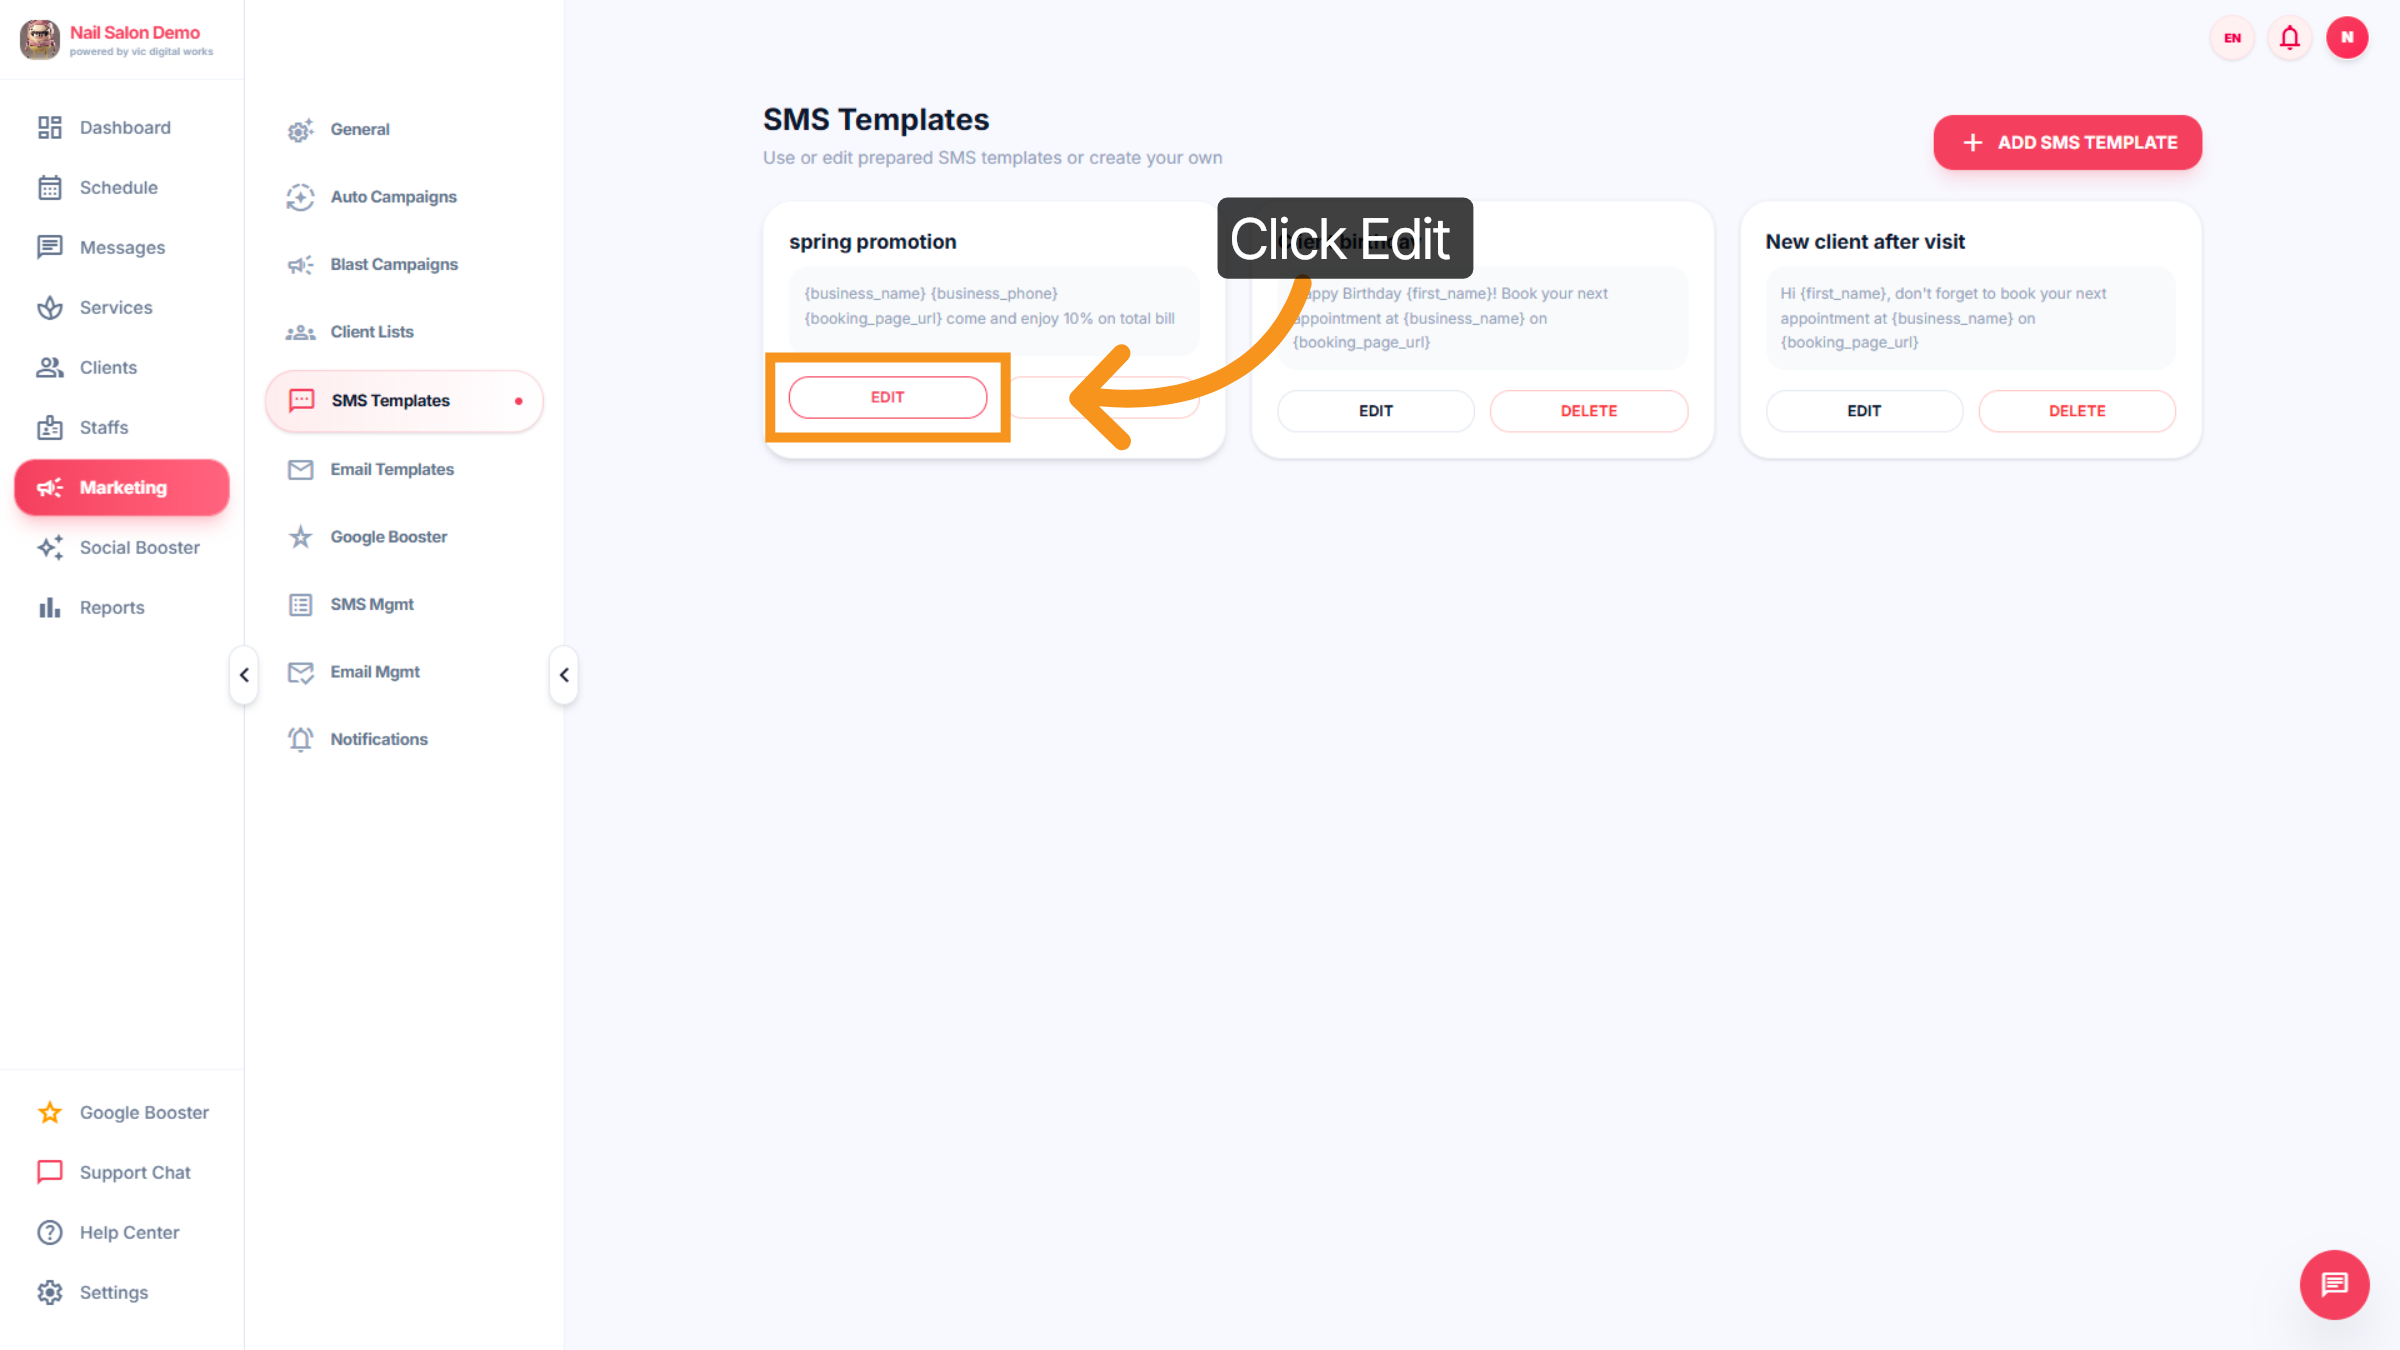
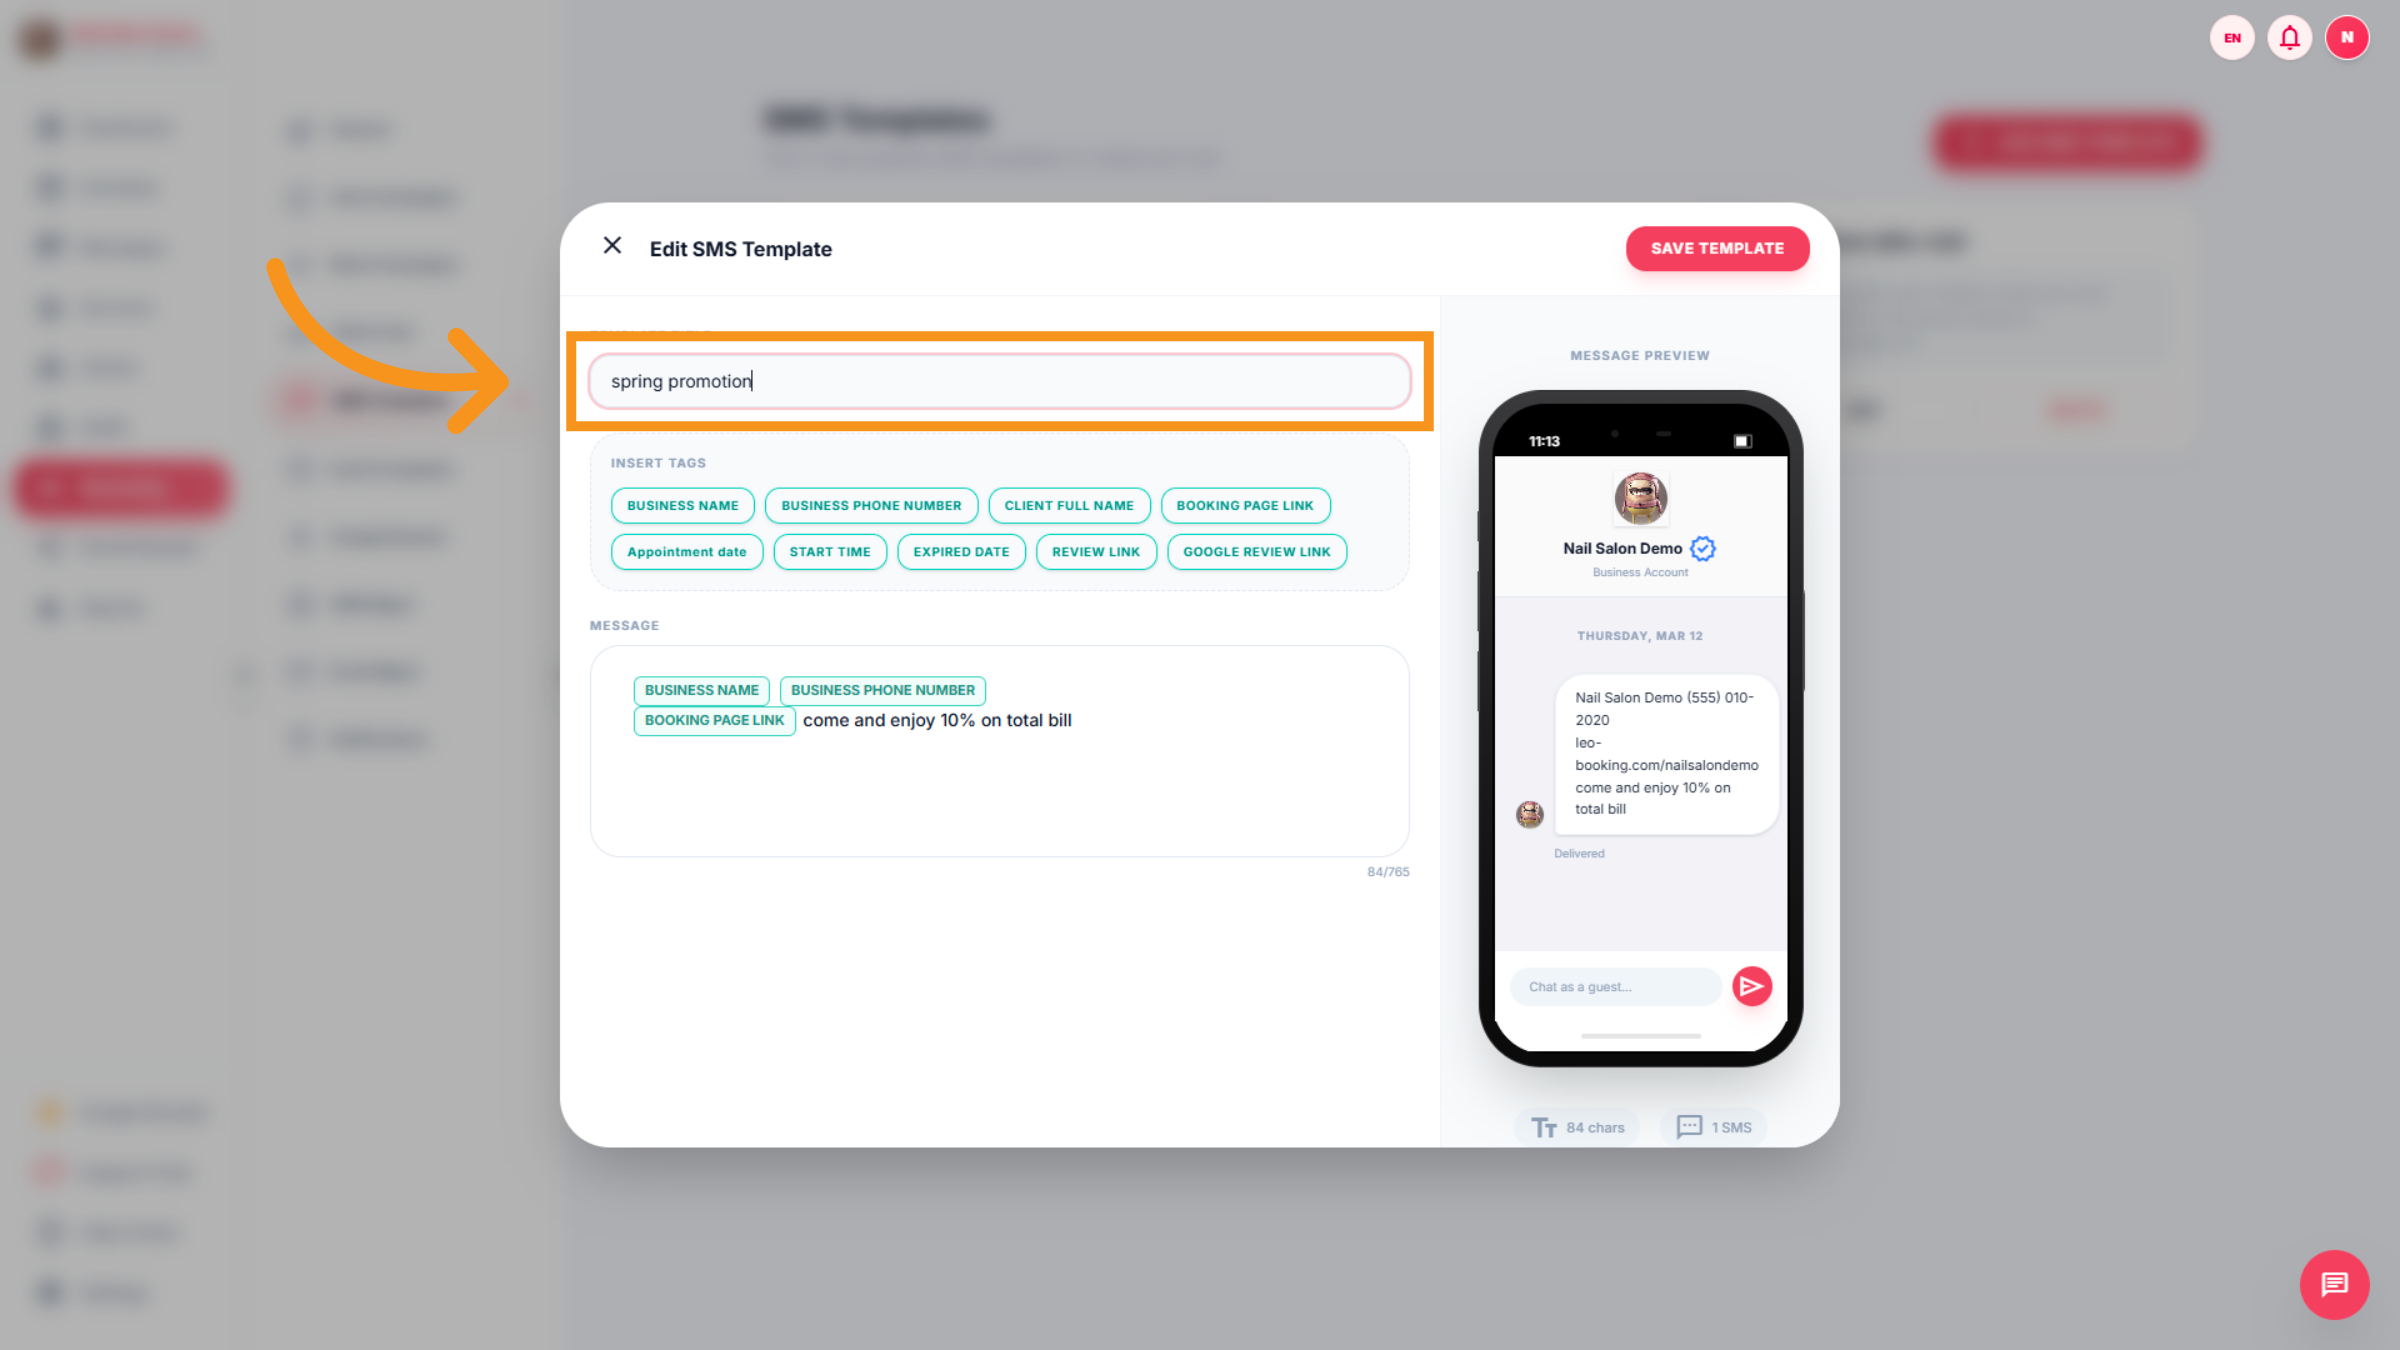
26. Edit template
Click the "..promotion" template to customize seasonal messaging.
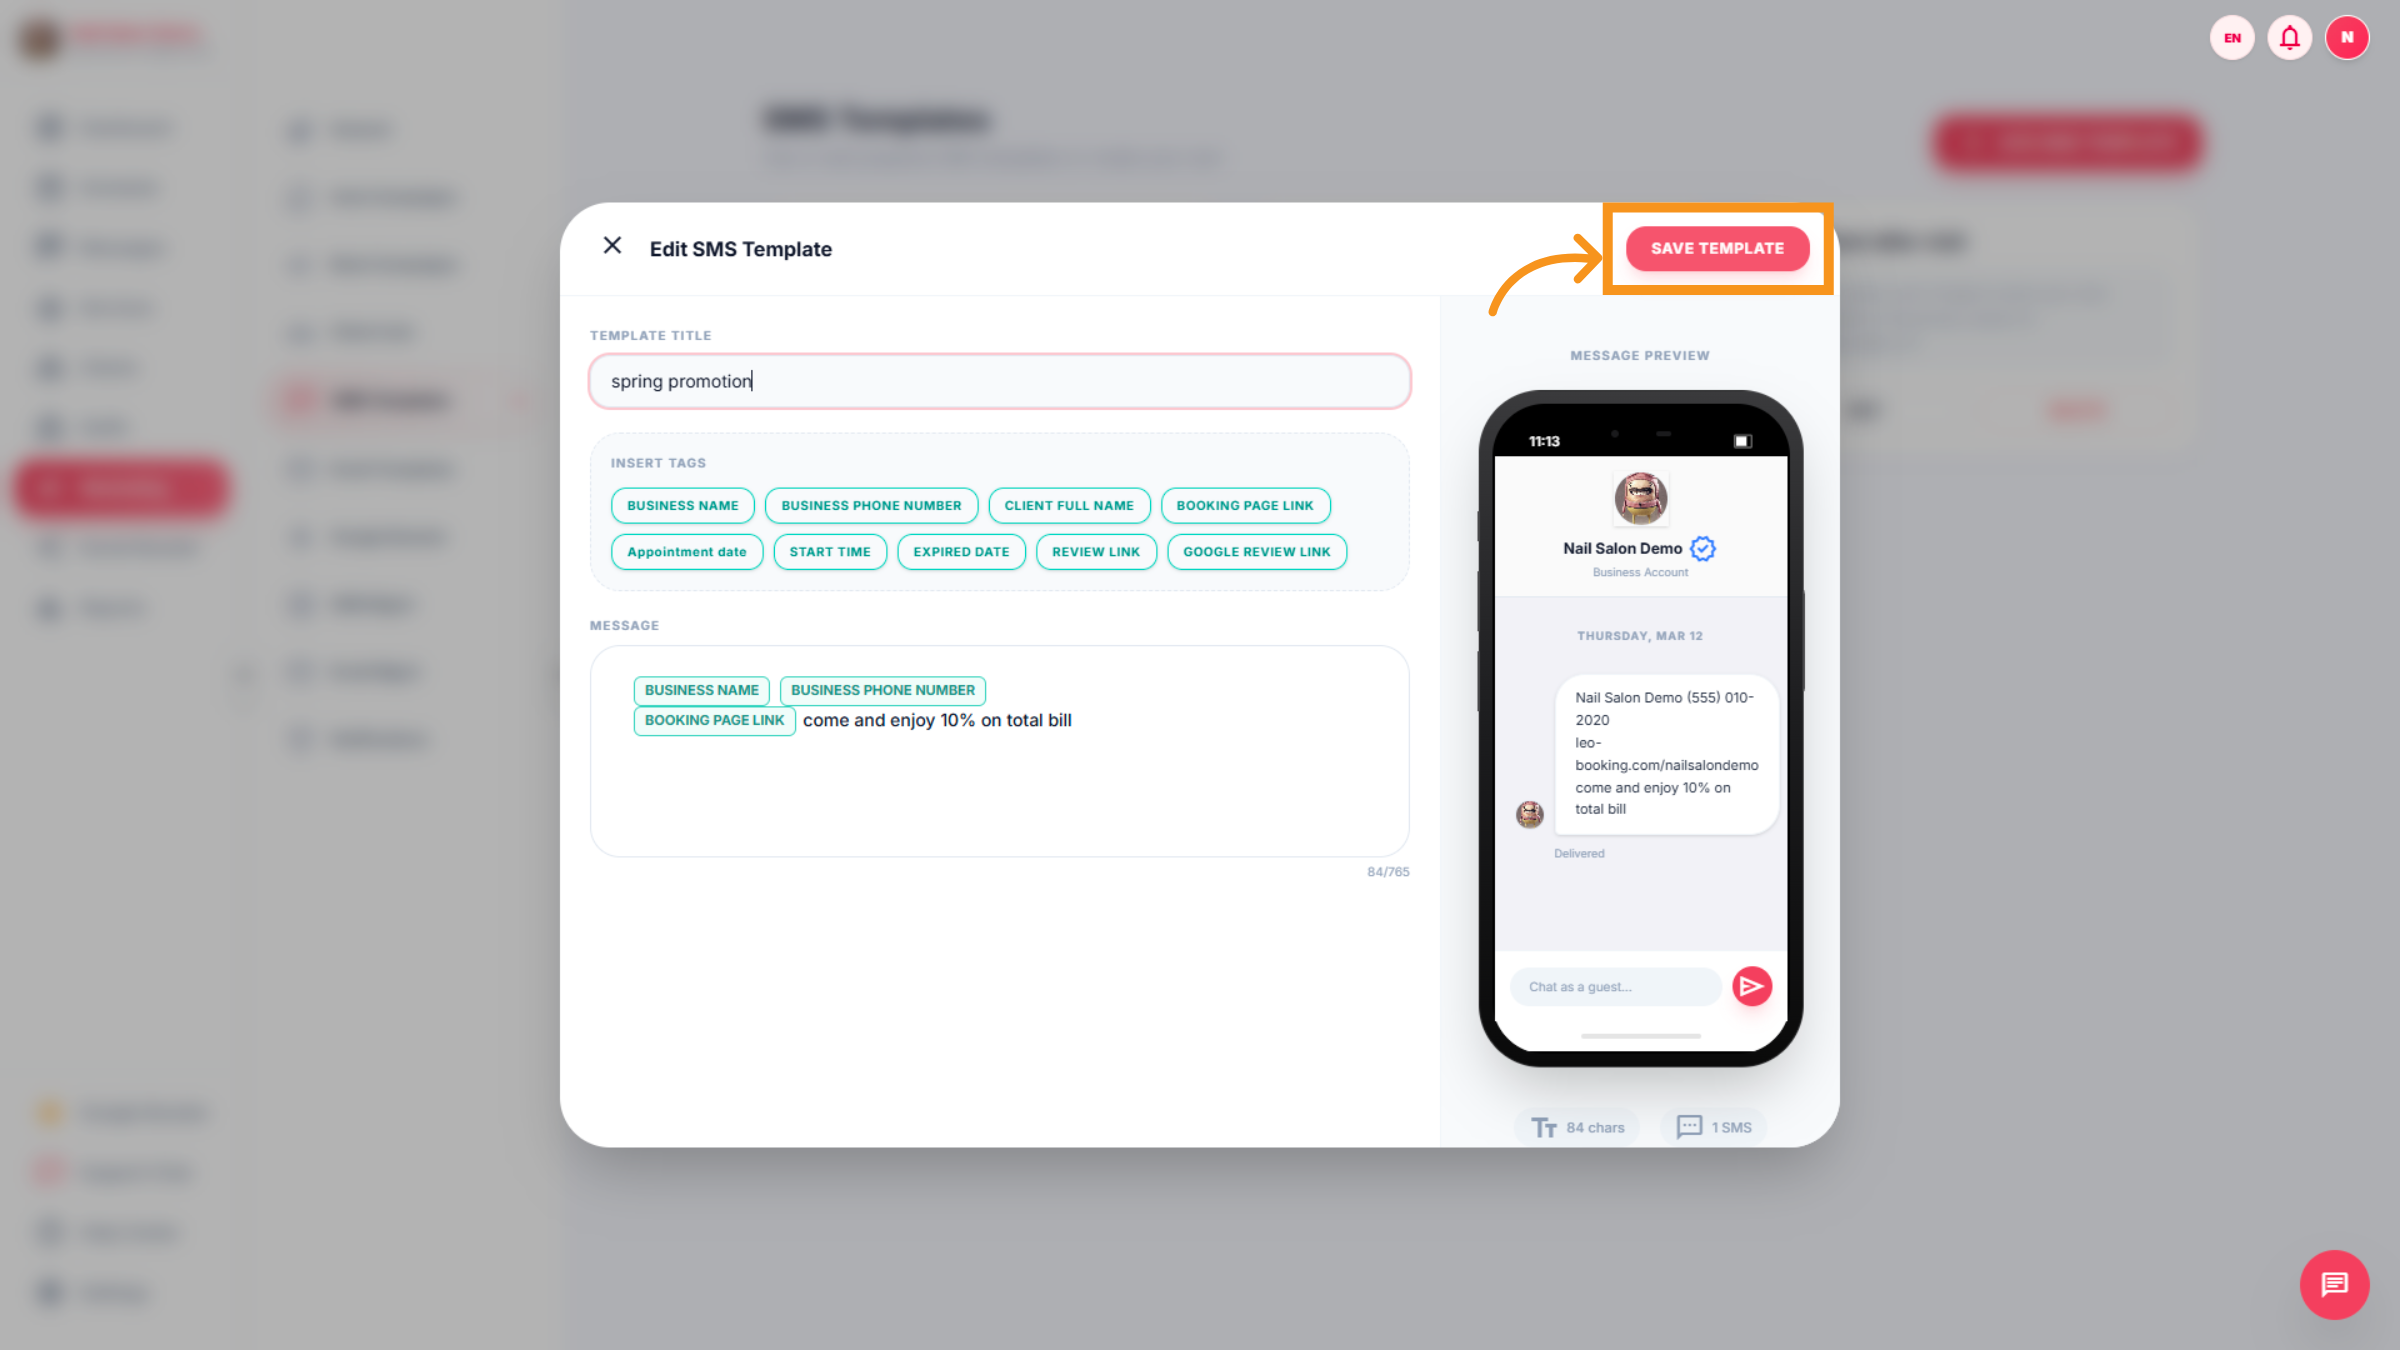
27. Save SMS Template
Click the "SAVE TEMPLATE" button to save changes to the SMS template.
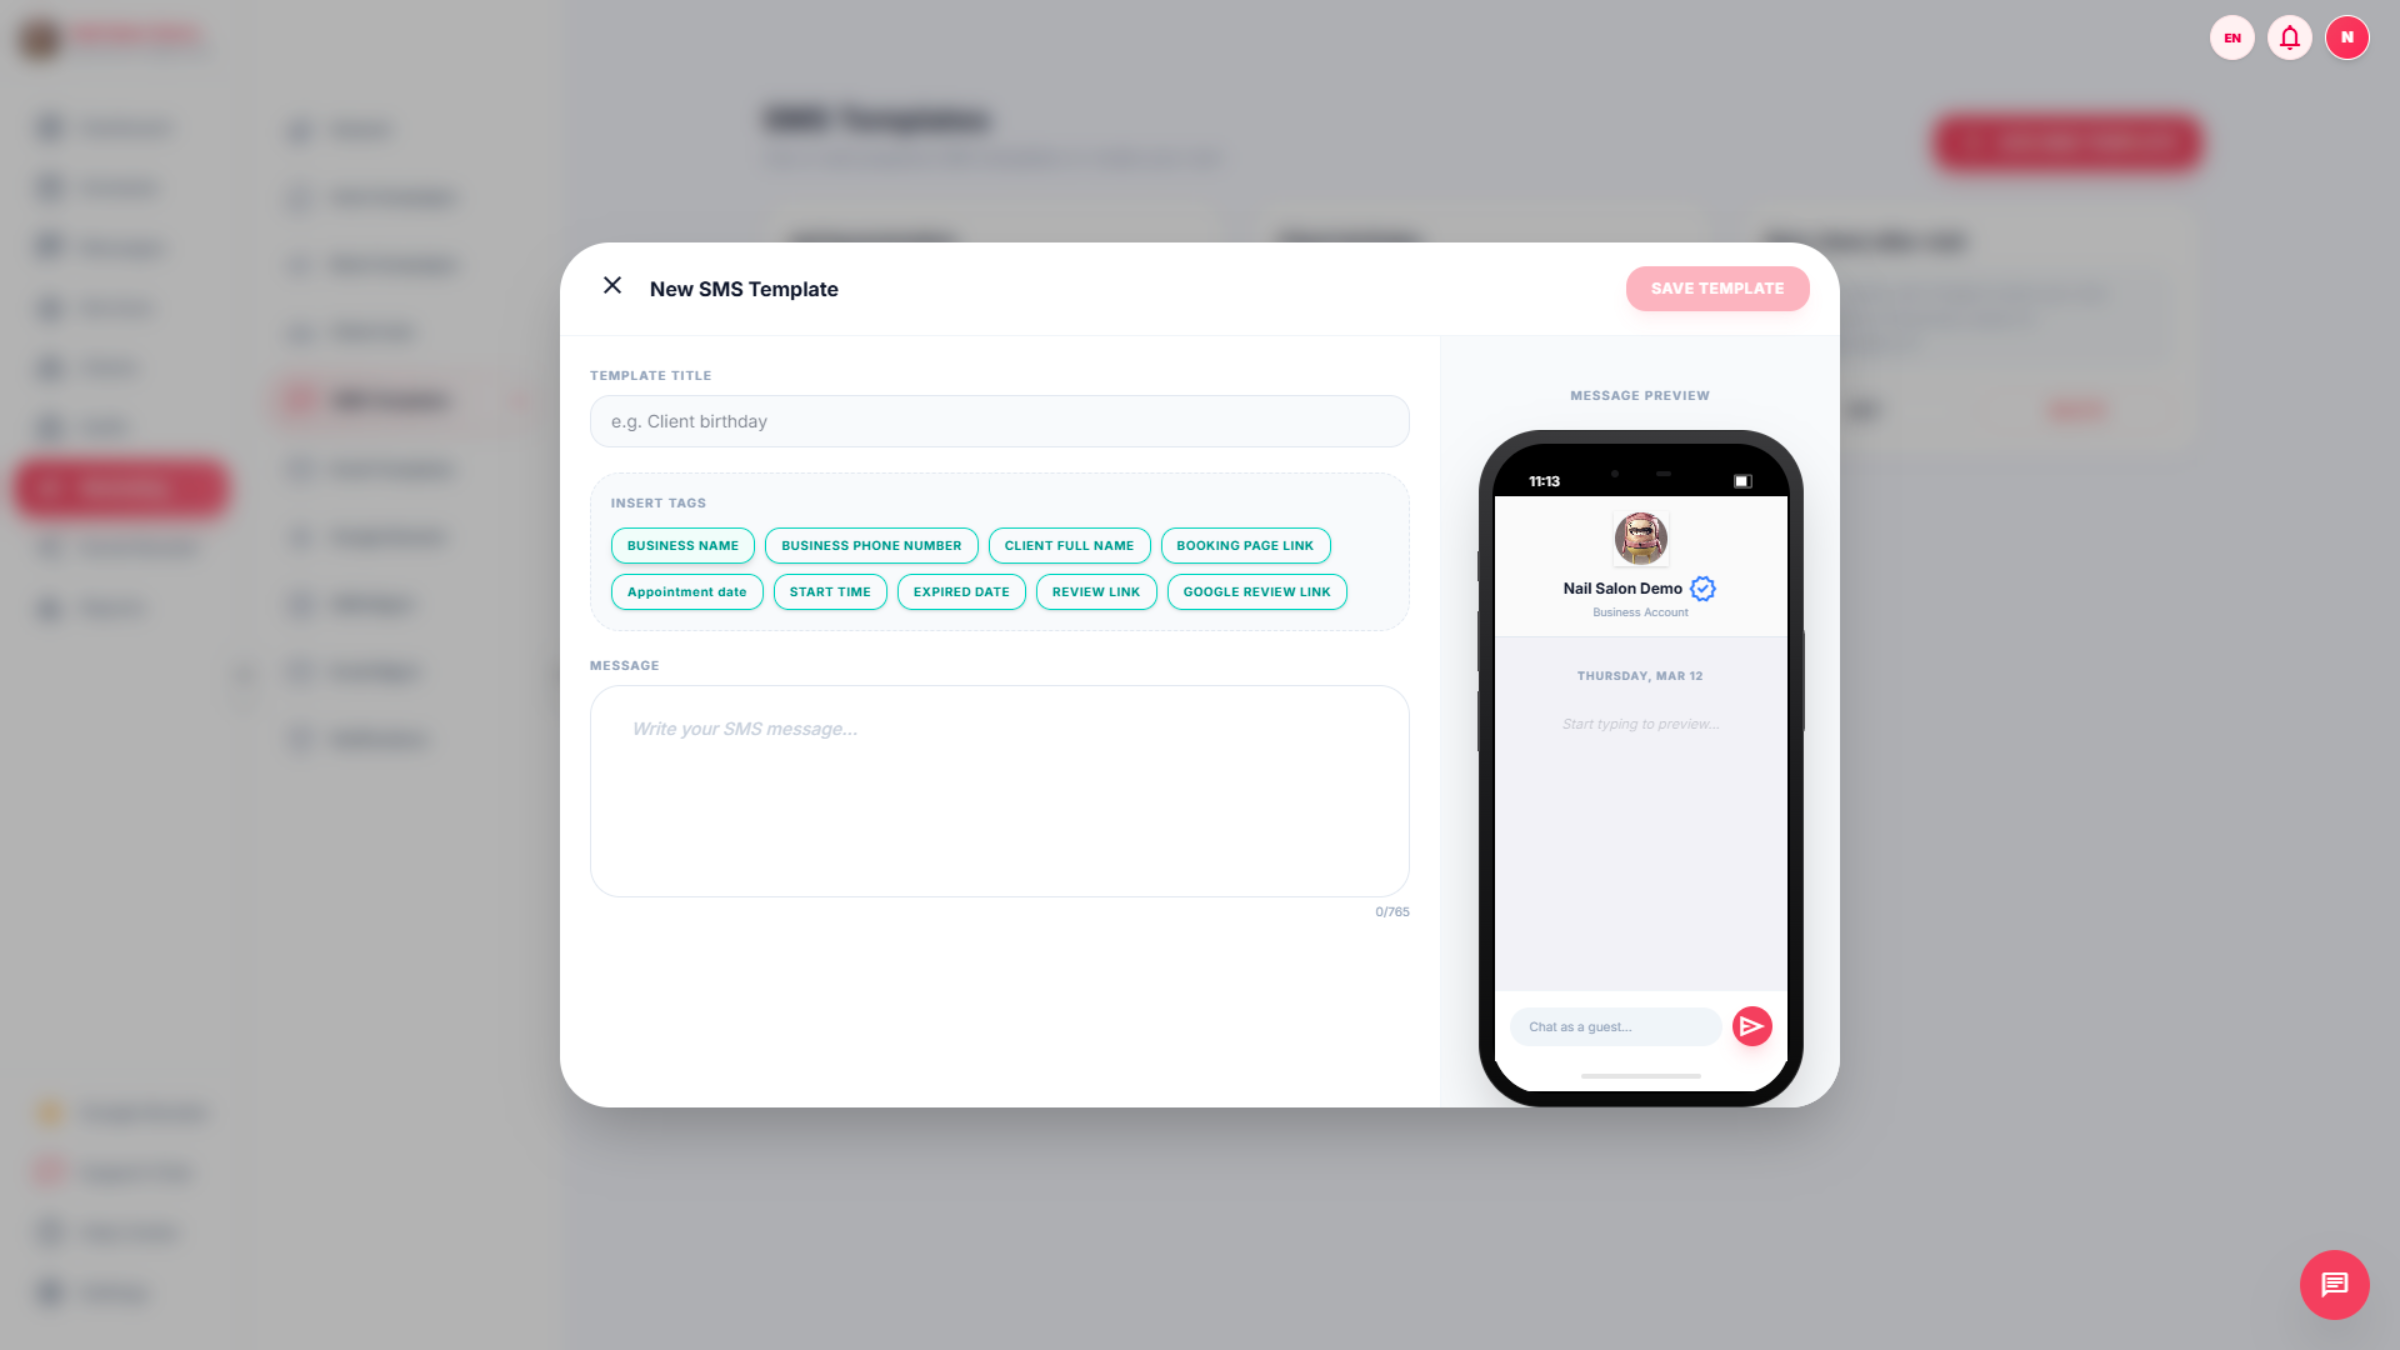
28. Add new SMS template
The SMS feature allows users to edit existing templates or create new SMS message templates
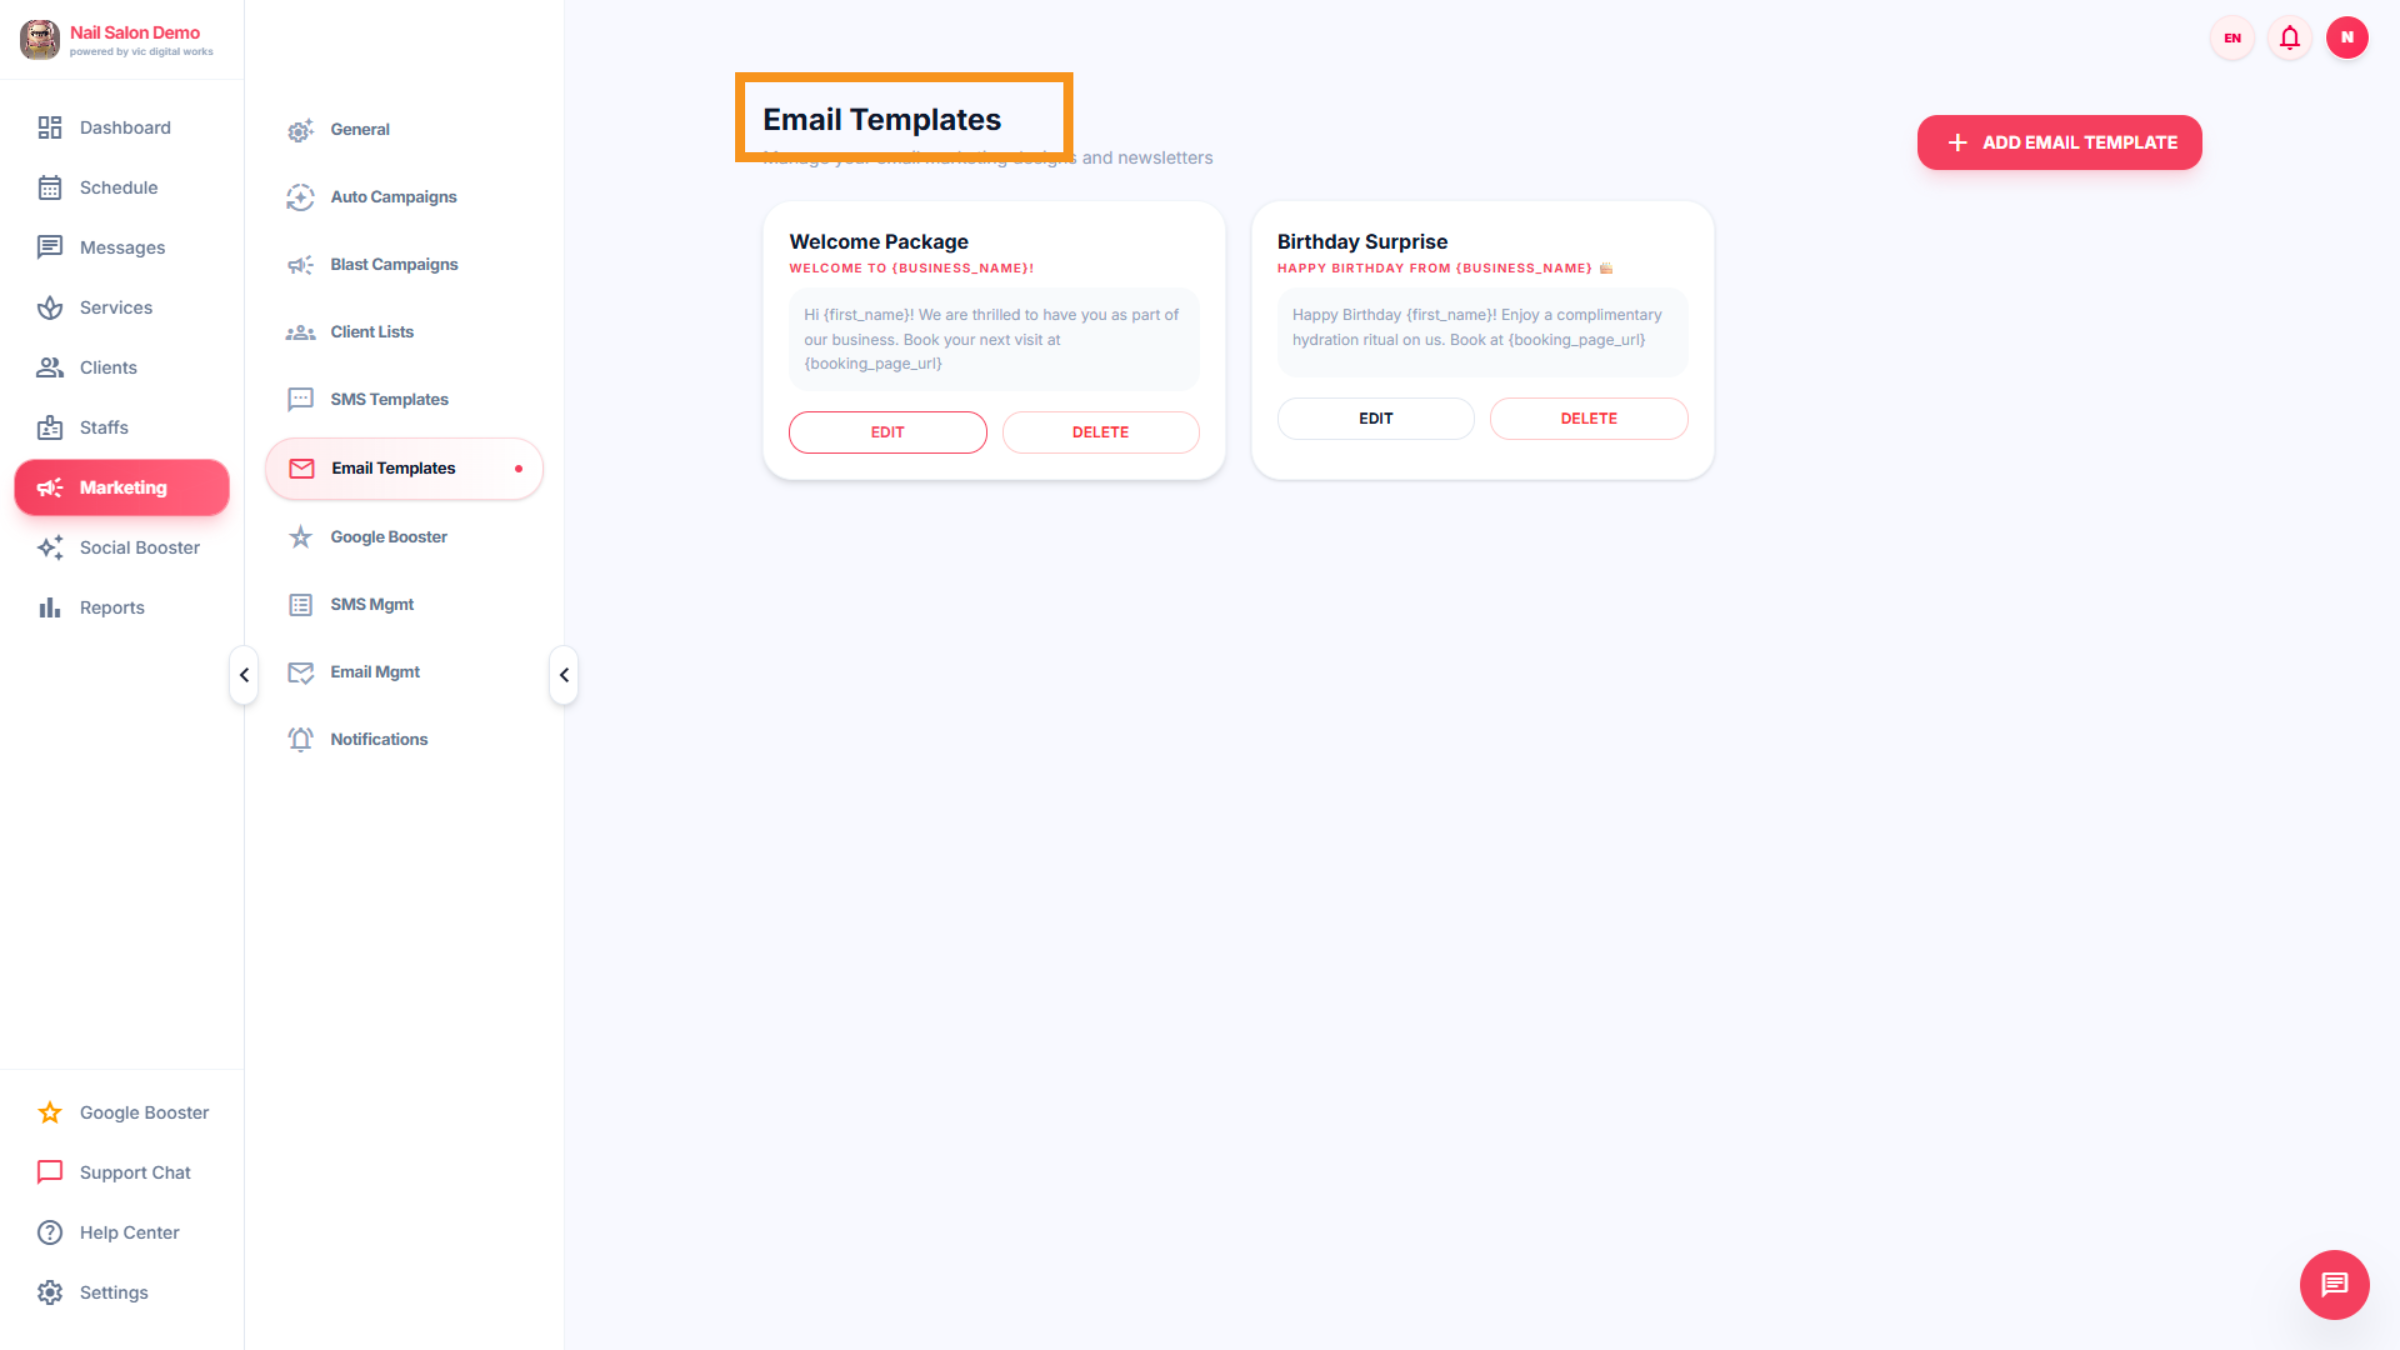
29. Email Template
In this section, you can add/edit a new template. Simply fill in the template title, insert tags, and message content.
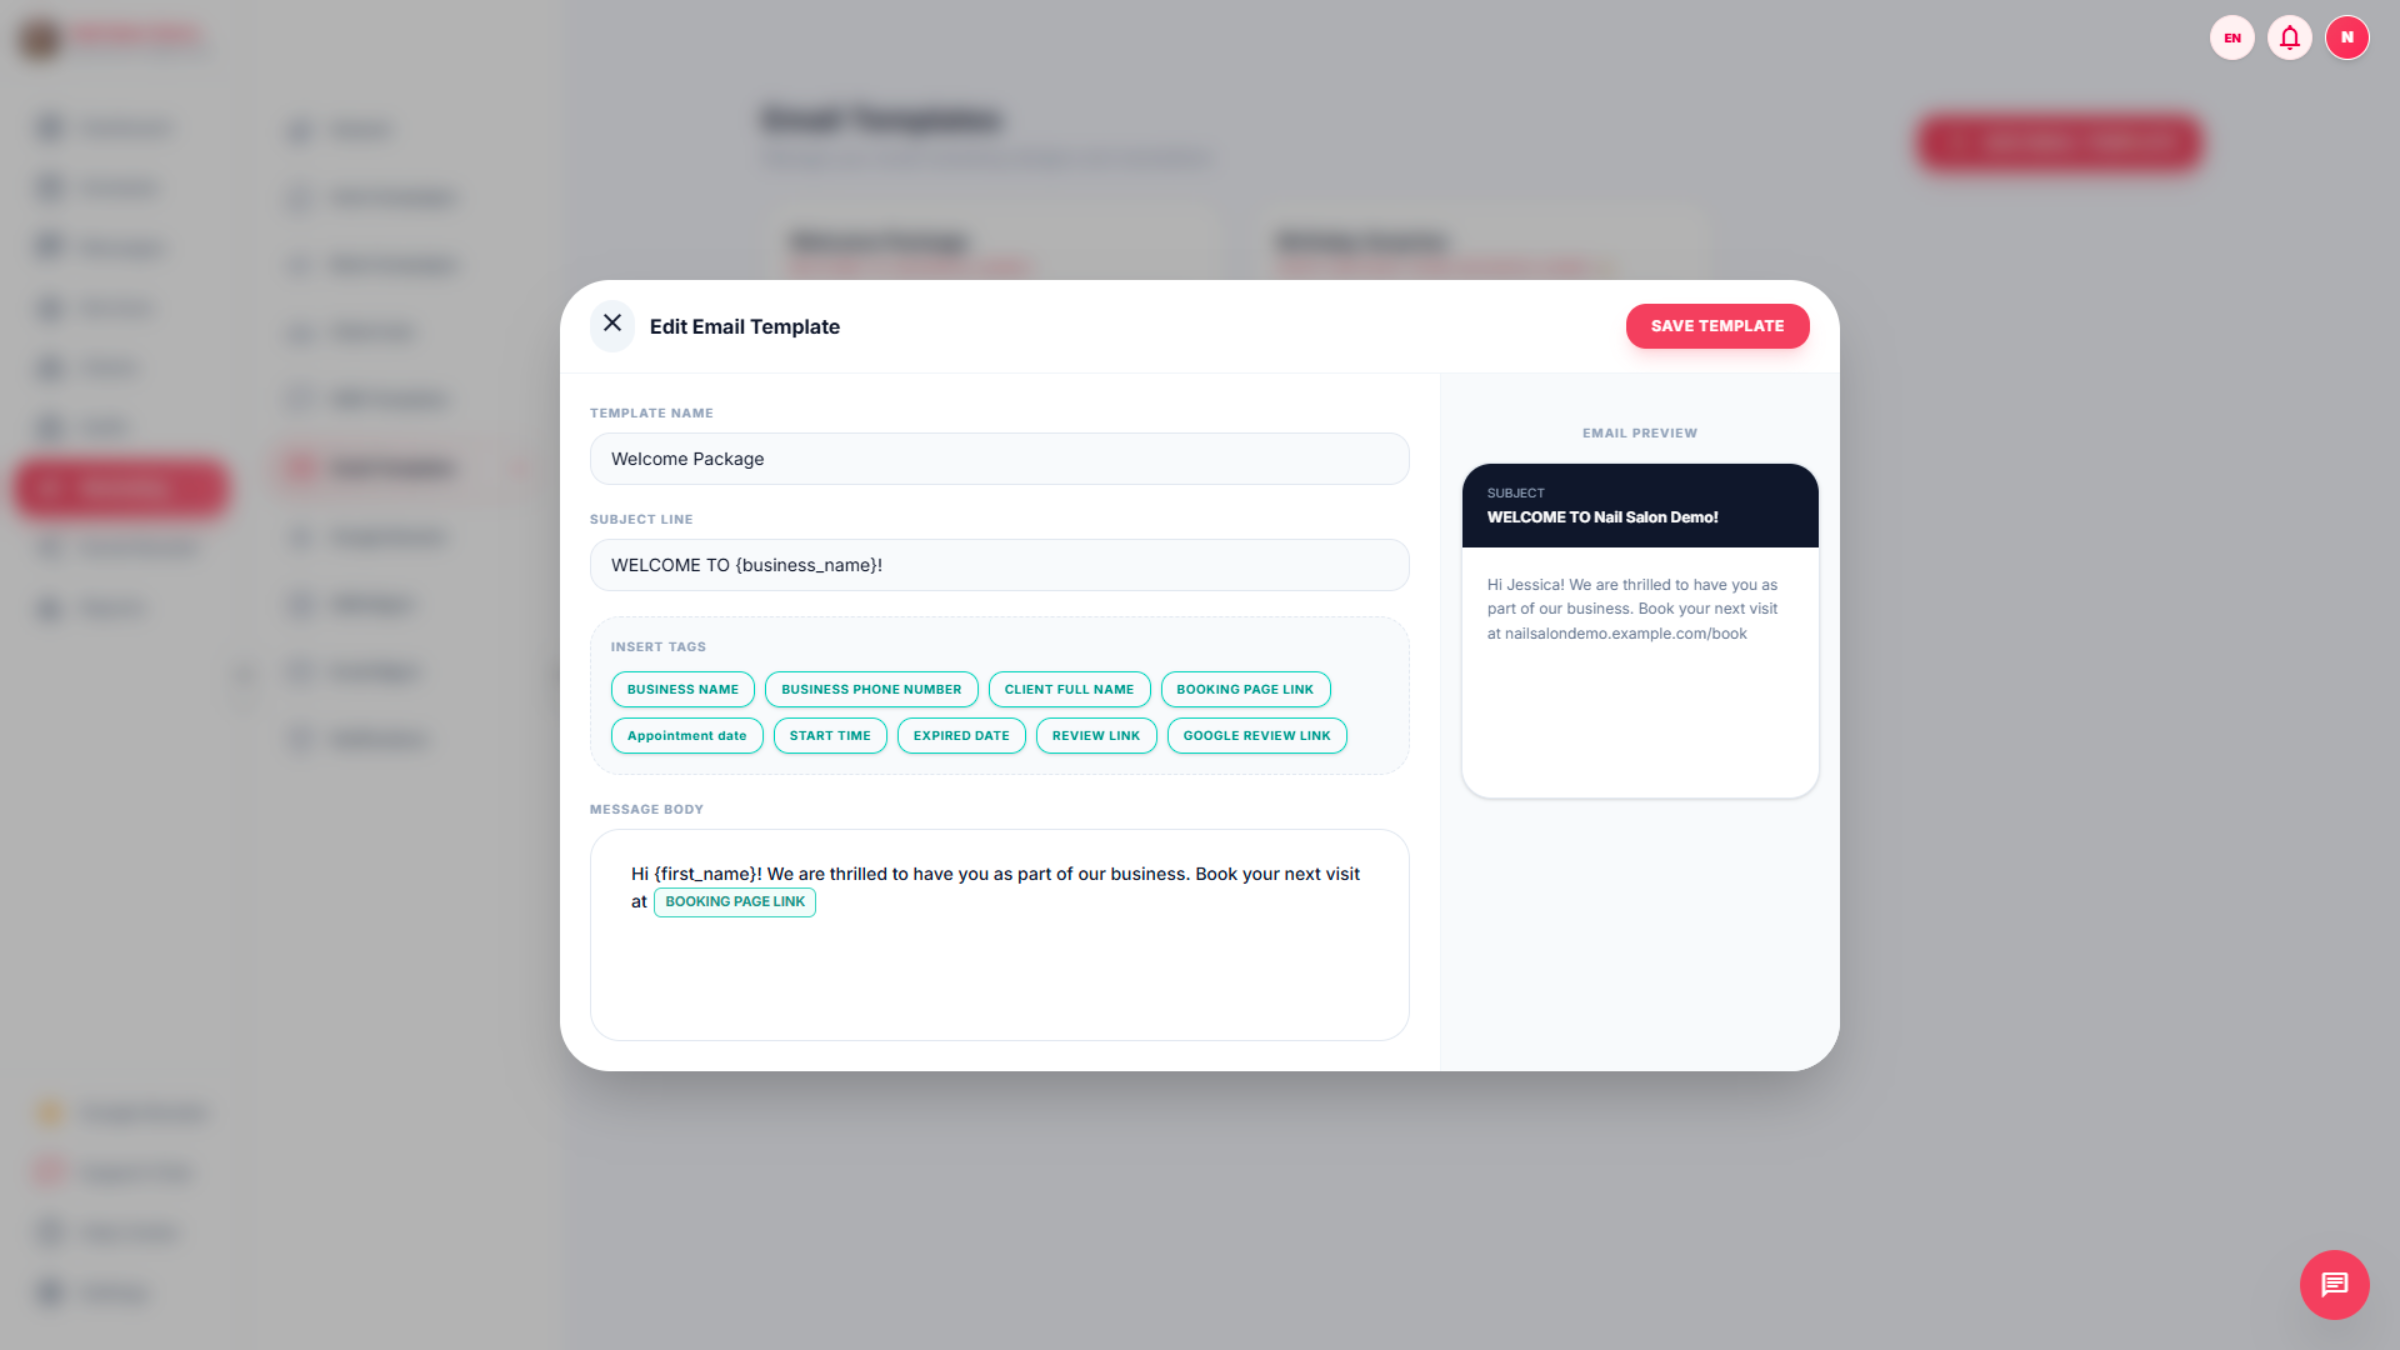
30. Email Editor
In this section, you can add a new email template. Simply fill in the template title, insert tags, and message content.
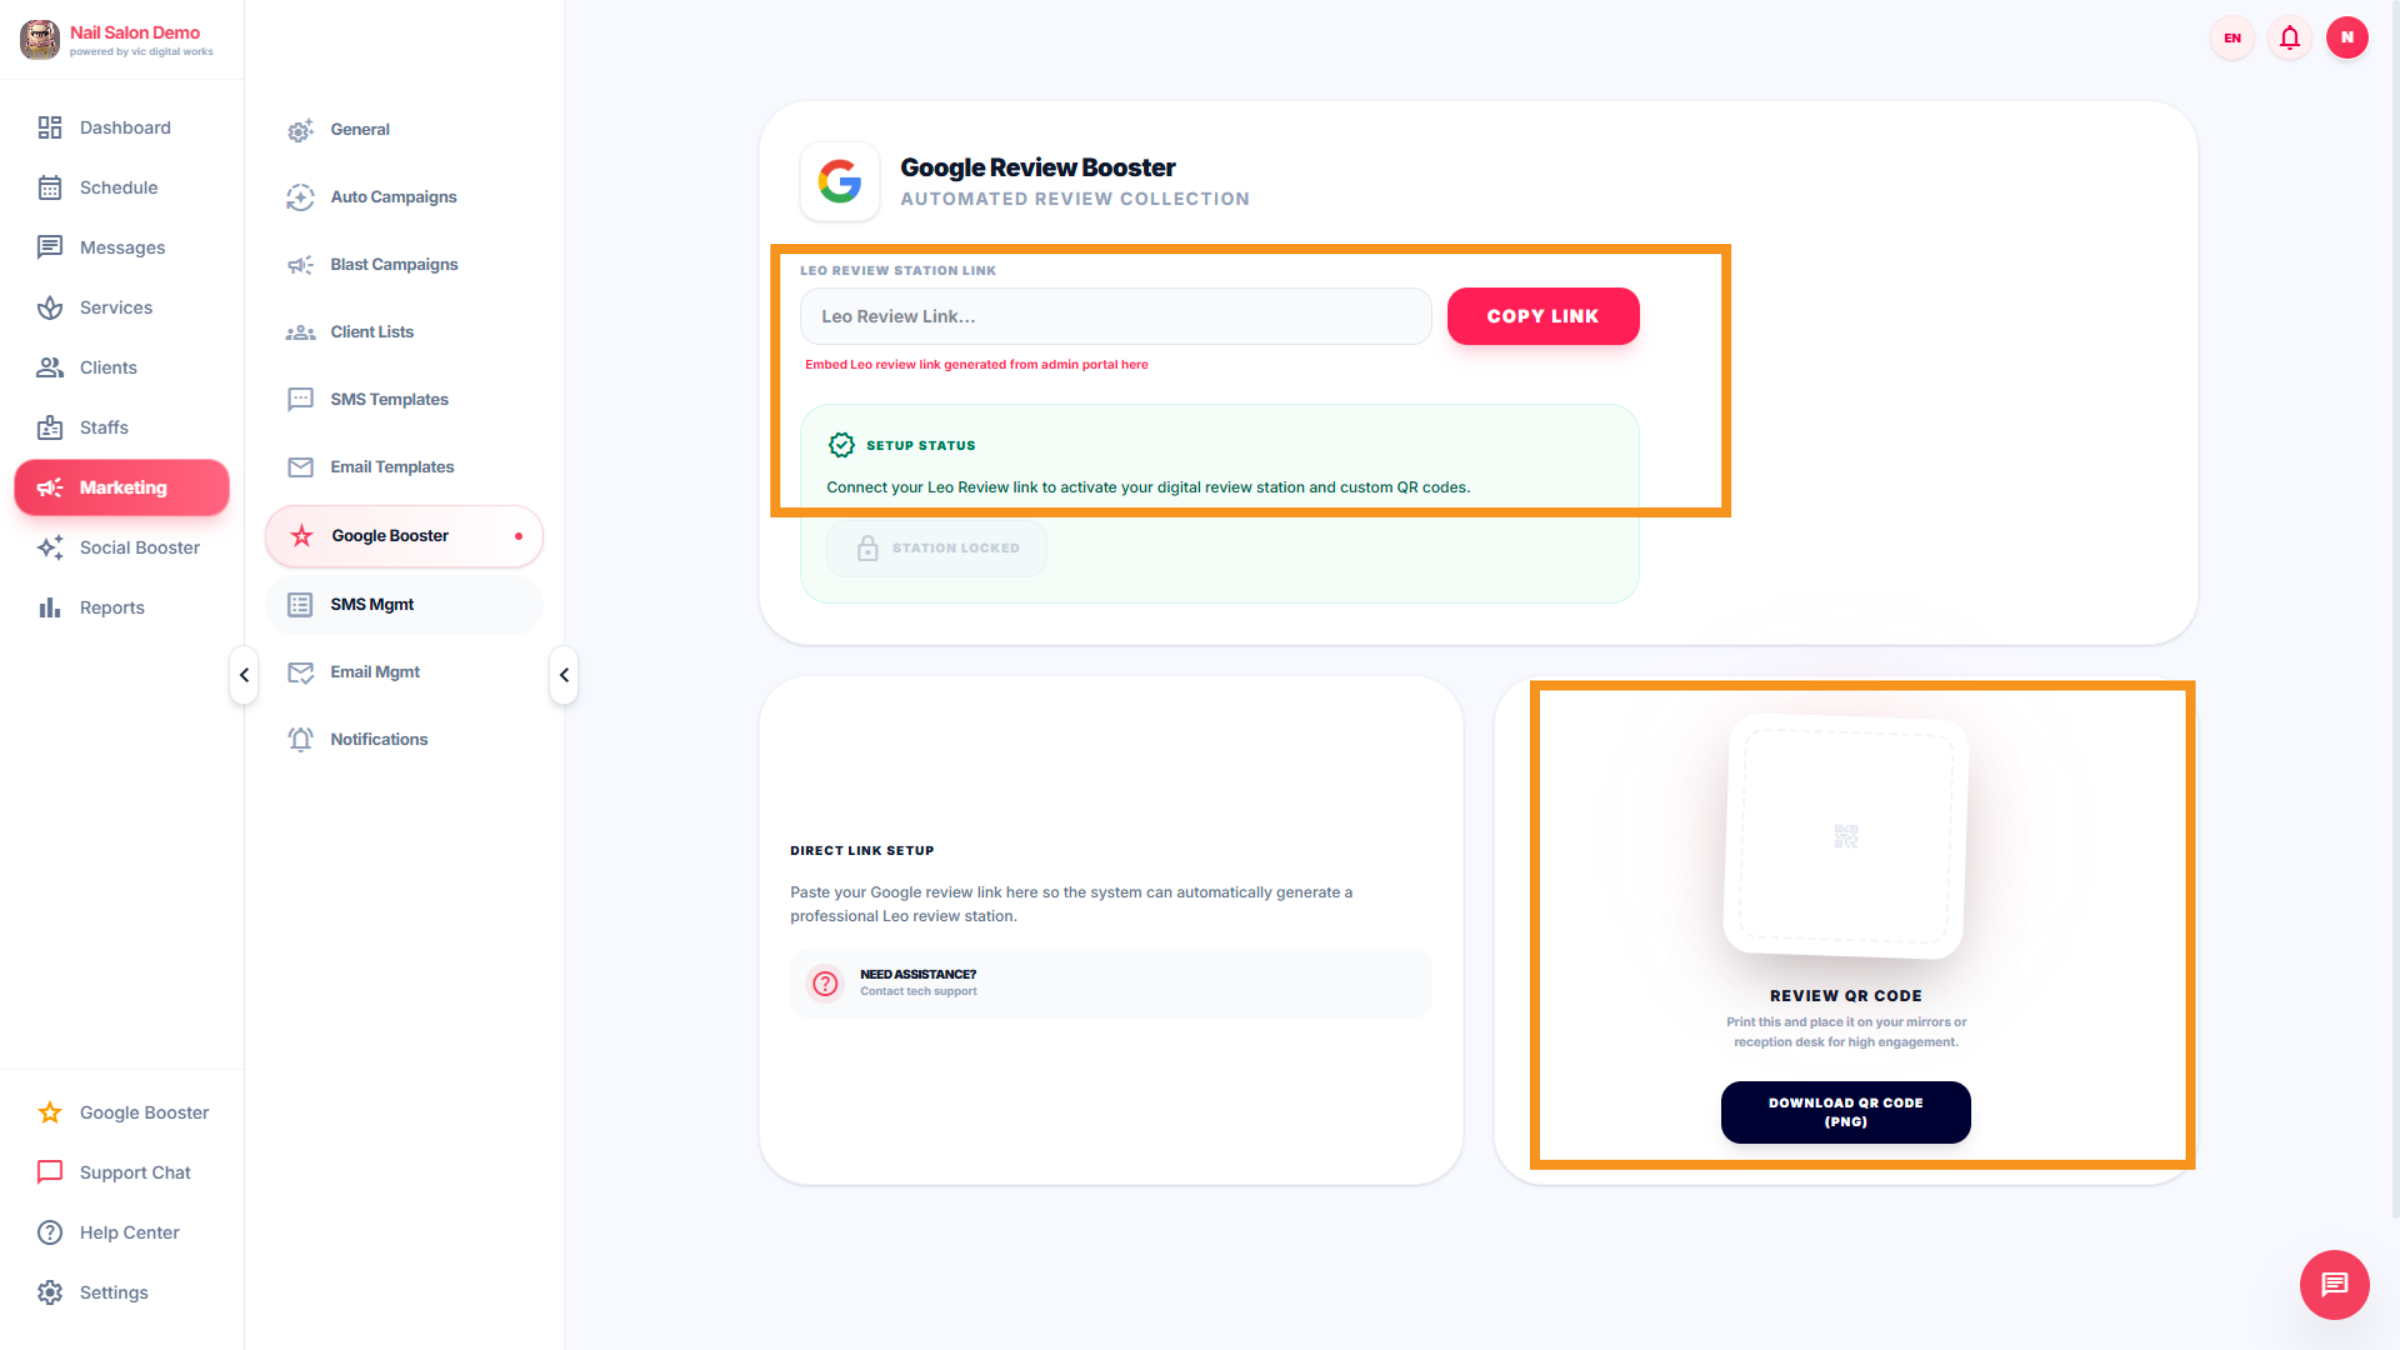
31. Google Booster
The Google Booster feature enhances your salon's online visibility, helping you attract more customers. It automates review collection and assists you in managing customer feedback.

32. Google Booster management
When you purchase a package that includes the Marketing feature, Leo Booking will provide you with an internal website address. You can log in to this site at the Leo Review Station link, where a QR code for customers to leave reviews will be displayed. Note: 5-star customer reviews will be posted to Google, while reviews with 4 stars or fewer will appear only in the salon’s internal records
33. Access SMS Management
Click the "SMS Mgmt" tab to manage your email campaigns

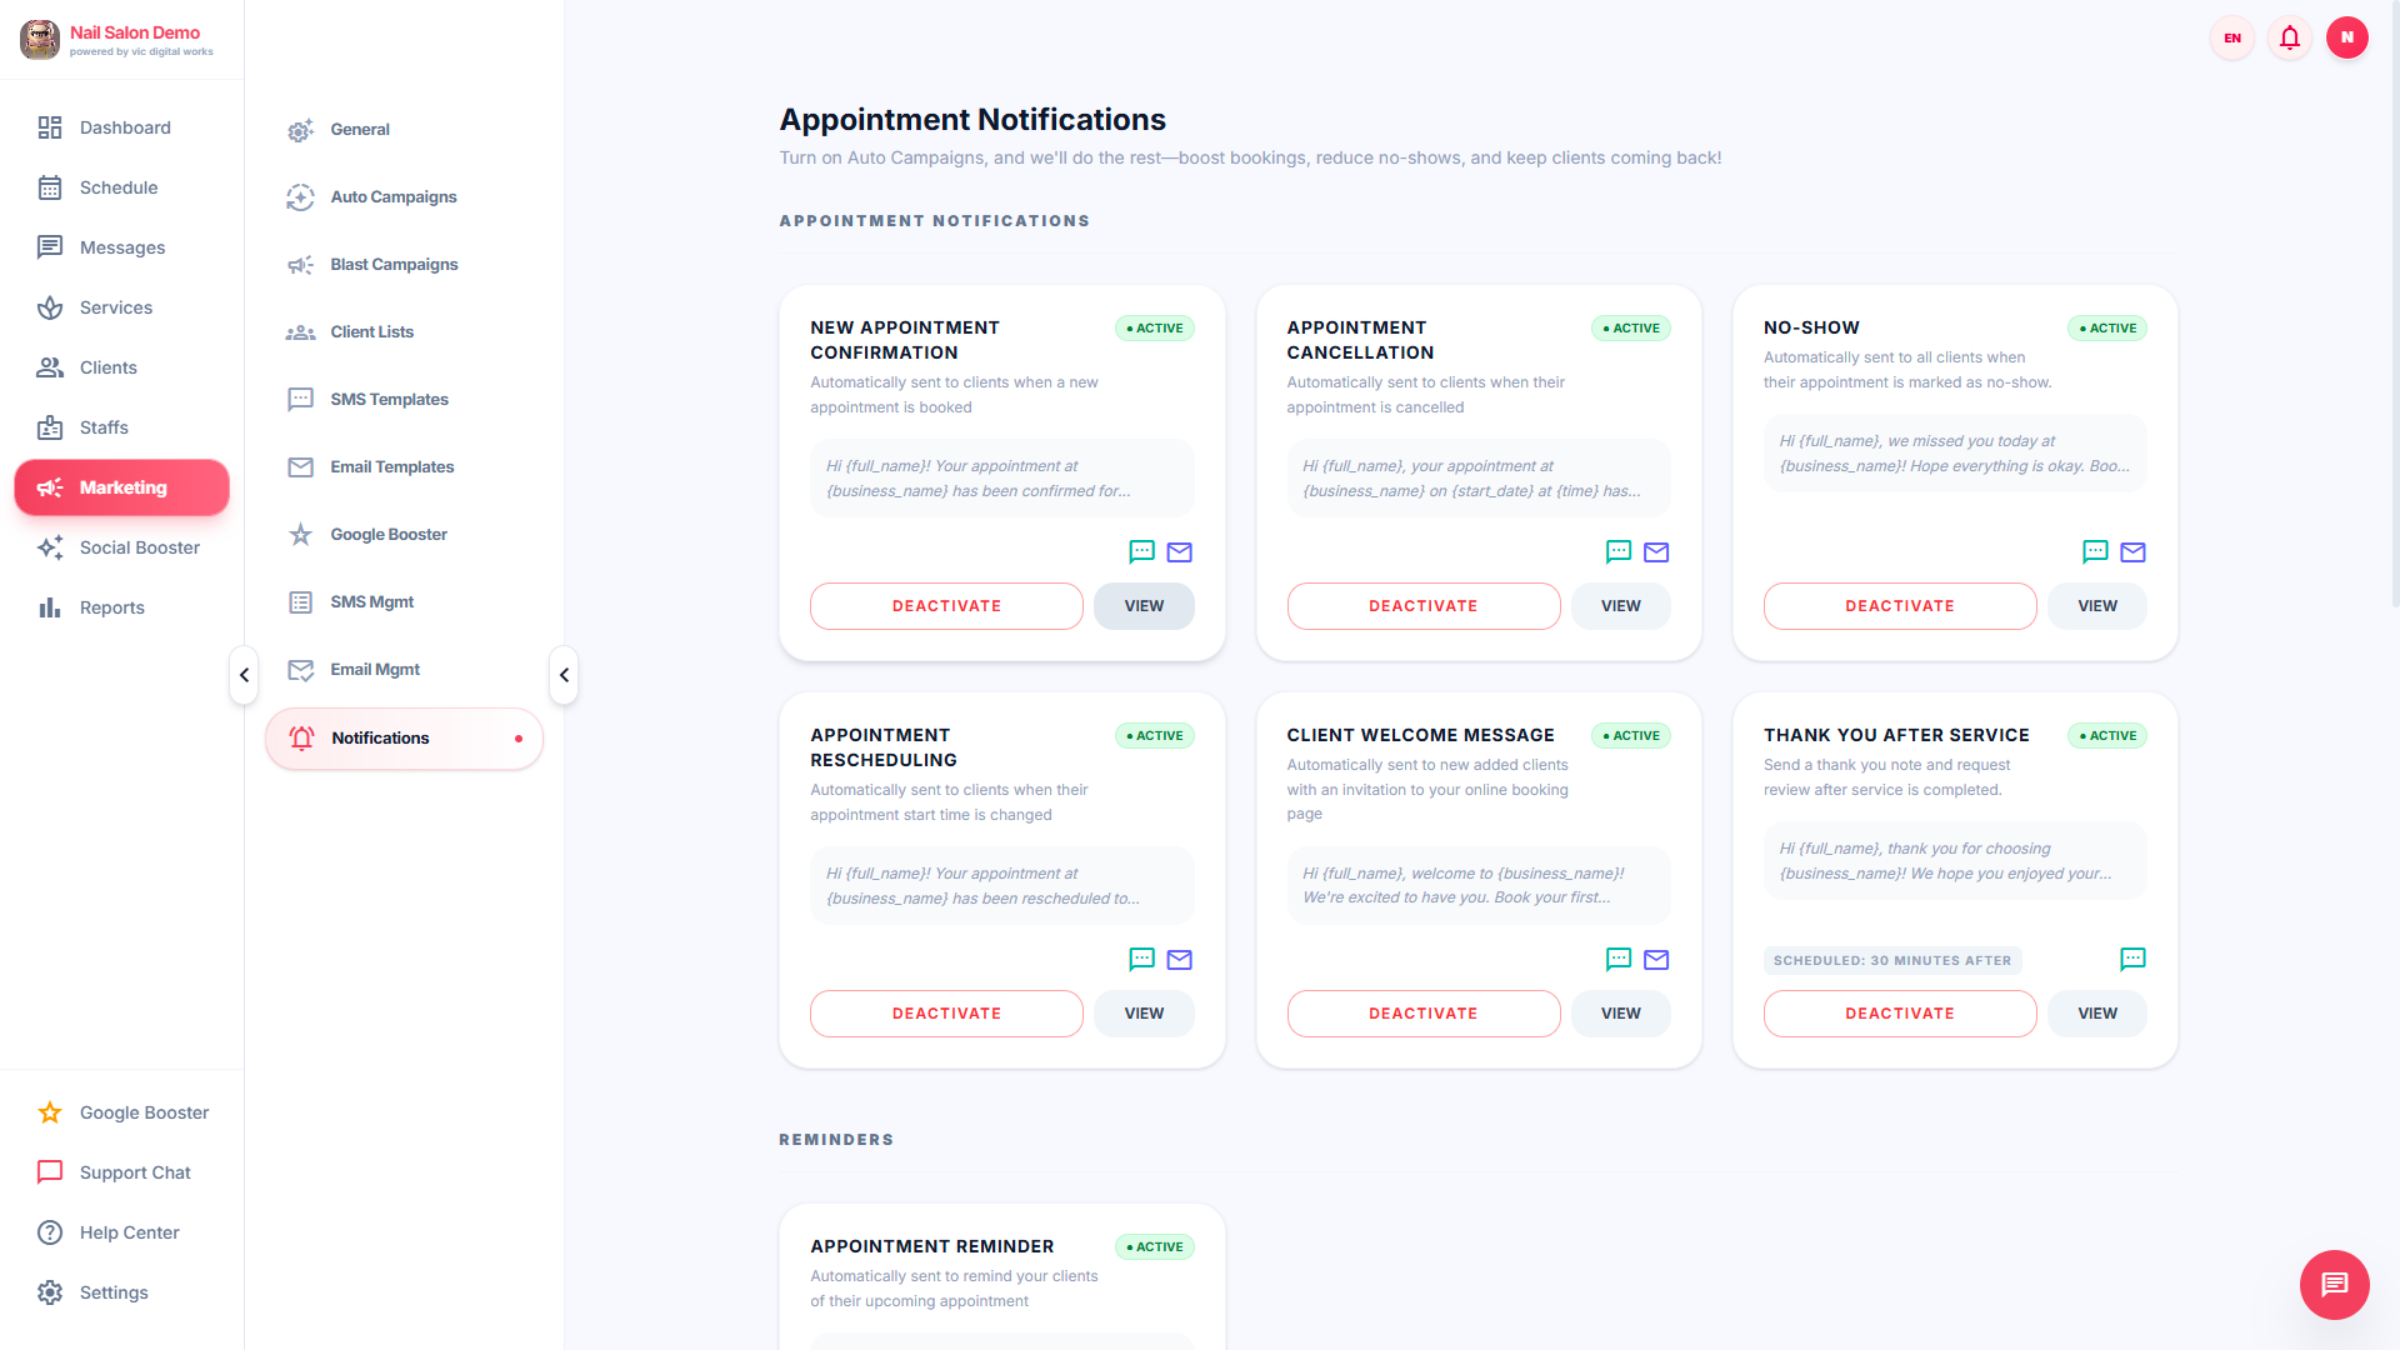
34. Notification Details
The “Notification” feature in nail-booking systems is designed to help salon owners and staff communicate effectively with clients and keep operations running smoothly. Here’s what it usually includes: -Appointment Reminders -Booking Confirmations -Cancellations & Rescheduling Alerts -Promotional Notifications -Internal Staff Notifications Review & Feedback Requests
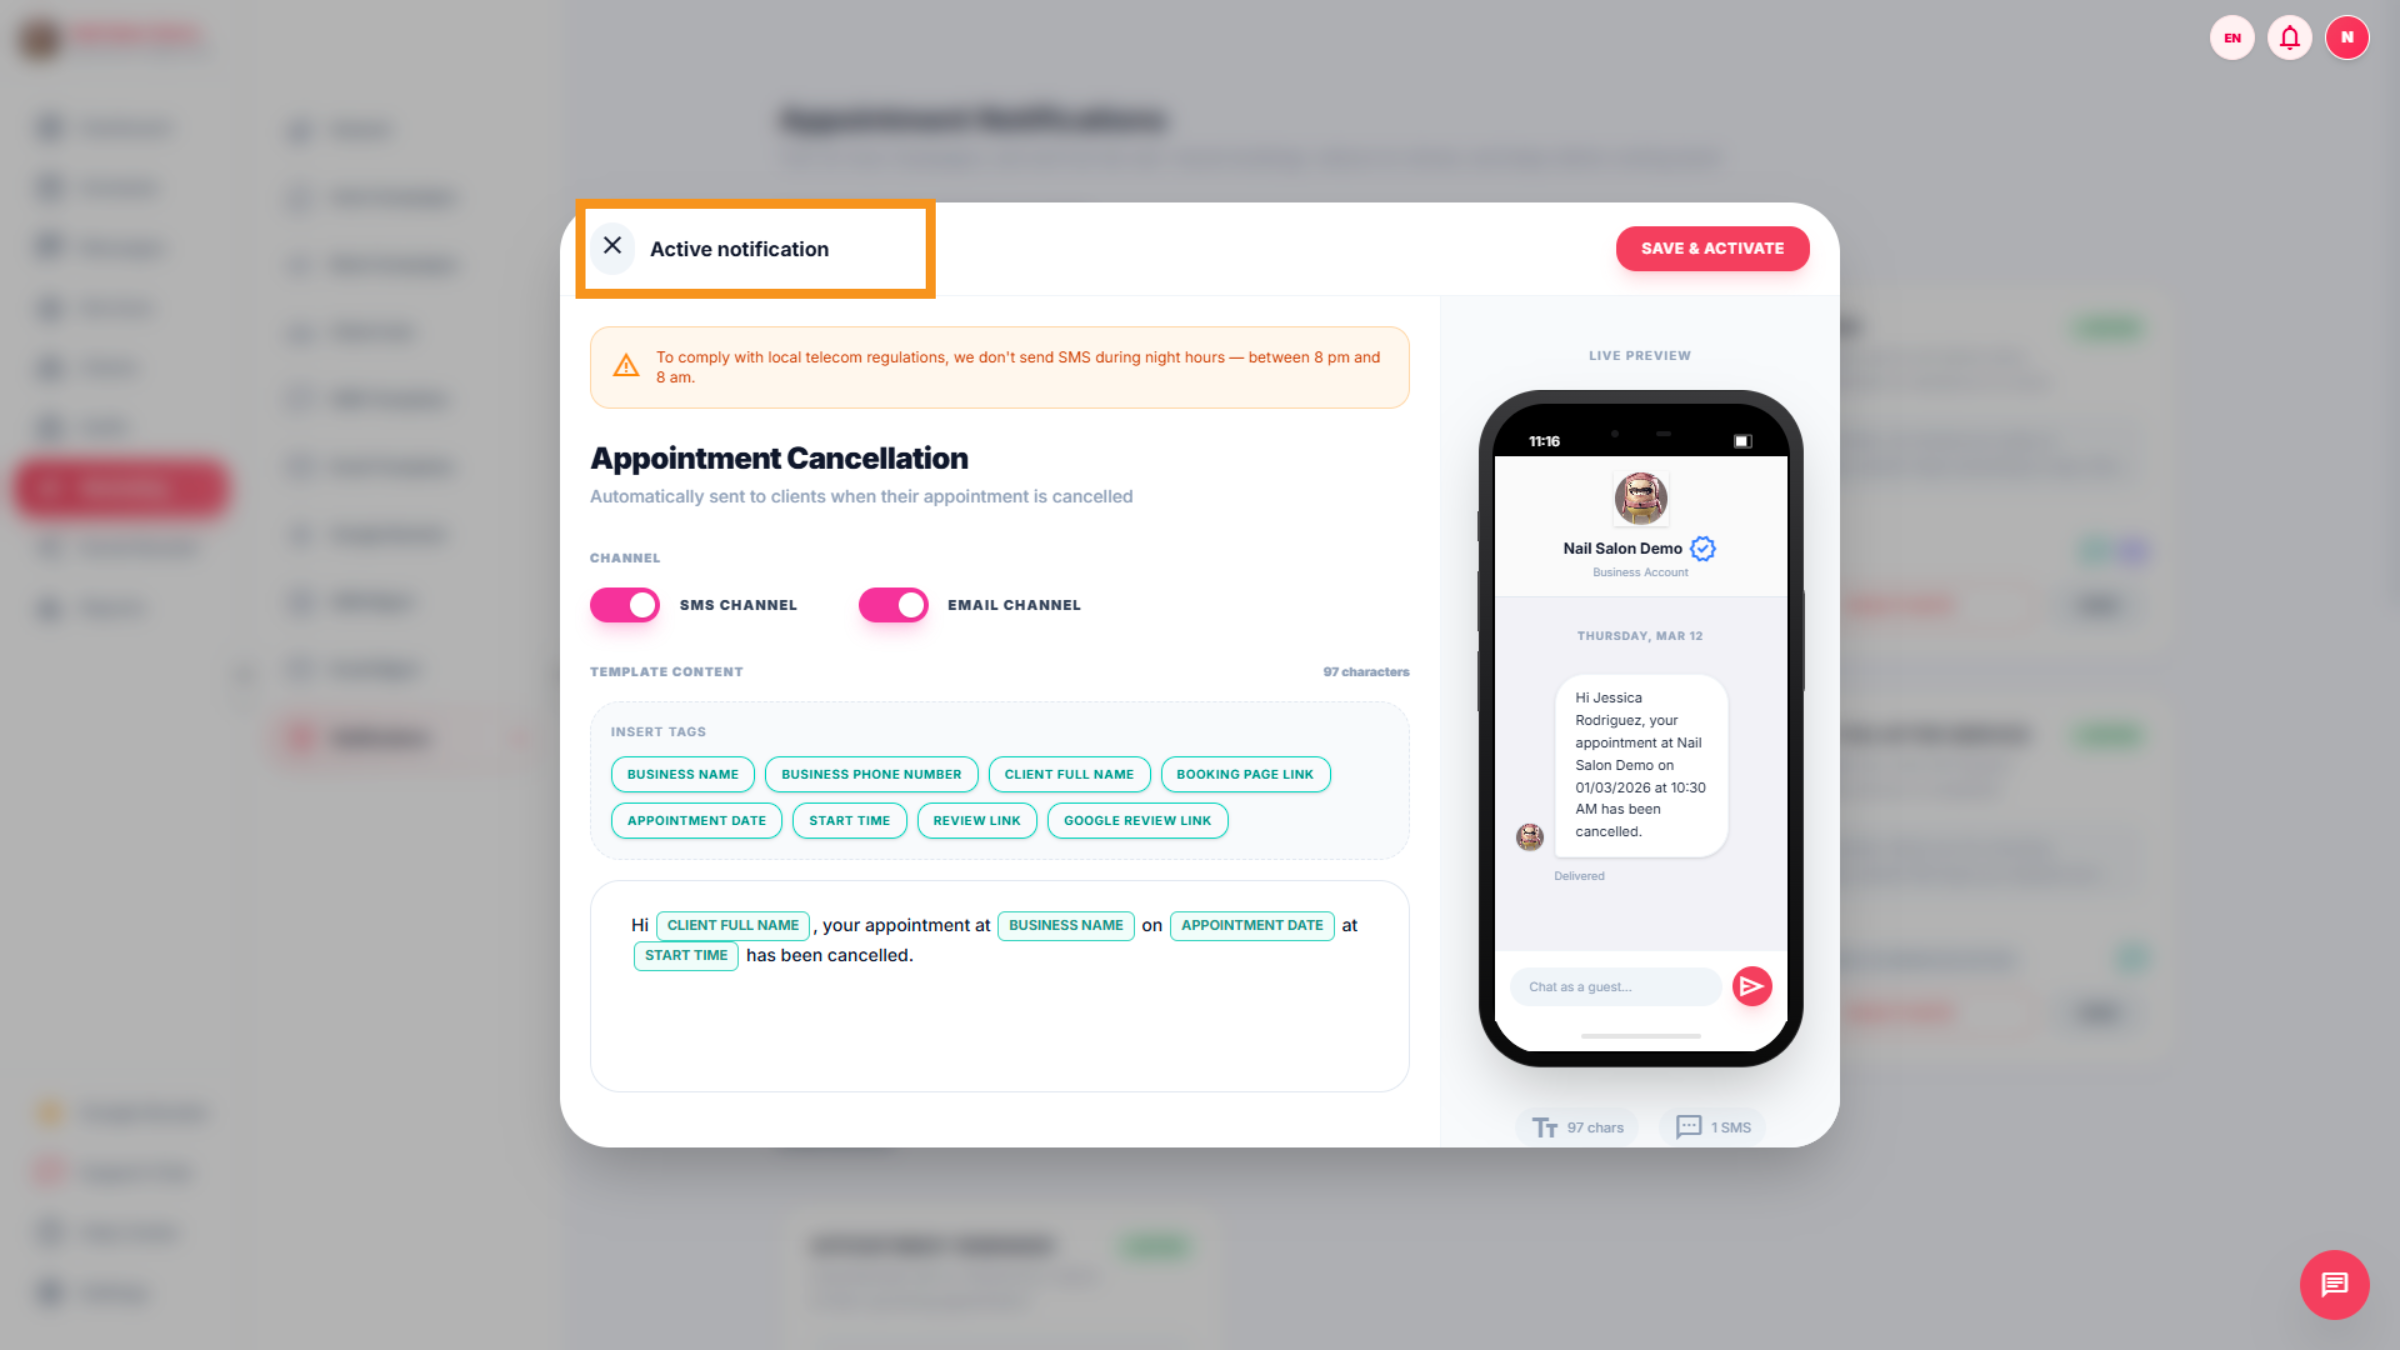
35. Notification View
In this section, you can view the content of the notification.
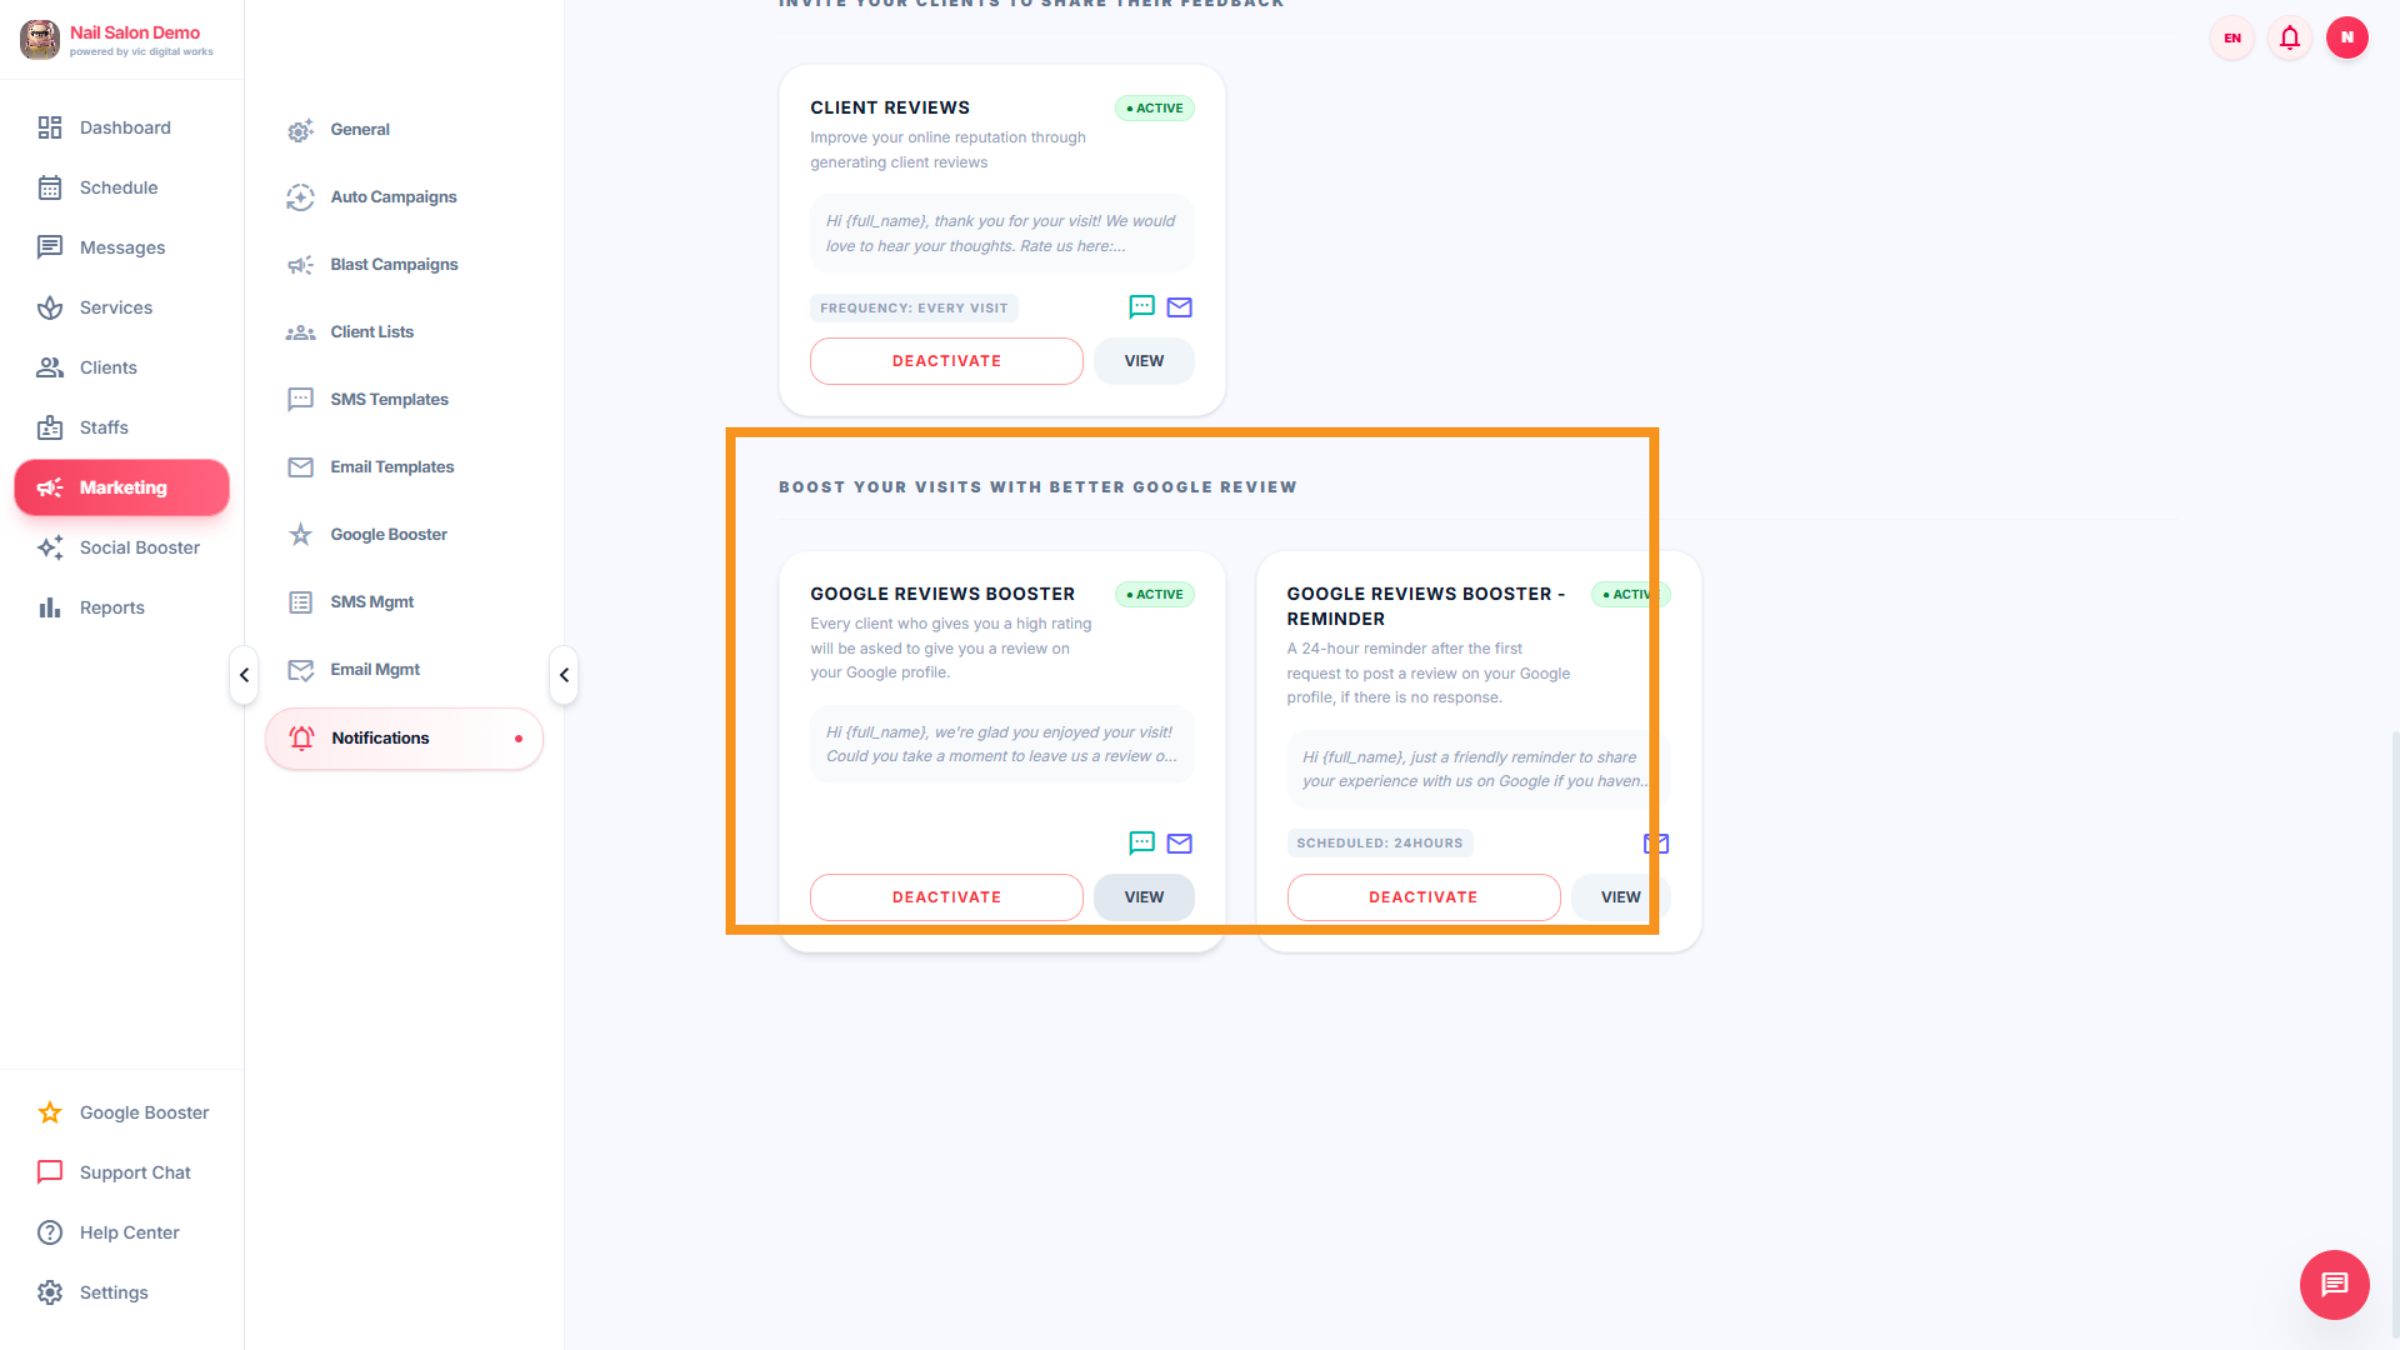
36. Notification Details
Or BOOST YOUR VISITS WITH BETTER GOOGLE REVIEW. Note: 5-star customer reviews will be posted to Google, while reviews with 4 stars or fewer will appear only in the salon’s internal records
You have successfully configured automated and blast campaigns, managed client lists with filters, and customized SMS and email templates in Leo-booking. This setup enables effective marketing communication and client engagement through personalized campaigns and notifications.