Configure Product Production
This tutorial will guide you through the process of configuring product production settings in the WorkTraq system.
Video Tutorial
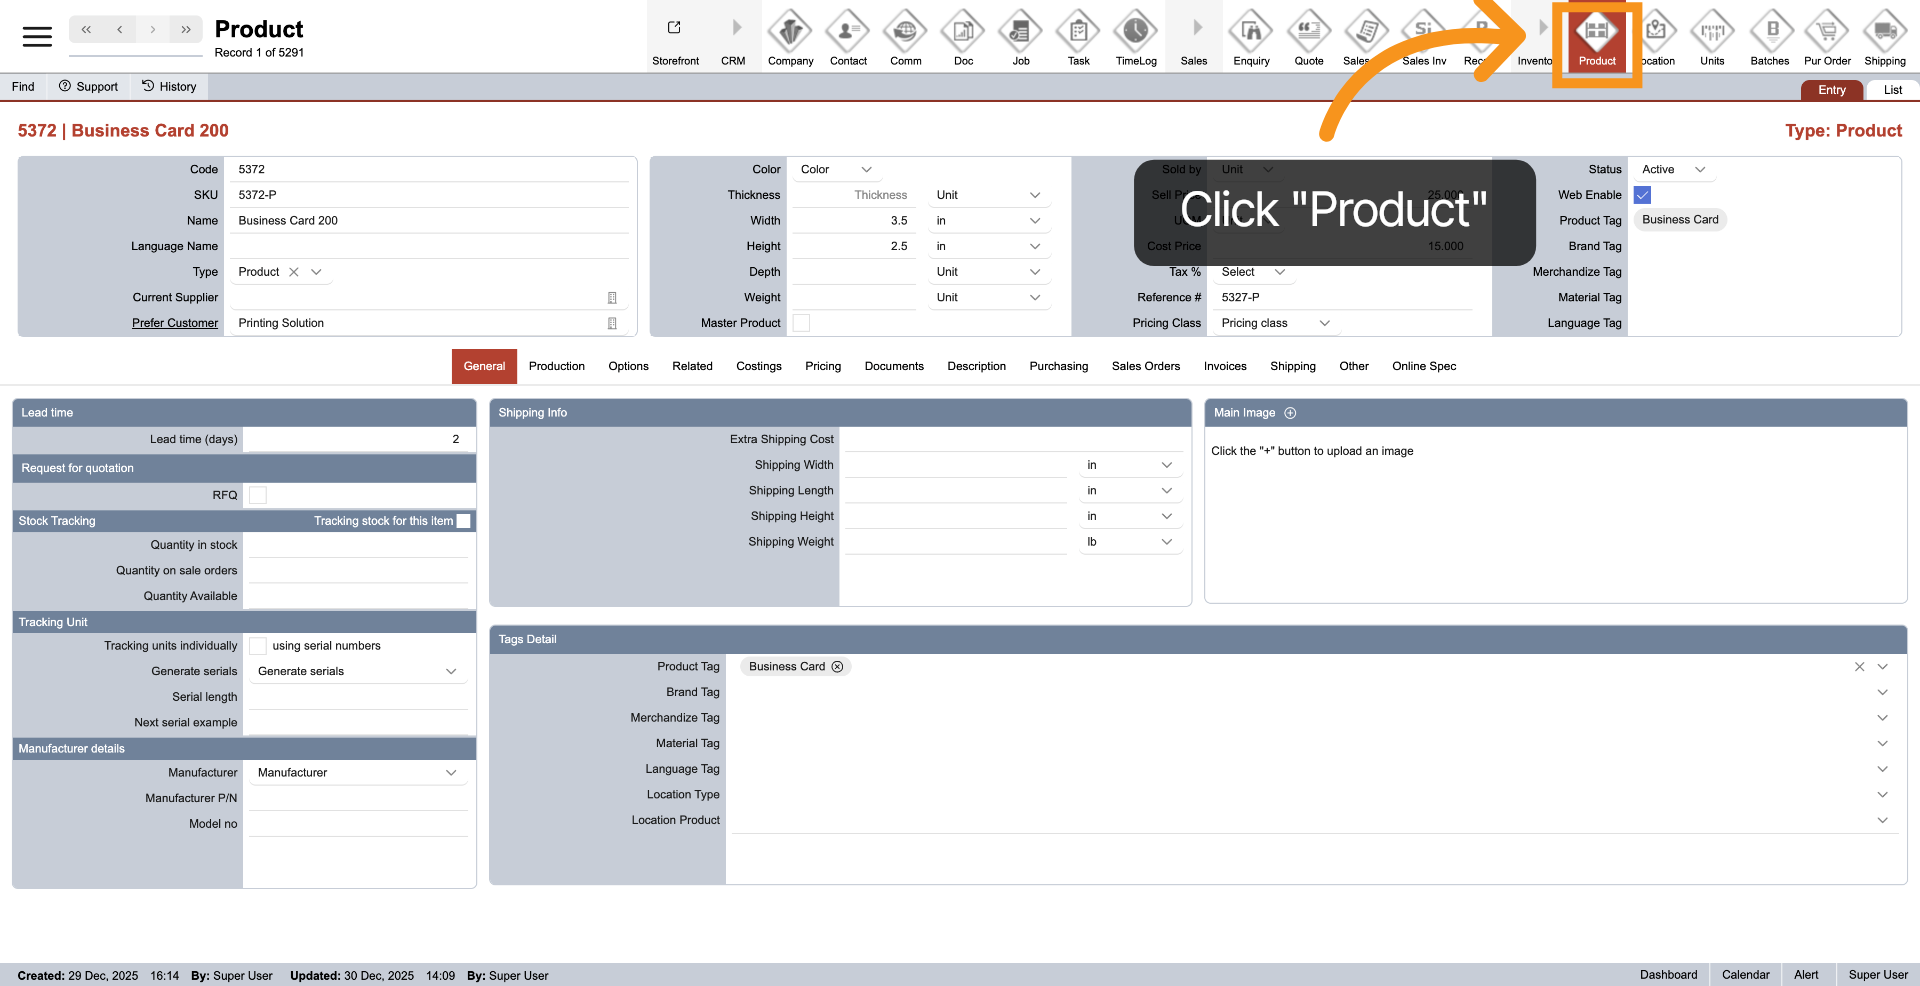
1. Access Product Module
Click on "Product" in the top menu to access the settings and configurations specific to that product.
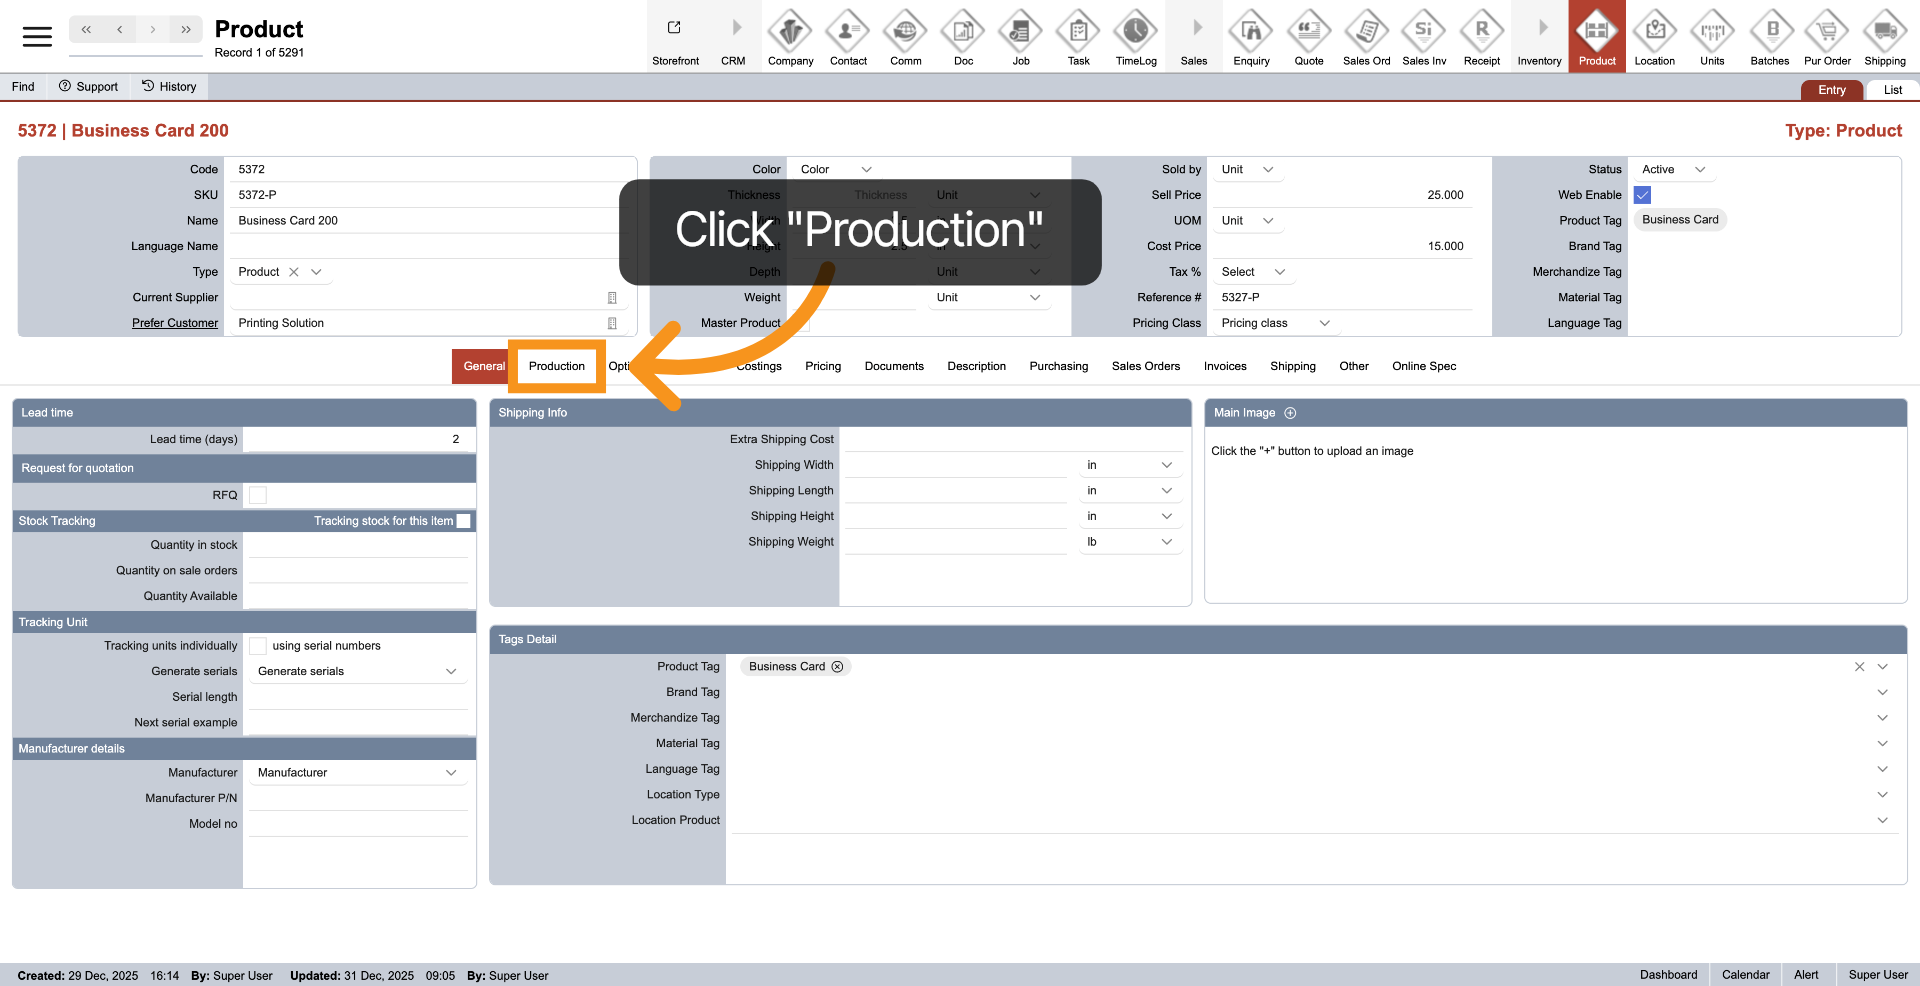
2. Choose Production Tab
Click on "Production" in the middle menu to access the settings and options related to production.
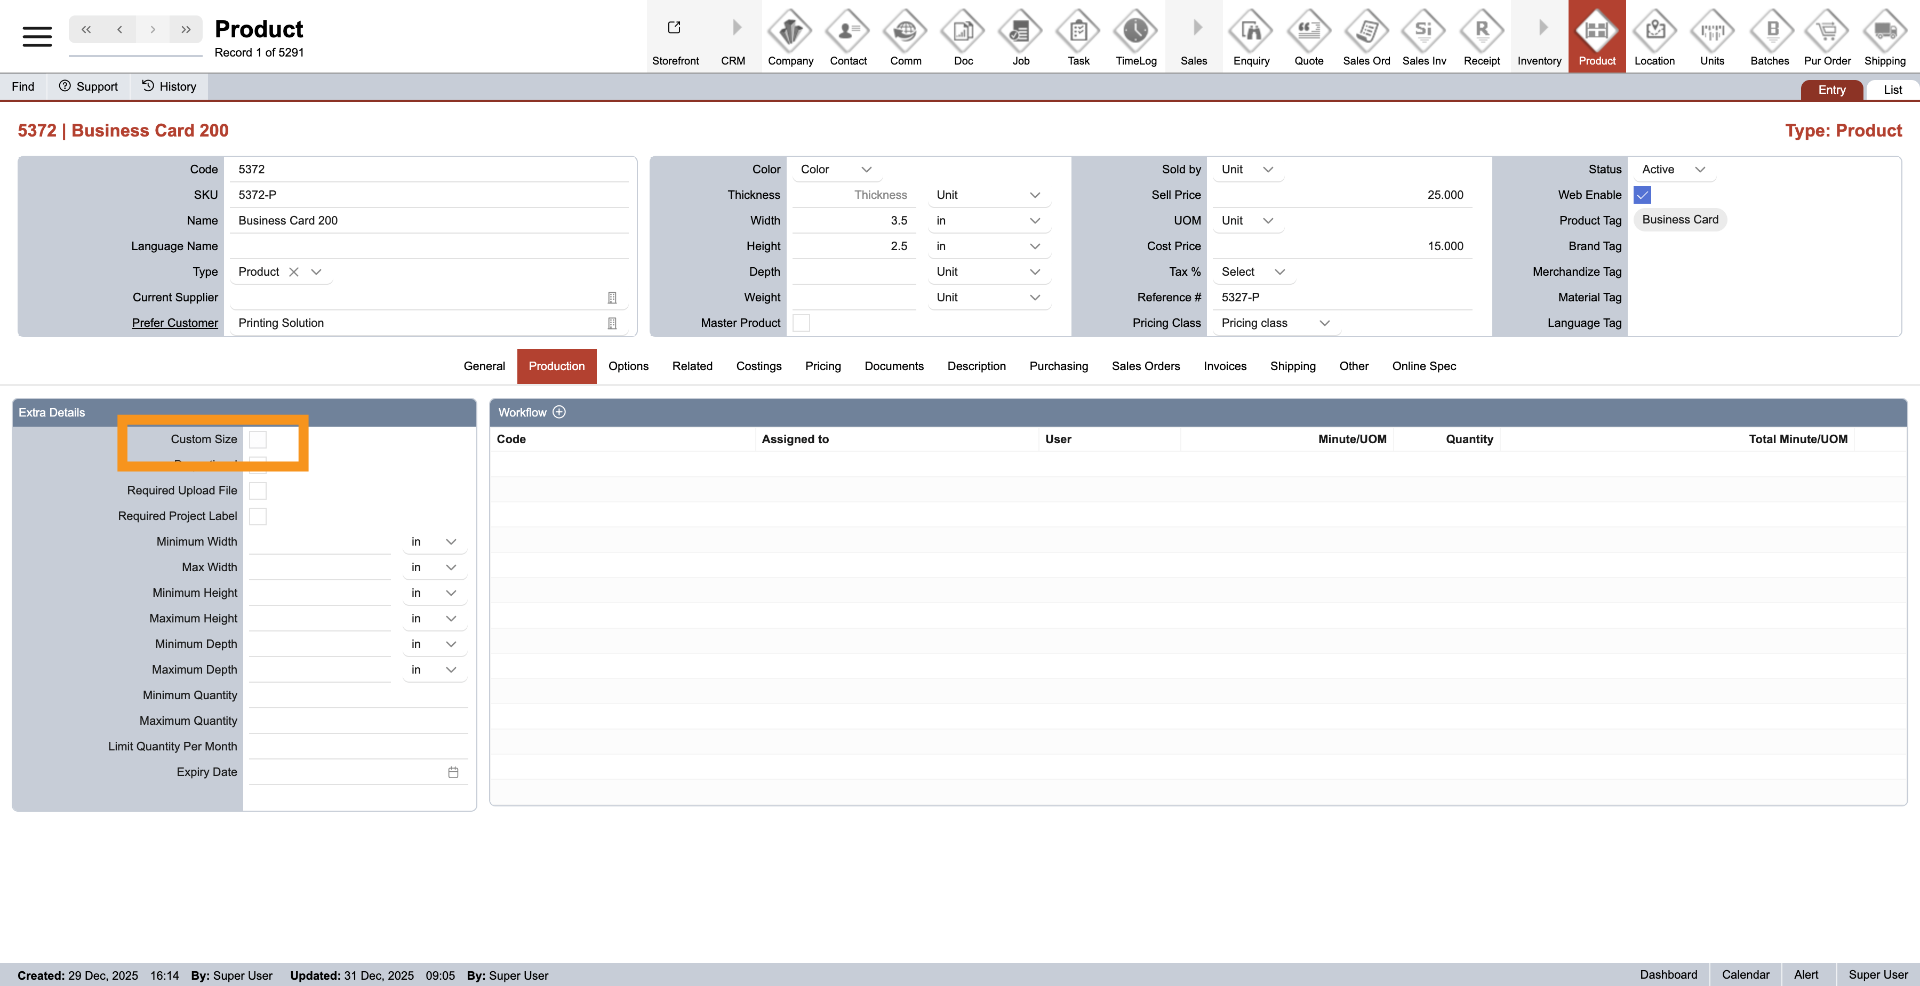
3. Custom Size
Select the Custom Size field to enable the option for entering custom dimensions for the product.
4. Required Update File
Check if the product requires any files before proceeding with the process.

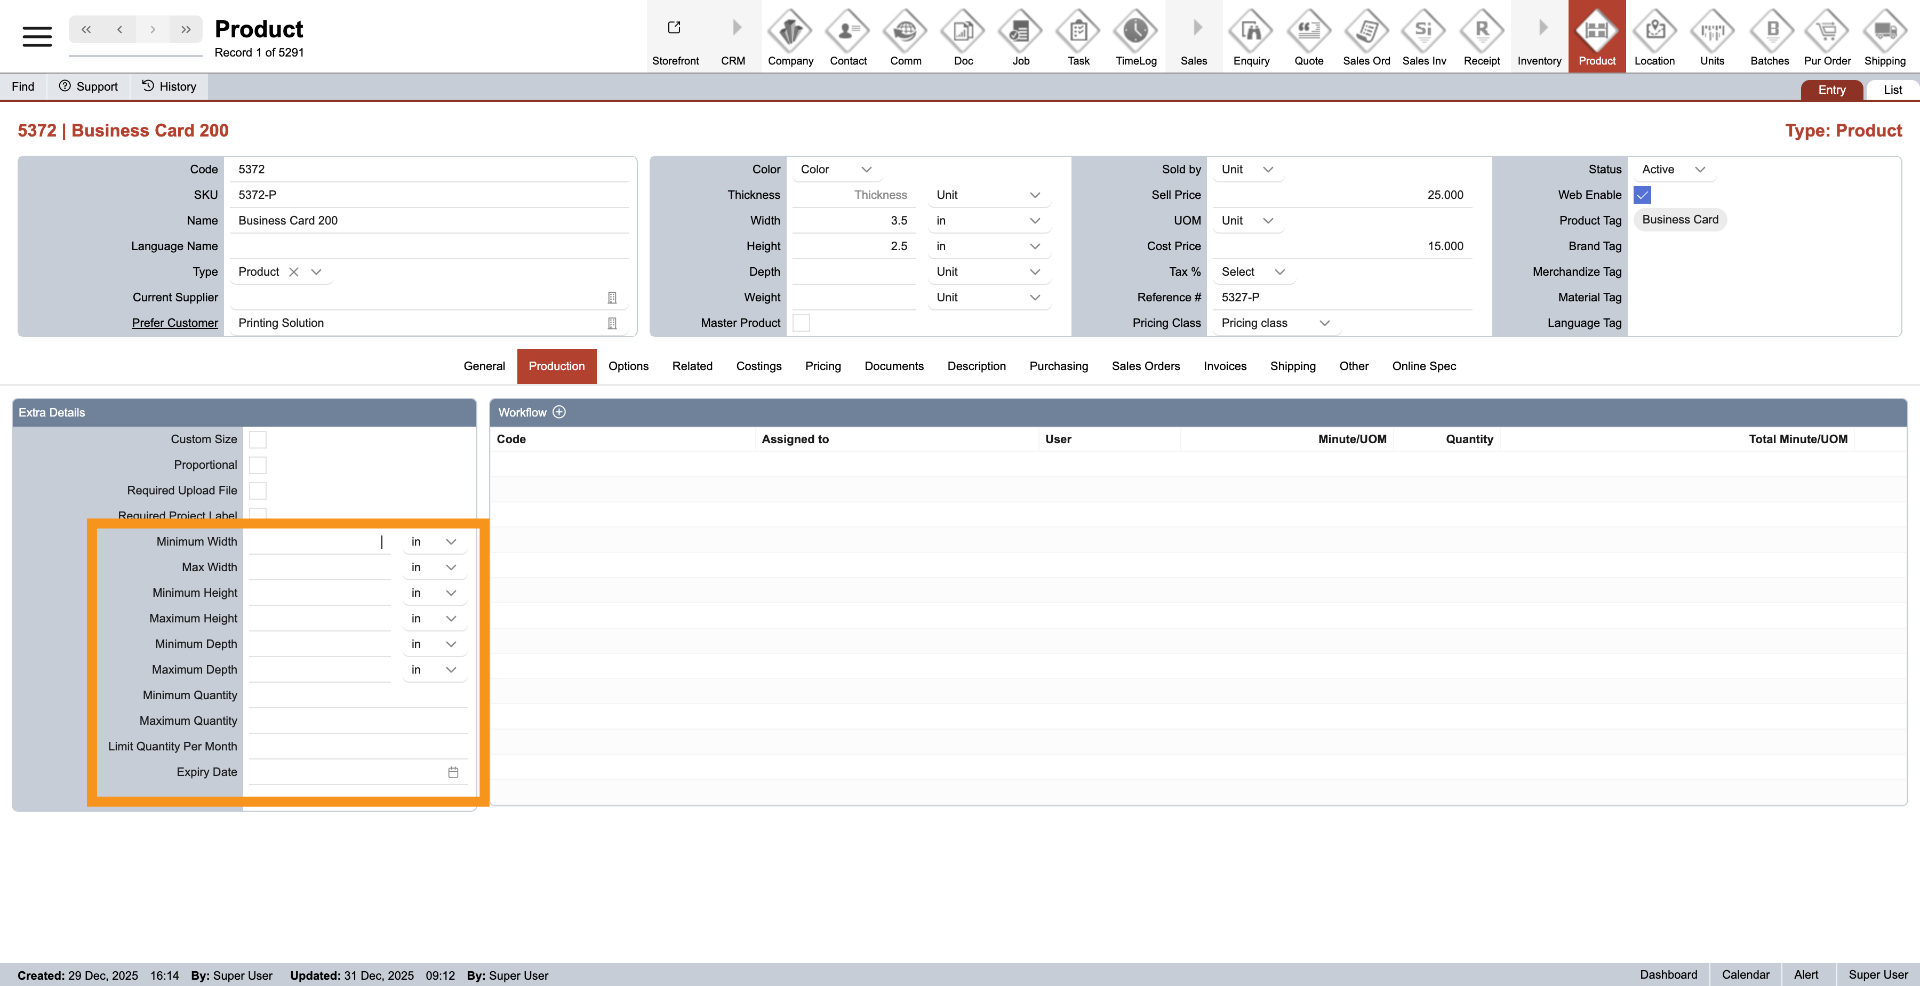
5. Enter Extra Product Details
Provide any additional details related to the product
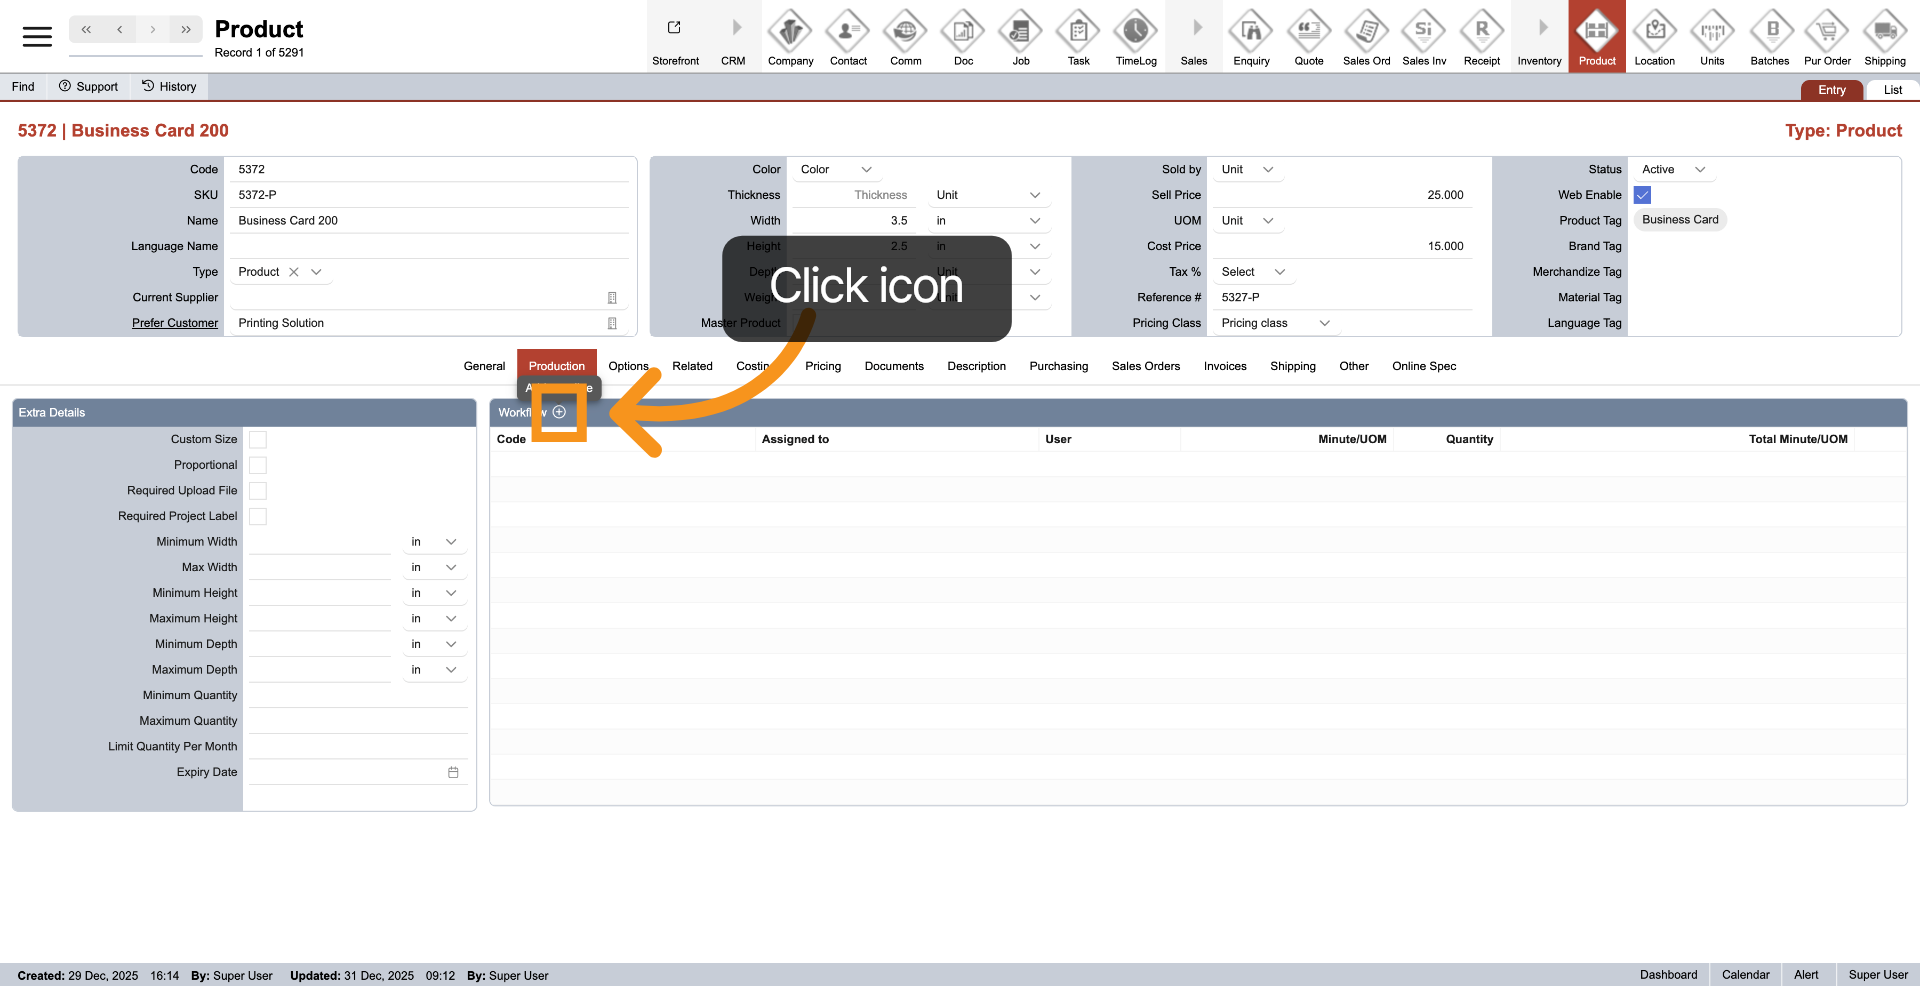
6. Add Workflow
To add a workflow for the product, click the plus icon in the Workflow header. This step helps you organize the machines used for this product and calculates the production time based on the selected machine. You can add multiple machines for a product as needed.
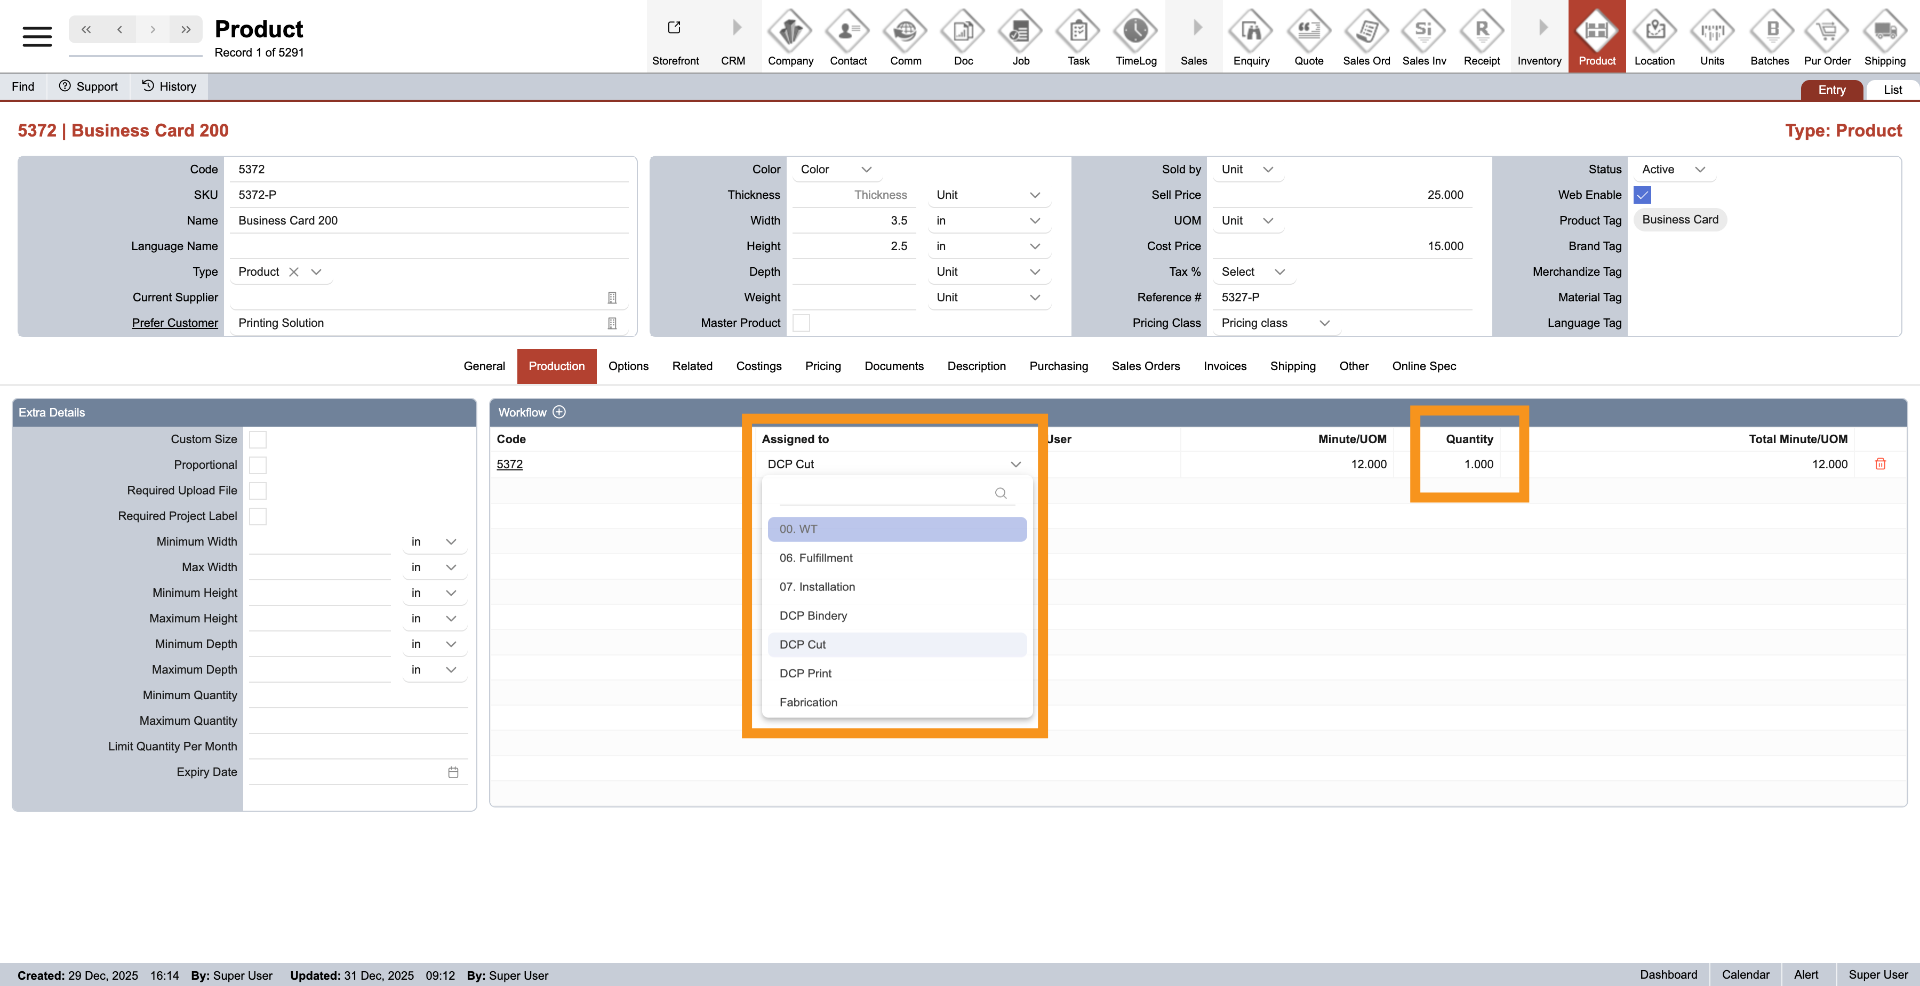
7. Choose Workflow Option
After adding a workflow, a new line will be added to the table. Next, click on the dropdown menu under "Assigned to" to select the appropriate machine. You can also adjust the "Quantity" as needed. The production time will be automatically calculated based on the settings.
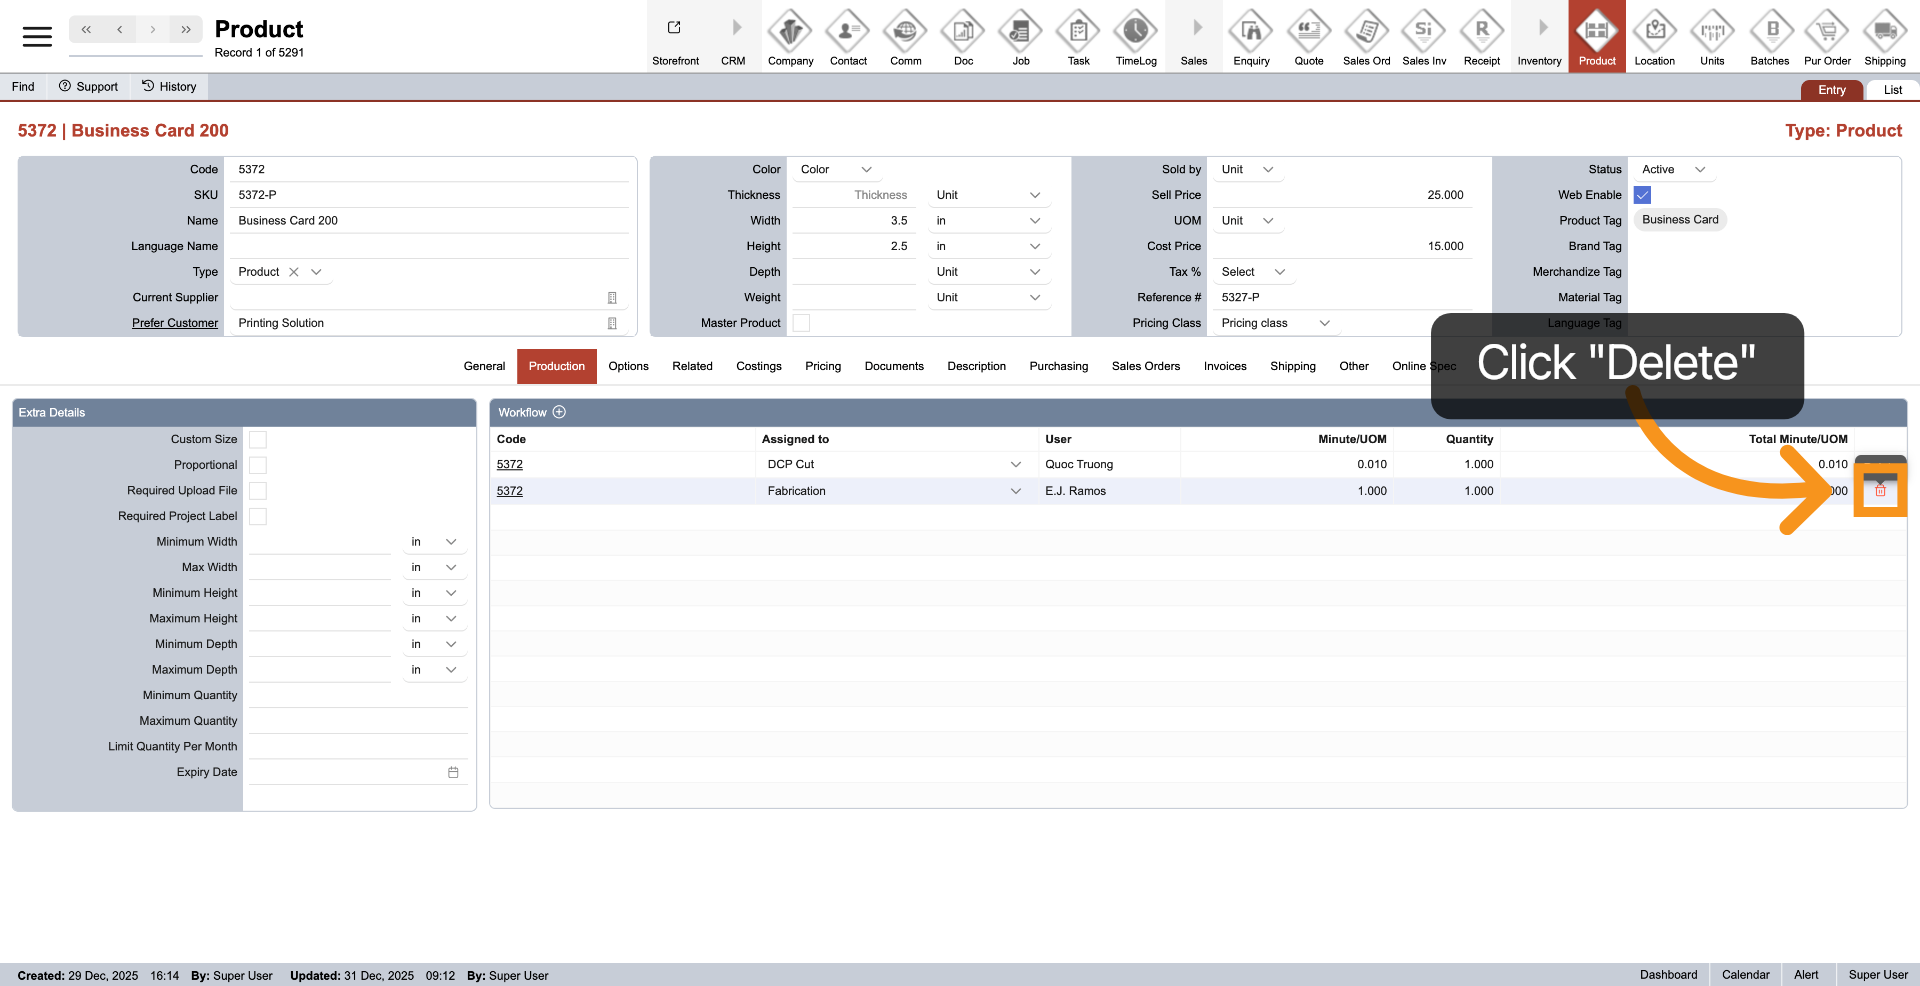
8. Delete Workflow
Click the delete icon at the end of the line you want to remove from the workflow.
You have successfully configured the product production settings in the WorkTraq system.