Create Contacts / Employees
This tutorial guides you through creating and configuring a contact/ employee in WorkTraq.
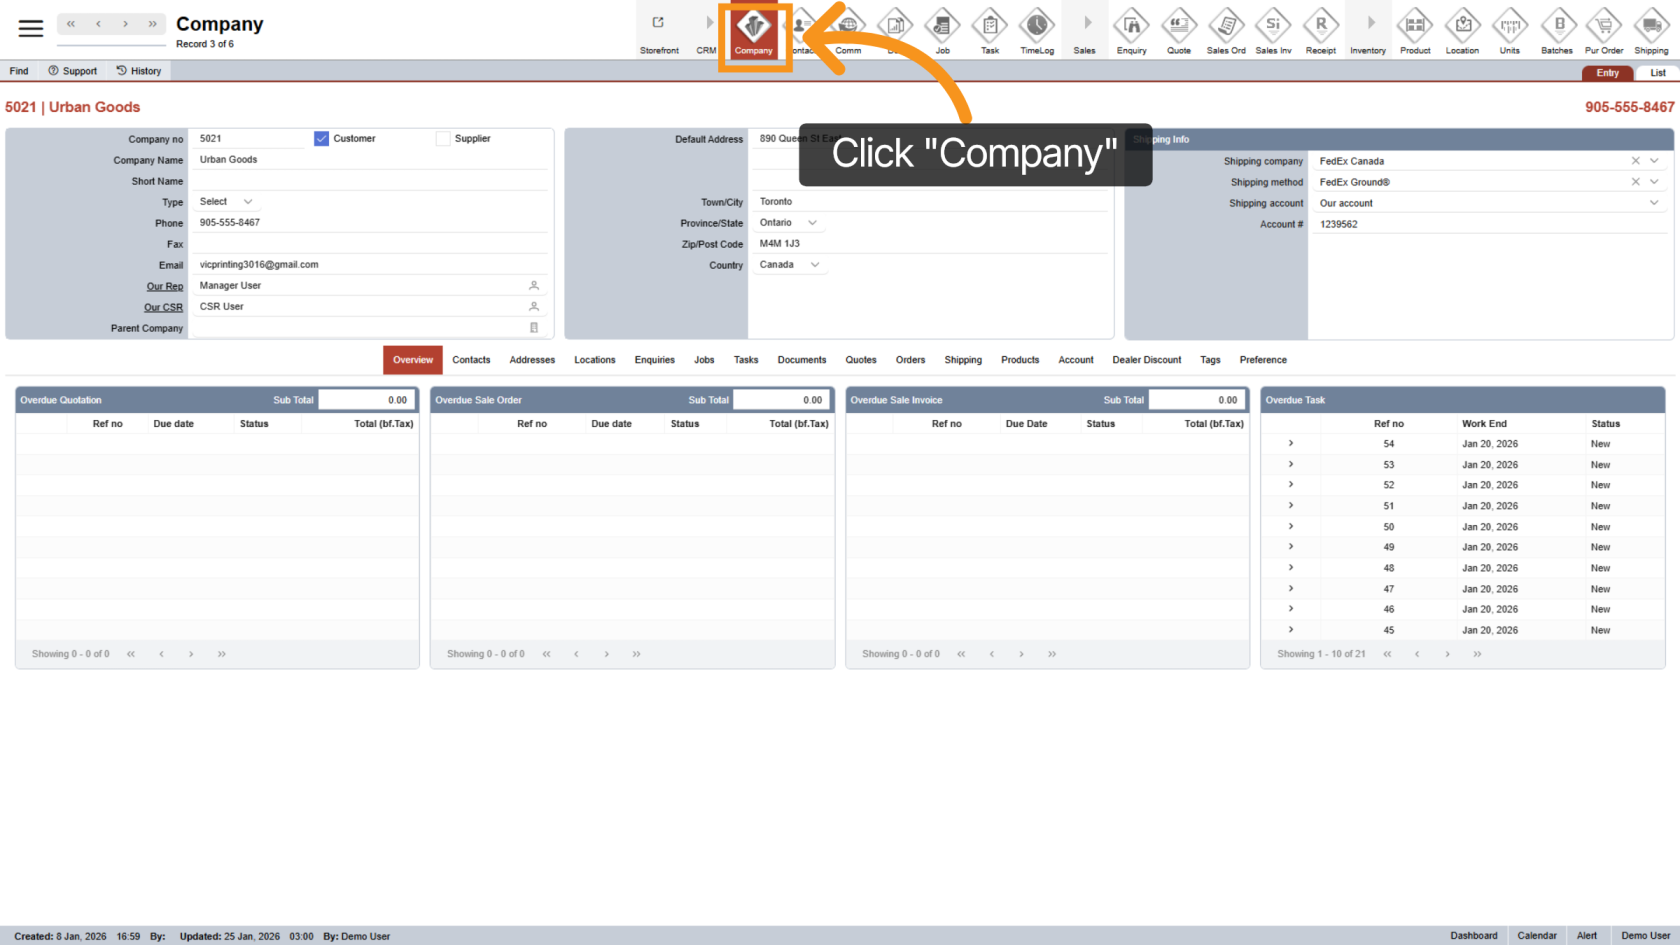
1. Open Company Menu
Click the Company menu to access company-related options and settings.
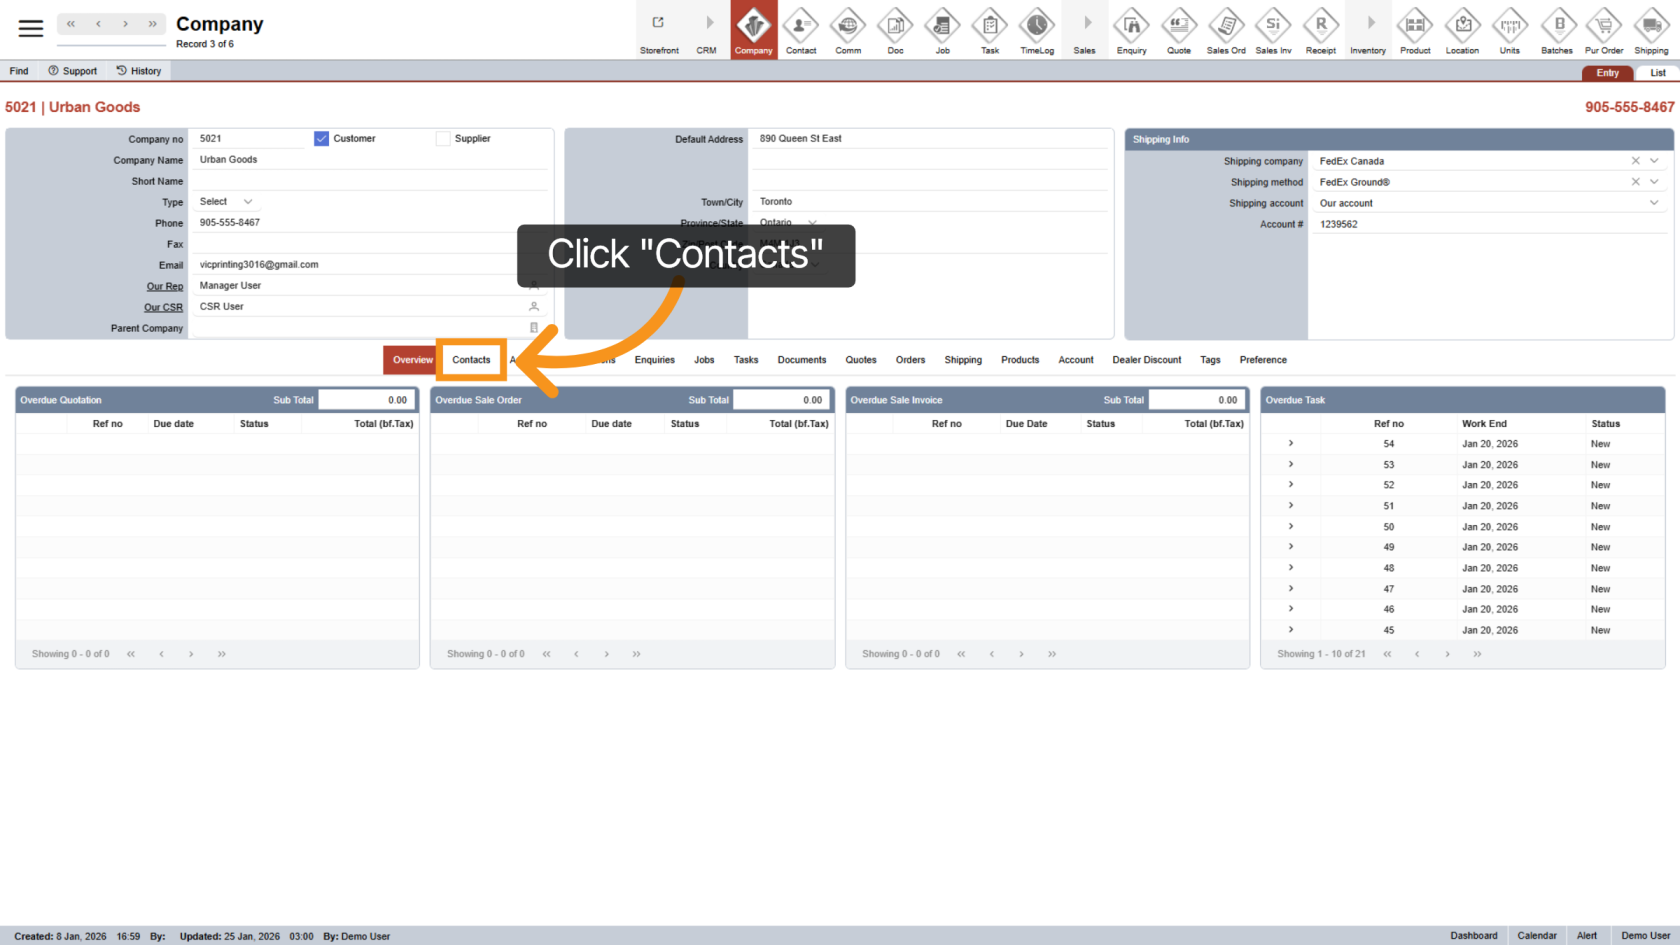
2. Navigate to the Contacts Section
Click Contacts to view and manage the list of contacts associated with the company.
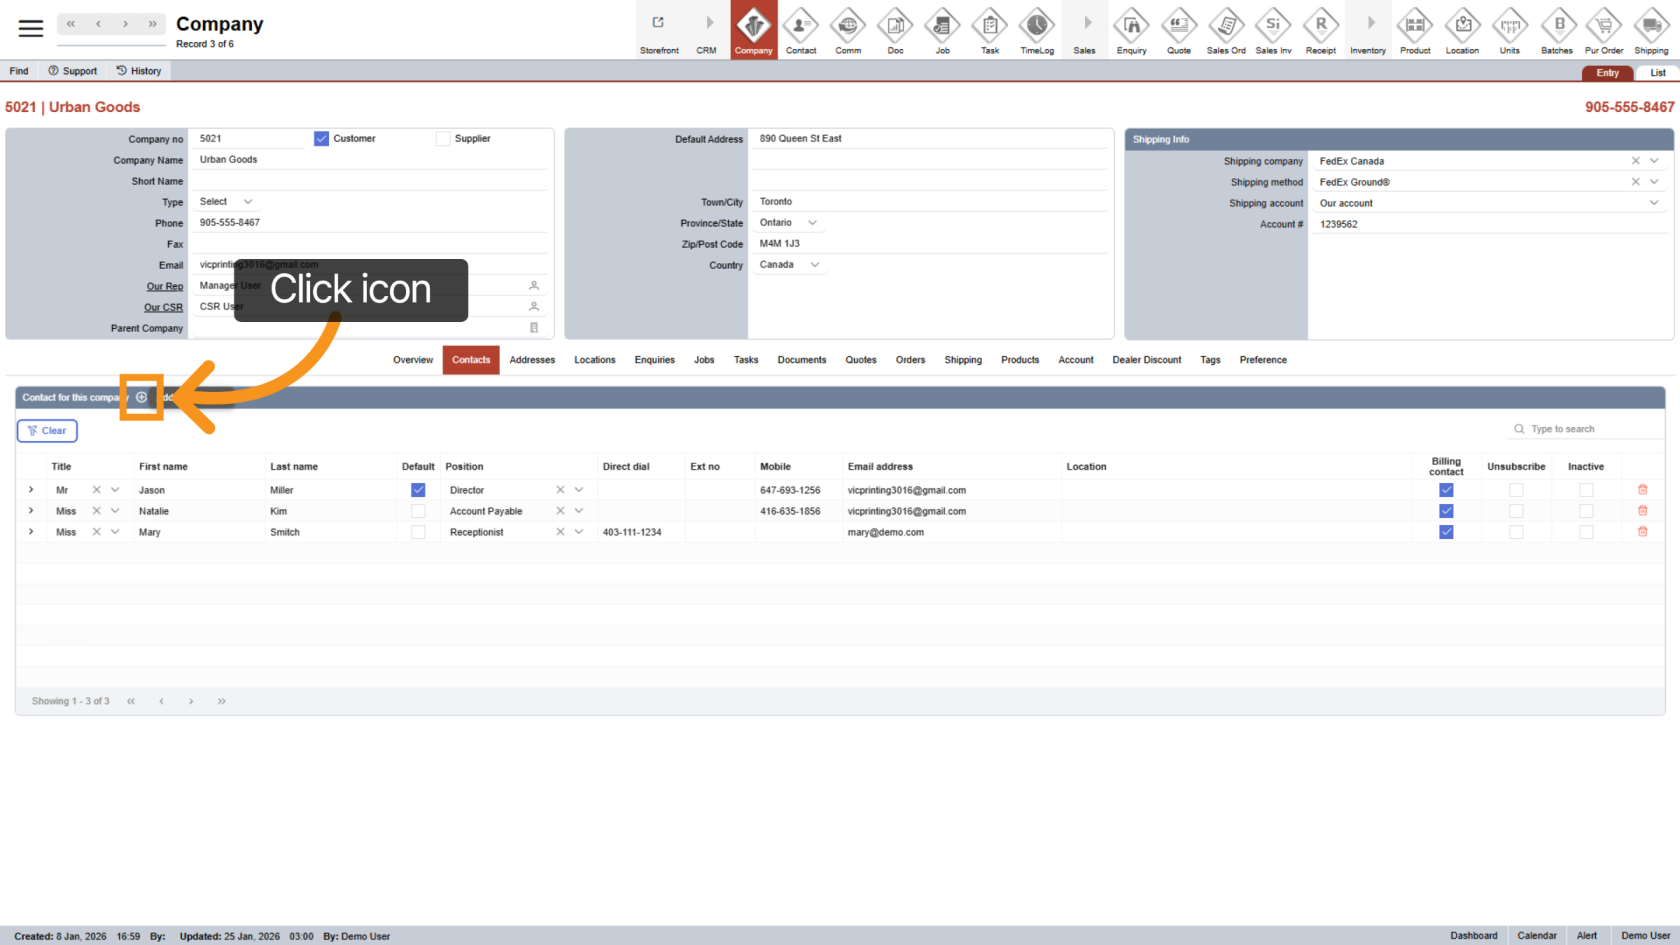
3. Initiate New Contact Creation
Click the plus icon to start creating a new contact record.
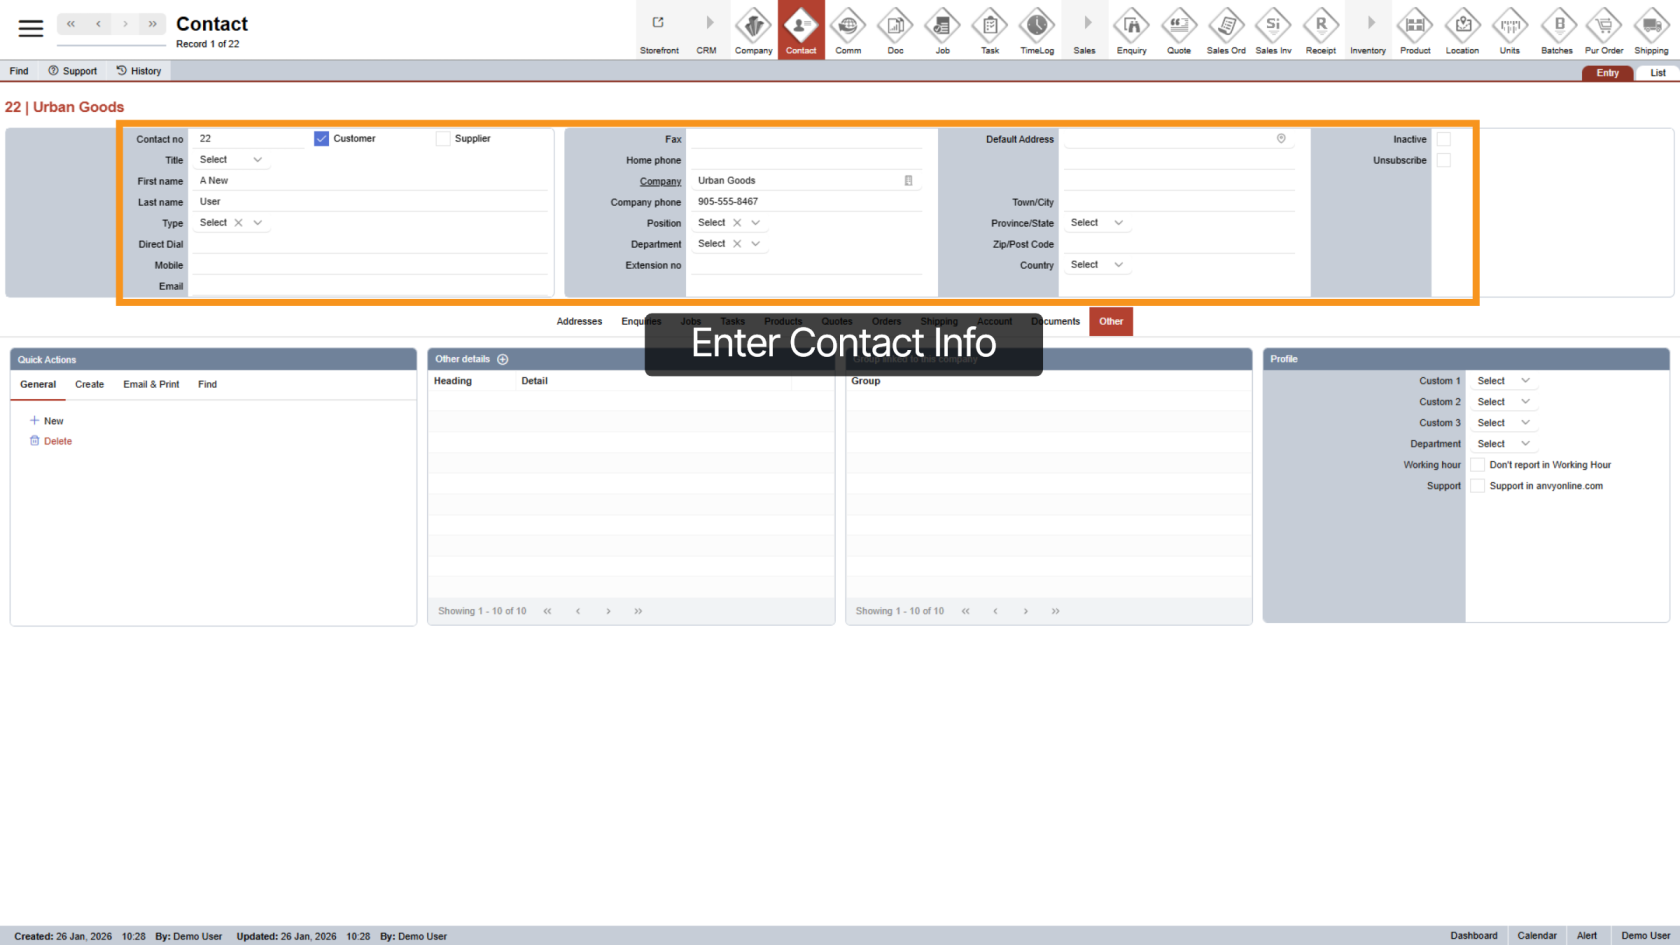
4. Input New Contact Details
Enter contact's info, including: first name, last name, direct dial, mobile, email, etc...
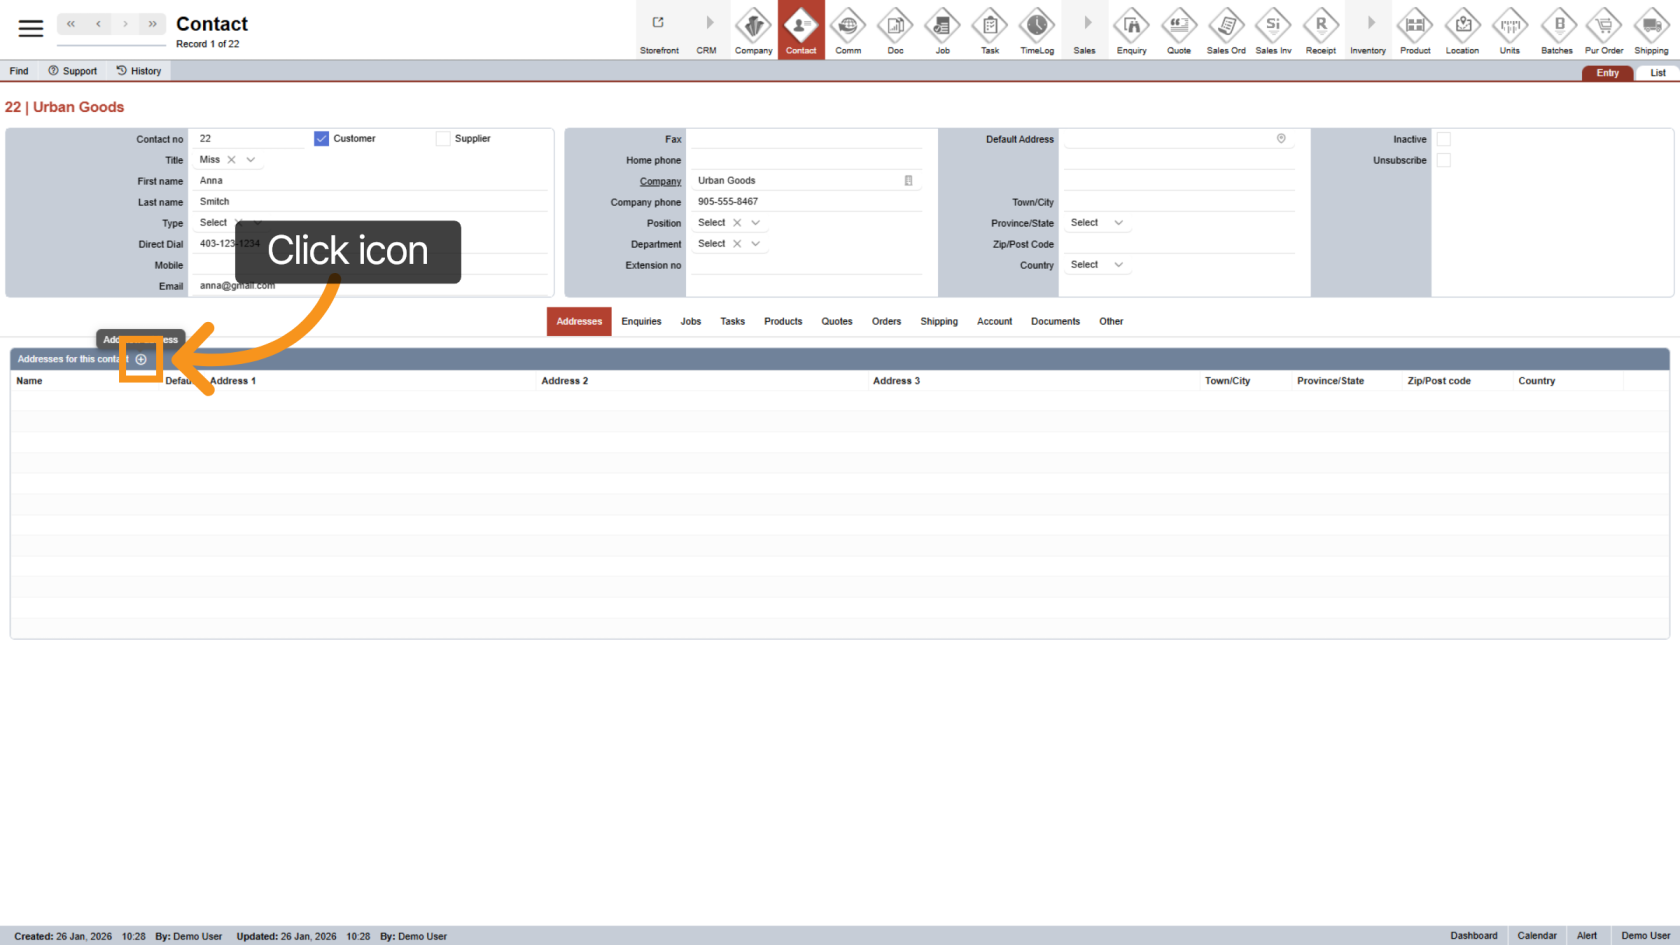
5. Add Contact Address
Under the "Address" tab, click the plus icon to start adding a new address for the contact. This information can be left blank if unknown.
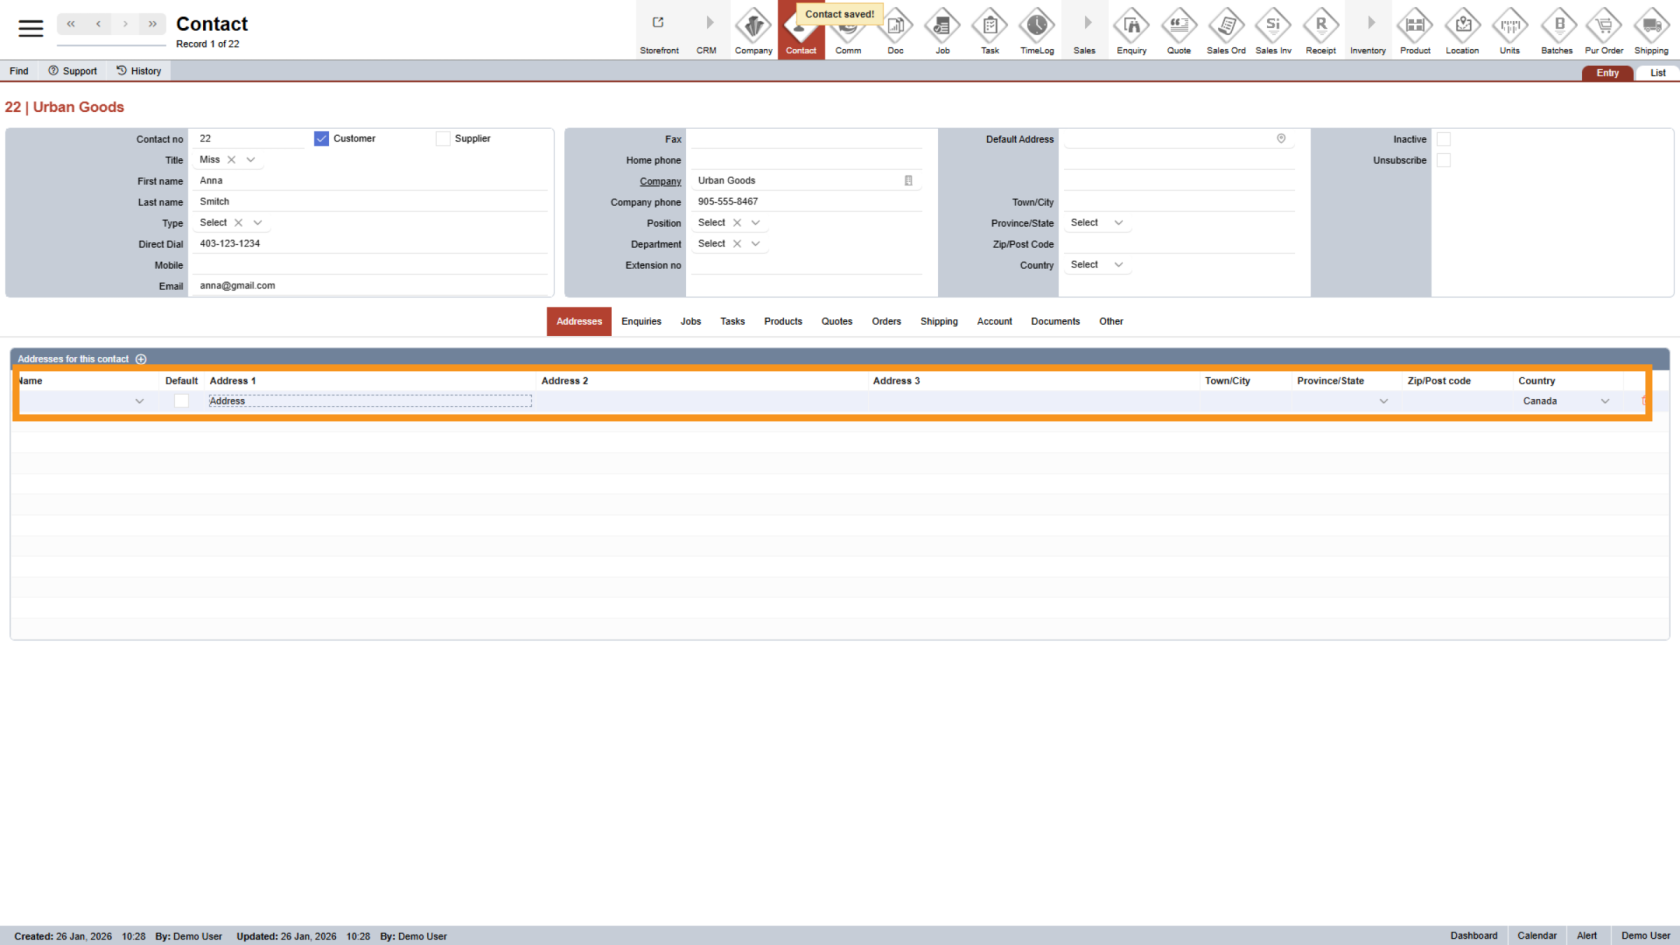
6. Add Address Info
A new line will add into Address table, enter the contact's address
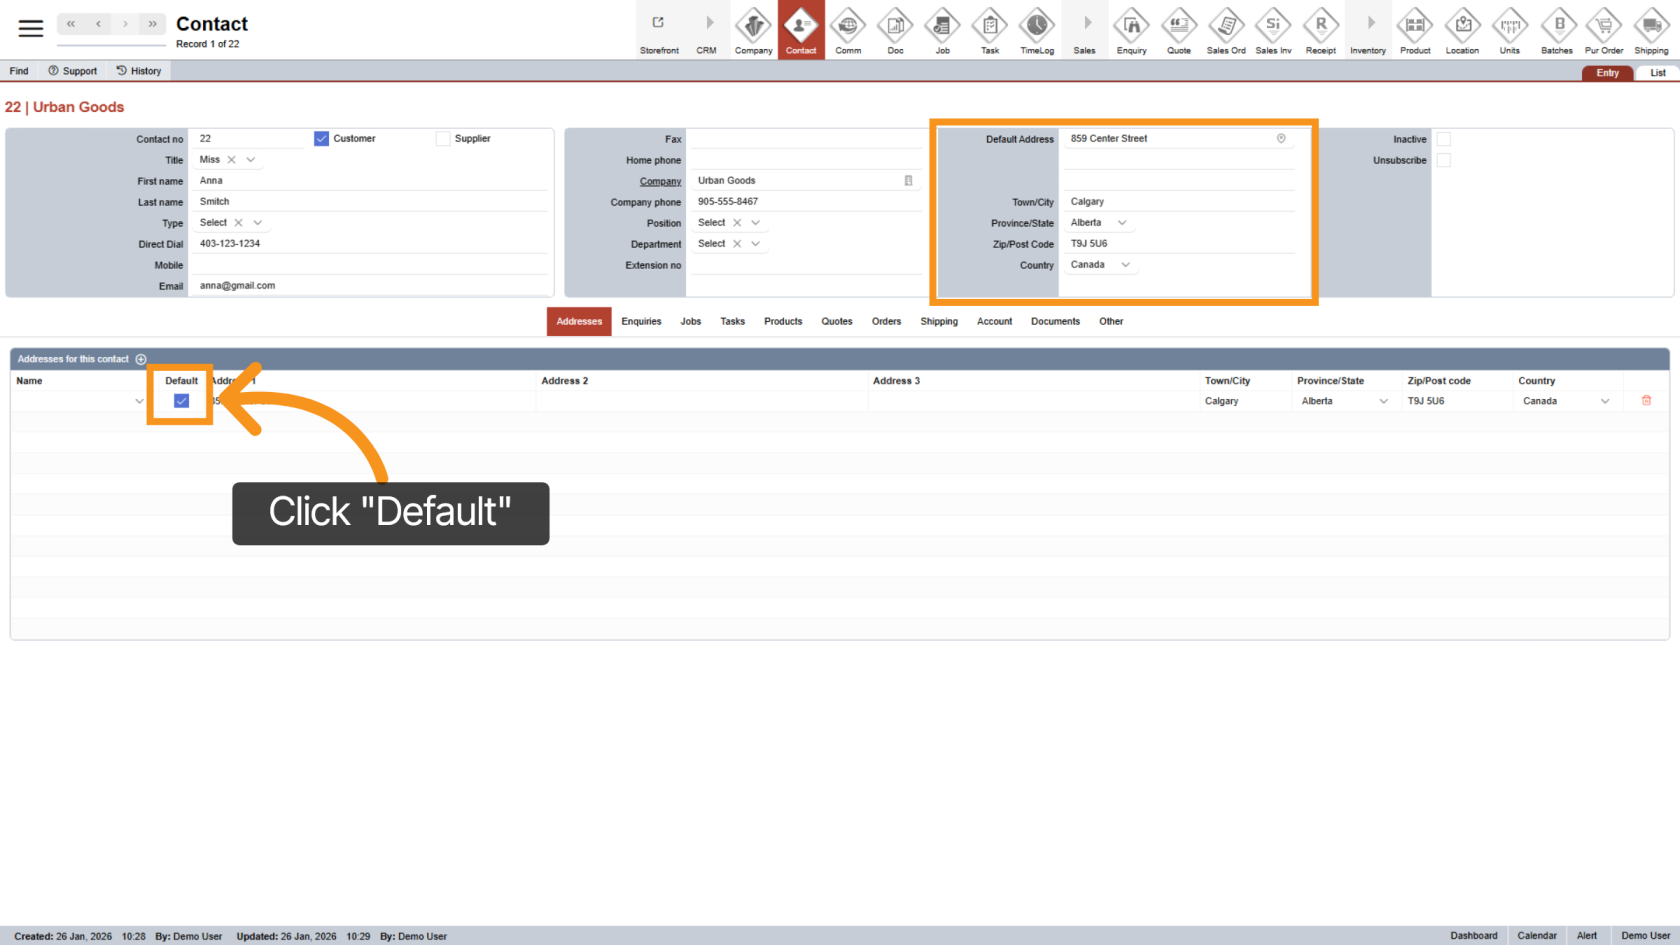
7. Set Default Address
Click Default Address to designate this as the primary address for correspondence.
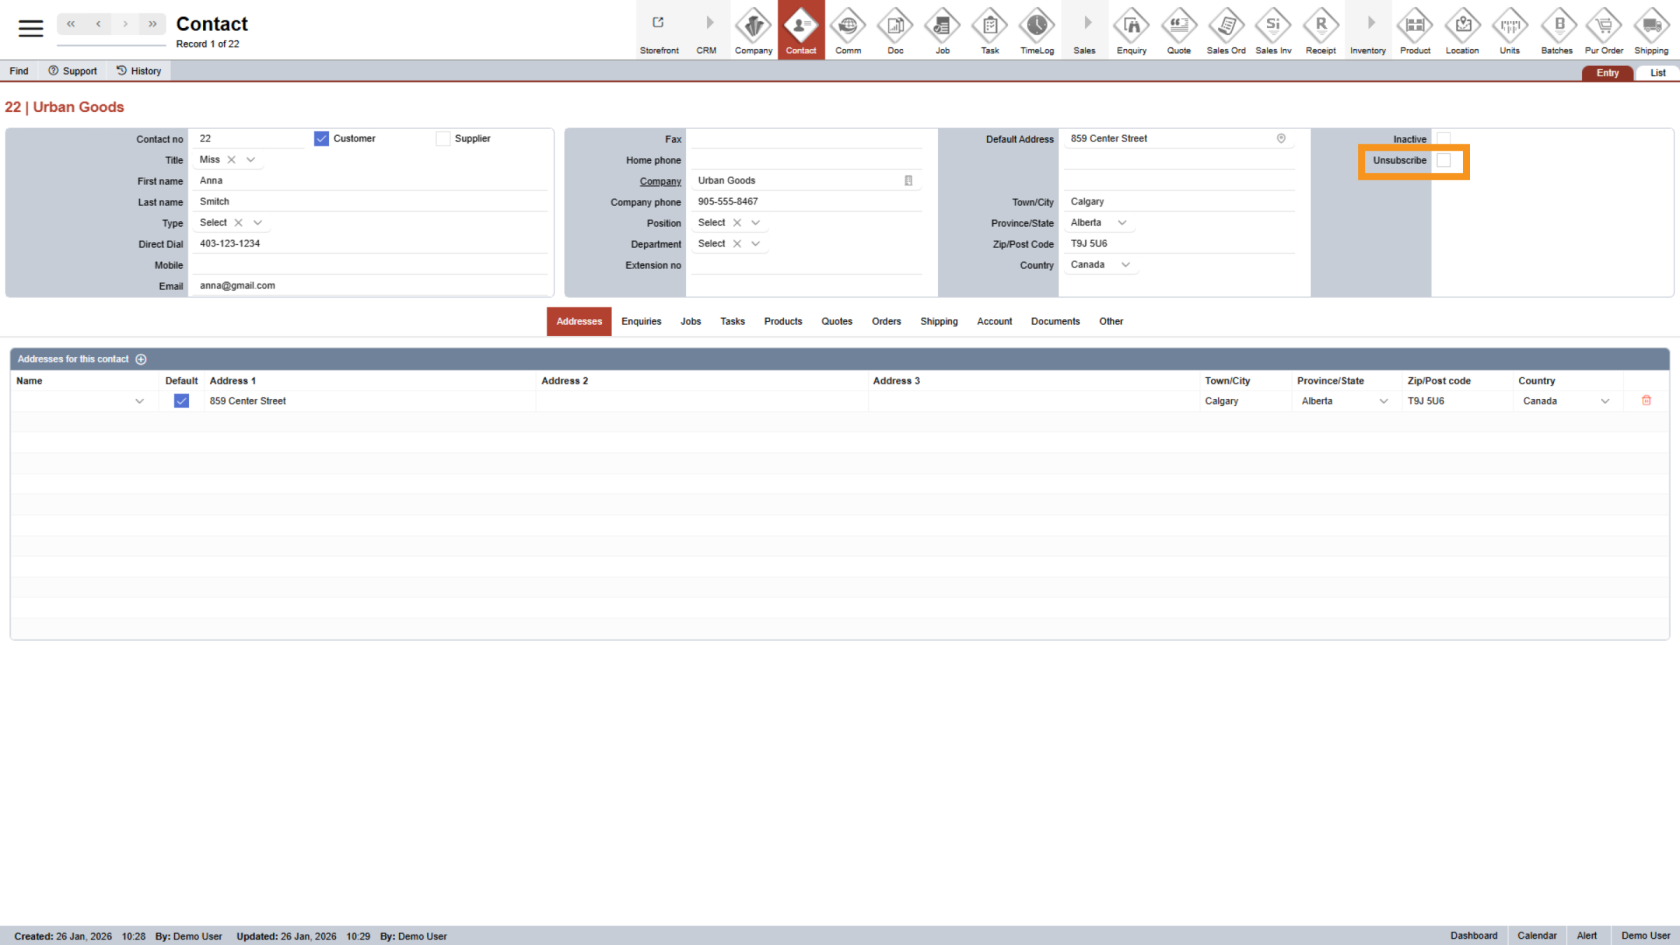
8. Unsubscribe
Select 'Unsubscribe' if the contact does not want to receive the company's newsletter.
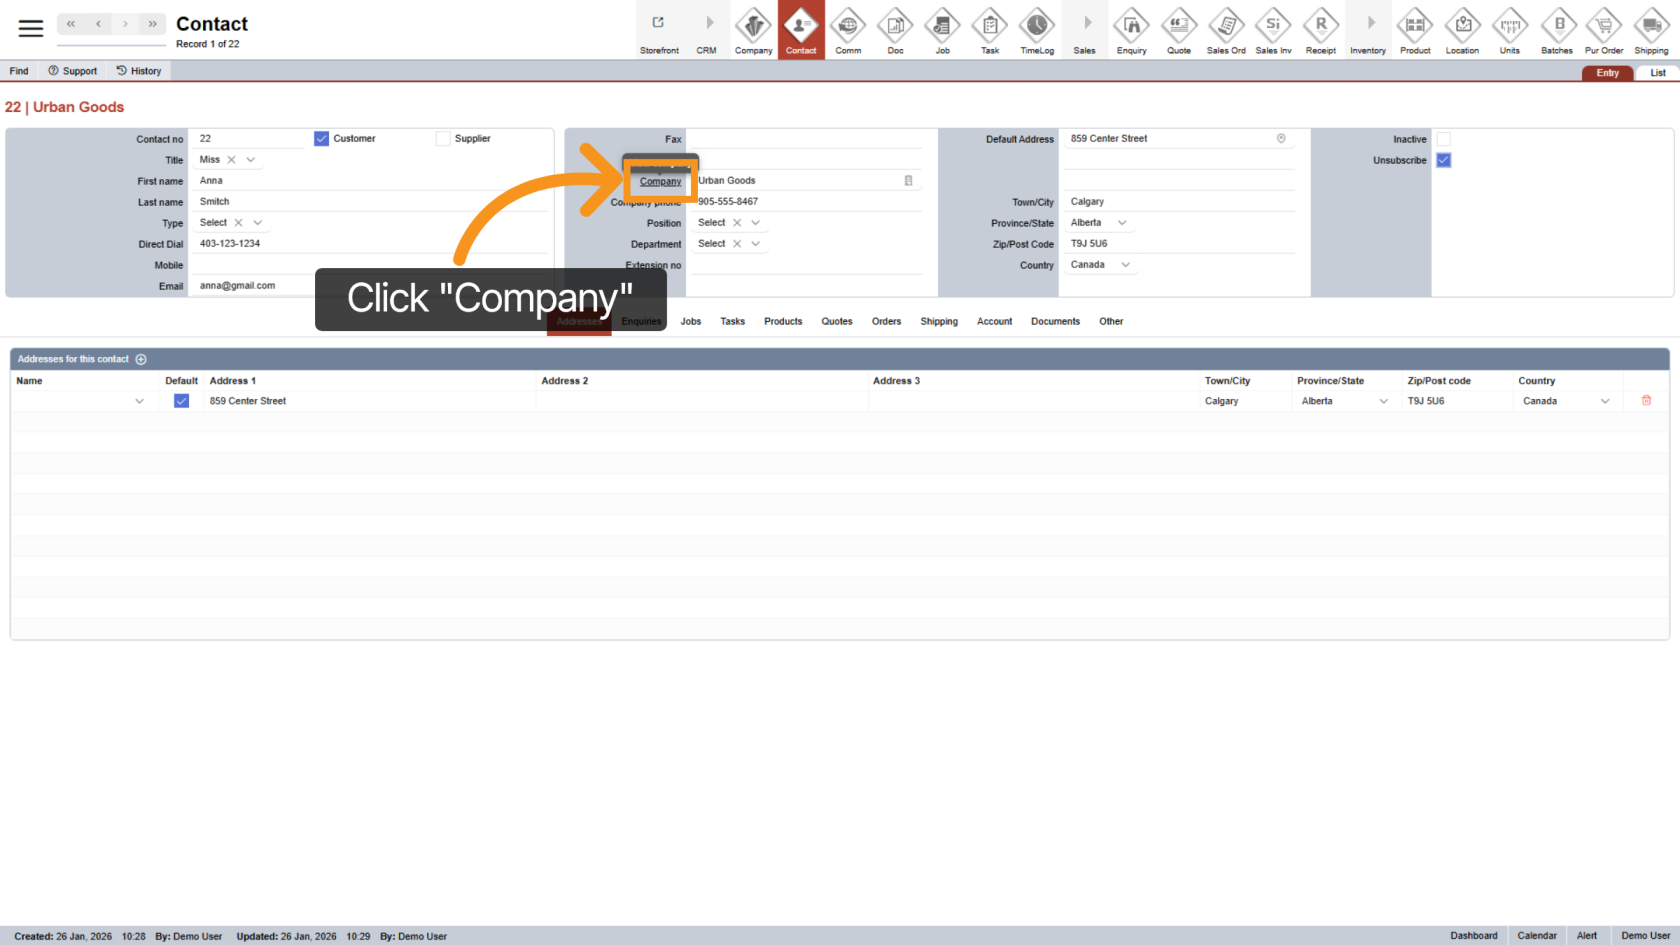
9. Back to Contact's Company
Click on the underlined 'Company' to navigate back to company configurations.
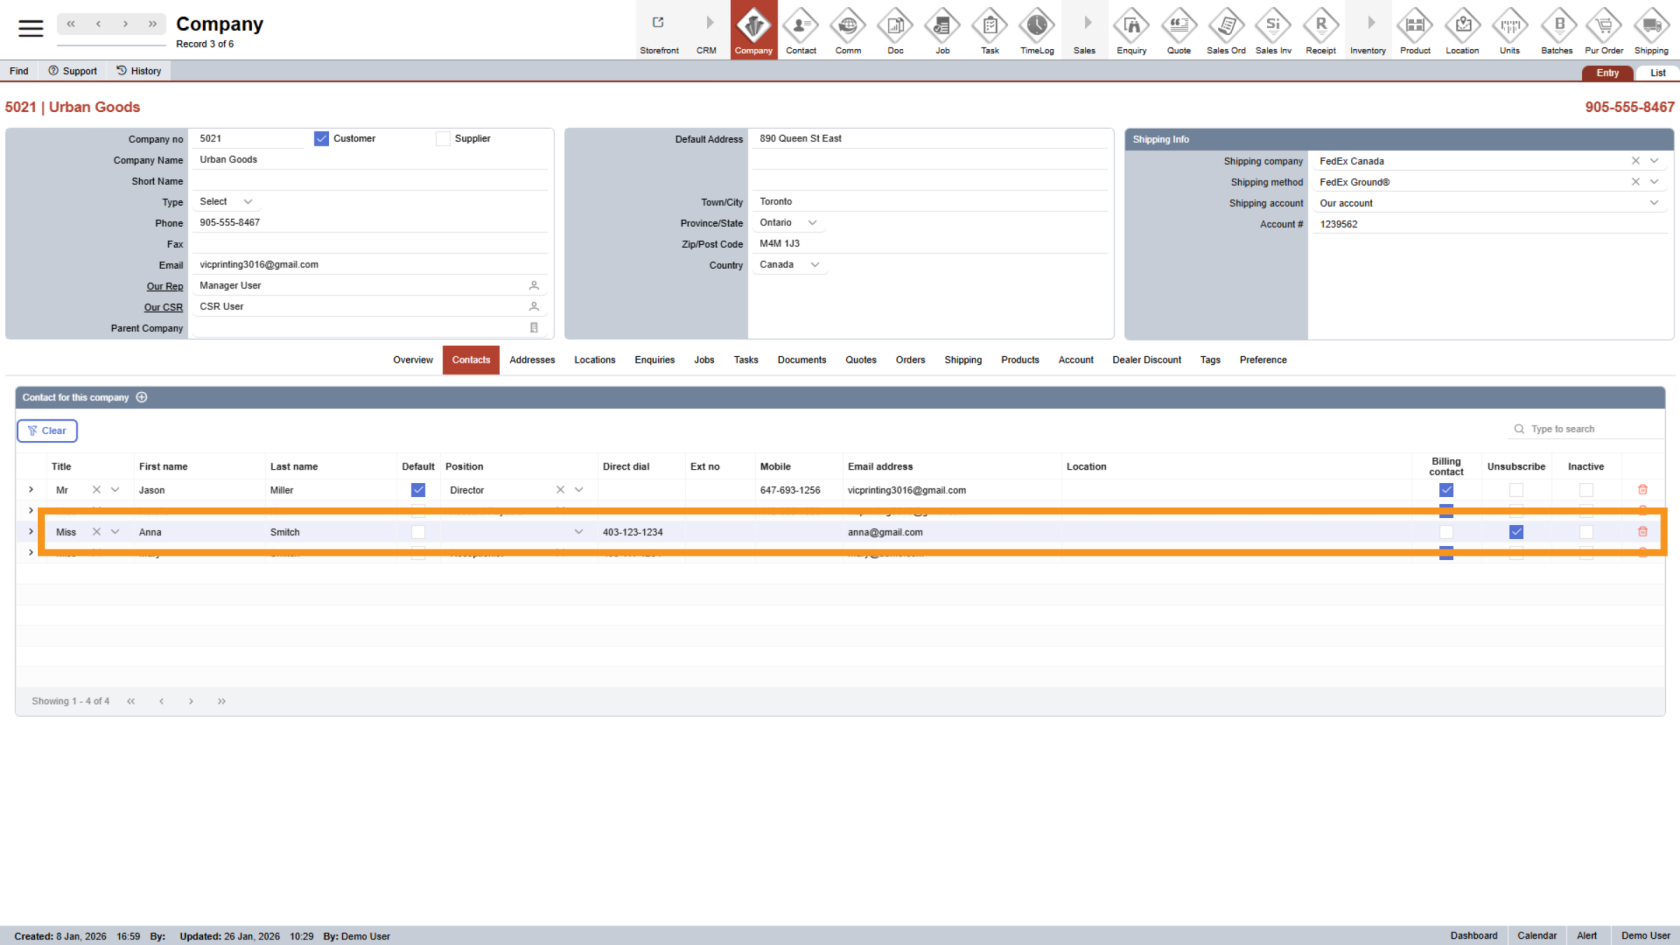
10. Custom Contact Info
Under the Company -> Contacts tab, you are able to update related contact details.
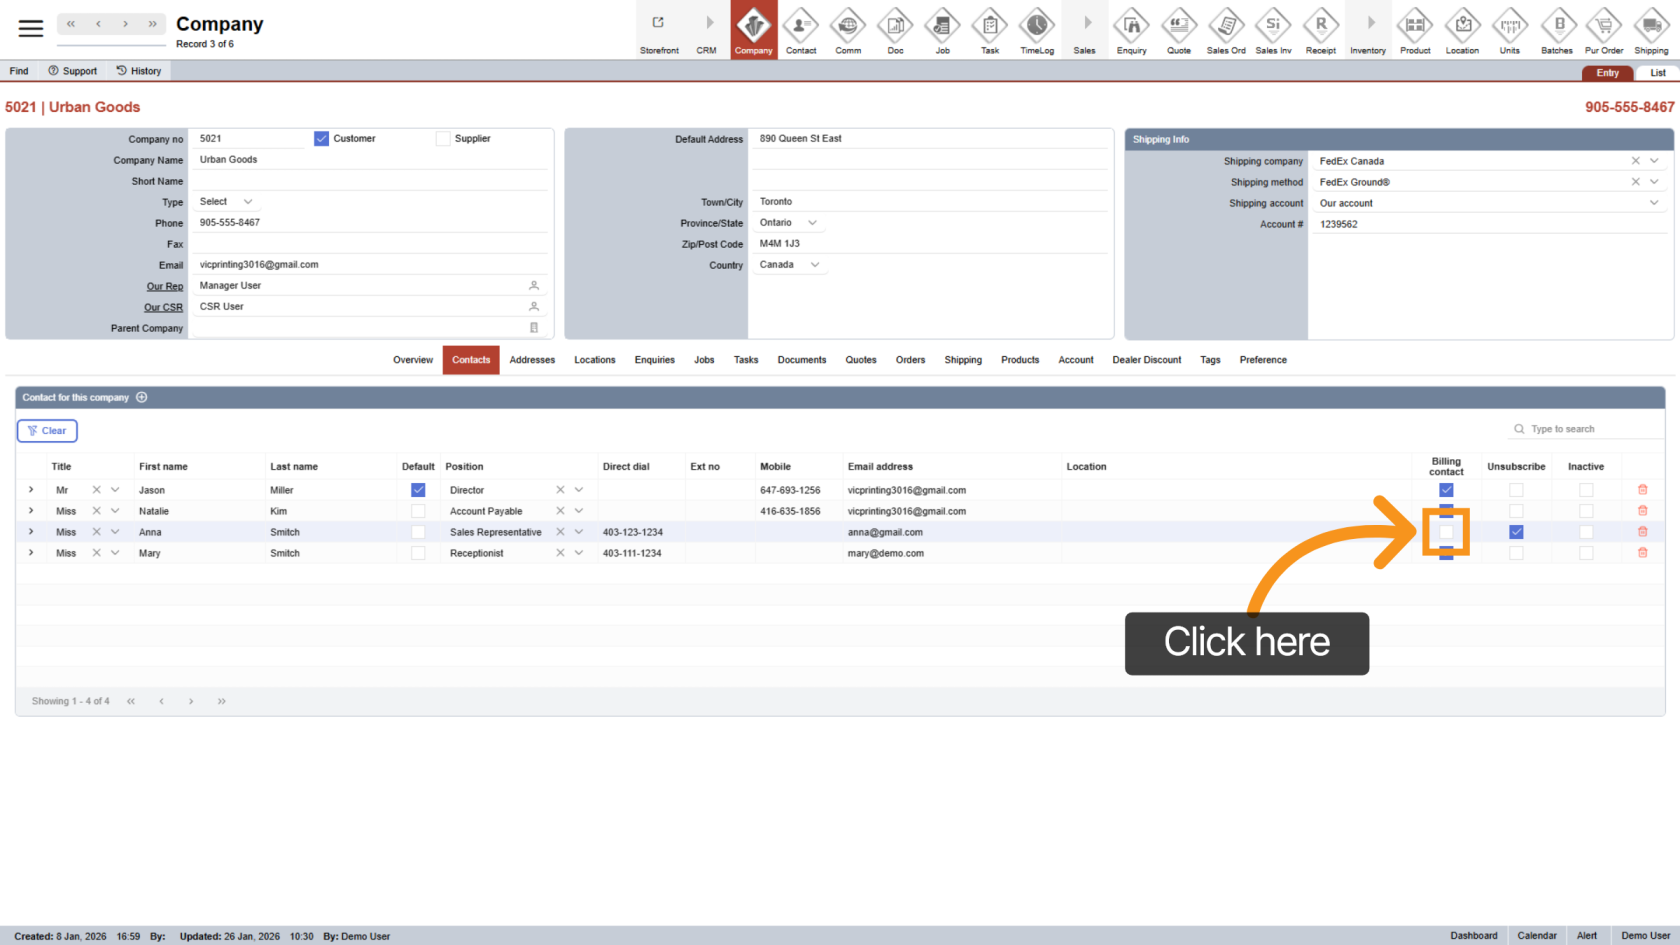
11. Company Billing Contact
Select the Billing Contact if the individual wishes to receive invoices. You can choose multiple billing contacts as needed.
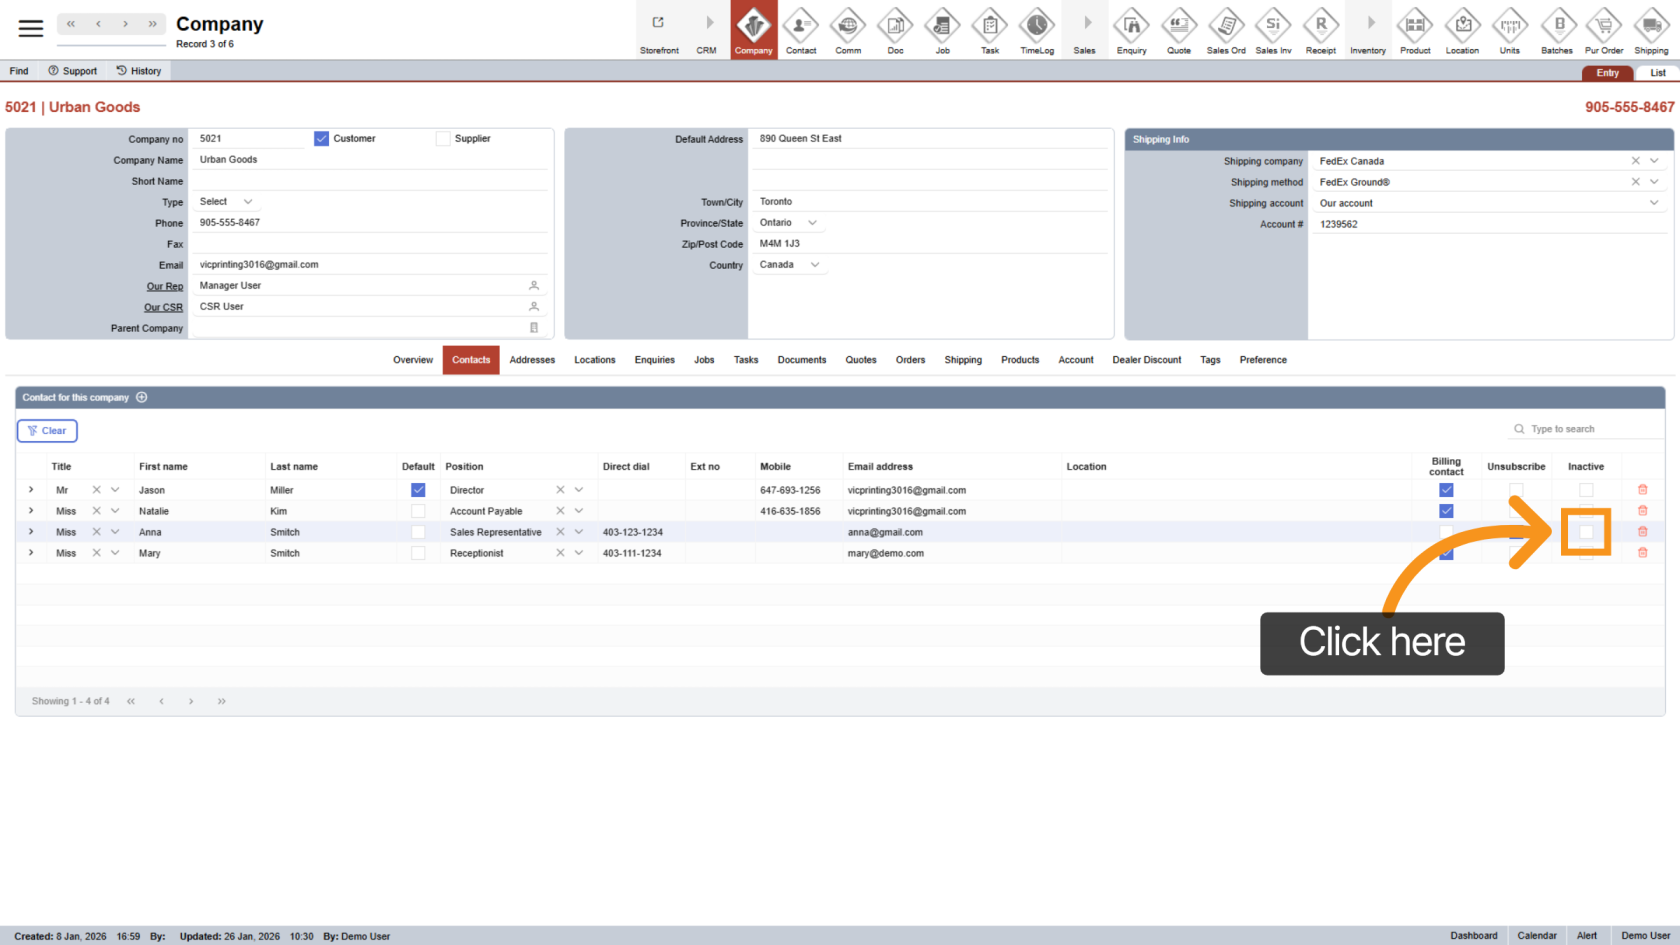
12. Inactive Contact
Select "Inactive" if the contact is no longer with the company.
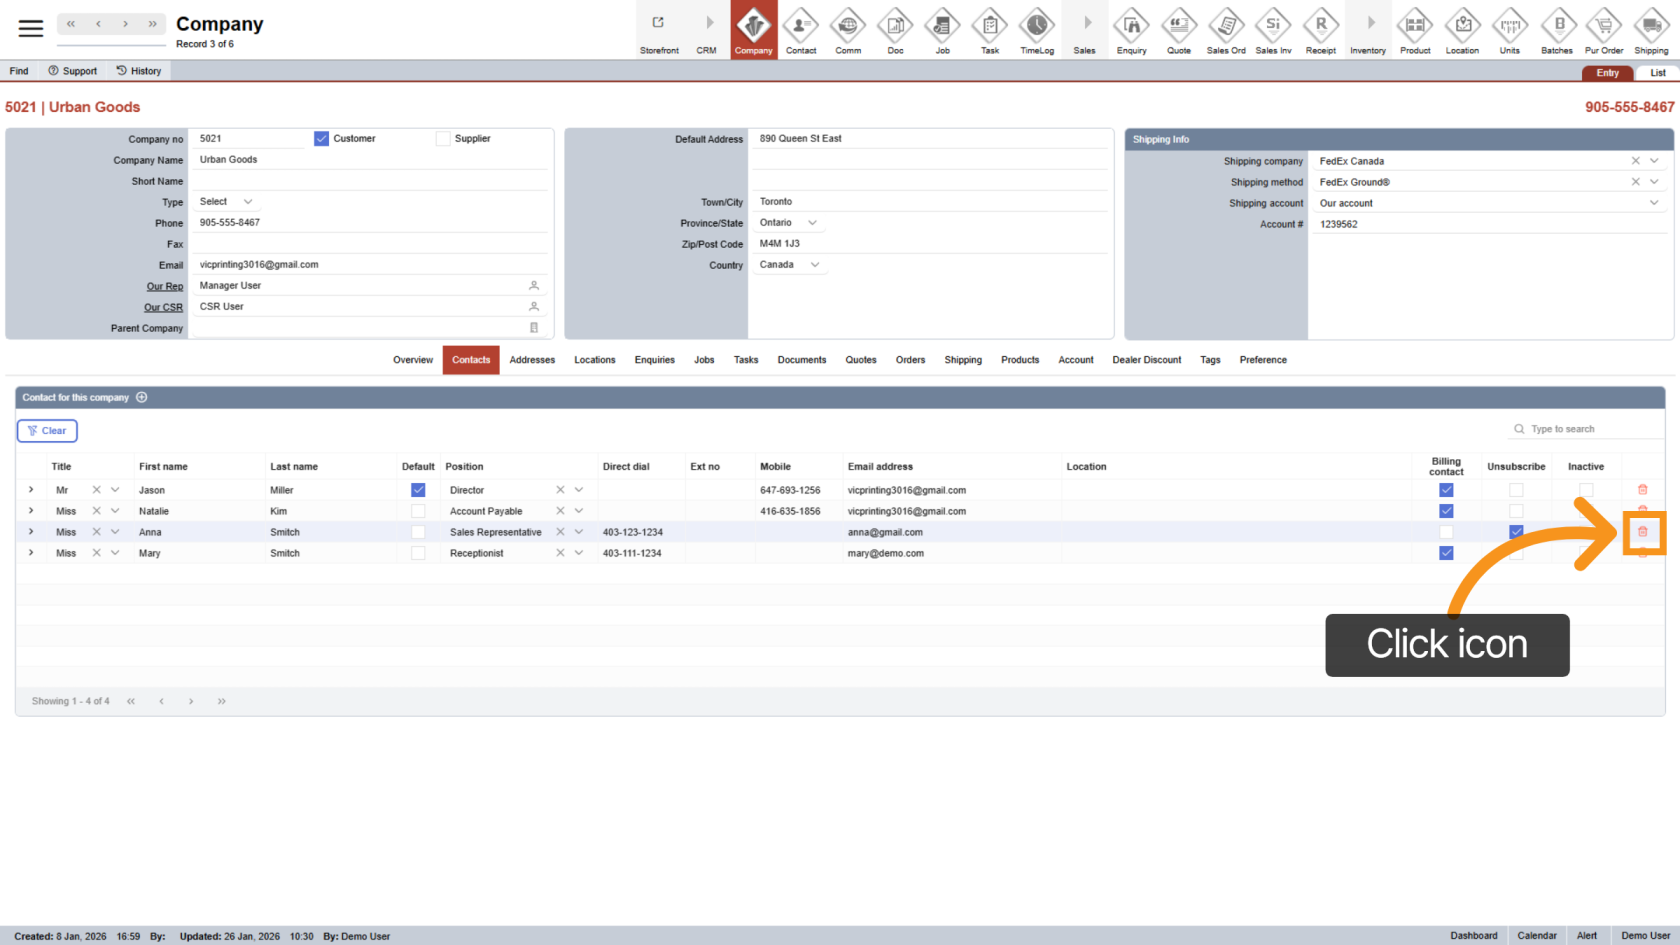
13. Delete Contact
Click the delete icon to remove the contact from the company.
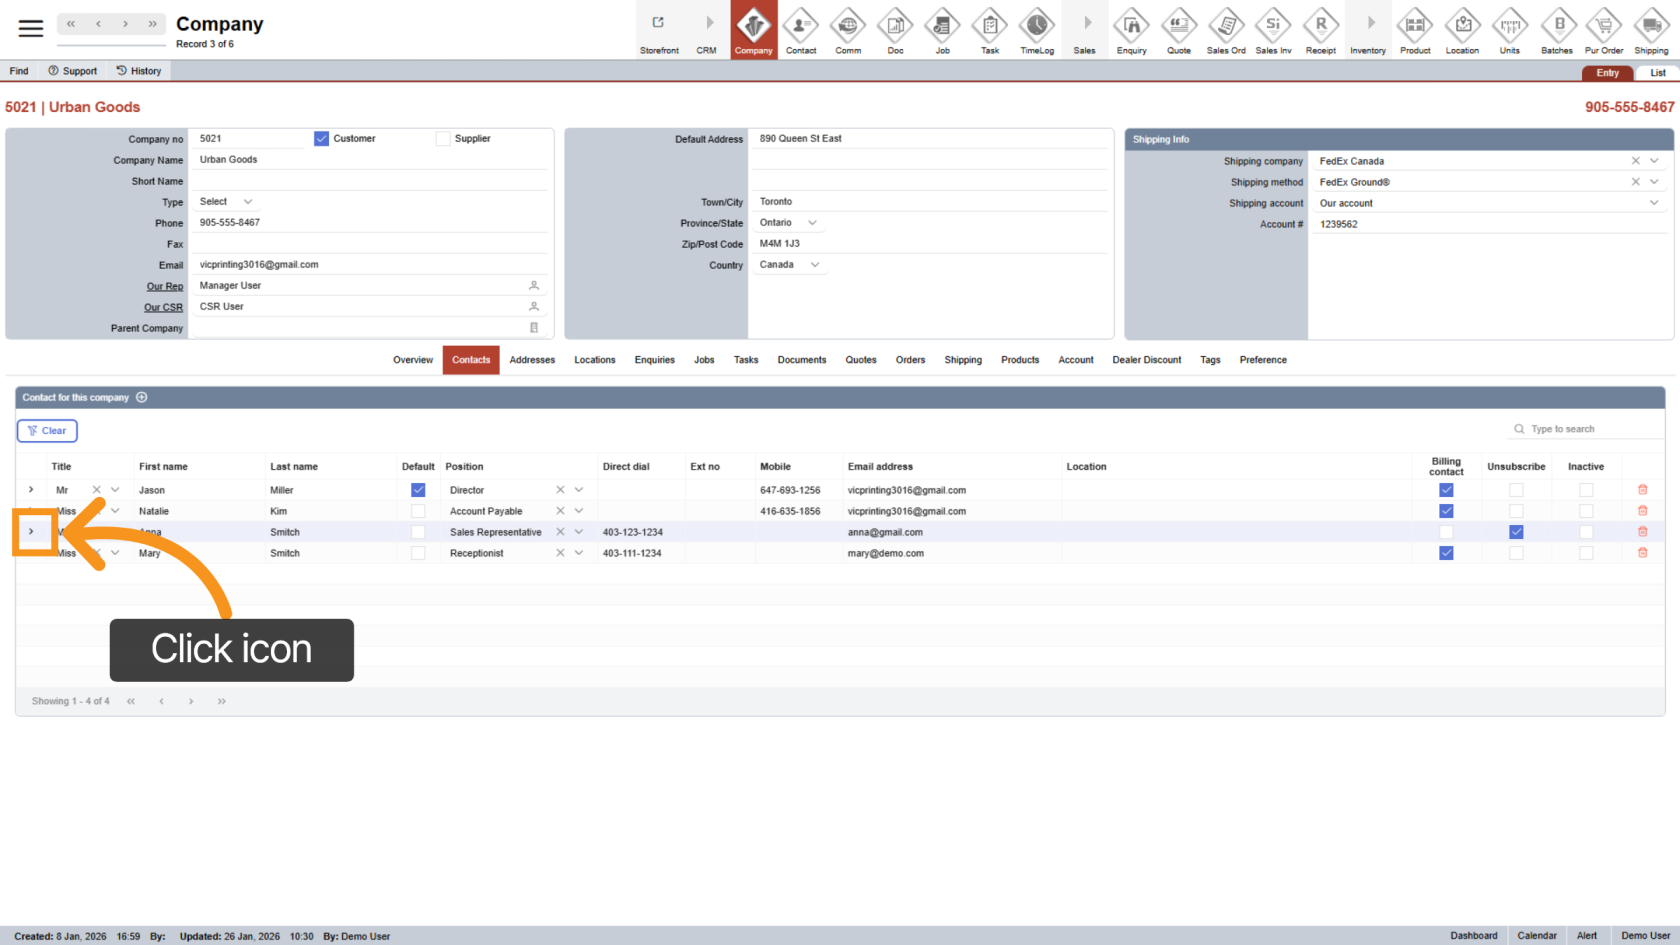
14. Open Contact Detail
Click the arrow icon to view the contact details.
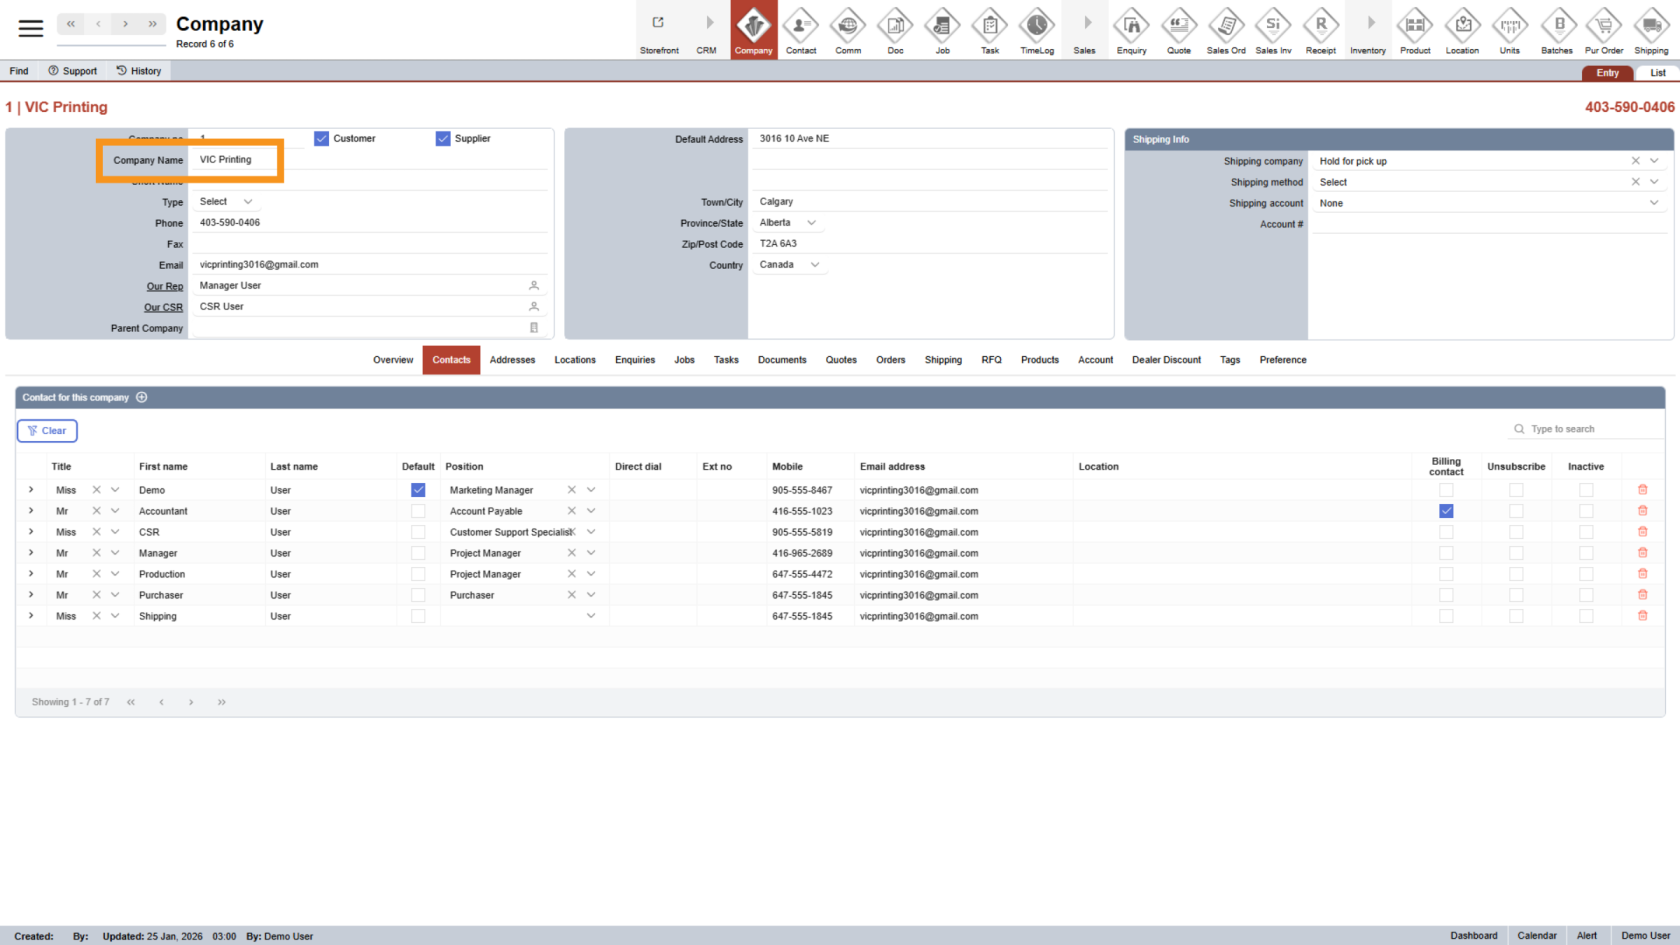
15. Create a new employee
The process for creating a new contact is similar; however, contacts created under your company (as opposed to a customer company) are considered employees. The key difference between regular contacts and employees is that employees can sign in to the WorkTraq system and have their working hours tracked for payroll purposes.
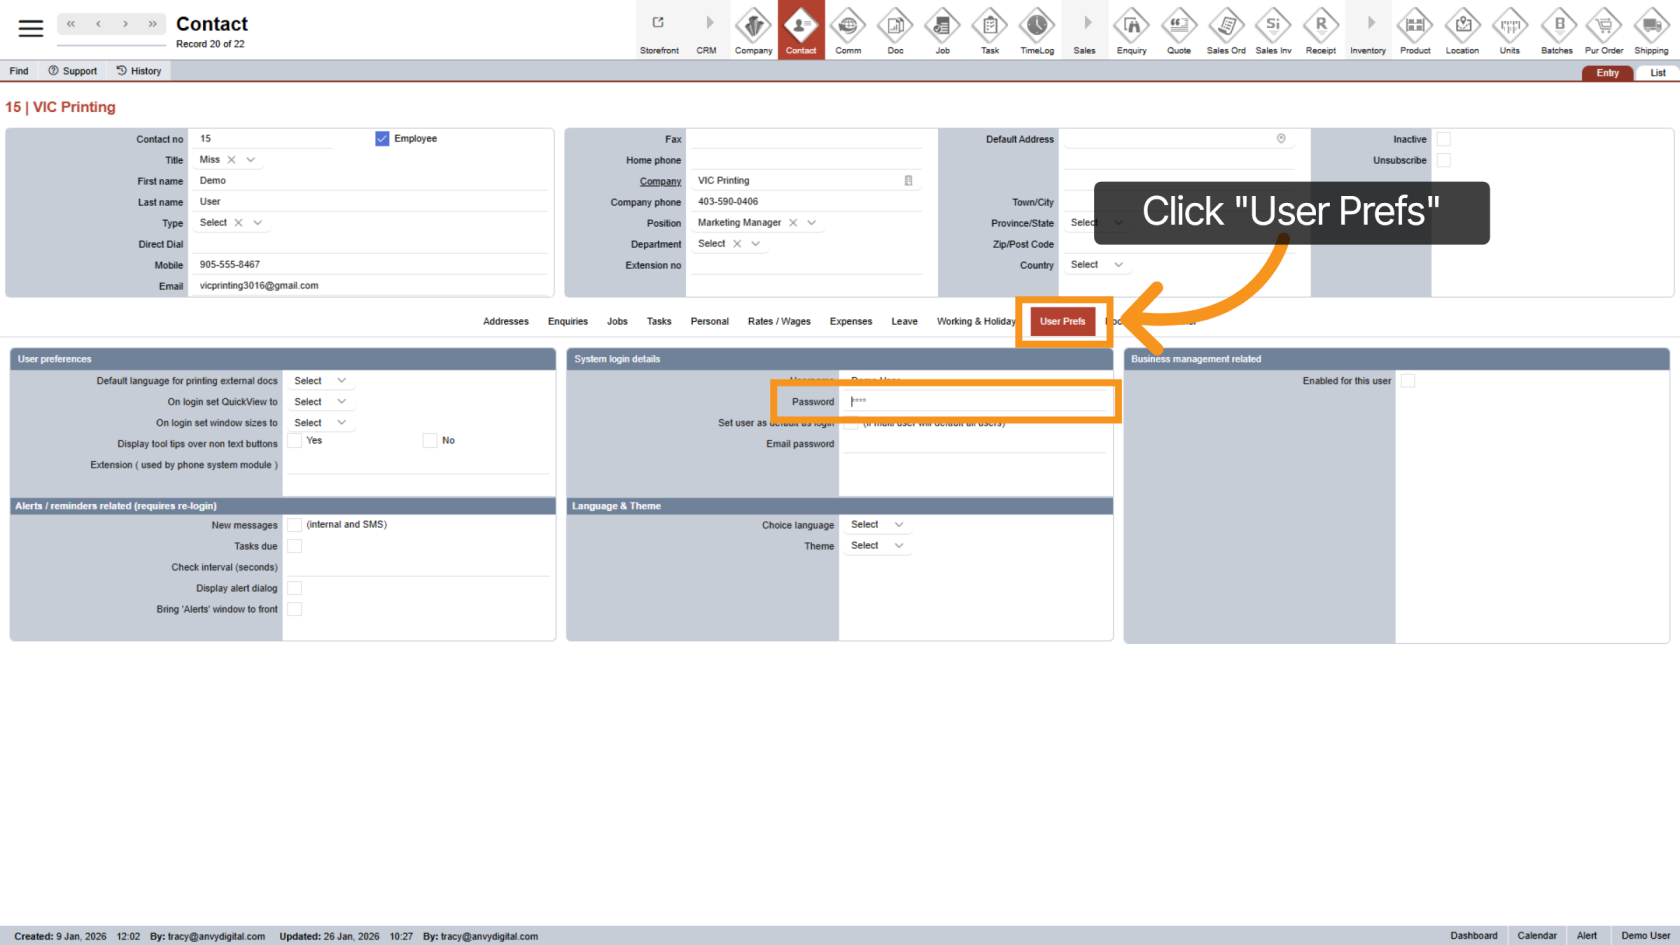
16. Set up Employee Password
Under 'User Prefs', you can set up login passwords for your employees, which are used for the Worktraq system login.
Note: After setting up the password, assign a role to the new employee. See Configure Employee Roles for more information.
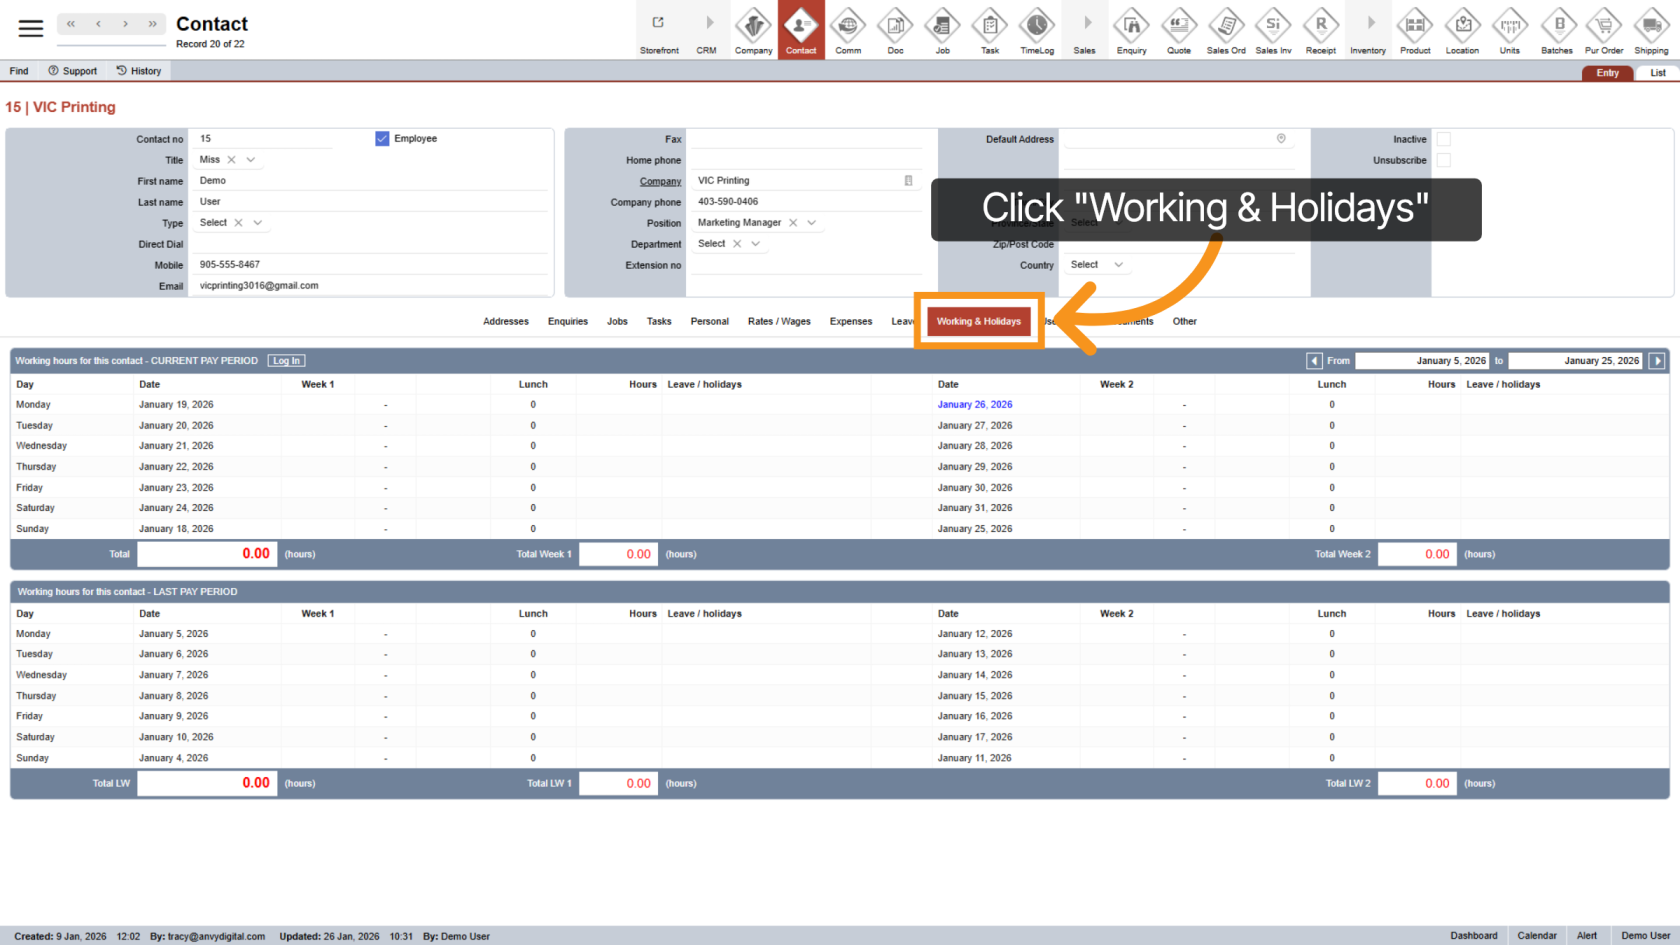
17. View Working Hours
Click on "Working & Holidays" to view the working hours for the current pay period and review time logs.
You have successfully created and configured a new contact in WorkTraq, including personal details, addresses, and preferences.