Product General
This tutorial guides you through configuring the general settings of a product in the WorkTraq system.
Video Tutorial
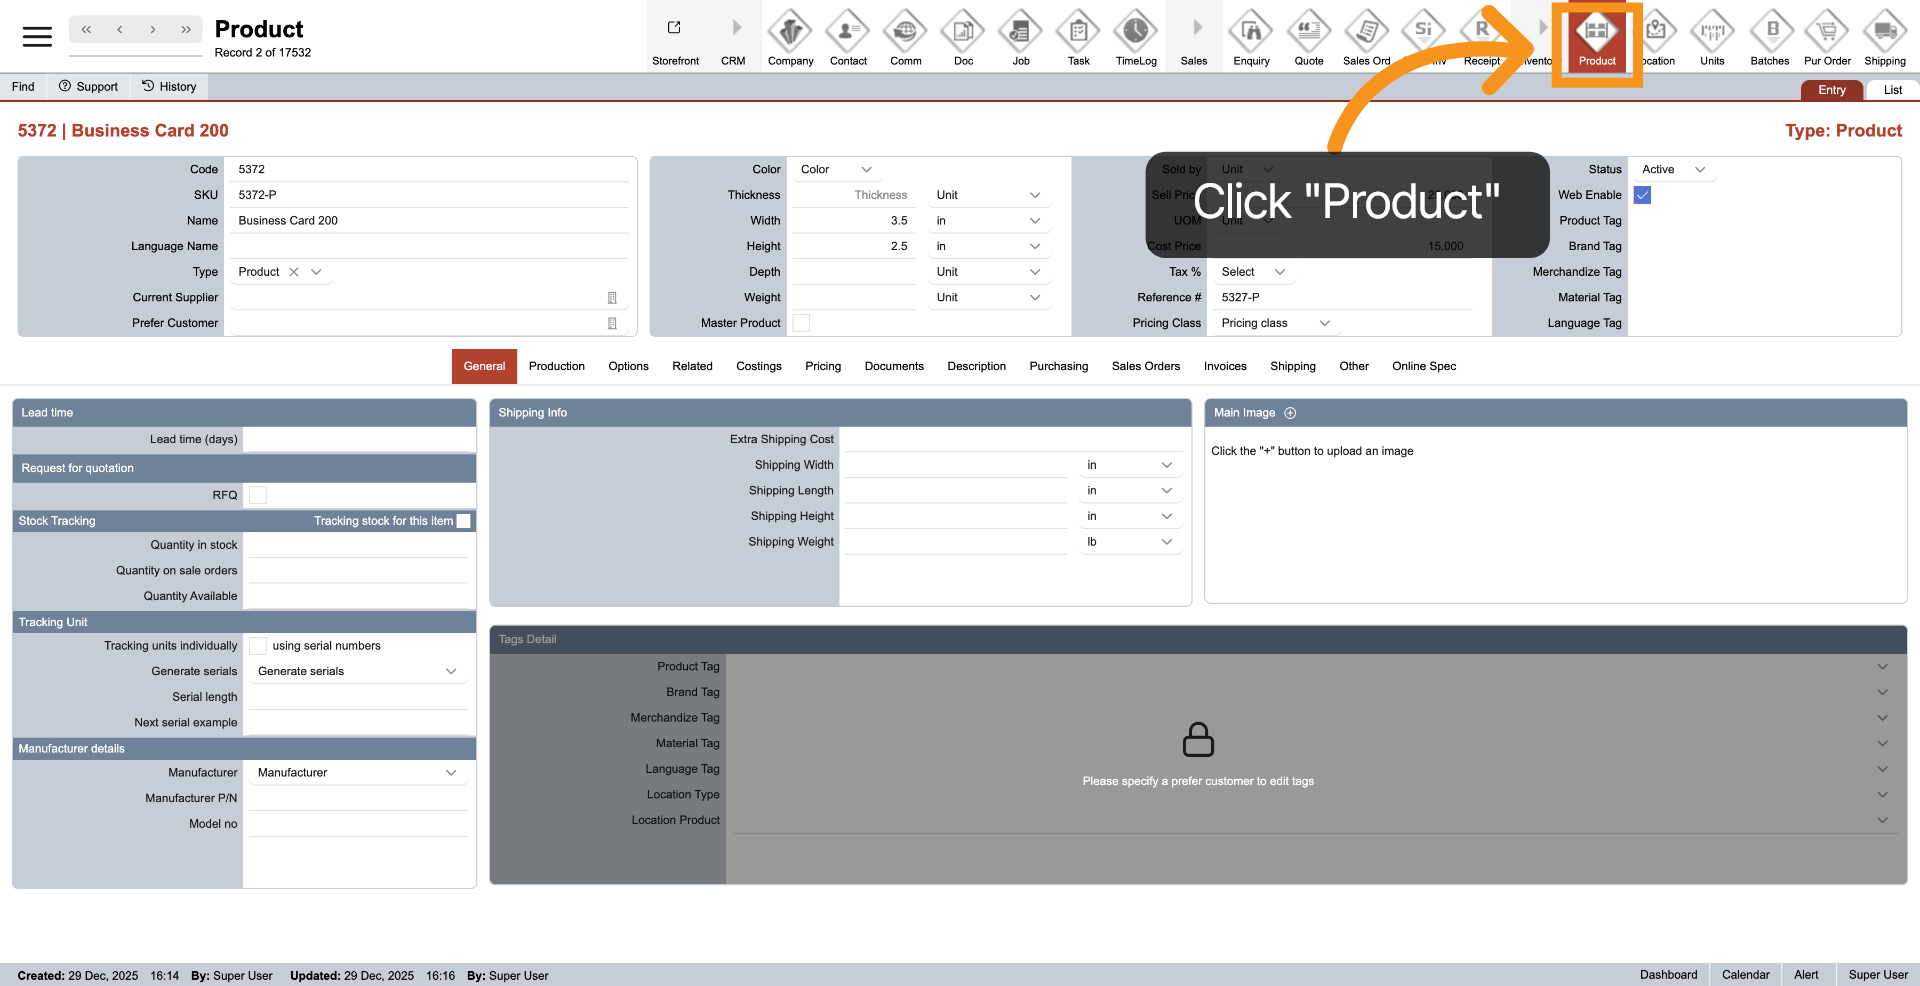
1. Navigate to Product Module
Click on "Product" in the main top menu to access settings and options related to the product.
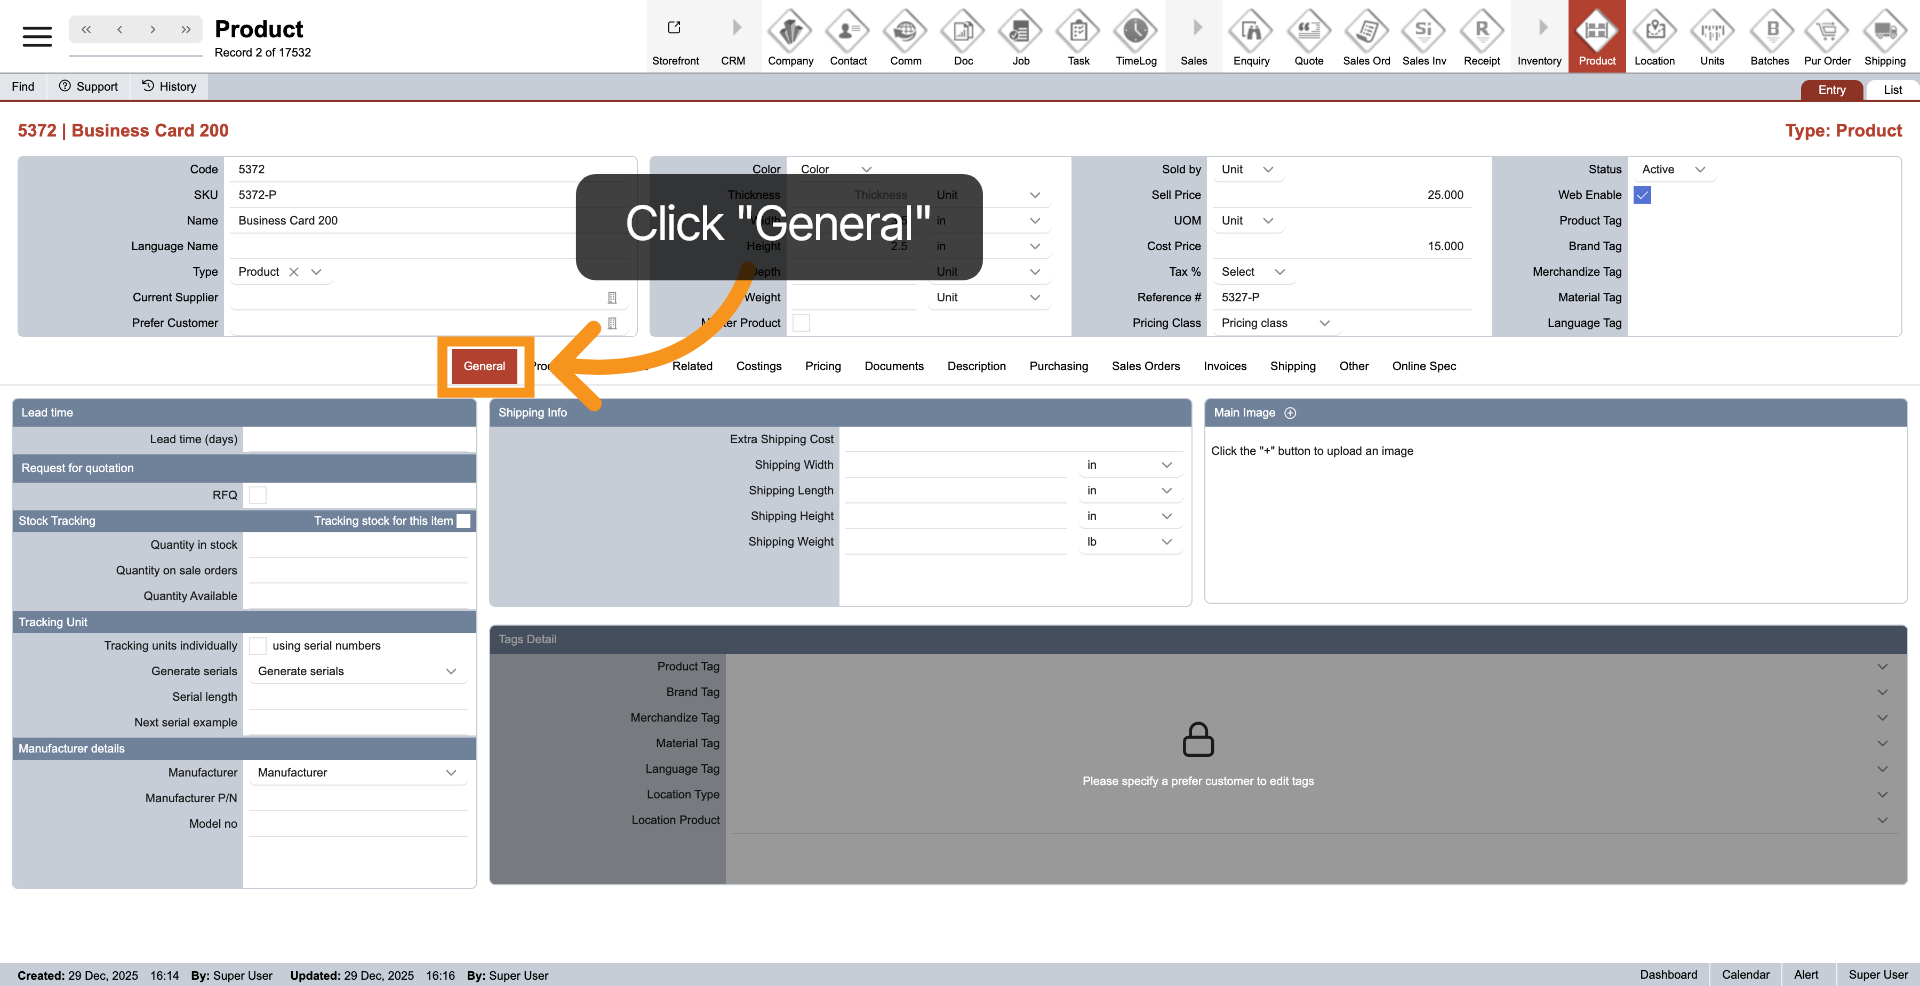
2. Open General Settings
To view and modify general product settings, click the "General" tab from the middle menu.
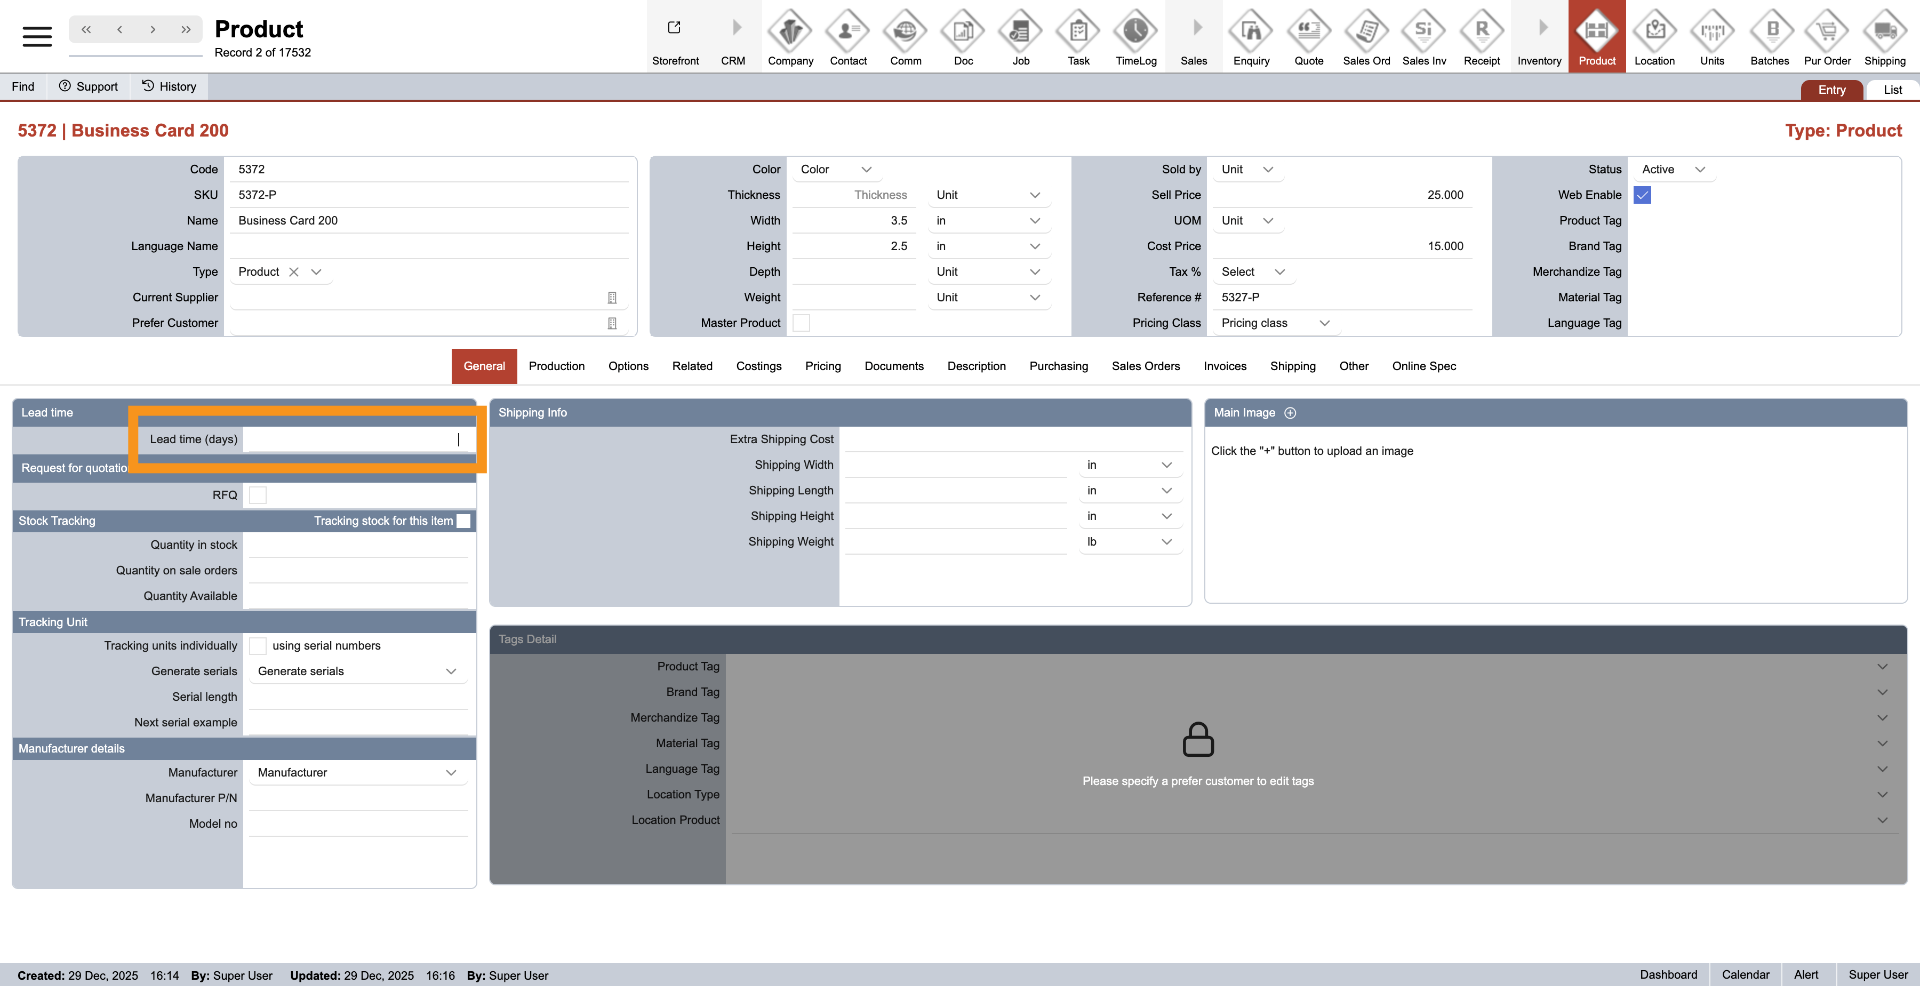
3. Enter Lead Days
If the product requires a waiting time for order or delivery, you can enter the lead days. This will be calculated with the production time when creating a quotation or sales order, helping your staff to enhance order time accurately.
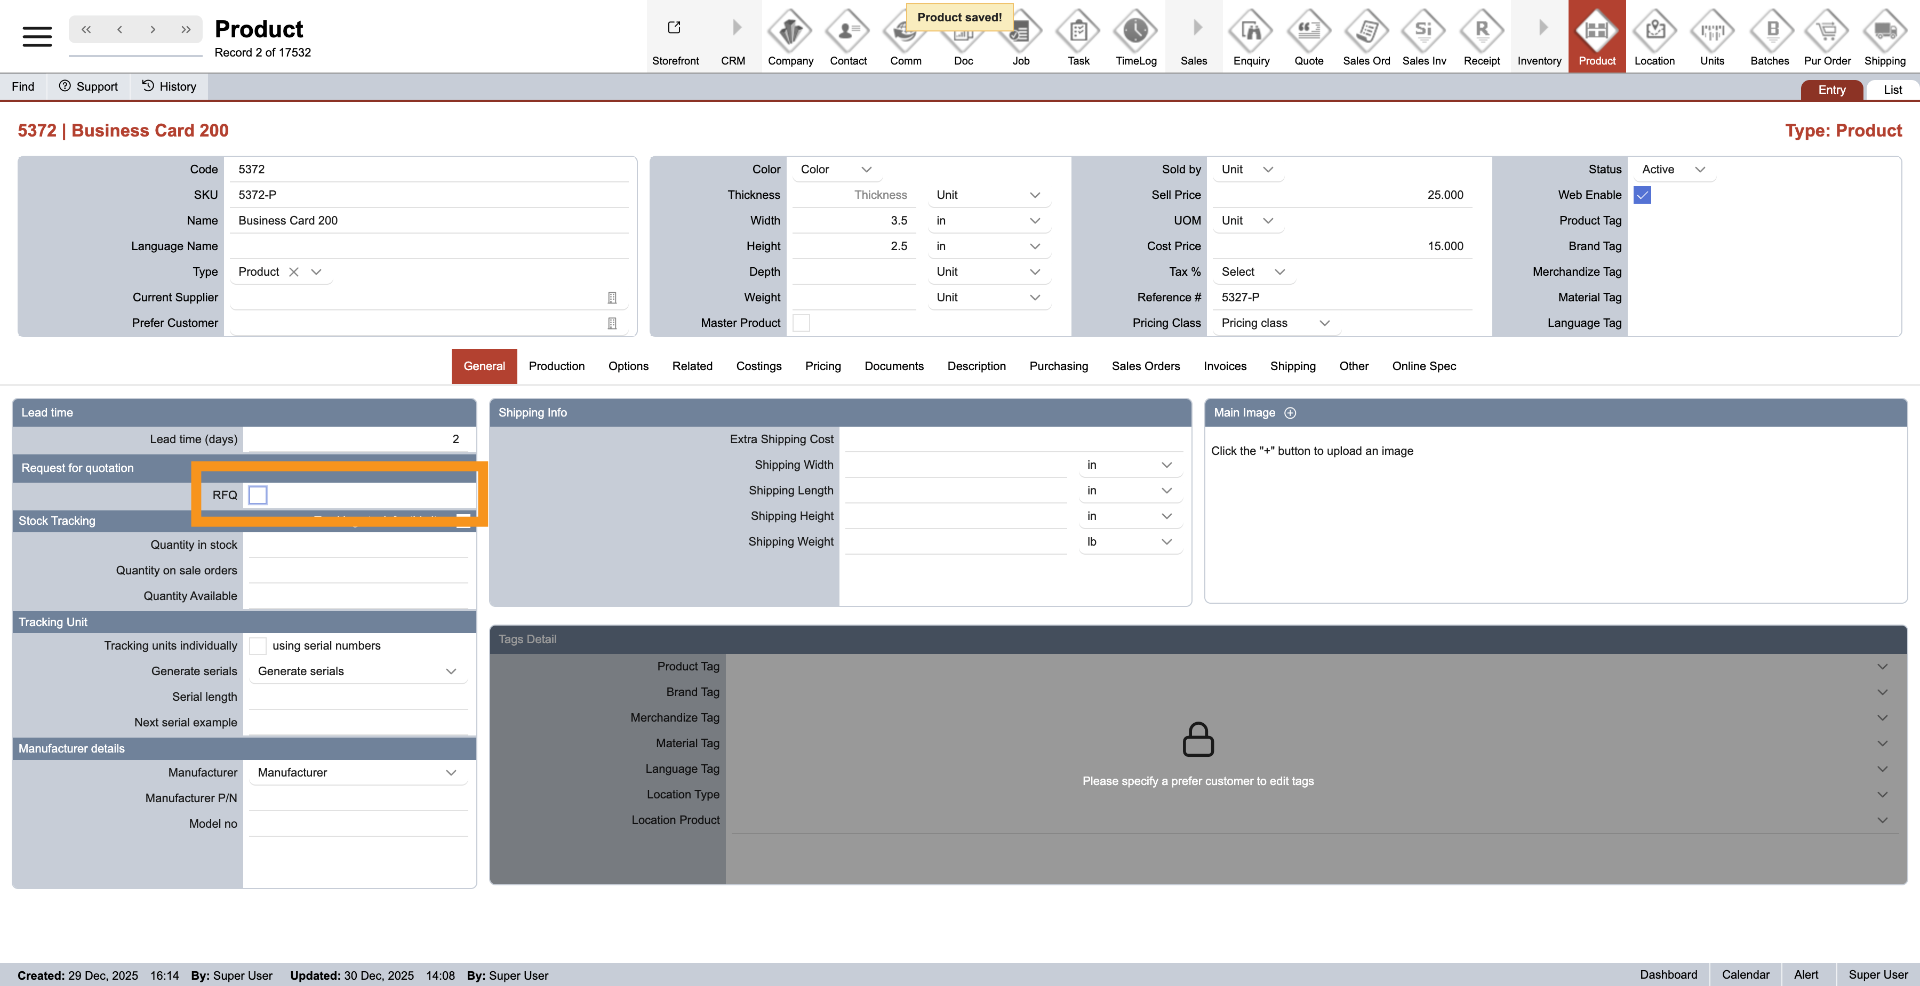
4. RFQ Details
Select "RFQ" if you need to request pricing before making a quotation or sales order. This helps prevent negative costs related to outsourced services or products. When you check this option, the system will always ask you to submit a request for a quote before processing any quotation or sales order that includes this product for customers.
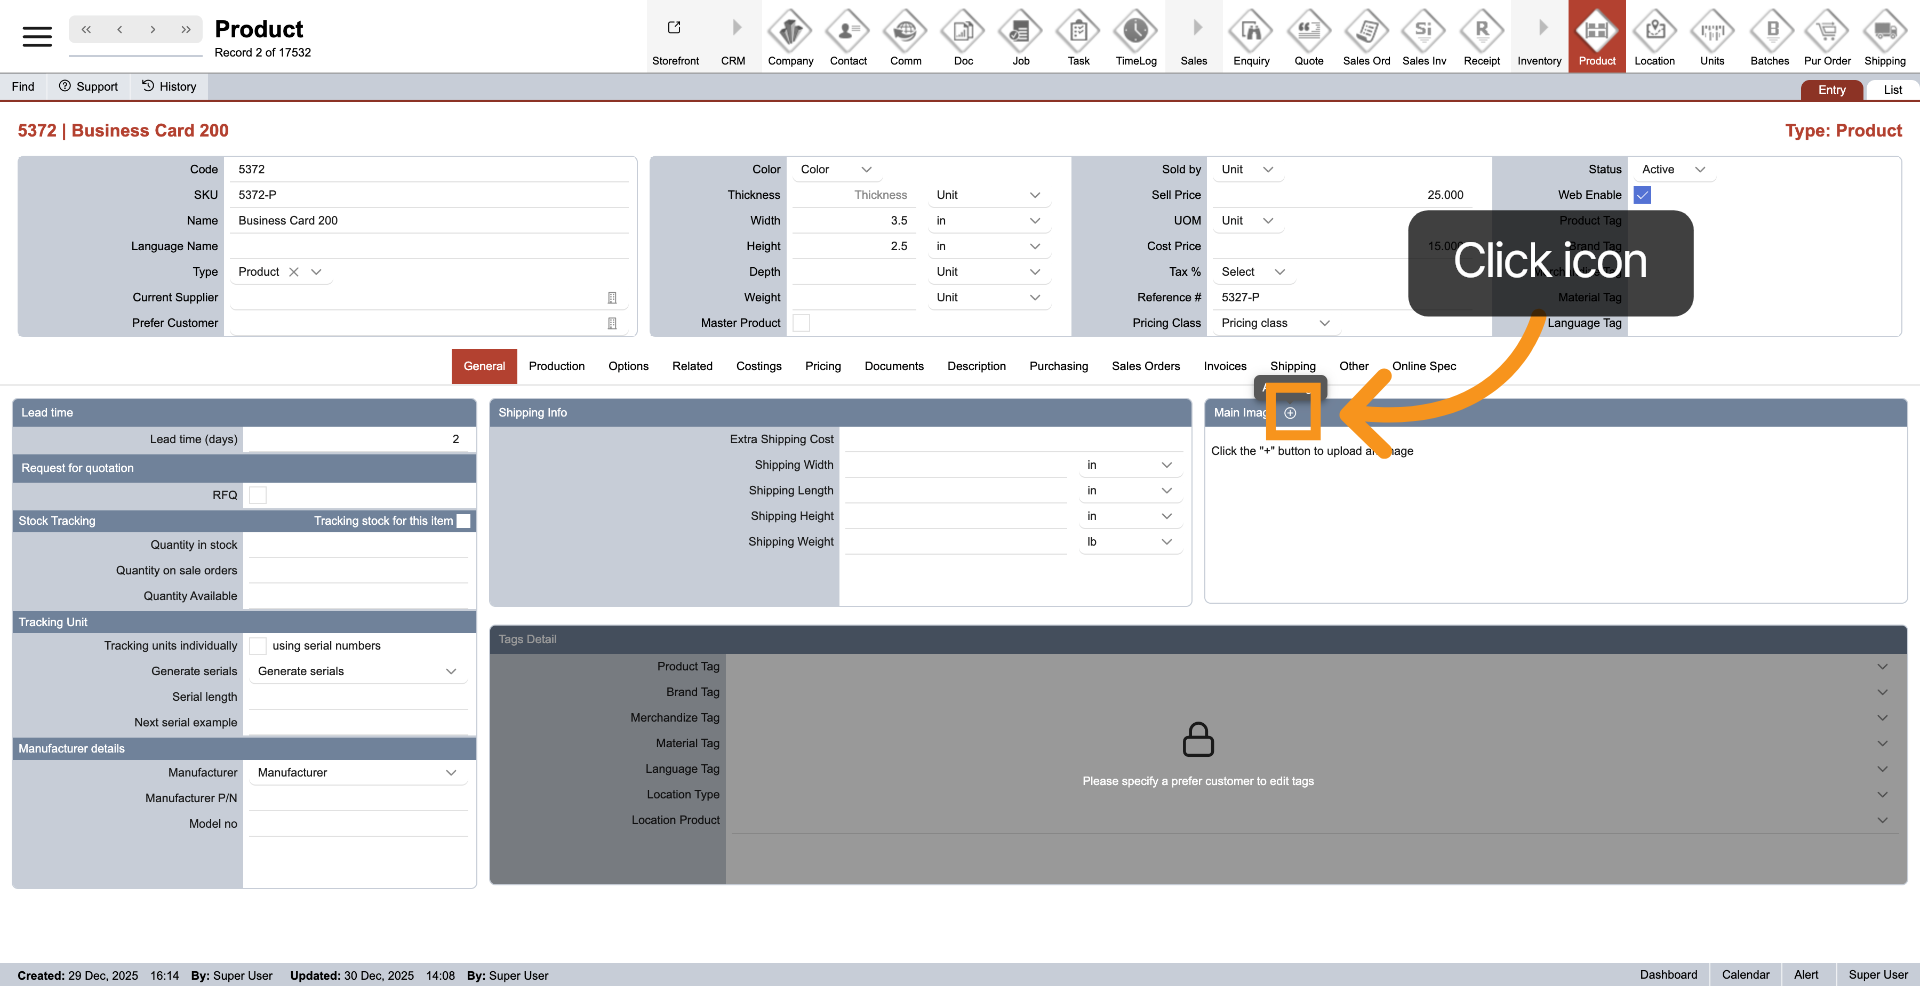
5. Add Main Image
Click the plus icon to add a main image for the product. The main image is required for the parent product to sell on the online store.
6. Add Product Tags
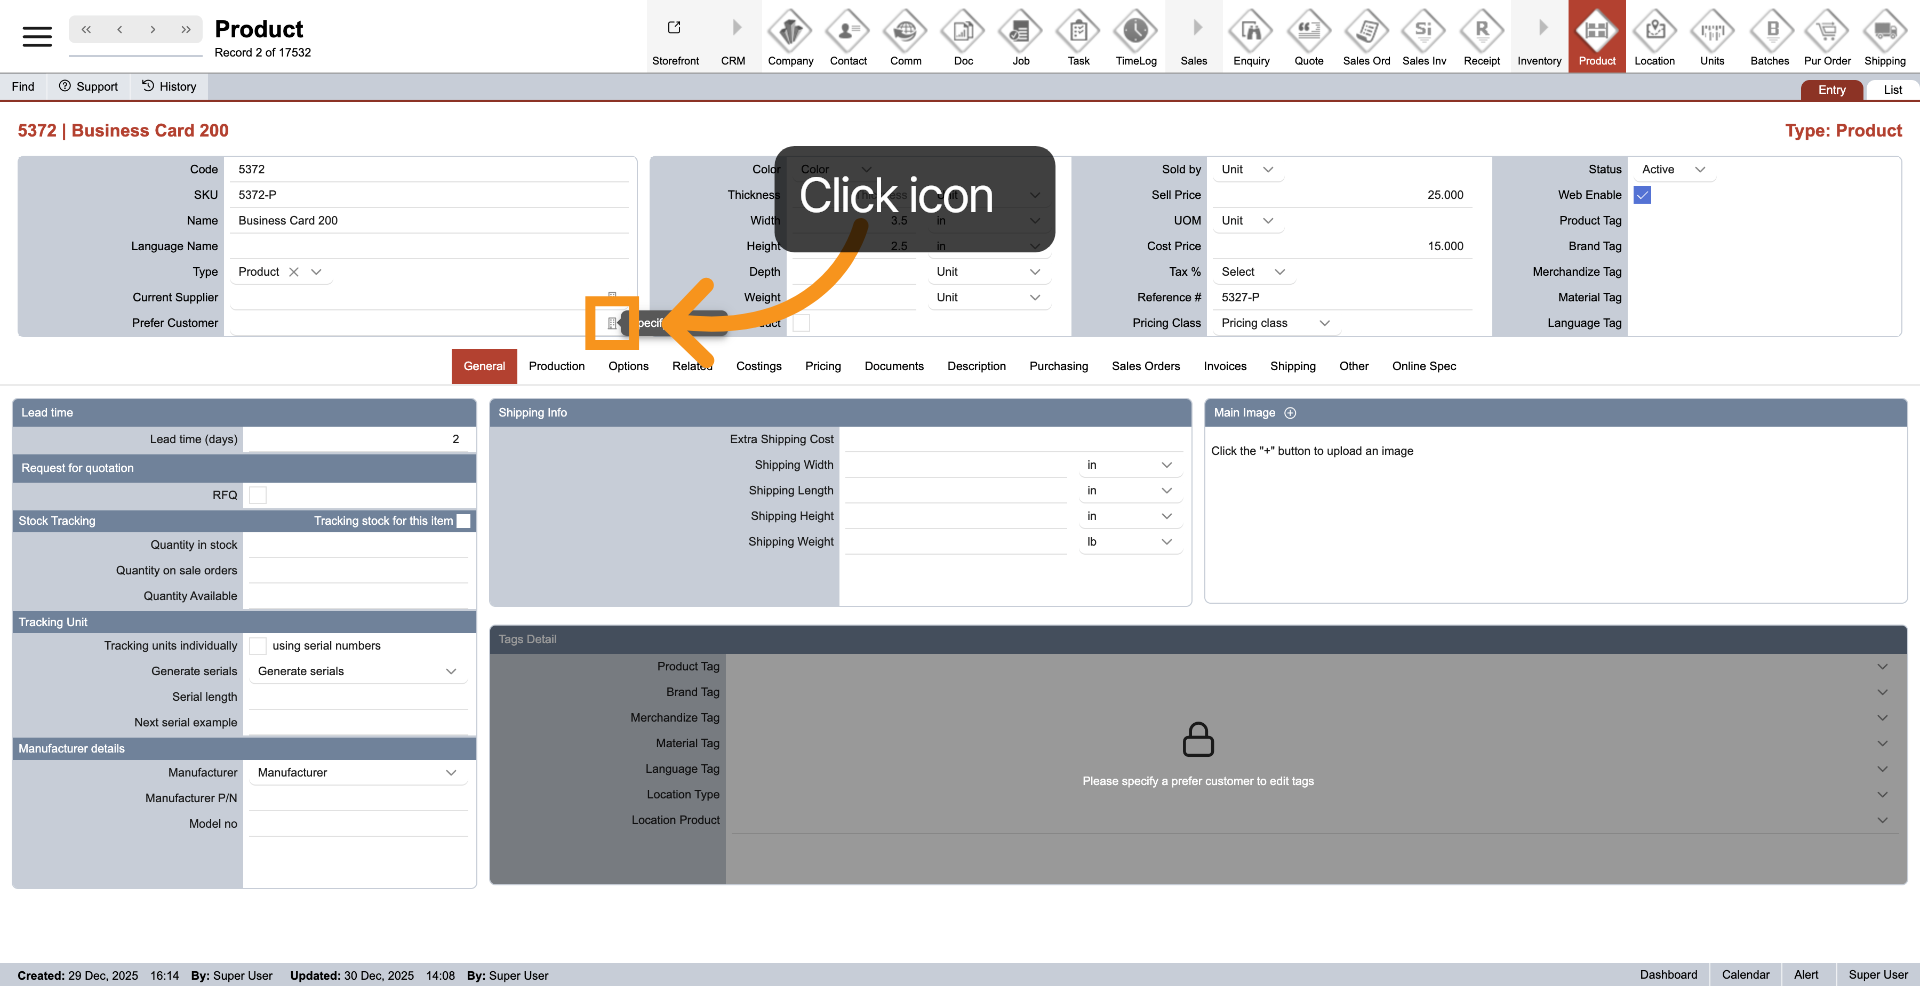
7. Enter Tags
Click on the dropdown next to category tag that you want to add.
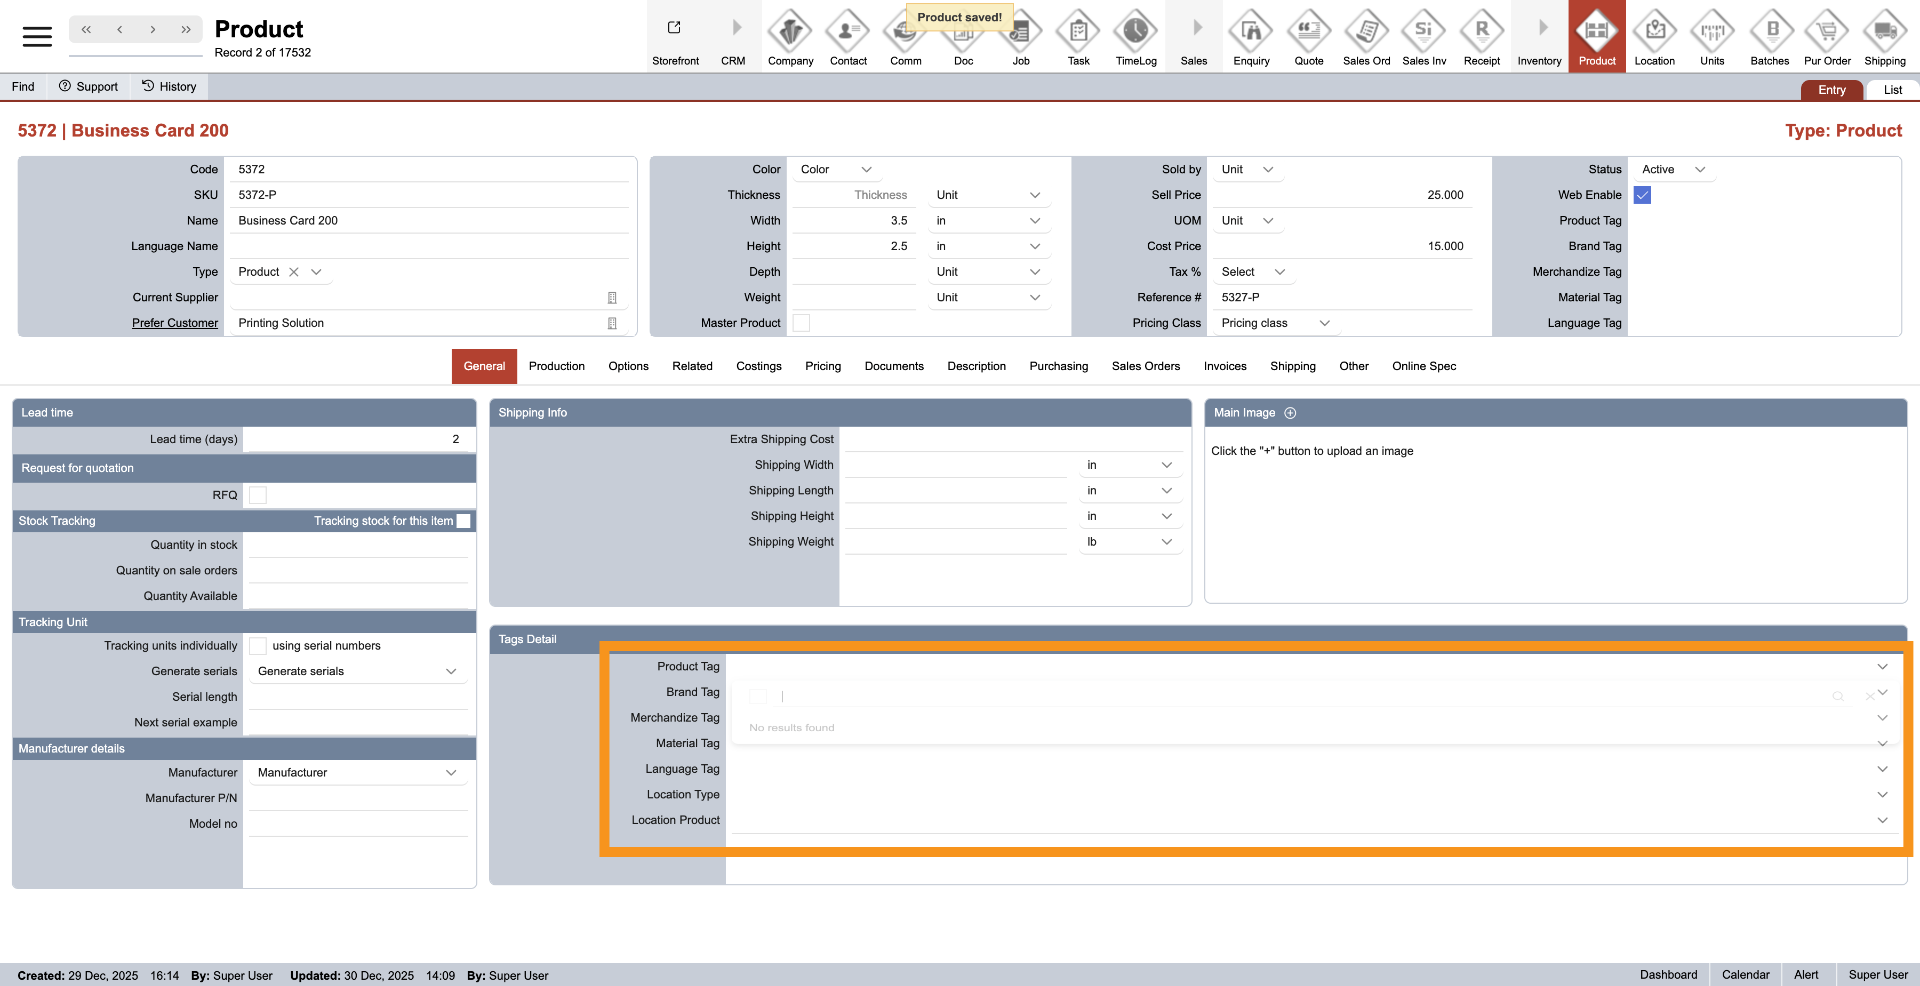
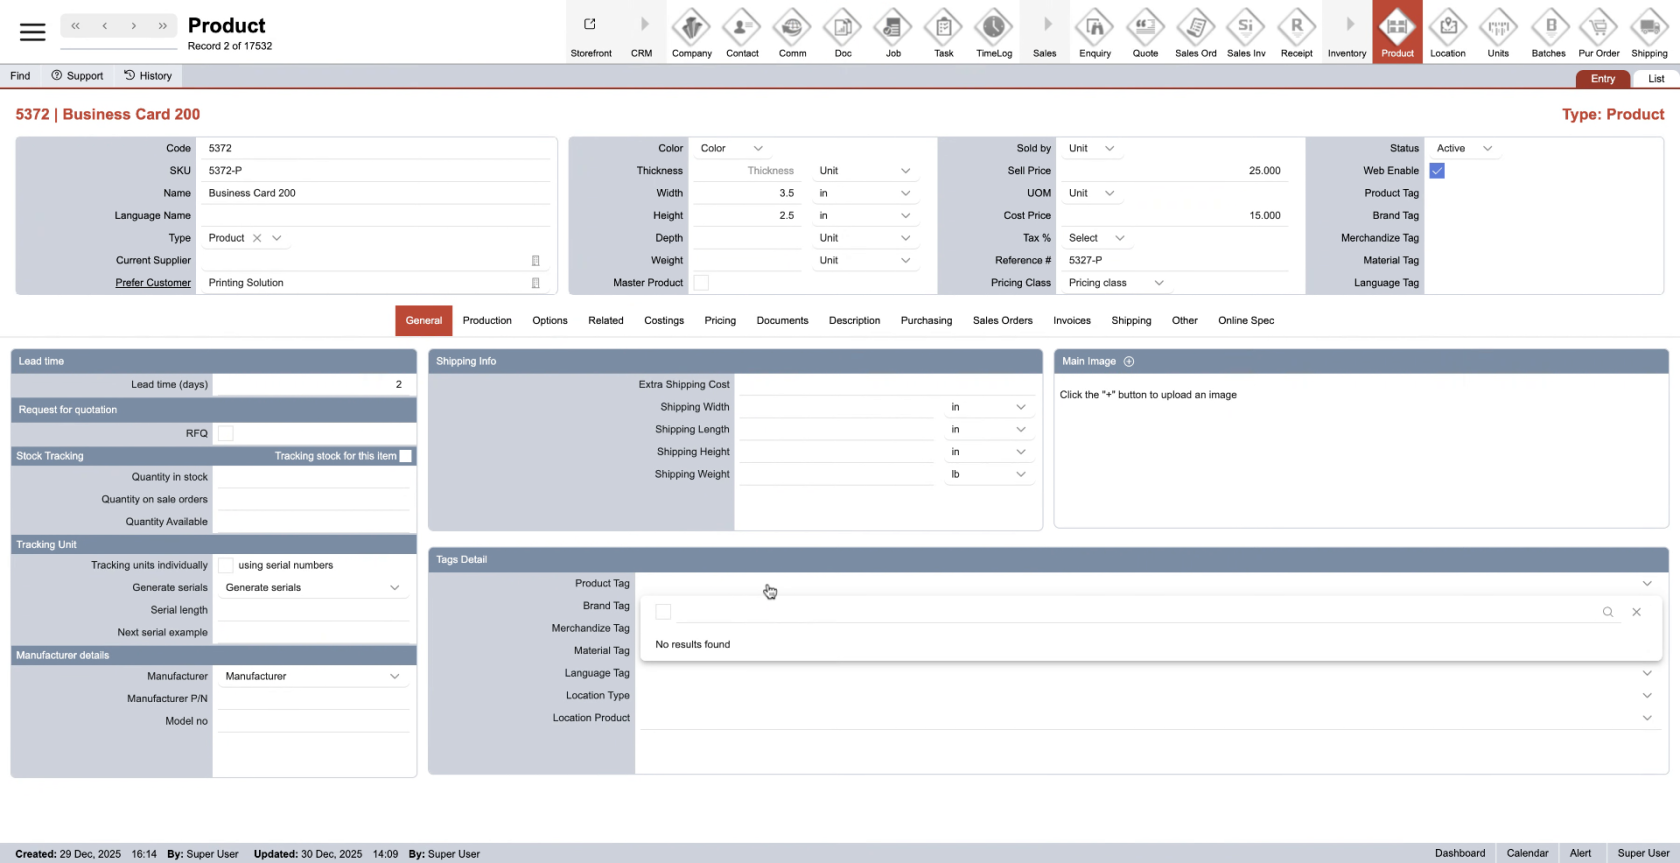
8. Create new tag
If no value is available, you can create a new tag by typing in the search tag bar, then press Enter to create it.
You have successfully set up the general settings for a product in the WorkTraq system.