Product Options
This tutorial will guide you in configuring product options in the WorkTraq system, helping you understand the product build, available options, and their prices.
Video Tutorial
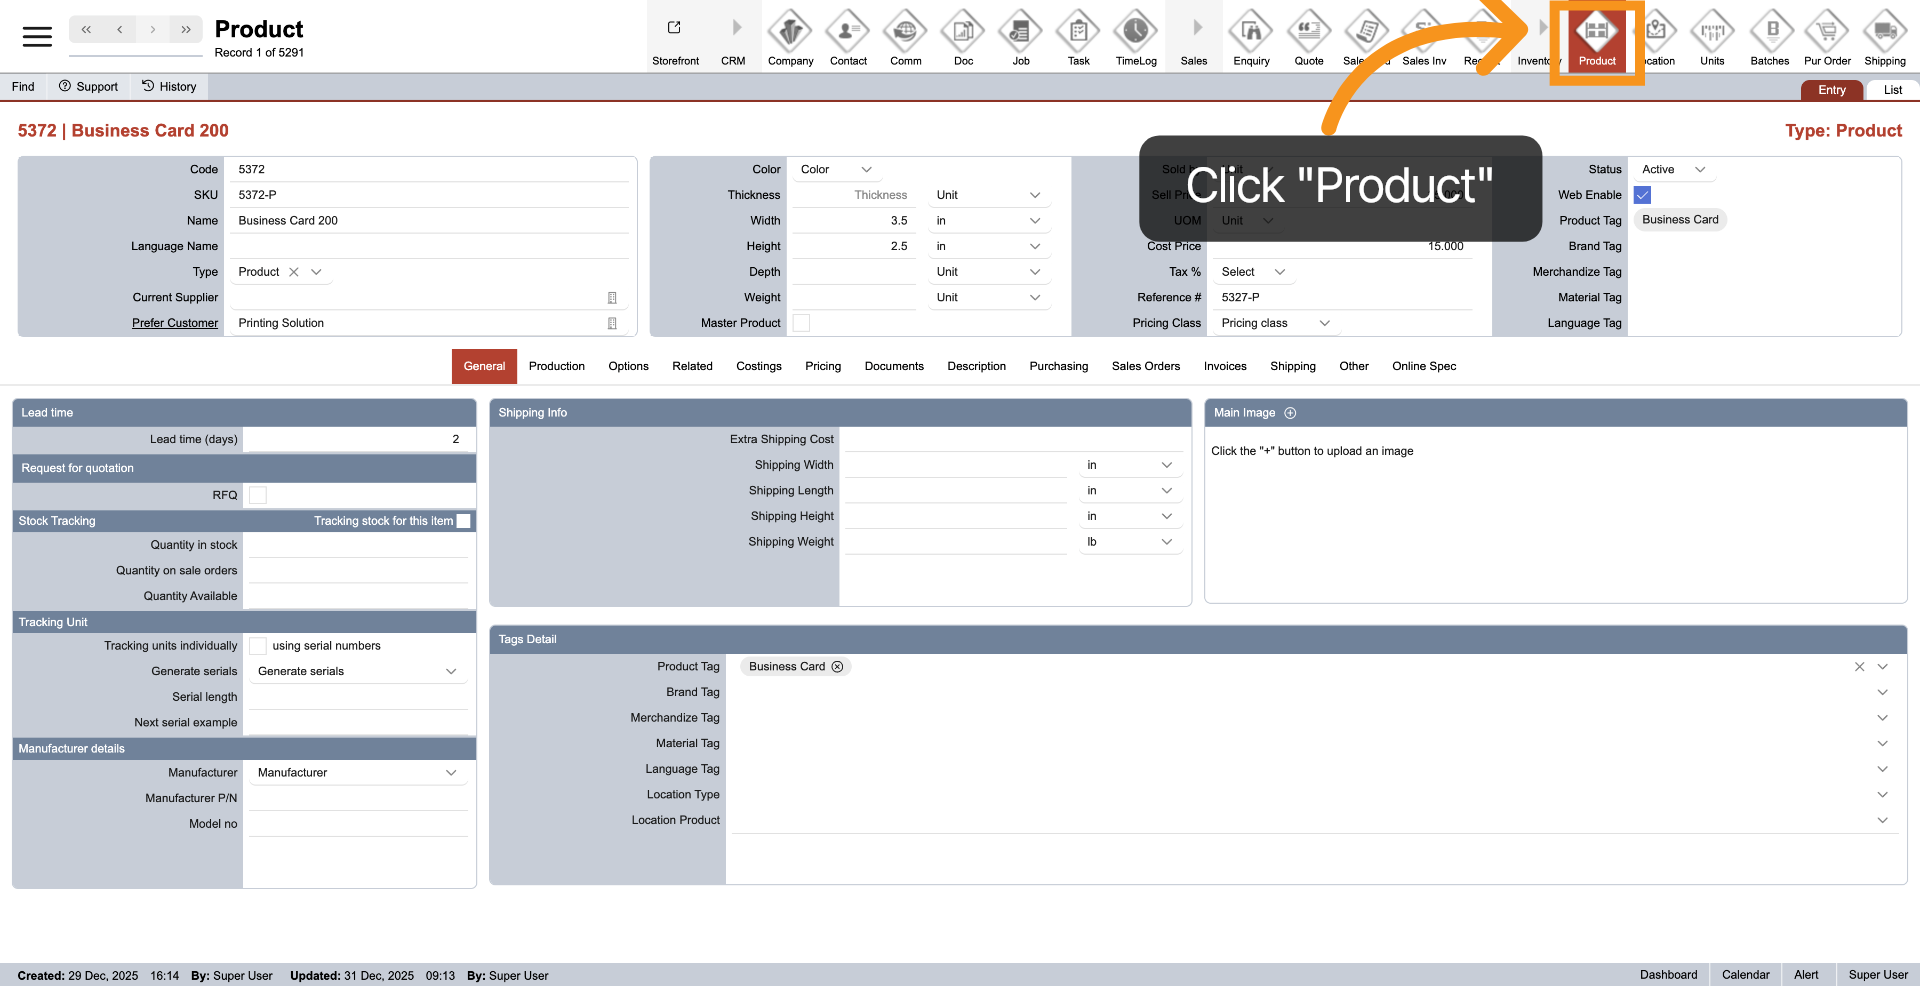
1. Open Product Module
Click "Product" on the main top menu to access product module.
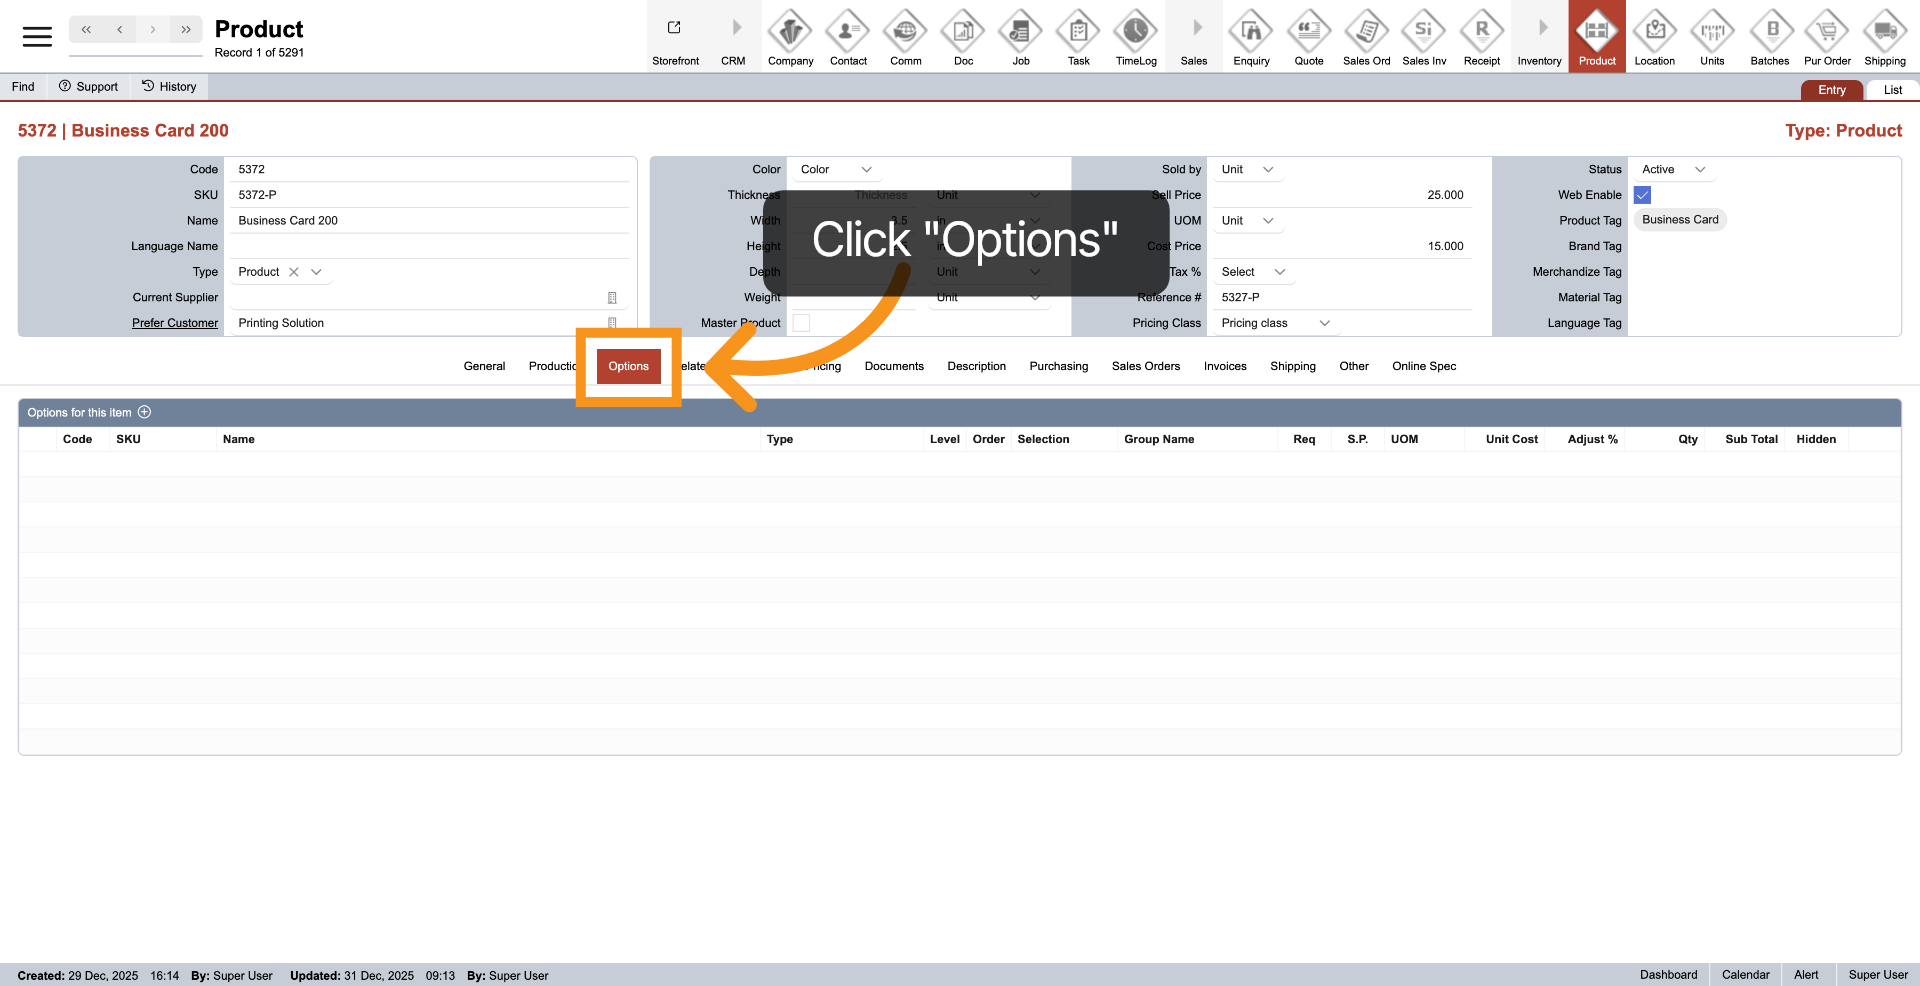
2. Select Options Tab
Click the "Options" tab to configure the options section.
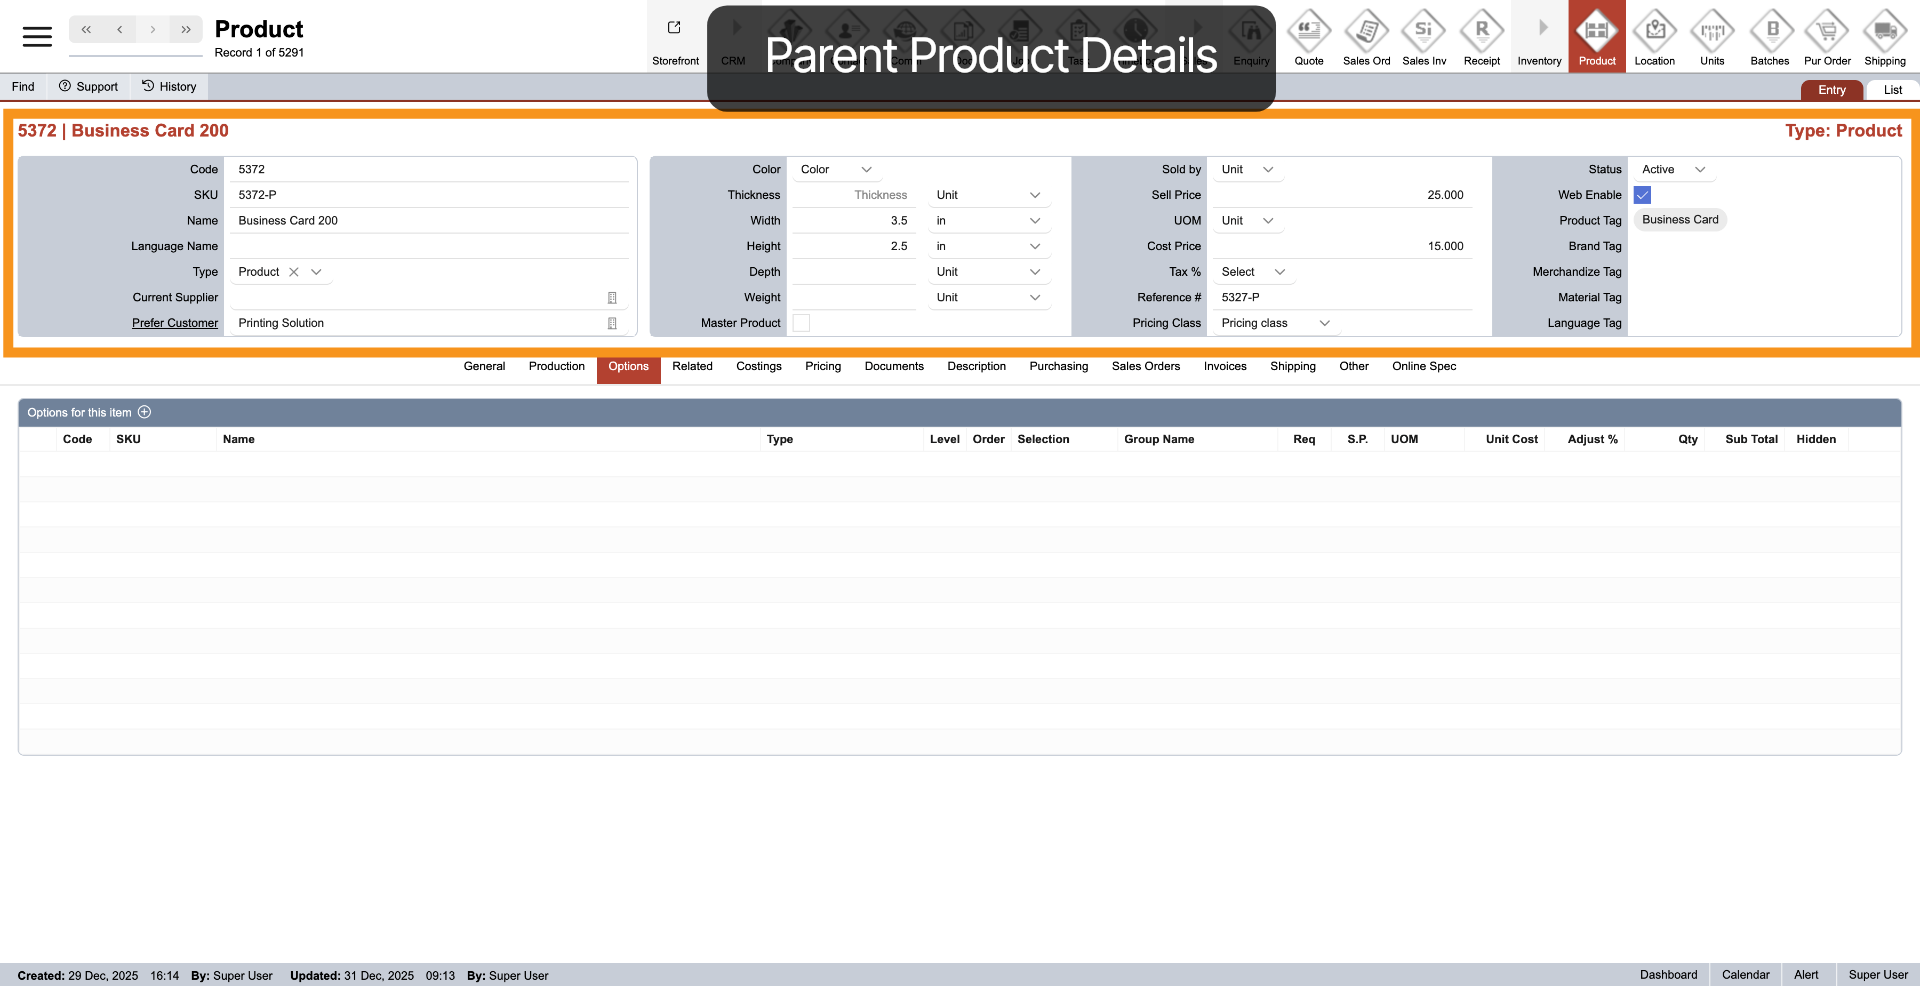
3. Parent Product
In the system, the information at the top is considered the parent product, while all the options added below are the components that make up the parent product.
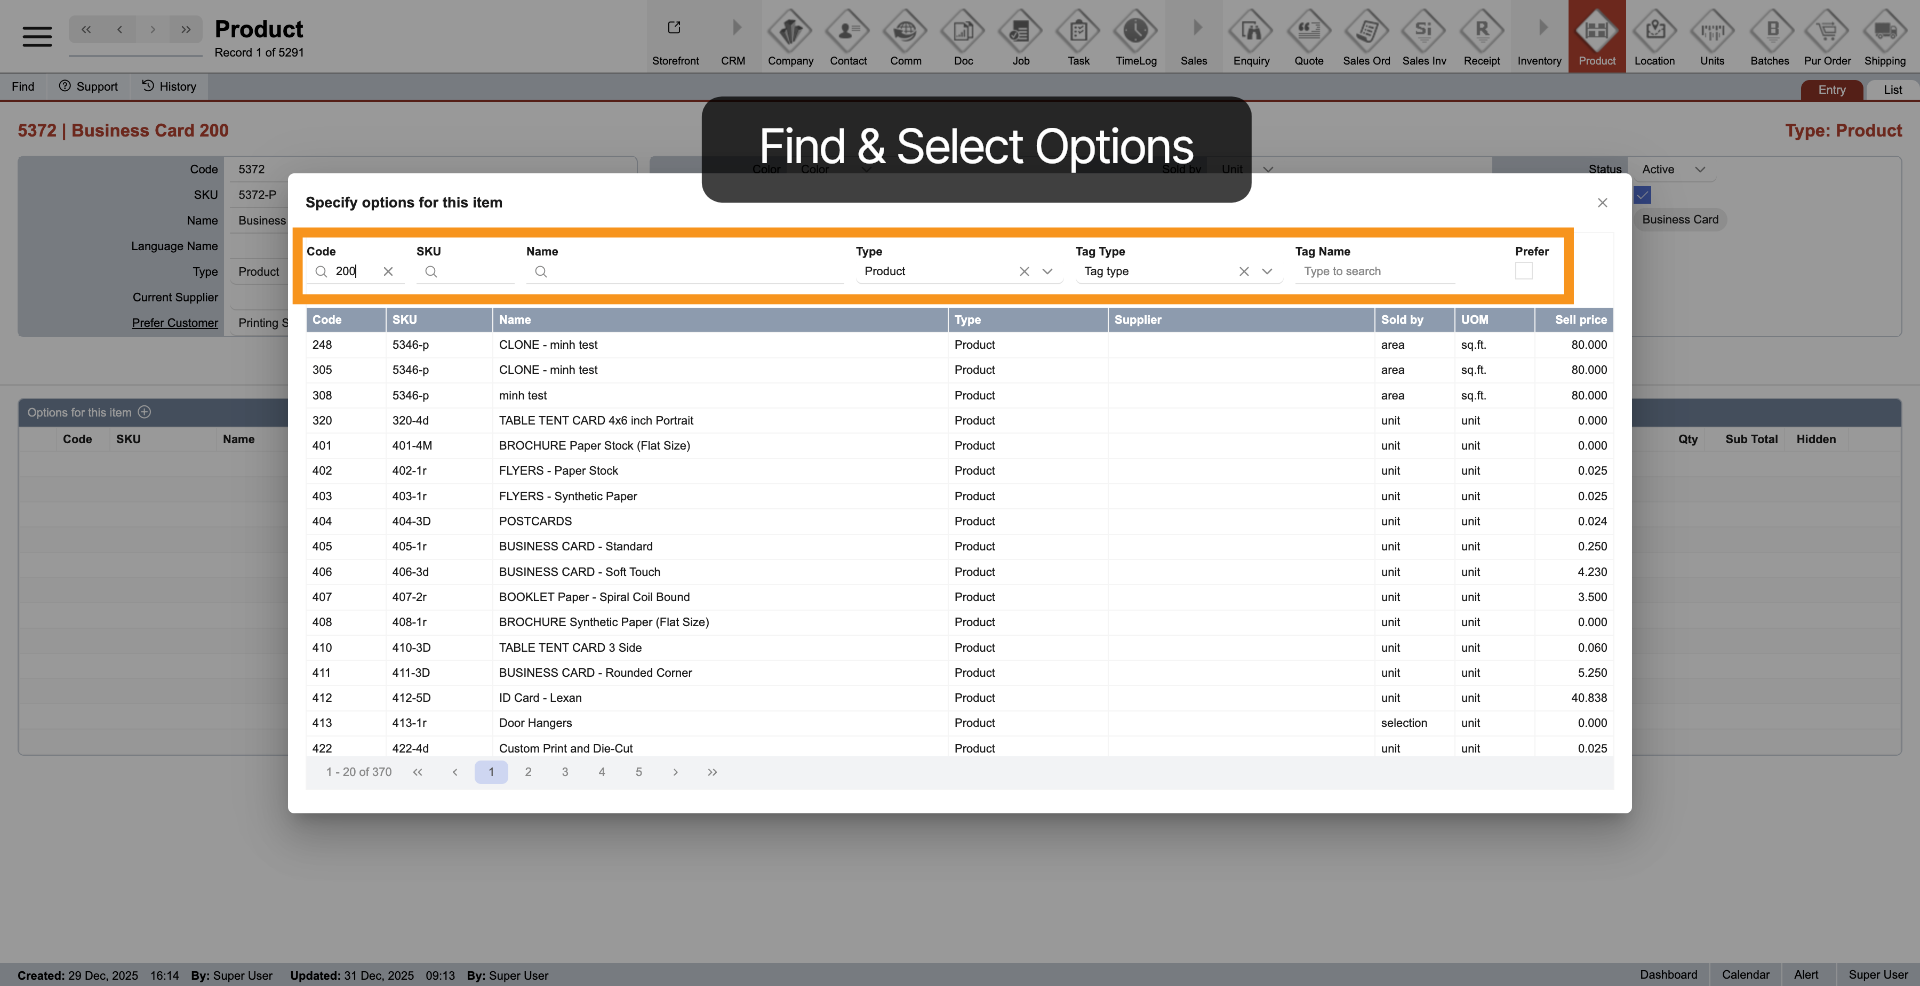
4. Add Options
To add a new option, click the plus icon at the top of the options table. You can add multiple options for one product.

5. Select Options
After you click the plus icon, a pop-up will appear. Here you can quickly search for the options you want to add. Then simply click on the option you want to include in the options table.
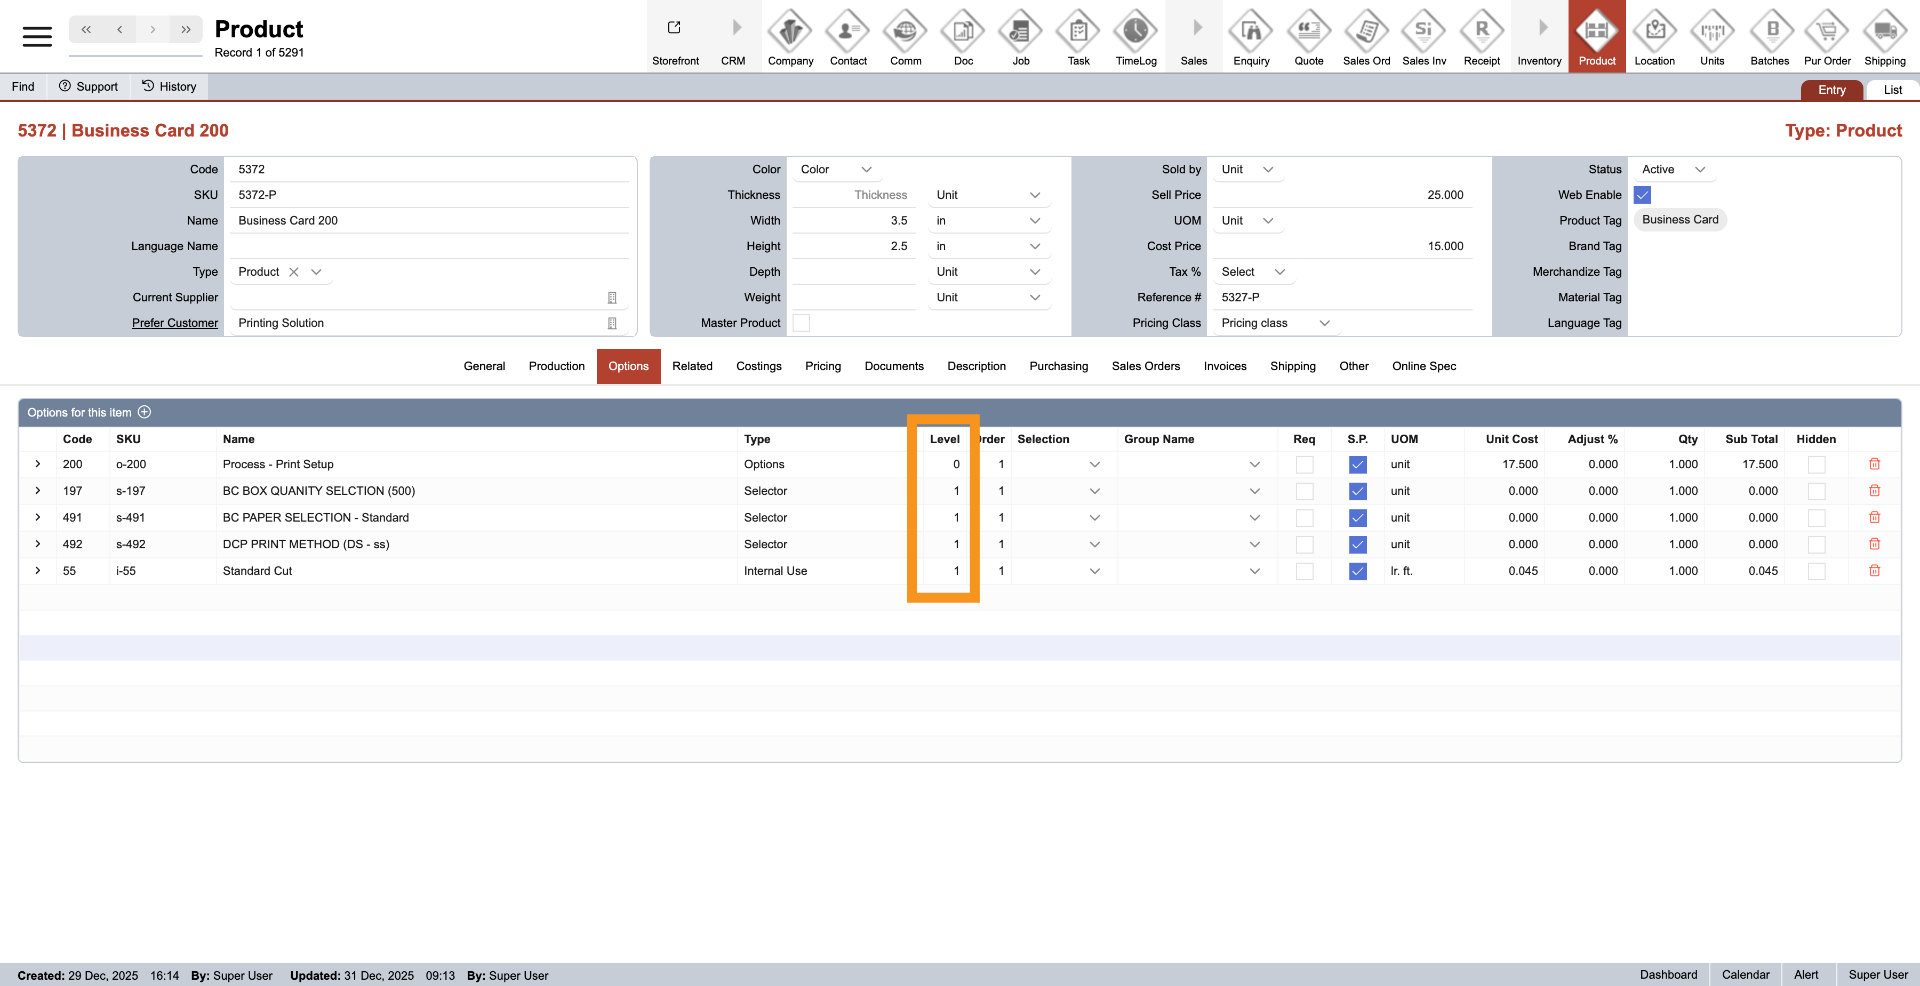
6. Options Level
Level to keep pricing simple and easy to manage, products are priced using independent levels. Each level is calculated separately, and you can create multiple levels starting from Level 1. Changes made in one level affect only that level.For example, increasing pages from 16 to 32 in Level 2 will updates only Level 2 pricing. Final price = Parent product price + total of all levels.
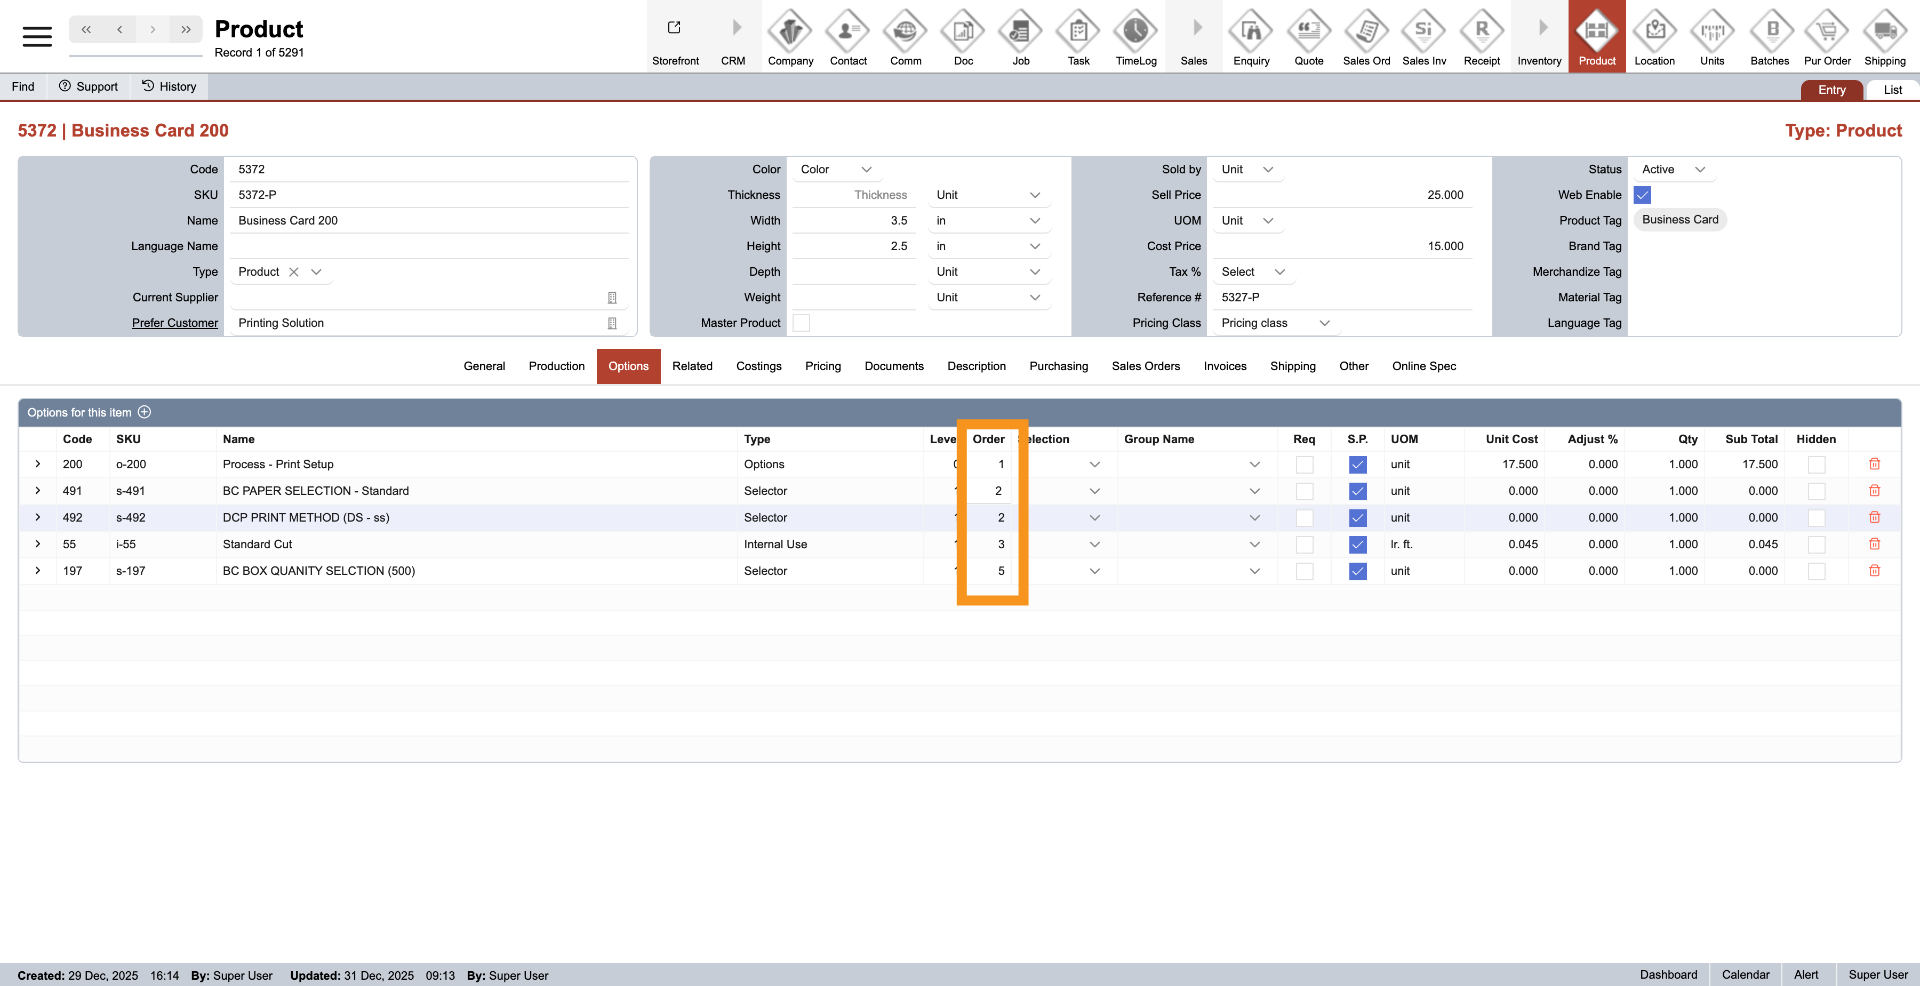
7. Options Order
Order helps organize the production steps of a product, making the workflow more structured and easier for staff to follow. It also controls the display order of options in the online store. You can assign any order number starting from 1.
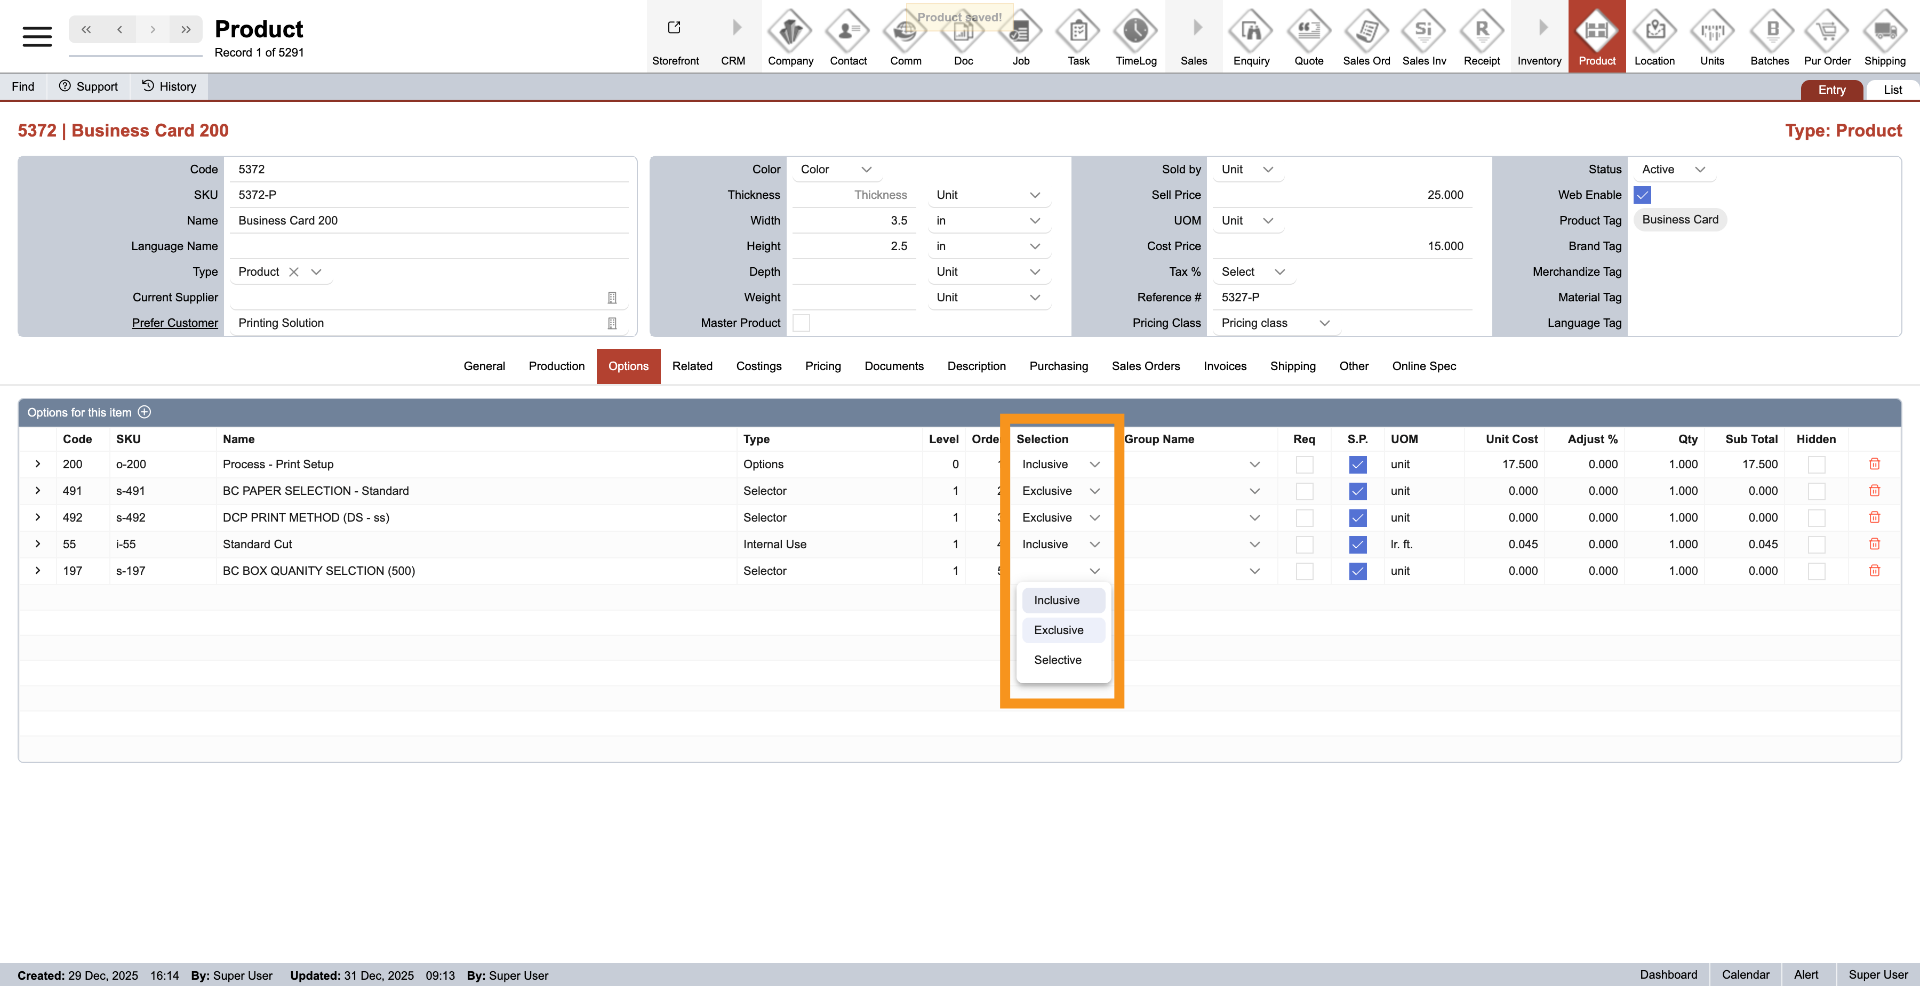
8. Selection Type
Let’s quickly review the three option selection types in the system. Inclusive lets you choose multiple options in the same group, such as add-ons or extra. Exclusive lets you choose only one option; selecting a new option replaces the previous one. Selective works only when the parent product is sold by Selection and allows you to switch between entire product versions, such as different banner sizes. For example, you can switch between Standing Banner 24×72 and 33.5×80. These products do not share the same size or options, and all related options update automatically. Remember: Inclusive means many, Exclusive means one, and Selective means full product switch.
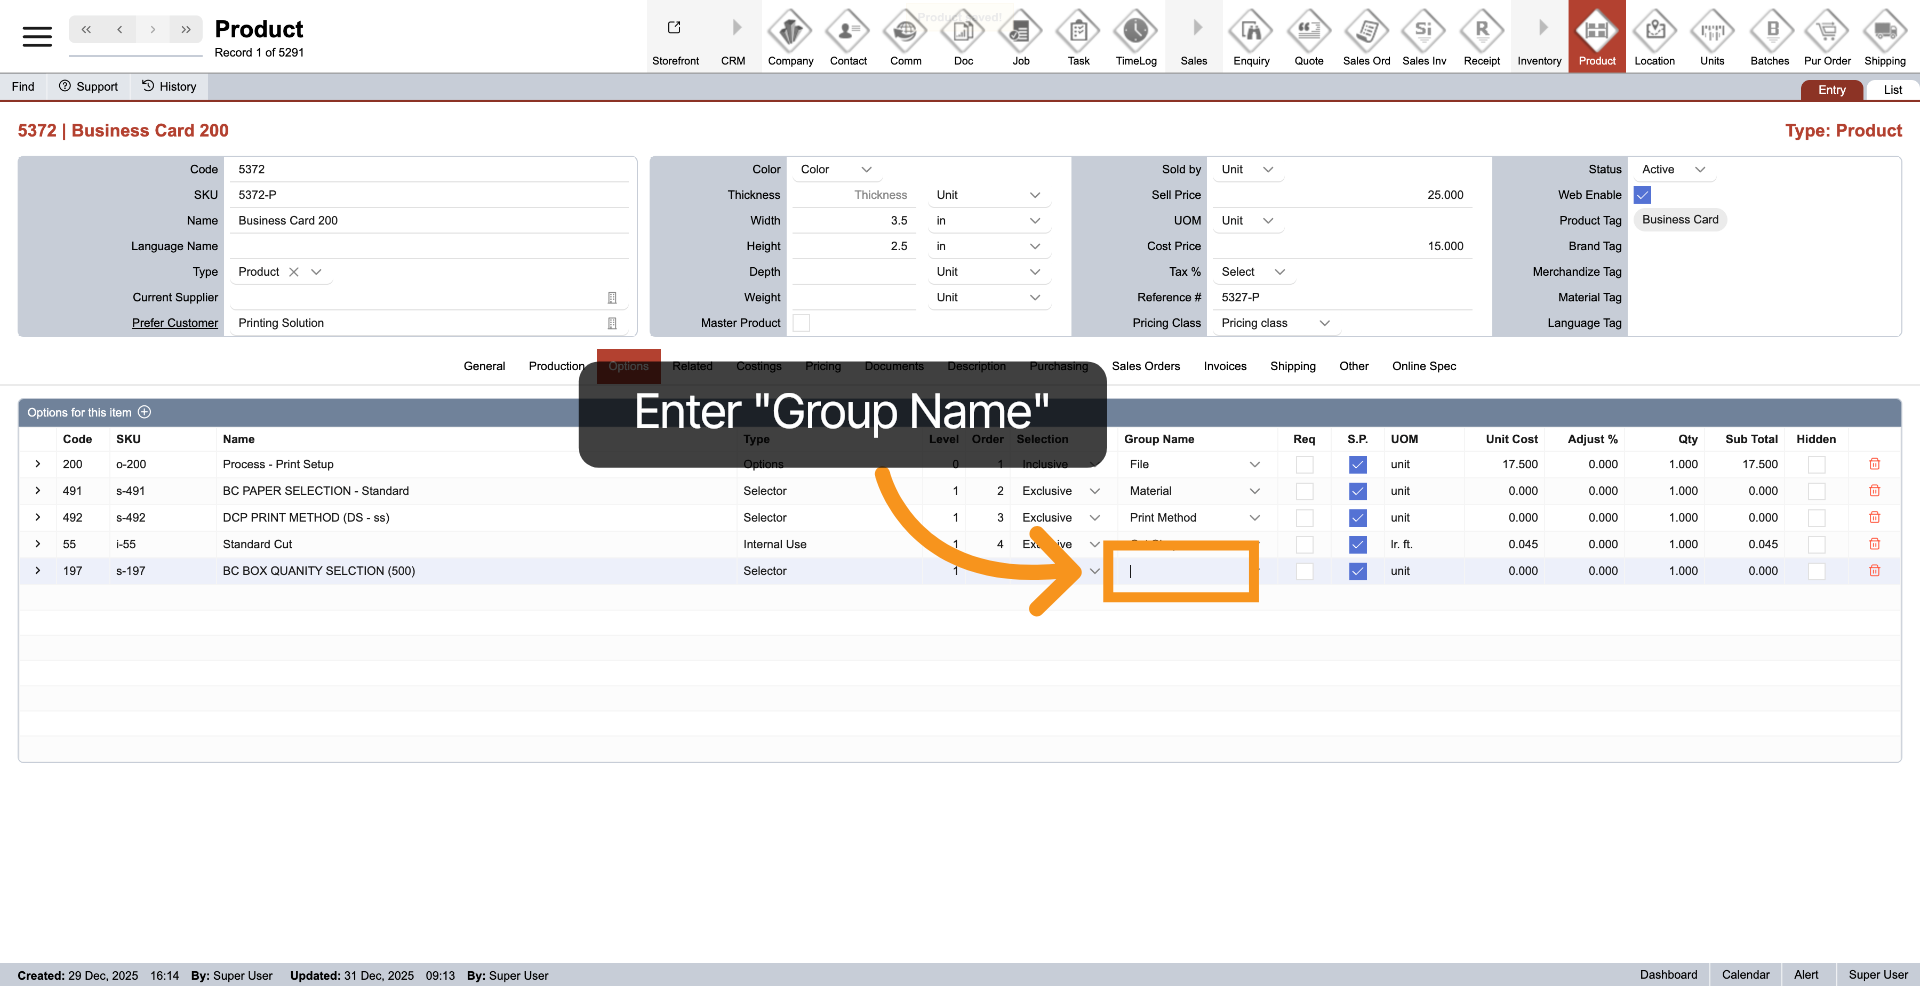
9. Group Name
Group Name helps you organize options in a meaningful way, making products easier to manage. It is linked to the Selection feature, so when you change a selection, all options under the same group name are automatically applied to the new selection.To create a new group name, simply type the name into the field and press Enter. The system will then prompt you to choose a selection type for the group. Select the appropriate selection to complete the setup.
10. Required Options
Checking Required makes the option required and automatically included and priced when the product is added to a quote or sales order.For Inclusive groups, multiple options can be required and cannot be unselected. For Exclusive and Selective groups, only one option can be required at a time, acting as the default, but it can still be changed if needed.

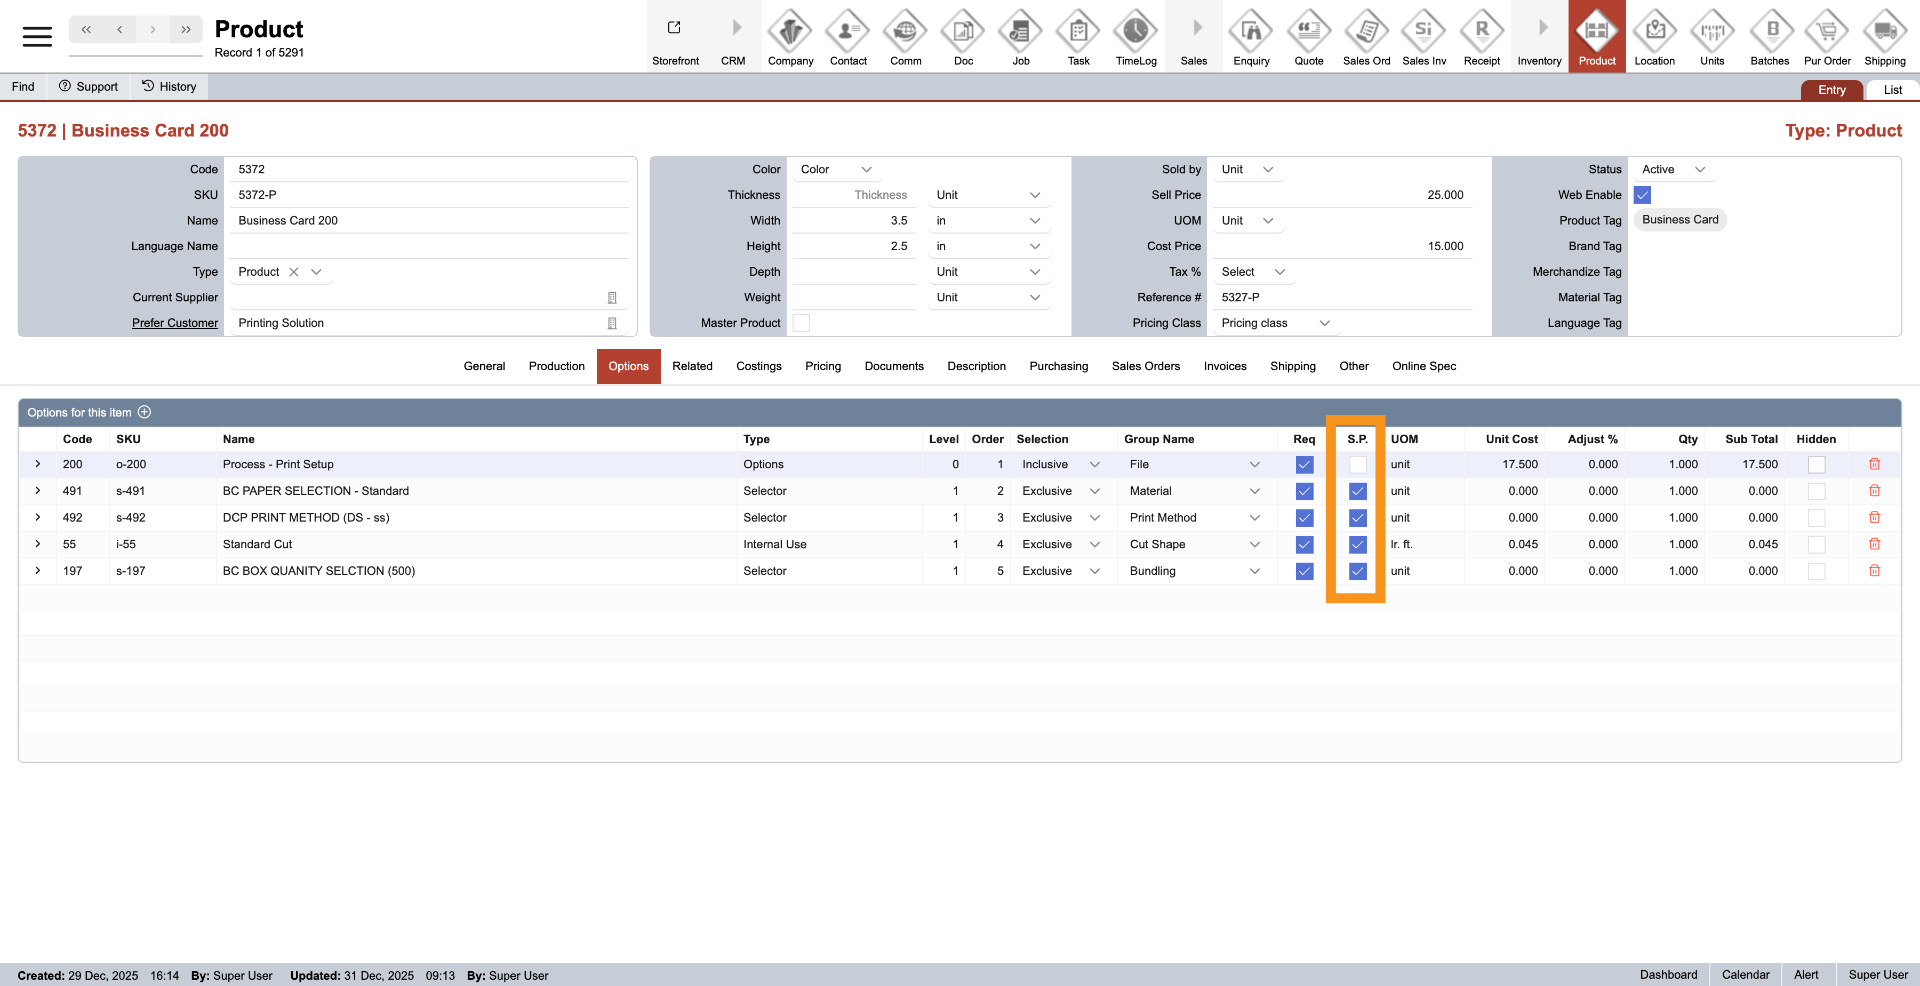
11. Same Parent Options
Enable the Same Parent option to use the parent product’s size and quantity for pricing. When selected, all linked options will calculate pricing based on the parent product, and the option’s own size or related details will be ignored. This ensures consistent pricing across the product.
12. Adjust % and Quantity
For each product, the Adjust % and Quantity settings allow you to customize how option pricing is calculated. This gives you greater flexibility and confidence when setting the final selling price.

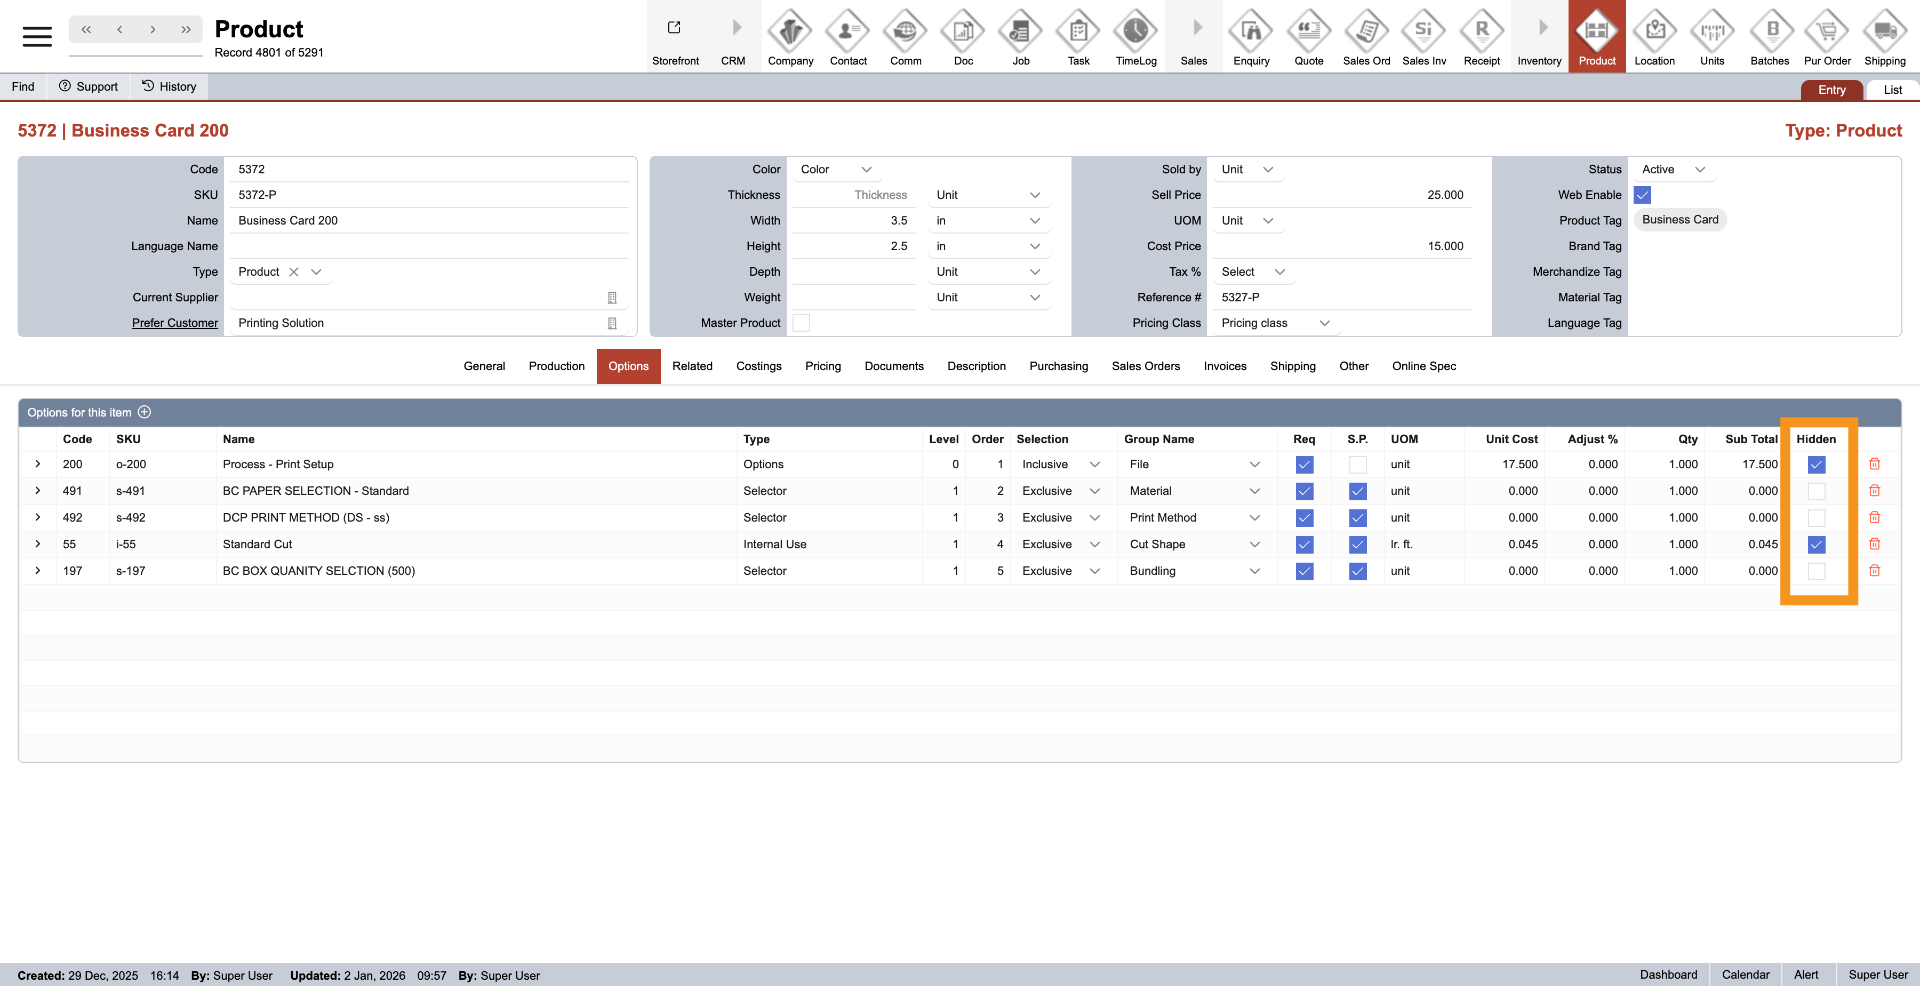
13. Hidden Options
In some cases, you may want to hide certain options from customers in both the online store and quotation documents while still including their pricing. This is known as hidden pricing.When the Hidden is checked, the option will not be visible to customers, but its cost will still be included in the final product price.
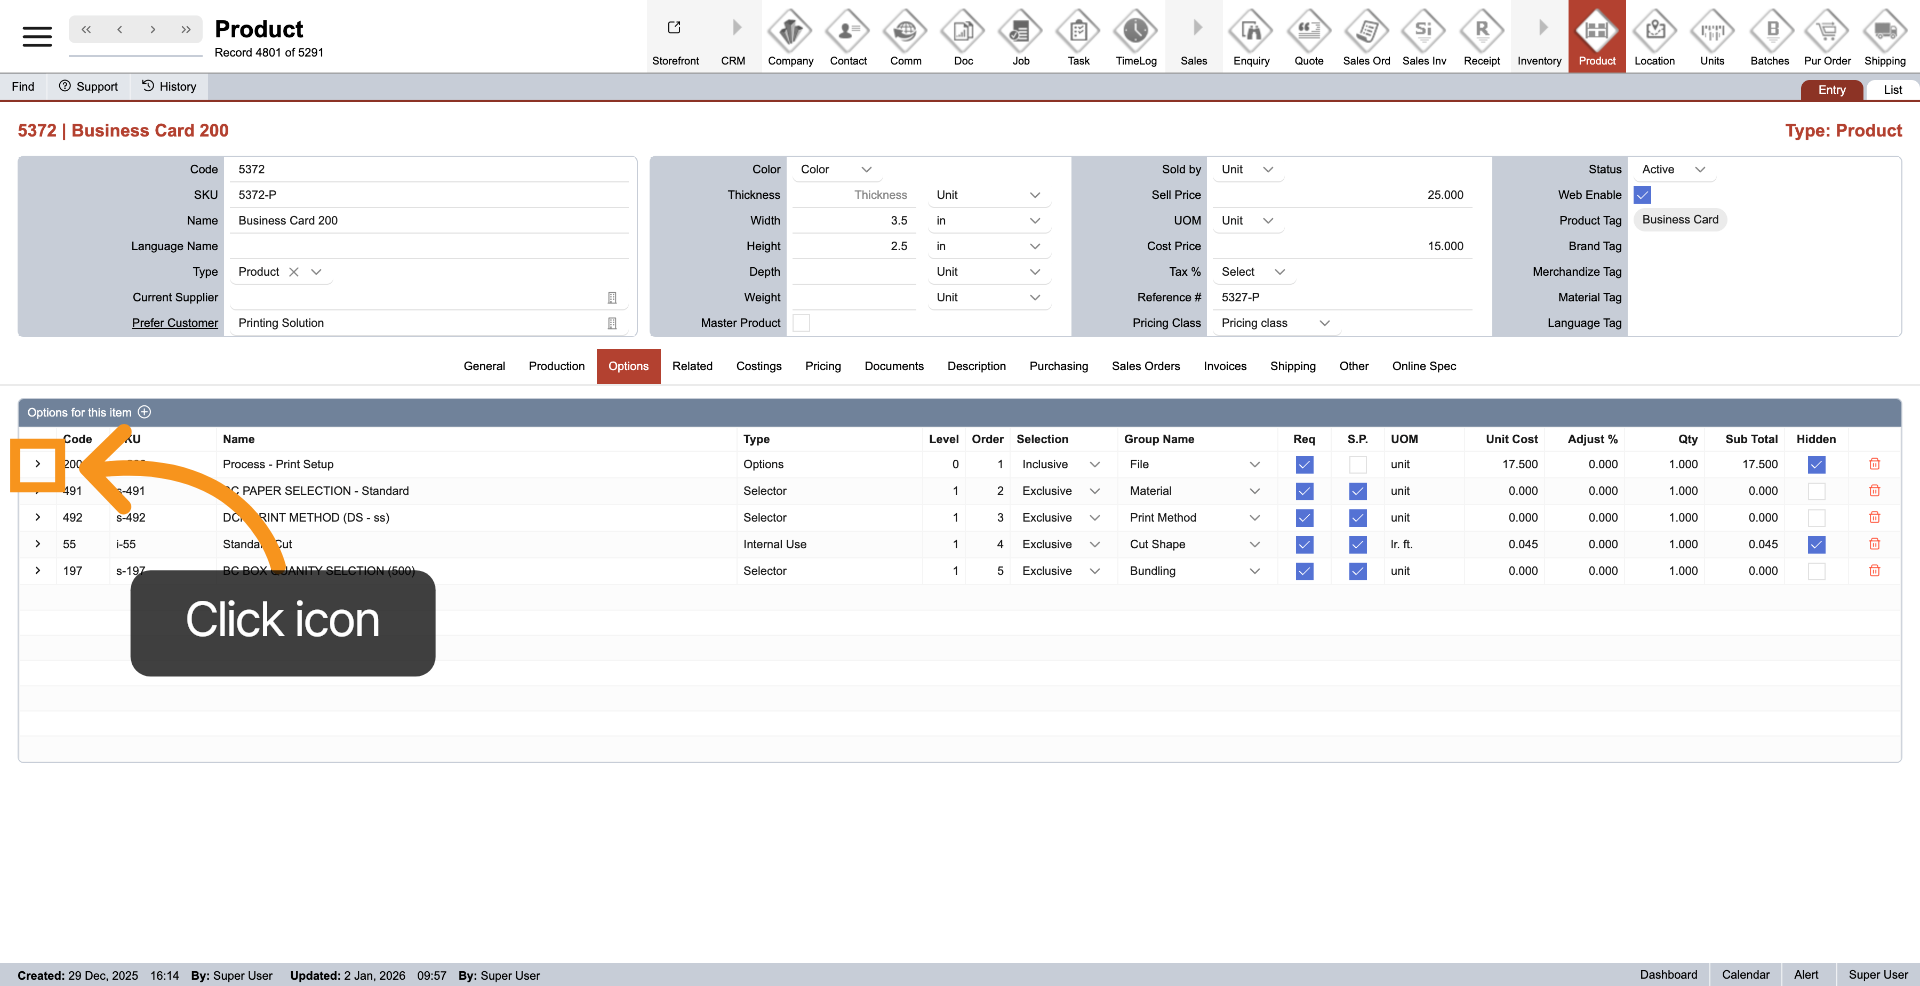
14. Navigate to Option
Click the arrow icon next to an option to quickly view its full details.
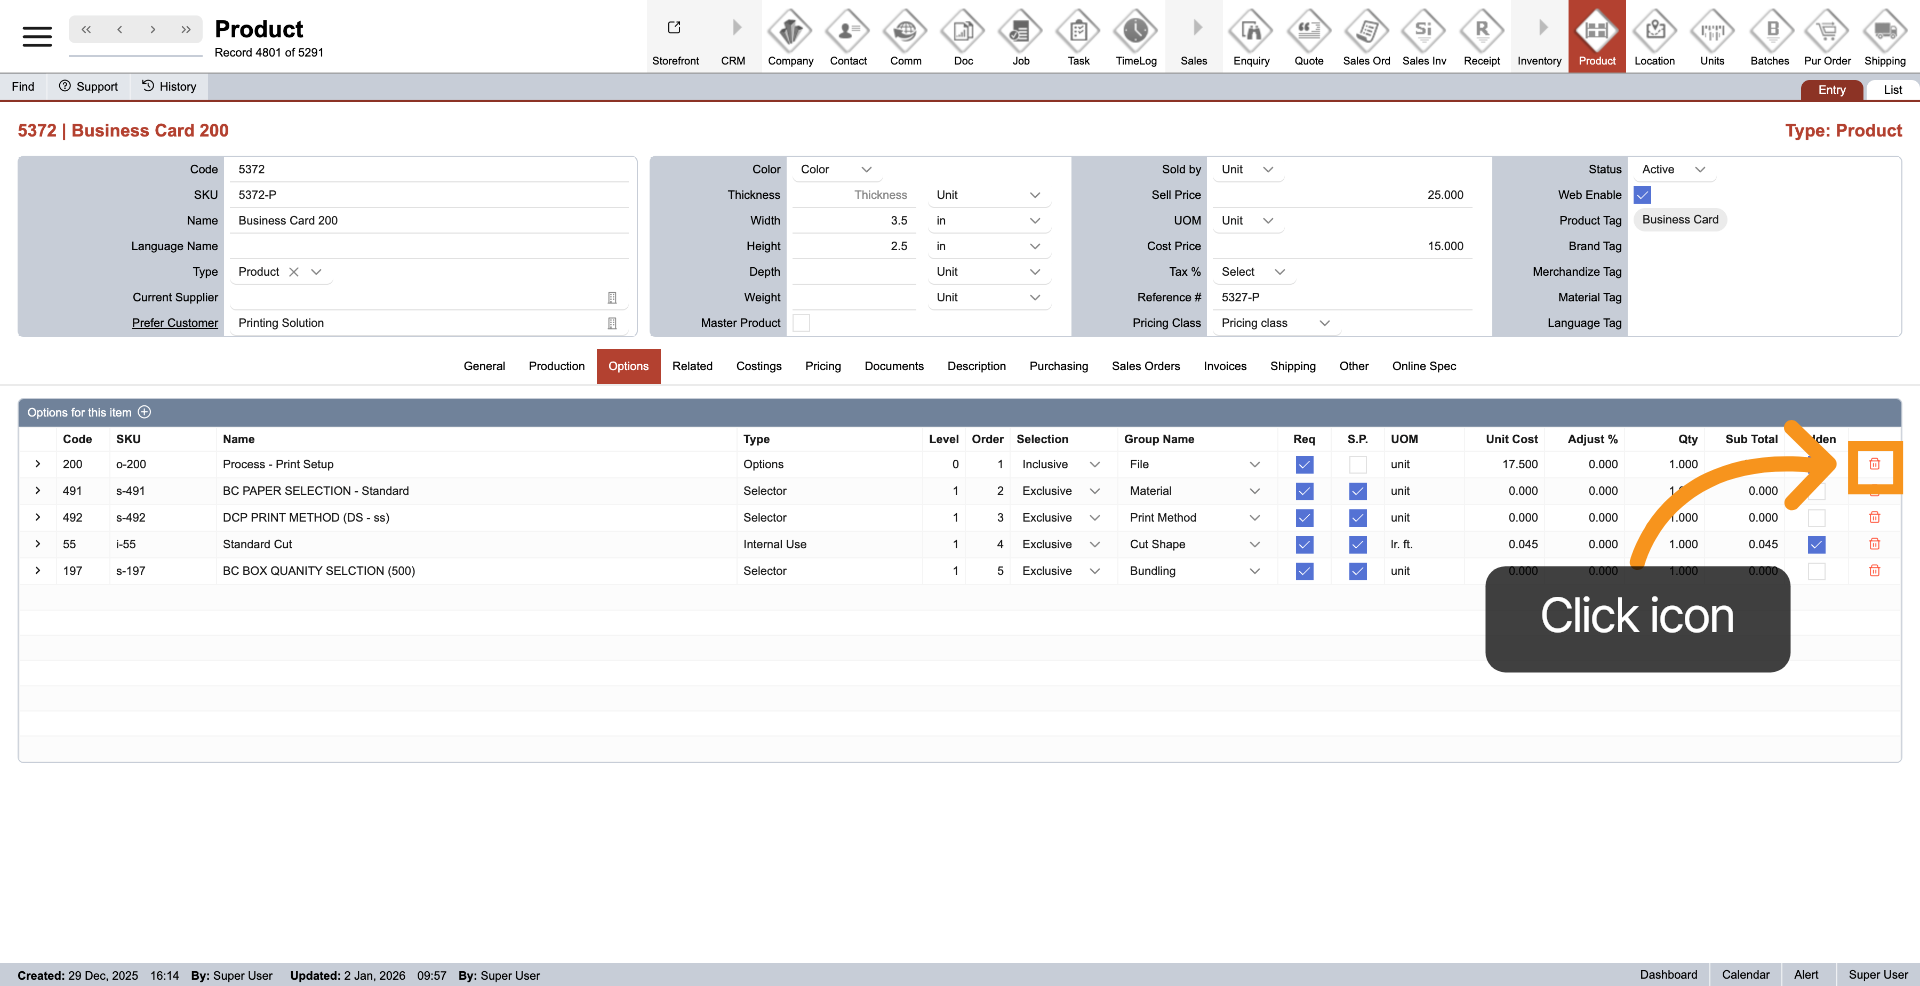
15. Delete Option
Click the Delete icon at the end of an option to remove it from the product.
You’ve successfully configured detailed product options in the Worktraq system. You now have full control over how your product is built.