Calendar Selection
This tutorial guides you through configuring date variants and customizing calendar settings. This setup allows users to easily update and format dates within the design.
Video Tutorial
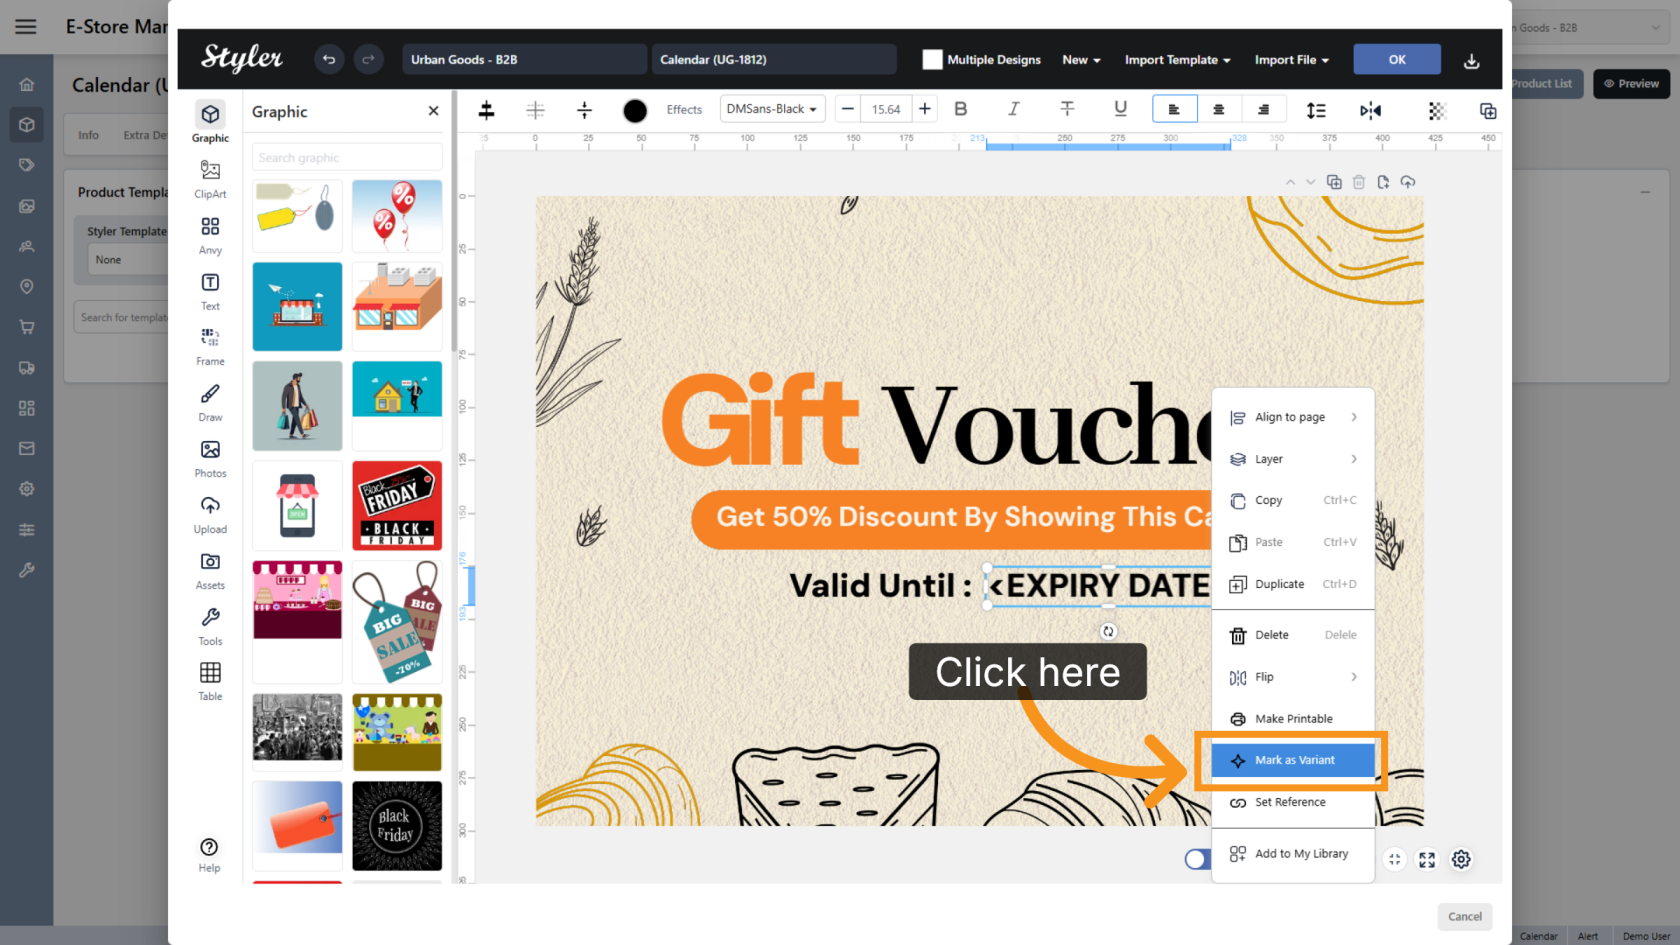
1. Mark an Object as a Variant
Right-click the date object you want users to edit, then select Mark as Variant.
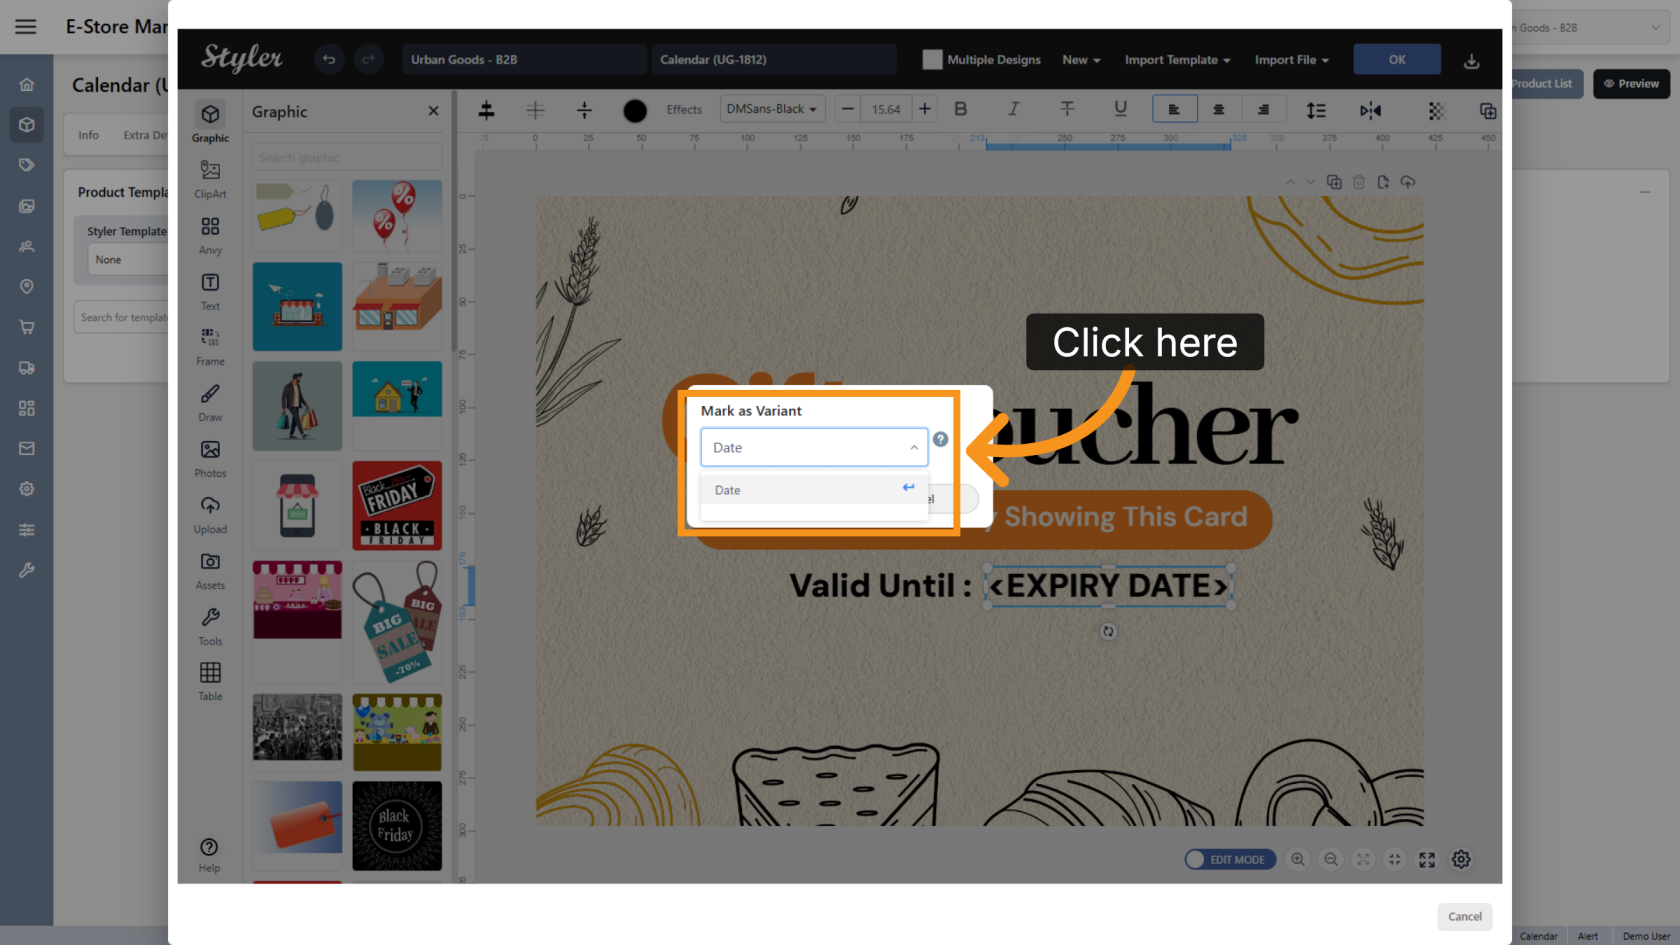
2. Choose a Variant Type
Click Select a variant type and choose the Date type for the editable field.
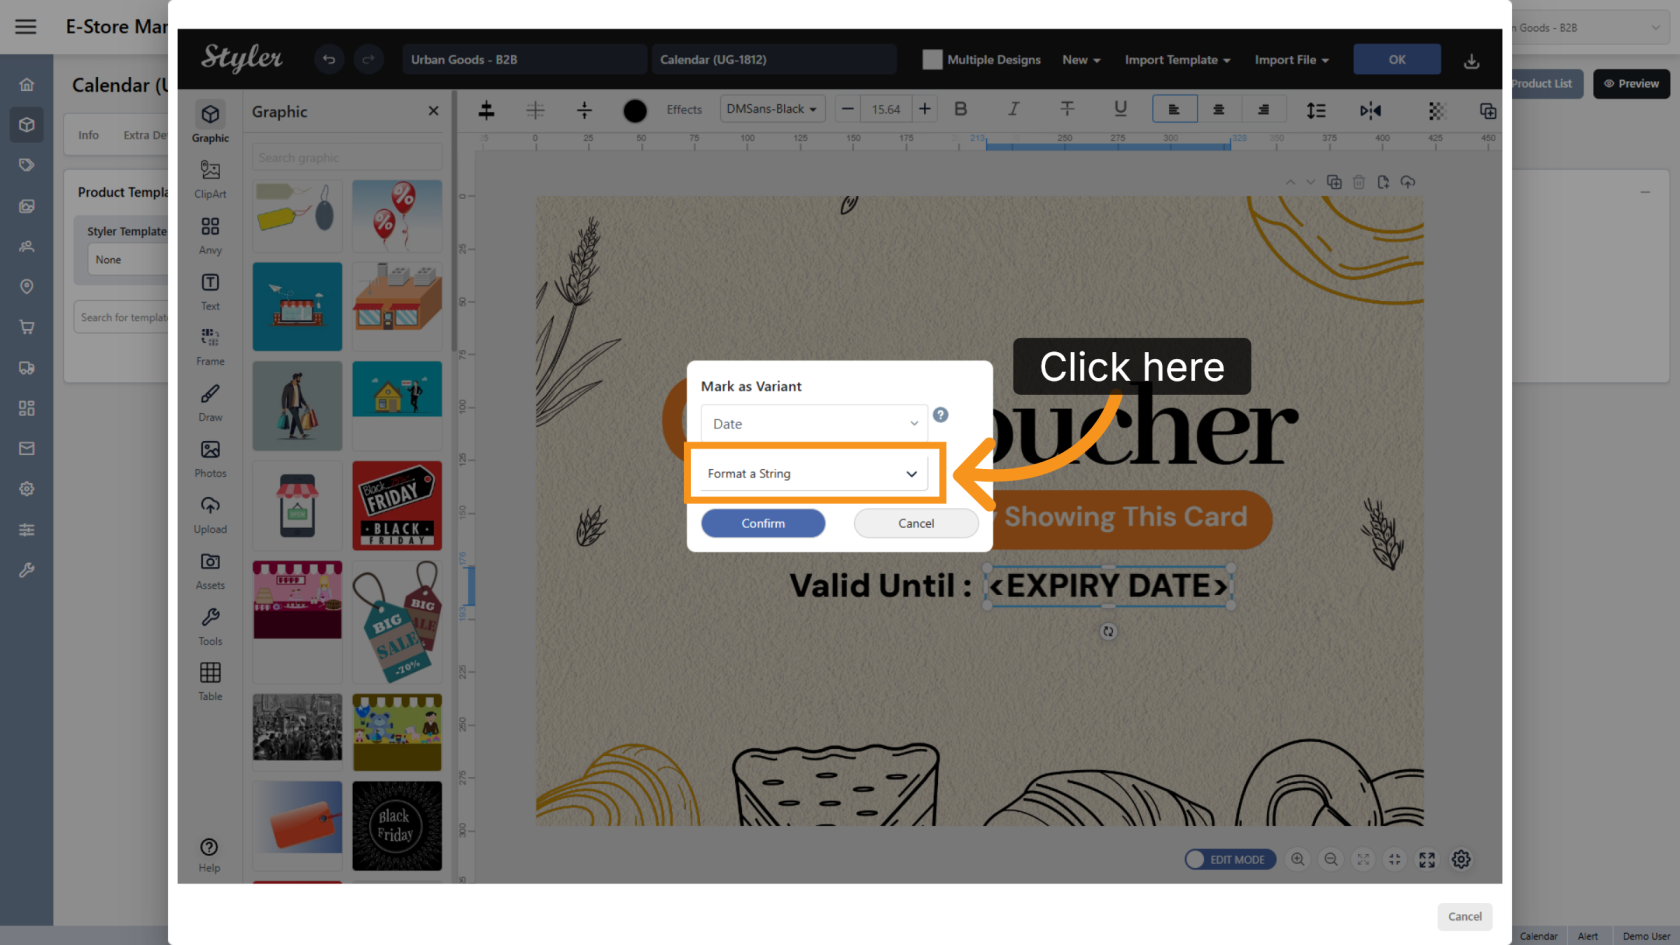
3. Configure the Date Format
Click Format a String to configure the variant display format.
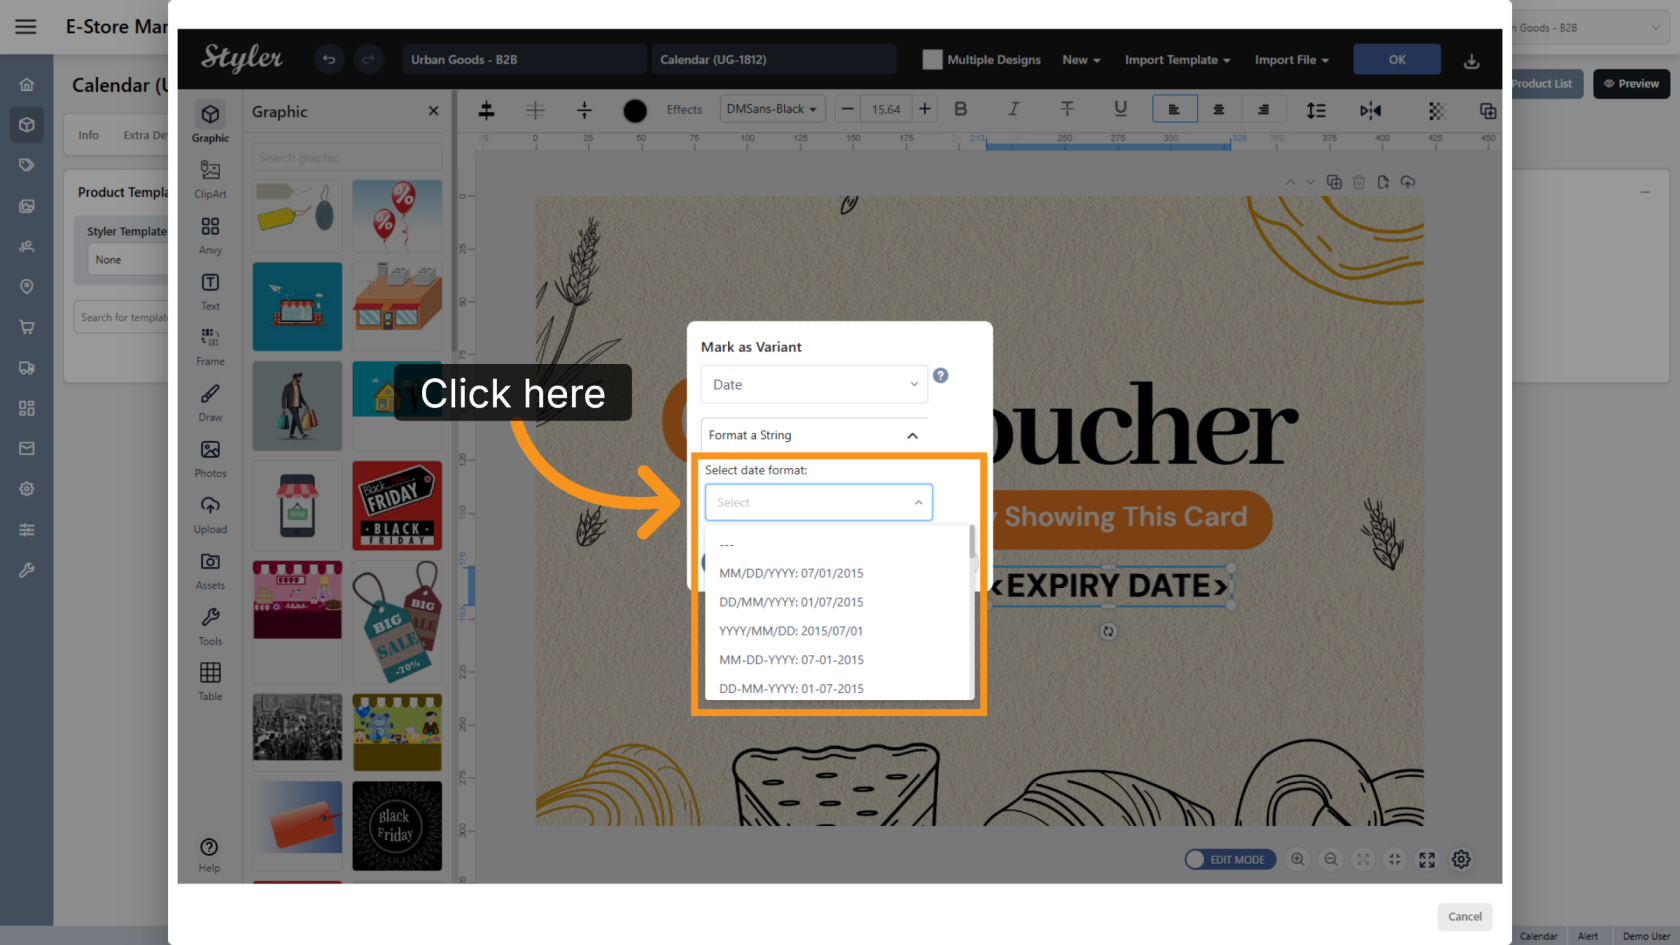
4. Select the Date Format
Click Select date format and choose the format you want to display in the design.
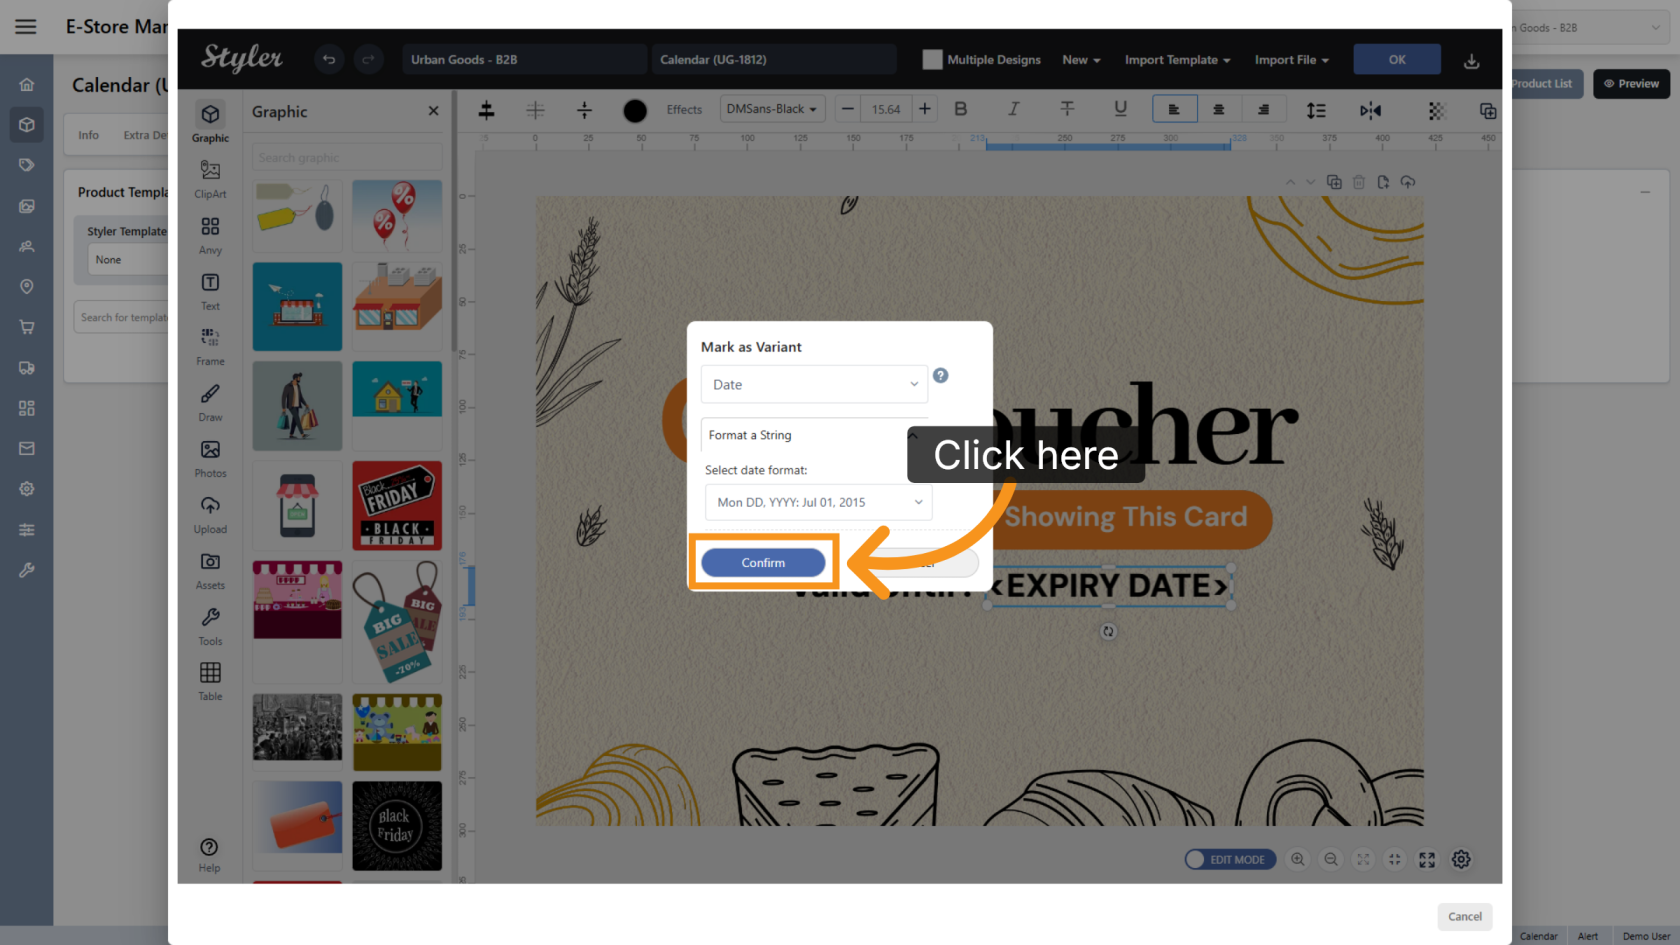
5. Confirm the Settings
Click Confirm to save the selected variant and date format settings.
6. Save the Configuration
Click OK to finalize the settings.

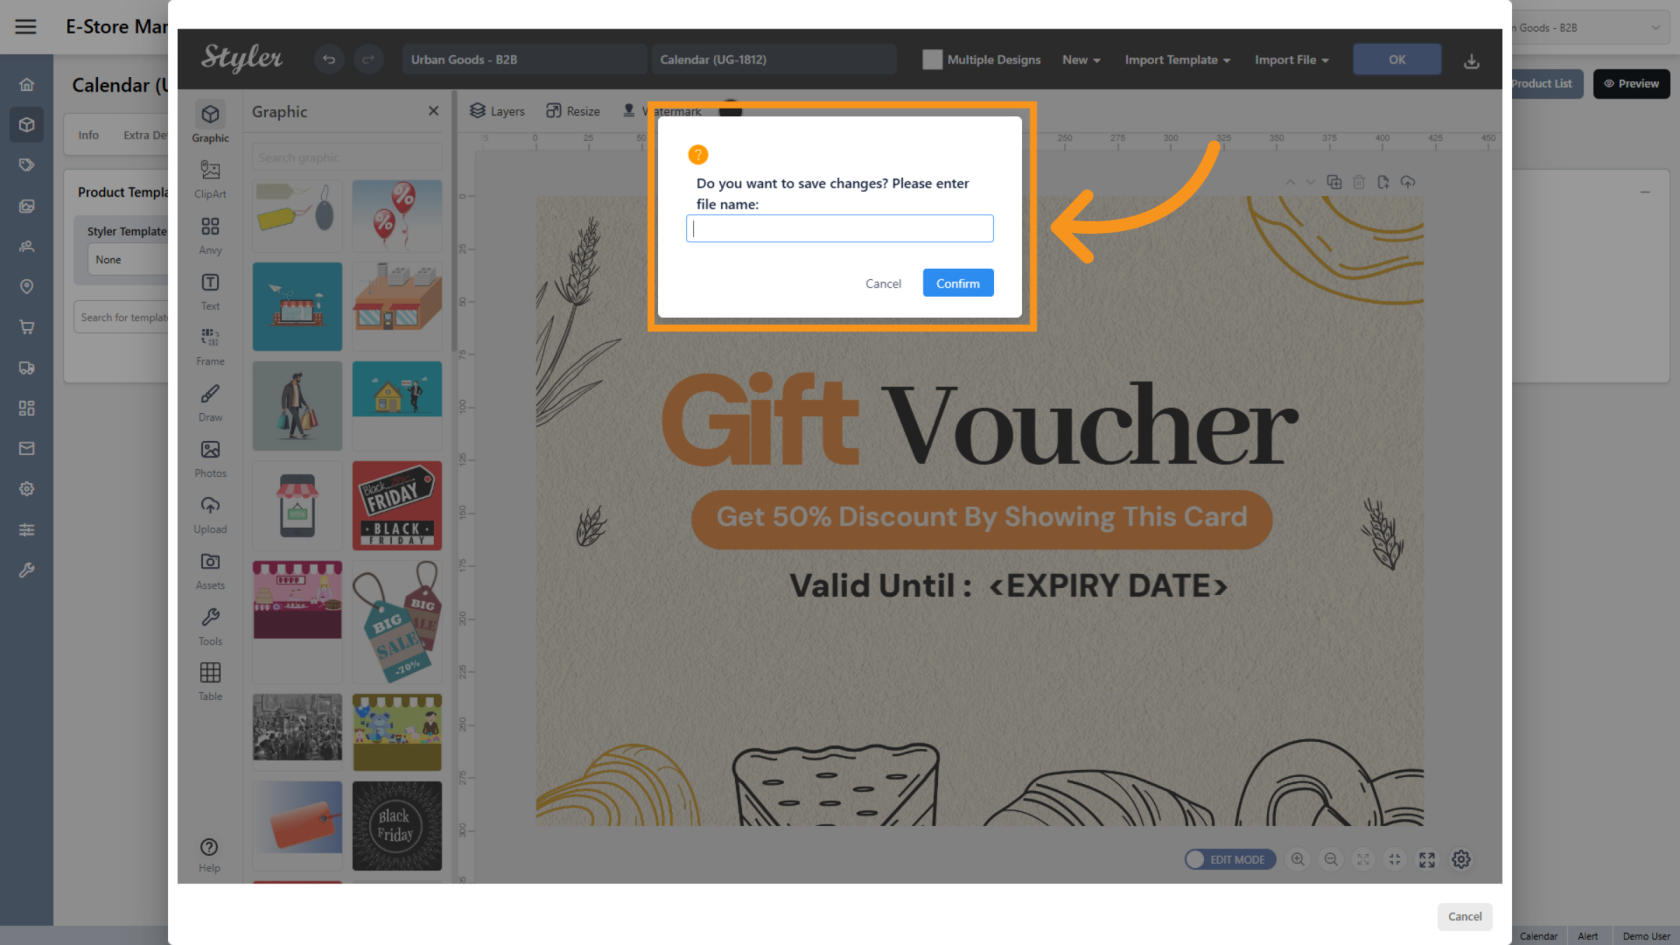
7. Enter the File Name
Enter the file name, then click Confirm.
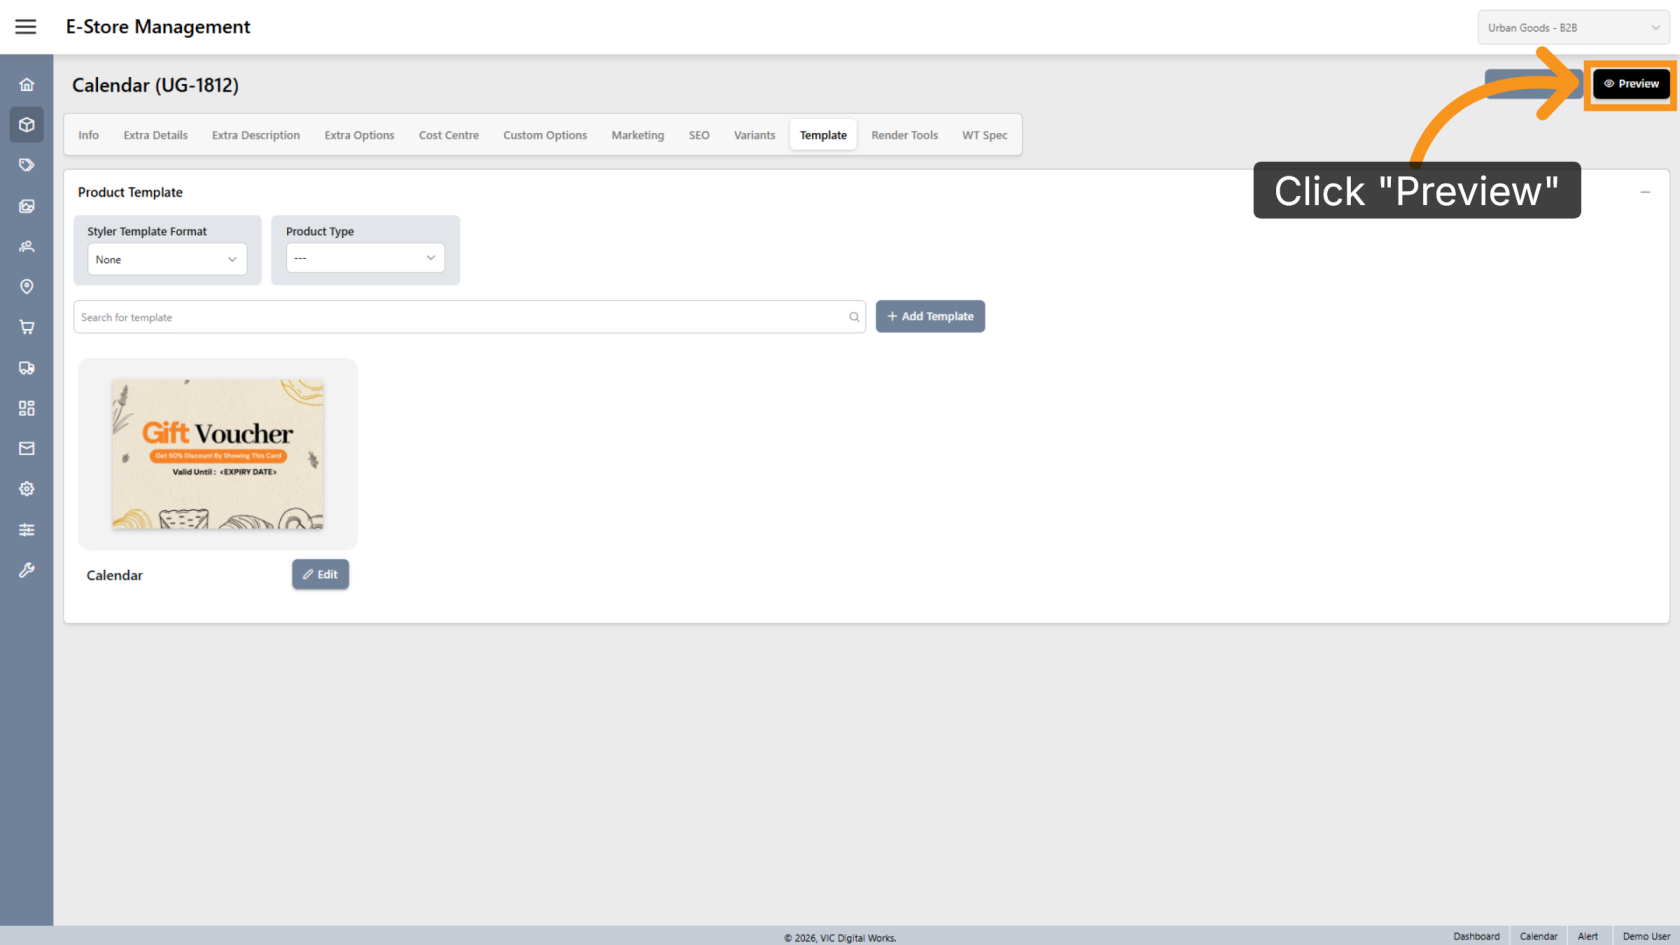
8. Preview the Design
Click Preview to review the final layout.
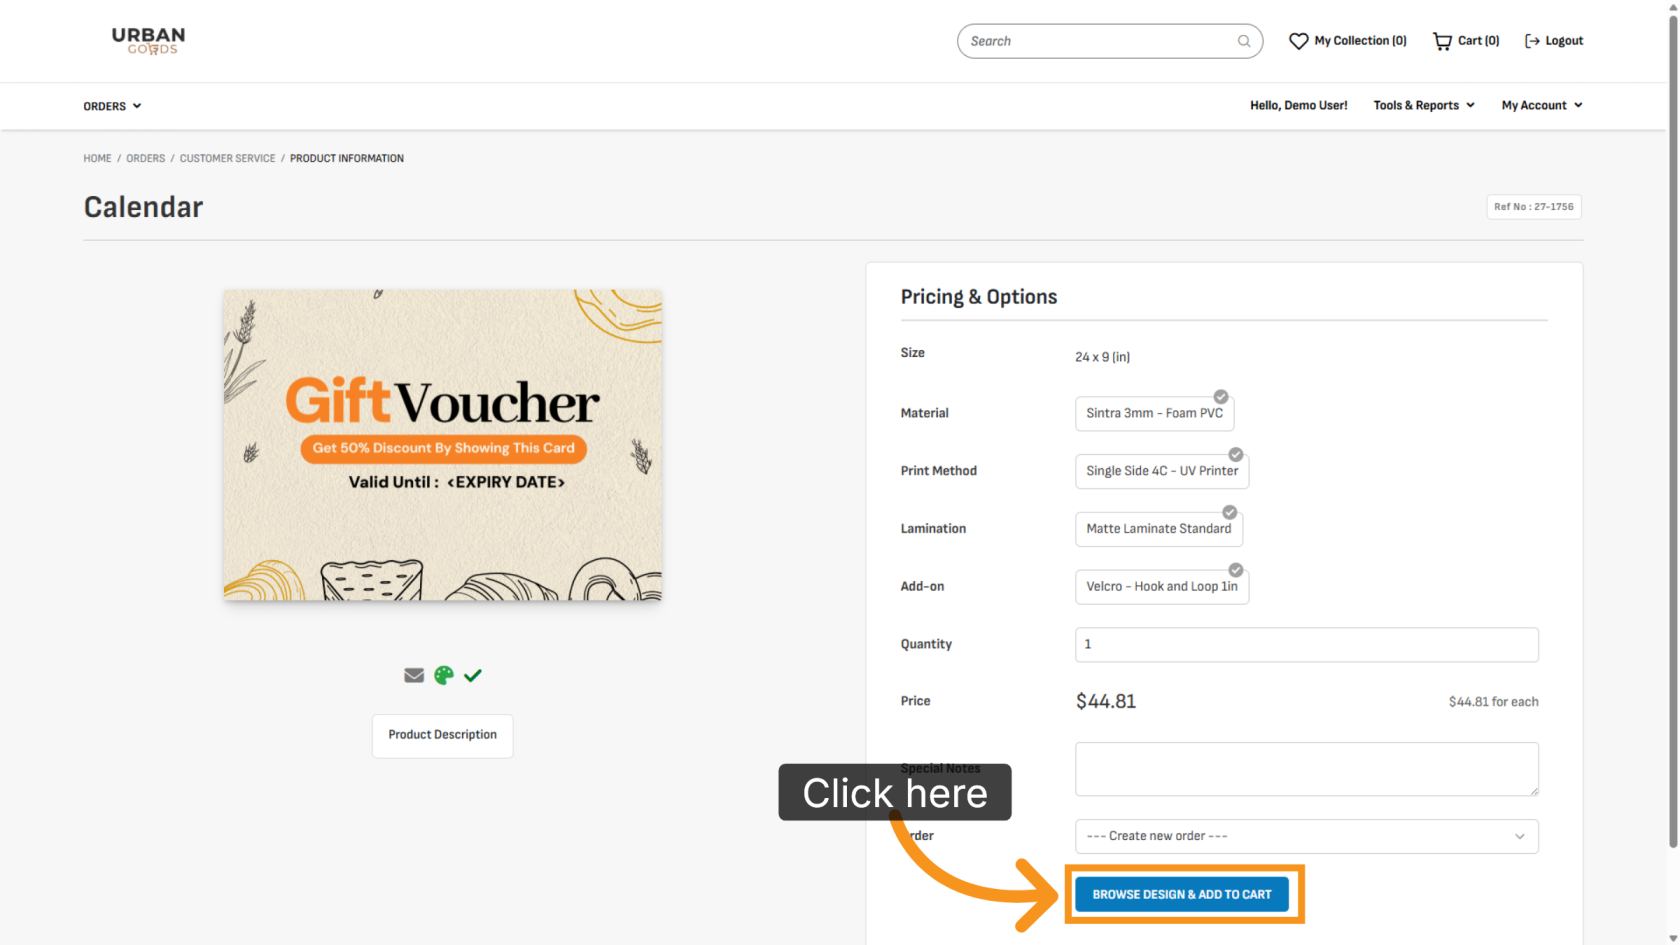
9. Browse Available Designs
Click BROWSE DESIGN & ADD TO CART to select a design for printing.
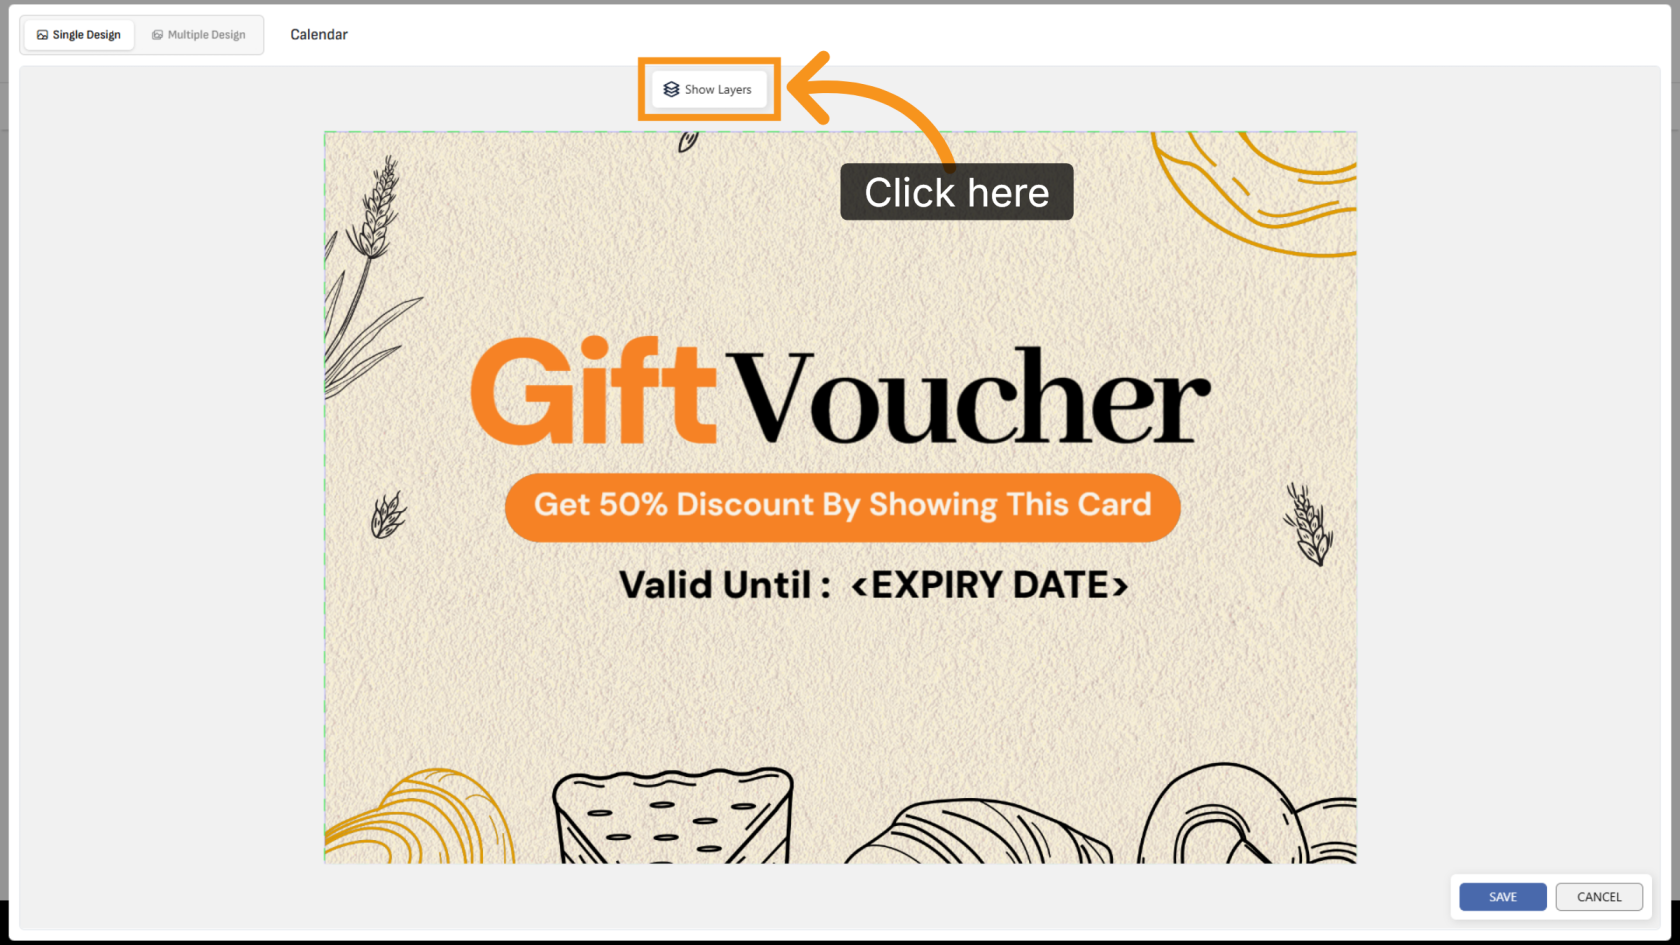
10. Show Design Layers
Click Show Layers to display all editable variant layers in the design.
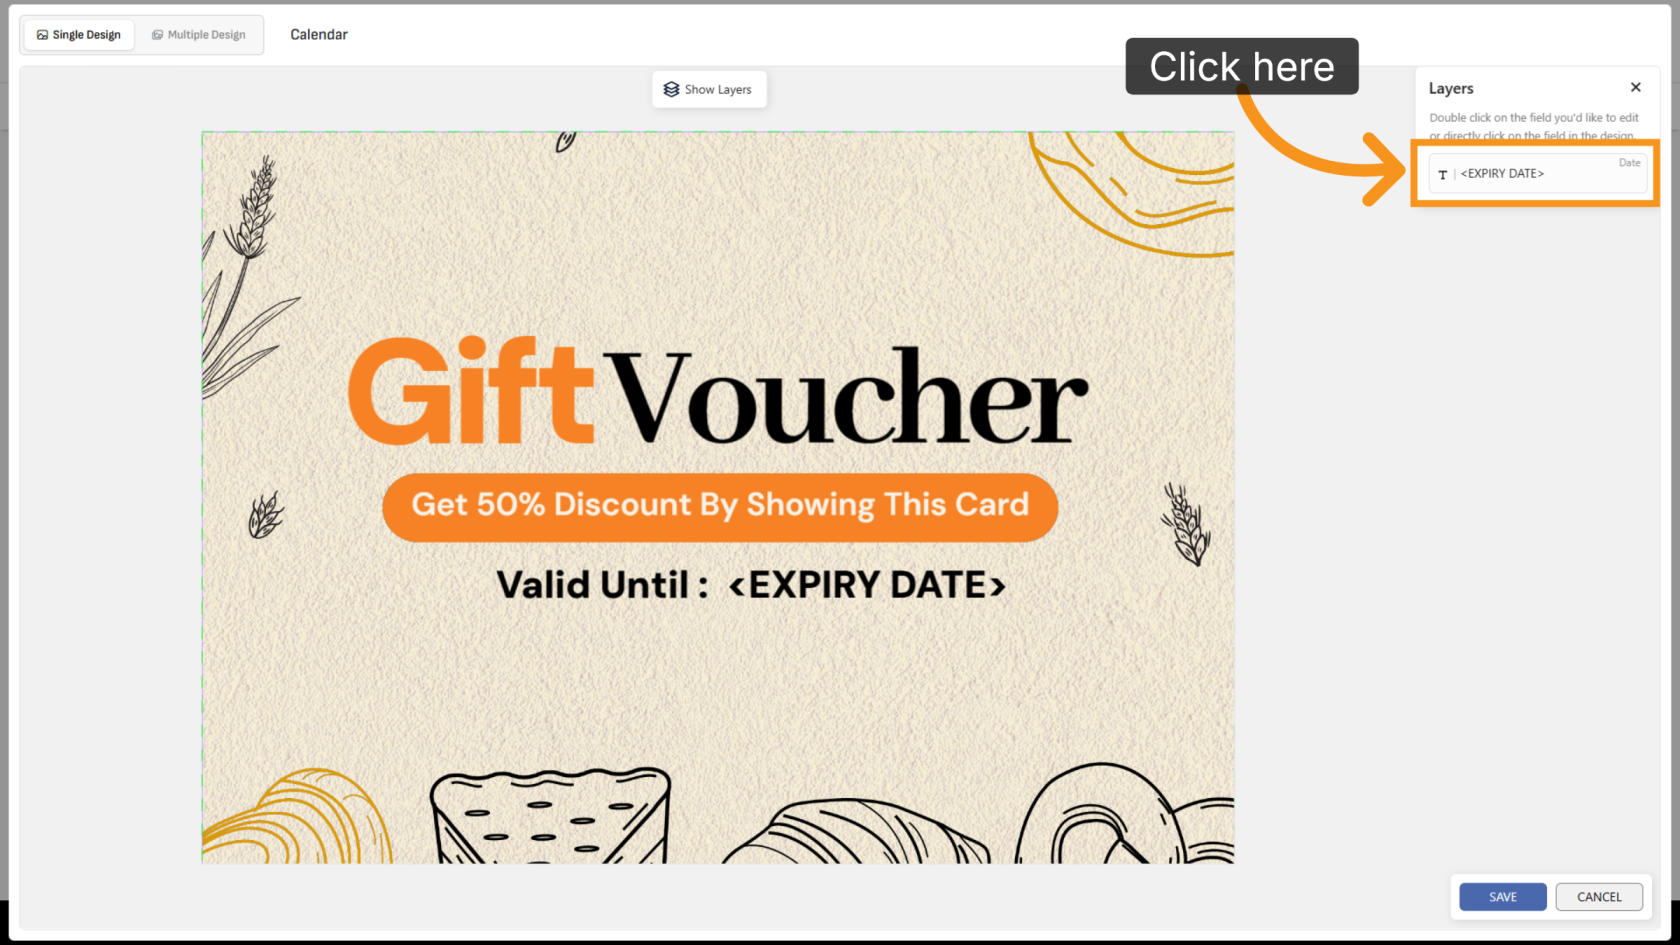
11. Update the Date
Click the date layer you want to update.
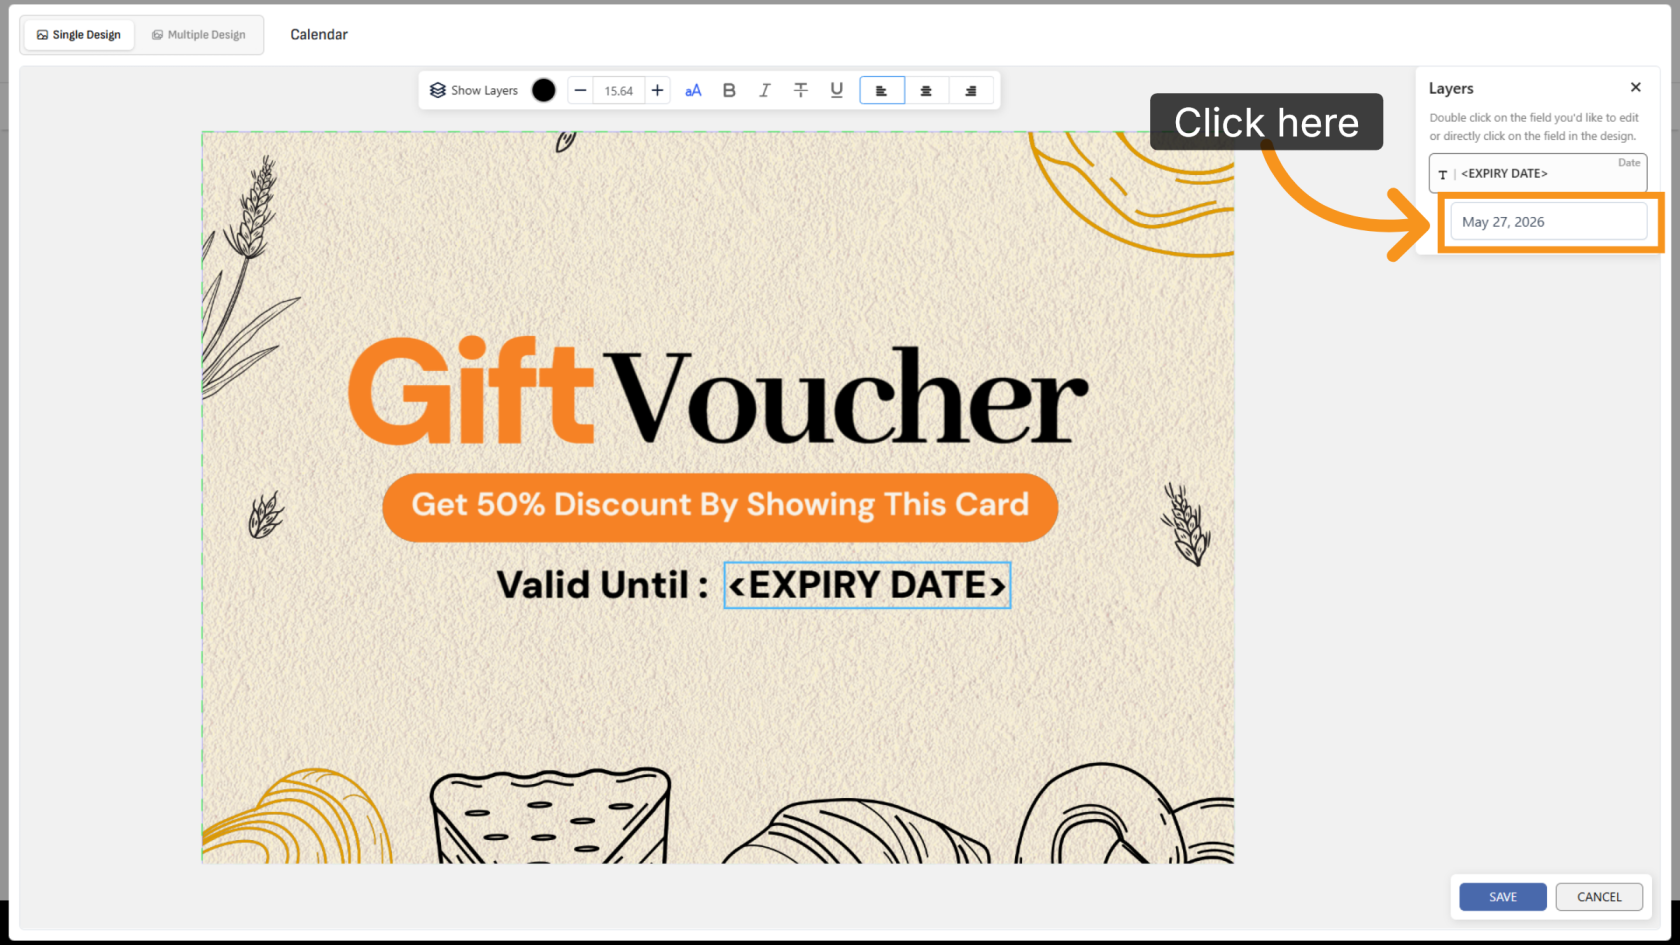
12. Select a Date
Click the date field and choose the desired date from the calendar selector.
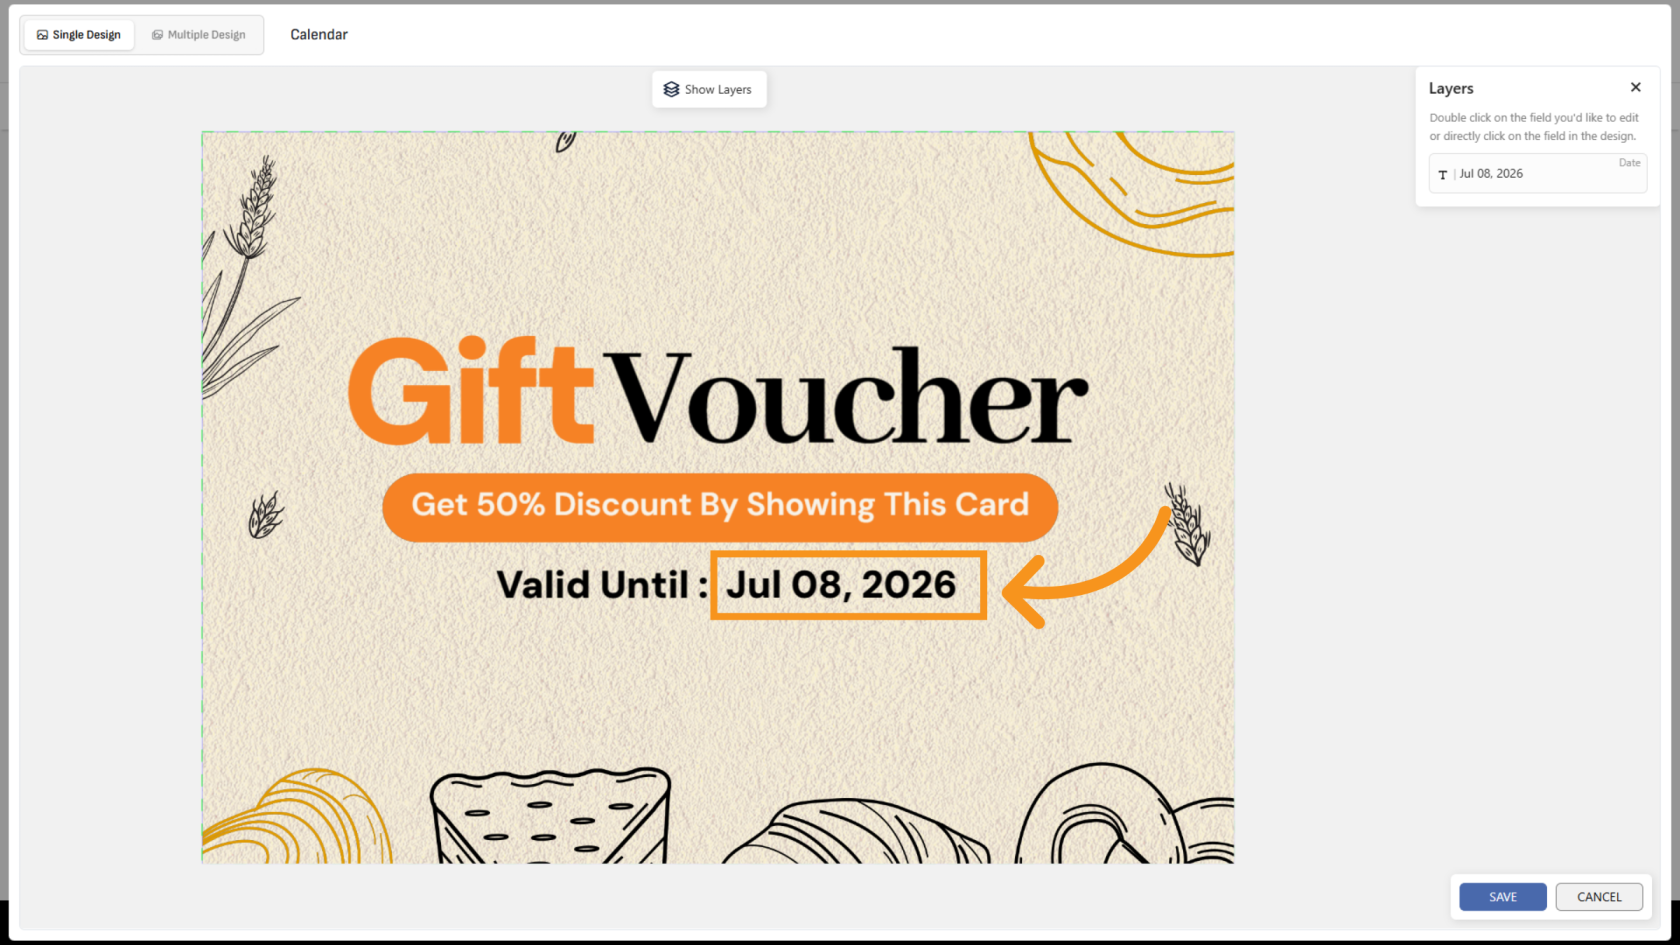
13. Review the Updated Design
After selecting the date, the design will automatically update using the date format configured earlier.
You have successfully configured date variants and customized calendar formatting. Review the design to ensure all date settings and formats display correctly.