Selected Variants
This tutorial guides you through configuring selected variants. Selected variants allow specific portions of text within a text box to become editable while keeping the remaining content unchanged.
Video Tutorial
1. Group Elements to Text Box
Select the required objects, right-click, and choose Group to "Text Box".

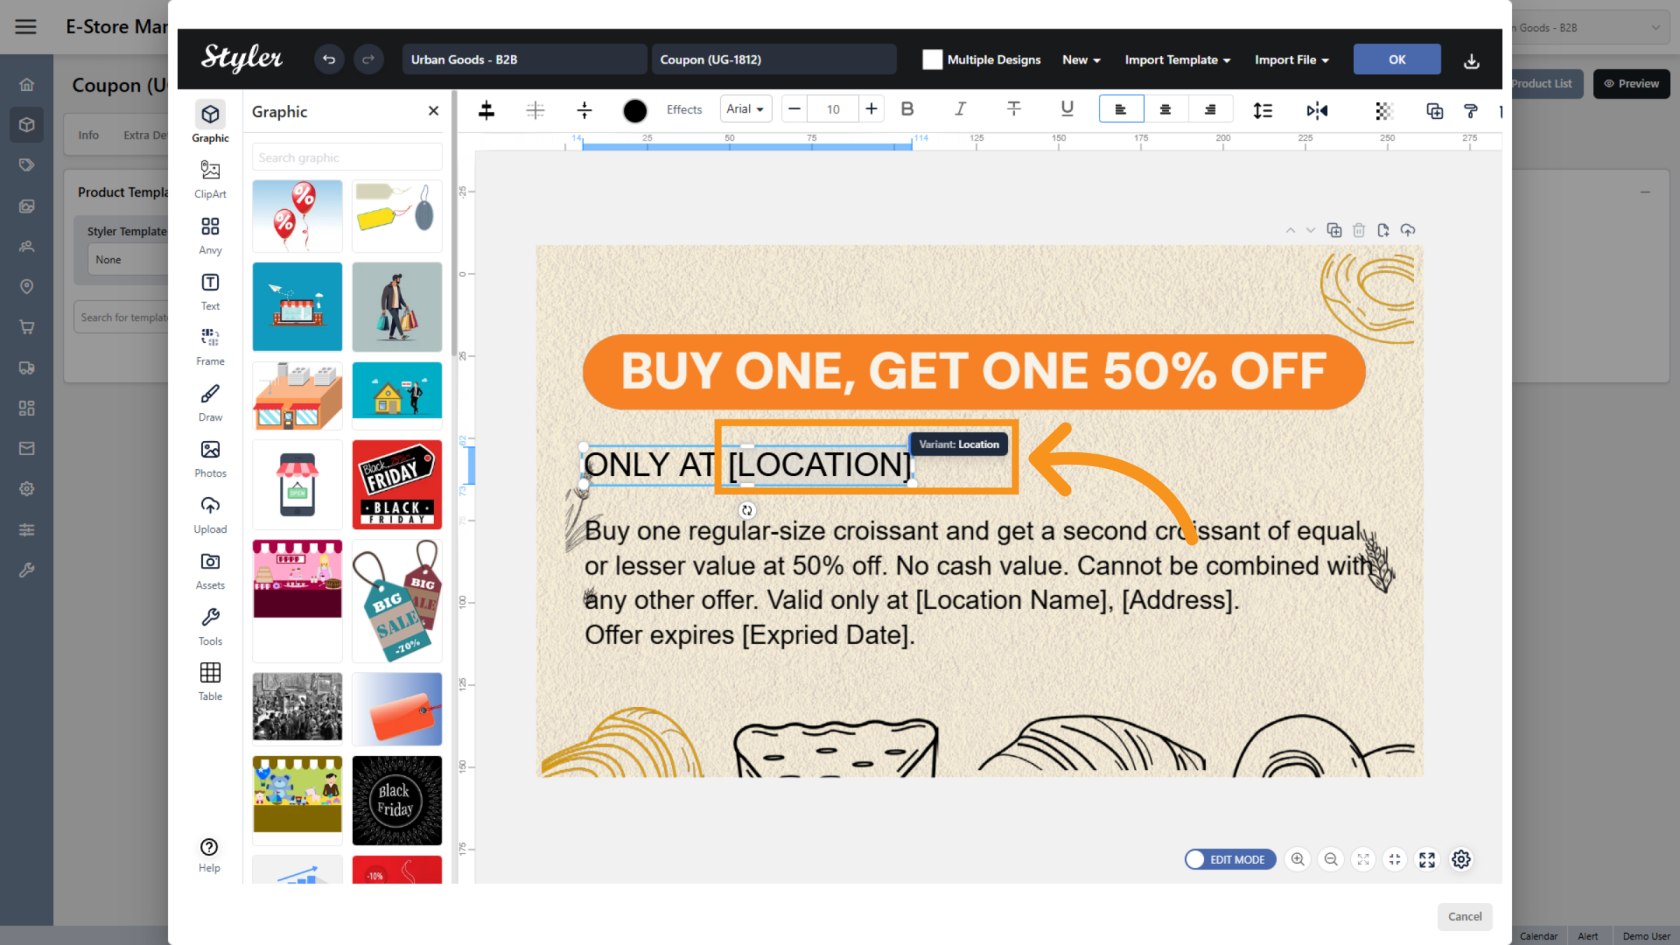
2. Select the Text
Highlight the specific text you want users to edit.
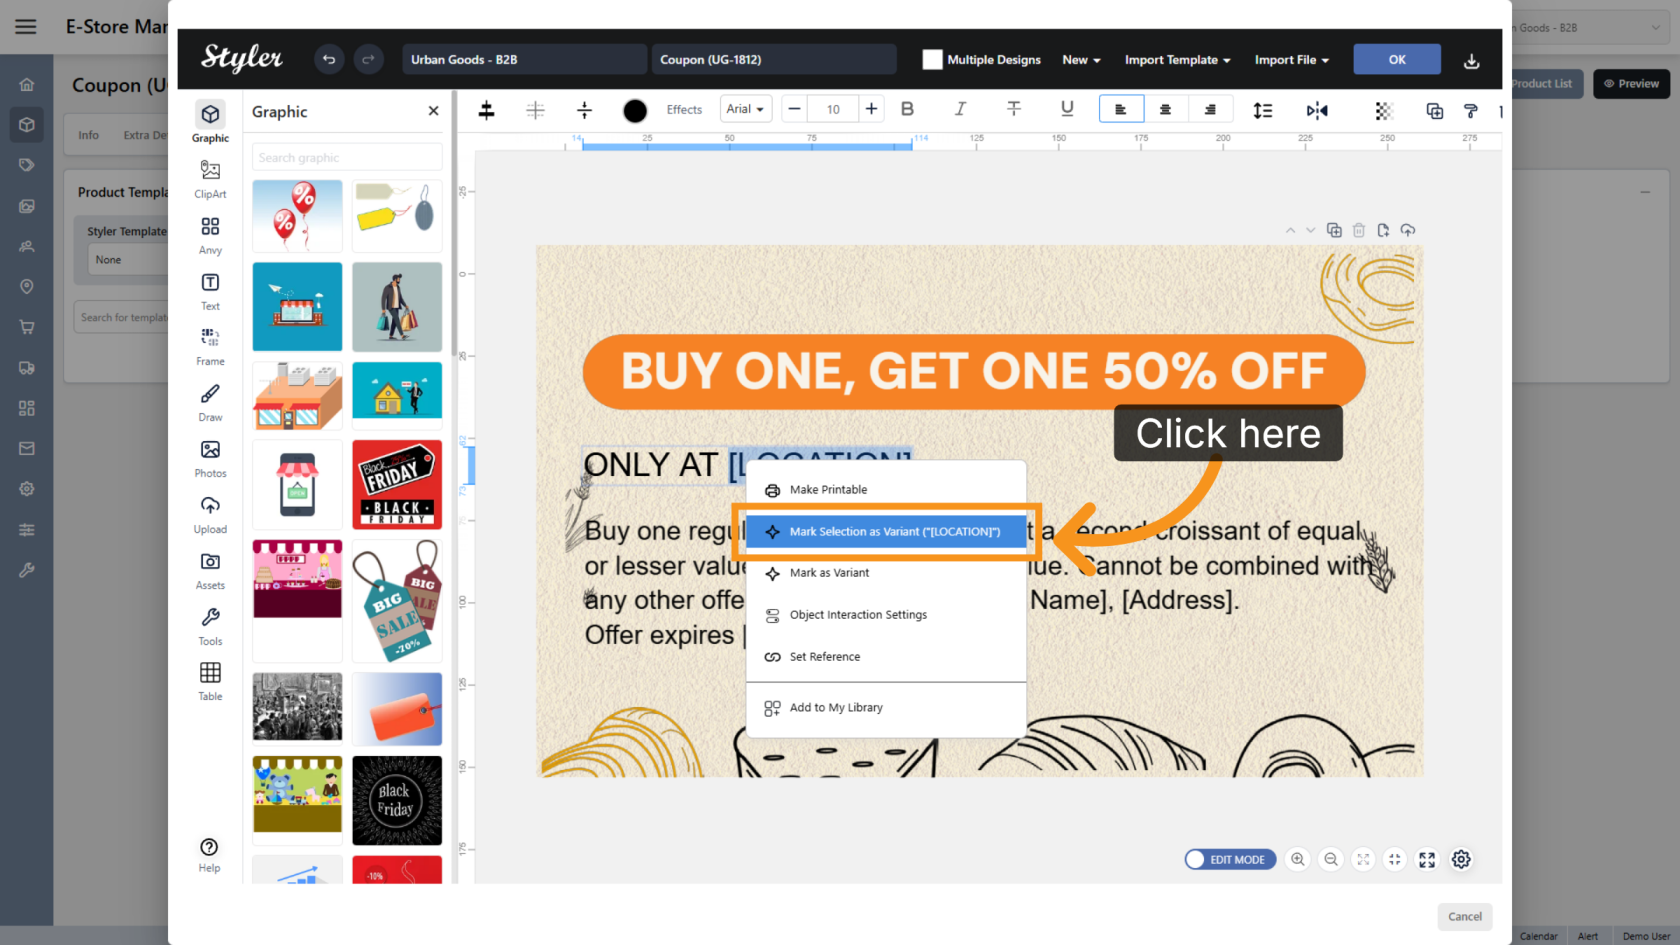
3. Mark the Selection as a Variant
Right-click the highlighted text and select Mark Selection as Variant.
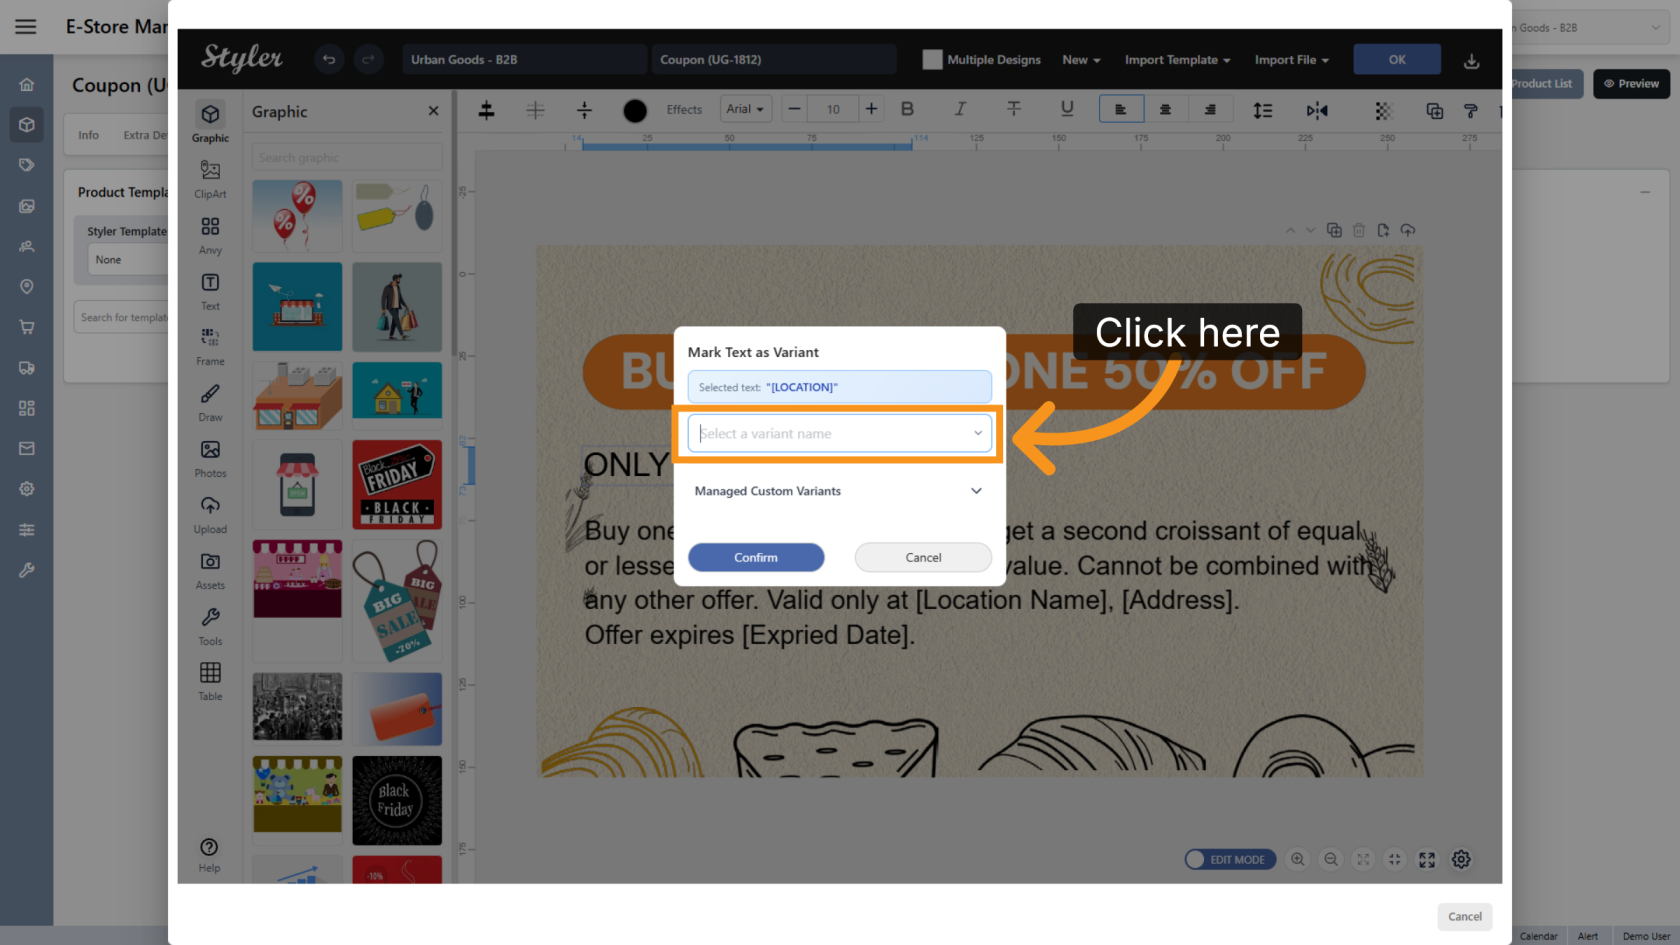
4. Choose a Variant Name
Click Select a variant name and choose a descriptive name for the editable field.
The name should clearly indicate the information users are expected to enter.
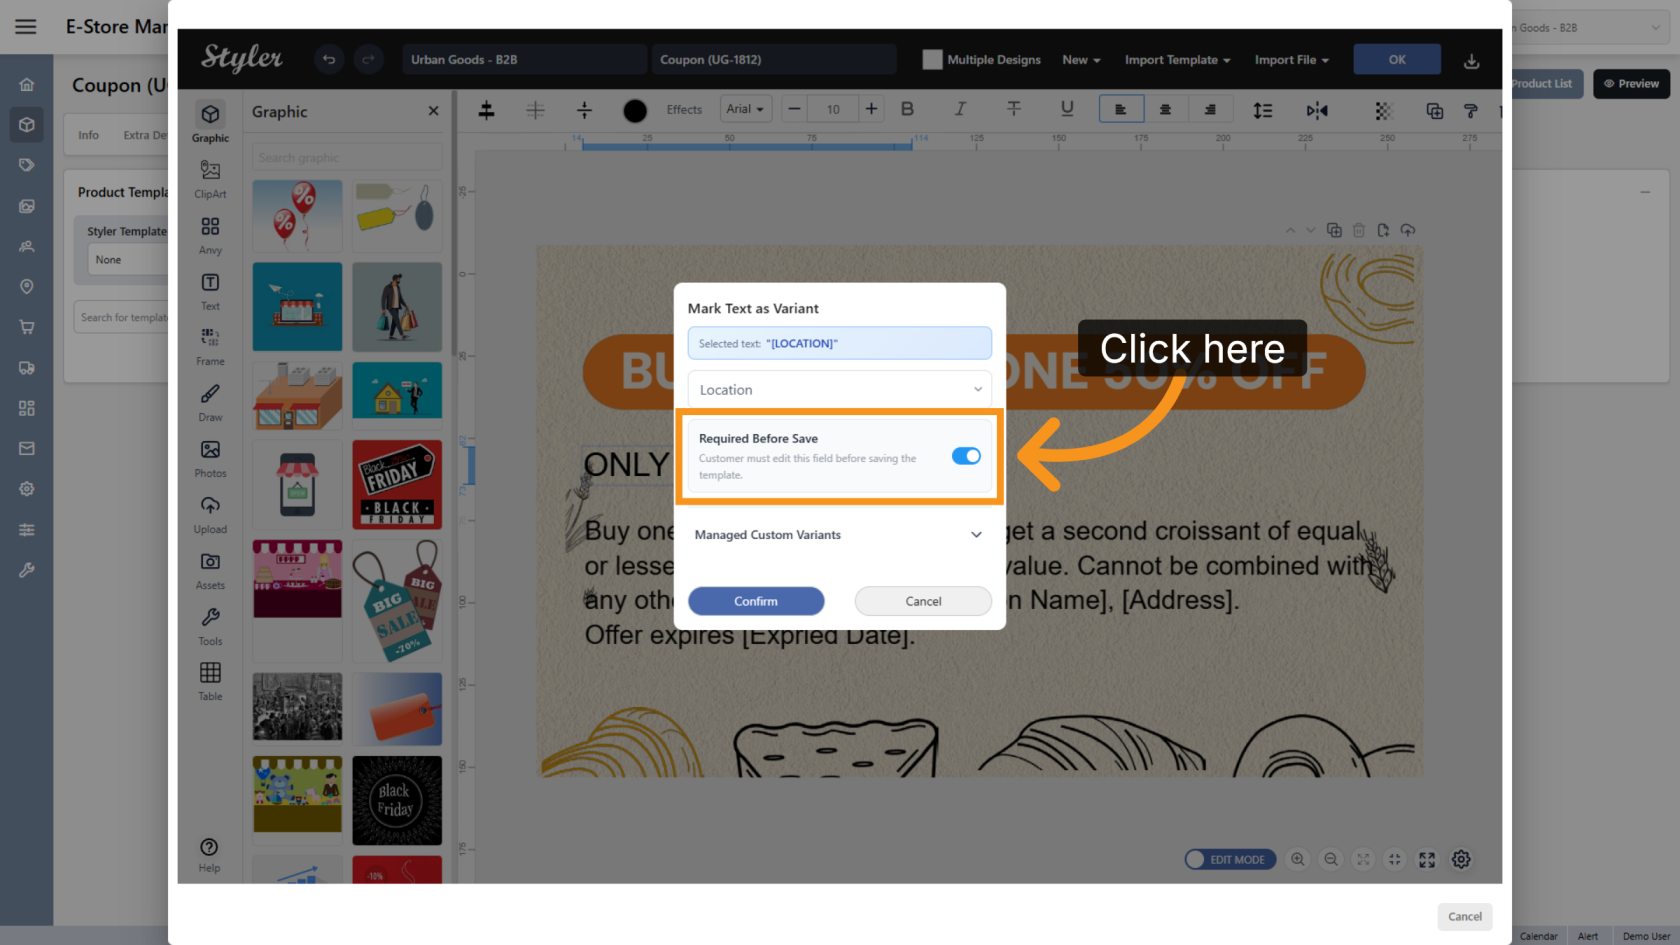
5. Enable Required Before Save
Enable Required Before Save if users must update the value before saving the design.
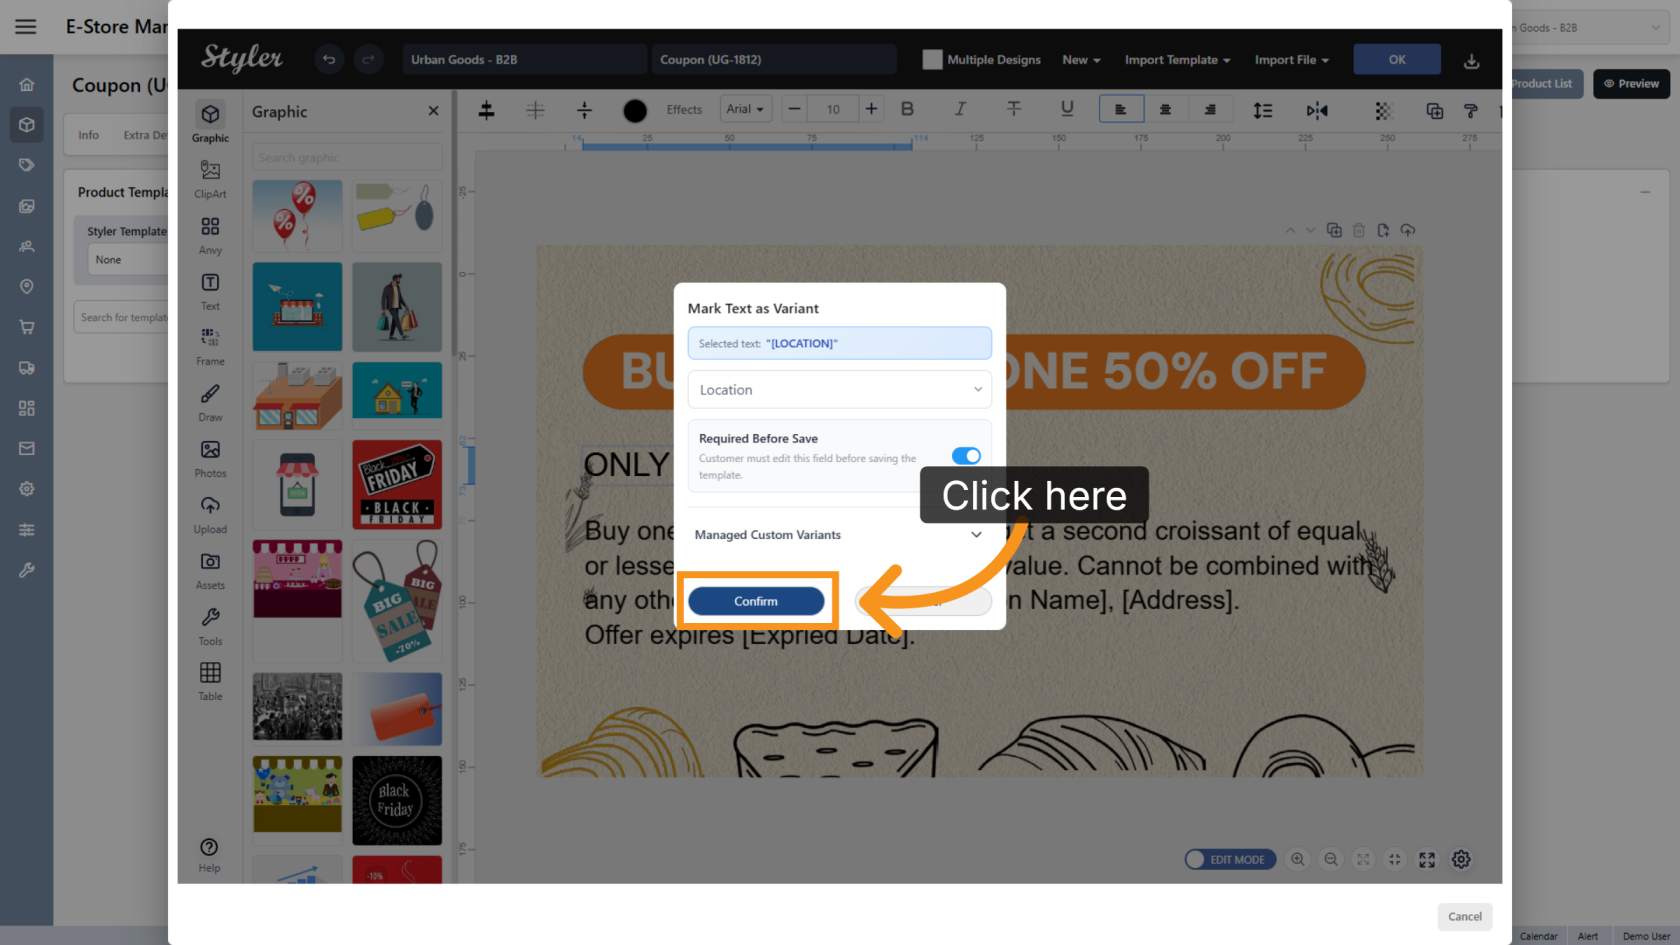
6. Confirm the Variant Settings
Click Confirm to save the variant configuration.
7. Verify the Variant
Hover over the selected text. If a variant tooltip appears, the variant has been configured successfully.
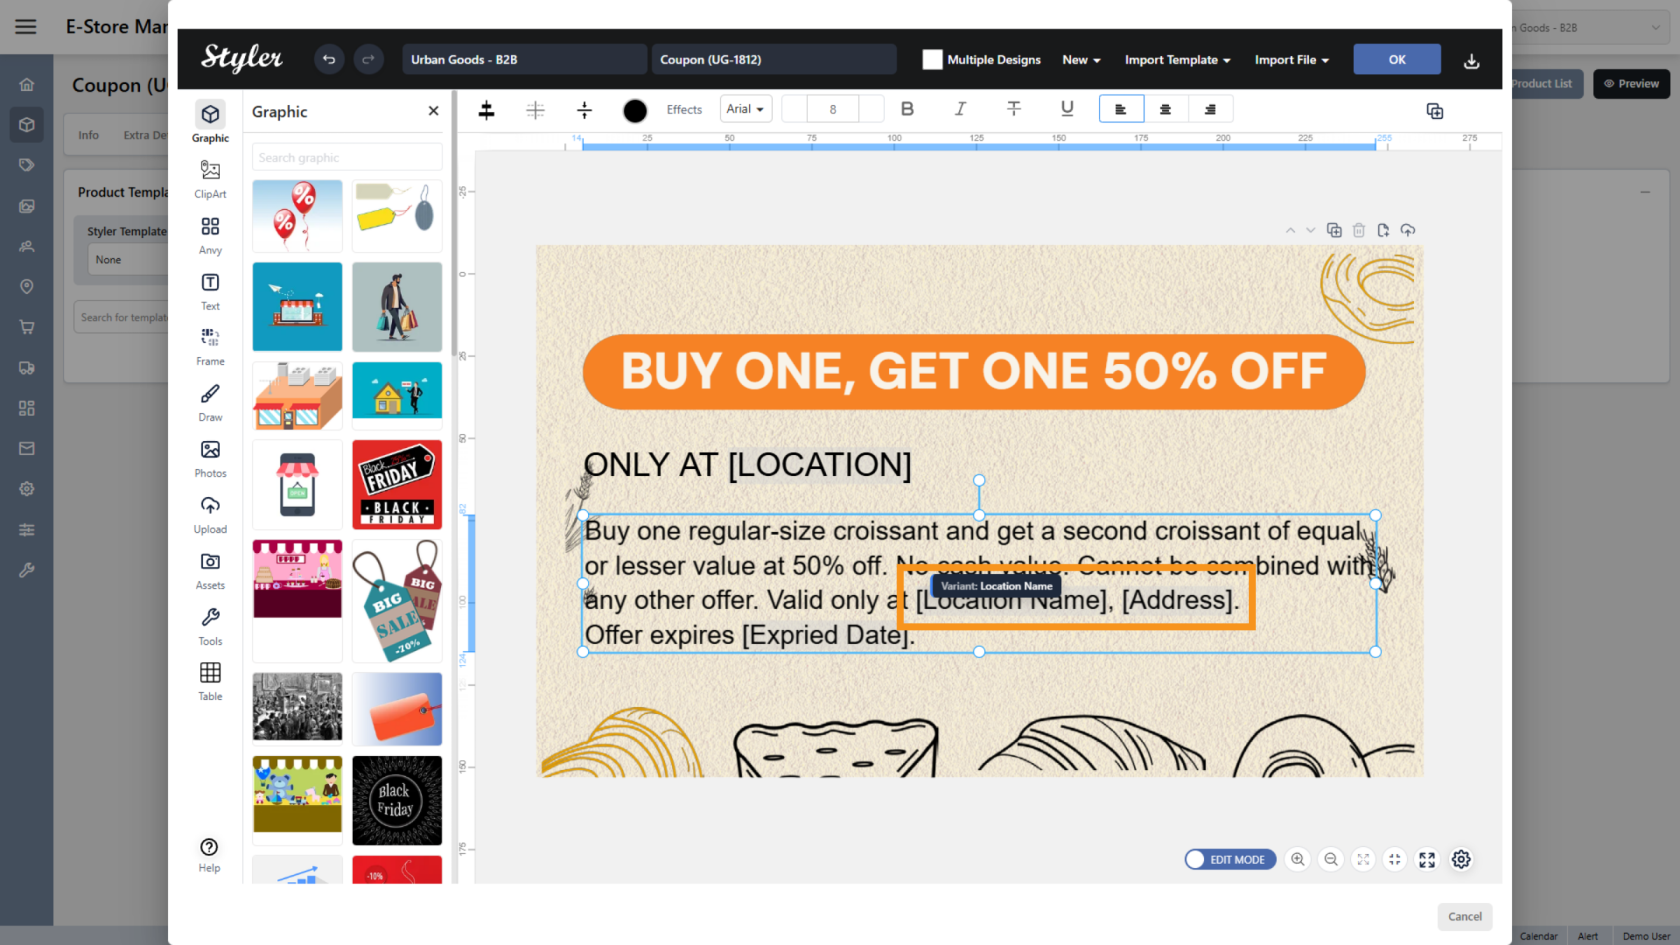
8. Repeat for Additional Text
Repeat the previous steps for any other text selections you want to make editable.
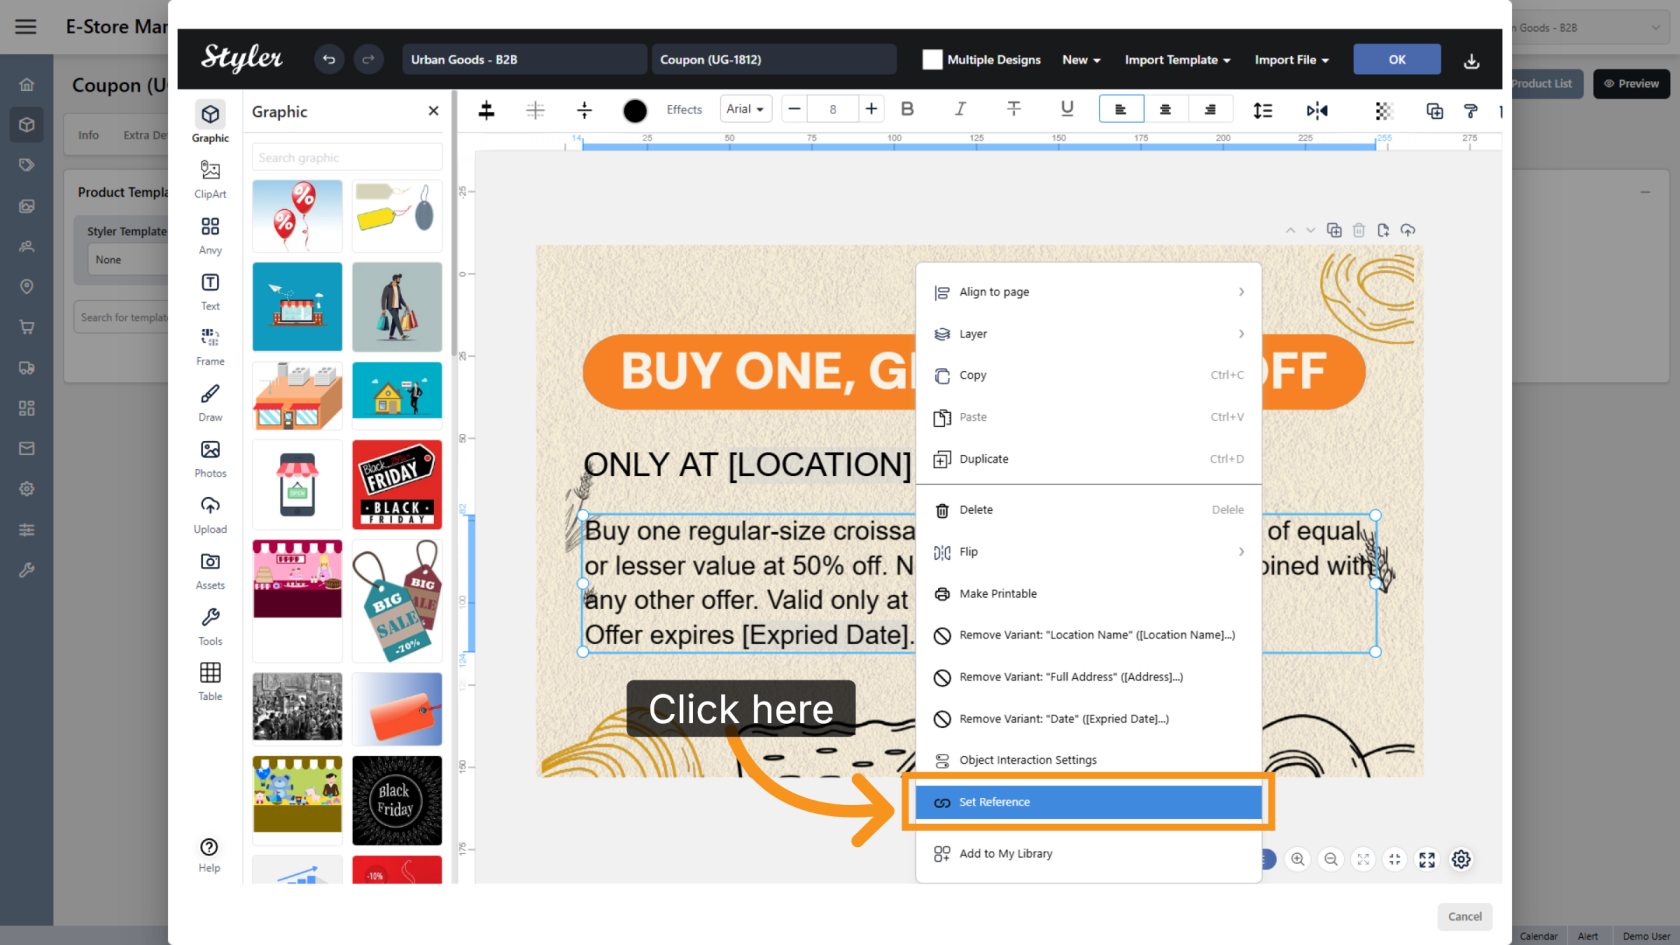
9. Configure a Reference (Optional)
If you want one selected variant to automatically update based on another variant, right-click the variant that should be updated and select Set Reference.
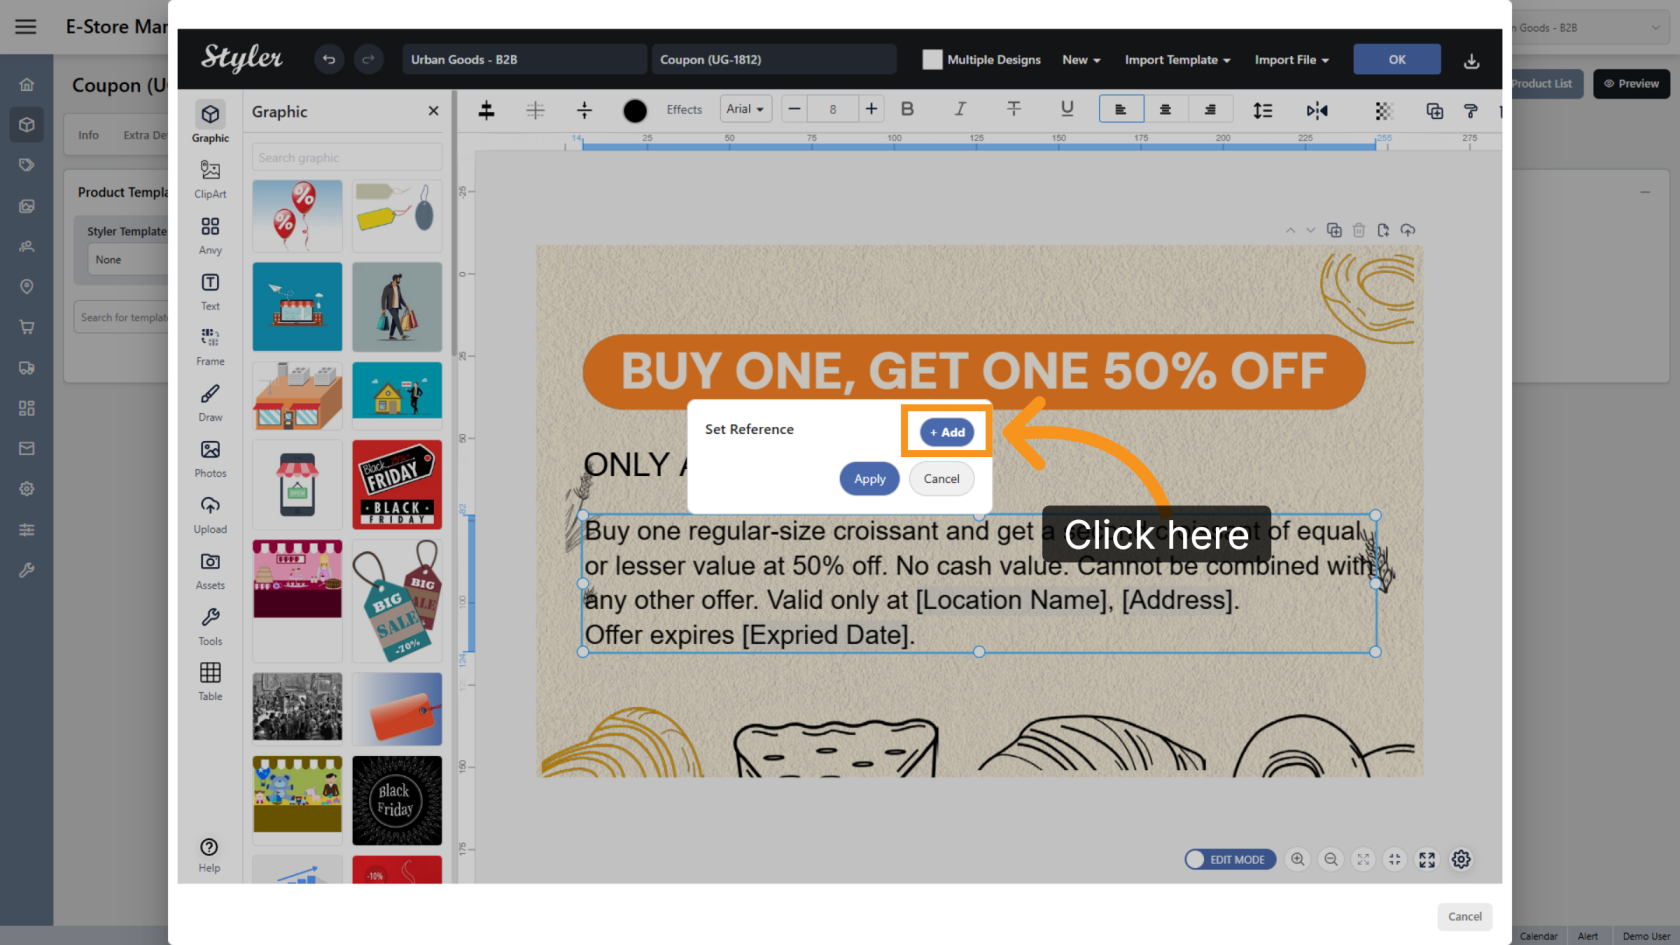
10. Add a Reference
Click Add to create a new reference configuration.
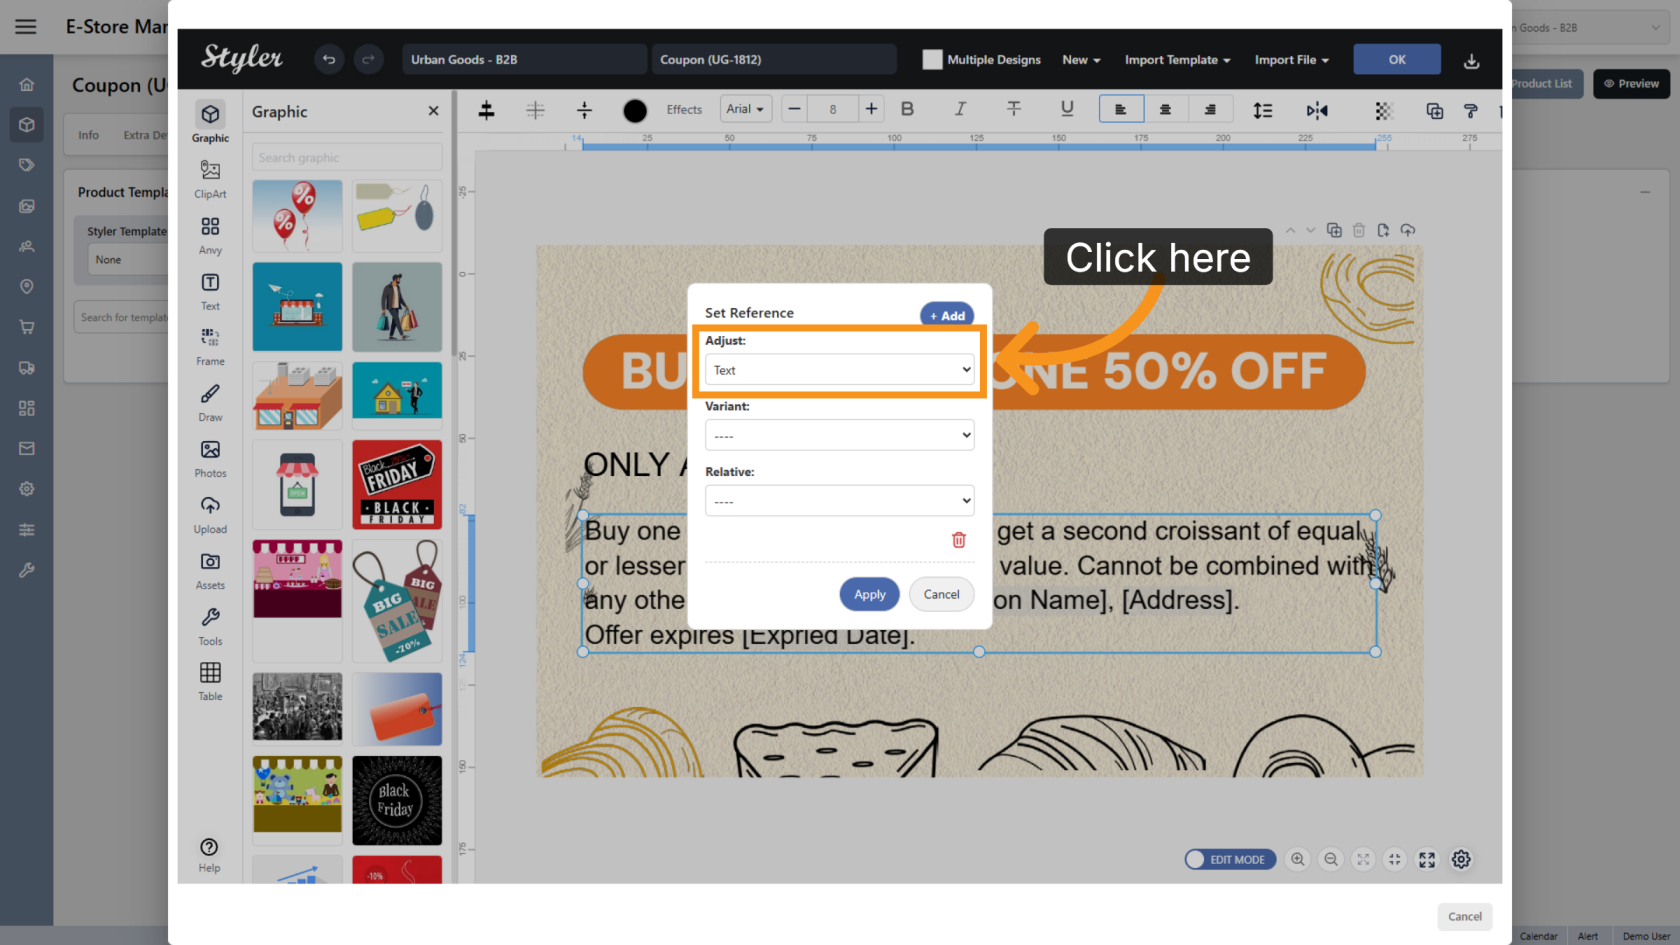
11. Select the Adjust Type
Set Adjust to Text.
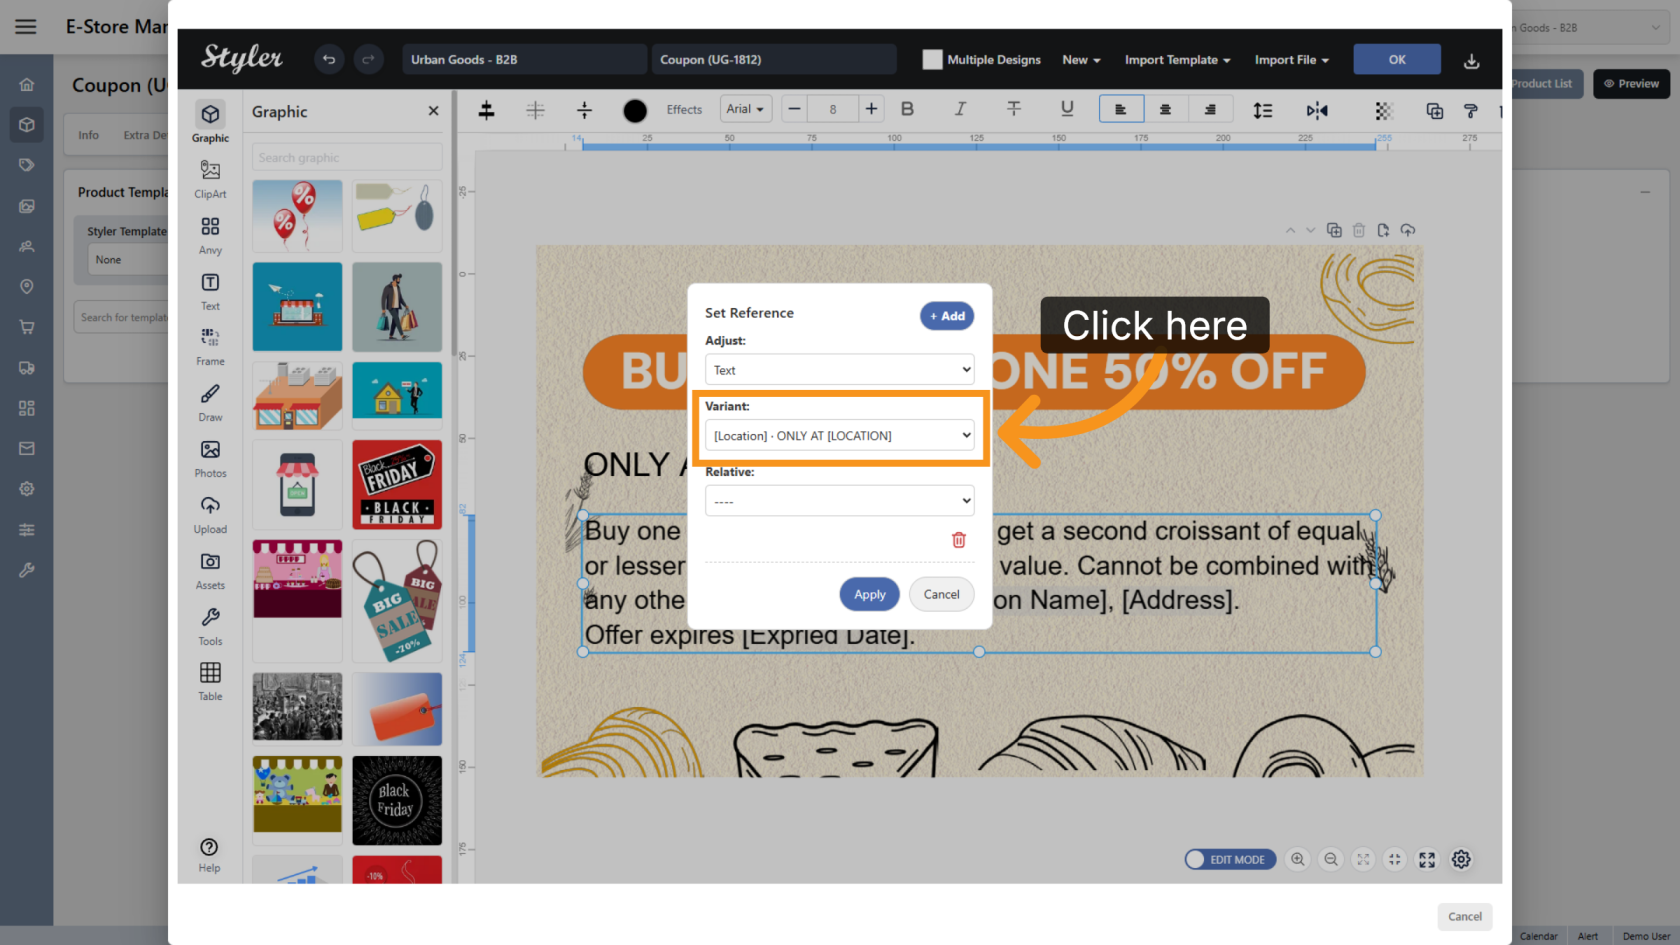
12. Select the Source Variant
Choose the variant that will control the value of the selected variant.
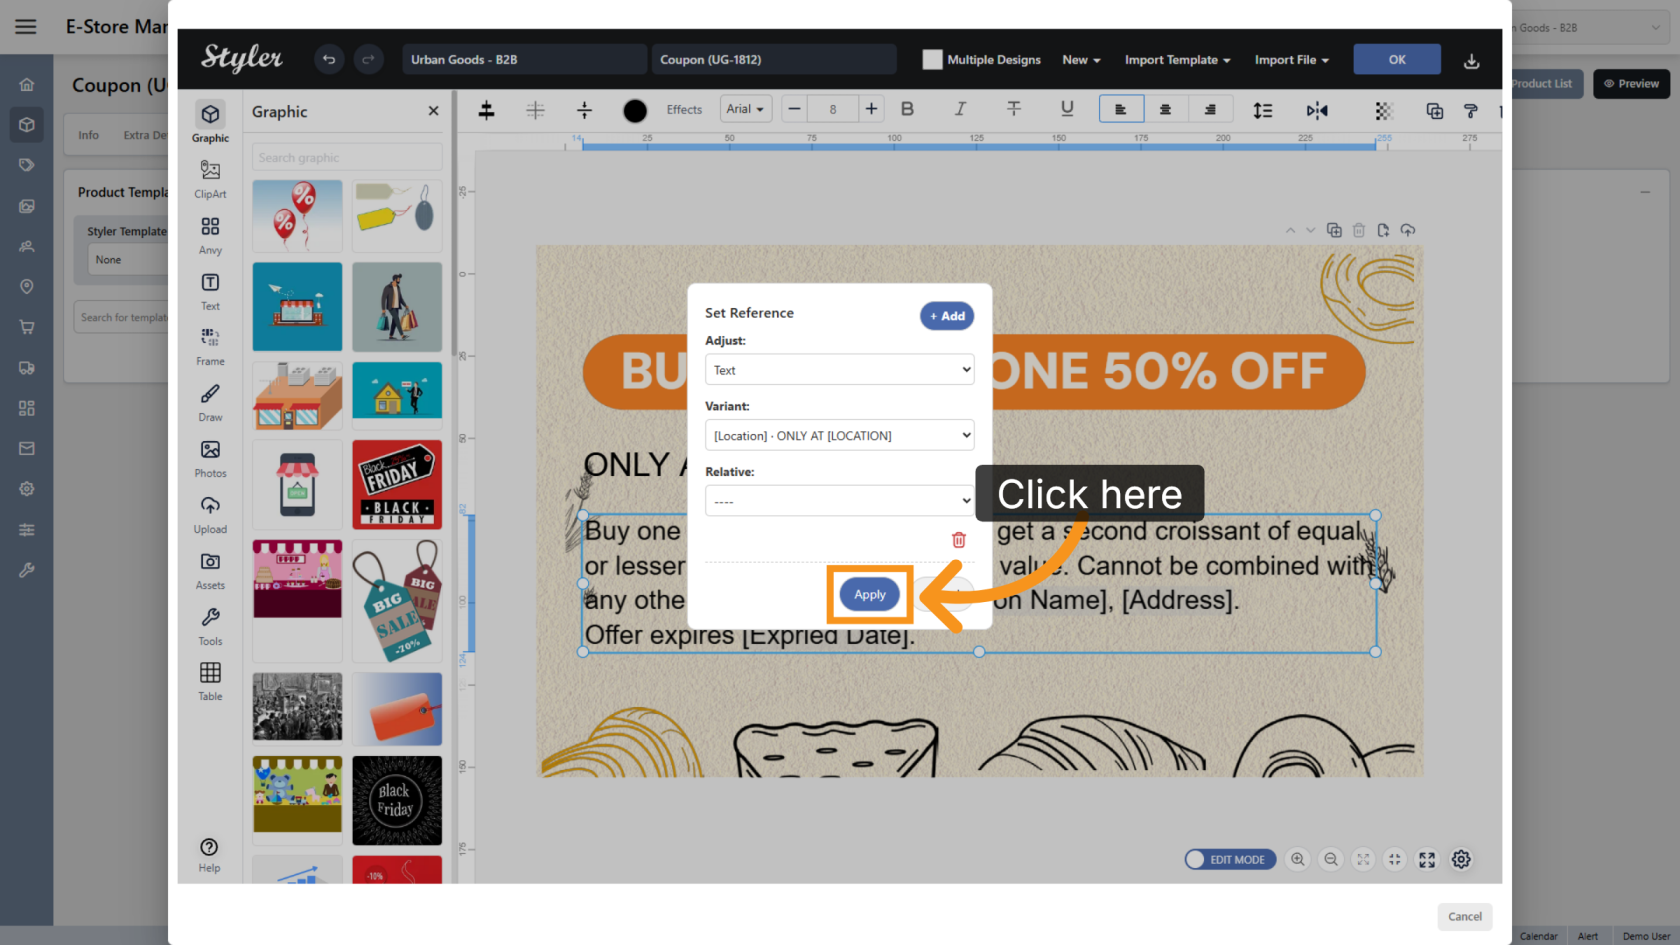
13. Apply the Reference Settings
Click Apply to save the reference configuration.
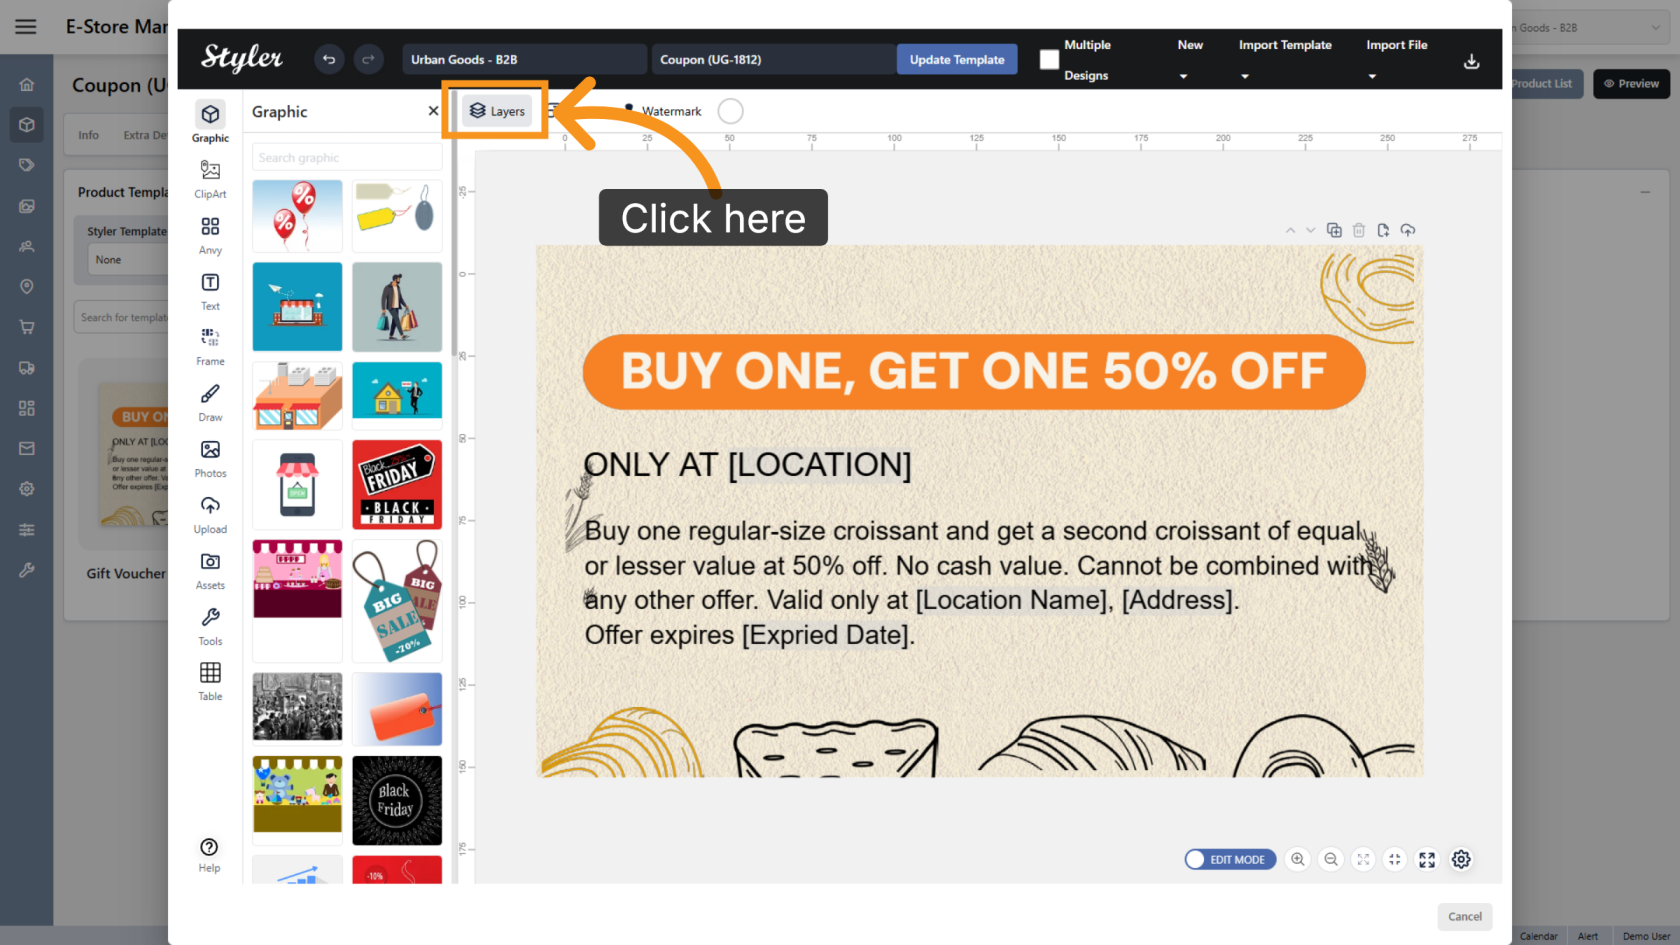
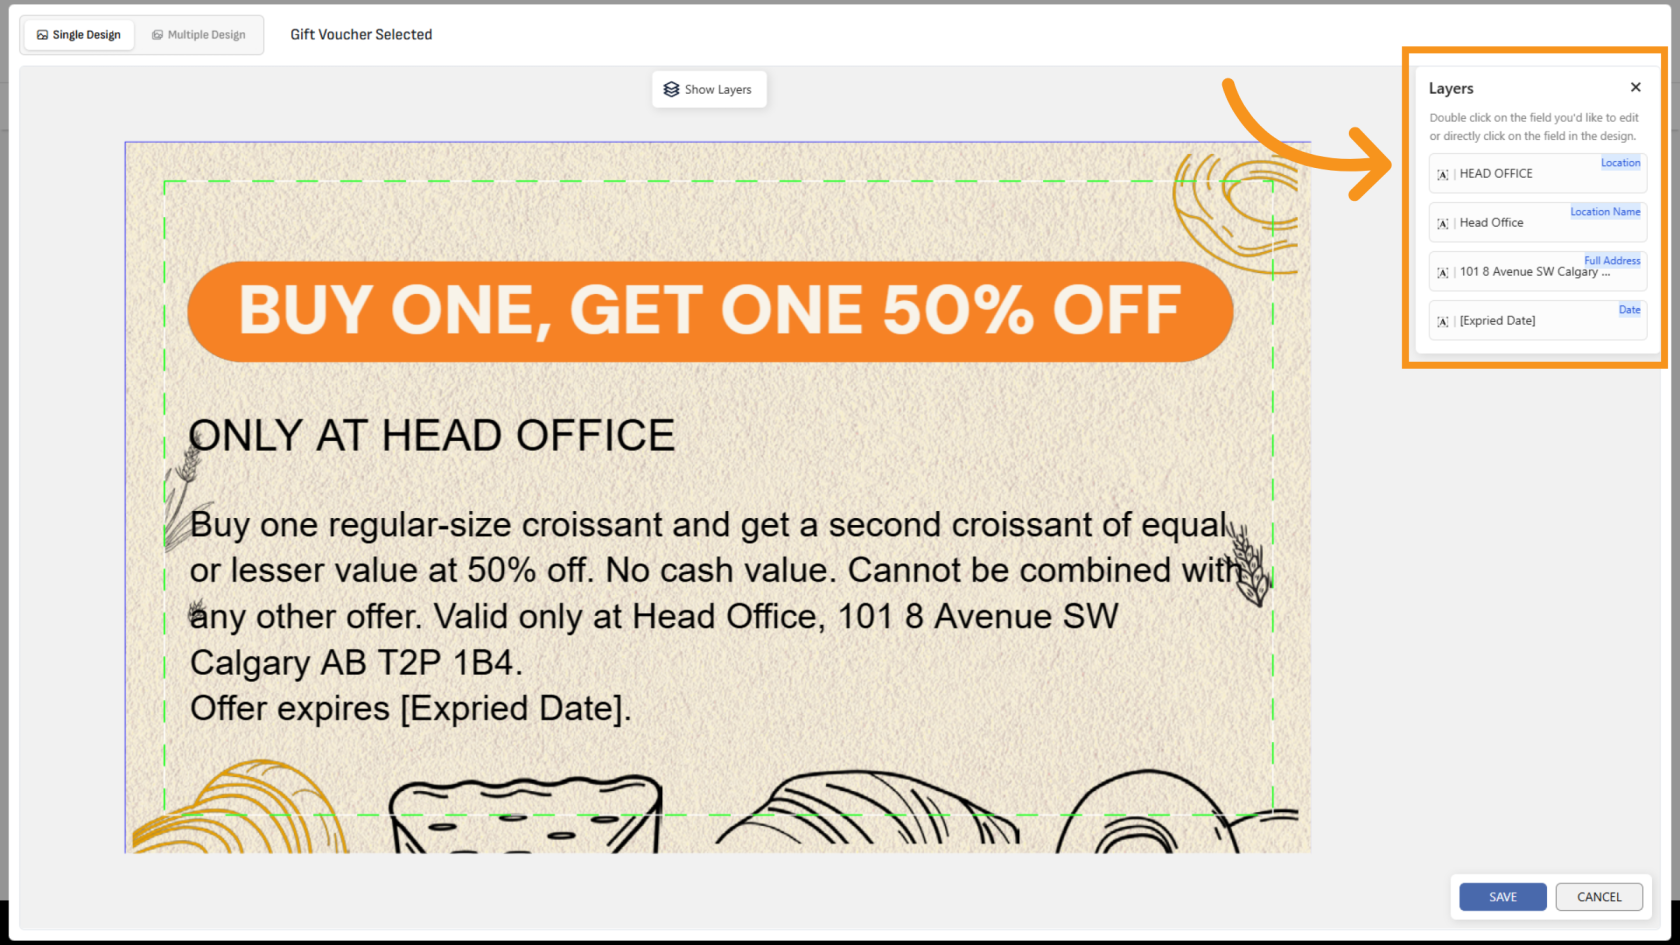
14. Open the Layers Panel
Click Layers to open the layers panel.
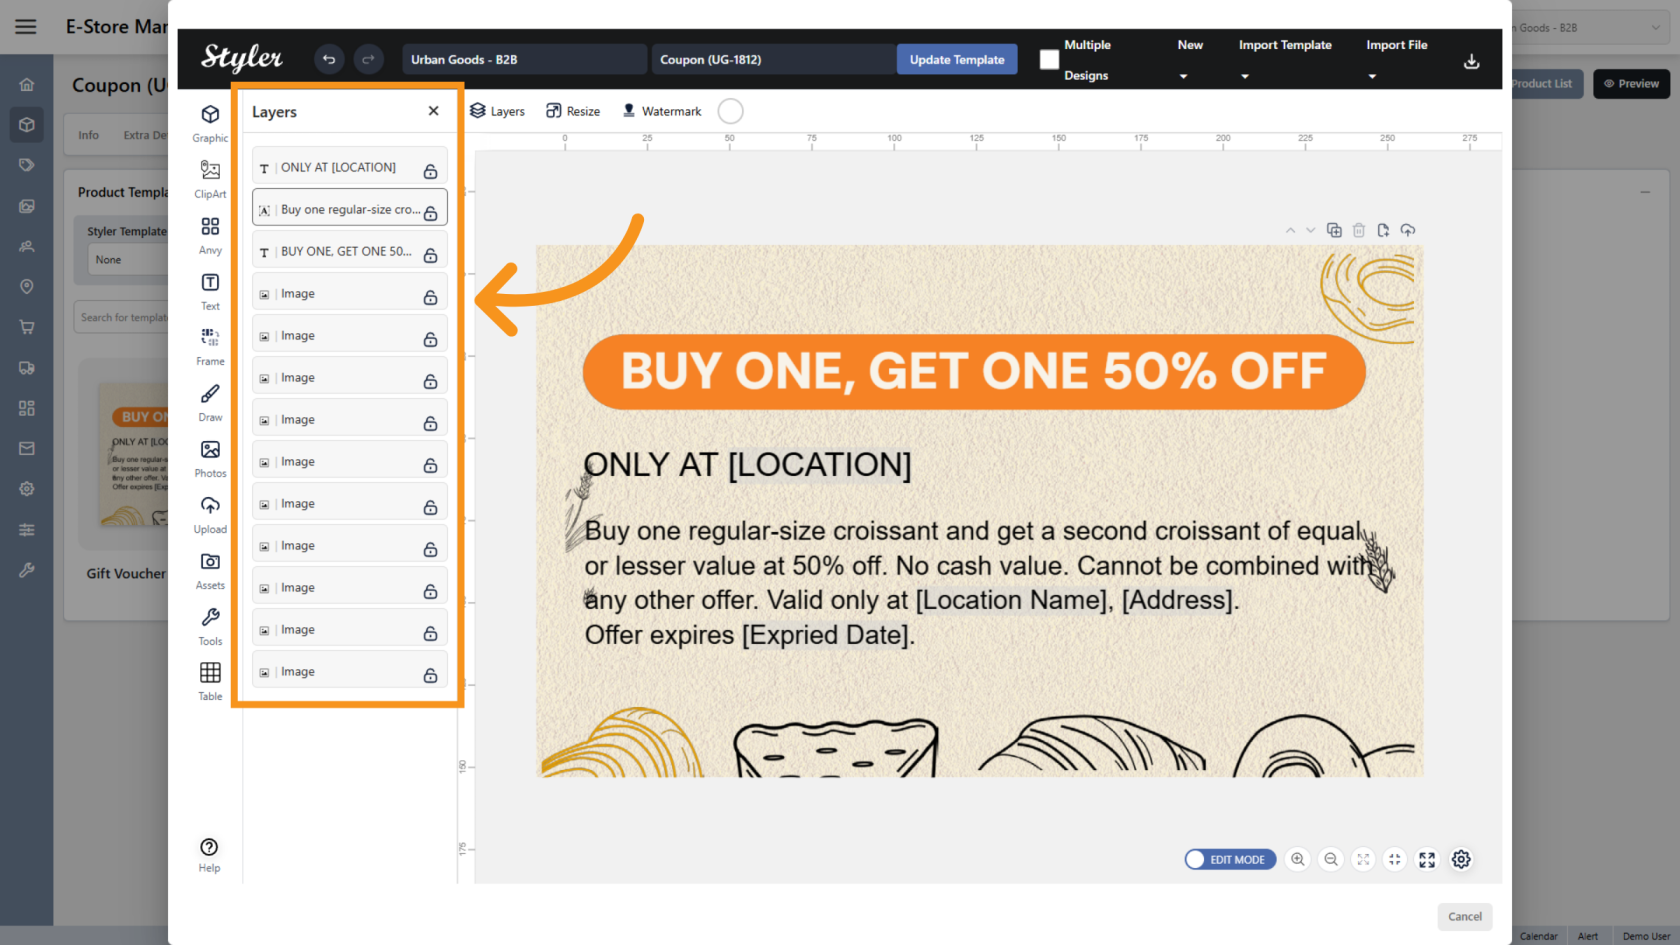
15. Organize the Layers
Drag and drop the layers to match the order of objects in the design. This makes the template easier for users to navigate and edit.
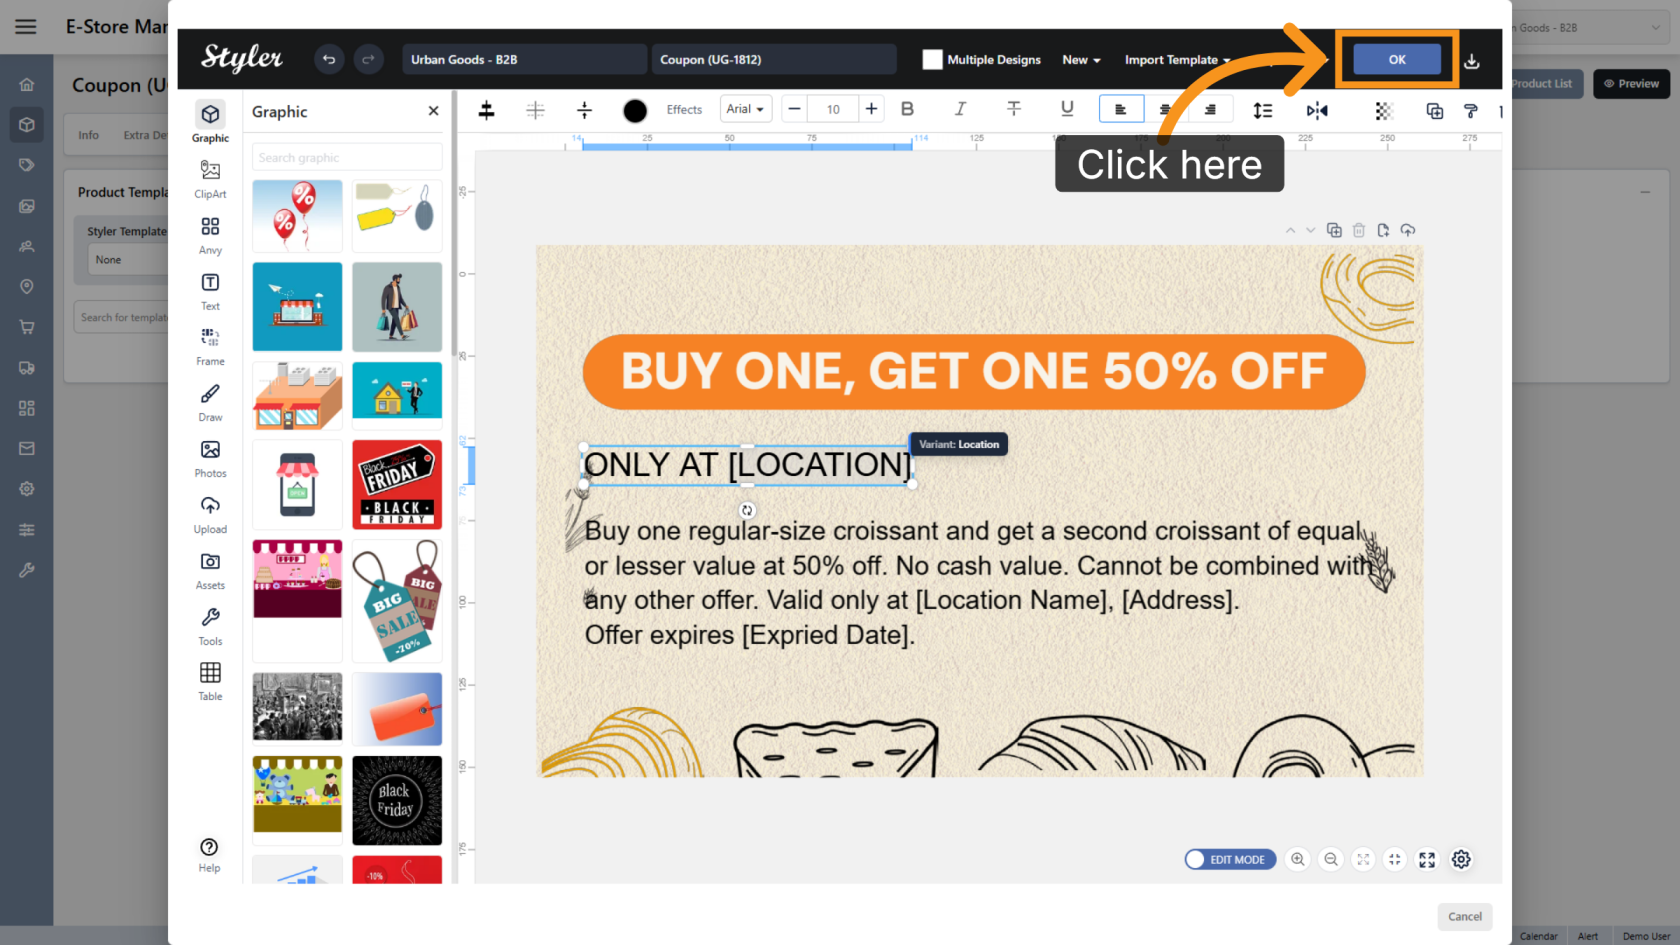
16. Confirm the Configuration
Click OK to finalize the settings.
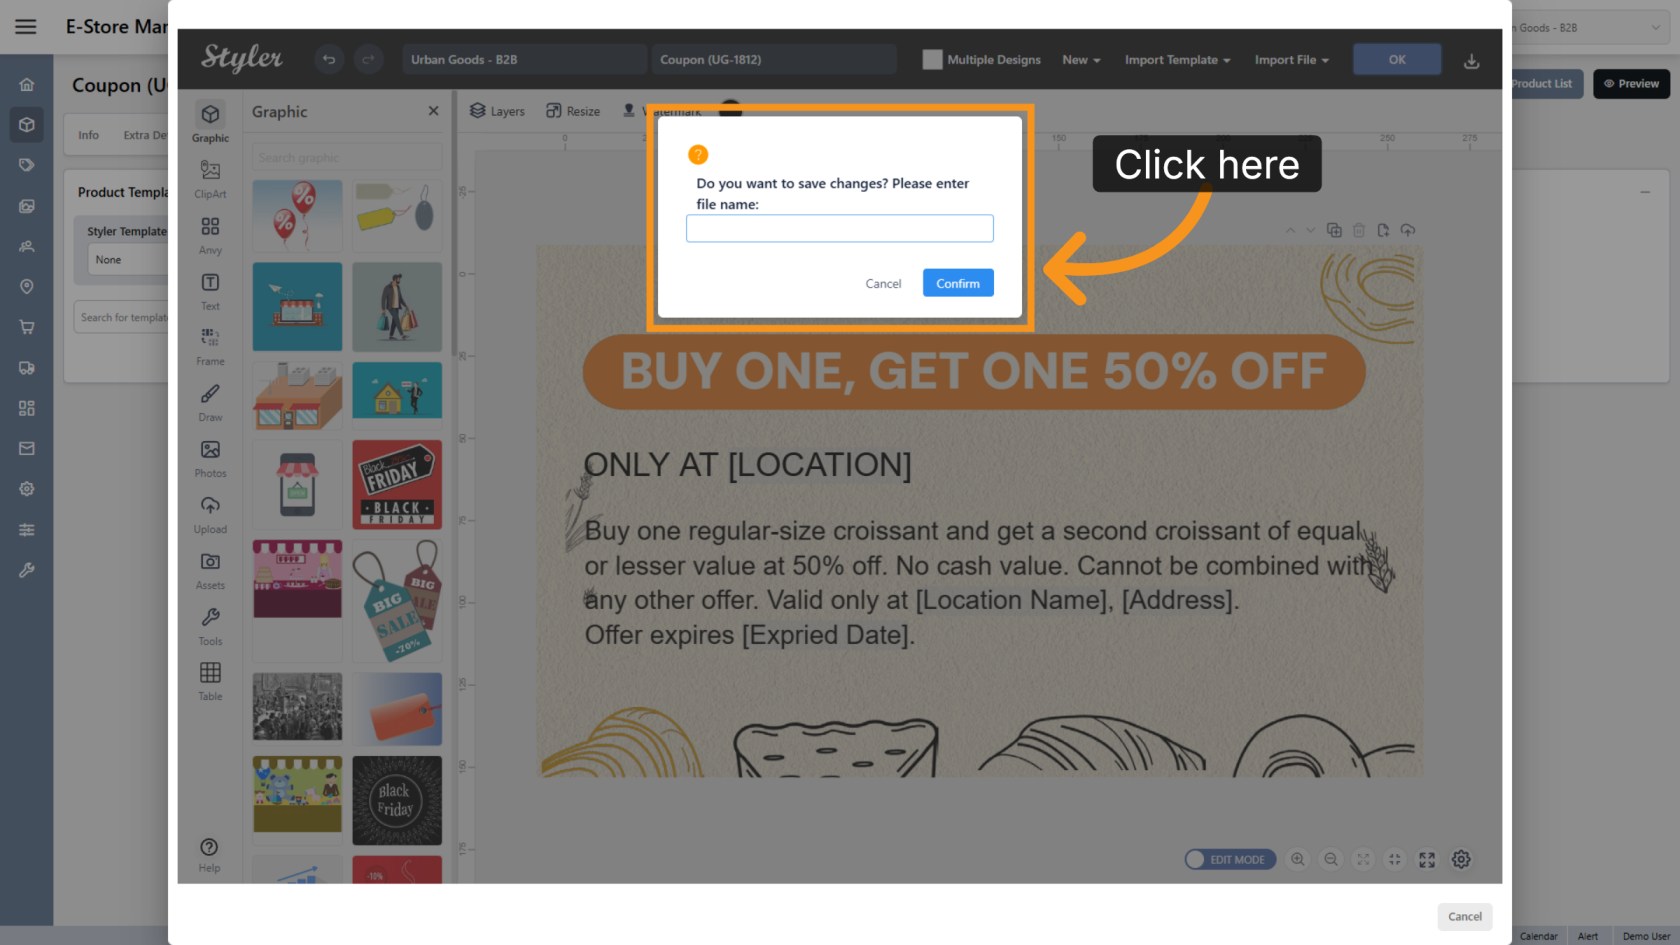
17. Enter the File Name
Enter the file name, then click Confirm.
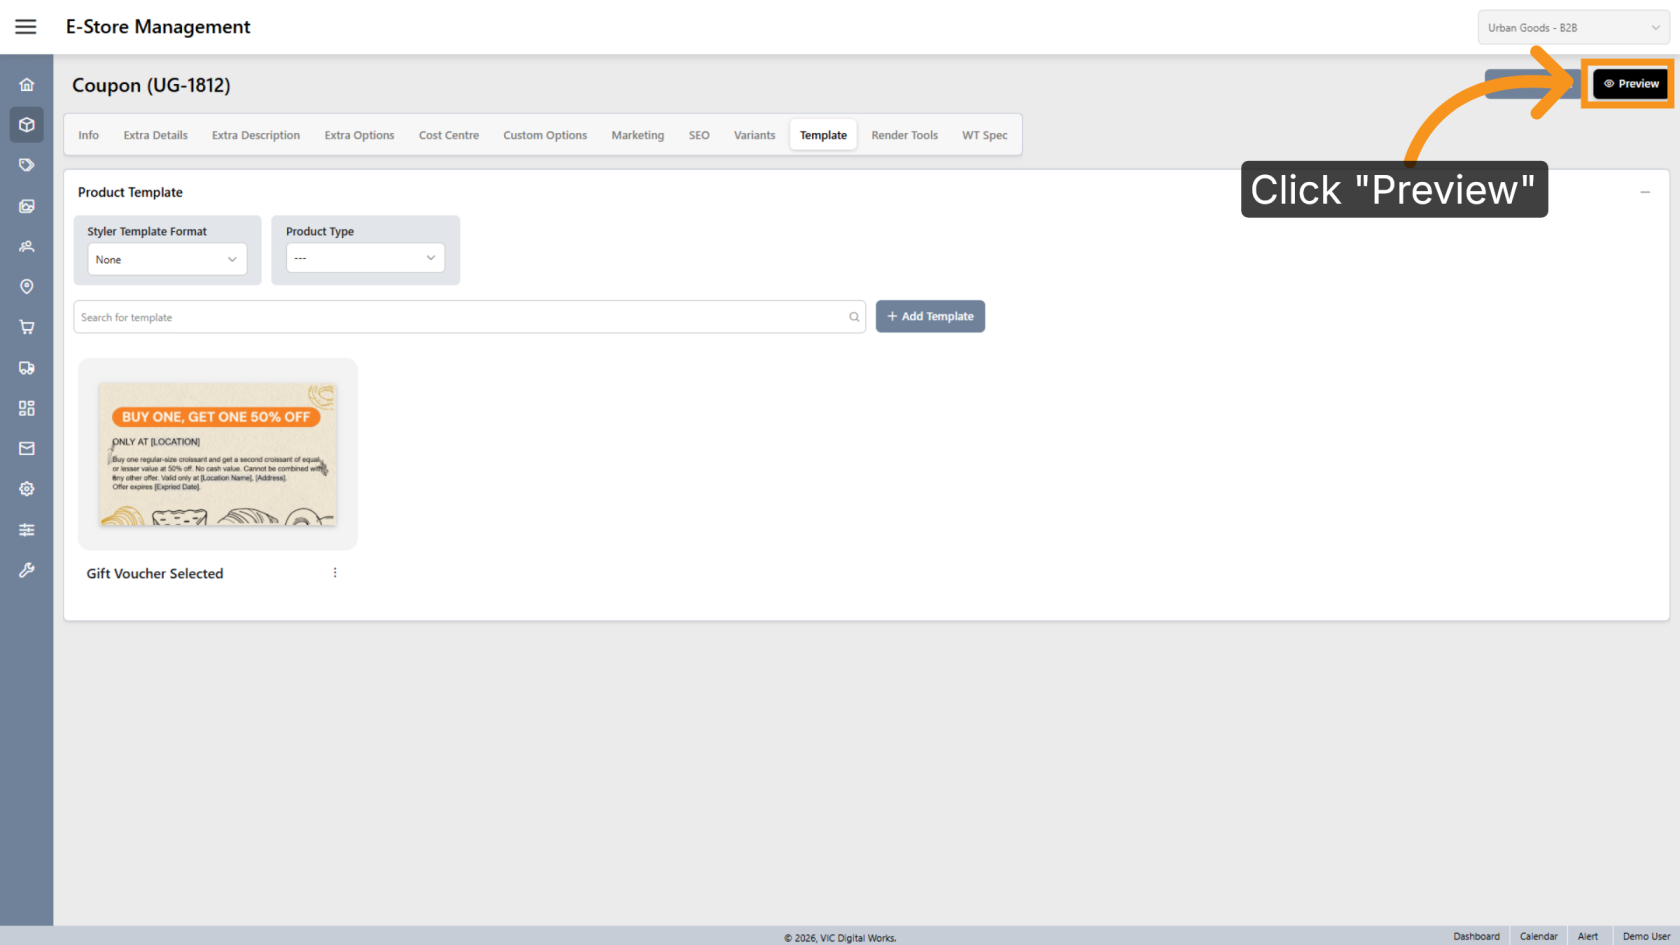
18. Preview the Design
Click Preview to review the final layout.
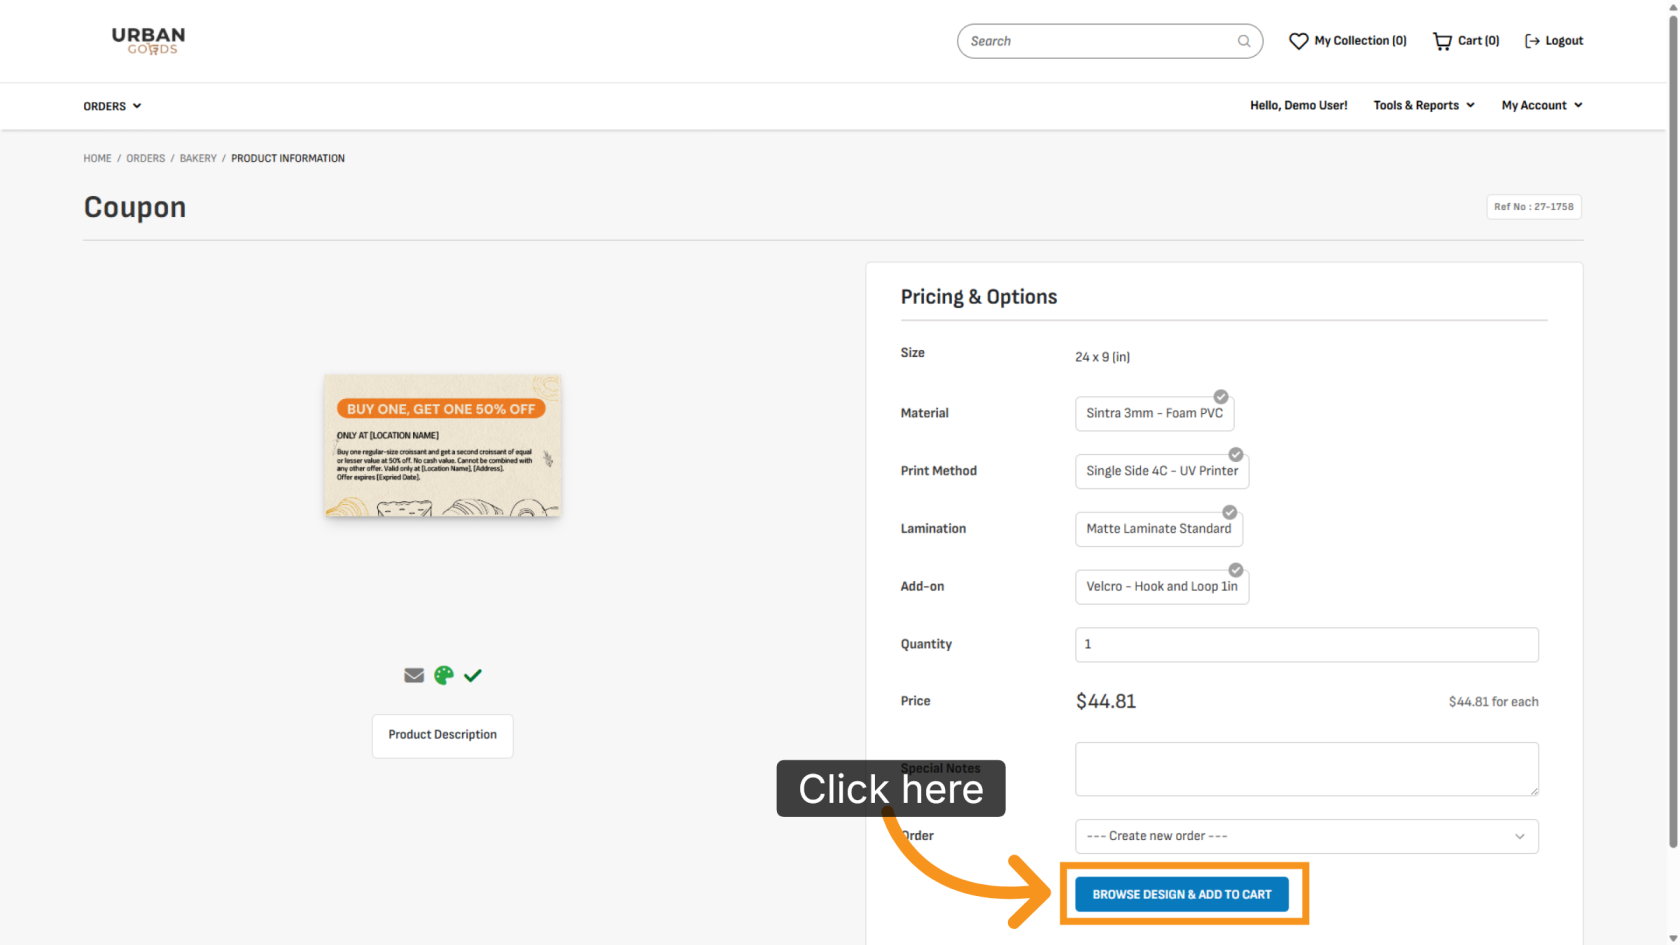
19. Browse Available Designs
Click BROWSE DESIGN & ADD TO CART to select a design.
20. Edit the Template
Double-click a layer to update its content.
You have successfully configured selected variants and variant references. Review the template to ensure all editable text and reference settings work as expected.