Menu Template
This tutorial guides you through configuring a menu template with editable headers, menu items, and pricing. Pricing can be configured using either a single font size or separate font sizes for the integer and decimal portions.
Video Tutorial
1. Mark the Column Header as a Variant
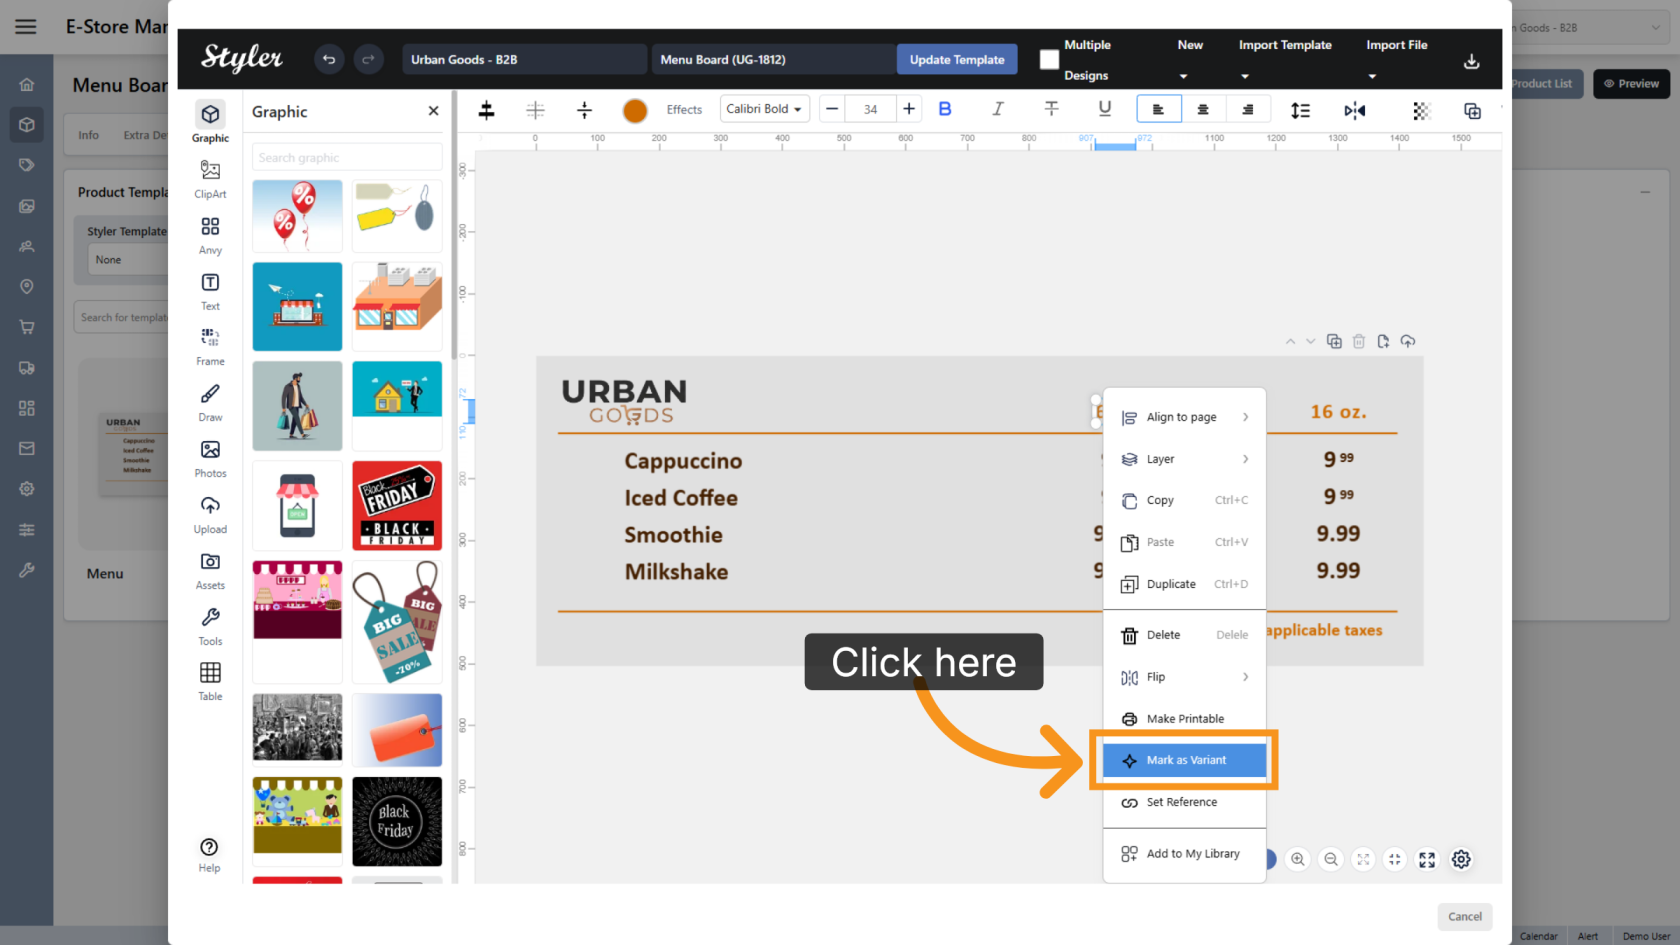
Right-click the first column header, then select Mark as Variant.
2. Select the Variant Type
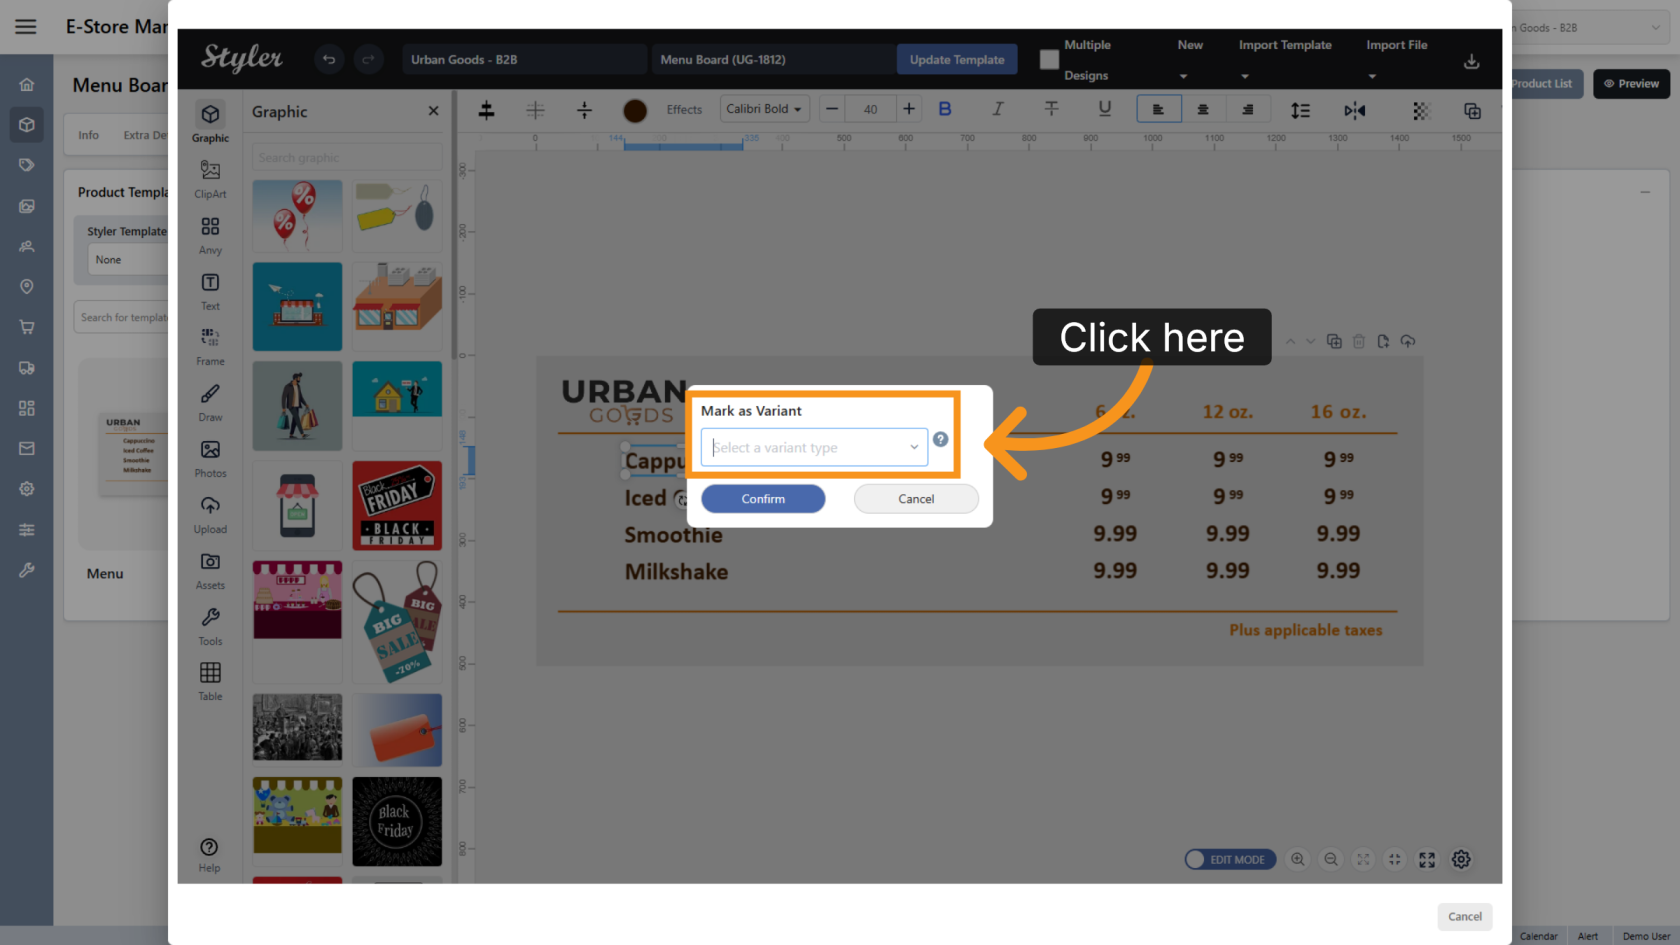
Click Select a variant type and enter a descriptive name for the column header. Include a number in the name to identify the column easily.

3. Confirm the Settings
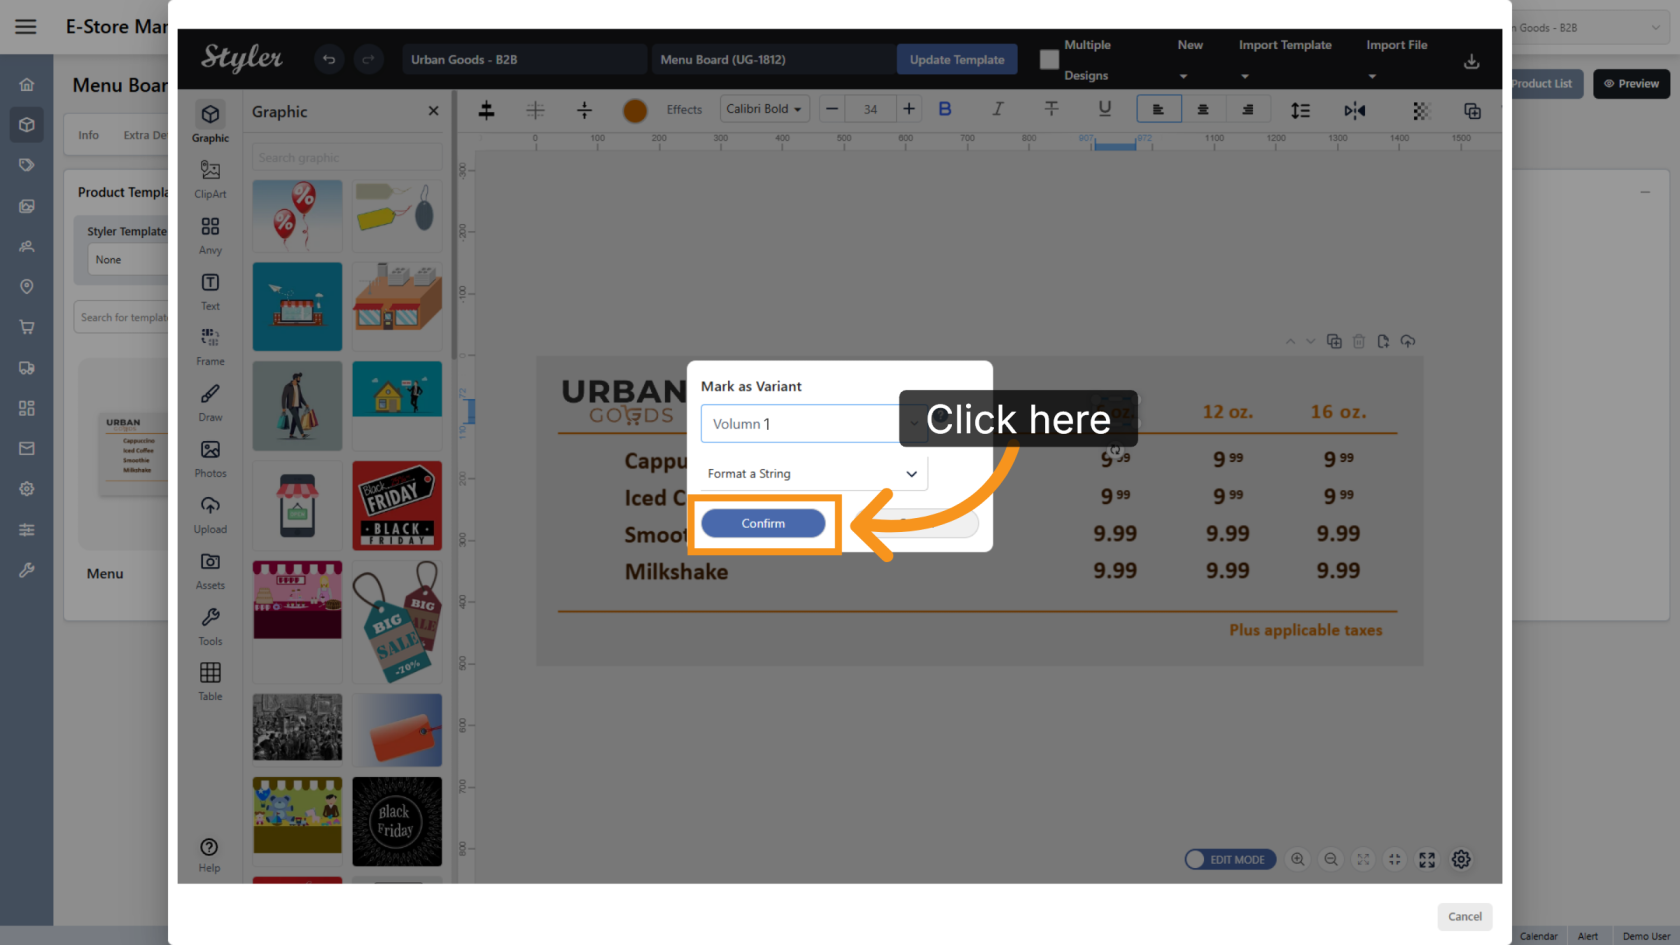
Click Confirm to save the variant settings. Repeat the same process for the remaining column headers.
4. Mark a Menu Item as a Variant
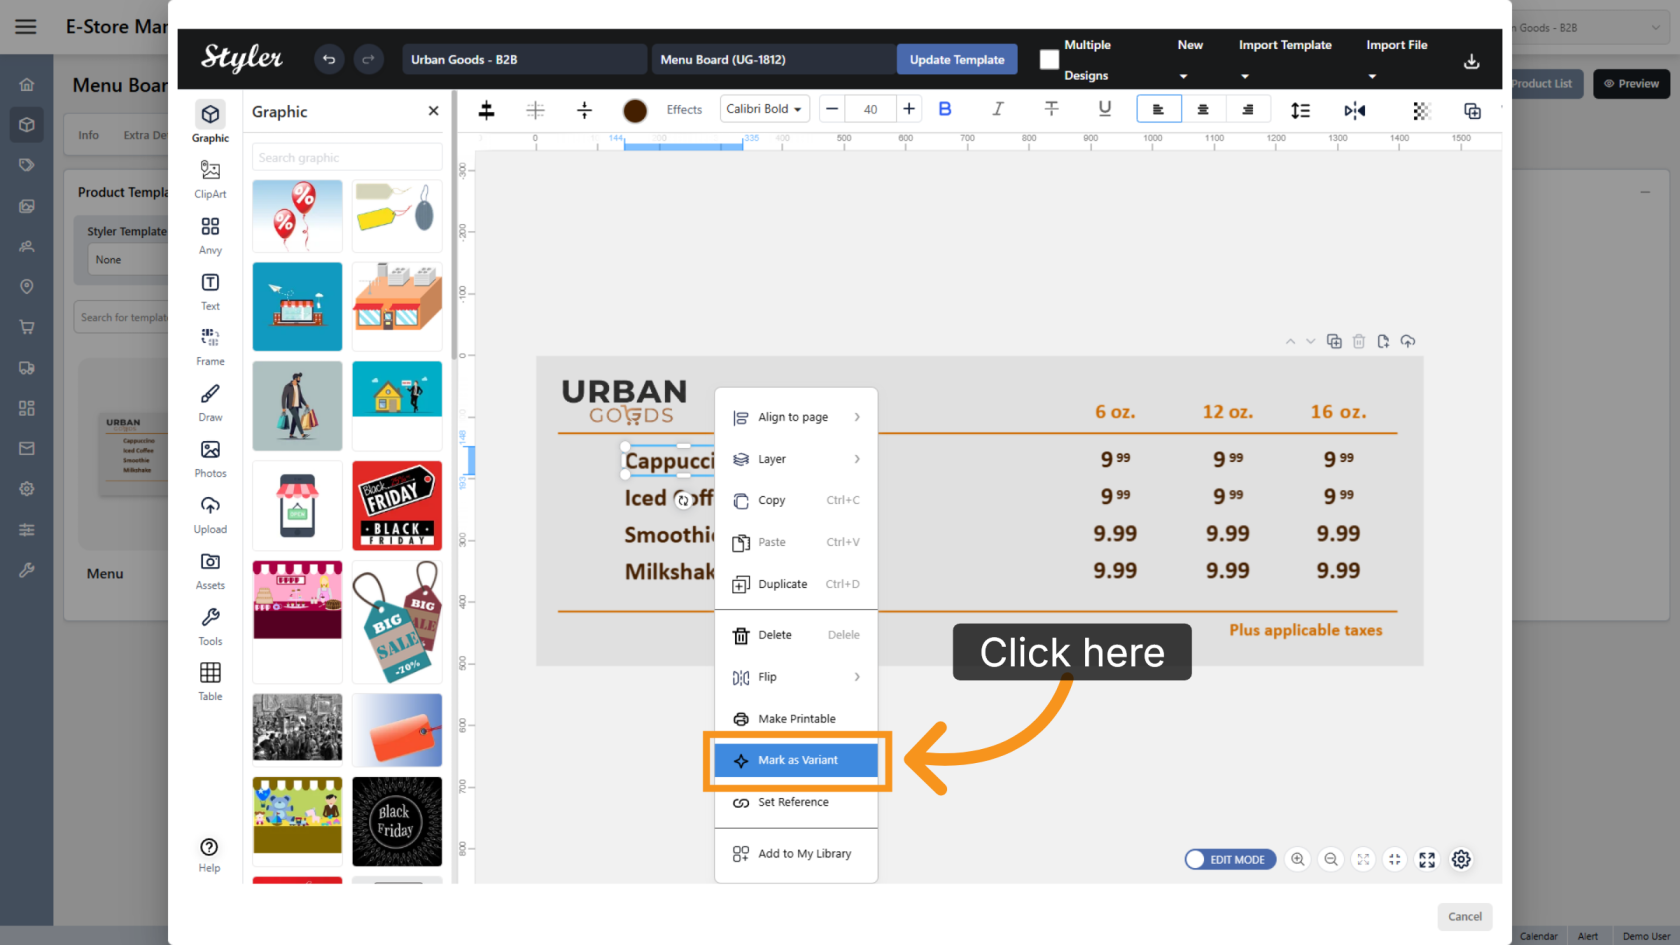
Right-click the first menu item and select Mark as Variant.
5. Select the Variant Type
Click Select a variant type and enter a descriptive name for the menu item. Include a number in the name to identify the row easily.
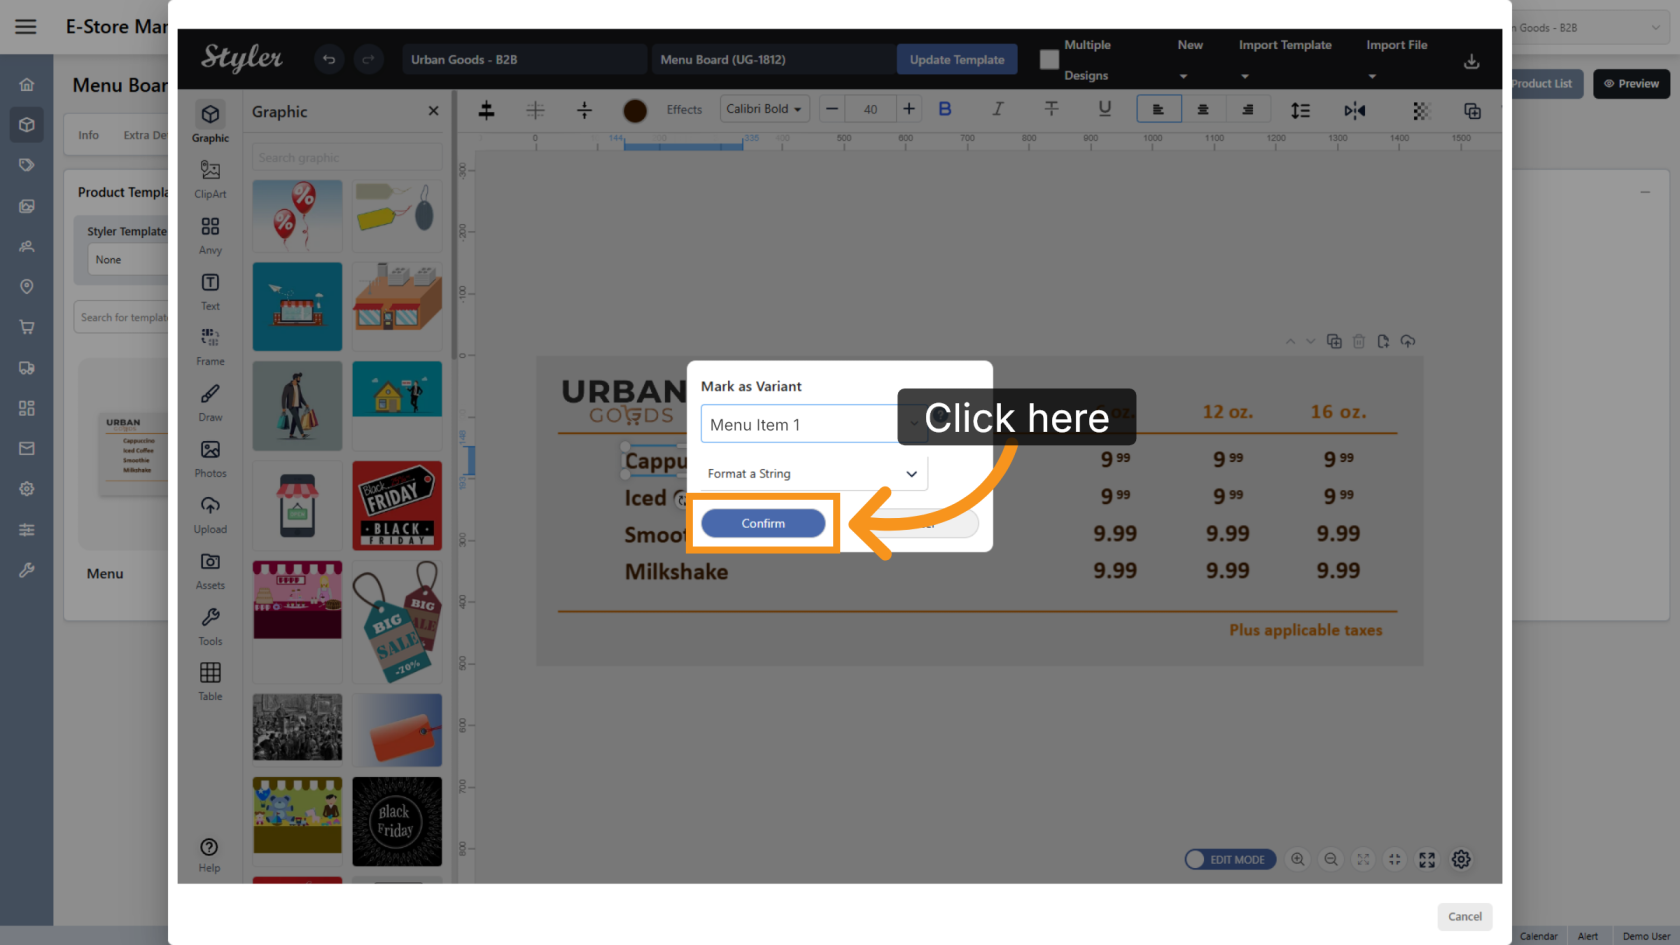
6. Confirm the Settings
Click Confirm to save the variant settings. Repeat the same process for the remaining menu items.
7. Configure Price Formatting
Pricing can be configured in two ways:
- Different font sizes for the integer and decimal portions.
- A single font size for the entire price.
The following steps demonstrate the different font-size options. If you are using a single font size, skip to Step 25.
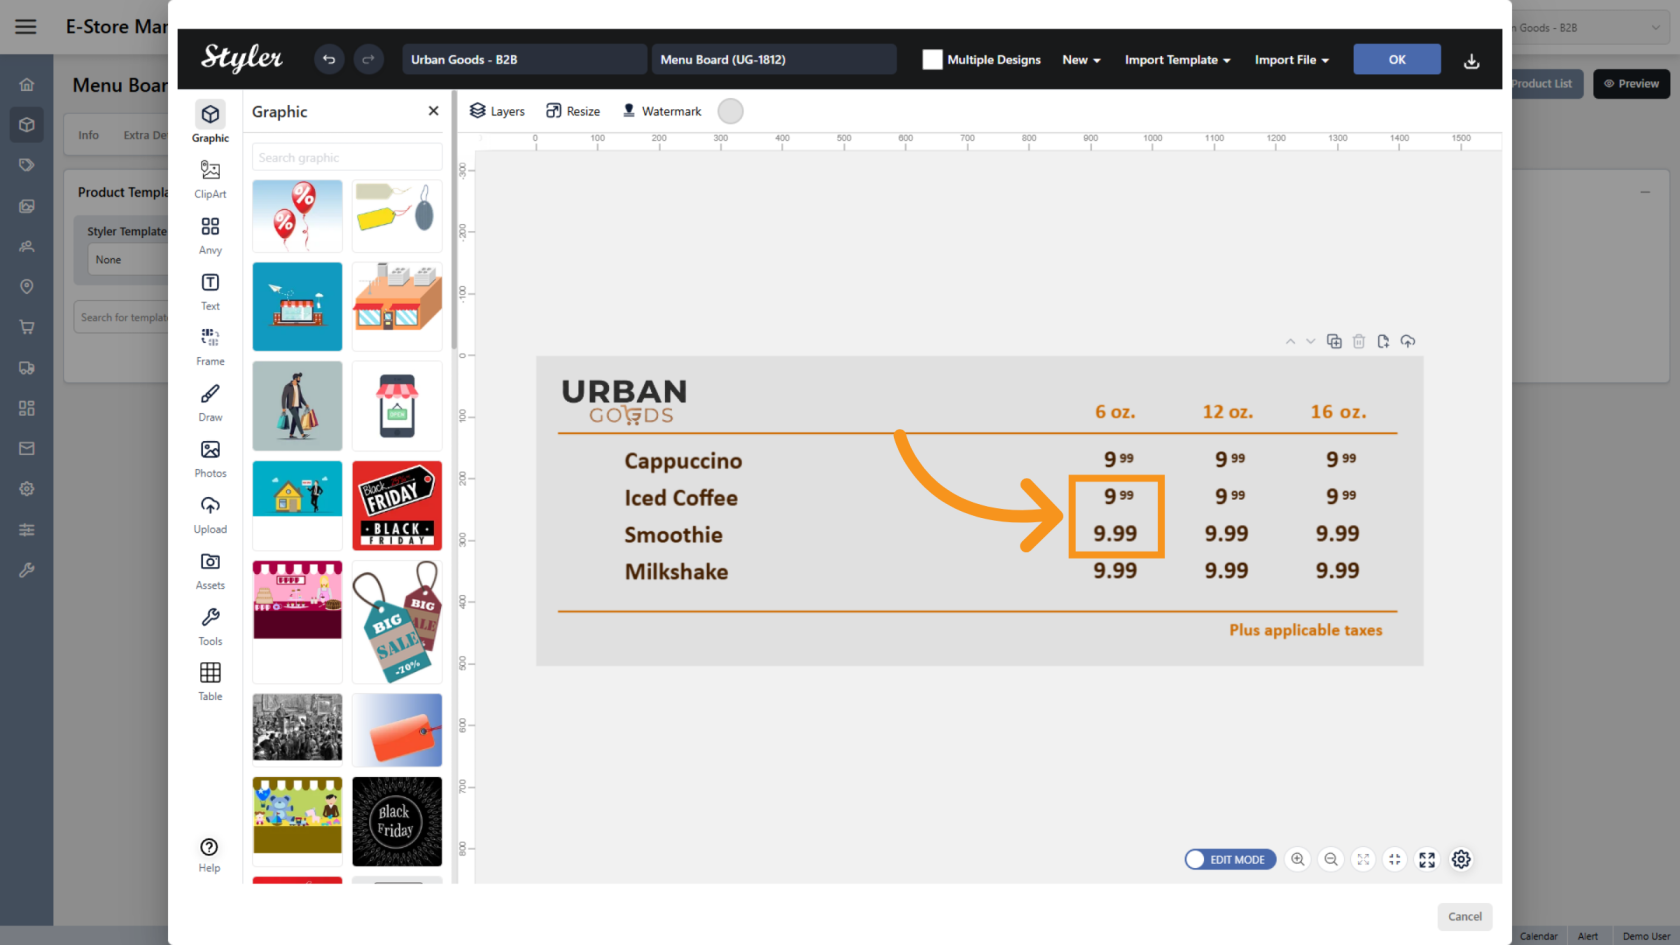
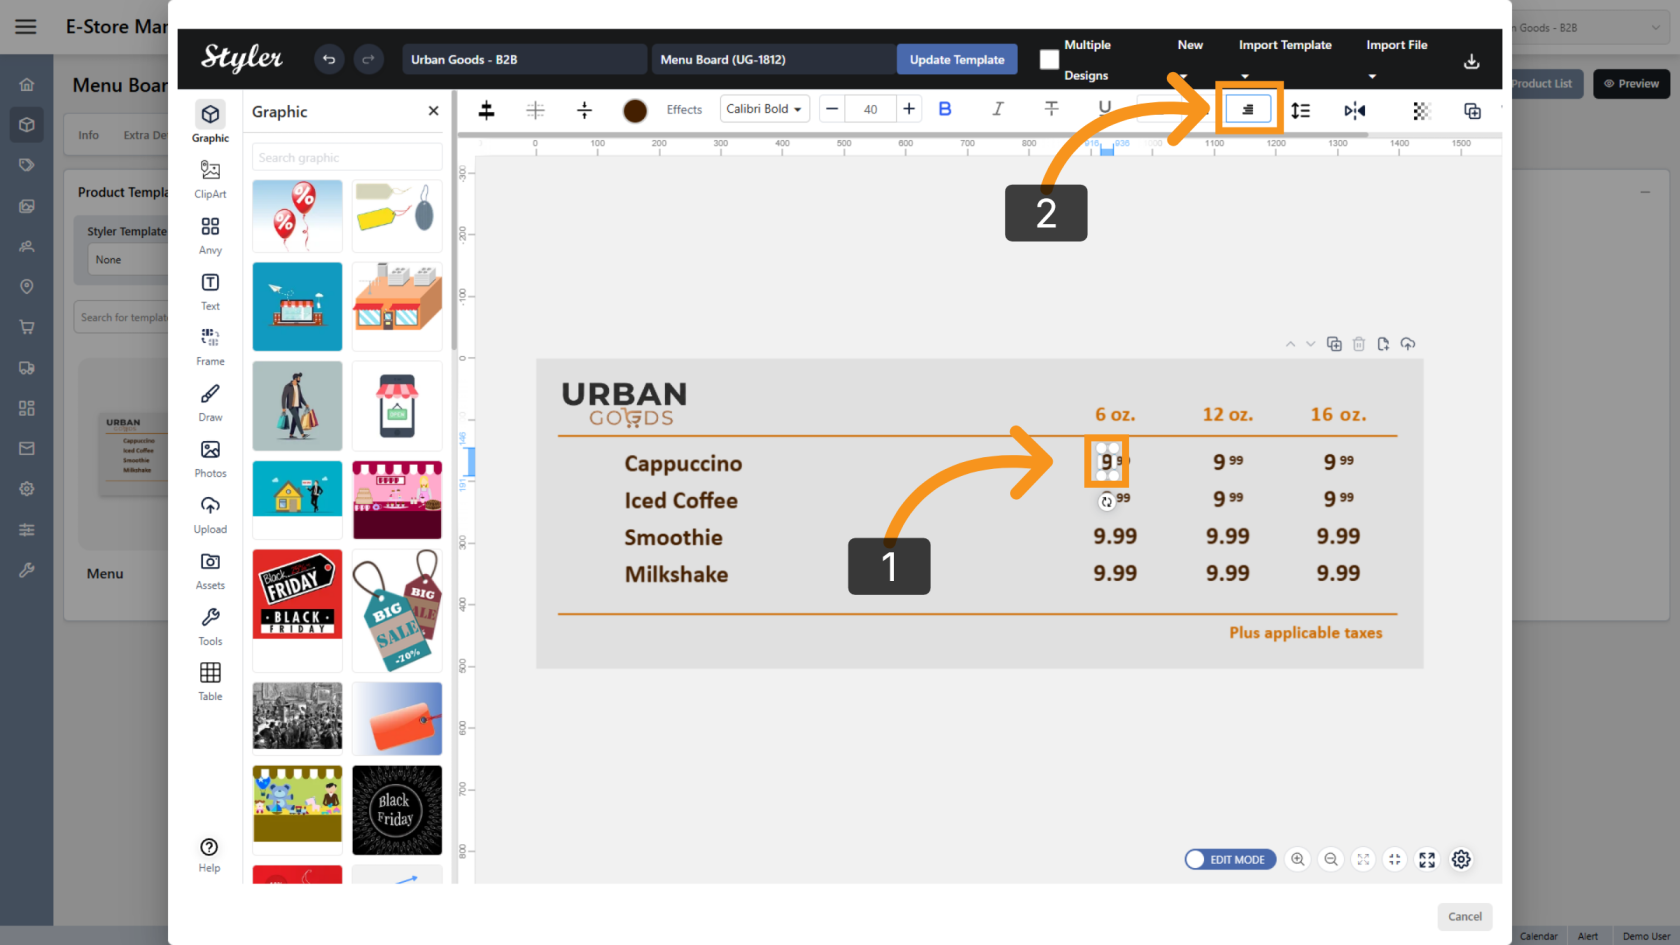
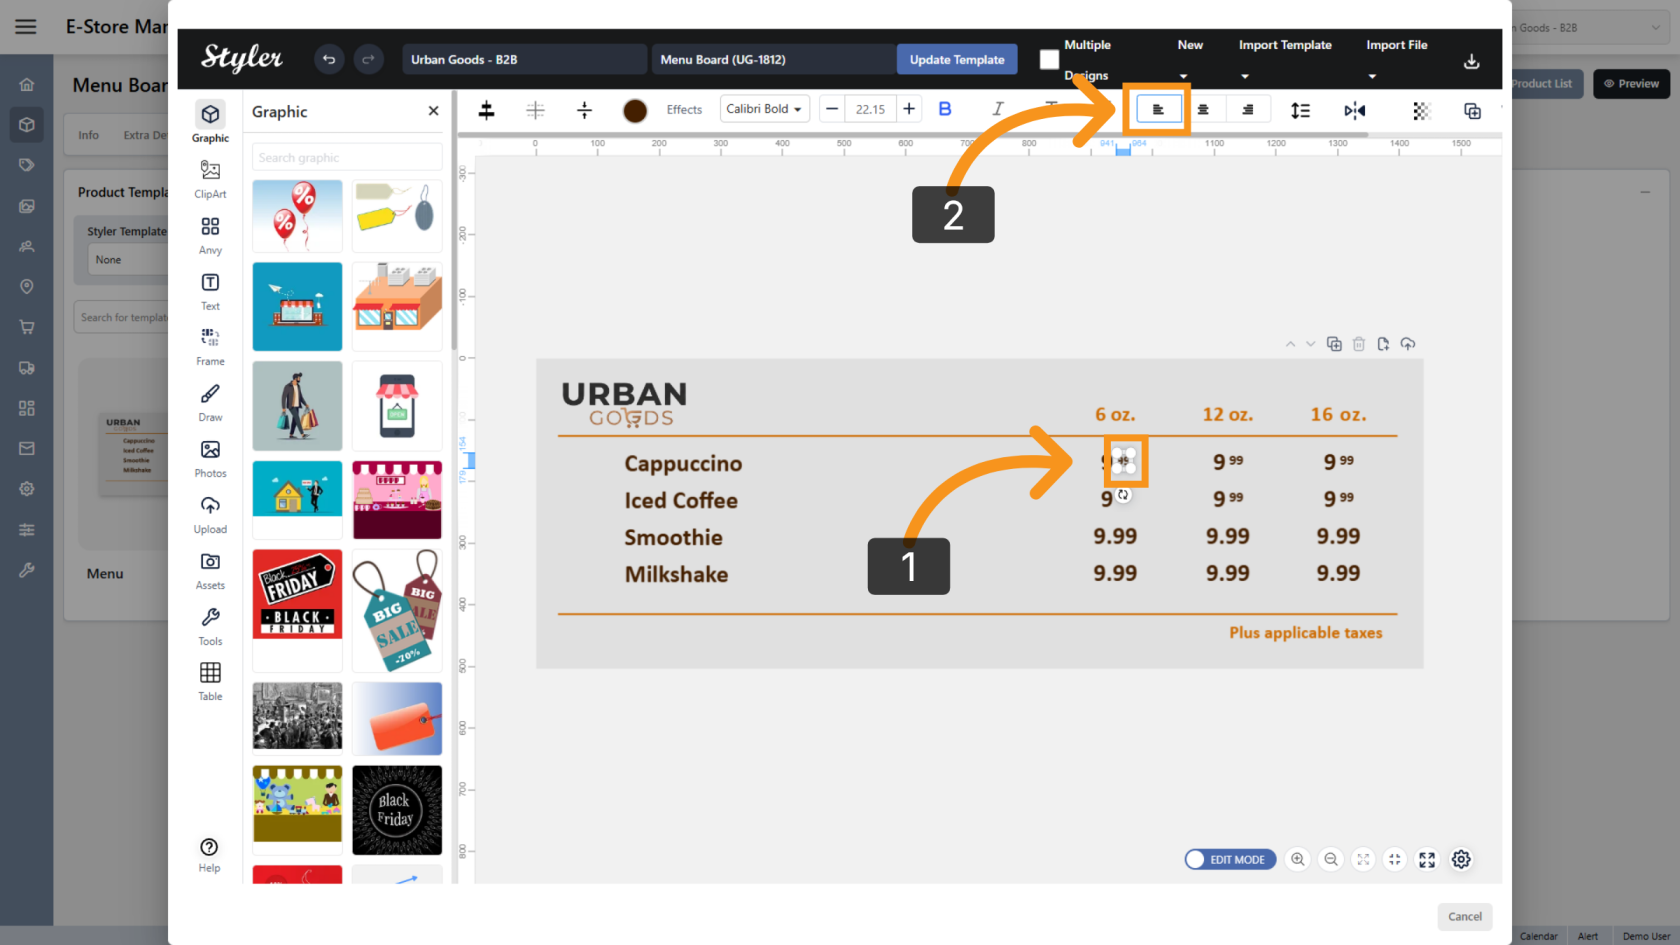
8. Set Integer Alignment
Select the integer portion of the price and set Text Align to Right.
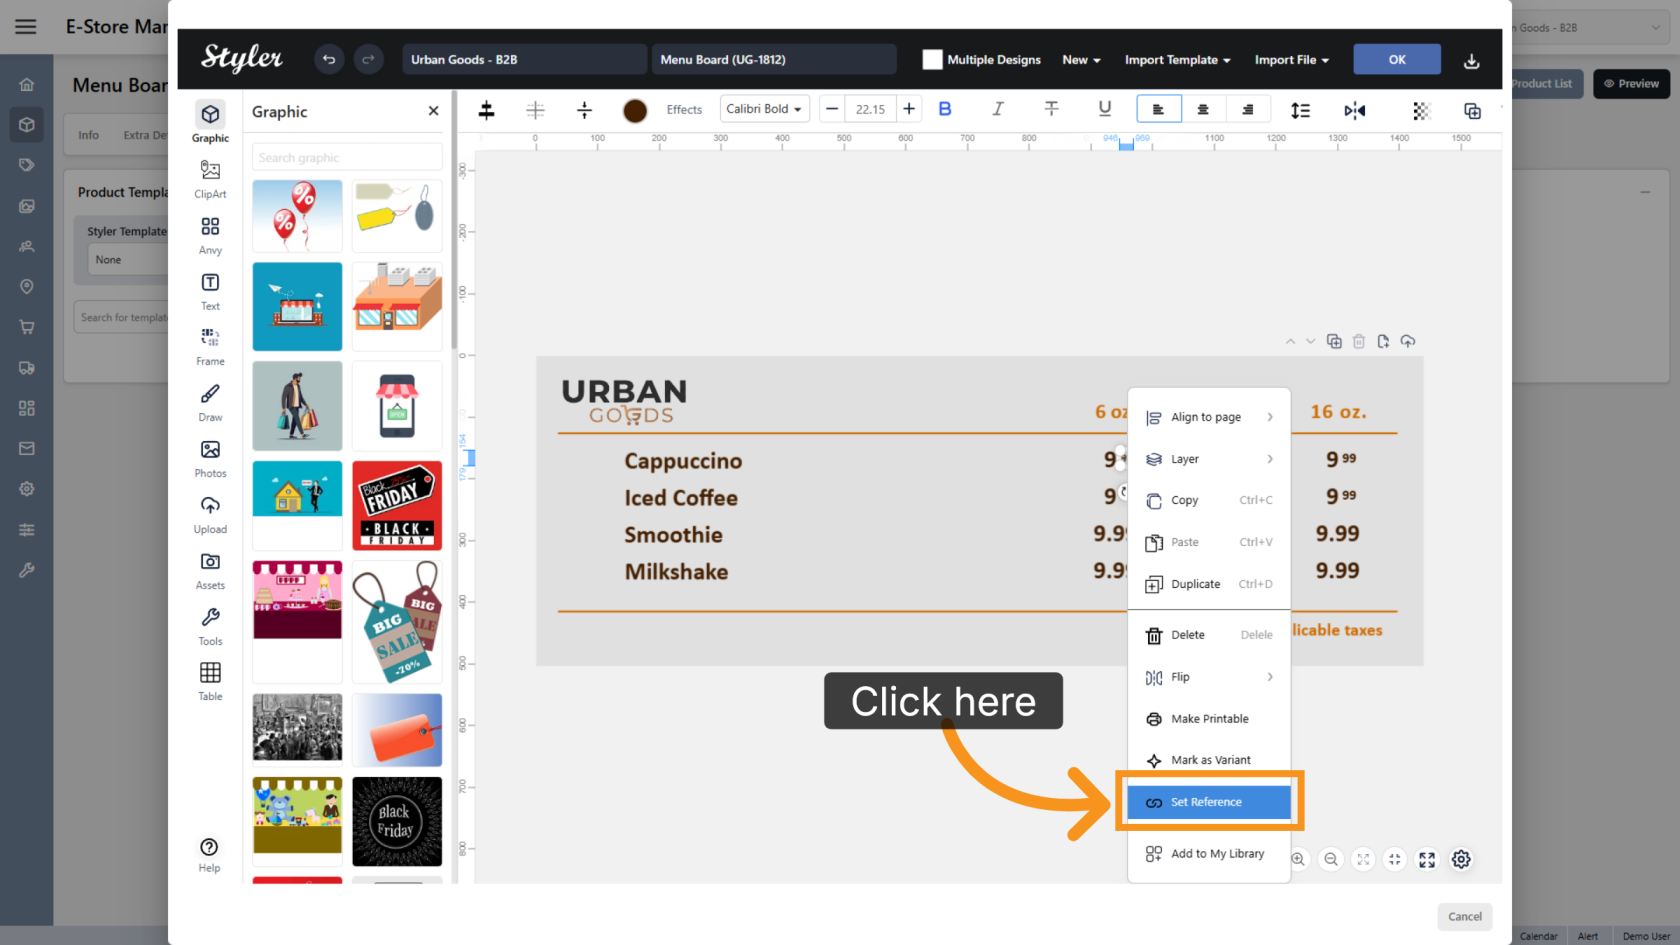
9. Open Reference Settings
Right-click the integer portion and select Set Reference.

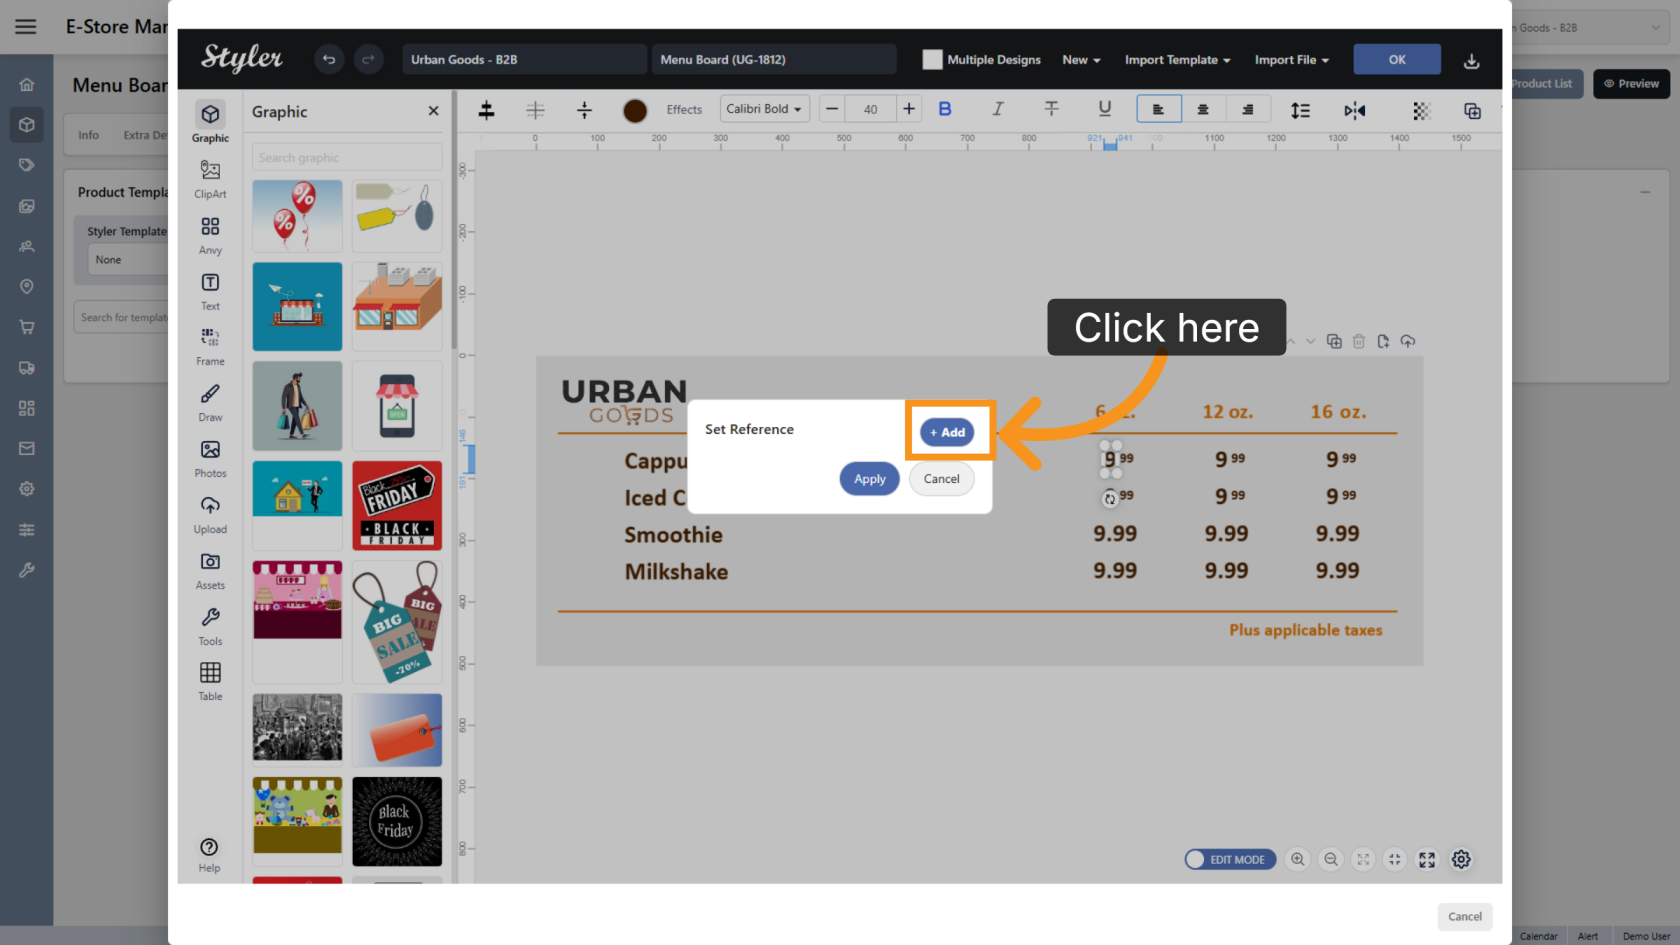
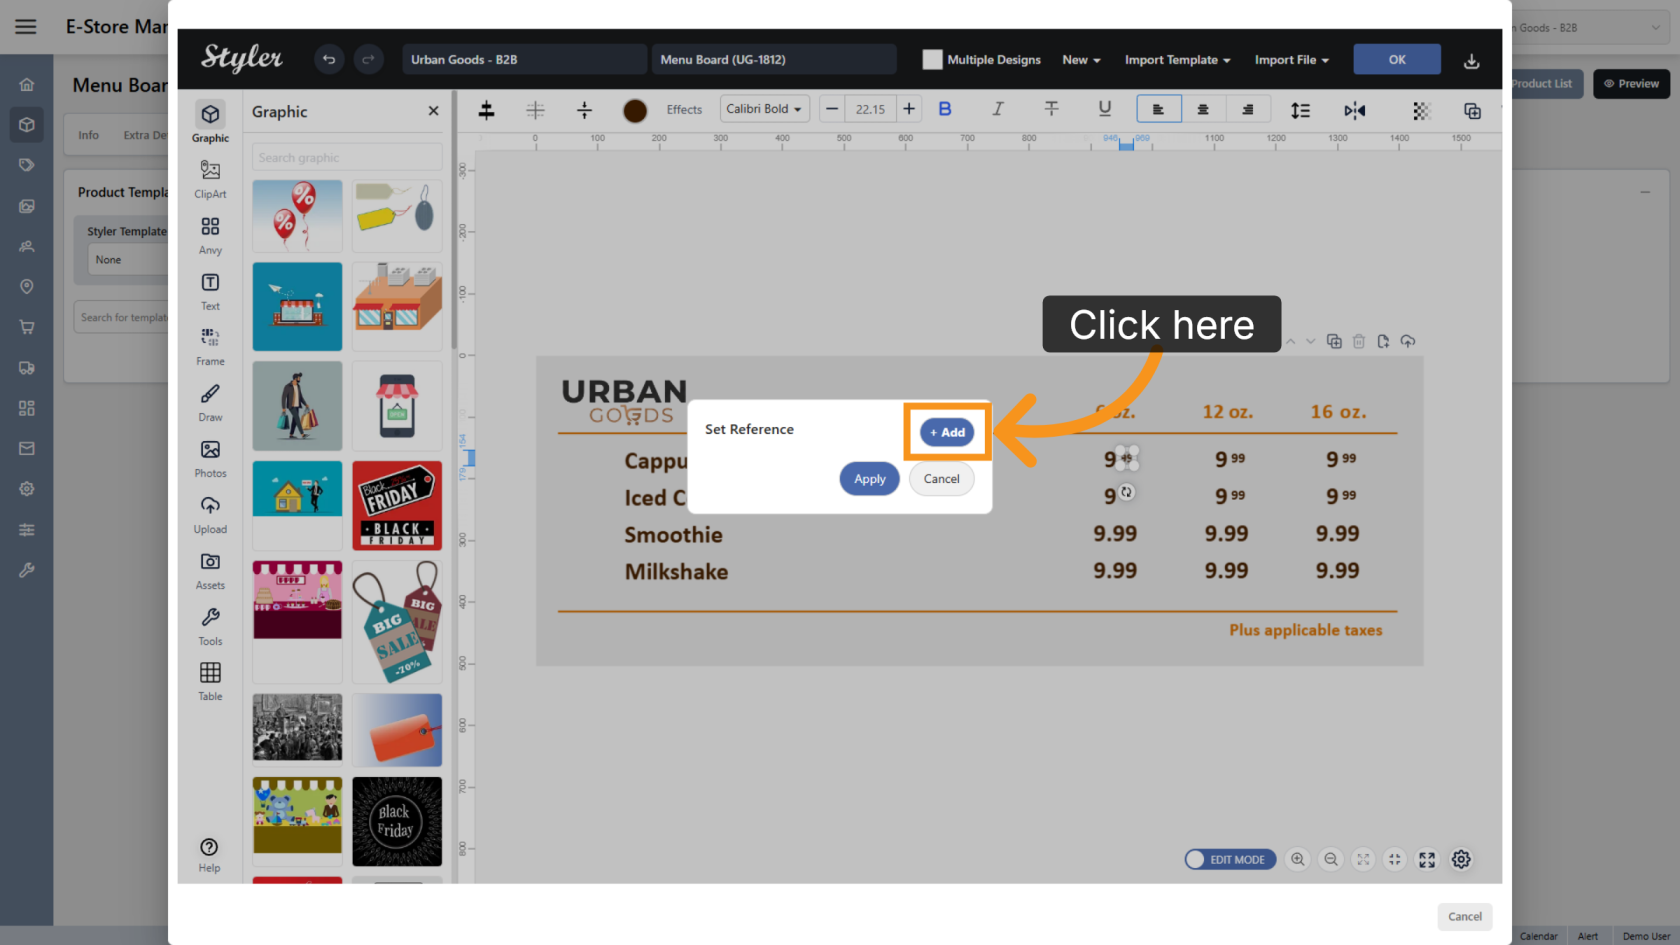
10. Add a Reference
Click Add to create a new reference configuration.
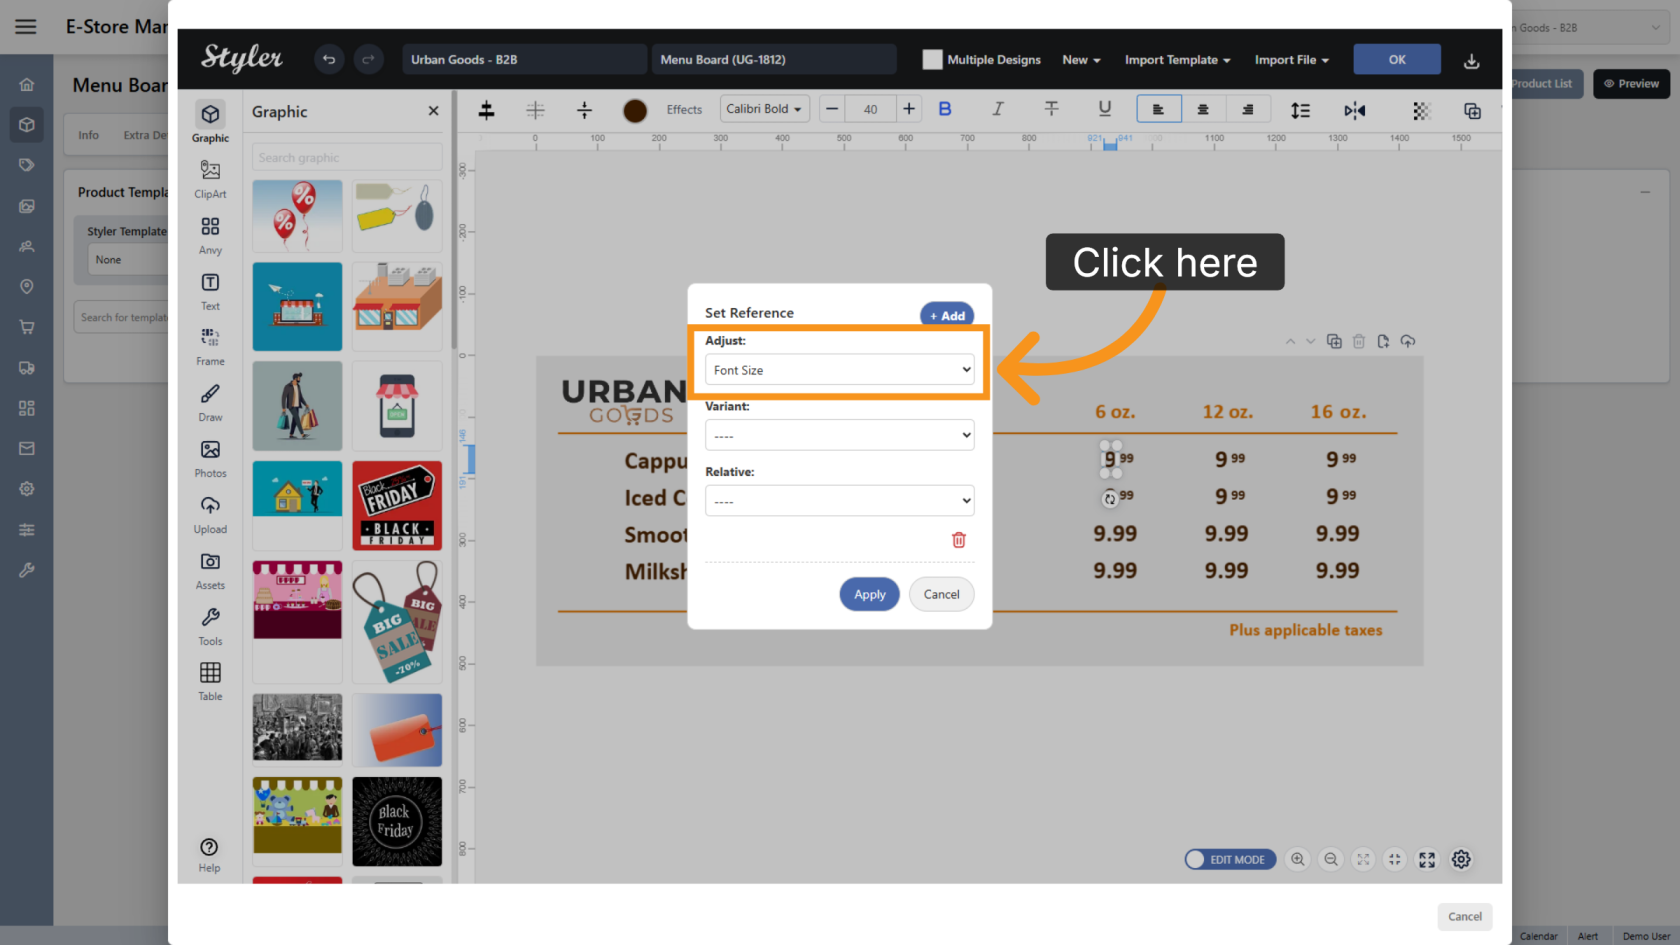
11. Select the Adjust Type
Set Adjust to Font Size.
12. Configure the Font Reference
Set Relative to Regular Font Size. This identifies the larger font portion of the price.

13. Apply the Settings
Click Apply to save the reference configuration.

14. Set Decimal Alignment
Select the decimal portion of the price and set Text Align to Left.
15. Open Reference Settings
Right-click the decimal portion and select Set Reference.
16. Add a Reference
Click Add to create a new reference configuration.
17. Select the Adjust Type
Set Adjust to Font Size.

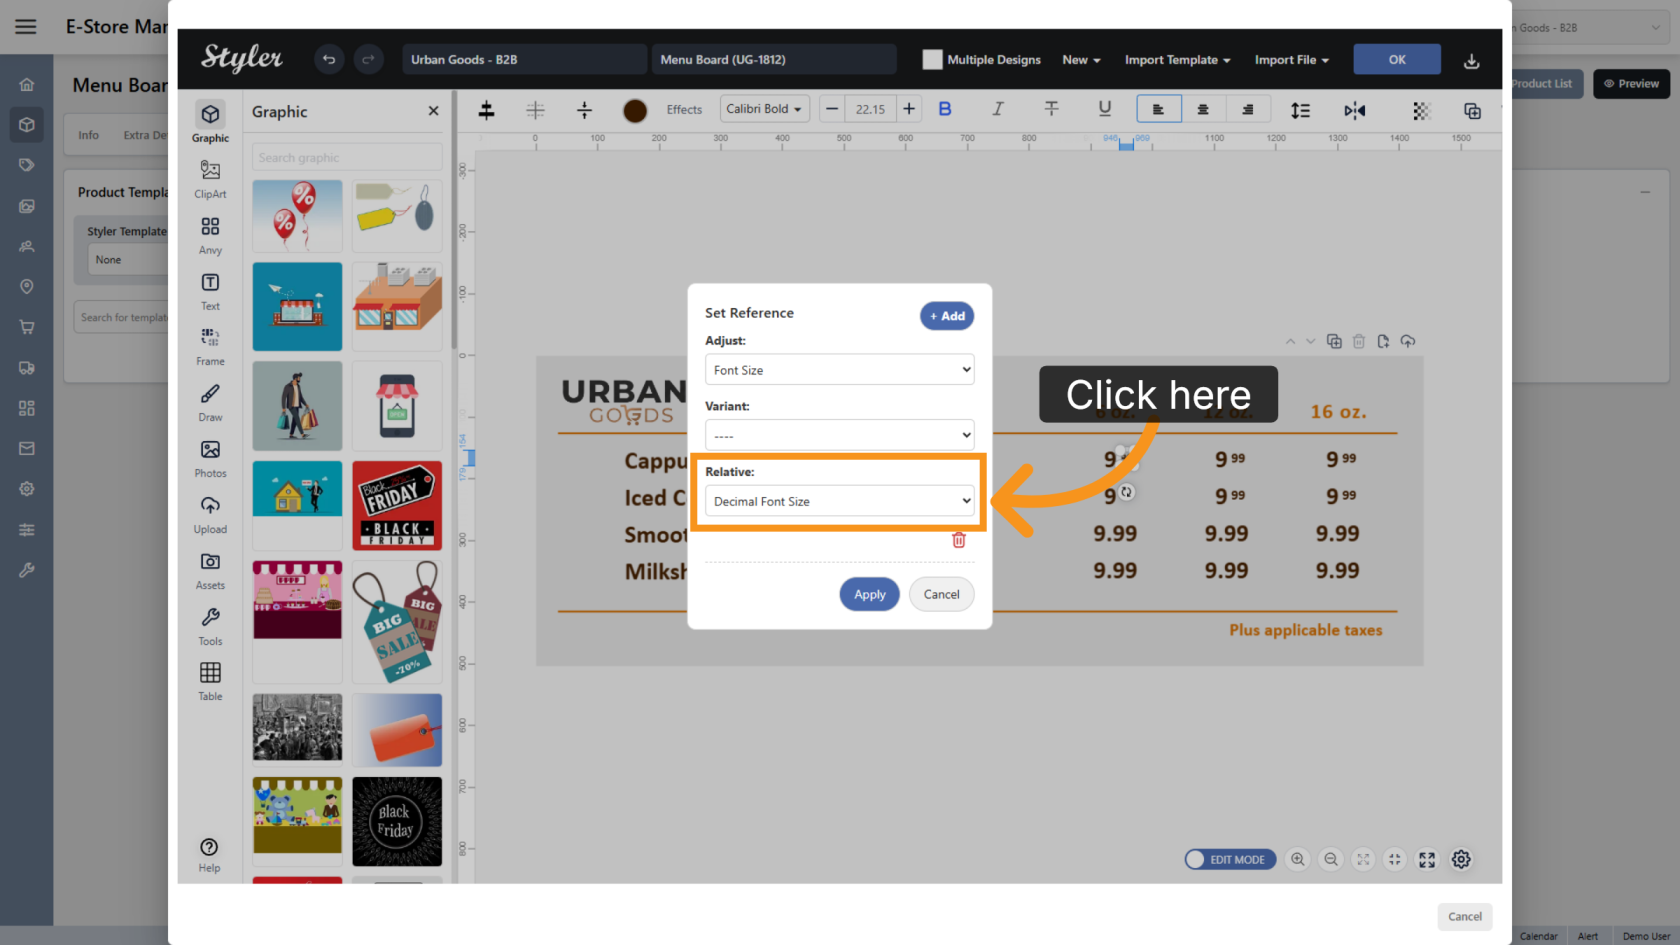
18. Configure the Font Reference
Set Relative to Decimal Font Size. This identifies the smaller font portion of the price.
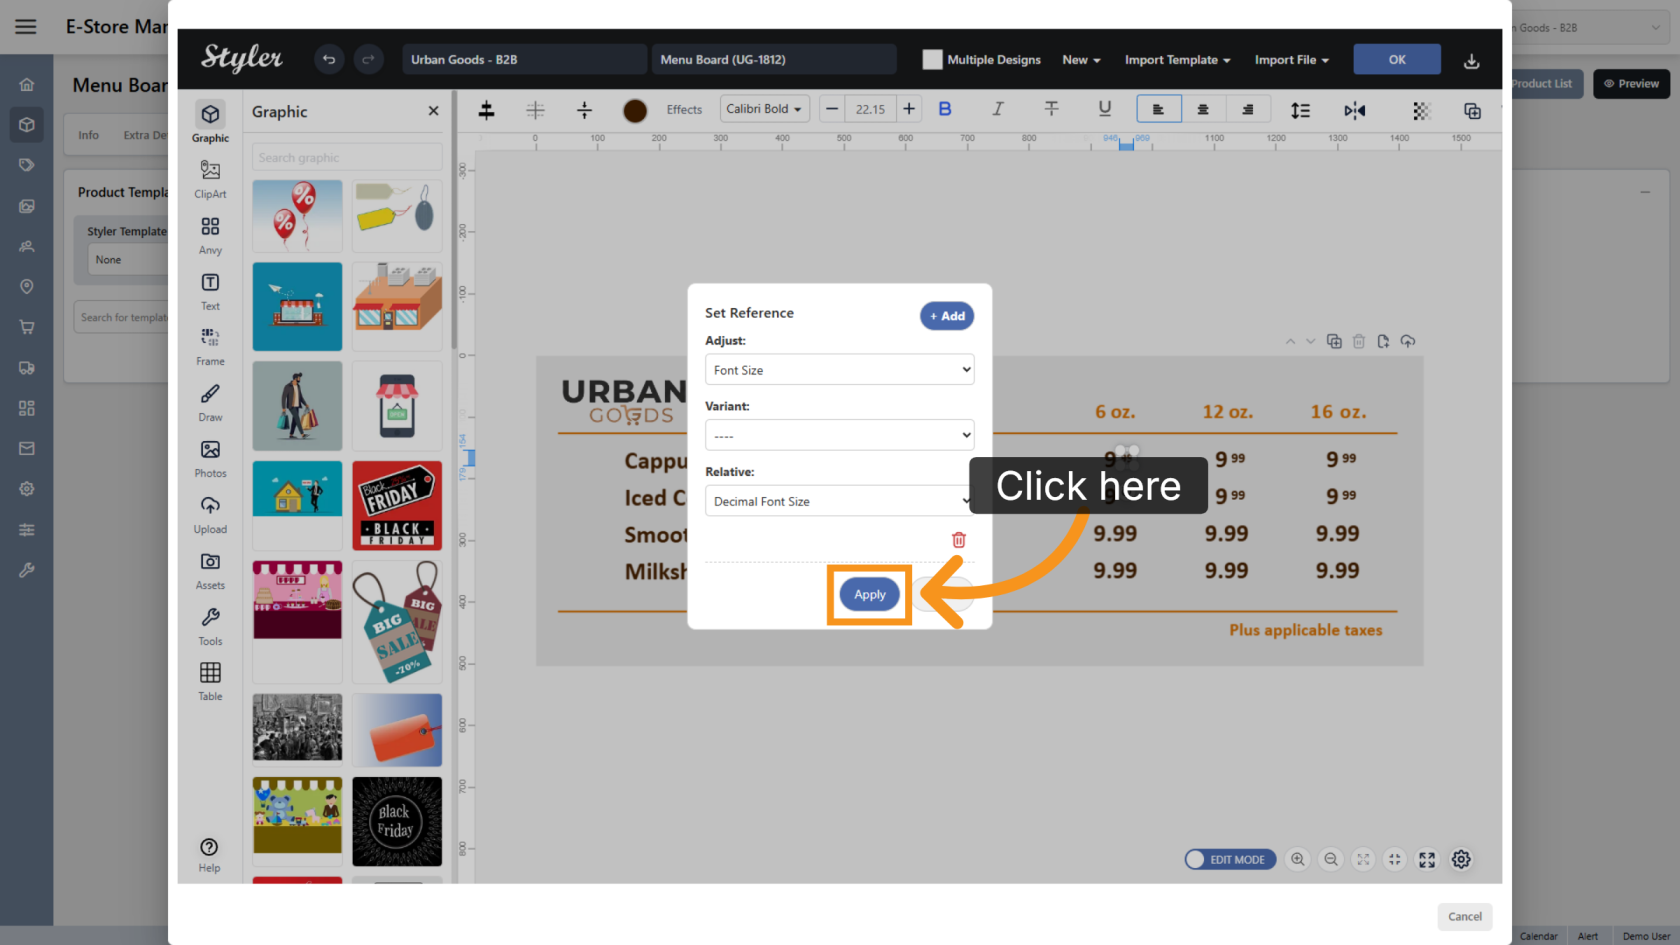
19. Apply the Settings
Click Apply to save the reference configuration.
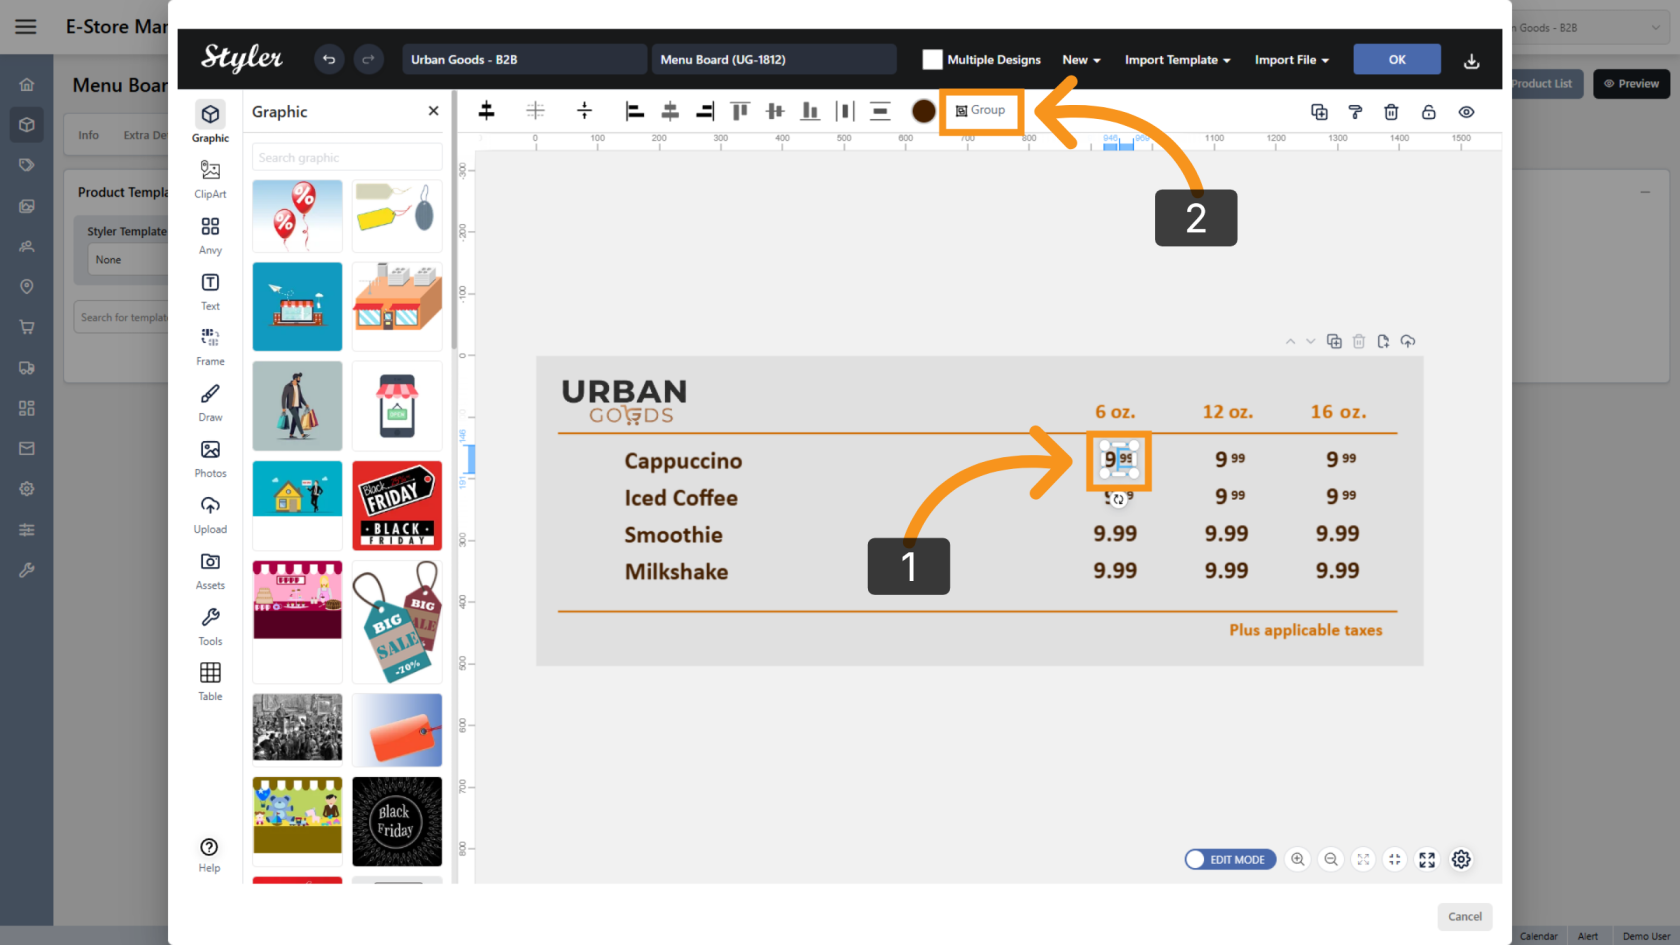
20. Group the Price Objects
Select both the integer and decimal portions, then click Group to combine them into a single object.
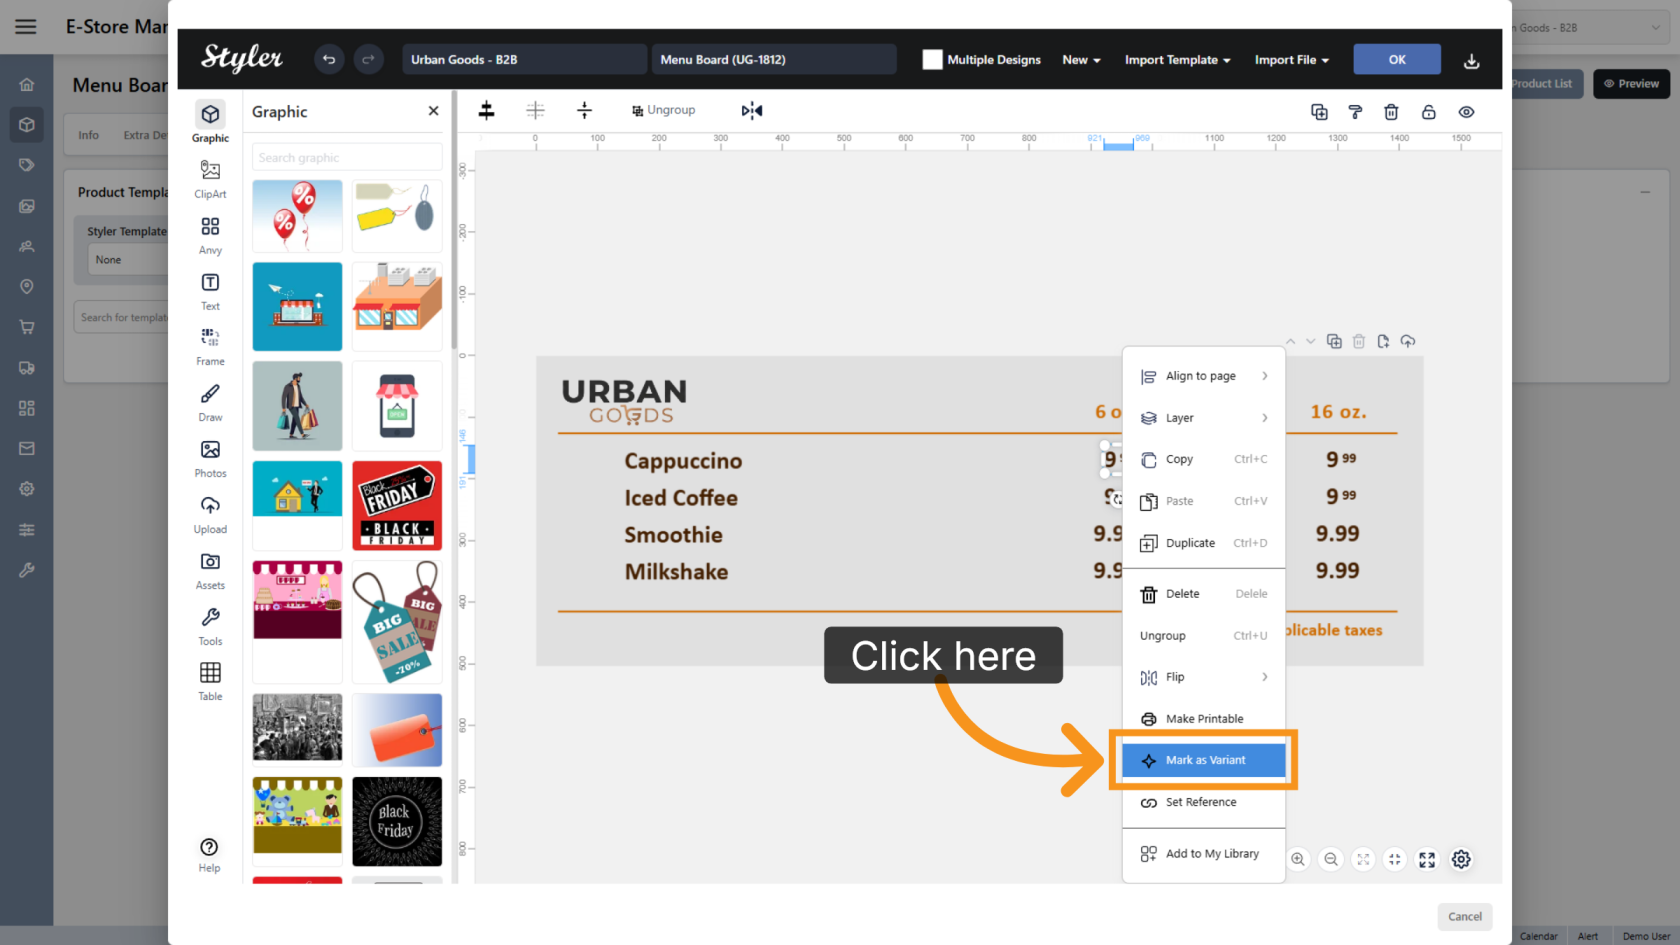
21. Mark the Price Group as a Variant
Right-click the newly created price group and select Mark as Variant.
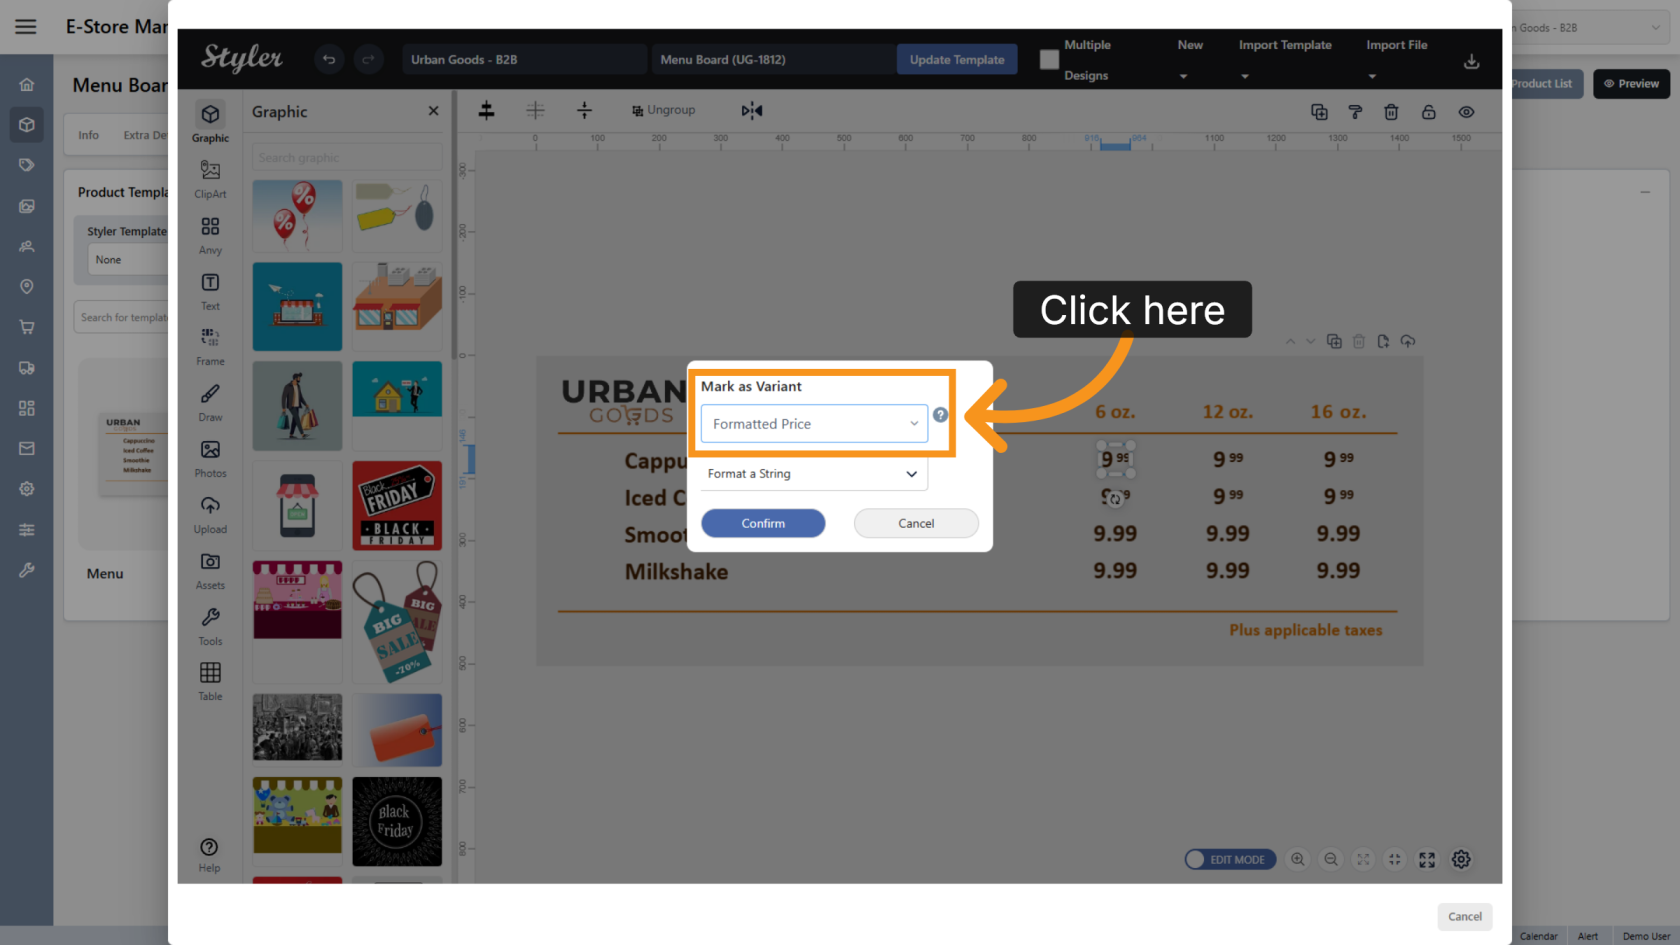
22. Select the Variant Type
Click Select a variant type and choose Formatted Price.
23. Confirm the Settings
Click Confirm to save the variant configuration. Repeat the previous steps for all prices that use separate integer and decimal font sizes.

24. Configure Single Font-Size Pricing
For pricing that uses a single font size, right-click the price object and select Mark as Variant.

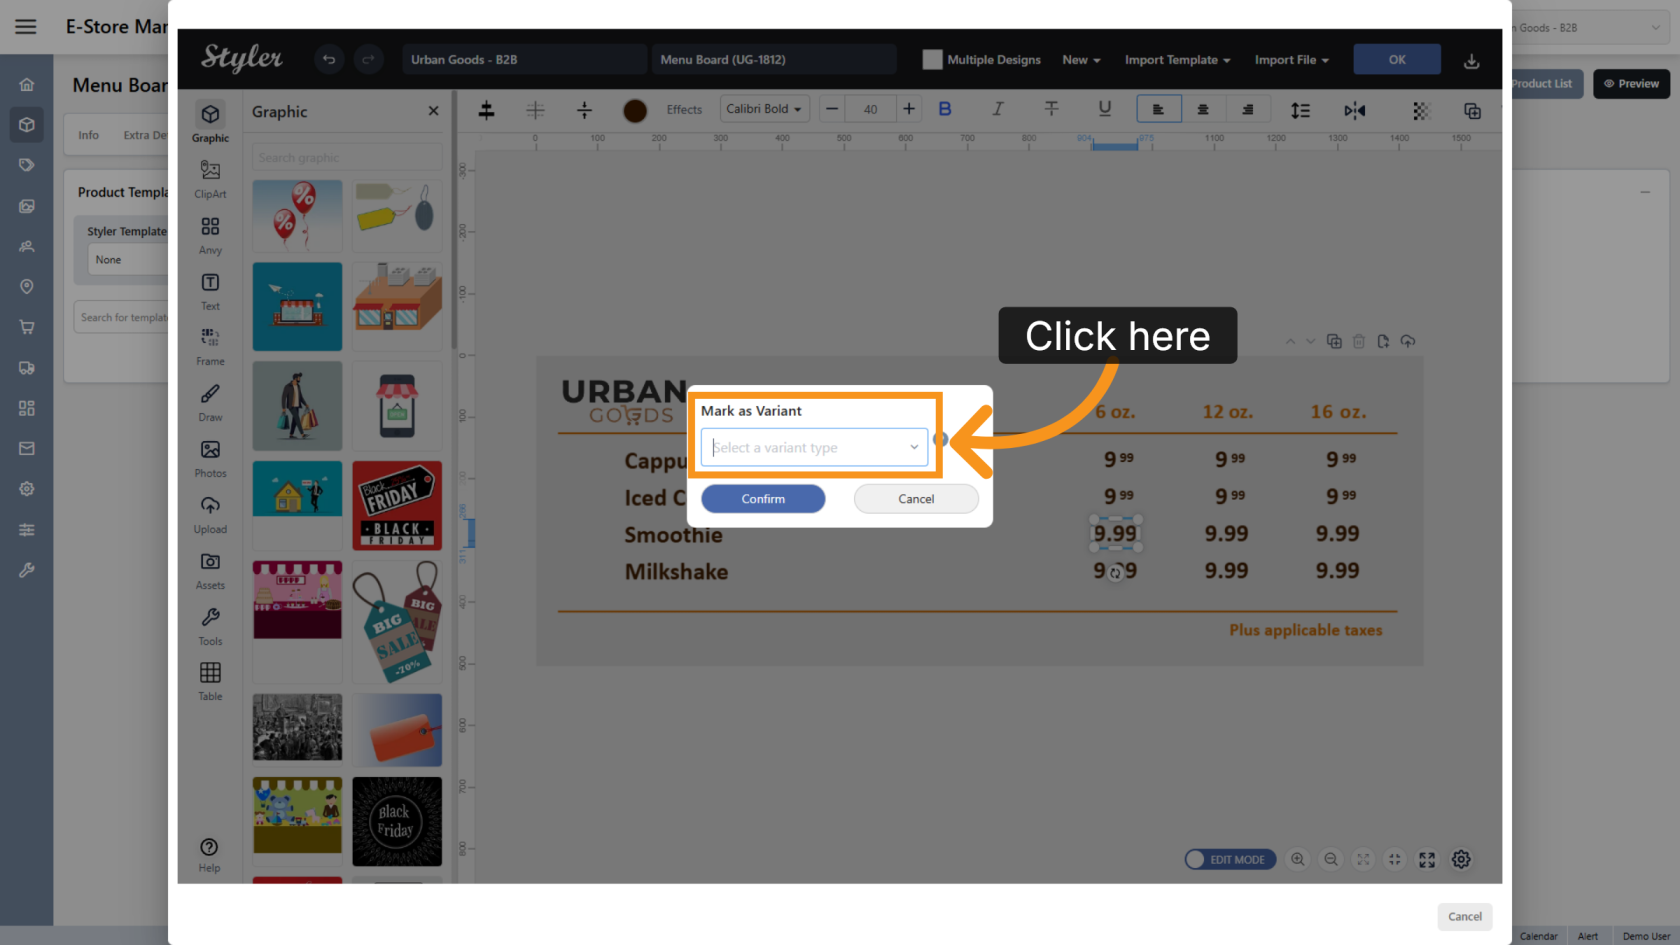
25. Select the Variant Type
Click Select a variant type and choose Price.
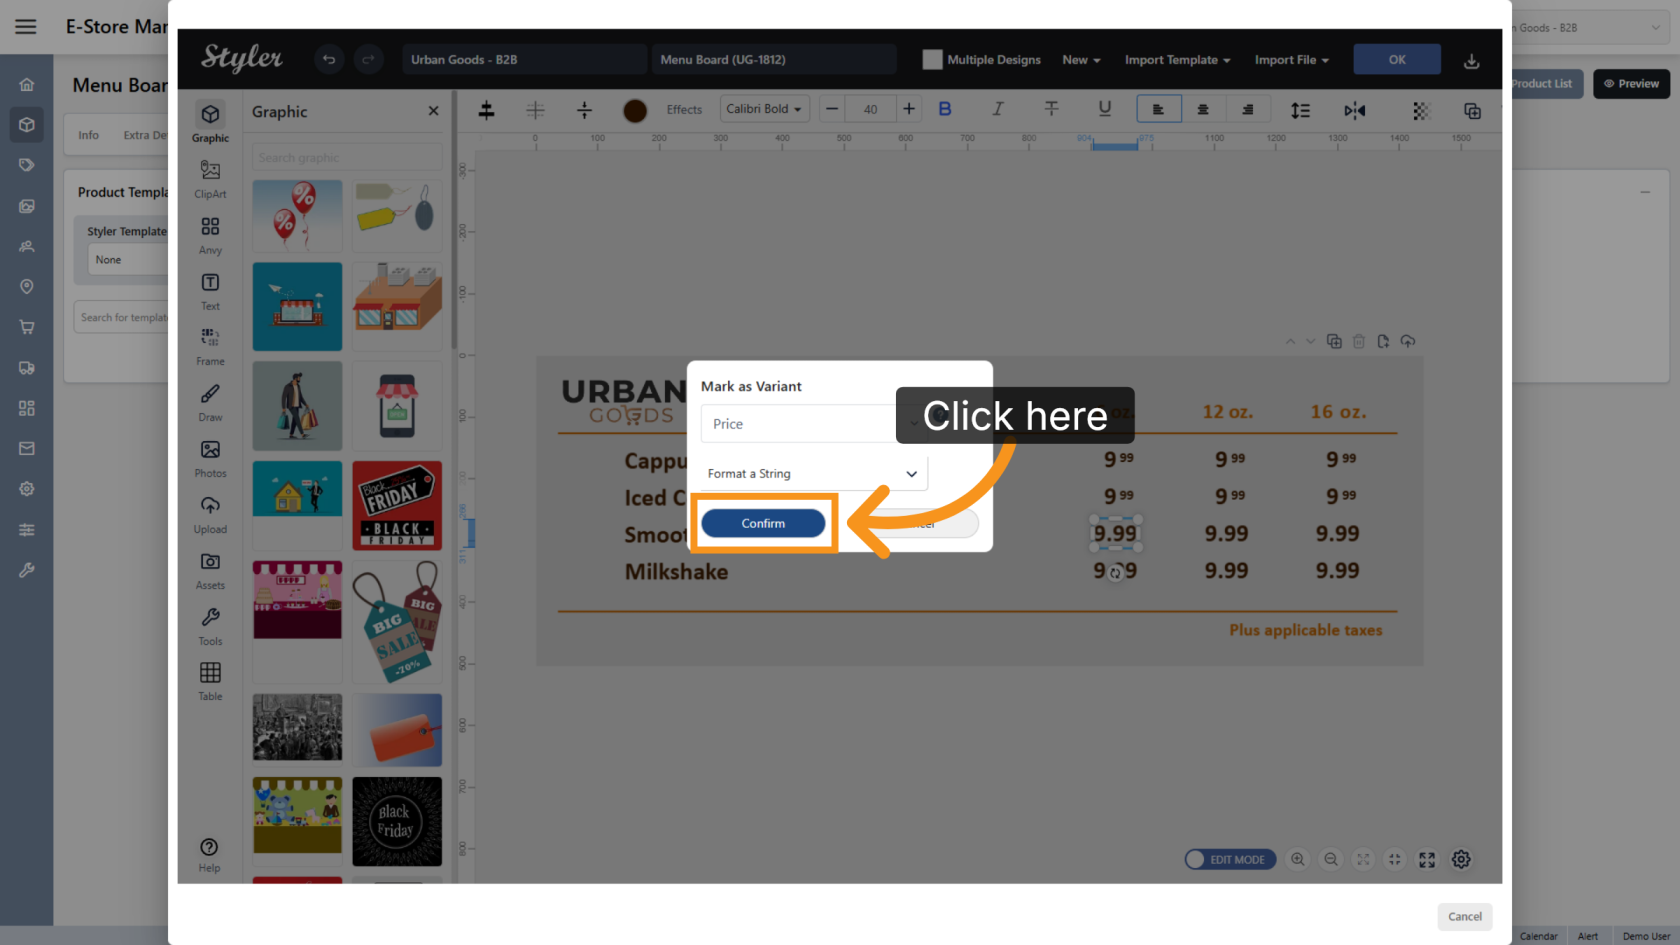
26. Confirm the Settings
Click Confirm to save the variant configuration.
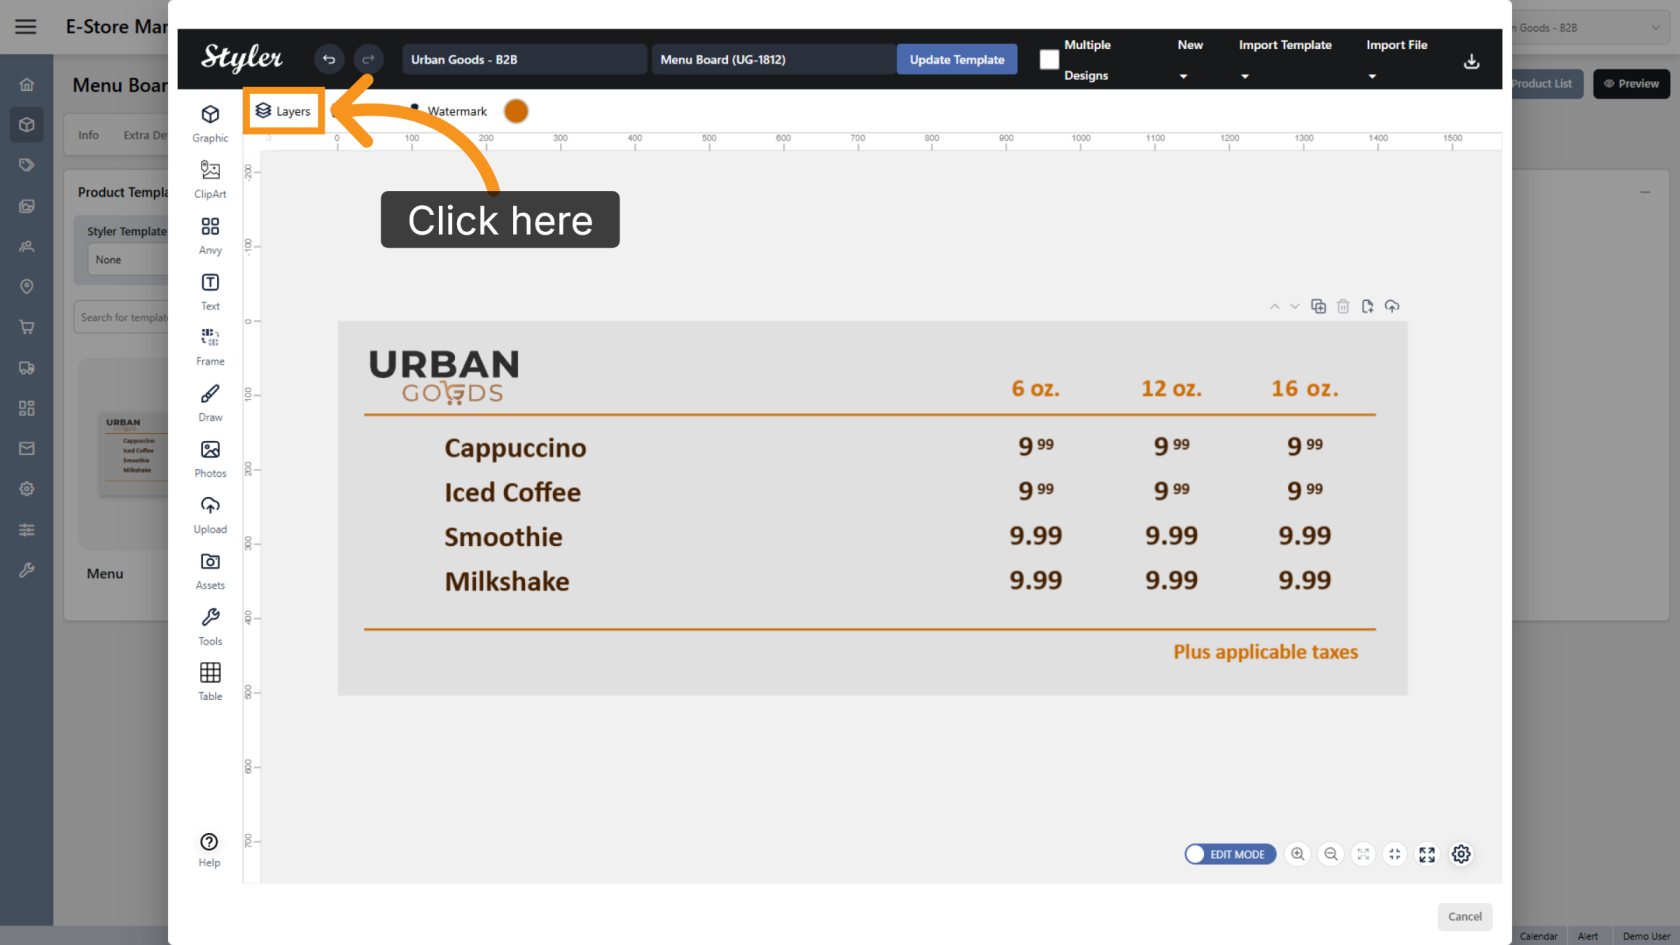
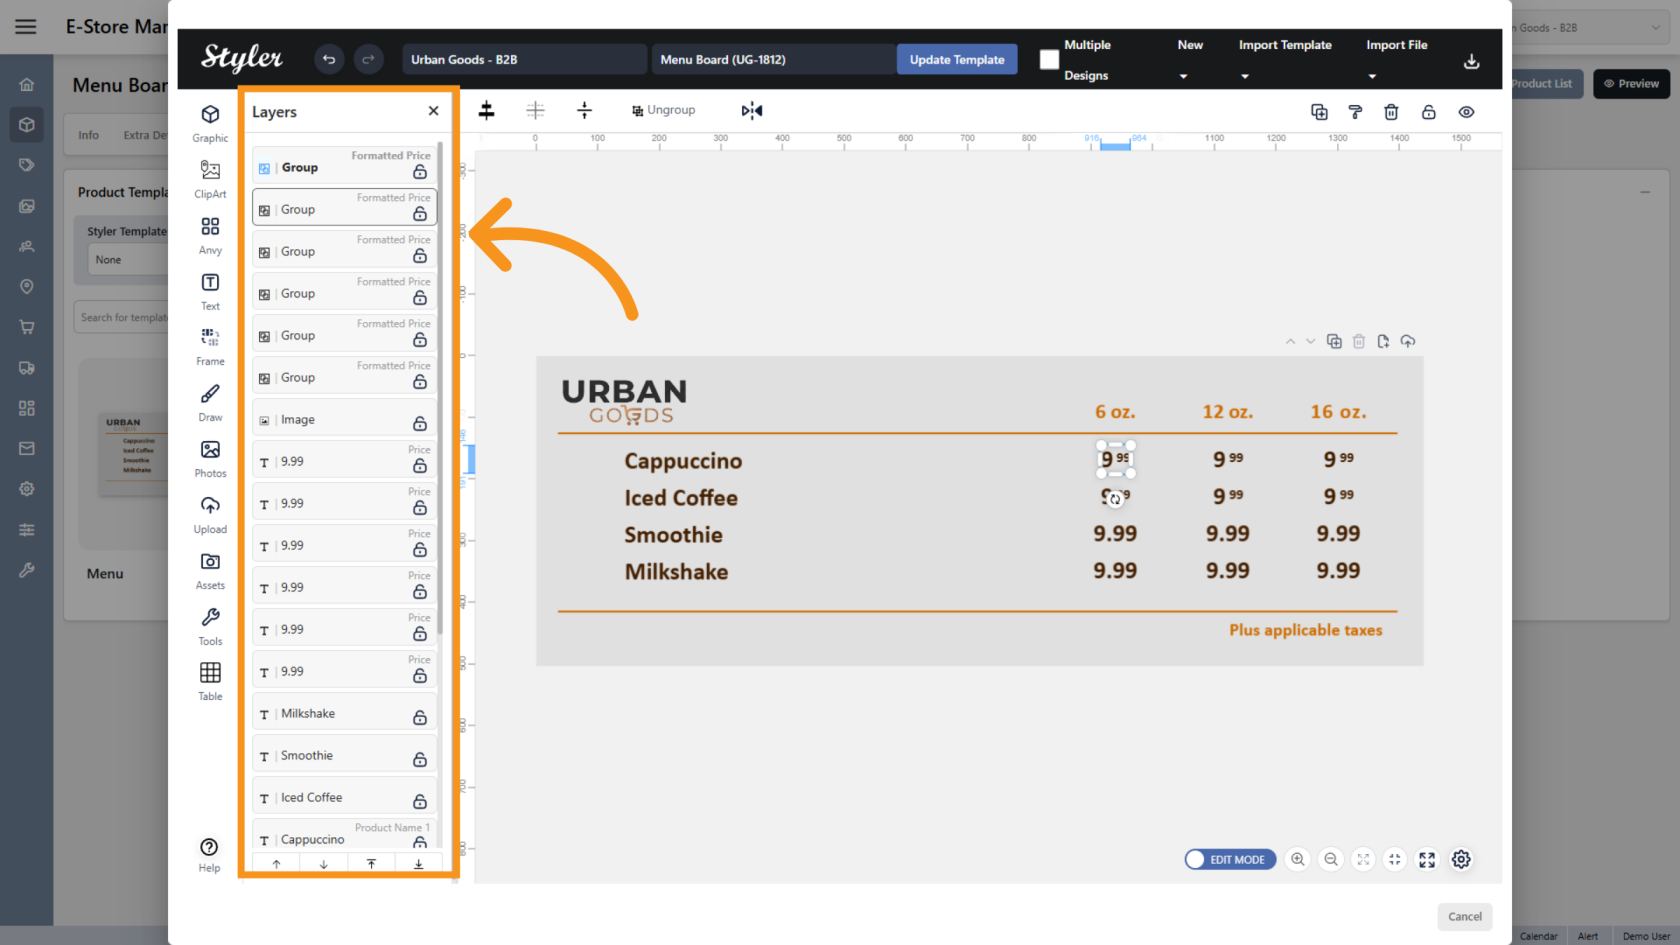
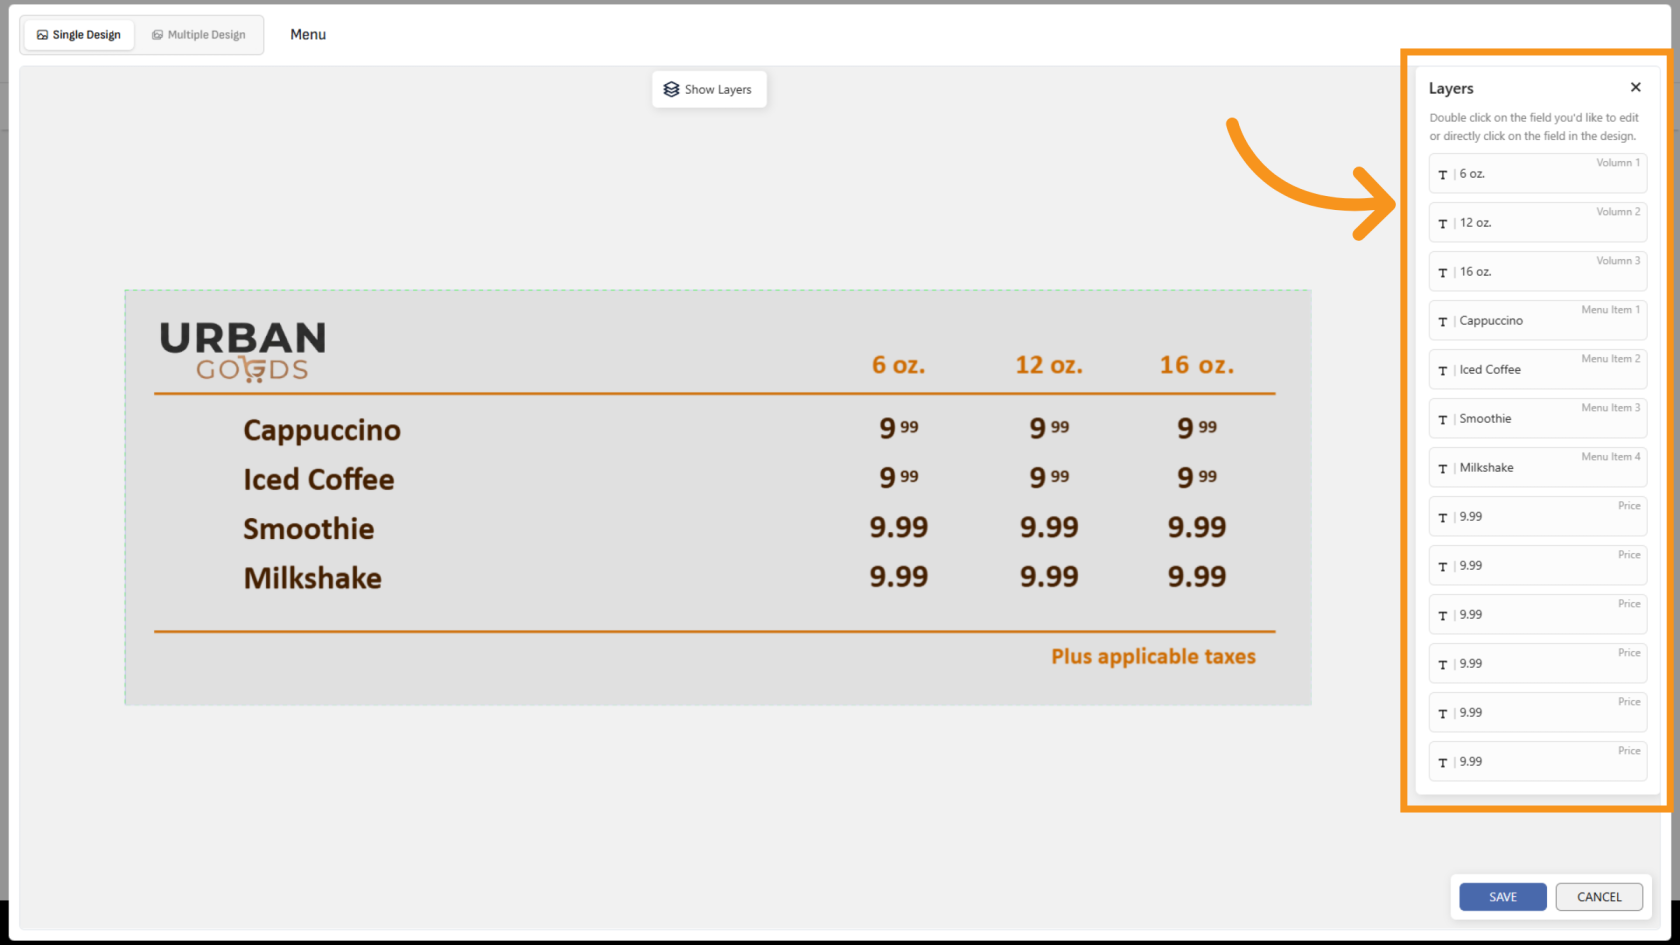
27. Open the Layer Panel
Click Layers to open the layer panel in the template.
28. Organize the Layers
Click and drag the layers to match the object order in the design. This helps keep the template organized and easier for users to edit.
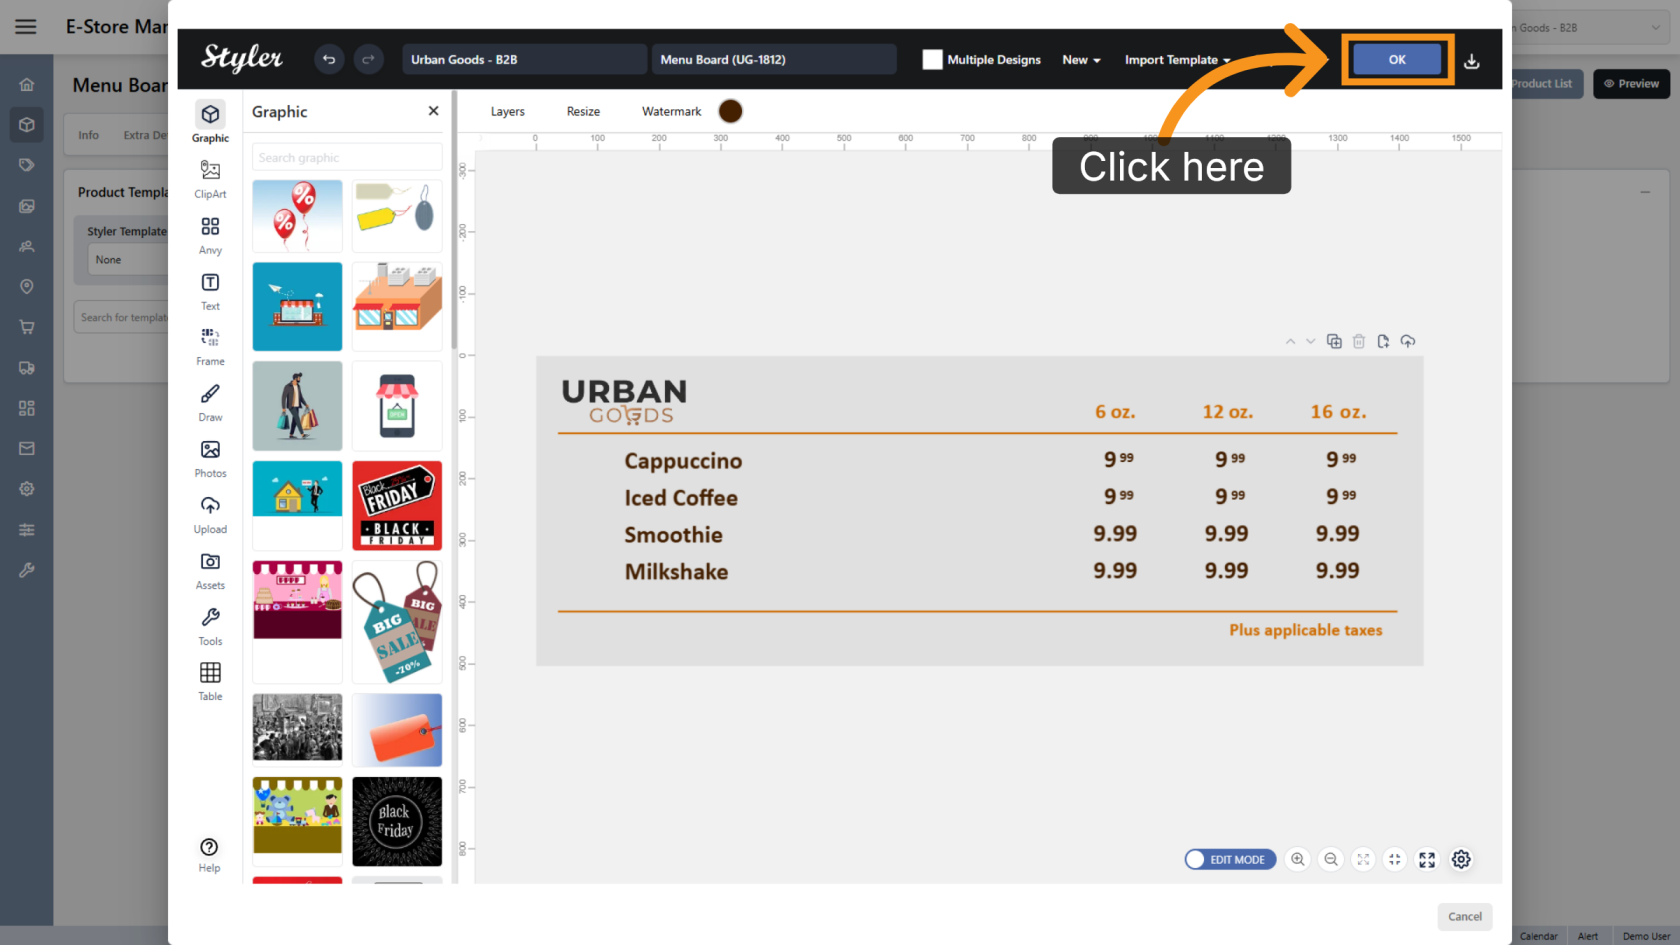
29. Confirm the Configuration
Click OK to finalize the settings.
30. Enter the File Name
Enter the file name, then click Confirm.

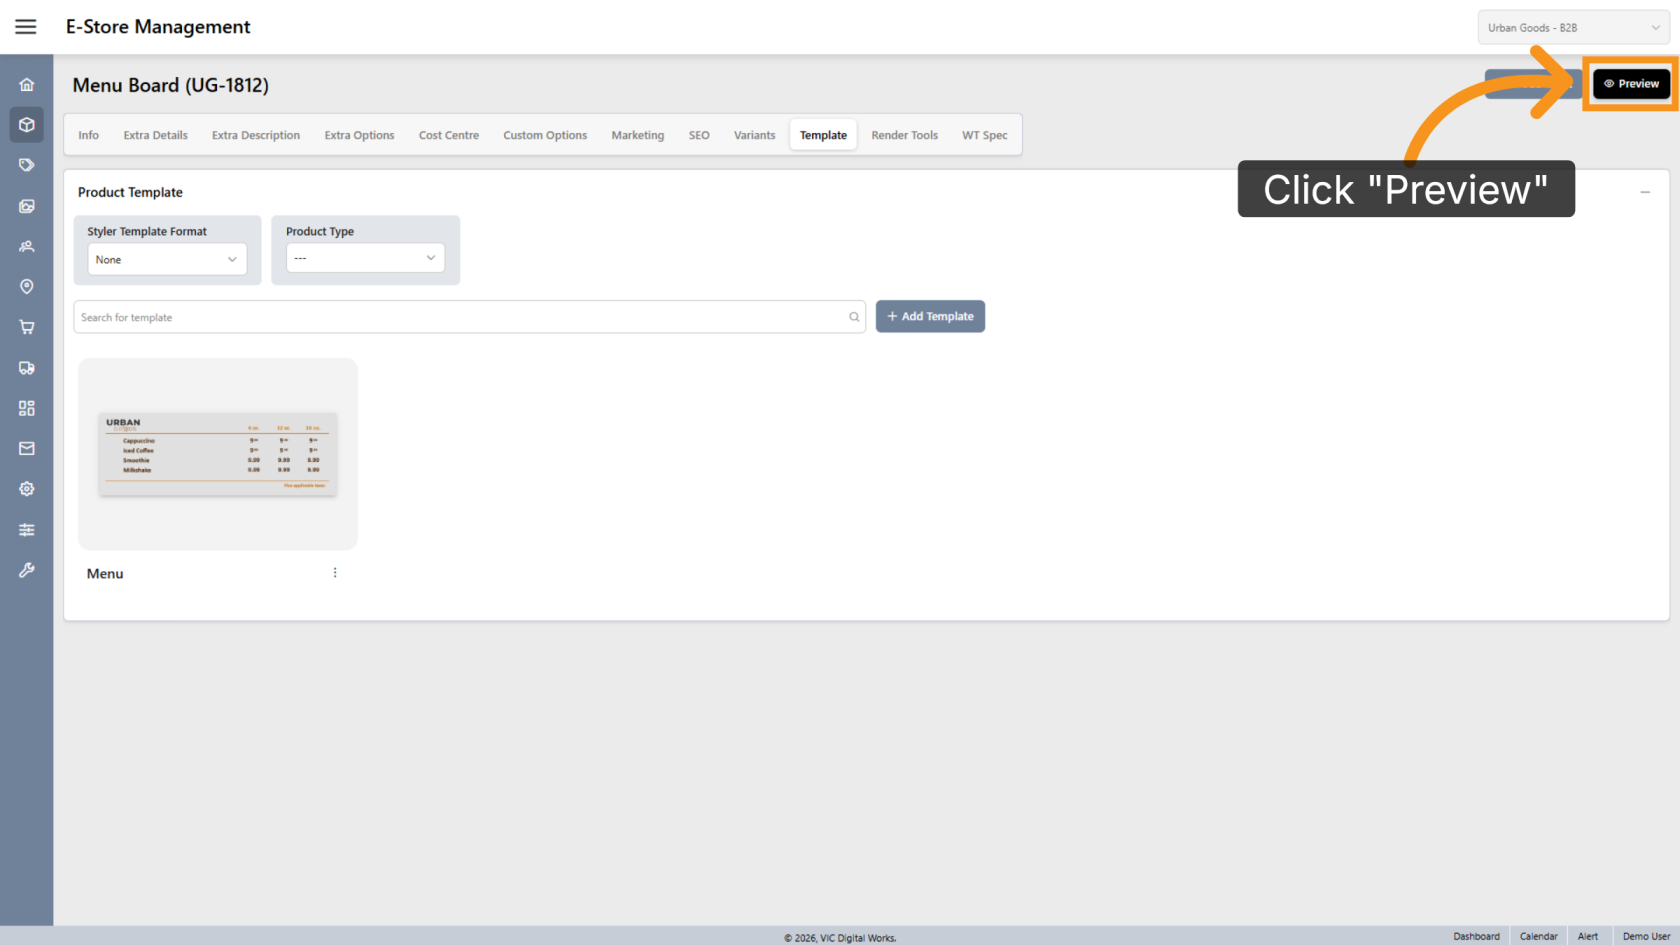
31. Preview the Design
Click Preview to review the final layout.
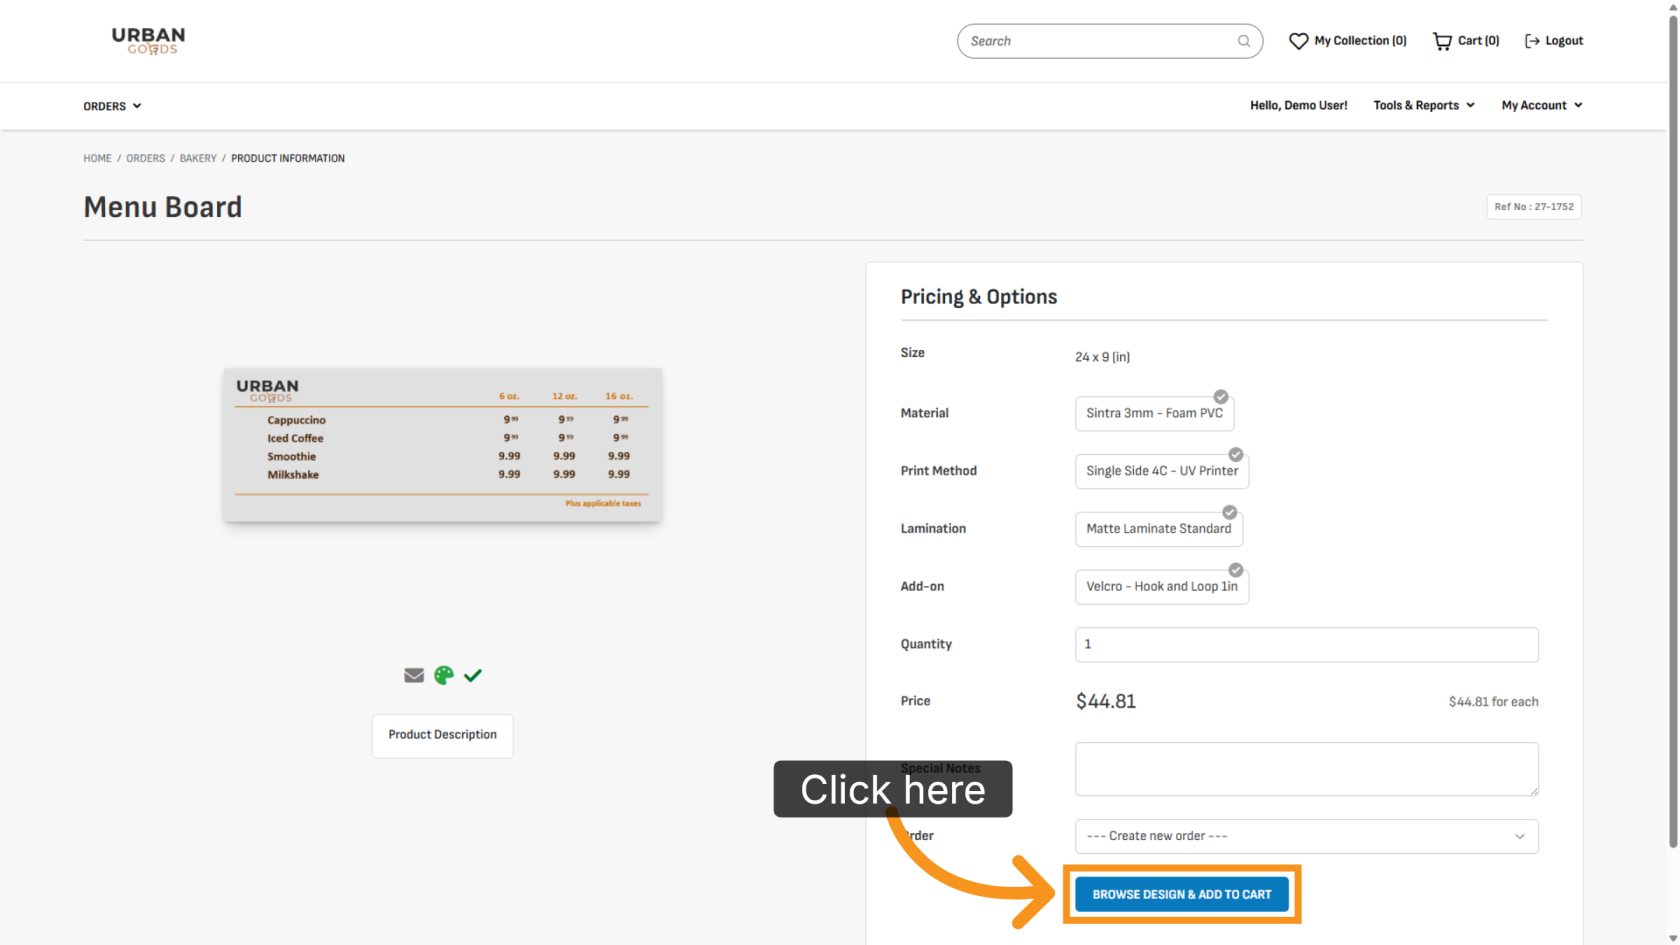
32. Browse Available Designs
Click BROWSE DESIGN & ADD TO CART to select a design for printing.
33. Edit Template
Double-click the layer to modify the design content.
You have successfully configured menu item variants and pricing formats. Review the template to ensure all variant types and pricing settings are correctly configured for user editing.