Add New Roles
This tutorial shows you how to add new roles and configure permissions in the WorkTraq application.
Video Tutorial
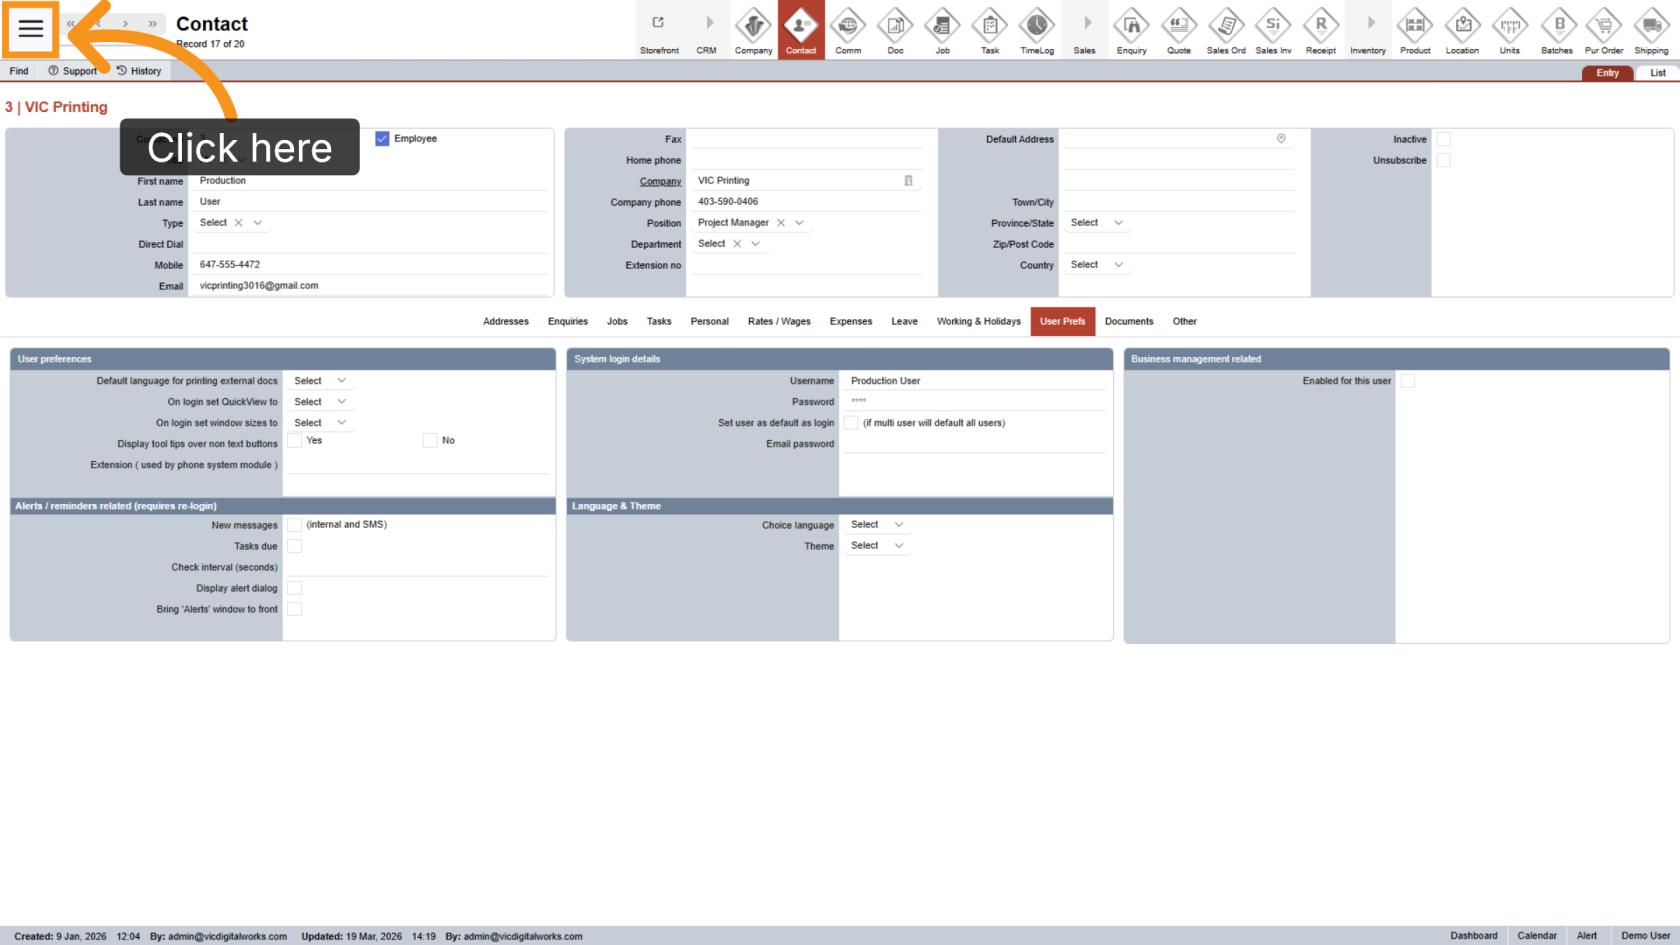
1. Open the Main Menu
Click the ![]() main navigation menu to access system options.
main navigation menu to access system options.
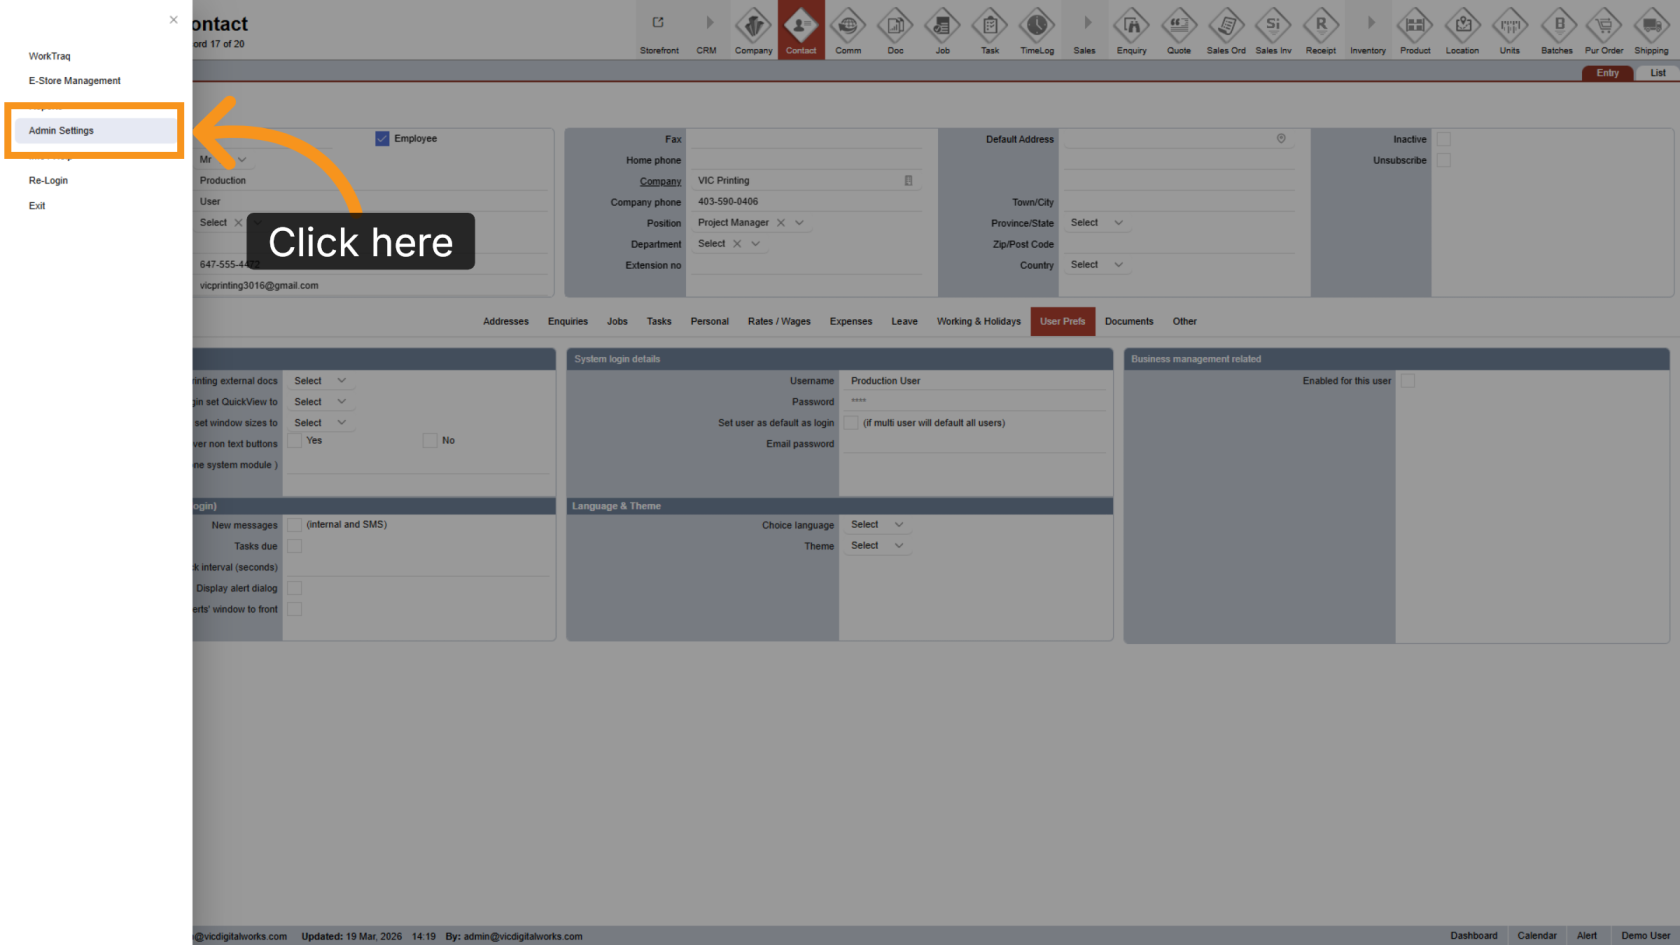
2. Go to Admin Settings
Select "Admin Settings" to enter the configuration area.
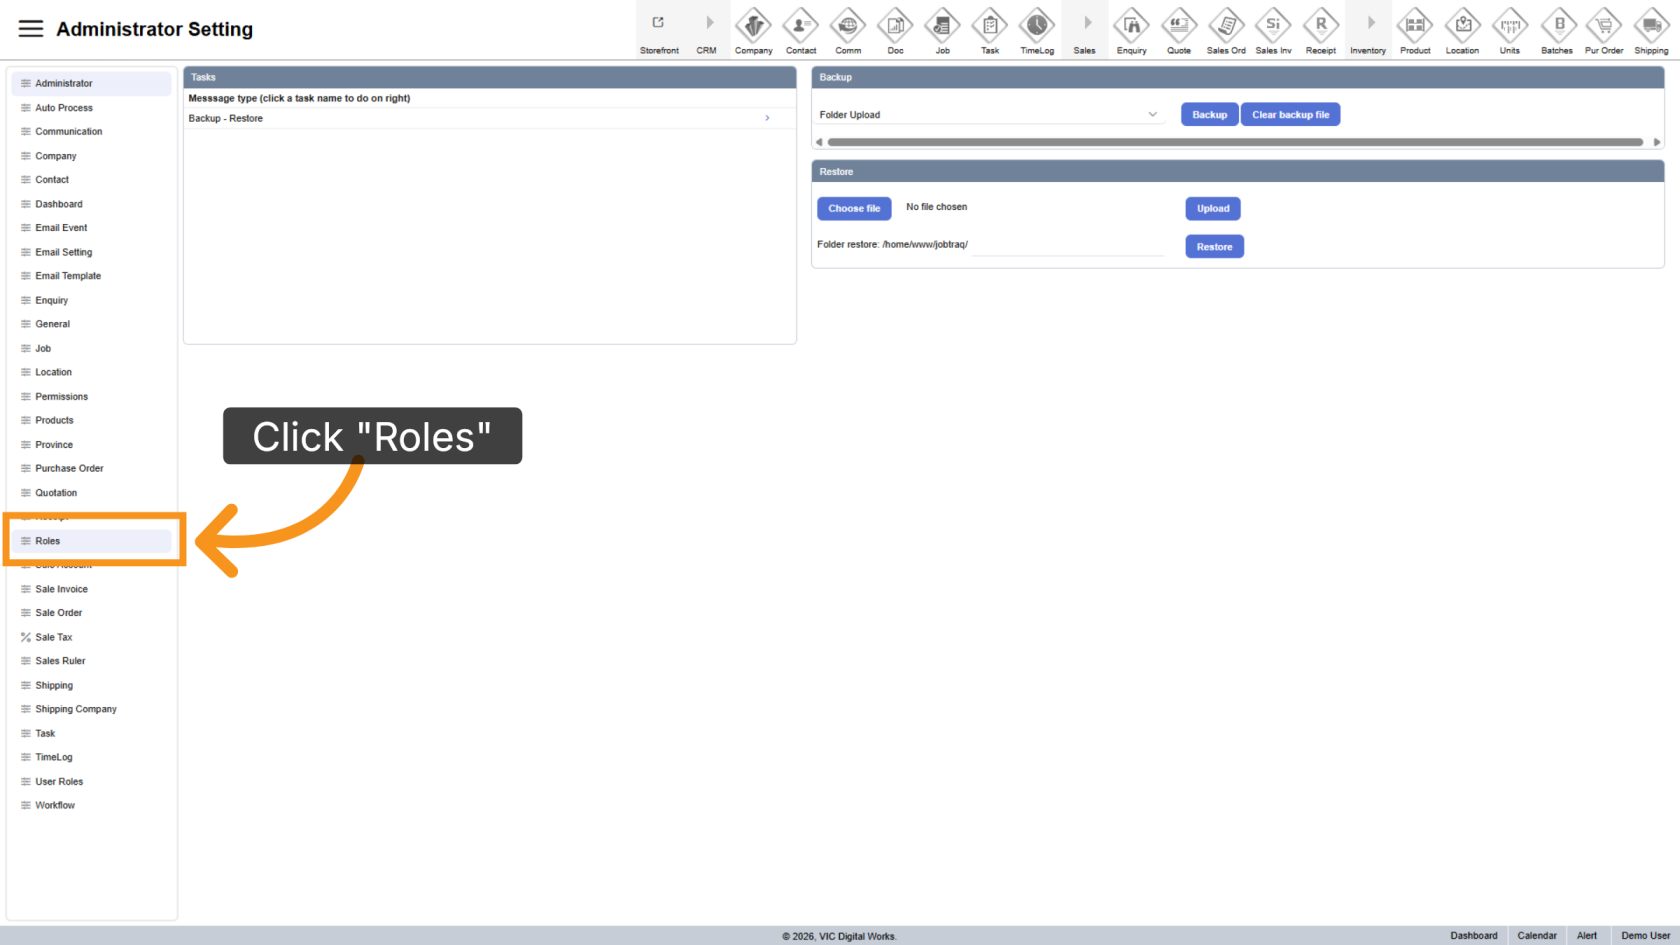
3. Open Roles
Click "Roles" to view and manage roles within the application.
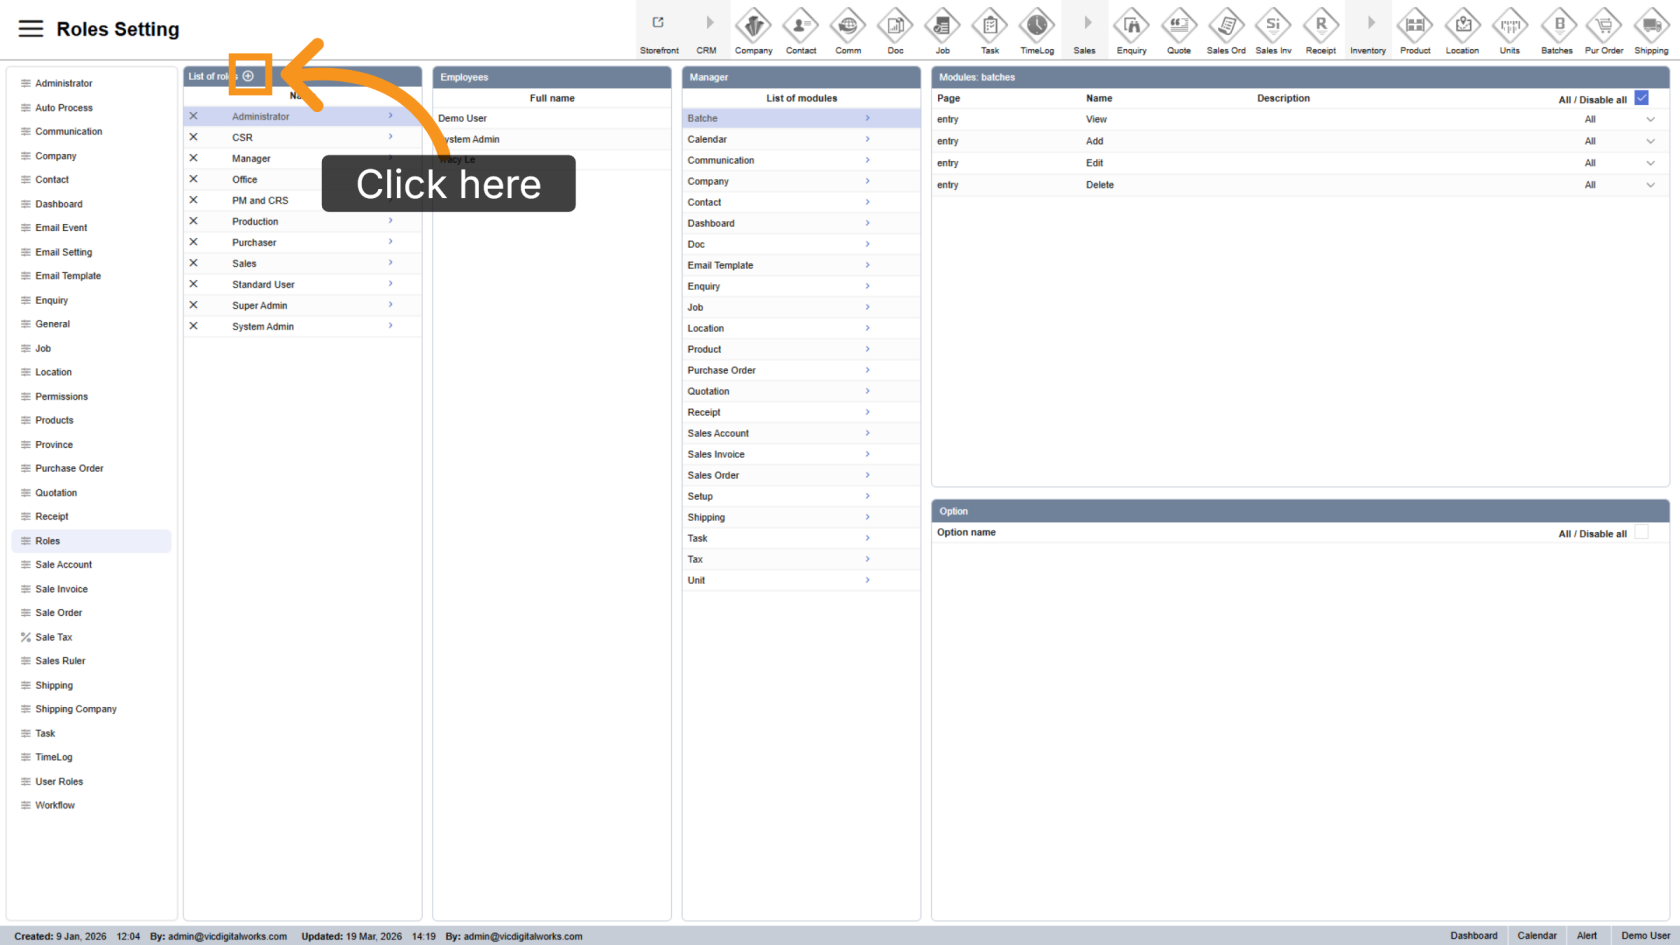
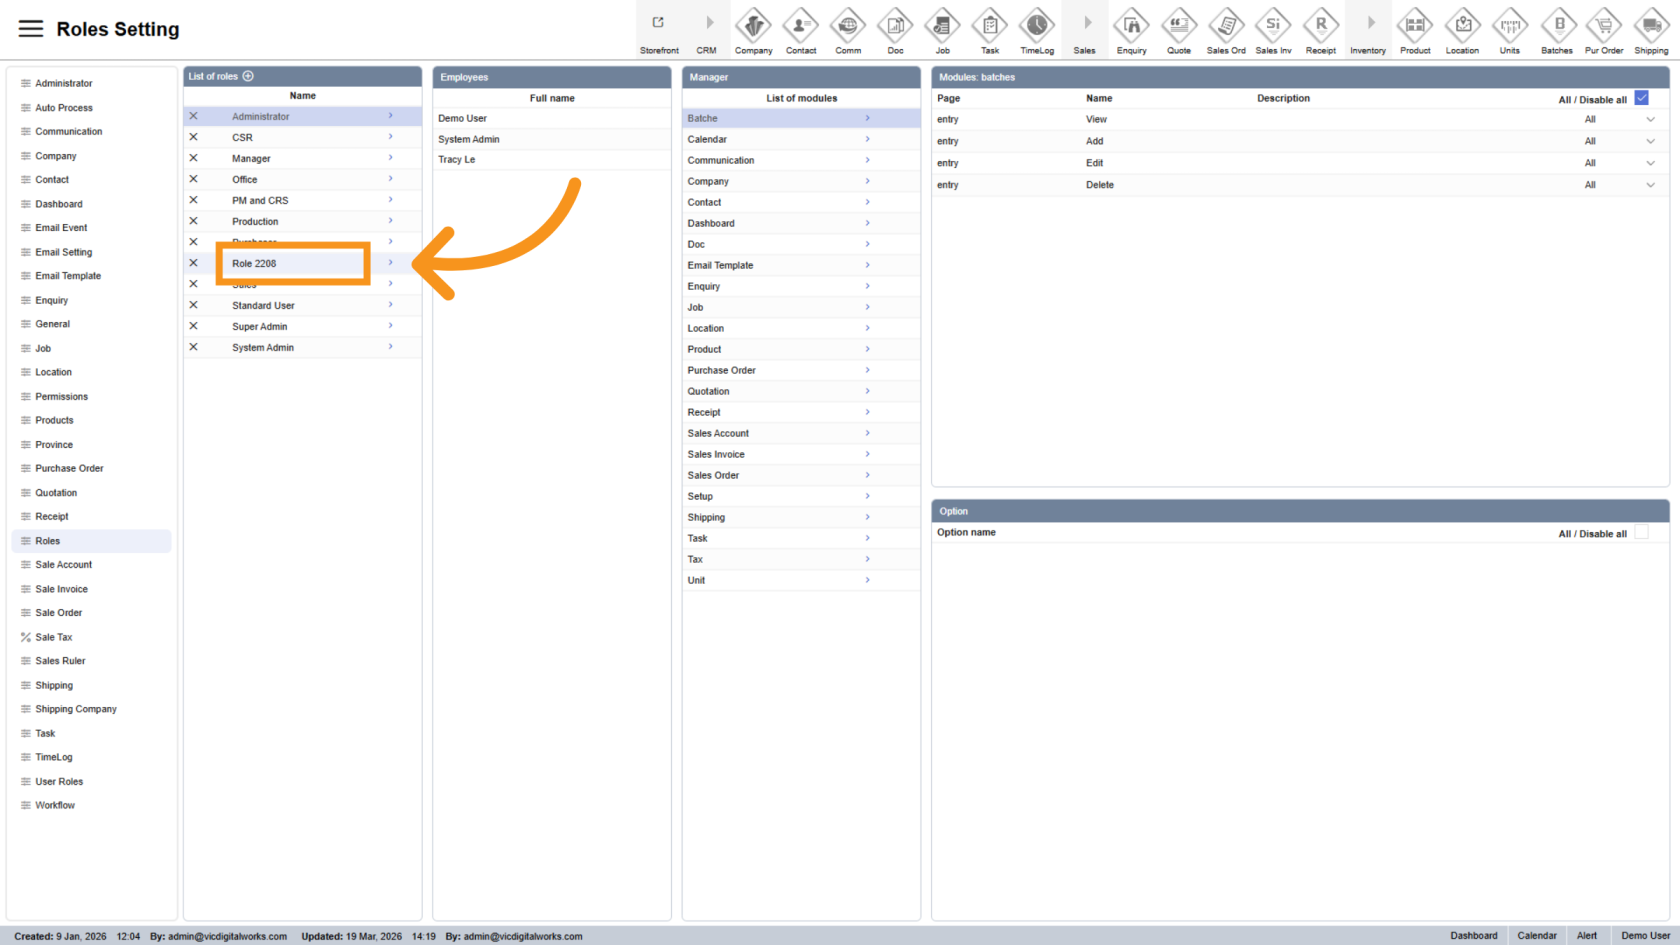
4. Create a New Role
Click the ![]() plus icon to add a new role.
plus icon to add a new role.
5. Rename the Role
Select the newly created role and update its name for easy identification.
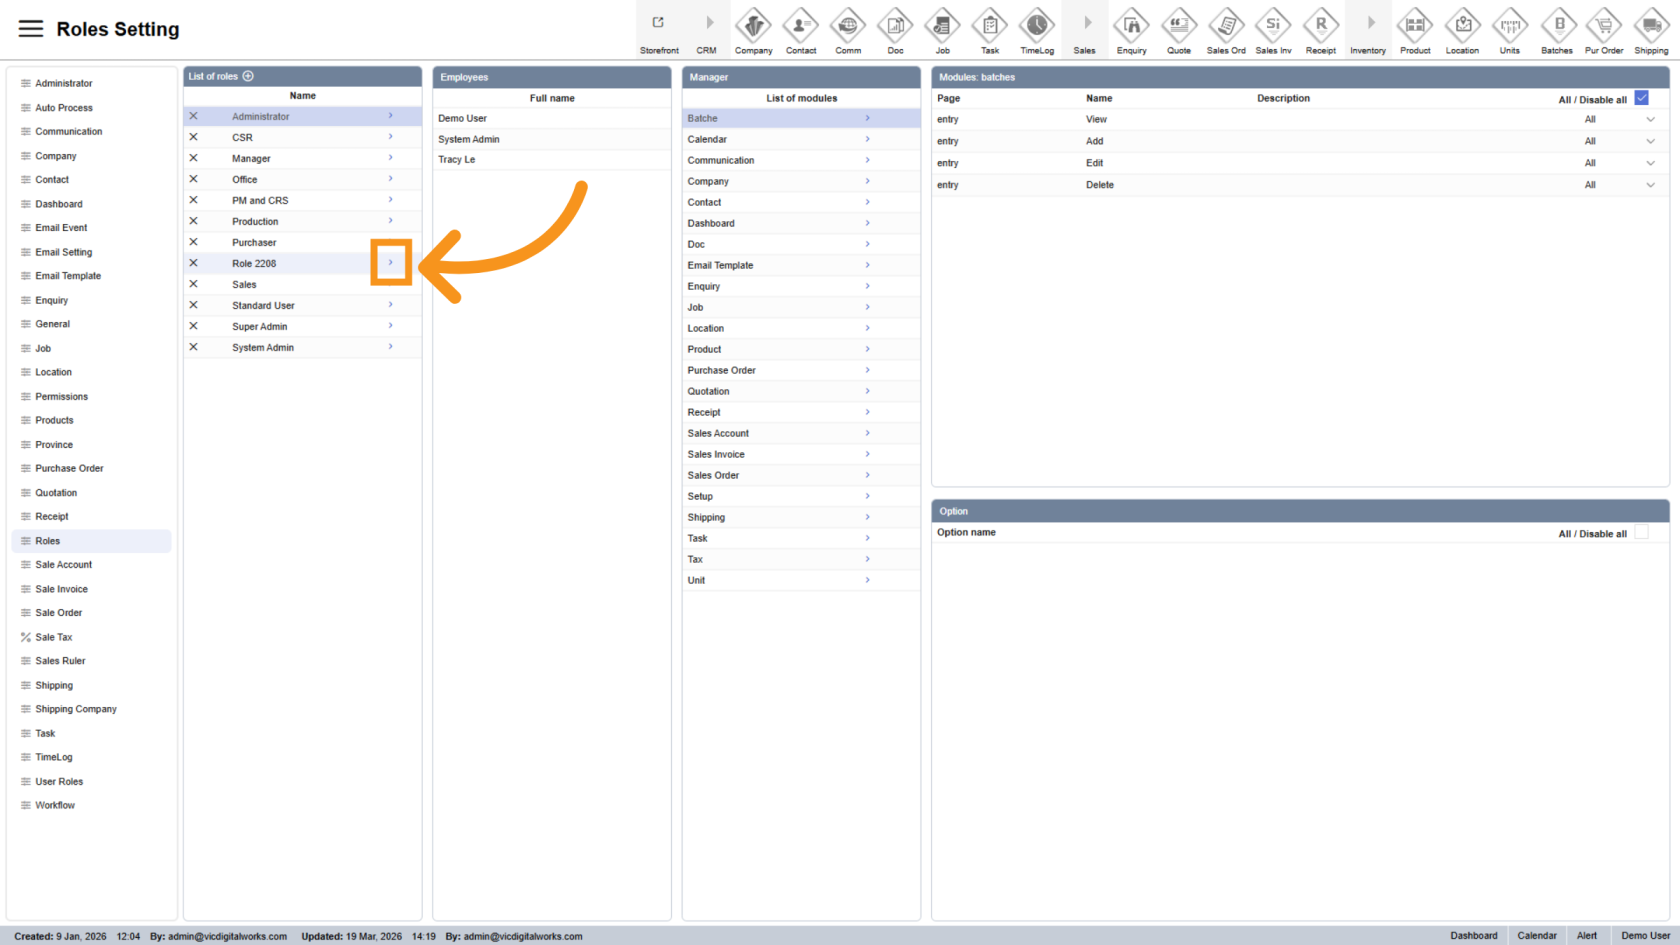
6. Select the Role
Click the ![]() arrow next to the newly created role to begin configuring permissions for that role.
arrow next to the newly created role to begin configuring permissions for that role.
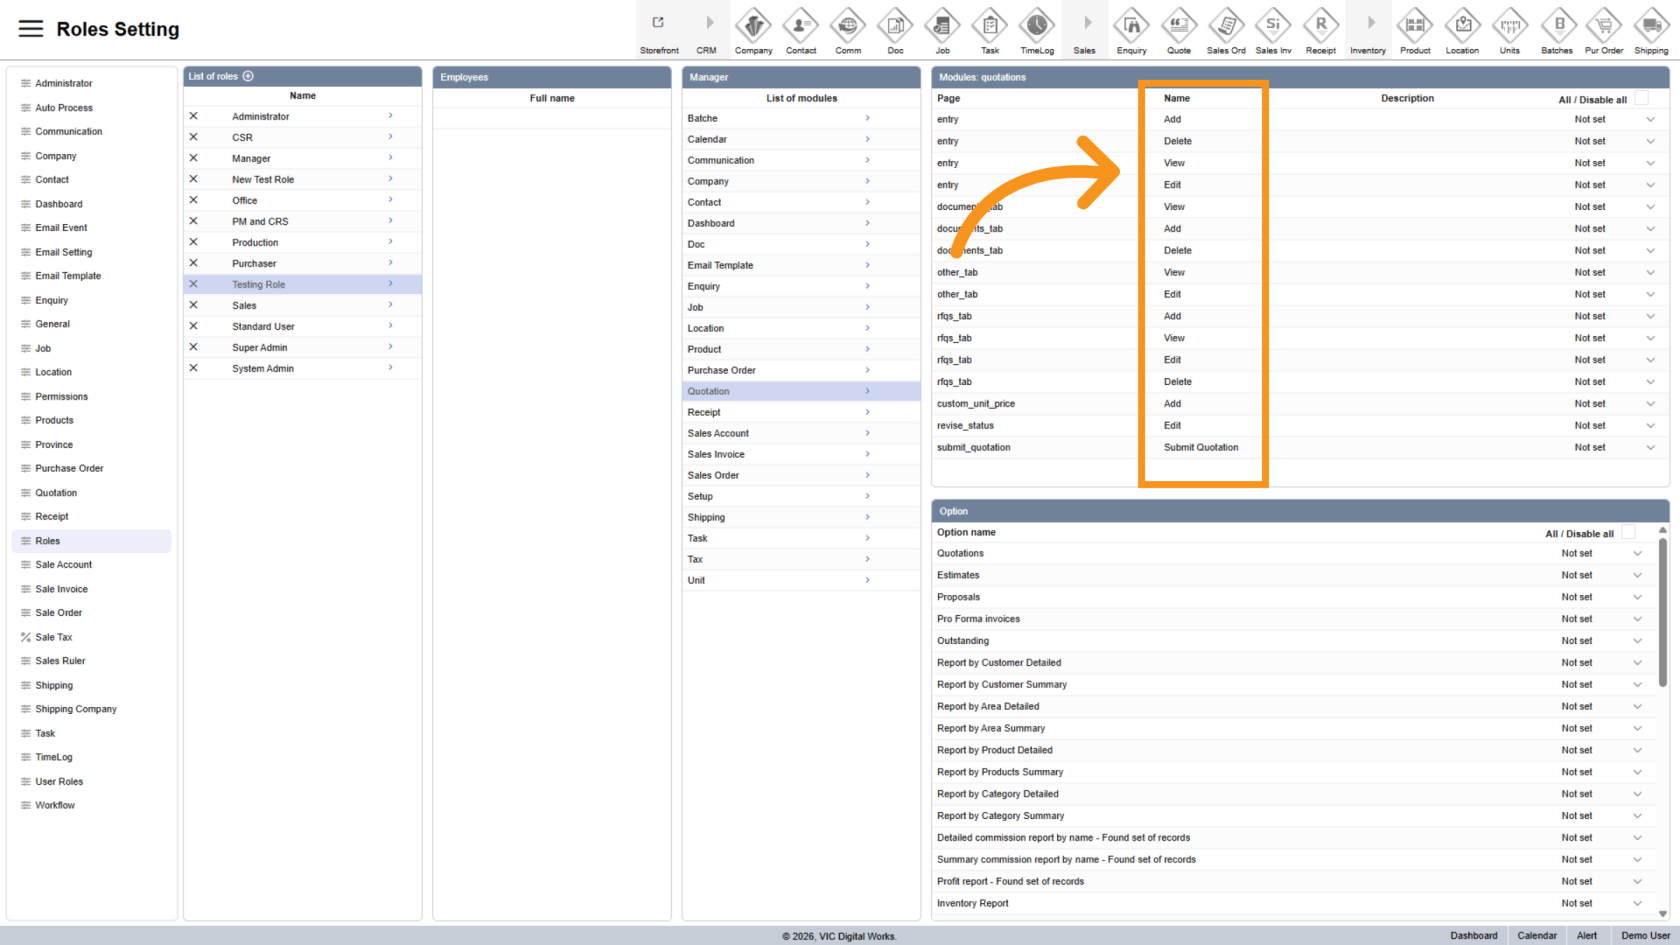
7. Select Modules
Choose the modules you want to control access for.
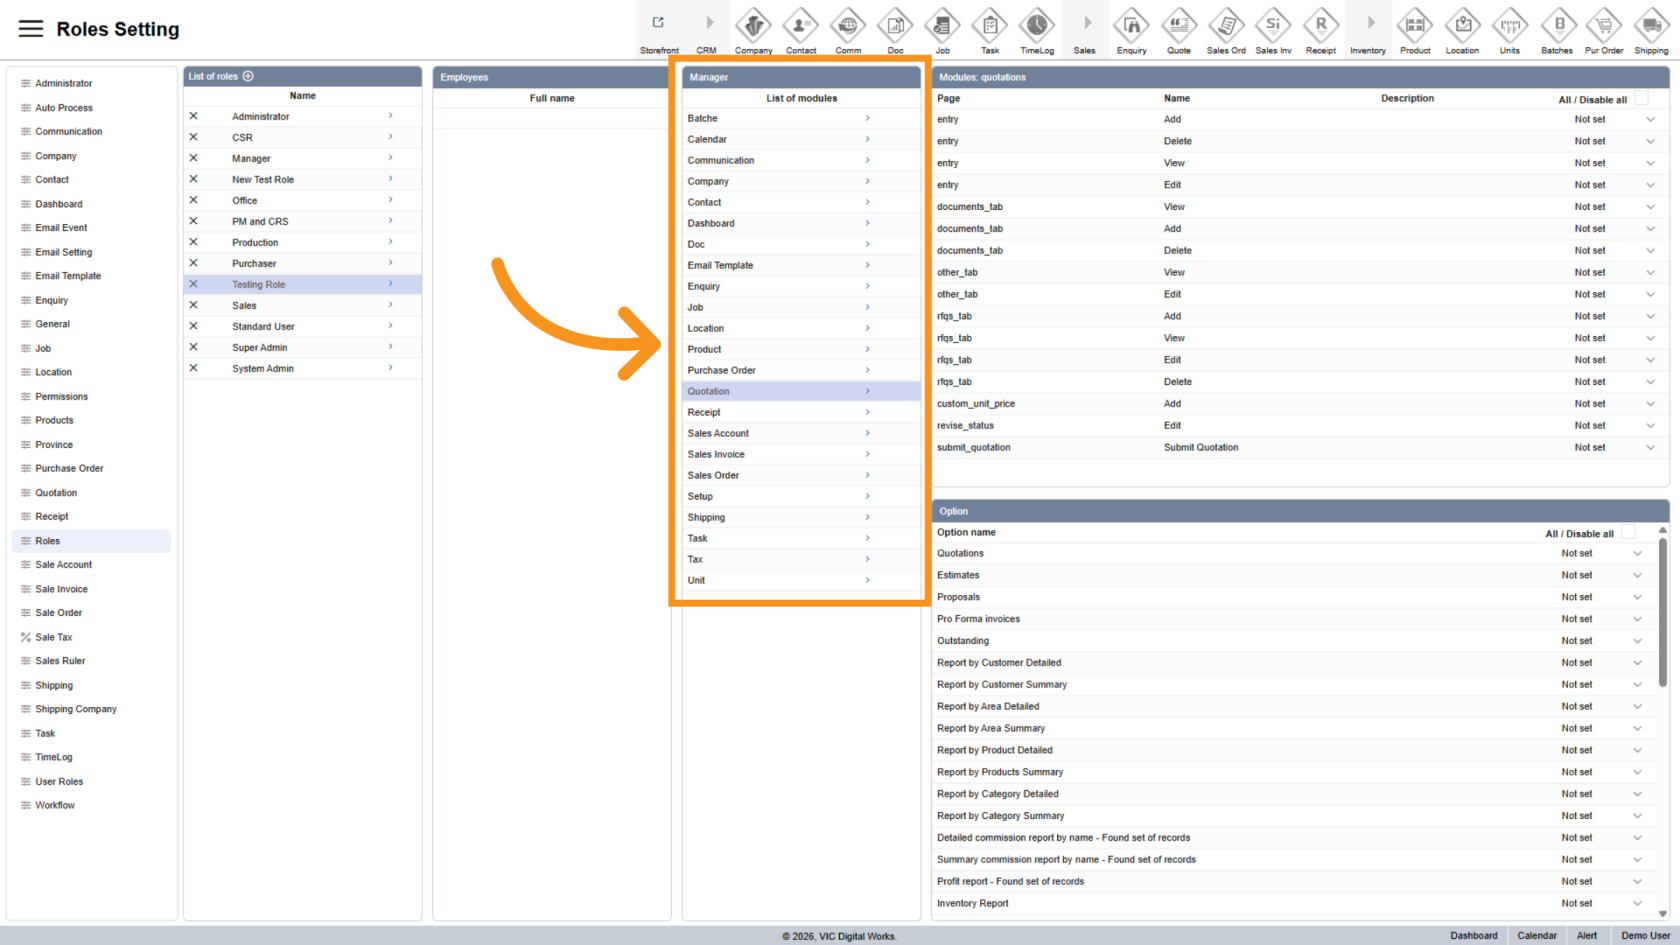
8. Configure Permissions
Set permissions for the selected role using the table on the right.
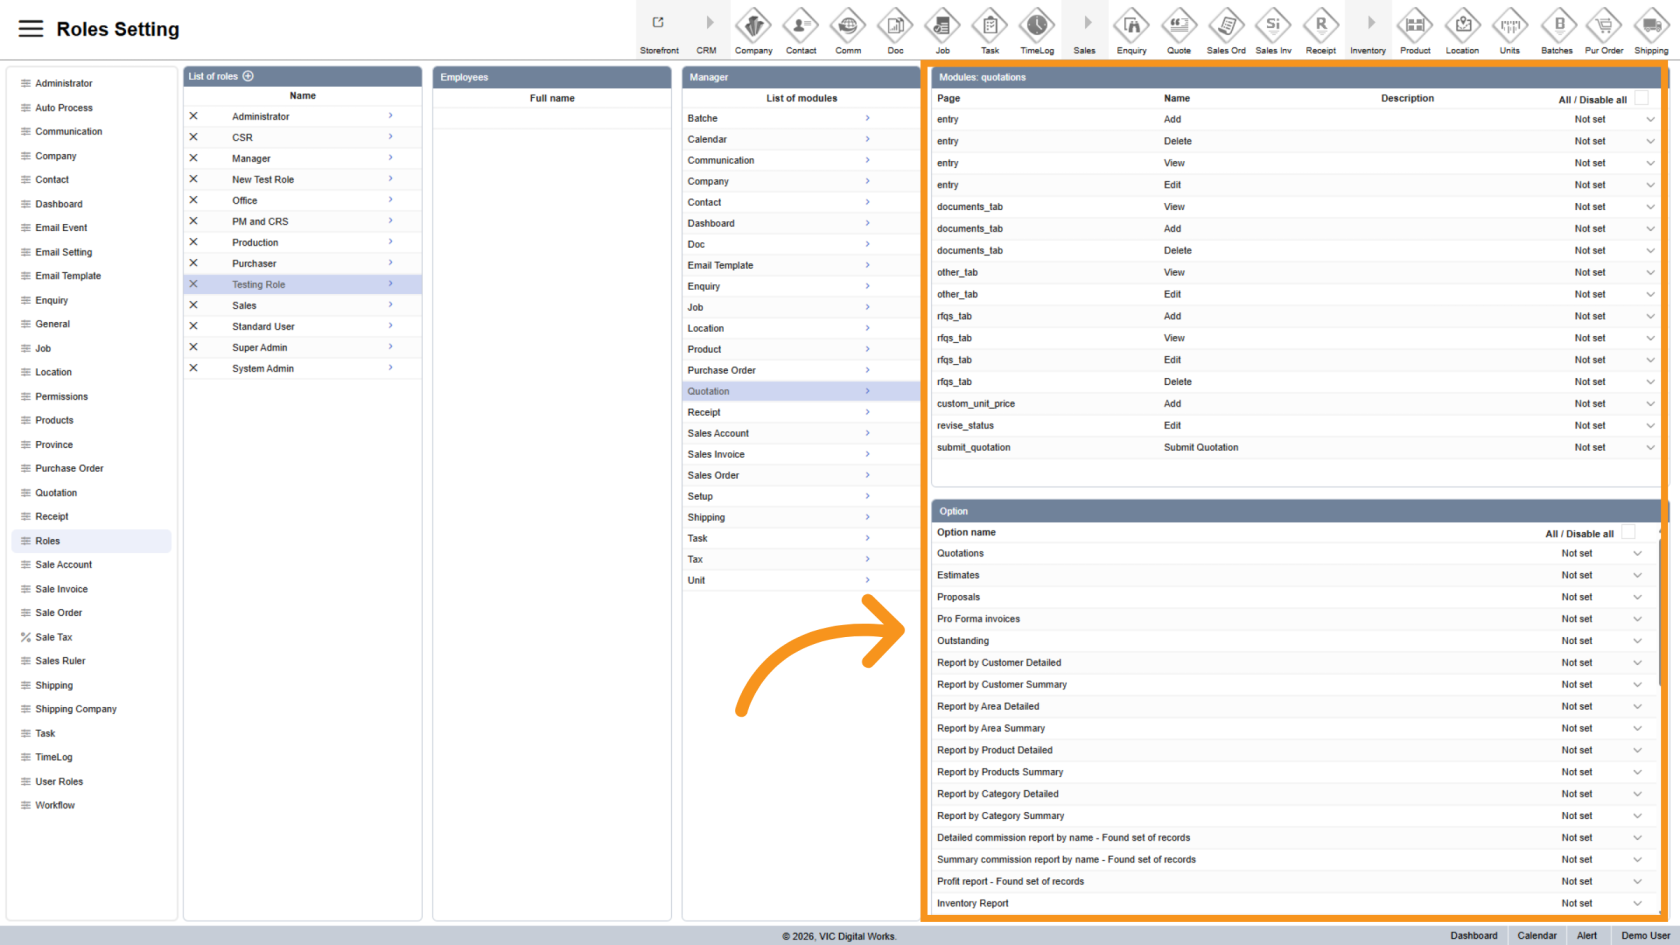
9. Configure Page Permissions
The Page column defines where the permission will apply, such as entries, document tabs, and other sections.

10. Configure Permission Types
The Name column defines the permission type for the role.
- Add enables creating new records
- Delete enables removing records
- View provides access to pages and information
- Edit enables modifying existing records within the system
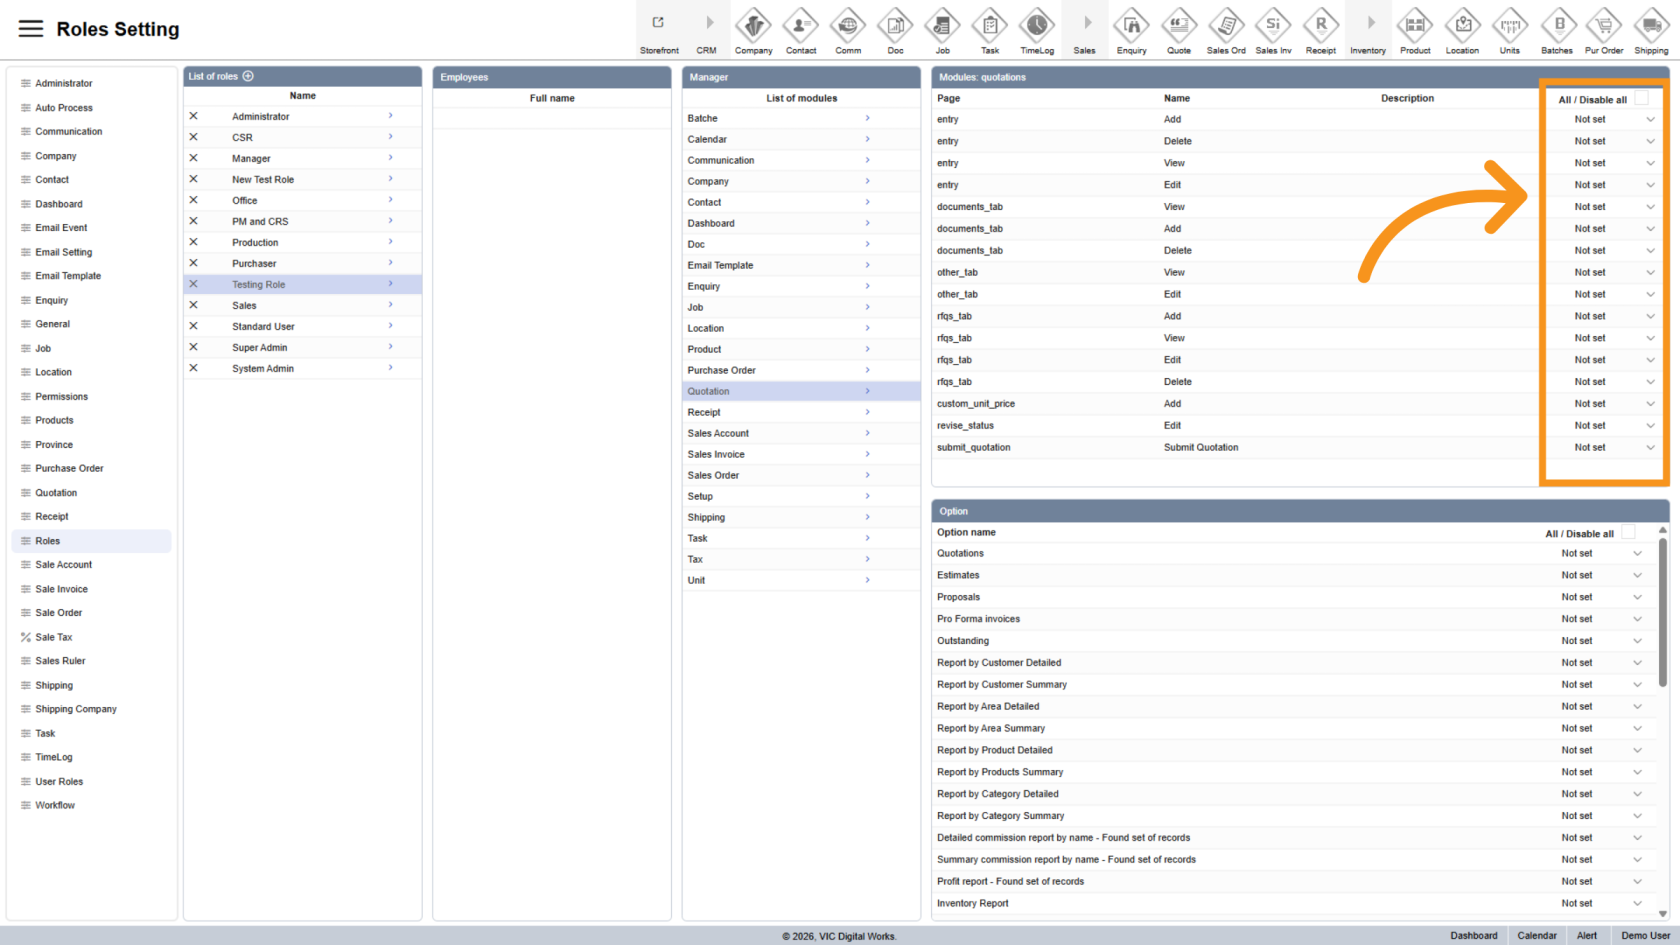
11. Apply Permissions
Select All to grant full permissions for the selected role.
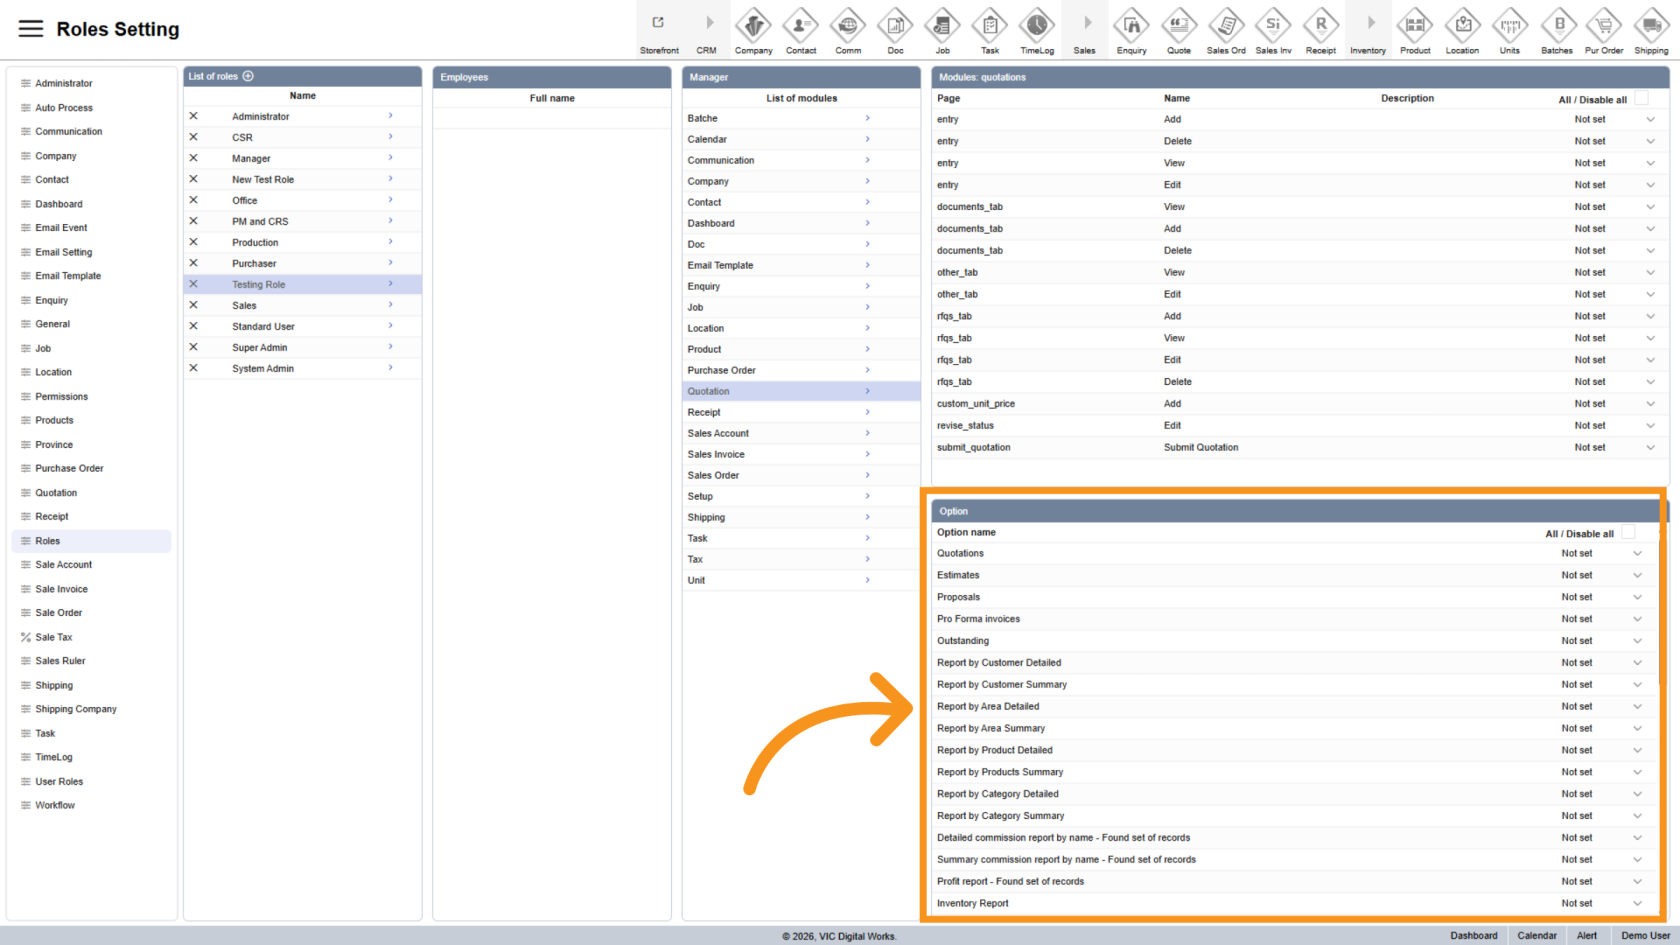
12. Quick Action Permissions
The options below provide additional permissions in the Quick Action menu, allowing the selected role to access more actions and features within the system.
You have successfully added a new role and configured its permissions in the WorkTraq application. Make sure permissions are assigned correctly to match your operational requirements.