Shipping Company Setup
This guide walks you through how to configure and manage shipping companies within the WorkTraq App.
Video Tutorial
1. Open Shipping Company Section
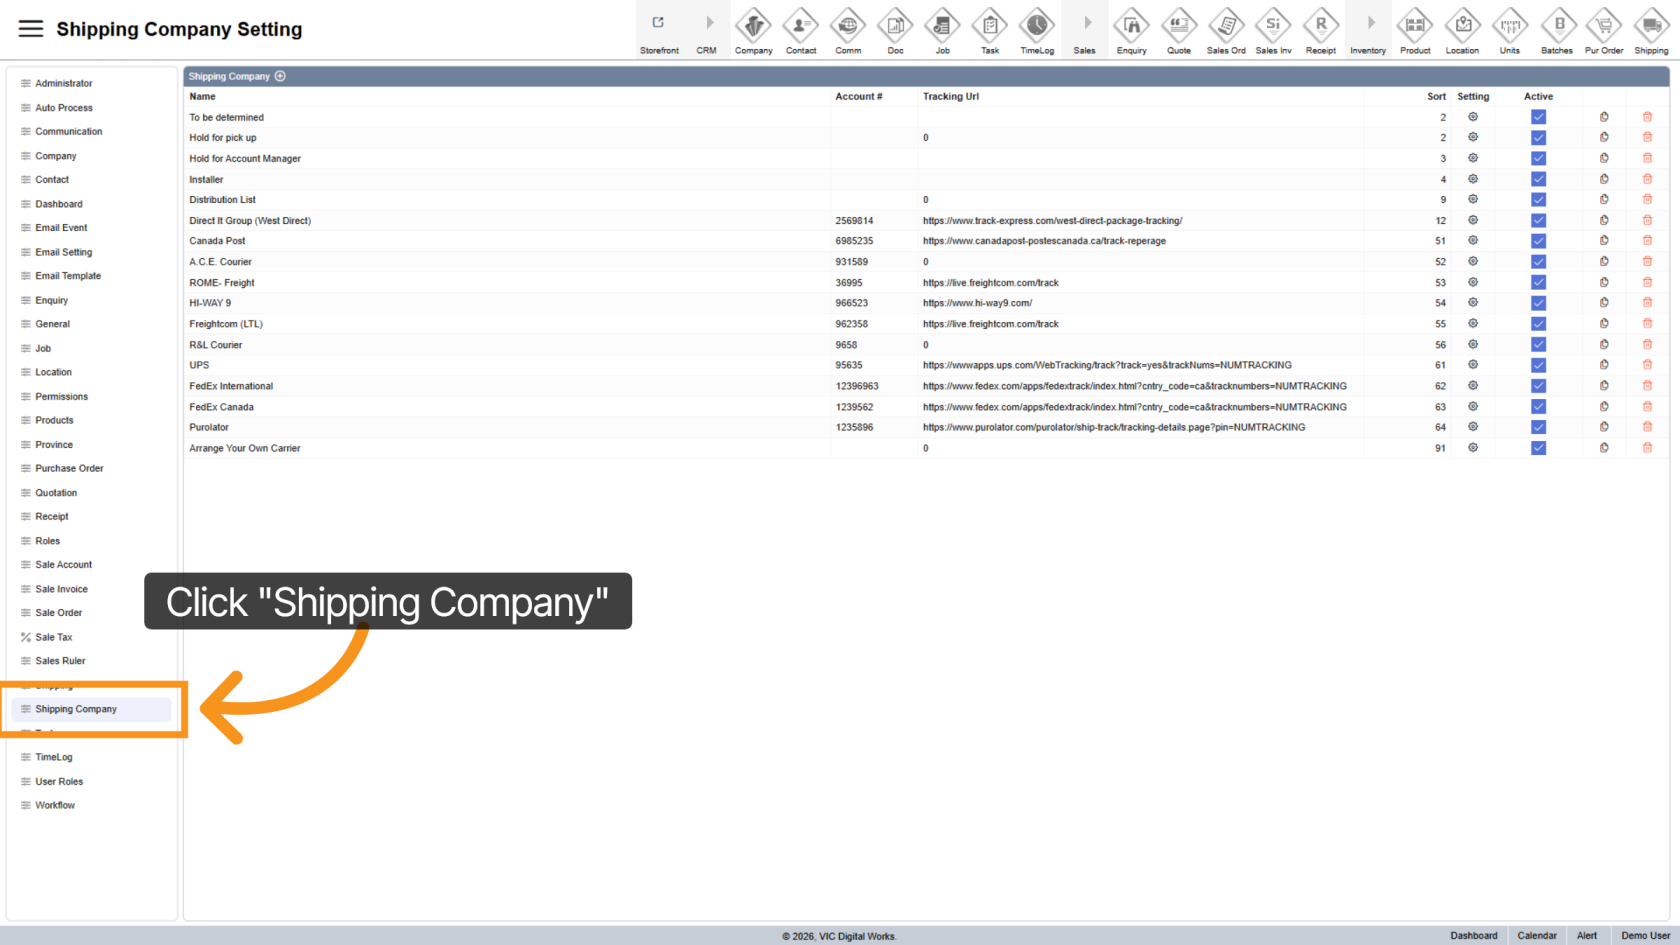
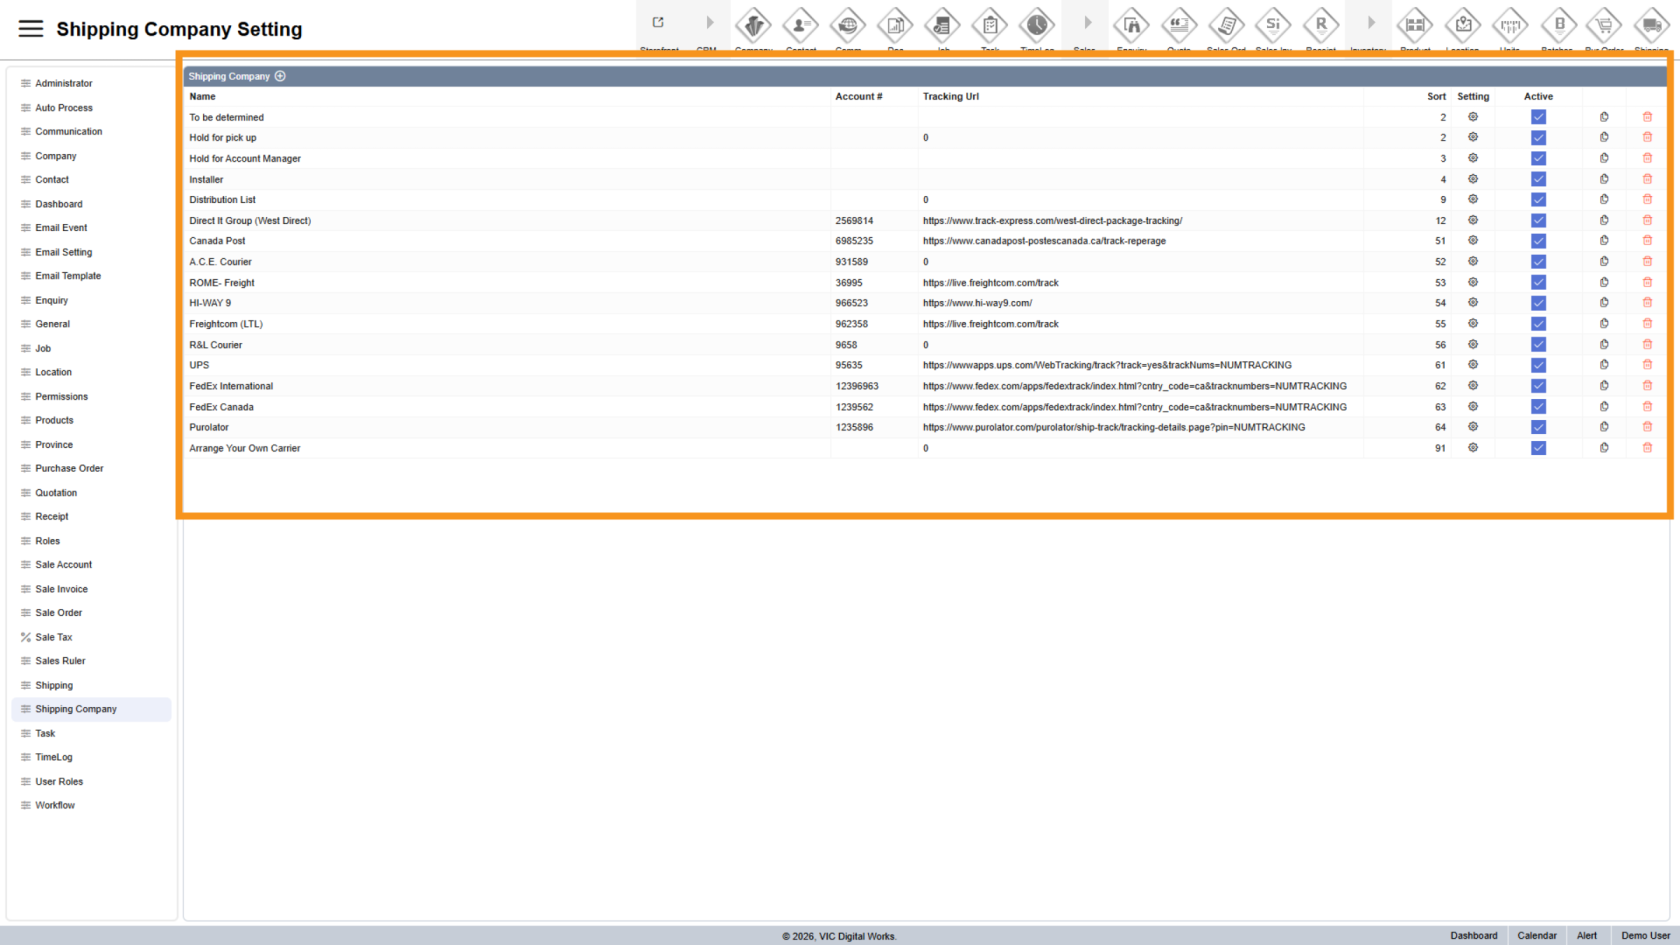
2. View Shipping Company List
All existing shipping companies are displayed on the right, including:
- Name
- Account Number
- Tracking URL
- Additional settings
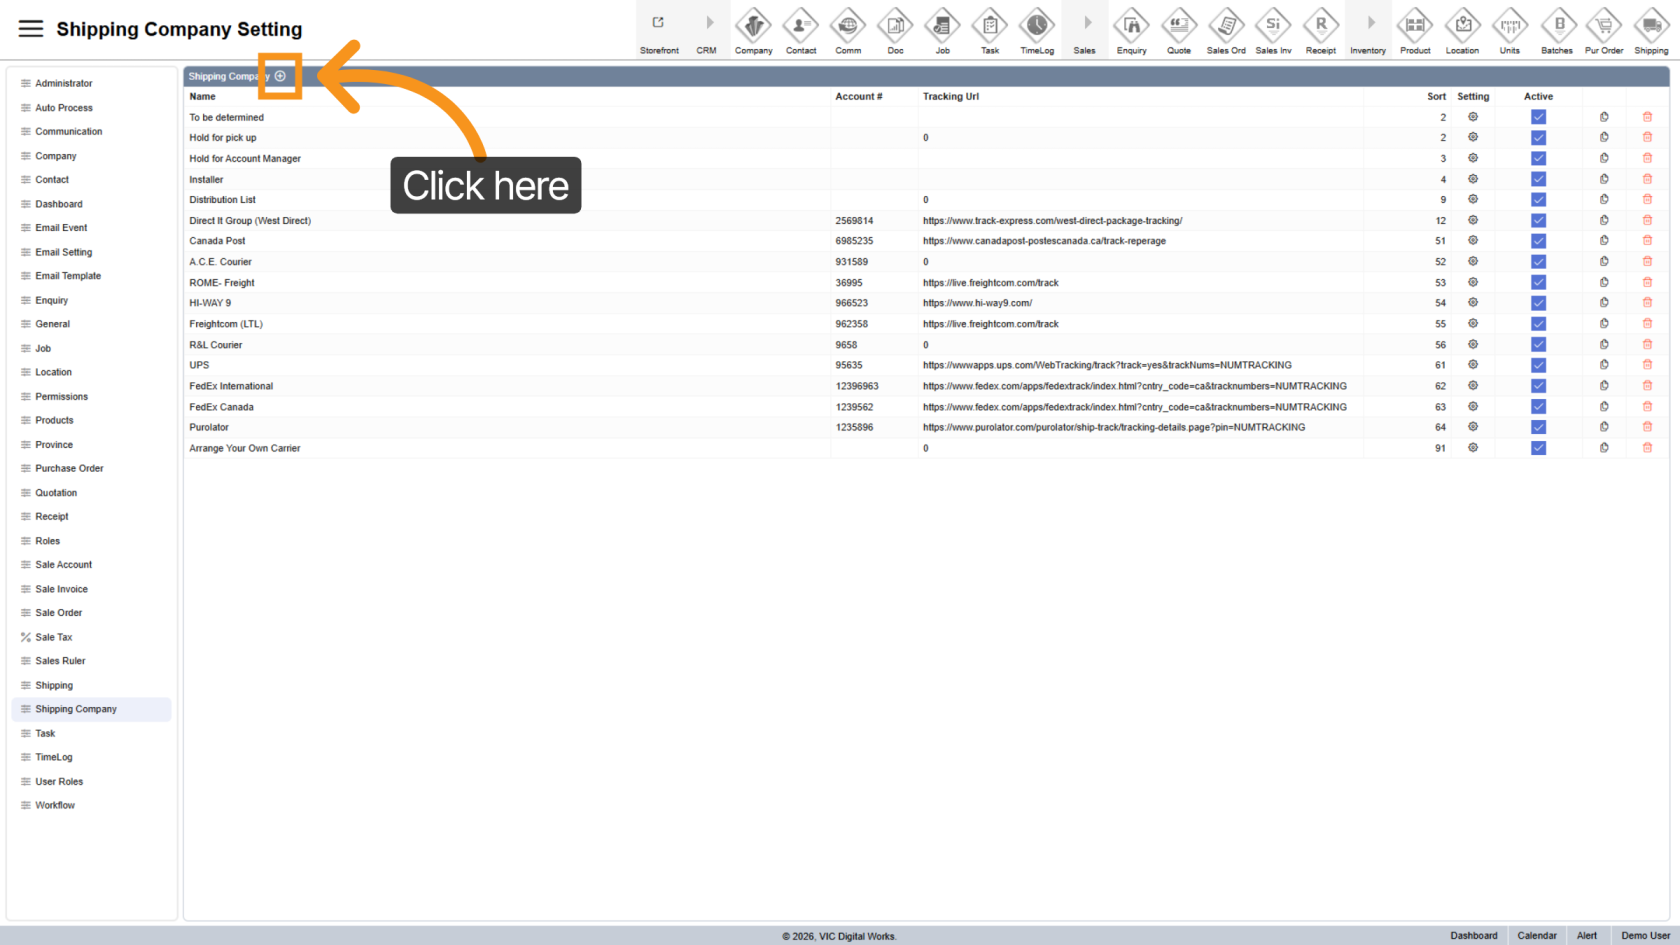
3. Add a New Shipping Company
Click the ![]() plus icon to create a new shipping company.
plus icon to create a new shipping company.
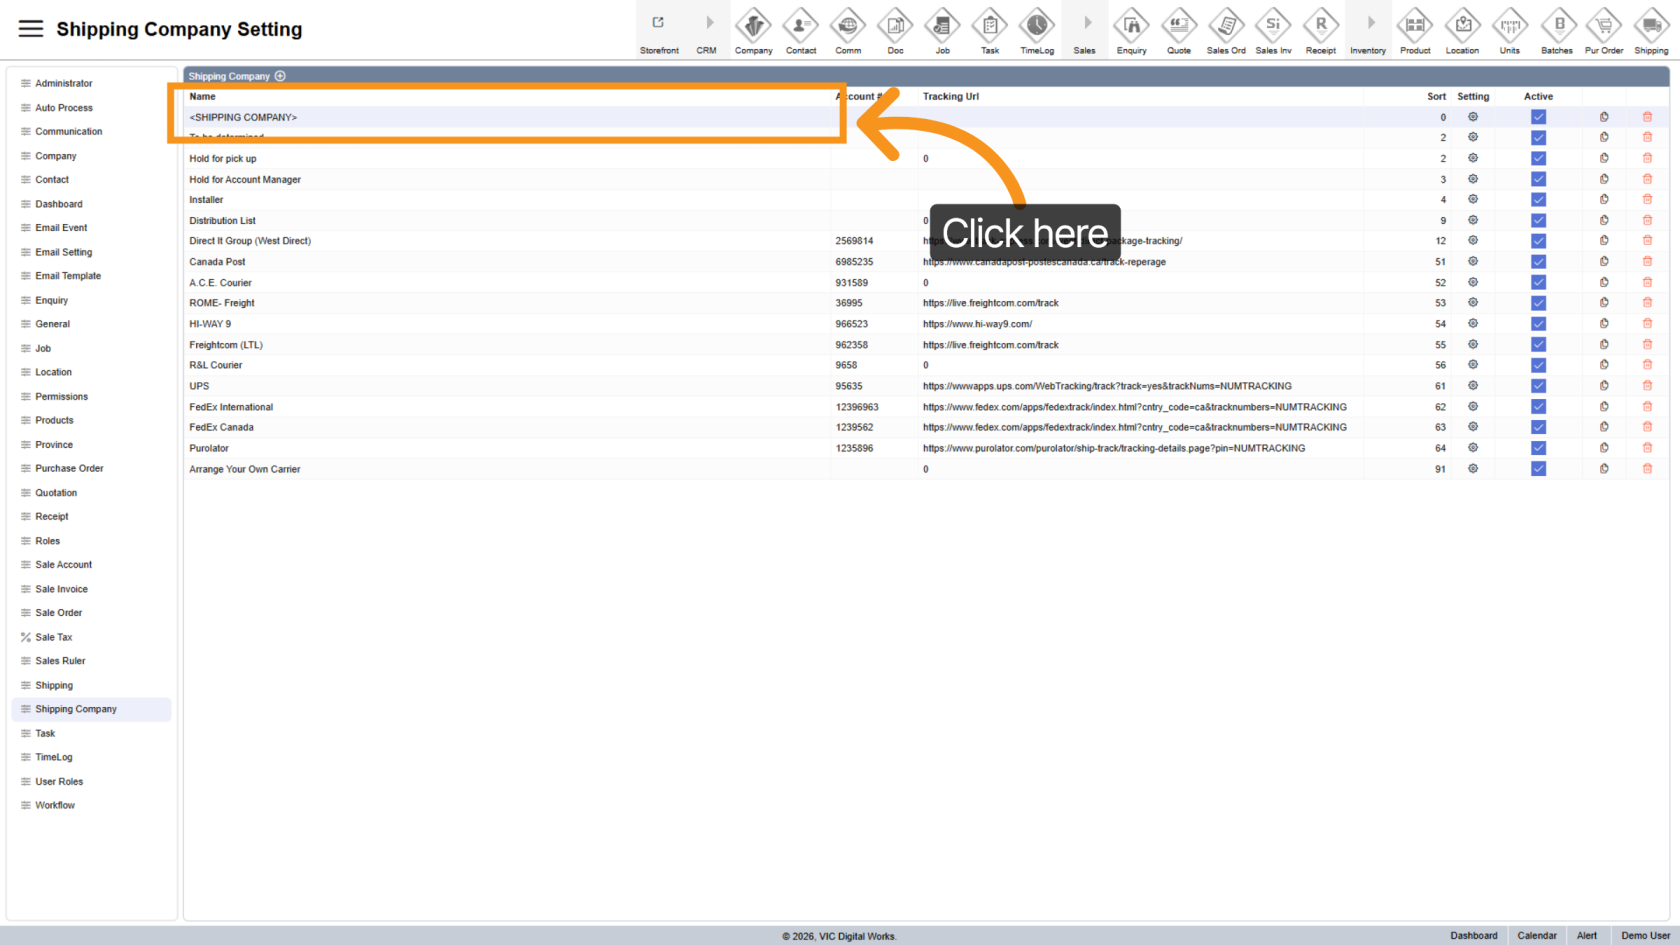
4. Rename Shipping Company
Click on the shipping company name to edit and assign a clear, identifiable name.
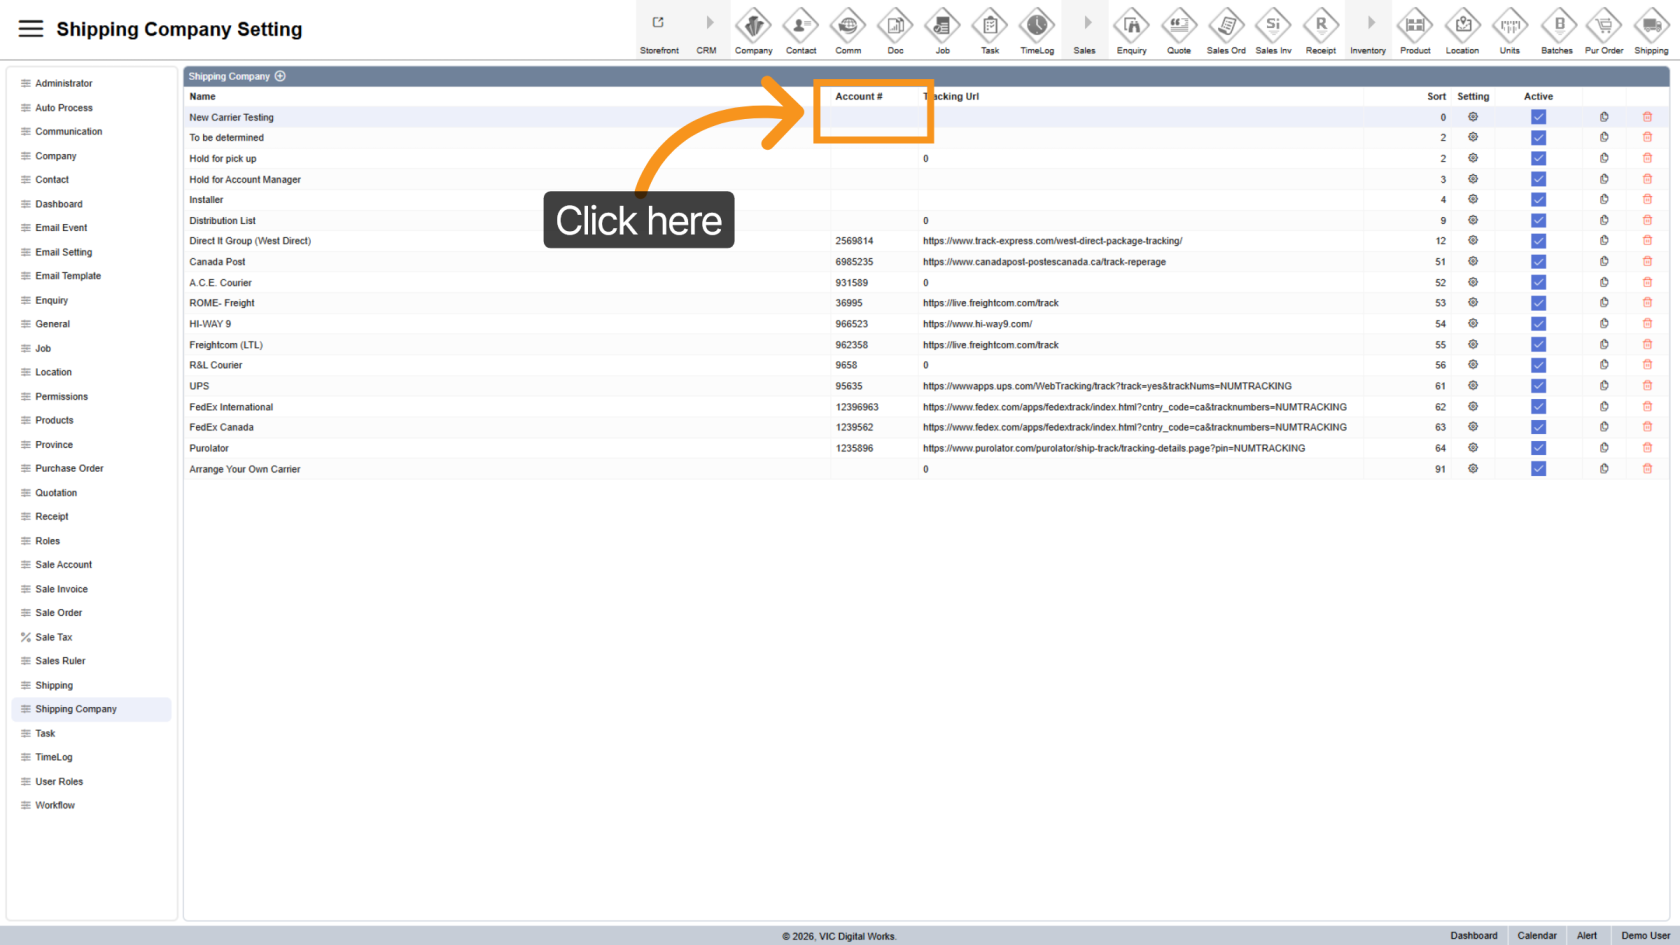
5. Enter Shipping Account Number
Add the shipping account number associated with the carrier.
This helps staff select the correct account when processing orders.
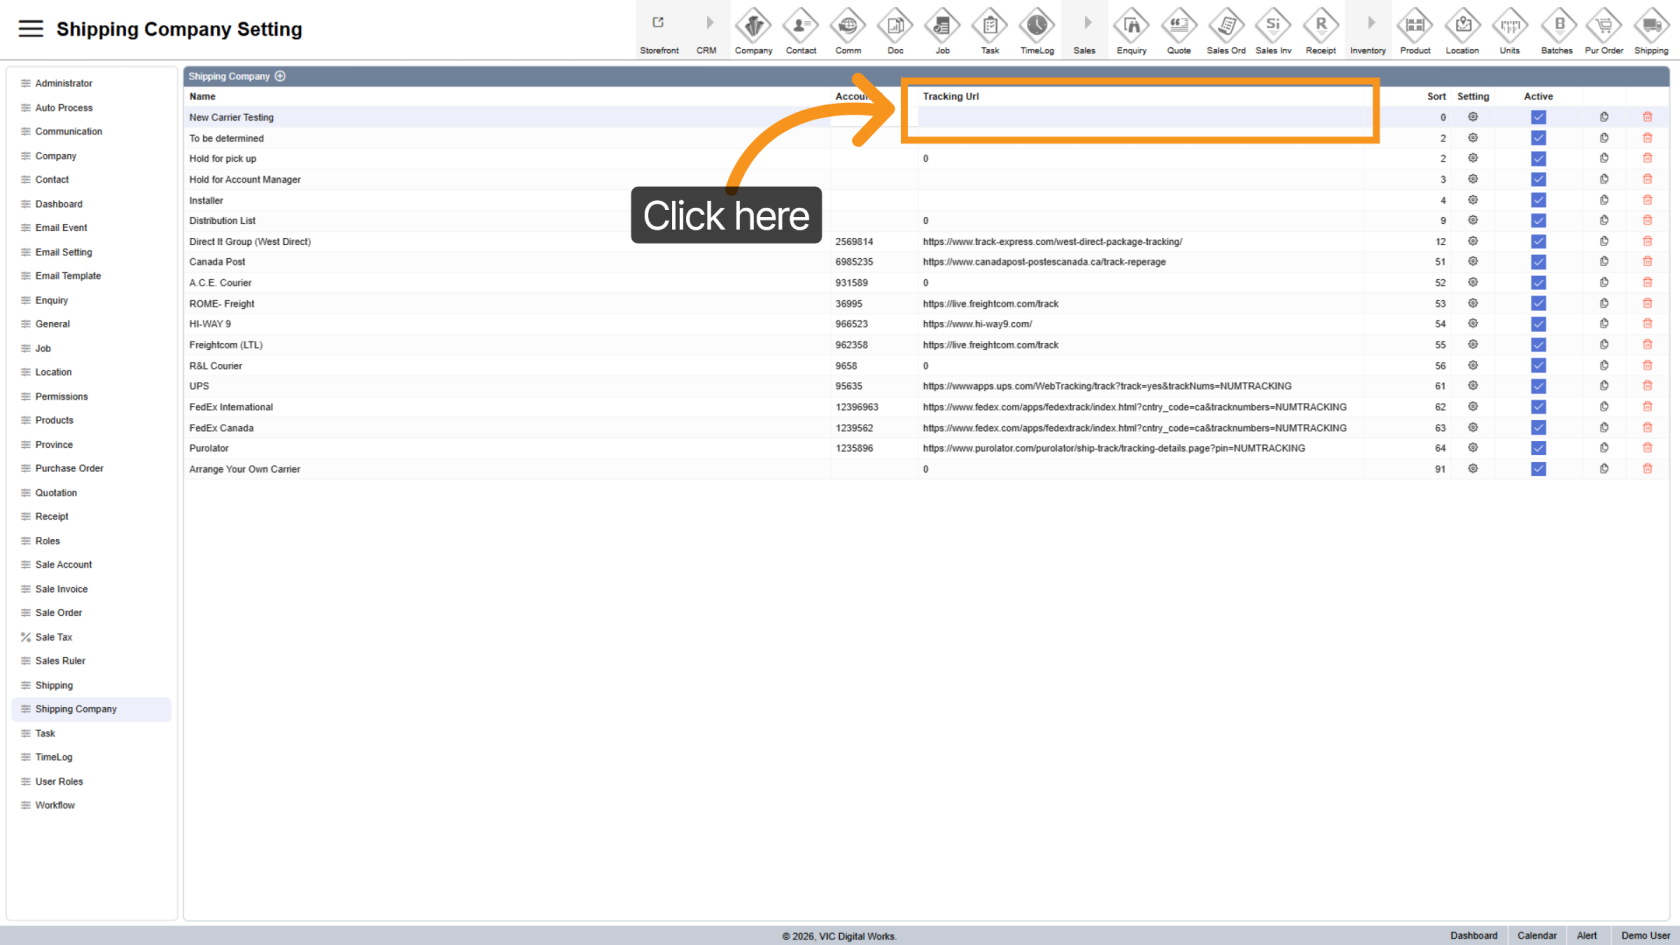
6. Enter Tracking URL
Provide the tracking URL that will be included in customer emails after shipment.
This allows customers to track their orders directly.
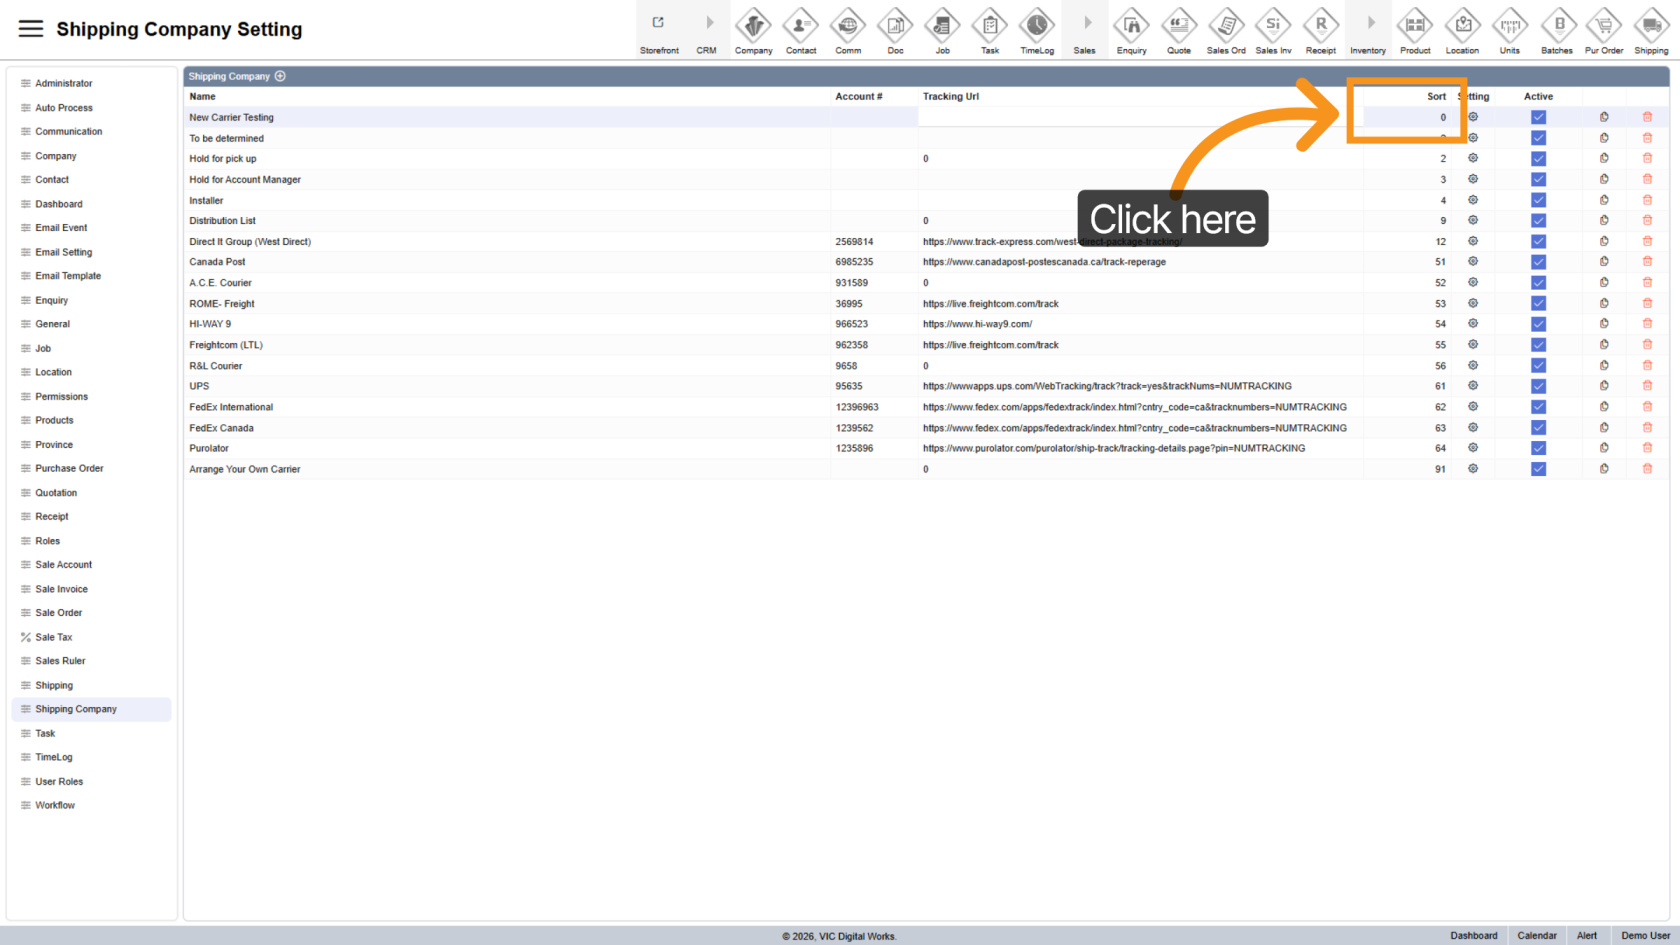
7. Reorder Shipping Companies
Adjust the display order by entering a sequence number.
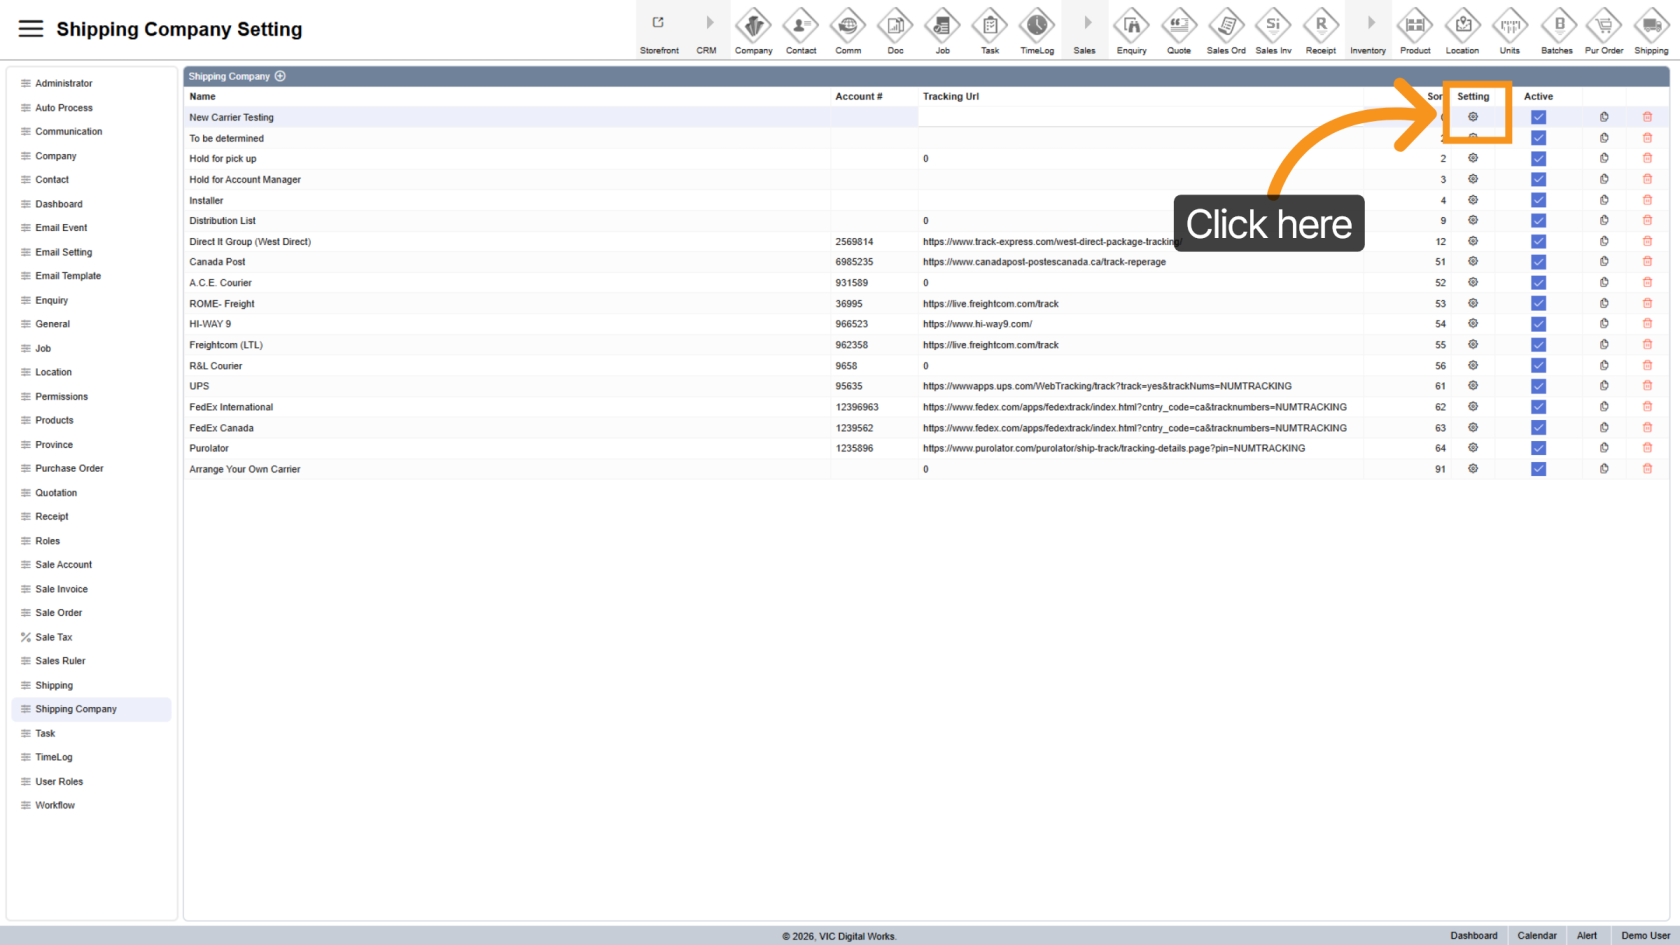
8. Open Settings
Click the ![]() settings icon to configure detailed options for the selected shipping company.
settings icon to configure detailed options for the selected shipping company.
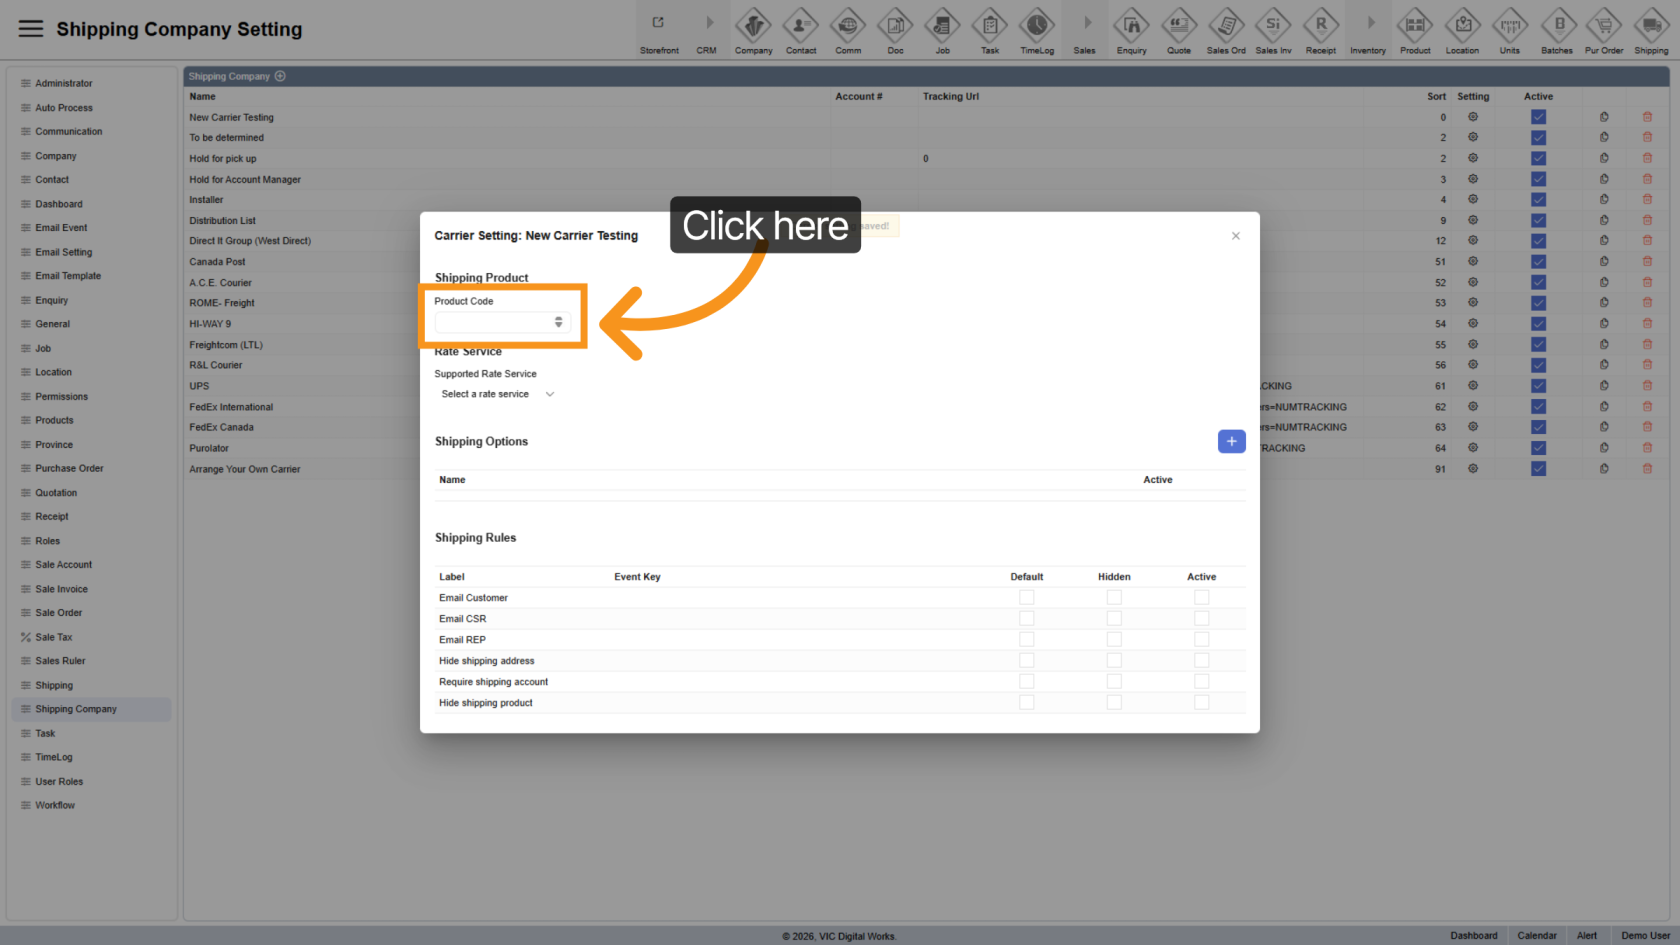
9. Add Shipping Product
Define a shipping product associated with this carrier.
This product will be automatically added to quotations and sales orders to ensure shipping charges are included.
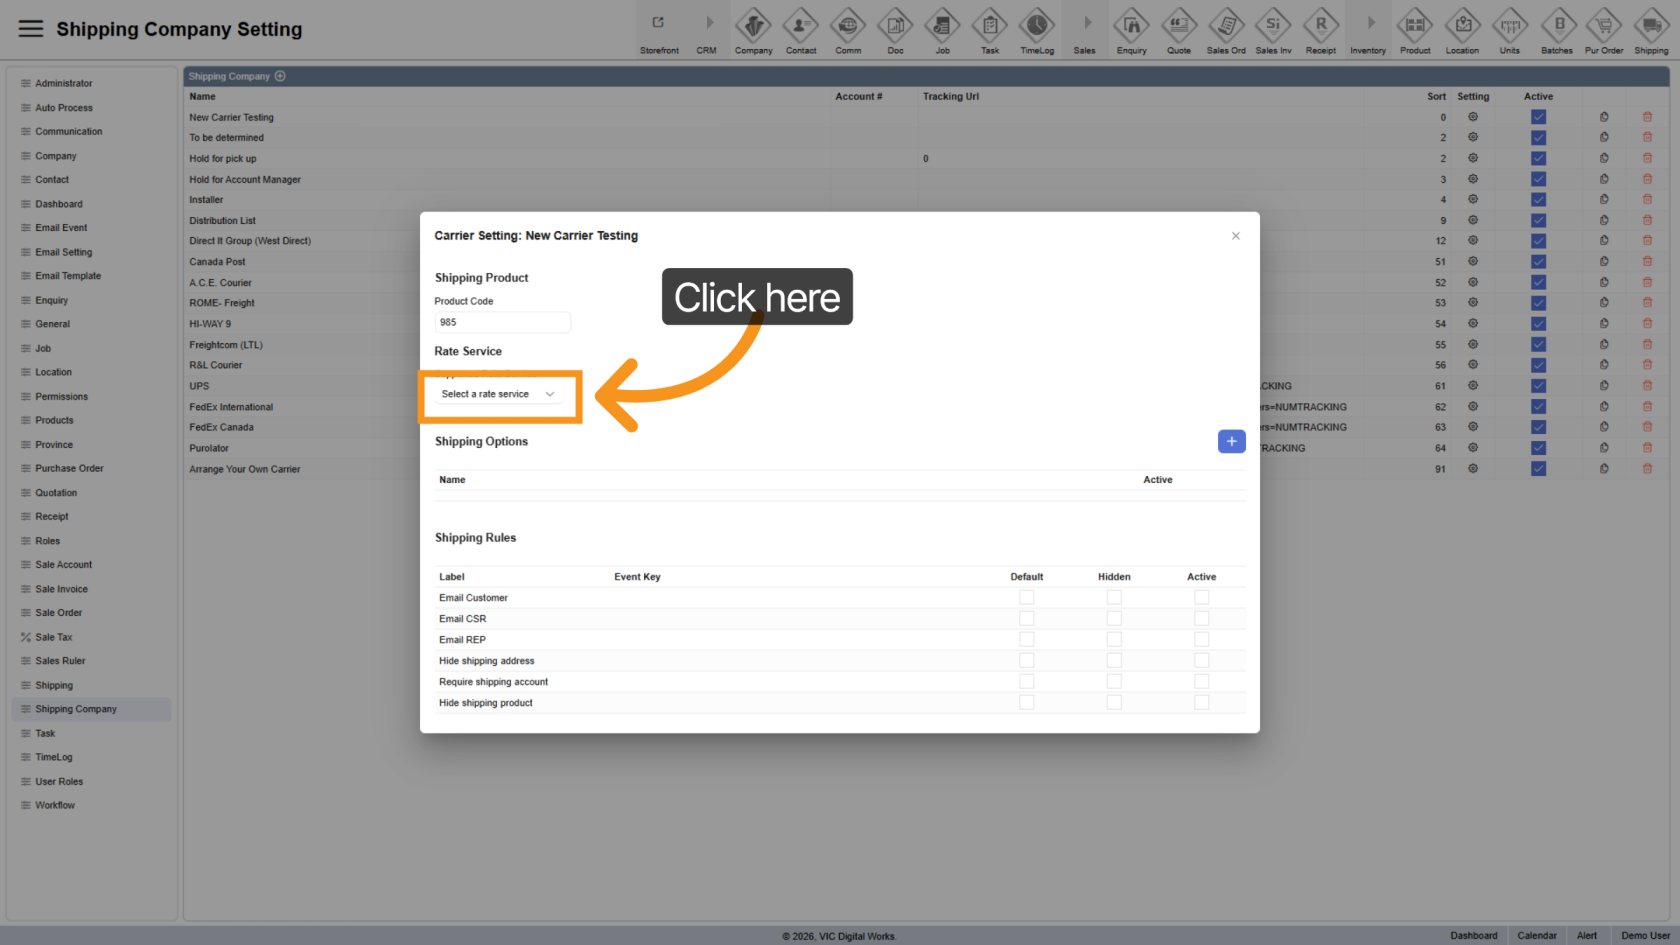
10. Apply Rate Service
Select a rate service to automatically retrieve shipping cost.
Currently supported carriers UPS and Purolator.
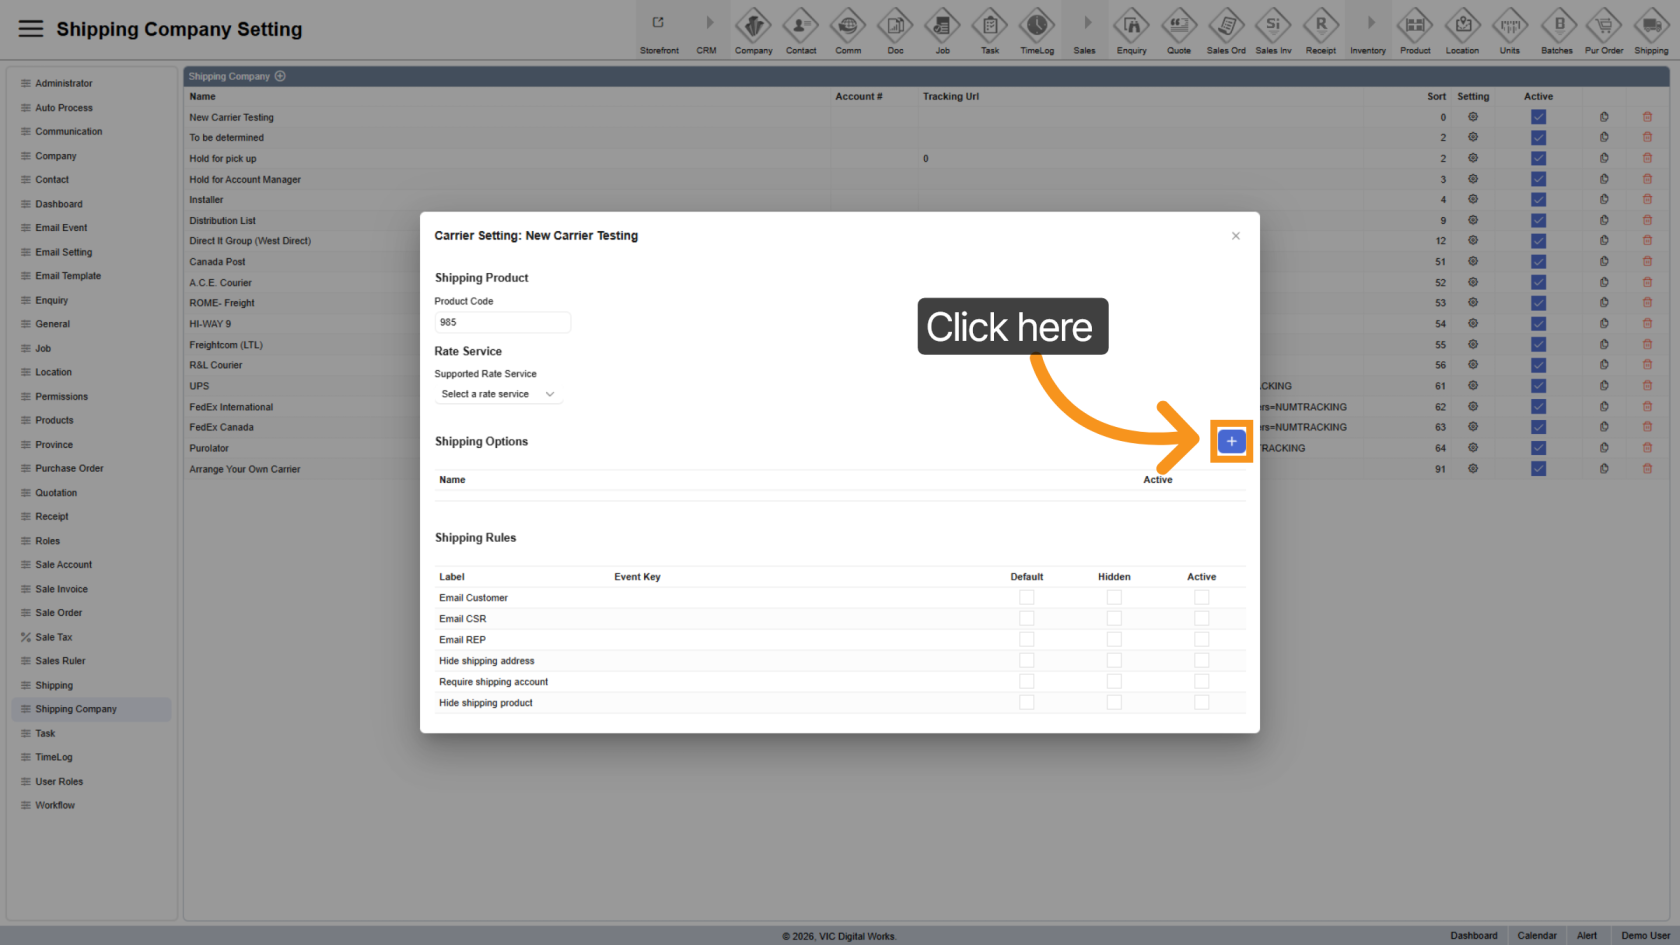
11. Add Shipping Options
Click the ![]() plus icon to create new shipping options.
plus icon to create new shipping options.
12. Rename Shipping Option
Click the option name to update it for easier identification.
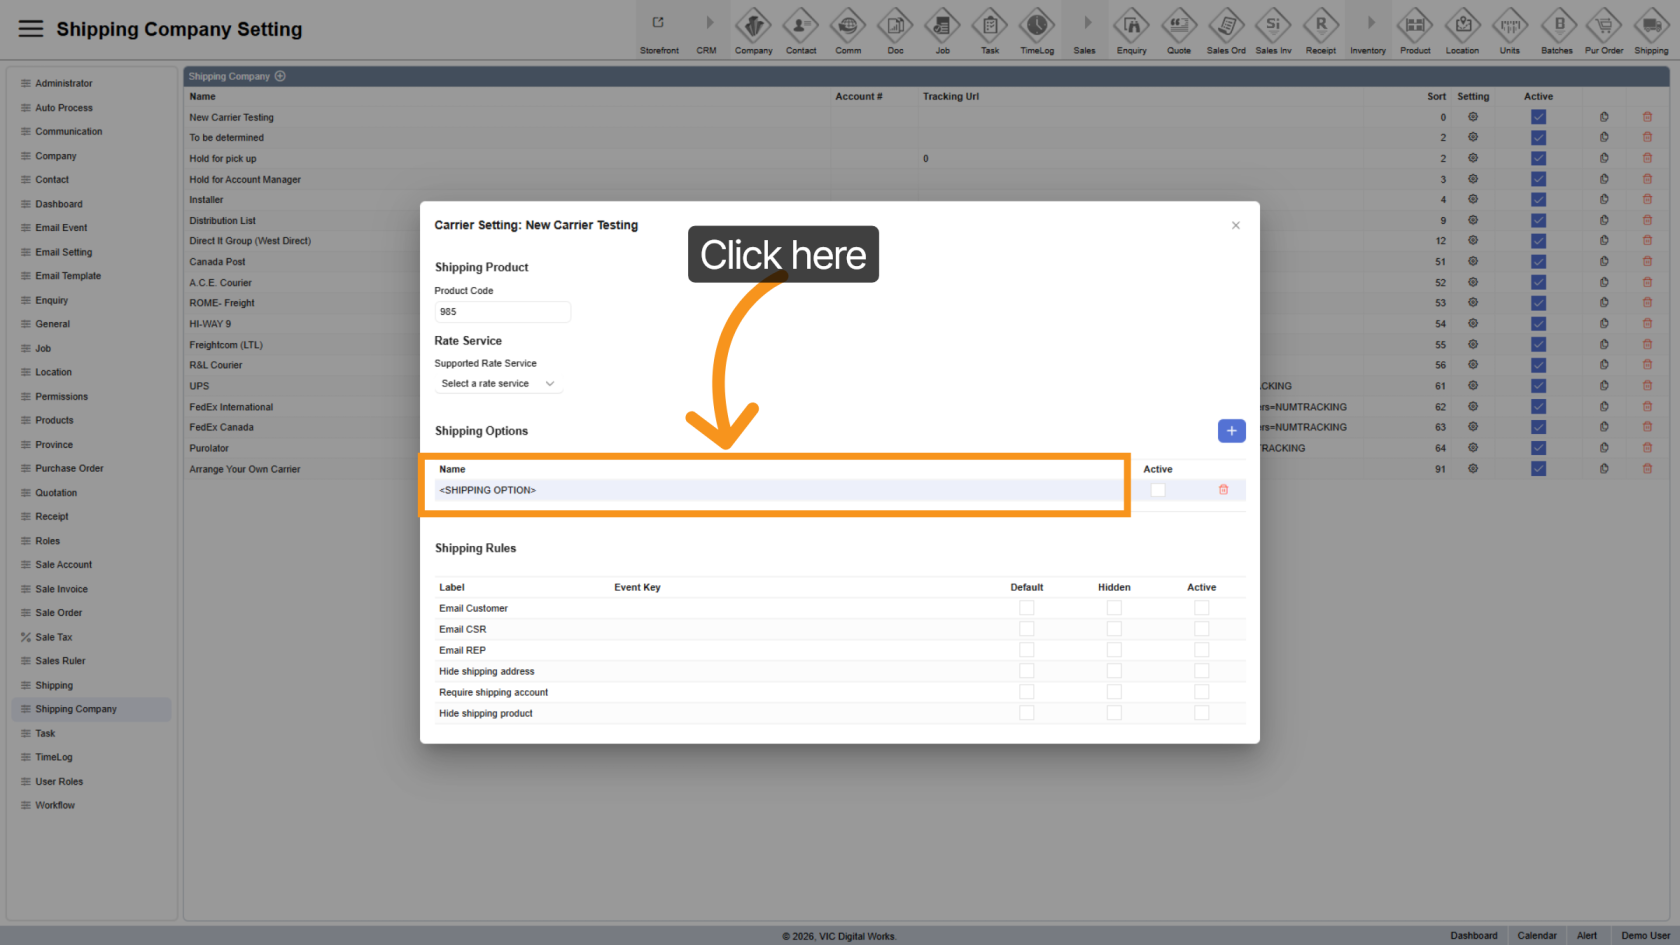
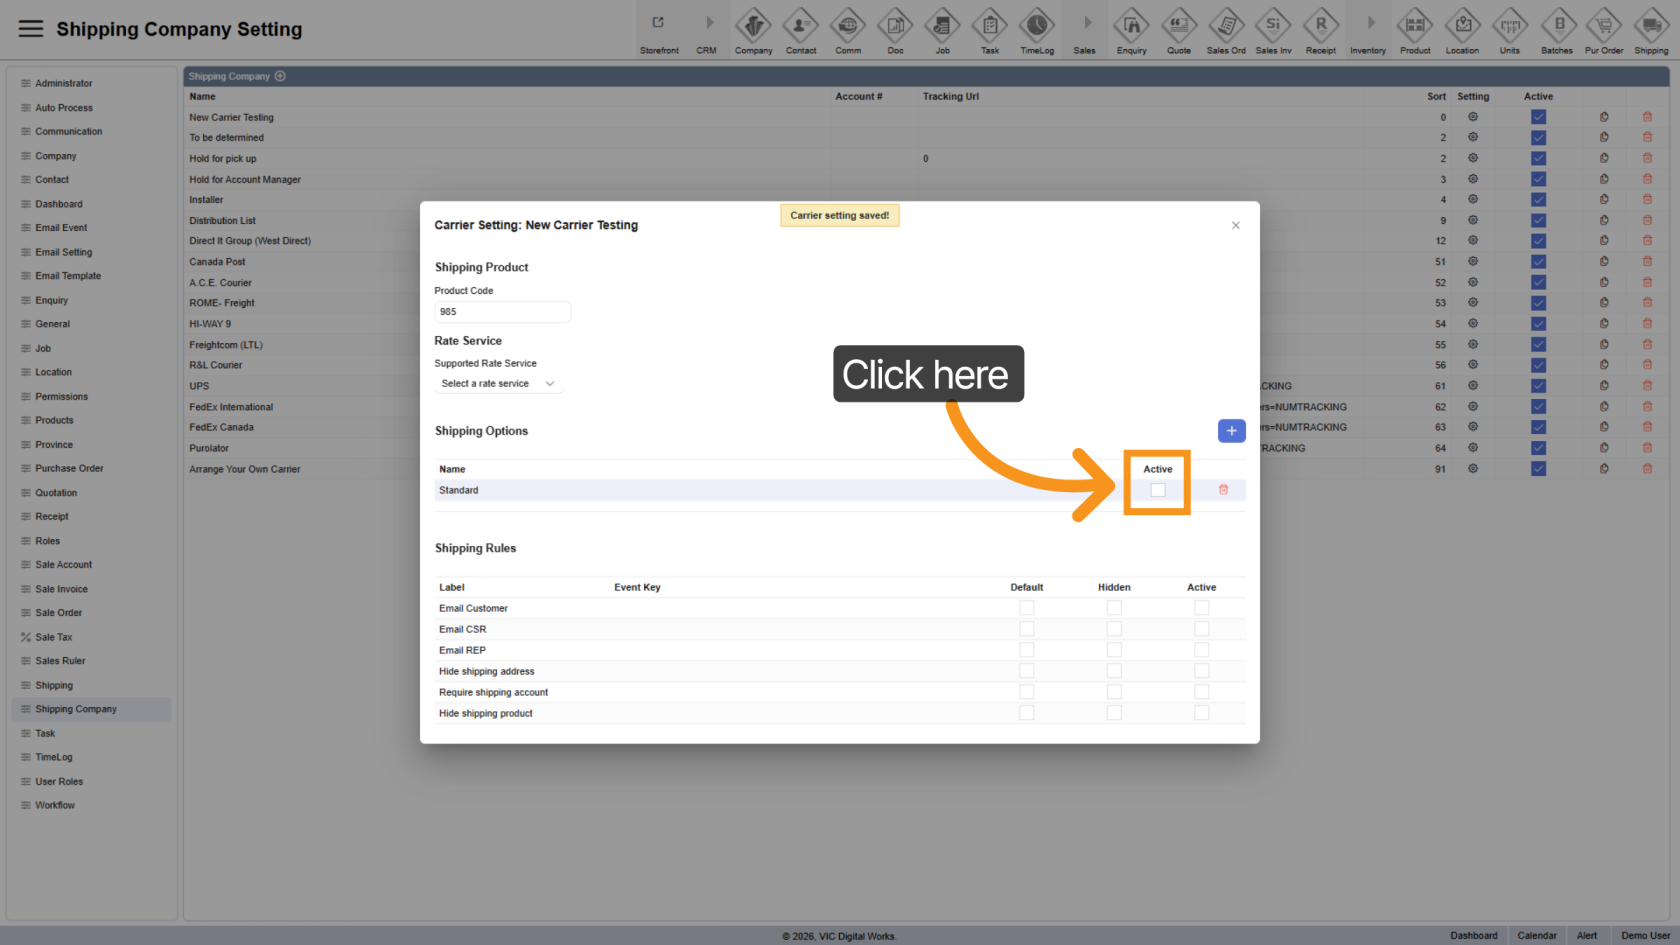
13. Active Shipping Option
Enable the option by selecting Active.
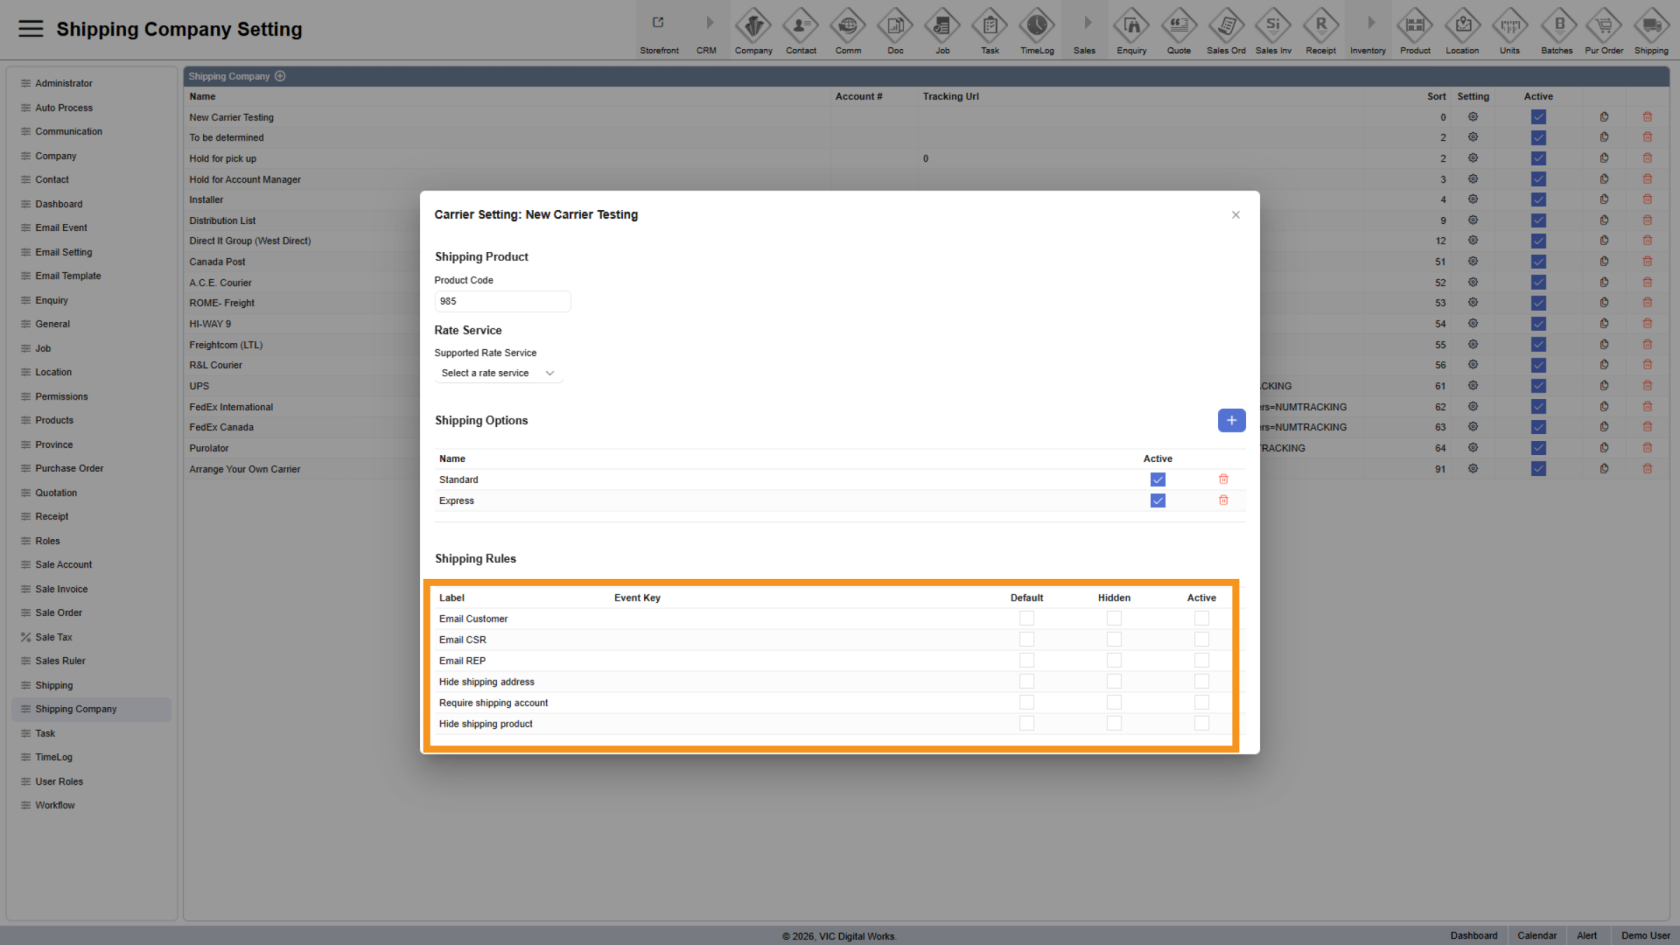
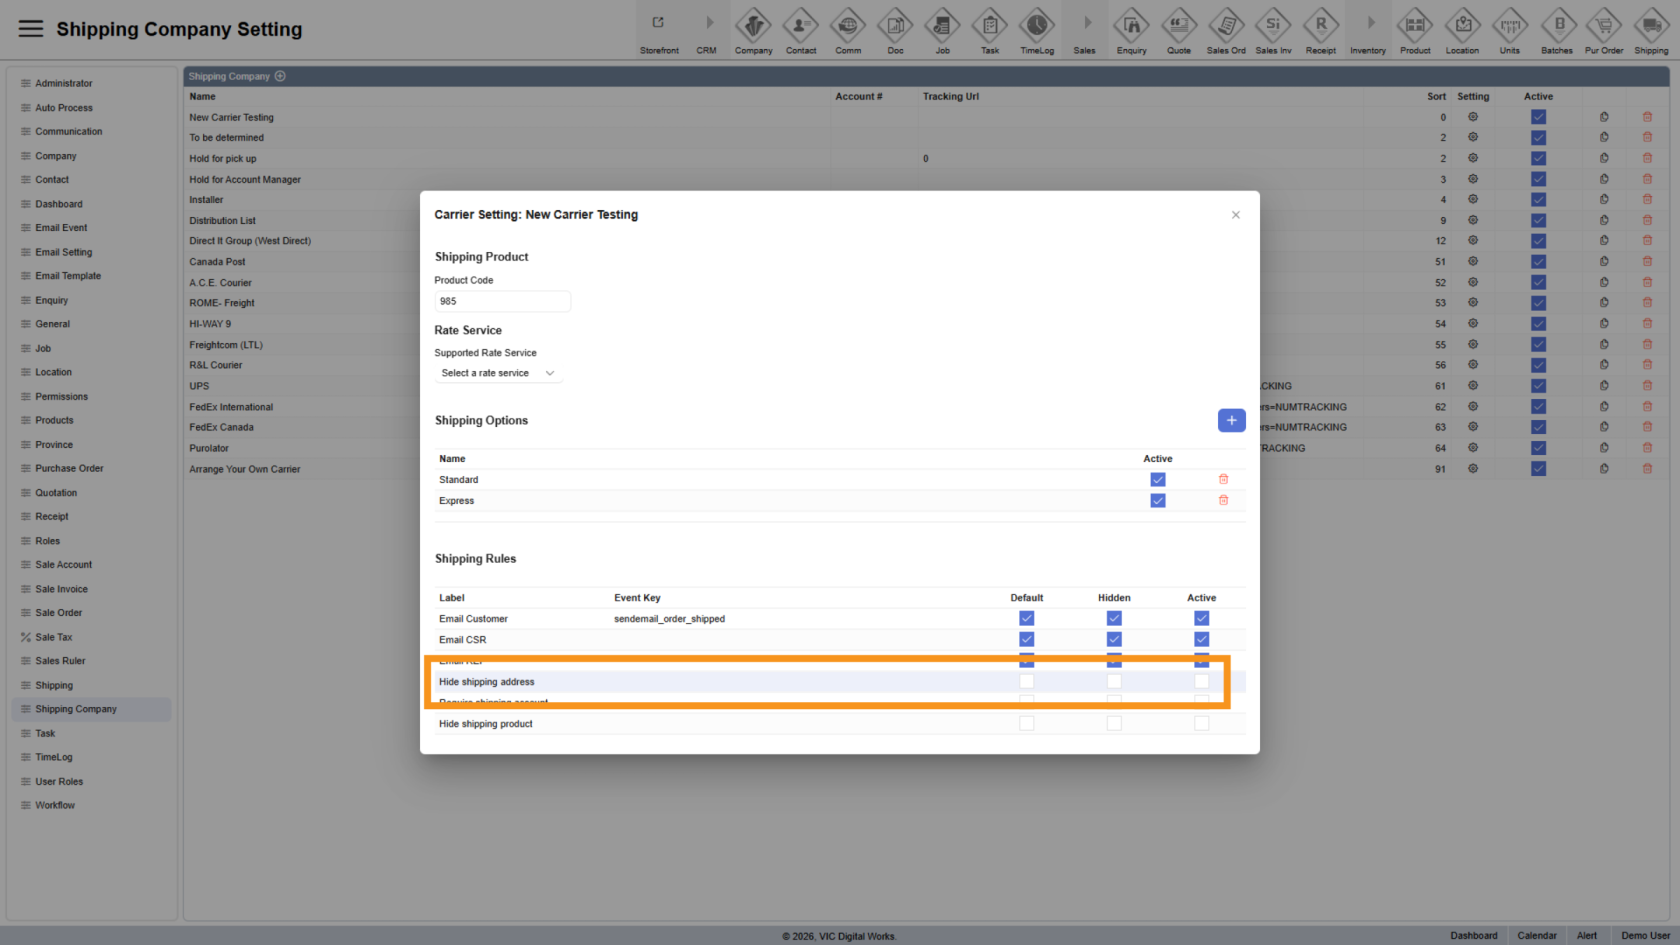
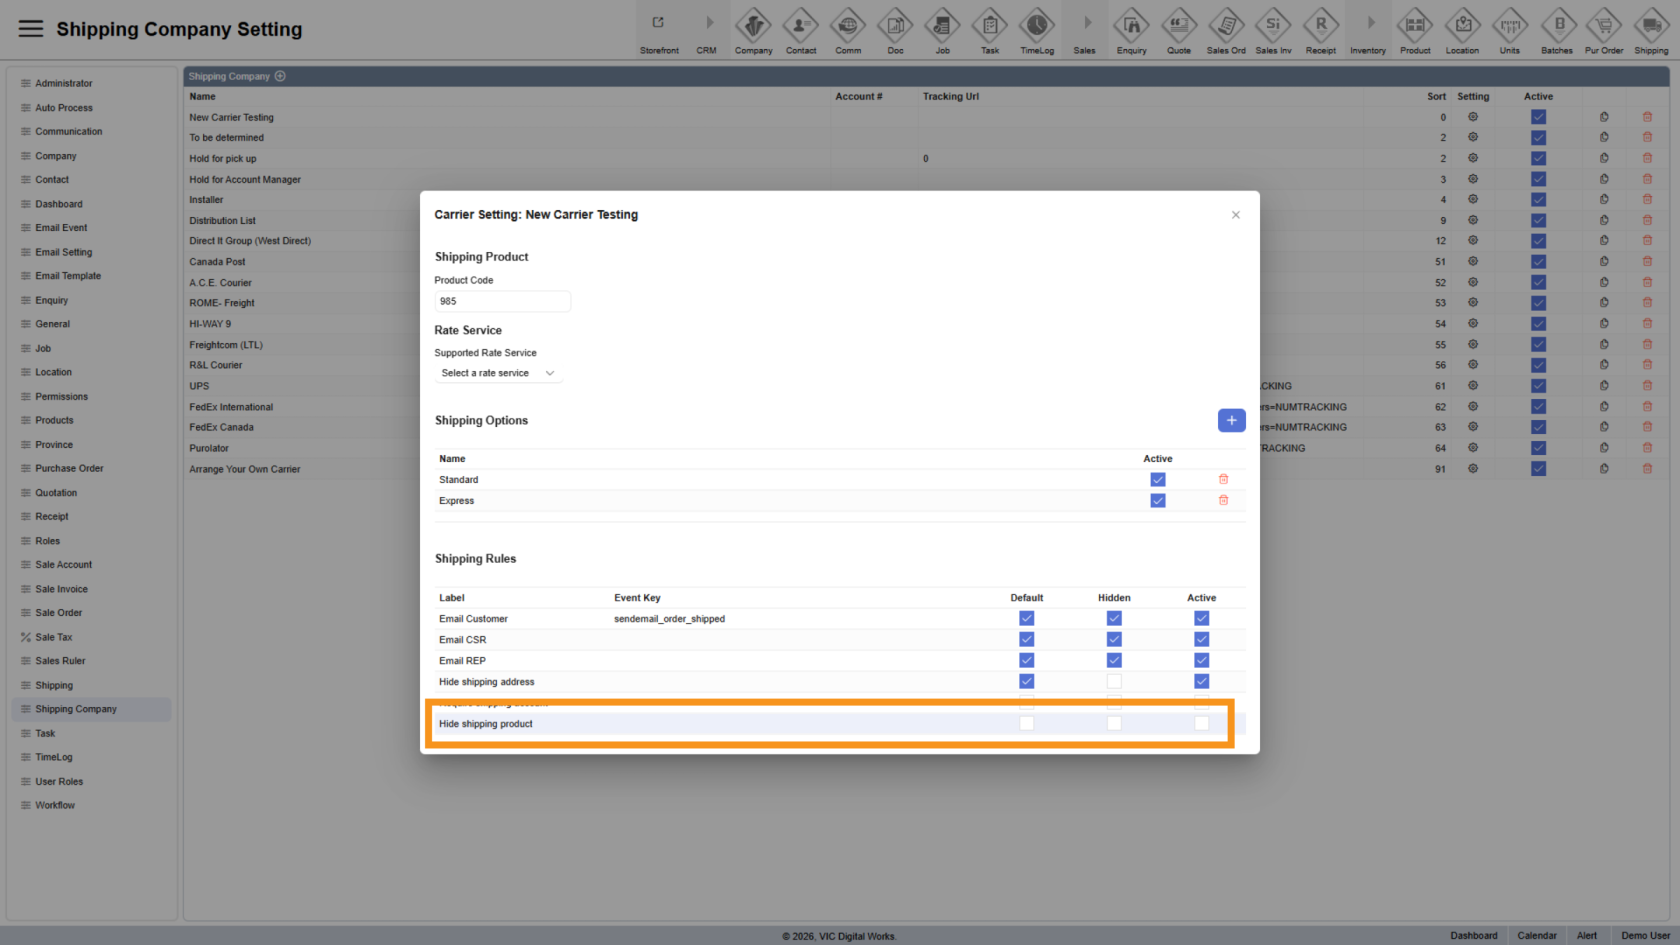
14. Configure Shipping Rules
Shipping Rules control how the carrier behaves, including:
- Email notifications (Customer, CSR, Rep)
- Shipping address requirements
- Shipping account requirements
- Visibility of shipping products
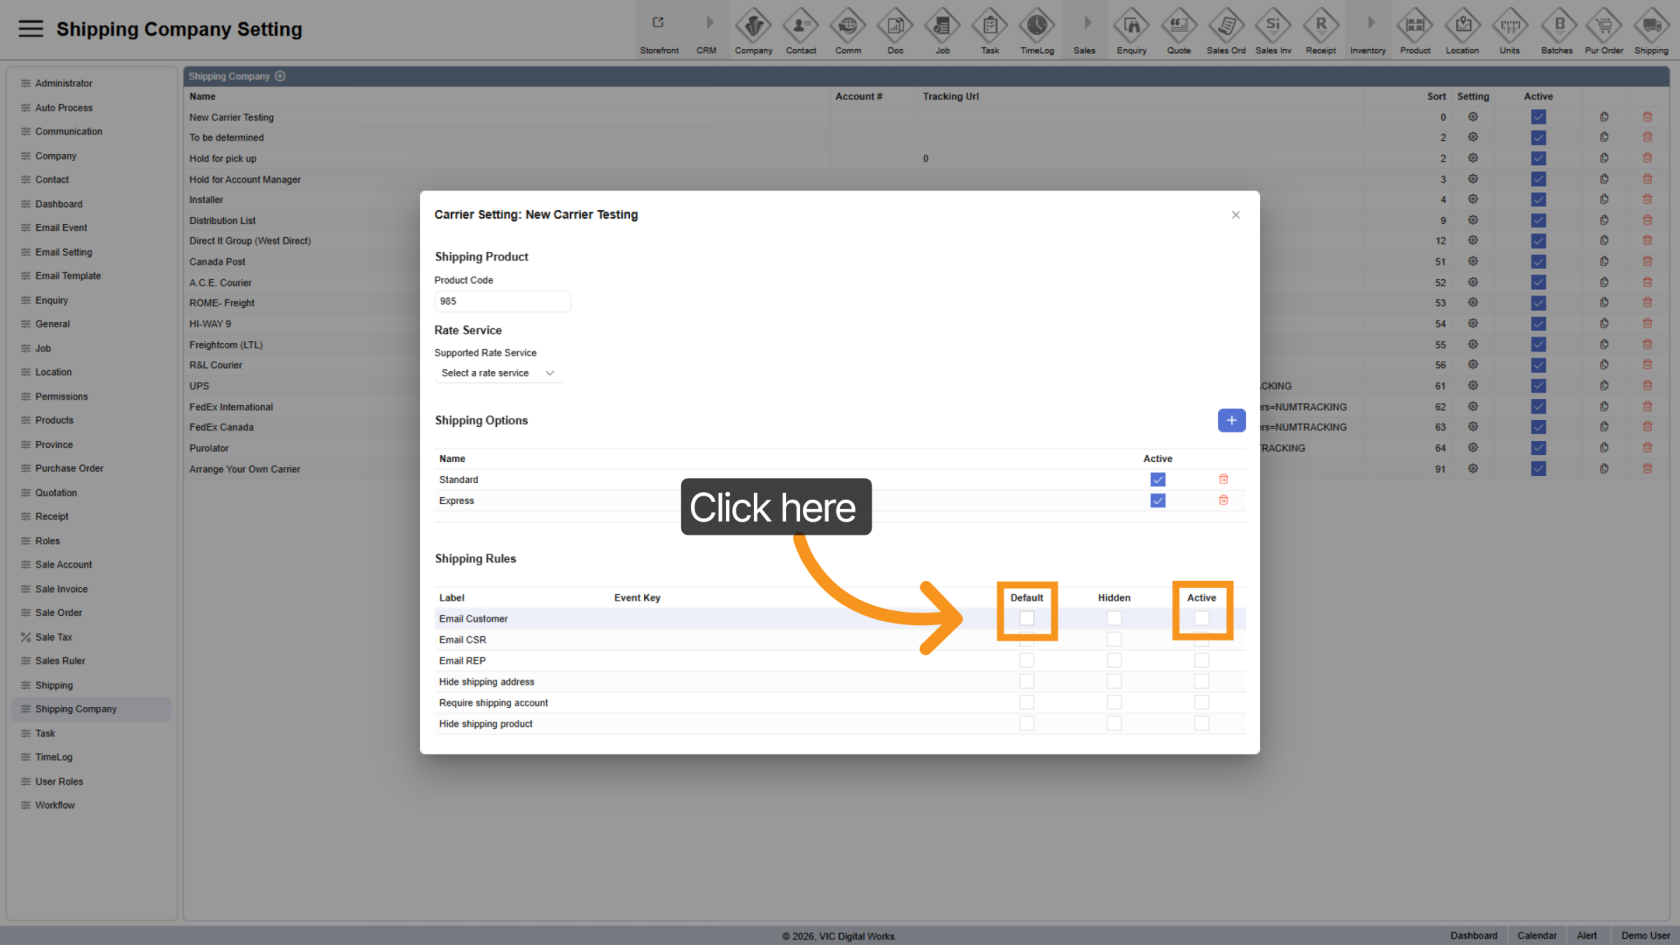
15. Enter Event Key
Specify the Event Key to determine which email is sent and to whom.
- Event keys are predefined by developers and cannot be modified.
- The selected event key defines the primary recipient.
- Other selections will receive CC emails.

16. Set Default and Active
Enable rules by selecting both Default and Active.
17. Hide Rule
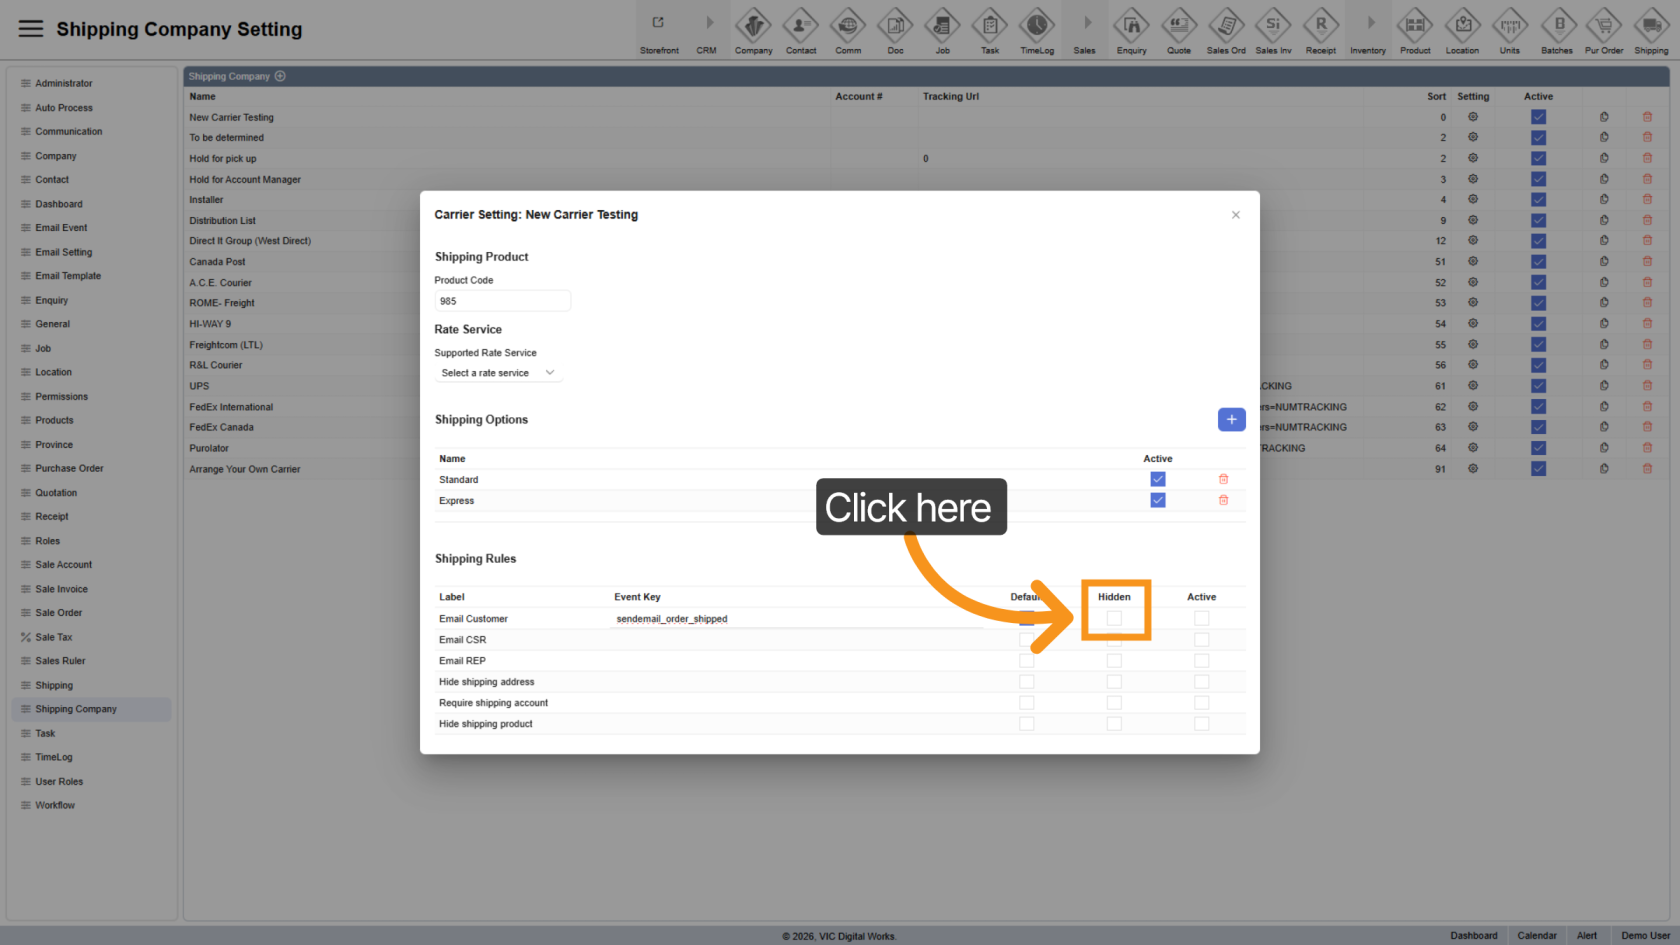
18. Hide Shipping Address
Use this when no shipping address is required, such as Hold for Pickup
19. Require Shipping Account
Enable this rule if a shipping account number is required during quotation or order creation.

20. Hide Shipping Product
Hide the shipping product from quotations and sales orders when not needed, such as Hold for Pickup
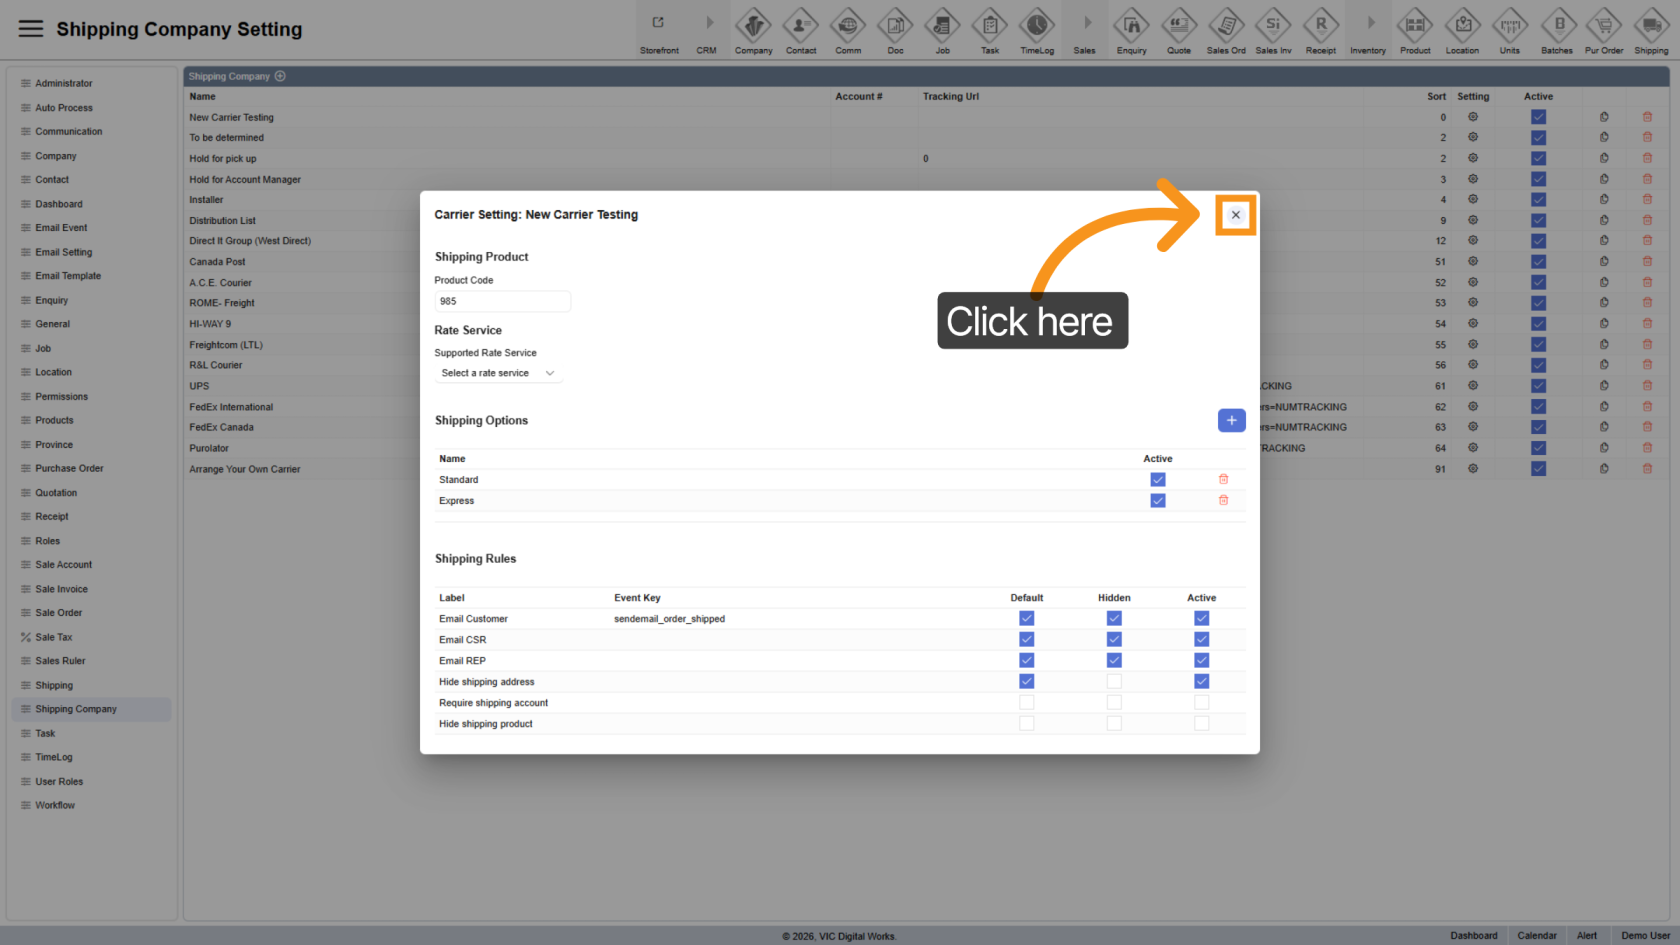
21. Close Settings
Click the close icon to exit the settings panel.
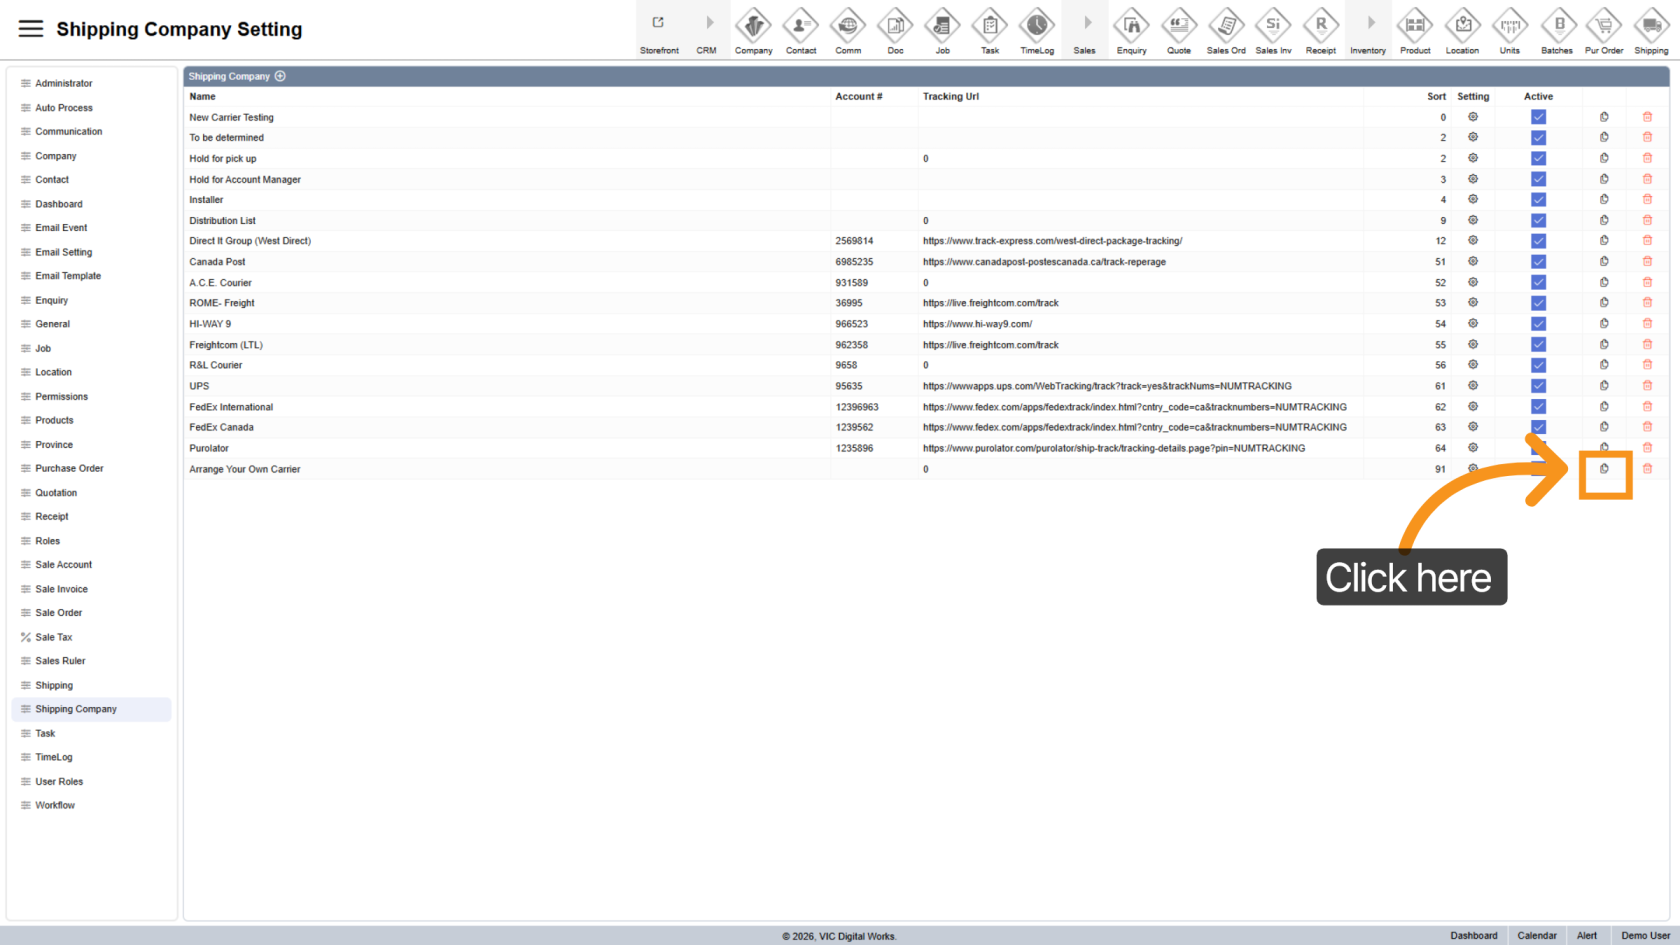
22. Duplicate Shipping Company
Use the ![]() duplicate icon to clone an existing shipping company and save setup time.
duplicate icon to clone an existing shipping company and save setup time.
23. Delete Shipping Company
Click the ![]() delete icon to remove a shipping company from the system.
delete icon to remove a shipping company from the system.

You have successfully configured shipping company settings in WorkTraq, including:
- Managing carriers
- Defining shipping products
- Setting up shipping options
- Configuring automation rules.
You can now proceed to manage orders using these updated shipping configurations.