Add Price Breaks
This tutorial guides you through creating and configuring price break tables in the Worktraq App, enabling you to apply different pricing levels based on quantity ranges, units of measurement, and markup rules.
Video Tutorial
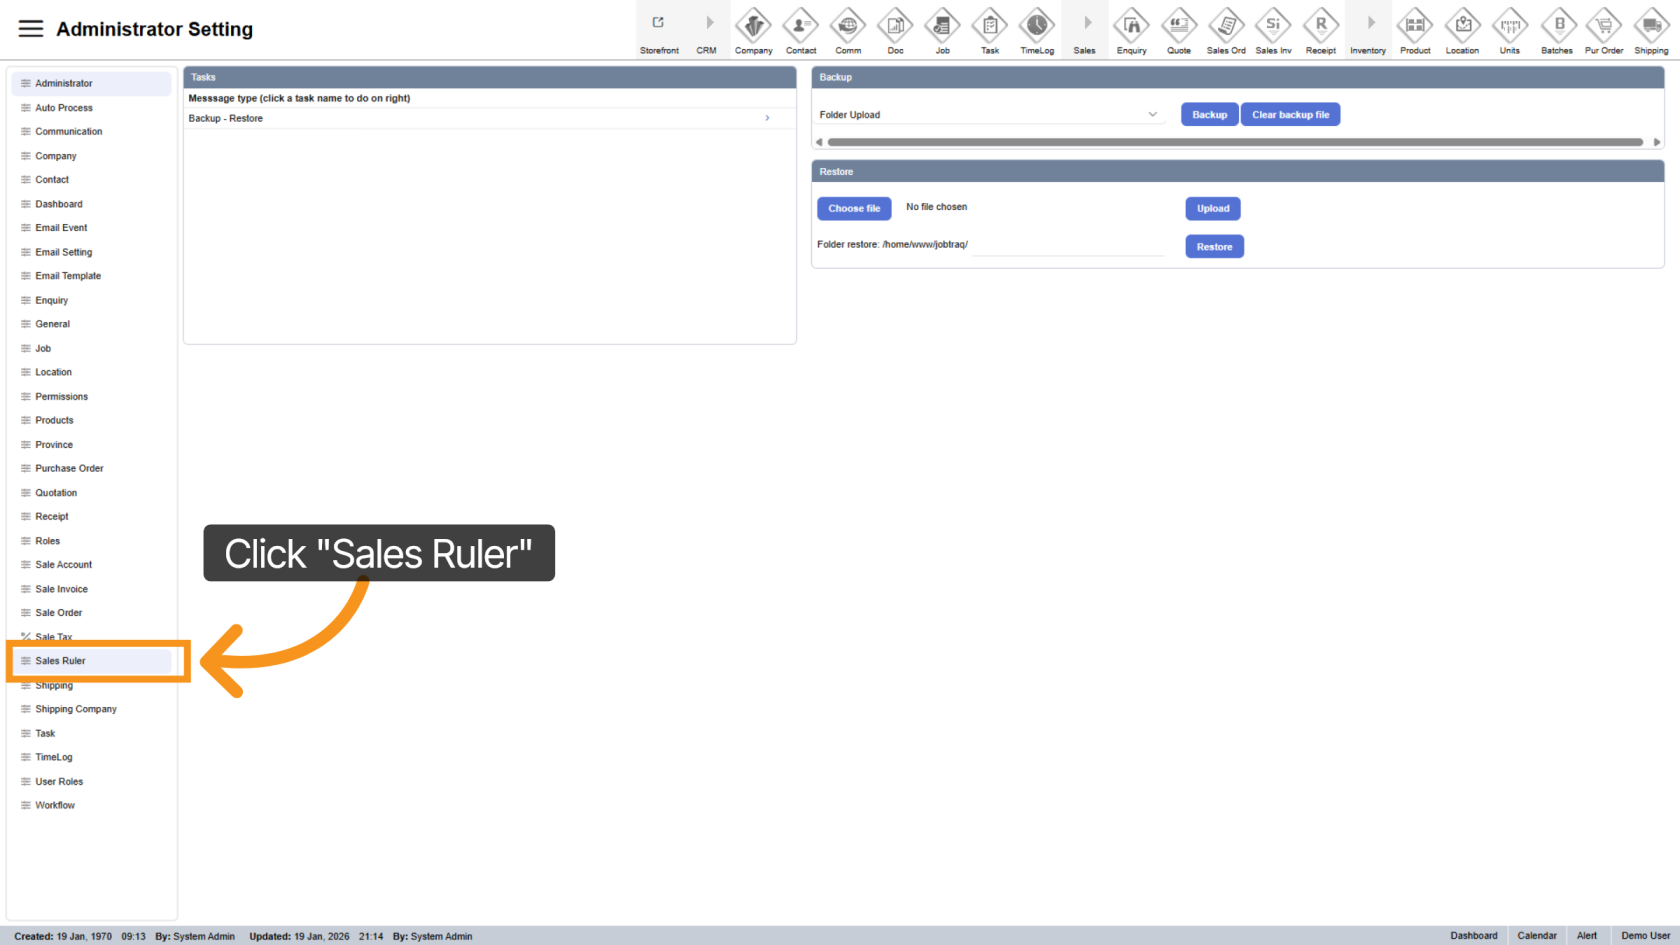
1. Access Sales Rule Section
Click "Sales Rule" to open the sales configuration area.
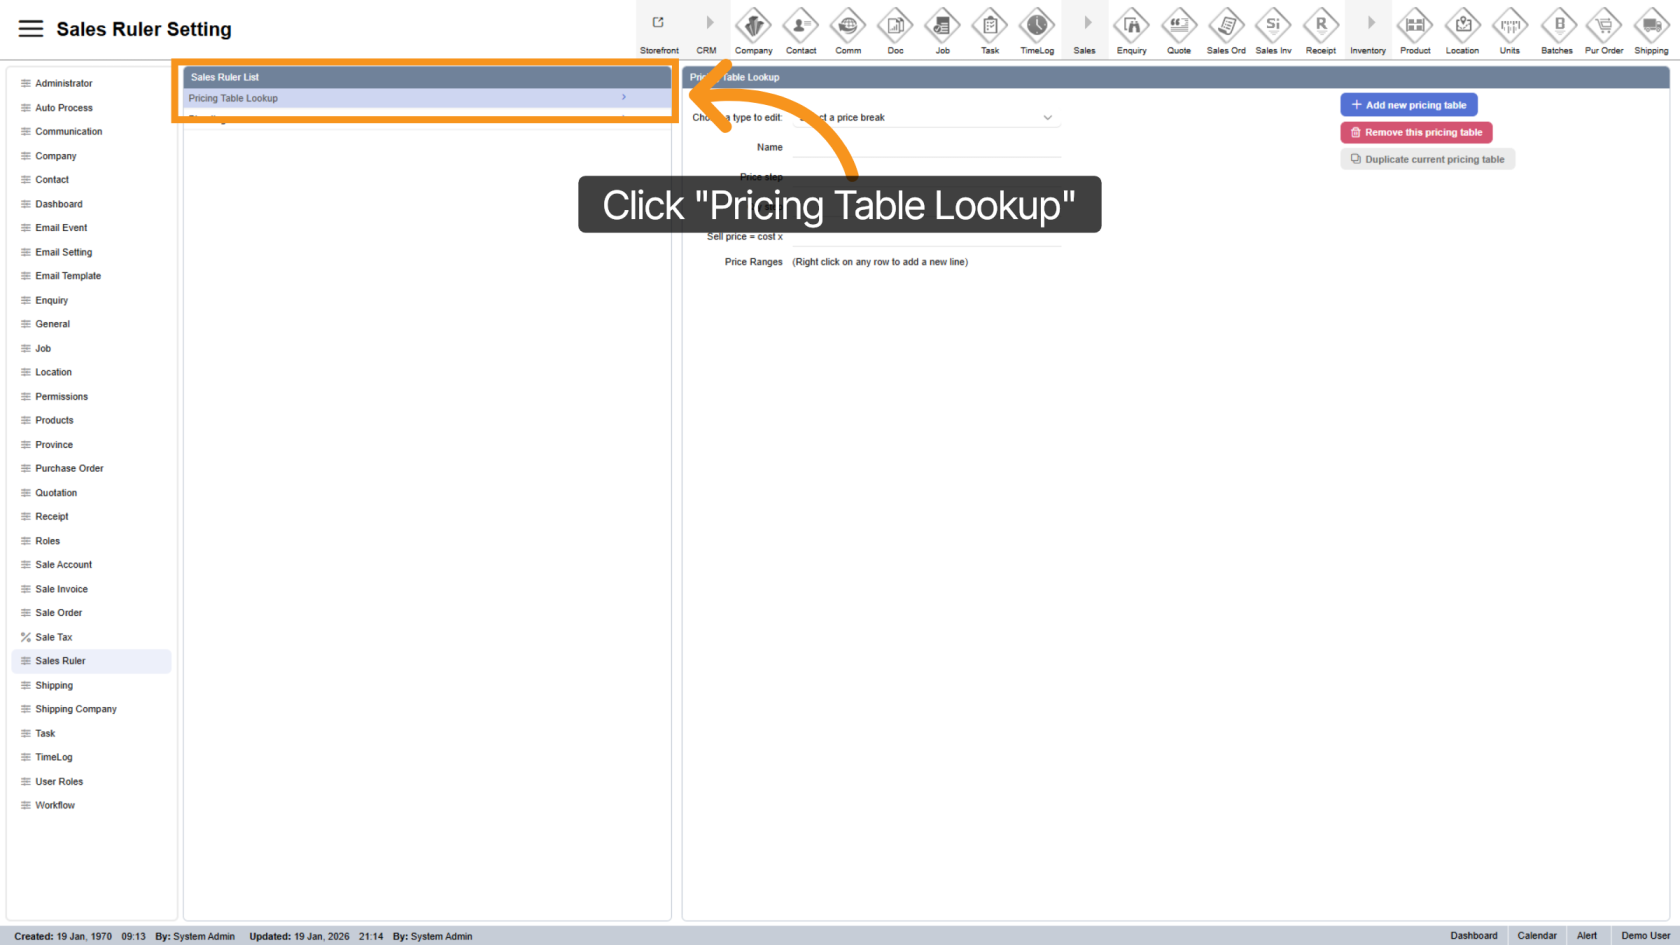
2. Open Pricing Table Lookup
Select "Pricing Table Lookup" to view and manage price break tables.
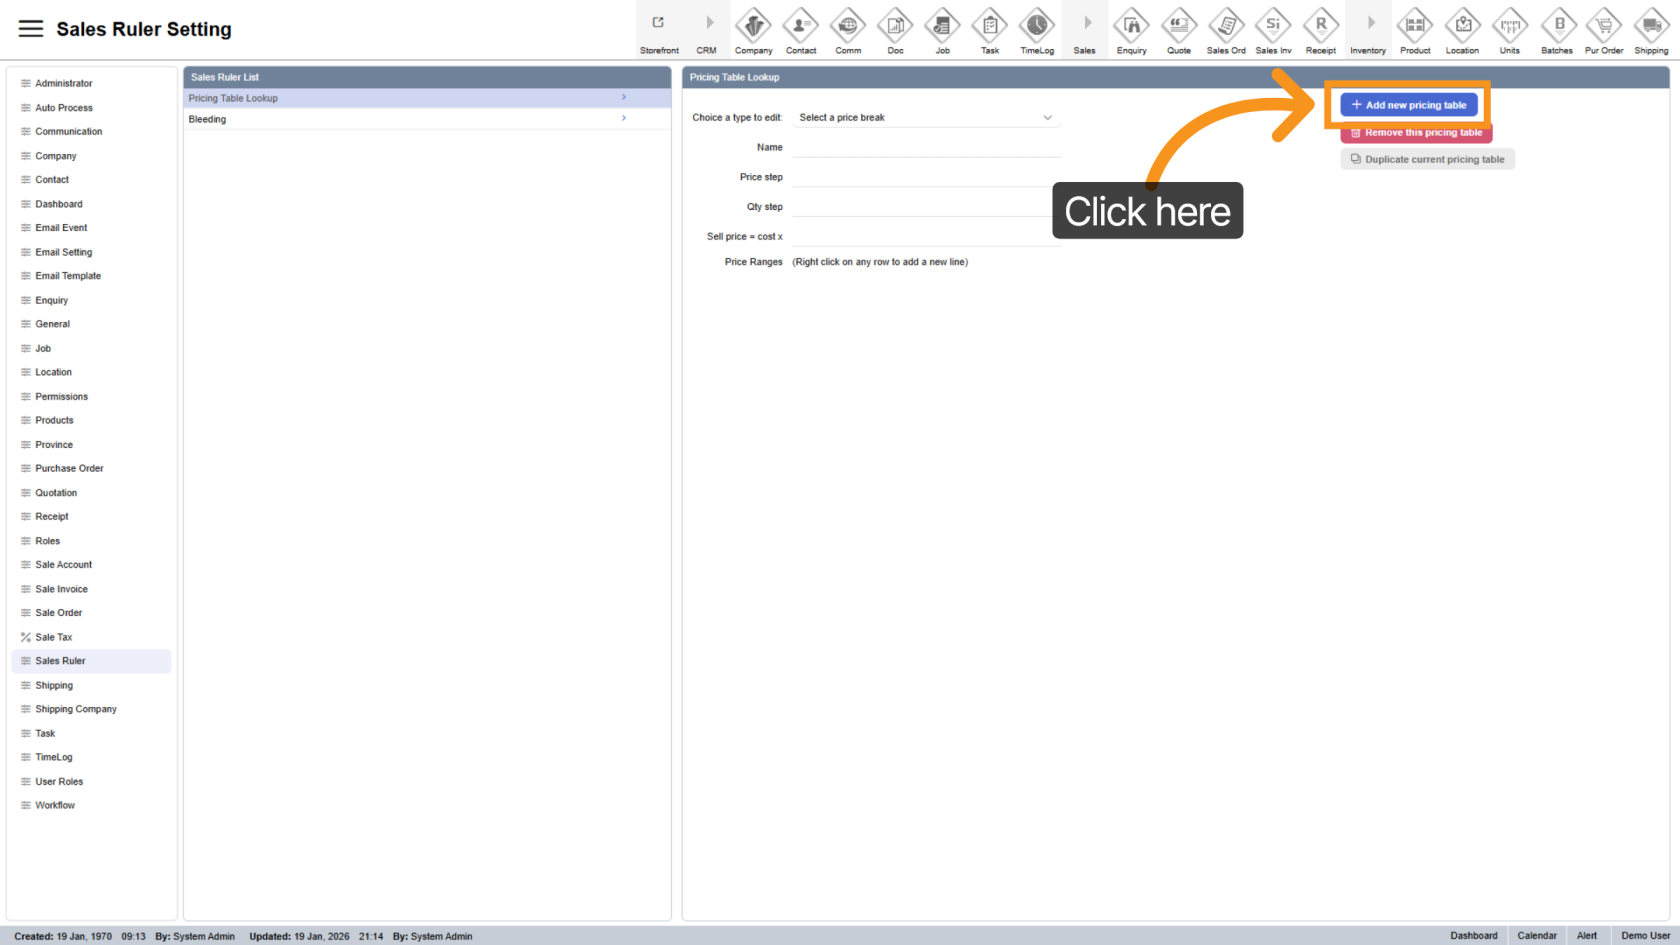
3. Add New Price Break
Click the Add New button to create a new price break table.
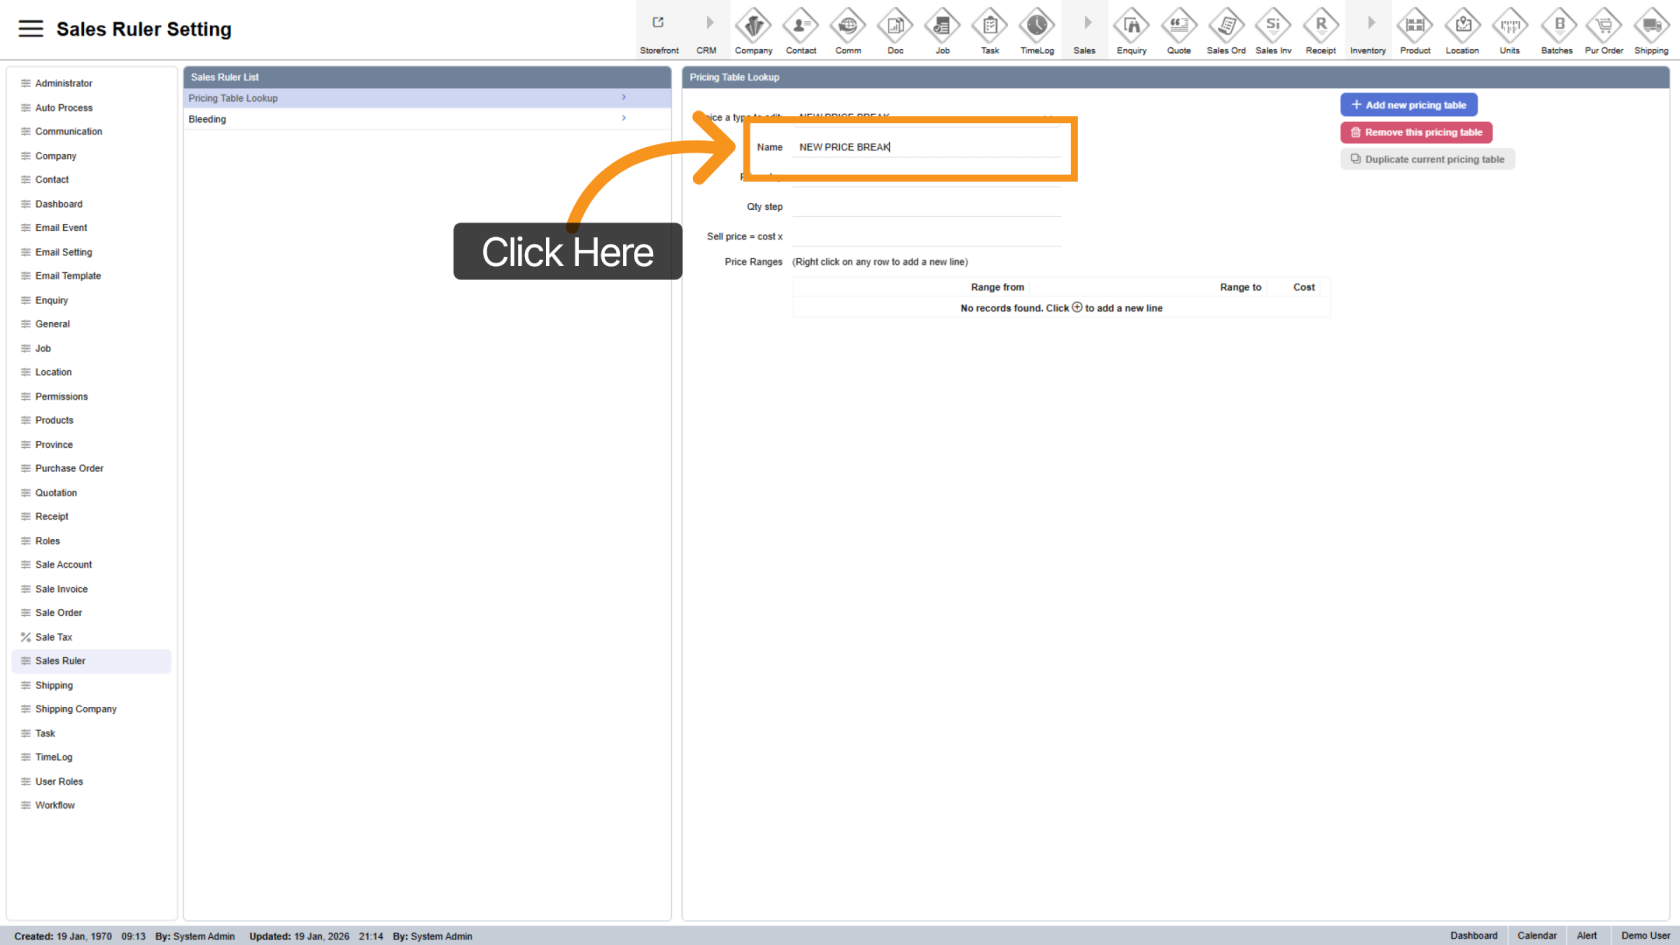
4. Enter Price Break Table Name
Provide a clear name to easily identify the table when assigning it to products.
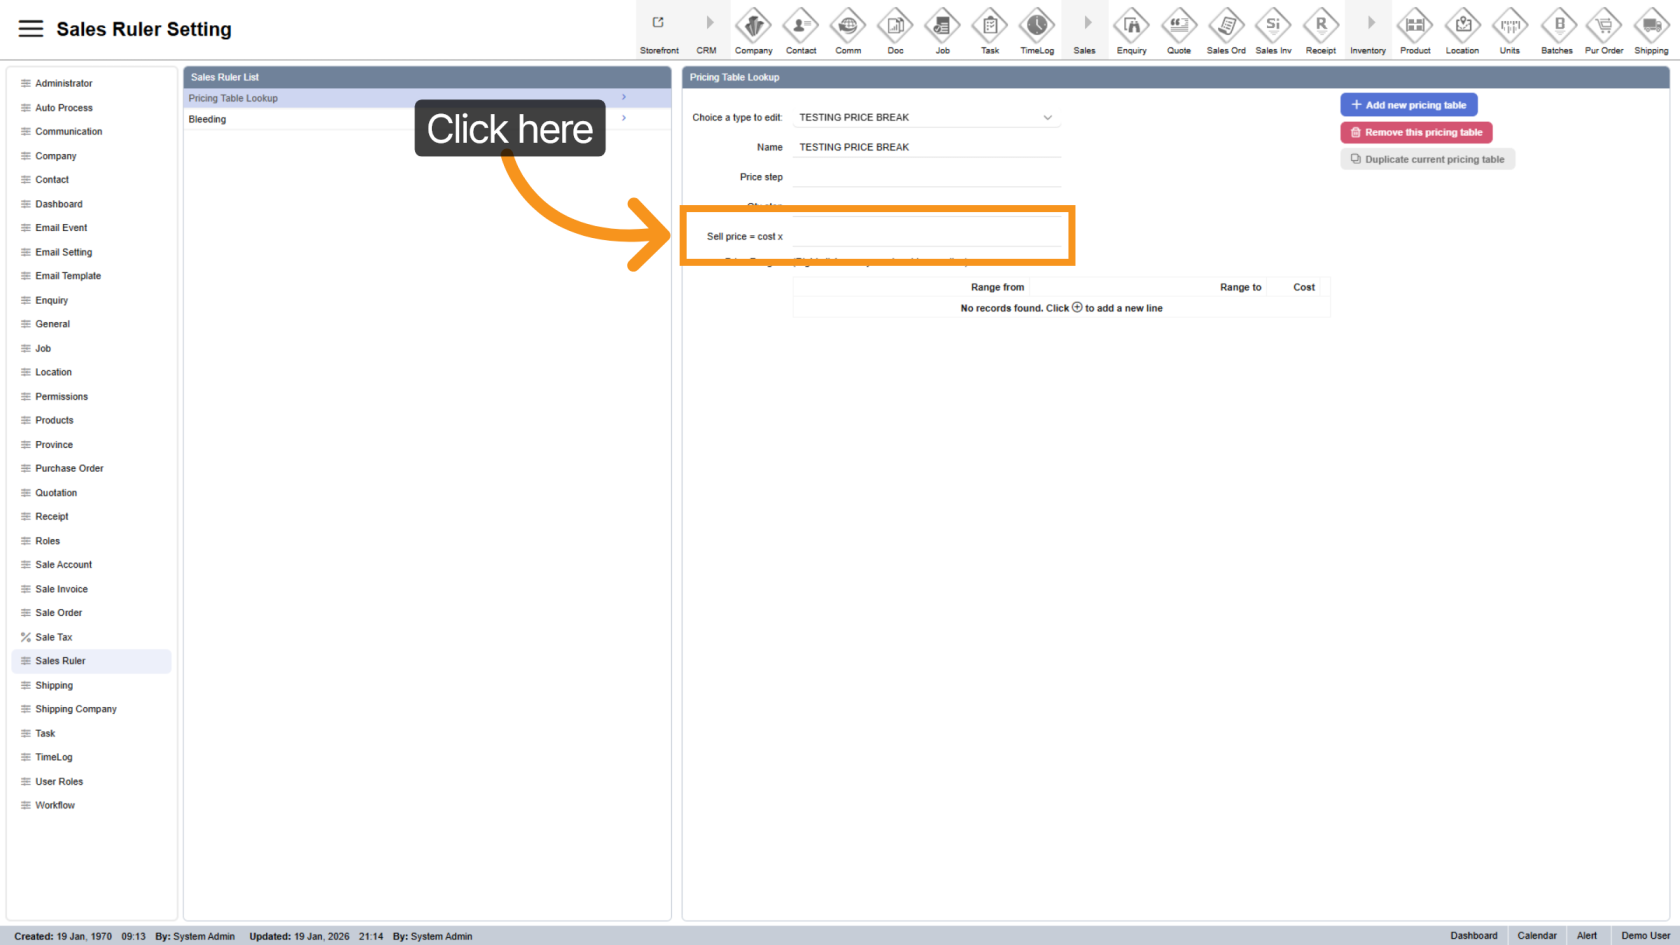
5. Enter Markup Value
Input the markup value used to convert cost into selling price.
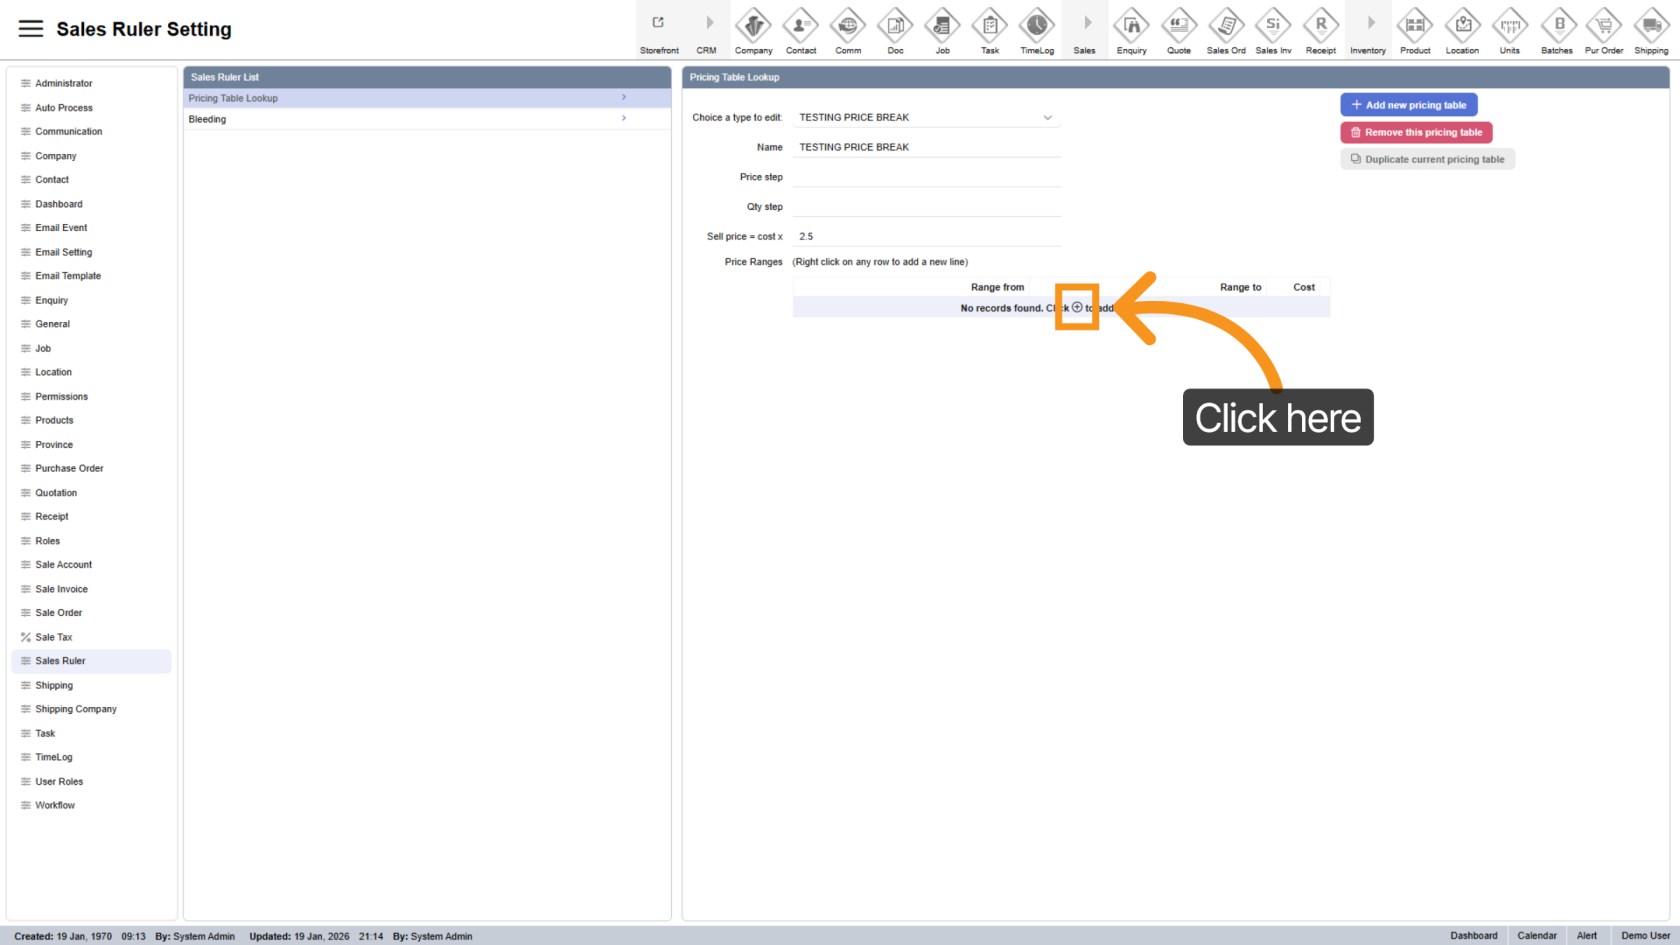
6. Add Range
Click the ![]() plus icon to add a new price range.
plus icon to add a new price range.
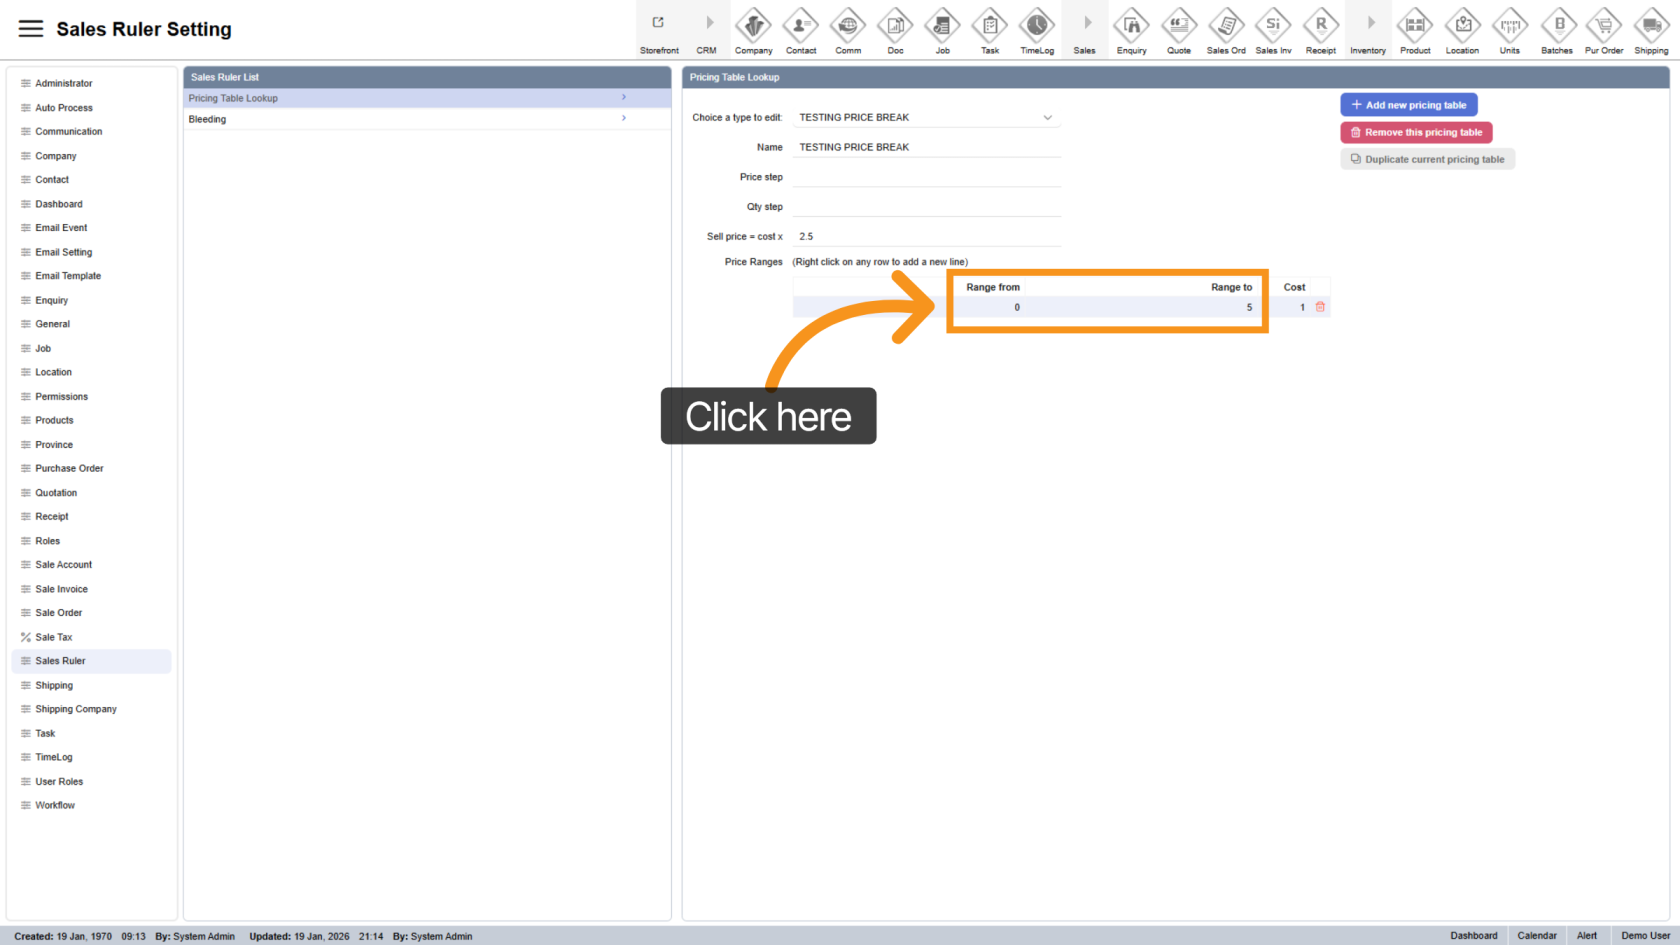
7. Define Range Values
Enter the From and To values.
These ranges correspond to the product’s unit of measurement.
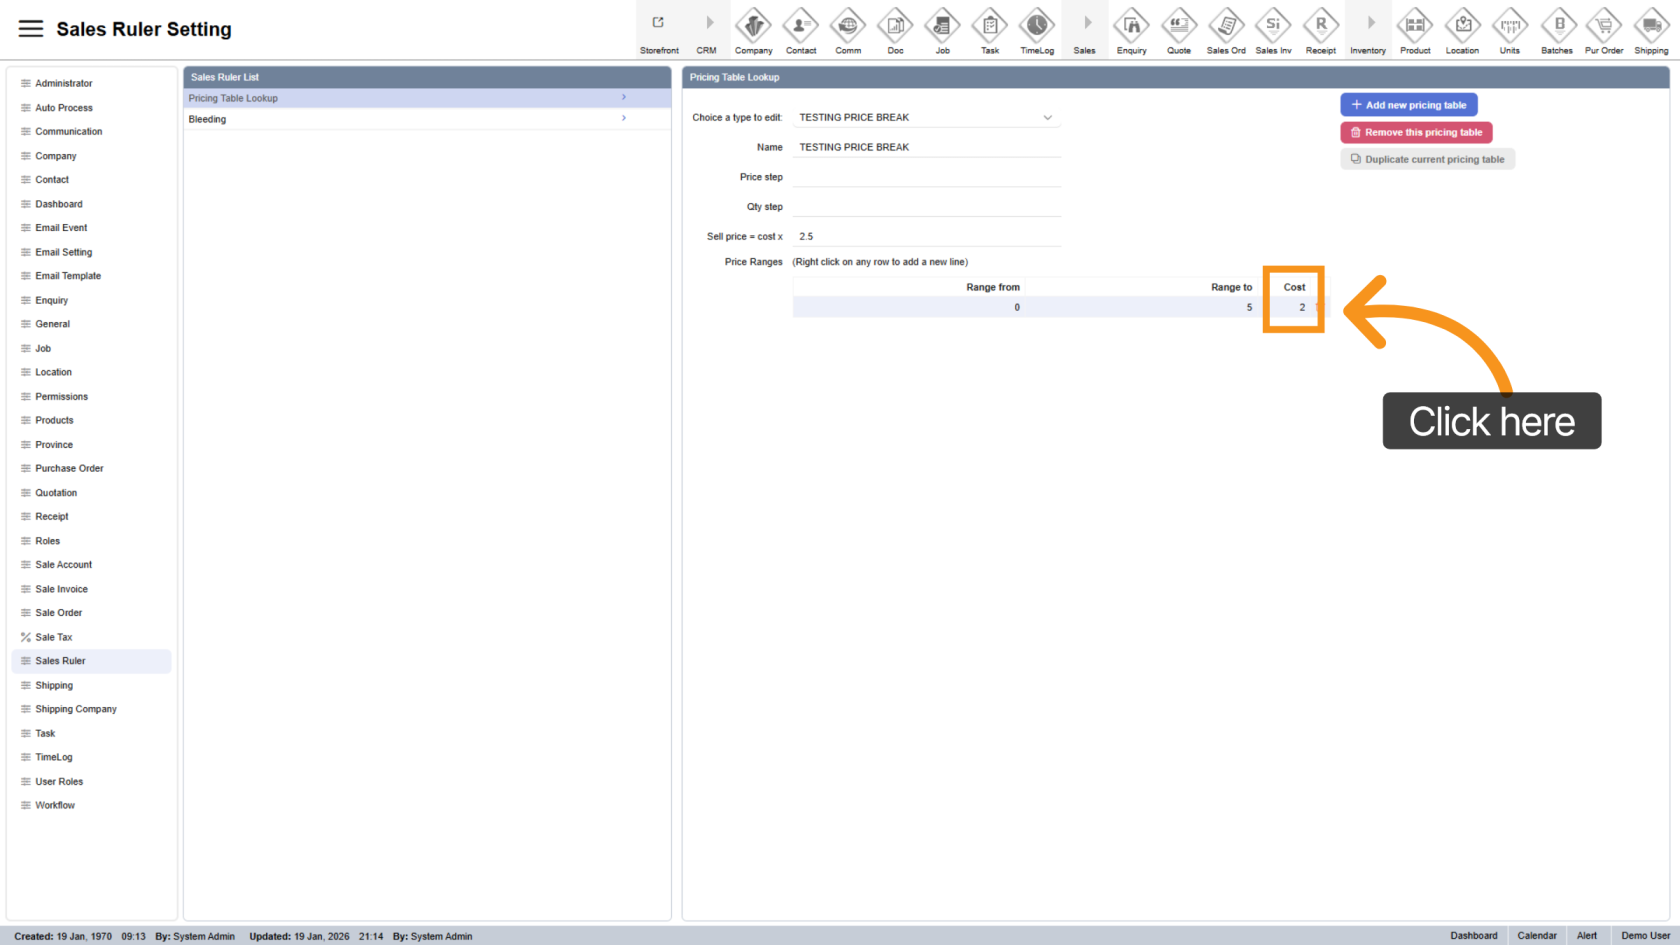
8. Adjust Range Value
Set an adjustment factor to increase or decrease pricing for a specific range.
This value will be applied after the base selling price is calculated.
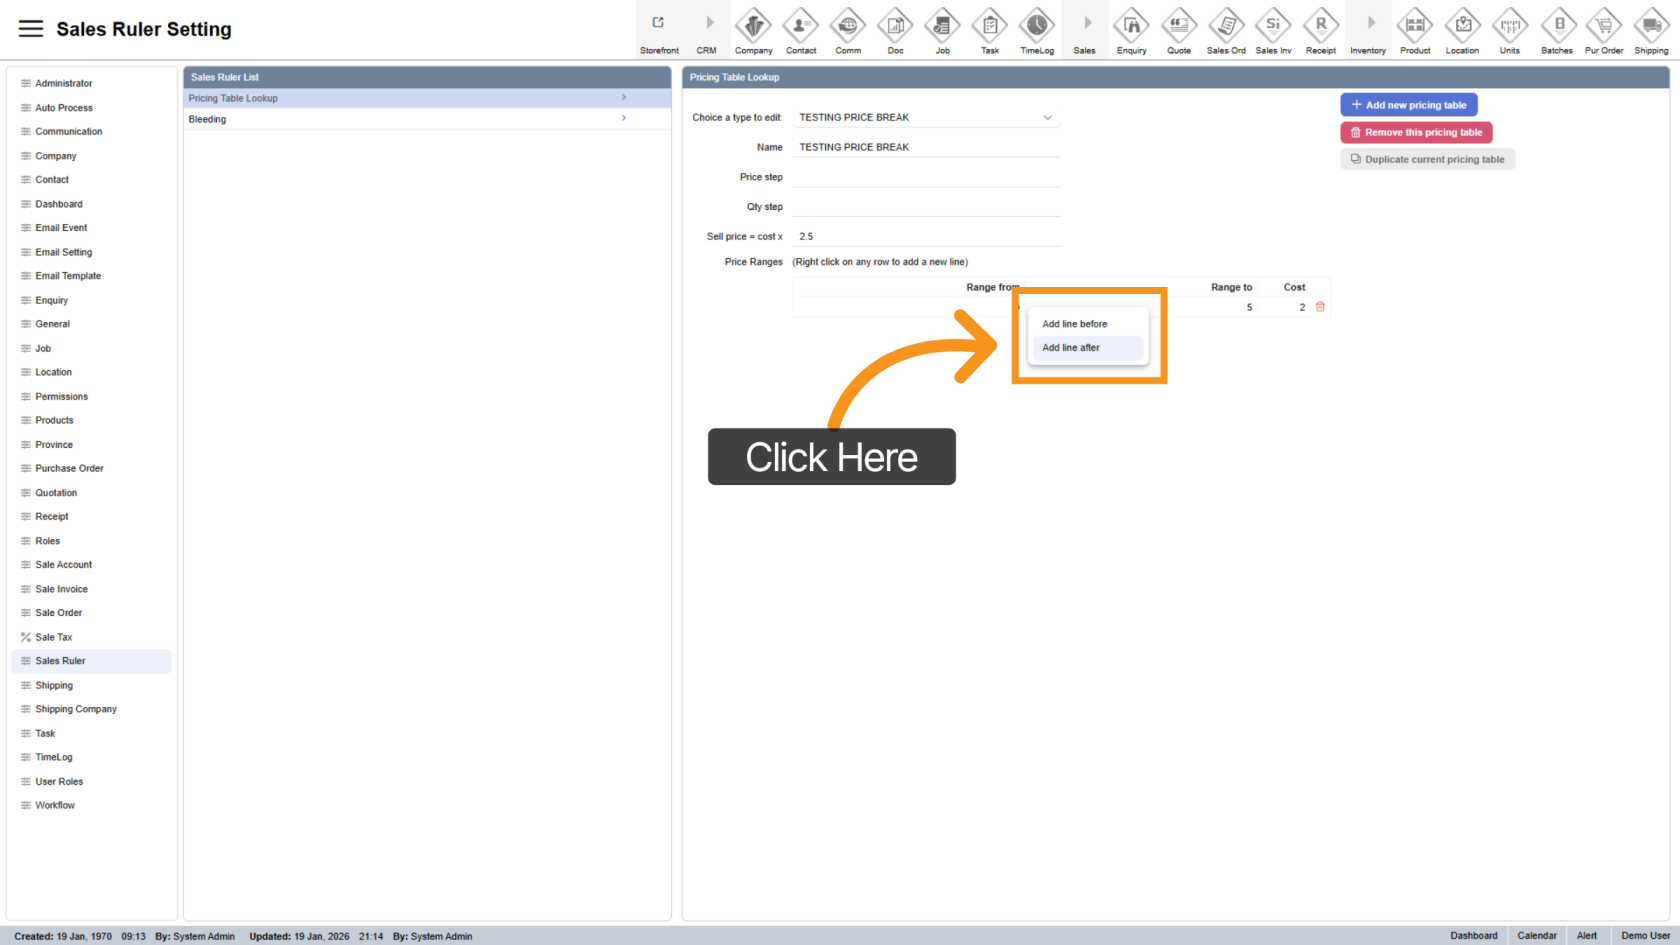
9. Insert New Range Line
Right-click on an existing row to insert a new range before or after the selected line.
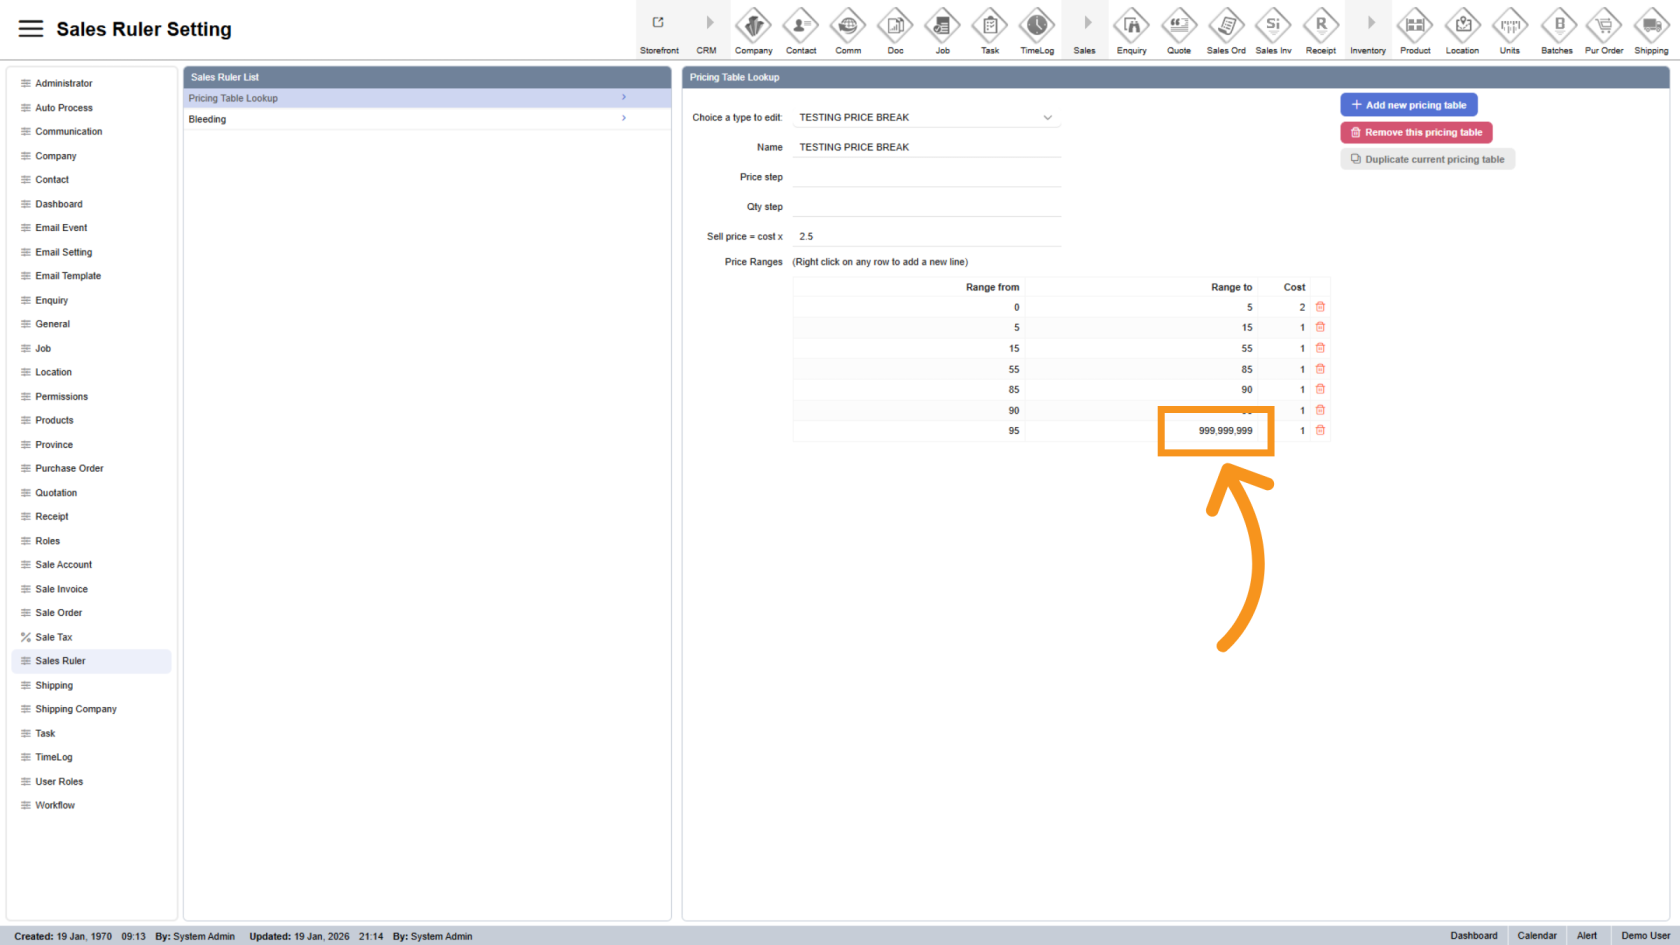
10. Set Maximum Range
Ensure the final range covers all possible values by setting a sufficiently large To value.
You have successfully configured price breaks in the Worktraq App. Double-check all ranges and values to ensure accurate pricing calculations.