Configure Landing Page
This tutorial explains how to configure the landing page in the application. The landing page customization only applies to B2C stores. B2B stores do not support landing page customization.
Video Tutorial
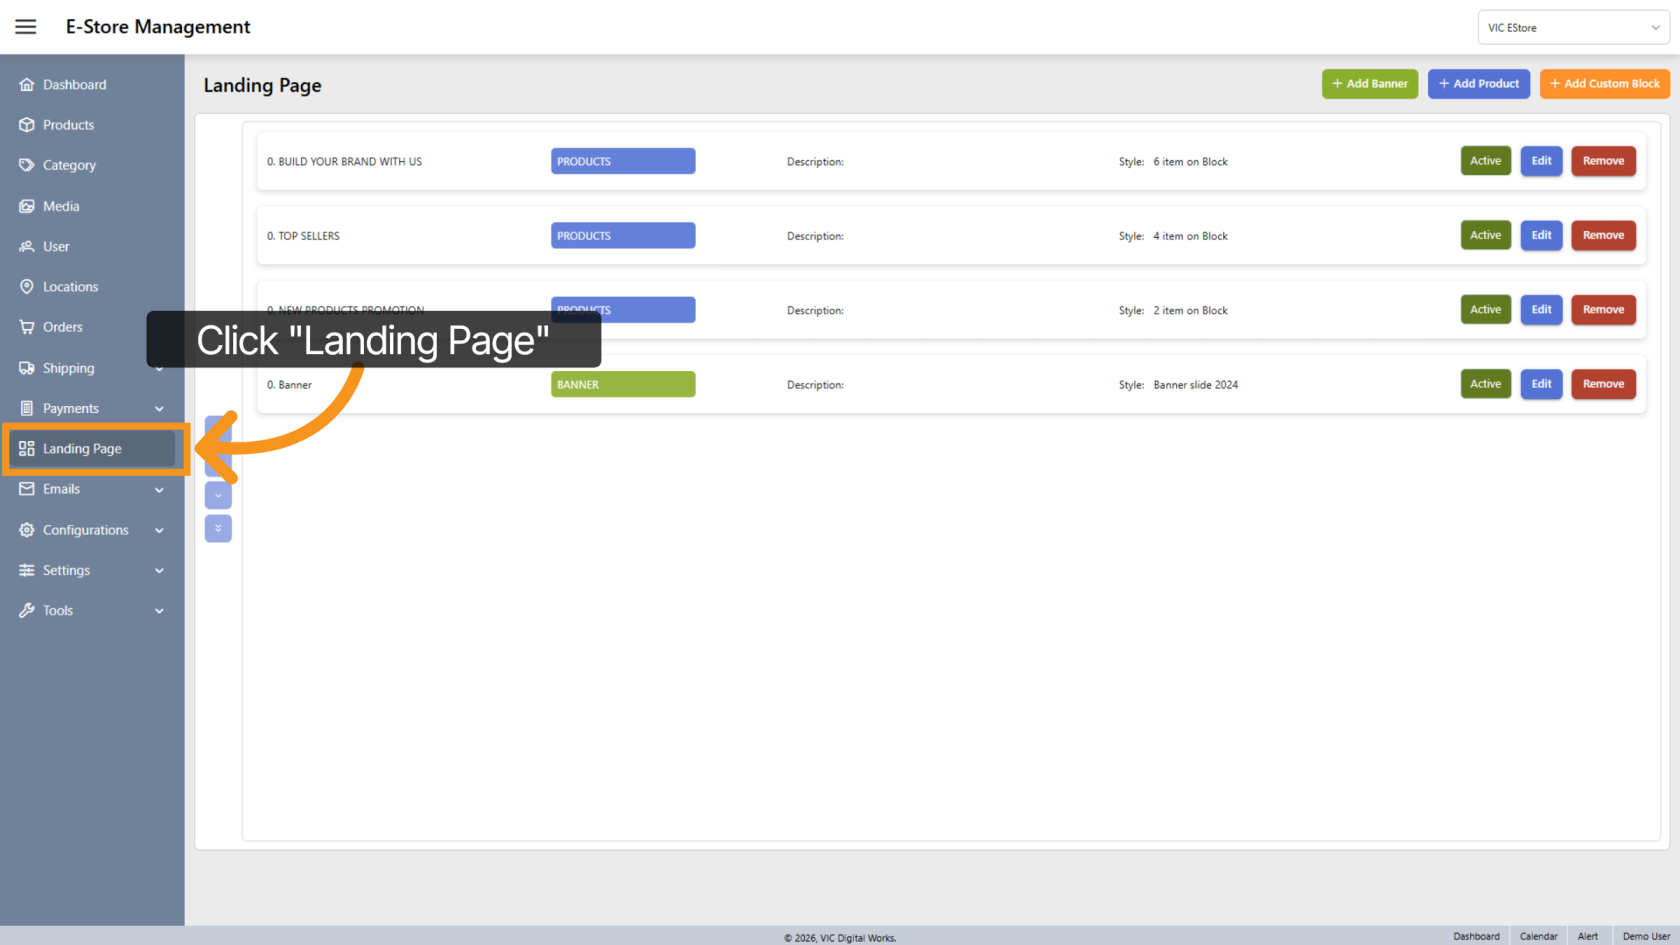
1. Access Landing Page Section
Click "Landing Page" on the menu to open the landing page configuration area.
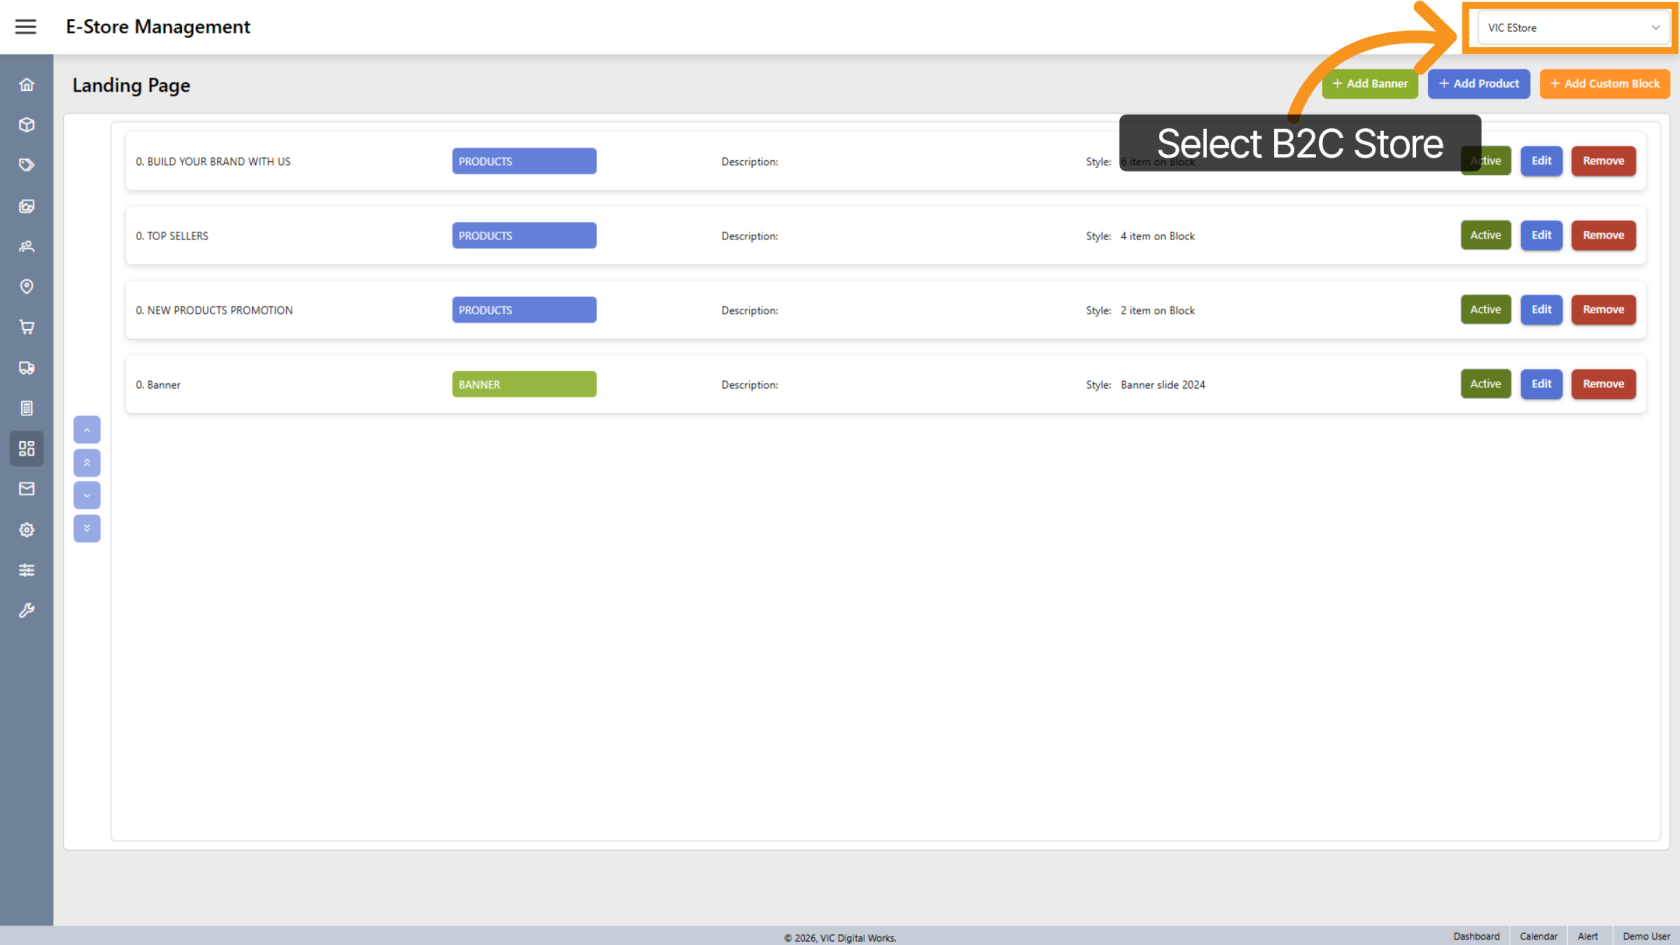
2. Select the Company Store
Select the B2C Company E-store for which you want to customize the landing page.
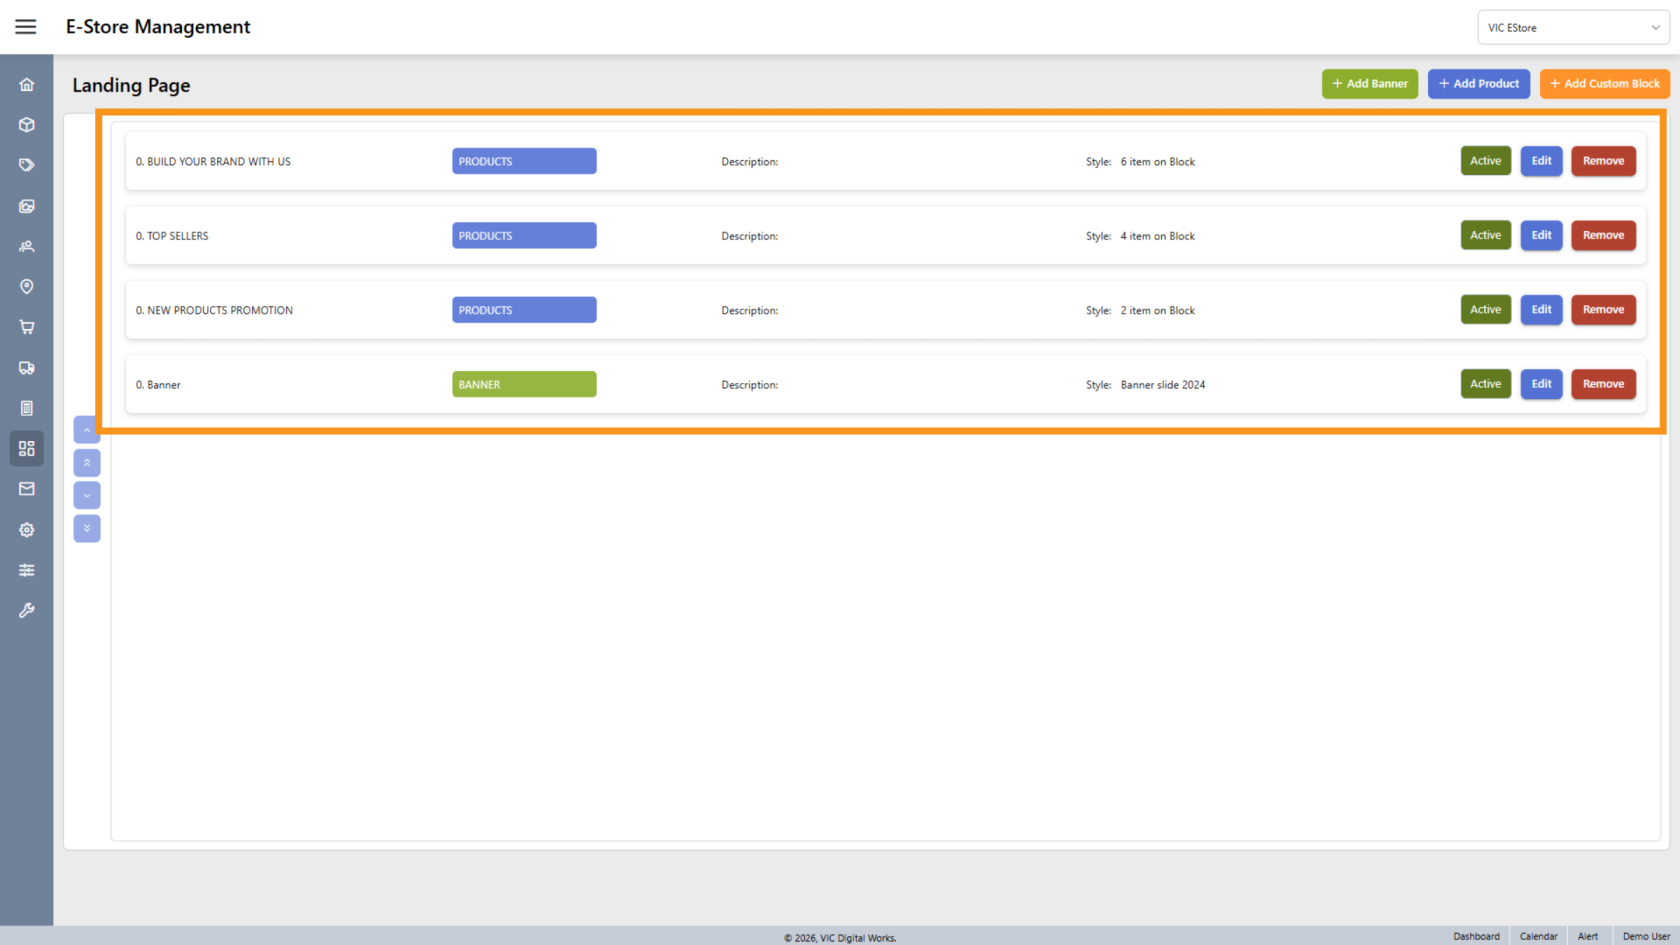
3. View All Settings
You will see all the landing page settings listed. The landing page is built using banners and blocks.
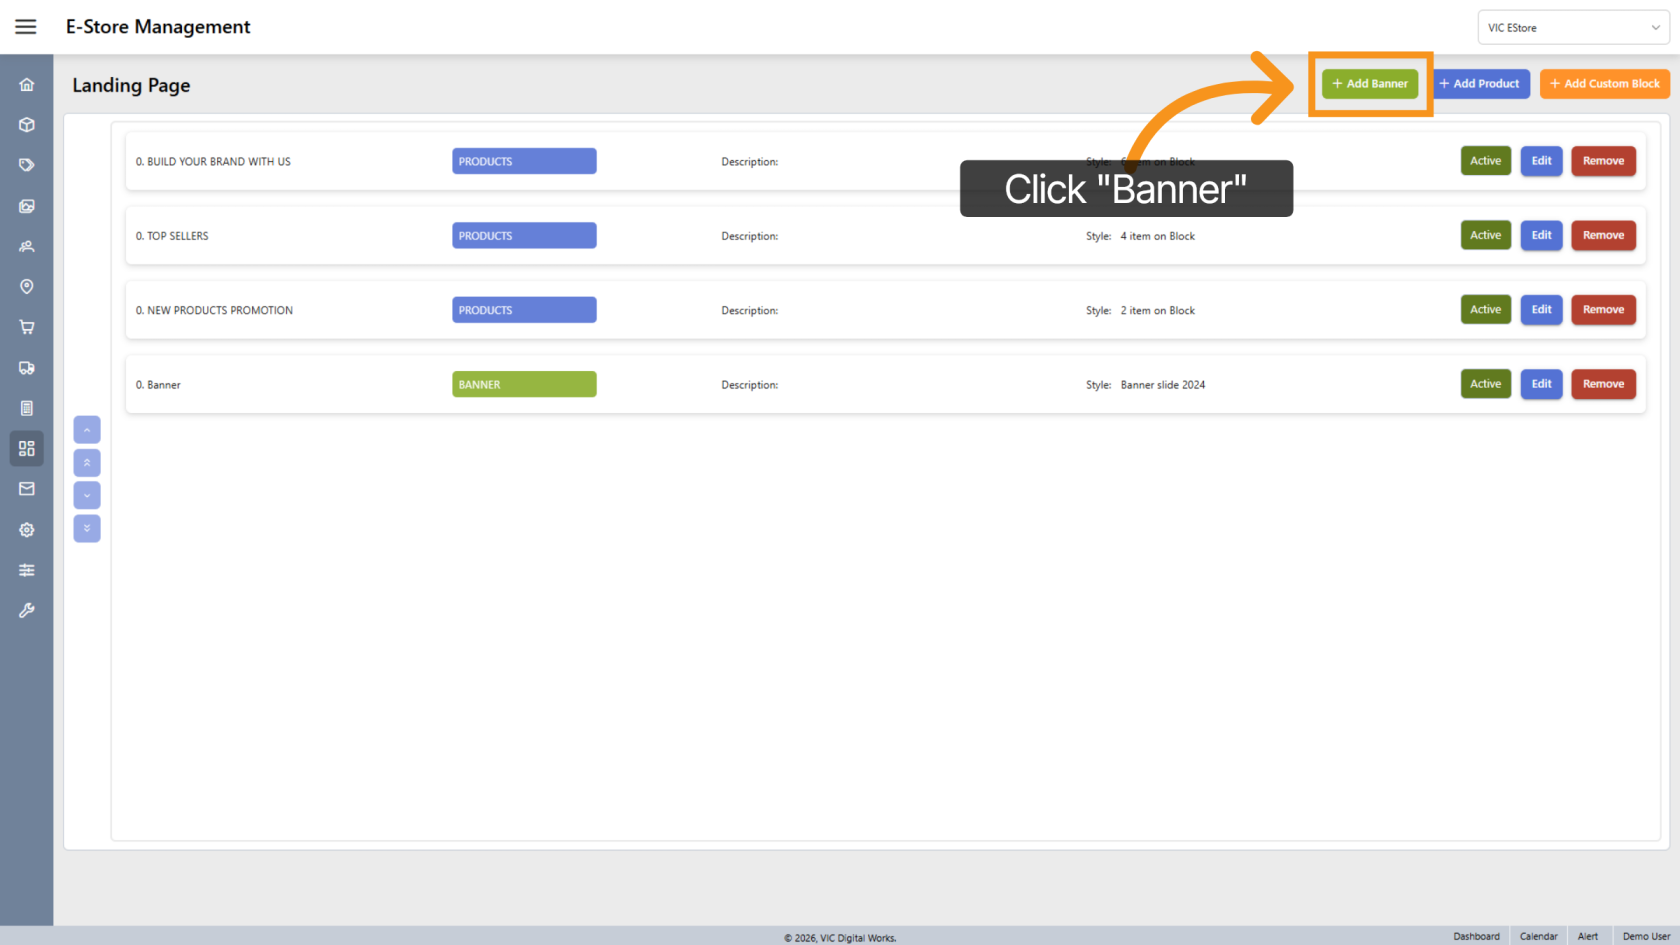
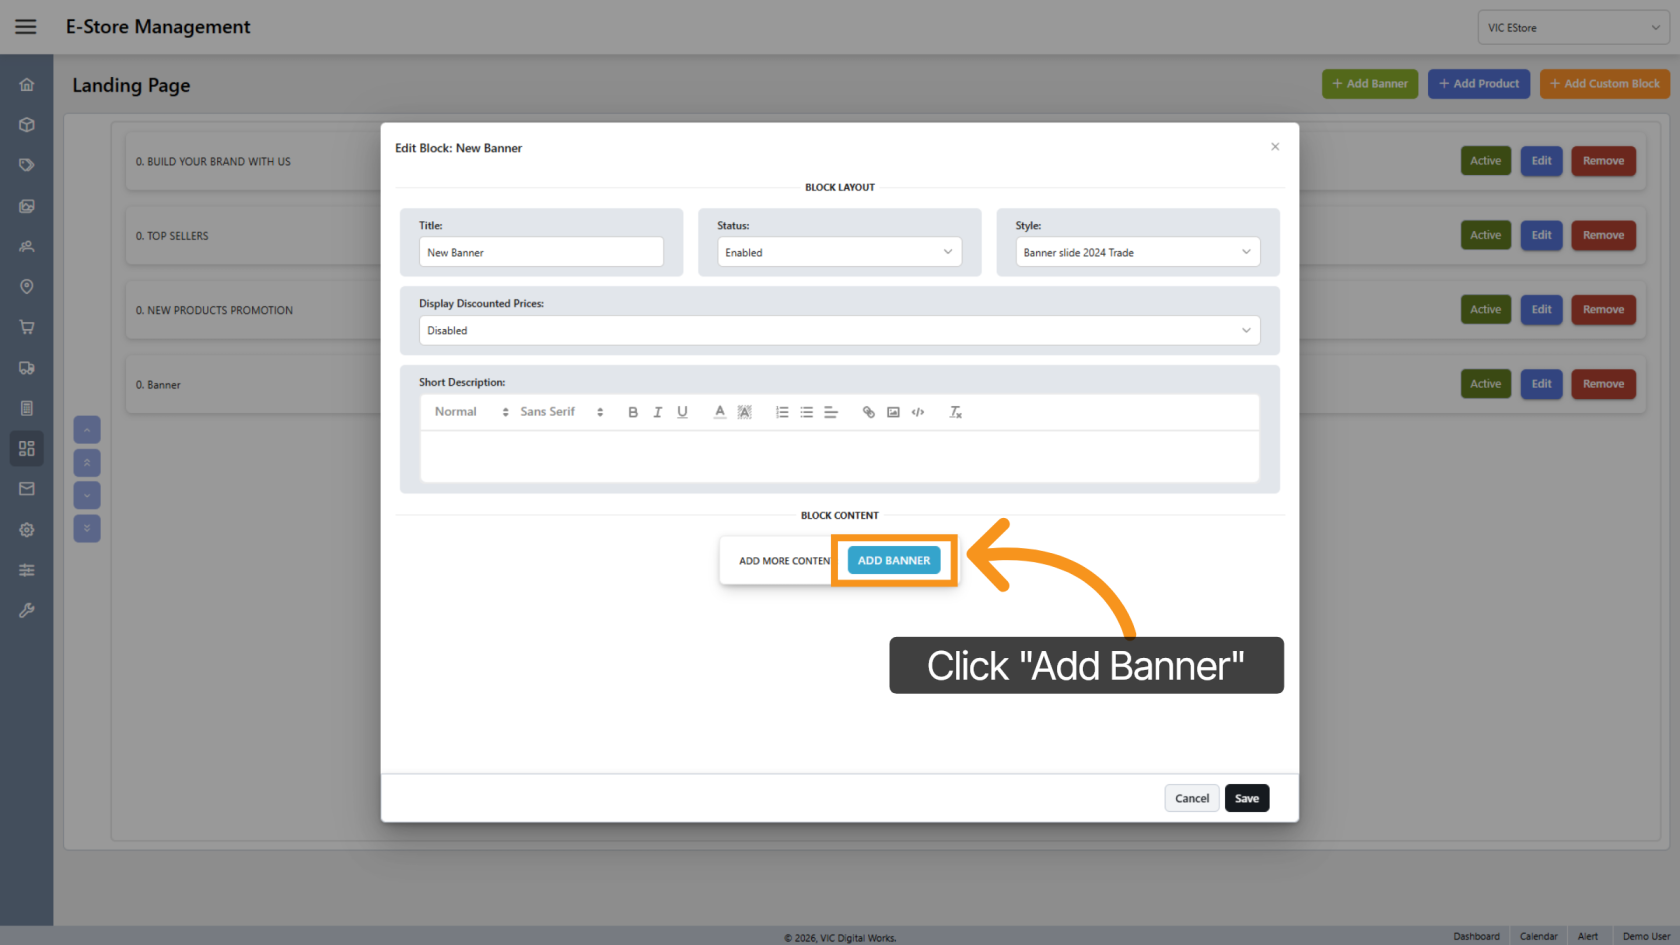
4. Add new Banner
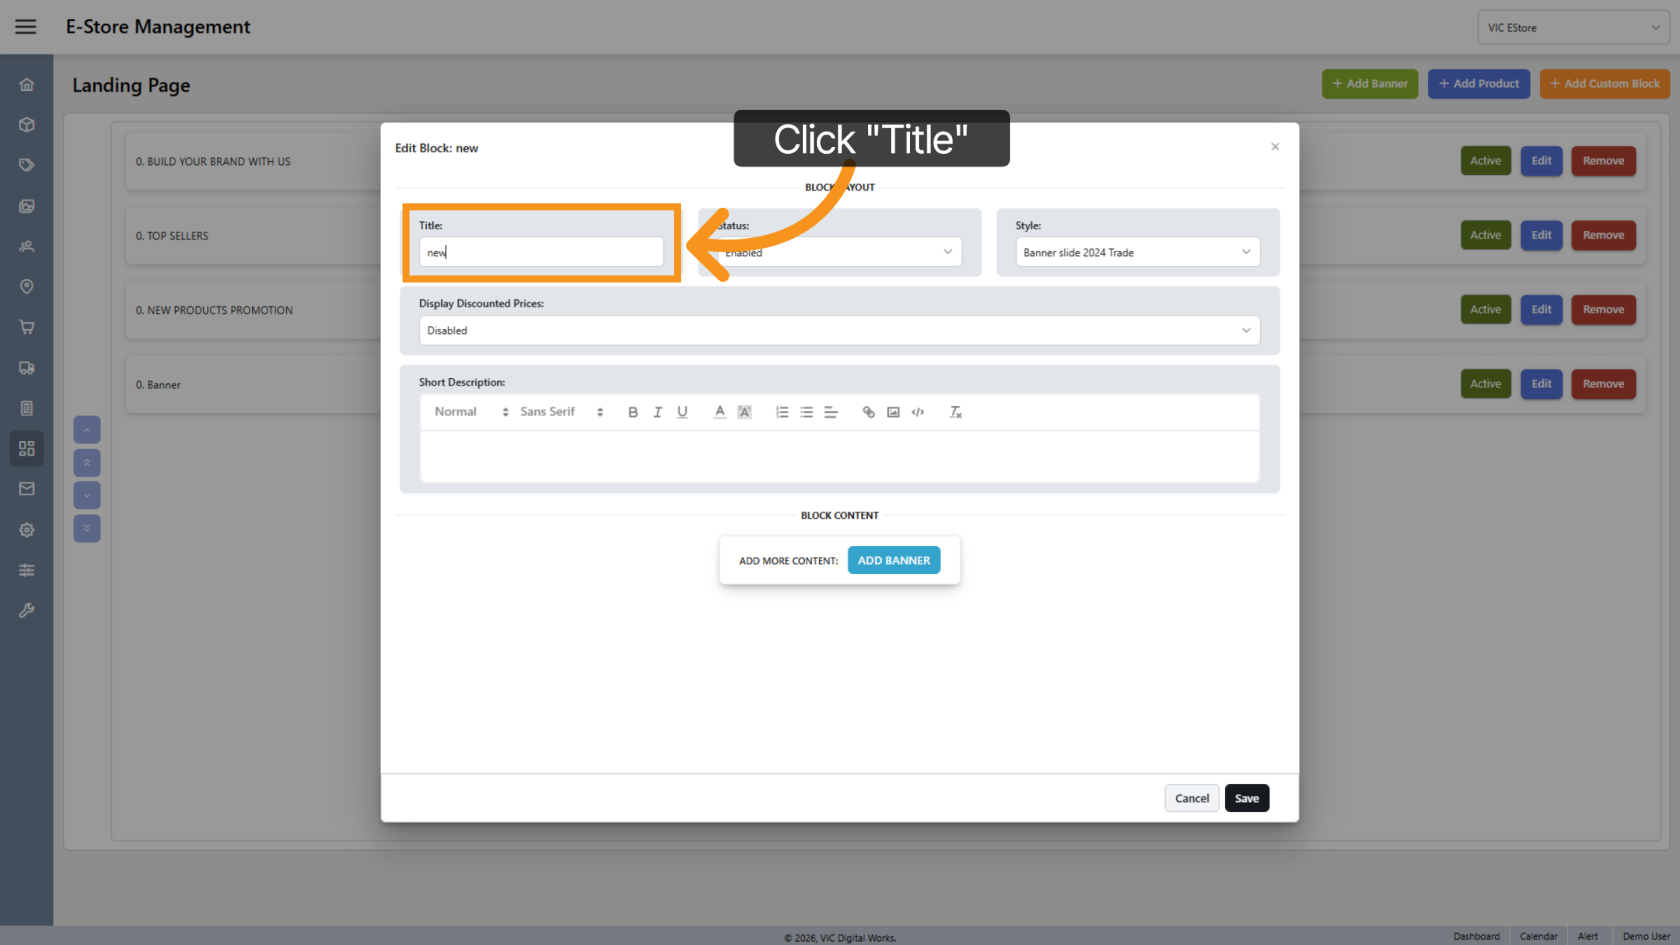
5. Enter the Title
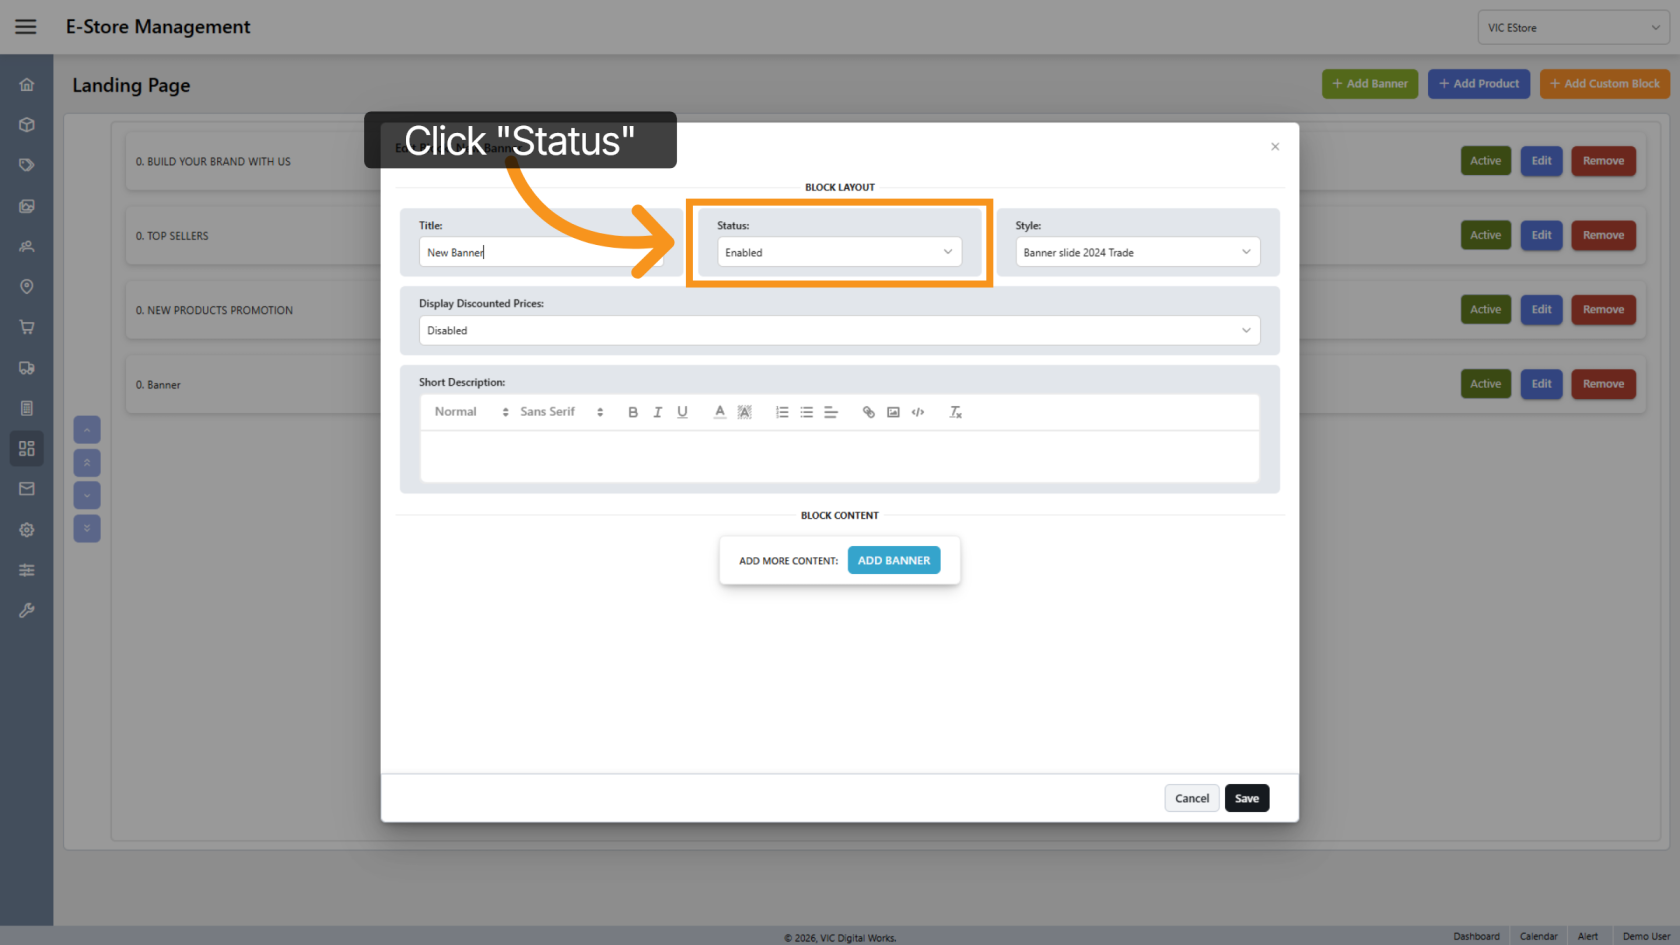
6. Set Banner Status
By default, the system sets the banner status to Enabled.
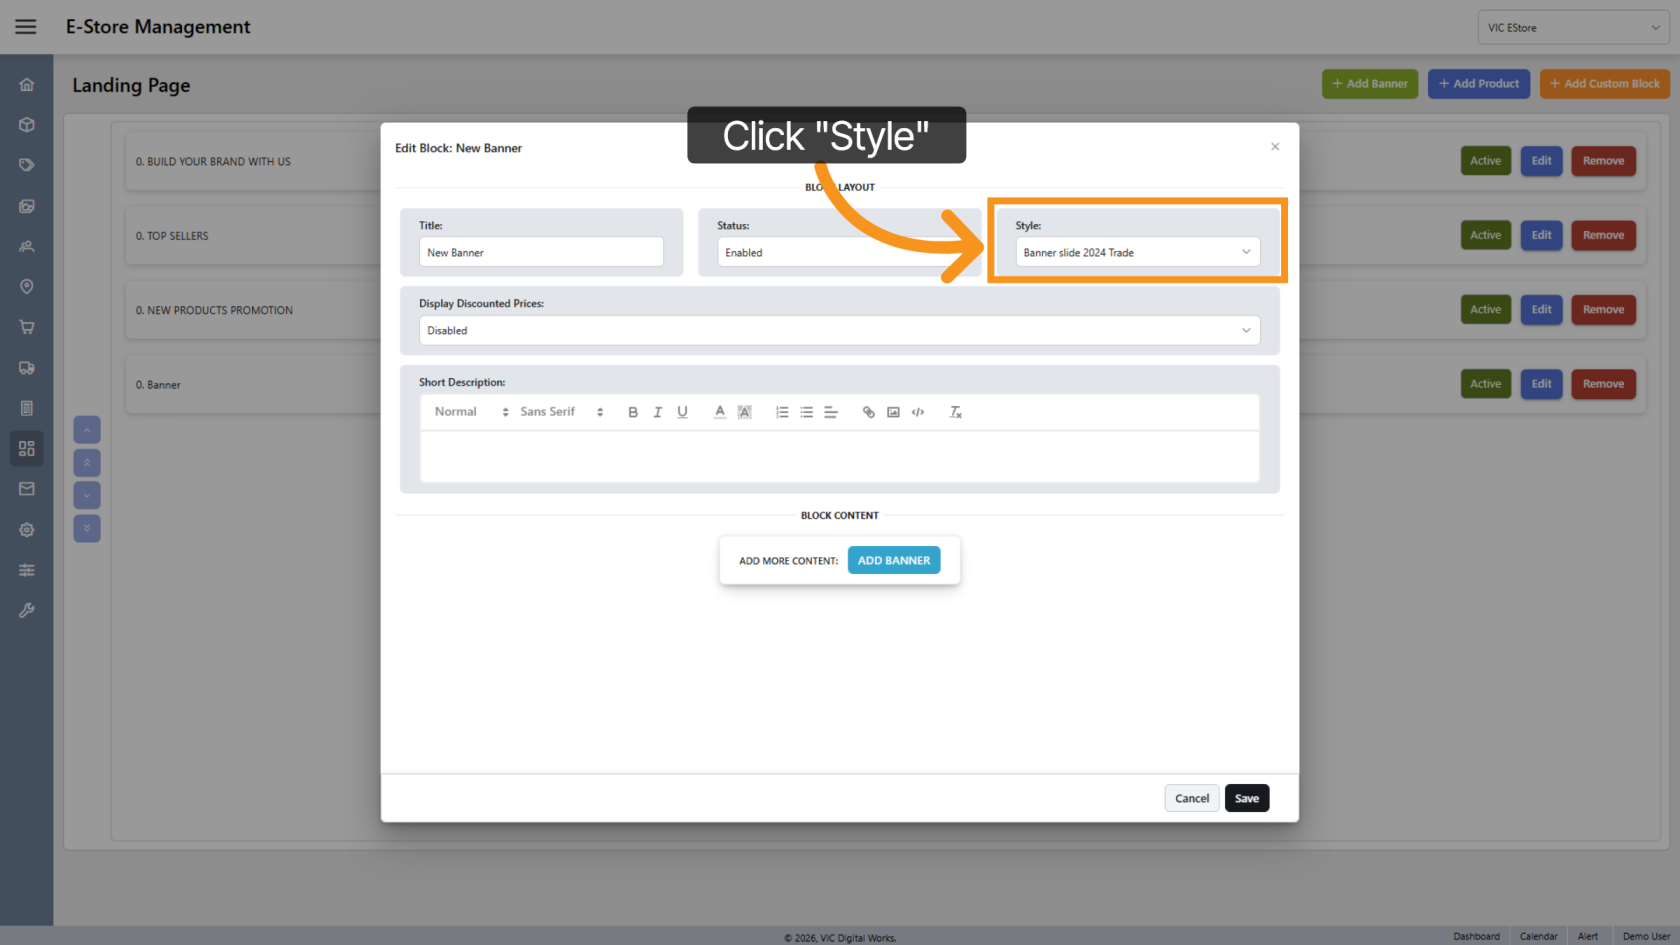
7. Select Banner Style
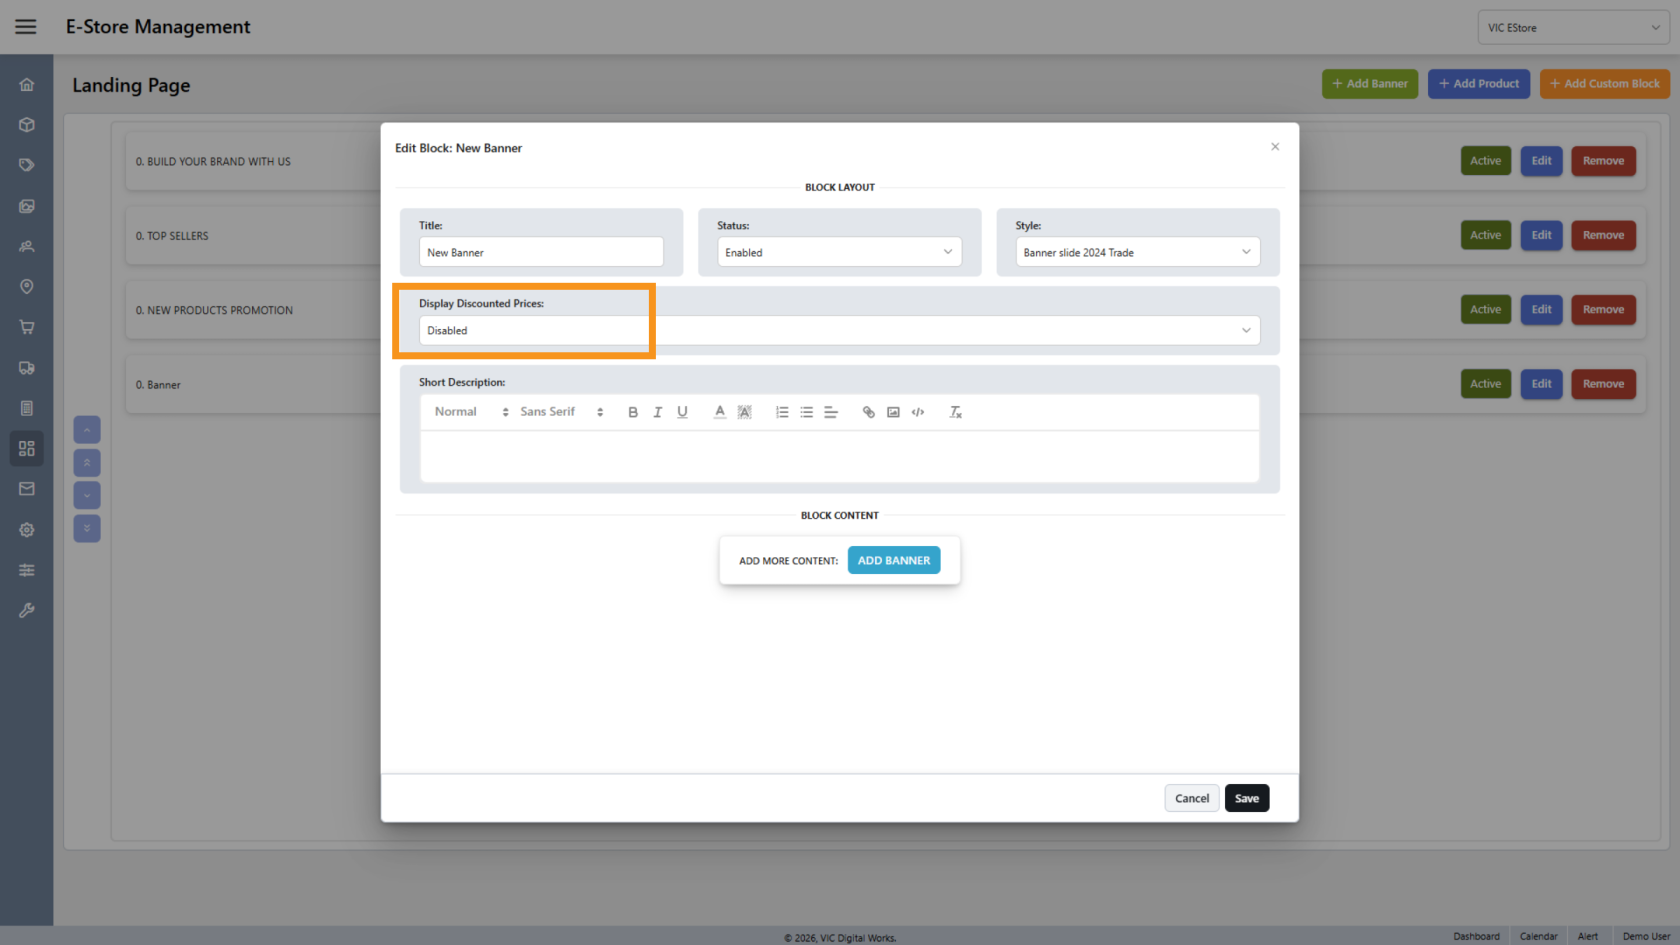
8. Display Discount
Enable this option if you want to display the product discount price on the banner.
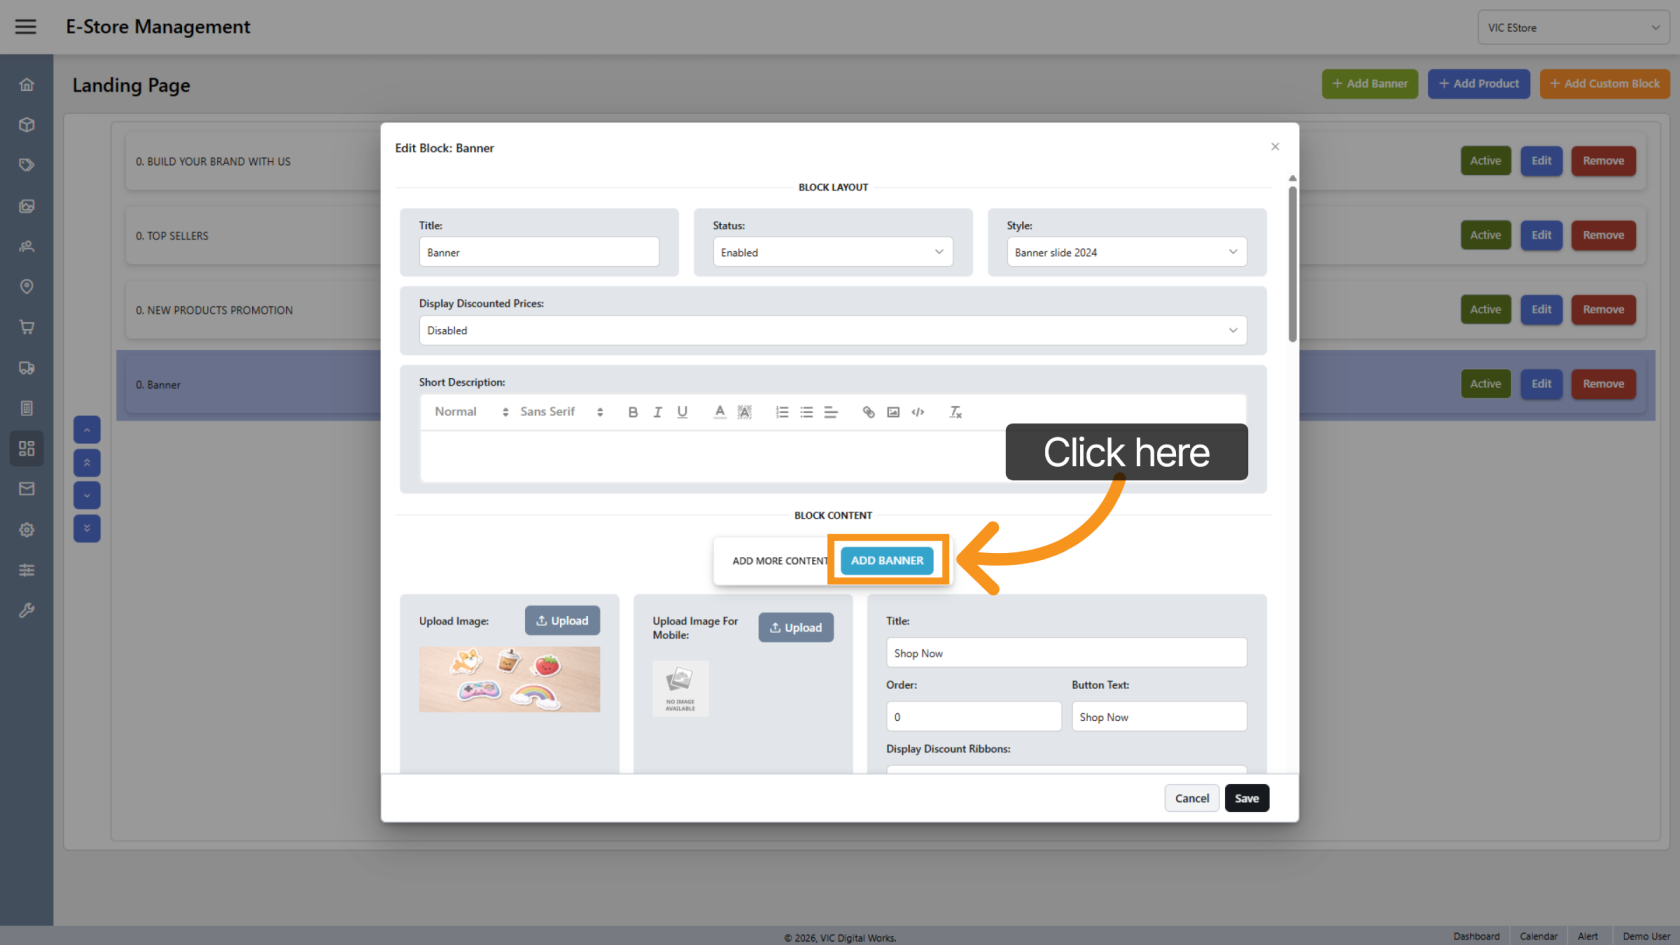
9. Add Banner
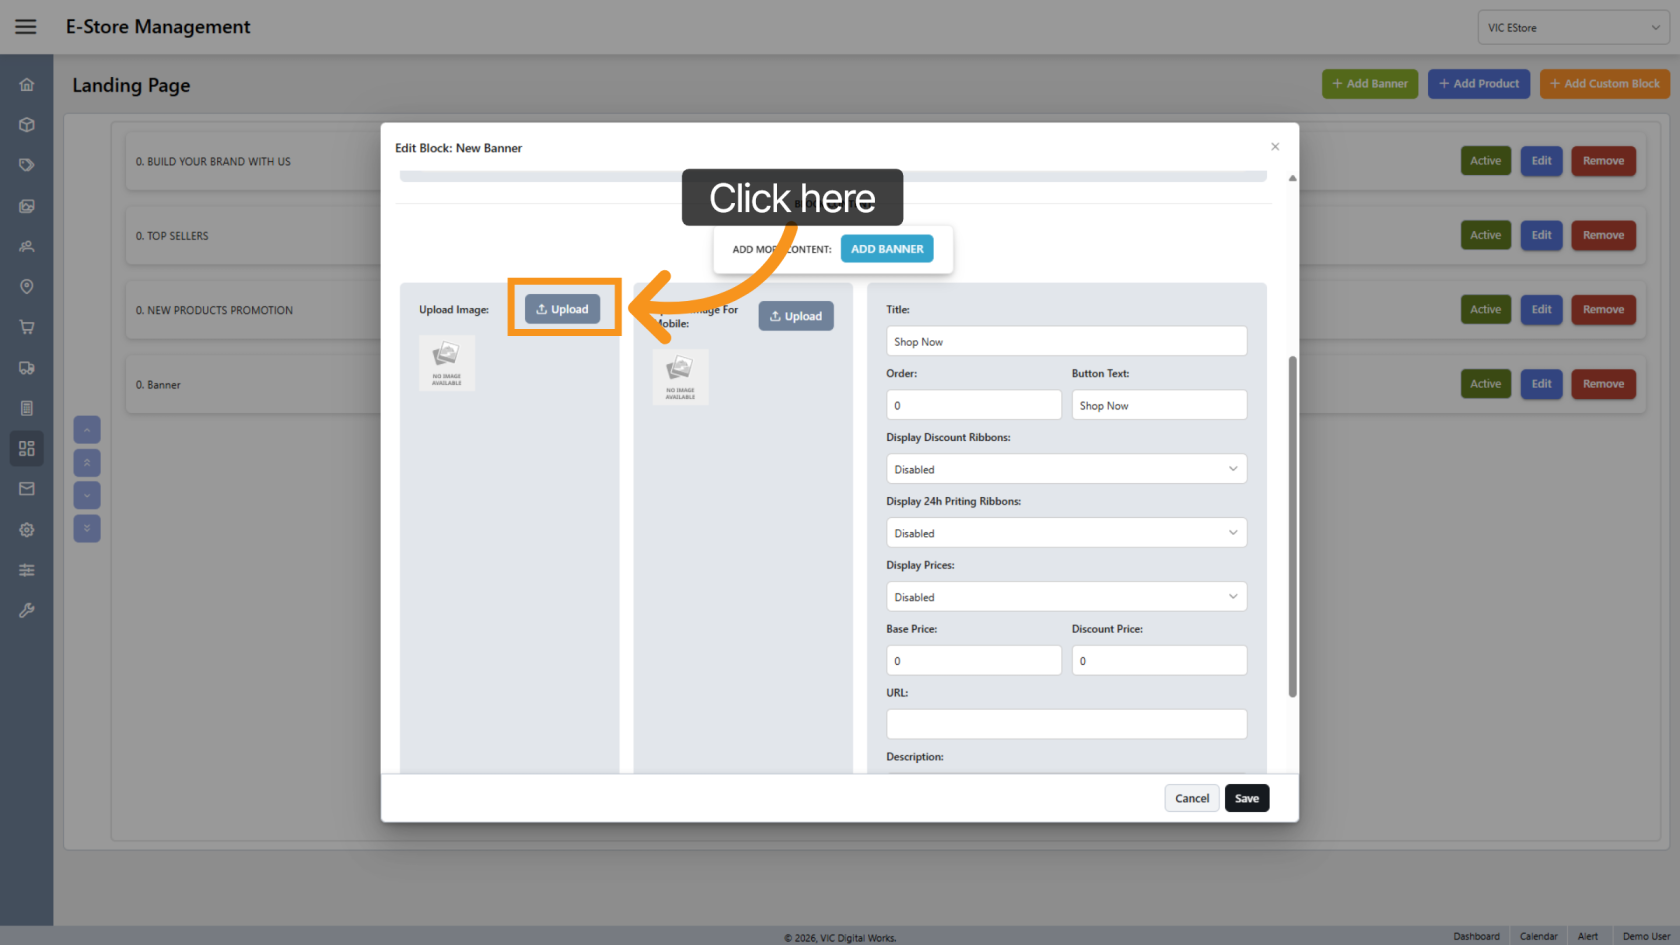
10. Image Upload Options
Click "Upload" to select the image you want to display on the banner.
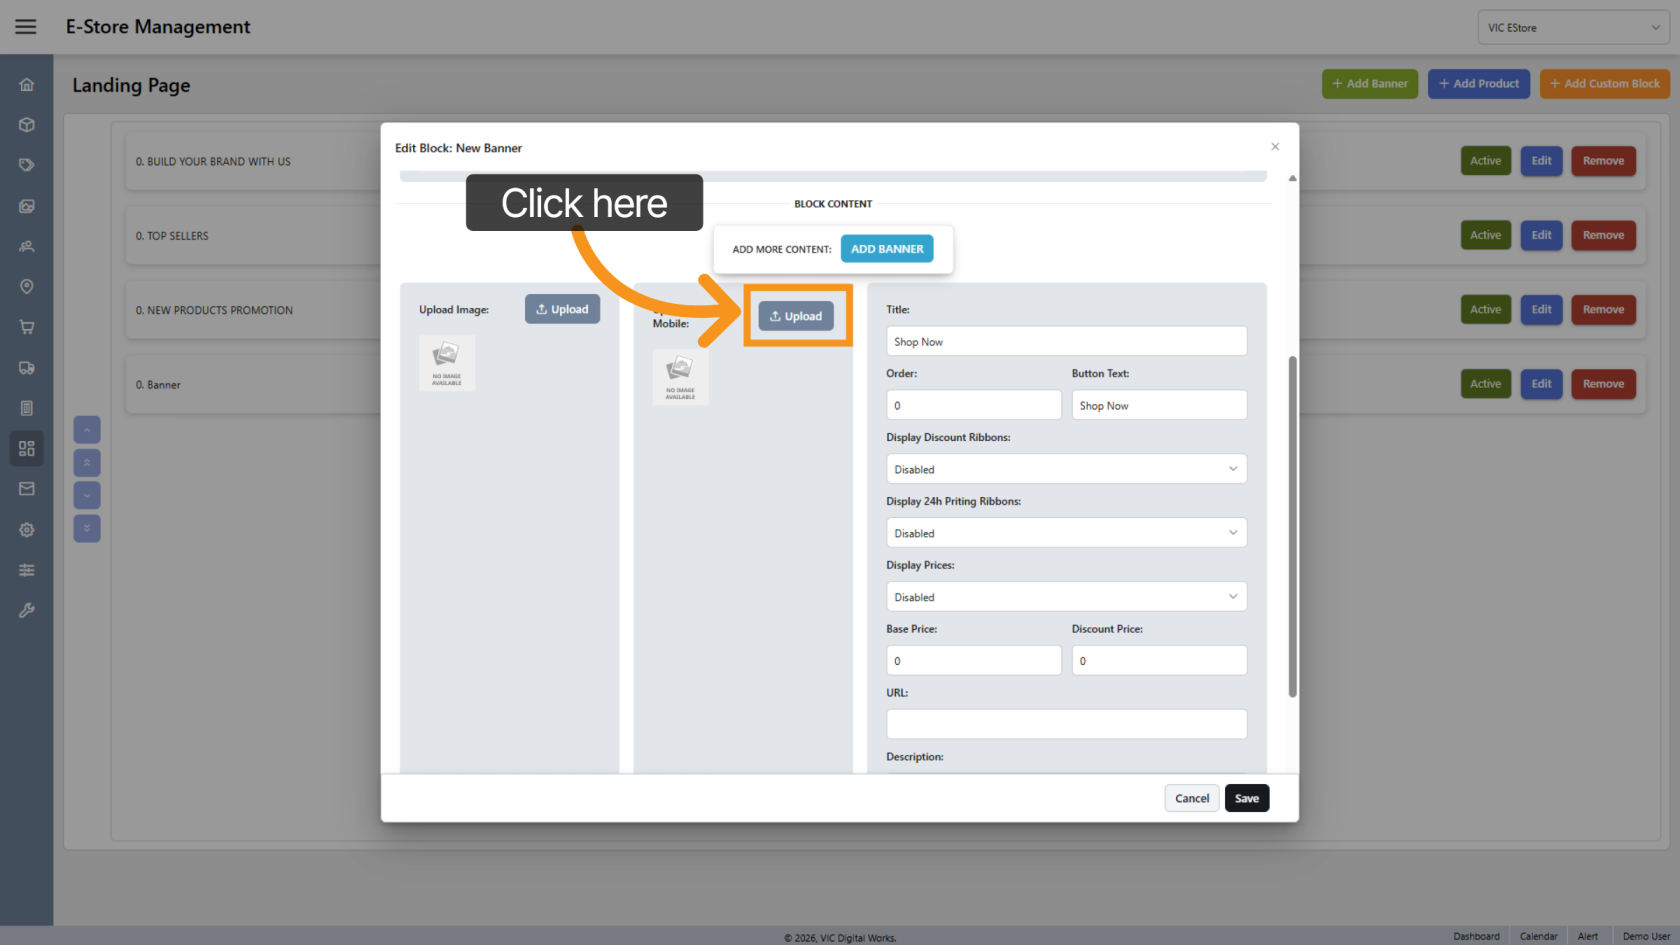
11. Upload Mobile Banner Image
Click Upload Image for Mobile to upload a mobile-optimized banner image.
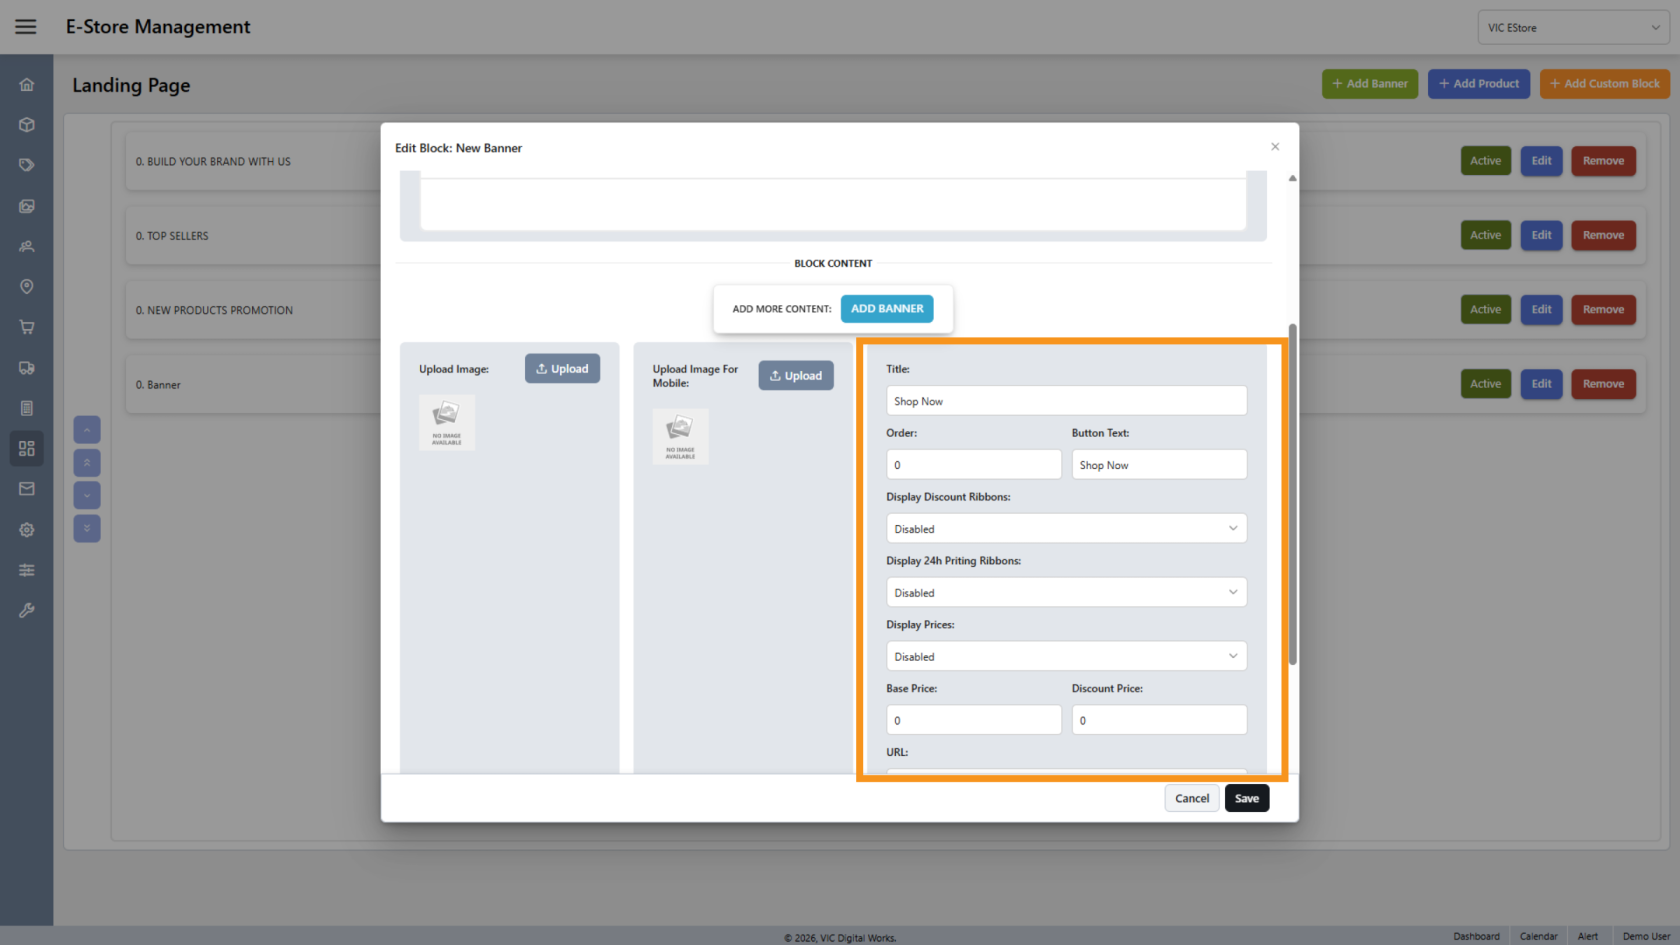
12. Add Product Detail
If you want to display a product on the banner, fill in the product information here. Make sure to include the product URL so customers can navigate to the correct product page.
13. Add Multiple Banners
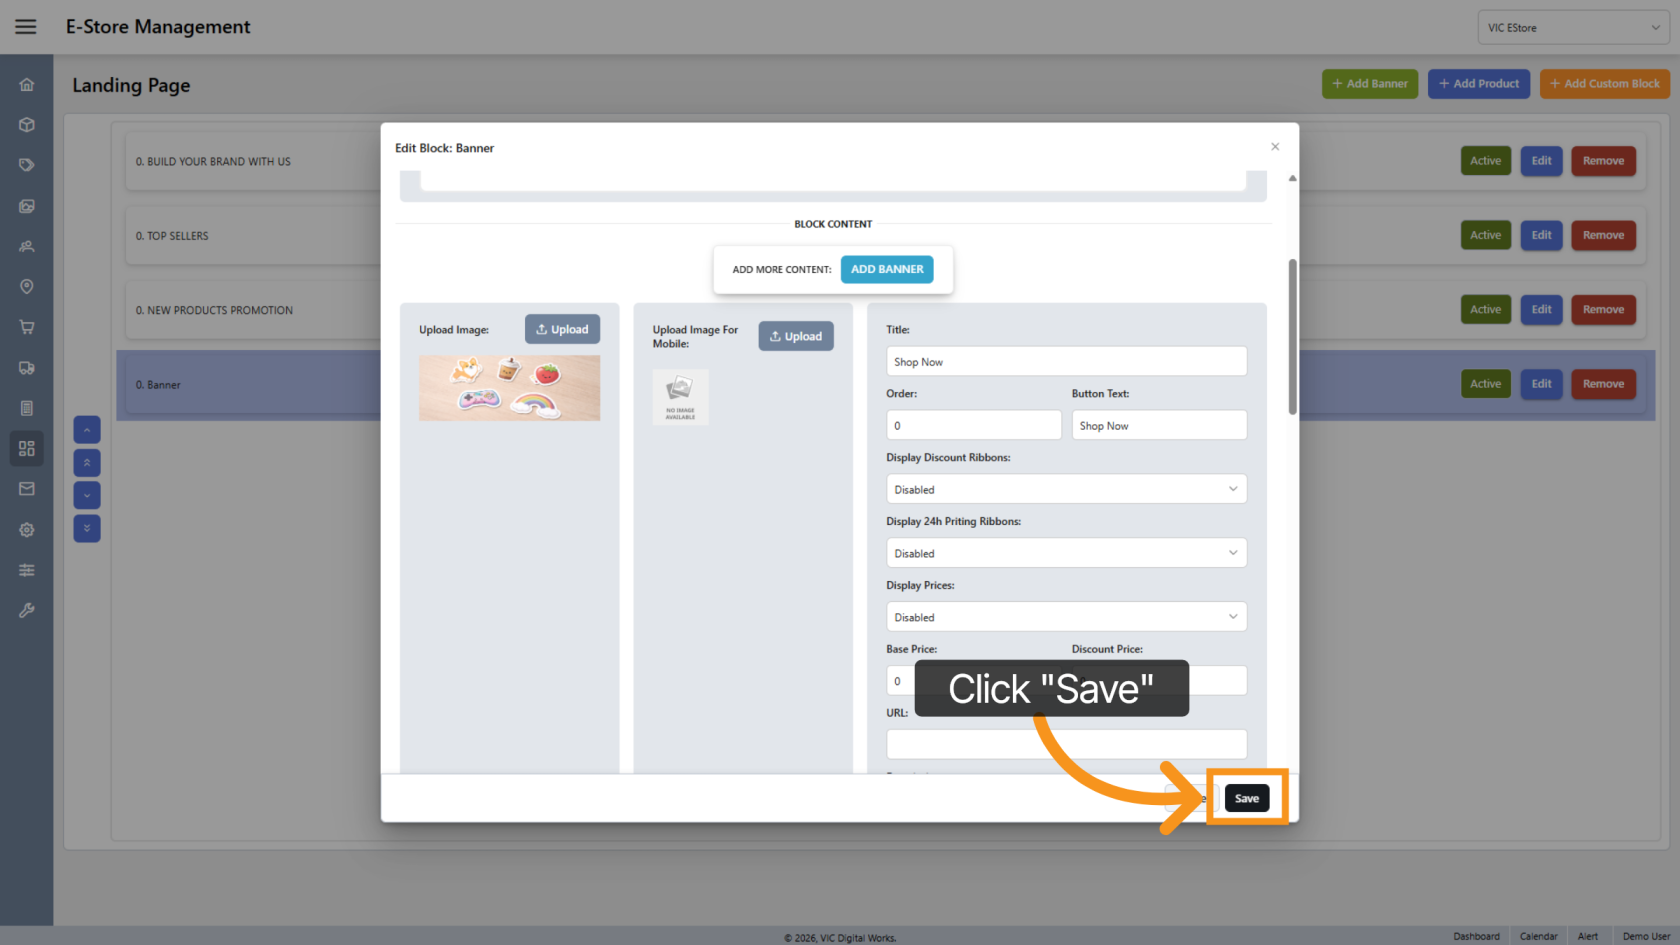
14. Save the Update
Click "Save" to apply all changes.
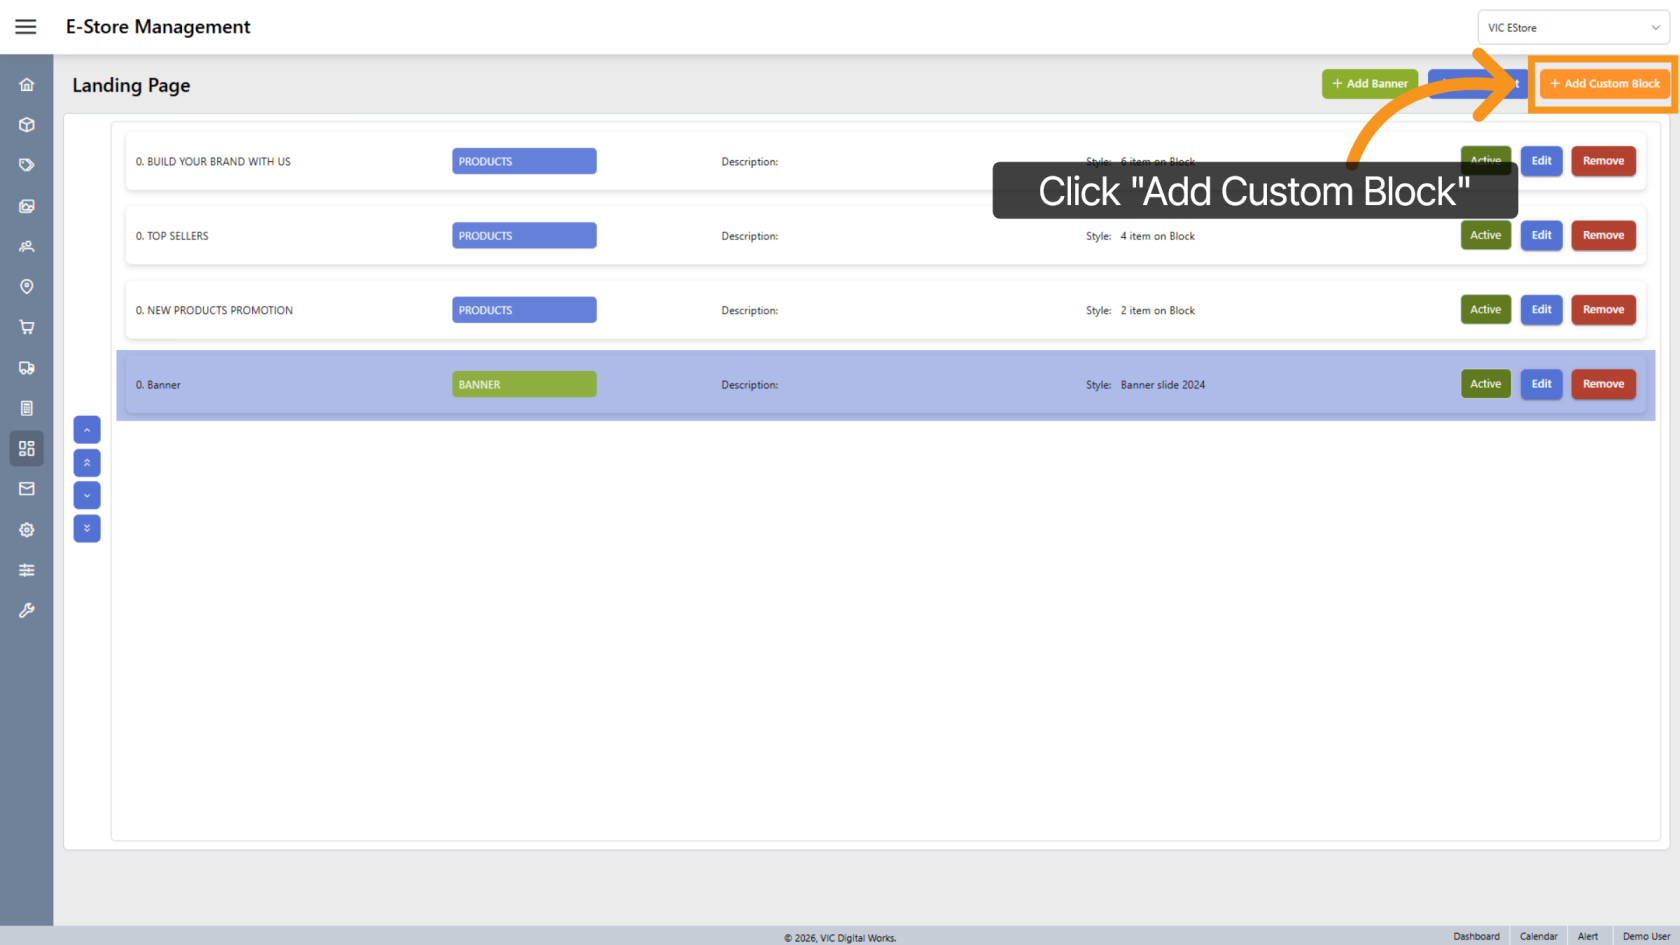
15. Add Custom Block
Click "Add Custom Block" to add a custom block to the landing page.
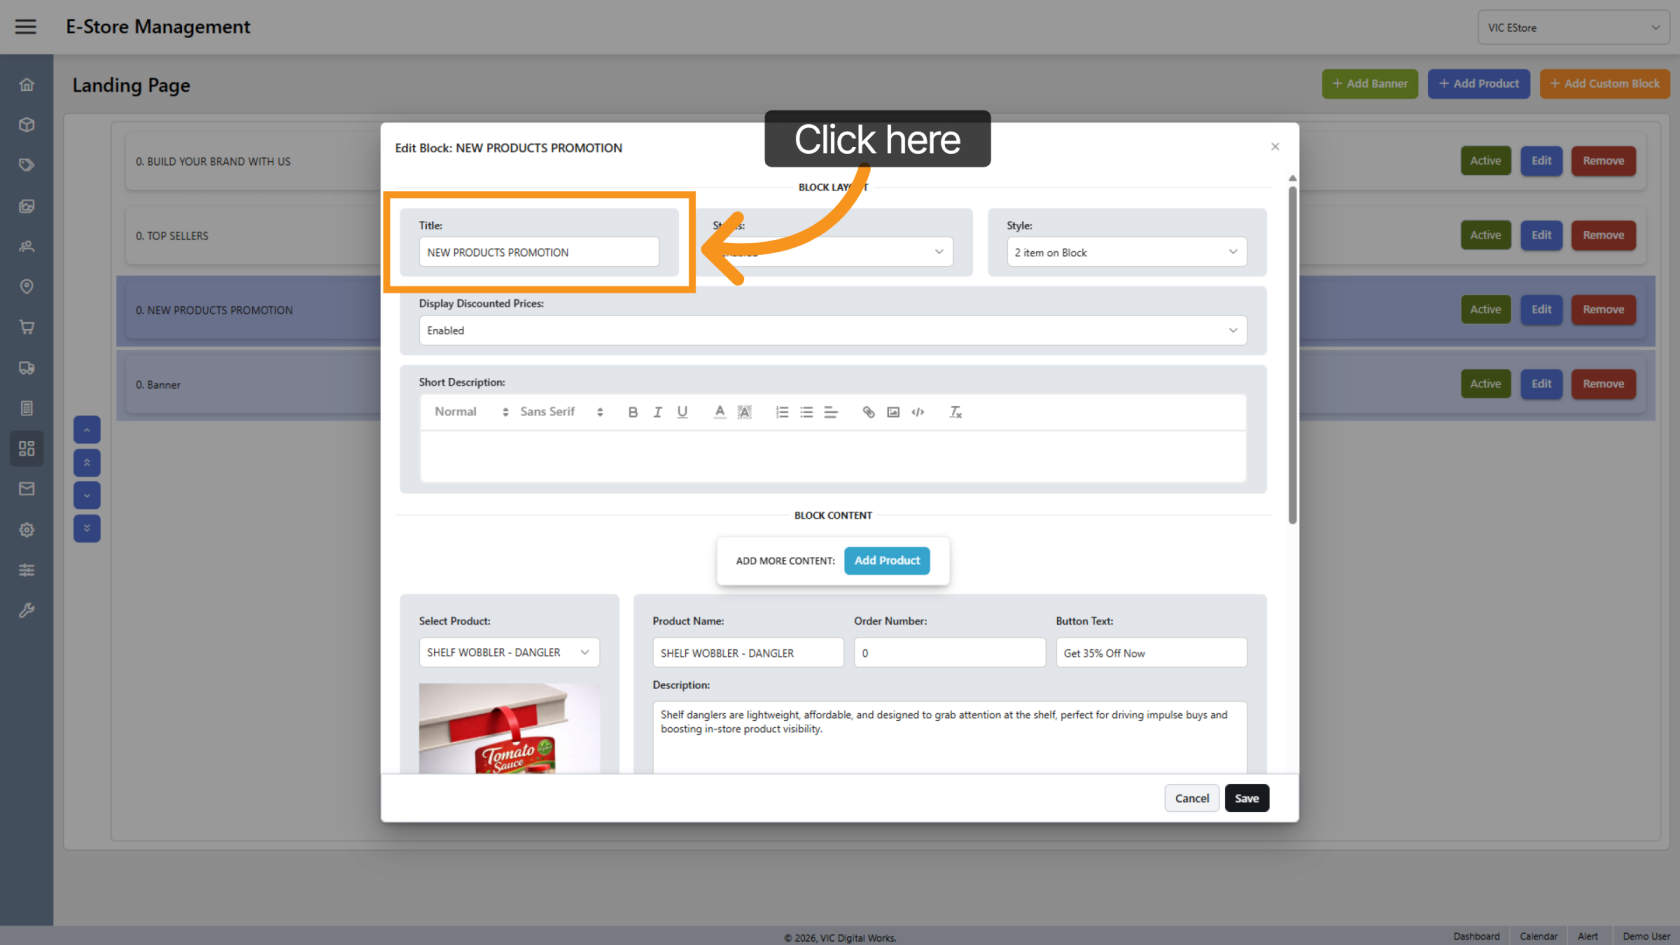
16. Modify Block Title
Click Title to change the title of the block item.
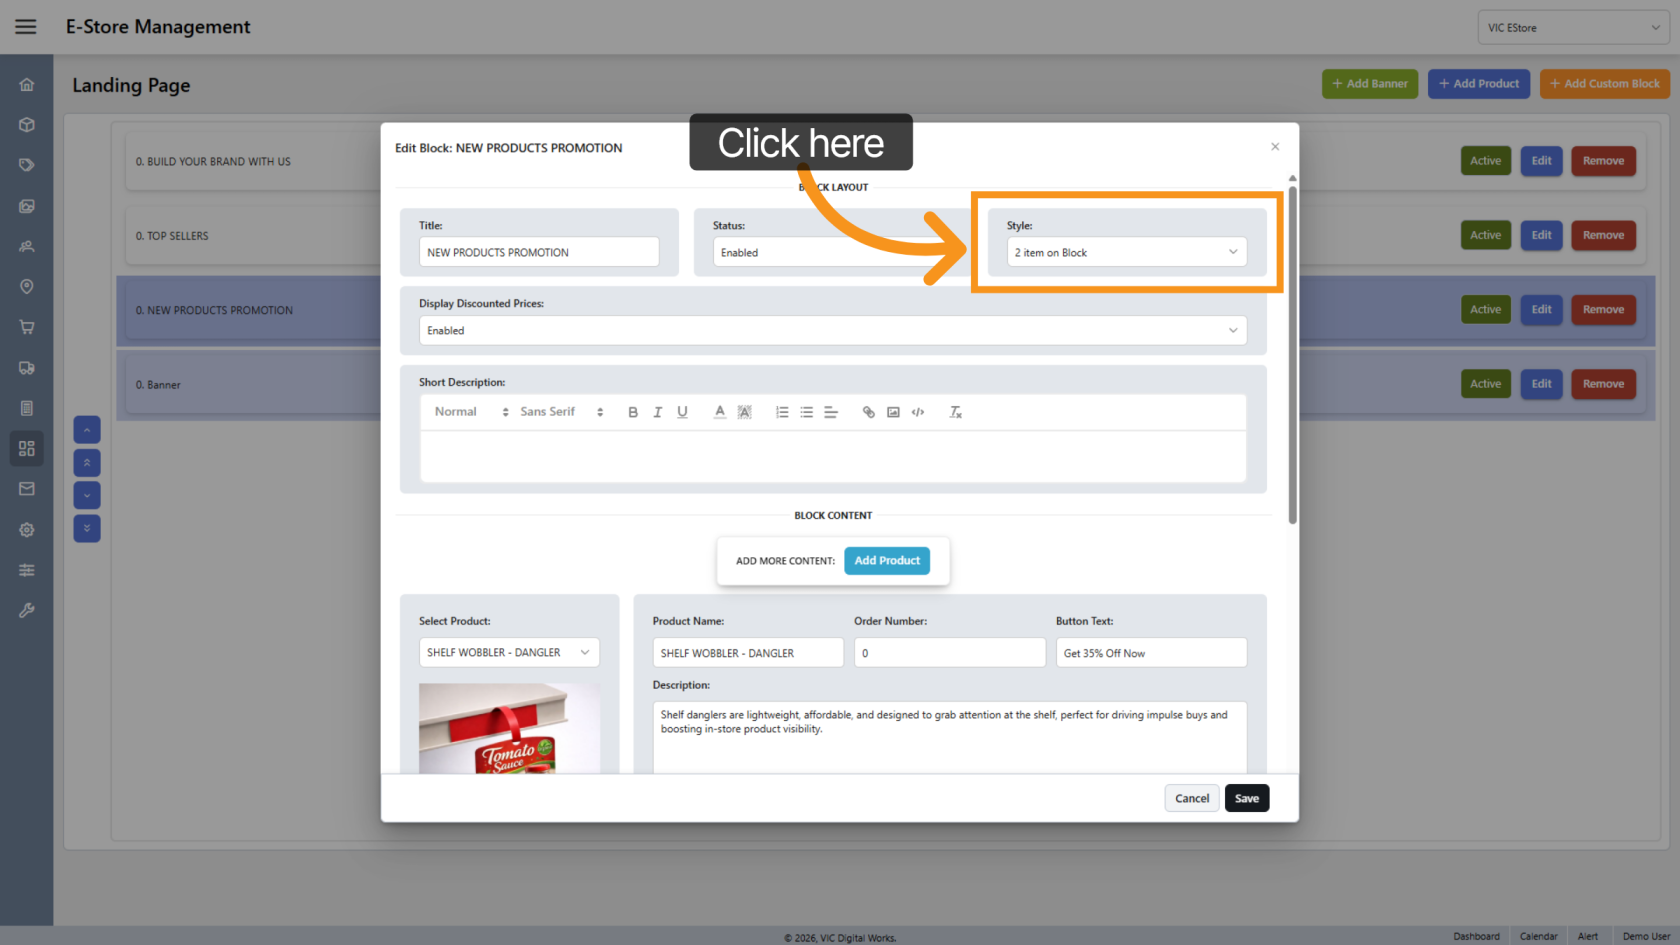
17. Select Block Style
Click Style to choose the block layout style.
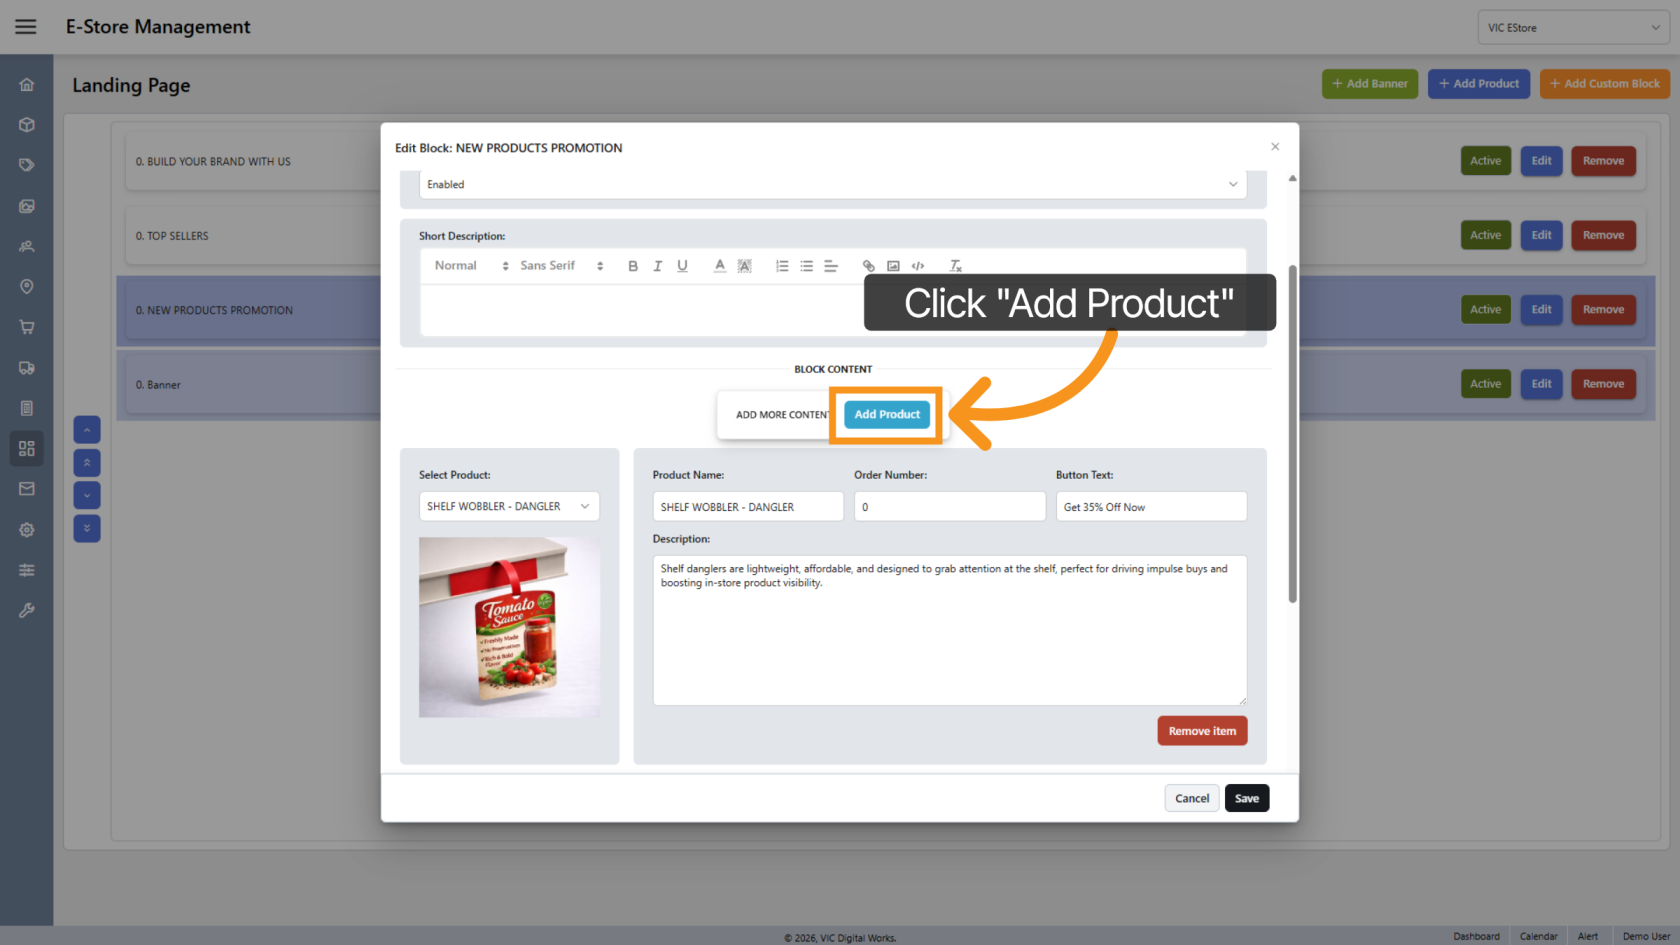
18. Add Block Item
Click "Add Products" to start adding items to the block.
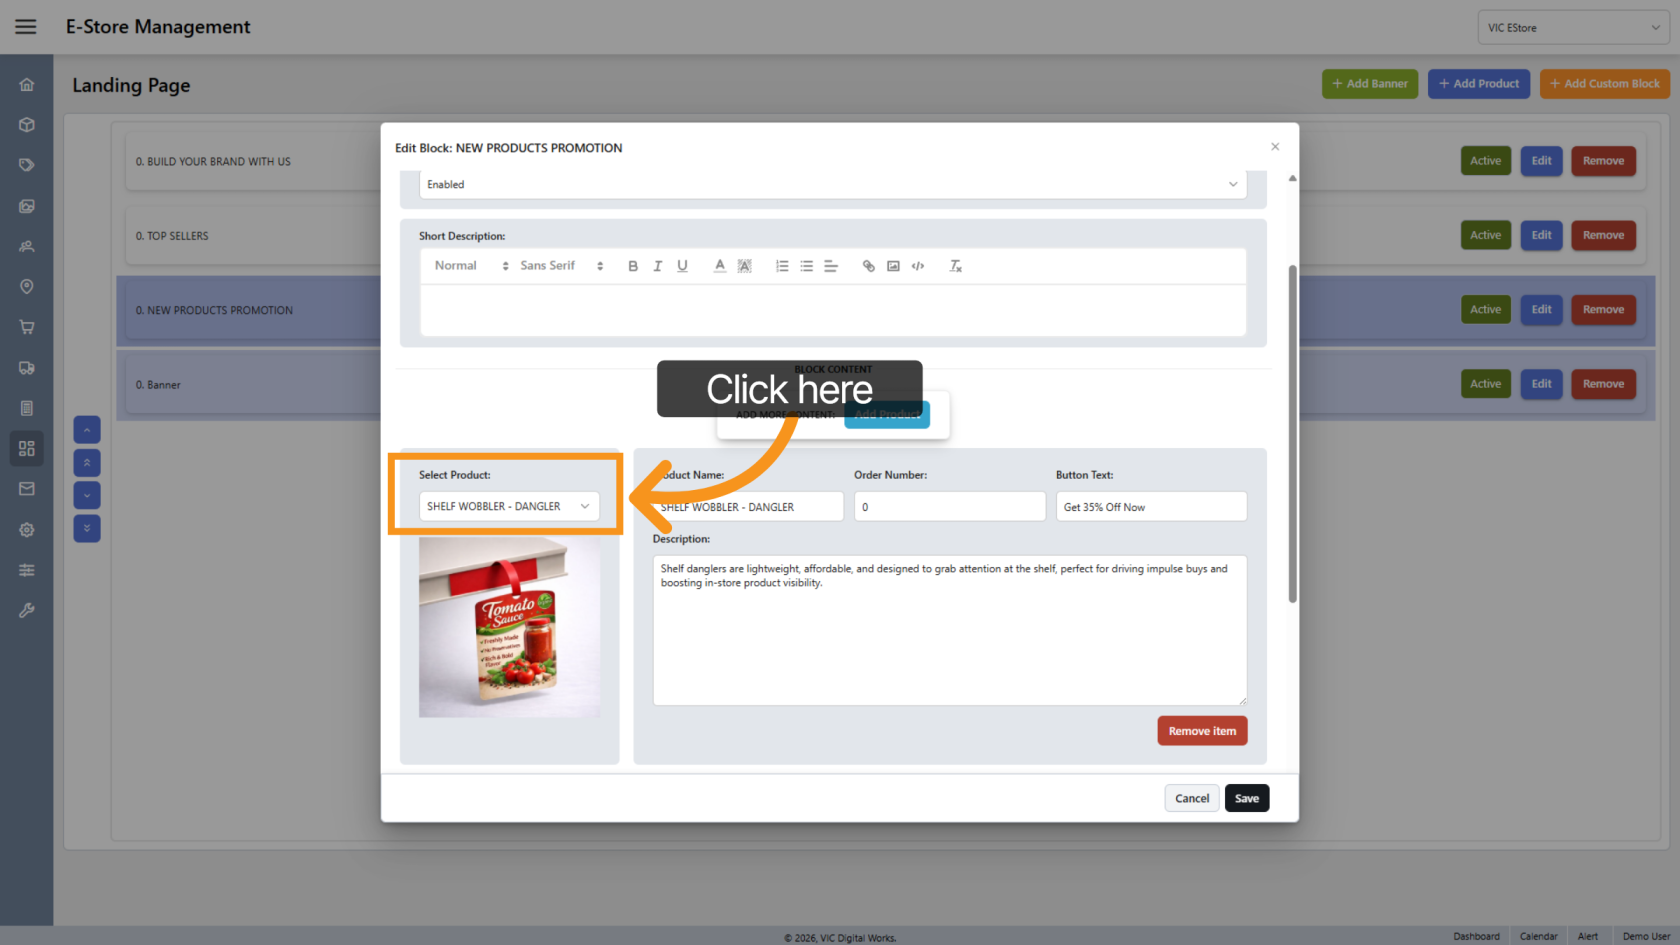
19. Select Product
Choose the product you want to add to the block.
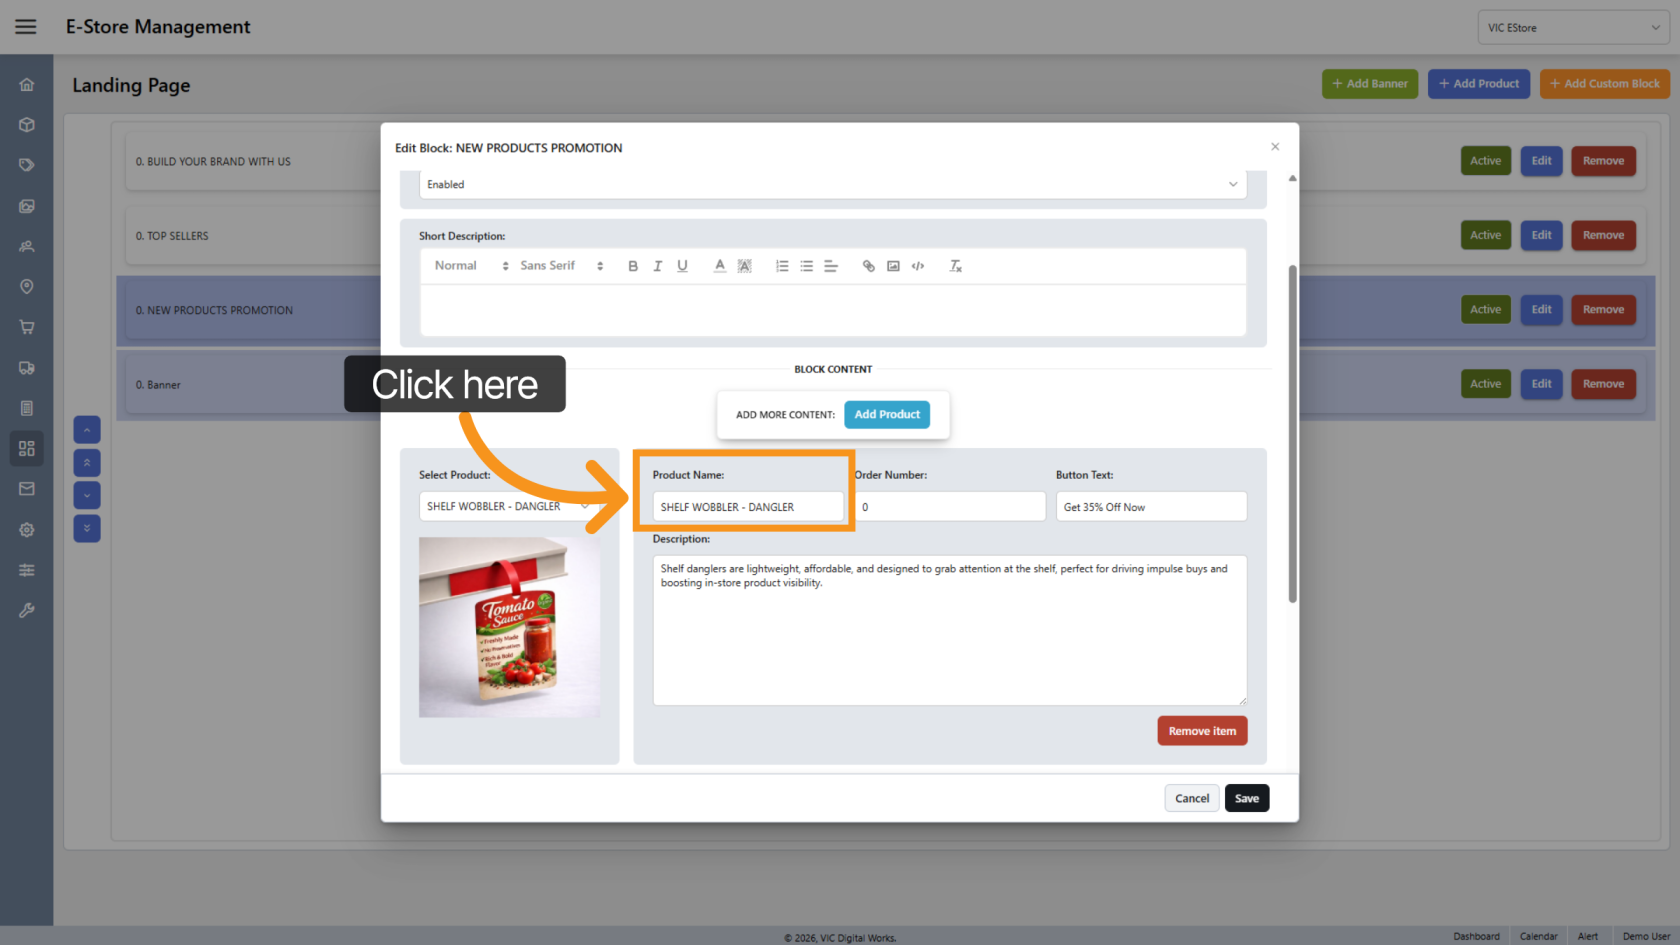
20. Product Name
Click Product Name to edit the product name if needed.
21. Add Button
If you want to add a button next to the product, enter the button name.
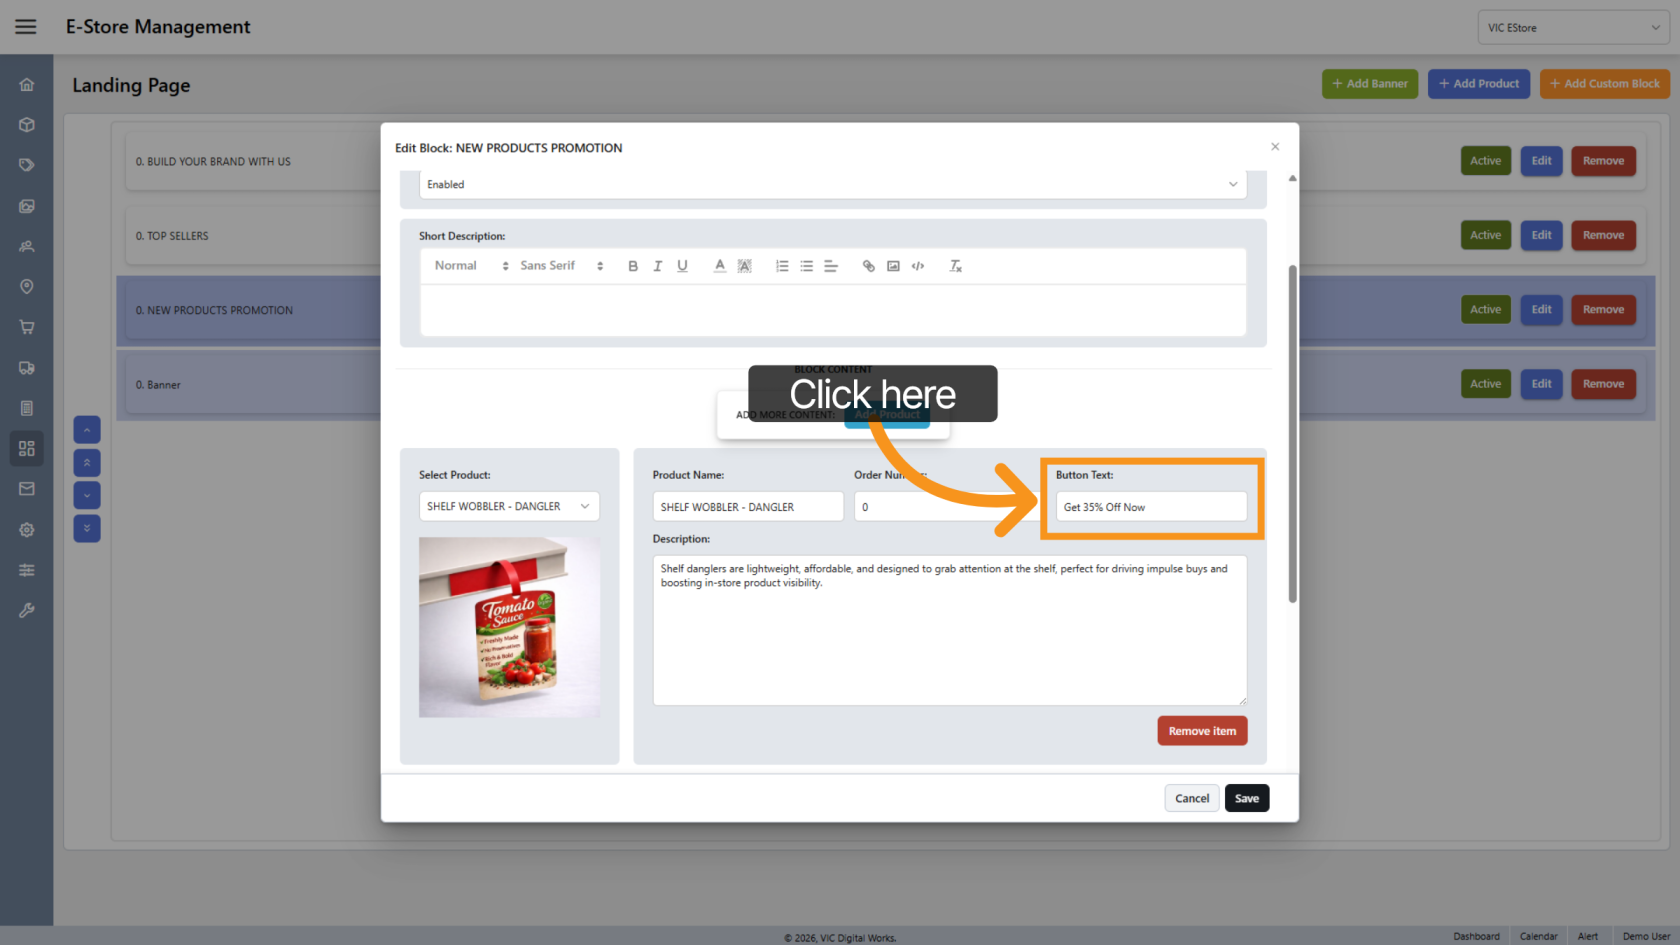
22. Add Description
Enter a description suitable for the product.

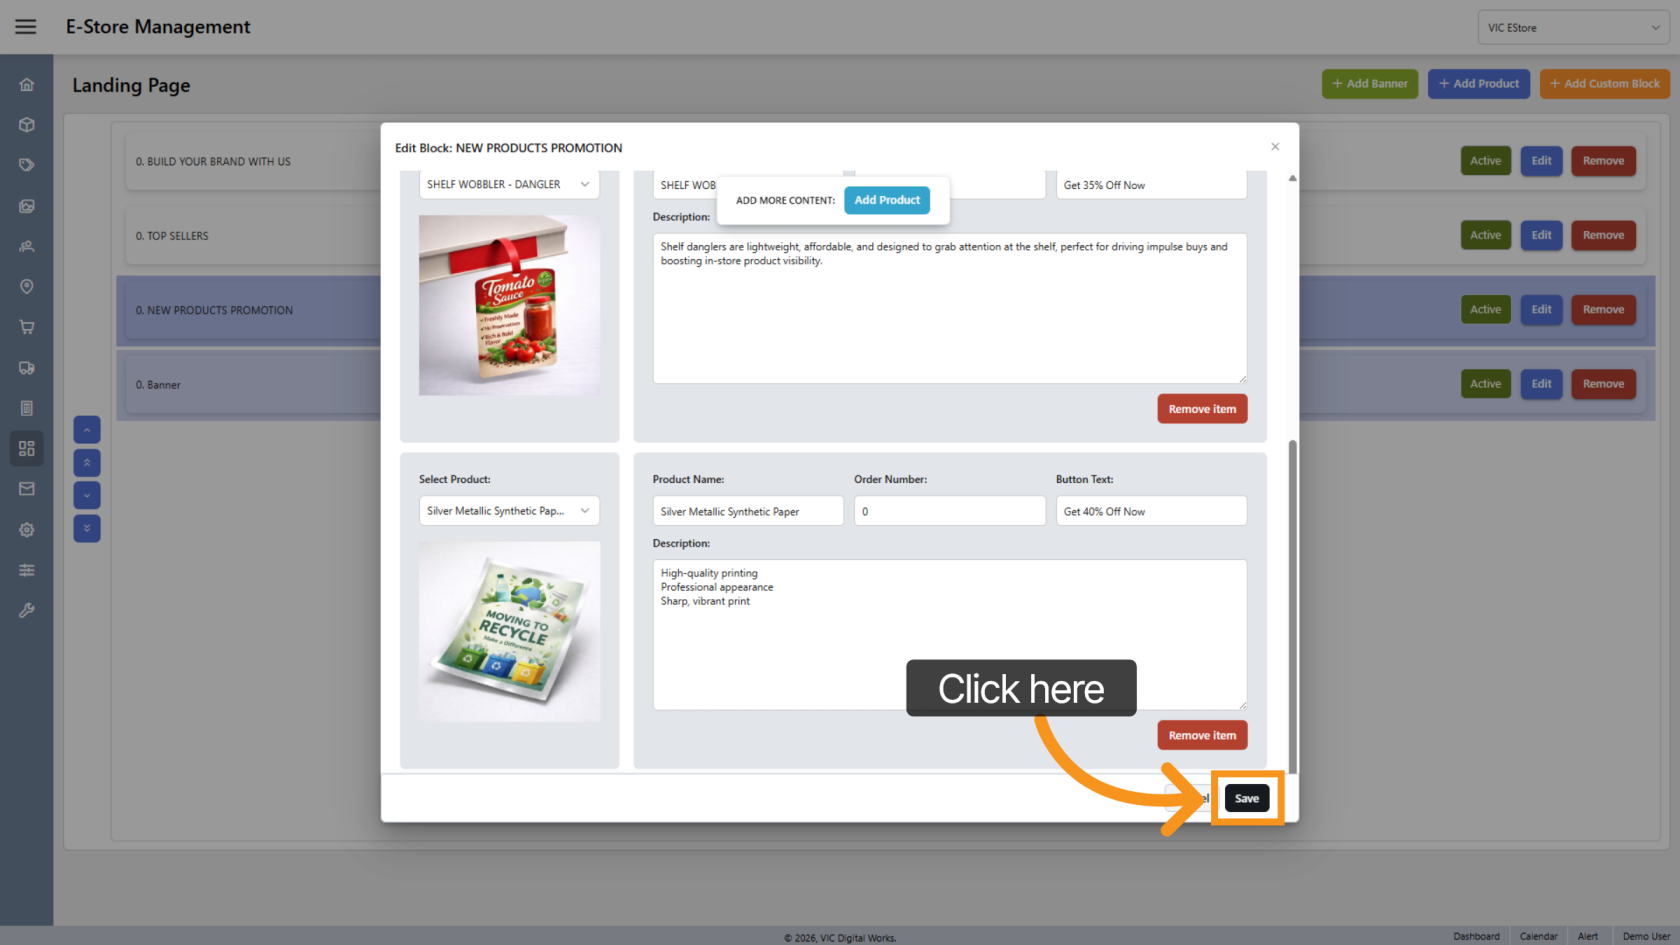
23. Save the update
Click "Save" to apply the changes.
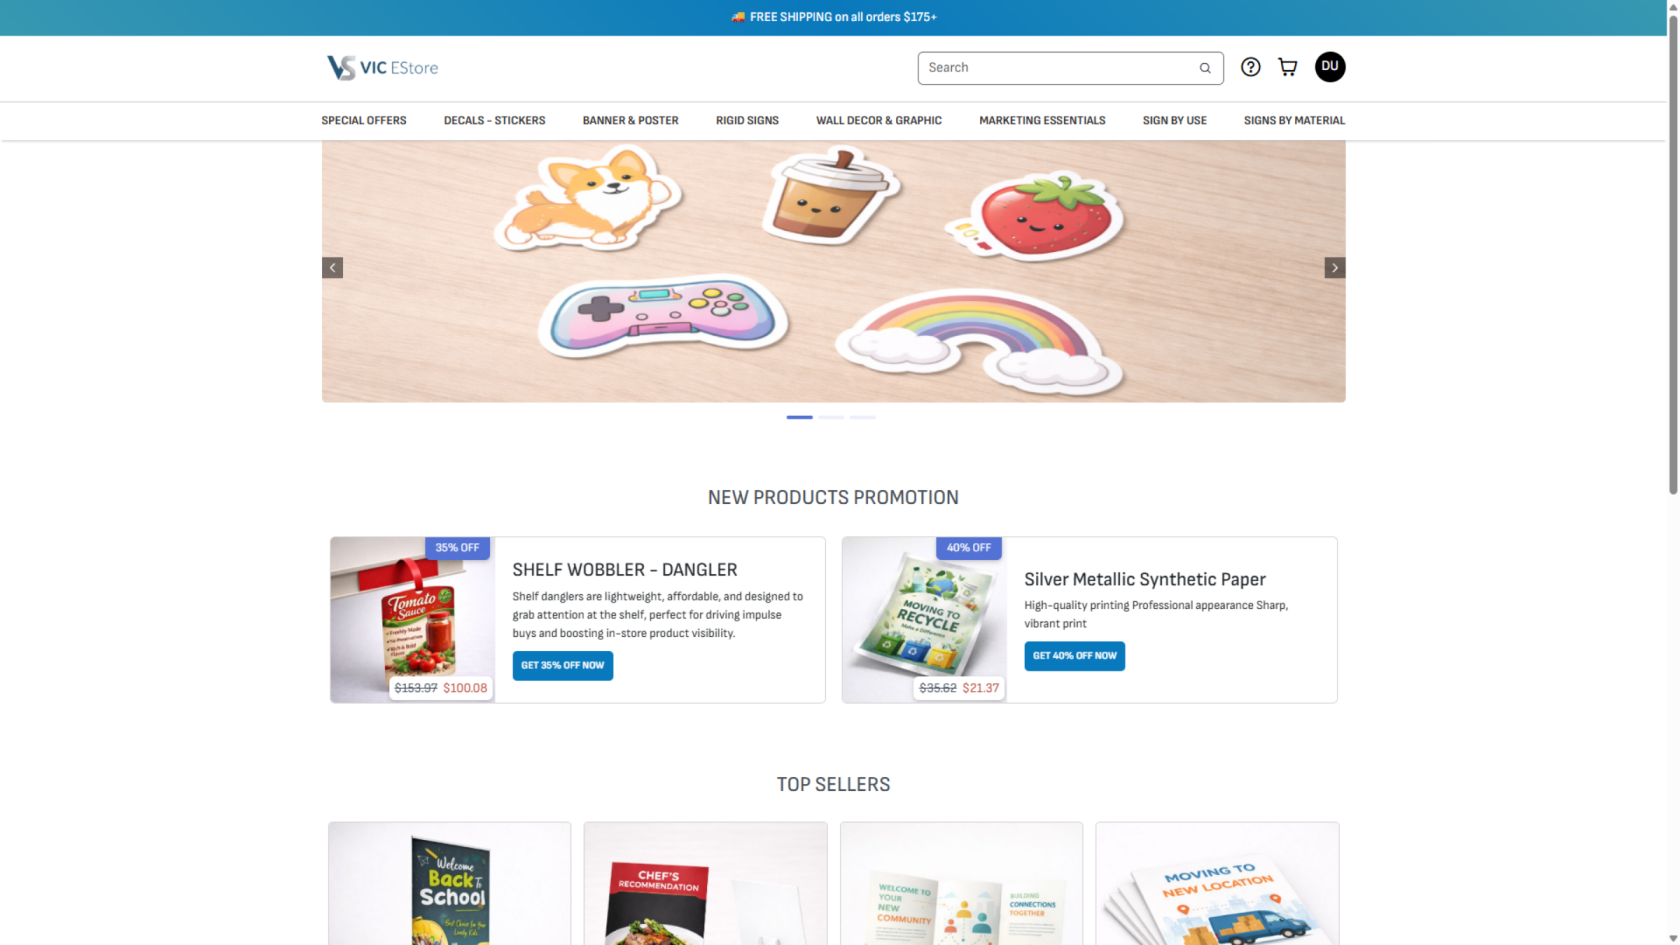
24. Review the Update
Open the E-store landing page to review all the updates.
You have successfully configured and customized the landing page in the application, including managing banners and product blocks to enhance your storefront’s appearance and functionality.