Shipping Profiles
This tutorial shows you how to create and configure shipping profiles and set shipping options for your E-store.
Video Tutorial
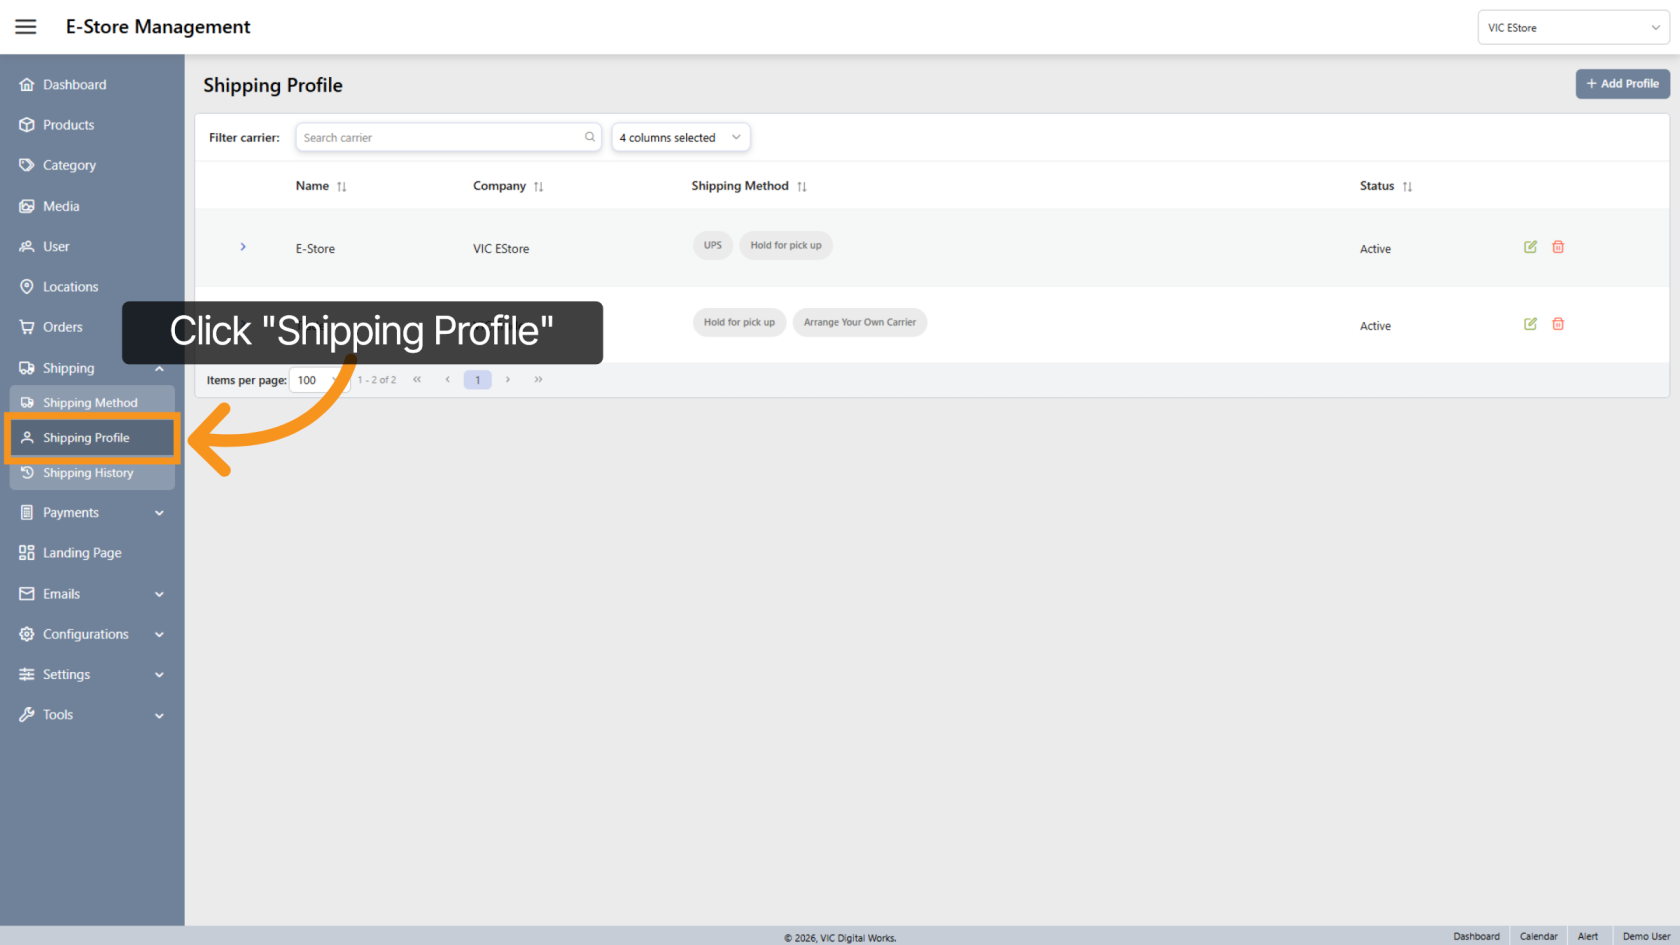
1. Open Shipping Profile Section
Click "Shipping Profile" on the side menu to access the main shipping profile management section in the app.
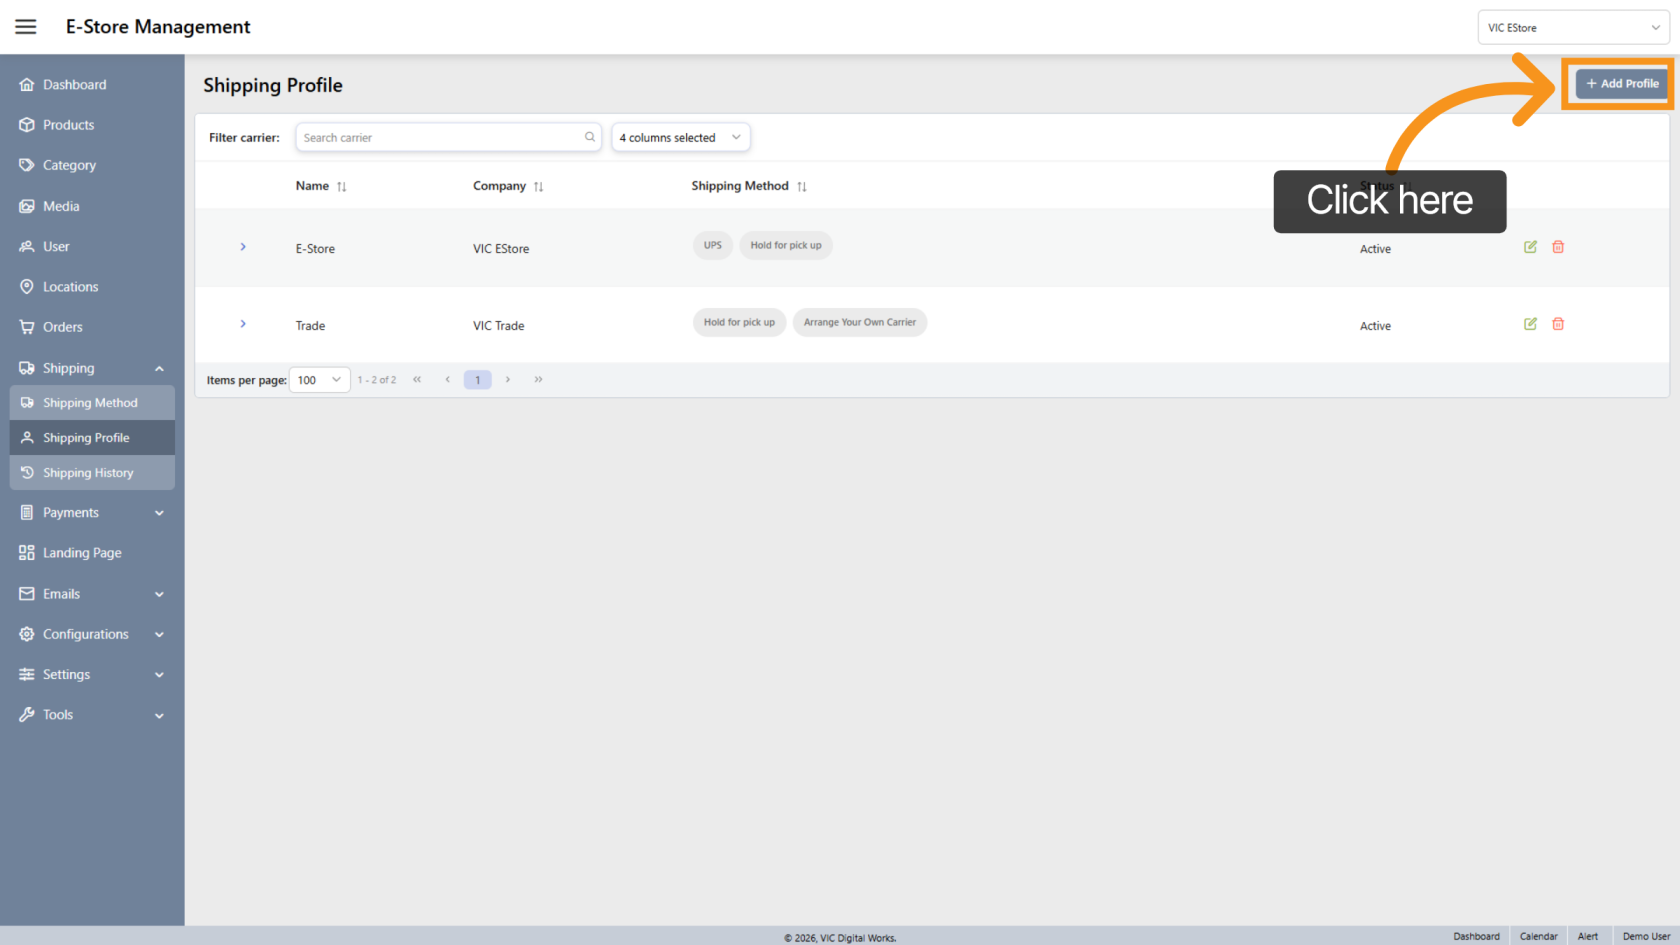
2. Add new shipping Profile
Click "Add Profile" to create a new shipping profile.
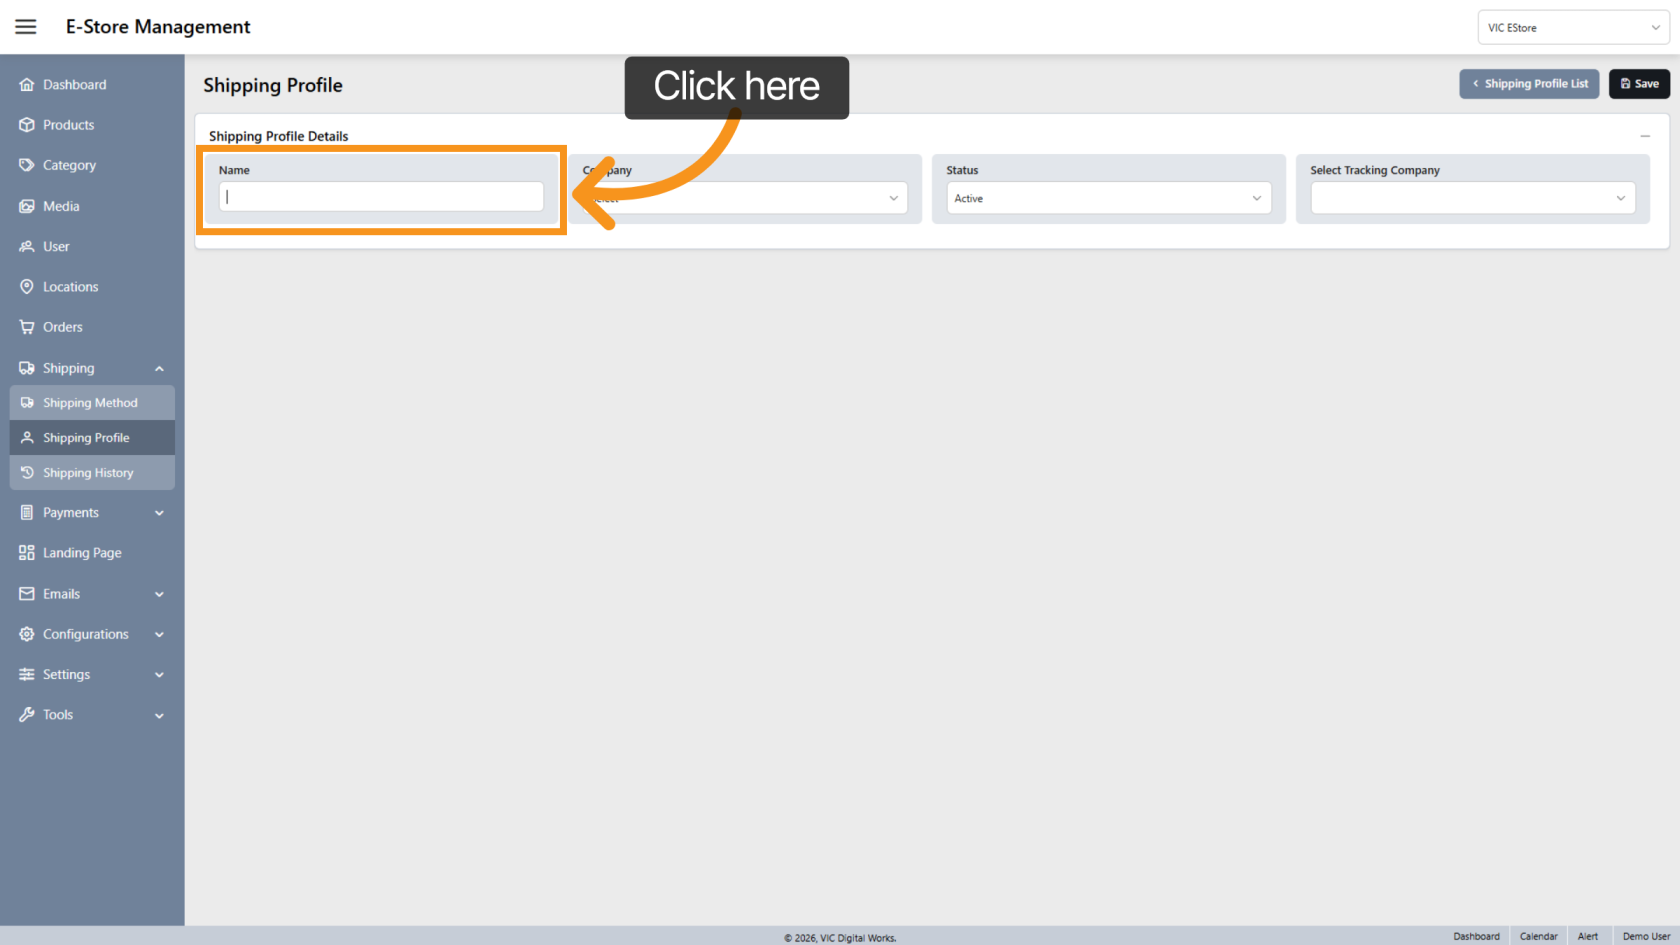
3. Enter Profile Name
Enter a Profile Name so it is easy to recognize and manage the profile later.
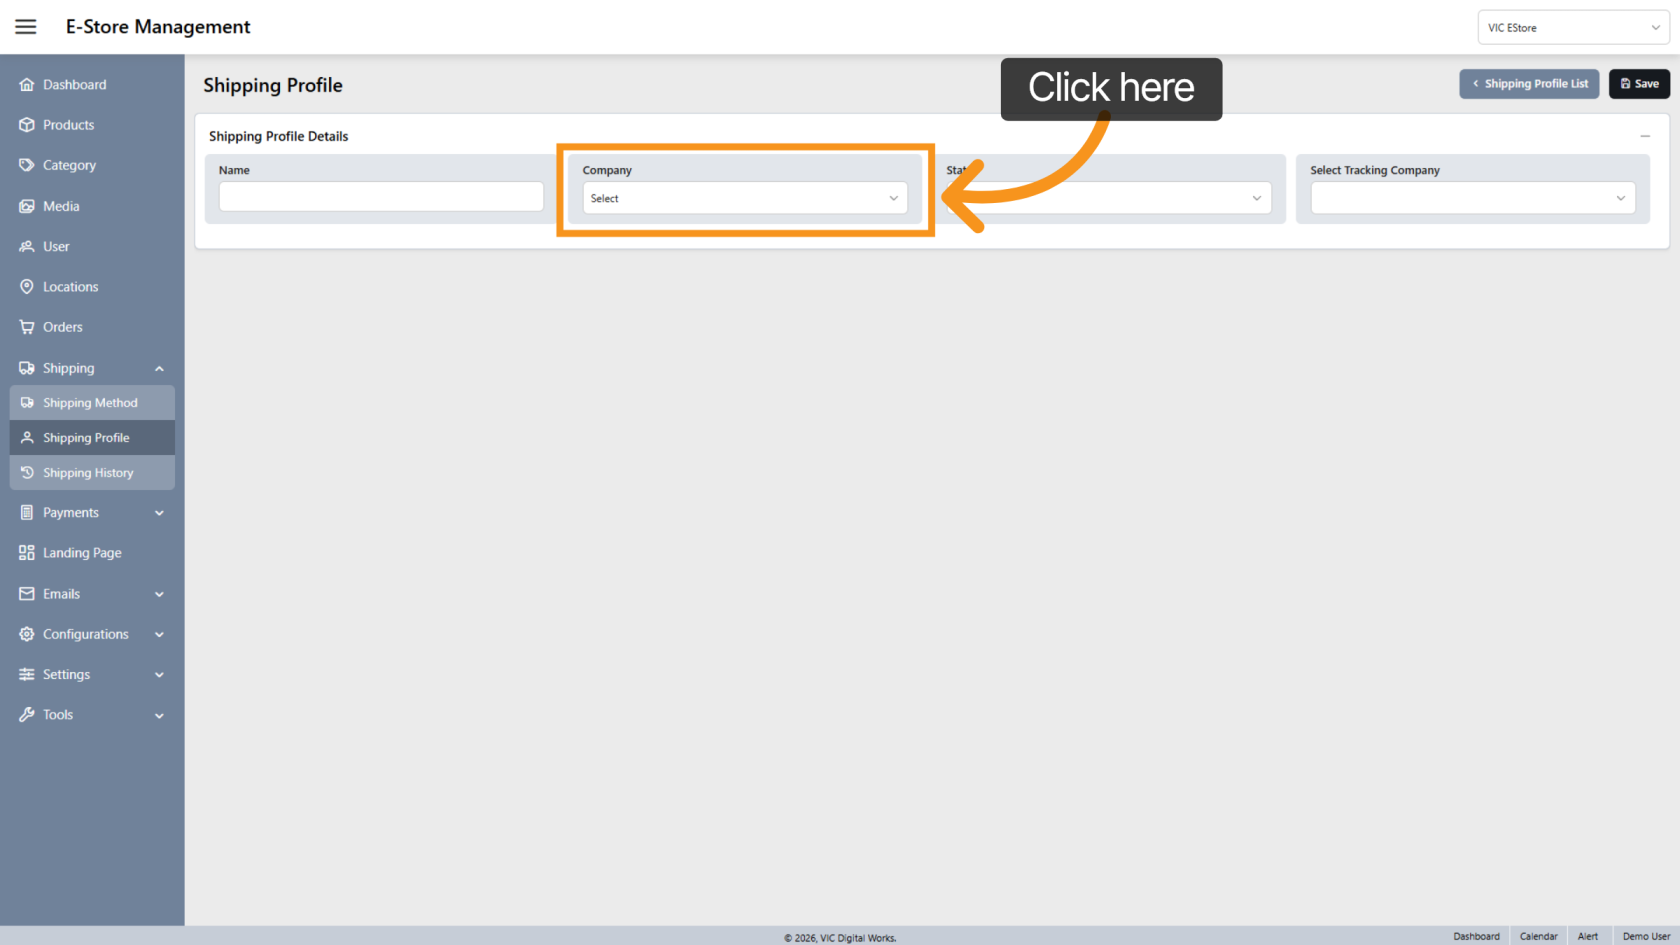
4. Select Company Store
Choose the Company Store where this shipping profile will be applied.
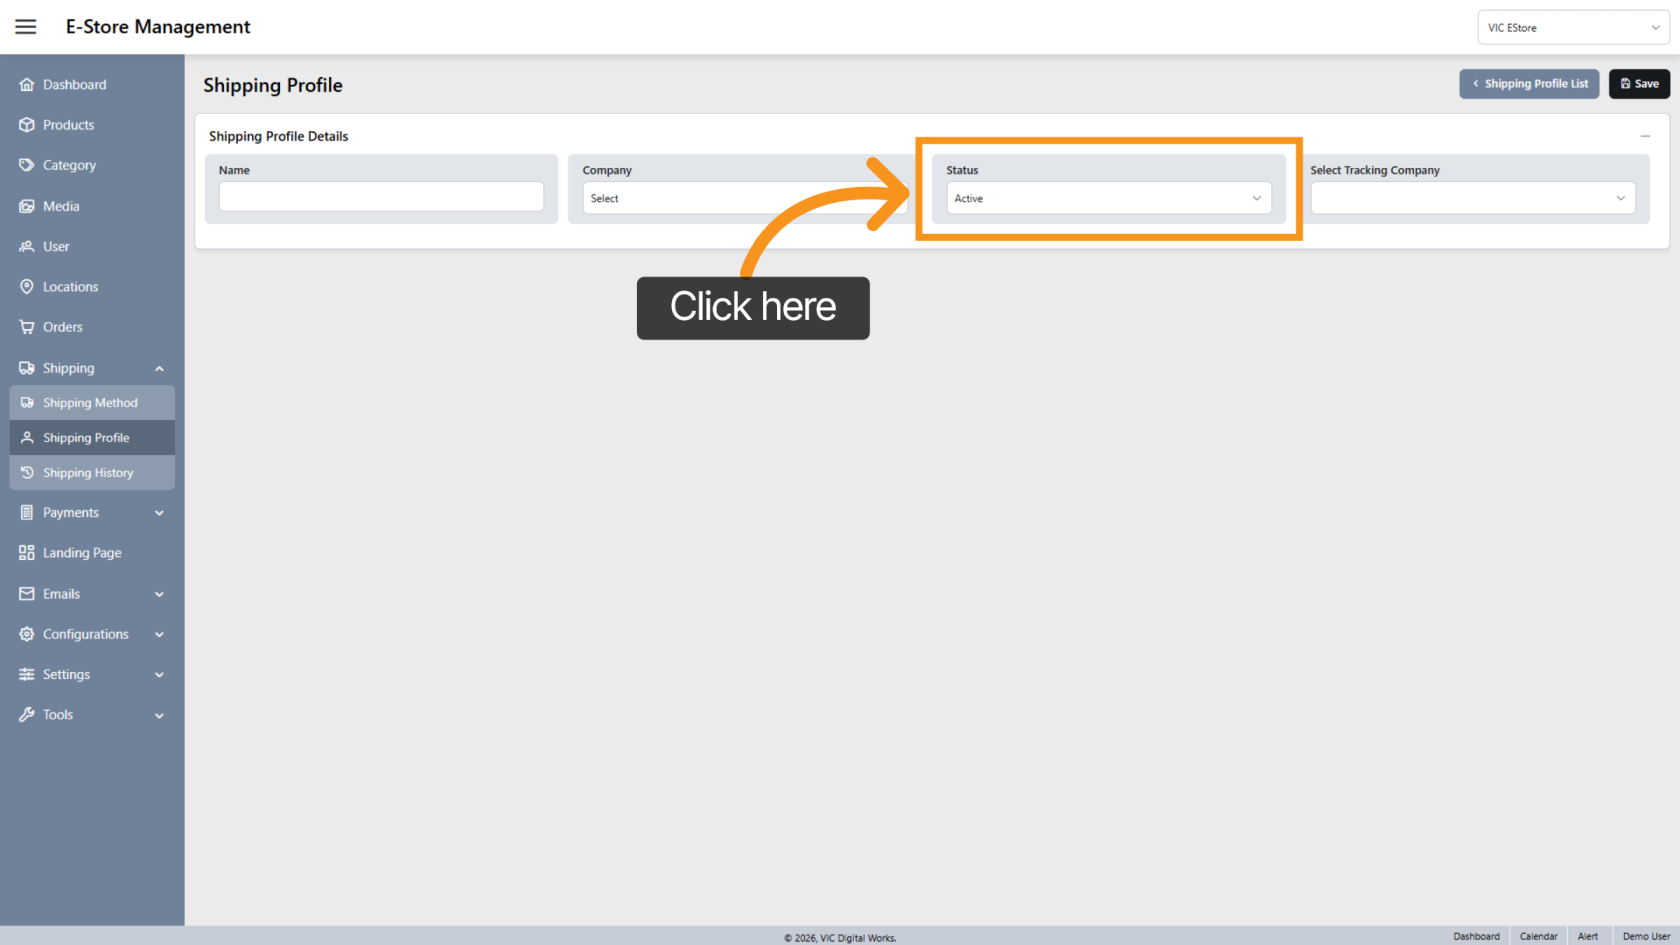
5. Set Profile Status
New profiles are automatically set to Active by default.
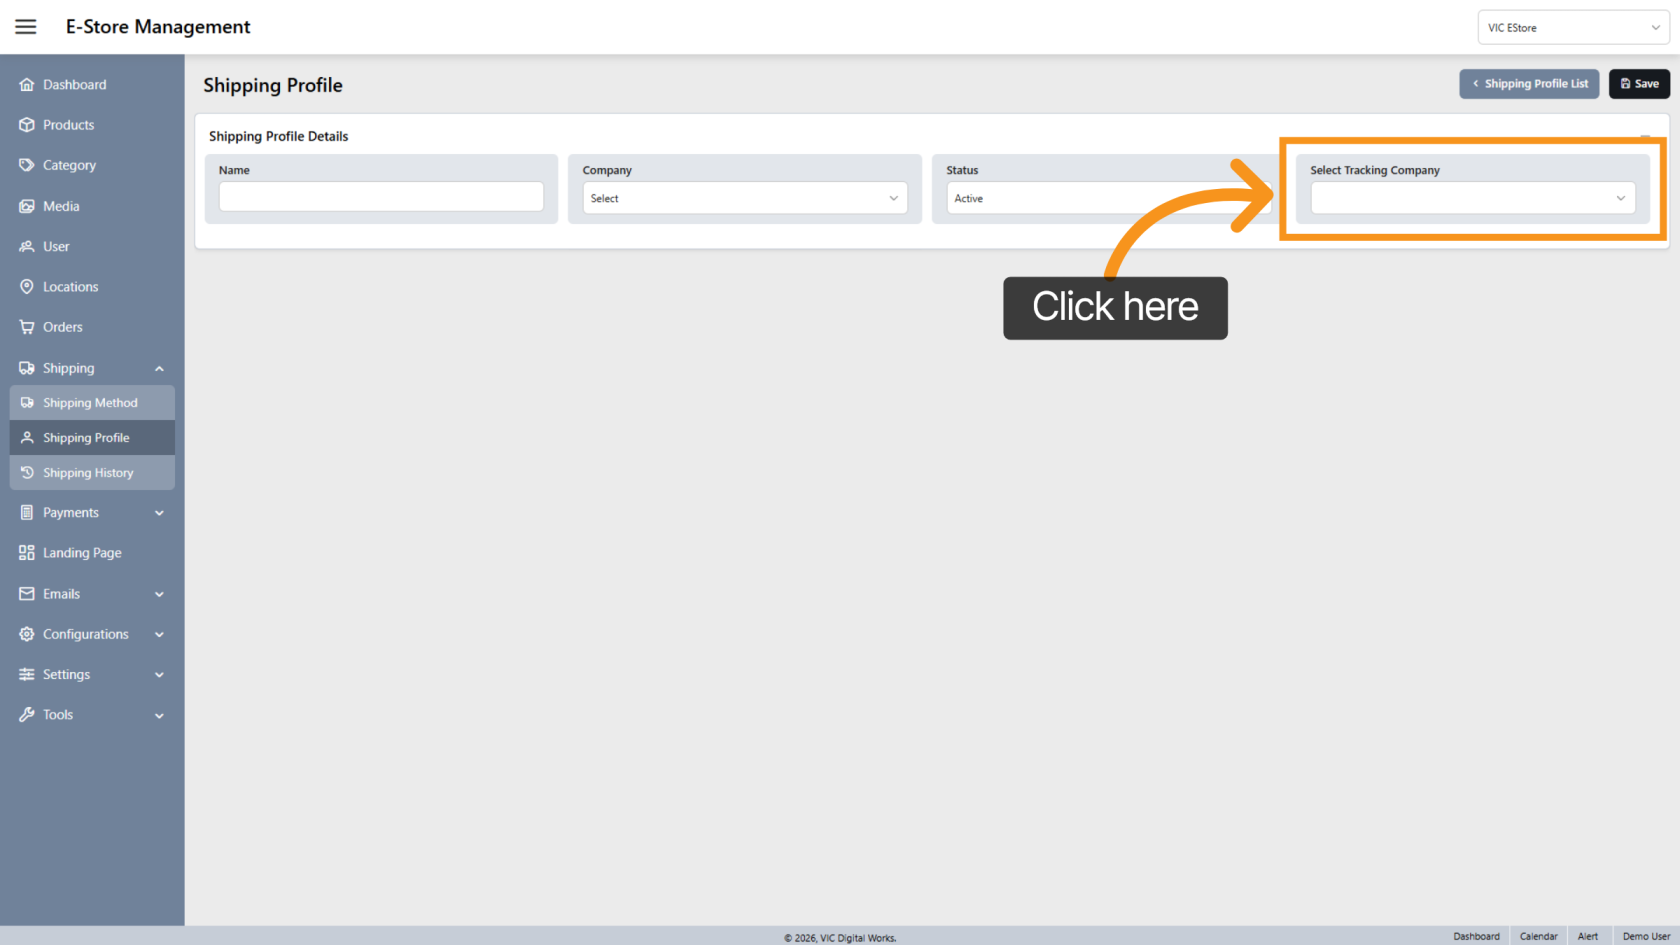
6. Select Tracking Company
Choose the carrier for this shipping profile.
You can add multiple carriers if needed.
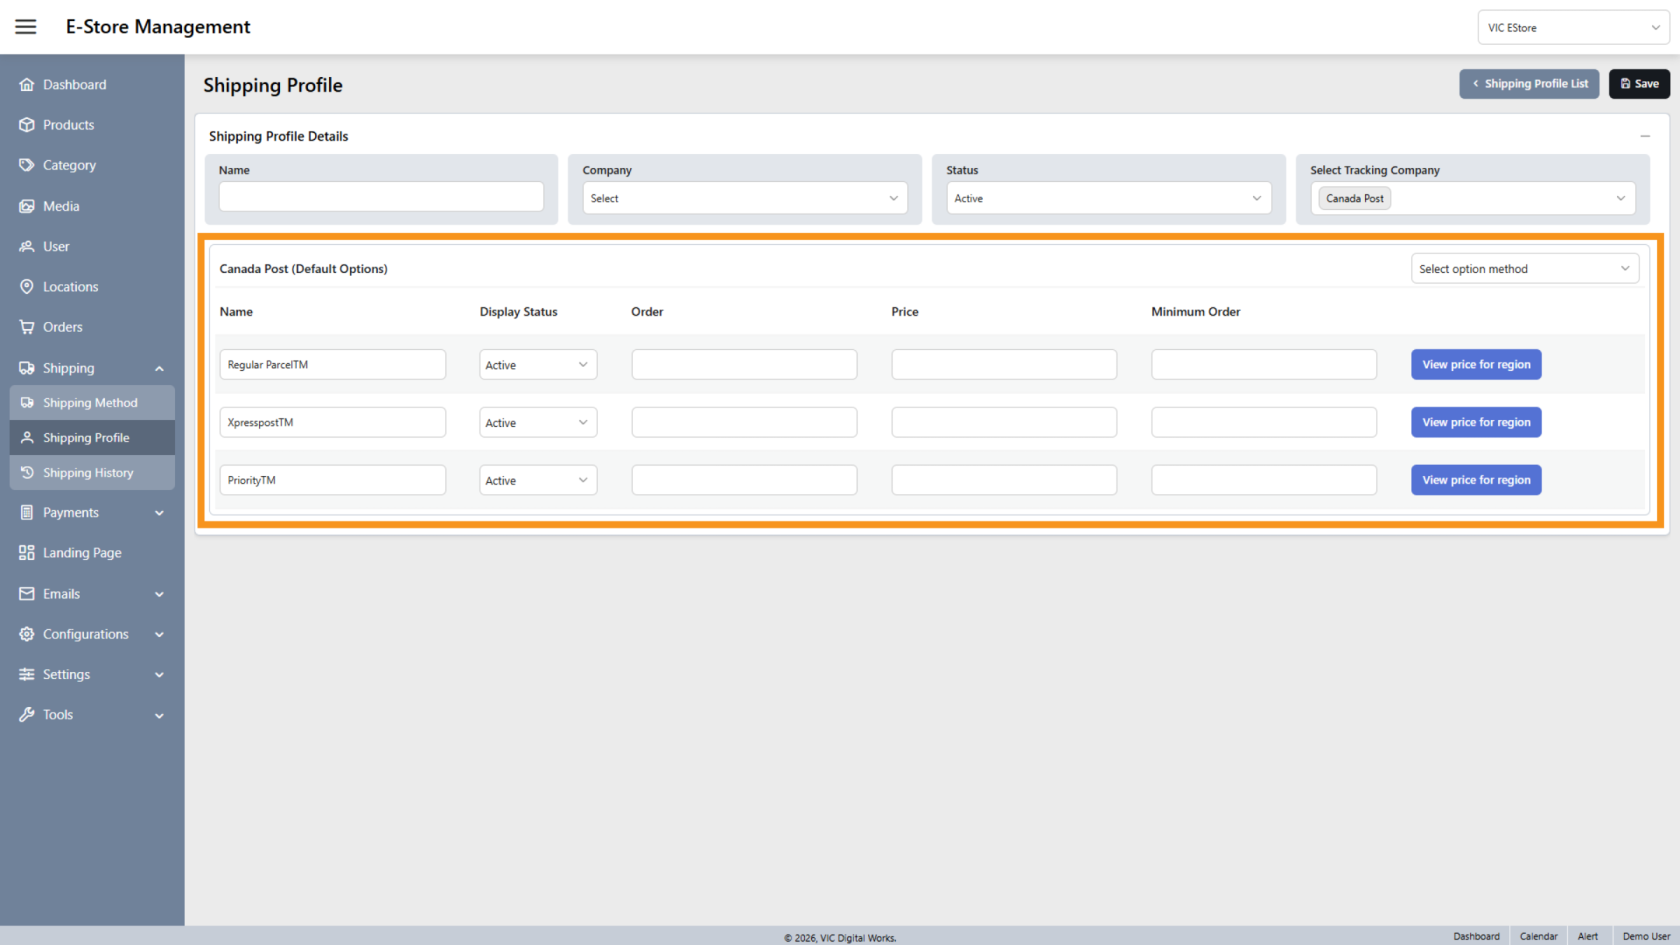
7. Custom Shipping Options
After selecting a carrier, the system will display all available shipping options provided by that carrier.
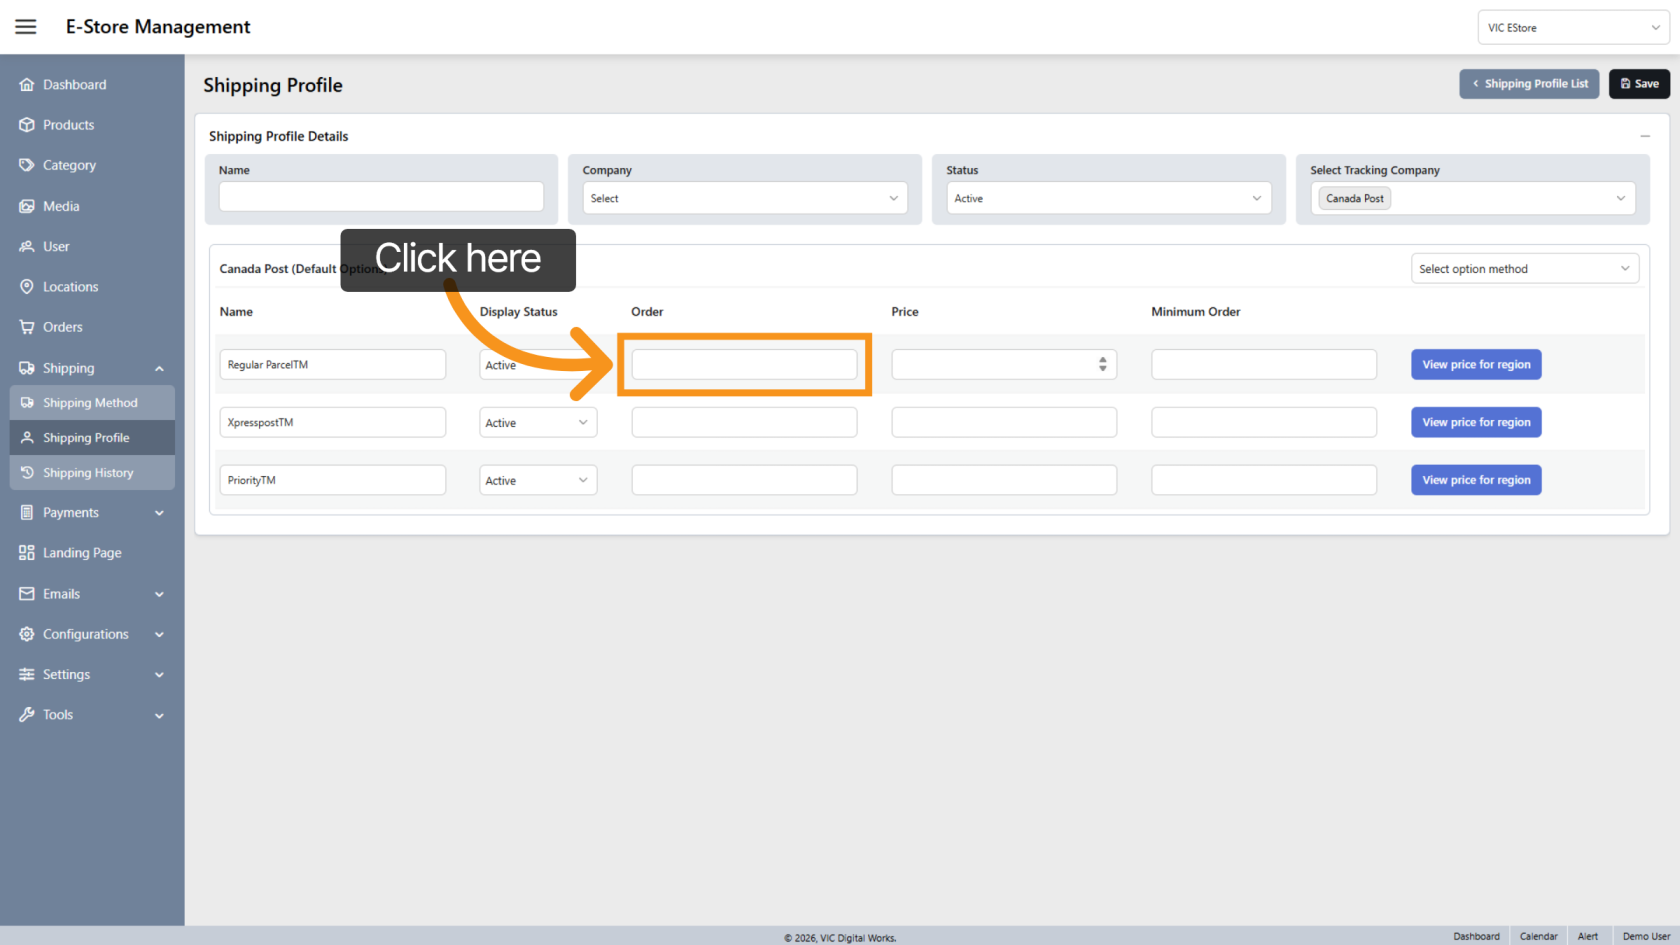
8. Reorder options
Leave this field blank if you do not want a custom order.
The system will automatically arrange the shipping options.
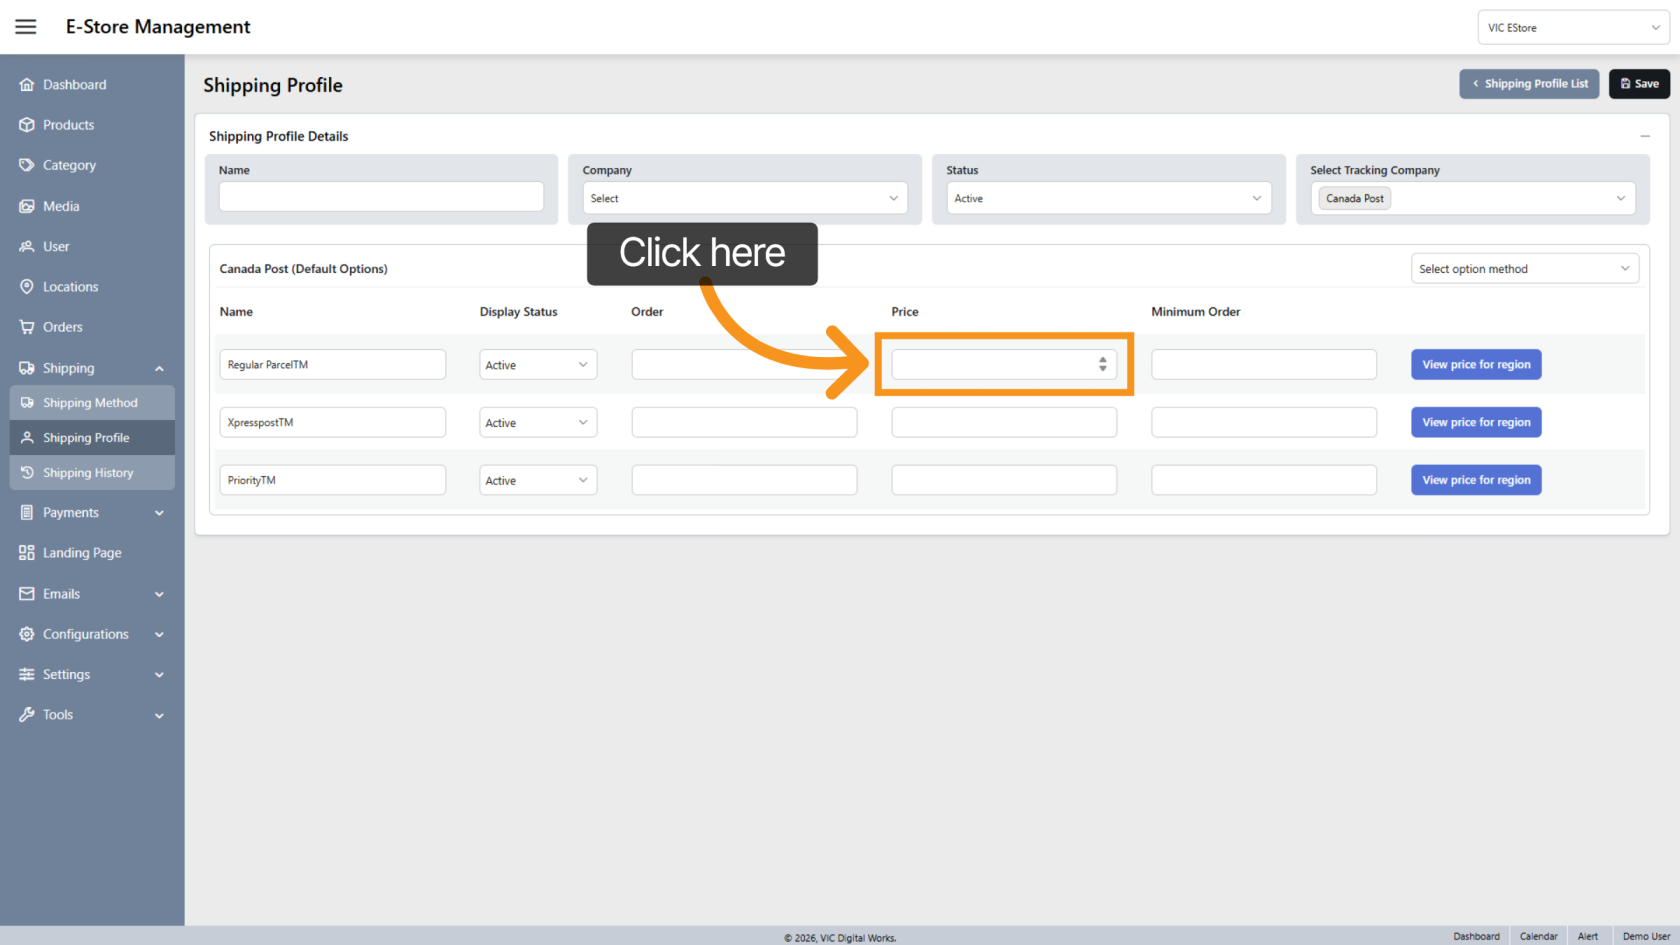
9. Define Price for Each Option
Enter a price for each shipping option.
This price will be applied as a flat shipping rate in the E-store.
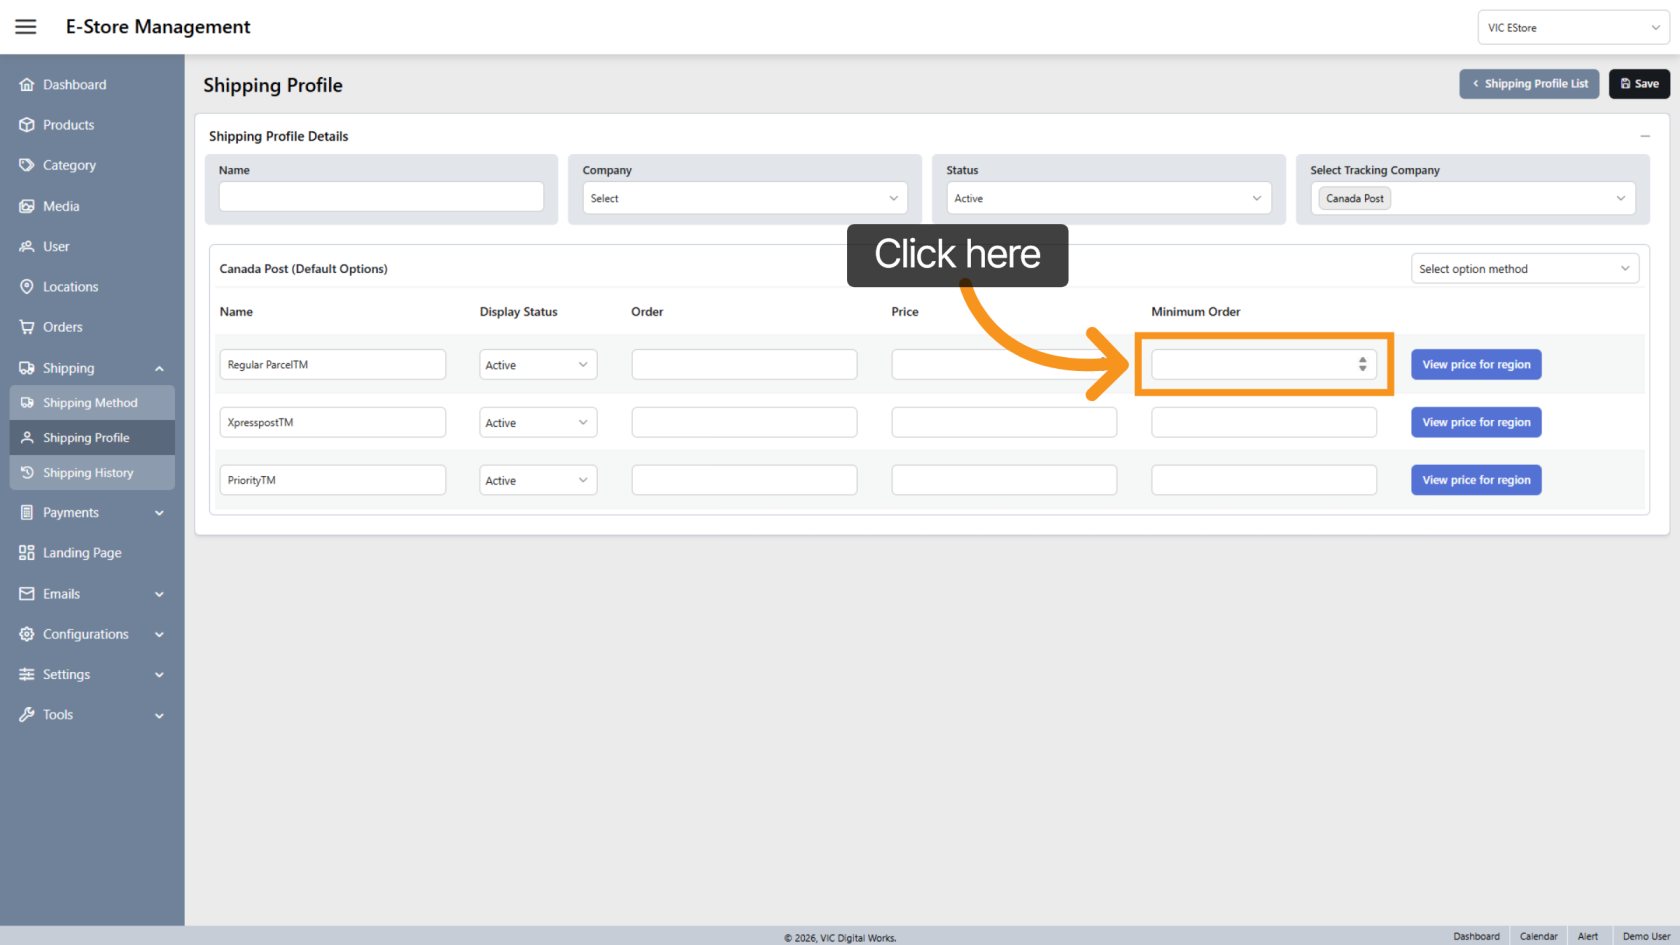
10. Enter Minimum Order for Free Shipping
Set the Minimum Order Amount required for customers to receive free shipping.
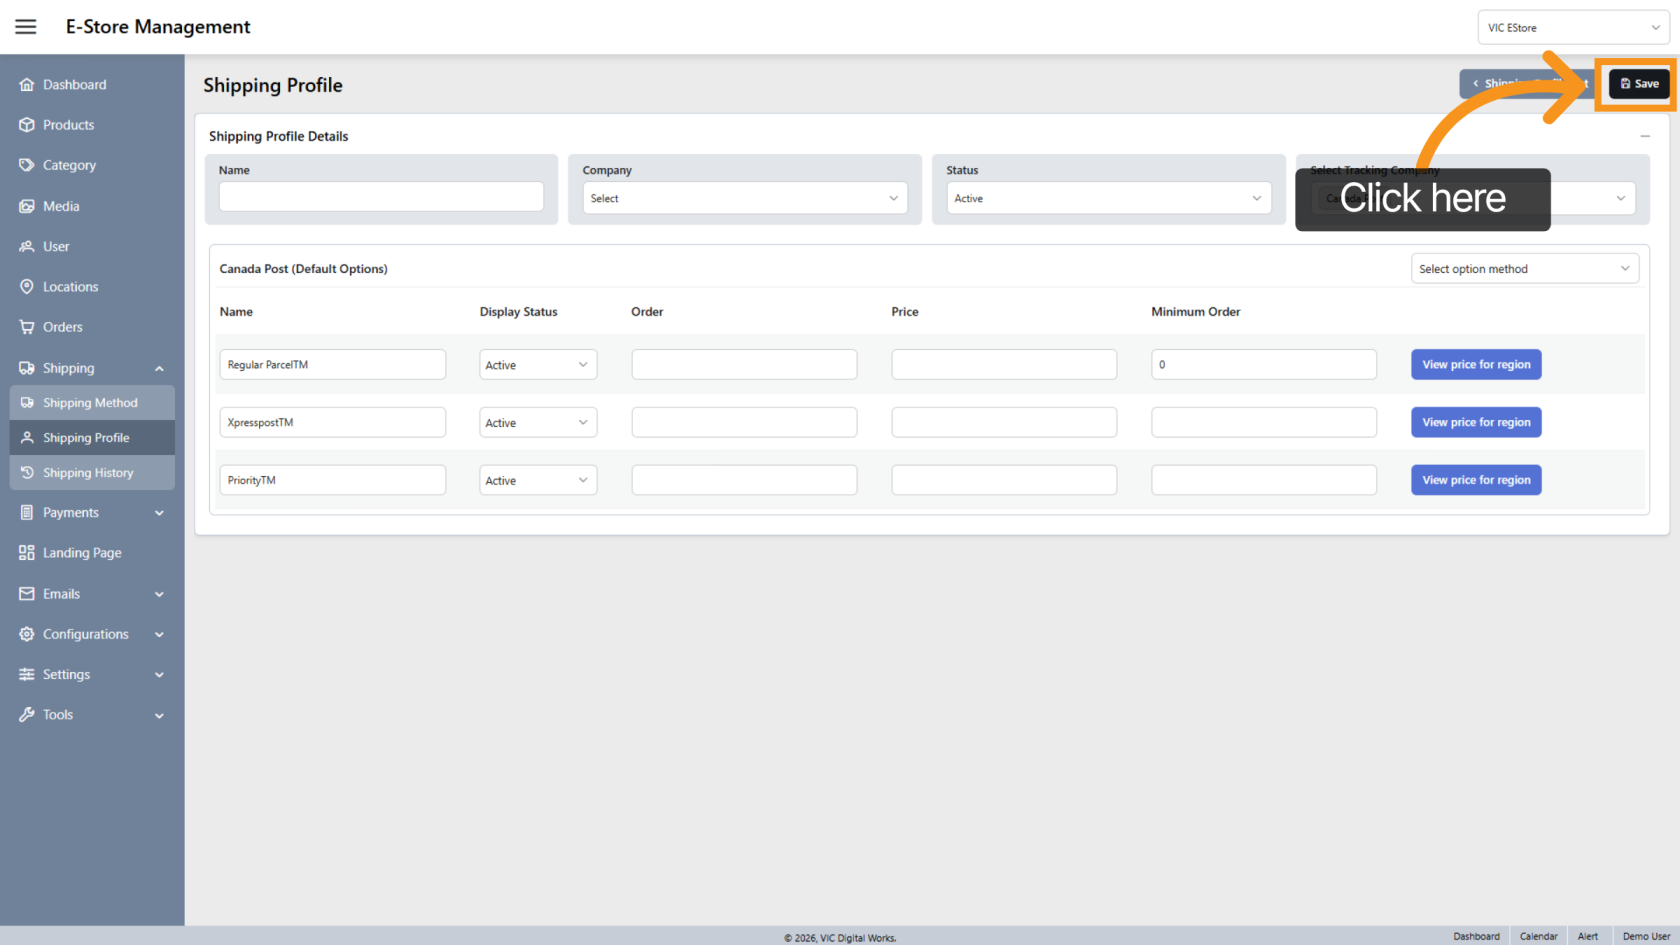
11. Save the Profile
Click "Save" in the Shipping Profile section to store all configured shipping details and options.
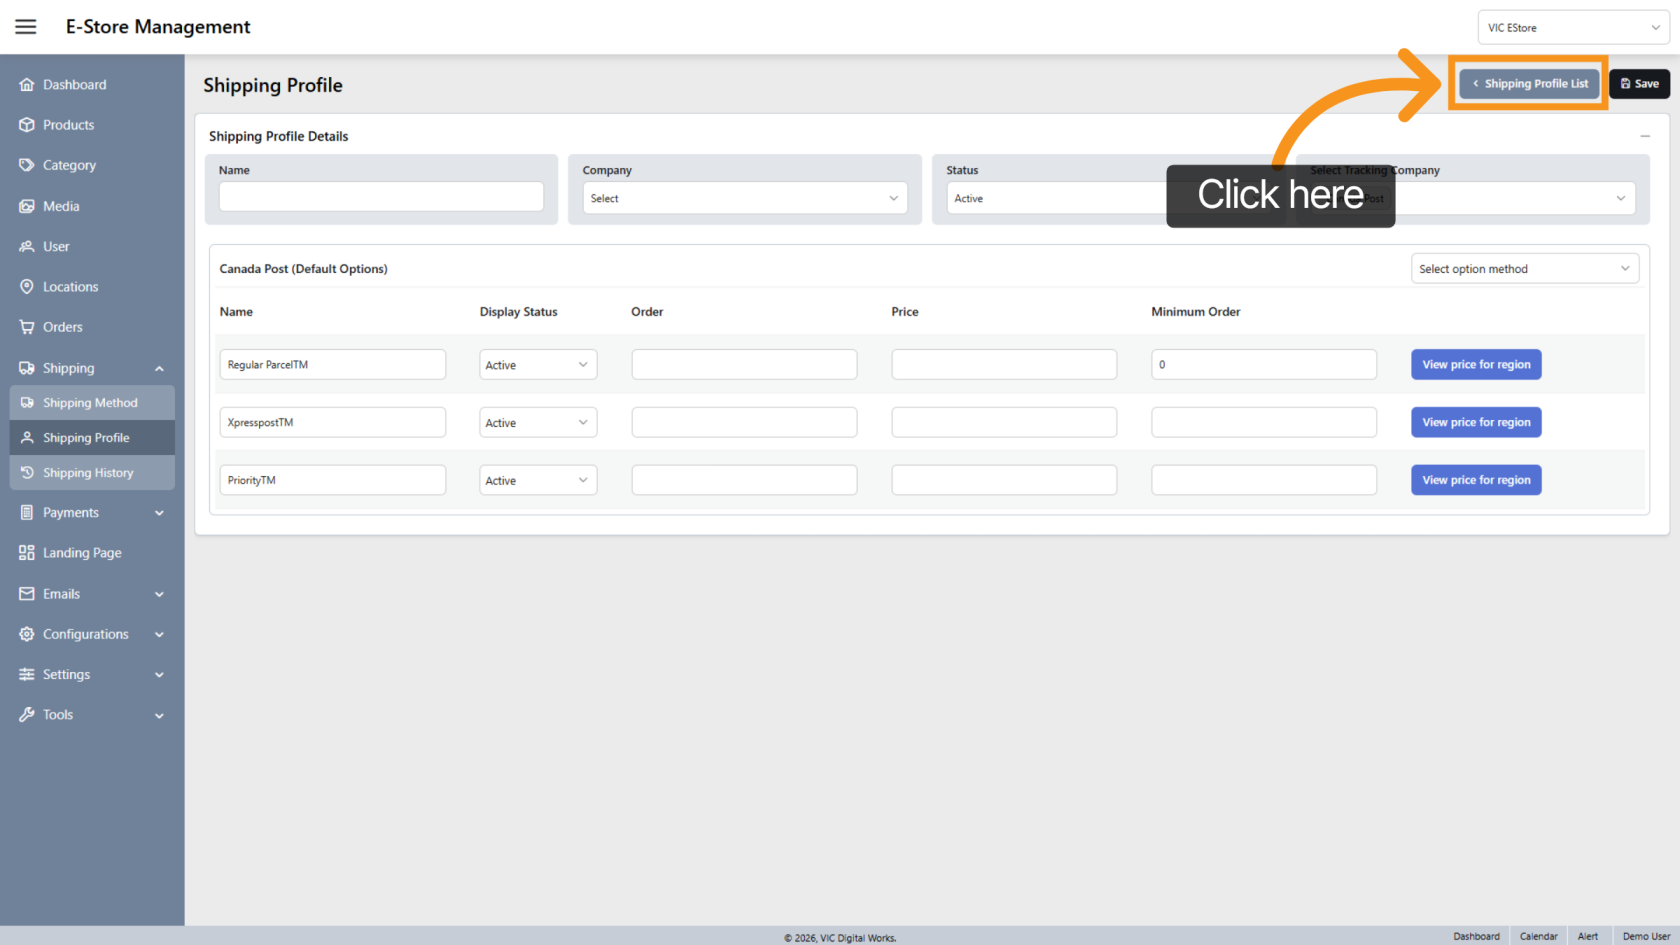
12. Return to Shipping Profile List
Click "Shipping Profile List" to go back and view all available profiles.
You have successfully configured and managed Shipping Profiles within the app. Review the profile list to confirm your settings and make adjustments if needed.