Quotation Workspace Overview
This guide explains how to navigate and use the Quotation Workspace in WorkTraq.
Video Tutorial
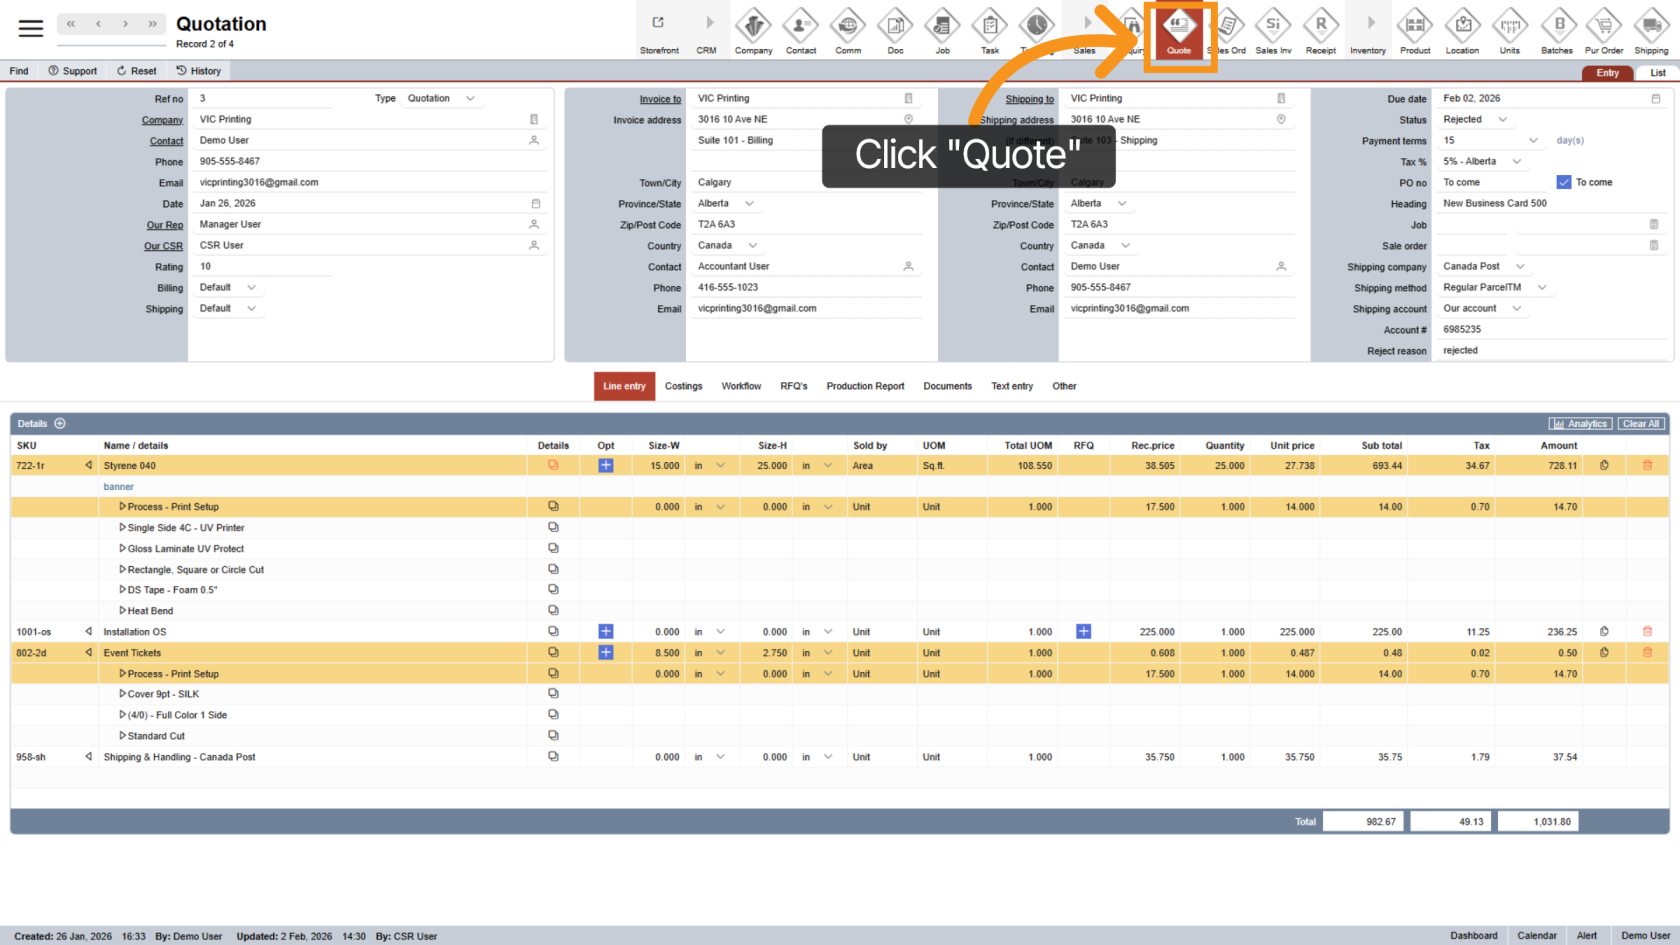
1. Open Quotation
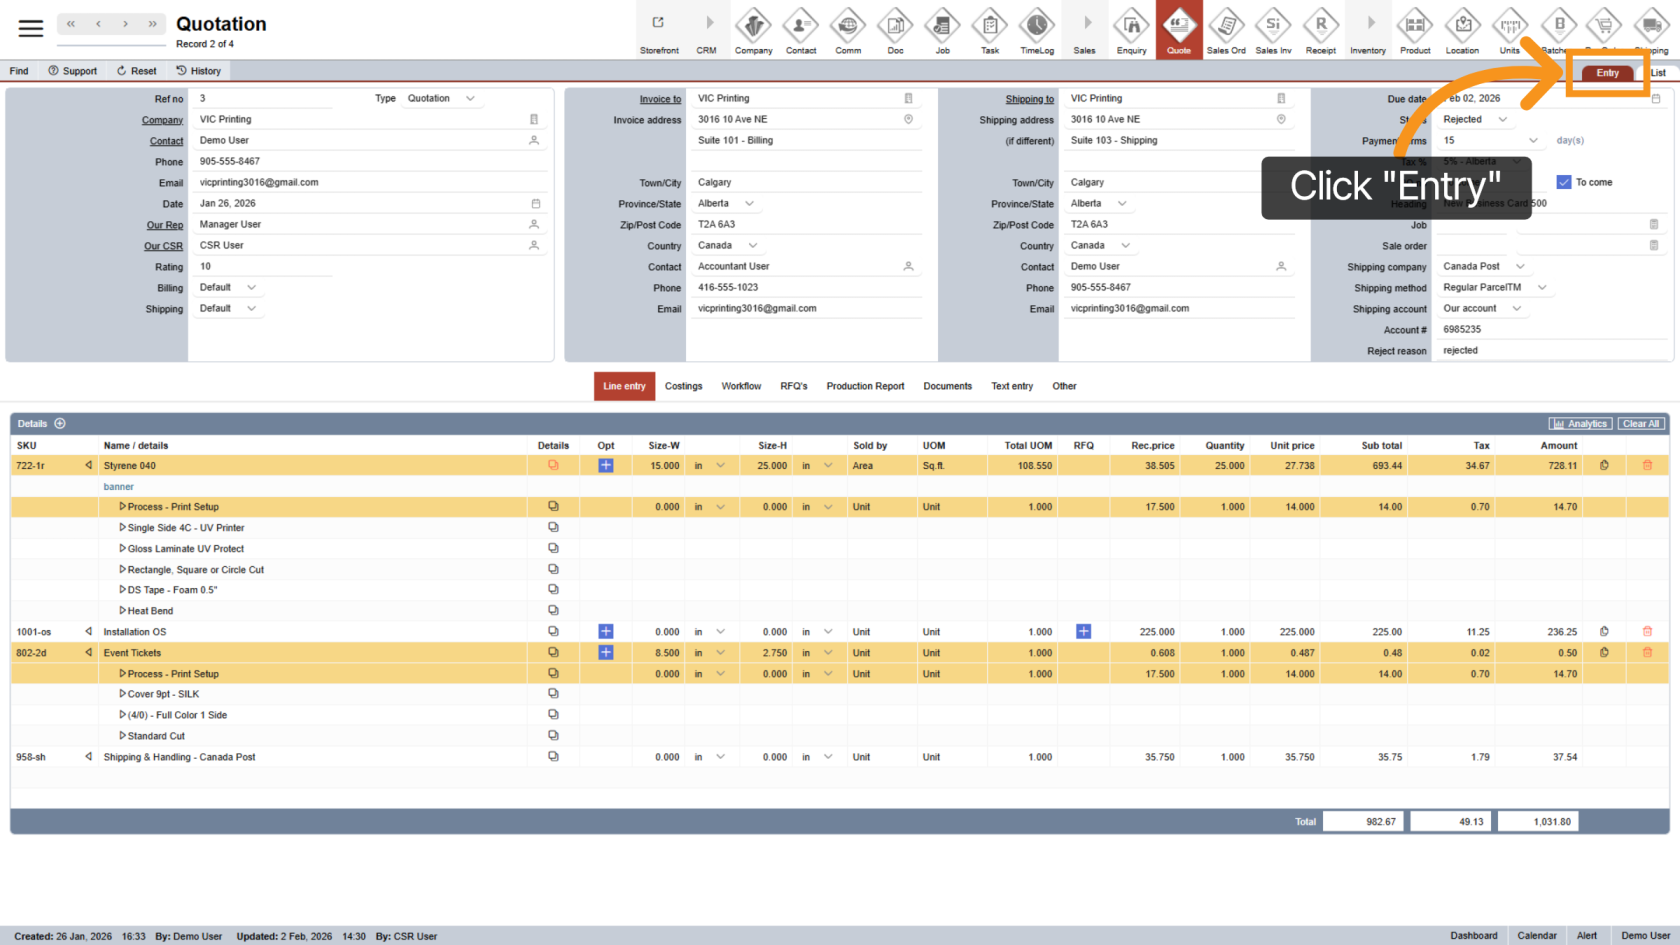
2. Select Entry
Click "Entry" to view detailed quotation information.
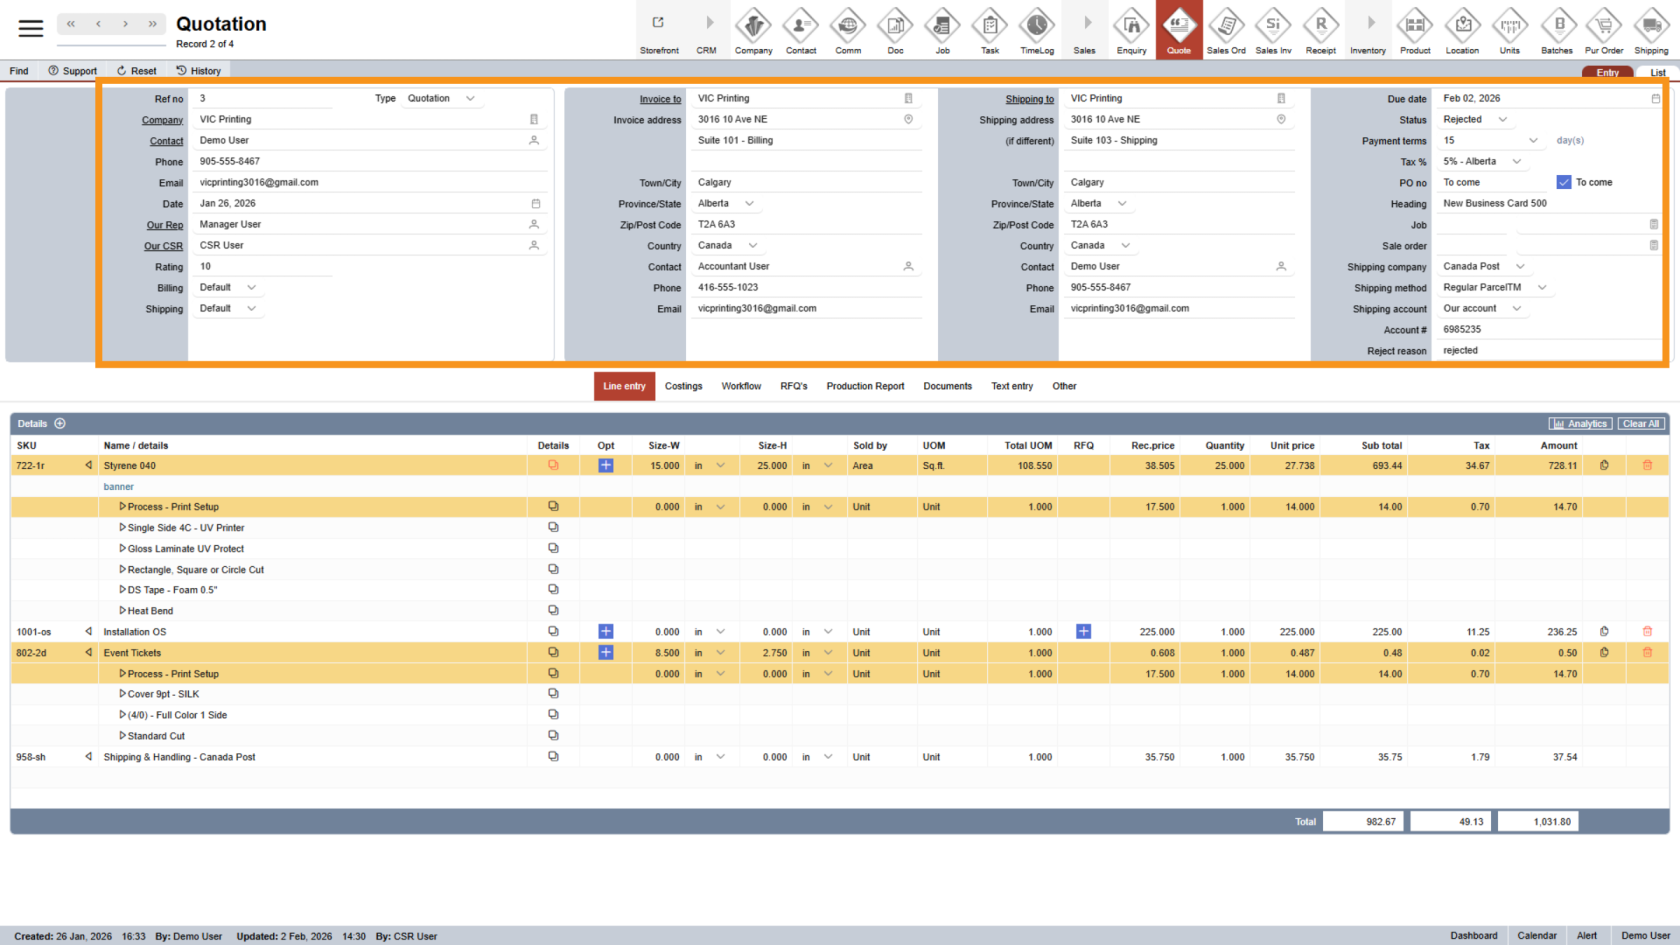
3. Review Quotation Details
At the top of the page, you’ll see all quotation details, including:
- Company and contact information
- Billing and shipping details
- Payment terms and other key information
4. Use the Middle Menu
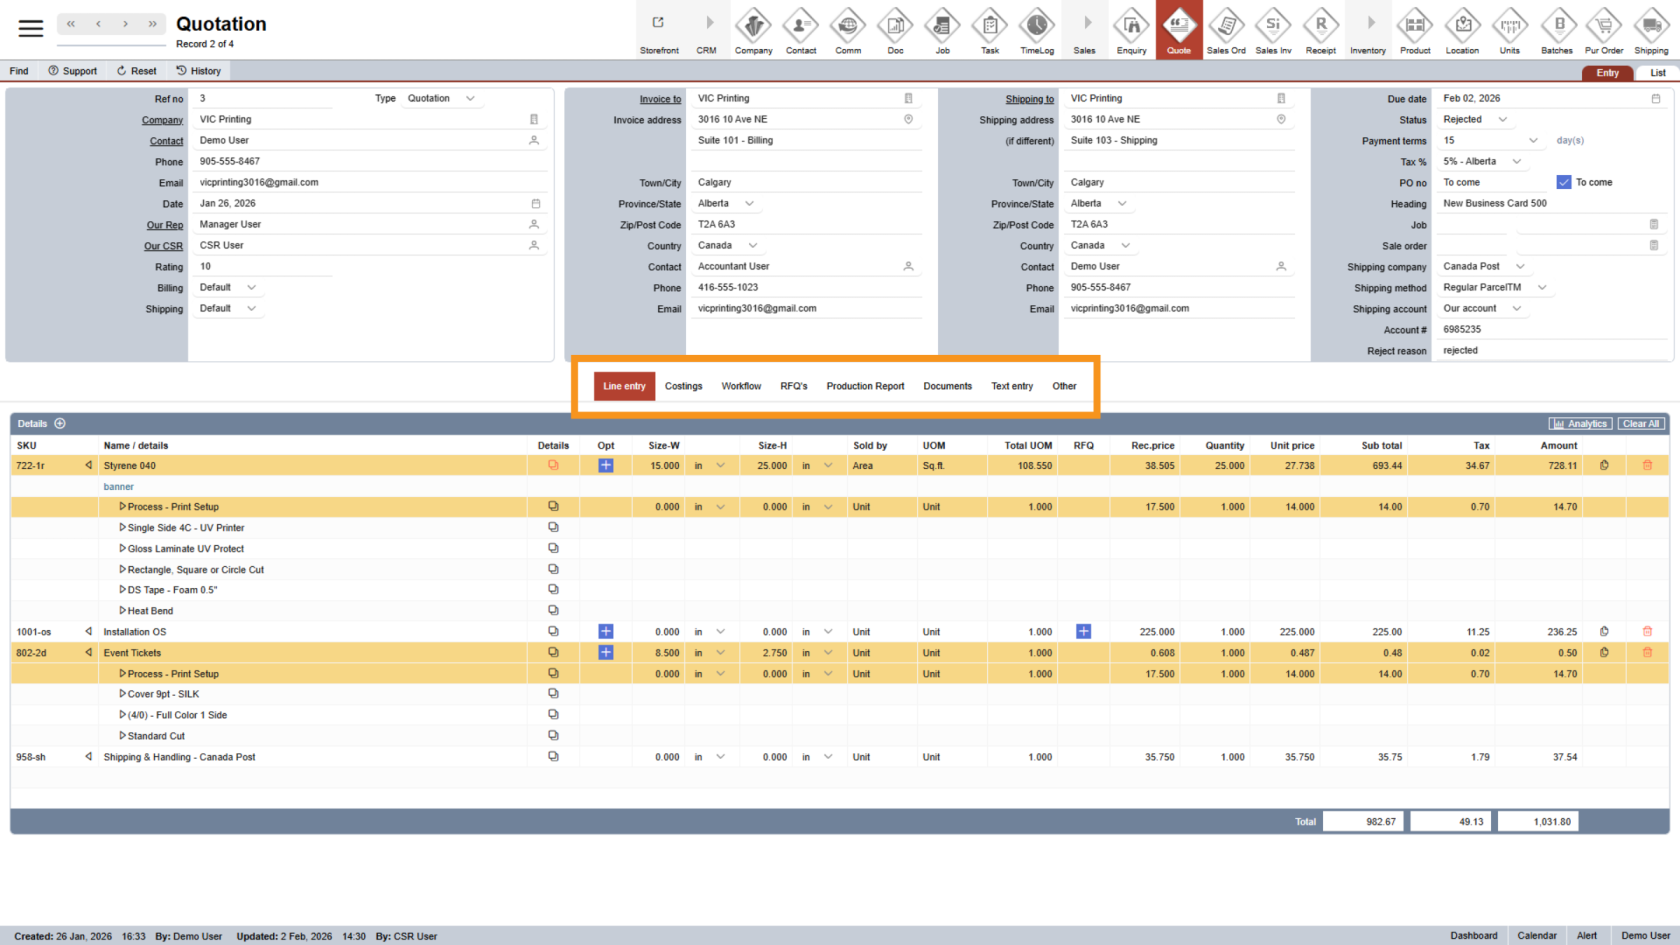
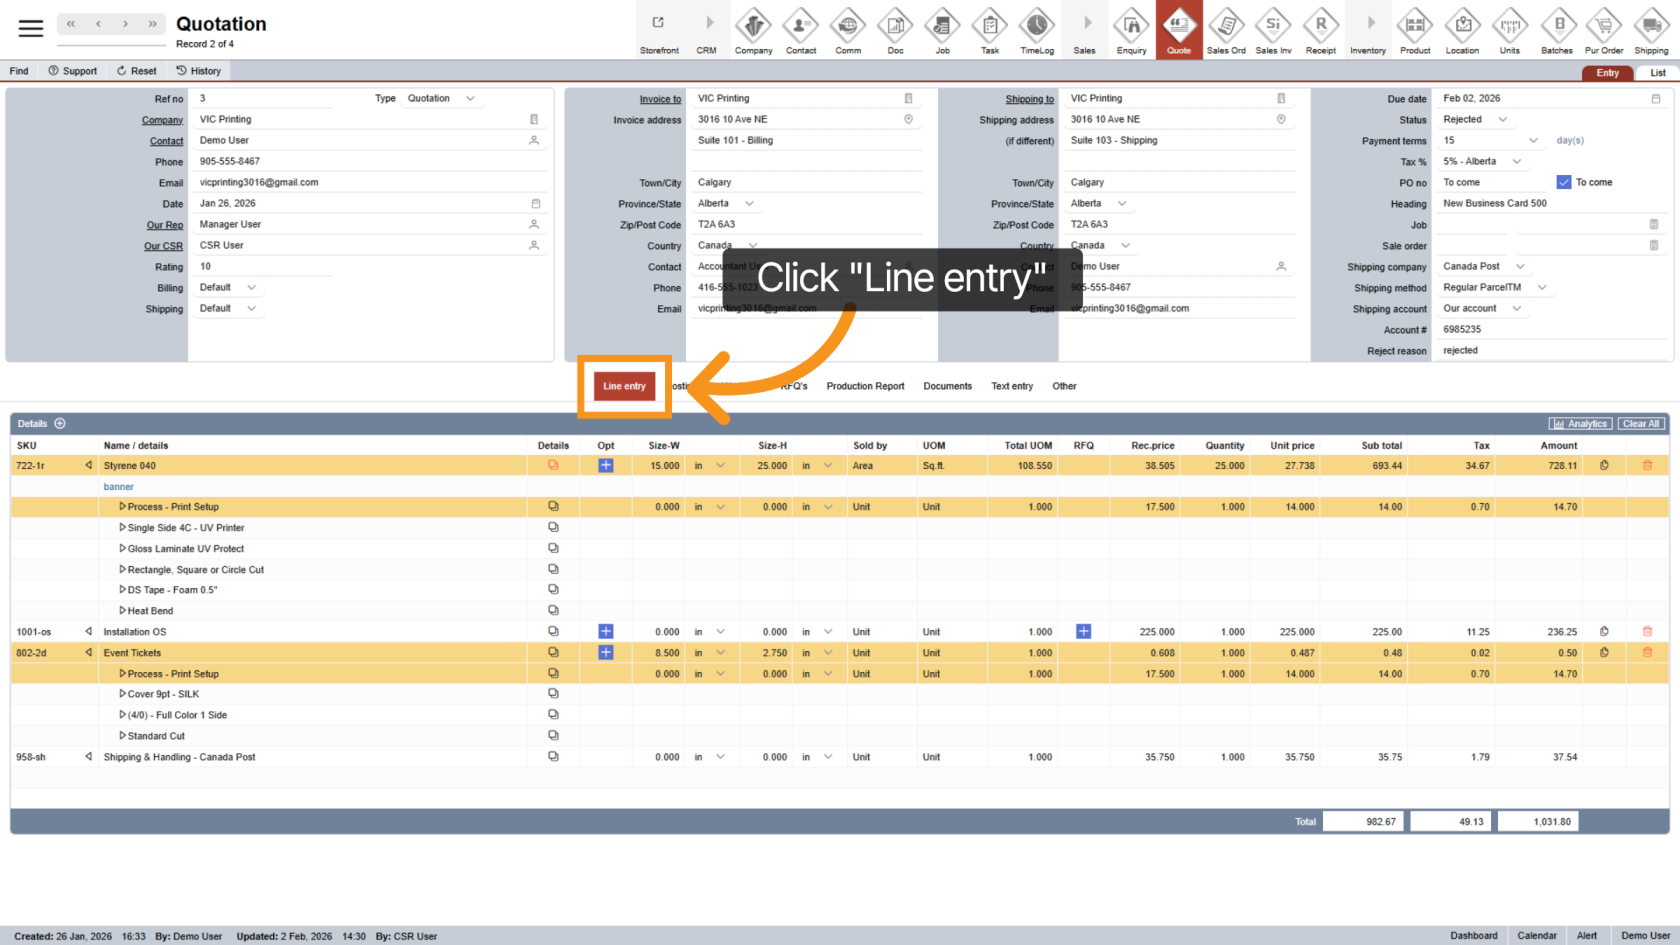
5. Line Entry Section
Click "Line Entry" to add or manage individual line items in the quotation.
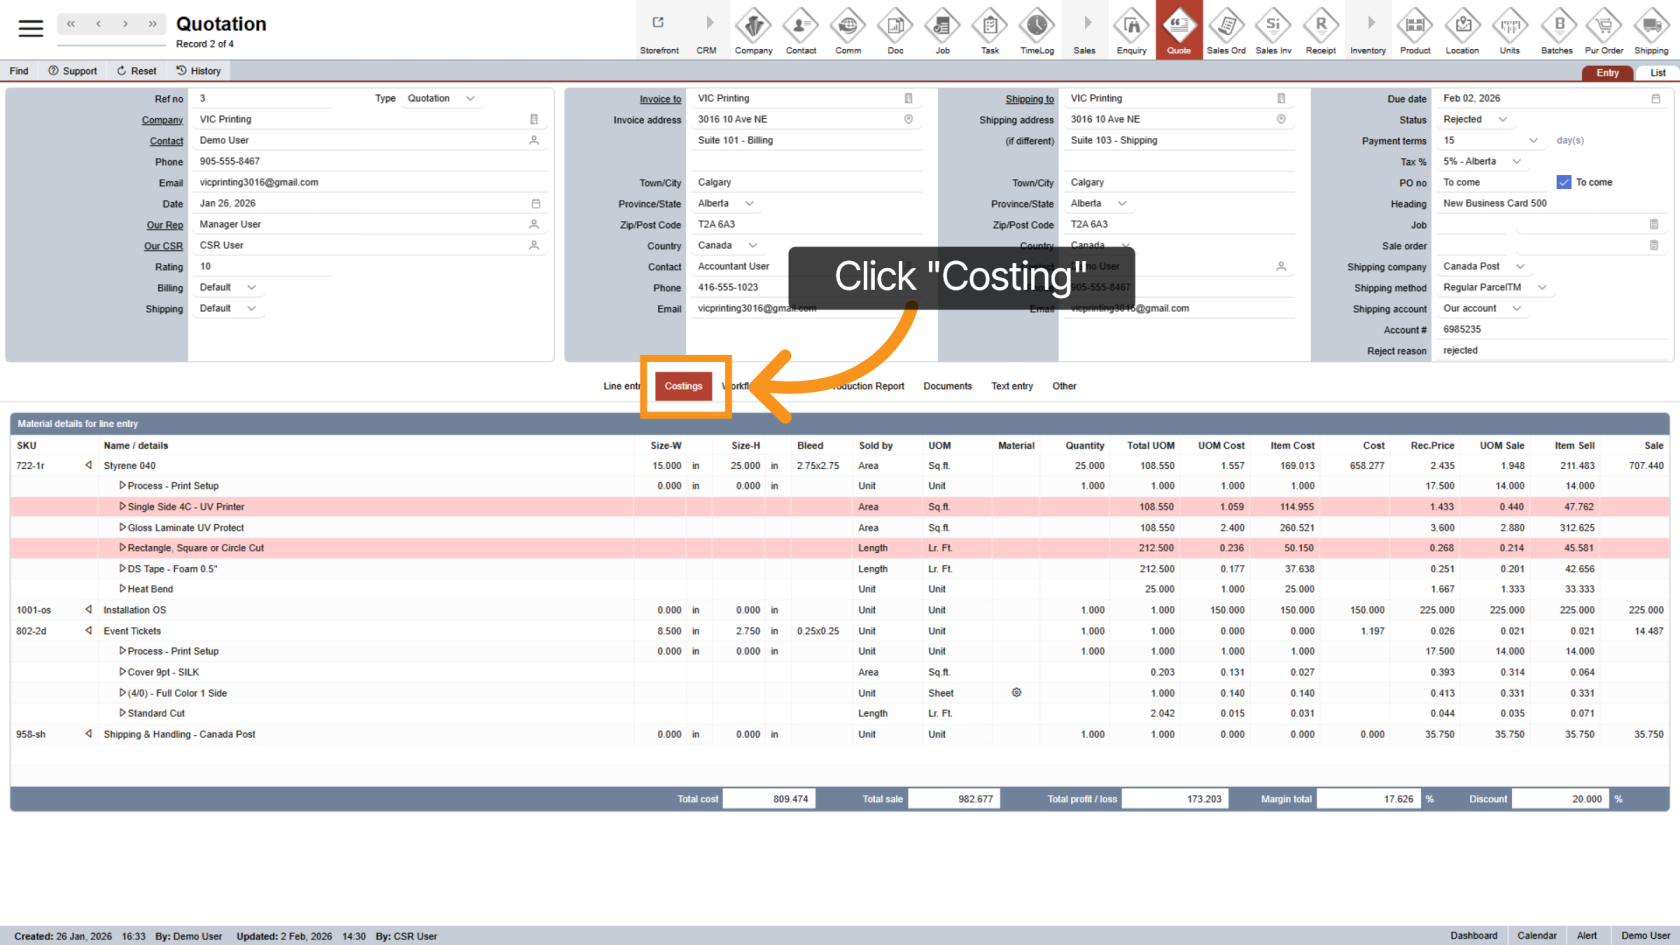
6. Open Costings
Click "Costings" to review and manage pricing, costs, and margins.
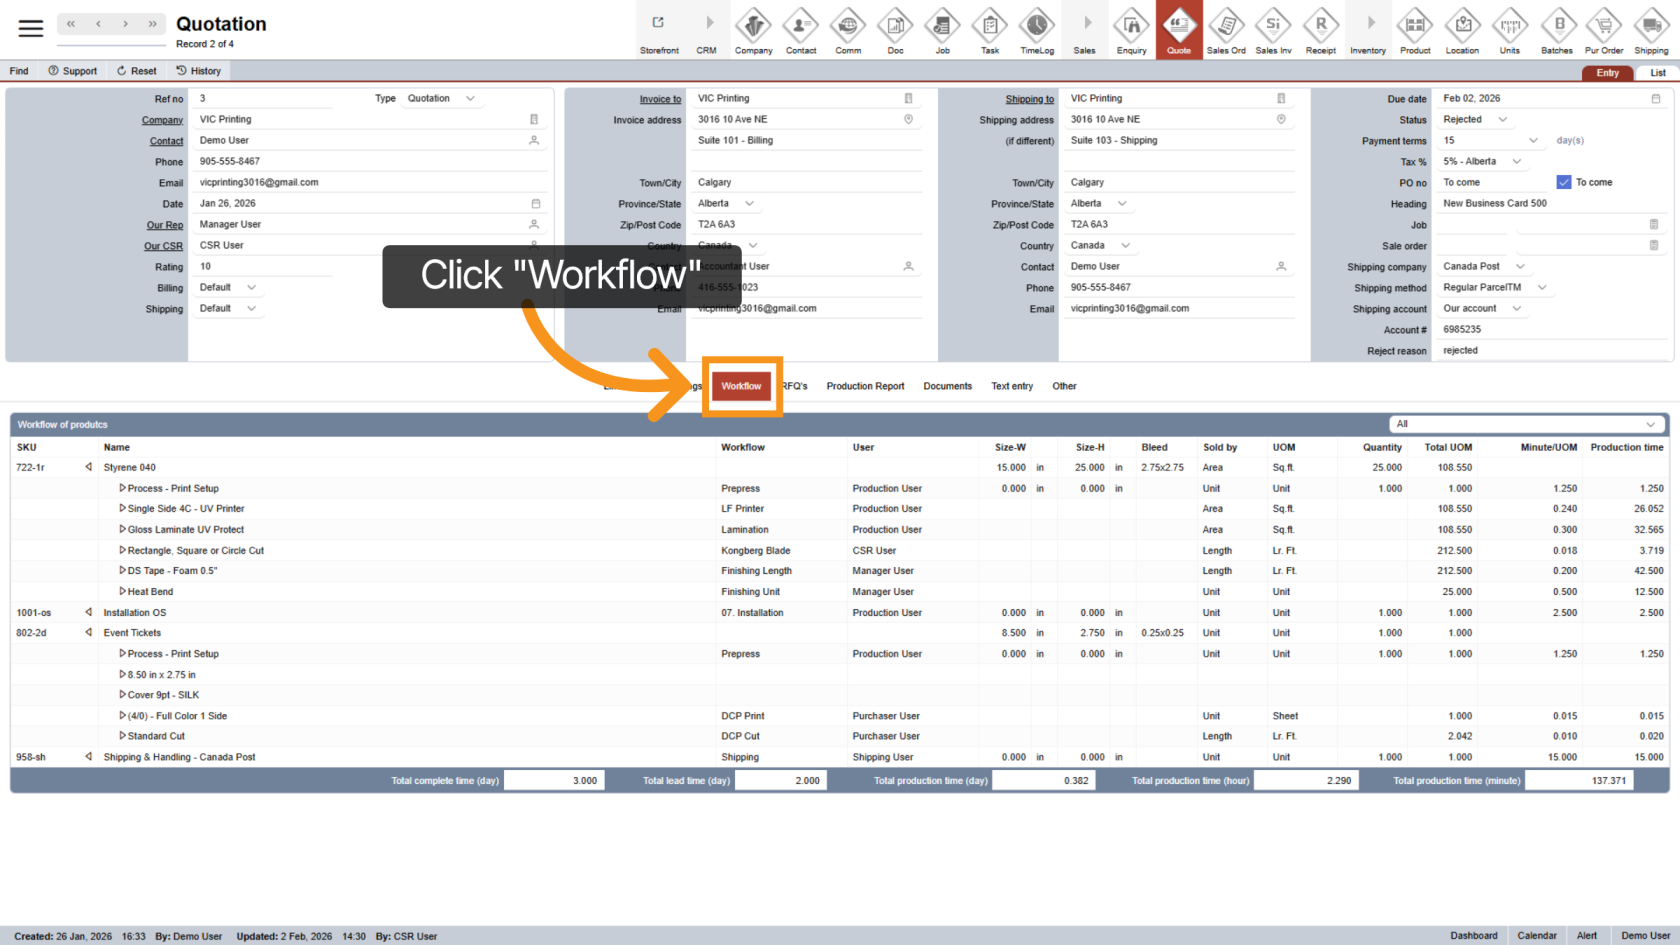
7. Access Workflow
Click "Workflow" to view production steps, assigned users, and lead times.
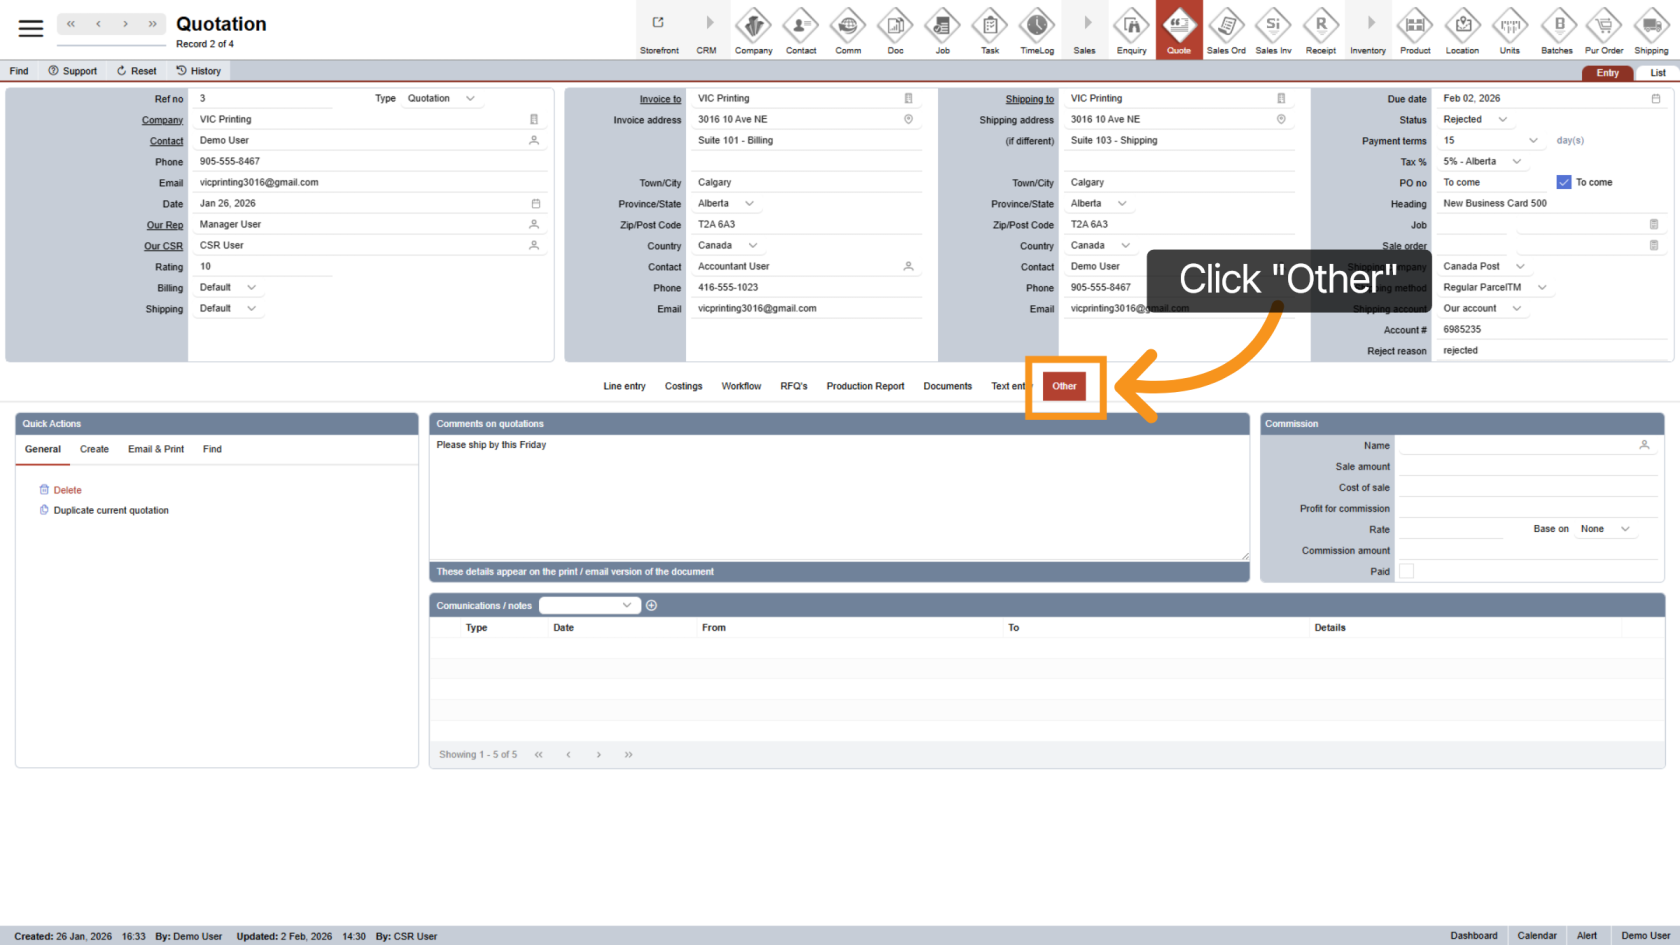
8. Open Other Section
Click "Other" to access additional options and communication tools related to the quotation.
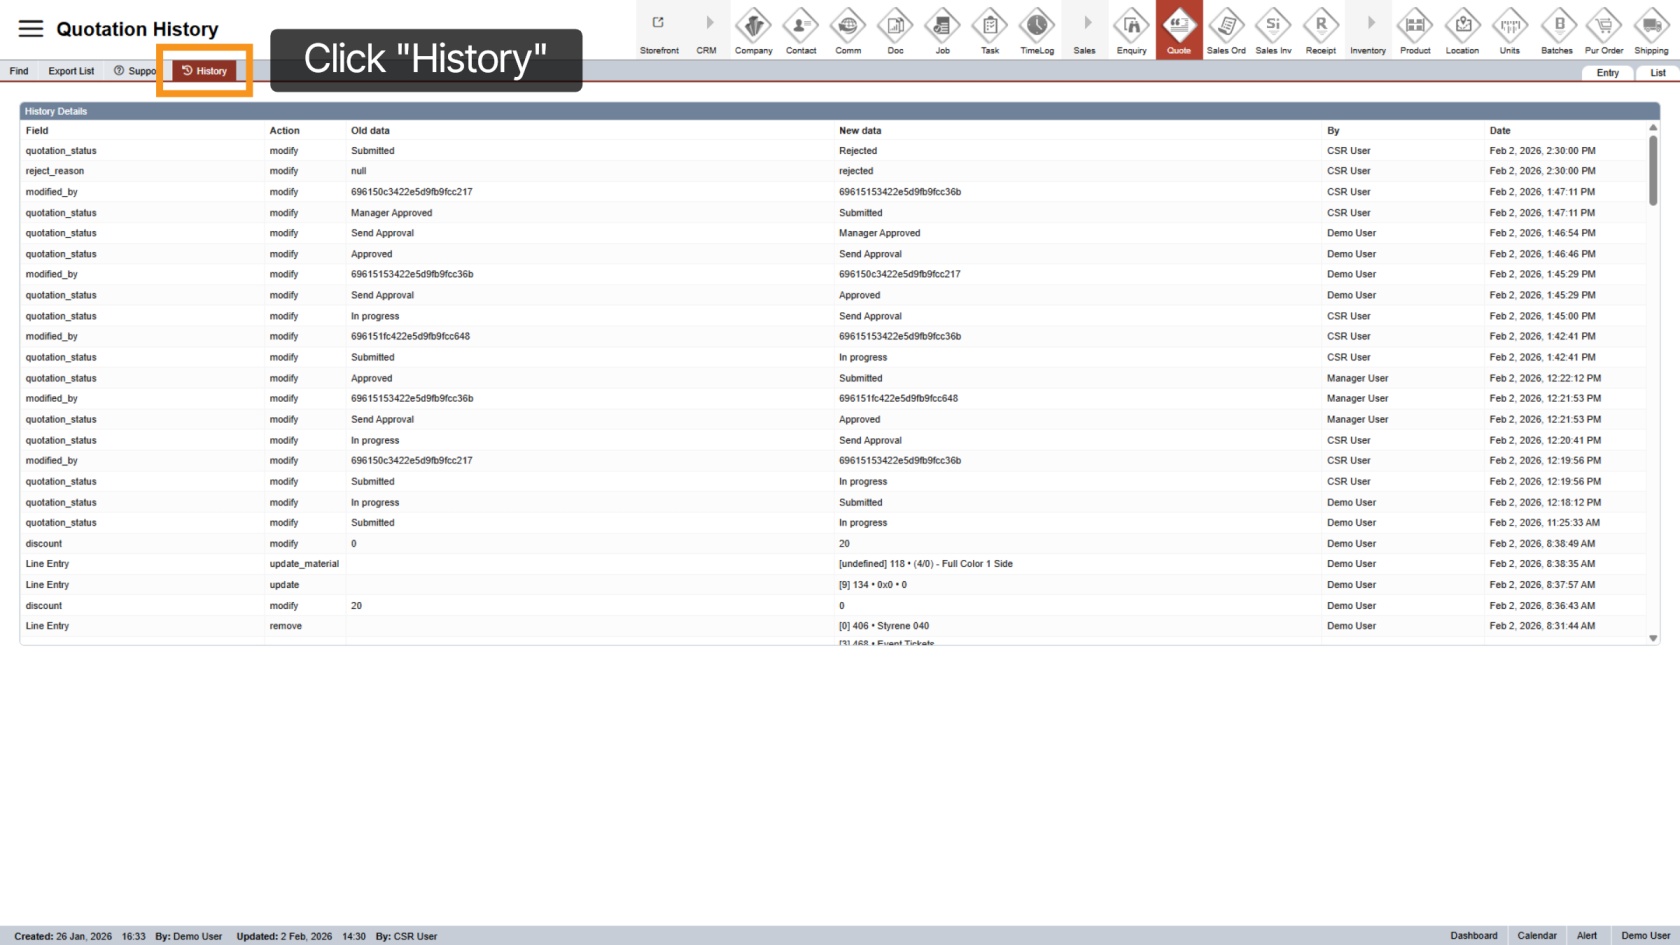
9. View History
Click "History" to review the quotation’s activity log and change history.
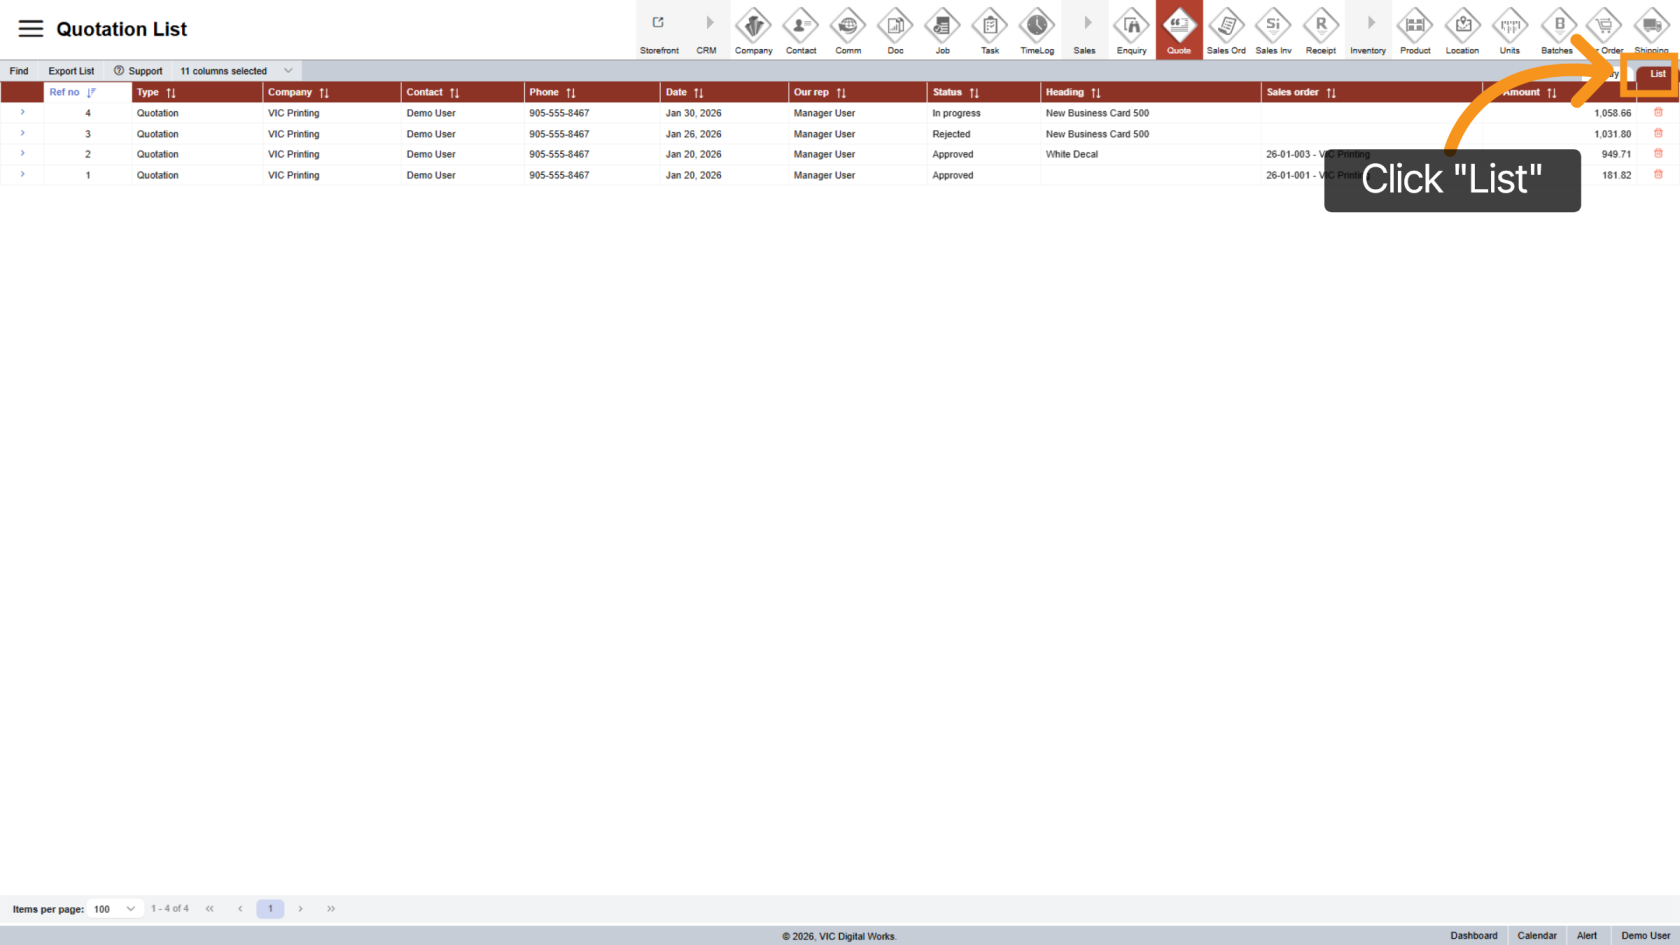
10. Switch to List View
Click "List" to see all quotations in a clear, list-style view.
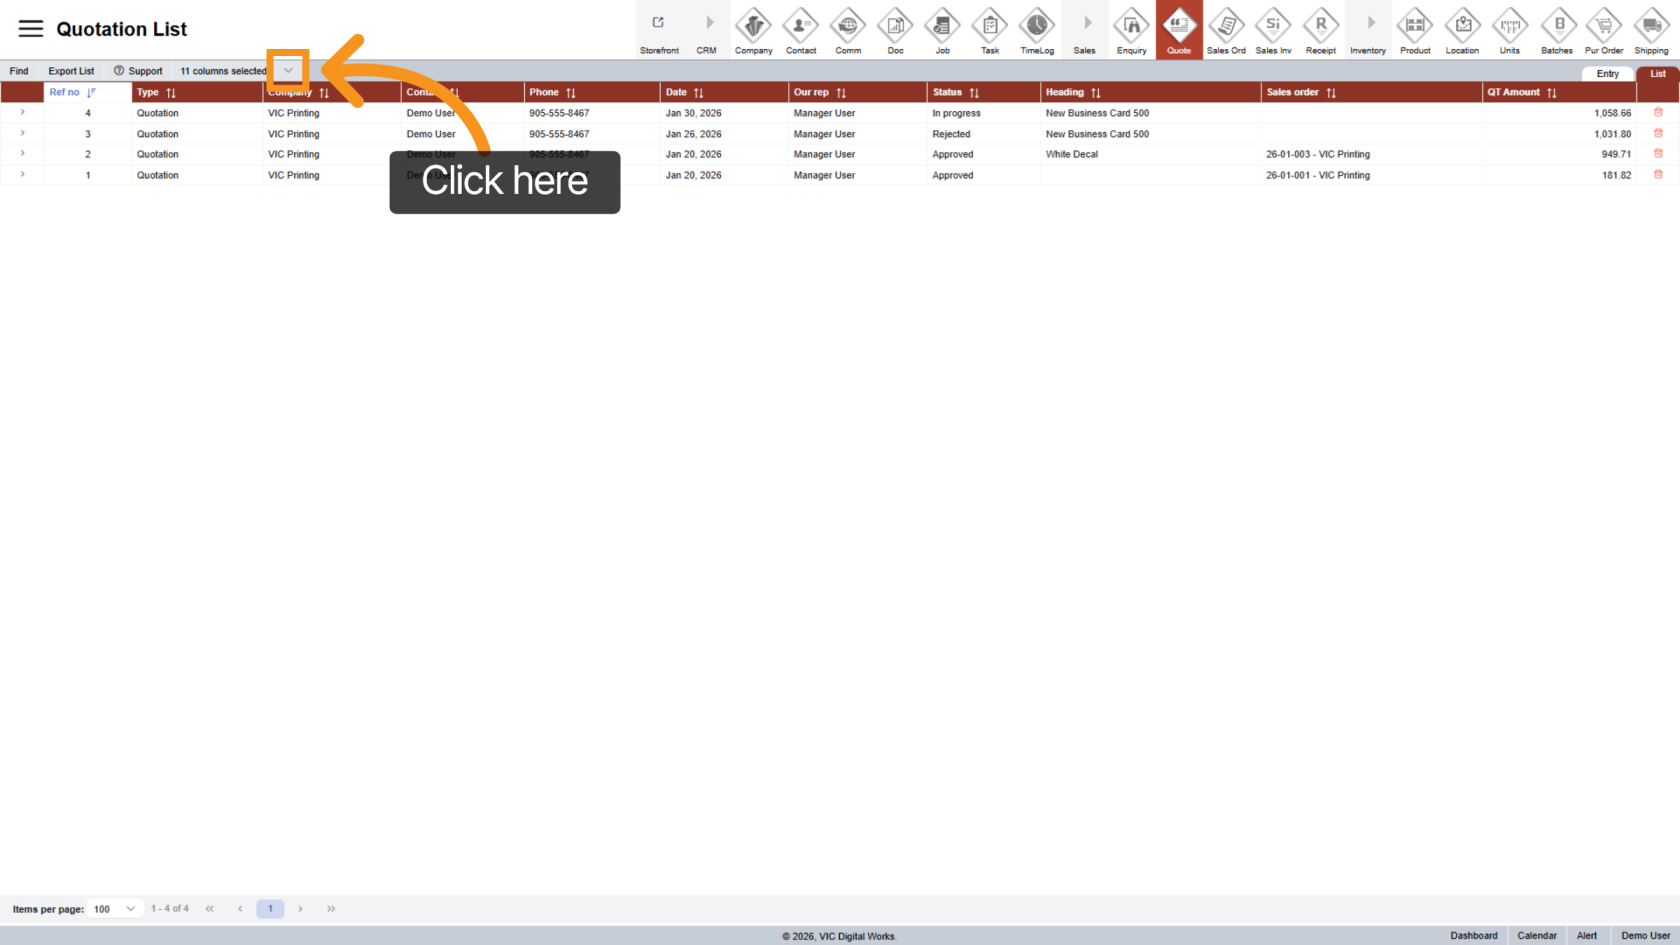
11. Customize List View
Click the ![]() arrow icon to choose which quotation columns you want to display.
arrow icon to choose which quotation columns you want to display.
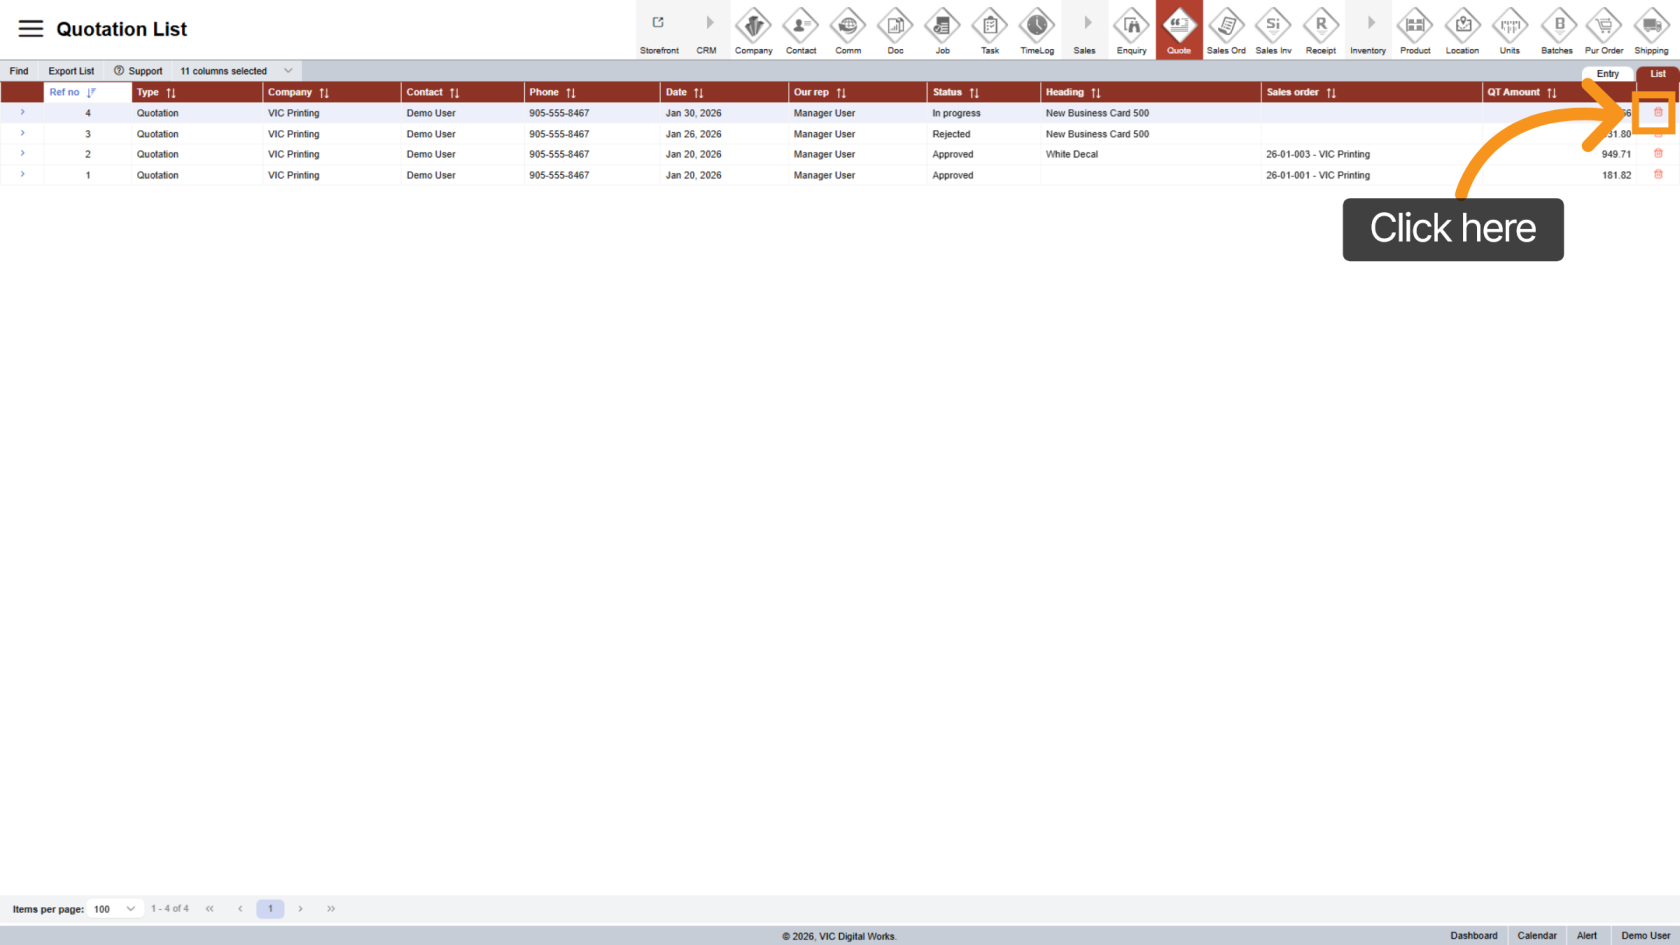
12. Delete a Quotation
Click the ![]() delete icon next to a quotation to remove it from the system.
delete icon next to a quotation to remove it from the system.
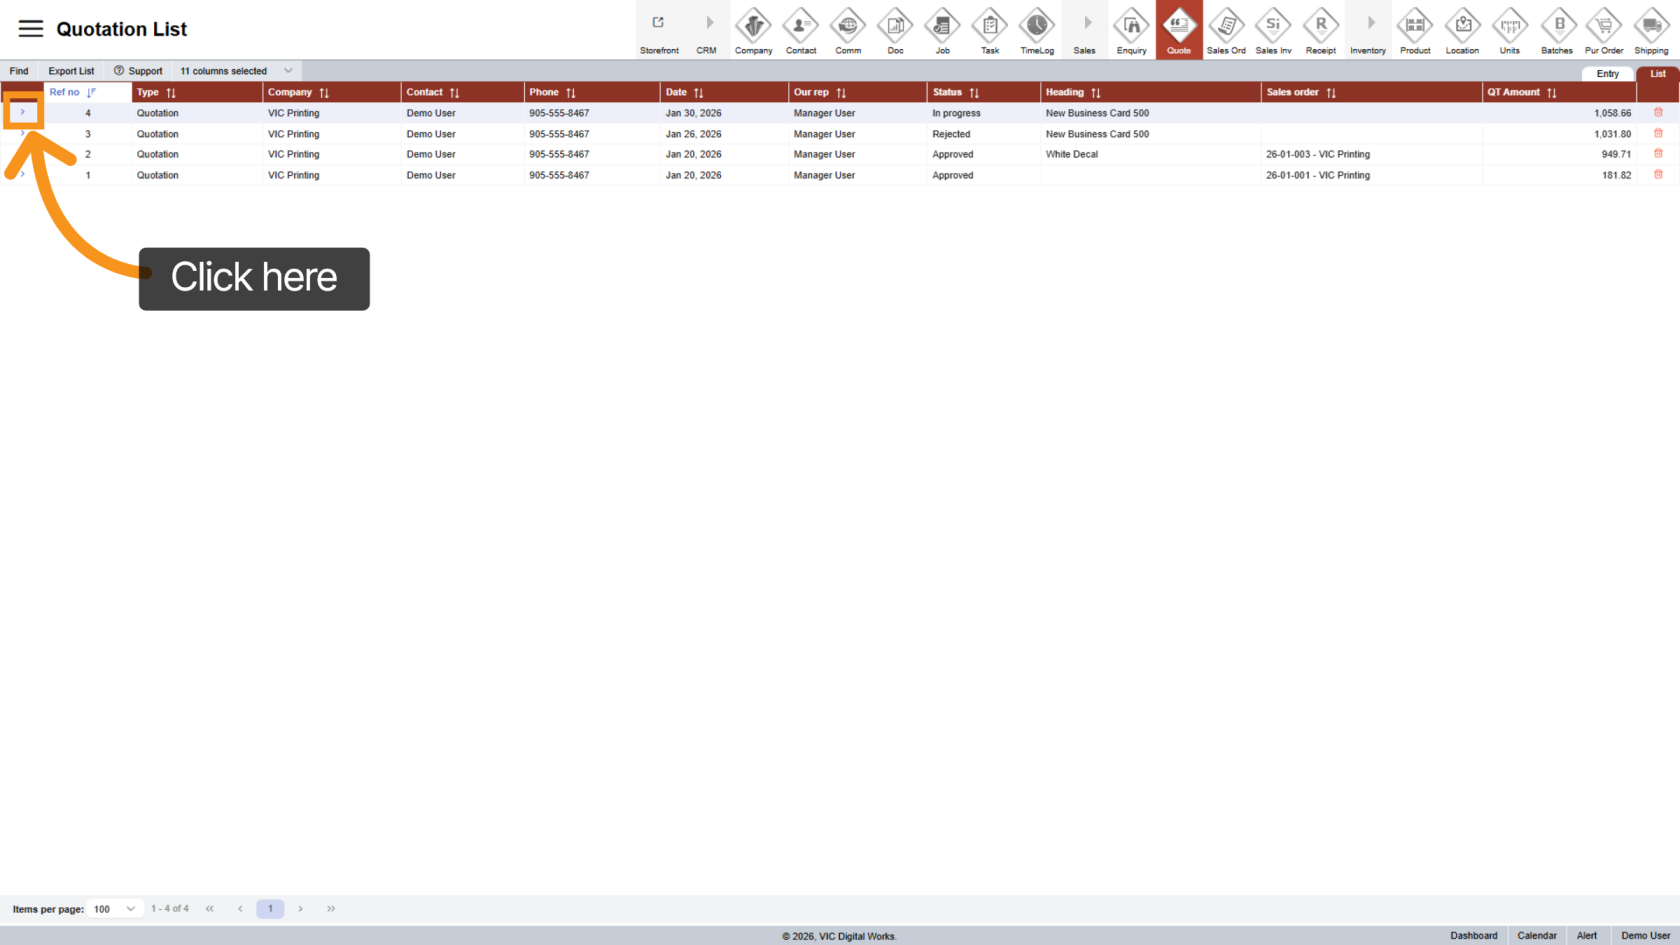
13. Open a Specific Quotation
In the quotation list, click the ![]() arrow next to a quotation to open its details.
arrow next to a quotation to open its details.
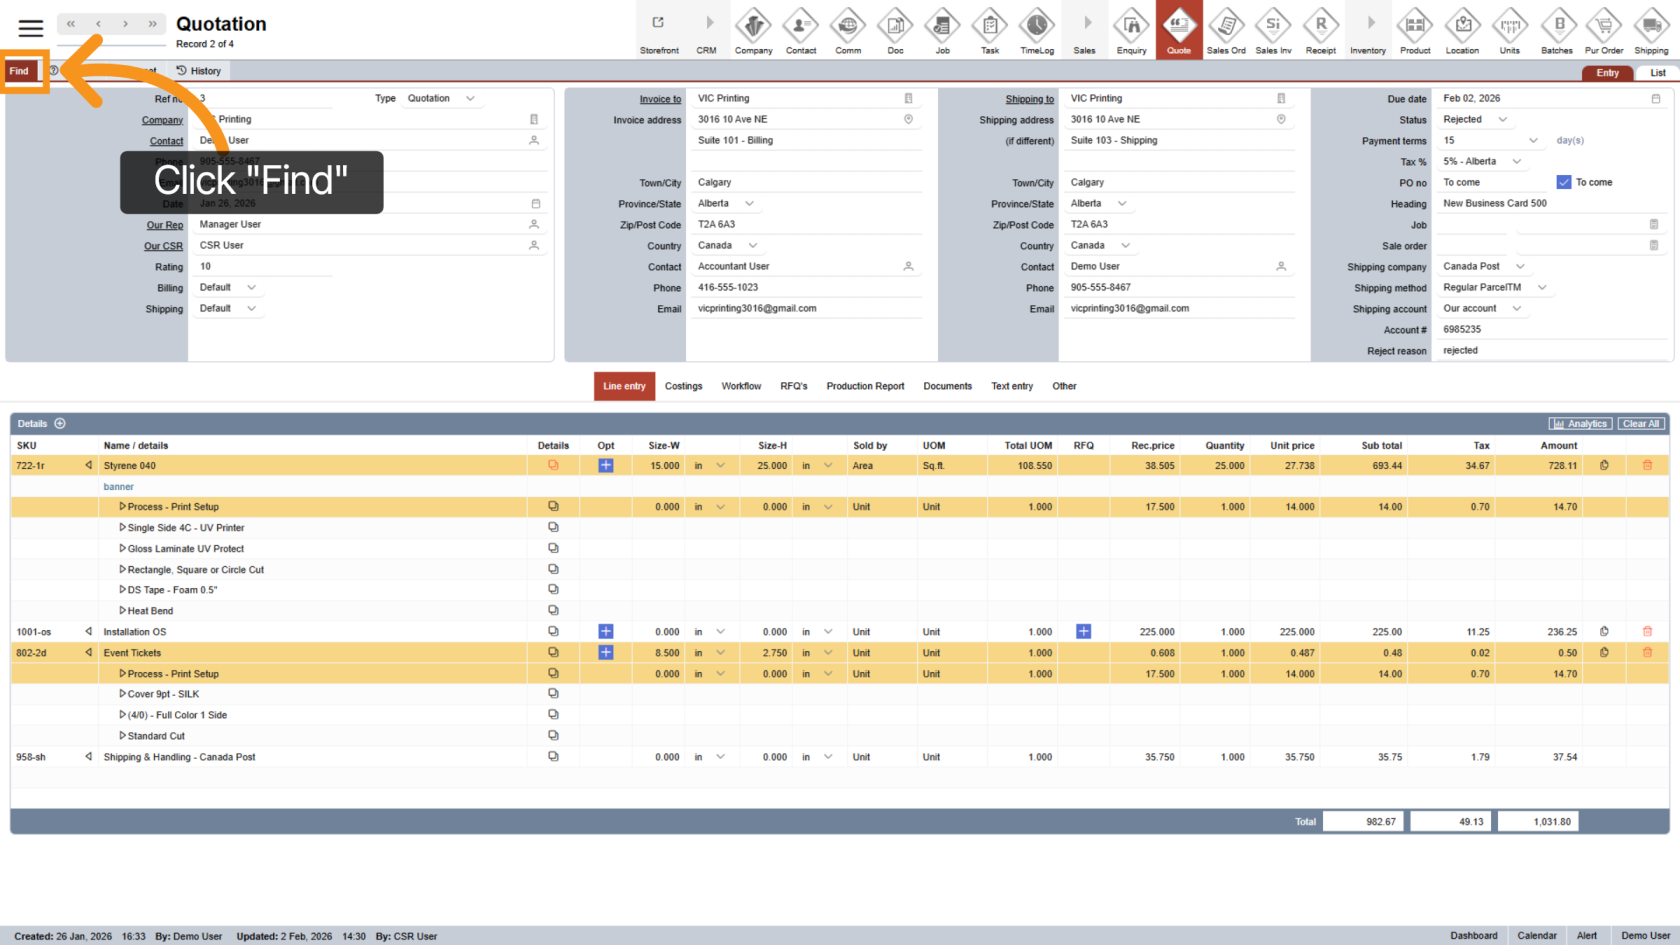
14. Find a Quotation
Click "Find" to search for quotations or related records.
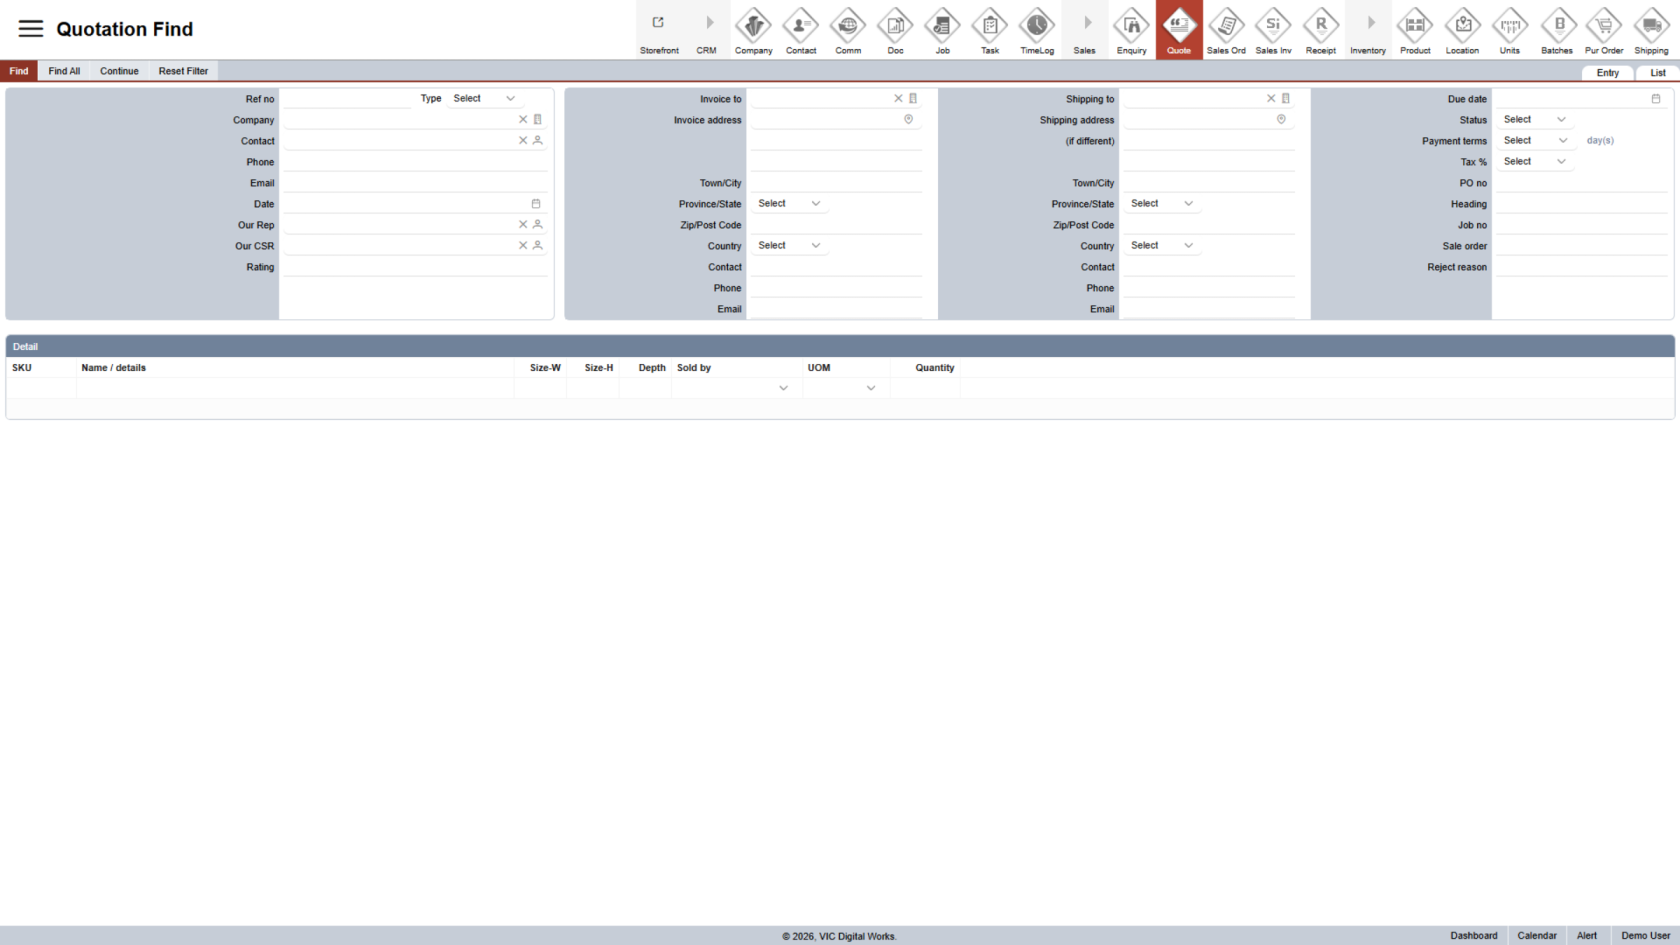
15. Enter Search Criteria
Fill in one or more fields to narrow down your search results.
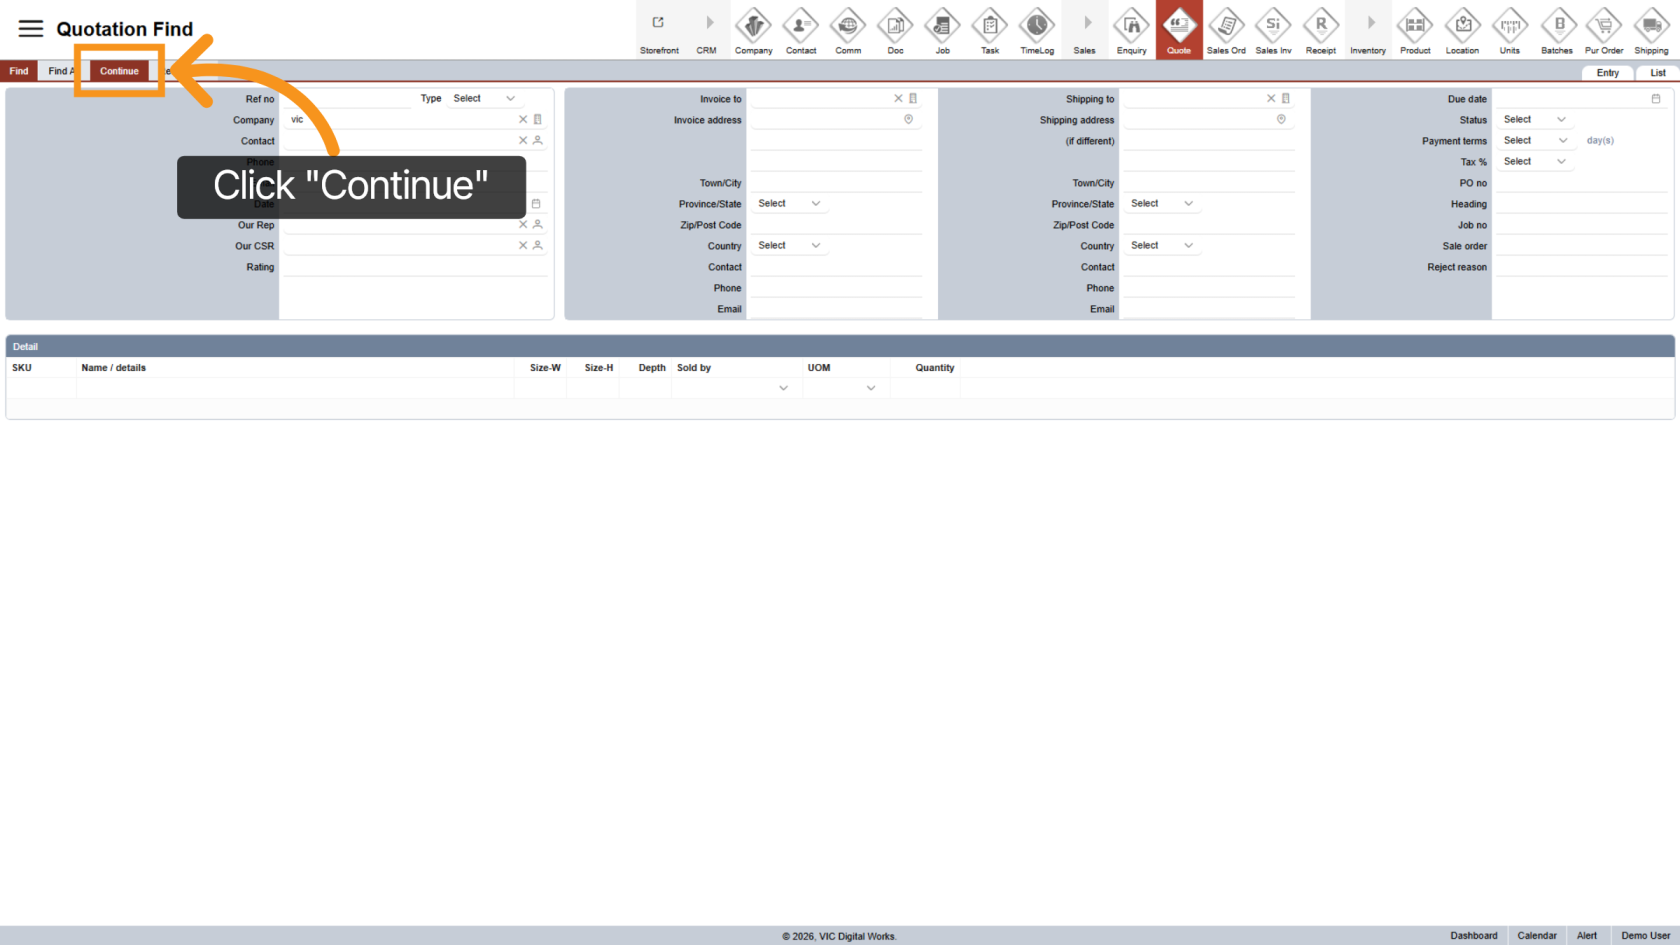
16. View Search Results
Click "Continue" to view the search results.
You have successfully navigated the Quotation Workspace in WorkTraq. You can now manage quotations, review details, and use search tools efficiently. Next, proceed to creating a new quotation.